landmizzle
Community Member
-
Joined
-
Last visited
Everything posted by landmizzle
-
Hi wishihada240z, Not to beat a dead horse but, with respect to this car, RUN, RUN,RUN and don't ever look back. Trust me, you'll be glad you did. For the amount of money it will cost you to get this car fixed, you'll be able to get a nice, no...REALLY NICE 240Z. Unless I had a whole lot of experience with body working and painting, I wouldn't even pick up the car for free-with the sole exception of maybe harvesting some parts off of it. You live in Southern CA according to your profile. I assure you, you'll be able to find better cars than this down there. Even if you're on a budget, the most important assett you have is your PATIENCE. Don't be in a hurry to get that first magical Z. The more you wait, and develope an eye from being exposed to the various cars you look at, the more likely it will be that you will strike upon a good deal and know it when you come across it. Not to be didactic (overly preachy) but, buying an old Z is definetly not like buying a new car ( yeah, I know obvious). It's not even like buying a "what someone would normally think was a used car". Nope.....you're buying a 30+ year old car that has more than likely had it's keys passed between more than one pair of hands and been cared for by people that might very well think opposite ends of the spectrum with regards to car care and maintenence. So, take it nice and slow and ask lot's of questions and do even more research and looking. In the long run it will be the best investment you can make and will only make that Z all the more sweeter. Best Regards, Landmizzle '72 240Z
-
Hi all, Not to be a turd or anything but, shouldn't this post be elsewhere as this really isn't a thread contianing a technical article? I won't say anything if you guys won't; just thought I'd point out the obvious............. Best Regards, Landmizzle '72 240Z
-
Hi ChrisA, Take a look in my gallery. The orange '72 240Z you see is the one I bought almost a year ago today. I paid $6000 for it from the original owner with 72K documented original miles. Granted I got a pretty good deal on it (from my perspective at least.) but, the gentleman you spoke with is diffently out of line with what the market will bear for a car as you described. I feel a little bad with this advice as normally I'm championing the idea that Z are worth more than many people think (especially the ones in nice shape.), however in this case, I'll echo the consensus; KEEP LOOKING! Best Regards, Landmizzle '72 240Z
-
Thanks EScanlon and 2ManyZs, I appreciate the advice and no, I won't "take it wrong". I'm just starting out on researching this topic, so I've a bit (o.k., alot) to learn yet. I have read a little on "touch up" guns. They seem like a reasonable option but I don't know if they'll work in the restricted enviroment I mentioned previously. I would like to be able to paint in my garage as I've done so far with my numerous "rattle can" projects. What kind of compressor (rating, hp,psi,etc.)would be required for a touch-up gun to get descent results? I have a spare front fender and passenger door that I was planning on practicing on to get the feel of whatever setup I get. Trust me, I really don't want to screw up my car. But at the same time, I take alot of pride in doing things myself if at all reasonably possible. It's not so much about saving money (although that doesn't hurt...) but knowing that the job was done right and probably just the challenge. If you have any other advice or input to share I'd greatly appreciate it. If you need me to be more detailed about my situation/goals let me know. I have habit of writing lengthy post so I'm really trying to hold back so as not create to many ZZZZZZZ's. And I'm not talkin' about 240's. <grin/shrug> Best Regards, Landmizzle '72 240Z
-
Hi all, Embolden by the results I got on the BRE spoiler I did last week, I'm considering tackling some other areas on my car. Most of the issues are paint chips, but I do have some "checkering" on the driver door and the hatch while presentable, could stand a smoother layer of paint. I don't really want to use a "real" paint gun and compressor as I don't have the room in the garage for the equipment nor the ability to set up a "paint booth". So I'm wondering if one can get good results with an airbrush and small compressor for chip repair, small touch-up (where feathering would be required.), and small body panel painting. What I'm looking for is better flow control than I can get with a "rattle can";especially with regards to feathering. The rattle can worked well with the BRE spoiler because the paint was applied across the entire piece and due to it's location, small defects won't be noticable. It's going to get rock chips anyways. The next areas I want to attack won't be so forgiving. I can get very good quality paint from www.paintscratch.com, so that's not an issue. I believe from my research so far, I can get needles for the airbrush that will provide up to 2-3 inches of spray pattern width. Flow control should not be a problem. However, I don't know if automotive paint will flow well through the airbrush or have enough psi or cfm from the compressor. Some of these compressors will pump 60 or so psi. Has anyone tried this before? Any advice or opinions would be appreciated. Best Regards, Landmizzle '72 240Z
-
Hi all, Just in case anyone is interested....I painted my BRE spoiler and installed it and really like the results. The spoiler is the one you can order from MSA. It came gel coated and I applied several coats of primer and sanded it down with 1000 and then 2000 grit. I then applied three spray cans worth of burnt orange (#918) that I obtained from www.paintscratch.com .This ended up being about 8 misting coats of paint. After about each 2 misty coats I again wet sanded down using 1000 and 2000 grit paper. After the final coat, another repeat of the 1000 and 2000 paper, followed by rubbing compoud and then polishing compound. The results can be seen in my gallery. BTW, the paint from Paintscratch is a very very close match and is supposed to be of the same type as the original paint. Since this was on fiberglass I had them add a flexing compound to the paint. The paint is not particularly cheap when ordered in spray cans, but it seems to be of high quality. If you would like, you can order the paint in quart cans (or larger) so that you can spray it via a real paint gun. Best Regards, Landmizzle '72 240Z
-
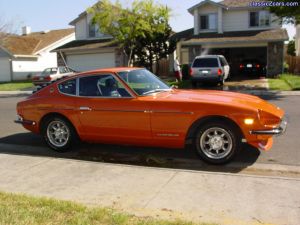 Thanks for the kind words. The wheels are Minilite's aluminum "Sport Mini's". These were made in June of '77. The size is 14"x6.5" and the tires are 215/60/14
 -
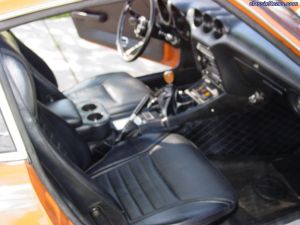 A little blurry, sorry. Now that the auto is gone, this looks like the inside of a REAL sports car. No offense to auto lovers.
 -
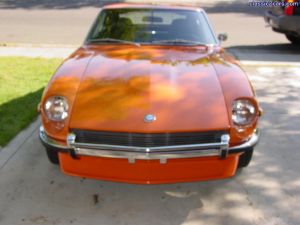 Sorry it's a little blurry. Good angle, I think. Man, that's a lot of ORANGE comin' at ya'.
 -
I think the BRE spoiler adds a hint of European flavor to the Z. Nice. Kid across the street is a punk and I would never let him wash my car.
-
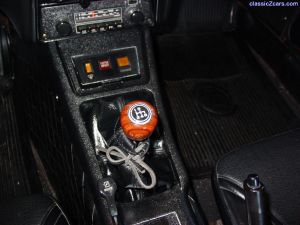 Lookin' stock. Only I know that there's a 5 gear. Strattling the line between stock looks and subtle improvements.
 -
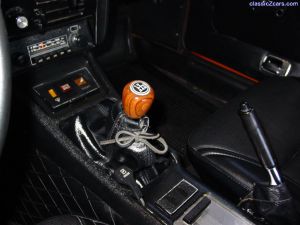 Not to add to the "what's wrong with an auto" debate; glad I made the swap. This is what the interior of a Z should look like!
 -
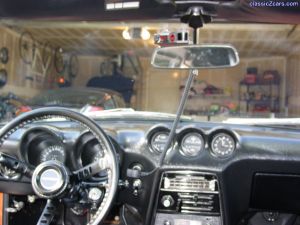 Commute mode. Moma always said to wear protection. Sweet. And yes they work. No I don't constantly speed.
 -
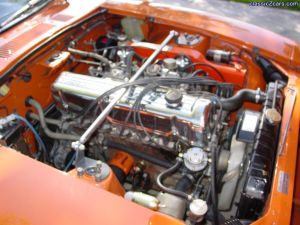 The vavle cover really lightens the engine bay. Like it better than chome. Still sharp but a little more subtle.
 -
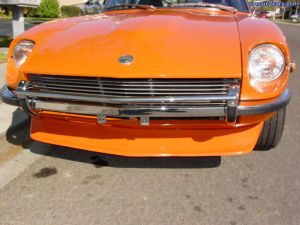 A littler closer look at the results. I'm liken' it.
 -
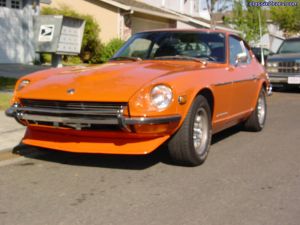 Recently installed BRE spoiler. Not bad for a rattle can paint job.
 -
Hi mdbrandy, You're correct that the automatic equiped 240Zs came with a 3.54 rear-end versus the 3.36 in the manual. It actually works out well if you do a 5-speed swap(you do have to select your 5-speed carefully as they came in different gear ratios). You get the best of both worlds; quicker acceleration and lower rpm's at highway speeds in 5th gear. You probably already know this but, I'll toss it out anyway.....The dual point distributor can be easily swapped out with one from the manually equiped cars. Toss in a Petronix electronic ignition and only you will know that things aren't as they appear. BTW, the Petronix will not work with the dual point distributor. Best Regards, Landmizzle '72 240Z
-
Howdy, There's nothing WRONG with an automatic transmission. I may have been the source of some of those posts you've read as I just recently did a 5-speed swap in my automatic equiped '72. I was like Beandip, in that when I first picked up my latest Z last April, the first thing I wanted to do was swap the automatic out. Based on serveral peoples advice I waited and drove the car about 15,000 miles to find out how I really felt about the automatic. Obviously, I came to a different conclusion, but that's just me. It's charming actually. Very easy to drive; especially around the city and in traffic. So there is nothing wrong with it. It all comes done to personal preference and what your looking for out of your Z. My main reasons for swapping out were; 1) I like the control I have with a manual. 2) I feel sports cars are more in charecter with a stick. 3) Manuals are more effecient (in general), ie. less power loss to the rear wheels. 4) Better gas mileage. My car went from 21MPG to a solid 25MPG. Bear in mind I went with a 5-speed swap. However even with a 4-speed, it still would have improved. 5) The car is just plan more FUN to drive, especially on back twisty roads. Even manauly selecting gears in an automatic doesn't come close to actually shifting for sport driving; besides the fact that the automatic has only three gears. 6) The wife is MUCH less likely to drive the Z now that it has a stick. Hehehe..... Again, bottom line is, if you have an automatic Z and you like it, keep it that way. It's your car and it's you preference that matters. Best Regards, Landmizzle '72 240Z
-
Hi Texasz, I'm assuming you're using 3M's adhesive release, if you're not go get some. For the really stubborn stuff you'll want to let the release agent really soak for awhile. Even so, sometimes you still need a little persuasion to get the stuff off. What I do in that case is get some hard wood scrapers I've made to remove the stubborn adhesive and weather stipping. My scrappers are made of 1"x1" mahogeny wood that are about 5" long with 45 degree cut on one end. These really get in there and assist with removing the adhesive without "jacking up" the paint. In addition you can cut a grove in the scrapper that's barely wider then the metal lip the weather strip attaches to, to ease the removal of the adhesive. Works great for me. Hope this helps. Best Regards, Landmissle '72 240Z
-
Hi Texasz, When I did the outer hatch strip on my '71, I did not have to remove the hatch. I would reccomend that you trial fit the weather strip first to see how it will lie. I agree with the previous reply that you want to make sure the all places of contact between the rubber and metal are very clean and free of old weather striping and glue. I used the black version of 3M's weather stripping adhesive. What I did was actually start the process at a hinge point. Apply adhesive to both the rubber and the metal and allow to get tacky before bonding together. Do small sections at a time especially around the hinge area and corners ( maybe 4' or 5' inches in the cramped areas.). You can do longer sections in the straight areas but, still don't get carried away and try too much. Doing it in sections will take a little longer but it's much cleaner and easier to deal with. Additionally, if you need to make adjustments, you'll have an easier time at it. After I completed one hinge area, I work my away across the top of the hatch to the other hinge. Once both hinges and the area between them is completed, work out towards the corners and then the final stretch on the straight areas going to the rear of the car. Once you've completed the process, let the adhesive dry at least overnight before closing the hatch. This will prevent the weather stripping around the hinges from creeping over the lip it's attached to. Allowing the adhesive to dry completely, will help assure the weather stipping lies flat. Hope this helps! Best Regards, Landmizzle '72 240Z
-
Hi all, Now maybe you folks know all about this, so I apologize if this is common knowledge. But just in case it might prove useful, I'll post this. I decided to trial install a BRE "Spock" front spoiler I bought from MSA. I wanted to check the fit and drill necesary holes prior to painting it. I mounted it up and held it in place with a couple of C-clamps and then looked it over, checking for alignment and contemplating where to drill mounting hole in the frame, valence, etc. I wasn't too keen on the idea of drilling holes in the valence and only maginaly more trilled with driling holes in the frame or the lower radiator support. I crawled under the car, now on a ramp and started feeling around in the front frame area and lower radiator support area. To my suprise I noticed a few small holes on the underside of the radiator support, three to be exact. I then felt around in the interior of the radiator support and discovered matching nuts spot welded above each hole. Sweet!!! I quick rumaging through my bag o' bolts and I found three screws, locking washsers, and lager washers that fit the drilled holes. A little measuring on the spoiler, some drilling, and 15 minutes later I had the spoiler mounted without drilling a single hole into the frame of the car. The ends of the spoiler-the part that reaches around to the front of each wheel well, is a bit far from these mounting locations and I thought a reinforcement in that area would be a good idea. I took some single sided sticky foam rubber, about an inch long and quarter inch thick and applied it between these ends and the corner valance on each side. Since aeordynamic forces on the spoiler will apply an upward force on these areas the foam rubber works well. The ends won't vibrate, causing stress on the fiberglass or mar the paint on the spoiler or corner valences. I've driven the car over a hundred miles in the last day at speeds up to about 90 MPH and over some seriuosly twisty mountainous roads with no problems. Still, the rubber foam was intended as a temporary measure until I could think of something better, hopefully not requiring drilling. Then it dawned on me. So trip back to my bag o' bolts and I had two outer shifter boot clamps. The ones that hold the fake leather shifter boot to the bottom of the center cosole. I widened them slightly, and clamped them on both ends near where I placed the rubber foam and viola. The spoiler is firmly mounted and not one body piercing required for my precisous baby. I suspect those three holes were originally installed at the factory for the European Z's that had the small front air dam. Just a guess. Anyway, I'm totally happy with the mounting and it looks like a factory install rather than some hack job. Now, I need to get around to painting it and it'll look real sweet. BTW, the spoiler does make a difference, which is surprising, considering it's size compared to the more common spoiler that come down much closer to the ground. The front end seems much more planted at speeds as low as 45 MPH and the car is very stable in cross-wind situations-very nice.I've always liked the look of the BRE spoilers. They just ooze "vintange look" and have a certain classy understated atitude. Gives the car an almost European flair. Hope somene finds this usefull. If anyone's interested I'll take pictures that might better illustrate what I've been rambling on about. Best Regards, Landmizzle '72 240Z
-
Hi 2ManyZs, I couple of weeks back I posted the results of this swap, including my impressions of the Maxima flywheel. Try this link; http://www.classiczcars.com/forums/showthread.php?s=&threadid=11142 Since this post my gas mileage has continued to get better as the transmission has loosened up. It's now up to a solid 25 MPG during my commute to work. That commute consist of about 30 miles of freeway and 15 miles of twisty mountainous backroads (fun stuff!). Anyway, I'm still very pleased with the actual swap and the results. Not so pleased with the attention to details on the part of my mechanic..... Best Regards, Landmizzle '72 240Z
-
Hi all, As you may recall I recently had the automatic transmission in my '72 240Z swapped out with a 5-speed unit from a 77 280Z. I am absolutely delighted with the swap. After the work was done and I got the car back a few minor issues had to be addressed ( instument lights couldn't be turned on without blowing a fuse, choke light no longer worked, etc.). My mechanic took the car back and fixed them free of charge (which he should since these items worked prior to him working on the car.). This morning I went out to do a tune-up on the car. So I put the car on ramps to change the oil first. While underneath the car, I noticed that I can clearly see my freshly installed 810 Maxima flywheel! In other words, the shield that normally sits between the engine block and the transmission bellhousing is not installed! This can't be good! I've been going to my Z mechanic for almost 15 years and I respect and trust his work. However, this last job has had so many little things forgotten about, it's begining to shatter my confidence in his work. So, first off, with regards to the transmission shield, am I making a big deal out of nothing? Do cars normally run around with this plate missing? I would find that hard to believe as I can see all kinds of grit, dirt, and road debris finding it's way in there. If nothing else, with the flywheel exposed as is, I can see it rusting in short order. I'll talk to my mechanic tomorrow, however, I wanted to get some opinions first. Any input would be greatly appreciated. O.k., my venting is over, we now return you to your normally scheduled "chit-chat"....... Best Regards, Landmizzle '72 240Z
-
Hi Kats, Nice job on the hose clamps. I appreciate your attention to details. Nice! Where were you able to get those braided radiator hoses? From your profile, I assume your in Japan. Maybe it's easier there but, I'm having one heck of a time trying to find them in the U.S. Any suggestions? Best Regards, Landmizzle '72 240Z
-
Hi all, Just in case someone is interested in doing this, here is what I found out from DMV (CA). They won't reissue the original plate unless you actually have it. If you found or purchased an old plate in a junkyard or swap meet you could have that plate assigned to your vehicle, for a fee of course. Best Regards, Landmizzle '72 240Z