Dave WM
Free Member
-
Joined
-
Last visited
Everything posted by Dave WM
-
 That will be tough, my other trip will be Oct 8. Will if can swing another trip, I will have a better idea by then on how well it handle a 400 trip.
 -
-
bad battery/ bad cables/bad battery terminals. I would not use a battery that had gone thru a deep discharge cycle for what ever reason. You should get it load tested at least and make sure you have good quality cables/terminals and everything is clean. Check to see if there is a current draw with the key off.
-
I will check the calendar and see what things look like. I have family near Columbus GA so could get there (400 miles) then just drive the 60 or so to Atlanta.
-
well since I want to make day trips with the Z (300+ at 70mph is about all I am good for) I needed to know how well the car handled extended high speed. Not wanting to find out in BFNW I got out on a few local toll roads that ringed O town, and kept it pretty much at 70-80 for about 90 miles. Happy to report that the temp just got to about 180 (85f AC on) and sat there, oil pressure stayed about 4/5 full. Had the lights on as well. Checked the oil and water level after I got home (and let it cool some) all looked good. Even stopped for gas at about the 1/2 point and was able to restart with no issues after filling up (no hot start problems). I did open the hood and check the oil while at the gas station so I guess that is cheating on the hot start. I hope that if I can go 90miles the next trip of 140 miles on the Tpike will be uneventful...
-
that is exactly what I did, just gutted an old thermotime (same size threads but much deeper and sealed) found a thermo swtich on ebay for a couple bucks, stuck it in, filled with oil, then sealed it up. works fine. Just have to make sure you know if its NO or NC and what the temp it activates at.
-
Prob covered but wanted to get the latest opinions. I have the 1 piece from MSA, got the permatex black. I understand that the rubber and metal should be cleaned, rubbing alcohol to get release agent off rubber and metal good and clean. the plan is to apply thin stripe of Permatex to metal and flange of rubber, none in the groove. Let dry, then another thin strip to metal over now dry adhesive and immediately stick down the flange. At least that the way the instruction detail how to use. This make a contact cement like bond. I tried dry fitting and can see it will be hard to work around the hatch hinges. I really don't want to have to remove the hatch. I will make up some custom tools (flat nylon rod) to let me work the adhesive in, spread thin and when time to bond, to push the rubber into place. I think it would be a lot easier if I were to install like the 3 piece set, less to mess with at any one time. I assume the 1 piece and 3 piece is the same just the one piece cut up? Any other tips or warnings?
-
for the fun of it flipped the disk over and glued it back together. the only deformity was the a tiny bit of a dimple. Perhaps over the years of vacuum the disk had been sucked against the port regardless of the recess, and had developed the dimple, which would overcome the recess and stick against the vacuum, conversely when the suction was applied from the bottle side, the dimple would not seal down flat. This is speculation of course, but flipping the disk should put the dimple away from the vacuum source and aid in the seal at the bottle side.
-
Well I sliced it open and am a loss on how it is supposed to work. there is a small rubber thin disk. the small side has a tiny recess while the large side is a simple flat. the disk does not seem to be retained any way so its not like a flap. I have no clue how it is supposed to work. Perhaps when suction is applied to the small washer side, the idea is the recess is to keep the rubber flap from coming into contact with the hole on that side thereby maintaining a passage for air. then suction is applied to the large side (motor off, tank under vacuum) the disk is allowed to move freely until it come into contact with the flat side hole and seal it up. Other than some slight deformity I can not see any real issue with the only moving part so I am at a loss as to why it was not working. No matter the cheap o from autozone works. I just like to solve mysteries.
-
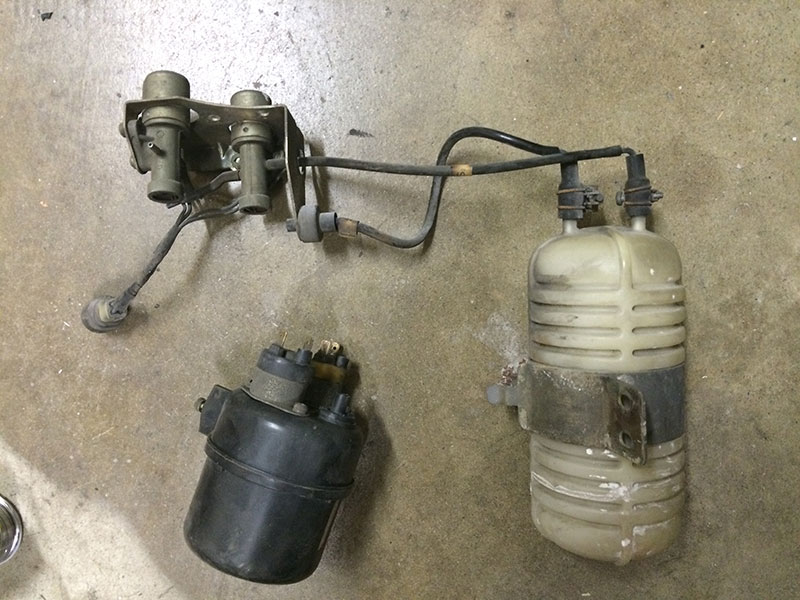
getting odd, on mine the air flow from the narrow side (bottom of your pic) to the wide side (top of your pic) that is you can blow air into the bottom and it will flow. On mine the narrow side (bottom of you pic) was trapped by a lock washer to the frame that holds the magnetic valves. This narrow side was then connected to the source of the vacuum thru a vacuum line that was tape together and routed back to the intake manifold. the Wide side (top) was connected to the bottle. I have added the pic of the way mine is installed, this is from another poster a few post back
-
I am going to hit that MOFO with some 100 PSI and see how it likes that
-
install fuel pressure gauge, then check function of pump.
-
mine is a California car, single point set up, with a EGR that is controlled by the water temp switch, mounted on the side of the thermostat (not the front with the other stuff).
-
It could save my sanity, on mine the air flow is from the small side to the large side, that is I can blow air thru small side where the metal retaining washer is fitted to hold it in place.
-
My AC vacuum source suddenly died. I traced it to the vacuum check valve. Don't ask me why but for some reason it works in reverse now. that's right it will NOT allow air to flow FROM the tank, but will allow air to blow INTO. So odd. I can reverse the valve and it will work as designed. I have no idea how the one way valve can suddenly reverse. If anybody has one of these let me know. Can you suck air thru the big end but not the little end. I am going nutz over this.
-
if you have a spent thermotime switch you could try this. Or you could buy what you need for 100$ plus last time I checked at MSA. I don't think the housing you have there would work well per the video, needs the larger sealed thermotime. I am sure there is a better option but finding the right thing is daunting, I looked at several, if you can find a NC fan switched that opens at the right temp it may work. I did this since I had the parts.
-
make sure you read up on the glue about how to apply.
-
I may go that route, but the fabing is more like it. Oh just read the other thing, check it.
-
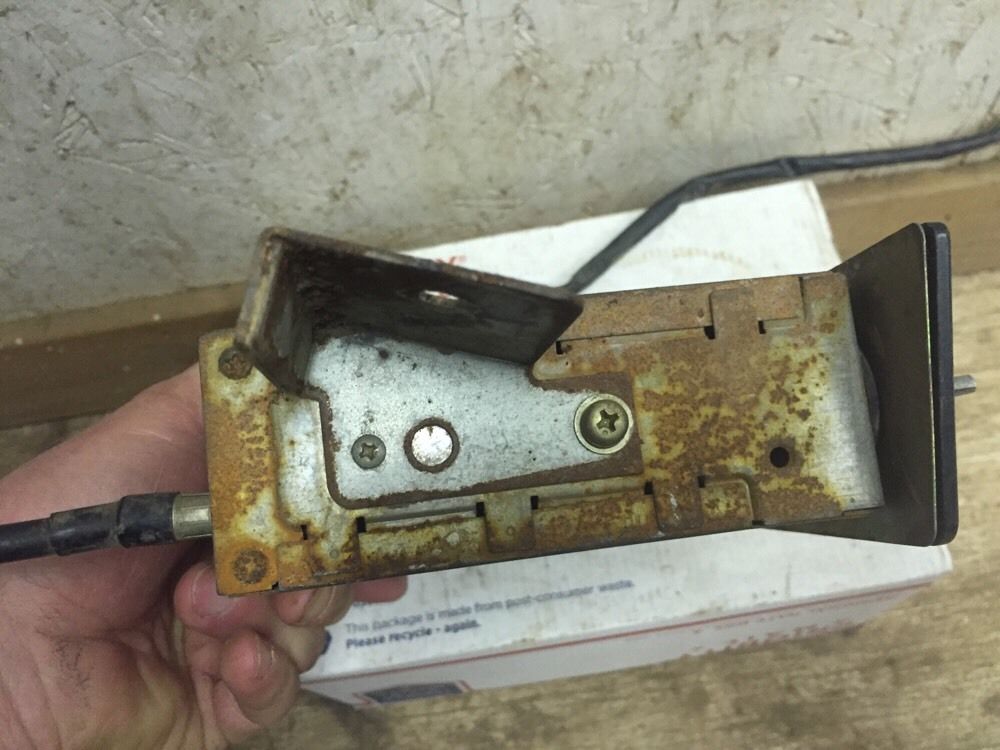
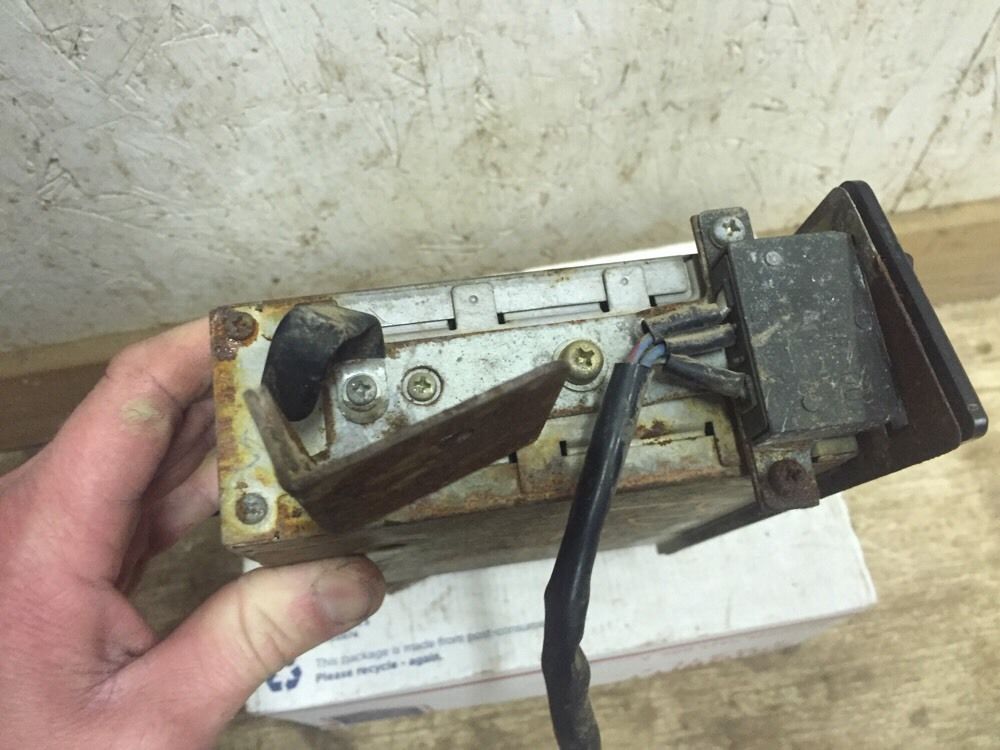
I am piecing together an OE stereo radio for my Z I have the radio and the METAL face plate, the plastic face plate is on the way. I have a switch I hope to get locally, really only need to source the mounts that bolt to the radio. I have the U shaped mount that attaches to the console. I did not want to piece this all together but seem the only way to get a complete radio with out spending a fortune on it. here is what I am looking for. one is a simple bracket for just the radio, the other mount to the radio and provides a mount for the antenna switch.
-
found it, power brake exchange got it from autozone, but you can buy direct, talk to them 1st etc... get the details on what you will be getting. http://www.autozone.com/brakes-and-traction-control/brake-power-booster/power-brake-exchange-brake-power-booster/322592_131640_0_212659/?checkfit=true
-
wow those look terrible. I got a recent one that looks brand new but it was NOT a cardone, wish I could remember, but the guy there said they were NOT reman, but rather NOS that were refurbished or something like that. It did look new, only issue was the vacuum port was 180 degrees out of where it should have been.
-
well that was easy. My headliner was detached for about 1/3 of the way on the driver side, sagging down and rubbing my head (I am tall so any sag at all is an issue). Got some headliner 3M glue, used a spatula to separate the driver and passenger side and then about 1/2 back (the rest was stuck on very well, I did not want to tear up the foam) where it was not holding real well. Covered the interior with bed sheets (seats/dash, anywhere it looked like overspray could be and issue) reclined the seats, put the brake handle down all to get as much unfettered access as possible, sprayed on a good even coat on both the roof and headliner, let it tack up (did not take long the heat the metal was not hot as it was in the garage, but the air temp was about 90f) then started from the middle worked up and over both sides. when I got to the edges (no glue about the last 4") I used the plastic spatula to tuck in. This has to be one of the easiest projects on the Z so far. Not completely detaching it no doubt made the alignment easy.
-
he head liner is a bit droopy and it was rubbing the top of my head. So before I do the passenger side seat I will have to get to work on re attaching the head liner. I am getting better at getting that seat apart.
-
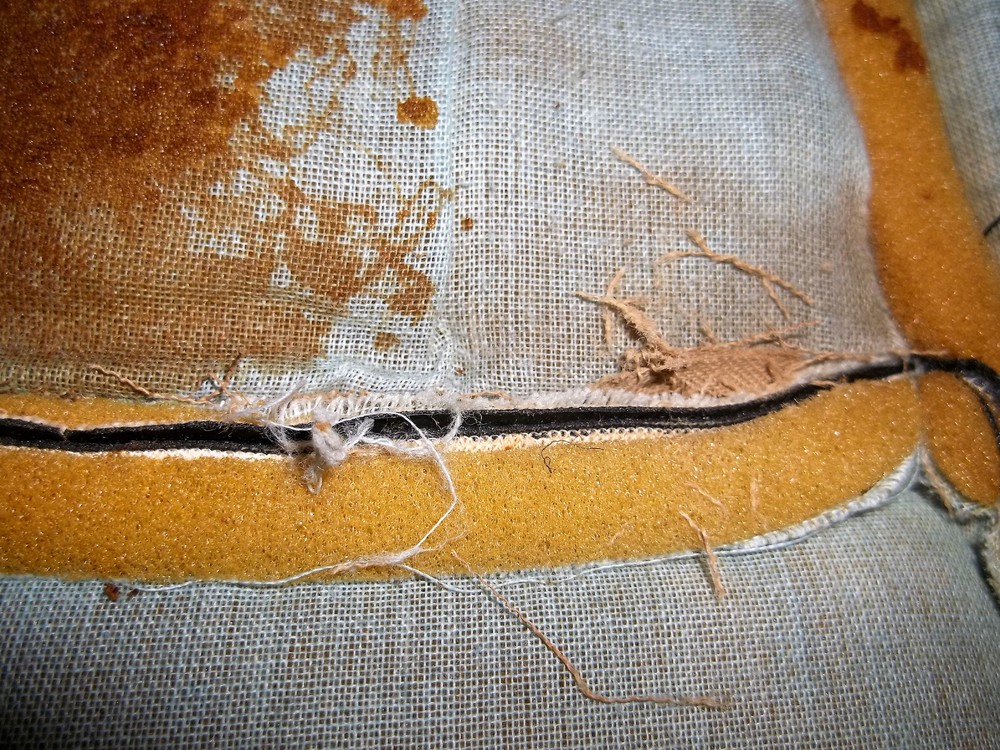
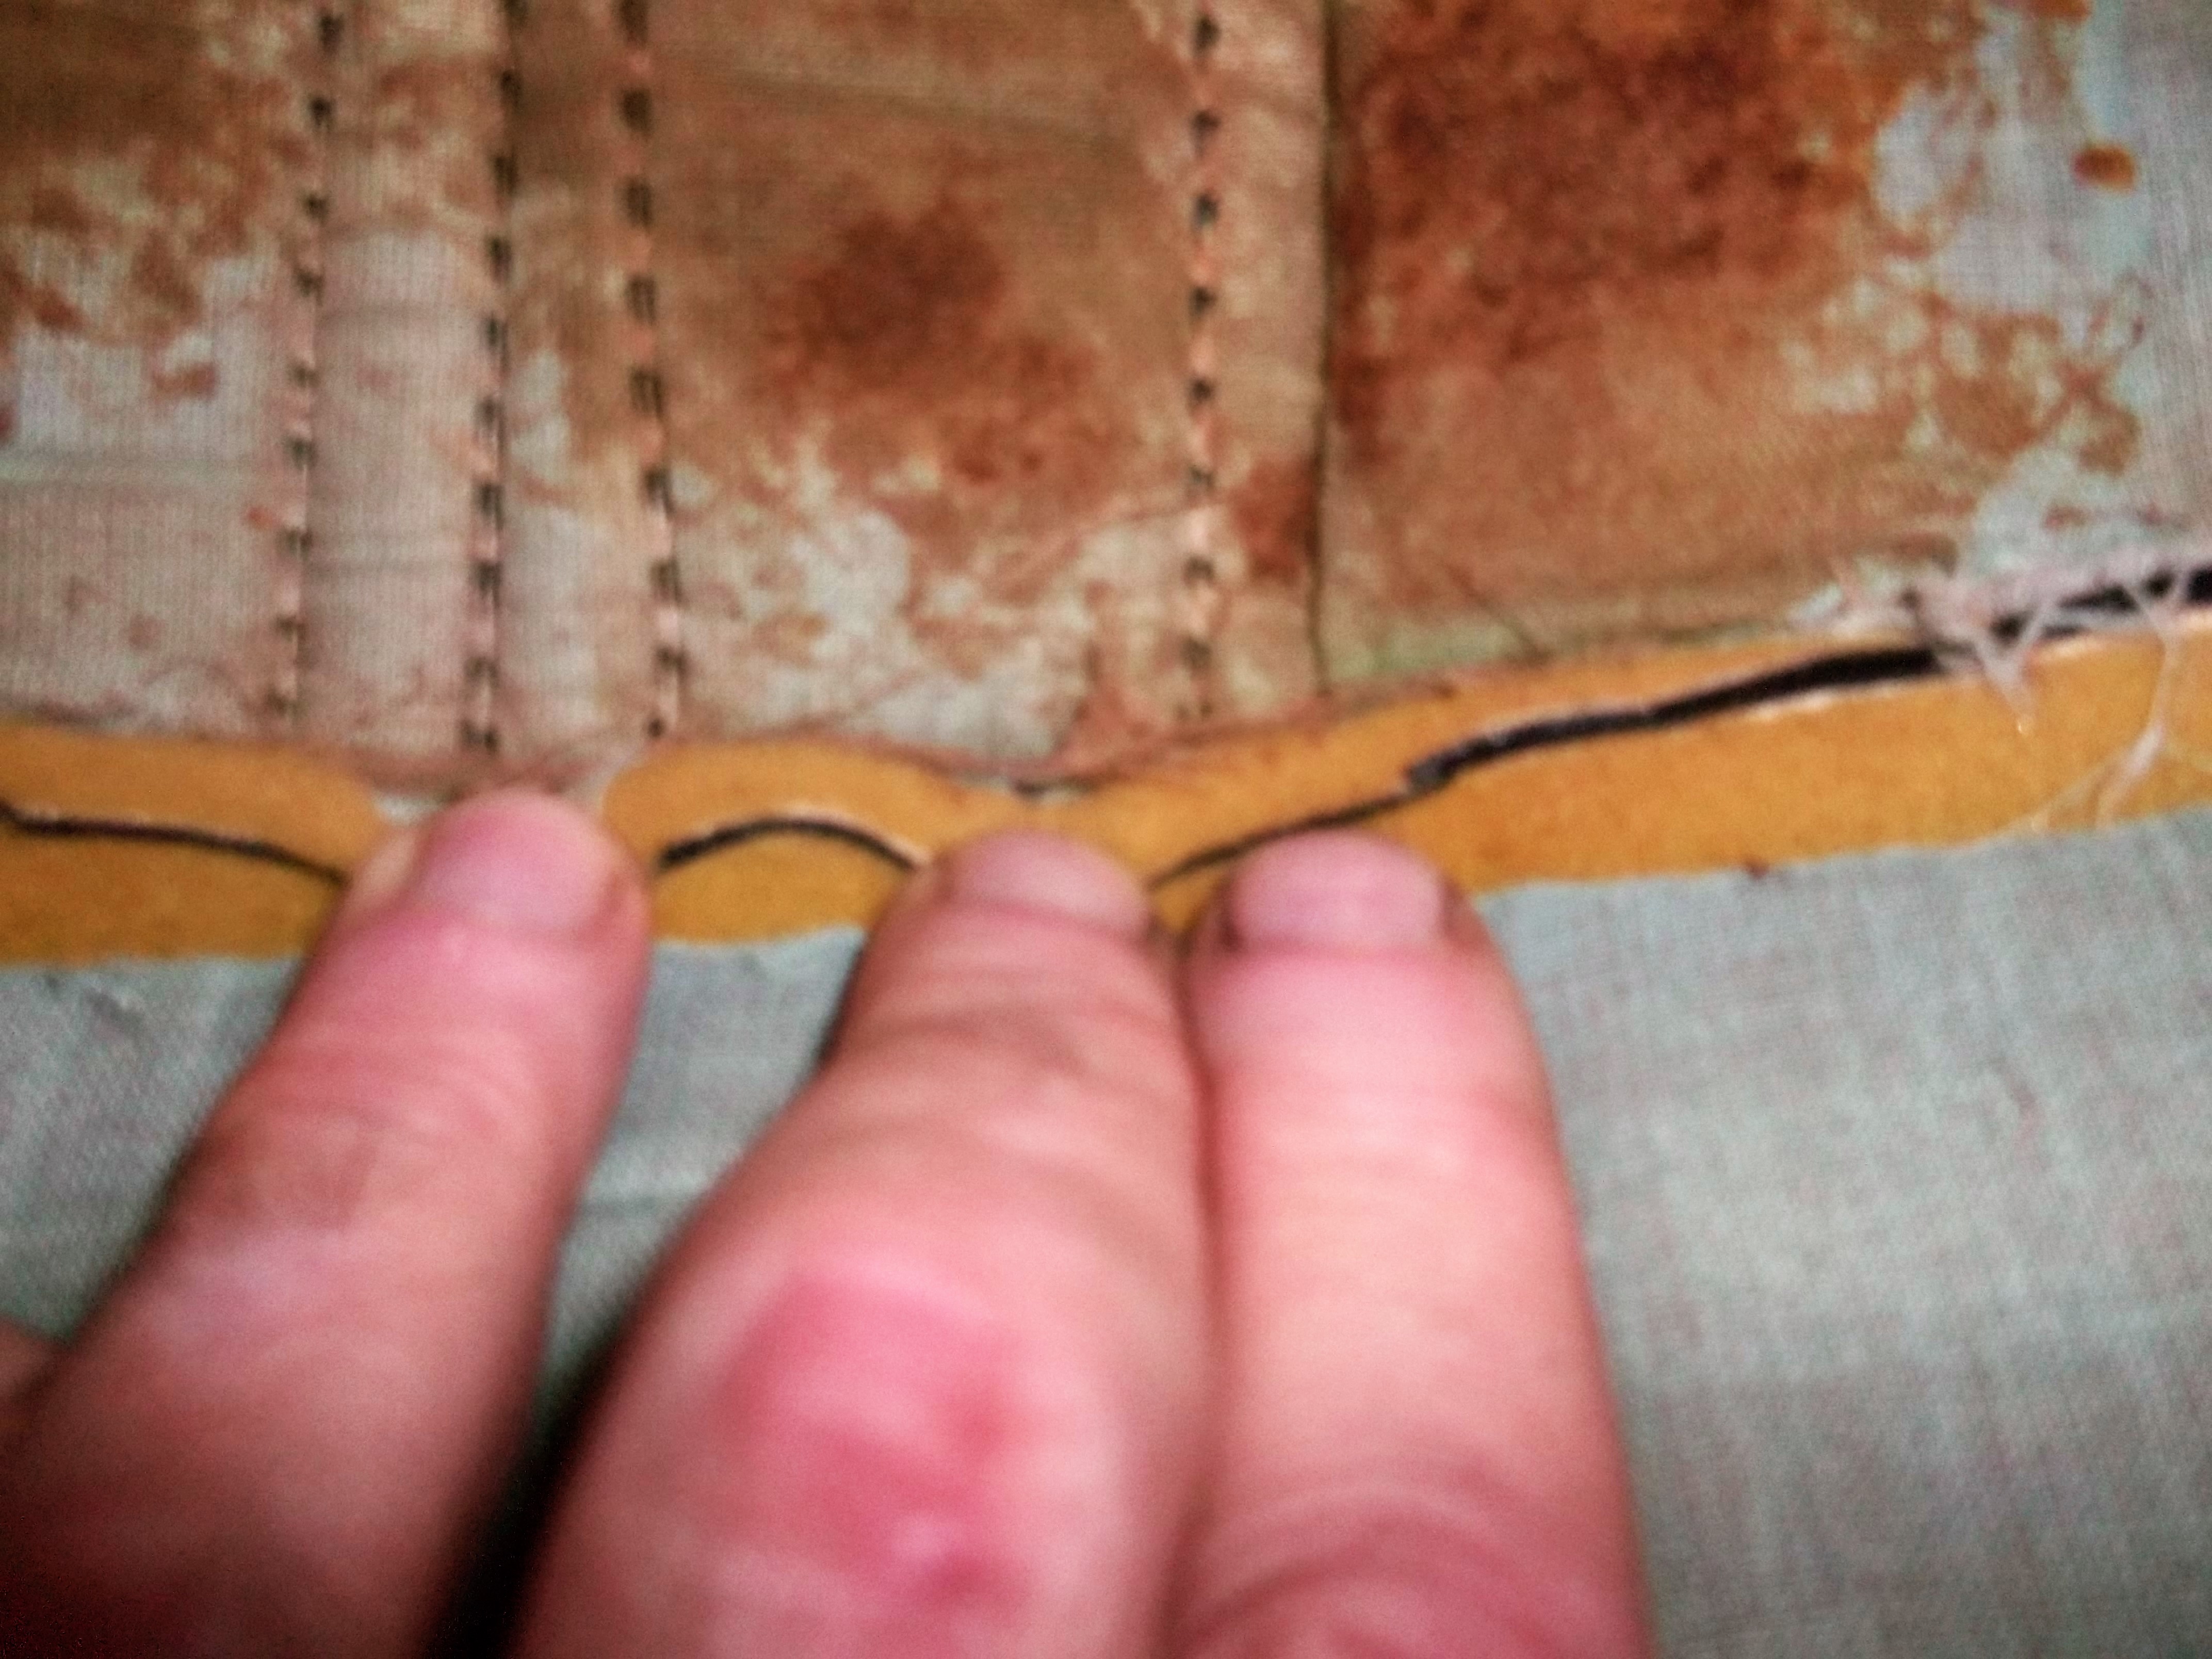
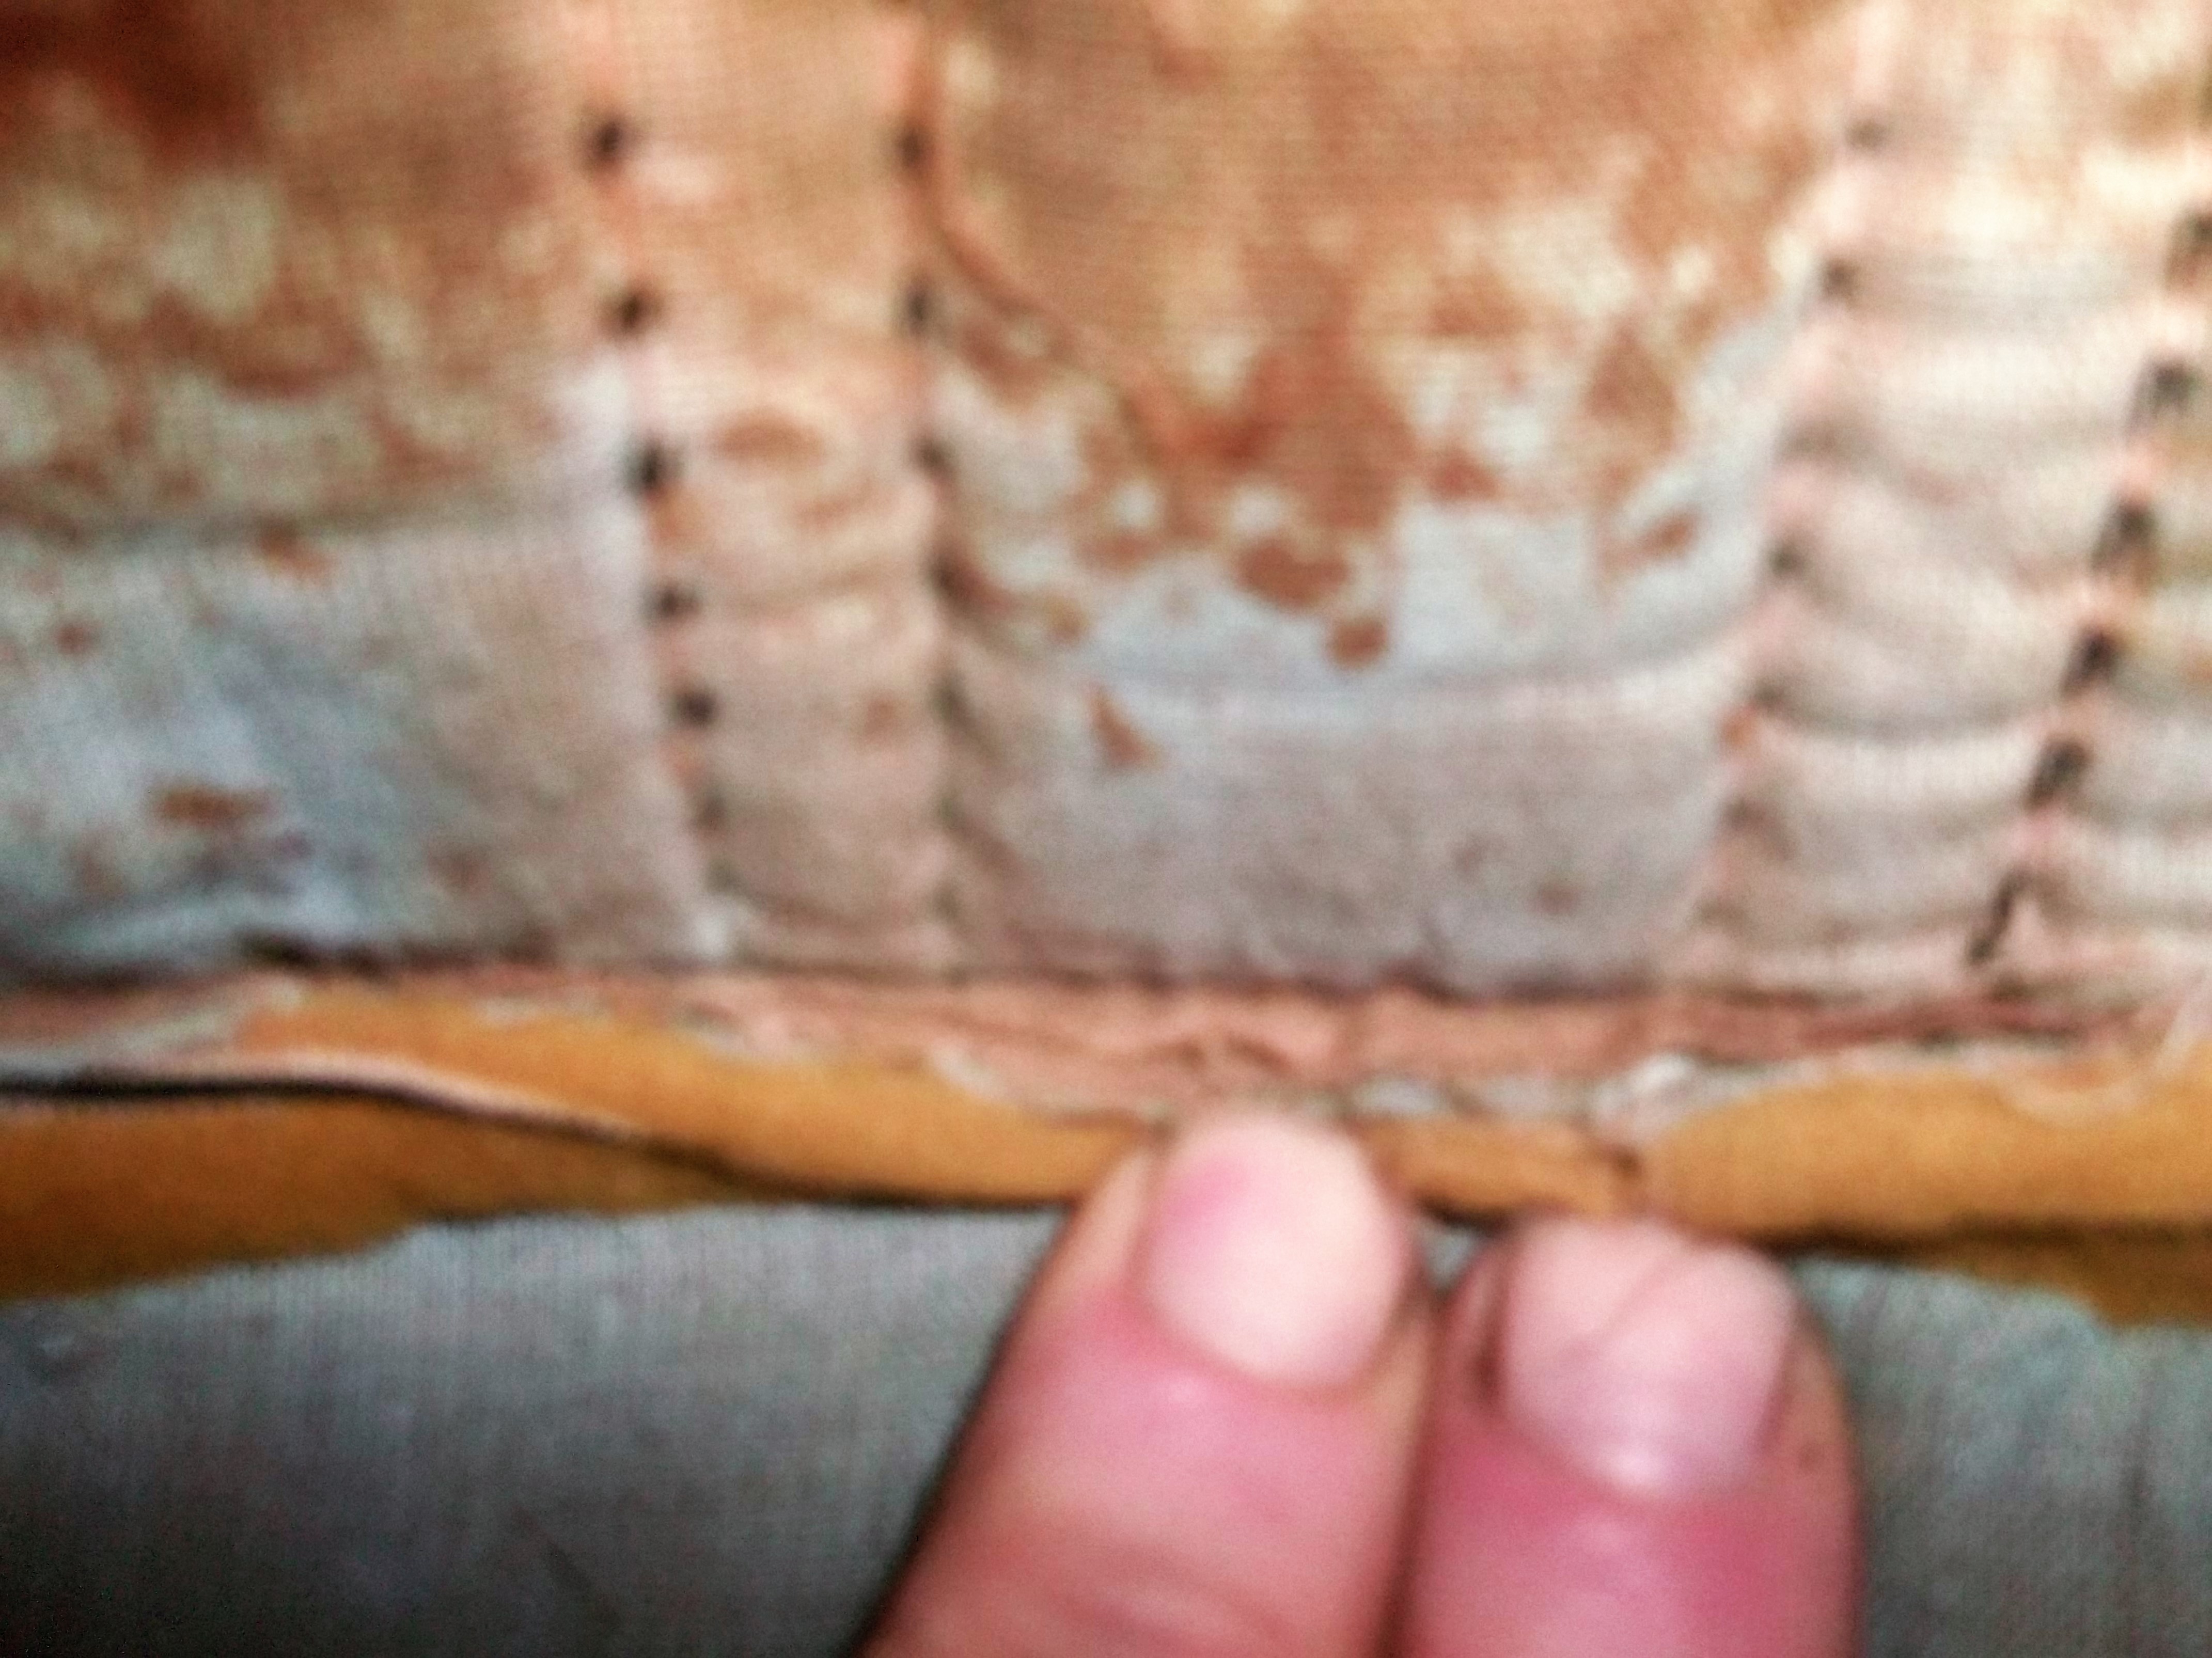
Mission accomplished. I used the old wire that had the thread bare covering on it (now I know that is the remains of the orig flap) removed the seat cover, put that wire in the flap, reinstalled the seat cover and used another wire to hook it and pull up to the center. After hog ringing that center in I put a few more in by just grabbing the flap (easier now with the center pulled up) and hog ringing in two more on each side. The effect is more subtle than I thought it was going to be based on how tight that pull was, but it does look better. Thanks gang for steering me in the right direction here.
-
the foam was in remarkable good condition. I took a closer look and found this