Dave WM
Free Member
-
Joined
-
Last visited
Everything posted by Dave WM
-
 that's what retirement is for!
 -
got a 20t harbor freight press yesterday, put it together and wanted to try it out. I had a spare front control arm for my 75 Z, and had tried various other techniques with no success. This included a BFH and a some large sockets, then a large All rod to act as a puller, all I managed to do was muck up the inner race a bit, prob from the BFH to the socket. For the press attempt I found a large pipe that was used as a wrench on a hot water tank (used to remove the electrical heating element). the round end of that fit the outer part of the control arm. One of the issues is getting a good fit due to the welding around that area. you have to get something that fits just right to keep the receiving tube square to the pushing of the press. Next was to find a socket that was used to push the bush out, that was pretty easy. After careful setup I started pressing. Could tell it was really not wanting to go and I did not want to over stress the hydraulics, so I got out the map gas torch and started heating up the outer part of the control arm. I could see it start to move without adding any more pressure, a few seconds later I was able to pump more (it had relaxed) and the movement continued. a few more pumps and it popped right out. Anyway seems like the way to go and I am sure I will have more use for the press later. pretty low cost as well, think it was about 150$ after the coupons that HF always has. Its has a small foot print so I was able to move it out of sight. I will use this on the Z for my control arms which still have the old bushes in them. I have some new ones to put in (rubber), just wanted to see how hard it would be to do it.
-
does this look like a side seal leak (I replaced the main seal after this, but looks like leak from side as well)
-
Ok so the battery is discharging with a .01 amp draw overnite? is that right? as far as the voltage regulator, just check the battery voltage with the car running, idle it should be around 13v with nothing on, with a load like head lights you will need to rev it to about 1.2k but it should maintain voltage around 13v if it does the charging system is fine. So how old is the battery anyway? have you done an IR or load test on it?
-
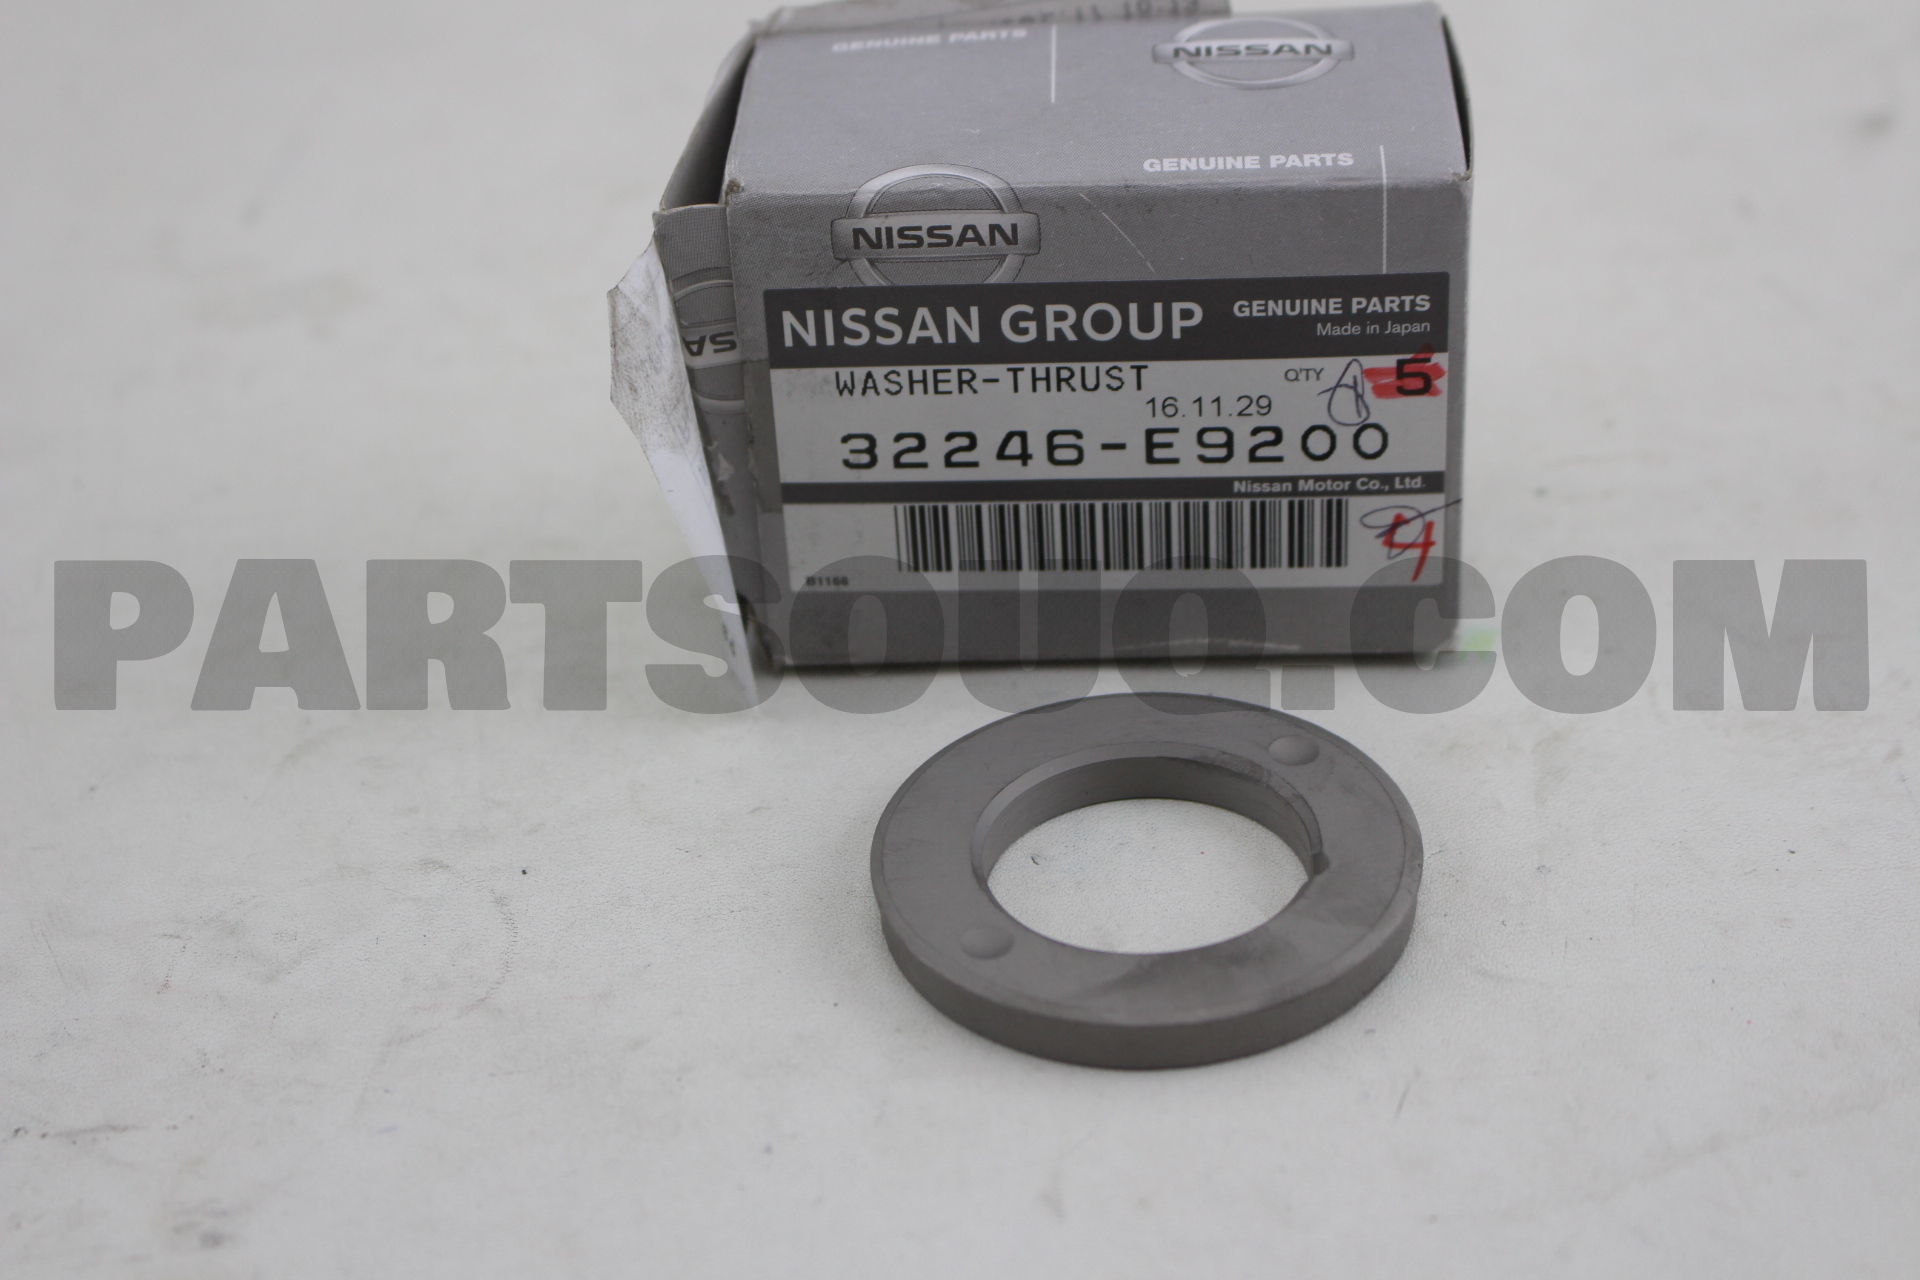
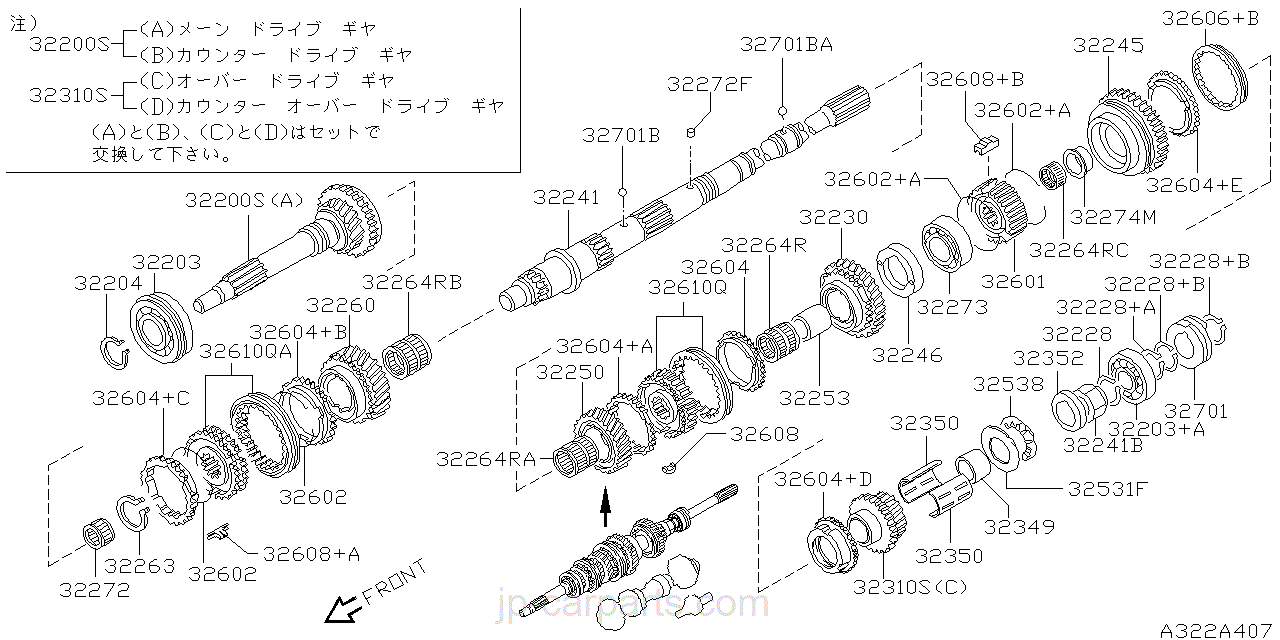
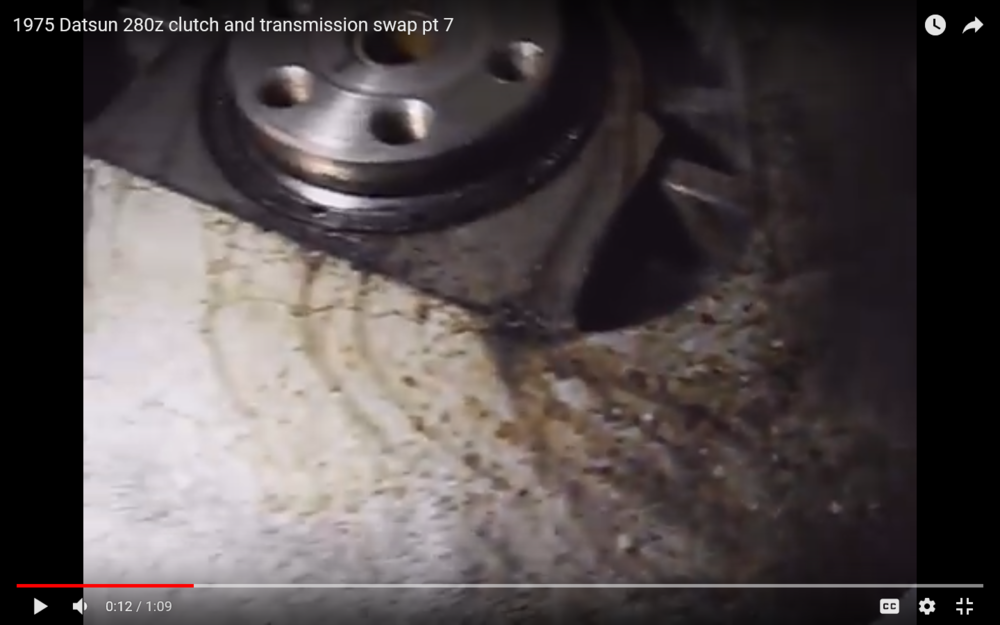
found what I was looking for, the dimples in the washer face the gear. if you look closely at the picture of the washer you can see the dimples, and same with the exploded diagram


-
its what's not there, universal/Disney/international drive et al. Too many tourist that make getting out on the road feel like a mad max movie. I did drive up to Tavares today, it was very nice
-
I would be so all over that. We were looking a property up in NE Alabama, oh my there was a 40*60 climate controlled shop with what looked like at least 12ft ceilings. Get this there was a body shop and alignment shop down the street. I told her I can retire and go get an apprentice job a the body shop, rest of the time I will be in my shop. she can have the house to herself!
-
will get a press tomorrow, 20t from HF. Think I can make up the required tooling to support the bearings for pressing in the shafts. Or will stick with plan and try do the same as village land. Been wanting a press anyway, figure would be nice to have it around. I thing with some creative thinking I can make the jigs from steel plumbing pipes and mounts. Driving me crazy to have to wait for parts now that I have it all apart. I think just about have the assembly sequence memorize. there was one thing that I could not see in the FSM. The thrust washer on 1st gear has two divots on opposite sides. I think they go against the gear and not the adapter plate, at least that's how I have it on my dowel the other thrust washers are just flat so does not matter. I measured the balk rings again the gaps are nearly the same between the old and new, within the margin of measurement error using my stacked up feeler gages (will look for some that are wider so I don't have to stack so much). just have to go at there and stare at it for now.
-
that is close to what I did, use a 100watt light bulb set on directly on the housing for a couple hours, then freezer followed up with some dust off from an inverted can. As you say, it tapped right in with a plastic hammer. I followed it up with an oversized socket to make sure it was flush with the alum housing, only light taps needed to set it perfectly flush. I was careful to align the oil hole with the oil trough.
-
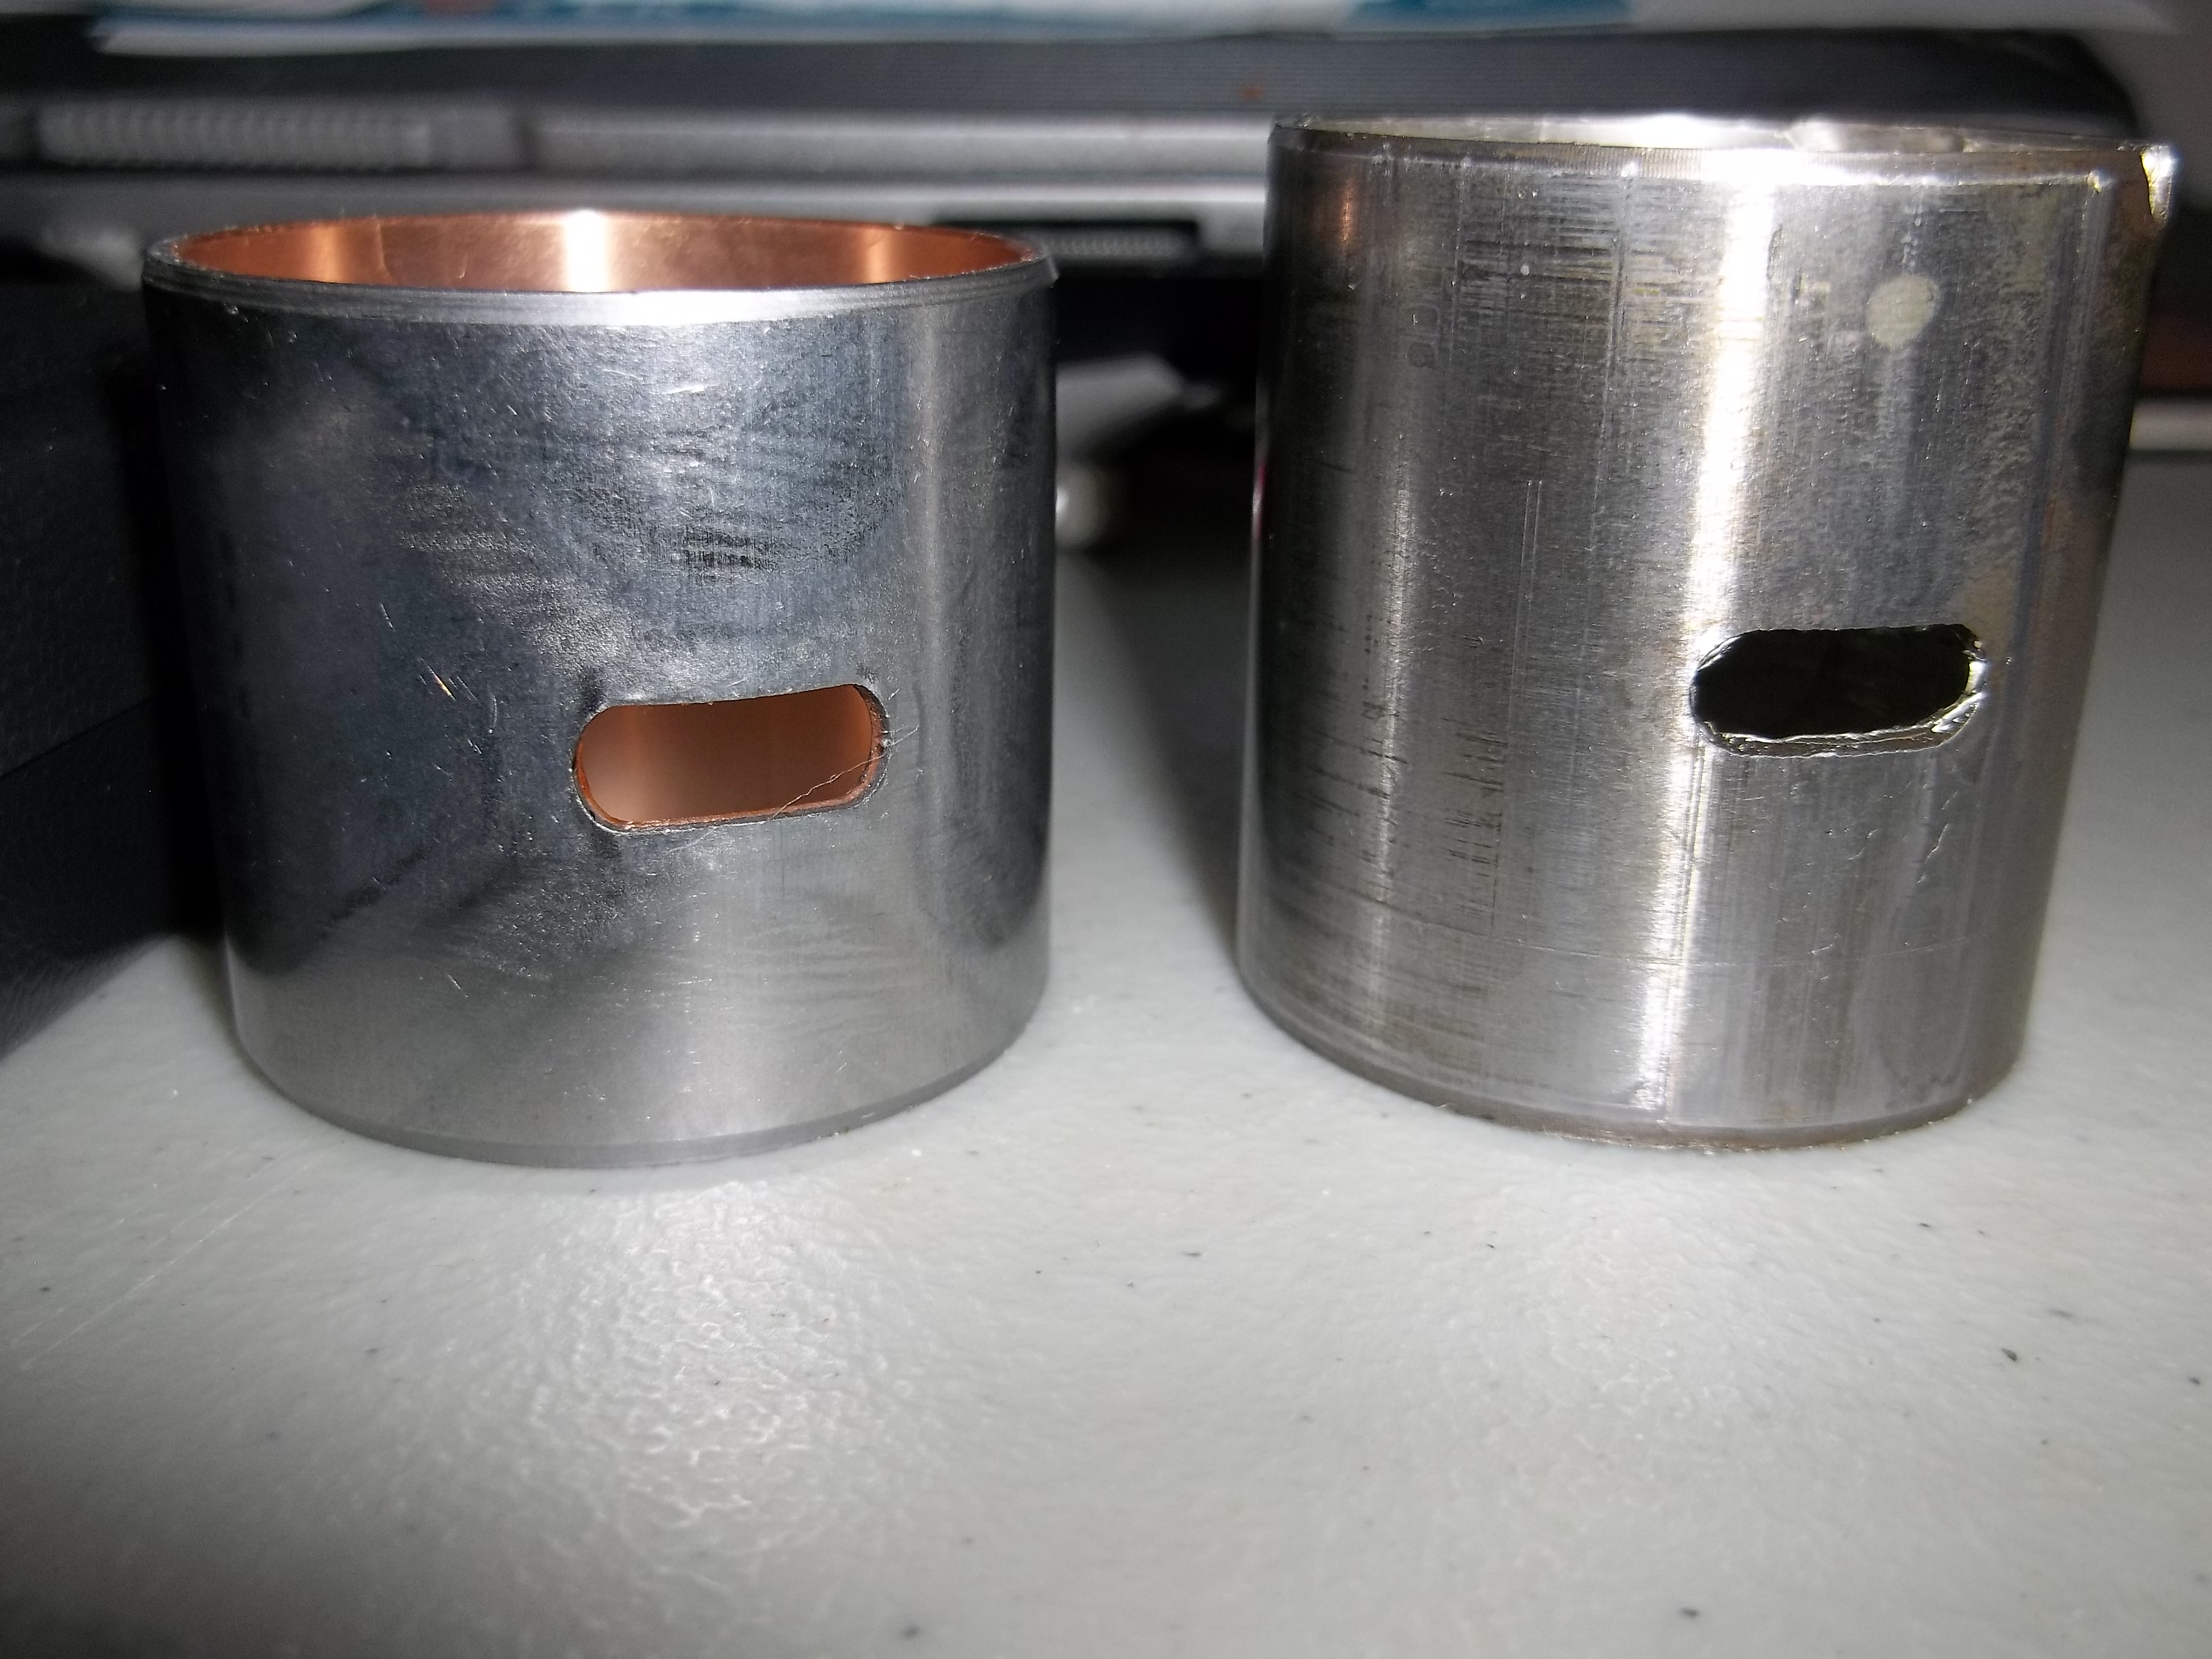
got the omega machines bush for the tail shaft. Seems like a lot better build quality, and the same length as what was in there (40mm vs the 35 for the cheapo one). the old one looked horrible. I don't know if it was due to the oil gutter that was knocked off when I got it, perhaps it had been run with out it for some time, so very little gear lube would make it to the bushing. More good news, I was able to find a new OD gear bush that will not need to be modified (I still have the over size one, just in case the one that comes in is not right). Its being shipped from overseas so may take a while. Got some new needle bears too since the bush is new. The springs came in for the syncro hubs, so I put the rev/5th one back together. that is the one I lost a spring on. It was a little intimidating at 1st until I figure out how to hold the engagement dogs in place while sliding the ring over the hub. I have to say that working on the transmission has been one of the most enjoyable parts of the car.


-
don't forget to check out the start switch itself. you want to make sure the ON stays ON when the key is advanced to the start position, I had an intermittent ON that caused a lot of grief. You need to test it to be sure.
-
did you pull the injectors and see them spraying gas? the idea here is to make sure sparkplugs are firing in the correct order fuel pressure is correct (EFI must have correct pressure to work right) injectors/ECU are opening and closing based on sensors startup parts operating correct (cold start valve,thermotime,AAR bypass) all of 4 only applies to a cold engine. I assume you have actually pulled the plugs and confirmed the spark as well as double checked the firing order.
-
don't forget to check the vacuum hose off the FPR, if the diaphragm leaks it will leak out that hose and directly into the manifold. I doubt its the problem since the fuel pressure is holding but still an easy check then move on to the ECU. If the injectors are not leaking (visual check) and the FPR vacuum hose is not leaking (visual check) then about the only thing left to cause flooding is excessive duty cycle of the ECU OR the thermotime is not cutting off after extended cranking (thermo= do not fire over spec temp, Time= do not fire for loner than spec time) the time part is to prevent flooding if you just sit there and crank the engine for ever. Frankly if it does not start in less 3 seconds, something is wrong and needs to be fixed. When its working well it will start in a fraction of a second.
-
don't go replacing the check valve, just clamp off the fuel line where it exits the fuel filter under the hood, right after the pump turns off. If it holds then the injectors and FPR are ok. It does not have to hold forever, mine will some times go over night other times will drop in hours. Its not super critical about the check valve that is not the problem, even if it did not work at all, the only effect would be a couple extra seconds for the fuel pressure to build back up. I mainly wanted to know if you were getting pressure and how long it hold to determine if there is a leak from one of the 7 injectors. Clamping off the fuel line, then the fuel return line, then the cold start valve in that order after each priming of the system can help narrow it down. OR just pulling the injectors all out to observe will do the same. One last place that a leak can come from would be the FPR. pull the vacuum line and see if any gas drips out with the system pressurized. But please don't start replacing parts without asking about it, again the check valve or lack of check valve is NOT the problem.
-
does it have fuel pressure during the cranking cycle?
-
could be a bad battery also. check the obvious 1st. the 12.6v you are reading does not tell anything, you need to check the current draw, if its low then the battery is most likely the problem.
-
most likely the clock. You need to switch to milliamp range (start with highest amp range so you don't smoke the meter) neg lead to neg post positive lead to neg bat cable (meter in series with neg lead). Read the current draw. IIRC the clock is something like 15ma so that is pretty much all you should see if all the lights are off. check stuff like glove box light going off when closed etc.. If you have a lot of current draw you could start pulling fuses one by one to narrow down the offending circuit.
-
do what JSM said, disconnect the CSV hose and cap it for now. should not be firing at all unless its cold where you are. At lest you will stop flooding the crankcase with gas (I would drain the oil and refill again until you figure this out, no reason to destroy the bearings in case is starts from gas thinned oil). you need to get to a point where NO fuel is spraying with the key in start and the starter solenoid disconnected. You should just see the pressure jump to 36 psi, then release the key from start and it should stay there at least for several minutes. How well it holds pressure will tell you if you are leaking fuel OR the fuel pump check valve could be bad. Regardless, get that working before moving on. Its best to resolve one system at a time rather than jumping from one magic bullet to another. Don't start replacing parts unless you know they are bad, doing so only adds more variables that can cause it to be harder to figure out what is wrong. Next you need to review the FSM and sort out the EFI injectors. Grounds and fuse links (including the main positive one right of the battery that feed the ECU harness). Don't be confused by the color of wires Red and Black do not always relate to positive and negative on the harness. Think that was an issue for another poster recently. You need to check voltages AT the disconnected 36 pin connecter. This assume the fuel injectors are not the problem (gummed up) a noid light would be a test to see if they are getting pulses. the only shot gun approach that you can consider is a check of all grounds and connectors (bullet and EV1 style on the sensors and injectors). these corrode and can give all kinds of problems, not easy to find using the typical voltage check due to the low currents of the test equipment (typical of DMM's). A very corroded contact will not drop voltage when measured with a high impedance voltmeter, but in actual use when current loads are much higher the resistance cause by the corrosion can have a large voltage drop. Again make sure the thermotime and the temp sensor wires have not been switched around they have the same connector ends (bullet) and can be reverse causing all kinds of issues. You can tell for sure by simply tracing from the theromtime (large on the thermostat) wire harness, trace to where it connects back to the cold start valve. its in a shared harness with the temp sensor but you can tell which is which by careful observation. the Temp sensor is the smaller of the two things that screw into the from of thermostat. It to is frequently a problem, but its easy to test and is part of the 36 pin check out items in the FSM. Its a simple thermistor type device so the test will include comparing the water temp (or ambient if the car is cold) to a chart where there resistance changes with temp. When these go you tend to have rough running due to too rich as they typically drift up in resistance. However again this is just conjecture as to what could be wrong, test things before replacing. And don't overlook the possibility of corrosion or wiring errors (which is why I suggest the shot gun approach on the cleaning of connections). One last thing to note, the wire harness is well past its expected life span, with that in mind exercise care when connecting/disconnecting/flexing etc... its easy to break wires, just adding to user caused problems that then need to be sorted. If you see a LOT of green corrosion on the pins of the connectors its likely that you will need to do some extensive surgery to excise the problem wires as that green has a way of working up a copper wire. Just keep this in mind when looking over stuff.
-
don't forget to check the cold start injector. Pull it out of the manifold and look to see if its leaking, in warm weather (over 70f) it should not spray, and it should only spray when the key is in the "Start" position even when its cold. Often times people goof up the bullet connections for the temp sensor for the EFI and the cold start thermotime swtich, make sure they are correct.
-
-
looks like he has the PU style bushings, at least on the rear control arms. I assume they don't need the loading?
-
Fuel pressure gauge before doing anything else, if you have not already study the FSM for what to look for on pressure. Corrosion is a big problem on a lot of the connectors to the injectors and sensors, grounds and fuse links. Clean them all. check for air leaks, EFI does not like unmetered air. Sensors tend to drift. The FSM has a good diagnosis section to point where to look. I would listen for the injectors to be clicking. Could be the injectors, you could pull them up, leave everything connected and have someone try starting, observe the spray. What insulation are you referring to in 3?
-
The EGR would most likely have an effect at low RPM you can test it by manually lifting the diaphragm while idling. You said you installed bosch injectors? were the new? I have a recent video of me trying to "see" the misfire using one of those clear spark plugs. I have not done anything else on the miss (mine is idle only), but if I had to guess it was a bad injector that does poorly at low flow rates. Not saying that is your problem since you say it happens at any RPM. If you can make it happen you could try a load test, pulling one spark plug cable at a time and see if any one has less effect on the miss. try to narrow down the issue. Just don't shock yourself, the ungrounded spark will try to find a path, I would use those long plastic cable pullers designed just for that, and then hold the open plug end near the block so the spark has somewhere to go.
-
found one local, the plan is to take the mainshaft with me and check fitment, if good, found a local machine shop to grind to length. the plan is to do 2 to save some on the setup, and have a spare.
-
Or if this ID OD matches a machine shop to mill off to correct length. it listed a 1.490 which looks to be about 8mm too long. https://cobratransmission.com/nissan-fs5w71c-4-cylinder-5th-gear-sleeve-50042094-1 I looks like they share the same needle bearing, so if the ID is correct all that needs to be done is to grind down the length (if that can be done).