marvelous240Z
Free Member
-
Joined
-
Last visited
Everything posted by marvelous240Z
-
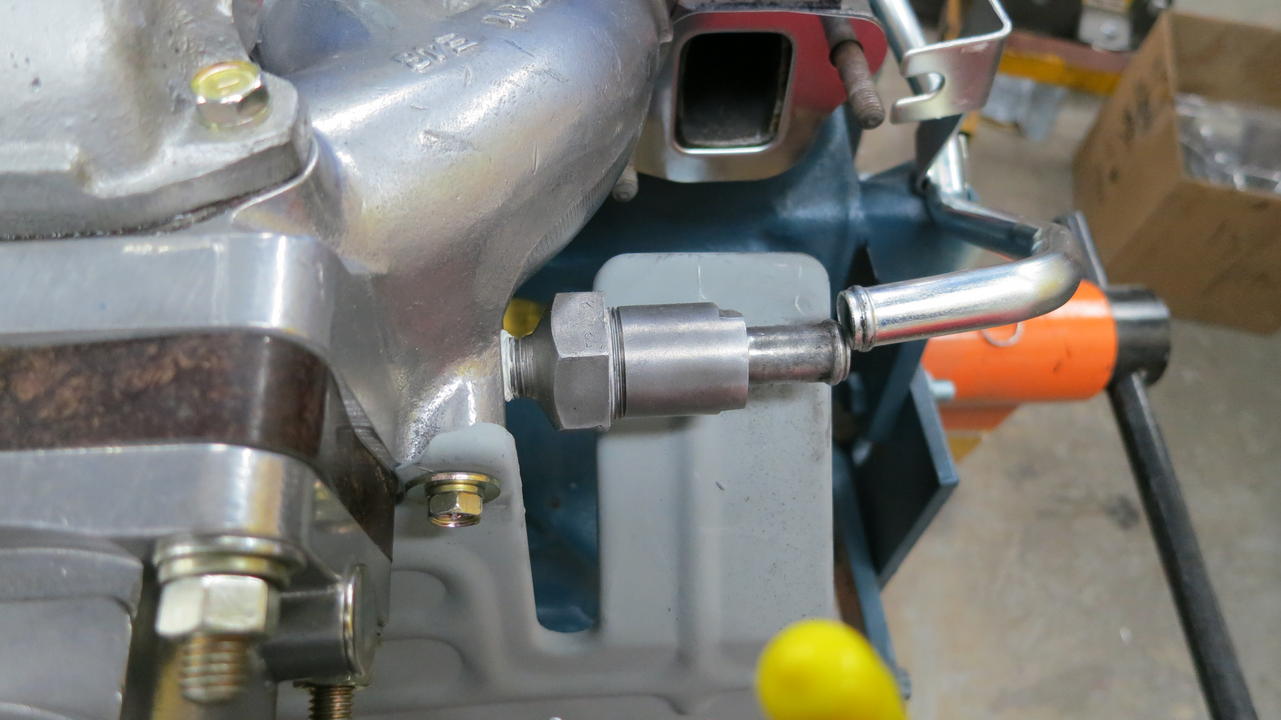
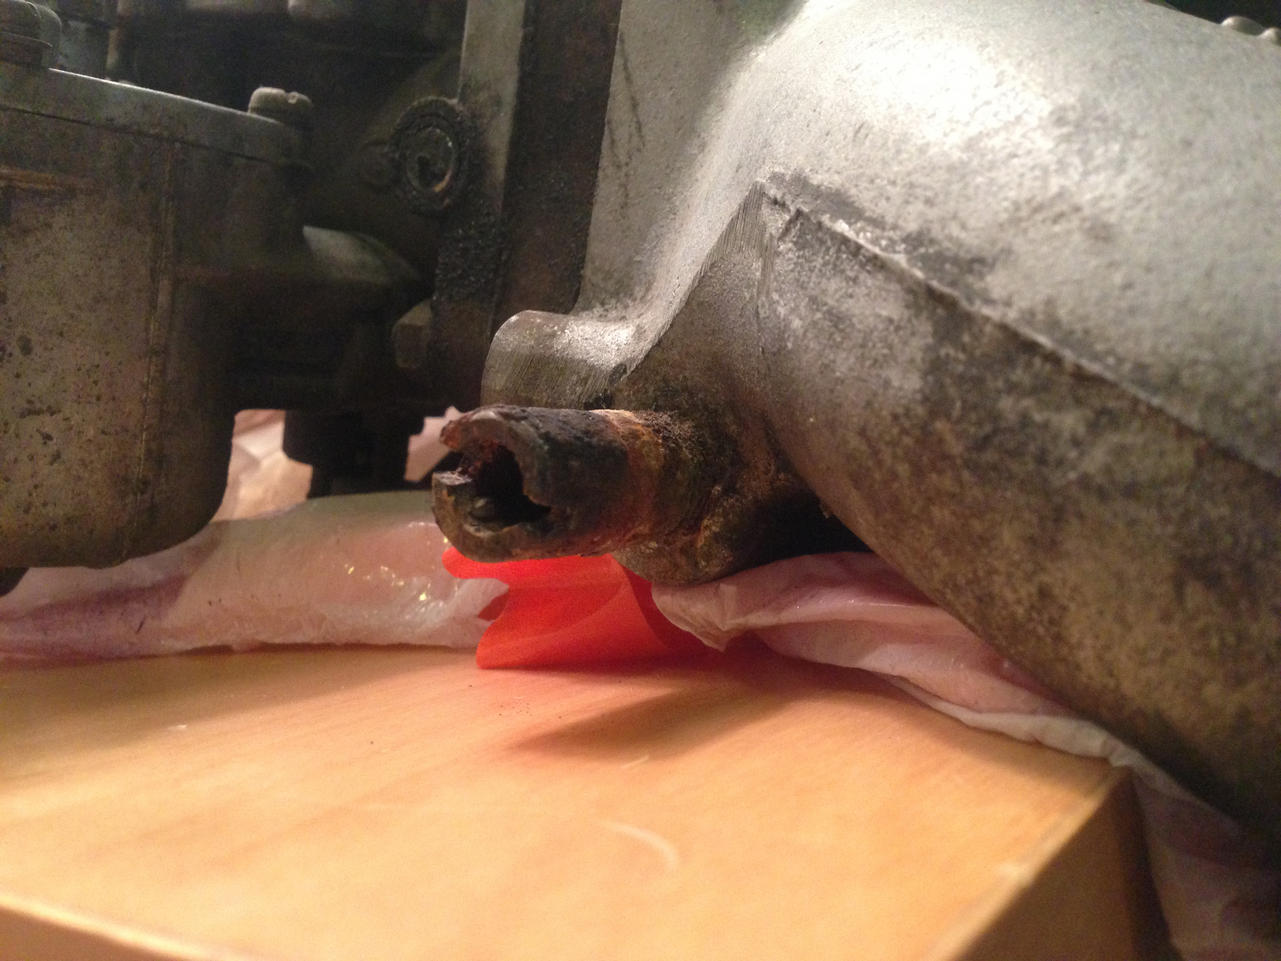
Ok. This one is going to be a little hard to explain. I was going to ask Bruce directly but I thought this would be a good discussion. So I'm assembling my motor (5/71 L24) and installing a pair of beautiful ZTherapy 4 screw carbs and E46 intake manifold when I notice something weird. I go to install the rear bypass tube and I notice that there is no way that I am going to be able to mount the rear bypass tube to the head stud without it interfering with the nipple sticking out the rear of the intake. So I'm thinking about what could be wrong when I realize, hmmm, I don't remember seeing that style of nipple on my old intake. I go over to my old intake and low and behold it has a shorter, straight shaft nipple with a slot in it, similar to the nipple that would be on the balance tube for the hose going to the anti-backfire valve. Notice how corroded this nipple is though. And thinking about it more it has every right to be corroded because why wouldn't there be a bulge at the end of the nipple like there is on the front intake nipple or like the one pictured above? I could imagine that rear hose getting loose, or expanding from the heat, causing coolant to push it's way back up the hose towards the intake. At first I thought the previous owner had messed with my original intake and swapped the nipples but I was looking at some photos online and most rear intake nipples have this slotted design. I have not yet found a photo of the nipple provided with my ZTherapy carbs/intake. Needless to say, I have some extra manifolds so I pulled one of the front intake nipples off (the ones with a bulge at the tip) and installed it in the rear and now the bypass tube fits fine. So I guess my questions are: 1. Is there something I'm missing? Is there a reason why the original rear intake nipple is designed without a bulge and with the slot? (I know the slot is for screwing it on because there is nowhere to grab it with a wrench) 2. What the hell was Nissan thinking putting different coolant nipples on the front and rear of the intake? (I guess that's similar to question #1) 3. Where did the rear coolant nipple that ZTherapy provided come from? Is this a Nissan part or is this a custom solution that ZTherapy came up with for some reason? Thanks in advance for all your help. Matt


-
I like them both equally as well also. I do think though that the side molding on your 280Z in contributing to it looking longer then your 240Z. Matt
-
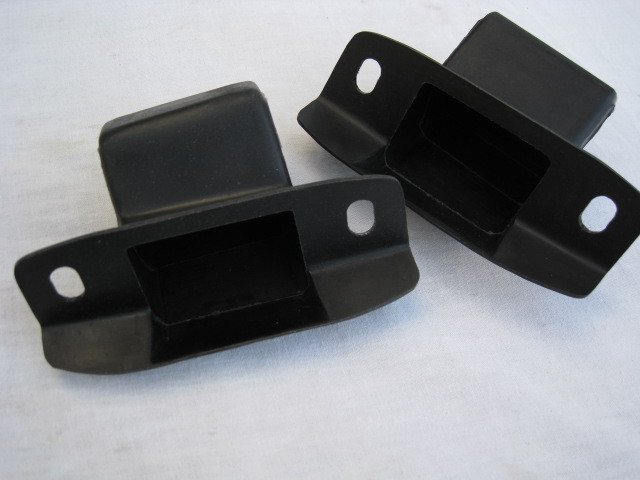
Yes siteunseen I am talking about the rubber cups that go behind the hinge, not the gasket. Attached is a picture of the seal I am referring to. It doesn't look like you have them. hmmm...

-
Thank you very much for all your observations. I agree that what both of you said. Dan you bring up some very good points. One thing that had me wondering though is it is possible that the bolts were removed after paint without them getting marred up. For example some body shops will hang the fenders with the upper fender bolts loose during the paint job so they can be removed without tearing up the finish. I guess that doesn't answer the question though on how they can be finally torqued down without the bolts getting marred. I would imagine the hatch hinge bolts need to be pretty tight. Matt
-
Interesting. I am a little confused about your picture though. It looks like you don't have any seals at all. Could you possible post a picture from a different angle? Thanks, Matt
-
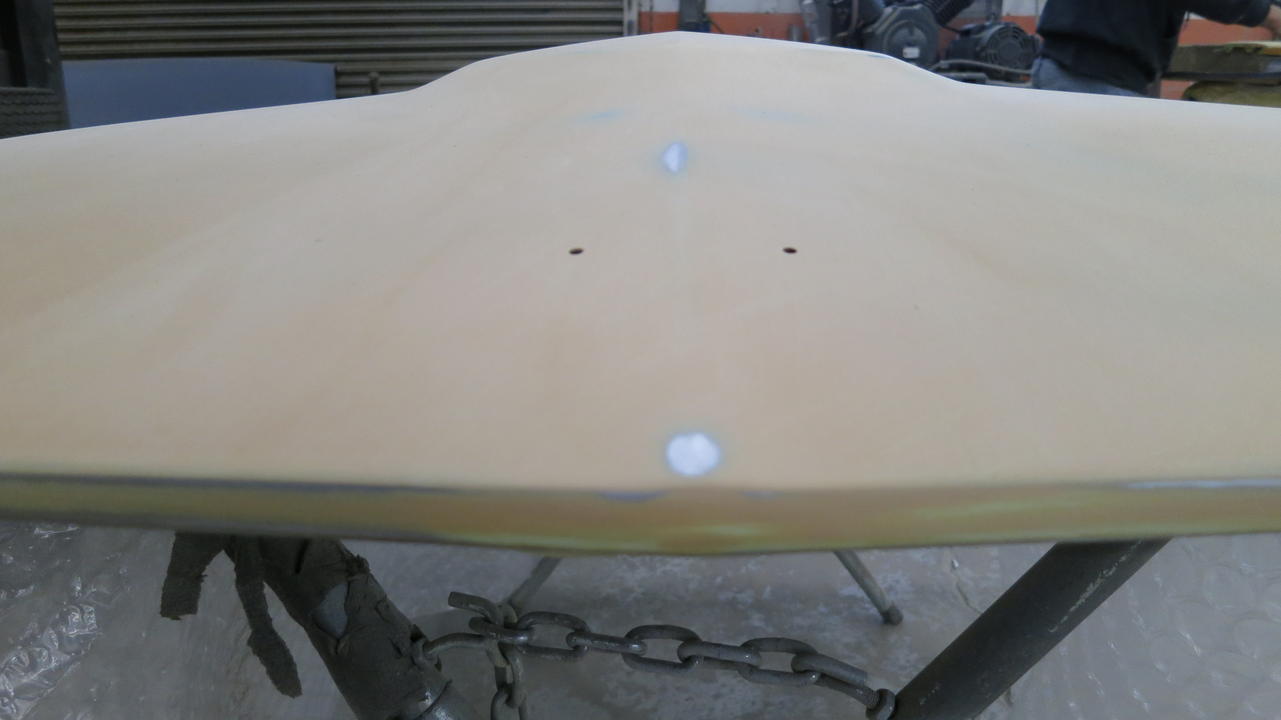
Can anyone tell me if the hatch hinge seals were painted body color from the factory? It seems a little odd to paint over rubber but I know the hinges and body bolts were installed prior to paint and then the actual hatch and hatch screws were assembled afterwards. Were the seals installed prior to paint or were the hinges removed from the body after paint to install these seals? Attached is a picture showing the area I am referring to. Right now the car is in primer. Thanks, Matt
-
I'm assuming a paint code is a paint code but according to Zhome.com they describe the 901 paint code for 1970-71 as Silver gray (metallic), 1972 as Silver Metallic and 1973 as just Silver. Are there any differences in the shades of silver throughout the 240z model years? I'm assuming there is a difference between 901 and 306 Silver Metallic on the 260Z and 280Z but whats with the various descriptions for the 240z's? Thanks, Matt
-
Ok so my conclusion is that it looks to be more rounded off on the vertical edge rather then coming to a straight crease. Diseazd you have no idea how many times I've referred to your flickr gallery the last couple of months when I need reference photos for my restoration. Your collection is truly magnificent. Matt
-
Thanks for the help guys! Matt
-
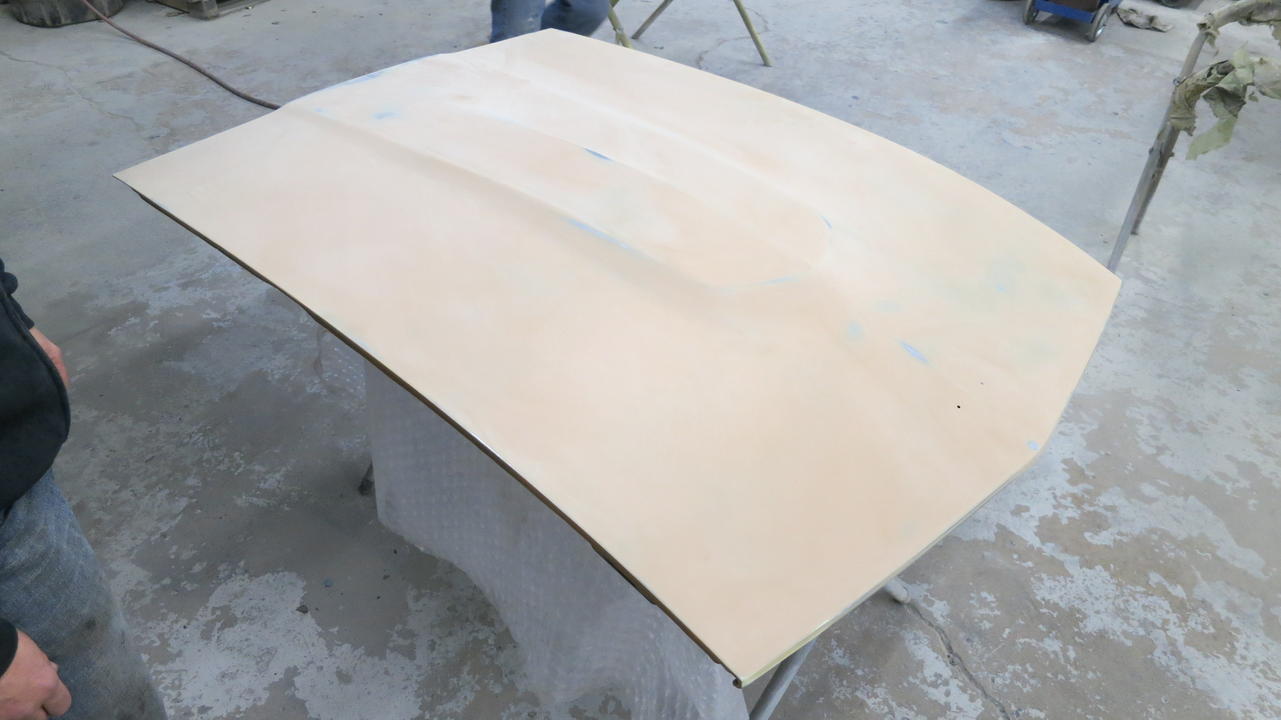
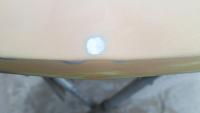
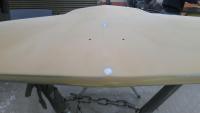
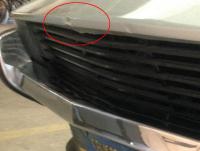
Hi Mike. Thank!. Hmmm. So your second picture it looks like everything comes to a pretty defined point, but is that just the reflections? The rest of the pictures seem to look like it's more rounded off. I can't really tell. Below are pictures of my hood after there repair (right now they are blocking down a coat of rust-defender before it goes in for primer). I think I will feel better about the repair after I see the car in a uniform color but I don't know. I seem to remember the hood from my old 75' came more to a point.

-
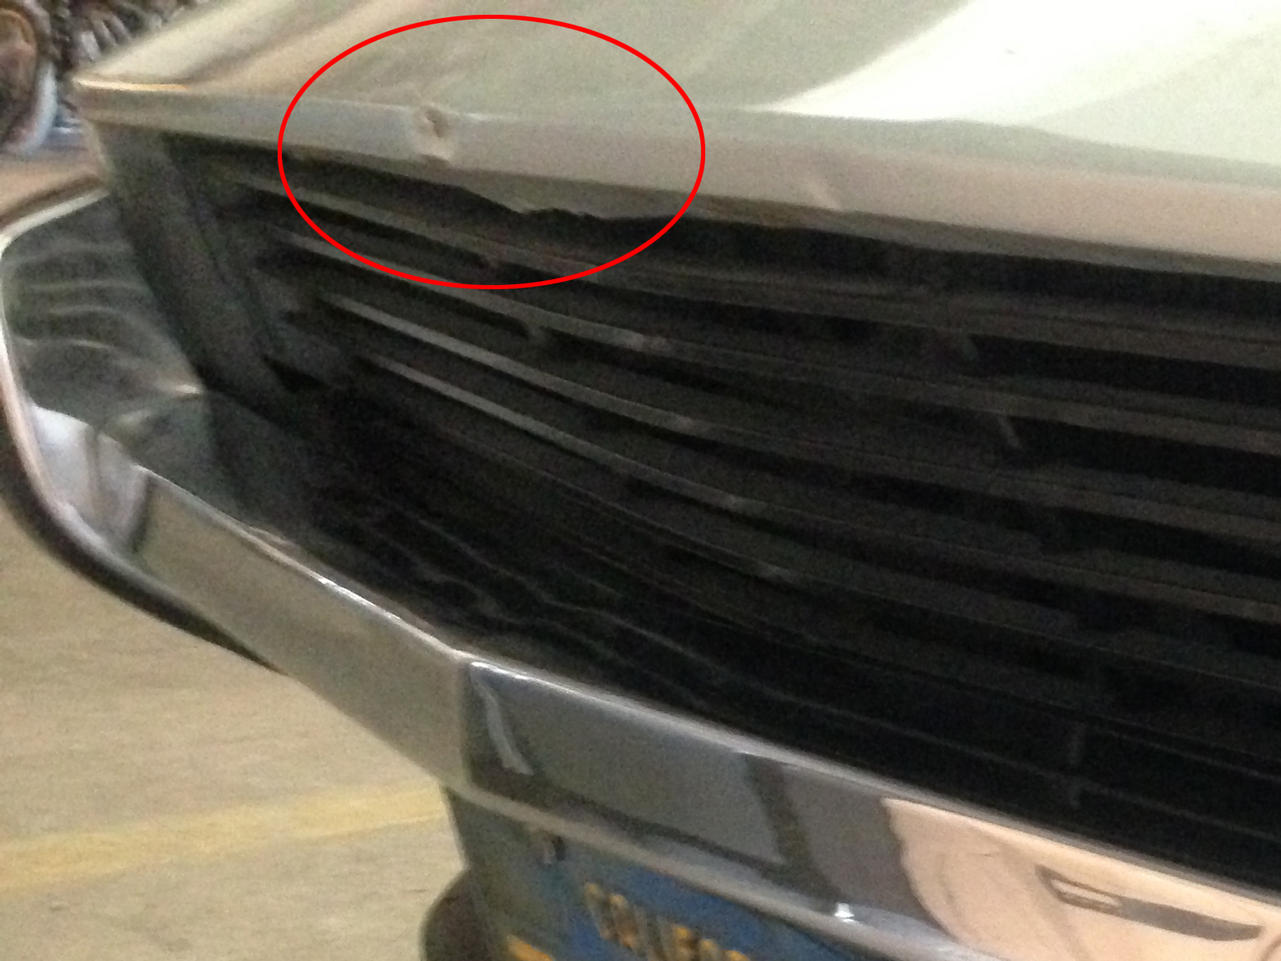
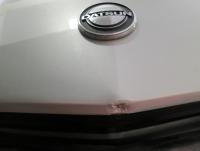
Here is a picture of the damage to better explain things...
-
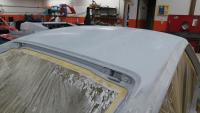
Hi all. Can someone please post a couple of pictures of the very tip of the nose on the hood to show how much of a defined point it comes to, and whether the point ends at a crease that then travels down the front lip of the hood? I hope this makes sense. Id like to see pictures of the very tip of the hood from the top, front, and underside to see how the metal was supposed to be folded over. My body shop is fixing a dimple at the tip of the hood and I want to make sure everything is bent back and creased properly. Thanks, Matt
-
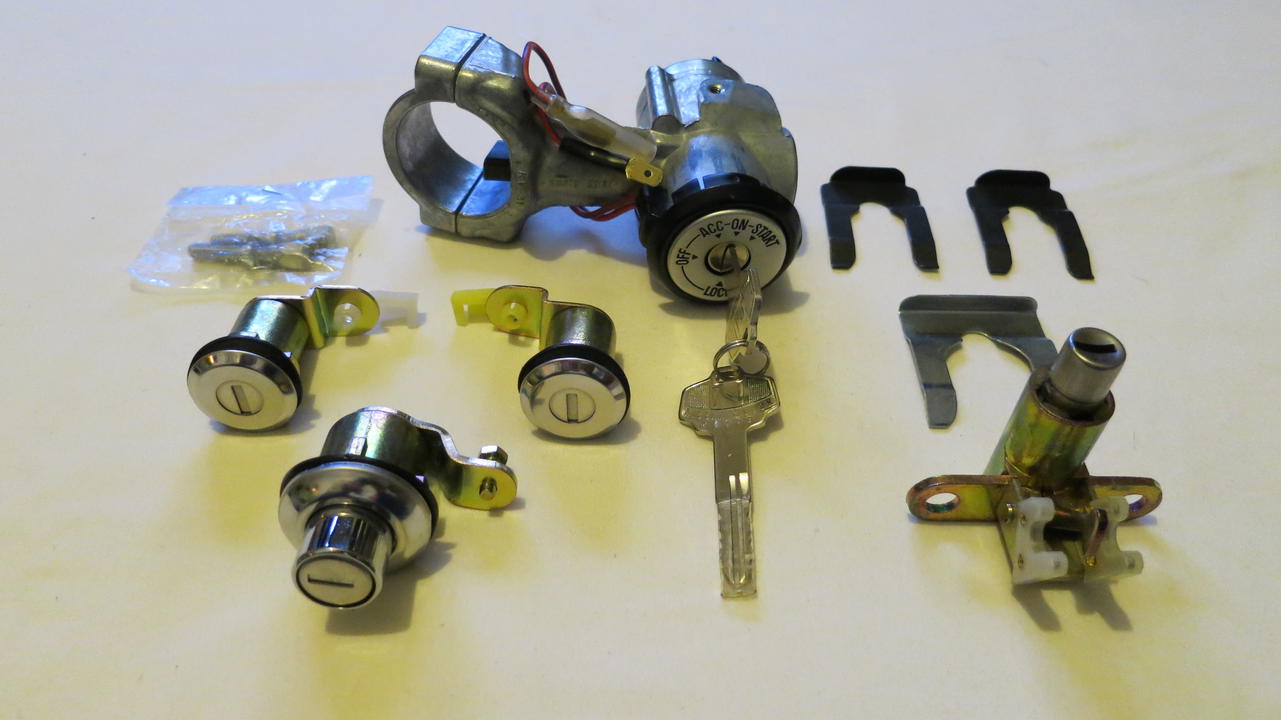
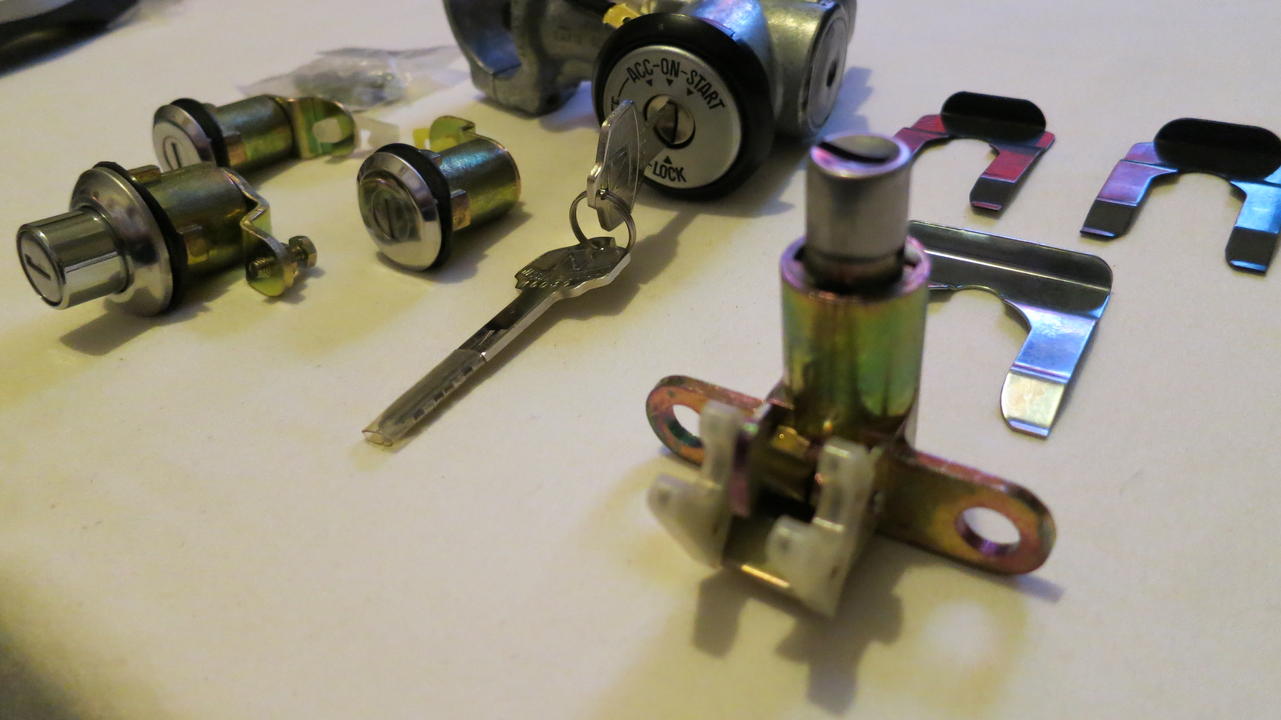
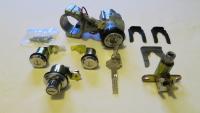
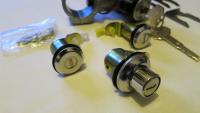
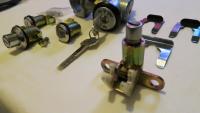
Hi Jeff. My NOS Nissan set (which I'm selling by the way) has the short arm with plastic insert. The left lock has a clear off white insert and the right has a yellow insert. I have a second NOS set and it's the same set-up. I believe the part number for one of the sets was 80010-E8800. I'm not sure what the part numbers are for the individual door looks. Matt
-
Thanks again for all your reply's. I think Courtesy will be able to get me one but Greg I'd definitly like to see some pics of your NOS one. I'll send you a PM. Ollie YOUR CAR IS SICK!!!
-
Thanks for the responses. I would prefer Nissan OEM or similar. Salvage yard is out of the question as this is a restoration. Can it be as easy as ordering from Courtesy Parts? I've had some bad luck ordering from large parts supplies where they may have the item listed but once I place the order I'll get an email the next day saying the part is NLA. Mat
-
Hi guys. I've searched the forum and I cannot find a straight forward question as to a source/manufacture of an OEM equivalent ignition coil for a stock 1971 (Series 2) 240Z with points. Please do not suggest switching to an electronic ignition because it's not going to happen. I am keeping my points. It needs to look and perform like stock. I will be using it with a NOS Nissan ballast resistor. It can be a little hot but nothing that is going to negatively affect the rest of my electrical system. Thanks, Matt
-
I received a package from him yesterday and got an email from him 2 days ago.
-
Ya I've been dealing with Norm for some parts on my restoration. I'm about to send him a list of stuff I need. He does good work.
-
Nice work! May I ask where you got all of your plated hose clamps?
-
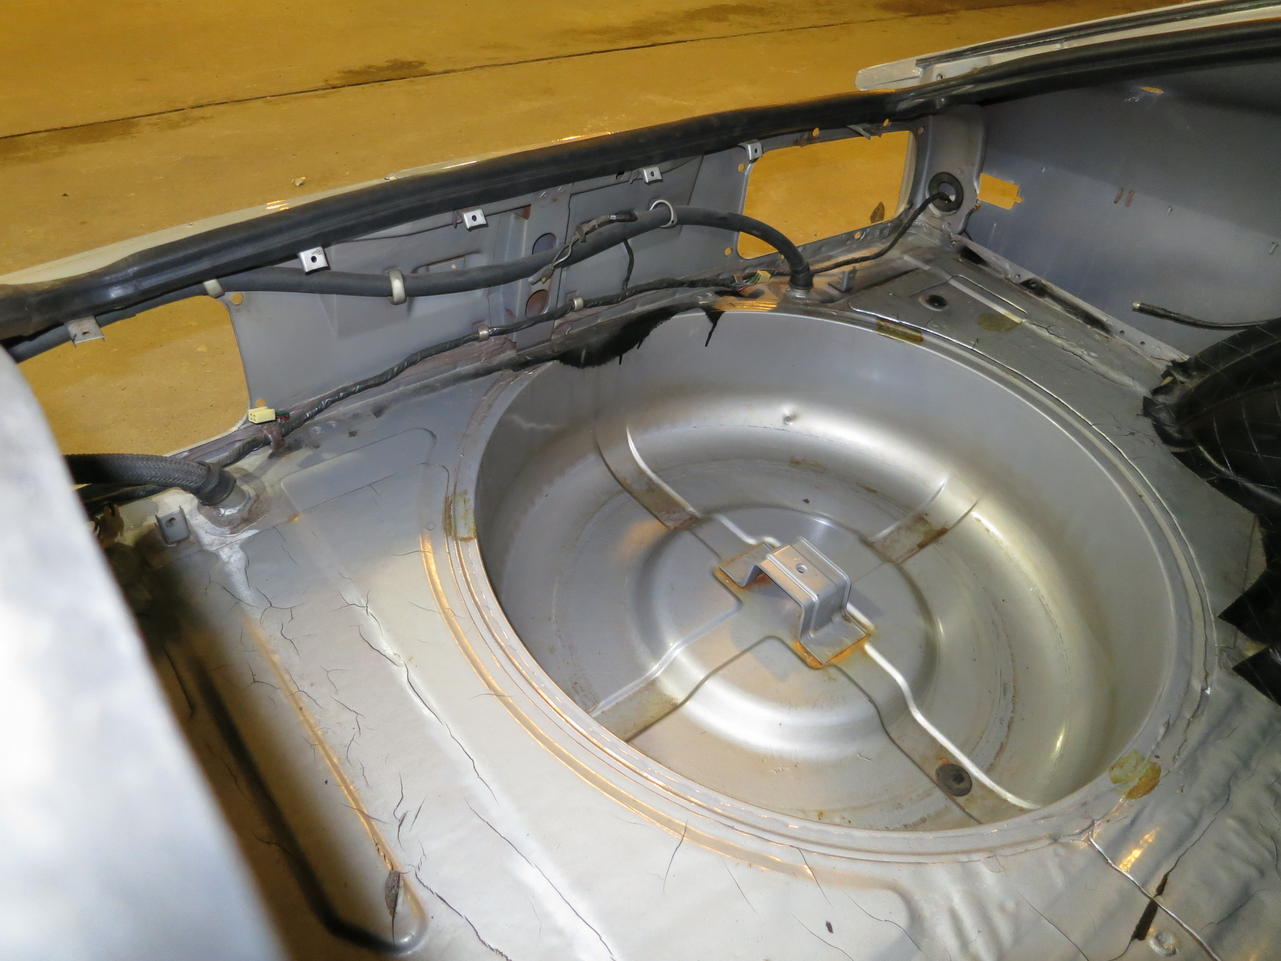
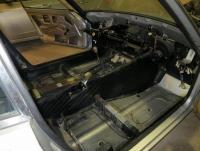
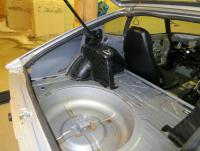
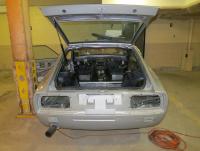
Hi Guys. I'm in the process of stripping down my 71' 240Z for bodywork and paint and while I have the interior disassembled and dashboard out I wanted to replace my Heater Control Valve and Engine Side Heater Hoses. My question is if I disconnect the hoses from the engine is coolant going to come pouring out? Do I need to drain the radiator before I perform this task? I attached some pictures of my progress in breaking down the car. Looking to send it off on Monday to the body shop. Can't wait!!!

-
I would also be interested in a dash for a 1971 240Z (without the cigarette lighter by the hazard switch).
-
I would definitely be interested in a front bumper bar for a 71 240Z.
-
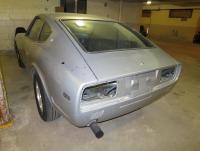
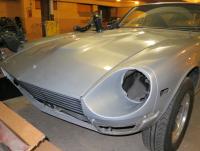
Hi everyone. Just wanted to let you all know that I purchased this 240Z (not at the sellers asking price by the way). The first winner of the auction never paid so I jumped in with an offer the second go around. The car is currently being shipped from CA to NY and I am expecting it to arrive next week. I didn't purchase the car for the "celebrity" status claim. I purchased it because it looks like a very original, unmolested example of a '71 240Z. Looks to be in pretty good condition but we will see when it arrives. The previous owner did not have much documentation. He got it from an estate sale. I was actually able to confirm some of his Steve Prefontaine ownership claims by getting in touch with Steve's sister and mother. They were very happy to talk to me. Steve did not actually own the car for any prolonged period of time. It was purchased by him and his friends in OR, along with many other 240Z's, which they use to drive across the border to CA and resell for a quick profit. There was a waiting list for these cars at the time as well as no sales tax in OR. Like I said I wasn't really interested in his celebrity ownership claims but is an interesting story none the less. I would still like to track down some documentation. Next step is to try to find out who Steve sold the car to in CA. Matt