darom
Free Member
-
Joined
-
Last visited
-
 What an amazing build thread! I just spent a few days reading it. What a journey! How is your car running? Did you figure out the rich carb running condition?
 -
Thanks, Parman. I will be heading out to Menards to get the automotive Goop tube. I don't know what 3M was thinking designing a glue which is black. Clear one makes perfect sense.
-
Hi @Parman , I totally understand your pain with the 3M adhesive and its black tar it leaves behind. My hatch top weatherstripping piece got detached. I used the 3M and Permatex - same results, it won't stay in place. I looked up the Amazing Goop one, and do like that it is clear when dries up. Did you use the Automotive version or the Trim one? Thanks! Den
-
Hi Bruce! I am glad you made it home ok. Relax, maybe get some back massage?
-
Congrats Bruce! The hatch strut is holding!
-
No marks to be found - there is a strong smell of Chlorine though.
-
Bruce, good luck on your trip! Looking forward to some pictures from the event.
-
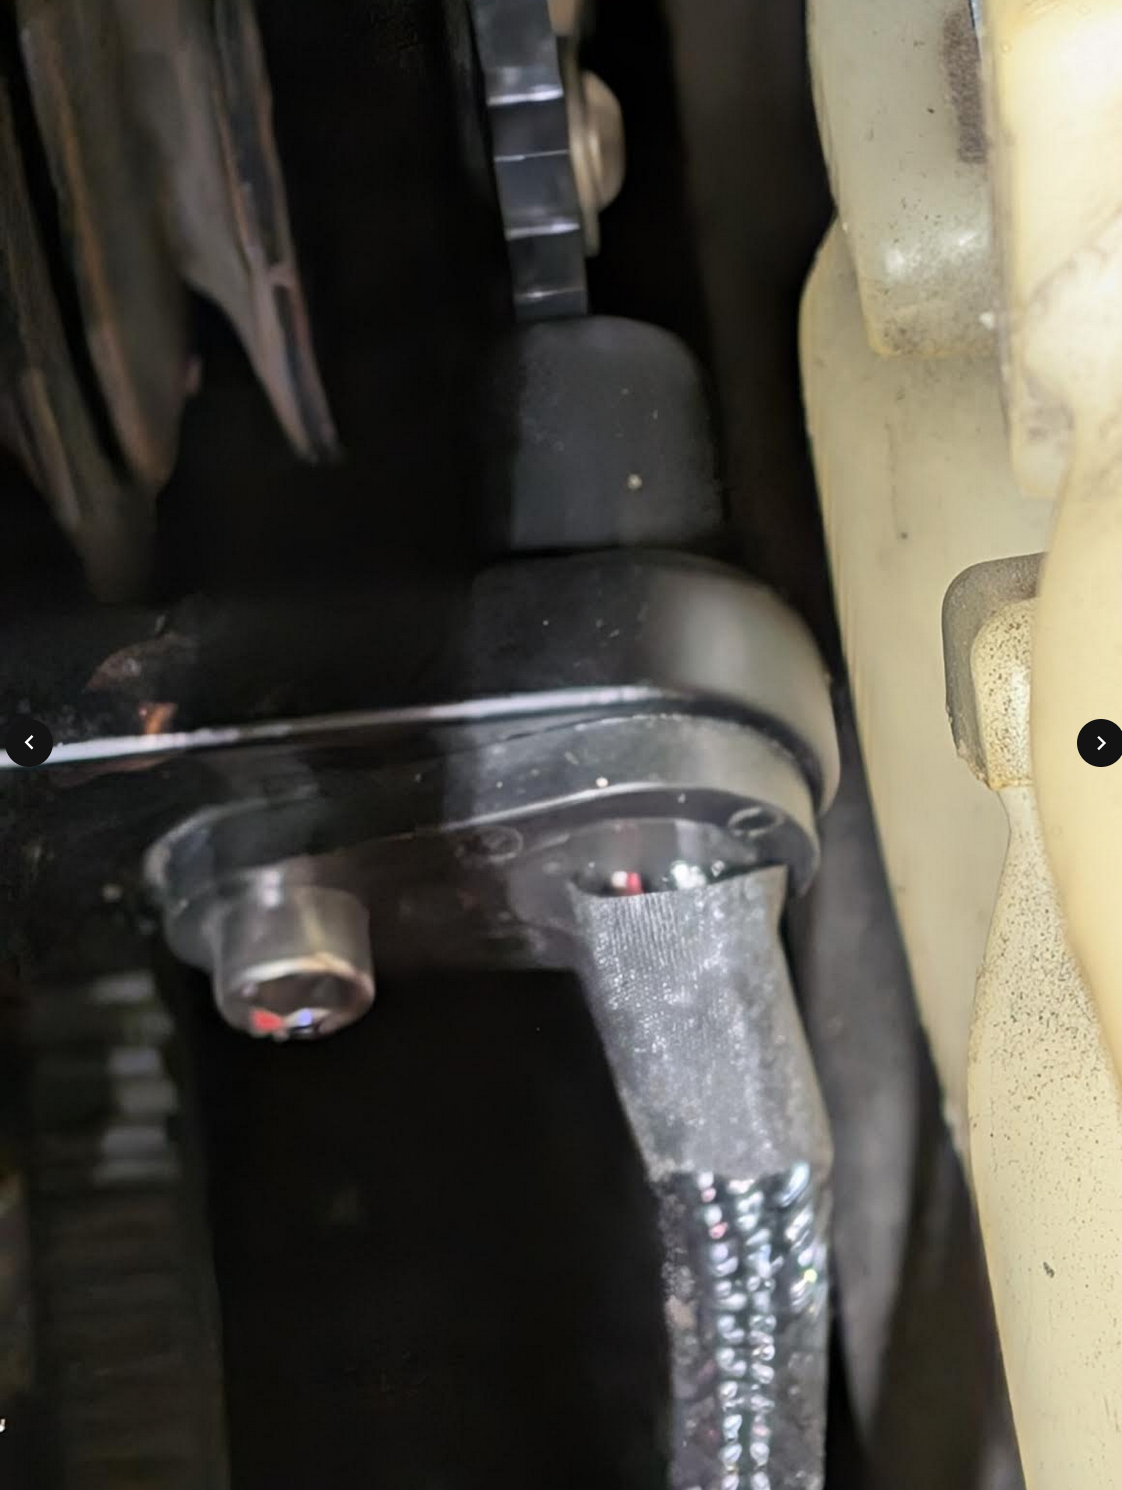
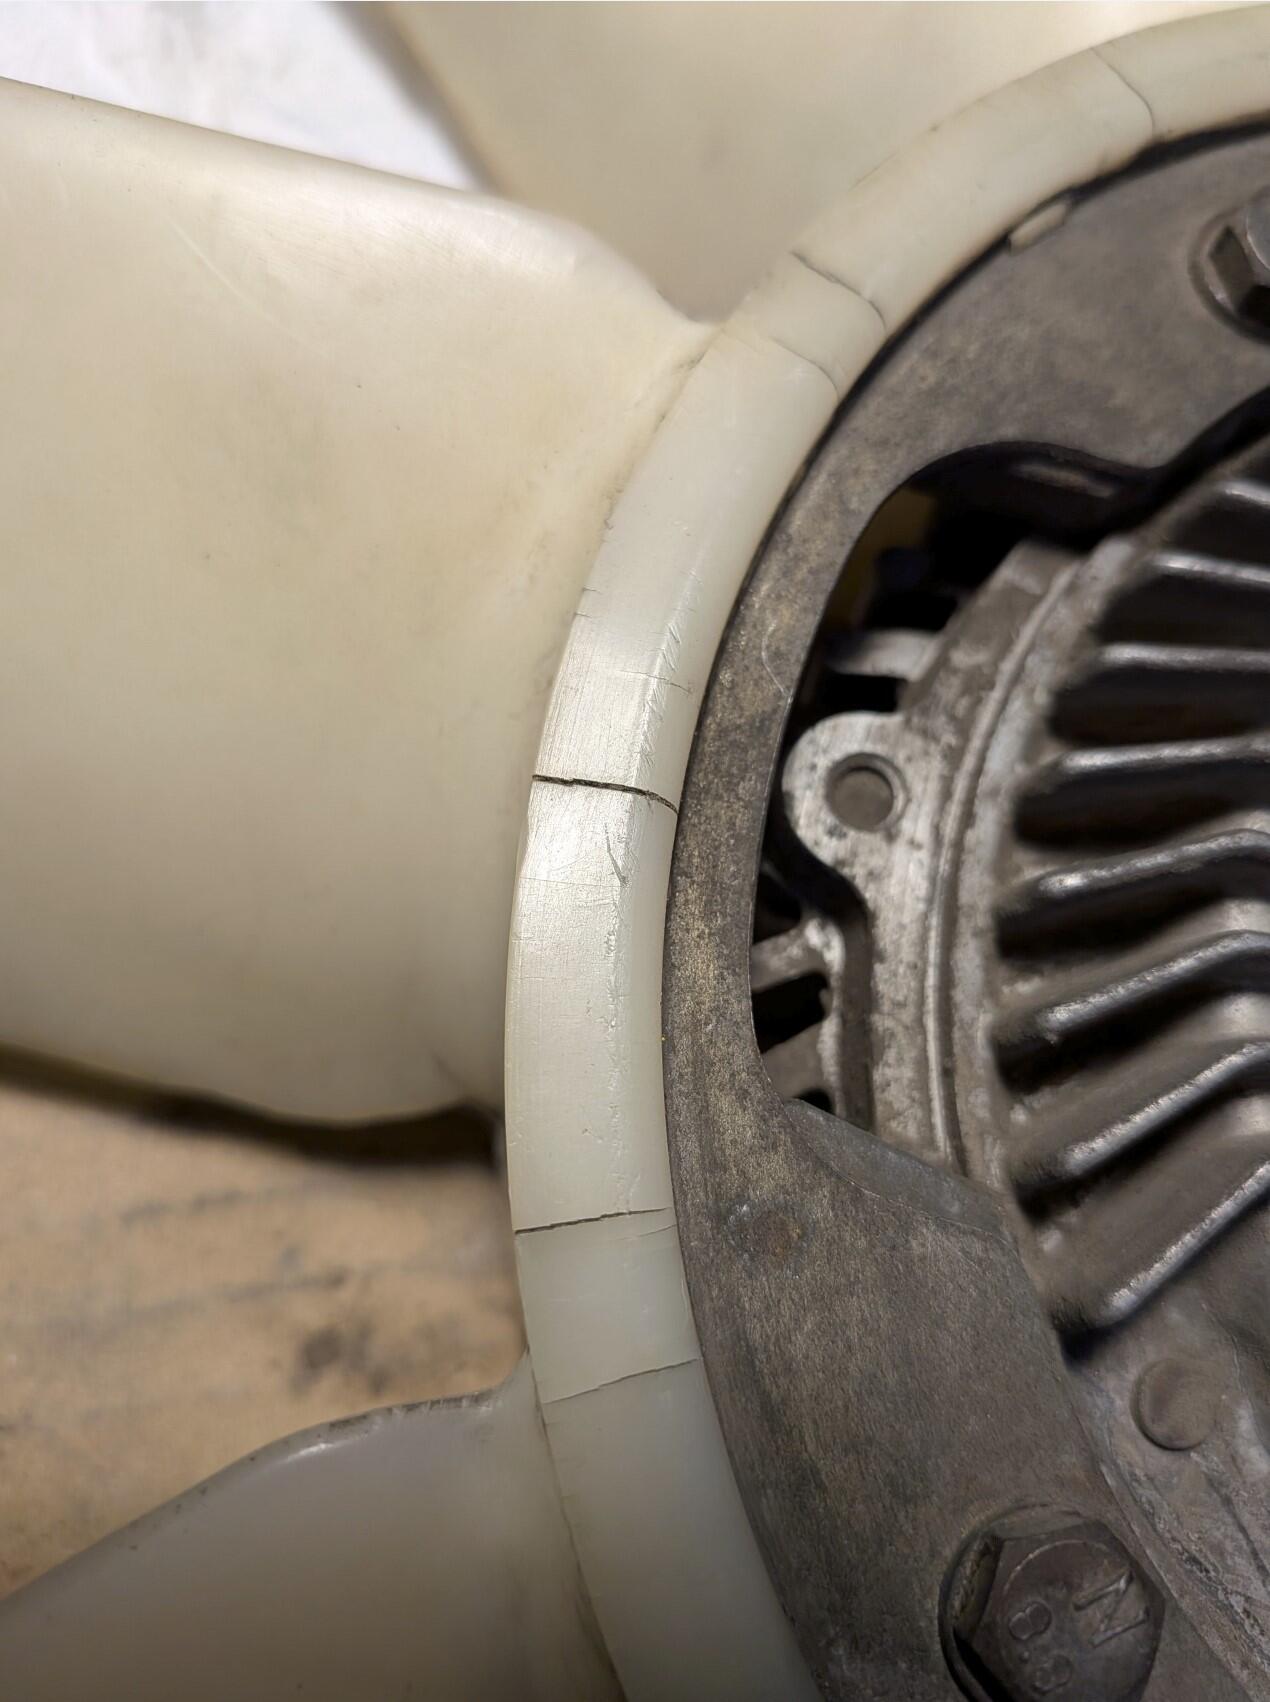
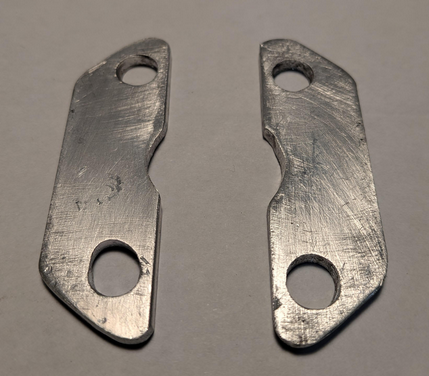
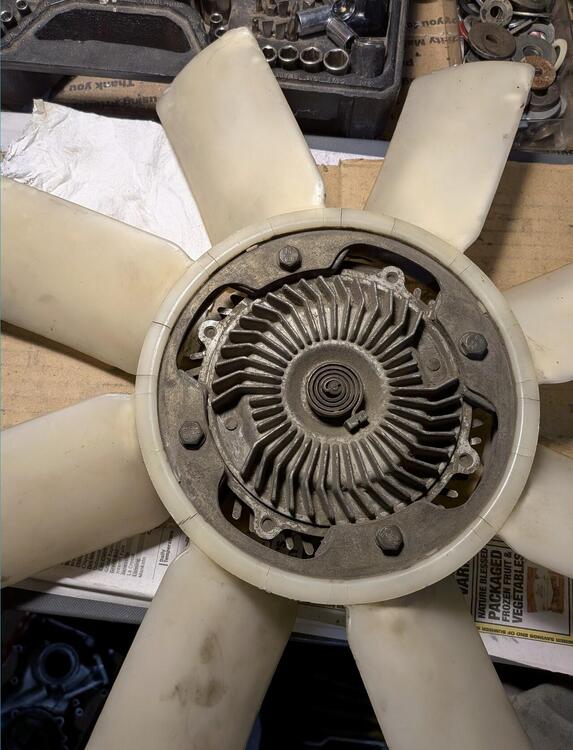
Thanks guys, I will measure the old/cracked fan vs the new replacement one. I am actually facing a different issue on top of the cracked fan blades. After I removed/reinstalled the tranny and installed a new TC, I started hearing some hitting noises coming from the front of the car. I think my fan got too close to my HALL sensor mount and would occasionally hit it (especially when warmed up). I fab'ed 2 shims to move the clutch/fan assembly forward by 3 mm: And here is how close the fan is to my HALL sensor mount:

-
Thanks, ordered one.
-
That's what I thought. Thanks!
-
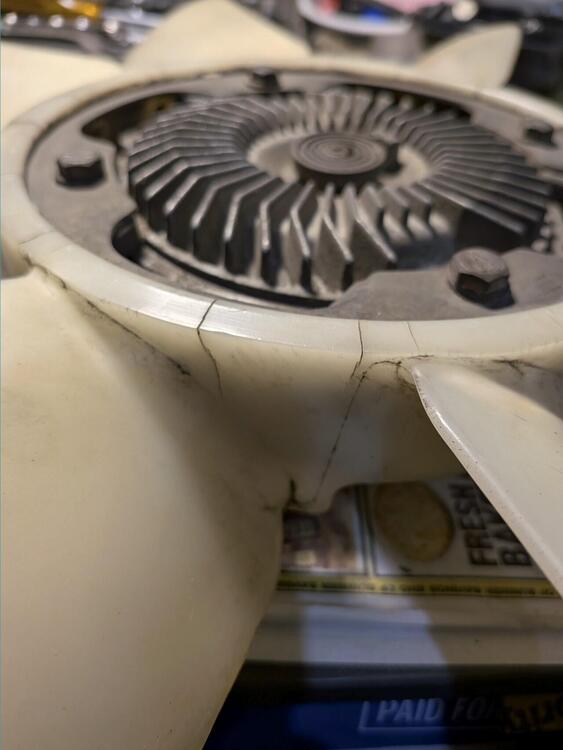
Hi guys, Can you please review the pictures of my radiator fan ('76 280z) and let me know if I should replace it with a new one from zcardepot? I am seeing some cracks and am afraid the fan can explode taking out my radiator and my hall sensor which is sitting within a few millimeters from it. The fan clutch is showing some resistance while free moving it. I'd like to stick with the mechanical one since it has been cooling my car pretty well. I have a stock fan shroud. Thanks!

-
Hi cgsheen1! Thanks for the recommendations. I am running the latest version of Microsquirt, 440cc Bosch injectors, Spartan 3 v2, crank 36-1 wheel with HALL sensor, LM7 truck coils with batch firing, AZC oil pan. I will try making Microsquirt work with the turbo (no sequential ignition). I have only one output left (relay) which I can use for an electric fan, for ex. I was aiming for 8-10 lbs of boost to play it safe and keeping my stock rear diff/half-shafts alive. I looked up some parts from rockauto and here is a list if it works? EXEDY 06030 clutch kit, 1975 2+2 Flywheel: AMS AUTOMOTIVE / RHINOPAC 167304, for 2+2 model Throwout bearing, WJB / INMOTION PARTS WRDNE01576C (any manufacturer preference?) Hopefully, if the car parts are for 2+2 model, I am not going to run into any issues with the fitment/clutch fork throw. I just installed a brand new master and slave clutch cylinders (for my 280z 1976 model). Will this create a problem? (I checked the part numbers, they are the same for 76 and 75, I think I should be good here). I started a thread here on hybridz dealing with my project: https://forums.hybridz.org/topic/136053-76-280z-microsquirt-project/ Thanks! Den
-
Yarb, it is the gasket I found at Rockauto. I think it is a cork type. Steve from AZC recommended to use the RightStuff gasket maker. I used it in the past, it seals well, and is a major pain in the neck to deal with if you want to remove stuff. Steve mentions it in his note with his oil pan that the best way to install the oil pan is with the engine out of the car :-) I wish it was my case. With an oil pan installation, the clearance on the 280z is tight already. The oil pickup on the AZC pan creates an issue trying to install the pan without jacking up the engine to give more room. If I use an RTV like RightStuff, I would swear that stuff all over while trying to install it. It would be a mess. What I did is to put a thin layer of black permatex onto the AZC pan and glue the cork gasket to it. Give it a few hours before the final installation. Now I can move the oil pan around the oil pickup with all my bolt holes nicely lined up etc. The gasket wouldn't move it I bump it against something. Apply some black permatex in 4 areas the FSM talks about, and you are all set. I don't think it would matter if it was a cork type gasket or a rubber one. I just need some material to seal the oil pan against the engine. I am sure some other guys have a different way to deal with it. If my engine was out of the car, flipped over, I would be happy to lay a nice bead of the RightStuff and carefully place the AZC oil pan on top of it. I am sure there would be no leaks since this stuff truly seals.
-
I installed the AZC pan, very nice piece. No leaks yet - I used a cork gasket with a few small blobs of black RTV in the areas suggested by the FSM. It might be in my head, but the engine noise had quietened down since the pan installation.
-
Thanks, Yarb. I am on hybridz too, I joined it when I started exploring the Megasquirt/turbo upgrade (I was getting fed up with the AFM/running lean etc lol). There is less traffic now as it used to be.