racebird1
Free Member
-
Joined
-
Last visited
Everything posted by racebird1
-
 If that doesn't pan out I may still have a junk door. I'll see if it's still there it may have been pitched.
 -
They needed to be bent in half. They would not do the bend they made me do it. I took pictures before I bent them so I knew where I bent them, I did it at a bend and you cant tell they were ever bent.
-
I recently had every bolt and fastener along with the fuel lines, brackets, clamps,fuel neck, cap, brake lines, heat shields, head light buckets, and basically every part of the car that was originally plated replated. It was a challenge to get a local shop to do it but I begged and they did an outstanding job and it only took 4 days. This is not what they normally plate they mostly do fasteners, they did the clear and the yellow. the stuff looks like new. I did the glass beading and rough pre cleaning to get any rust off. THE COST FOR THE WHOLE CAR WAS $250 The only problem I had was that the brake line fittings were tight from the plating I had to wire wheel the threads on some to get them to fit.
-
Correct lobe up on #1 when at TDC. Both valves are supposed to be fully closed when the #1 is supposed to be firing. Remember there are two revolutions to each cycle. TDC should always be on the compression stroke. Turn the engine slowly you will see the exhaust valve open then the next rotation the intake valve will open this is coming up on the compression stroke when it reaches the TDC both valves should be closed so the engine will fire.
-
I had my tank redone they cleaned and sealed it and it looked pretty good. I then sprayed the outside with POR 15 and it looks like brand new cost about for them to do the shop work $200
-
A rough way to see if your timing is close is to take out your plugs and carefully turn the crank and using a wooden dowel bring the #1 cylinder up to top dead center of the compression stroke and check to see if the rotor in the distrubetor is pointing to the #1 wire position. Also still may have head issue possible water still getting in cyl. Sometines it may pump air into cooling system so look for air bubles in the radiator. Do a comp test in each cyl. Good luck.
-
I am looking for a right rear shock tower black vinyl trim cover and a left rear chrome tail light trim. Good shape to fit a 1976 280z TAHNKS
-
If your pump is put together wrong it will not work properly. I have pictures of how it gets lined up if you still need them. Did you say you checked the intake screen on the fuel pump? You may need more fuel in the tank to get the FI system flushed through. You also should check you fuel pressure you need at least 36 psi after the filter or you won't get enough fuel to throttle it up.
-
Your problem sounds like it is in the cap area and not the mount of the neck on down because all hose connections problems would cause the fuel leak to run down inside the car behind the trim pannel and the gas smell would drive you nuts. Your problem is most likely from someone leaning hard on the fuel nozzle when filling up and thus slightly bending down the top lip of the filler neck preventing a good seal with the cap and gasket. To repair this you would probably have to remove the filler neck and if possible carefully bend the top of the filler neck back into it's proper position.
-
Another problem you may run into is low fuel pressure because of crud in the fuel tank. This caused the exact same problem with mine.
-
When I plugged my 76 back in after sitting for a number of years most of the things you are saying on yours did not work on mine, in fact only one side of the turn signals worked and that really puzzeled me. It turned out that there did not appear to be any corrosion on the contacts but there was just enough oxidation on almost all of the contacts that most of this stuff would not work. Even the horn barely worked. I took everything apart including the map light and hazzard switch apart cleaned the contacts and now all is working great. Even the licence plate lights needed the sockets cleaned if you take one apart you will see why the wire is only put up against the socket and pushed into a plastic housing. No crimp and no solder. The contact point corrodes and they no longer work. The hazzard light only worked on one side because there is two contacts in the switch one for each side. Check voltage with a test light that is how I foulg most of these problems I was getting power and could not figure out why they wouldn't work. Back in 1980 Ihad a 76Z and my map light never worked well I am sure that was probably the issue then. Good Luck
-
Thanks for the tip on getting the picture on the posts I feel like a idiot it was pretty easy but just couldn't find it. I went to EZpull & save in New Ringold, Pa today and no 280z they did have a few 300Zx's and one 280ZX but nothing earlier. Wow it's amazing how these pictures of these cars in the yards makes us Z lovers cringe. Anybody know of a 280 in or near eastern Pa please let me know. Thanks
-
I had tried that link yesterday with no luck. doesn't seem to be any around here. Question How do you get a thumbnail with you name on your posts. I have been trying to figure that out with no luck? Thanks
-
Just a quick note I called 56 local yards looking for any 75 to 78 Z here in the Allentown Pa area and did not come up with a single car. I am almost done with a restoration and need only a few decent parts. I bought some from e-bay but sometime the parts you get are not usable and that is now holding me up. I hate buying things twice. The thread is a great idea for people to get parts they need. I would be willing to drive a distance if I knew I could find parts.
-
My 76 which I am restoring and dont have on the road yet has the same backfire when giving it some gas from a idle. I have not adjusted the timing yet but I know it gets better or worse when playing with the timing. The valves on mine are very quiet.
-
Unless the valves are tapping and making a lot of noise that may not be your problem. The backfire may be in the intake but the most common causes range from intake air leak such as throttle body boot. That causes the engine to not know the exact amount of air it's actually getting or it can be from improper timing. Try checking the timing and look for leaks at the intake air. I believe only 1/2 of the valves can be adjusted from that spot then you may need to rotate 1 turn to do the rest. I could be wrong it's been 28 years since I did a adjustment. The rocker is usually a little loose on the ones you should be adjusting at that spot. Not the ones that are tight. Good Luck
-
I am in the process of doing mine right now, the set I took off was original but did not have the loop in the cover so nothing was used but the wire was attached to the springs. They were possibly redone any they cut the loop off because there is two tabs there like one may have been cut off. The set I bought used the vinyl for the loop and looks strong enough to me since as you sit on it the tension will only decrease. I am going to try to replace the straw matt that was on top of the springs with a 1/2 inch thick silicone foam because the matt stank like mold. I got this set from e-bay and don't know who made them. Good luck
-
-
I had my engine color mixed today as well as the light blue for the 75 on up air filter box. I hope to paint some tomorrow and will let you know how the color matches to the original. I will be using Dupont enamel with hardner should be better paint than original. I also noticed when preping and sanding that they did not use a primer and just painted right over bare steel.
-
One quick note here is I did not see anybody that if using POR15 you should spray the primer on the POR when it has just started to flash off. This is because it is like a rock and as stated it is hard to sand. Either way always use a self etching primer or be sure to etch metal before priming. I personally would not por the whole engine bay. Too much work and not worth it.
-
The problem with doing the engine bay is if you are like me the bug has a way of getting you. I went from not going to do it at all because who sees it but you to, to doing a complete rebuild. I gutted everything to the bare block. I sand blasted and POR15 the rusted areas then sanded and painted it out side on my drive way Also sprayed the interior at the same time. Put plastic down to protect the driveway. I did not get much dirt at all. I am painting some brackets and the engine to the original color. I have all and I mean every plated part in there at a plating shop getting replated in the proper yellow and clear zinc plating. That includes all the hardware. The cost add up quickly. Basecoat clearcoat about $200 for materials, POR15 $40.00 Engine paint materials $100, Plating $250 and don't forget Labor, Labor, AND more Labor. Remember I wasn't even going to do this. The next thing will I be able to figure out where everything goes.
-
Just a quick bit of possible useful information. I painted the tail light panels today using the duplicolor Graphite wheel coating as reccomended somewhere here. They came our pretty decent the color is not exactly the same the metalic flakes are a bit larger than original but non the less they look good. Wet sand with 320 and 3 light coats about 5 minutes apart should be just fine. I will be spraying the tank and brake booster with POR 15 black tomorrow and will also be painting the engine and and air filter along with some brackets with the dupont Turquise paint with. I will let you know how the color matches.
-
I have a pipe from a 2+2 from what I can see the bends are all correct except one I am sure is too far back due to it being from a longer car. I think I know how far to move it but I just really would feel better seeing it first. The shop I am using puts the sample pipe on a machine that reads that pipe and bends the new pipe to the sample. Thanks
-
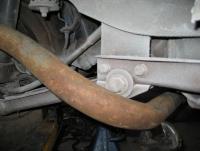
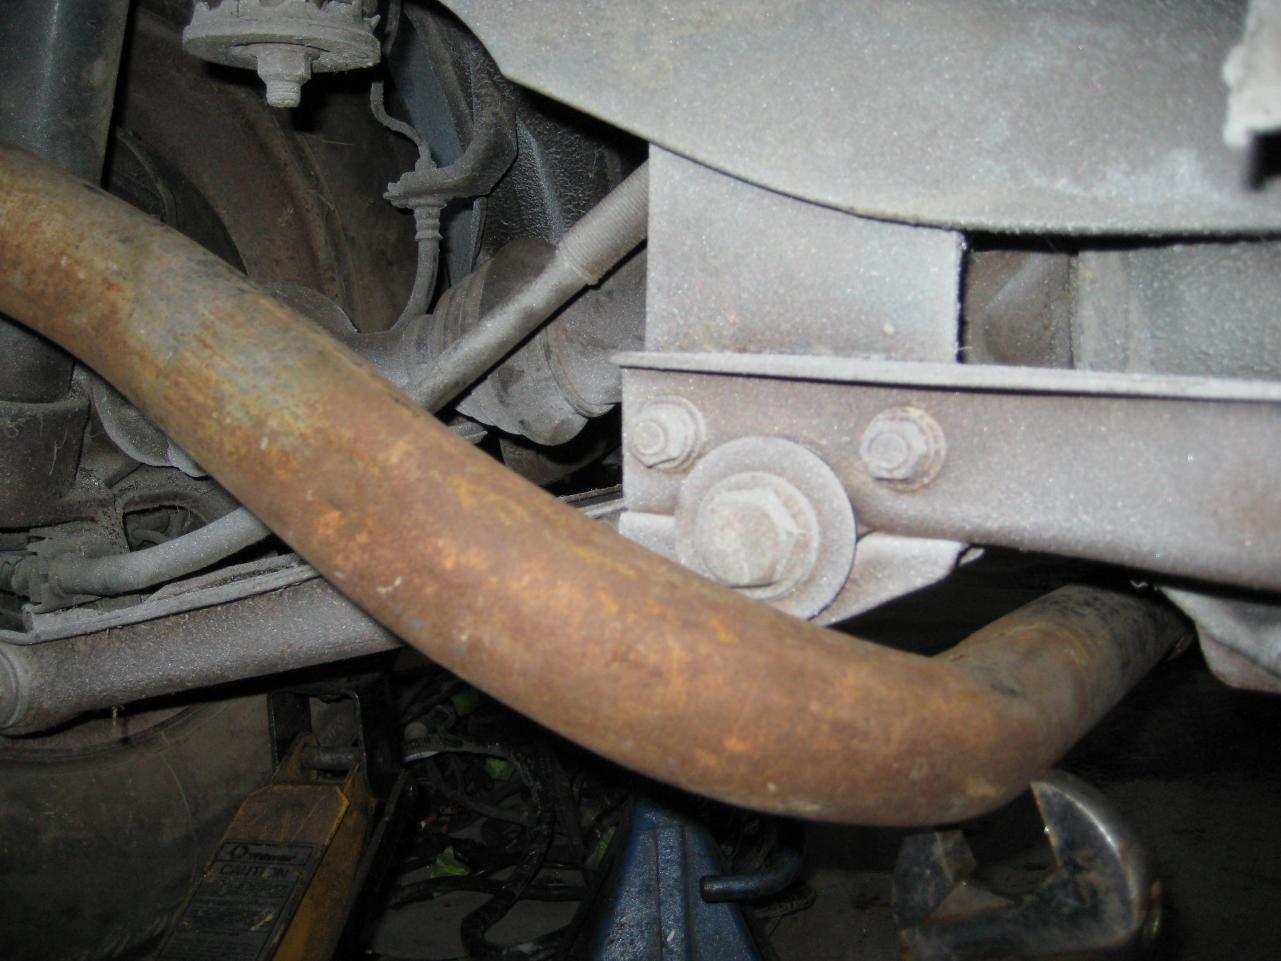
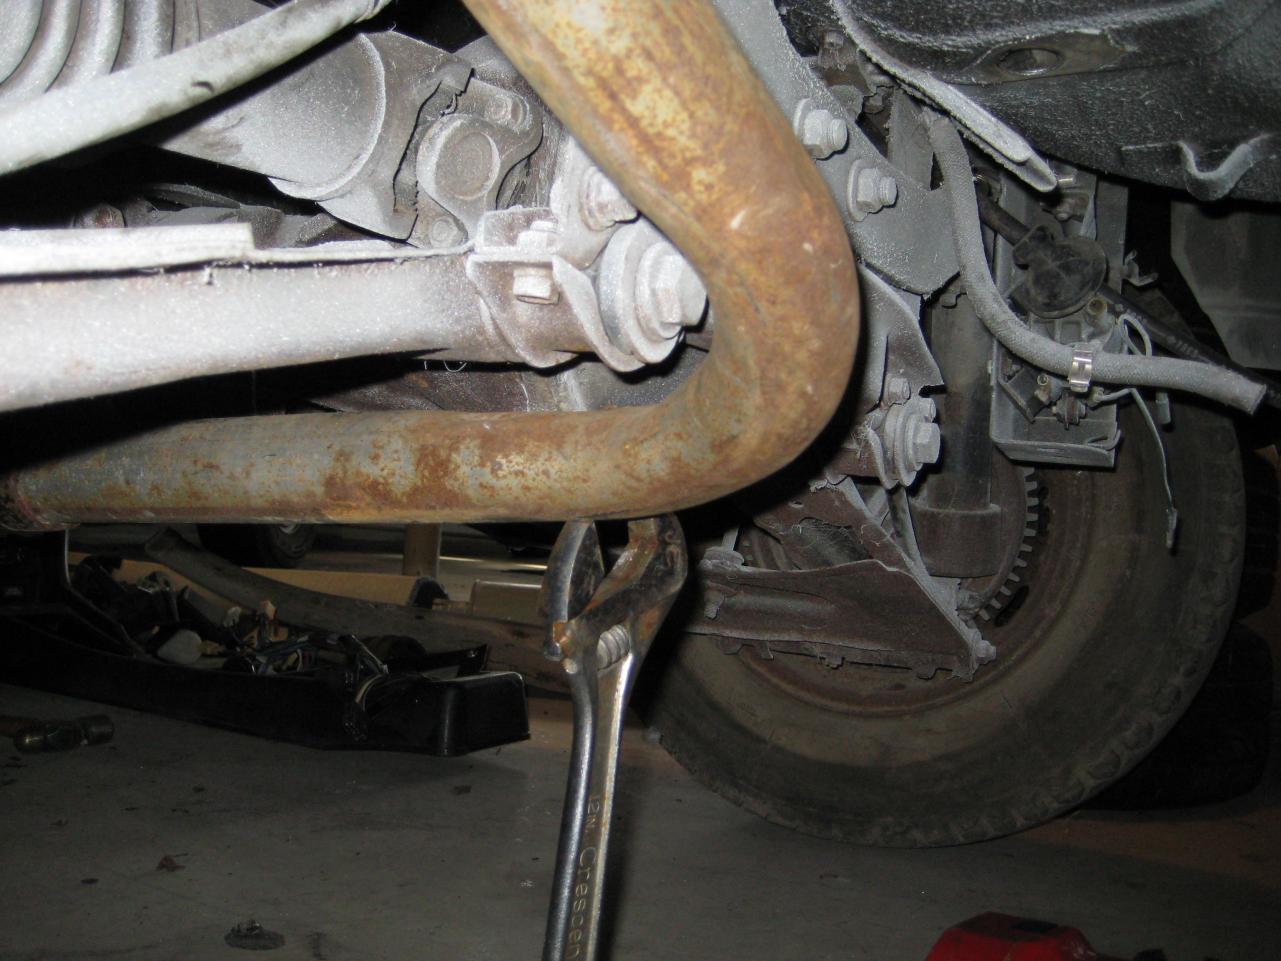
I am in desperate need of help. I am getting a pipe bet tomorrow and I want to make sure it has the proper clearences. I do not have a good sample to give them but I have a pipe from a 2+2 That apears to be the same but is too long and I think the one bend is too far front. Can anybody get me some basic measuremets from a stock exhaust or pictures would be great. I need between the muffler and the resonator. The bends going up and back to the muffler I am good with with. Its the next zig zag that I am not exactly sure where it goes. A picture of that and going to the resoator would be excellent. PLease Help racebird1@aol.com
-
Long story kept short I got a 76 had no exhaust I got a excellent condition original resonator and muffler off of a 2+2 but need to get a new pipe bent and I need help with clearences so I don't get pipe bent wrong. It looks like the 2+2 pipe is the same but too long in some places. One question is how far behind the crossmember that goes behind the diff should the pipe be? That is right where it bends up. If you can help that would be great or if anybody could e-mail me with pics of a stock exhaust to show clearaces mainly from Muffler to Resonator. Thanks Jim