JimmyZ
Free Member
-
Joined
-
Last visited
Everything posted by JimmyZ
-
 Many thanks guys! The yard I was thinking of was one owned by a NASA employee. It was a private yard which contained one MGA and '70-'73 240Z's. This yard supplied the owner with parts for Z projects and revenue for taxes and was not a "proper" business. (would not show up in search engines) Today such a yard would be a gold mine I imagine. I found the yard through a reference. Looks like I'll have to go driving around Sanford. If I do find the yard I will be sure to pass it on to the rest of us. Hey 26th... When you say the Sanford yard is pretty spartan are you reffering to the yard I'm thinking of or just a regular yard? Many thanks again. Jim
 -
Just wondering if anyone knew of any JY 240's in the Central FL area. I once knew of a JY in Sanford which was full of 240's. It has been so long since I visited it I forgot where it was. Does anyone remember this one? Thanks, Jim
-
It could also be that the floor of the cowl area has some rust holes. Had to fix these on my 240. Look where the firewall abuts the cowl floor for rust/water flow.
-
Are you sure it's not the frame rail extension that you're thinking of? You almost need to replace the FR extension. Removing and refreshing it would hardly be worth the time. MSA sells pans. Here's another http://www.datsunzparts.com/NewParts/bodyf.htm I just put a set of pans like the ones in the upper right corner. (linked page) Aside from mising drain holes they were fairly close to the originals in the 240 I was working on. Mike has a great article/sets of photos for his pan replacement. Jim
-
The standard head thickness is 4.218". (I believe) Grab a set of calipers and measure the head. As mentioned before .030" under this needs to be shimmed. You are using stock components right? If not, that might be the problem. I'm just grasping at straws but is it possible that something came loose down low? (Tensioner)
-
I had one do the same thing but it eventually broke after applying excessive torque. I was able to weld a head on the 1/4" protruding stump and then it turned out easily. It seems that the heat helped loosen things up. I tried playing a torch on the block where the bolt resides but no joy. (side of block) The heat from welding a head on the bolt close to the deck did the trick. Arne has a great idea/point. Sacrifice the head bolt and work at it after you get the head off. This will leave you with a 3" shank to play with instead of a stub. Once the head is off you can apply some parts blaster/pen lubricant and work from there. These bolts are next to impossible to drill! Don't think that you can get it with an easy-out. Get a stud remover and soak the thing with pen/lube for a day or two. This would be the last resort next to welding a head on. If all else fails then a shop can EDM it. You will have no luck trying to undo the bolt from the topside. The cap of the bolt allows no pen/lube to get through. 2c Jim
-
Last I checked the hood from Nissan was around $300. This is the best way to go. I spent several hours saving my hood and between the time and materials spent it would have been cheaper to buy new. 2c
-
I am faced with the same thing. (Insulators and brackets) For the rubbbers I purchased some 1/2" thick rubber and cut it on a bandsaw. After it is cut to shape it gets drilled in a drill press. It doesn't hurt to chill the rubber in the freezer before drilling so the bores get a smooth finish. The main pain about making the metal holders is punching the slot. An easier method of making them is to make them in two pieces and make the slot at the joining line before welding. (TIG tack) With a small file set and several well placed holes you could also form the slots. Much easier to get parts off a wreck of the same series though. 2c Jim
-
There could just be some crud in your needle valve. I took mine apart and found that it was seized. It had been sitting for a few years. 2c Jim
-
Is the grommet I posted a few posts ago "the " grommet in question??
-
This is out of my 2/71 Z. It came with the 4 speed. Is this the grommet? Prob not but worth a try.
-
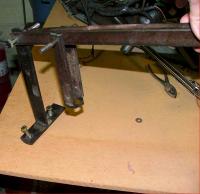
Santa was very good to you then! Just wanted to make sure that you weren't going to have a bad day with the new cam. FWIW/ You can make a valve spring compressor pretty cheap. It's another story when you are removing the valves instead of compressing them. It's much easier and faster to make/use a bench tool. The inner springs make things a little complicated when trying to get the collets out/in. (If you try and compress by gripping the springs)
-
If you have an oil leak this can lead to a premature failure of the starter. It might just be that by coincidence the starter took a dump. Have you tried manualy switching the starter to see if the starter turns? Do this by unplugging the blade connector from the solenoid and touching a bridge wire to the + wire. (Hot terminal on starter from batt) This should be the first order of business. If the starter does not turn but the click is healthy then try giving the solenoid a few "taps" with the end of a hammer or something. (This vibrates the internals and sometimes frees things up to make better contact. (A temporary remedy) Check connections at batt next. From your description these items are all that it could be. Seems that the rest is working fine.
-
That's great to know that they can be had that inexpensively. I always cringed at the idea of $14/ea.
-
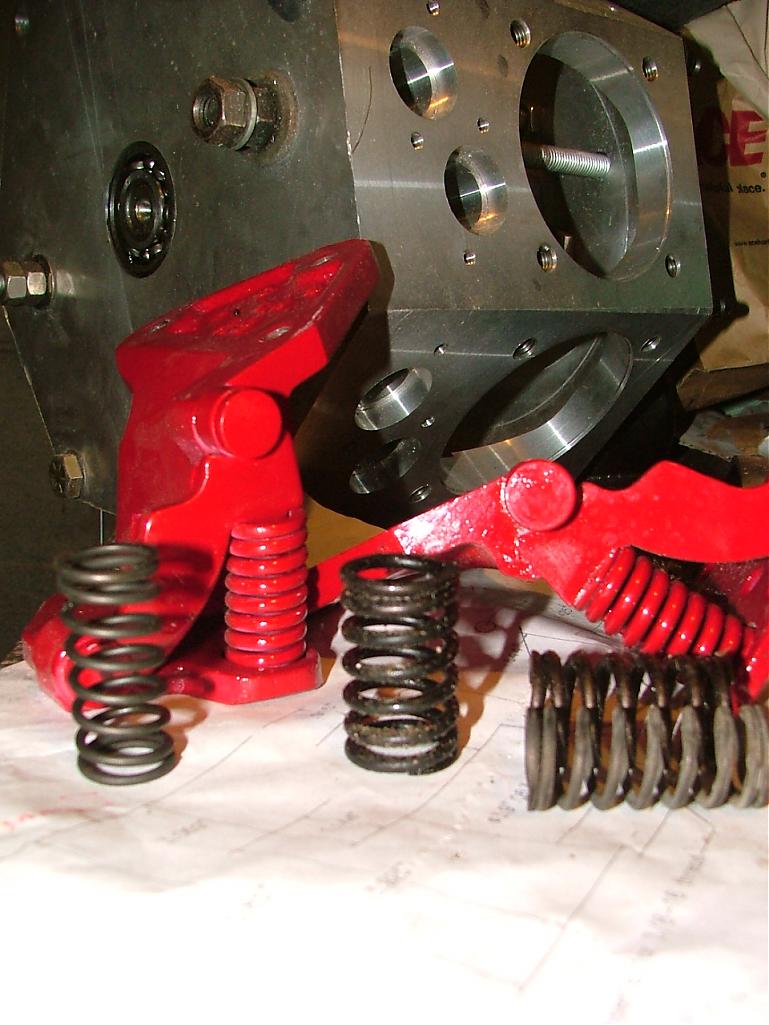
Trying not to be a pain in the a** but can't you just grind off the offending extra meat on the series 2 hinges. (Might need to use allen bolts for affected areas) Sorry but from the initial post I couldn't grasp whether it was a hinge CL prob or hole prob... just knew it was off. I have my hinges out at the moment and am well aware of the lack of adjustment on the door side. Tight holes. It would be nice to see the original hinges rebuilt. I've tried having springs custom made but it is 3-4x as expensive as buying something mass produced.(Big springs) Most custom spring mfg's won't give you the time of day for doing just two springs. Small springs like this are easily made on a lathe though. Just need some music wire of the right size. You might also be able to get away with modding an innerspring off discarded cyl head parts. (Cut to length and use torch to fold over new end on spring) I've got a ton of springs from heads. If you would like, take some measurements and maybe there is a match in the pile. Coil thickness, free height, etc..
-
Isn't it true that you need new rockers for the new cam or is that just a sales pitch? Jim
-
Is it an issue of hinge centerline lining up with the other hinge or just door positioning/adjustment?
-
Just an experiment... I'm sure you've done this. Lay both hinges on something flat and butt the plates together. This could help you figure out how far off the bolt patterns are. If I'm reading this right the door sticks out too much with the new hinge. One solution would be to mill a slot in each of the door-side holes of the hinge to allow for adjustment. (In or out) If you wanted to be a purist you could braze or use a nickel rod to fill the slot a bit. I think the hinge is iron which is why nickel rod was mentioned. (Stick weld w/Ni) My Z came from the factory with a shim under one or two of the hinges. At least it looked like factory. It might be cheaper to have it milled at a local shop but I would be glad to do it for you if need be. My 2c
-
There were a few times I missed a gear and slammed my tach. It seems that the points system went into flutter or something because the engine died. (Thank God) Must have been doing 9000 RPM+ because it was an unholy wine. Yes, the engine lived but I would have been pissed if I blew a hole in the block. Just had to restart and I was back at it. According to a book I've read the 240Z can safely rev to 8000 , 260&280Z 7500 RPM. (mechanical limit in stock form) Ignition system won't let that happen though. Any move to an electronic system should include a rev limiter such as offered by Crane cams. The book mentioned above is a good read.. The Design and Tuning of Competition Engines by Philip H. Smith. Carl's point of metal fatigue brings up the good point that unless you have a new crank, rods, etc you should treat things as suspect and not rev too high. Regardless of any shot peening, polishing or heat treating an old part is an old part. My 2c Jim
-
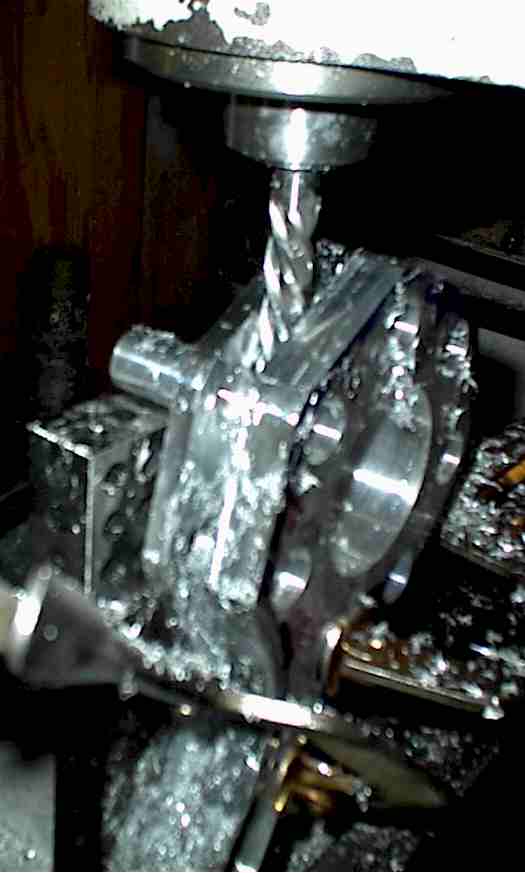
If you need something fabbed I have a milling machine and lathe. Does the hinge itself need machining? What a headache. This is the only way I can see to make it work and still look OK. Thought I'd give the post a bump^ Jim
-
Nice Stephen! Had a feeling that there were differences between the 240 and 260 "boxes". Do you have a picture of the heater valve/heater core arangement? Hopefully this is as easy as hooking up the vaccum lines or replacing a dashpot. Do you think it's odd that he has only one way flow through his core? Sorry Rebel, There are just a few differences between my system and yours. (Quite a few) The design is the same but it just looks different. On the 240 you have simple cables which attach to the dash controls. Apparently this is not the case on the 260 as it uses a more modern method of actuation... Vacuum actuated dashpots. Looking at Sblakes picture it looks like the heater core is upstream and not in the box like it is on mine. I see there is also a relay for the heater. hmmm A picture out of a manual will tell you a lot more than anything I've shown. I'd be looking at Blakes 1st picture part numbers 4,5&6. (Heater stuff) The one way flow through the hoses still has me stumped. Jim
-
Let's hope it's a U-joint. Seems to me it could be a rear axle bearing. This is not fun to change out. The clonk then whine could also just be a tired differential. I've gone through several rear ends in mine. You prob won't need to bother with taking a halfshaft apart. Look for a driveshaft repair shop in your town. In Orlando we have Advance Driveline. Shops like this can rebuild rear ends, install high quality U-joints and balance shafts after assembly. You need to bring the parts to mine though. They don't take'em out. 2c Jim
-
It may be best to start a new thread. Title it "heater problems in 260Z" or something. There may be some differences between my 240 and your 260. The fact that water flows one way suggests that there is a blockage at the valve. Either there is a chunk of hose, radiator sealant or the heater valve is broken internally. Try and flush with pressure in the direction of no flow. (Not too much pressure or you may damage the heater core) As far as airflow goes... When you condenser do you mean A/C or heater core? These images may help... With the door closed you get no flow to the lower section of the box. (Your knees and legs are not gettting hot air) Hope this helps. You may need to replace the valve. If it's too cold out you could temporarily bypass the valve and have water flowing throuhg the core all the time. If you are saying that it does flow but in one direction you could reverse your lines for the season. My unit allows for water flow in both direstions so something isn't right with yours. (If 240 and 260 are the same) I wanna see you keep from getting frozen as I had to make a trip in 0 degree weather with little heat once. (Had no T' stat installed) Jim
-
My welding experience is not as great. I had a MIG job for a few years and have some TIG time as well. Nowdays my welding is for hobbies such as the Z and plane. As for shrinking with a torch, I've done it a few times with a wet rag. A lot of the old bodyshop books describe methods for torch shrinking. I wouldn't try it on something thin and visible like a Z's hood. Seems that the trick is to avoid putting in too much heat. Shrinking with any accuracy is definitely something that takes practice. For fun I've taken a few "oil cans" out of some flat panels. Never did it on anything visible or critical though. It's easier to replace a hood than to shrink an oil can out of it. It can be done though. My bodyshop buddy has a stud welder which can be employed for shrinking. (Special attachment on head) This is simply an electric version of the heat and cool principle. (Wet rag still needed for cooling) I was trying to avoid a mechanical means of shrinking for appearance sake. It would be easy to go nuts with a shrinking dolly/hammer but the metal would be marred horribly. It would also be easy to stretch the metal further by hammer forming (against a block w/recess) a channel to reinforce and "take up the slack". Neither method is acceptable to me but it might be if your sanity was on the line. There is also a shrinking disk for a grinder but I don't think it's worth buying for just a floor pan. Check out pg 198.. http://www.delmarlearning.com/samplechapters/dl_display_sampchap.aspx?isbn=0766813983&cid=12 My 2c
-
OOOOOOhh Hey! I just remembered. The doors inside your heater box may be different from mine. It is possible that one of the cables to the various flaps is broke, disconnected or slipping. The result is that the heater core may work fine but not be getting any airflow through it. Check the cable on the opposite side of the heater box for function. You should hear the large door/flap opening or closing in the middle of the box. (When shifting from heat to cool) Try selecting "Floor" and heat or defrost etc and see what happens. Geez why didn't I think of this earlier. Does anyone know the diffs between ventilation plumbing? (240vs260Z) This might be it. Jim