Leaderboard
.JPG.cfcada9cf1c1b502df3f5f2f2ca3ff36.JPG)


Popular Content
Showing content with the highest reputation on 12/09/2025 in all areas
-
(this is for anyone else interested in a little information about some specifics that you raise:) 1. NONE of the above are "Coil - ". (Stock config = Coil "-" is connected to the points output of the distributor. So, new wire from the Coil "-" to your new gauge...(it will be a 2nd wire connection as the Coil "-" needs a "signal to fire" from points or an electronic ignition unit as well - your new gauge is just tapping into that signal)) 2. You don't necessarily need to jumper any of the wires in that connector, but you need to understand the coil wiring to decide whether to JUMP or just ABANDON the G/W and B/W in the connector pictured above. The stock circuit goes like this: IGN SWITCH -> B/W -> Ballast Resistor -> G/W -> Tach connector -> Loop on back of Tach -> Tach connector -> B/W -> Coil "+". The coil gets power at IGN ON through this and the Tach "senses" the flow of electricity to the coil. If you're replacing the stock Tach, the re-route of the B/W back to the Tach is not necessary - the B/W and G/W to that connector can simply be ignored (abandoned). SO - the B/W that goes to the Ballast can be connected to the Coil "+" - either through the Ballast (by removing the G/W and running a short wire from there to the Coil "+") OR bypassing the Ballast and connecting the "ballast's" B/W directly to the Coil "+" instead - IF you no longer need a Ballast Resistor in the circuit. note: I think it's better to abandon and get all that extra wire (and added resistance) OUT of the power circuit to the coil... BTW, the other two wires in that connector: Black - is a Battery Ground. R/L is gauge lighting - it's listed in the wiring schematic as "IL". So Black is the power ground for the Tach - the Tach gets power (battery voltage) from a Green in another connector.2 points
-
I should have something in a donor part if you decide to go that route.1 point
-
Yes, it can be checked, but there is a risk of shorting out the fusible link if the owner does not insulate the end of the alternator wire properly. I try to lay out the tests to minimize the chance of introducing another problem.1 point
-
1 pointAlso, Japanese market variants had the option of factory stereo from beginning of production, so there are speaker holes in both sides of the interior quarter panel trims and the sheetmetal underneath them was designed to accept speaker mounts on both sides.1 point
-
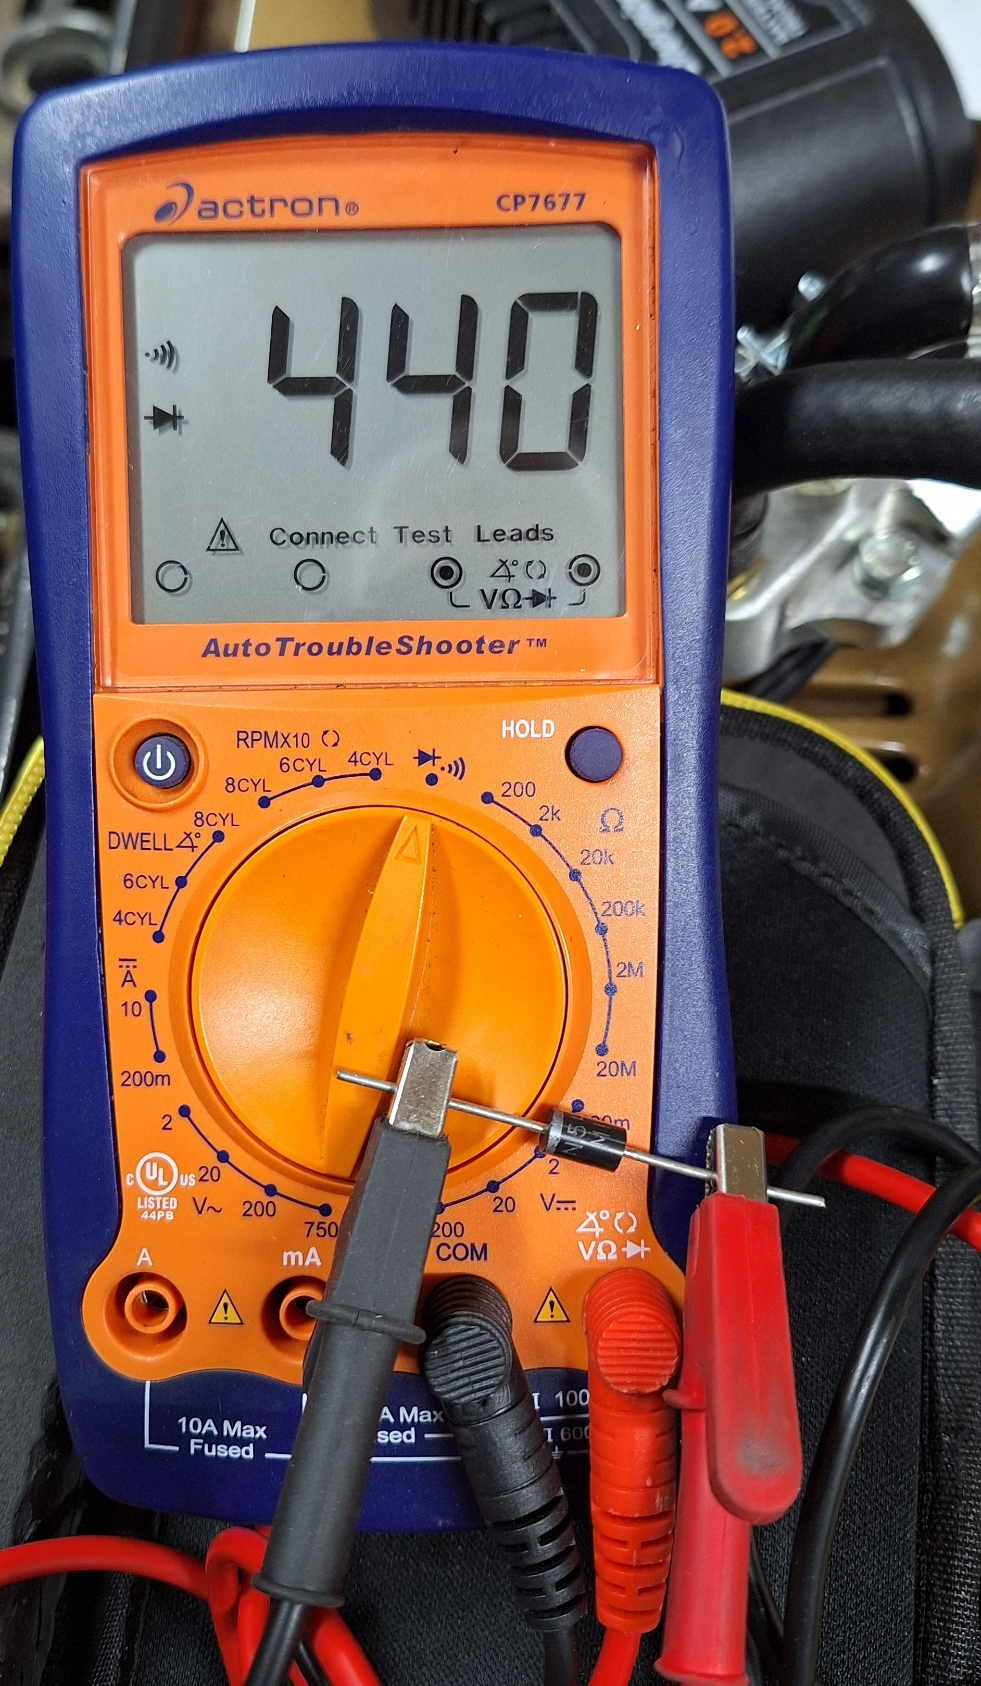
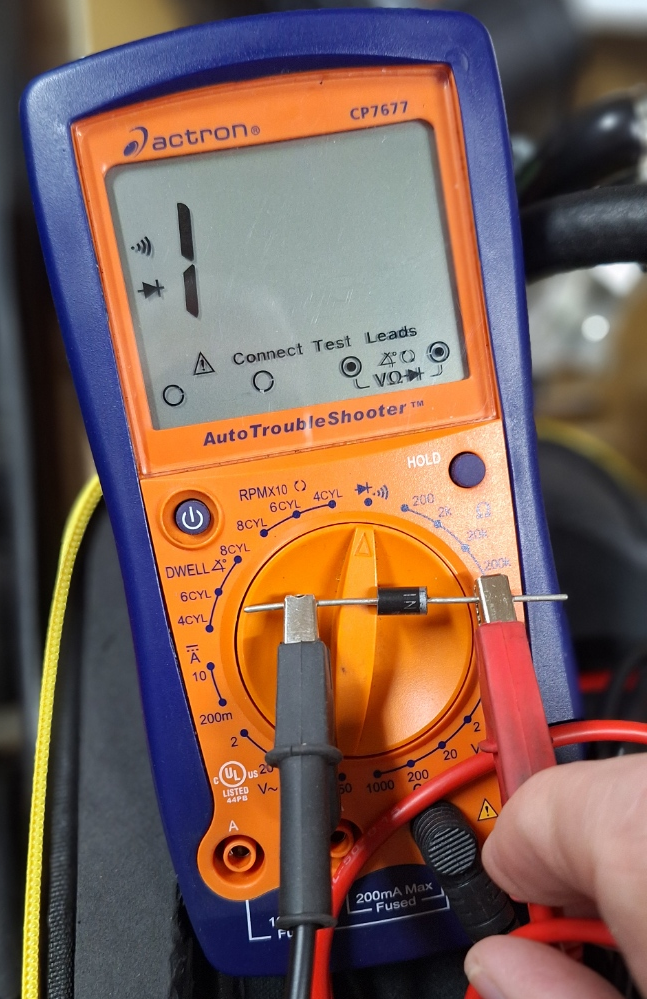
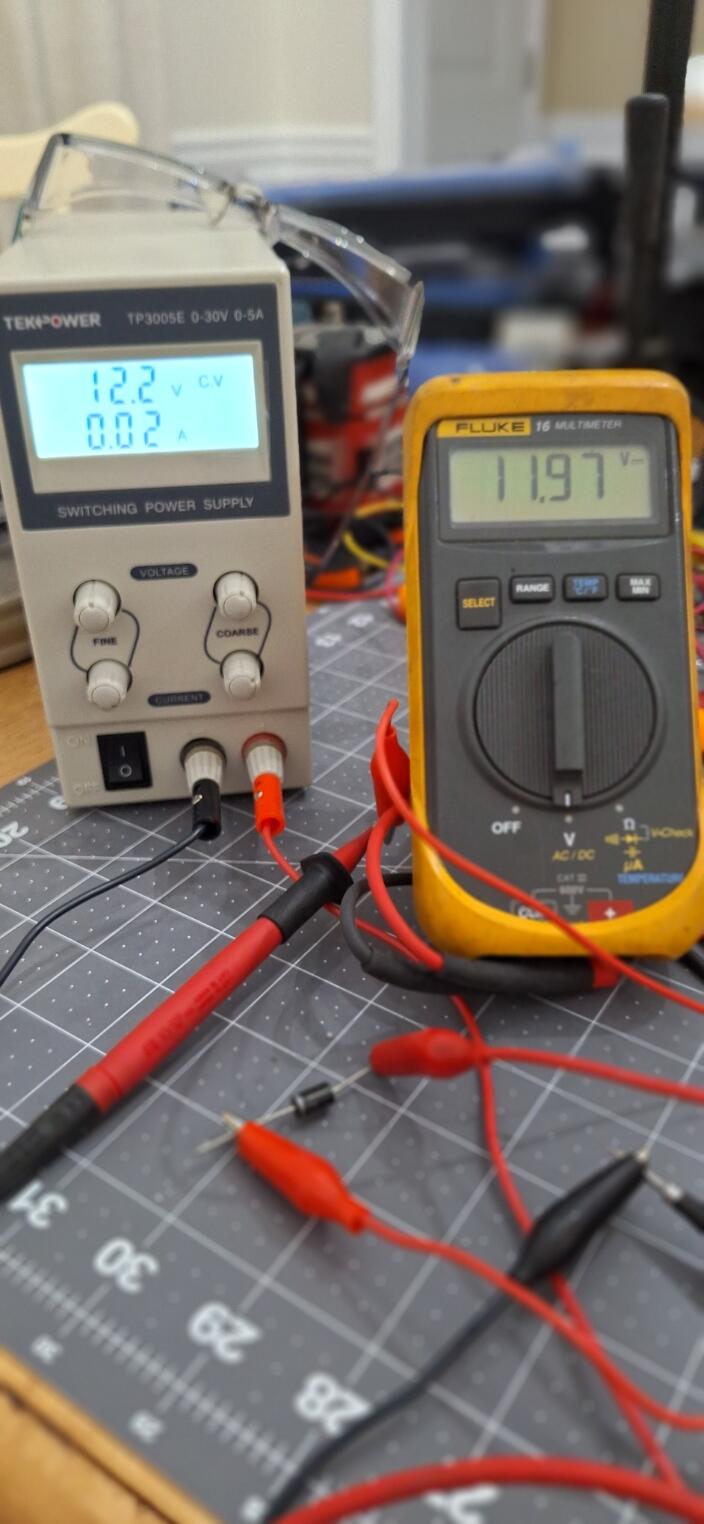
Of course, there is one other possibility. I could have designed the test wrong. I dug out a diode that should be the same spec as the ones used in the plug and tested myself. I found my instructions were lacking. You should re-test with the meter in diode testing mode. You can leave the key in OFF, too. If you test from the ballast resistor to the white/black wire, you should get a result similar to this: With the leads swapped, you should see this: If you do the voltage test, you should see a little less than battery voltage as the diode causes a slight voltage drop.


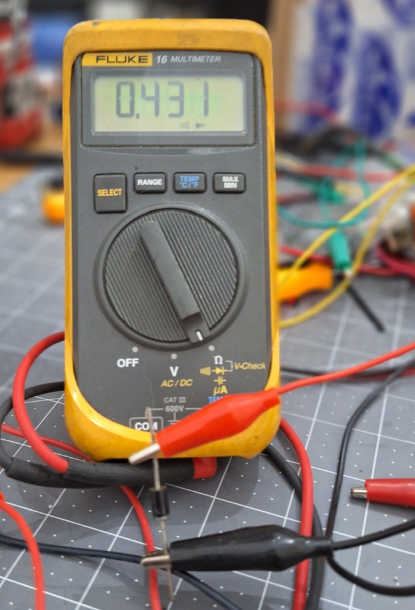
 1 point
 -
1 pointDid a bit more sleuthing and bought these https://www.ebay.com/itm/357952518138 along with the Toyota Koito housings that you linked! Found the housings cheaper here: https://cruiserteq.com/oem-toyota-koito-h4-headlight-upgrade-kit-w-harness-elec81110kit/?searchid=0&search_query=h4 All-in at about $110, I'm excited to try these out! Hopefully no more melted wiring and better light output.1 point