Leaderboard
-

nomuken
Free Member3Points34Posts -
Patcon
 Subscriber
 2Points11,136Posts
 -
ksechler
Free Member2Points544Posts -
charliekwin
Free Member2Points664Posts


Popular Content
Showing content with the highest reputation on 11/25/2015 in Posts
-
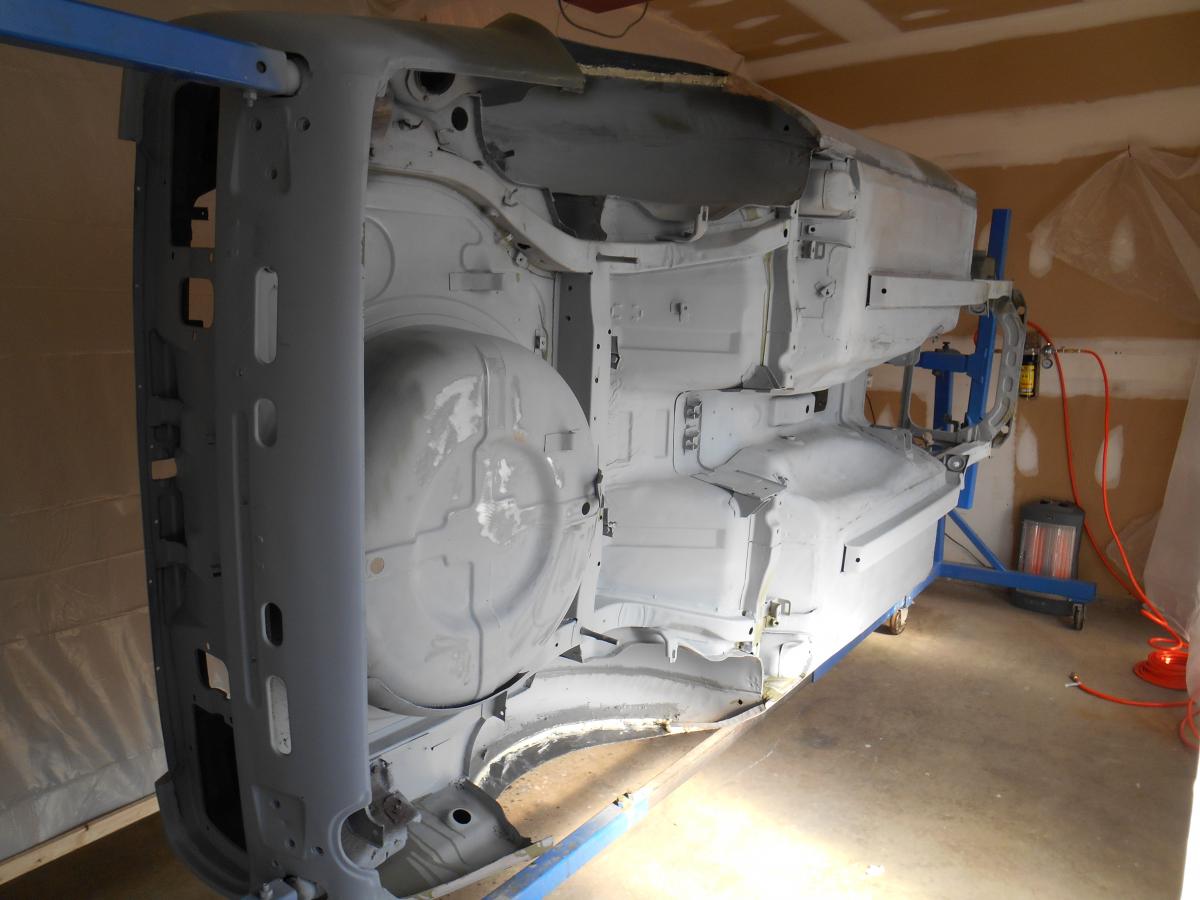
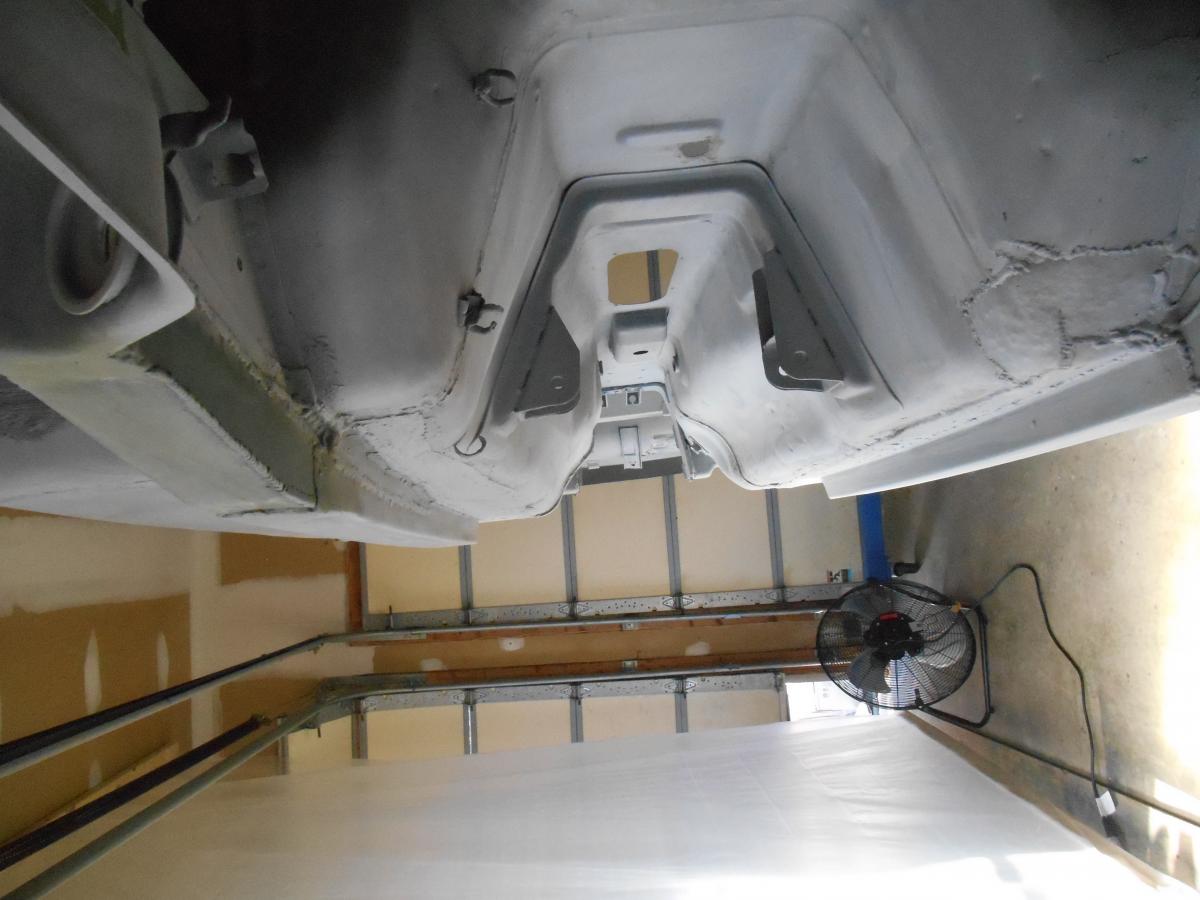
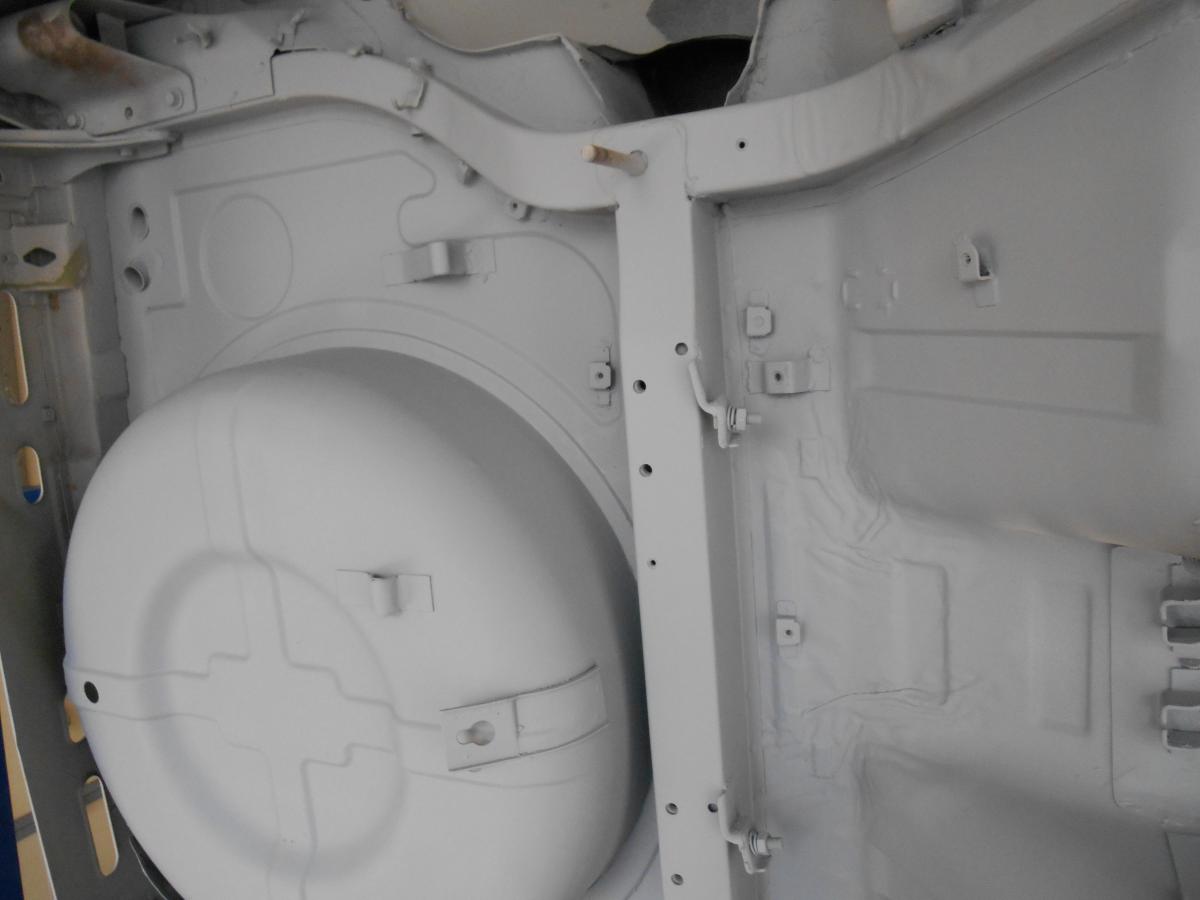
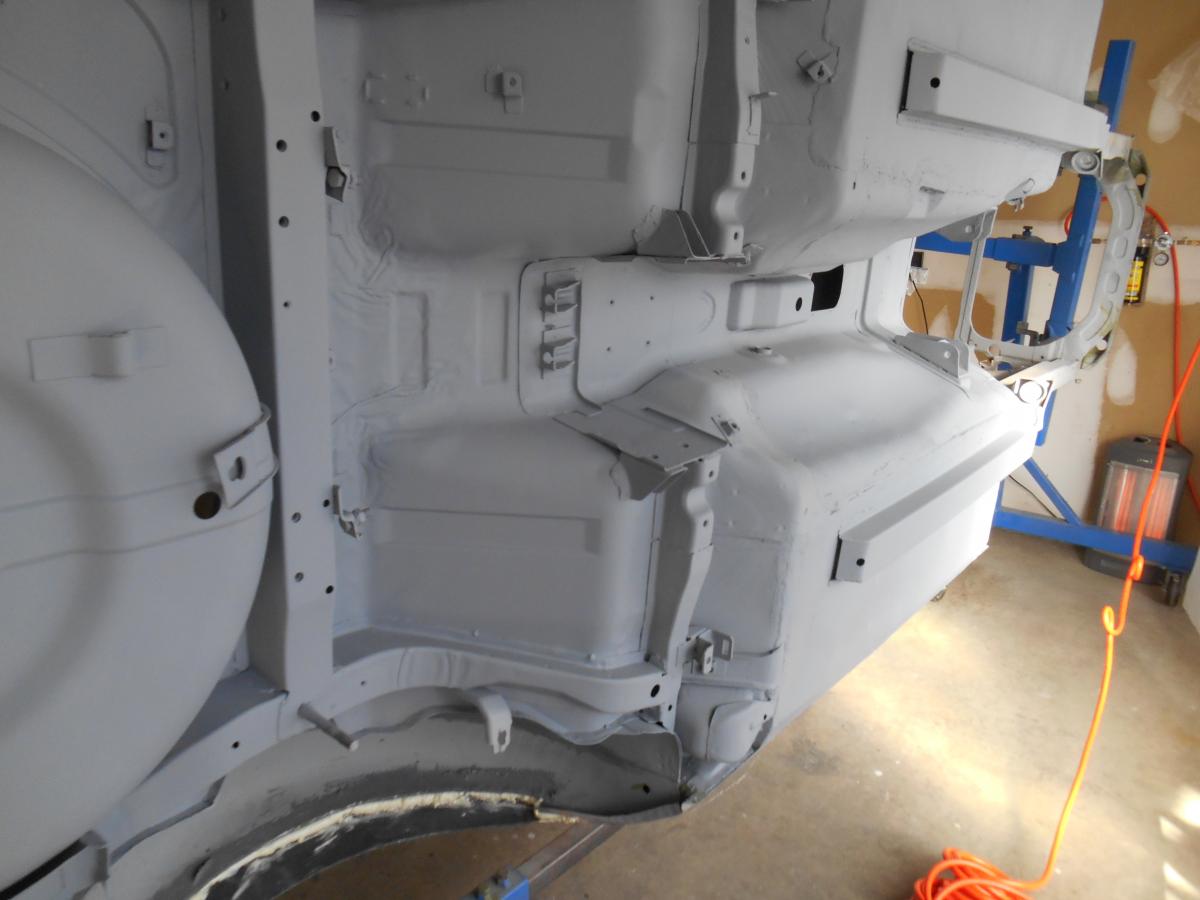
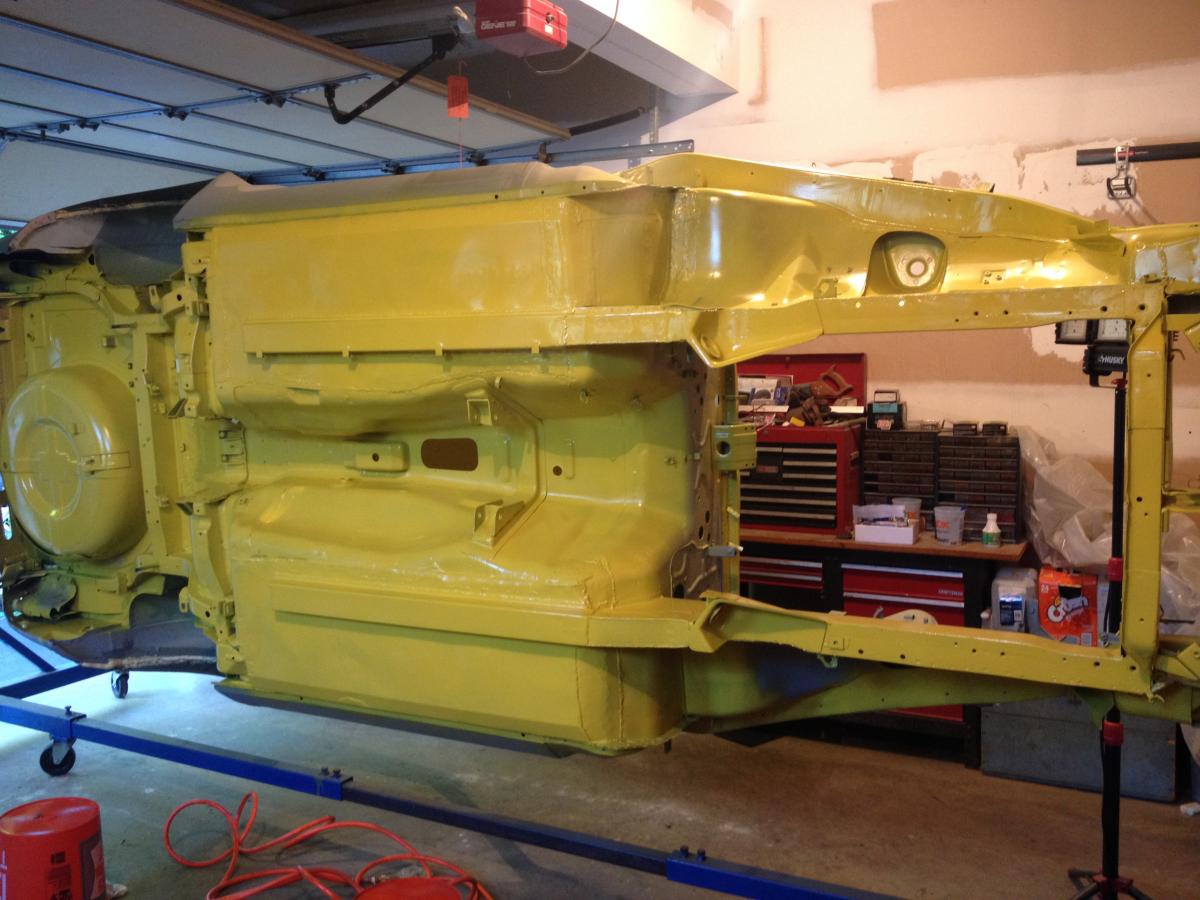
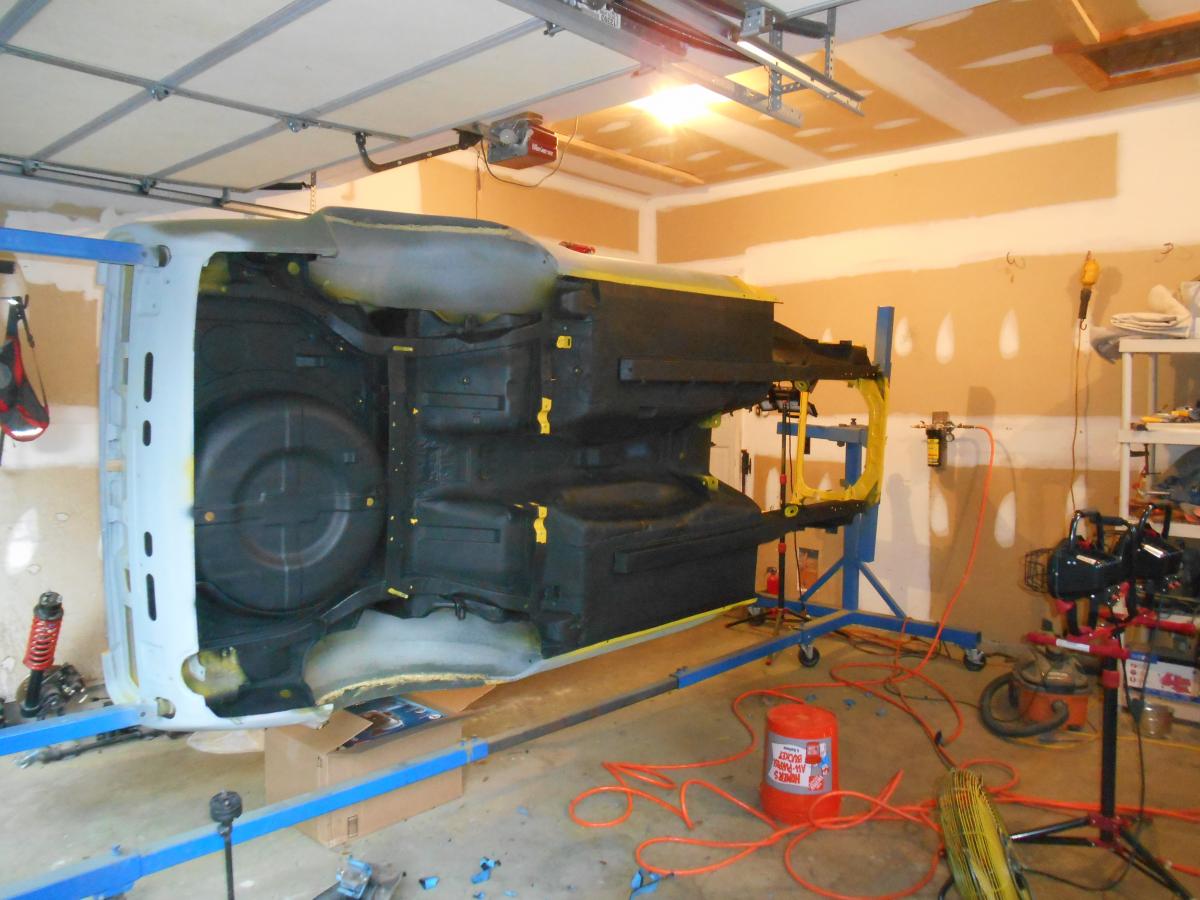
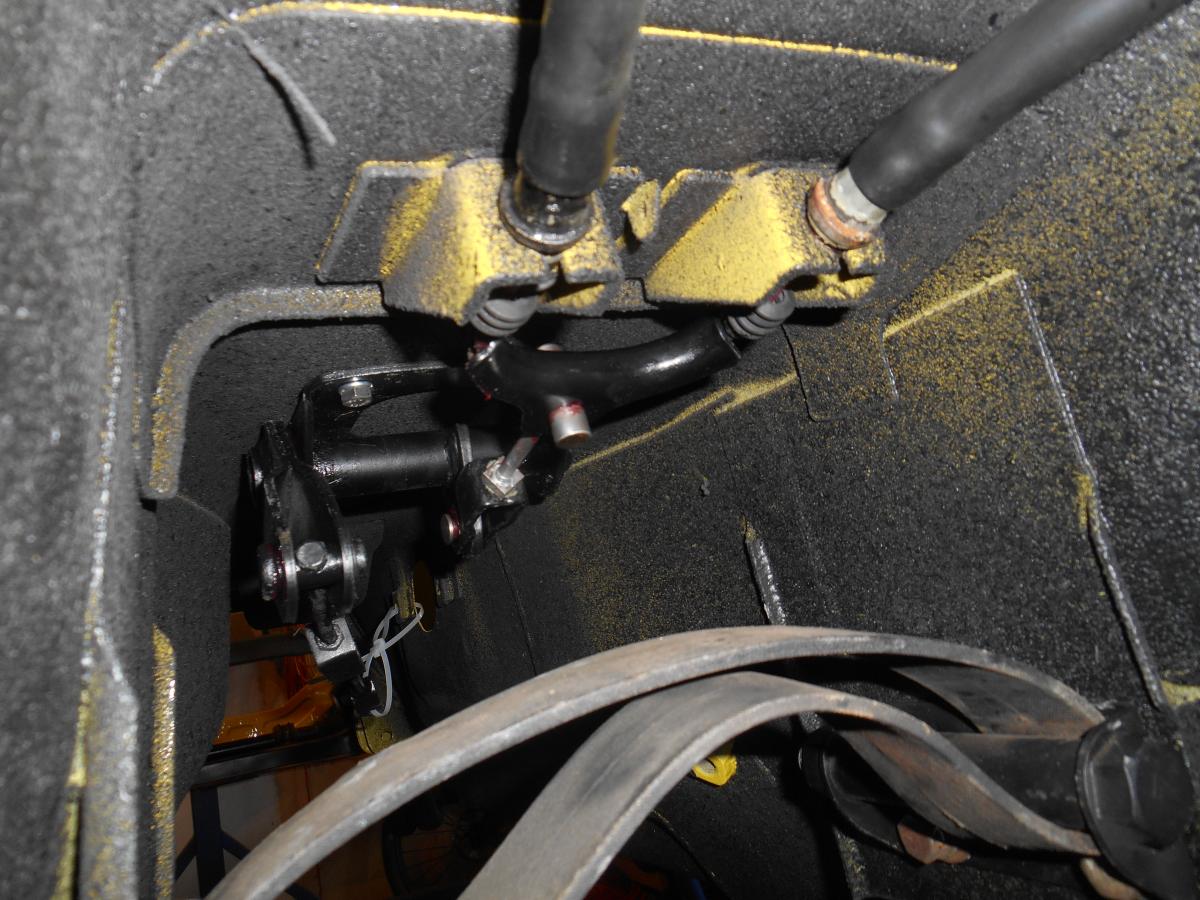
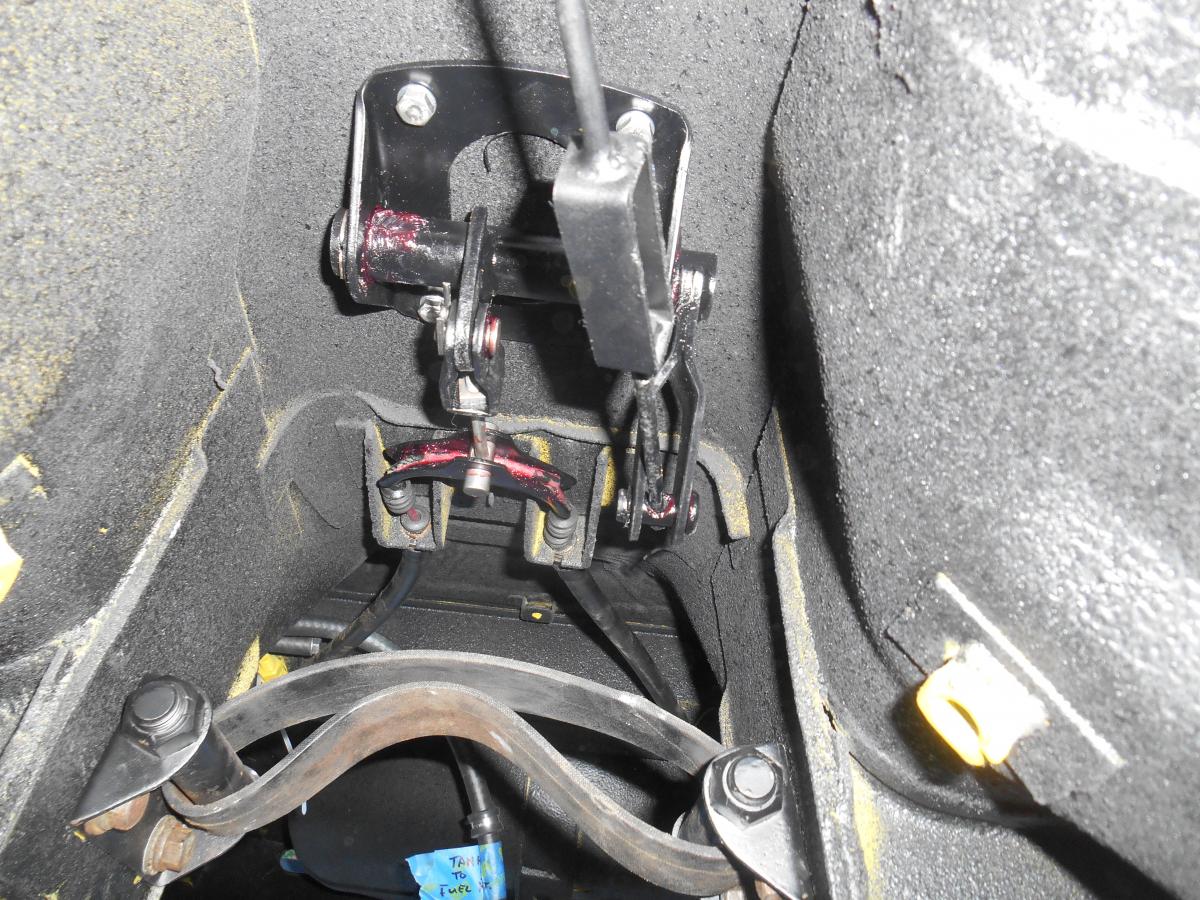
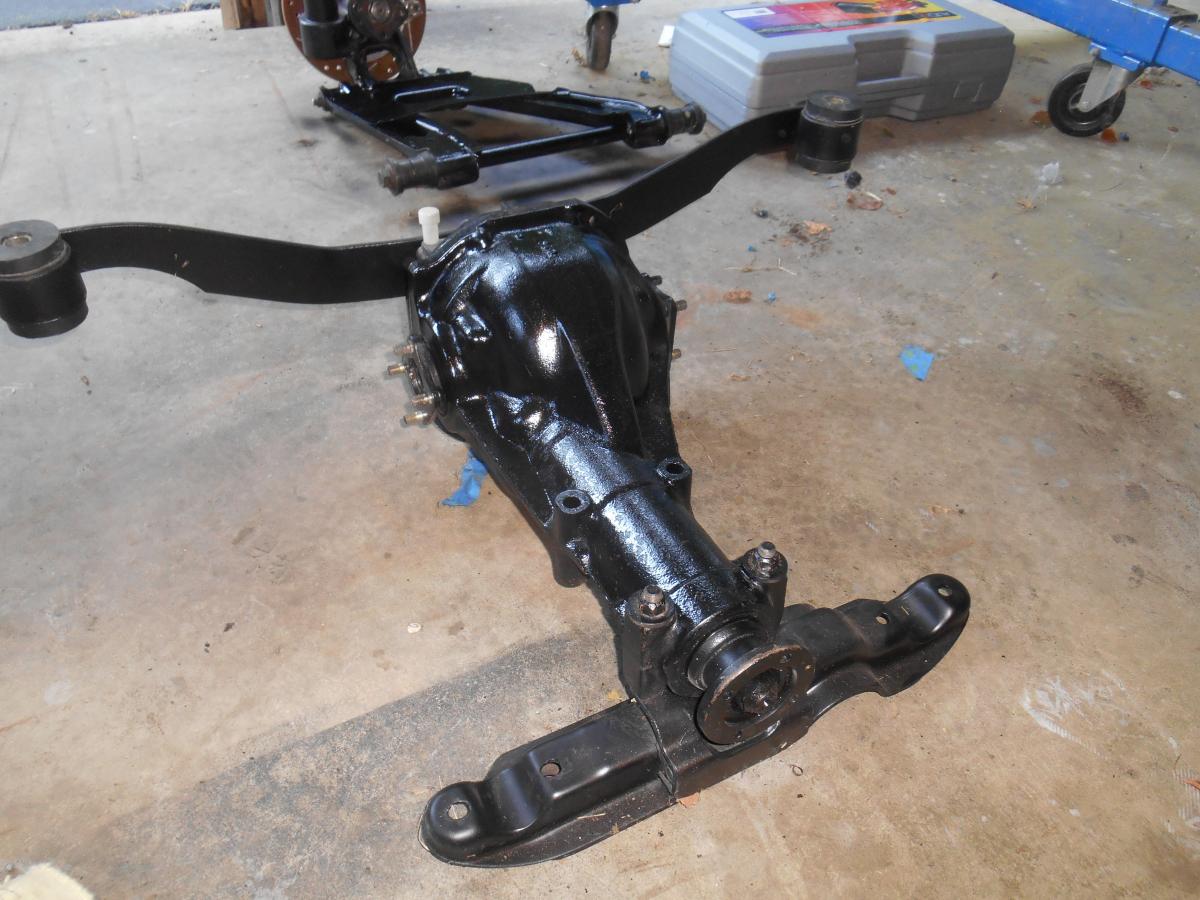
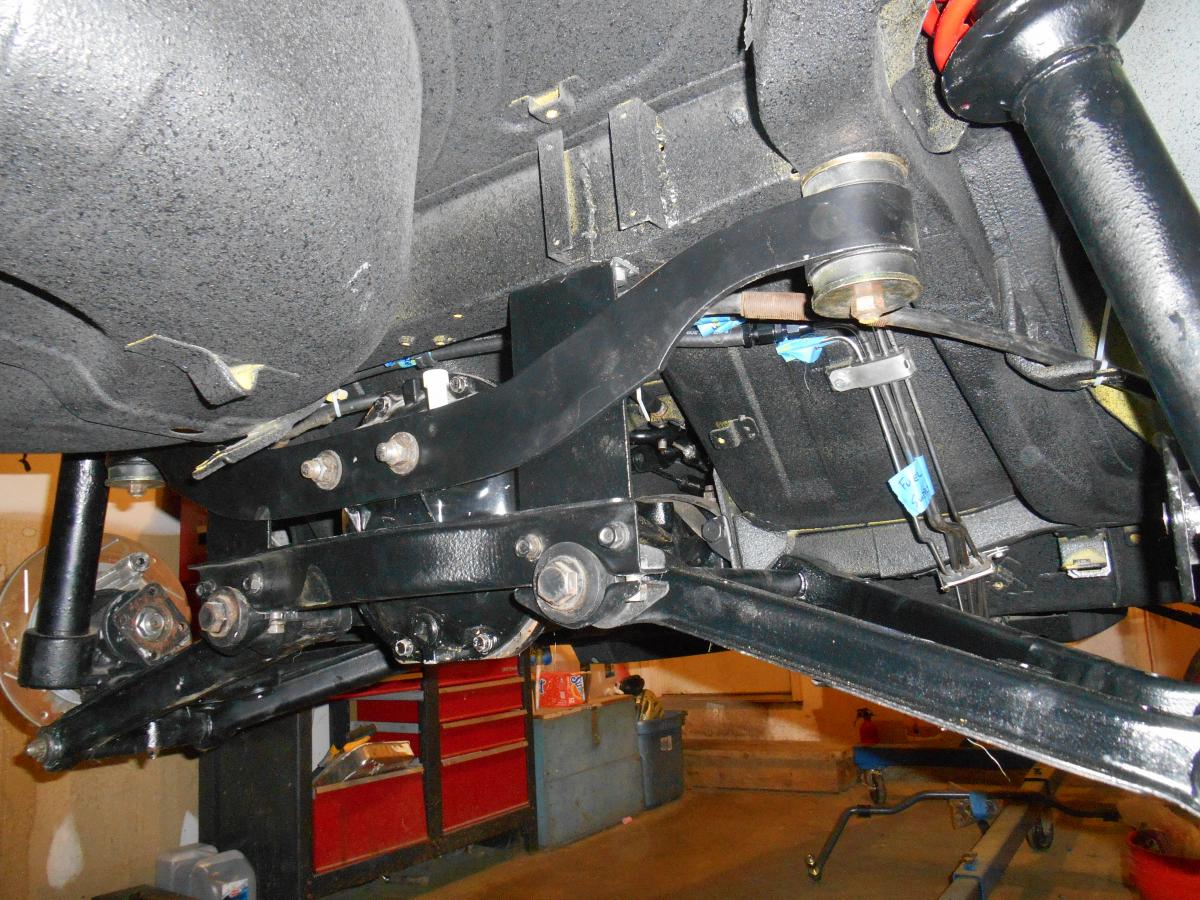
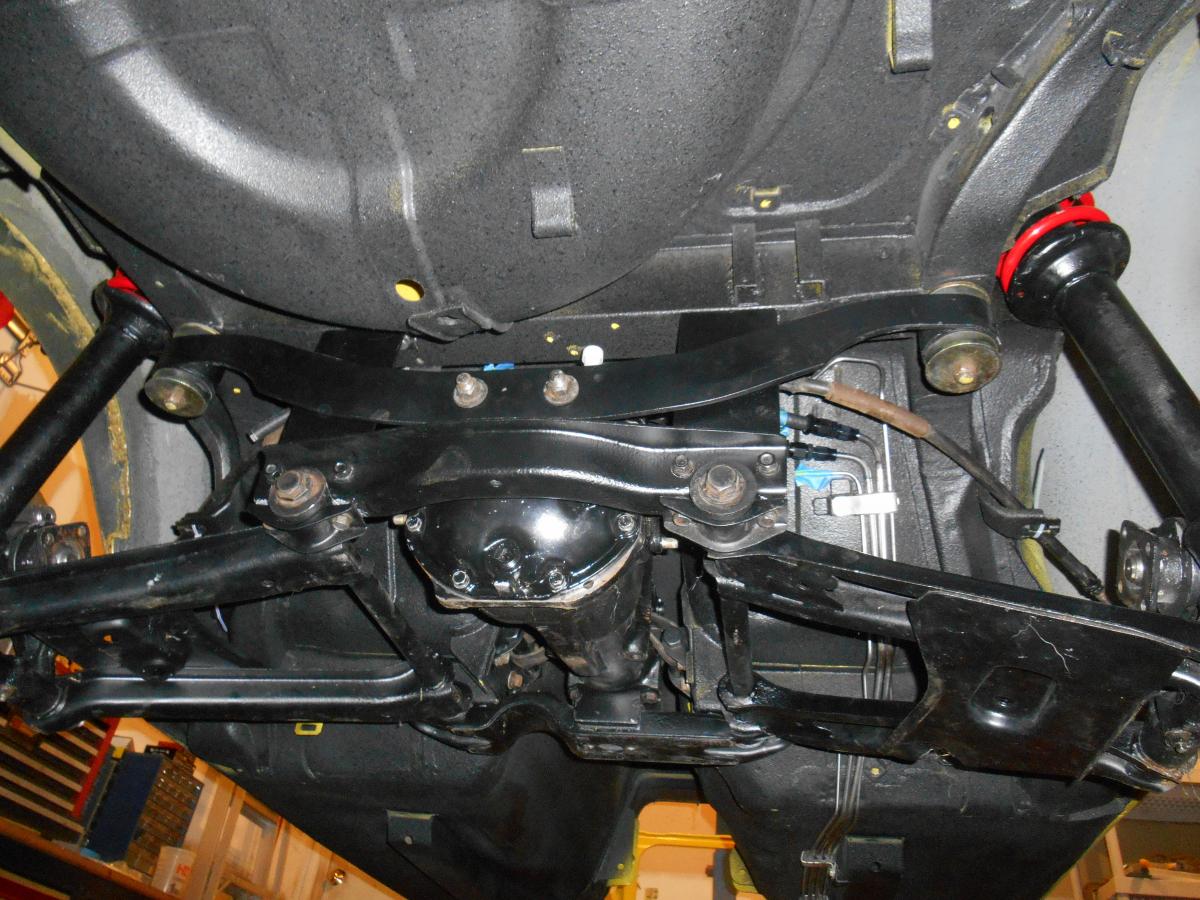
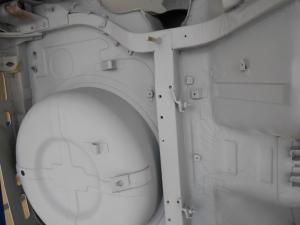
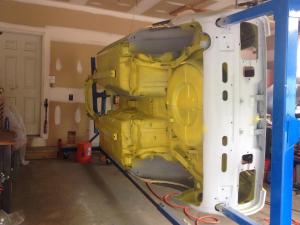
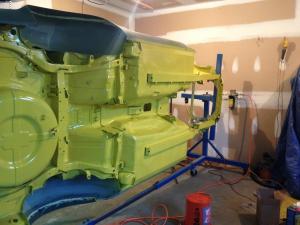
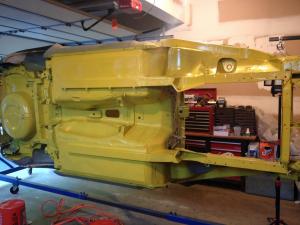
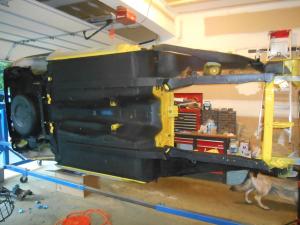
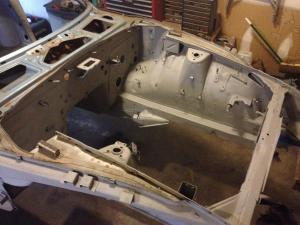
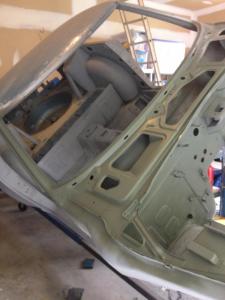
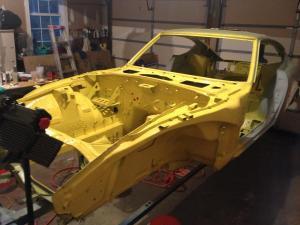
2 pointsWhile the interior paint was drying, I did some suspension work. So I removed the front axle, engine crossmember and steering to refresh some parts: Oh and I did pretty much the same for the rear: After the paint had dried I started rebuilding the interior layer by layer. Sound deadening: Some more insulation and some new vinyl from MSA: Oh and I rebuilt the drivers side door with a brand spanking new NOS door card2 points
-
I find that time not money is the bigger challenge for me completing my car projects. Now don't get me wrong we live very modestly on a very tight budget but I go months between episodes in the shop working on the Z. That being said there are several projects that I can think of I would donate to. Blue has a very low number car that is on his project list and the super low number car on the forum that looks like swiss cheese is another. Another way to invest in the projects would be to help with parts. I have quite a number of parts laying around and would gladly help these projects that are very rare cars. I suspect that between the entire forum we could cobble together a lot of the parts necessary for some of these low number cars.2 points
-
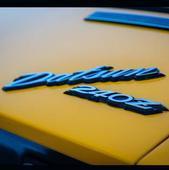
1 pointSo I decided to start a thread to keep track of my mild build and to share my experiences and such 25th of august a longtime dream came true. I often wrote on my blog "one day I will...". I do fantasize about a S30 for at least 10 years now. And the 25th was the day, I got myself a Datsun 240Z. It was imported from the US to Europe in 2011. It is a 1973 model, and I love it! On the second try I managed to pass technical inspections and got the car registered. Thanks again Eric for borrowing me the stock-ish wheels. Till now I did a tune up (spark plugs and wires; distributor cap, finger, points and condensator; ignition coil and ballast; fuel pump). Soon I will get the carb setted again. And then it's a go for modding and restoring piece after peice. Think i will start by optimizing and restoring the interior and modding the suspension. And 2 pics from cars and coffee this weekend. I love driving this car. And I try to do it as much as possible to find as much weak points as possible. So I know what to change, modify, make better this winter.1 point
-
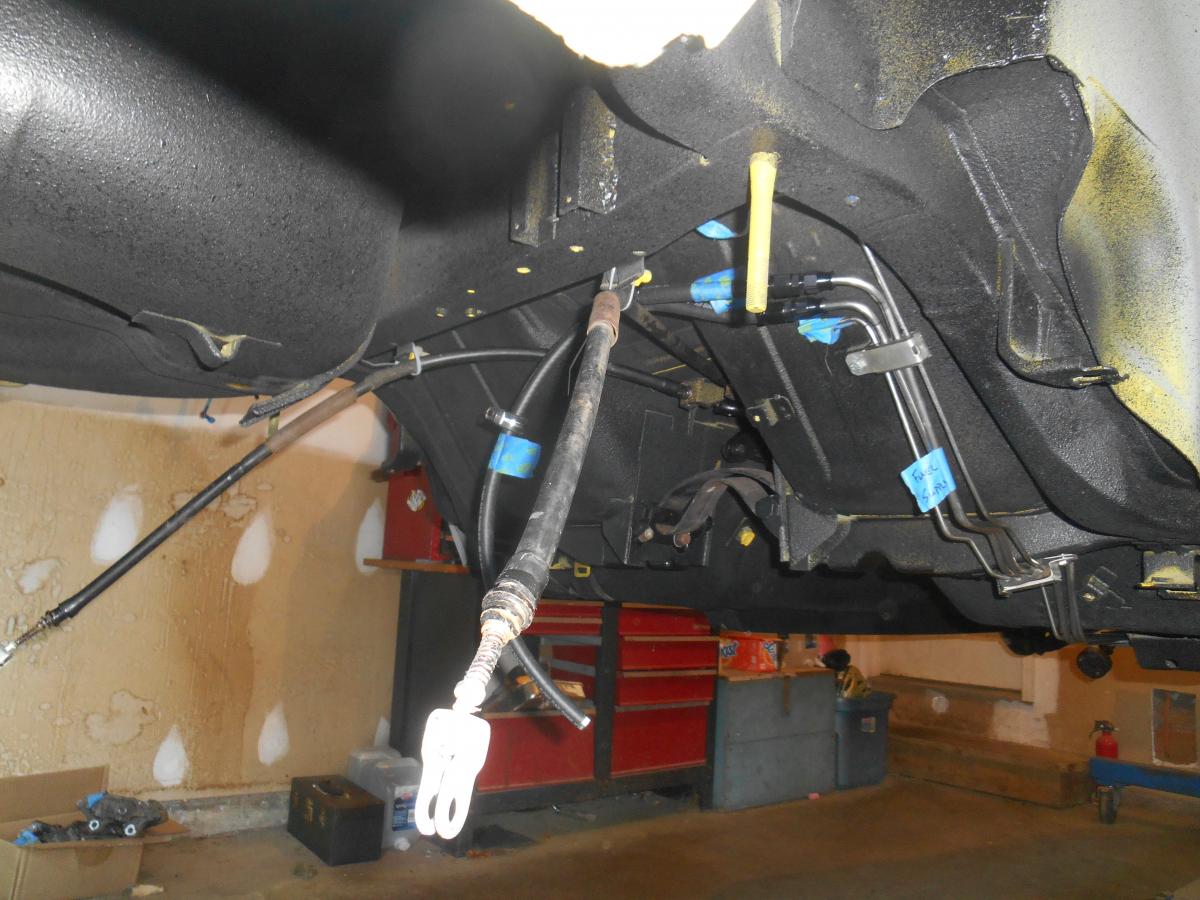
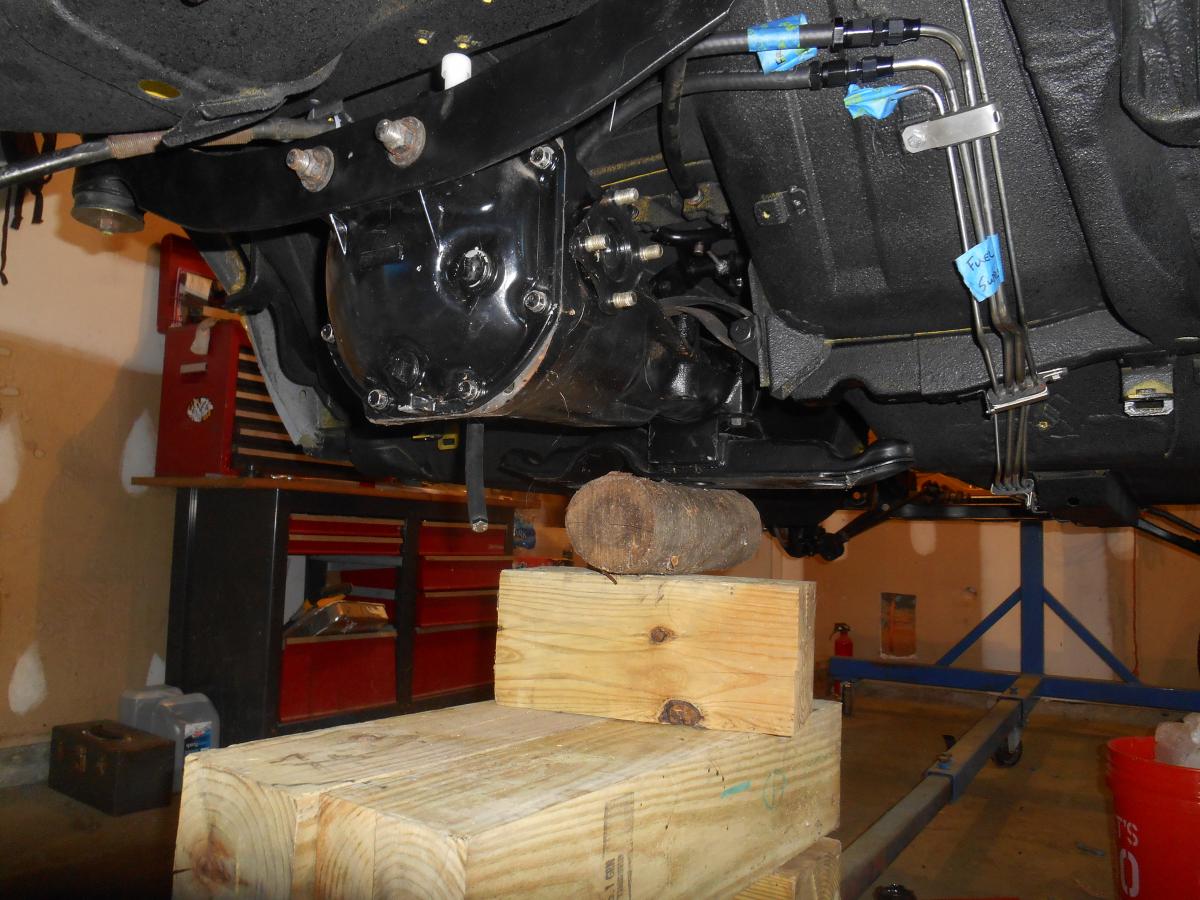
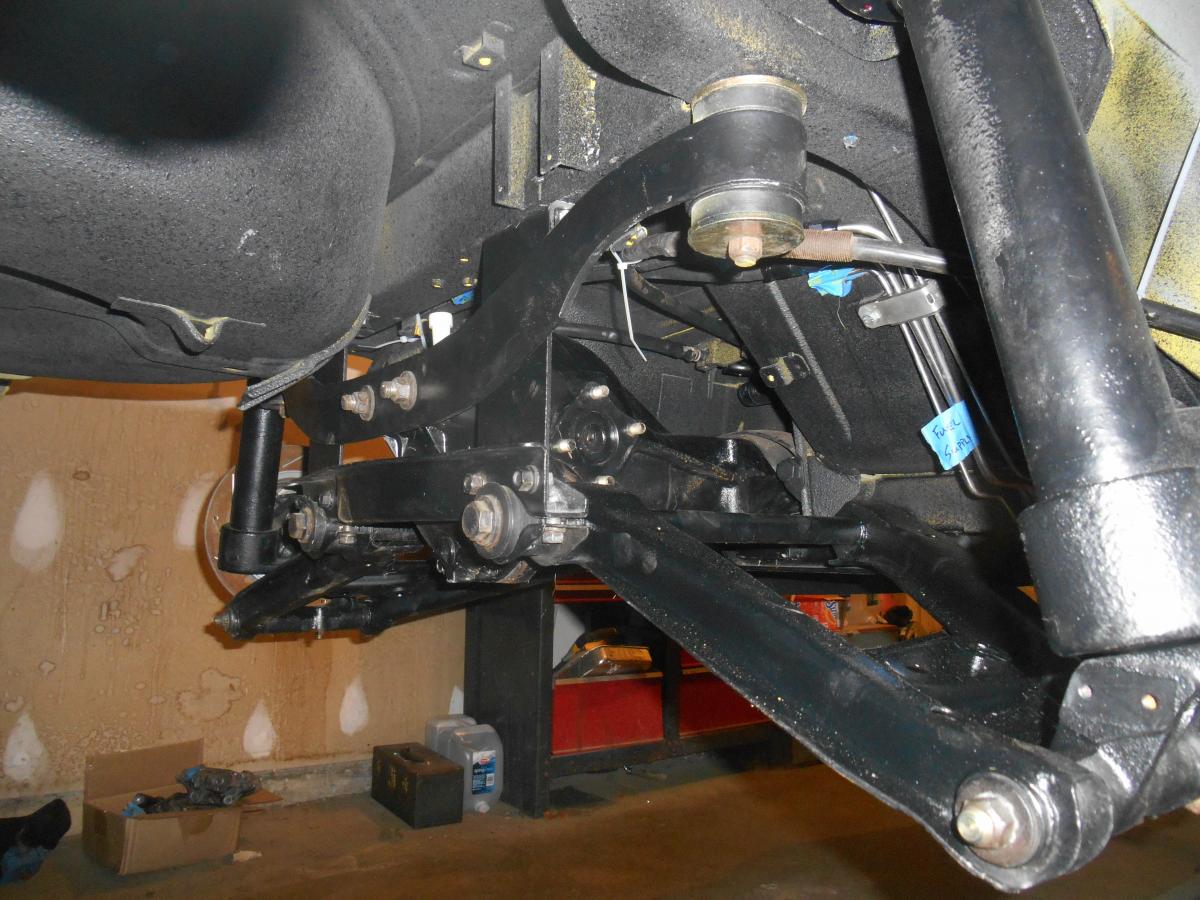
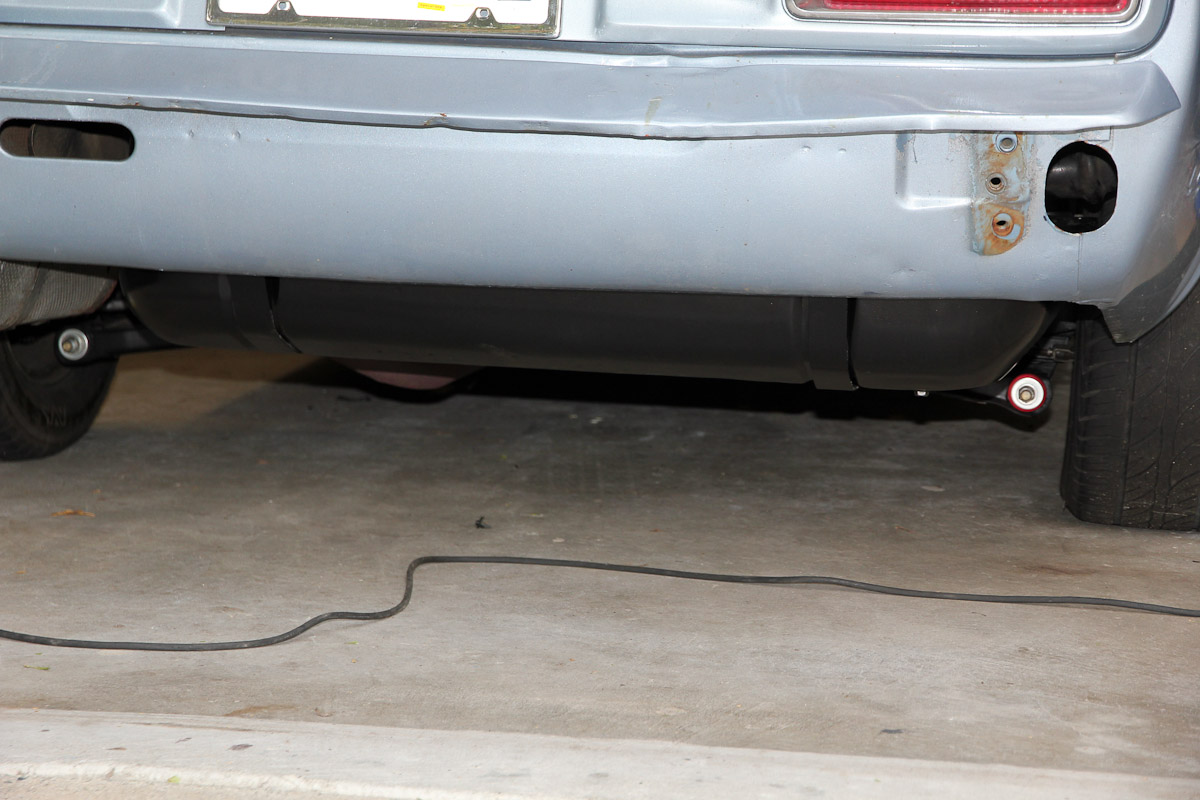
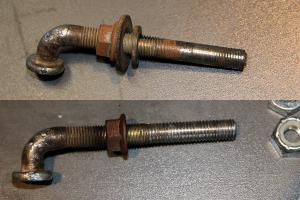
1 pointHere's some work under the car. The plan and sequencing went like this: 1. Put on the old rusty hard lines to remind myself where they went. 2. Bend new ones (wrong) 3. Re-bend the lines (right) 4. Weld on new attachment points for the lines 5. Mount the tank, new (aftermarket) fuel pump, and (aftermarket) fuel filter, which included welding in mounts for the filter and pump 6. Put on the suspension to sort out the hardware and verify there is no interference 7. Take the whole works off (I labeled and packaged the parts better this time -lesson learned) 8. Prime, paint and undercoat 9. Put all that crap back on


 1 point
 -
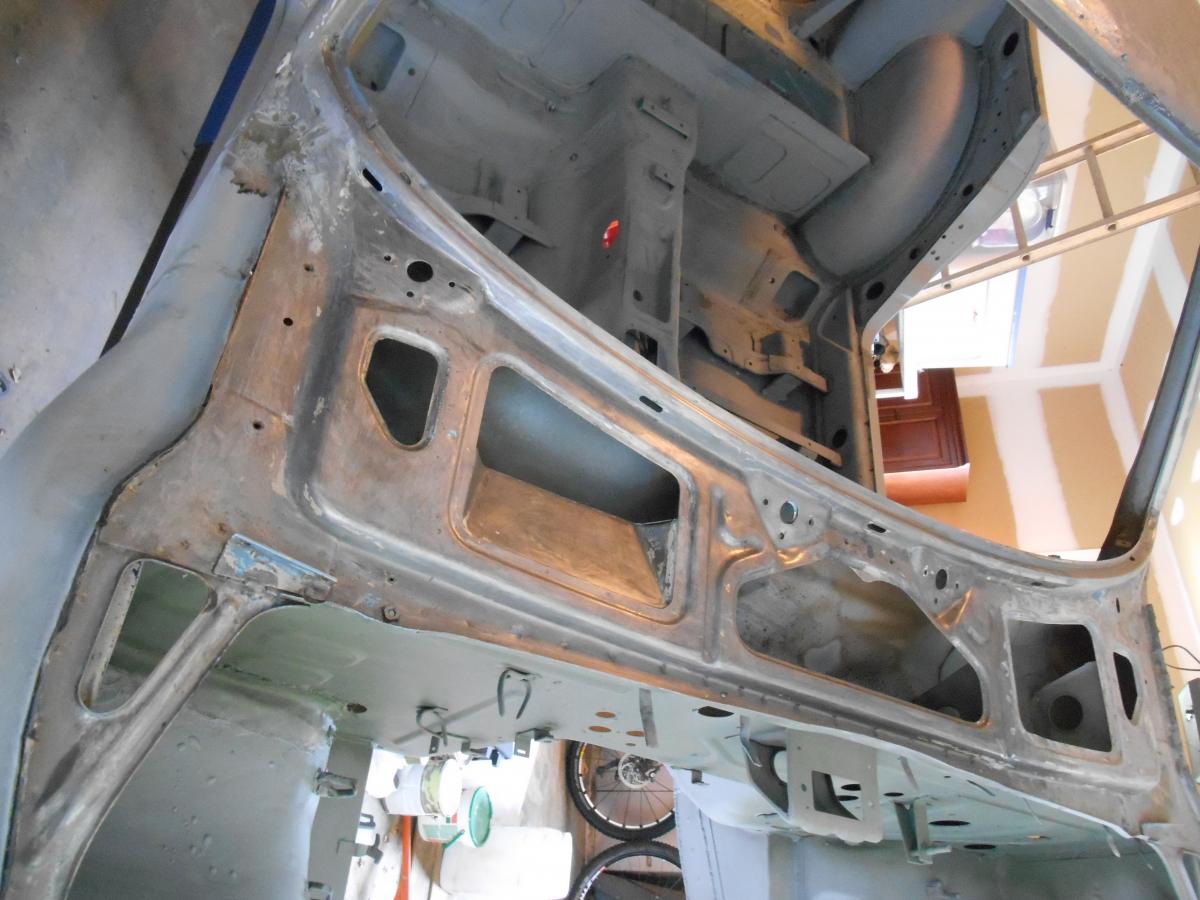
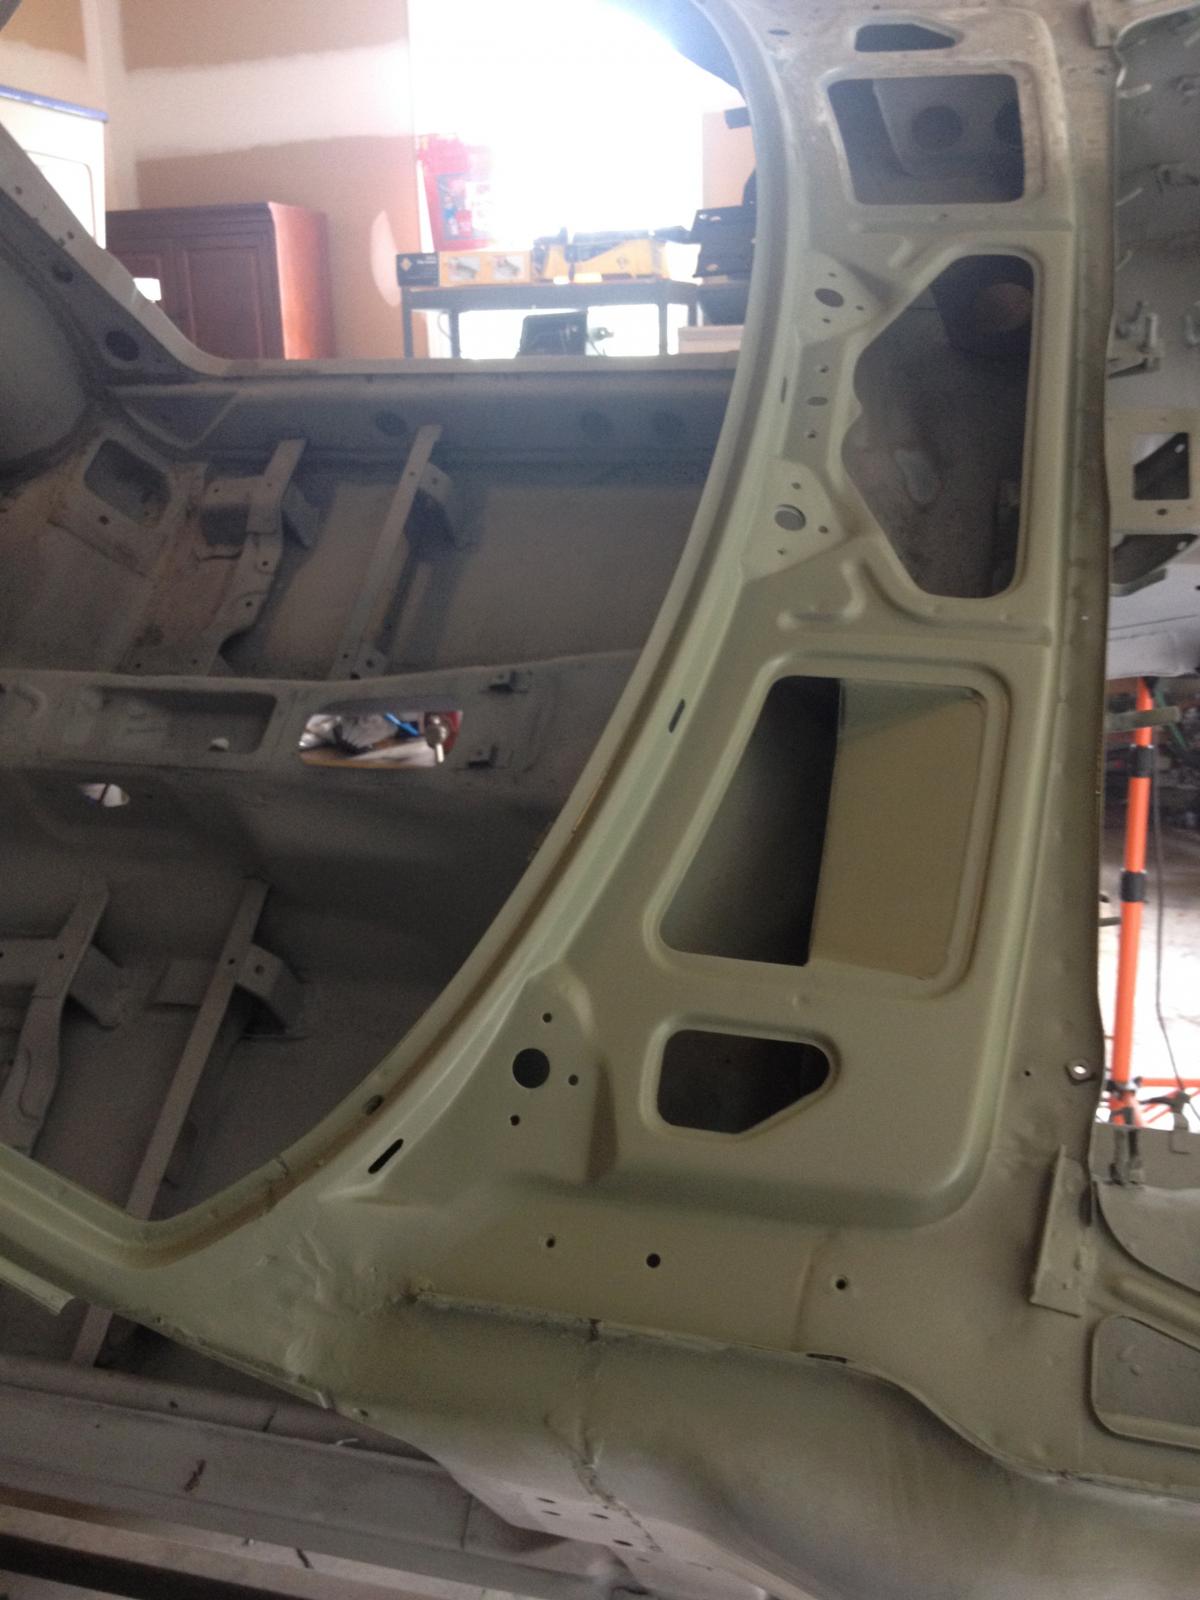
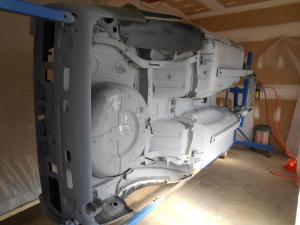
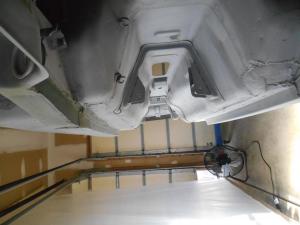
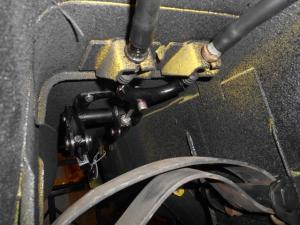
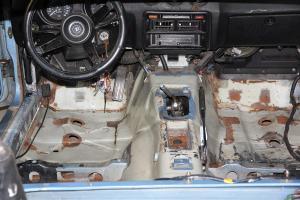
1 pointHere are some photos from the engine compartment. I went through a phase where I didn't take too many photos so I don't have much to show. The engine compartment work went hand in hand with me sorting out the undercar, hardlines, and fuel delivery. Somewhere in there I did some *gasp* welding on my gas tank to repair pin holes, which I have posted elsewhere. The engine compartment was sandblasted and a couple mounting points welded in for my brake proportioning valve and fuel pressure regulator. Enjoy!


 1 point
 -
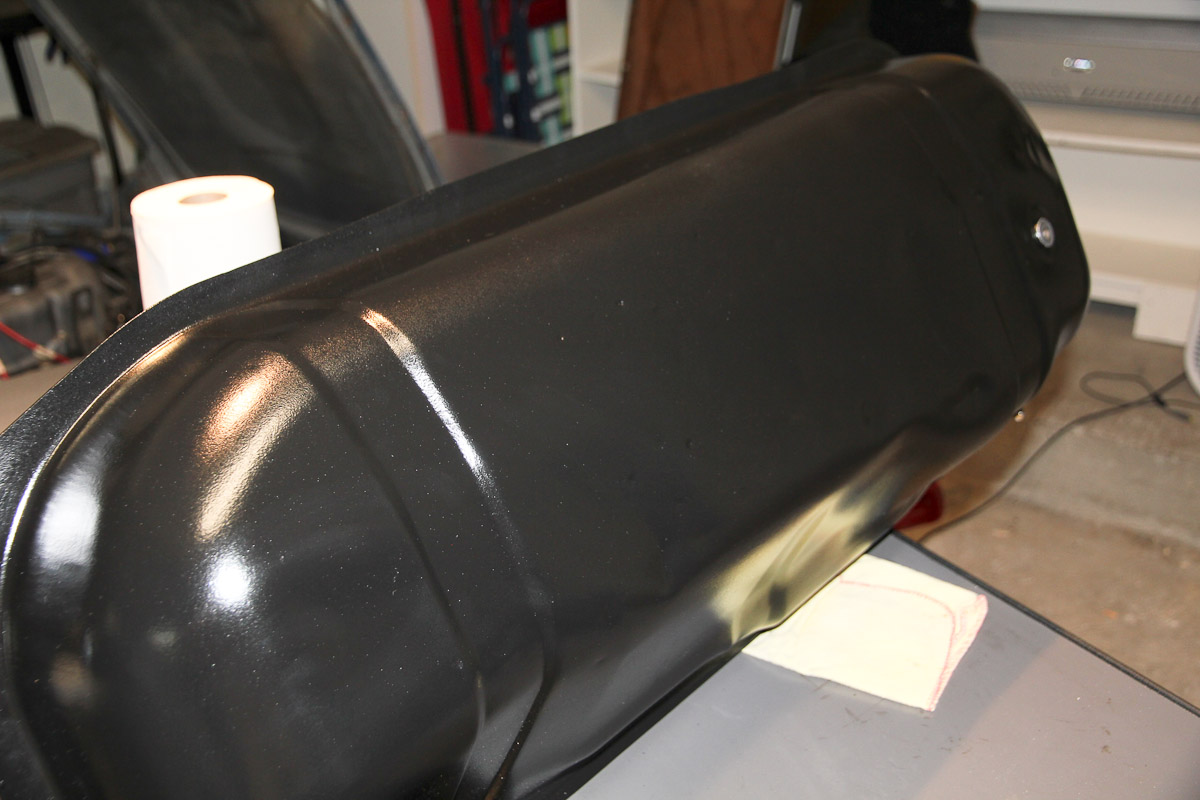
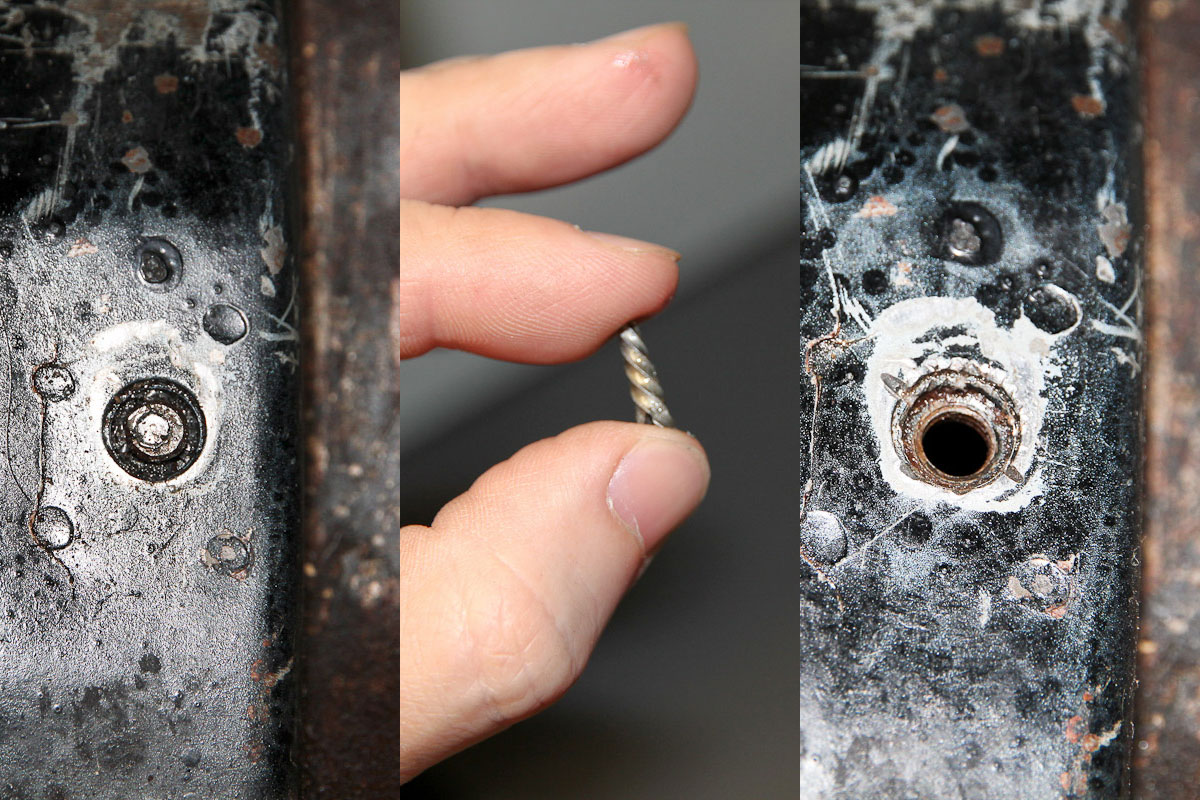
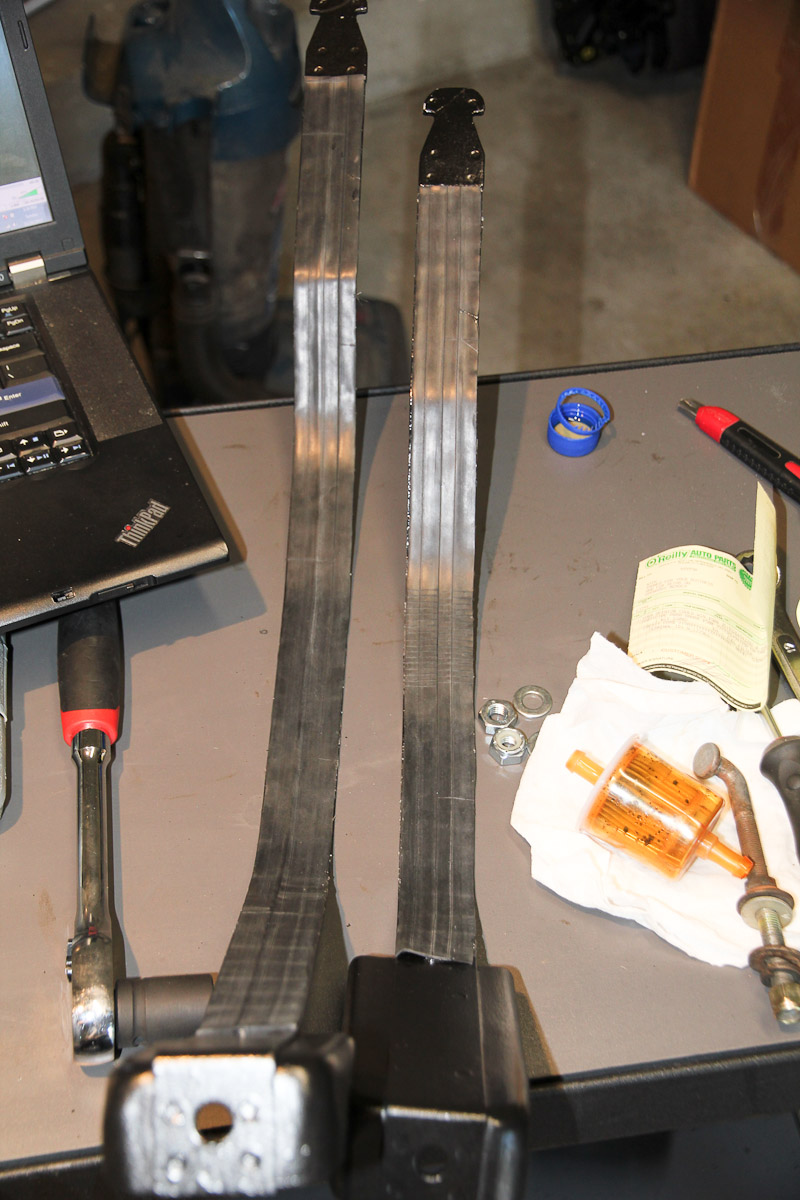
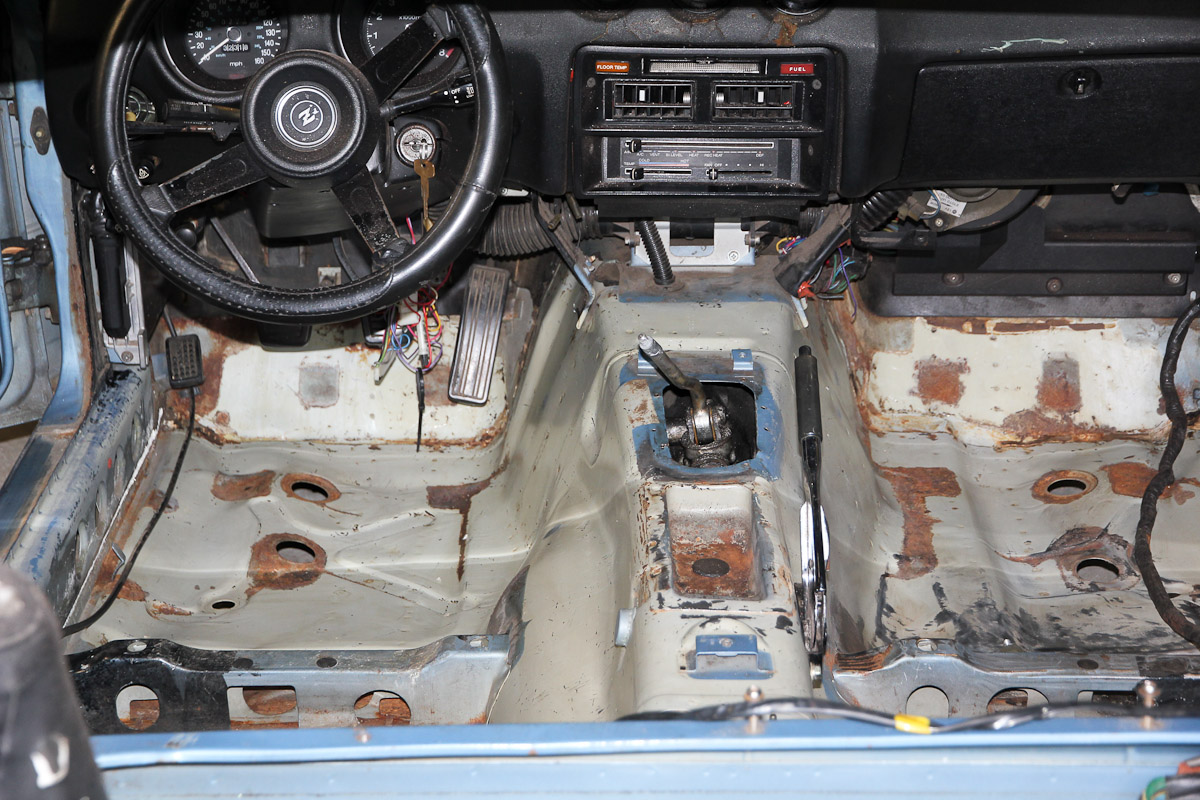
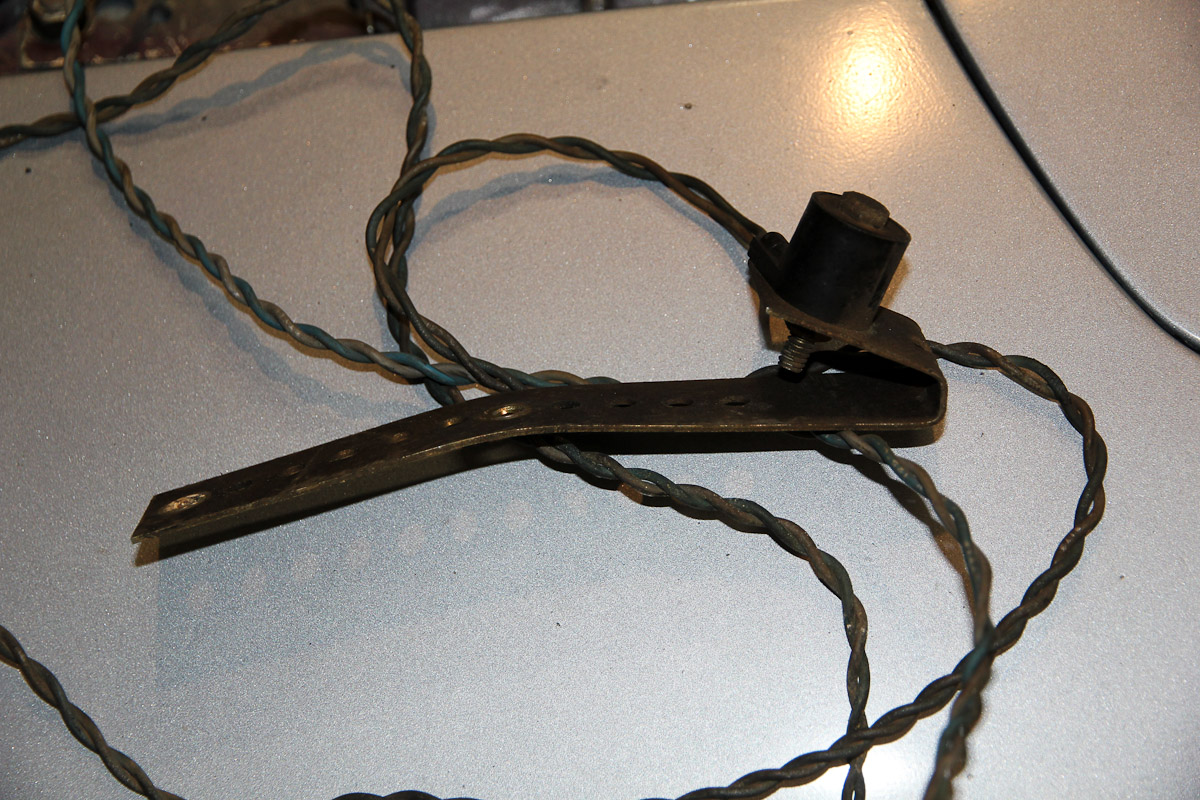
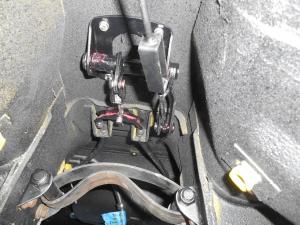
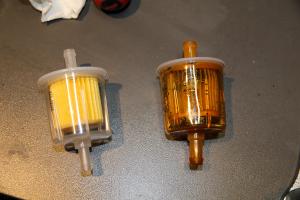
Still plugging away! I sprayed the tank with the black top coat the weekend before last, which went ...not great. The Masterseries stuff is a lot thicker than the Eastwood paint I used before, which caused some issues. The first coat went on terribly, but the second -- which I thinned a lot more and fiddled with the gun settings -- was acceptable enough. It ended up having almost a hammered look, which wasn't really what I was planning on but looks okay for what it is. Since I was at it, this was also a chance to see if I could fix one of the J bolts that a PO had stripped the bejeezus out of. The Harbor Freight tap and die set I bought saved it. The inline filter I put on when I did the tank the last time was also fairly gunked up with stuff that I couldn't flush out, so I replaced that too. And made some new linings for the straps out of an old bicycle inner tube. The tank went back in on Sunday night, and even with ~4 gallons in it, there's still no fuel getting into the lines, so that has to get straightened out. Hopefully it's still just low. Work on the interior also coming along. Finally got everything cleaned enough to be able to hit it with a wire wheel tomorrow and start prepping for paint. One small victory: the broken seat bolt lost. I tried using a screw extractor, which promptly broke off right when it occurred to me that this probably wasn't the best approach. I got the broken part of and drilled out the rest of the bolt without even damaging the threads. A small thing, but it's nice to get a win! Then there's this thing, which used to be mounted to the transmission tunnel. I'm pretty sure it's part of the cruise control system that someone put in. The wires make their way down to a bundle underneath the brake booster, but I haven't traced them further. Looks like it might be a sensor of some kind. Anyone know for sure?

 1 point
 -
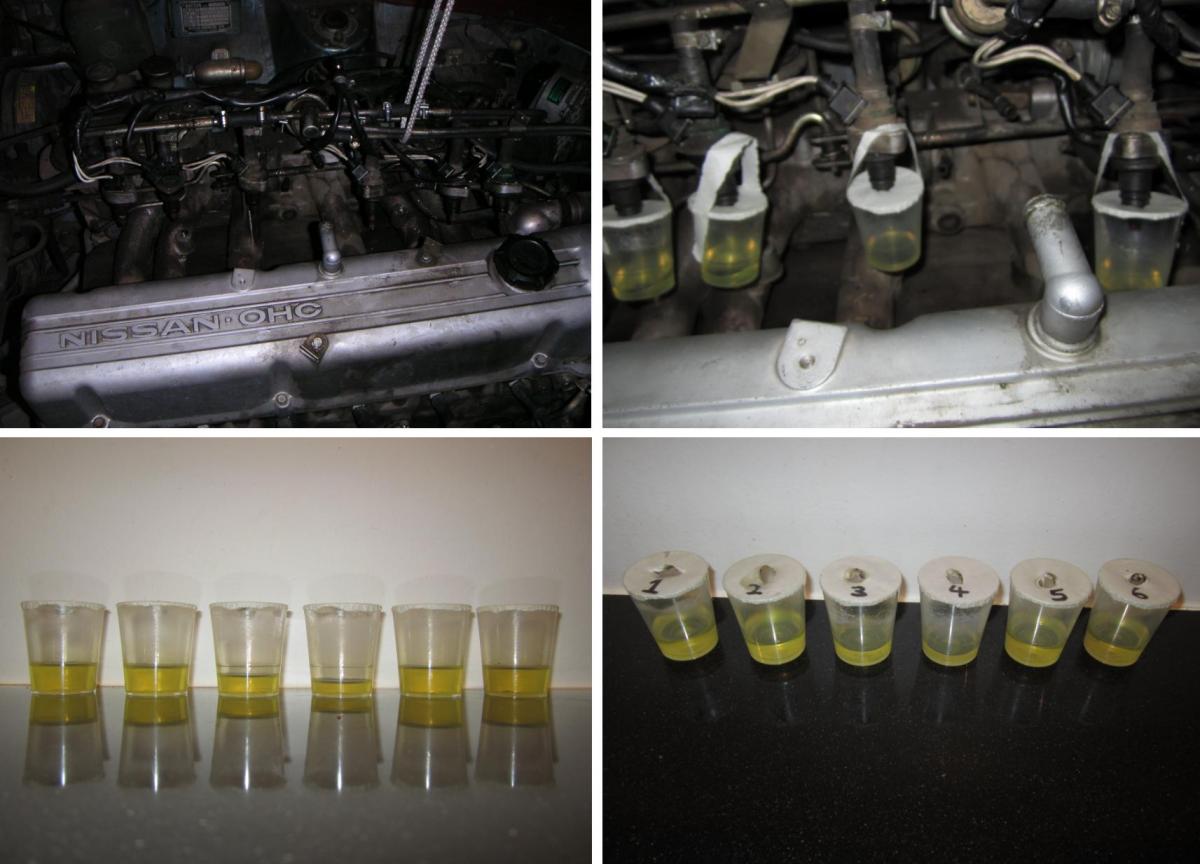
I was suspecting problems with my injectors once. Lean on 3 and 4 spark plug. To check the injectors I lifted them out of the manifold and attached small beakers to them and cranked the engine 10 seconds. With the spark plugs removed it wasn't to much stain on the starter motor. After seeing the results it was obvious the injectors were causing the lean condition. I removed then and reverse flushed them with a mixture of carb cleaner and fuel. They have been working great ever since. You mentioned changing the injectors last year. I think I would leave them to last and try to test, repair or replace the other parts first. The leakdown test with the pressure gauge will tell you were to look. You probably have more than one culprit causing the pressure loss. Like Sarah said, pressure loss is not that big a problem as long as its not getting air in the system it should built up pressure in seconds. When I first got mine it lost pressure in about 2 minutes. Mine was the check valve and a leaking fuel filter (leaking at the seam). After that it now holds pressure for 3 to 4 weeks. Just a note on starting: When it has pressure mine starts 1 second and sometimes 2 seconds. After the pressure has dropped to almost 0 psi it takes 3 to 5 seconds to start. Chas
 1 point
 -
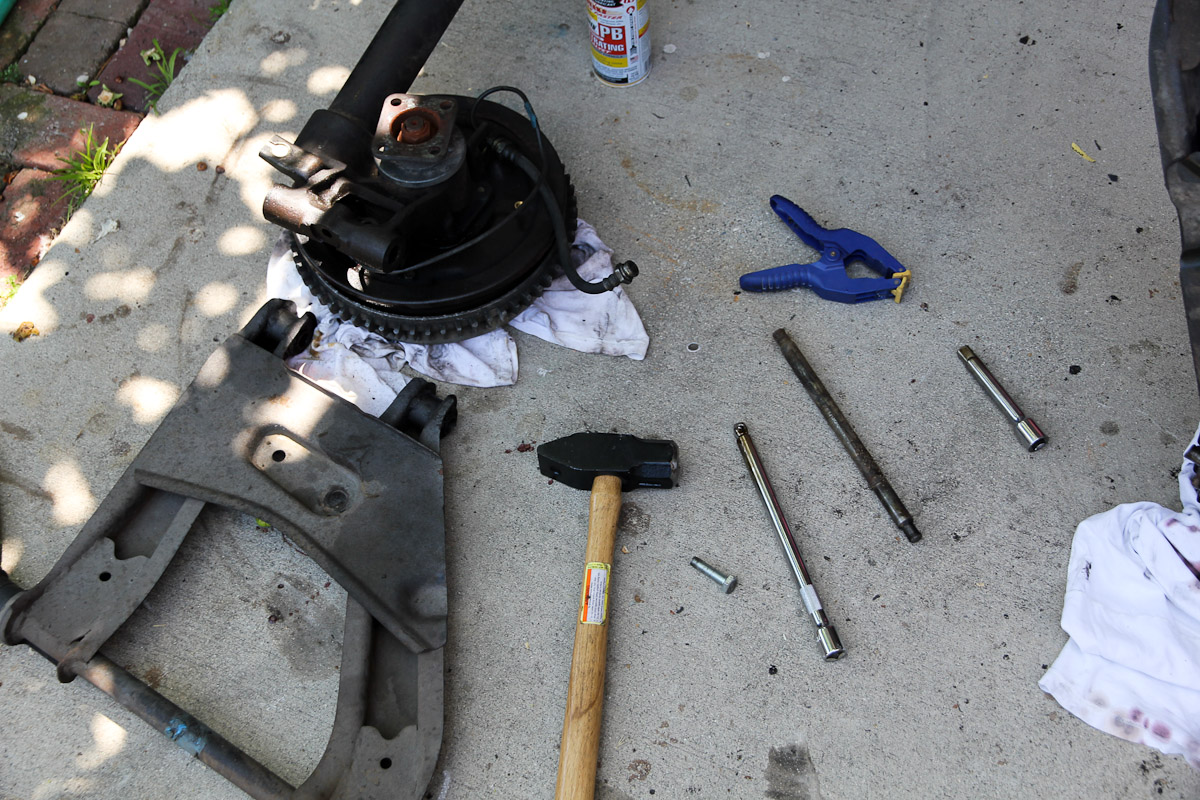
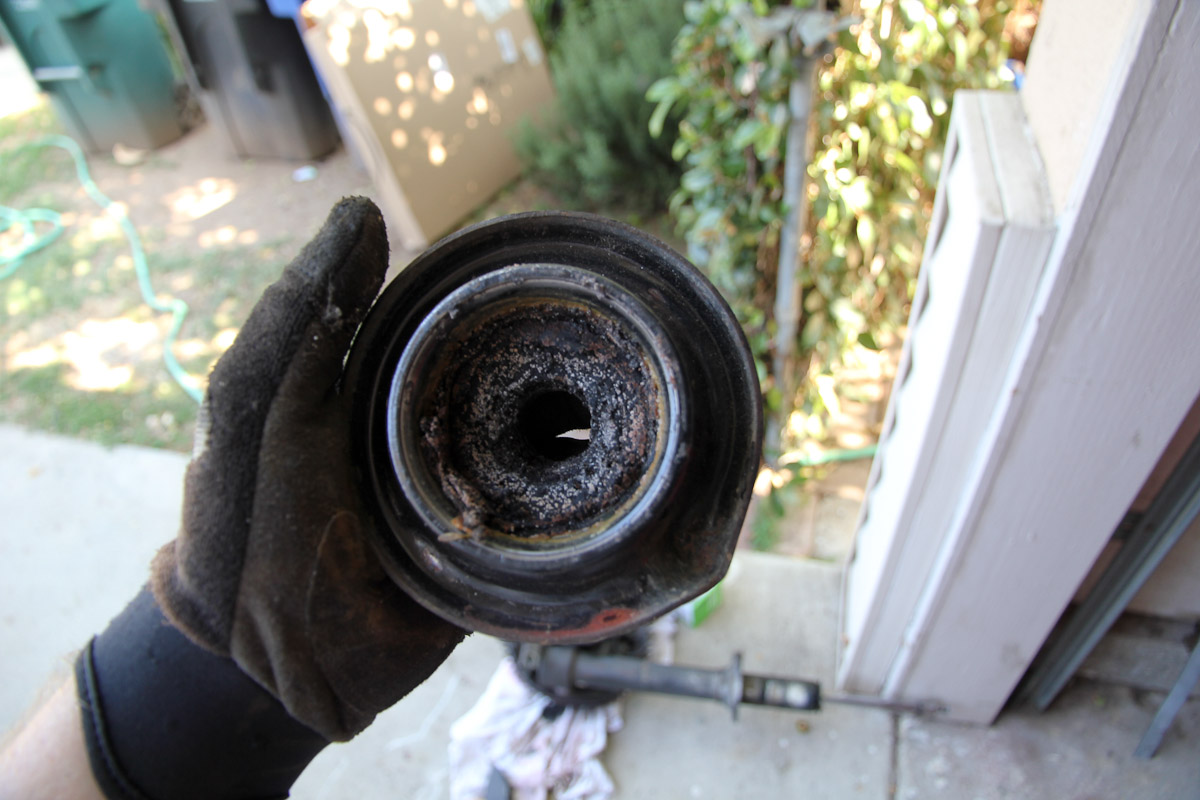
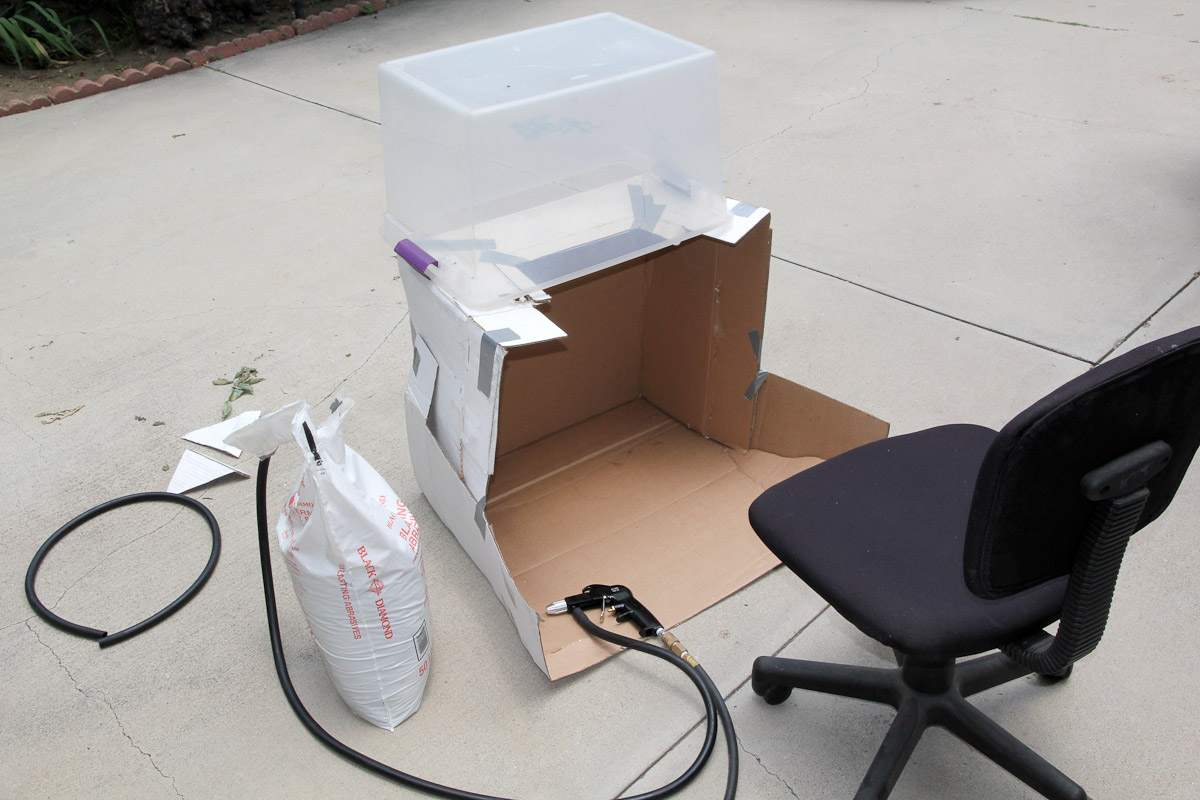
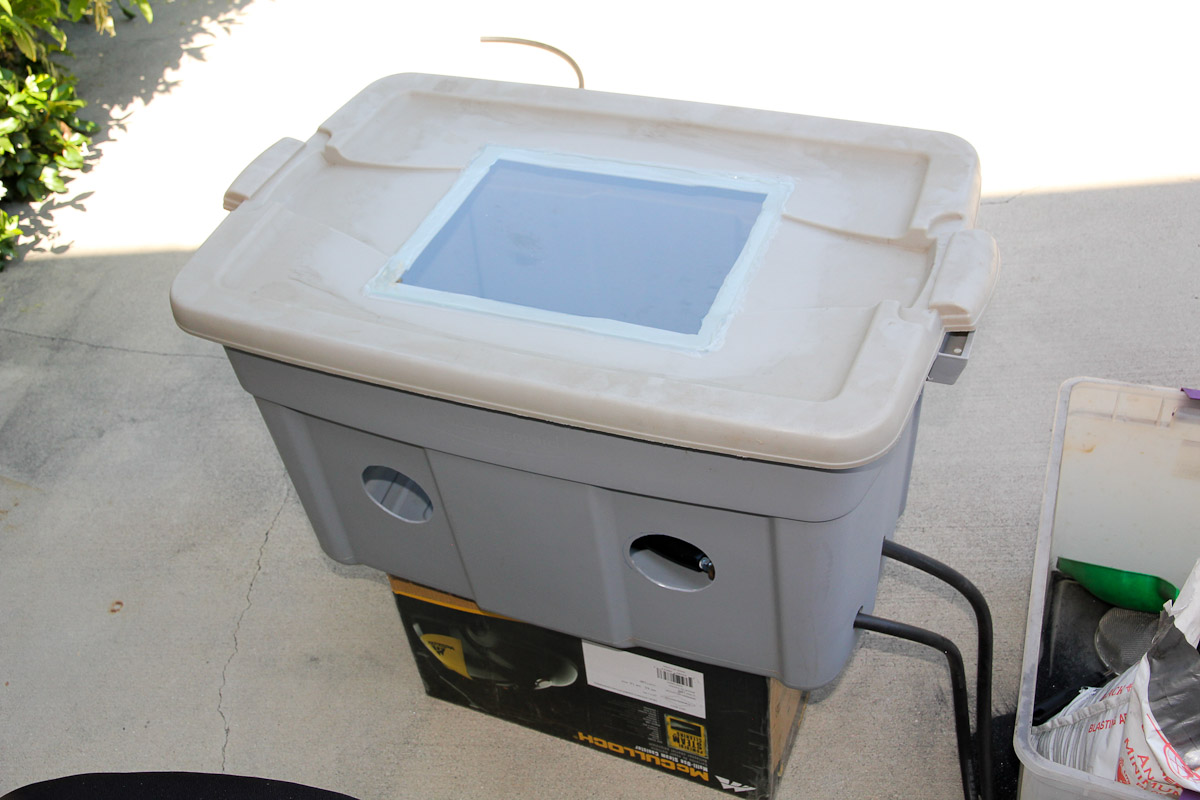
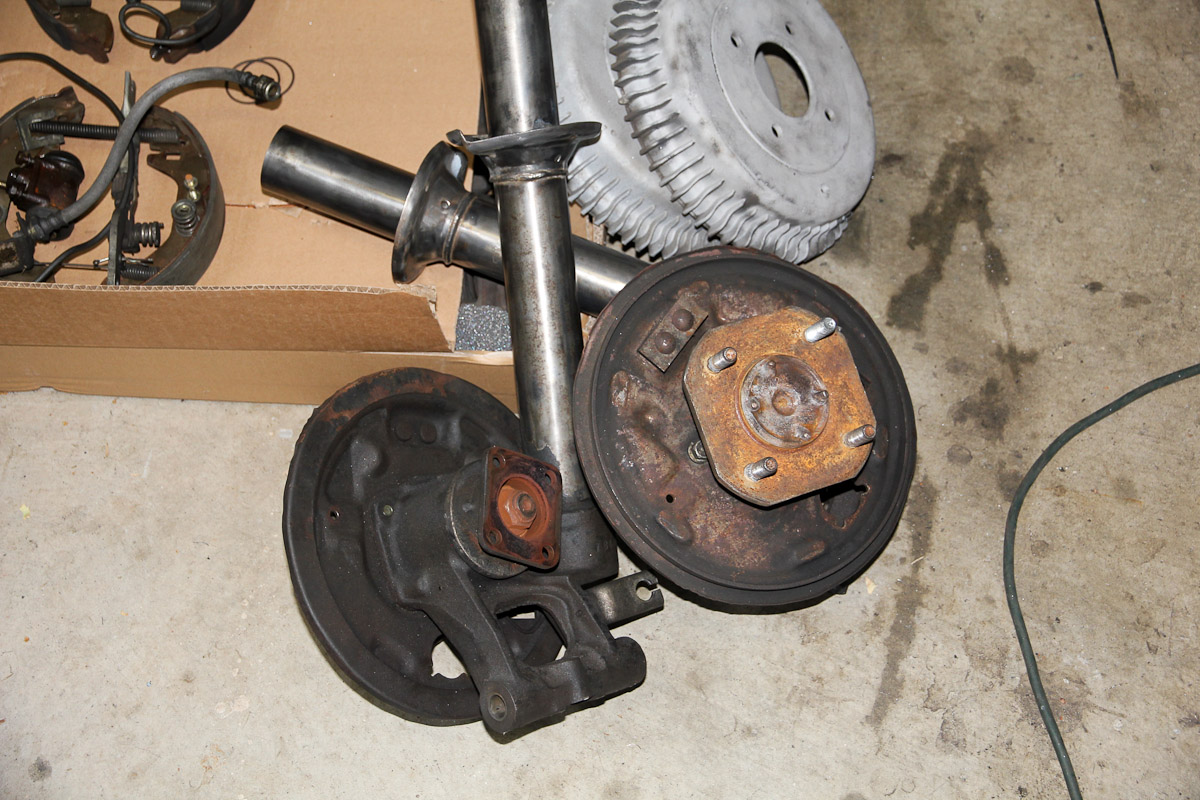
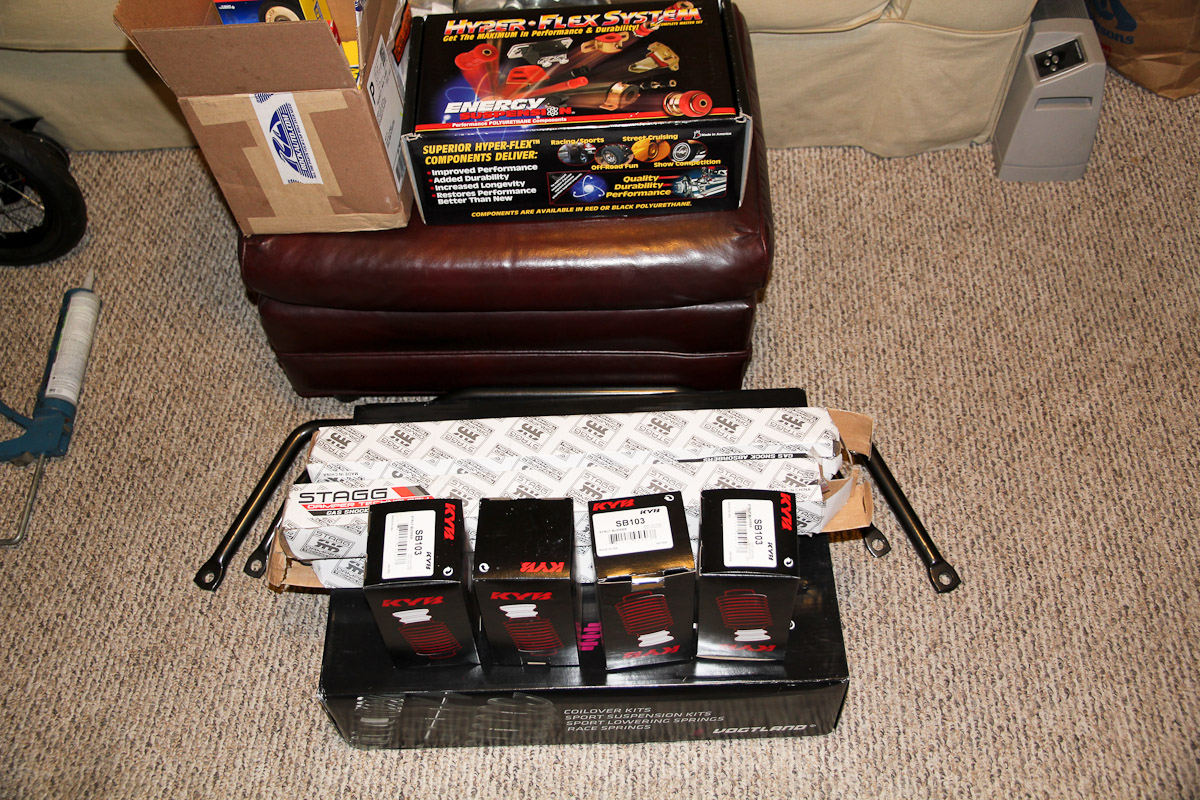
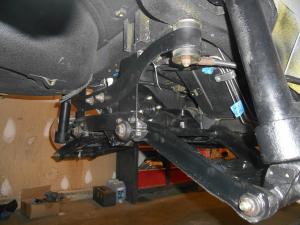
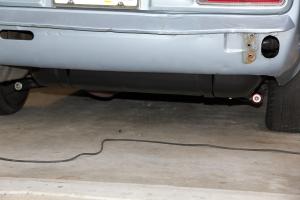
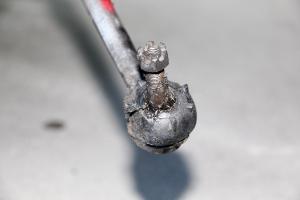
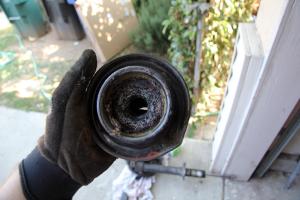
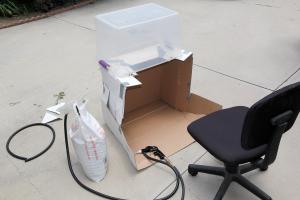
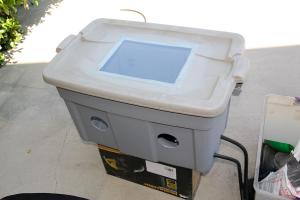
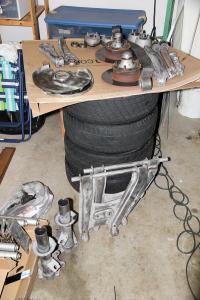
Small update, here in the middle of re-doing the whole suspension. Took both front and rear off the car two weekends ago and found some good and bad. Bad: one each of the tie rod ends and ball joints had torn boots, so they're all getting replaced. All four shocks were completely blown; no rebound at all. The strut mount insulator bearings were covered in some kind of severe nastiness. Spindle pins were in bad shape, but at least that made it easy to beat the heck out of them. Good: seems like all the bearings are in good shape. A previous owner had already replaced most of the bushings fairly recently, so getting those off proved easy. Aside from consumable parts like the ball joints, everything else was actually in pretty good shape and I didn't have to facepalm once when taking things apart. After getting everything apart, it's been a lot of cleaning and paint prep. Started with a wire wheel, then made my first go at media blasting with a $20 siphon-feed gun. Not really knowing what I was getting into, I made this -- uhh...crude -- little "setup" thinking it might keep the mess down. It didn't. So I did a little scrounging around the house to come up with something a little more sophisticated. Still made a mess, and wasn't without some difficulties, but it got the job done well enough. Still have a little cleaning up to do, but hoping to get prep finished by this weekend so I can move on to paint and then get everything put back in two weeks. My stack of parts going in: Vogtland springs and Stagg shocks, Suspension Techniques sway bars, poly bushings, tie rod ends, ball joints, and a bunch of miscellaneous hardware. Only thing I'm not sure about is how to deal with the rear struts. Blasting and then painting the whole assembly seems like it would be a bad idea: too likely for abrasives and other stuff to get where it shouldn't be and muck up the works. I supposed I could remove the rear hub, but everything I've read makes me think I never want to do that. So for now, I'm planning on just cleaning and painting the strut tube and leaving the rest -- rough thought it may be -- as is. Is there a better option?


 1 point