Nigel Mulvey
Community Member
-
Joined
-
Last visited
Everything posted by Nigel Mulvey
-
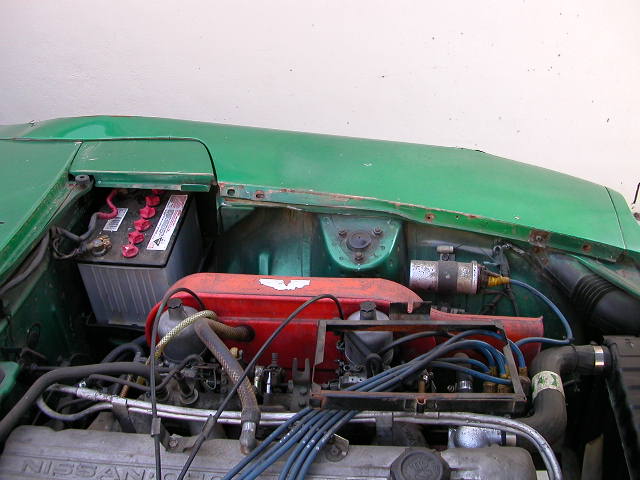
I got stuck into dismantling more of the engine bay today and while I was happily labeling away I realised there were a couple of parts that I do not have a clue about. I have attached a photo with the two parts highlighted, I worked out they have something to do with the air-con because there are some connections to the rest of the system and I don't have air-con in the 240 nor do I have these parts. If anyone can help me out I would be most grateful.
-
You can access the website from the buttons below. Alternatively here it is: http://www.users.bigpond.com/nigel.mulvey/index.htm Cheers.
-
Well I have finally got around to getting my web page on-line and for those that are interested there are some photo's of my 1971 240 daily driver and my 260 2+2 before the argument with the Ford Falcon which has been well documented elsewhere on this site. The photo's aren't too good because my scanner is broken and I got my digital camera after I had the smash in the 260. I haven't taken any digital photo's of the 240 yet as we are in the middle of a drought and we are not supposed to be washing cars so it is looking a little 'dusty' at the moment. The photo's I have posted are digital photo's of paper photo's. I have also posted some (digital) photo's of my project car and will be diarising my progress. I made the first entry back in November and what with exams, work and christmas I have not done much more since (I am planning to get out there this PM). Anyway, I would appreciate any comments anyone might have. Happy New Year Y'all.
-
Over the past few months the indicators (turning lights) on my 240 have gradually ceased to function. Having read other posts, I decided to pull apart the indicator stalk assembly and clean the switches up a little - low and behold the indicators have started to work again albeit somewhat randomly. The only thing I didn't do was take apart the little contact assembly which clearly is the bit that needs a good cleaning. Because this small assembly is held together with a couple of tabs I didn't want to go pulling it apart and find that I couldn't reassemble the damn thing. Can anyone tell me what is inside there? Is it straight forward to take apart and re-assemble or am I going to be confronted with fiddly little parts that I can't put back together or worse still - lose. There must be a reason that the switch mechanism was assembled this way. I'm just wondering if it was to keep enthusiastic amateurs like me well away from it! Thanks in advance!
-
The rotisseries I have looked at connect to the rear bumper mount and the bolt holes in the frame rail that are used to bolt the under tray into place.
-
Gavin, It is a Nikon Coolpix 2500 and it cost AUS$699 from Domayne. You could probably pick one up cheaper if you hunt around. I have a friend who is a bit of an expert when it comes to digital photography and his advice to me was 'any Nikon'. I was looking at the Coolpix 4500 and my friend checked it out and thought it was excellent but that model is around AUS$1,500 and I couldn't quite stretch to that. What I like about the 2500 is that the lens and flash flip away and are well protected when not in use. Hope this helps.
-
... and this shows the wing nut damage from the inside. You can see the orange of the air cleaner cover through the hole.
-
This shows the wing nut damage from the outside ...

-
Here is a photo of the damage at the top of the wing.

-
Here is a photo of the rail and associated damage.
-
There is a bit of damage to the rails and a crease just above them. The suspension rod pulled straight out of it's mounting hole. The point at which the wing bolts on at the top now sits at about 45 degrees instead of vertical. The engine obviously bounced over quite a way because the wing nut on the air cleaner cover penetrated the inner wheel arch. It may well be fixable, but I don't know that I want to spend a lot of money on a 2+2. I've got the 1977 260 as my project car and I am going to use the 2+2 engine in that as I had only just rebuilt it. But if anyone would like to take the 2+2 on as a project (I have a spare L26 engine) make me an offer. Other than the obvious damage it is very solid.
-
At last bought a digital camera. I've been umming and ahhing for weeks. For those that are interested I've posted a couple of shots of my 260Z 2+2 following it's(not so) recent argument with a Ford Falcon. Alfadog, next up is my 240 but we've been having terrible dust storms in Sydney the last few days and it doesn't look its best at the moment.
-
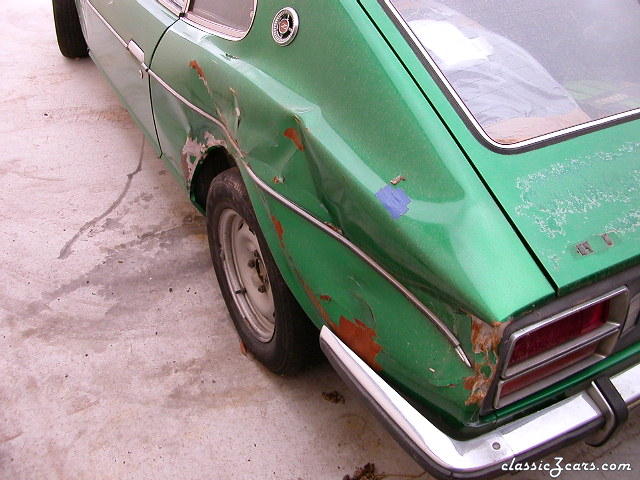 This is a picture of my 260Z 2+2 after the argument it had with a Falcon. It has been standing outside for a few months now.
 -
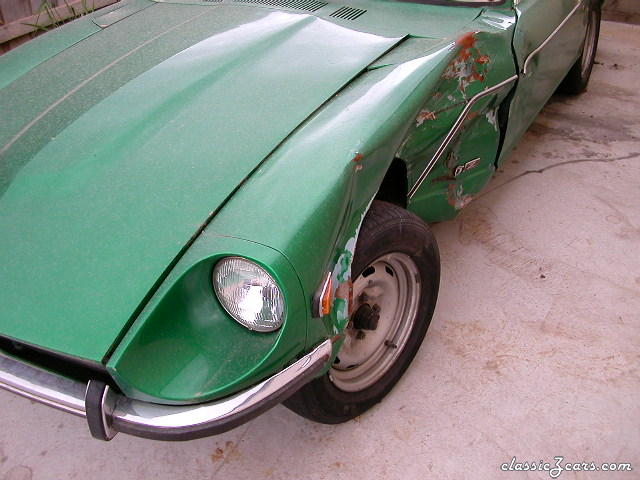 This is a picture of my 260Z 2+2 after the argument it had with a Falcon. It has been standing outside for a few months now.
 -
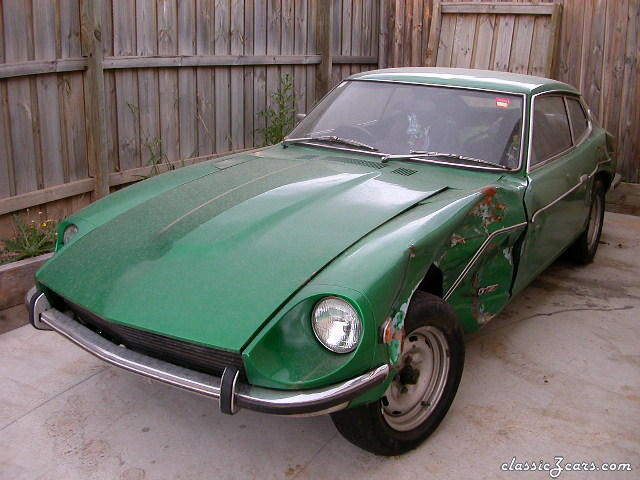 This is a picture of my 260Z 2+2 after the argument it had with a Falcon. It has been standing outside for a few months now.
 -
Could always send it down to the trans. tunnel. That's where I have mine attached to a passing water hose with a plastic tie.
-
Roger, I definitely have a spare that I can let you have, looks like I've got a three screw and four screw type. I haven't got a clue what to ask for it (advantage Roger) but if you would like to message me an offer we can take it from there. Cheers,
-
Been to Hell and back. It is in Norway. At the risk of lowering the tone a collegue of mine at the time ensured he got intimate with his girlfriend so he could tell every one that he had a ... (edited by the author - use your imagination).
-
I'm pretty sure I have a spare. I'll have a look and get back to you. Freight from Sydney shouldn't be too bad.
-
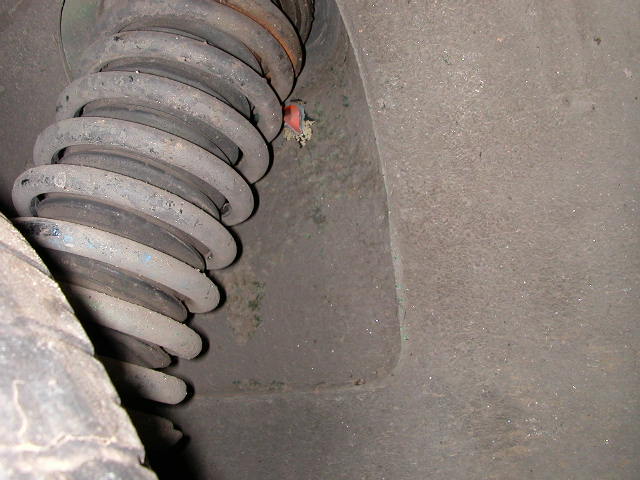
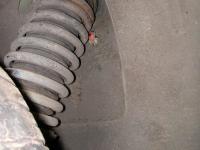
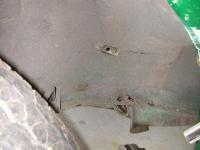
I've been having a closer look at my project 260Z and not suprisingly there is a bit more rot than first noticed although that hasn't put me off. What is of concern though is that the frame rail on the passenger side has sustained some damage in the past. It looks like the rail has landed heavily on a kerb or similar and there are considerable indentations in the area although there does not appear to be any twisting in the adjacent areas. Does anyone know if this might be symptomatic of further damage? Are such indentations fixable or has the strength of the car been compromised to the point where I should try another donor vehicle? It doesn't actually look that bad, but I just want to be sure. Unfortunately I can't provide pics as I don't have a digital camera and my scanner has broken.
-
I'm trying to develop a strategy for approaching the full restoration of my 260Z and could use some advice. I plan to strip the whole car down to a rolling shell and, notwithstanding the discovery of any expensive looking rust holes, get it media blasted at Austech. An acquaintance of mine, who has restored several Galaxies, swears by baked enamel for the body work. In all honesty I didn't know you could have something as big as a shell finished in this way, I thought this process was only for small parts such as suspension etc. So to avoid embarassment from my ignorance I didn't press my acquaintance for any further information. What I really would like to know is what is the prep work required for enamel baking in terms of priming etc. Does anyone have experience in this area that can advise of the specific order things should be done in. Austech can strip the paint and prime the shell afterward but then I have to take it elsewhere to have the bodywork done. Should I bother having Austech prime the shell or should I get it straight to the body shop to have that work done and then get it primed. I've read Carl Beck's piece on this subject but it doesn't talk in terms of a baked enamel project. Any help would be appreciated.
-
Sorry if I caused offence. I'll crawl back into my hole now.
-
I've looked through the carby forum and the Z-Therapy site and can't seem to find the answer to this question. Is there any difference in performance between the three screw and four screw carbies, I know that one was used on early Z's and the other on late ones but I'm not sure about the performance issue. I have a three screw set on my project 260 and a spare four screw set that the previous owner of the 260. I would like to know so I can choose which to hold on to and which I should sell on.
-
Let's try again.