HusseinHolland
Free Member
-
Joined
-
Last visited
Everything posted by HusseinHolland
-
 Duplicate
 -
Many thanks - I'll try adding a condenser - I have a spare from a Volvo - there is one already on the positive side, but I'll leave that one alone.
-
Reinstalled the 12 volt Volvo coil, and the bypass for the ballast resistor. Plugged in the original HEI module I had installed, and the car started right up. The problem all along to low cranking speed with somehow impacting the spark? Not sure but now it works. Problem is the tach no longer works. Before digging through the whole thread, does anyone know if I have to replace the resistor for a different value or remove it?

-
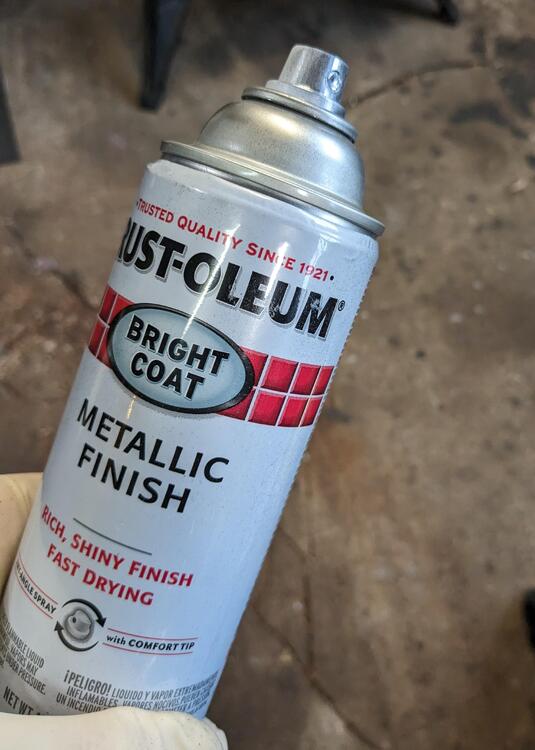
Interesting. The issue there is that surface imperfections will show right through. With the Chrome finish I used (I think it is Rustoleum, which he did not test), you can lay it on pretty heavy & it will level out cracks somewhat. The problem as I'm sure you know is that the original chrome foil separates, tears, buckles from the plastic, so unless you remove it all from the base, there will be issues with the surface finish of any product that is such a thin film. I think the nail polish version would be ideal for small details like the console & switch frame edging.
-
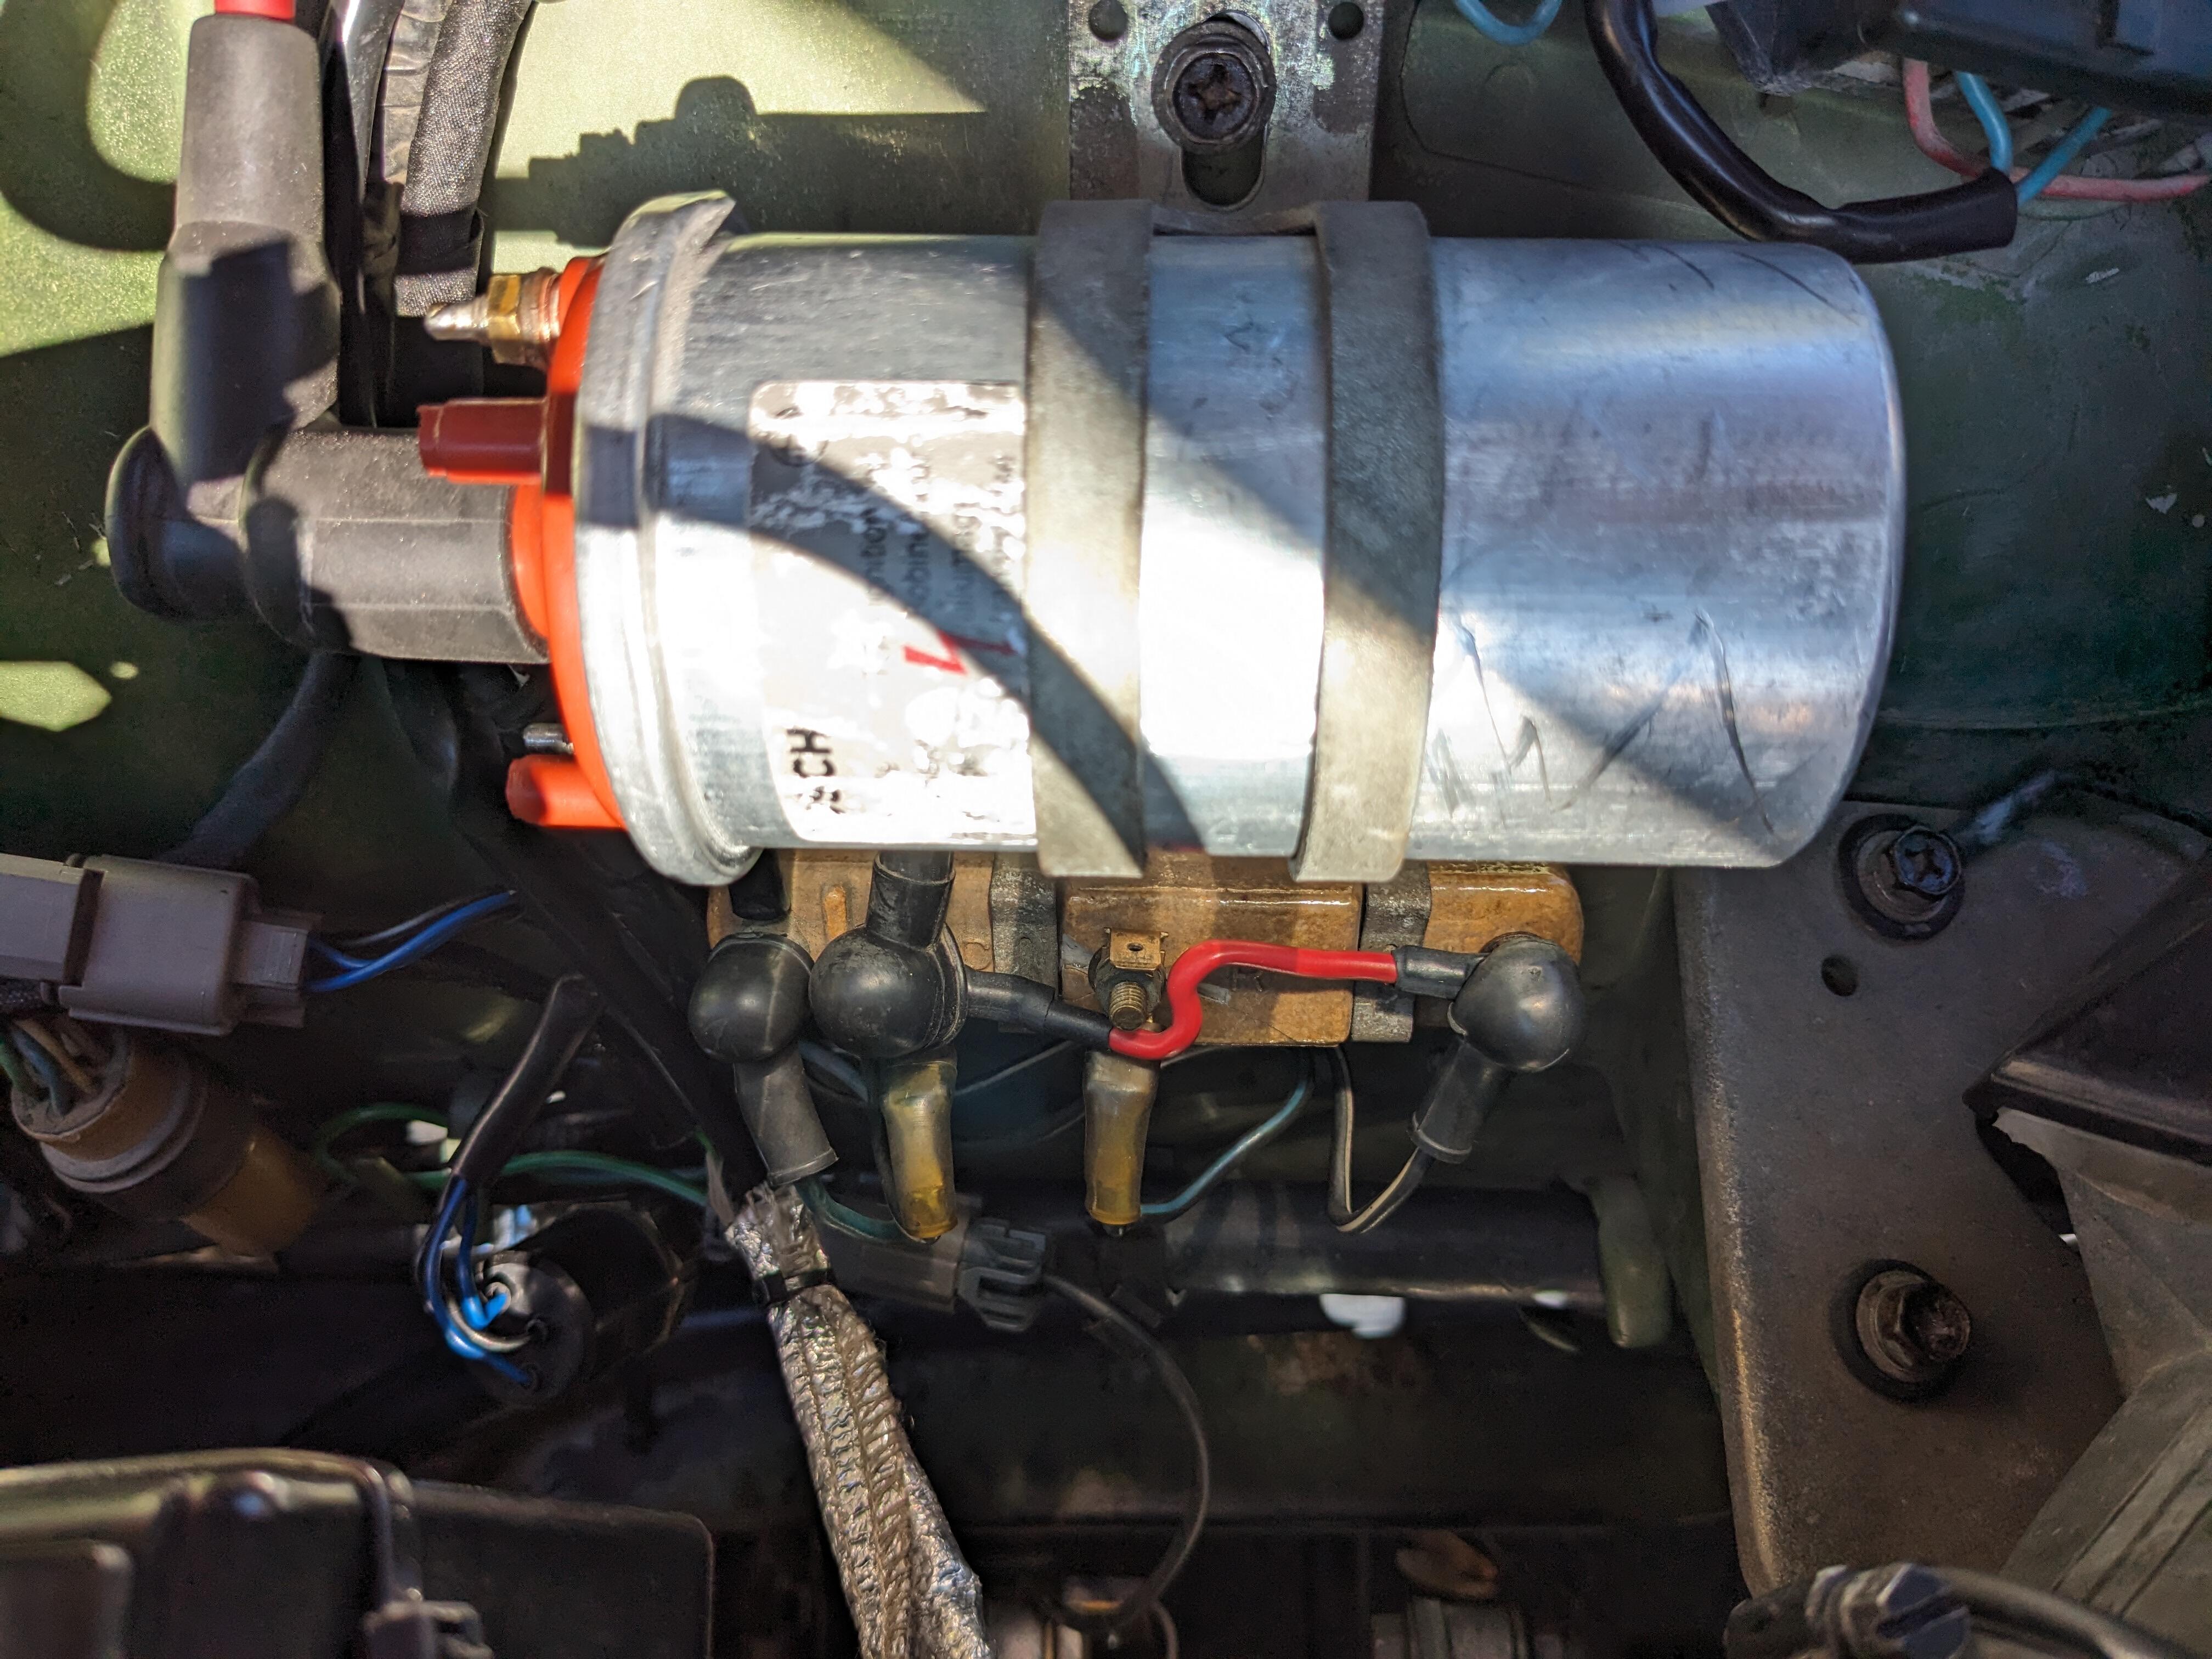
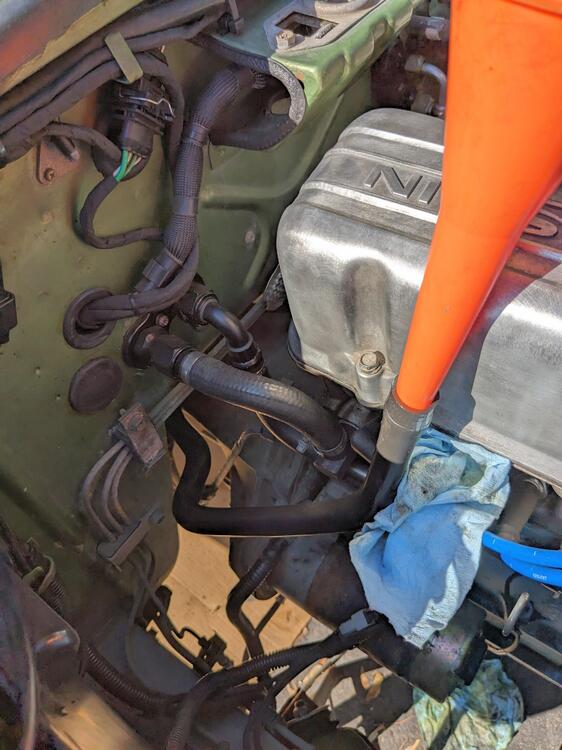
Seems possible - I guess it depends where the vaporization is taking place - it would seem likely that it is more than just in the injector body, as it takes at least a minute (it feels like more) to level off & return to normal. Fiat added an injection cooling fan system to their 80's version of the Bosch L-jet - it had a shroud on the intake with a duct attached to a blower. There was a temp switch on the manifold to trigger the blower on shut down. I think I read some reference to something similar on here, however I've not seen any pics. I can't visualize what a mess that would like like on the L28 EFI.
-
Indeed - however it will come back in the spring, presumably. It's gonna be a year or so with the stock drivetrain. This is annoying.
-
I have to clean the covers first, they have my handprints all over them 🤪
-
Resurrecting this one. I have noticed that with the current higher ambient temps, after driving 15-20 minutes home on the highway (driving spiritedly, probably around 70-75 - speedo isn't accurate, perhaps with the change in profile of 15"tires?) then parking at my Mum's for about 15-20min while I check in on her - I have the symptom described here. I know it's fuel starvation, I can see the AFR's are 16's or higher on the WBO2 controller. So, back in 2014 the general consensus was Bosch 0280150901's (195cc) with a modified rail, or FJ707T (which look to be stock format fitment?) Trying to figure out if I can live with this for a year, or if I need to address it. EDIT - for reference EV1 0280155746 are 195cc
-
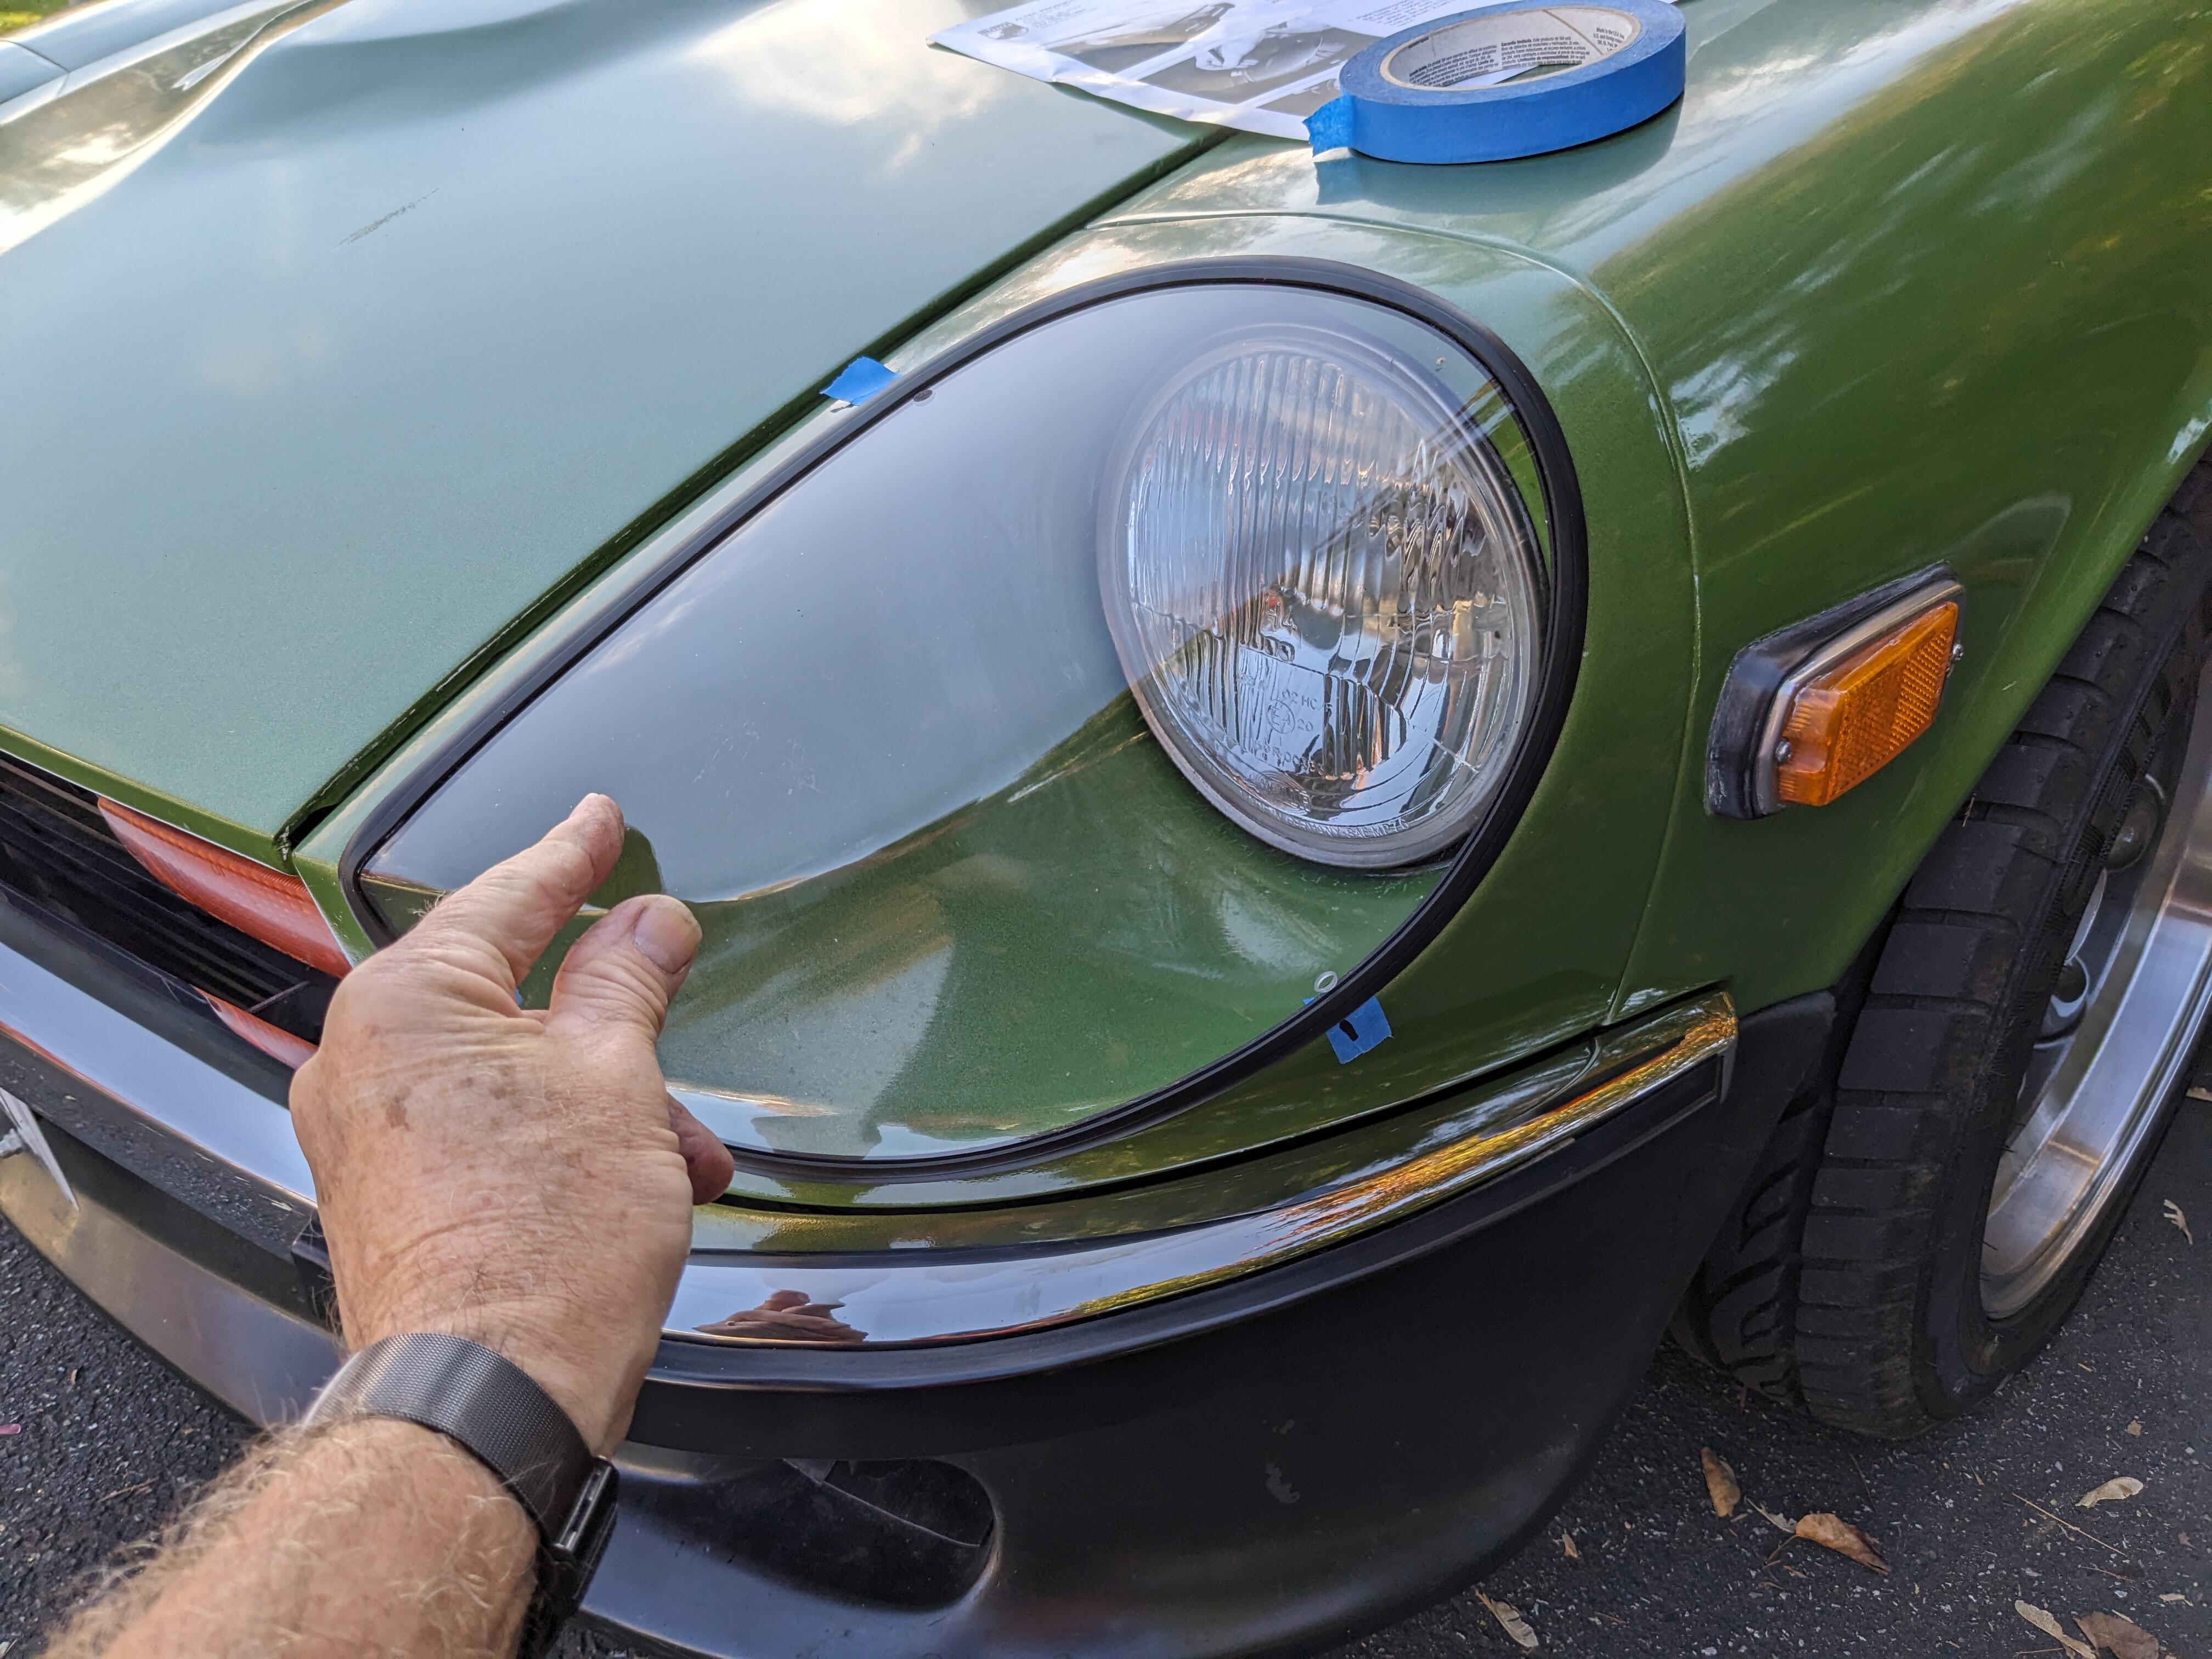
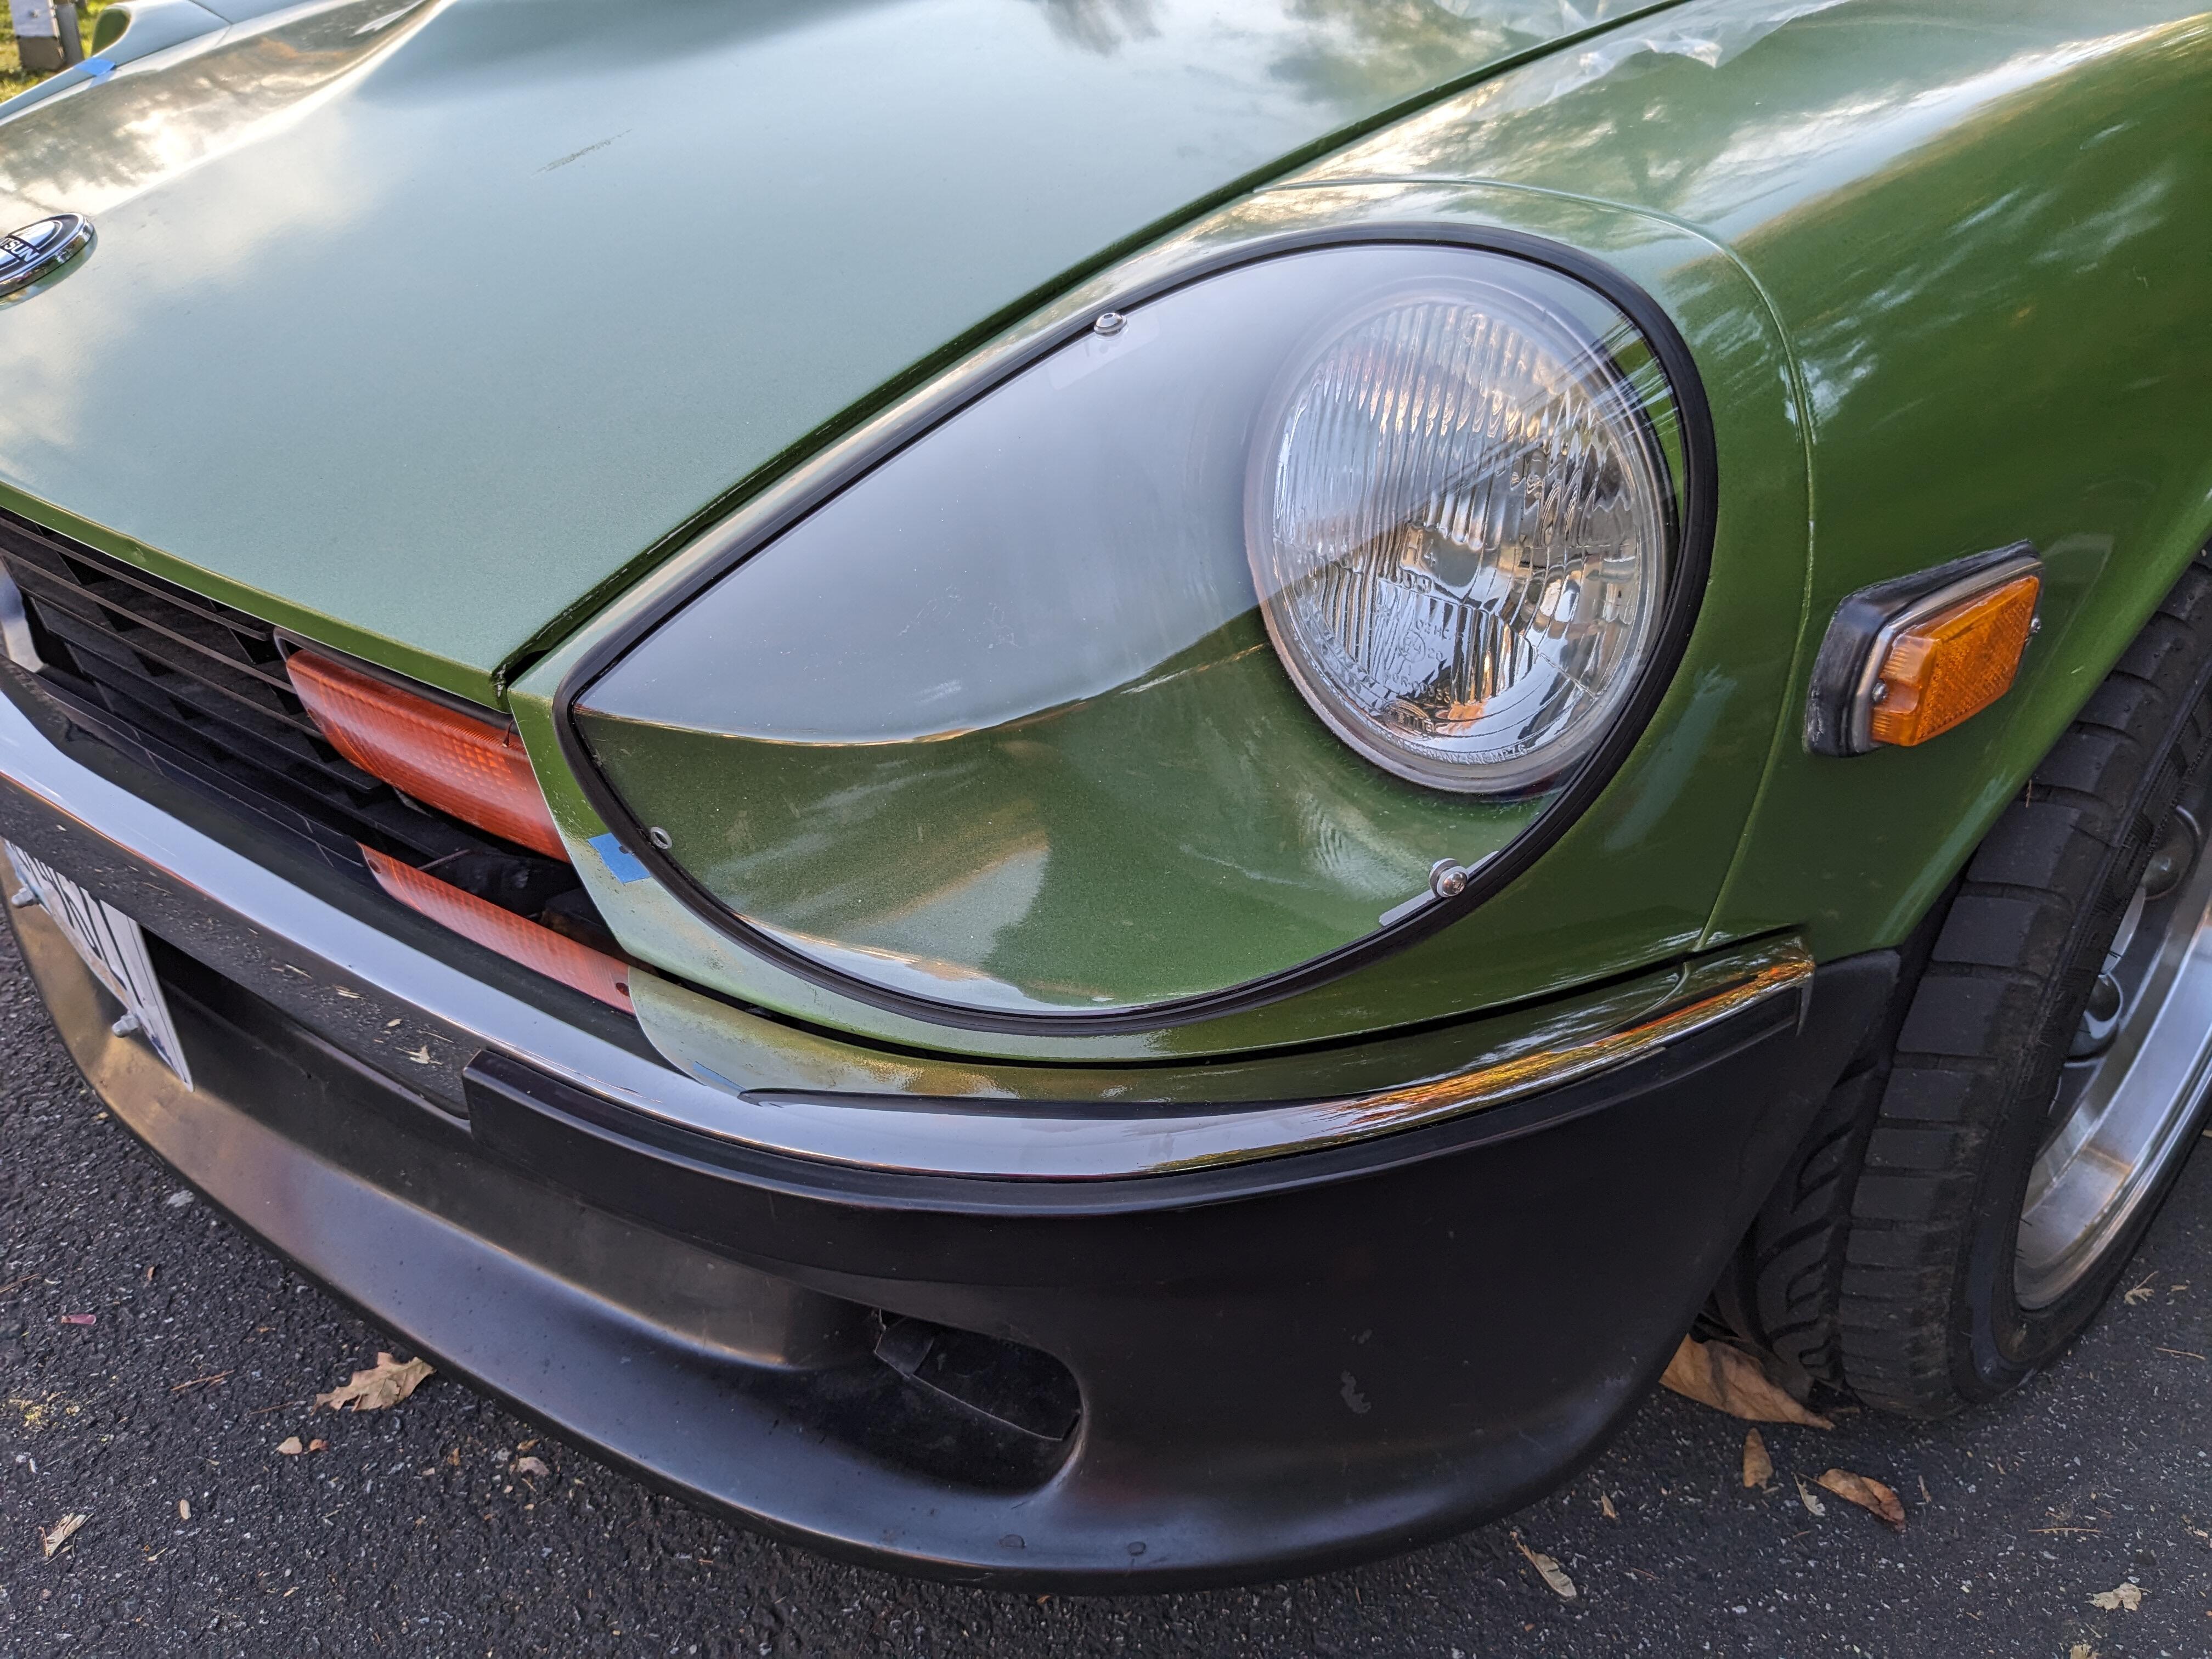
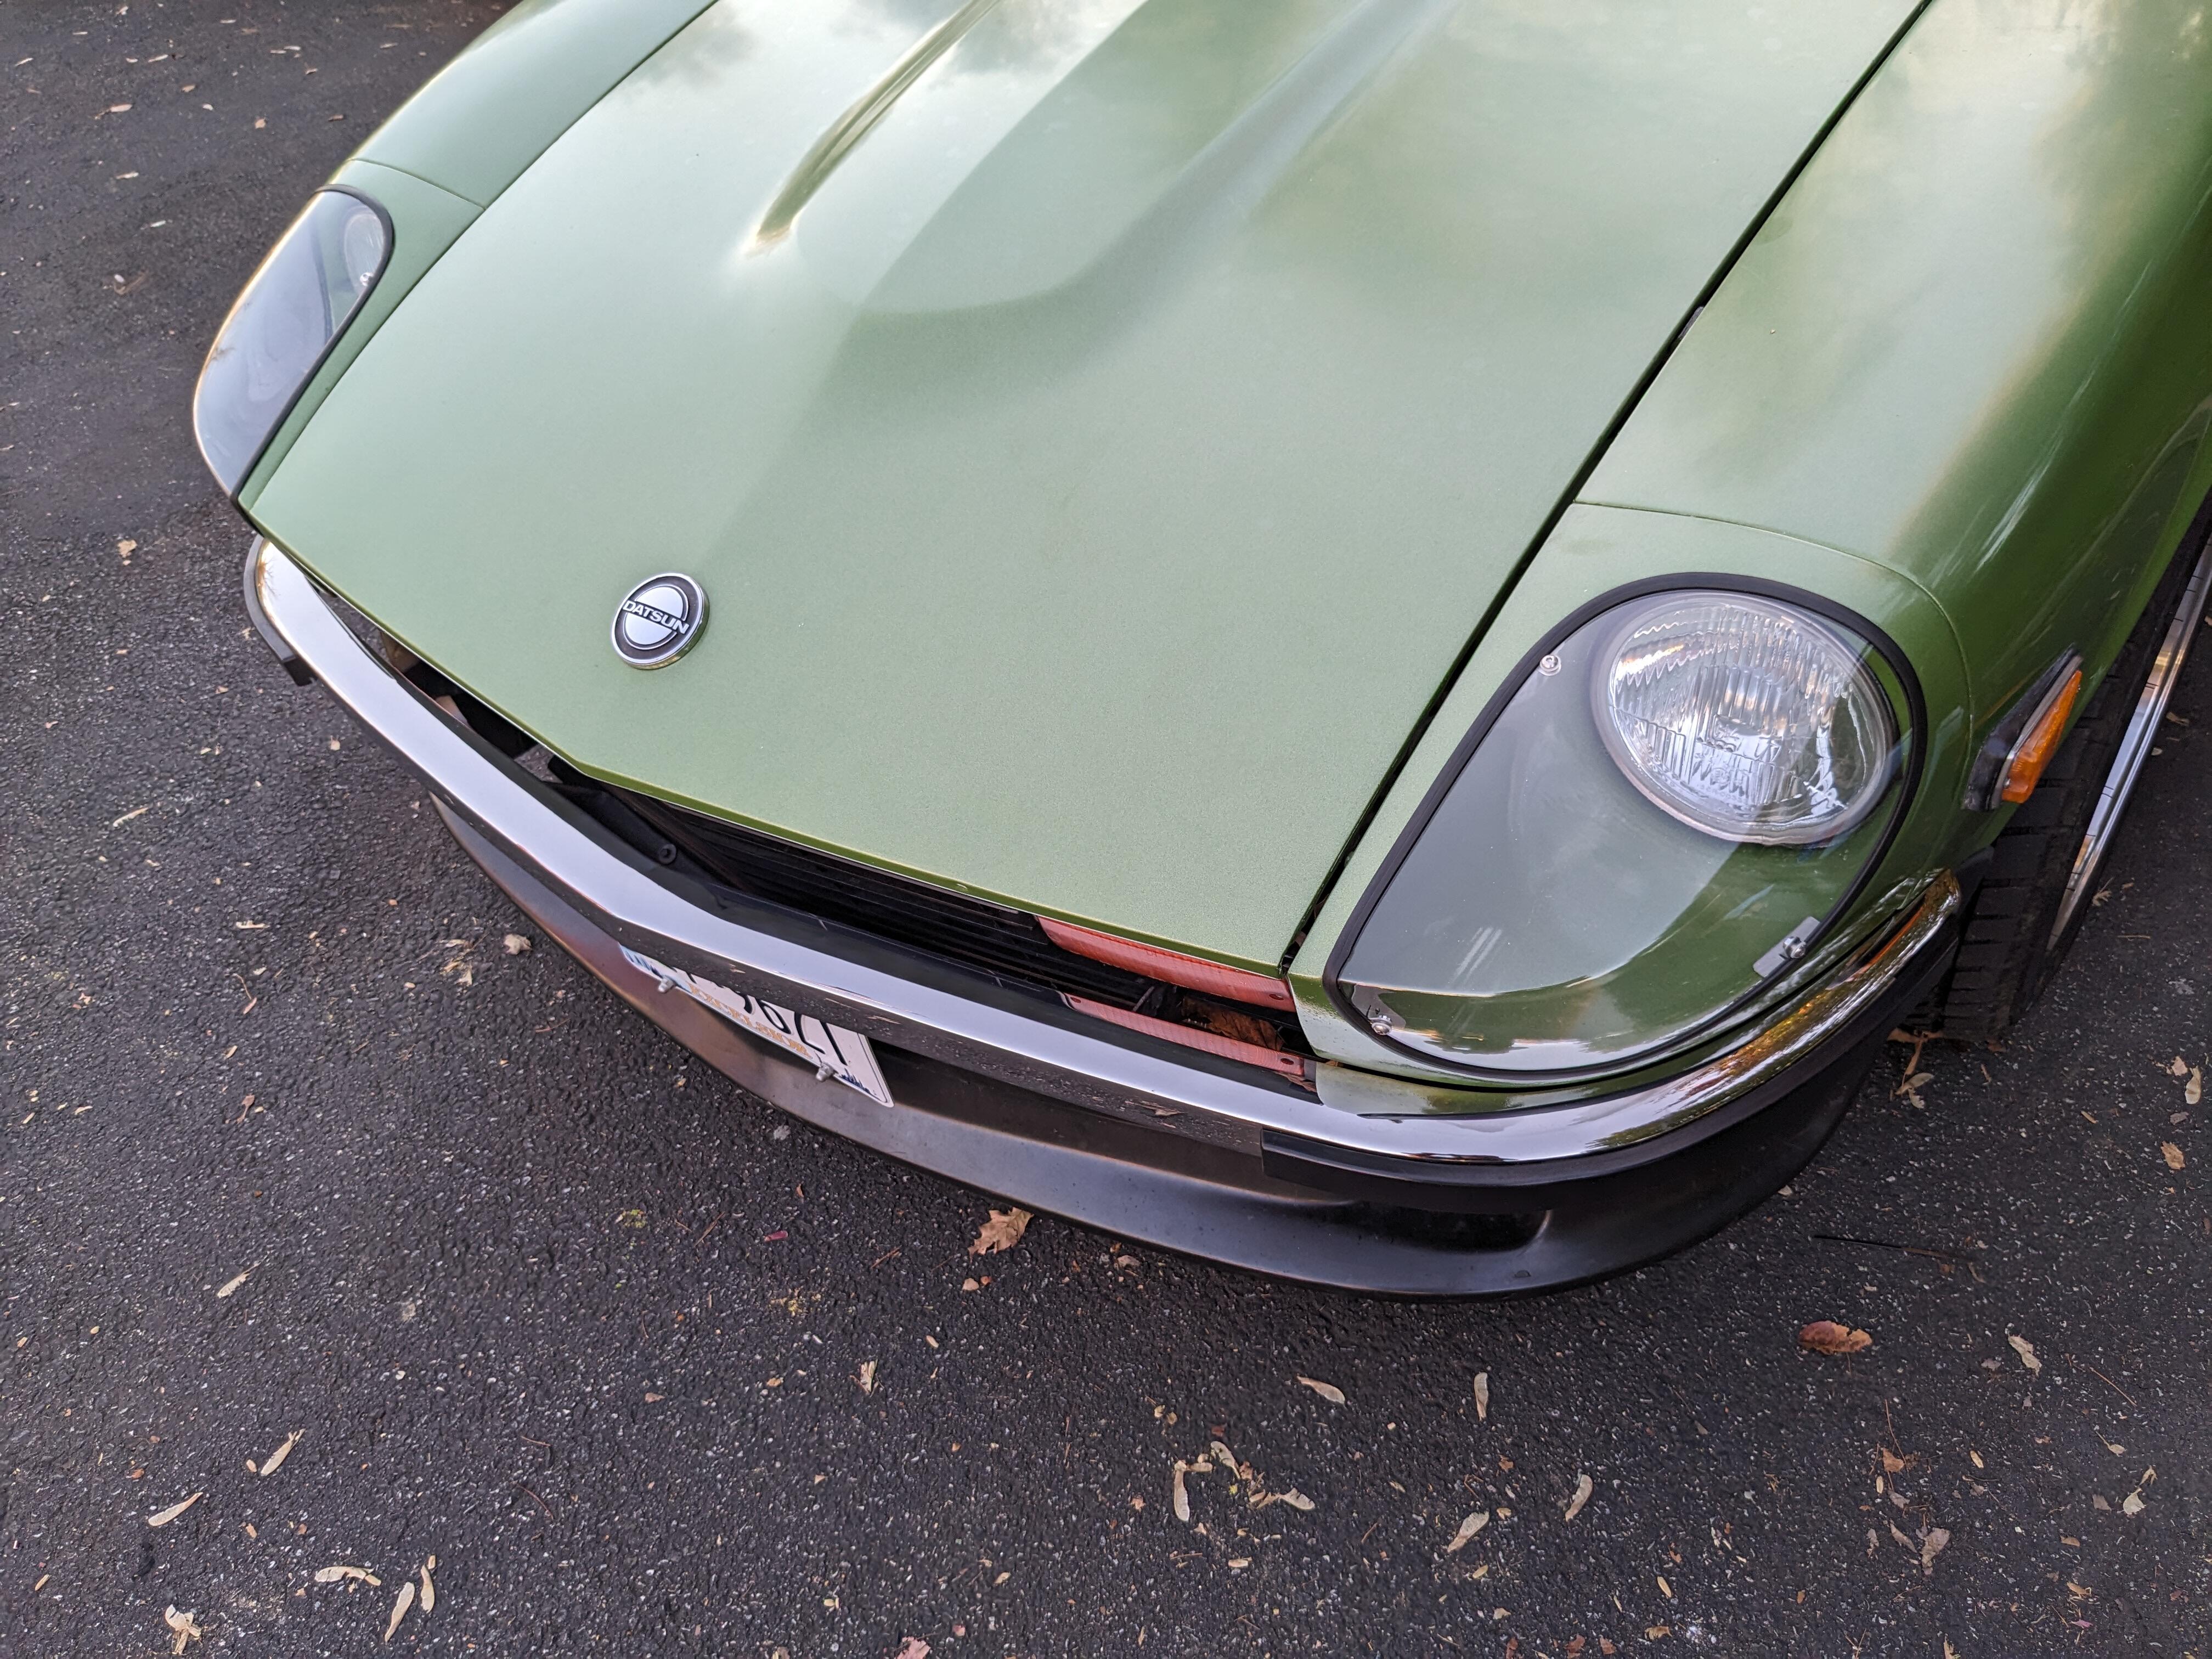
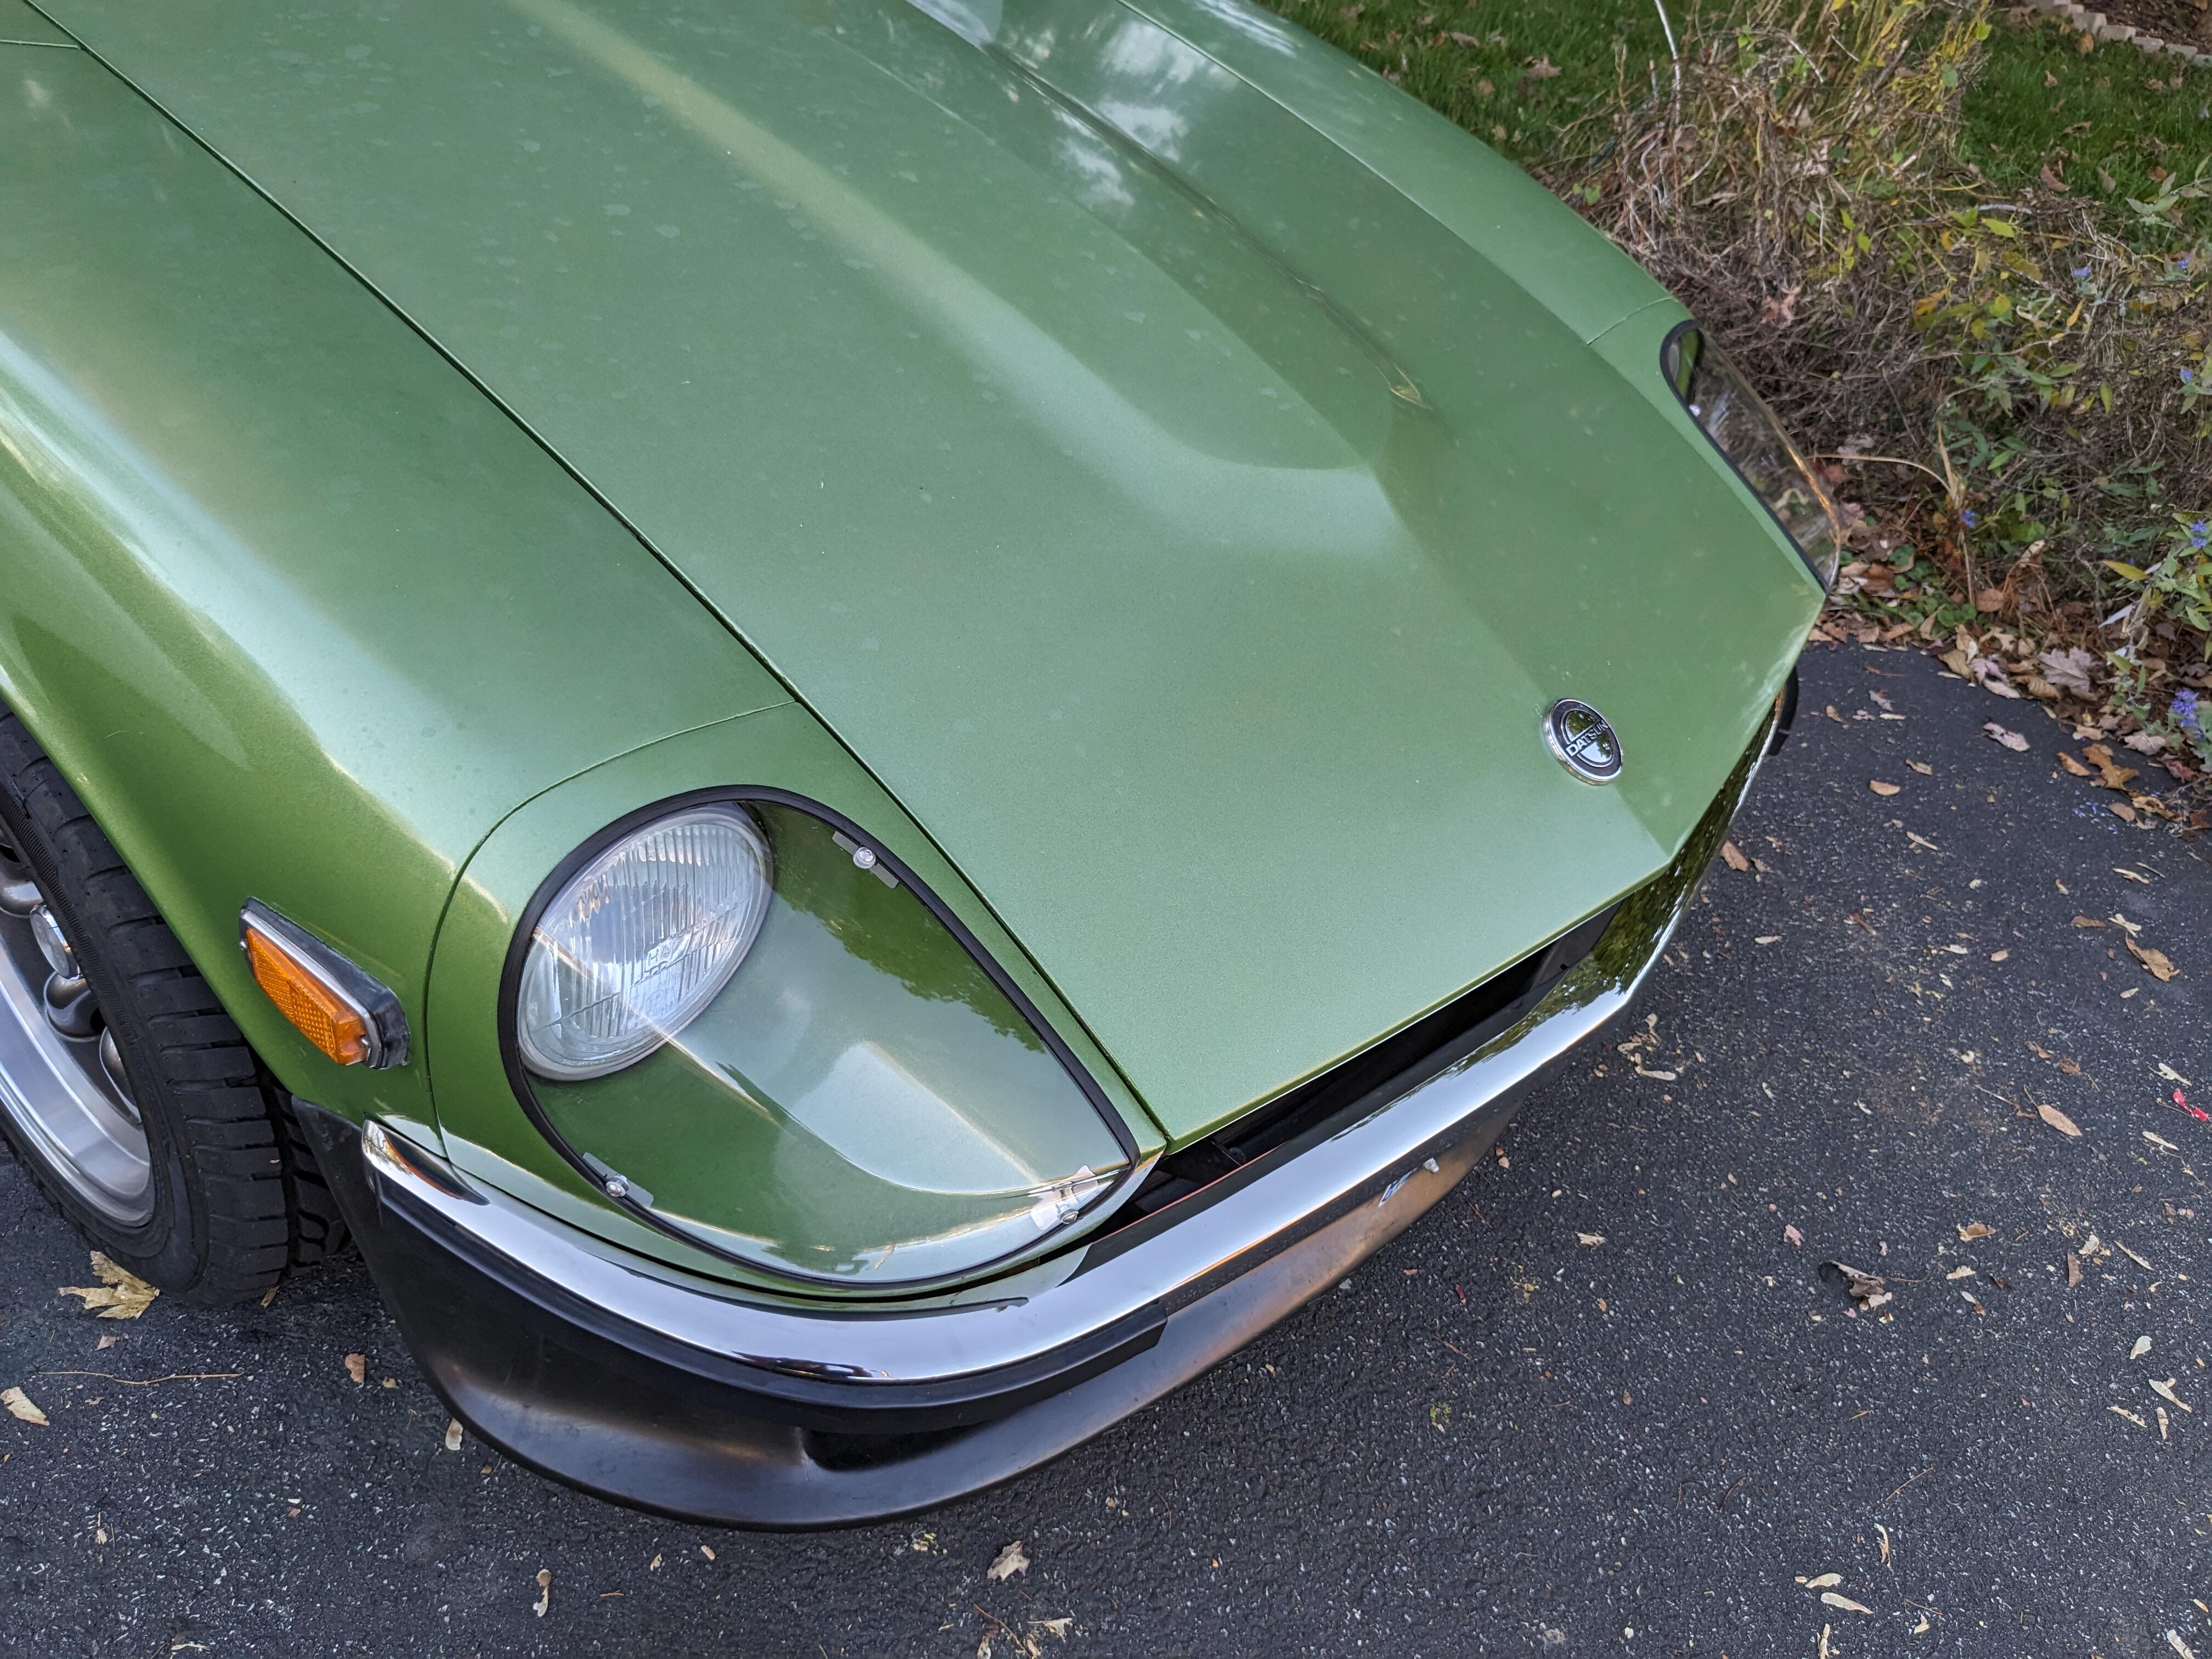
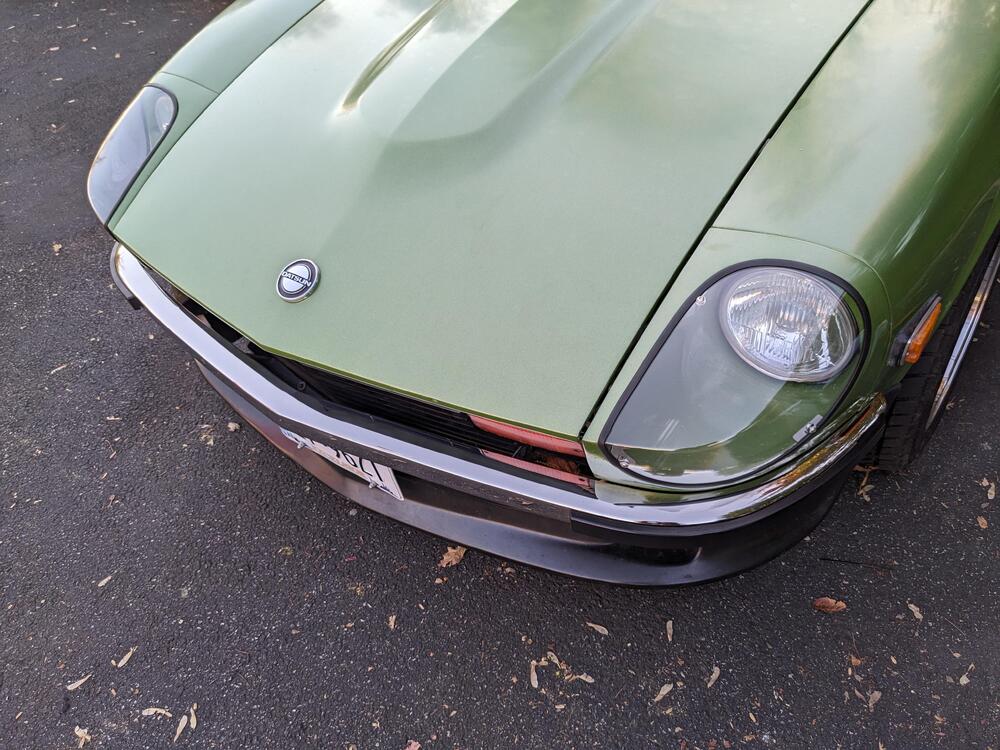
Now that I have the H4's installed, I decided it was finally time to add the headlight covers I got from Motorsport Auto back in the Spring Probably going to paint the brackets, doubt I can stand looking at those


-
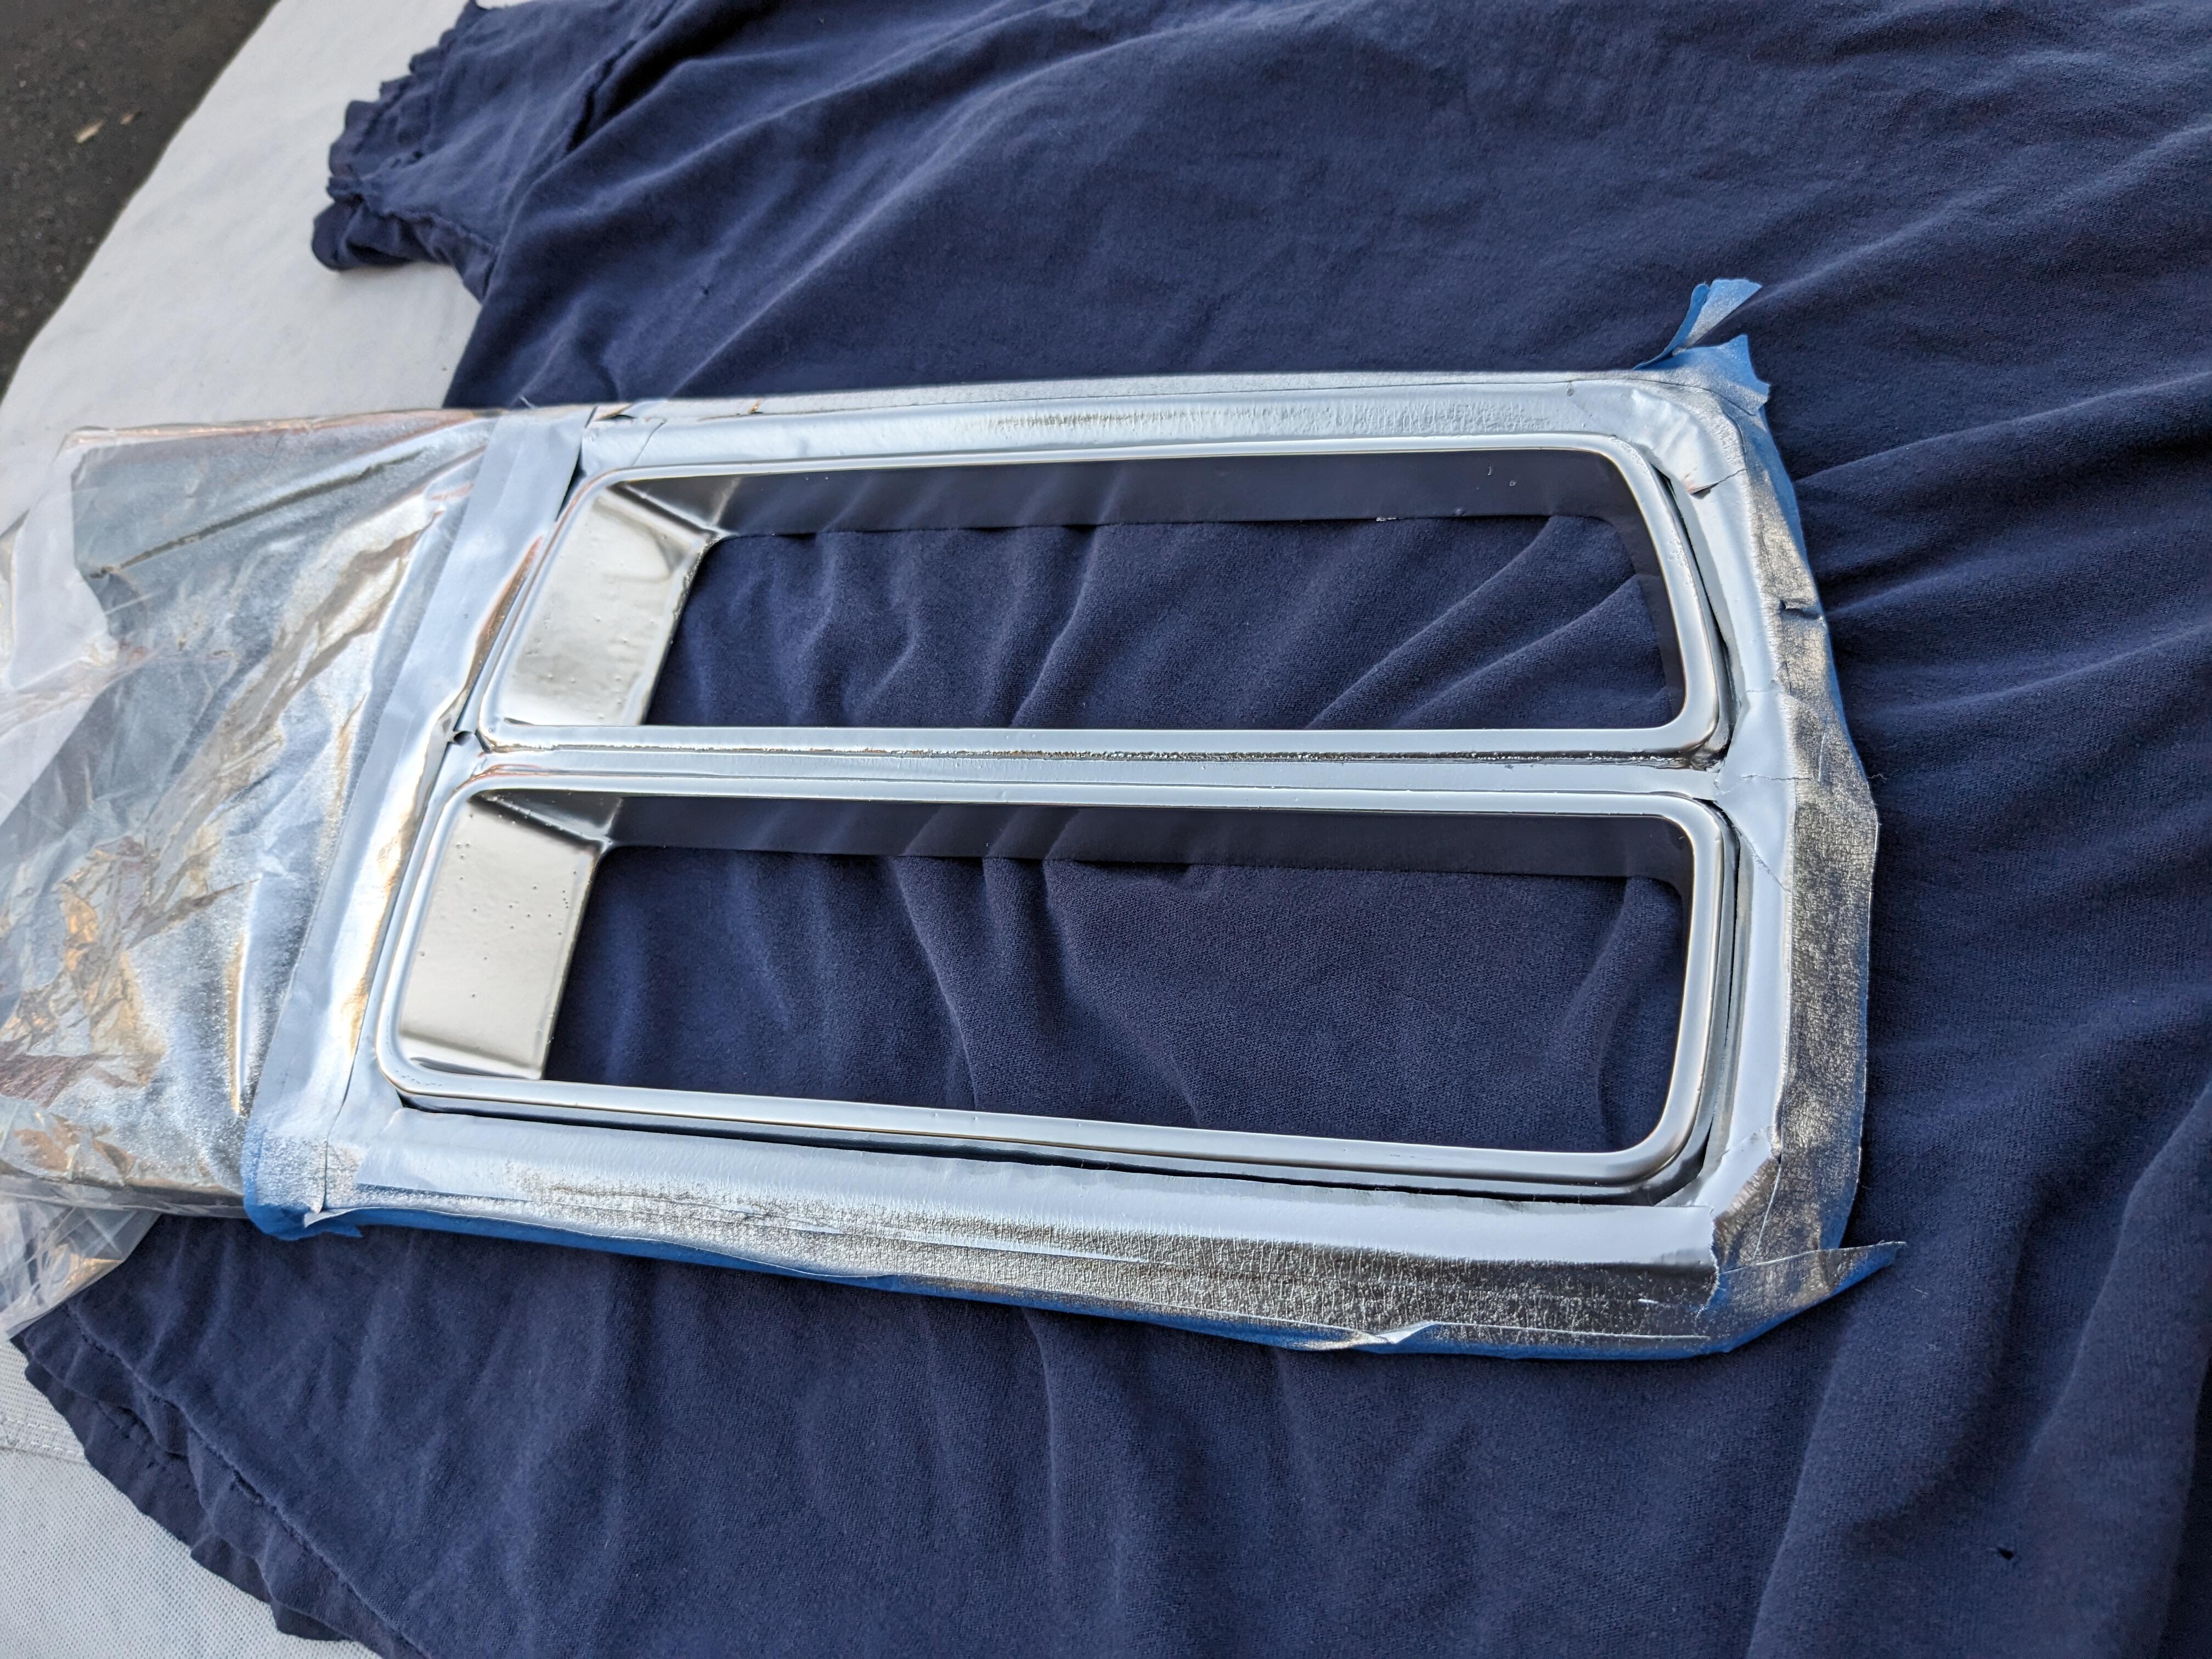
That's interesting - I'll have to take a look. I did have to redo the chrome - the center recess on them where the foil was peeling bothered me too much. I filled the recess yesterday's then sanded, masked & repainted the chrome today. It's still got imperfections, but better overall


-
One would think - 3rd is noisy, overall I'd say it is quieter, besides whatever is worn with 3rd gear.
-
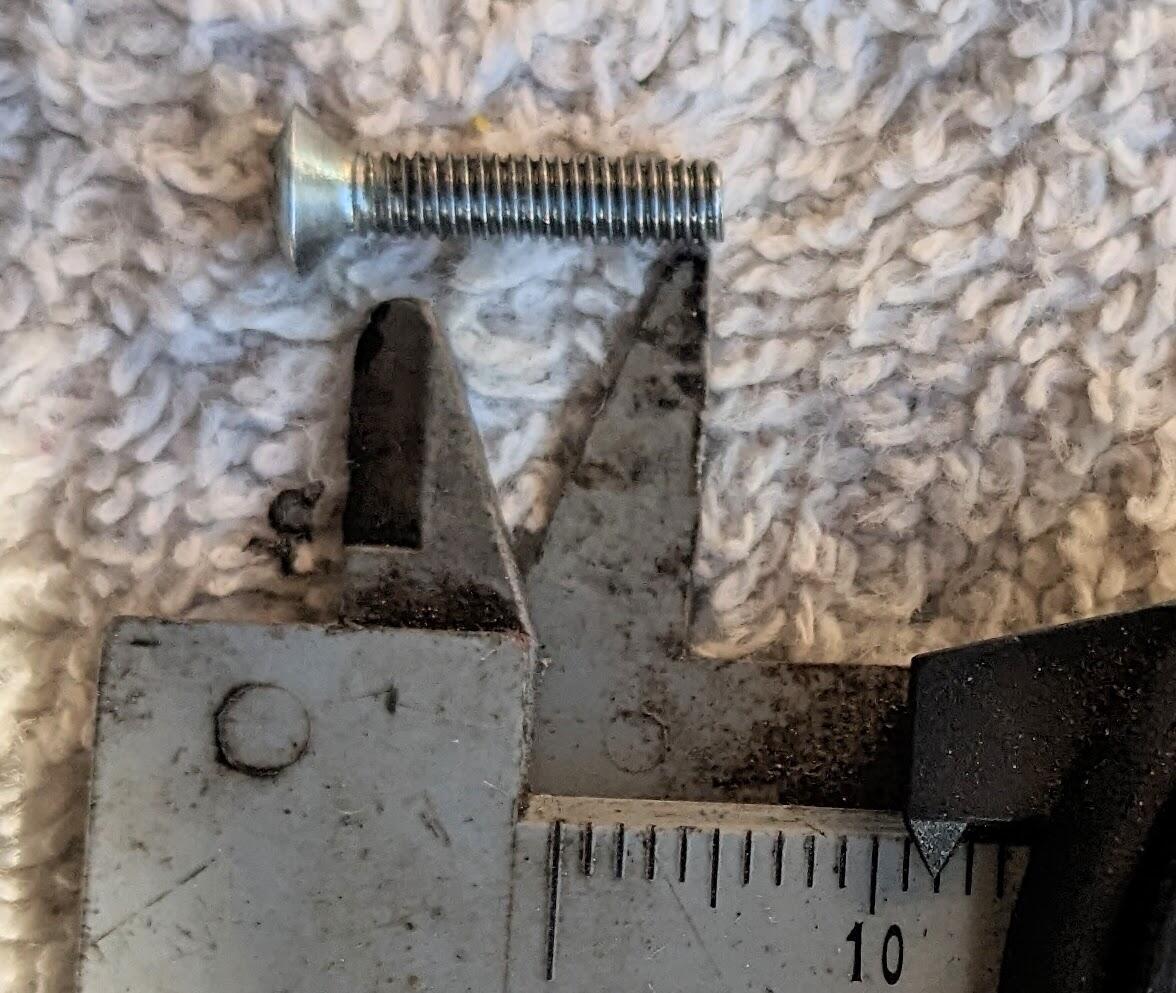
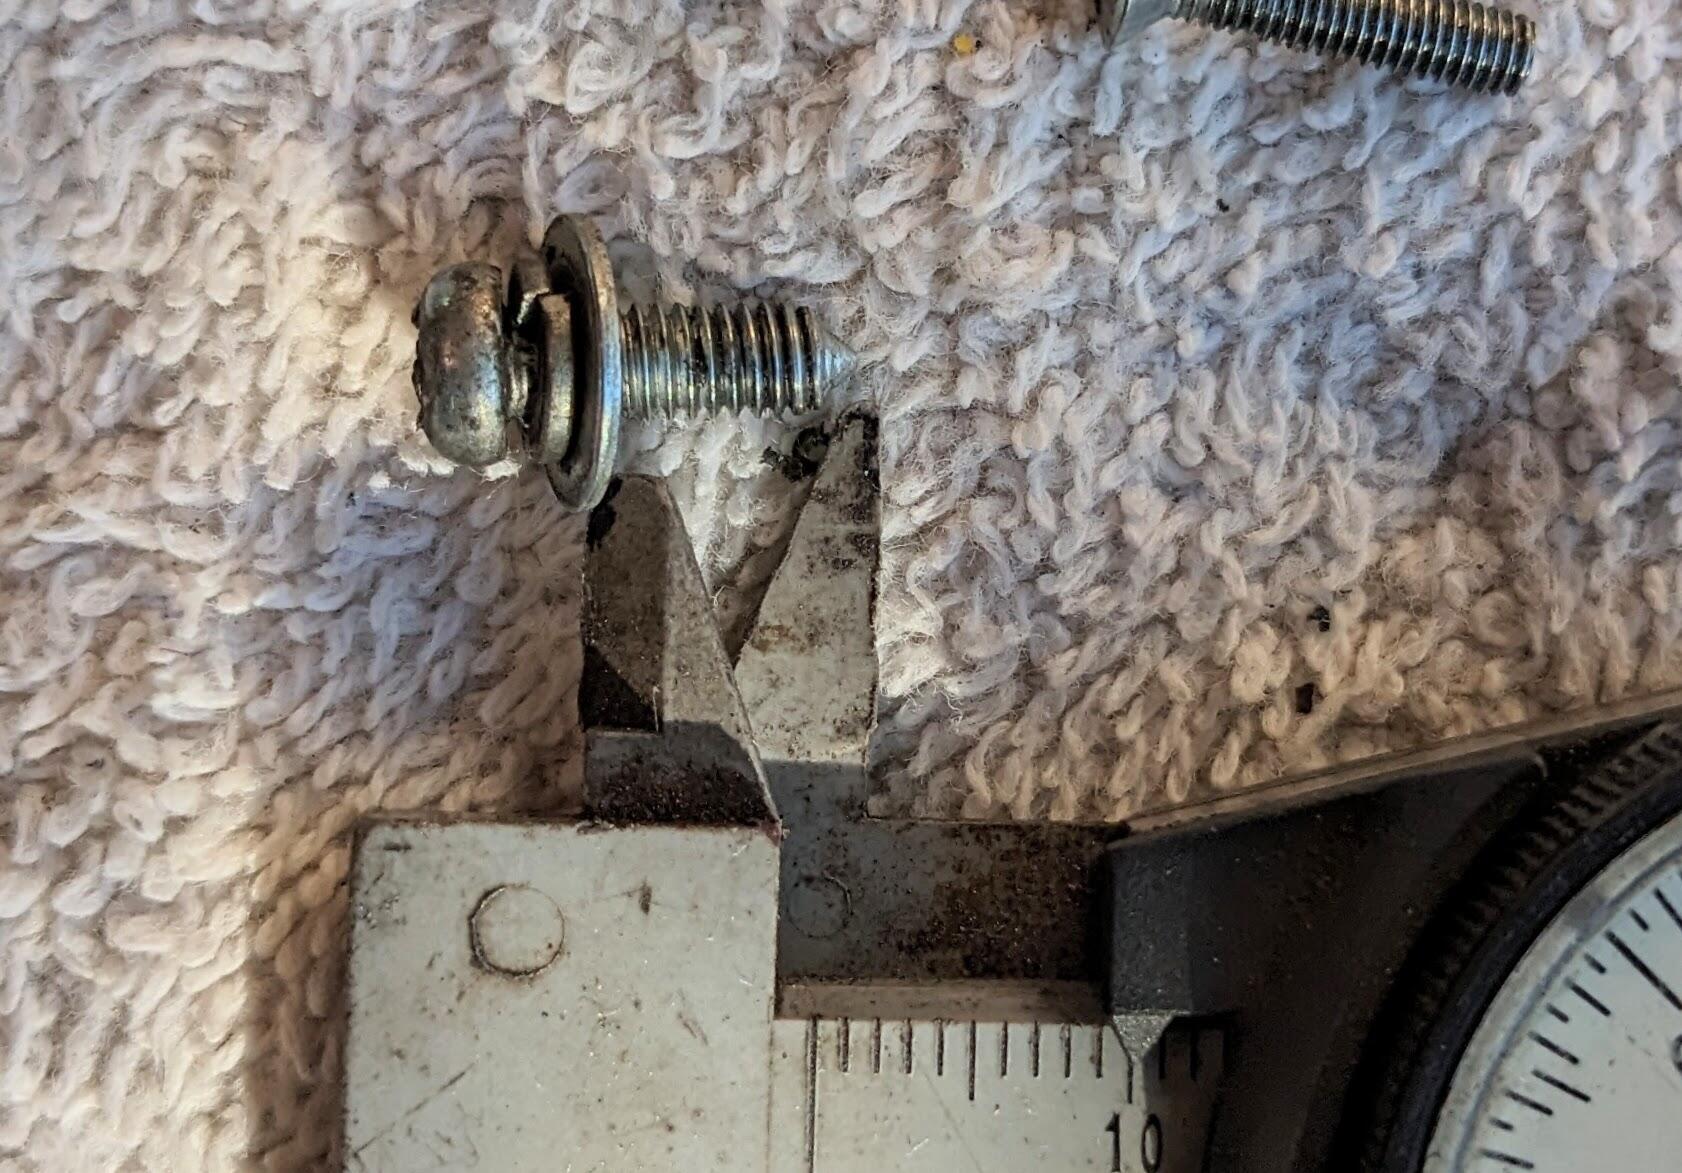
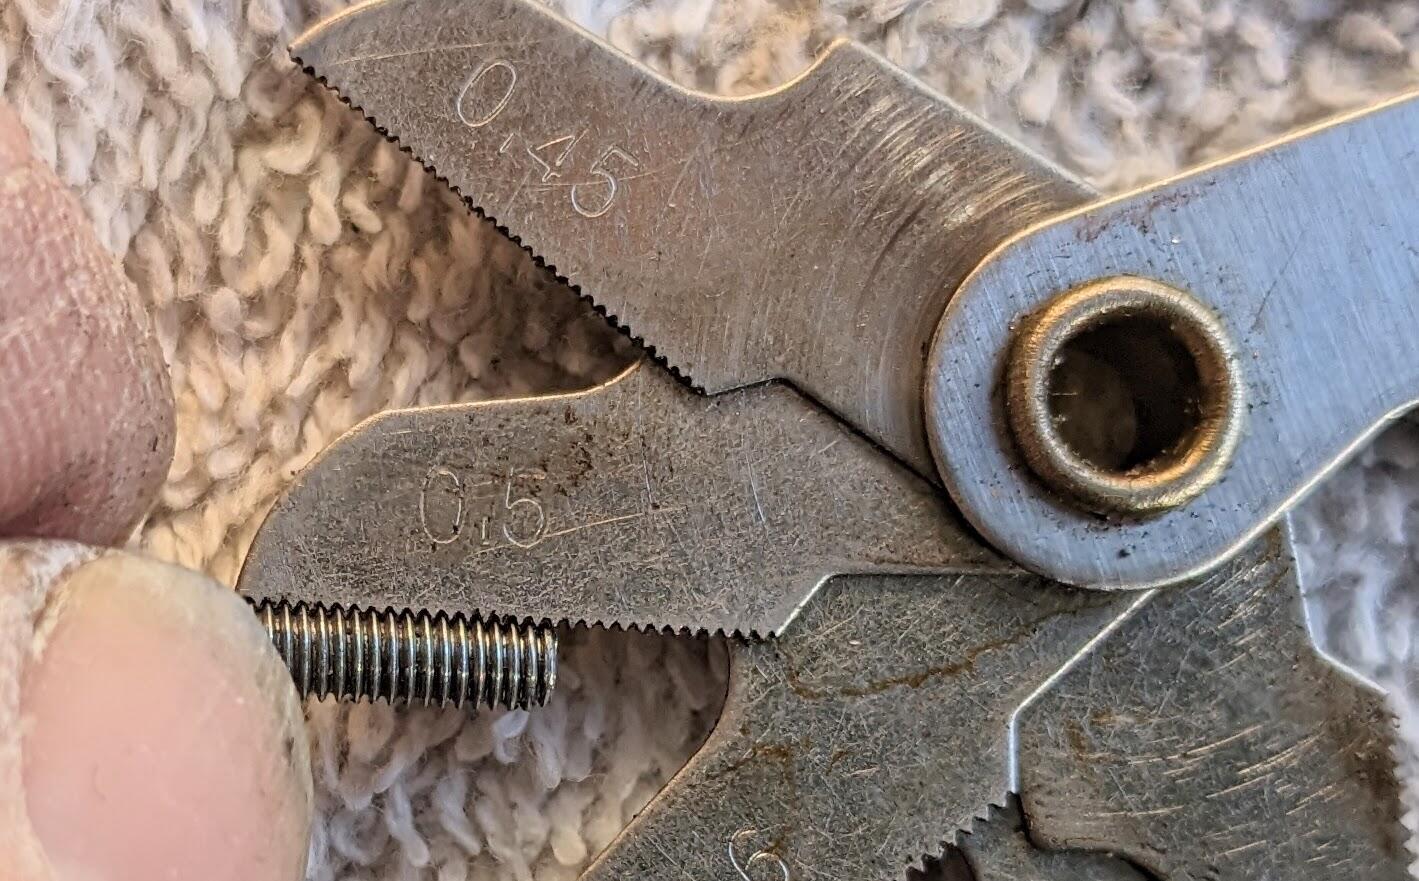
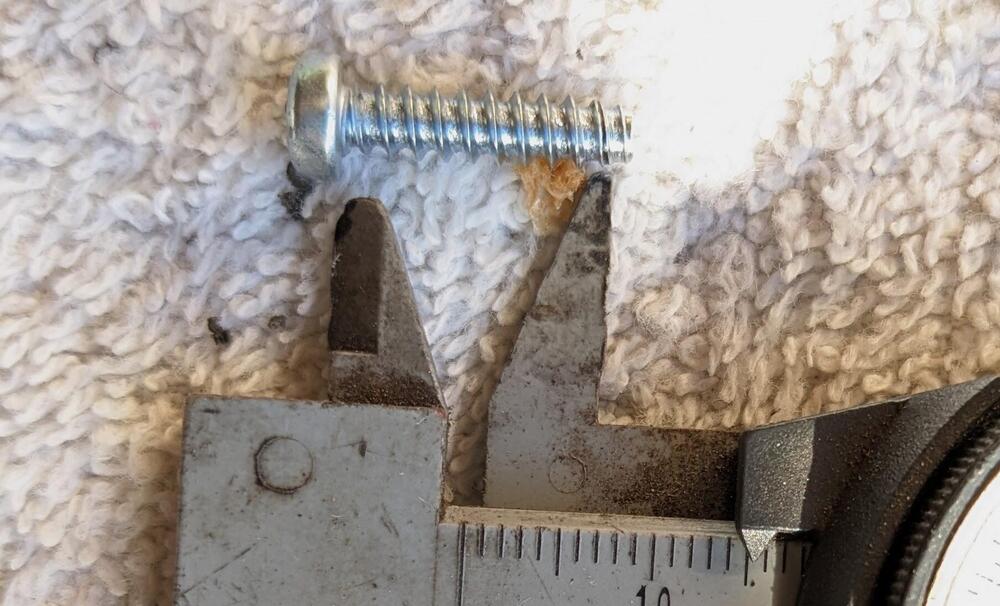
Probably no use to the OP - these are the 3 types I found on my 280Z. 4 shroud screws, approx 15mm L 1 M3 x.5 12mm L pan head machine screw into combi switch housing 1 M4 10mm L machine screw into ignition switch housing (didn't bother measuring pitch, it's the same as all the other M4 machine screws on the dash).


-
Wired Video: https://youtu.be/fyIlQdHmAo8

-
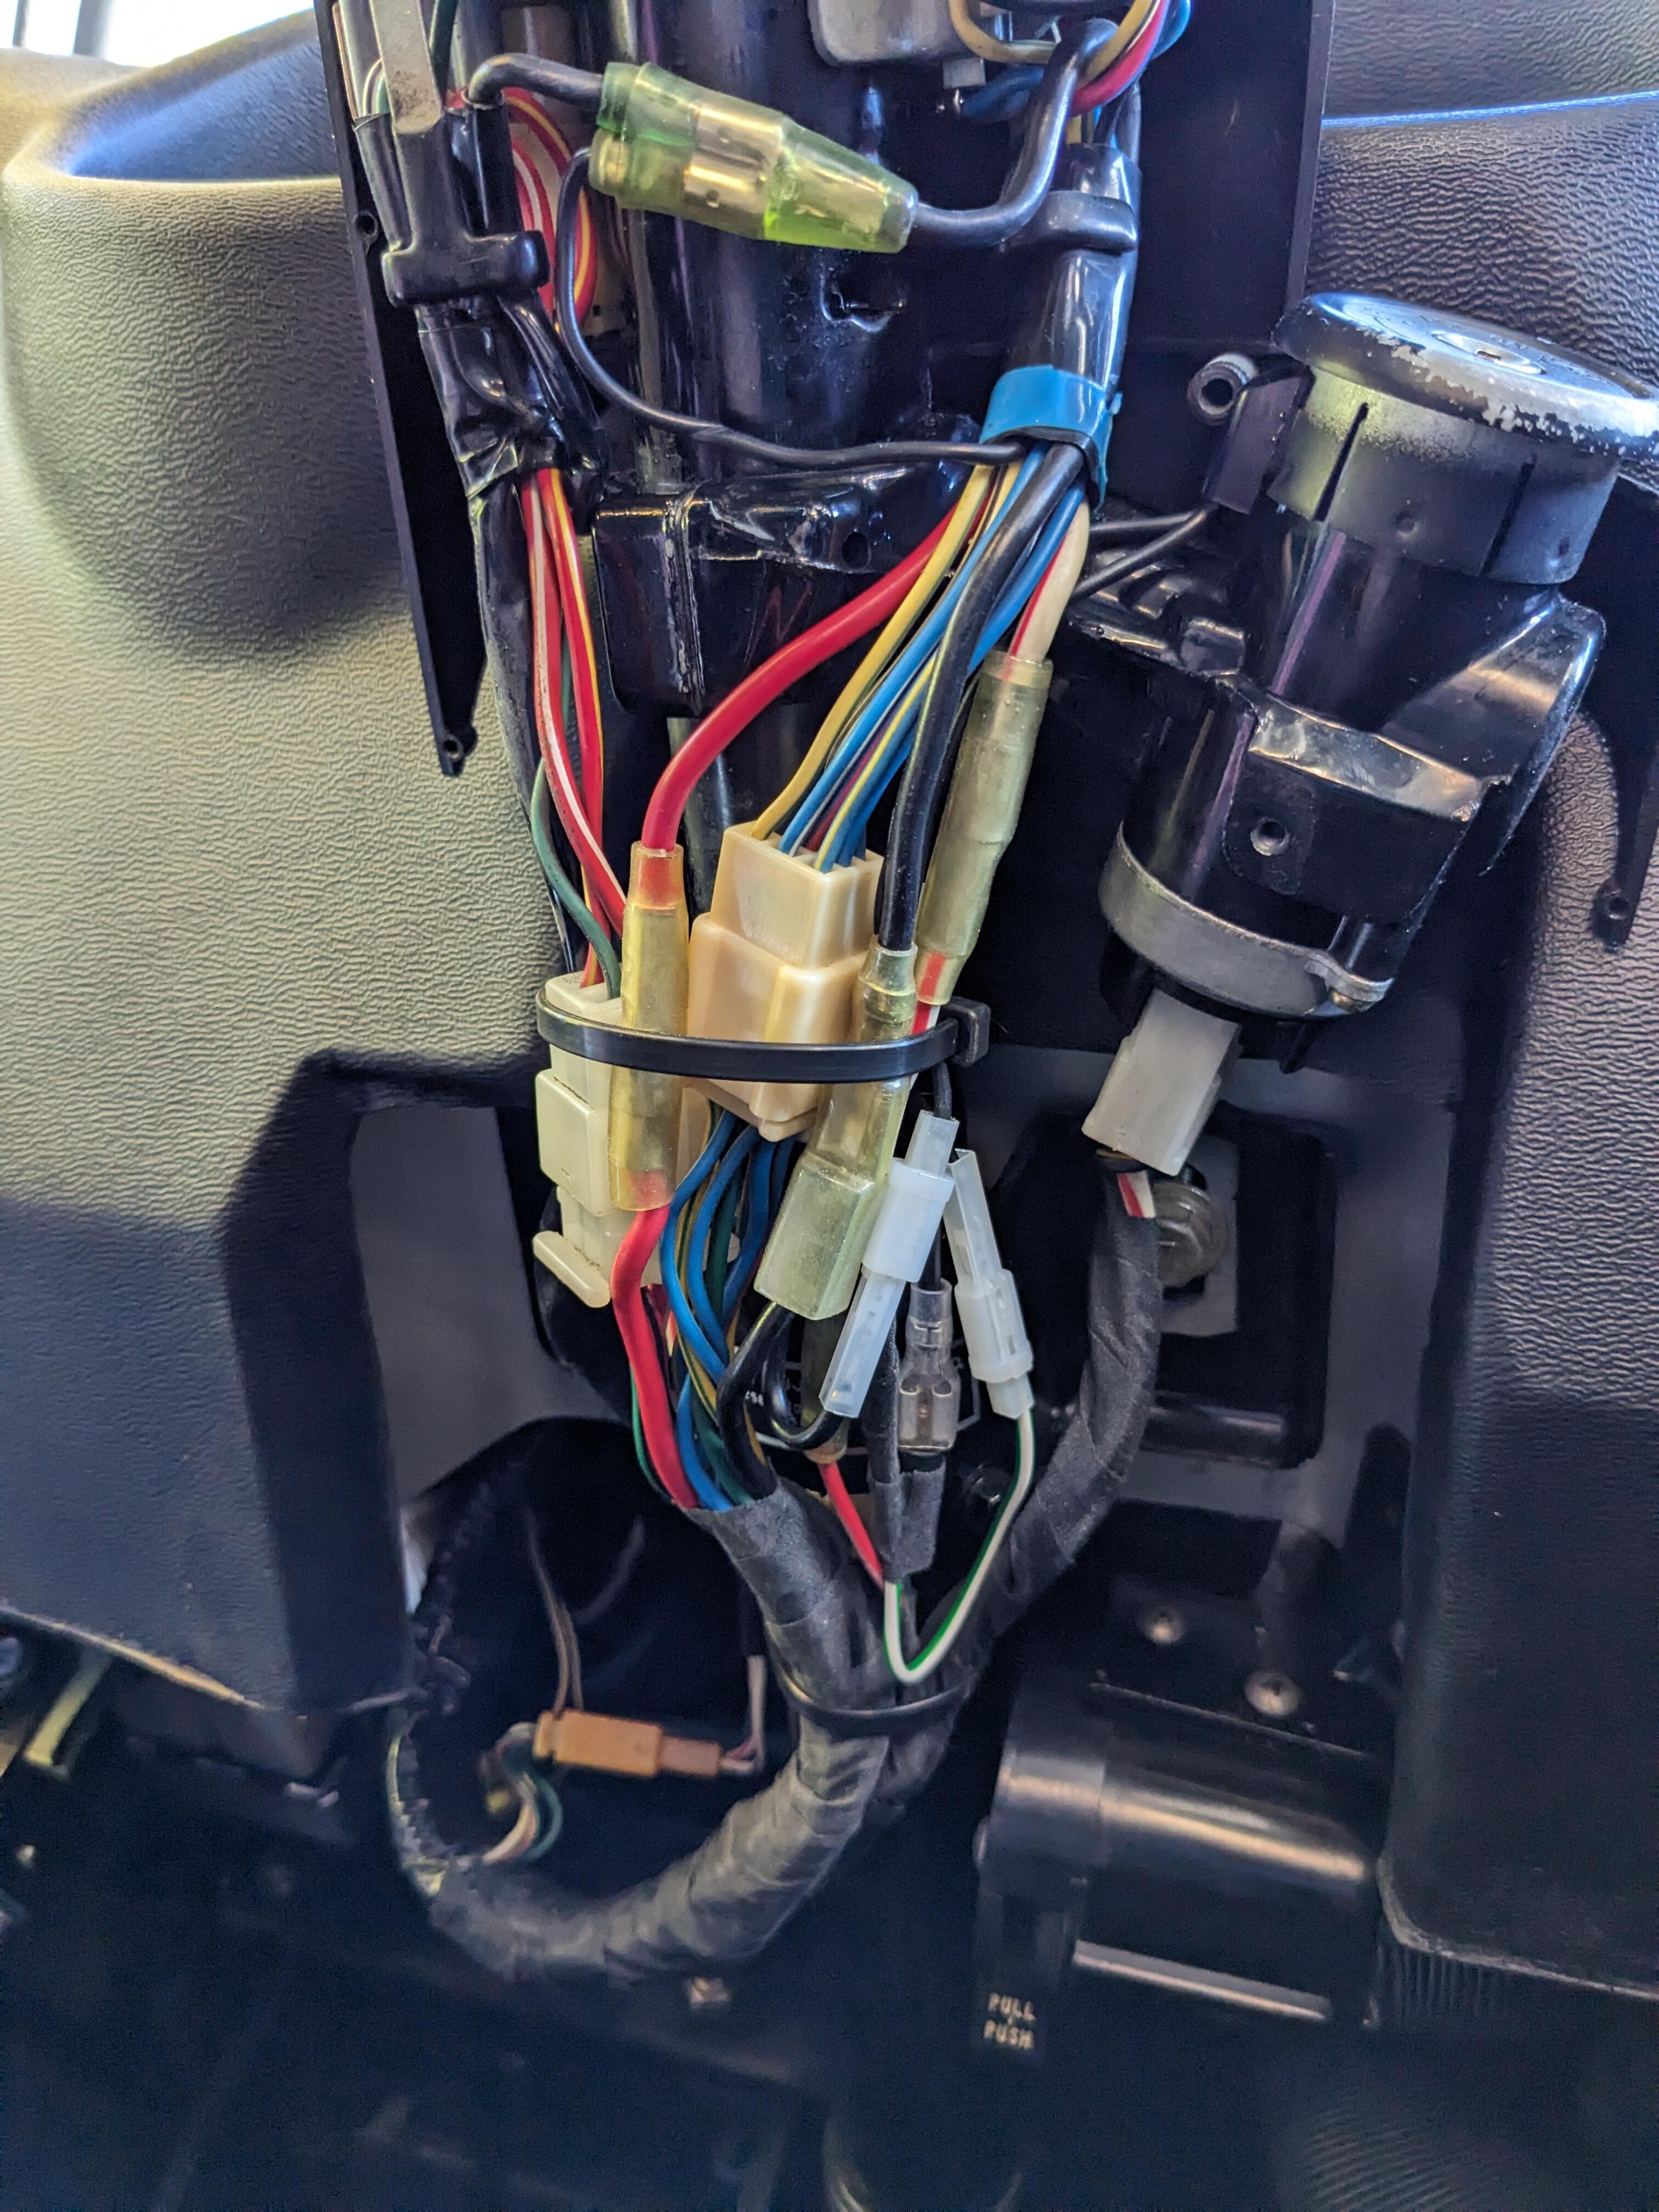
To close the variable intermittent feature out - I couldn't find any permutation of wiring (using the stock int. relay wiring) that would make the VW relay functional. Something about the way Nissan switches the ground circuit just doesn't work out. I'm not about to re-invent the wheel & re-wire the circuit from scratch, so I just put the OEM relay back. I'm not planning on driving the Z in the winter or inclement weather, so as long as the wipers work as wired, that's good enough at this point. I do have to remove the transmission & delete the staged park spring mess, mine doesn't work , and just ends up not parking as low as it should most times.
-
I did order one like that - with a case, about $4. I'll wire it in the AFM pump switch circuit. As an aside, with the proper cranking speed back, the startup times hot or cold are very much improved.
-
Thanks again Steve. That was the one I assumed was meant to be front side marker, since the link showed the small dome . I ordered following your suggestions, I did however look for some slightly cheaper cylindrical versions - still, came out to about $75
-
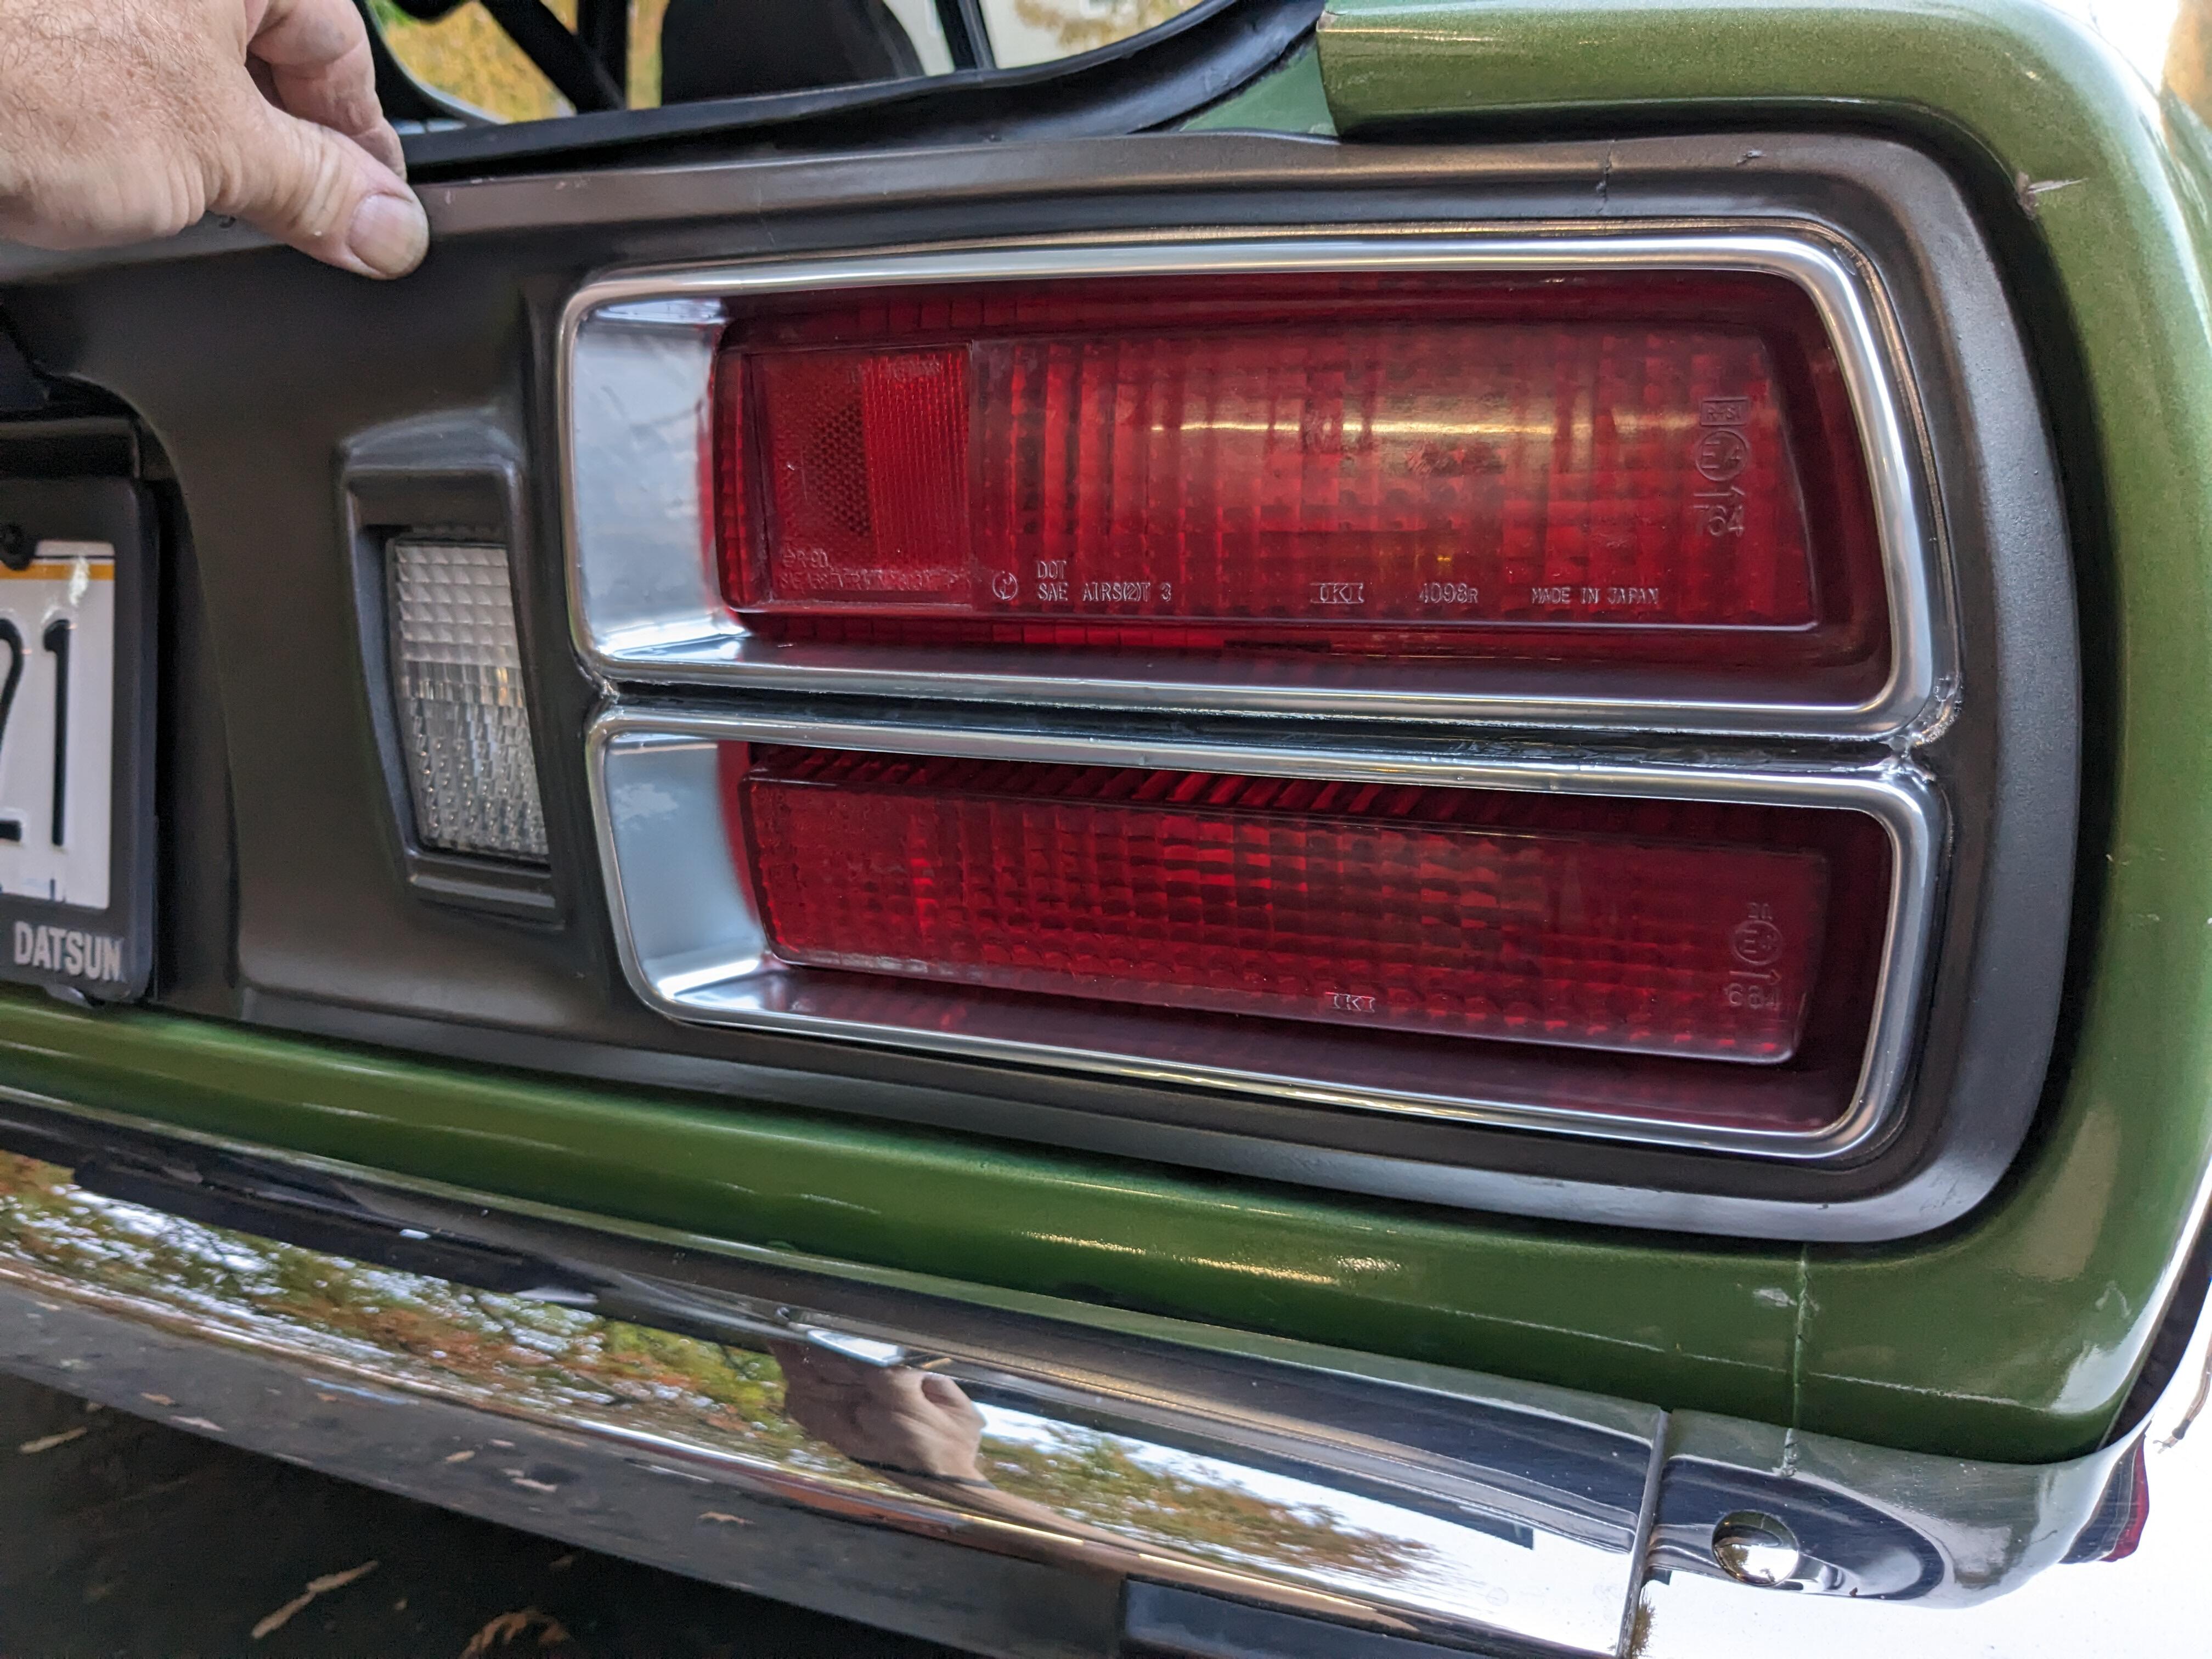
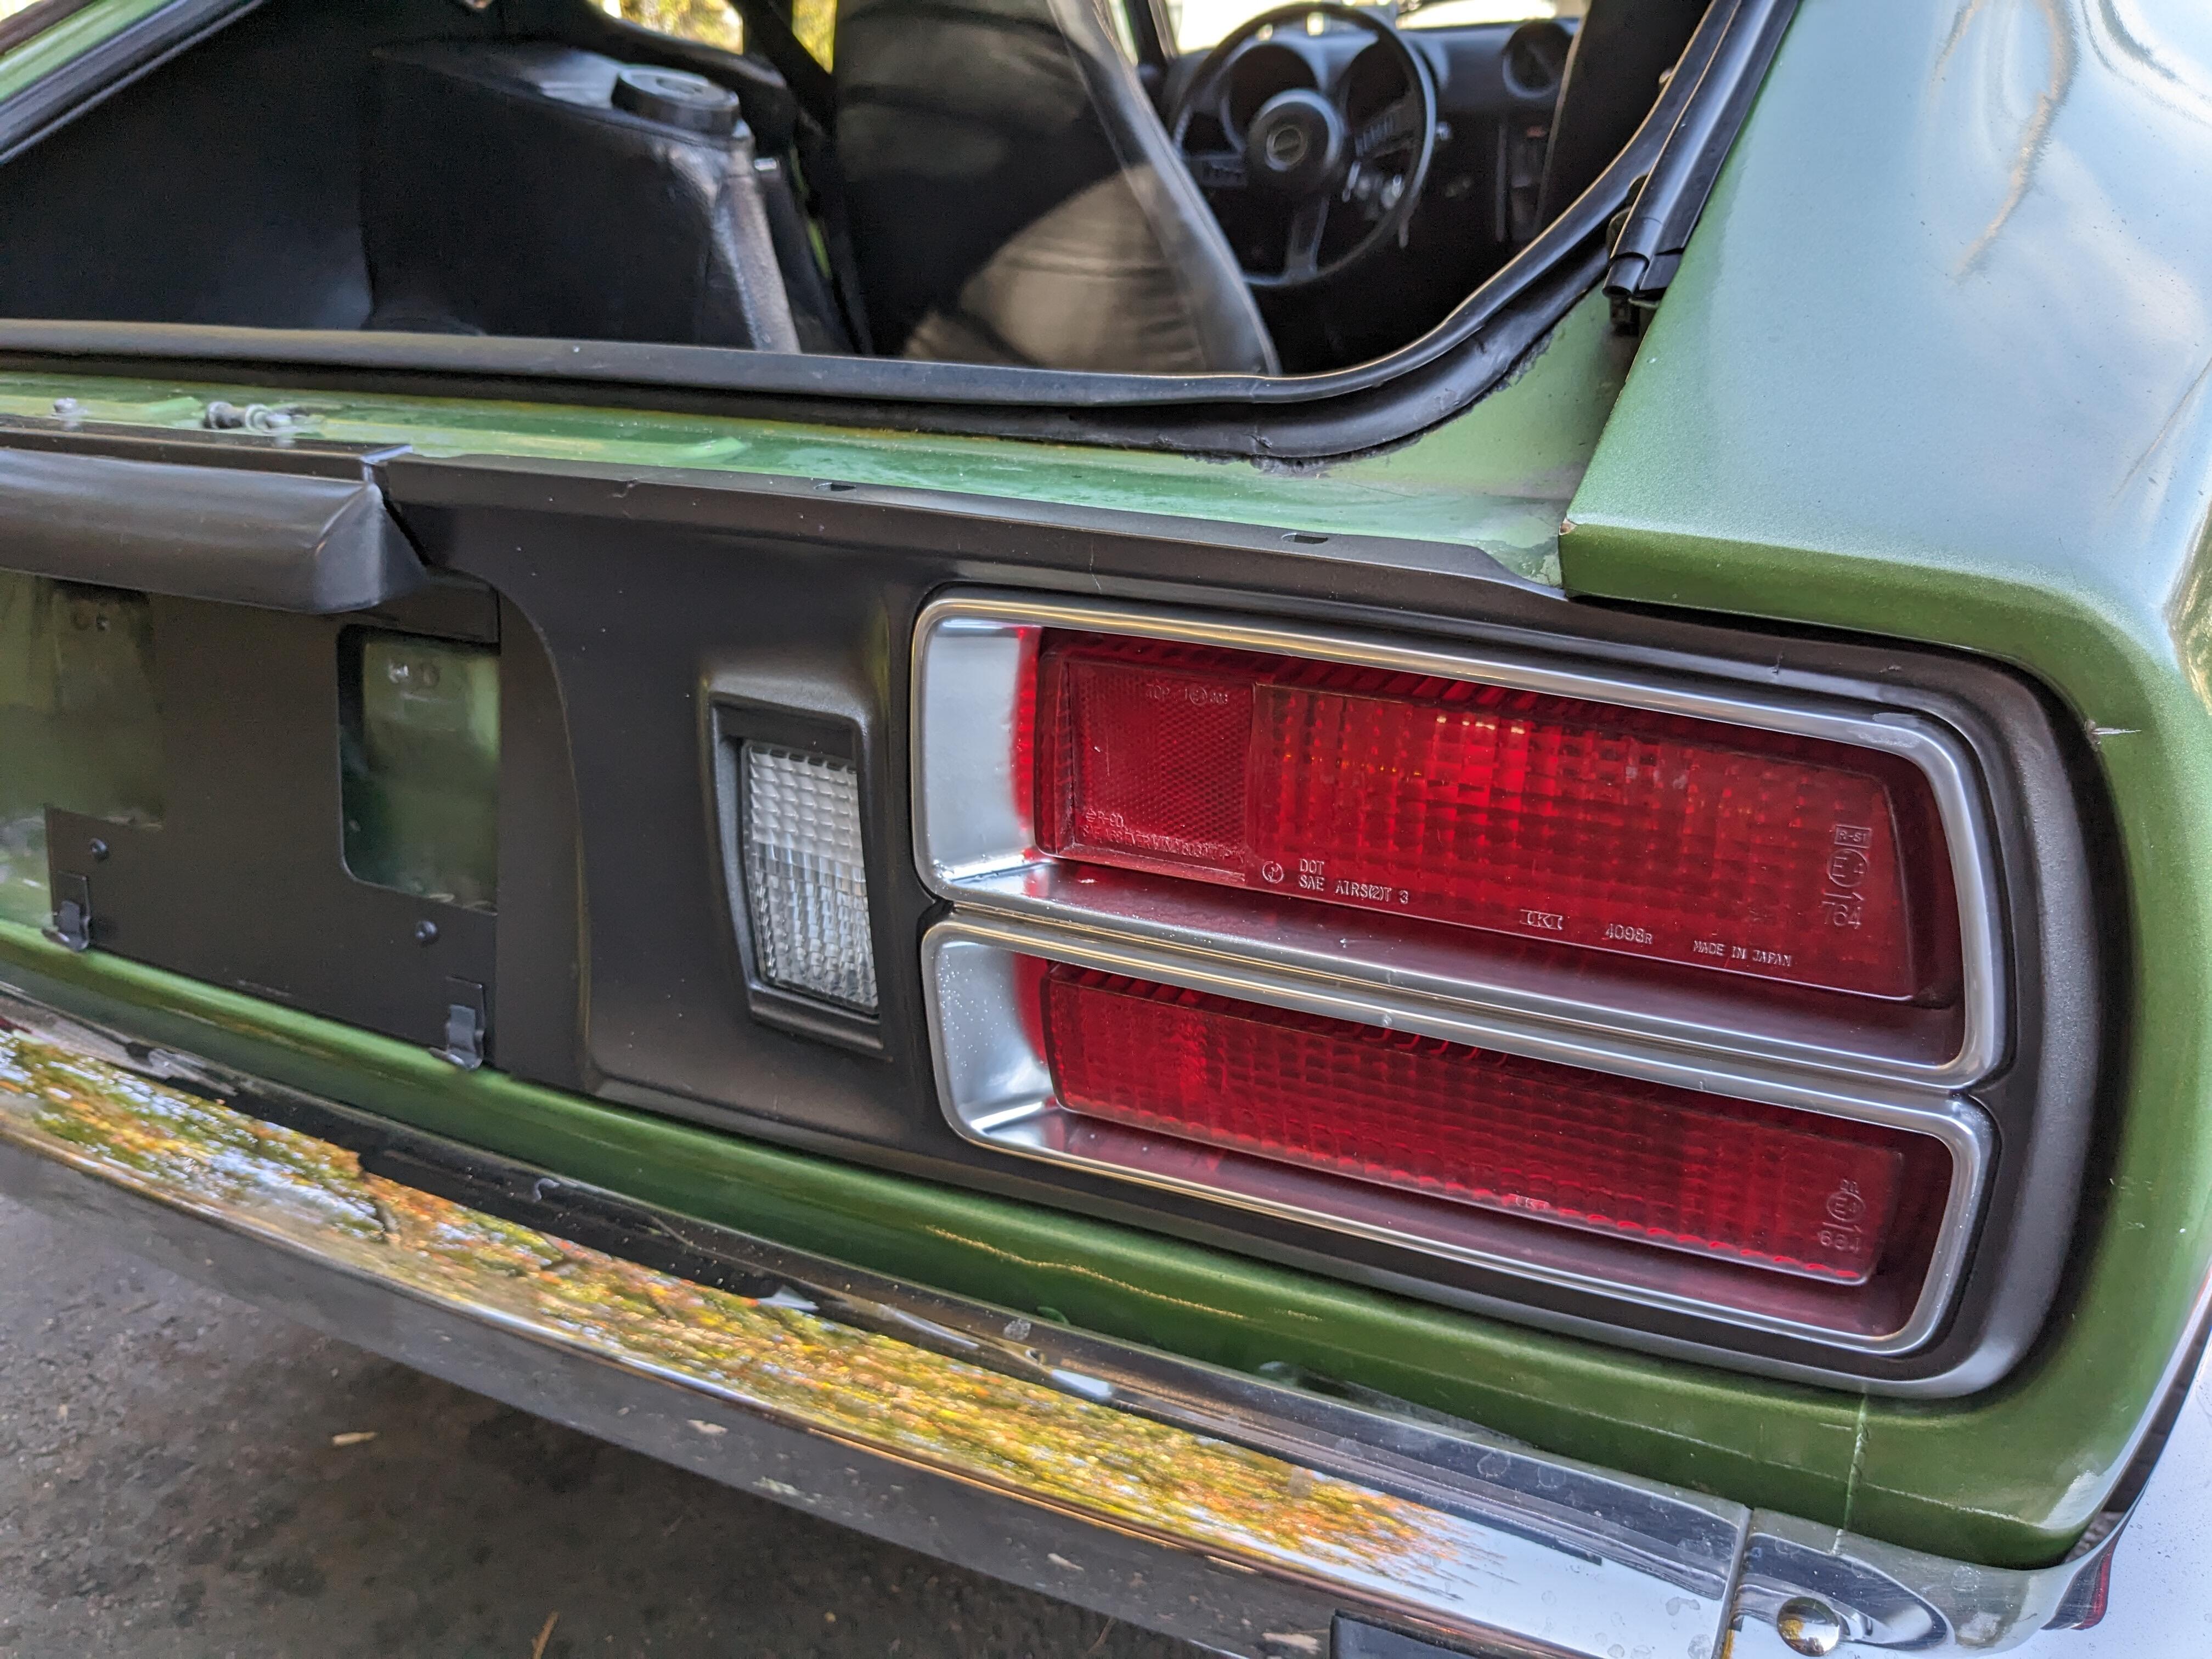
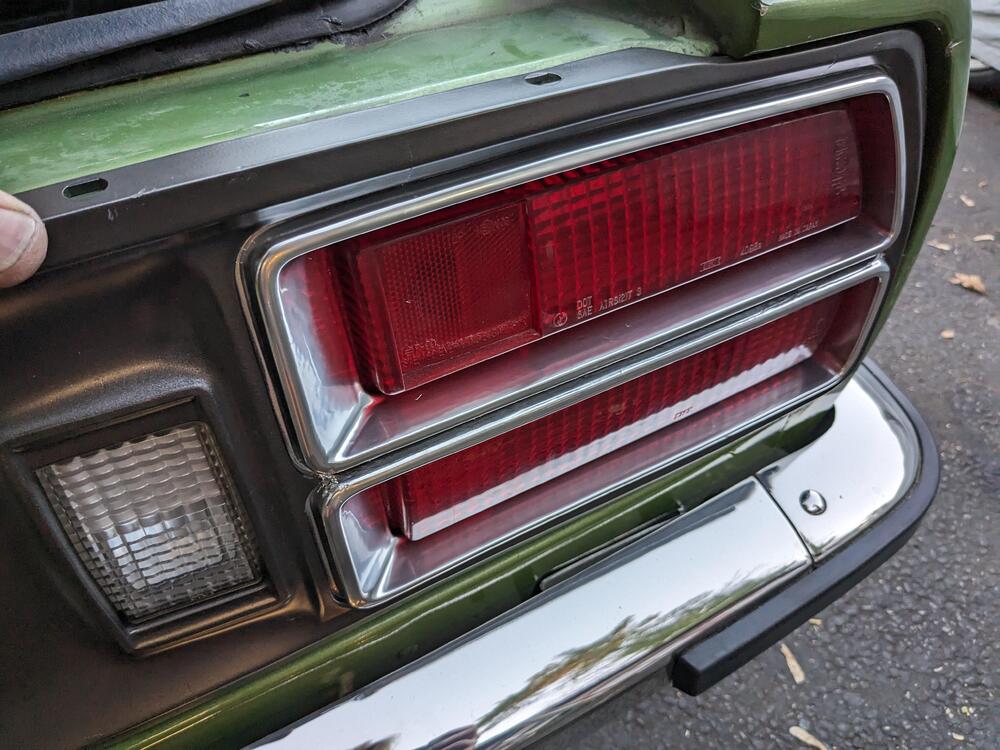
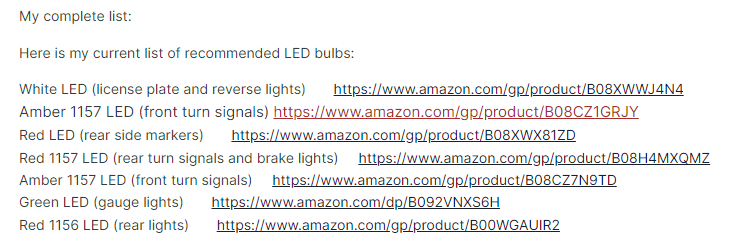
Thanks Steve - I'm am confused about the side markers - the link is for 1156's - I thought the side markers were a smaller base? I have not dismantled them yet. Tail lamp uses 2 or 4 (total) 1156's? Front side markers would also use 1157 in amber assuming they are also directionals - I've not paid any attention honestly - one of the two Amber listings should say front side markers? EDIT - went out to the car (75 280Z), I have: 4 small bulbs for side markers, single filament. 2 amber 1157 front signal/park. 2 1157 rear signal + tail. 2 small base park. 2 1156 brake lights
-
Doing a quick google search I'm not coming up with a reference list of suitable LED bulbs to replace the side markers, parking & taillamp bulbs. The Instruments I already swapped out for LED, except the tach due to the reversed polarity. Is this something you have already documented? I also noticed in your video your car doesn't have the wheel arch liner & forward splash shielding I had to remove to get to the bucket. Would have been easier if I had removed the wheels, but I was being stubborn 🤪
-
Thanks Steve - I actually need it for the drive to work 🙂 - I teach high school, so I'm out the door by 6am.
-
I put in my old Hella H4's (from the X1/9) with the LED bulbs Steve recommended. One of them has water damage, so I ordered the Kioto H4 housings while they are still available, at such a good price. housings came out smoothly, no snapped or stripped hardware. I didn't order new gaskets, so I cleaned & lubricated them for reinstall Comparison of sealed (low) beam to LED


-
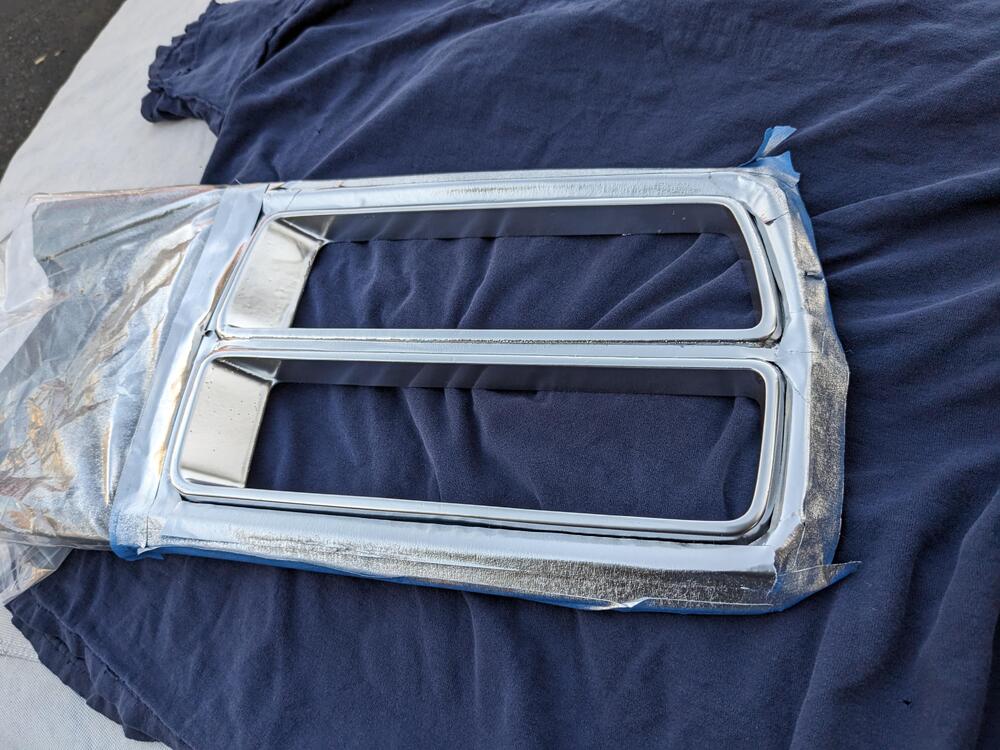
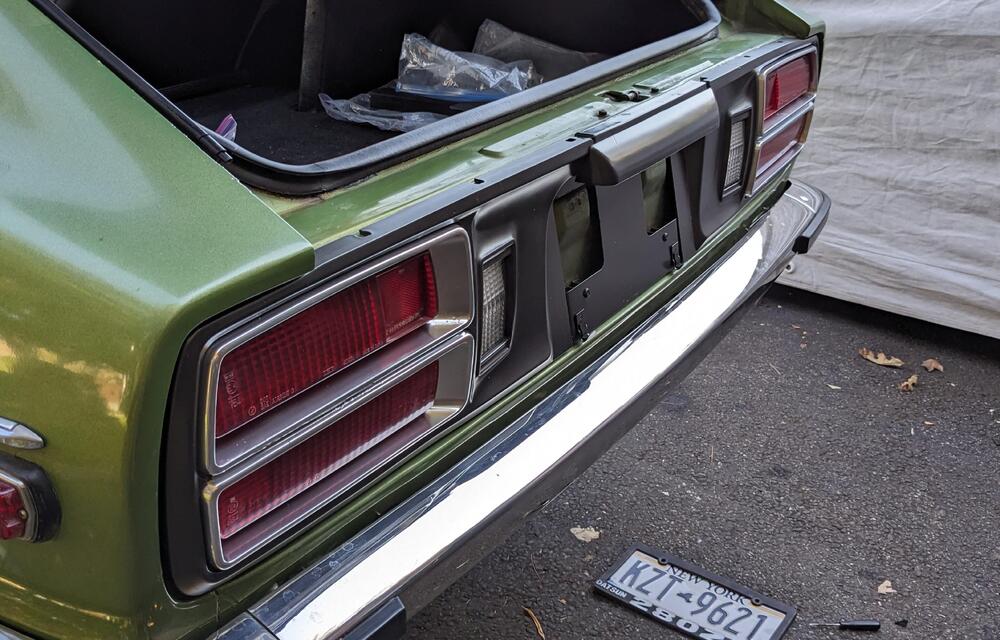
Test fitted the panels - still waiting for the gaskets before I actually install them. They (the chrome areas) look pretty rough up close. Still better than they were.


-
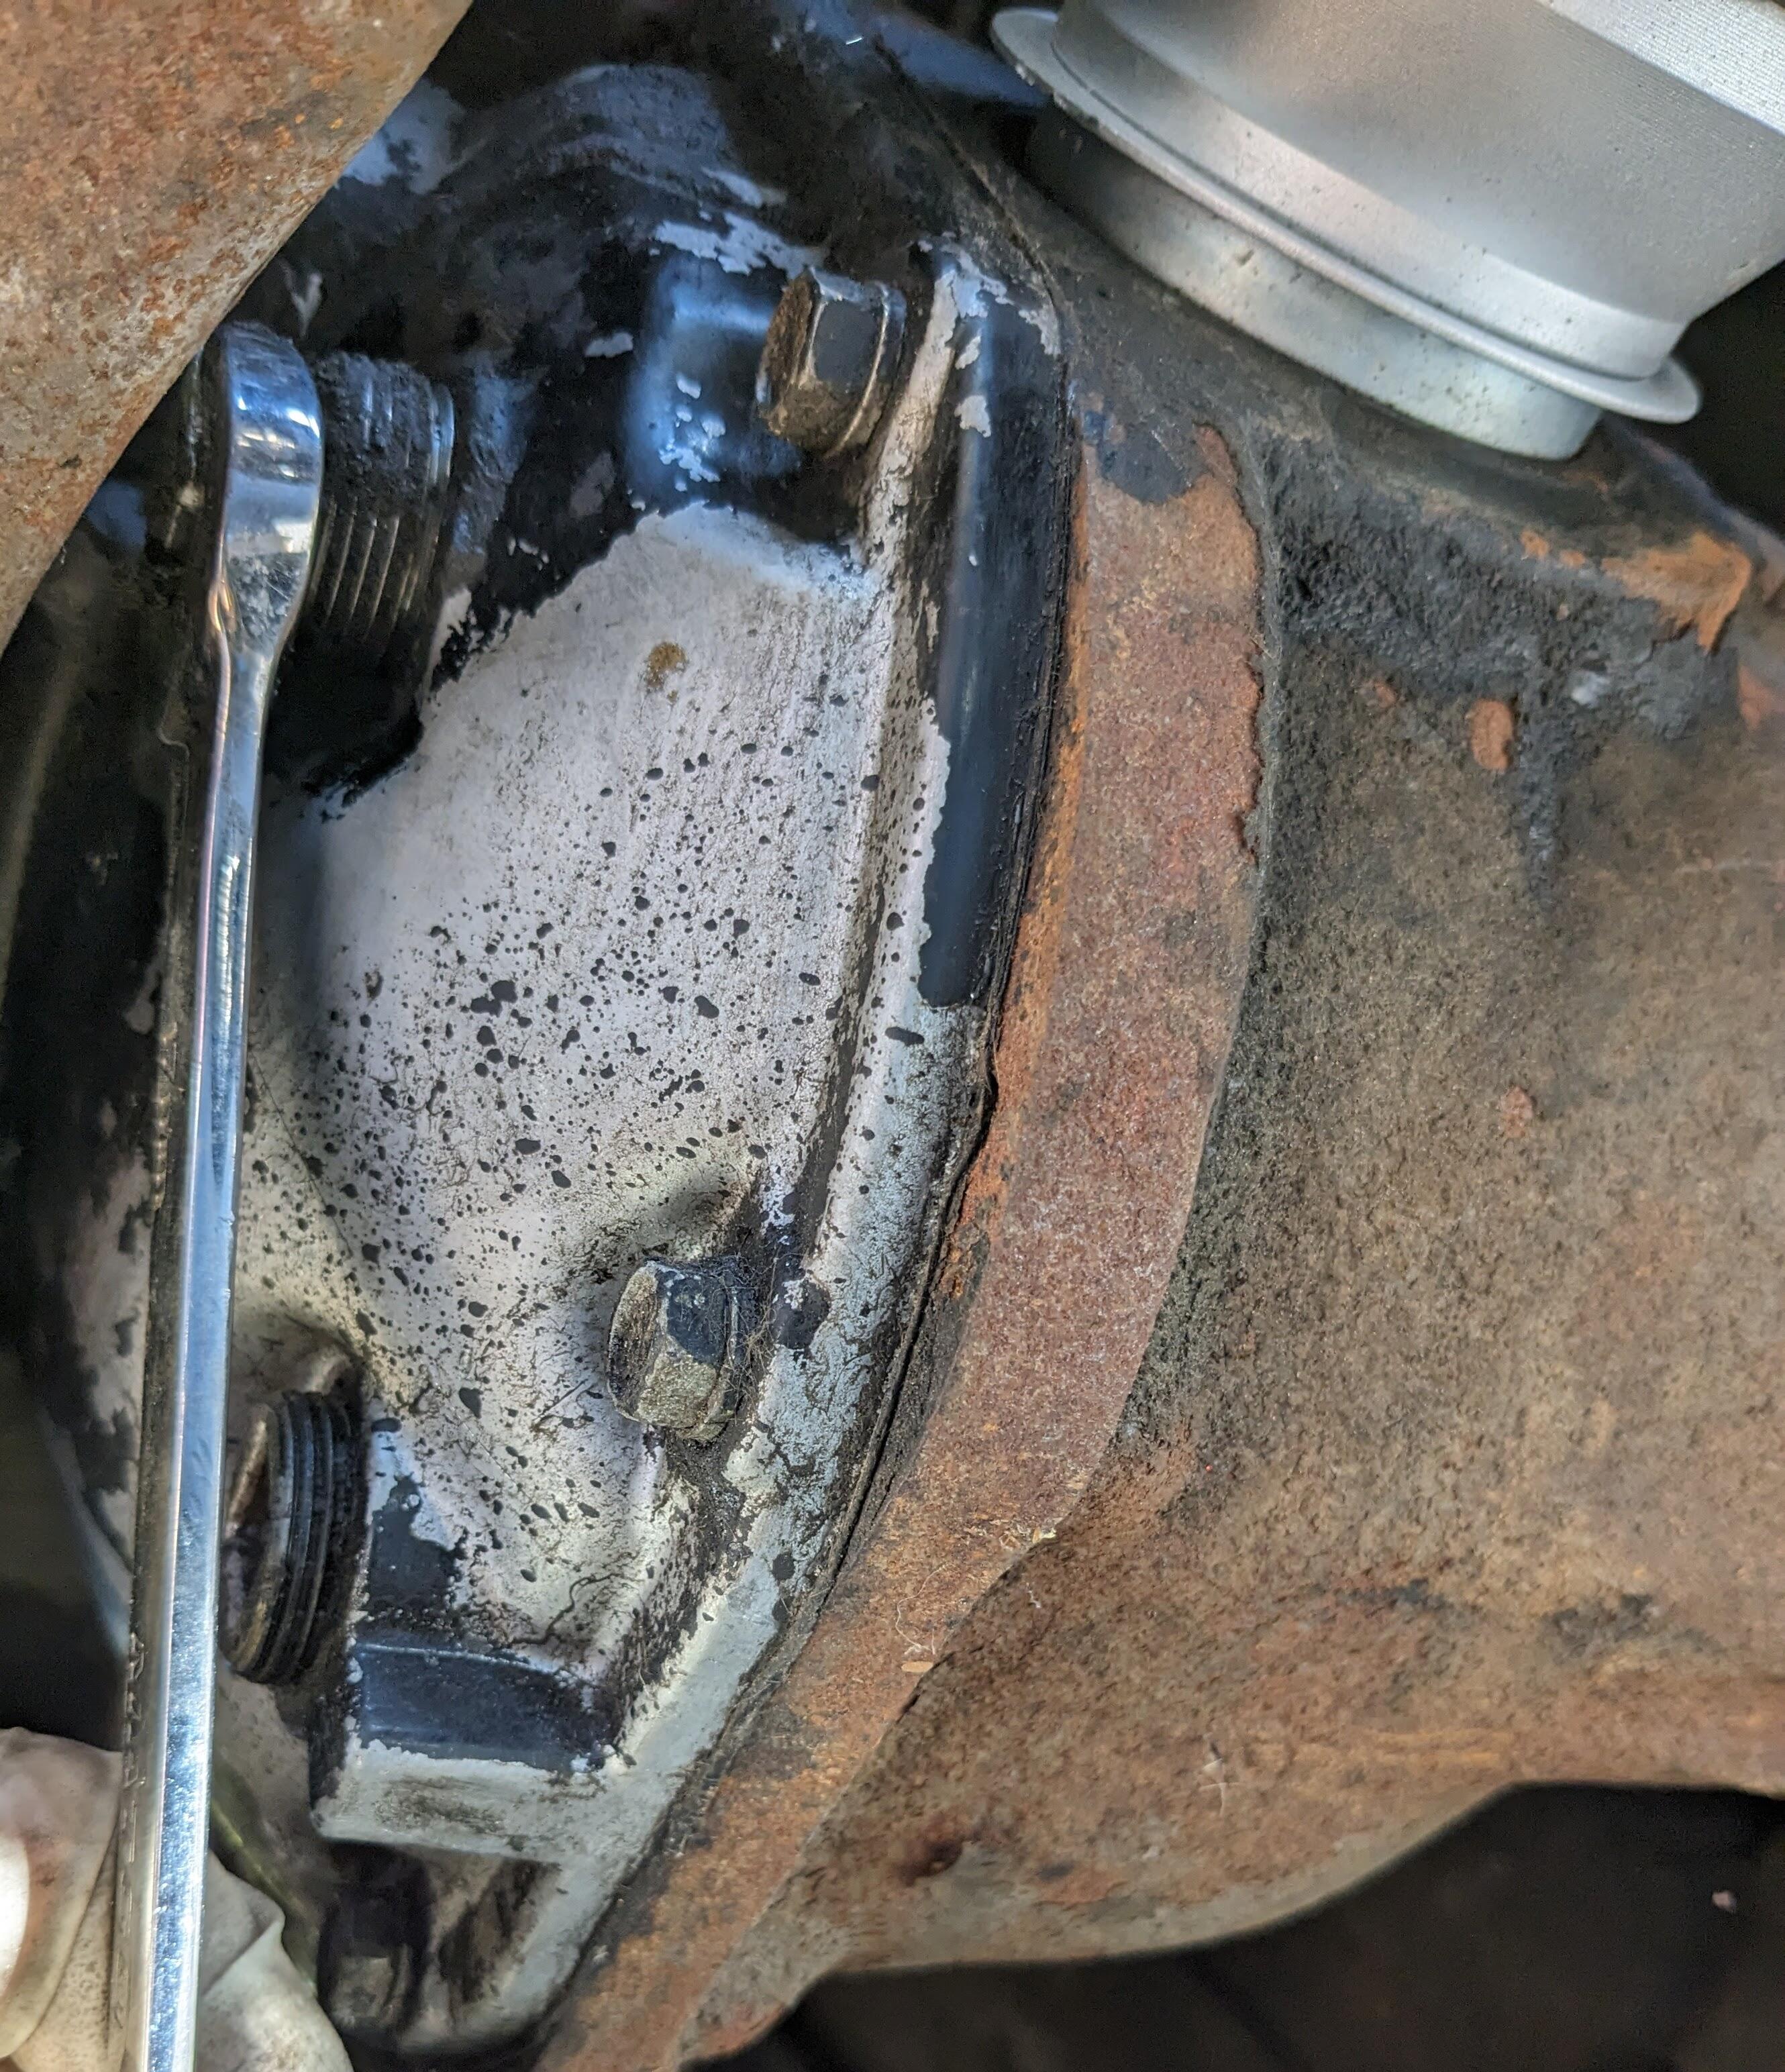
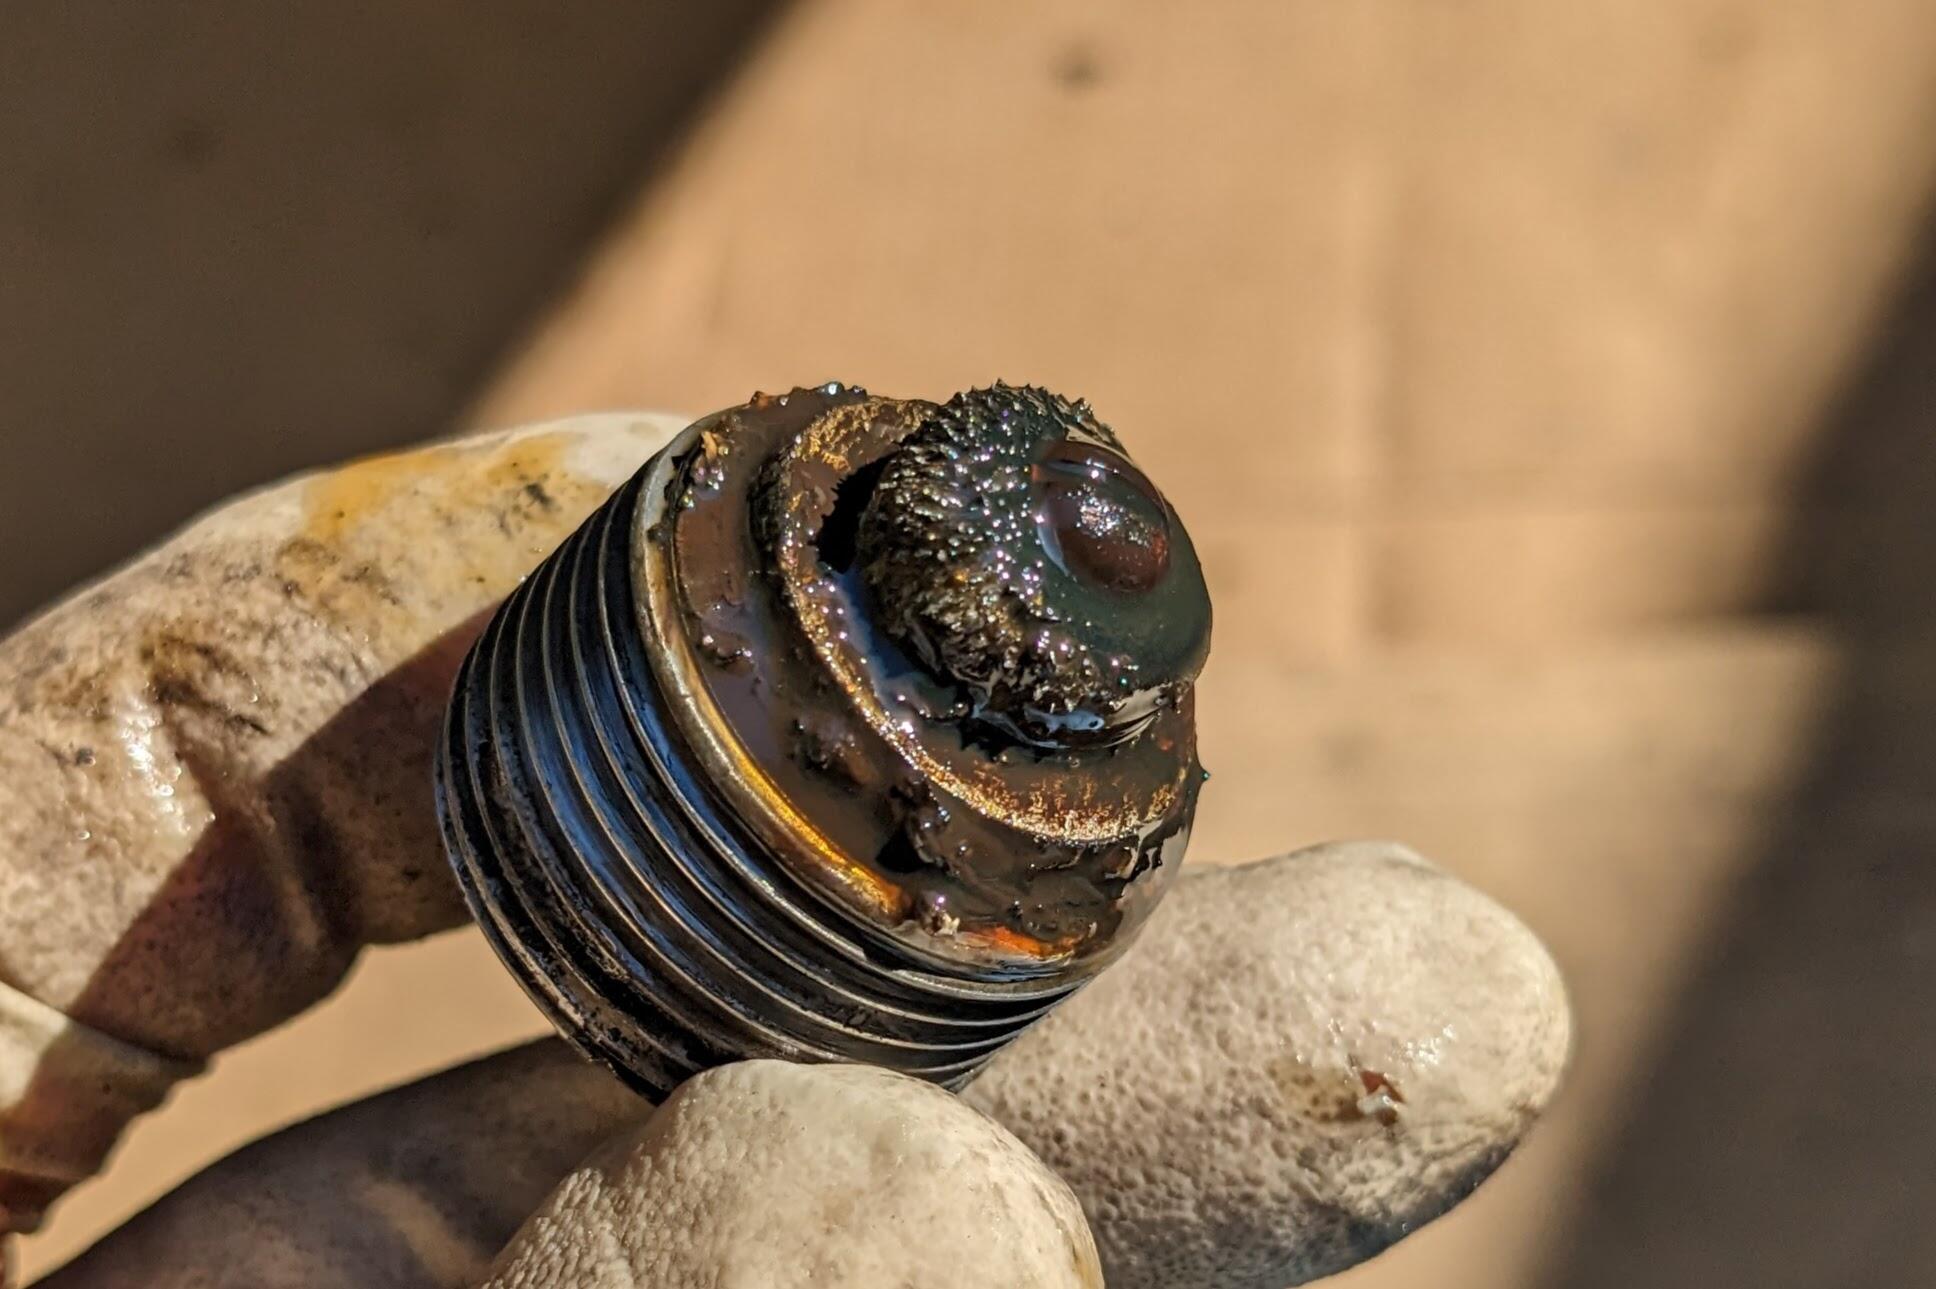
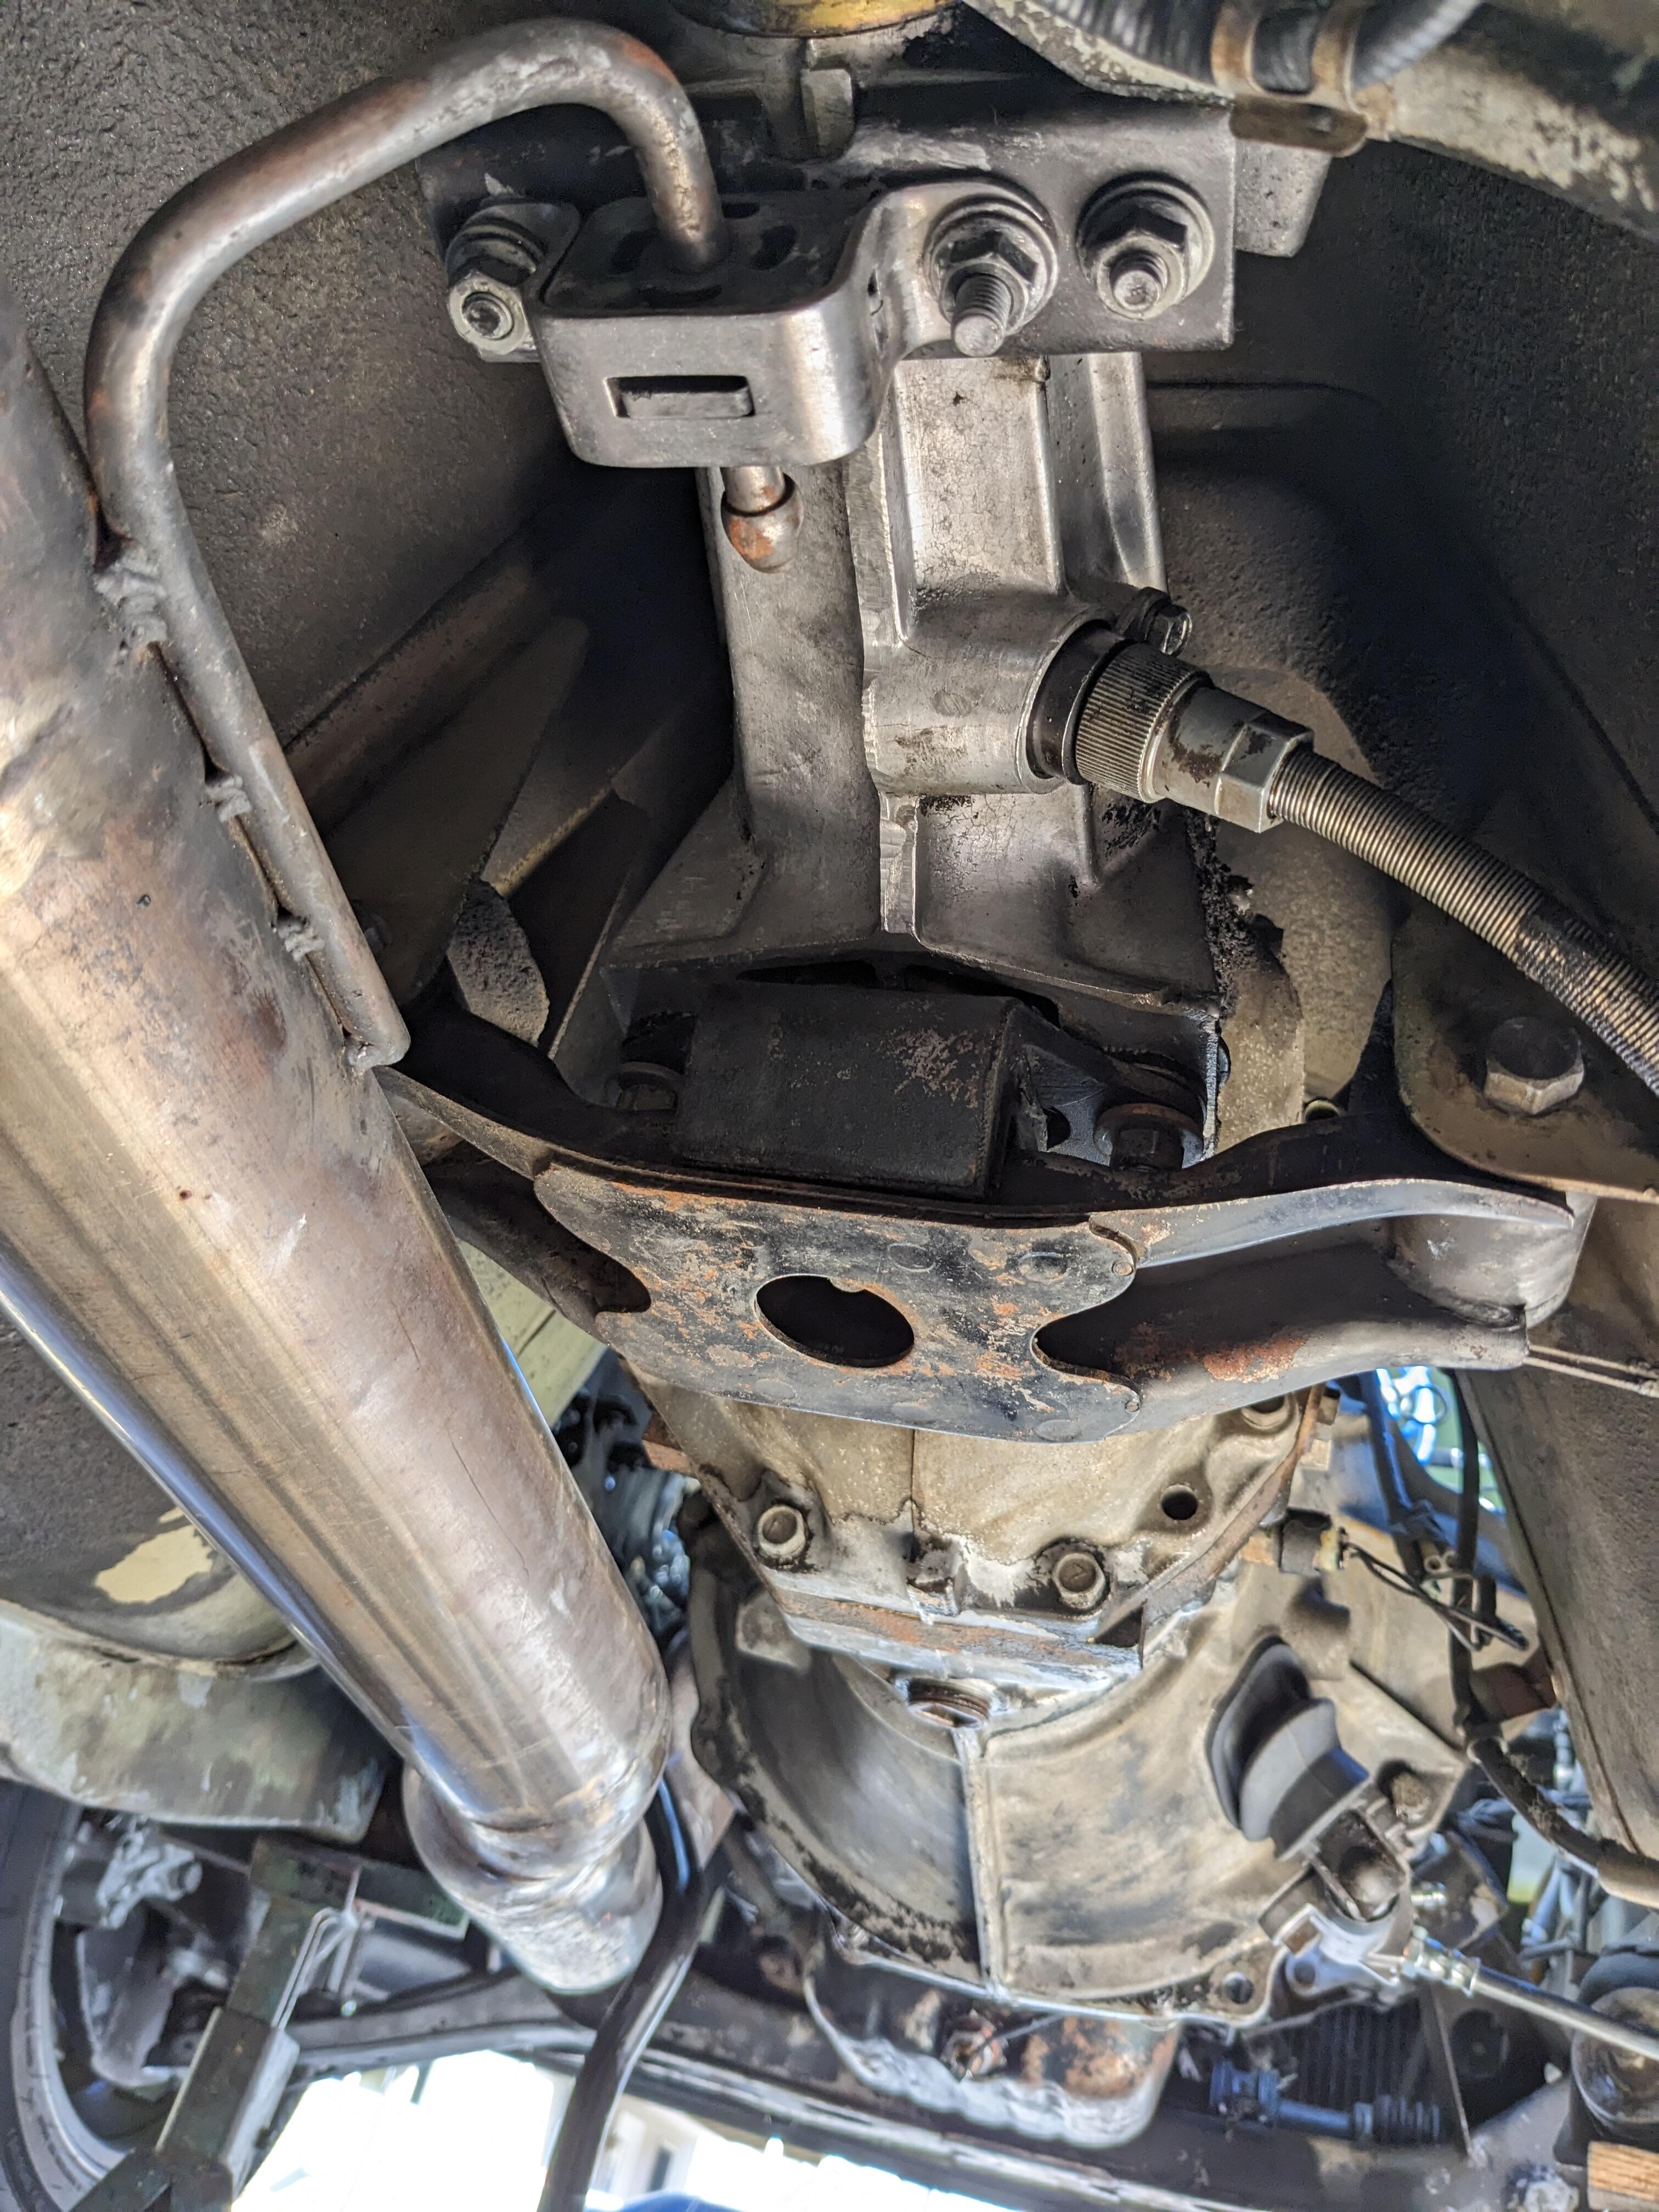
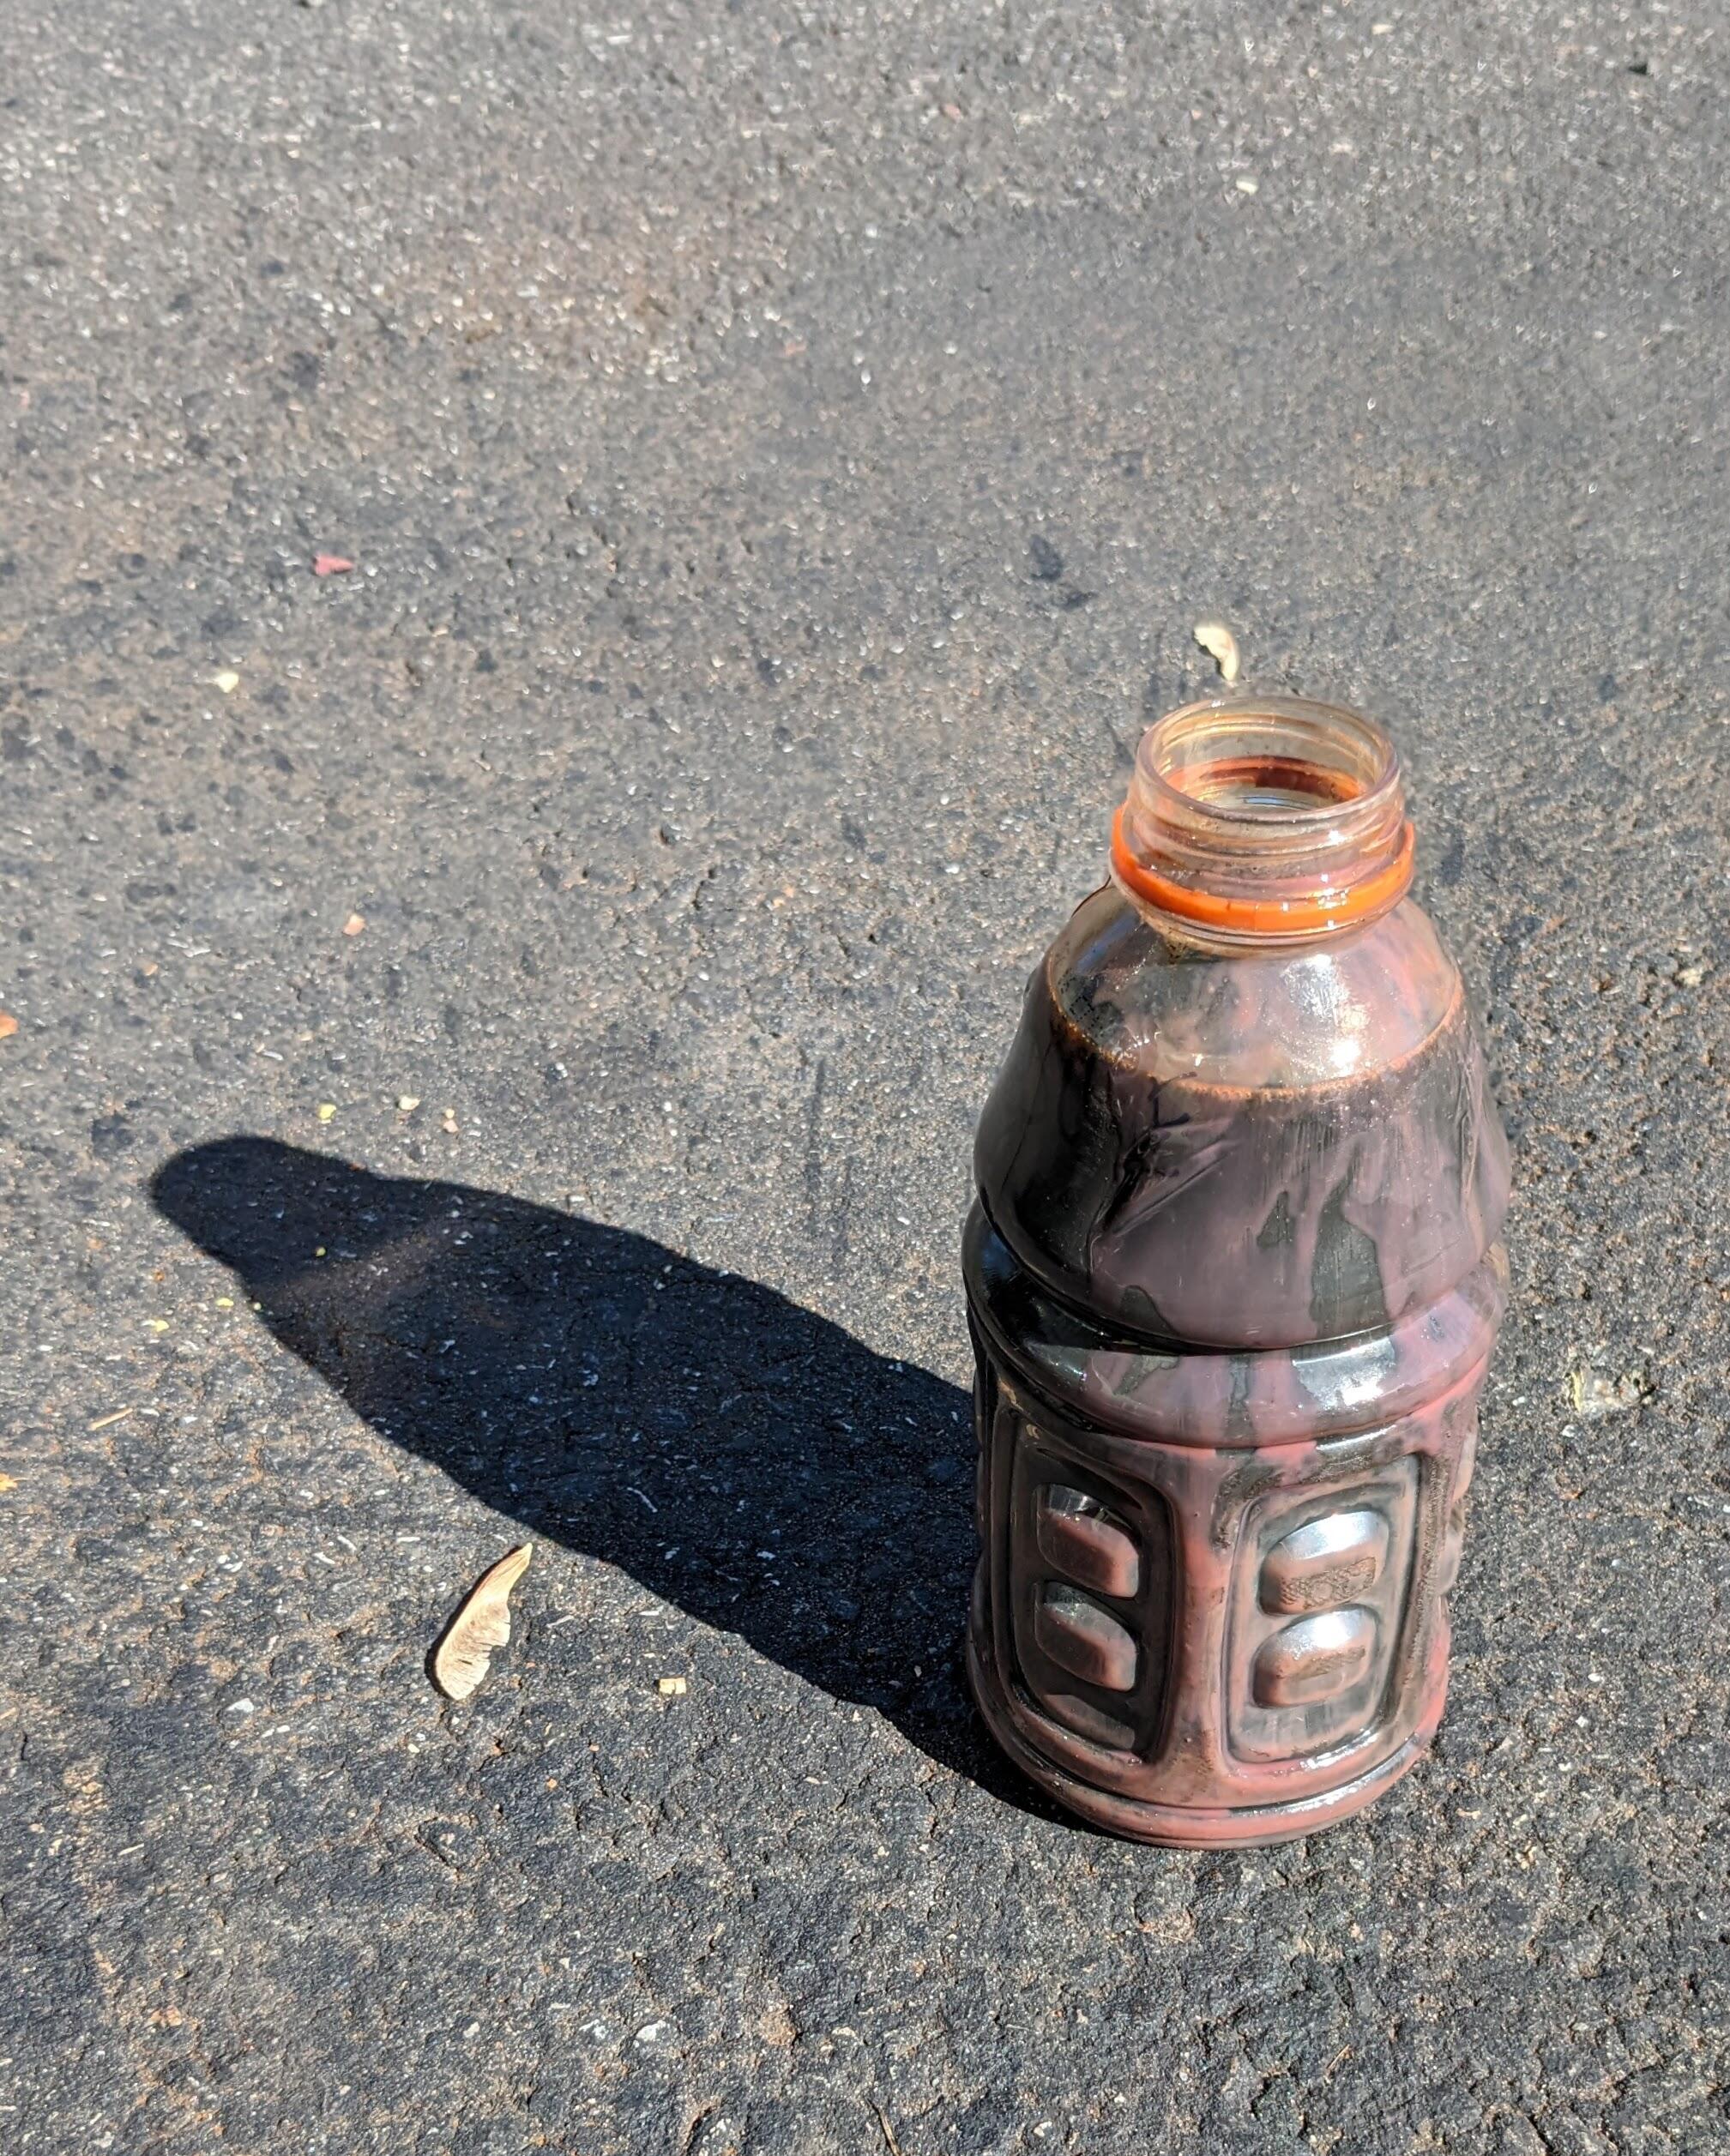
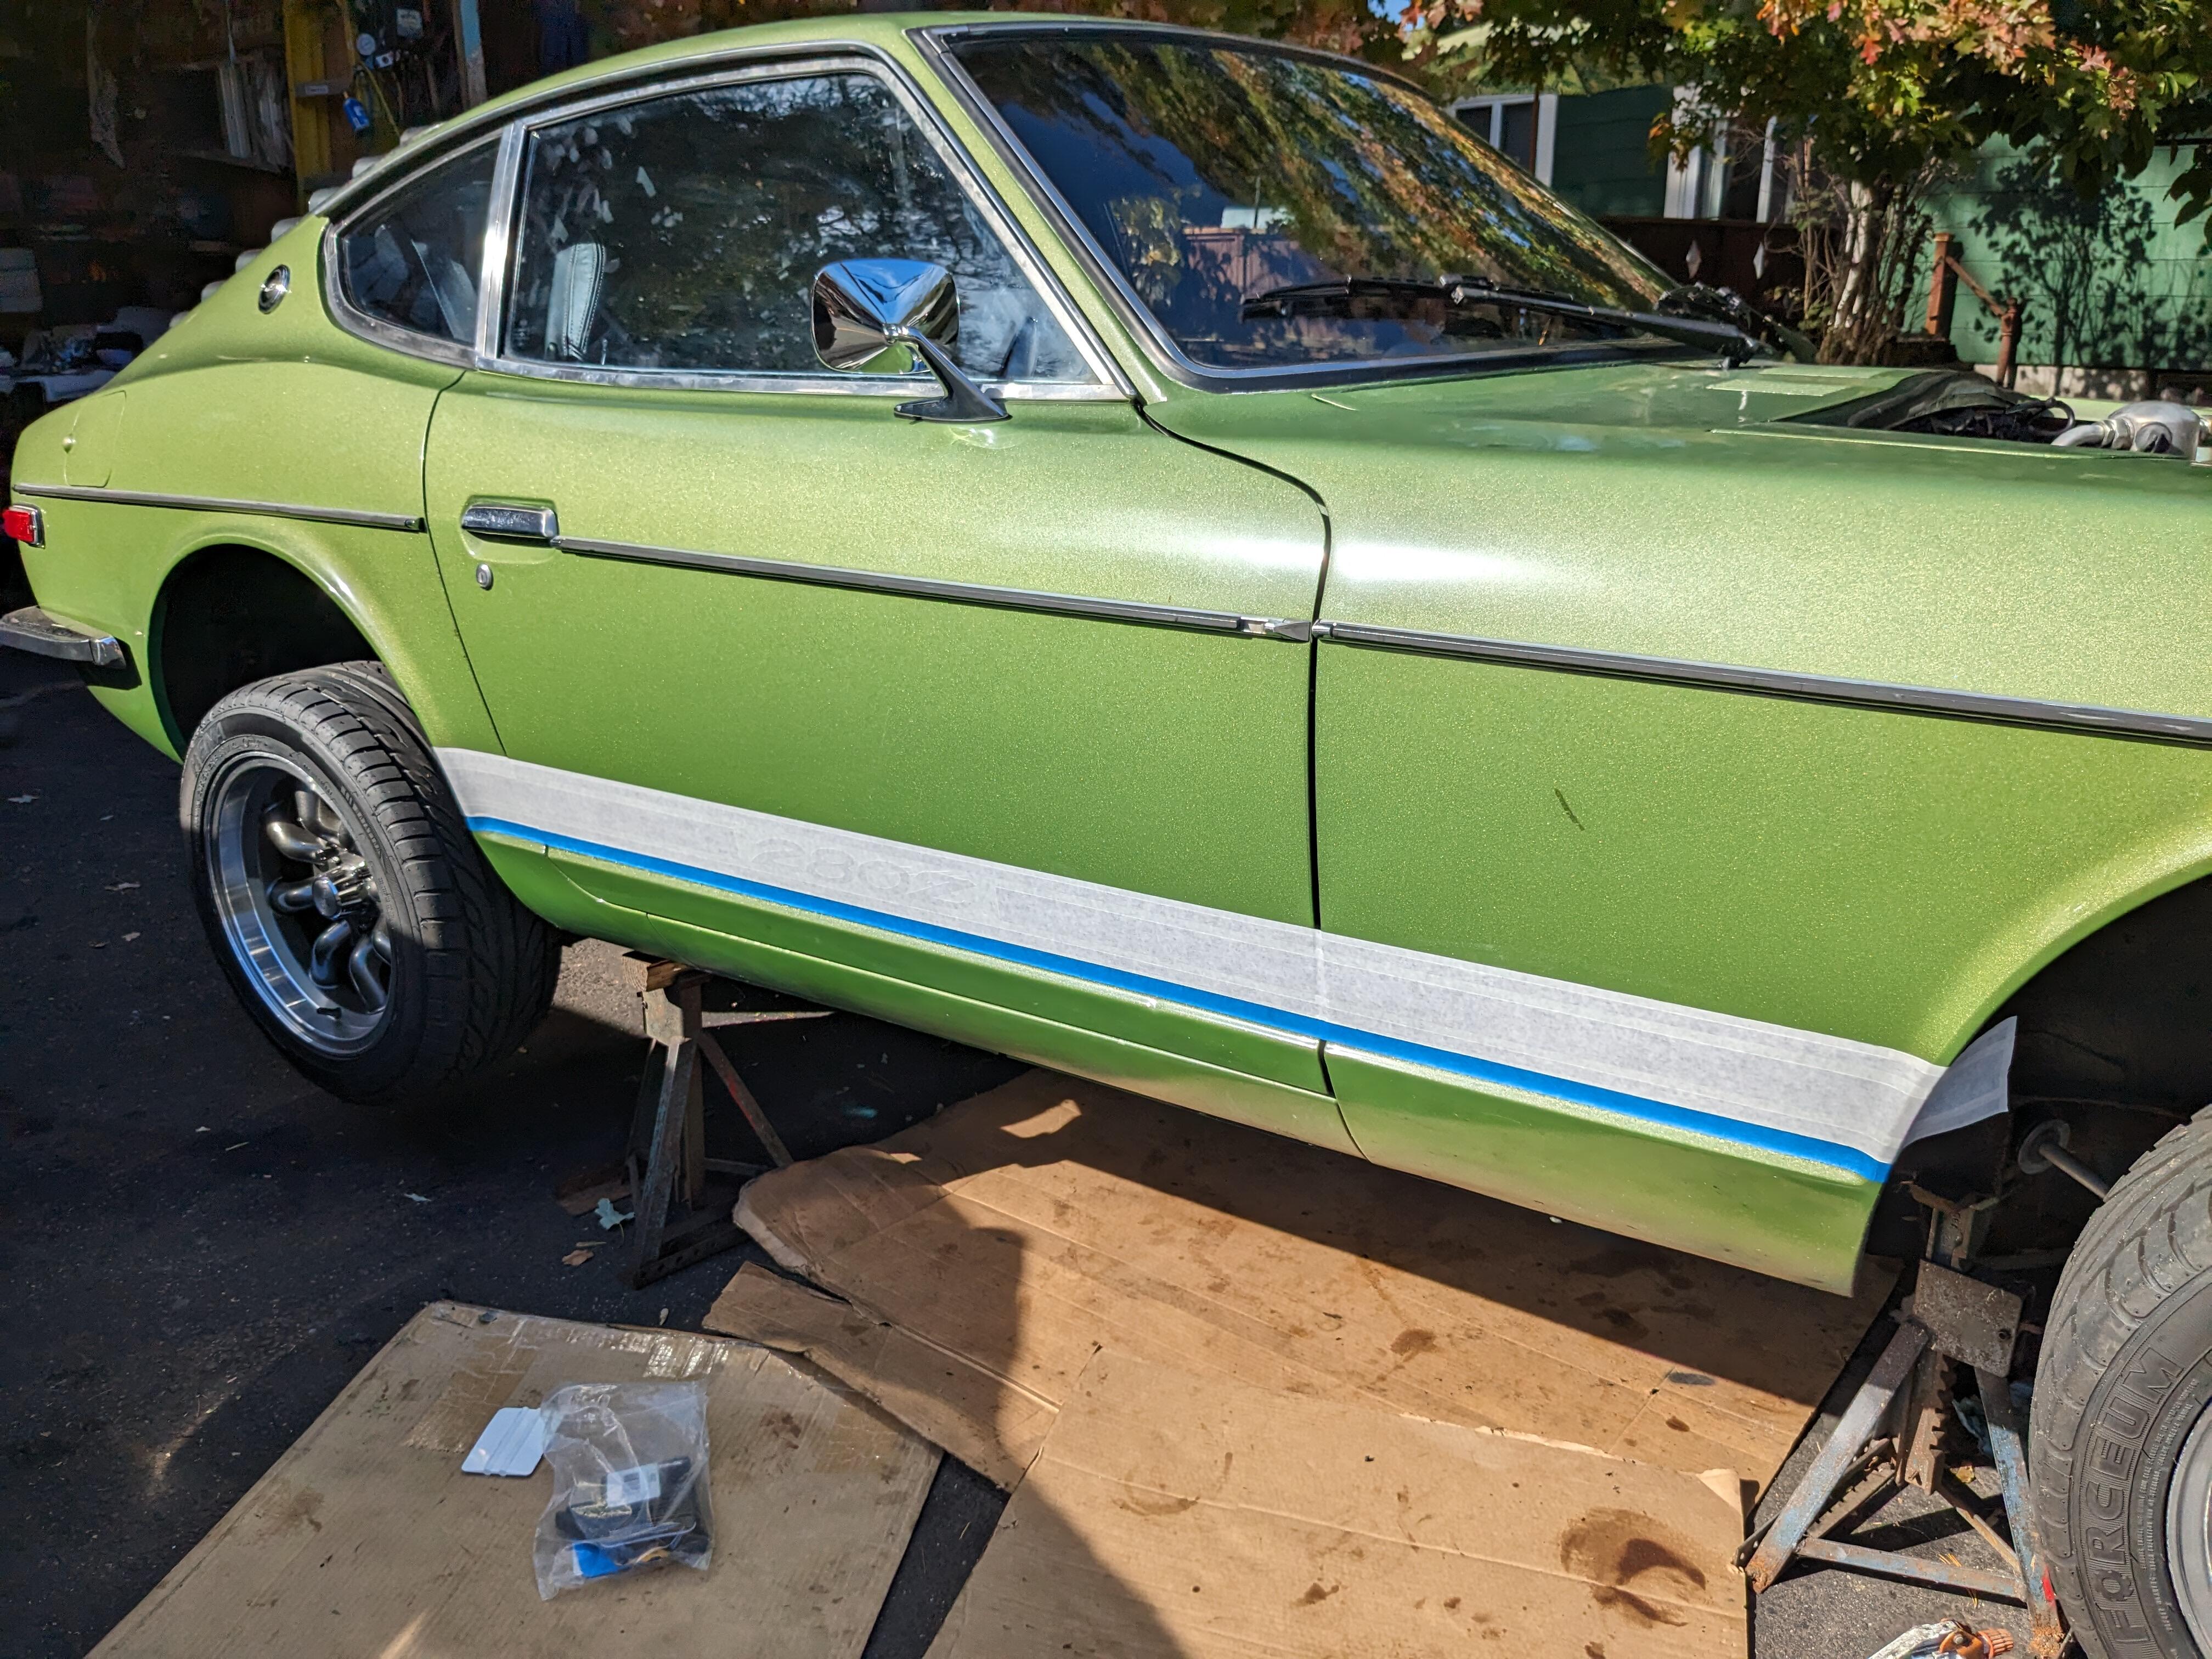
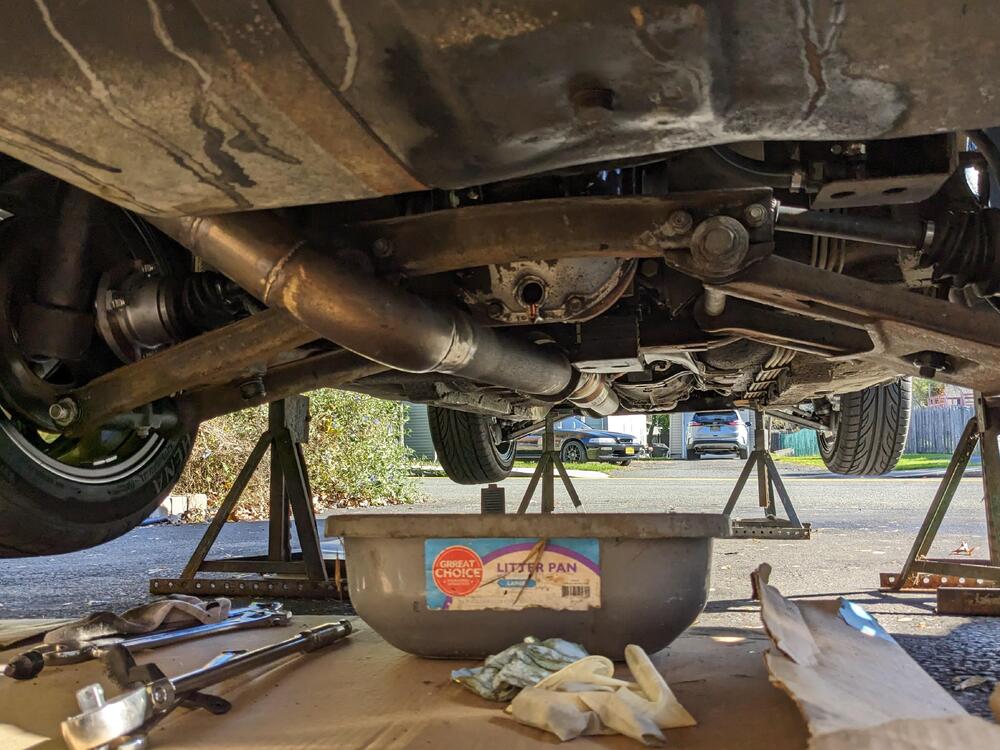
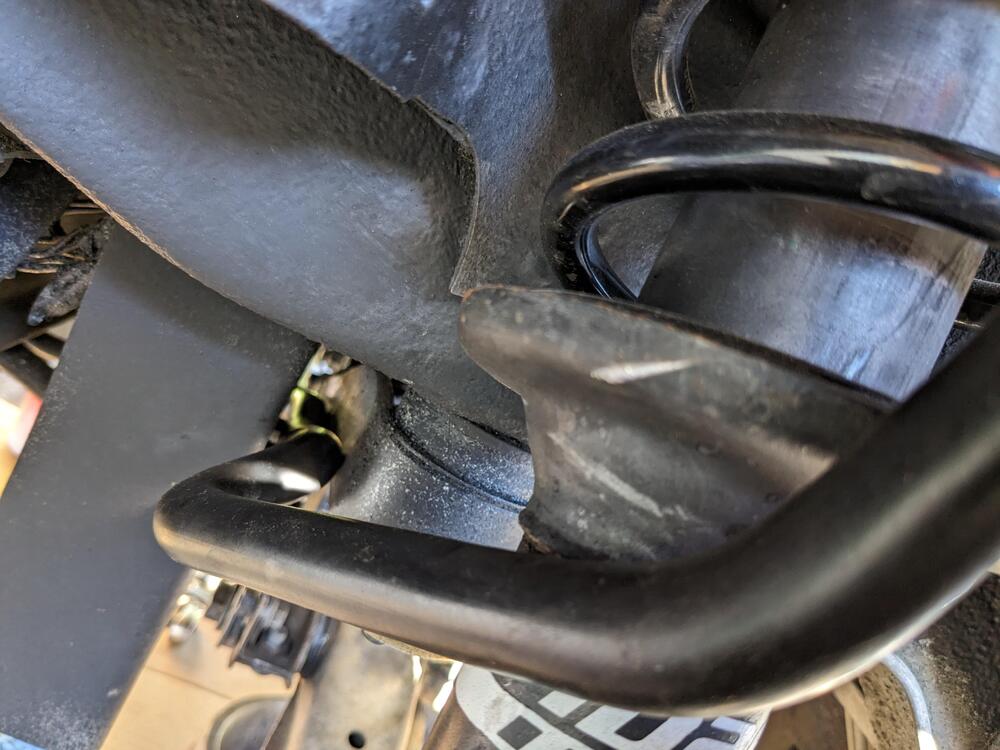
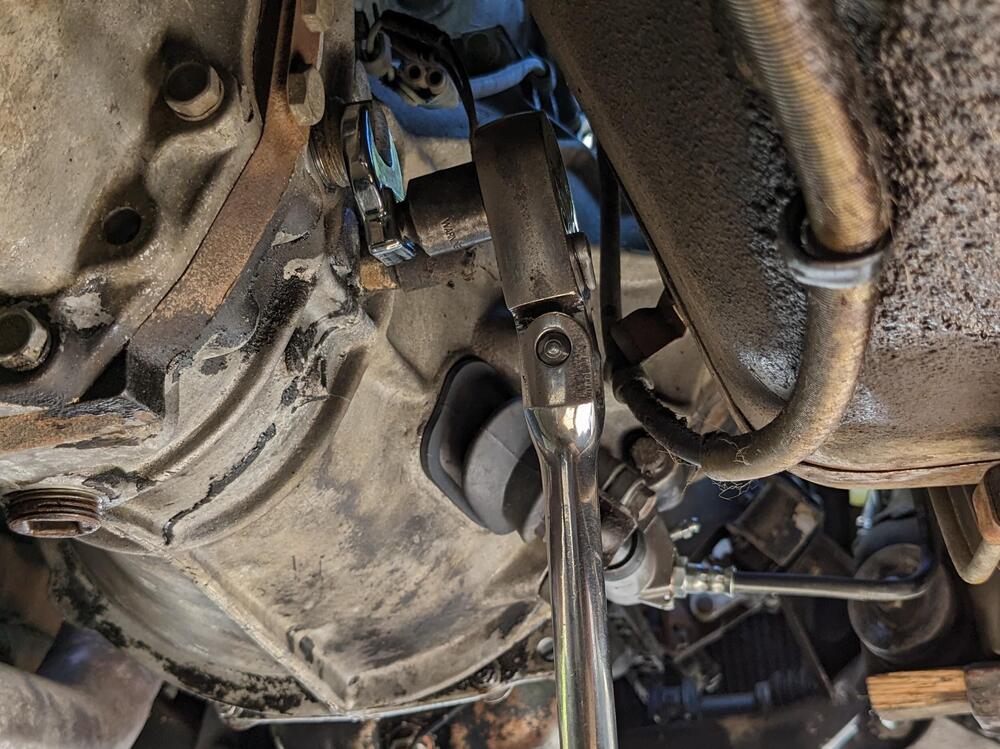
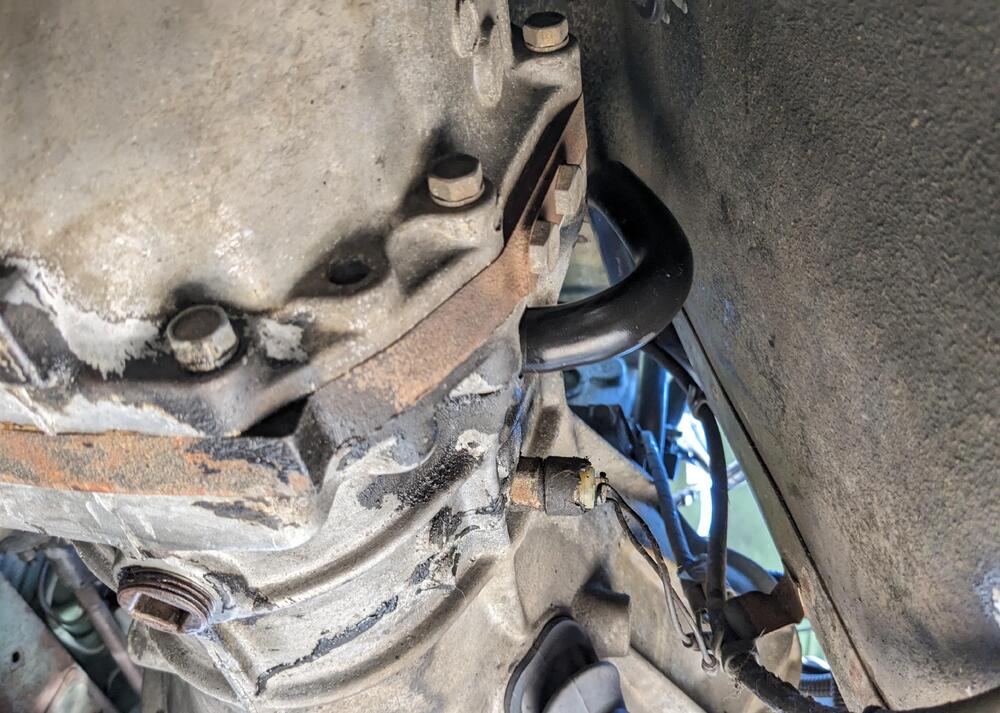
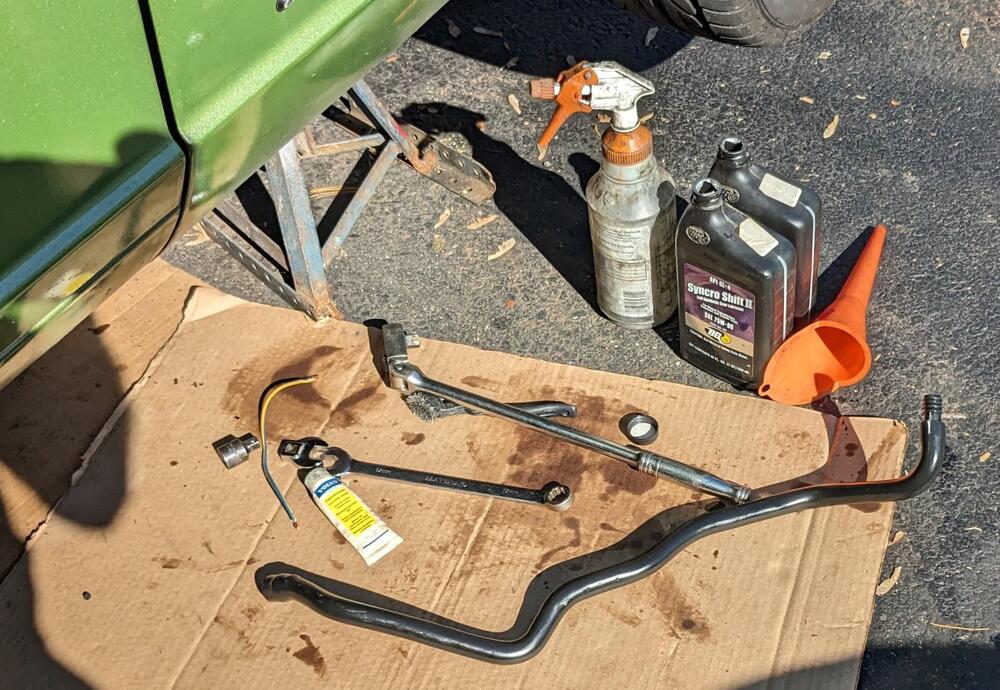
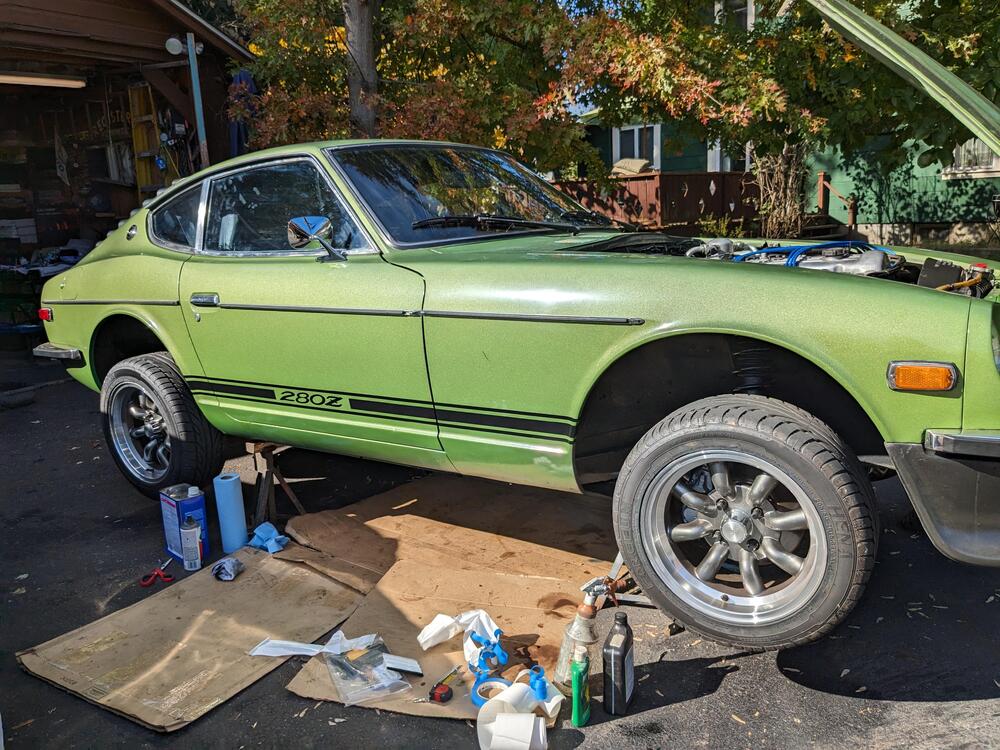
I was nervous about doing this today - given the posts talking about difficulty of removing the plugs. I used a 17mm crow foot w/the 1/2 drive ratchet on the trans, 17mm wrench with another wrench hooked over it for leverage. Both came out without any real drama. diff drain - some metal particles I used my trusty transaxle fill tube- it's a crankcase breather hose from a 90's Volvo Diff took about 1.2 quarts (GL-5) before it started coming out the fill plug trans Trans took 2 quarts (Gl-4) - just started dripping out the fill plug with that only got one quart out of the trans Found that the reverse light switch is dead - easy to test since I had it in the air While I had the car in the air, and the temps are back in the 70º range, I got the side decals on.


-
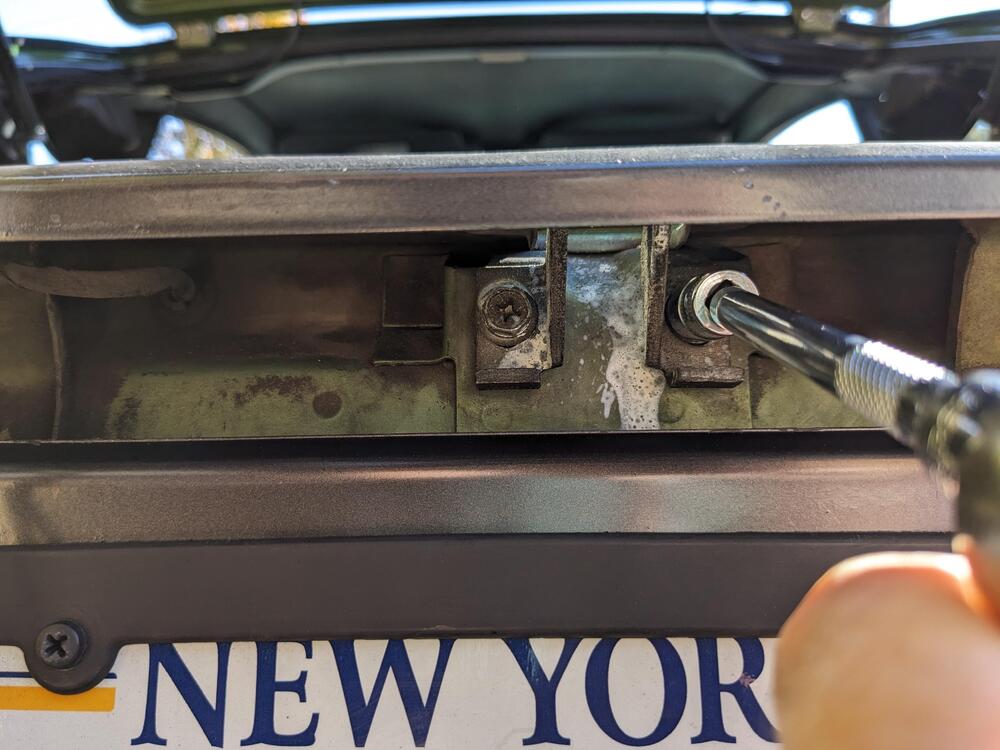
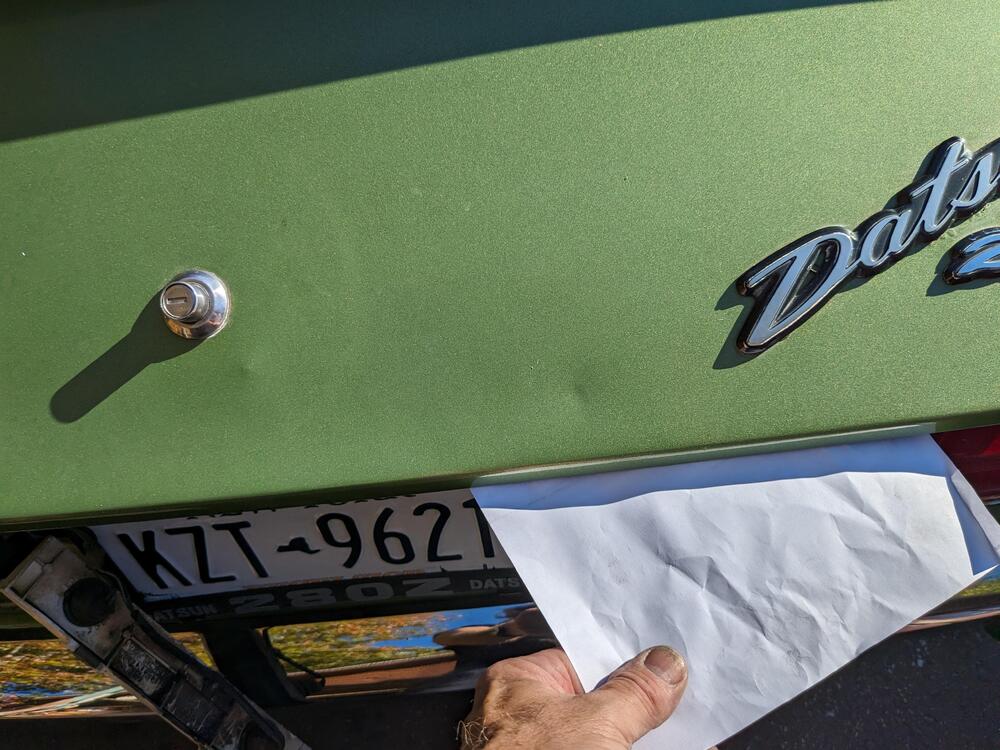
Followed grannyknot's directions - much better now, no more slamming required. I did have to make it a touch tighter than I wanted, to make sure the horizontal seal was snug against the hatch - don't want any fumes sucking in. Paper pull test to check
-
That would make sense, wouldn't it? I ordered 50 of each male/female, so I have them.
-
Thank you, Steve - those are indeed the ones! Of course, that site doesn't actually tell you the make of the terminals. I don't need the housings. 😄 It's probably safer the way I have it now, through a larger surface area bullet terminal.