chaseincats
Community Member
-
Joined
-
Last visited
Everything posted by chaseincats
-
Sorry, that's what I meant - the valve at the top doesn't hold vacuum, so it pulls in fresh air/vapor at all times, including at idle. When I started it after re-connecting the canister to the purge/throttlebody trigger vacuum lines, it ran poorly with the rich/lean number on my a/f gauge bouncing between 12 an 16 and it drove equally as poorly until I disconnected both vacuum lines (capped the purge hose on the intake and connected the throttlebody directly to the distributor like before.
-
Gotcha. If I smell near my gas cap, I do smell vapor - is that normal?
-
Thanks for providing this! Kind of odd, I noticed it went from easy to blow through (from the engine side) to hard with each successive time I blew through that line in the engine bay. According to this however it should be tough all the time? Also, it is kind of confusing as to why it should be hard to blow through when going from the engine to the vapor tank. You'd think that should be easy since the vapors are coming that direction (from the tank to the engine), no? -chase
-
Hi guys, I'm honestly not sure which sub forum this was supposed to go in but here we are. Periodically I smell gas fumes in the car. One of the main culprits was the old-style hose clamps weren't sealing the hoses to the vapor tank well enough. I changed them to modern belt-clamps which helped a lot but not fully. I've been testing the leak by blowing in the hardline that connects the carbon canister to the vapor tank and scampering back there to sniff around (which is how I originally found the clamps were a problem) but I'm still smelling some fumes while driving so it's not fully fixed. At this point I can't seem to pin down the smell point and even used a smoke machine but found no leaks. Could the check valve that goes from the vapor tank to the carbon canister have a bleed-off function? Also, any idea where that check valve is? I can't seem to find it. If it sits outside of the cabin then that might not be the leak though. Note: my carbon canister is disconnected because it doesn't hold vacuum. If I was able to use that system, I'm assuming this wouldn't be as big of an issue but who knows. Any ideas? chase
-
Thanks for the information all, I'll check these out!
-
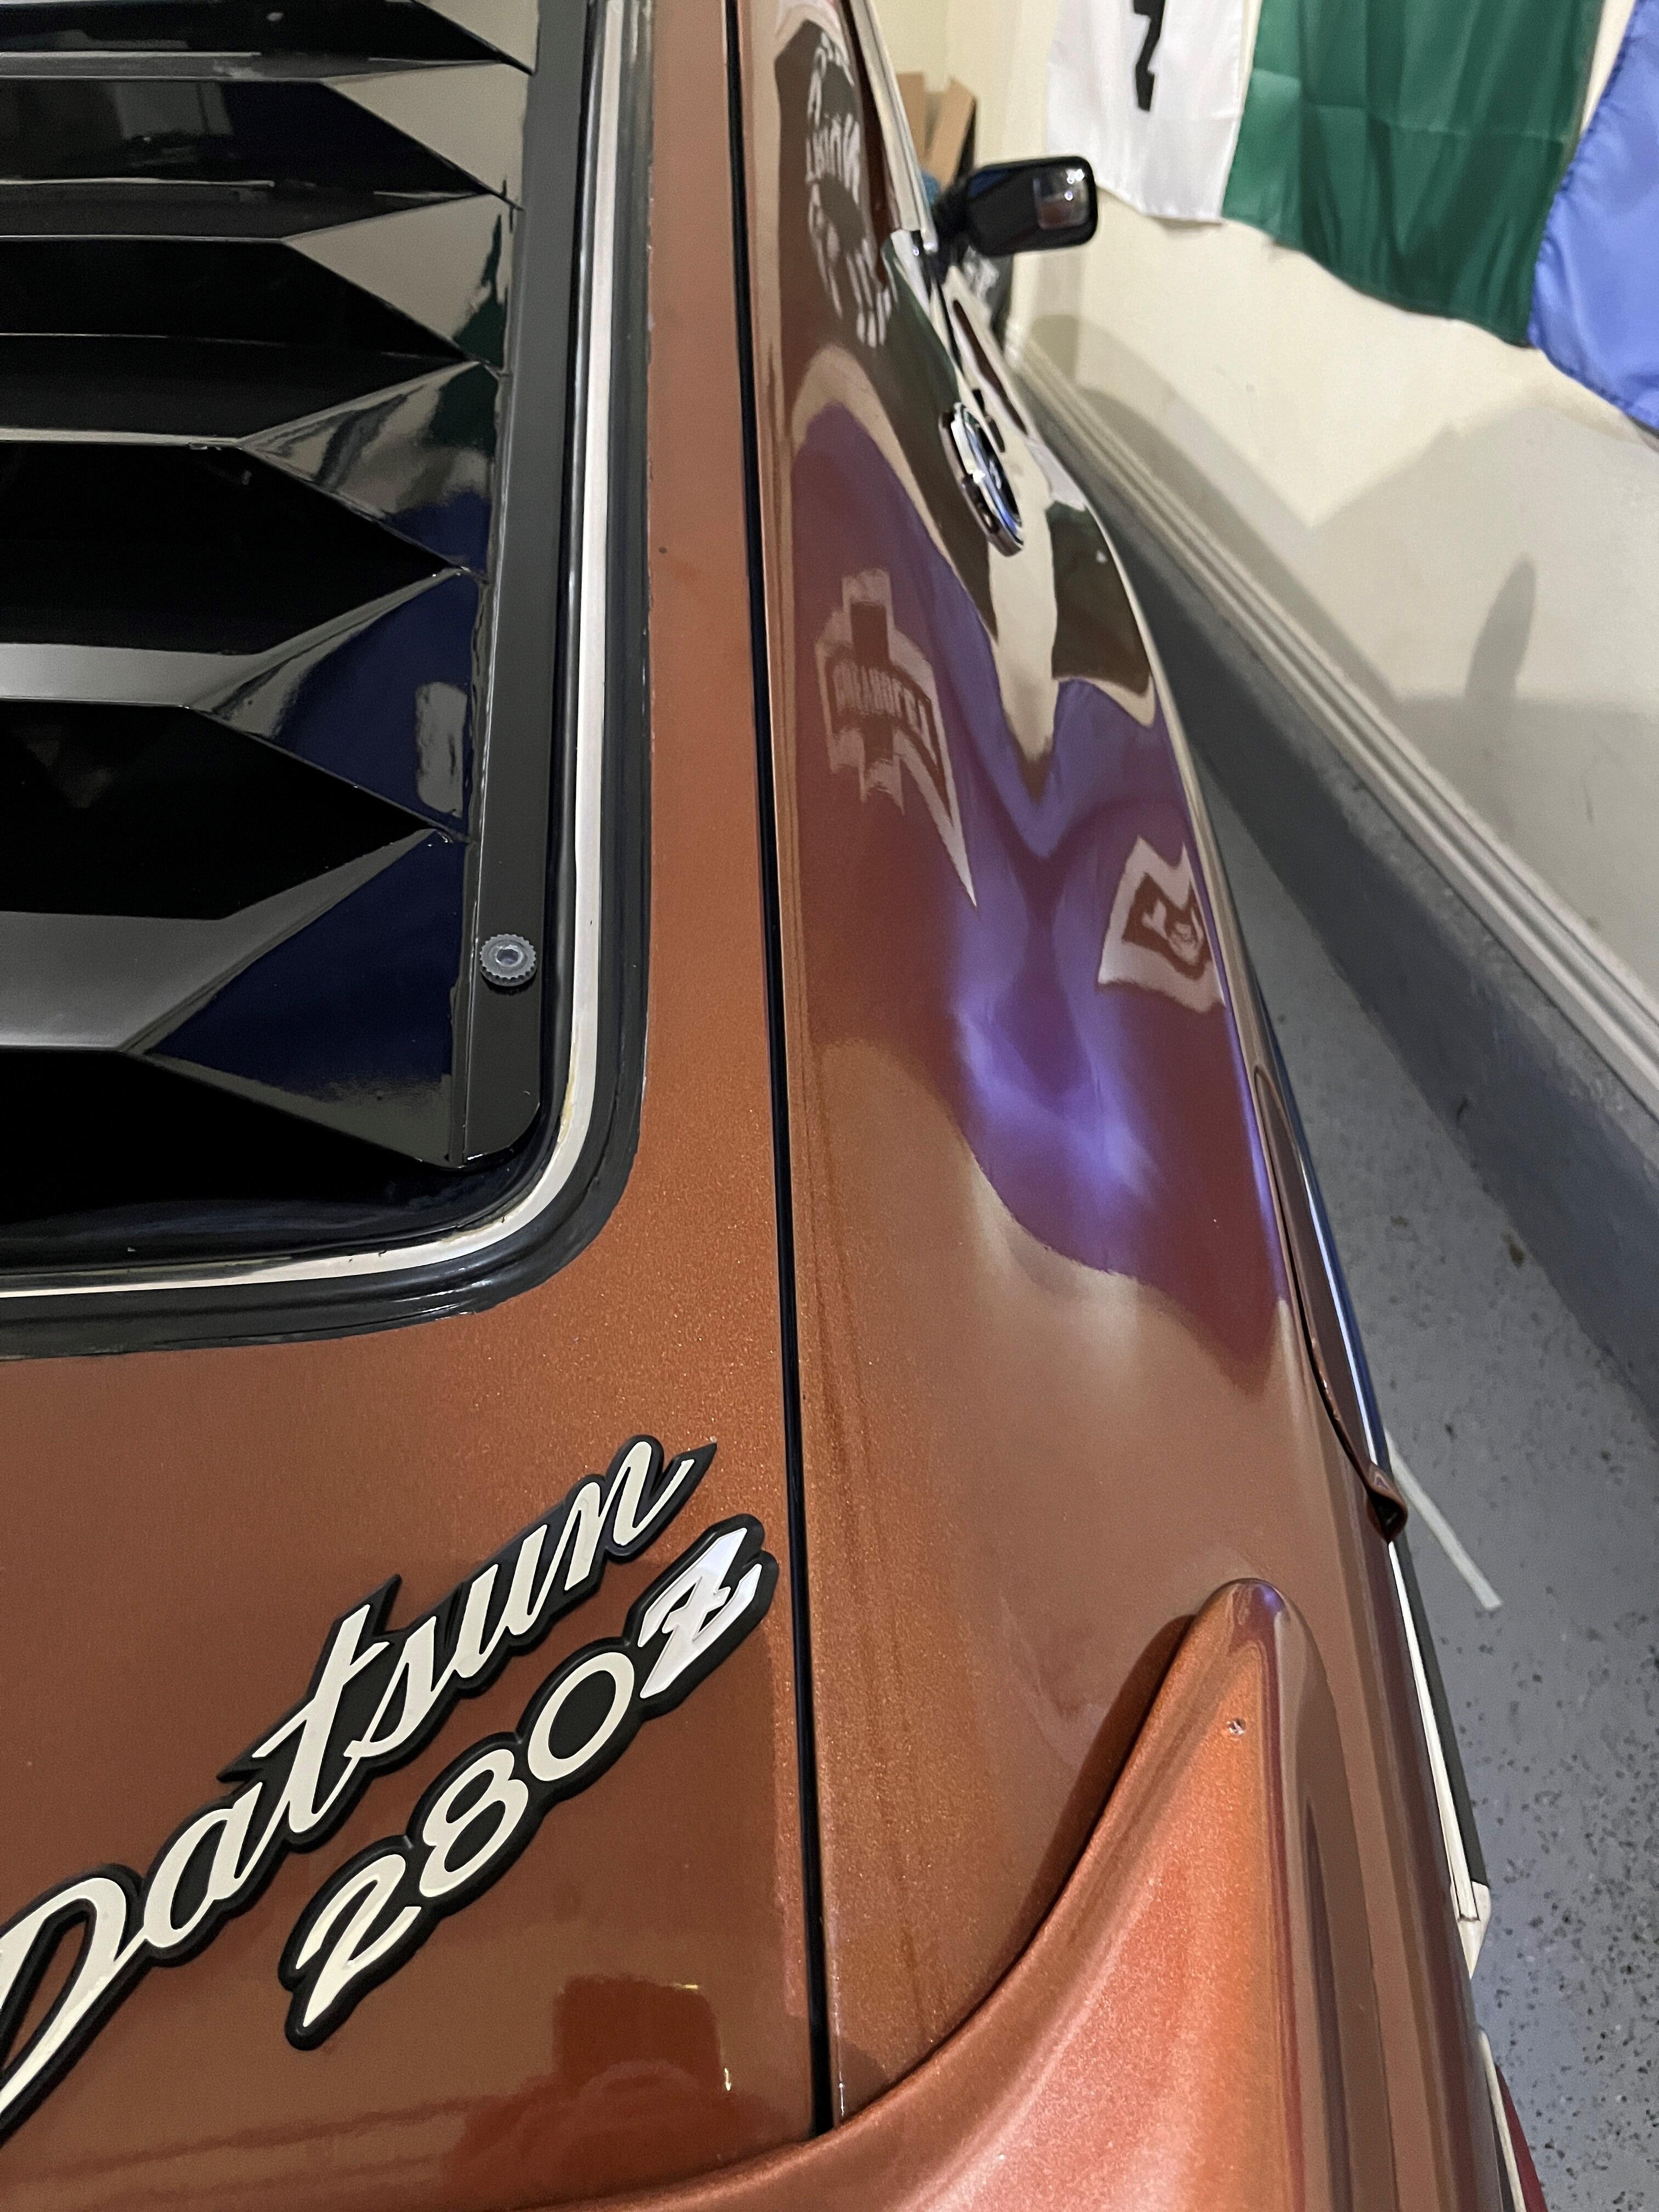
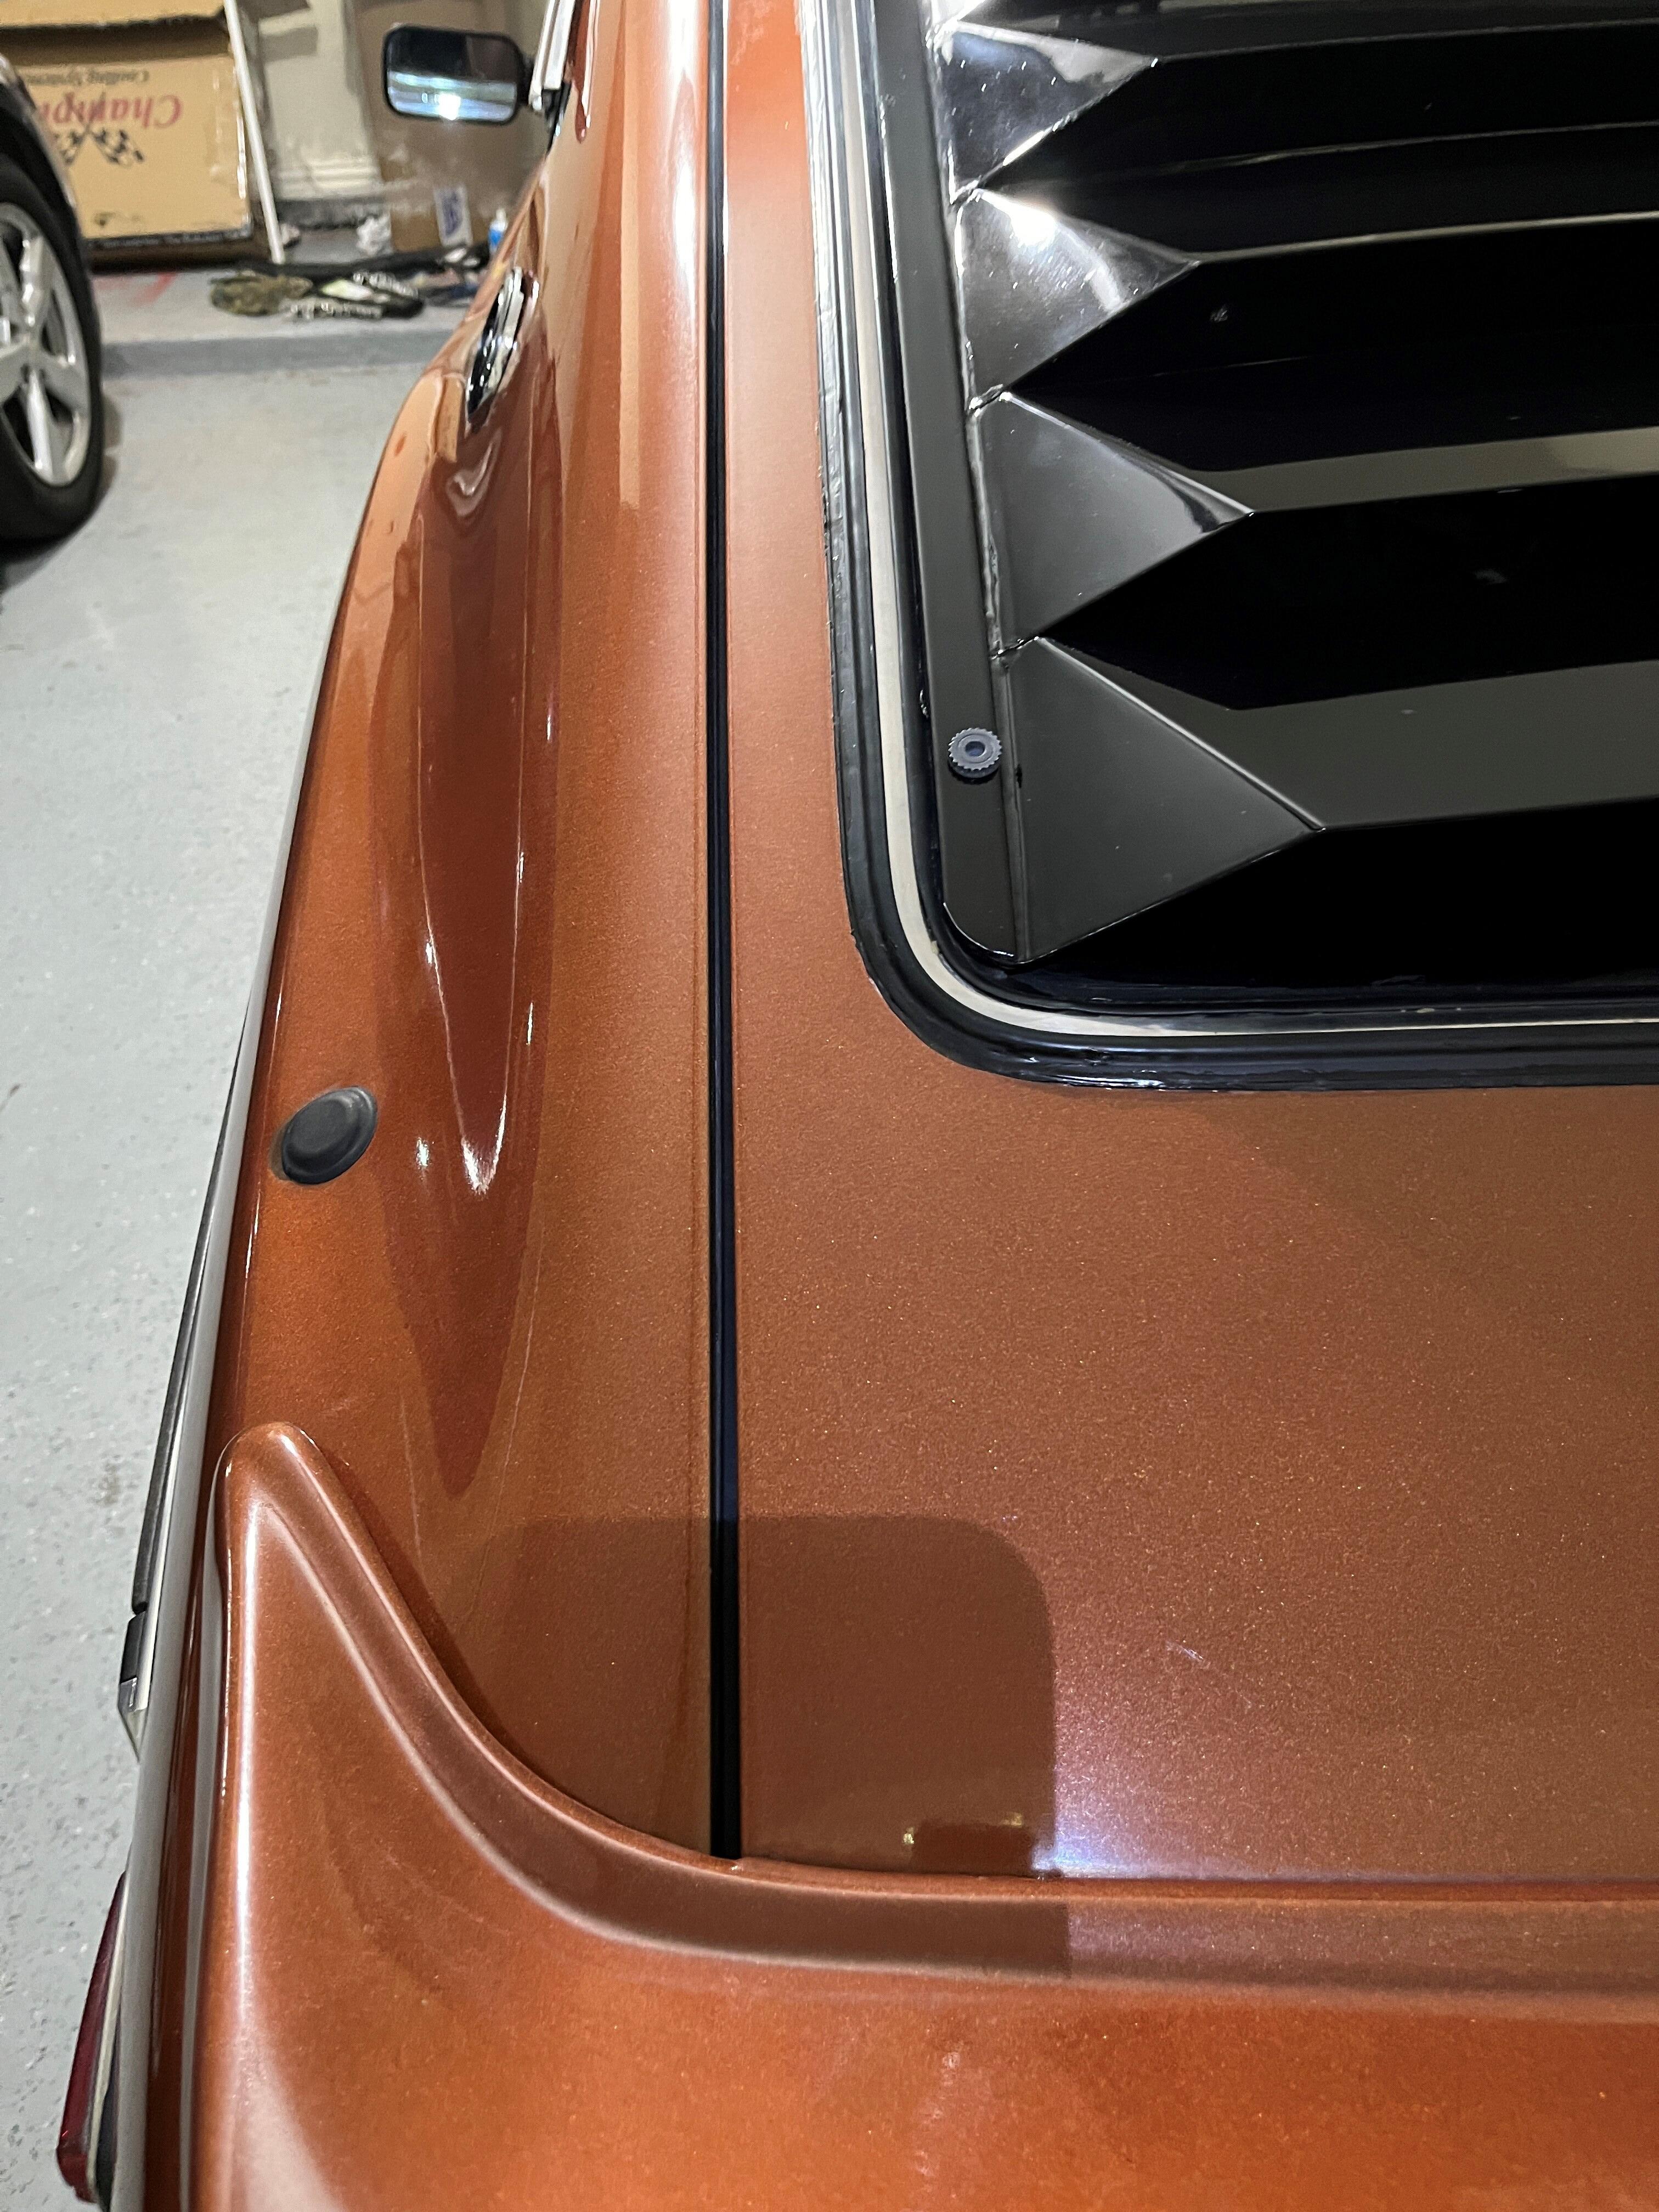
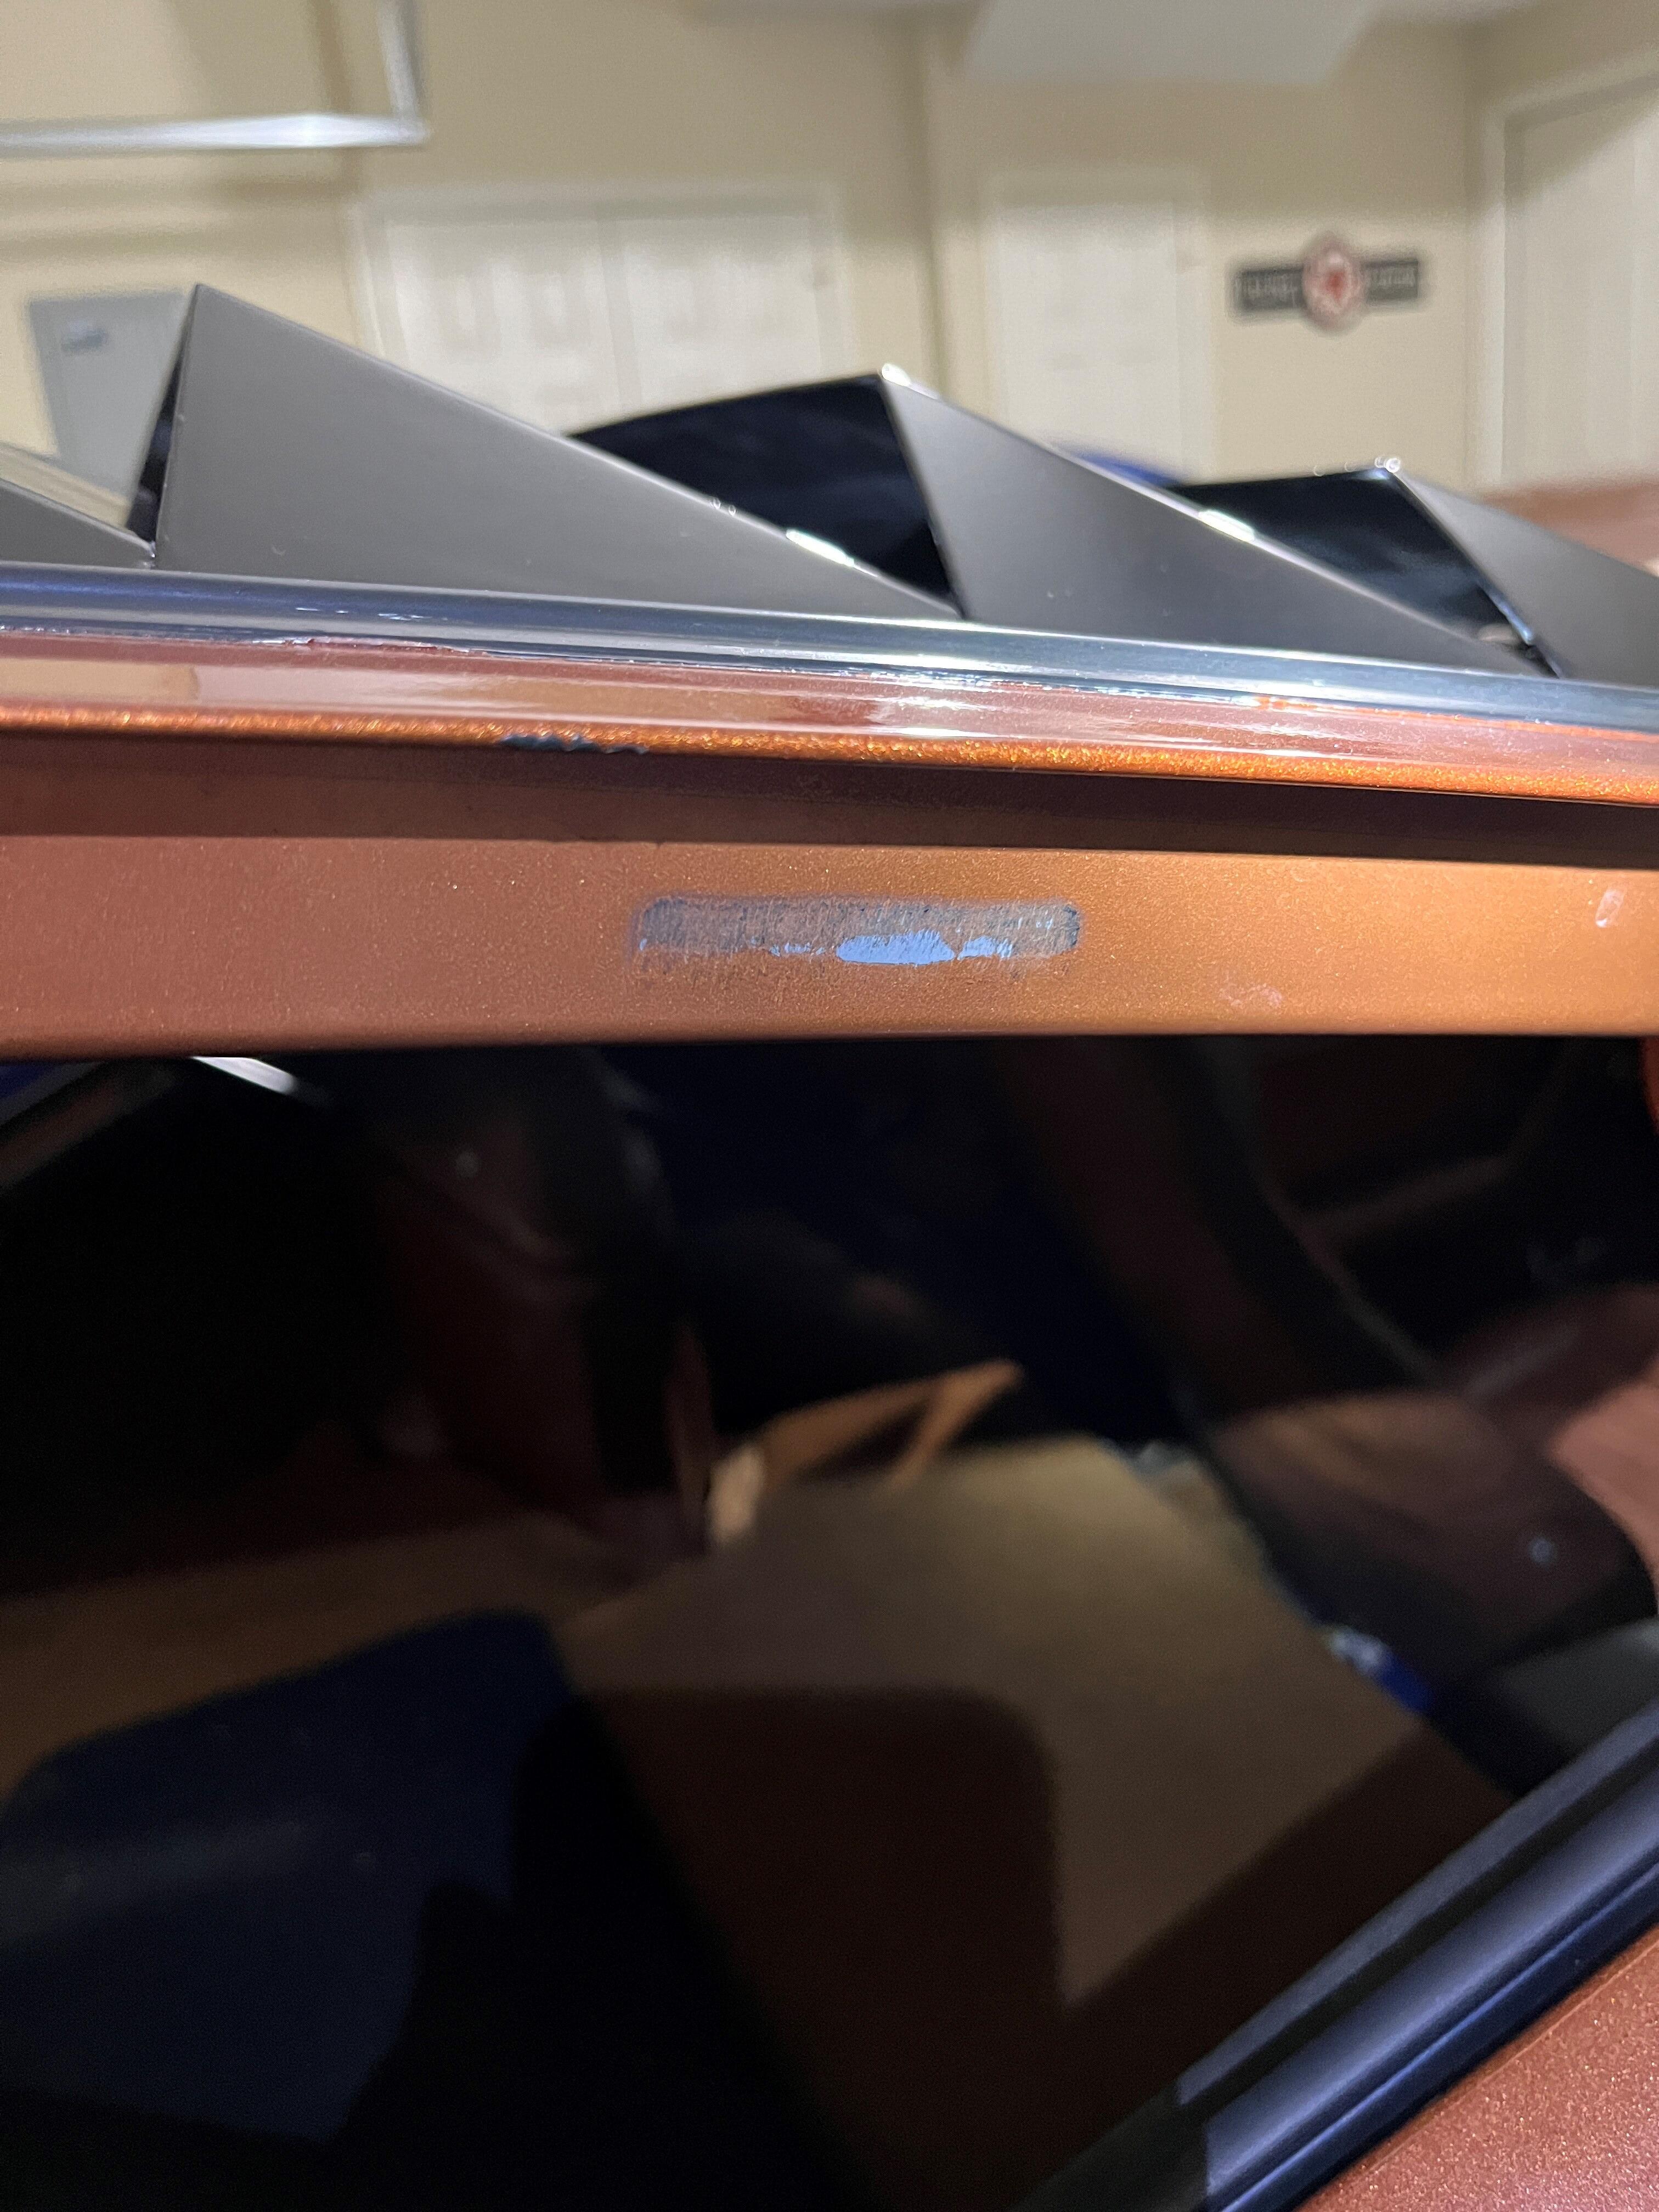
Hey gang, So there has been this squeak towards the back recently and it's been driving me nuts. I found out its the rubber alignment bumper on the side rubbing on the side of the hatch meaning the hatch is misaligned left to right. Is there any way to fix this? Pictures so the left and right - you'll notice the gap between the hatch and body is different on each side with the third picture being the paint rubbed off by the side bumper.


-
so it sounds like I should open the cowl and see if theres any mud dauber mud in there?
-
So it's sounding like the resounding conclusion is some sort of very short-lived bug. Quite frankly that sound/how often it happens kind of makes sense. The buzzing really doesn't last all that long and will go away for months. I'll start taking a look around the car to find openings that may need shuttenings (which I'm dubbing a word). Does anyone know where the fresh-air opening is for a 78? @grannyknot The rear hatch plugs have an unbroken piece of duct tape over them as a seal.
-
When it does happen I play with all of those in my head and nothing really seems to add up. Interesting people saying it could be a bug. It does sound like it could be something angerly buzzing in there, but I don't understand how something would enter that area if that is indeed the case.
-
any idea what that buzzing could be? it really does sound like power buzzing, its really odd.
-
Hi guys, Quick question for you - is there a wiring harness that goes through the a-pillar or through the portion above the door but below the roof (its covered with foam/vinyl)? The reason I ask is periodically I will hear a buzzing, kind of like the sound of high voltage jumping from a wire to a ground coming from the area above the passenger door but below the roof. Is there a wiring harness there that could have a nicked wire? This does not seem to be affected by the volume of the stereo. -chaseincats
-
The trim panel is not going to do you any good unless you seal the metal opening behind it as the piece won't be airtight even when bolted down. Get a bunch of duct or painters tape and seal that opening in the hatch then poke holes in the tape where the trim screws are going to go - that's the only way to be sure its air-tight.
-
Absolutely agree, just passing on what we did/worked
-
There is one on the ZCCA page but all it is, is me opening the door and having smoke pour out. It really is as simple as throwing the machine in the back of the car with all the windows up/hatch down and waiting. I didn't dangled the cord out of the window and rolled it all the way up, then sealed the rest of the area (maybe an inch) with painters tape. Sucking smoke in from inside the car arguably works better. I had someone hold the fog machine near the hatch, and placed the shop vac hose in the trunk area and squeezed my way back there as well with the vac on. You do not need to seal the car, just having the vacuum on is good enough (my doors and windows were open for example). I hope that helps!
-
You absolutely are. Just tape it shut in the interim - you're not losing anything but braincells outside of a bit of ducttape
-
Glad to hear it but I'd be really nervous to remove the lights and sever that 'glued' seal
-
We found that after the car fully pressurizes, the larger leaks show themselves but the smallest ones stop which didn't make sense but that's what happened. The rivet leak for example only showed itself after we held the smoke machine behind the car and turned on the vacuum
-
All of the above. I will say, though regarding the trim panel, I sealed the back of it with a bunch of tape then poked holes in the tape where the screws would go. That trim panel tends to sag since its so old and no longer seals that hole. EDIT: I forgot to add that I found the reproduction hatch gaskets were a bit too small and ended up ungluing itself in the top area by the dome light since it was too tight. I ended up buying the OEM one but it wasn't cheap (I think around $250) but worth it at the end of the day.
-
-
Yeah, I finally had enough too. Even though I used my friend's fog machine, it is definitely worth the price of admission to buy one for this project. All your local Z friends will be happy to come over and do their cars too I bet haha.
-
Yep!
-
Yeah, the PO made a poor connection that was hiding under a bunch of electrical tape
-
Final update: We fogged the car like in that video again last weekend and confirmed sealing the taillight gaskets with Seal 'N Peel (one bead between the gasket and the light housing and a second between the gasket and body) worked perfectly - no smoke escapes there anymore. That said it didn't 100% fix the issue meaning there were leaks else where which we found due to a shotty weld job done by the PO when replacing the hatch base which must have been rusty. Fogging: - I saw this originally on another thread which I cant find but besides what we did (throwing the fog machine in the car and shutting the door) there's actually a better way to do it. - Once the car is fully pressurized with the fog machine, the smoke will escape from the paths of least resistance, which isn't the tiny pinholes in the back. The trick is to have someone hold the smoke machine behind the car and move it around while you turn on a shop vac and let it sit in the hatch area creating a vacuum (just like how the car works while driving). You will see where the smoke is sneaking in then just wipe some seal 'n peel or whatever sealant you have left and its game over. You'd be surprised where smoke sneaks in, for example, smoke was sneaking in AROUND one of the rivets I found. This is definitely worth your time to do at least in my opinion.
-
I completely forgot to update you on this, sorry about that. Wiggling it worked and I haven't had an issue since. What a waste of time changing all those alternators out ended up being lol. Thanks Captain
-
Correct, you need to modify the box to get it to fit. The general consensus is (this is what I did) getting some literal tin snips and cutting away the metal until you can fit it in. Don't be discouraged by this, it's absolutely worth the effort.