inline6
 Subscriber
-
Joined
-
Last visited
Everything posted by inline6
-
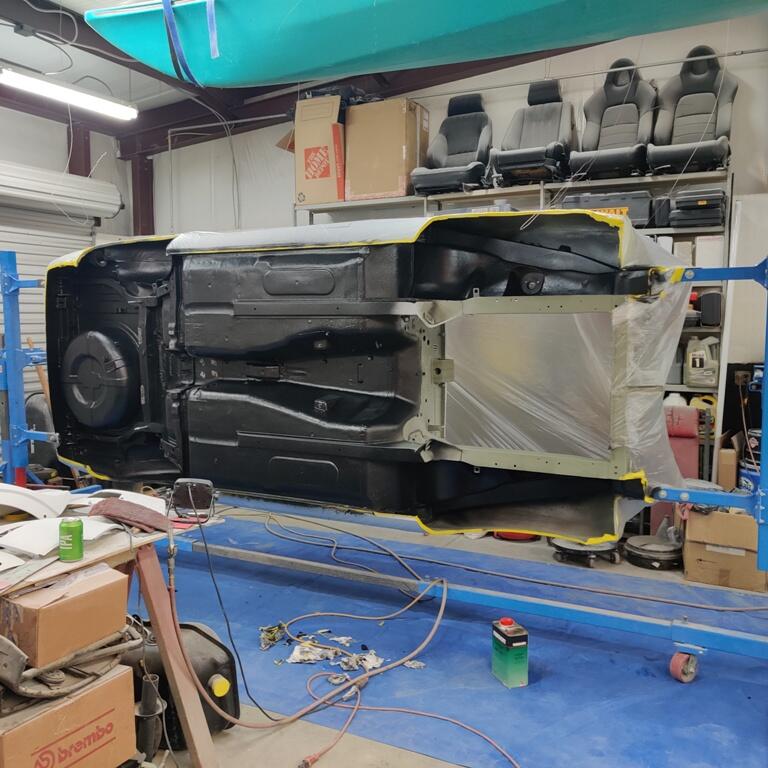
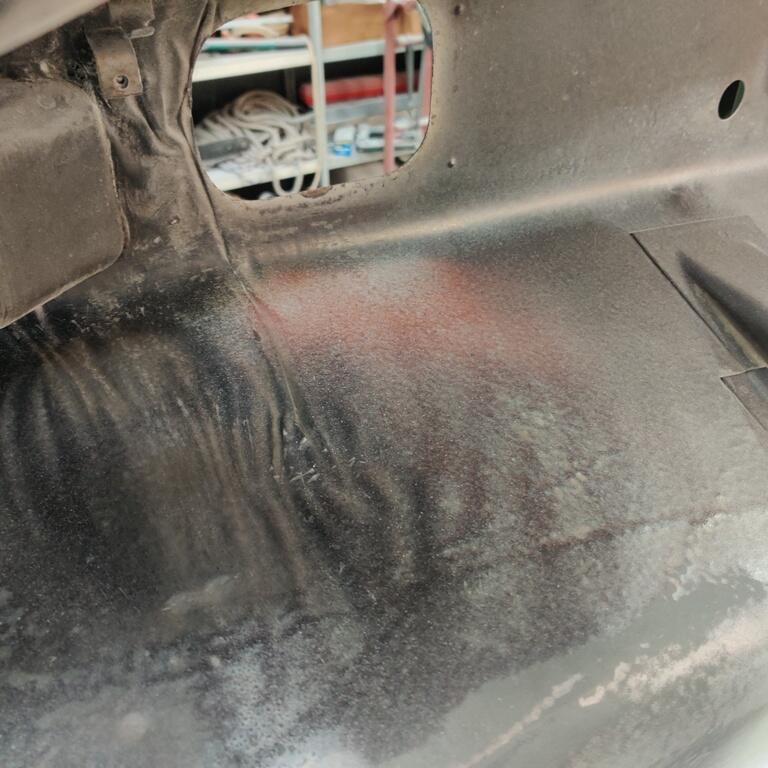
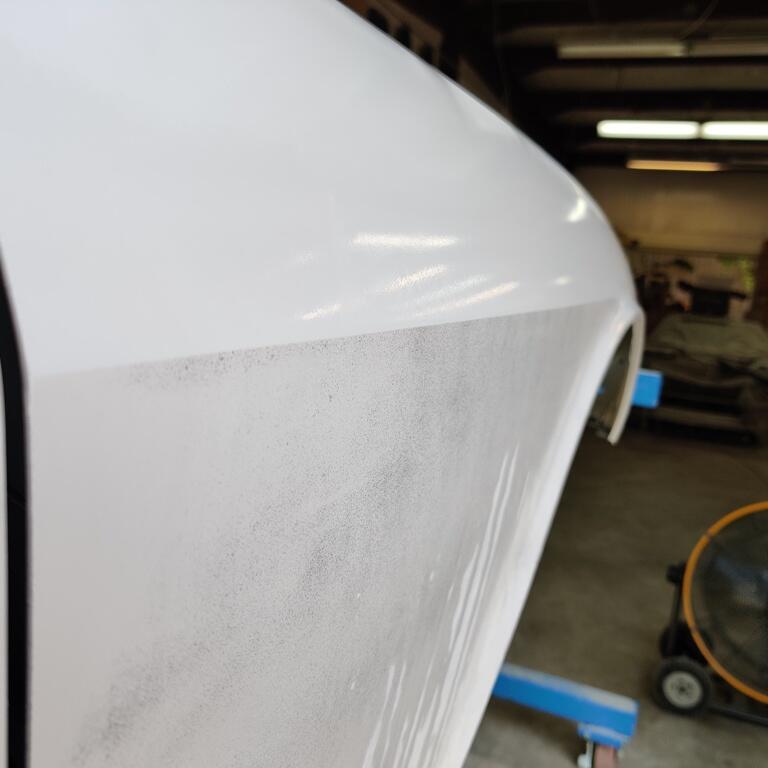
 Made a video which is a few minutes long showing the undercoating. Sorry for the odd movement and shaky filming briefly - the cord of the light I am holding got tangled up on a container on the floor. If I could shoot the undercoating again knowing what I know now, it would be much better, but I am pleased with the results.
 -
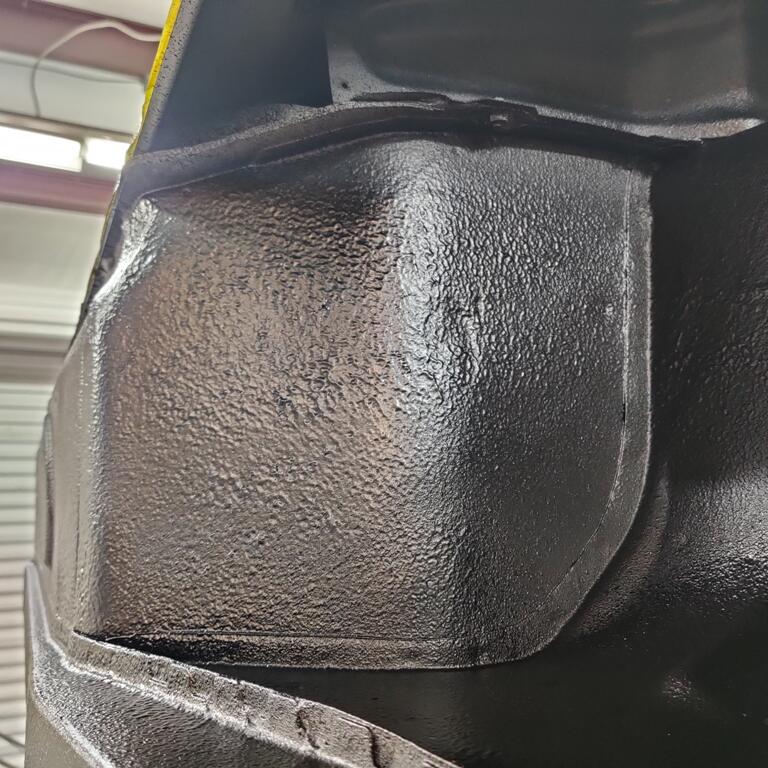
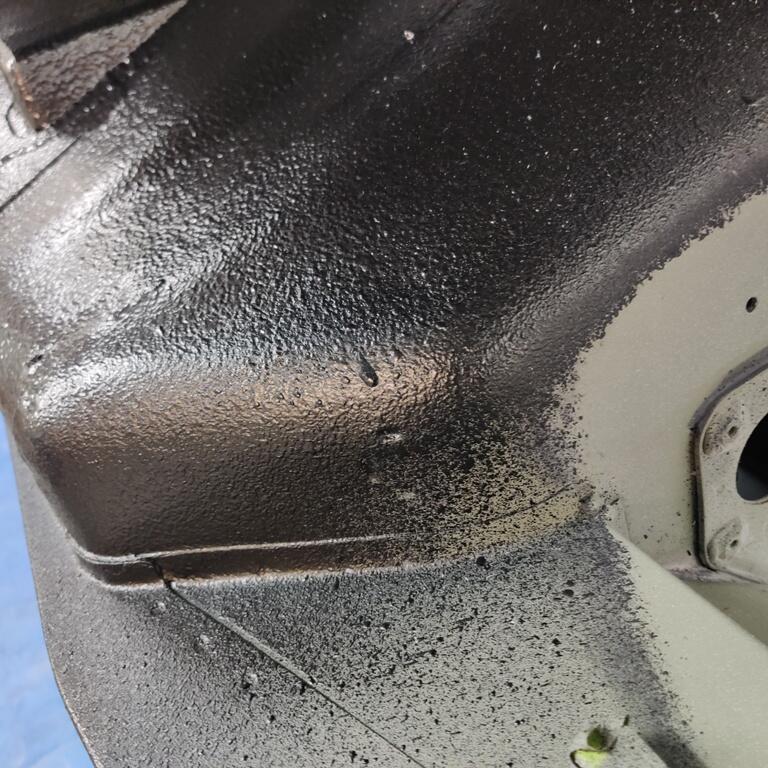
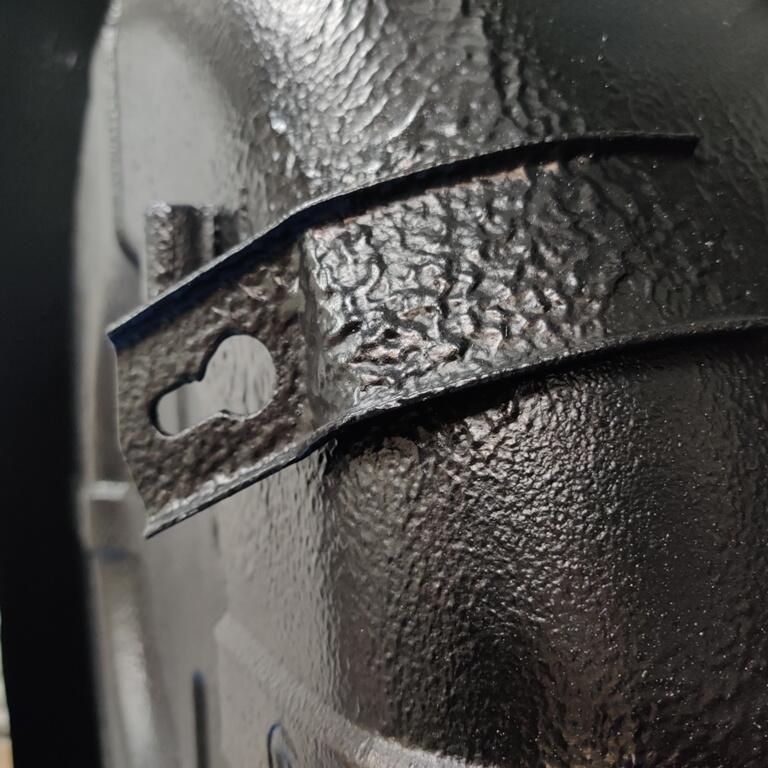
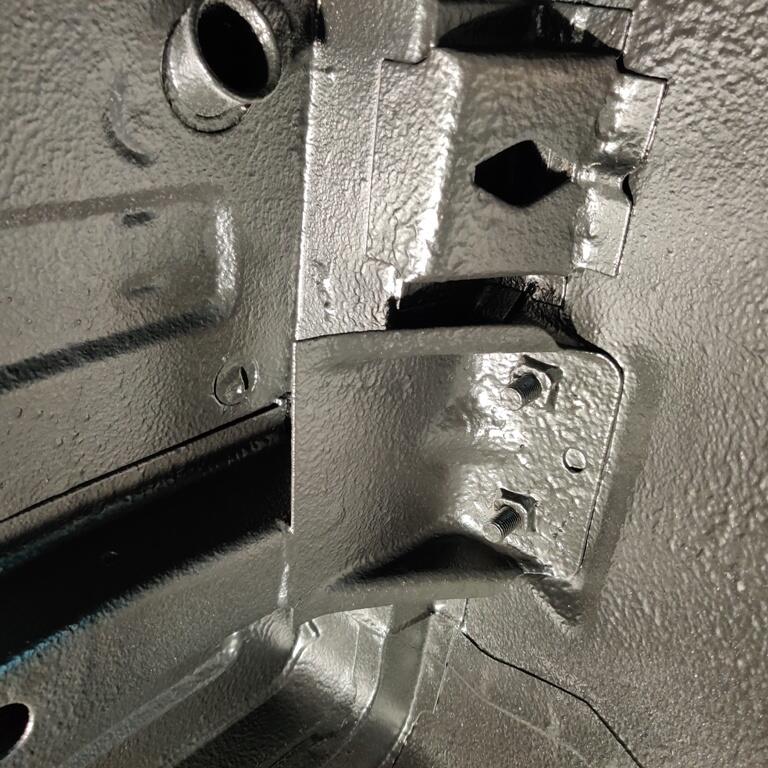
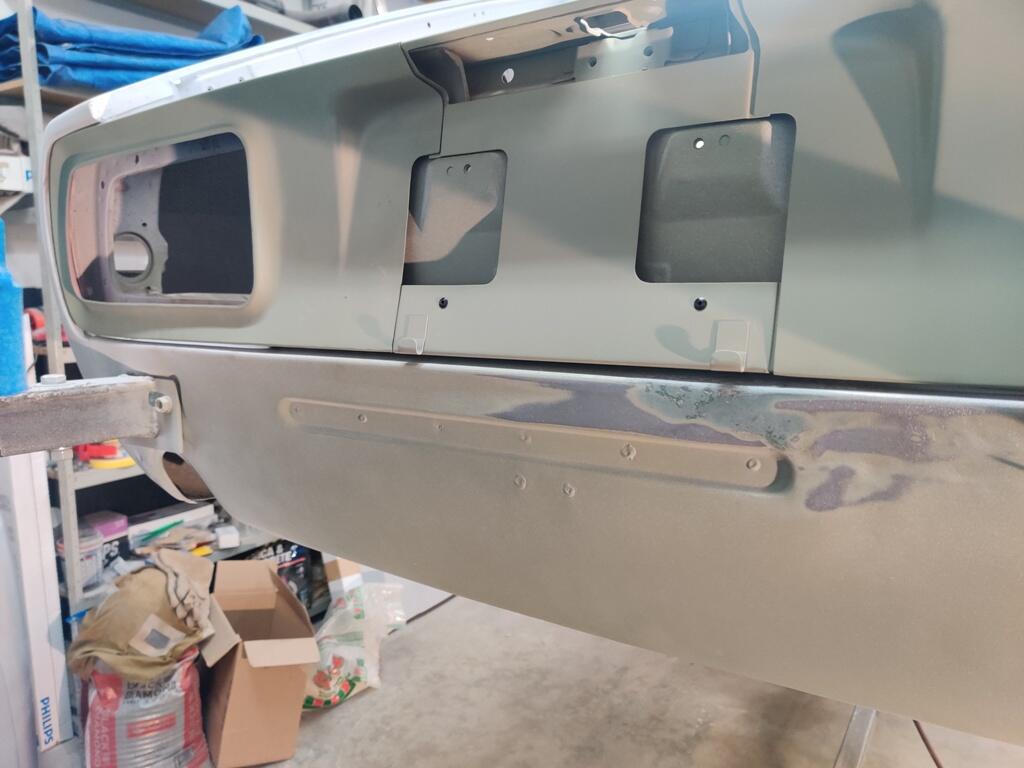
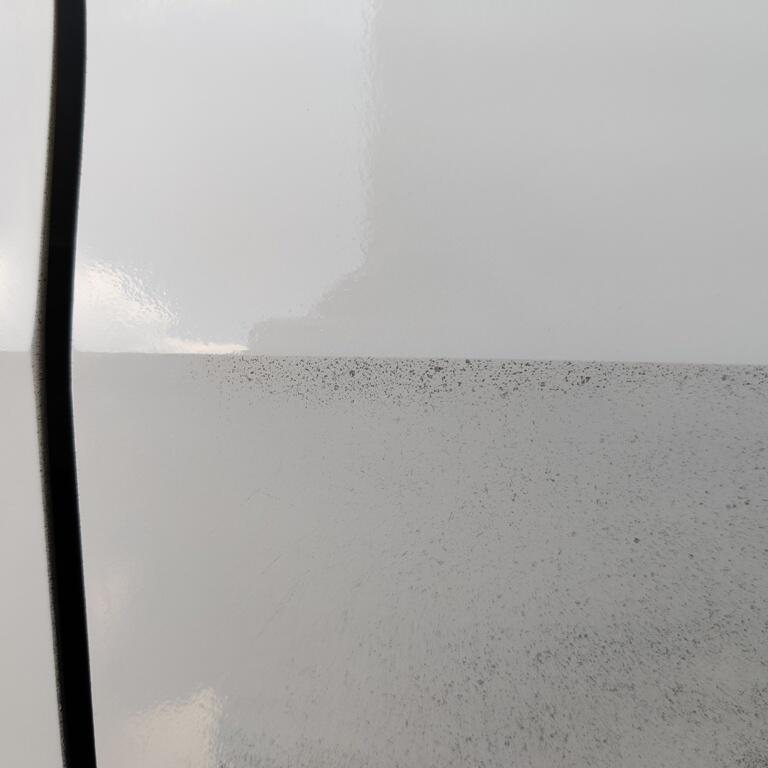
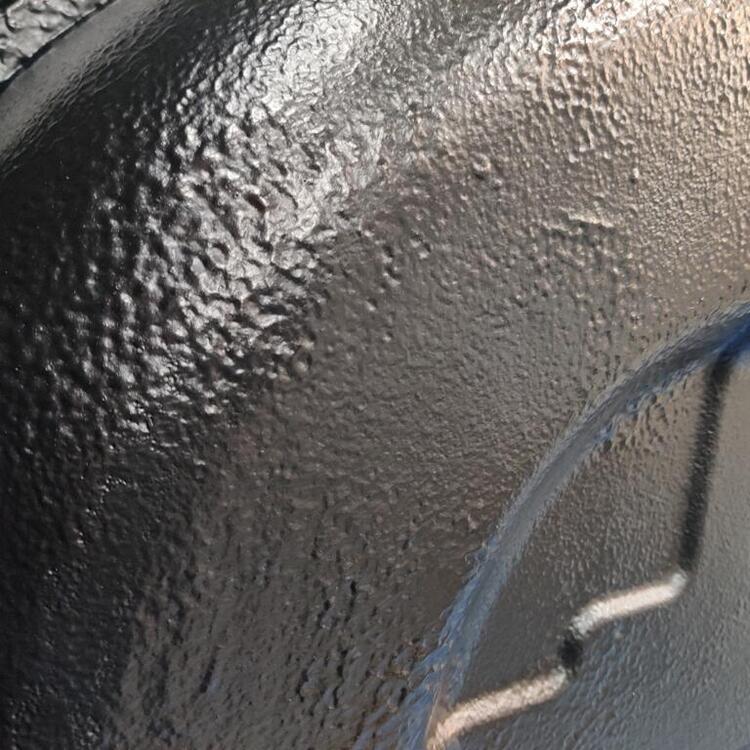
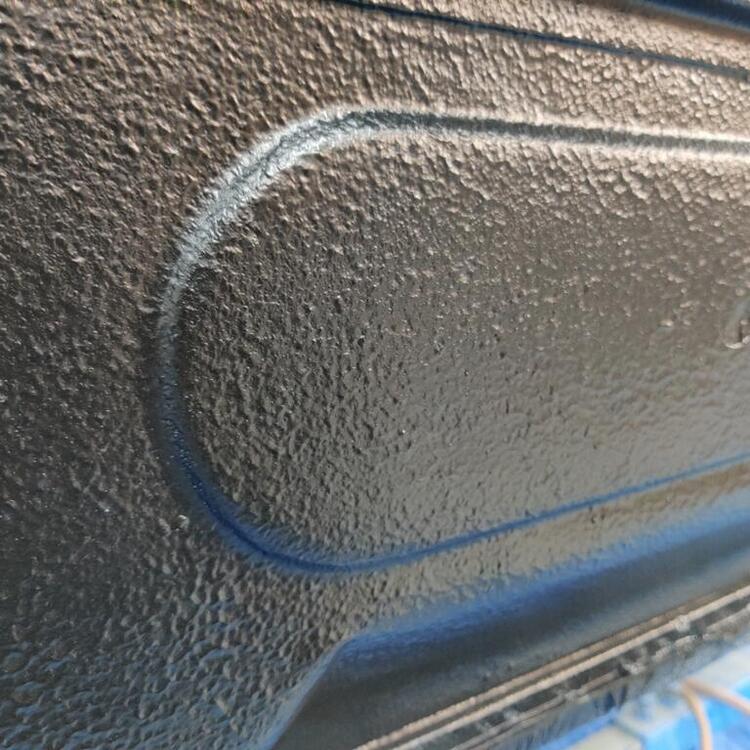
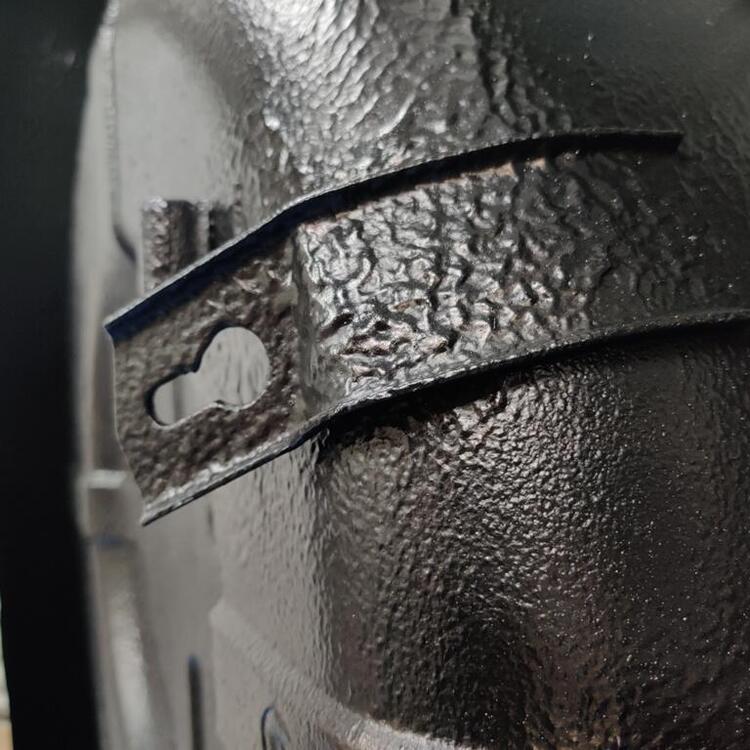
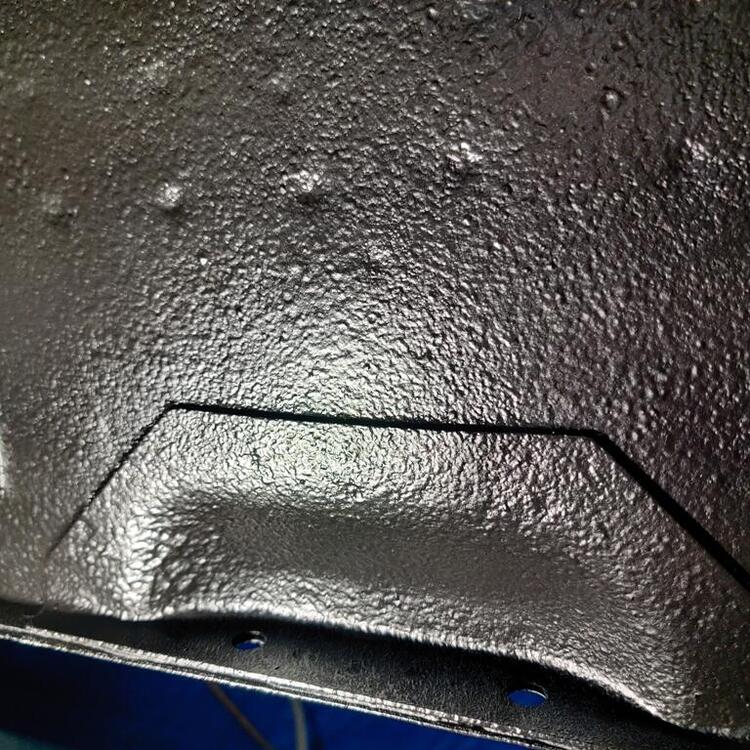
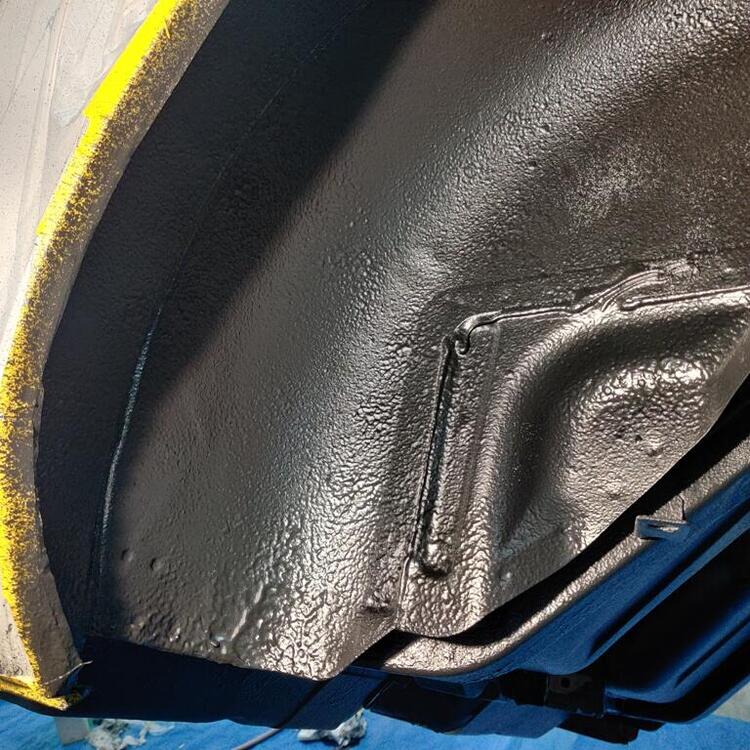
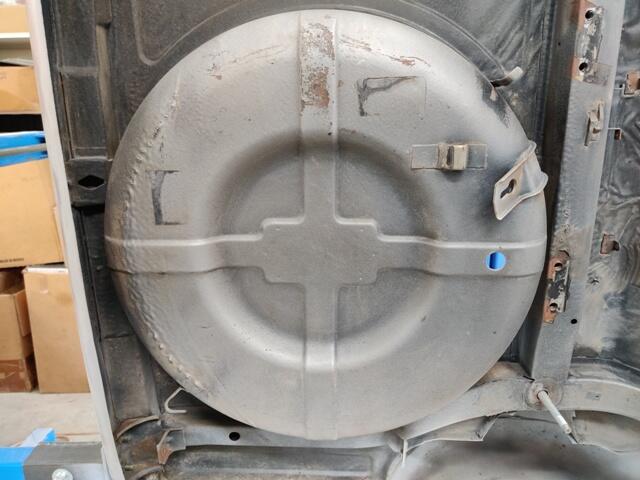
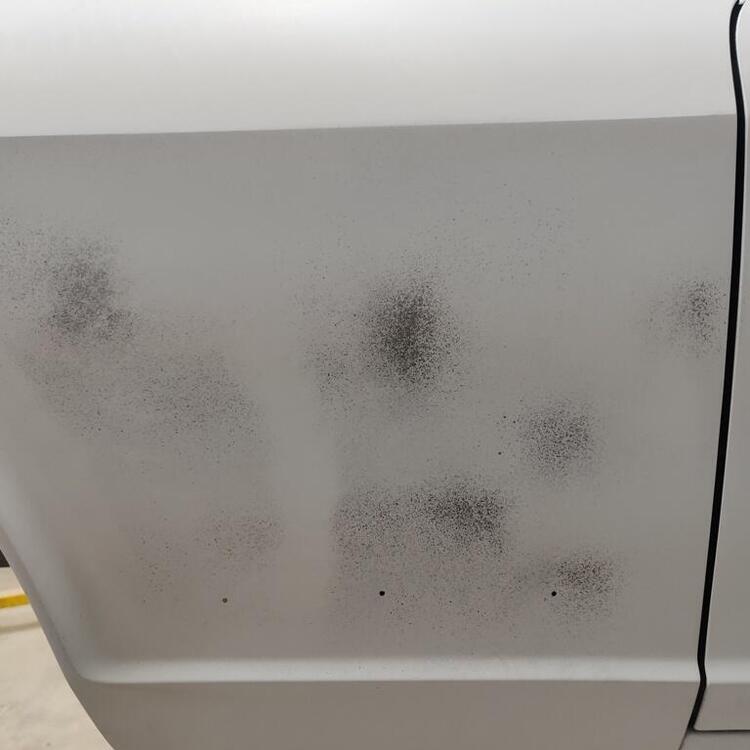
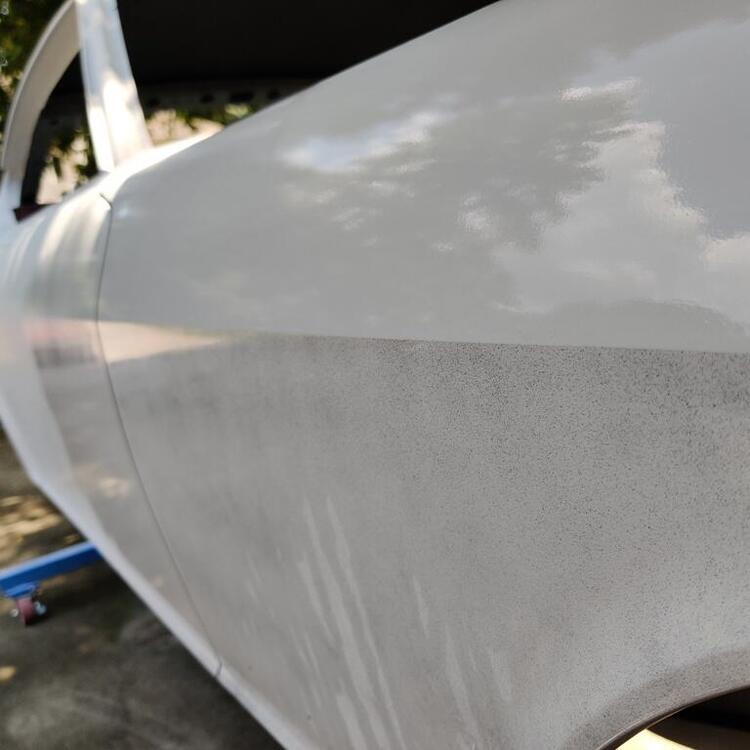
I was able to get the Raptor Liner applied today. With all my planning, I had hoped for a better outcome, however, it is hard to achieve what I planned without having some experience with this stuff. The standard mixing calls for 3:1 of Raptor Liner with the hardener, and up to 20% urethane reducer. I mixed 4:1 with hardener and would have gone 4:1:1 with thinner, but that mix wouldn't all fit in the Raptor container. As part of my planning, I watched videos that said it was a bad idea to mix more than one container at a time. If you are doing a truck bed liner, that is probably wise advice. However, for my custom mix, and at the gun, I was using 60 psi, I was able to get through a full can in like 2-3 minutes. Then I would have to stop, and go mix again. And that would take 5-8 minutes, so the stuff already sprayed on the car would dry for that amount of time, and when I came back and started spraying, you could see the transition. That is not ideal. Had I to do it over again, I would have mixed all four bottles with hardener and thinner at once in a large bucket. And then fill the bottle and spray. Refills of the bottle/container would take less than a minute, and stops and starts in the material on the car would be indiscernible. My plan also included spraying undisturbed factory coating with the HVLP gun to refresh the appearance. It became quickly apparent that wherever the new coating wasn't, it was going to be very noticeable because the texture is a bit rougher than the factory. In addition, my first full can only covered the wheel well area and rear lower apron. So, it became clear to me that I may not have enough material completely spray the whole car, and I quickly ditched the idea of using the HVLP gun. So, I applied a little less thick on the remainder of the car to attempt to get full coverage on everything that remained to be sprayed. My test samples ended up consuming enough material to cause me an issue of running out prematurely. 4 cans is just enough for the mix and psi, etc., I used. Keep that in mind if you attempt to follow any of my experience here. With all of that said, it could have been much worse. So, here are some pics to share the outcome: Again, for the wheel well and rear lower apron, I went a little thicker because I was unaware that that point that I didn't have material to spare. I like the look of that first can of material - still not quite as smooth as the factory coating, but I prefer it. Once I realized how much area I had to cover with the remaining cans, I had no alternatives.


-
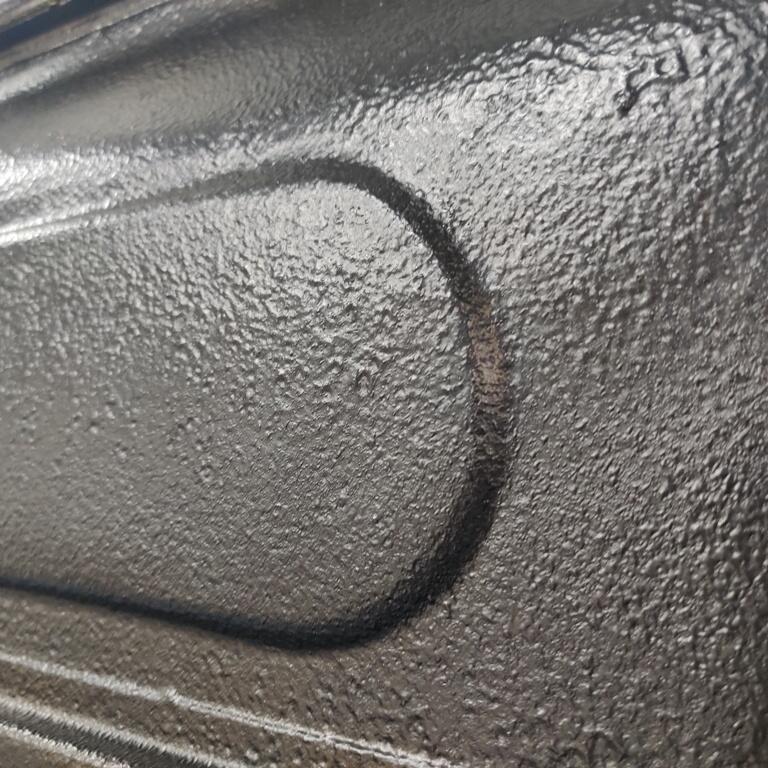
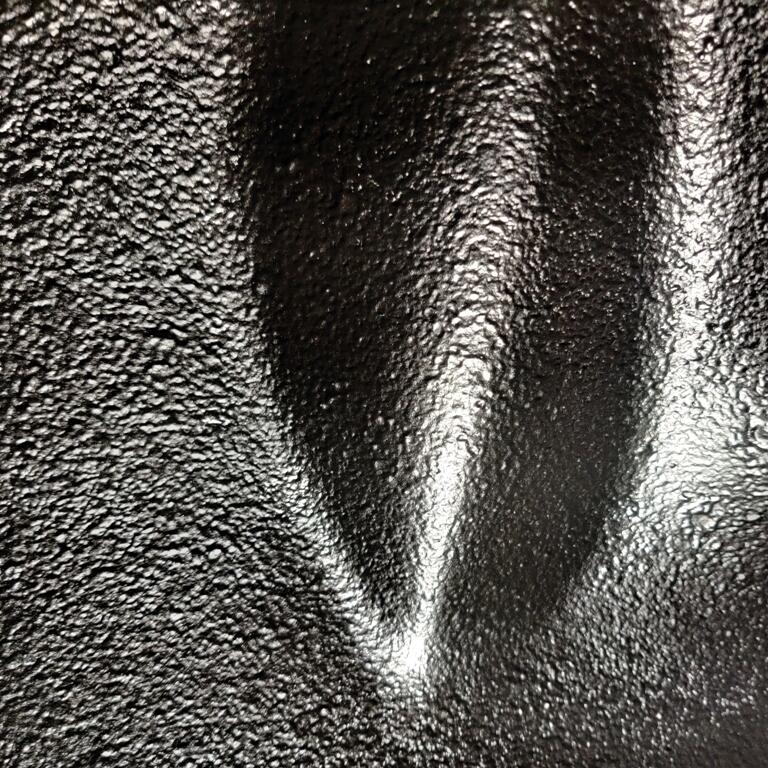
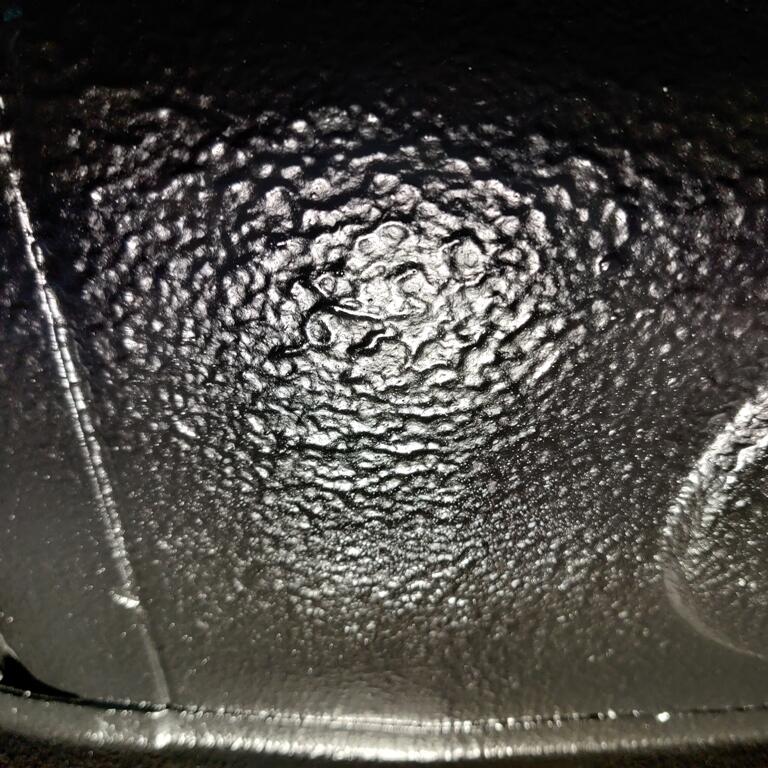
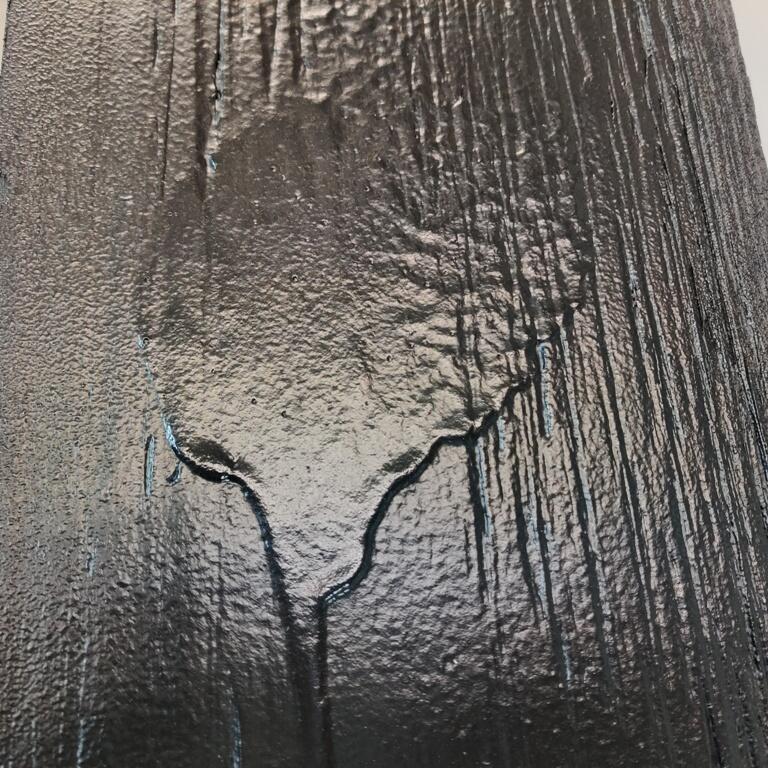
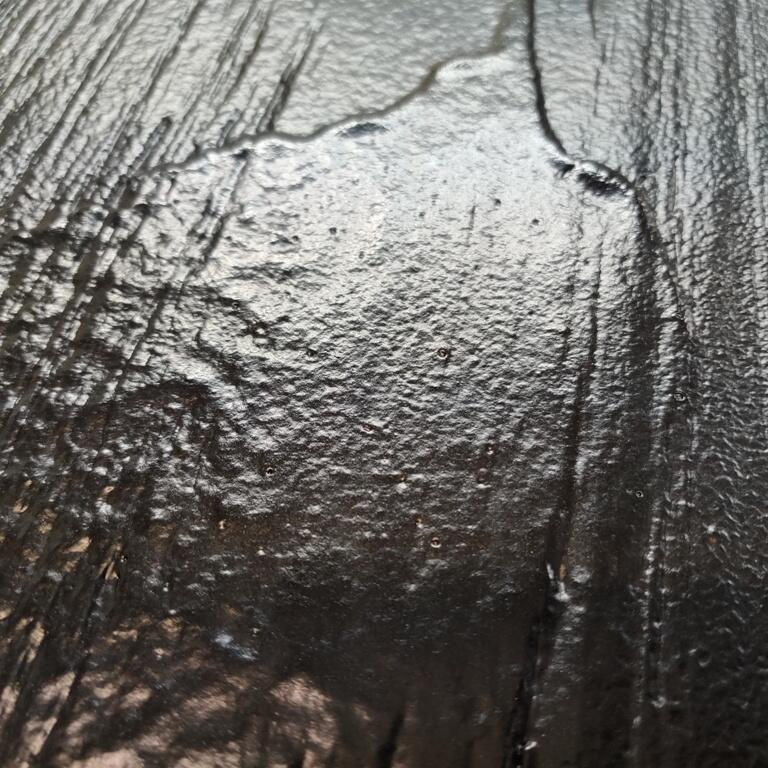
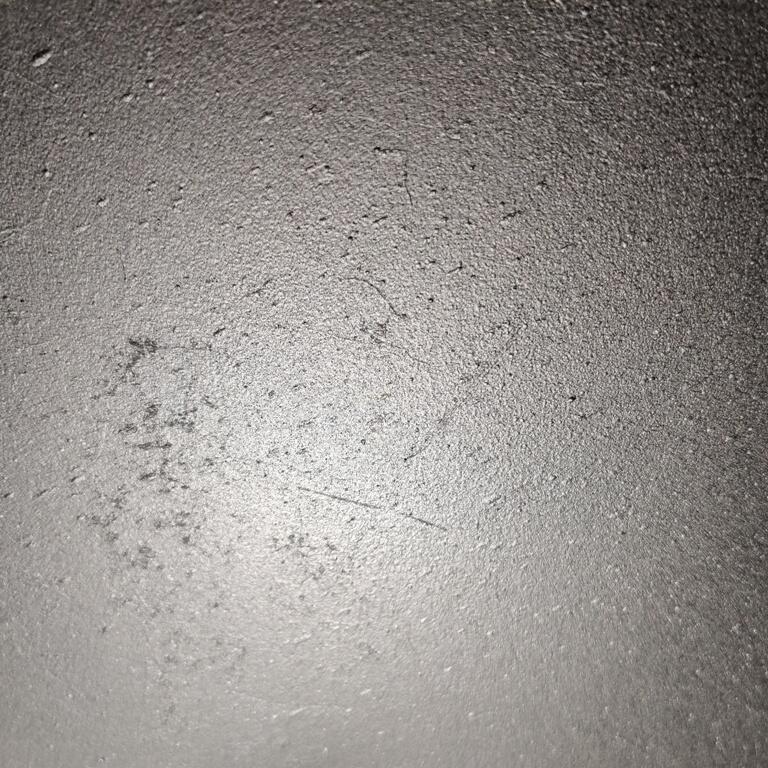
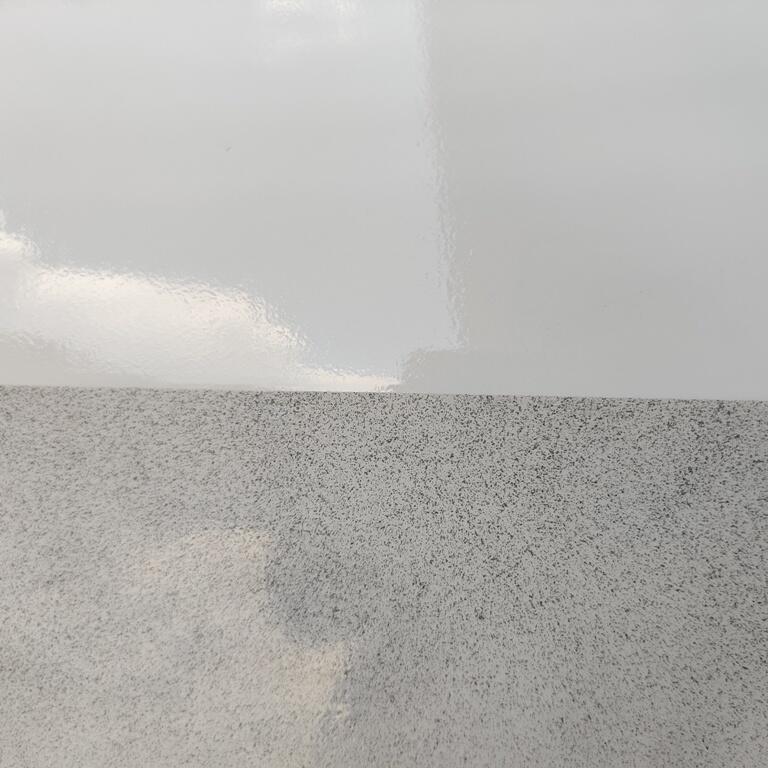
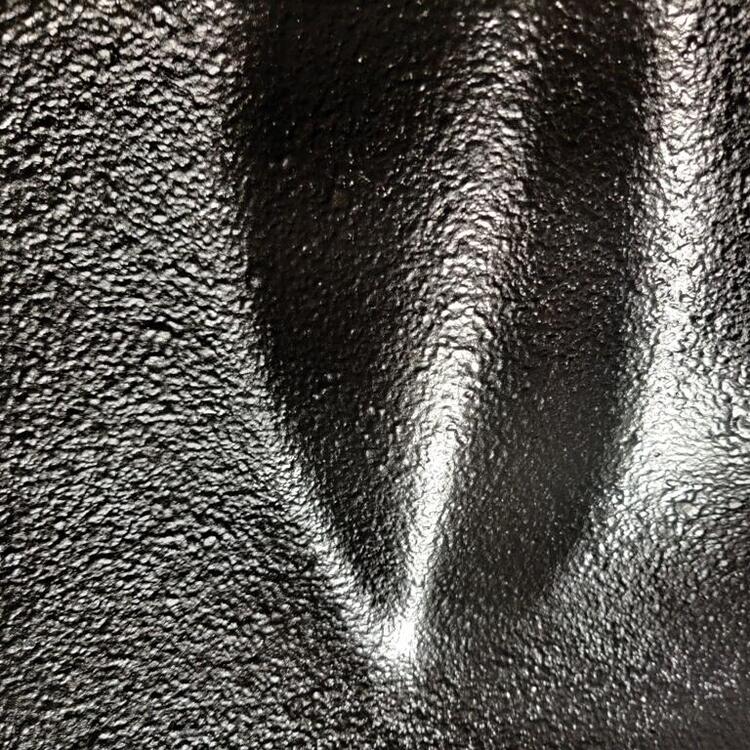
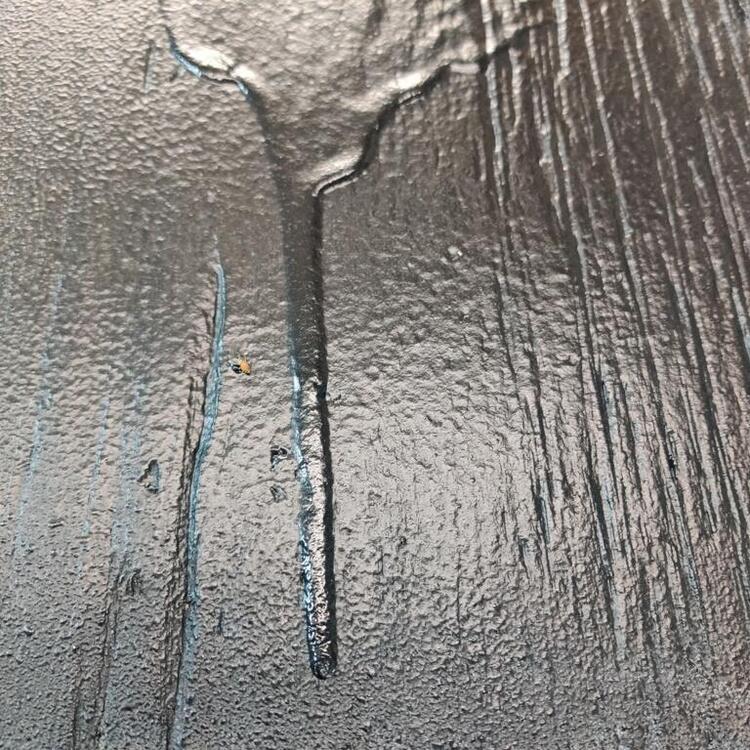
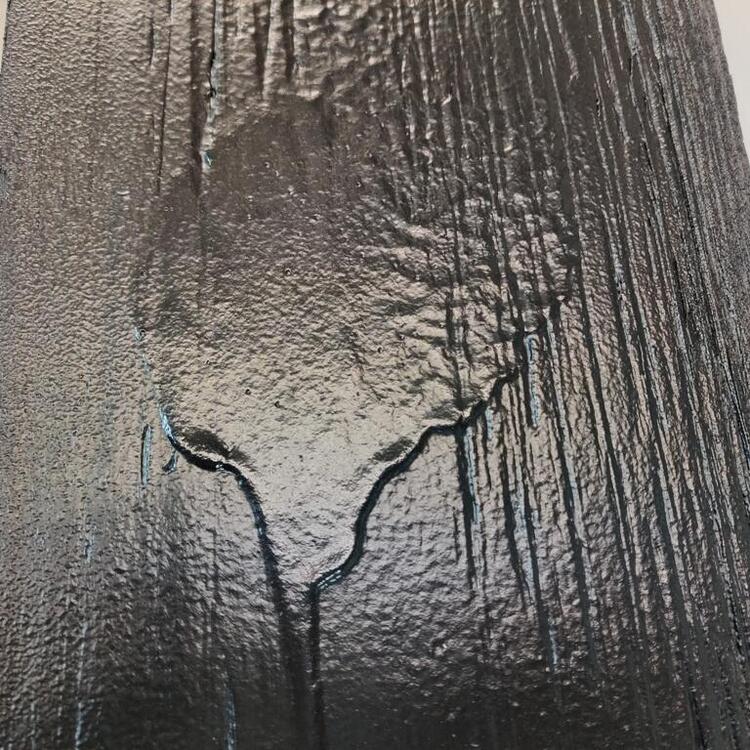
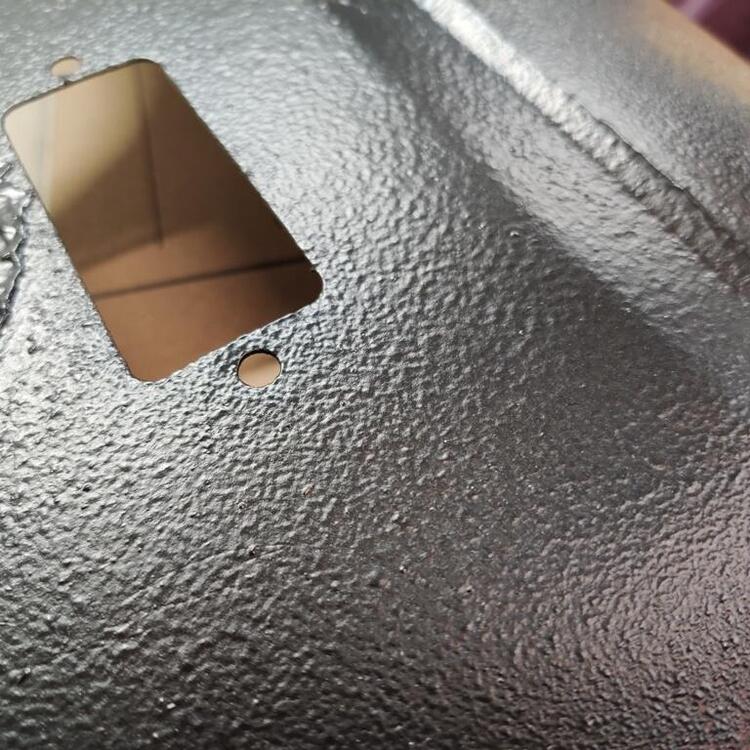
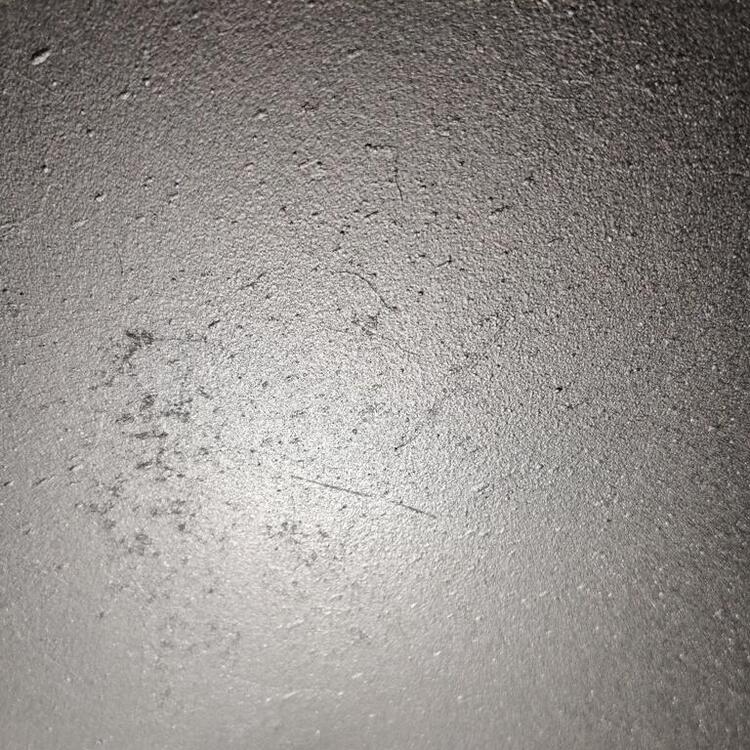
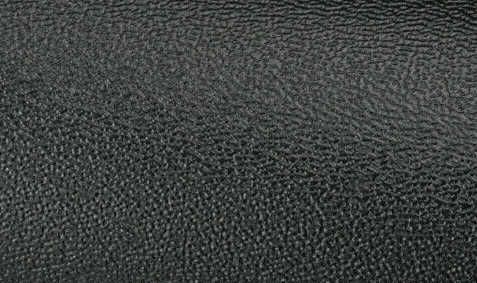
I was able to do some experimentation yesterday with the Raptor Liner and I am pretty darn excited to share - this was sprayed on a piece of plywood: Pretty - darn - cool, eh? I know, right! In case you think I am joking, have a look at a couple of pics of my car's original coating: Now, I don't intend on making runs, however, I am excited to see that the original texture can be replicated, though it will not be easy. Here is another pic - focus on the middle of the blob: Creating that texture on the areas of my floor that no longer have the original coating is my goal. If I stick with what the instructions say for mixing ratio and thinner and spray pressure and gun distance, I will get something more like this: That is not bad - I kind of like it. But, it doesn't look have the same texture as the original coating. The samples above were shot with a Schutz gun. This last one was done with an HVLP gun: This was shot on the inside of my well used and not prepared at all wheelbarrow. I am actually quite zoomed in here, but a couple of observations are: There is very little texture at all The coating is a bit less glossy Scratches in the original paint and rust (both underneath) show through the new coating. So, the plan is to used the Schutz gun to add a coating back where there is none and to a few areas where it was not applied from the factory. And then, I will follow with a coat from the HVLP gun on the entire bottom of the car. I think the texture of the original coating will show through the HVLP coating. If I don't achieve the desired texture with the Schutz gun applications, I will wipe it off and try again, or I will wait for the Schutz gun applied coating to dry, and will "fix" areas as needed with some sanding. We'll see how it goes.


-
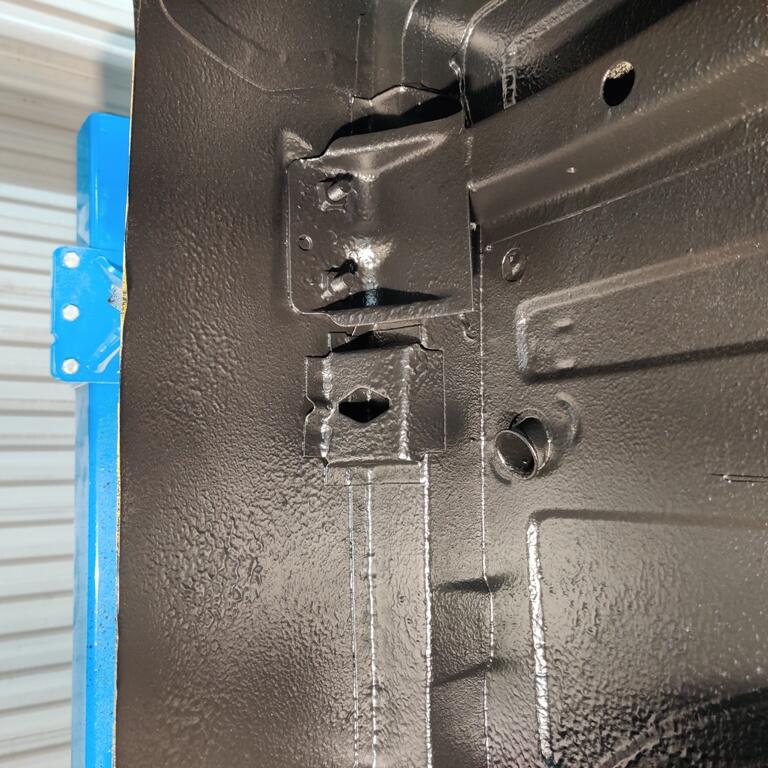
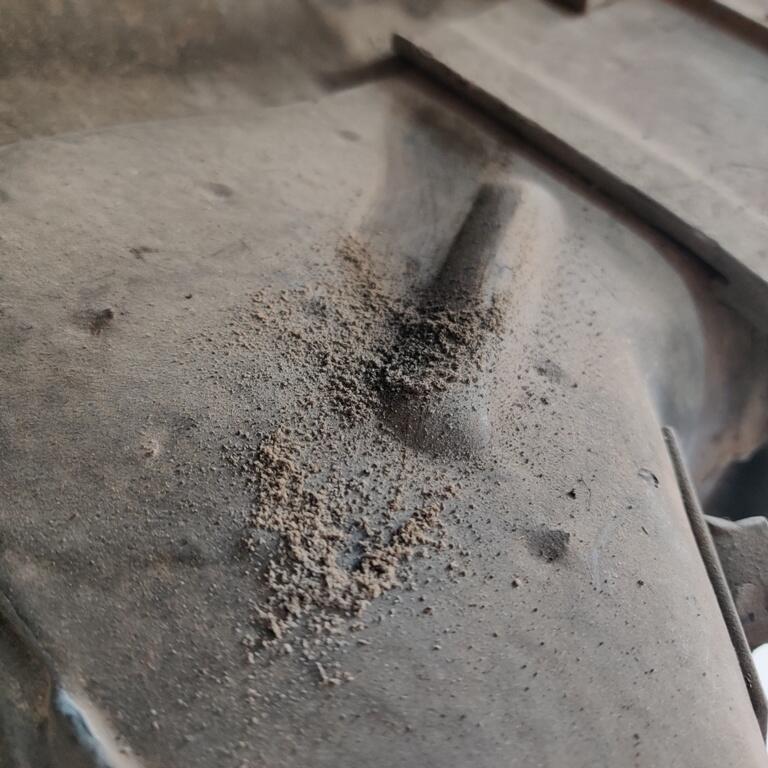
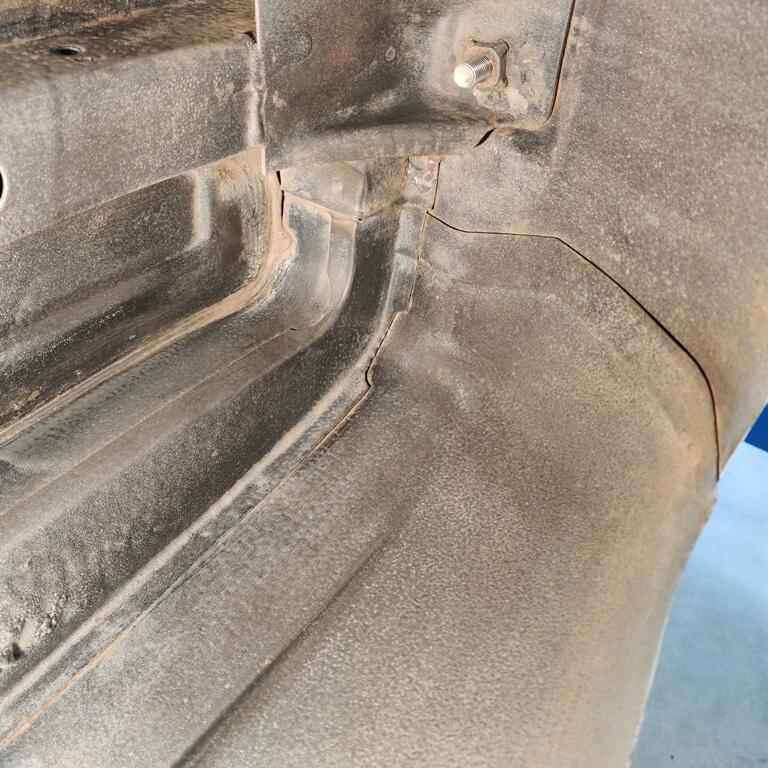
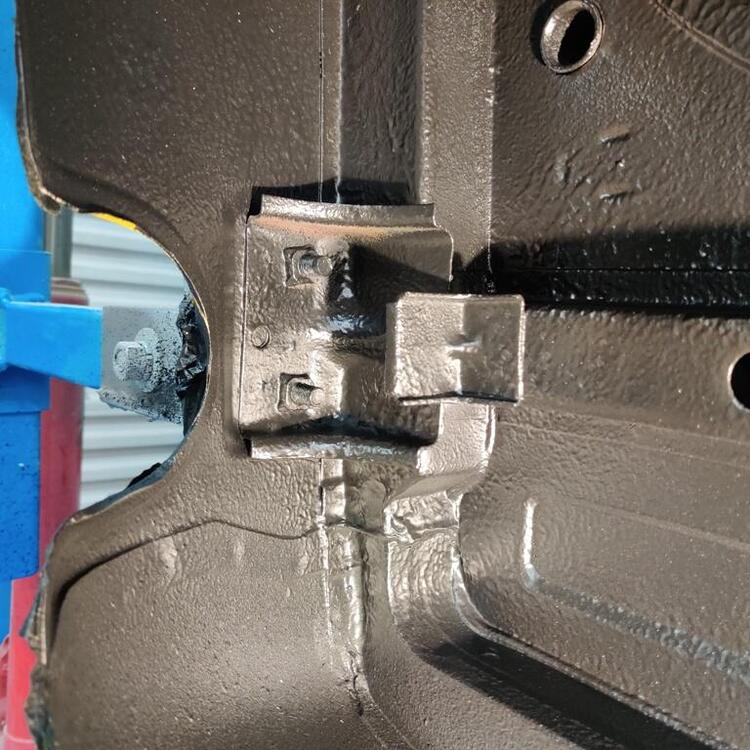
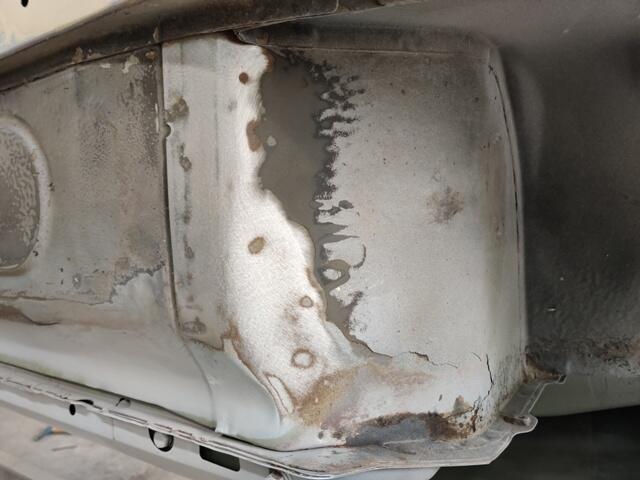
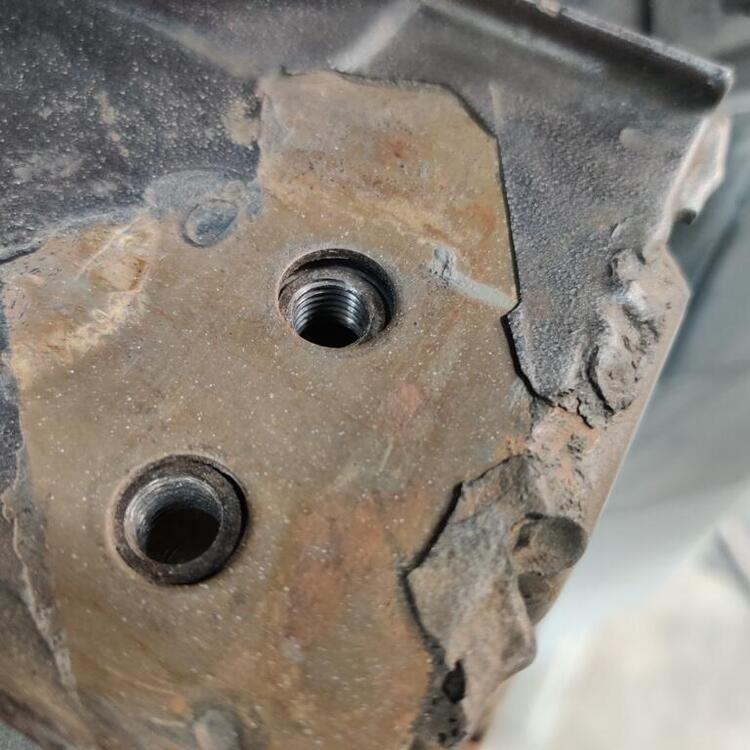
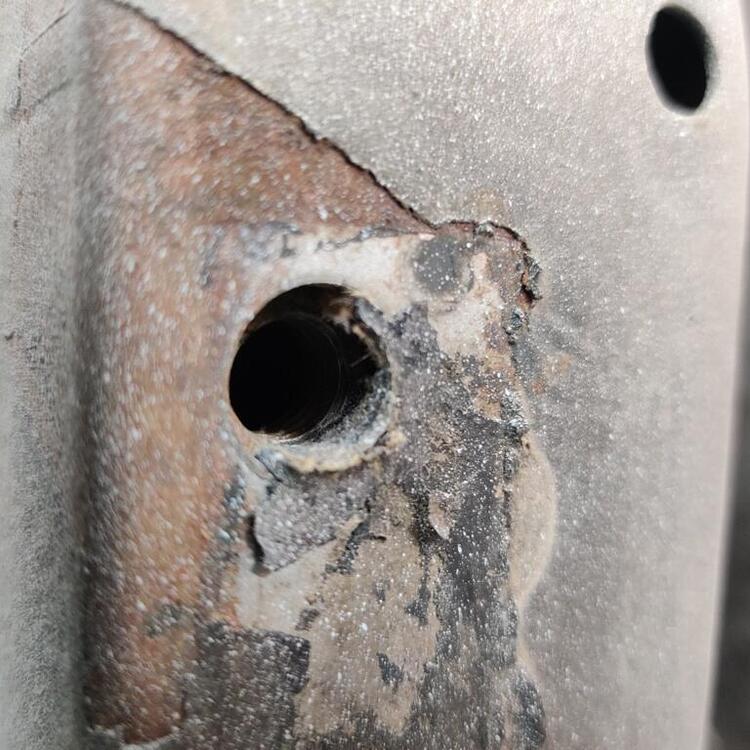
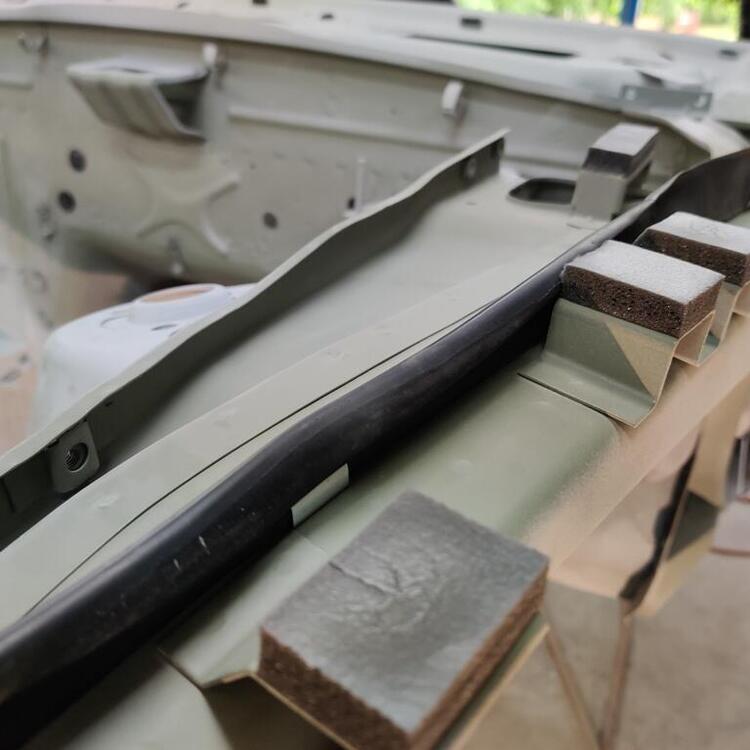
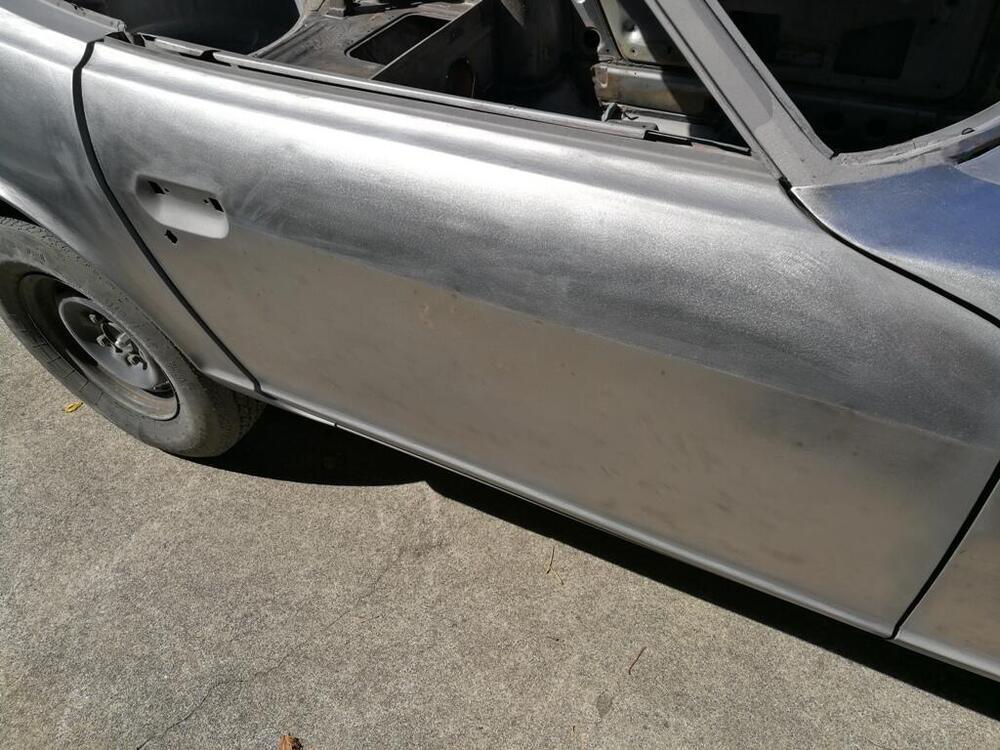
With what I believe (hopefully) is the last of the primer coats on the exterior of the car, I have switched to the bottom surface. There are areas of the floor which had impacts. These were straightened and the existing undercoat has been sanded down and feather edged. These photos show basic progress in that regard: My plan is to keep most of the original undercoating on the car. It is in great condition in most places. Where it is not, I will be attempting to spray Raptor Liner (primer on bare metal areas first). I've watched a lot of videos on Youtube of people who have experimented with different ratios of hardener, thinner, spray pressure, and spray technique. In almost of all them, the texture is not like what you see here on the car. But, I have ideas of how I may be able to get something close. In addition to continuing to prep the underside today, I hope to have time to experiment a bit. I am intrigued by one technique I saw where the person used less hardener than is called for and a Harbor freight HVLP gun with the tip drilled out to 2 mm. He claimed that less hardener allowed the coating to flow out more before drying, and the video seemed to confirm that. The Z is small, so the Raptor kit I bought should be much more than I need, allowing for plenty of material for experimentation. At the factory, they used a kind of tape to cover bolt holes to keep the coating from getting to threads. I took some existing tape off where he handbrake part bolts to teh underside of the tunnel (third pic): Preparing the underside for a coating of Raptor Liner to repair areas where the factory coating is gone) and give the entire floor a somewhat consistent finish is a lot of work. I am using small wire brushes to remove the accumulation of dirt cemented in place with oil. Then I follow with a degreaser/thinner. Then I follow with more wire brushing and a red Scotch Brite pad. It is tough to get into all the corners, but I will get them eventually. Seam sealer will be used on some seams like the overlap of the lower, rear panel to the quarter panel (third pic).


-
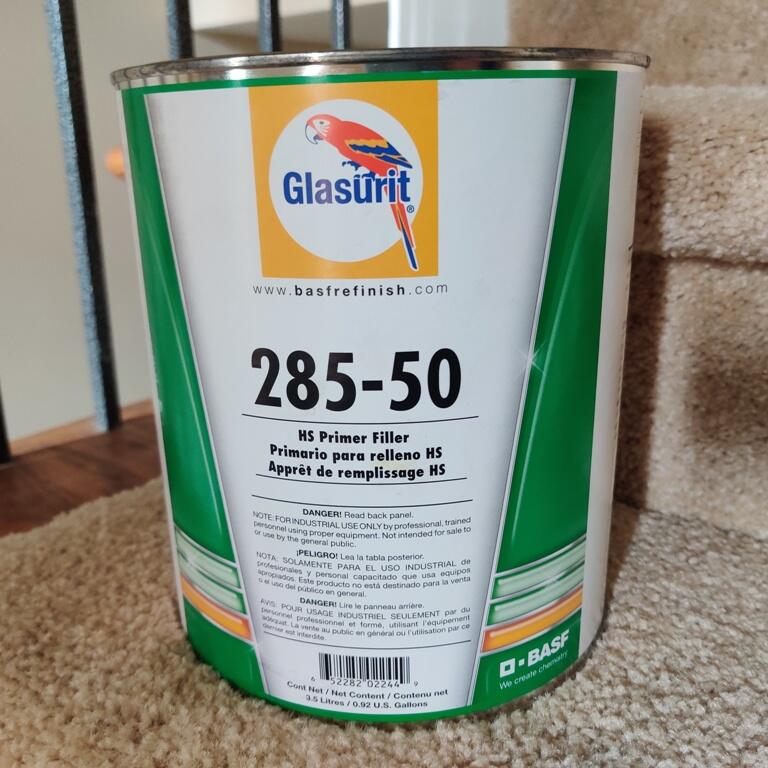
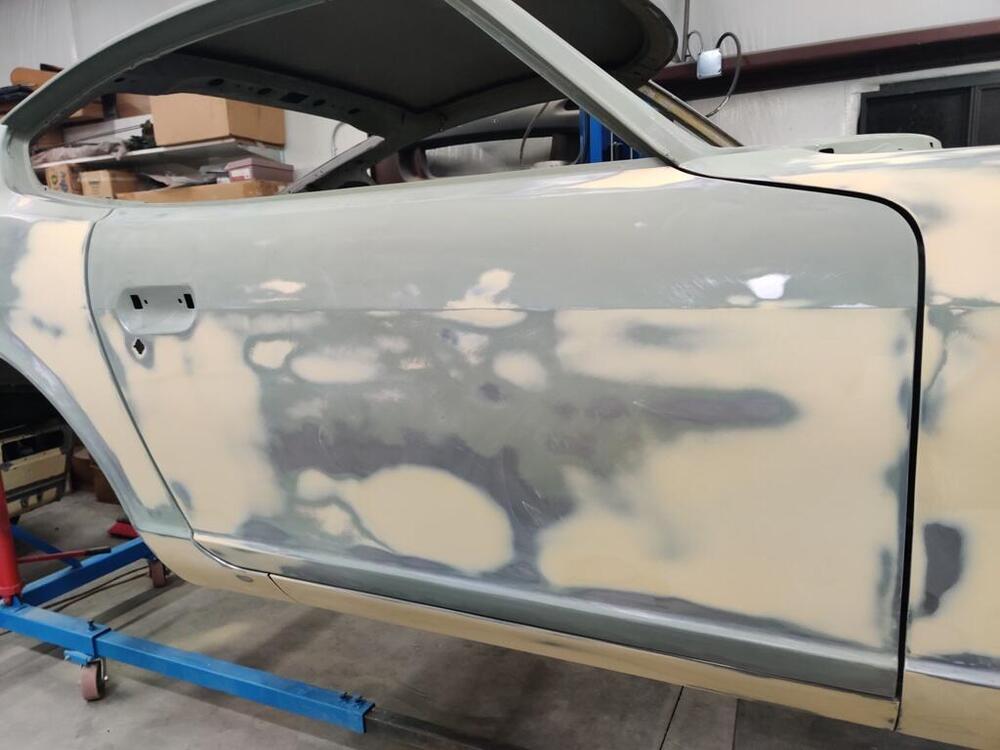
I was hoping the time between weekends for primer to dry was sufficient, but I can't explain the reappearance of very slight low areas on the right door and flat vertical area of the right fender unless the previous layers shrank. Most of the bodywork is a year plus old, but unfortunately, I am in a situation where many primer coats are being used in a few areas to build up low areas. I used very fine body filler in those areas to attempt to raise them up, and that helped. But, inevitably, when sanding the body filler, where the filler edge meets the primer, there is a slight transition which I find easiest to address with coats of primer. For my 510 that I will do as my next restoration project, I will be doing things very differently, so that not so much primer is needed. Speaking of which, I bought another gallon Friday. It went from low $400 last time to $516 this time, with tax.

-
I sanded most of the car with 600 grit today. I have been working most weekends on the body since my last post. A few areas look to have "moved" to me. Not the areas shot in this video, but a few other spots. Perhaps some shrinkage has occurred over the last couple of months. Body work is difficult and time consuming.
-
Zspert, you have my respect - I don't mean any disrespect, however, that is very, very, very... silver. As in, doesn't look original to me. Don't get me wrong... I love that silver. But, is it the original silver for 70/71? I am close to having the car I am restoring painted and am planning to go with silver, which is the color it was originally painted. However, I am concerned that I won't like the factory silver which often looks grey in pics. What paint line was used for that car? Anyway, from the one pic, that car looks very, very, very nice. Would love to see more pics. I also have an order typed up for several items from you - some of the last items that I will need to procure for my restoration.
-
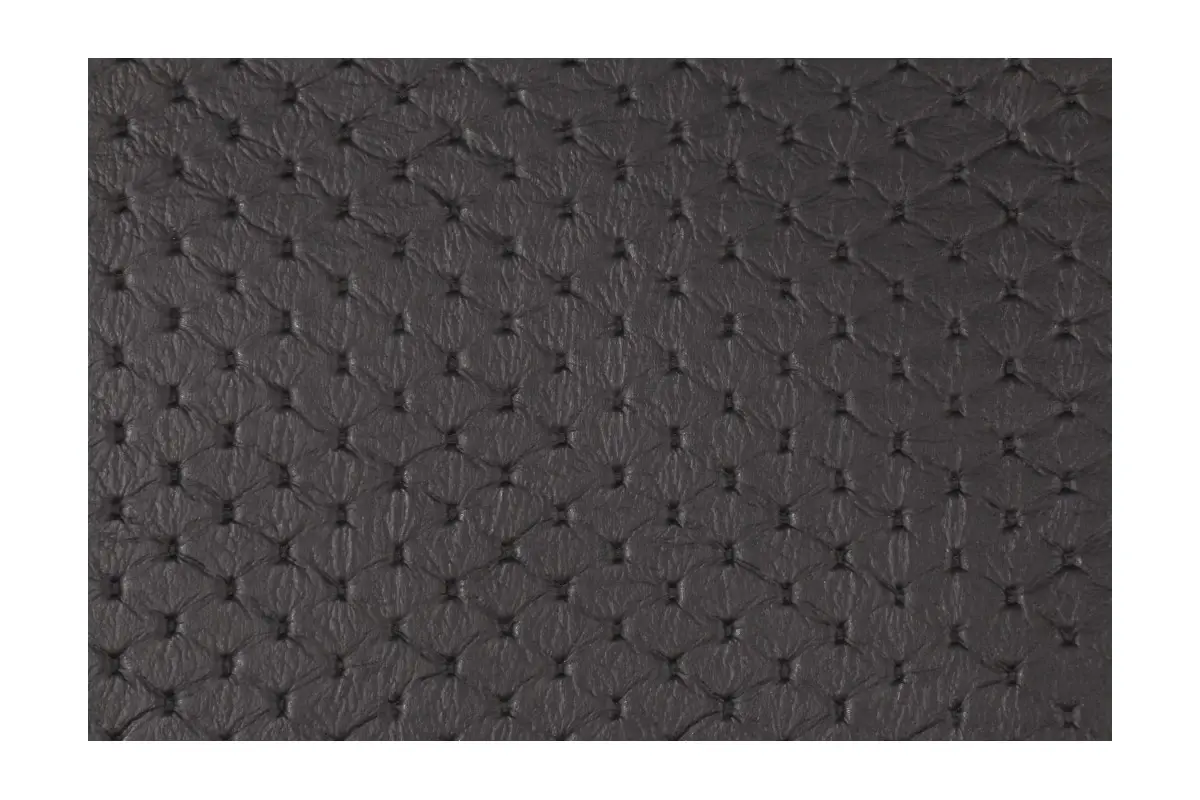
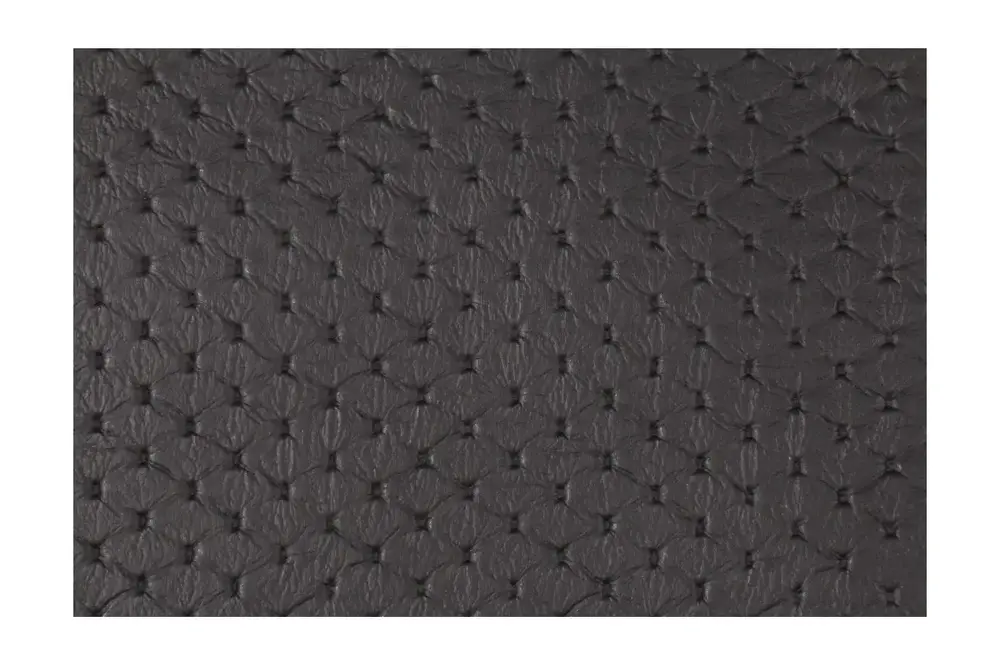
This is great! Thanks for posting these pics. Another material I have been looking for is a vinyl for the tool storage compartments. I have had sourcing some used ones on my list for a very long time, but haven't been able to find anything. I am contemplating using a cloth material - gluing it to a 1/8" foam backing to "semi" replicate the original look. Here is a cloth I found: https://www.decorativefabricsdirect.com/MORSE-BLACK-Diamond-Fabric-p/7036211.htm This vinyl would probably be more durable, but looks considerably different: https://www.fabricguru.com/marine-vinyl/marine-vinyl-diamond-outdoor-fabric-black.html?gclid=CjwKCAjw6raYBhB7EiwABge5Kl3cwLQmn_bZARZ-xjpzzLBqujGFLs8qjcoWdEbapQ8zzvbzNIH3HBoCCCwQAvD_BwE

-
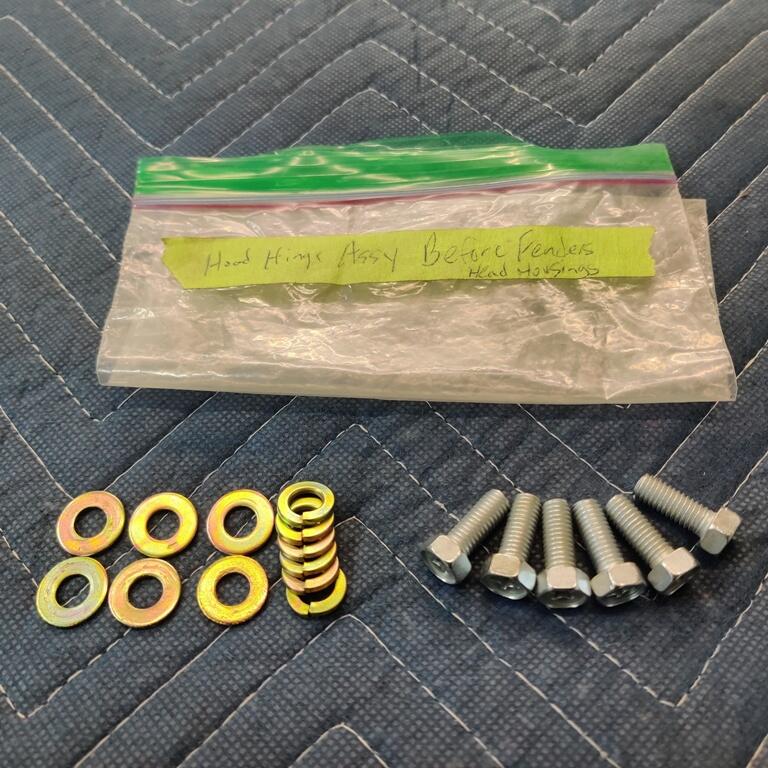
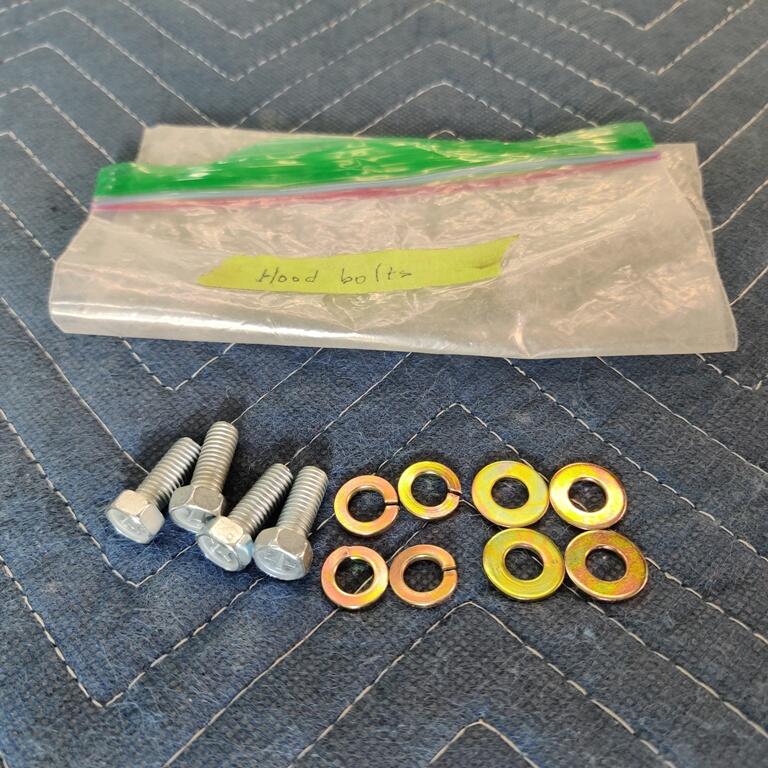
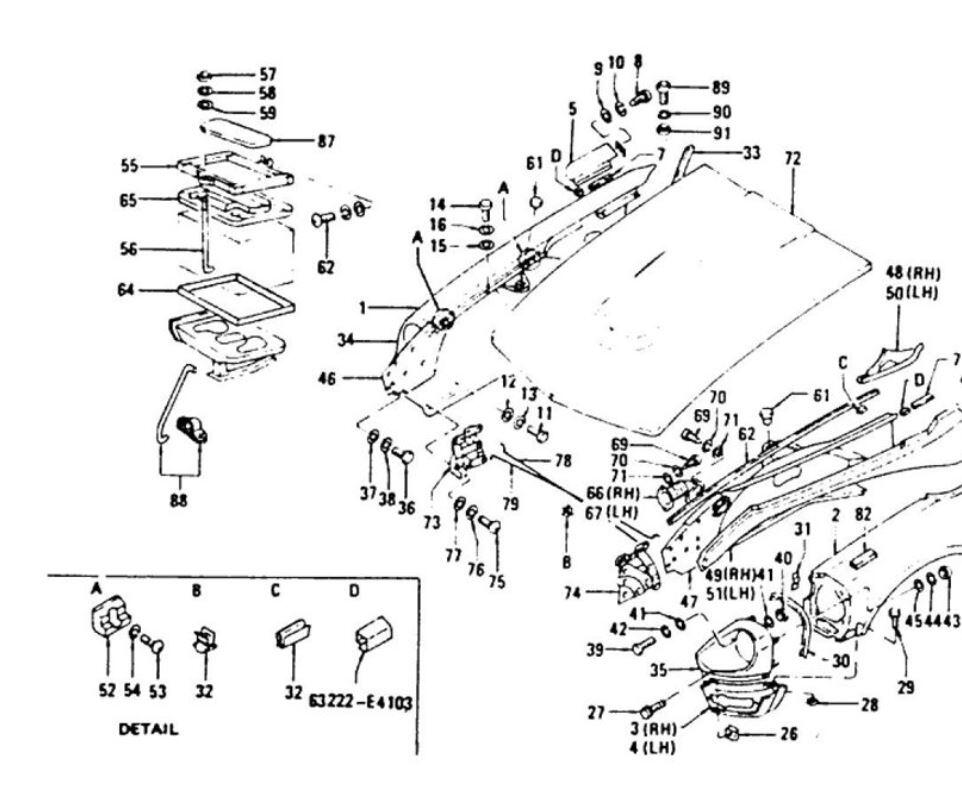
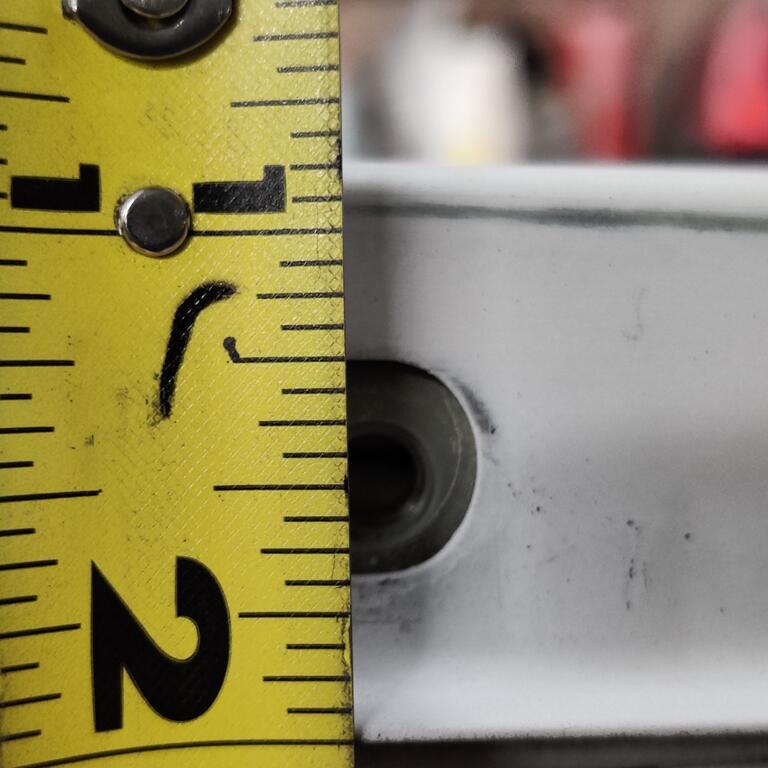
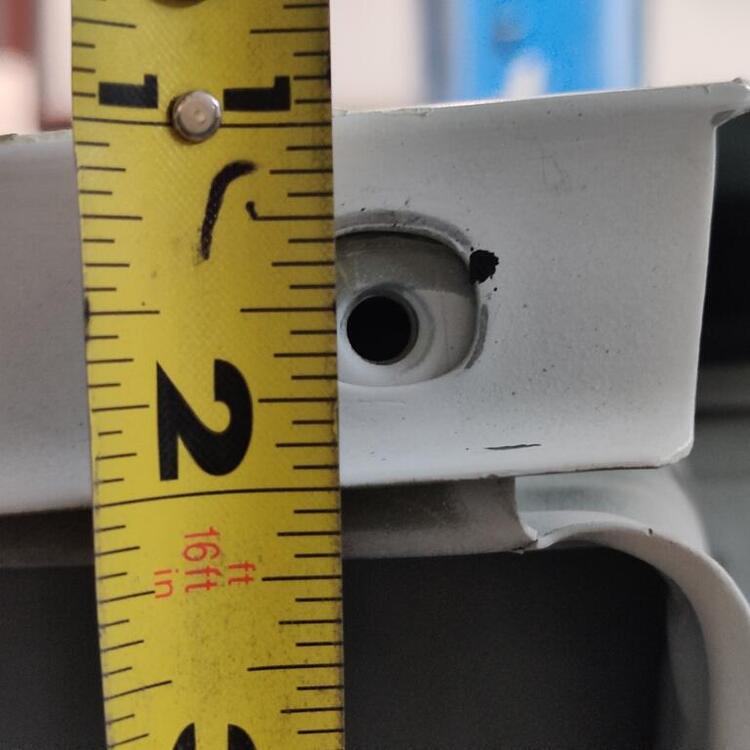
Realizing that a key next step in the body work for this car was to determine the final fitment of the top, inside edges of the fenders, I proceeded with mounting the hood over the weekend. In order to do that, I had to first modify the angle brackets connecting the car at the bumper bolt locations to the rotisserie. I had to cut a small section from them to get freedom of movement for the mounted hood hinges. With that out of the way, I proceeded to struggle mightily with aligning the hinges and getting the hood to "sit down" all the way. I didn't take pictures of them, but it is important to note that the "hood - bumpers" (reference A in the drawing), don't just align the hood laterally in the engine bay opening. They are POSITIVE stops for the hood depth - caps added for emphasis! I put them on before final adjustment of the height of the fender inner edges, and they were keeping the hood from shutting enough! Suffice to say... you must leave those off when aligning the hood and fenders, and add them later (as Nissan did after the car was painted at the factory). Hood hinge and hood bolt for documentation purposes: On to details about the chore of aligning the fenders with the hood. After adjusting the hood and fenders as well as possible within their "ranges", the left fender was sitting up higher than the right, a little more in the back (note the inside surface of the fender inner flange can be seen from this angle in the first pic, and less so toward the front of the car in the second pic. Well, I couldn't push the inner edge of the left side fender down any further, as it was at the full range of adjustment using the bolt hole openings on the fender inner edge. That was odd, because I wasn't having the issue with the right side fender. So, I began to compare the two: Left side vs. right side - in that order: It is a little hard to see, but perhaps you can make out that the left side fender has about 1 and an 1/8" from the 2 on the tape to the top surface, while the right side fender has about 1 and a 1/32" from the same 2 on the tape. To get the driver side fender inner edge to align with the hood surface properly, I had to open up the slots in the fender. I did this by using a die grinder and protecting the opening with a flat steel plate: After a few rounds of this on the fender bolt holes, I was able to push the fender down enough to align with the hood properly. I then tightened those inner fender edge bolts for the last time and locked in the fender top surface position. Of course, I then had to "touch up the body work on the fender top surfaces on both sides. I keep learning my own lessons over and over again: 'don't do body filler work on these panels until they are in final position'. Tonight I scuff sanded the inner surface of the hood to ready it for primer filler. The tops of the fenders, and inspection flaps are also ready for primer filler. With any luck, those will be final coats of primer on those areas - more panels are reaching the point where I can switch to wet sanding with 240 grit. After that, I should be able to progress to 400 and then 600 to finish out the sanding process.


-
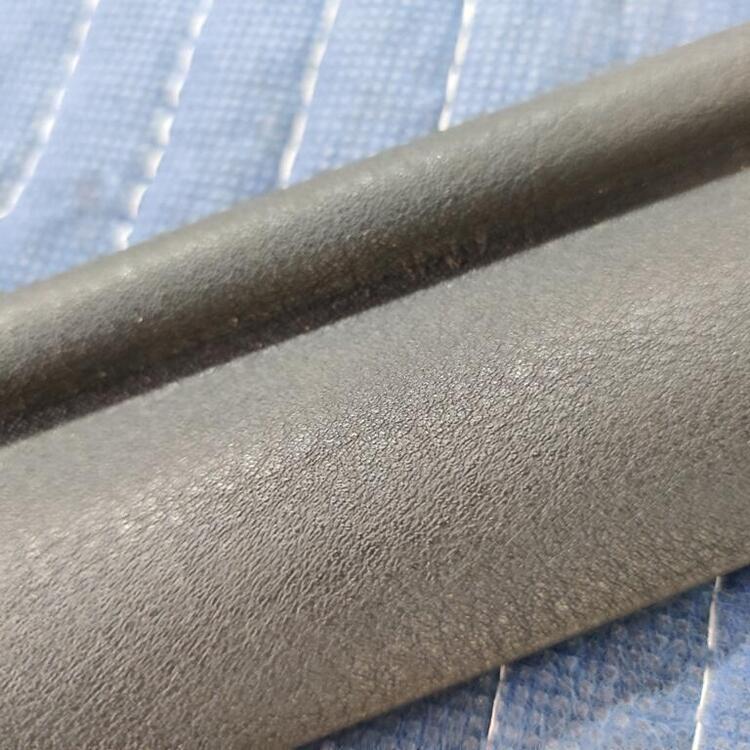
Here is a closeup of the material on Ebay:
-
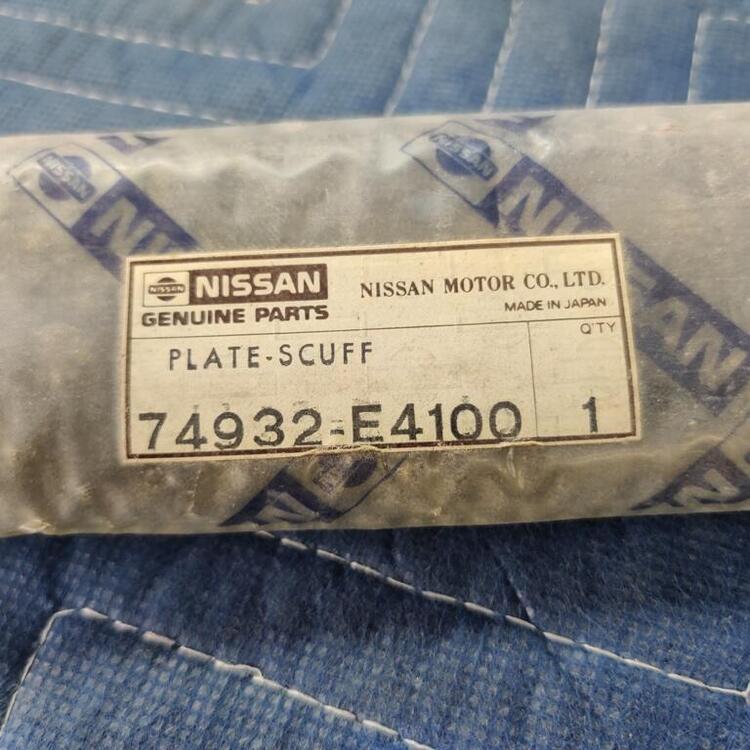
I've been searching on and off again over the last few days to try to find suitable vinyl replacements for the areas mentioned above. Tonight, I came across a vinyl that looks similar to the original vinyl glued onto the scuff plates. It took me a while to realize that I needed to search for "vinyl wrap". I kept searching for non-backed vinyl and was coming up with nothing. Ebay auction It is cheap enough ($10 including shipping), so I think it is worth a try. I haven't yet found an A pillar trim that looks like the original material. I have found some that are nice. My trim pillar trim was carefully removed and is reusable. I may go that route.
-
There are some frame charts I've seen - take a search online and see if they give you the dimensions you need. I can take some rough measurements if you need. Just let me know. However, I think the frame chart might be your best info.
-
Interesting. It looks like there are holes in the replacement panel that line up with the inner U frame section. Those holes appear to me to be there so you can "rosette" weld to the new panel to the frame. In the third pic, I think I see evidence on the U frame section (goes horizontally from side to side on the car) of where the old welds were ground through to release the old panel. The holes in the new panel appear to be too far away from the U frame. This is the original tail light panel on my 1971 240z. You can see the rosette welds inside the indentation area (this area is obstructed from view when the bumper is on the car). You can also two rosette welds where the panel attaches to the gas tank support "box" of the U frame. The panel should be touching the bottom flange of the U frame support rail. Here is a pic from inside.

-
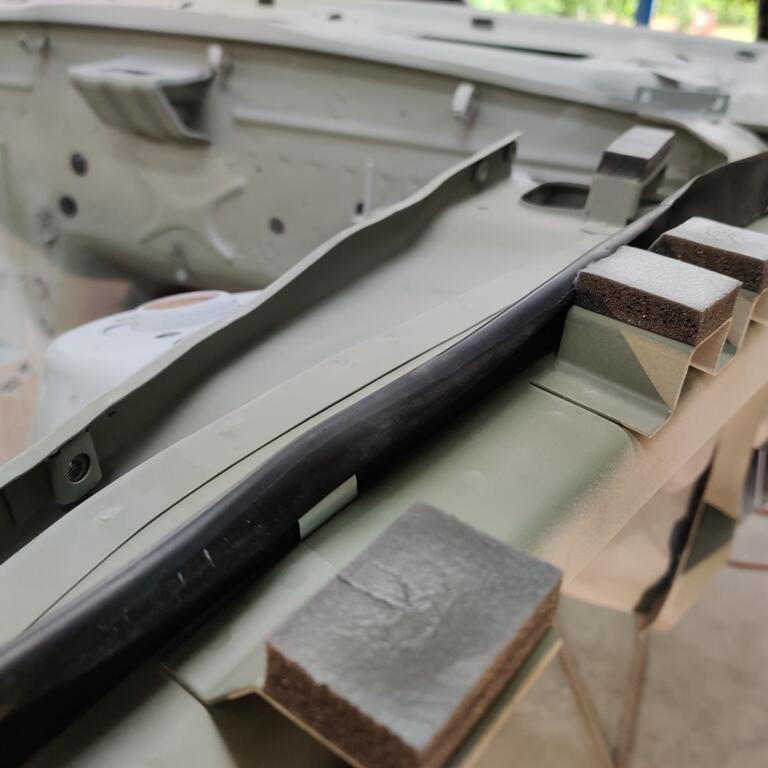
I've mentioned this a couple of times before, but I think it is worth repeating for anyone who may do bodywork on their car in the future: panels bolted onto the car change shape, so if you do your bodywork before the panel is bolted down, you will be doing it again after. While my car is on the rotisserie, I can't finish the top side of the fenders. The problem is this: I can't bolt the hood on and finalize the position of the fender where it bolts in several locations along the top, inside edge. The front rotisserie mounts interfere with the hood hinges, so I can't bolt them into place. I forgot about this and "went to town" sanding the top side of my left fender, breaking through the primer filler to body filler as you can see here: And here is where I again emphasize that panels move - that "high spot" I was sanding down is centered above these "support pads" that are underneath the fender surface - the spot is just above the two in the right side of the picture: These closed cell rubber pads contact the fender and apply force to the unsupported part of the panel. And, depending on that inner edge of the fender's final location, the force could be higher, or it could be lower, causing a difference in the final shape of the fender. I hope I haven't removed too much of the filler there! But I won't find out until I can put the hood on and adjust final fitment on the inside edge of the fender. This next picture shows the side of the fender a while back when I first bolted the fender on (please ignore the poorly applied guide coat - the can was about empty): Same deal: the rubber weather strip on the inner fender support contacts the fender and applies a force to that unsupported area of the fender. In the picture, you can see the guide coat has been sanded away where that rubber is contacting the inside of the fender panel. It changed the fender shape considerably! At least I have already reworked this area extensively and have the bodywork for the side of the fender behind me. Bodywork - will it ever end?

-
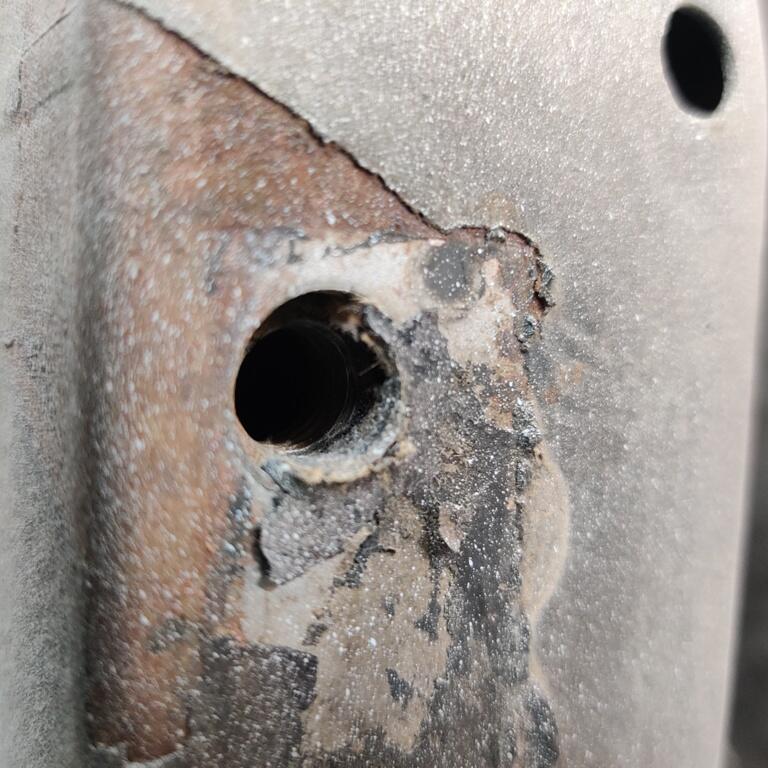
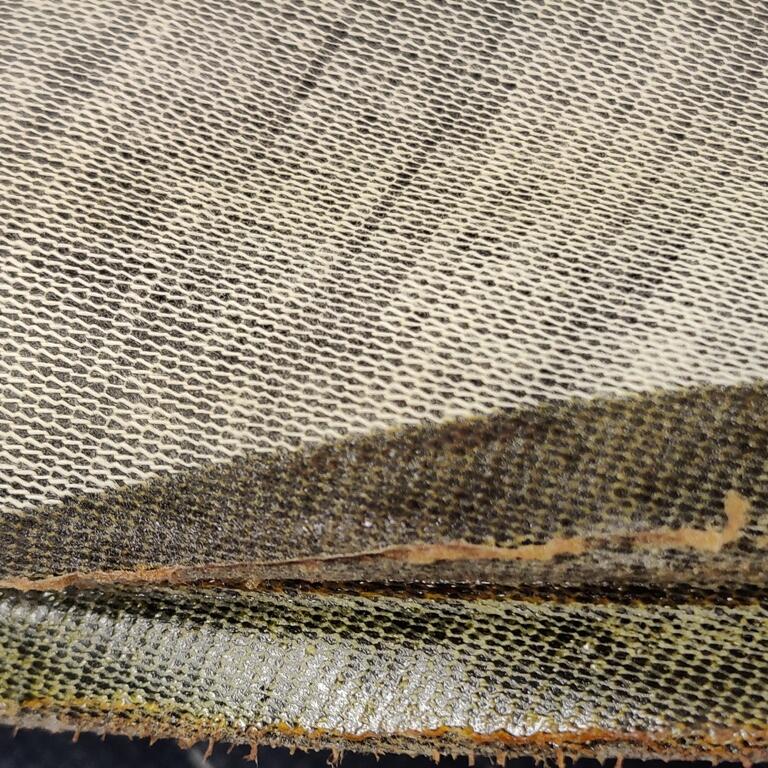
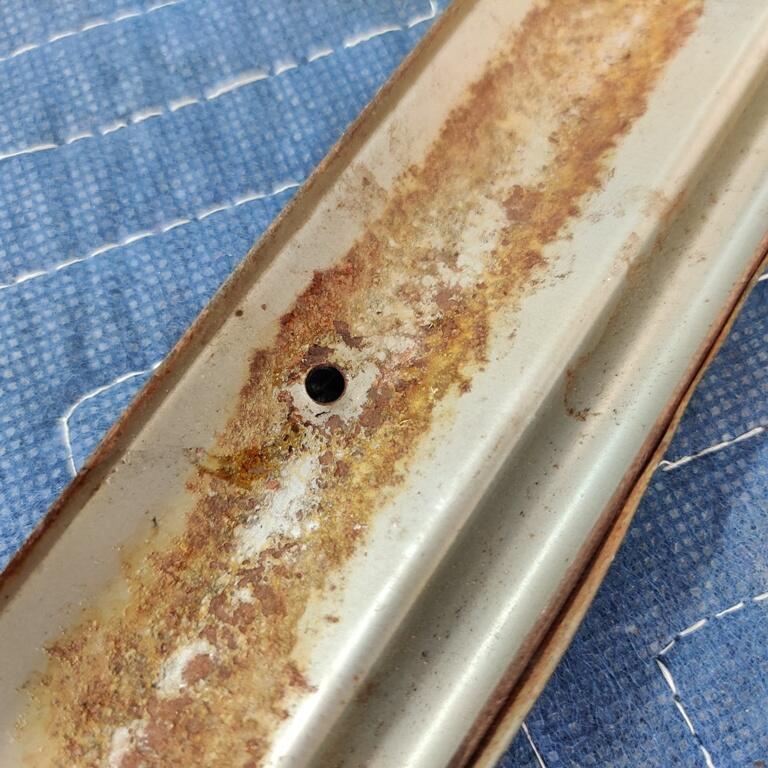
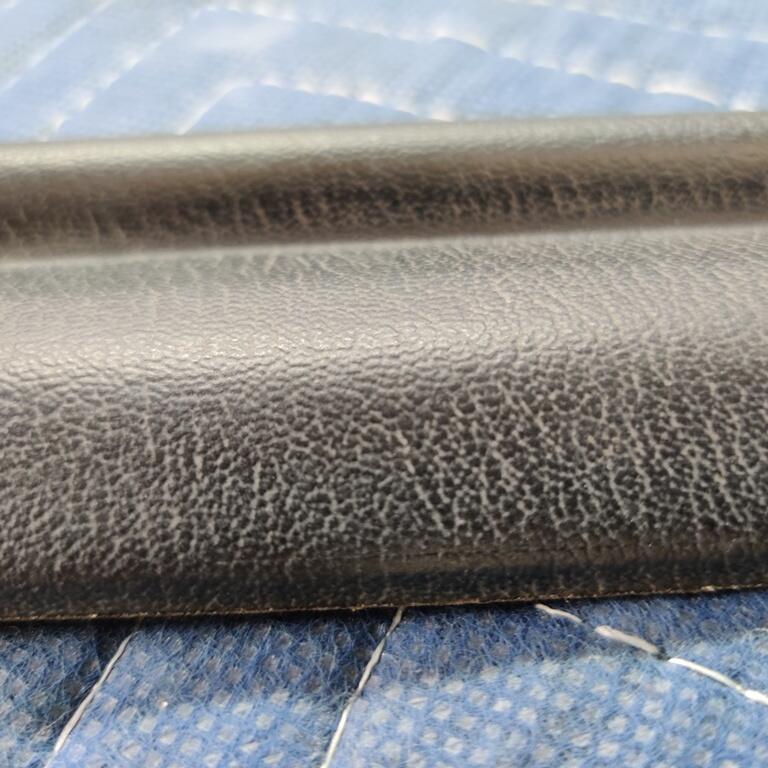
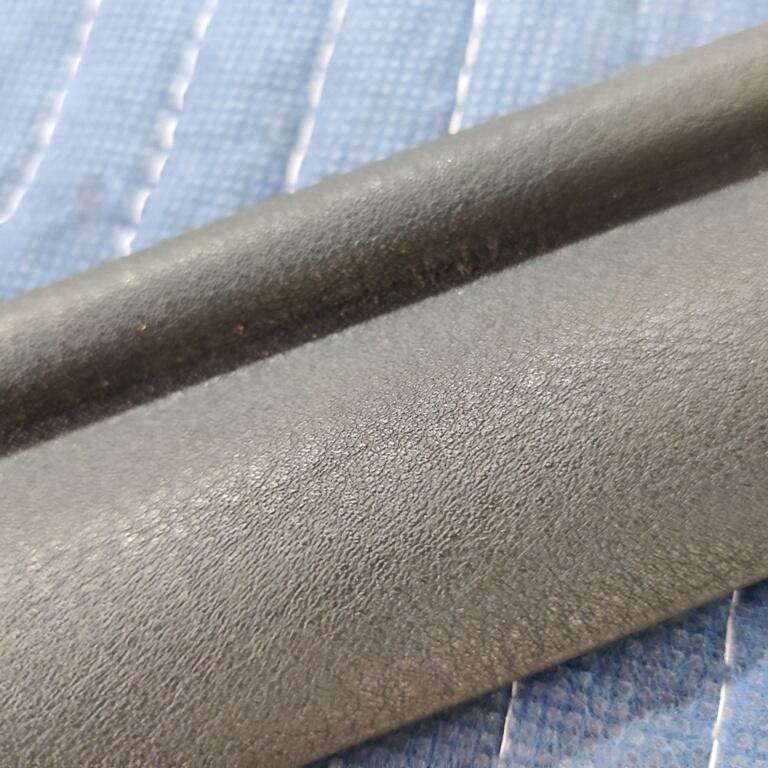
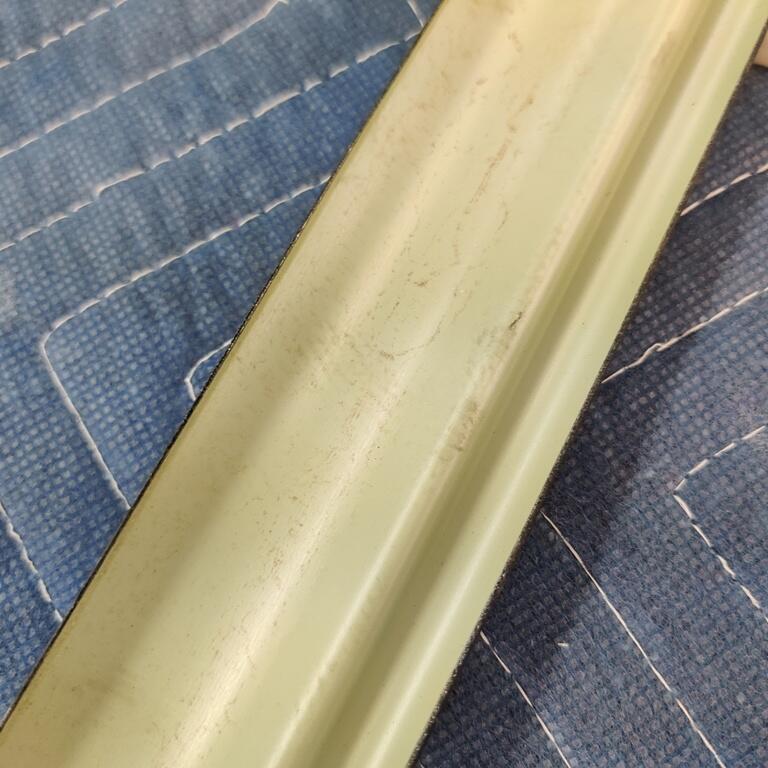
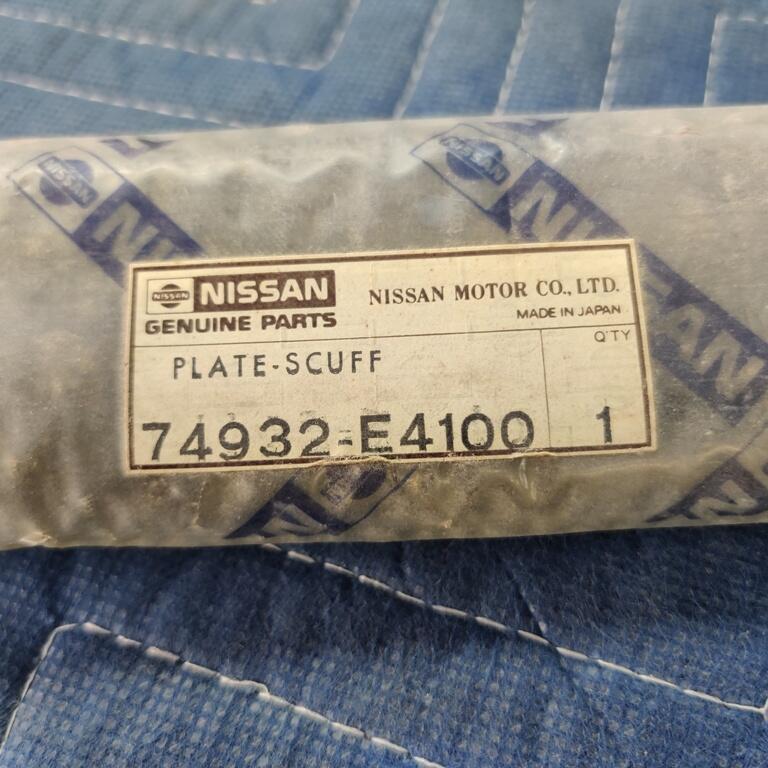
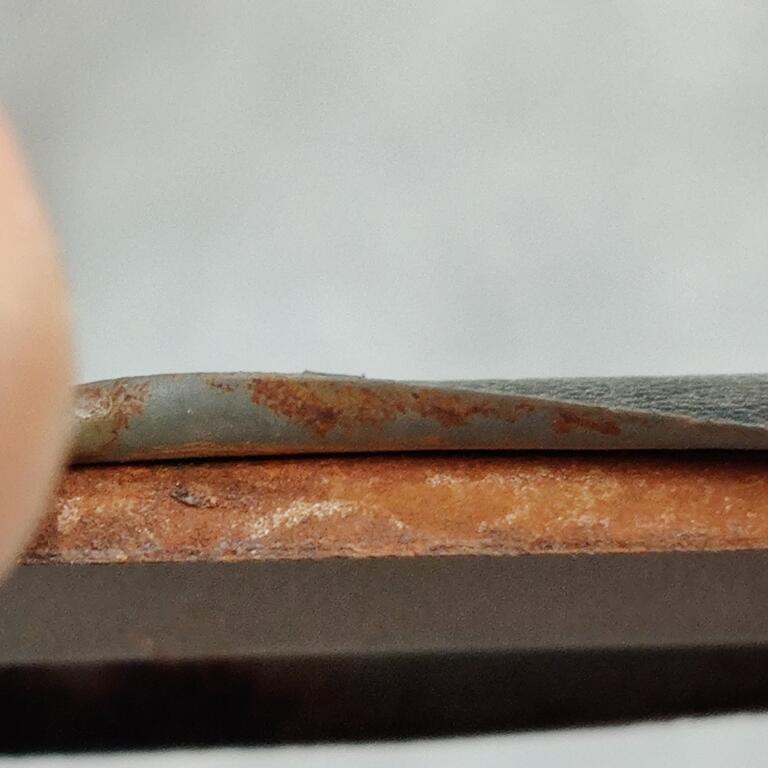
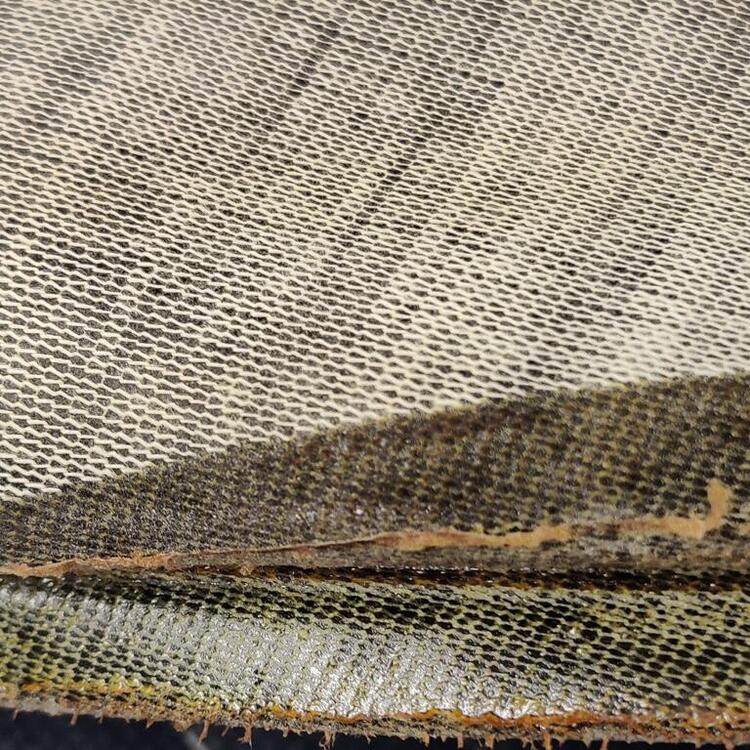
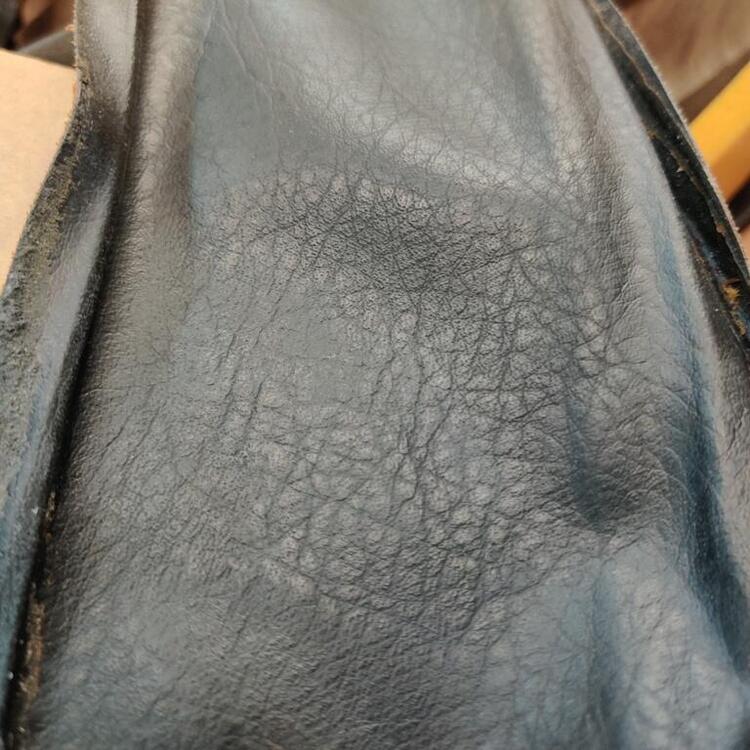
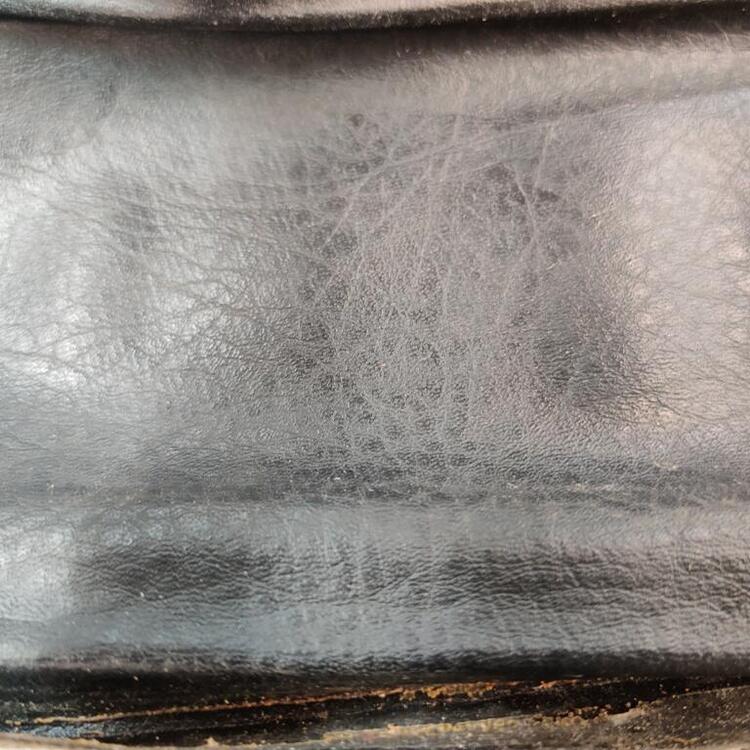
I've started searching online for the vinyls which could be suitable replacements for the original that was used by Nissan on my car, a 1971 240z. For now, I am specifically looking at the A pillar, and front windshield header trim, and I am looking at the vinyl which was used as a covering on the black metal trim piece, which I call rocker panel threshold trim. I am looking for suitable new vinyl materials which are "close" replacements. So far, I have determined that there are vinyls with "backing" and "non-backed" vinyls. However, searching for suitable replacements is not going well. Anyone have any luck sourcing vinyl that is close or anyone have any advice to help me source these? Pics for reference: A-Pillar trim (has backing): Rocker threshold - Early type with vinyl covering (non-backed) - also interesting that the underside is bare metal - no paint or primer and very susceptible to rust: Rocker threshold - Late type with crinkle paint - note: primer/paint on the under surface:


-
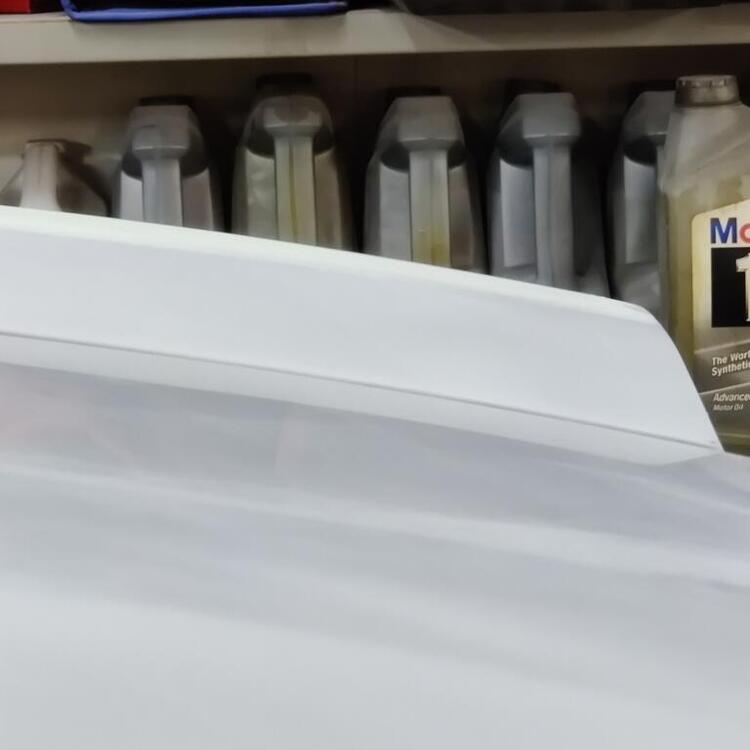
This past weekend, I finally felt it was appropriate to do some wet sanding. Up to this point, I have done all body work sanding dry, with grits of sandpaper including 80, 120, 180, 240 and 320. Mostly, I have used 80 grit and then 120 grit on body filler. And mostly, I have been using 180 grit for everything else. I have been using 240 grit and 320 grit on fender lips and other areas which require more precision, such as where the forward edge of the body belt line terminates on the front fender. Truthfully, I have likely been too conservative in that regard. I have learned a lot about doing body work, as I knew I would. I just wish I could have learned faster. Anyway, it was exciting to do some wet sanding. For wet sanding, I am going over the whole car with 240 grit first. As I go, I am seeing small areas which will need a bit more primer filler. However, I am seeing the end of bodywork on this car coming... finally. I am trying to make sure my belt line is consistent and sharp. I don't believe I will keep it this sharp when it is to be sprayed with color, but I think it is a lot easier to round off a consistent, sharp line to achieve a consistent finished shape than to attempt to round off a line that is not entirely consistent, if that makes sense. Right side front fender (pics 1,2,3: front to back, back to front, back portion of fender close up of beltline): (pics 4,5, and 6: middle portion of fender close up of beltline, front portion of fender close up of beltline, close up of termination of beltline At the termination point above the wheel well opening, the belt line dips downward a touch. That should be easy to fix (to be made straight instead of dipping down) by wet sanding the area that still has guide coat on it. I just need to be careful there.


-
Dang. Bought a new shift knob a while back (has a slight imperfection, but I spent a lot for it - so no interest in spending a lot for another). Keep hoping I can find someone with NOS Jute. Not likely, though.
-
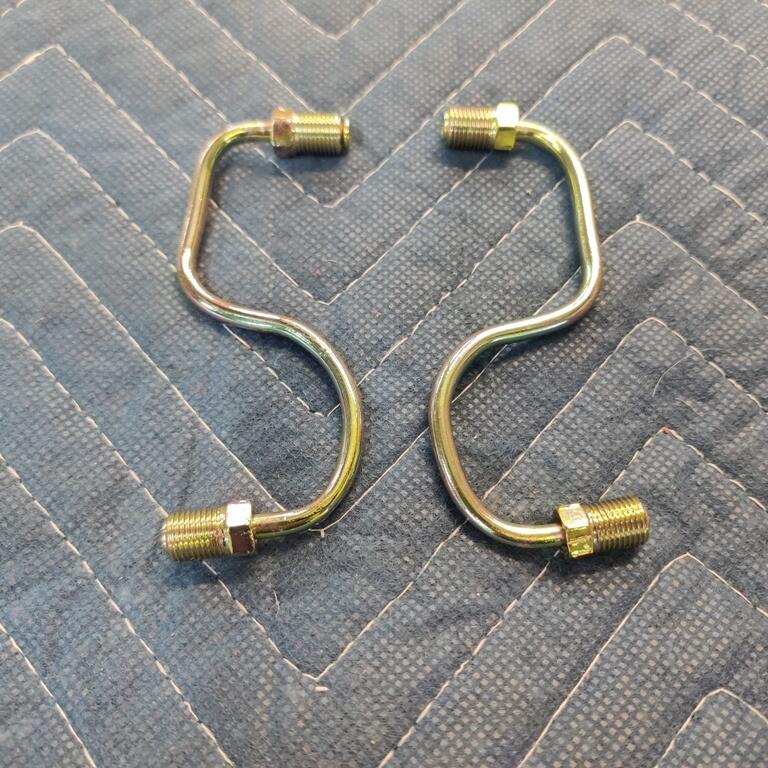
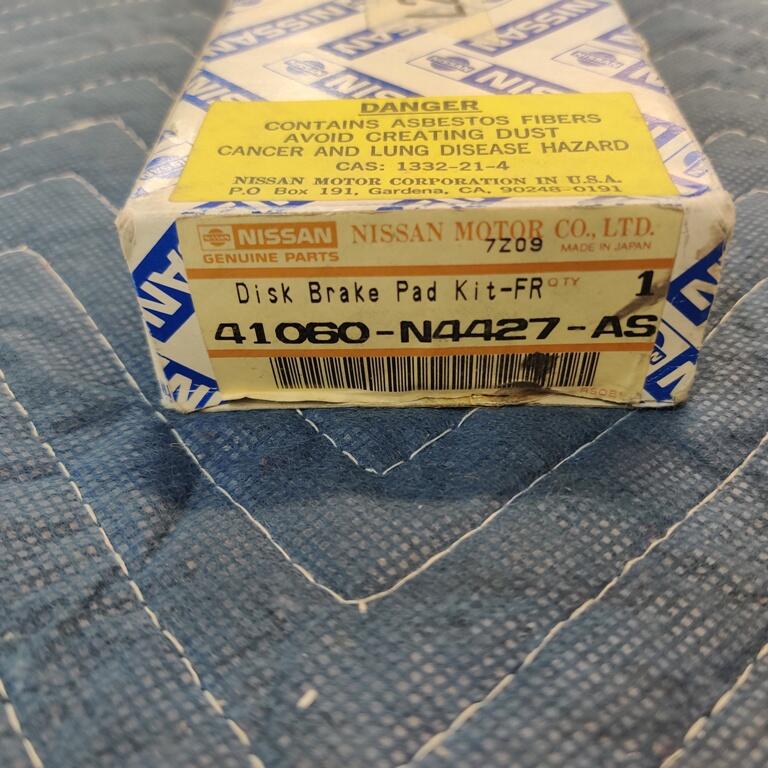
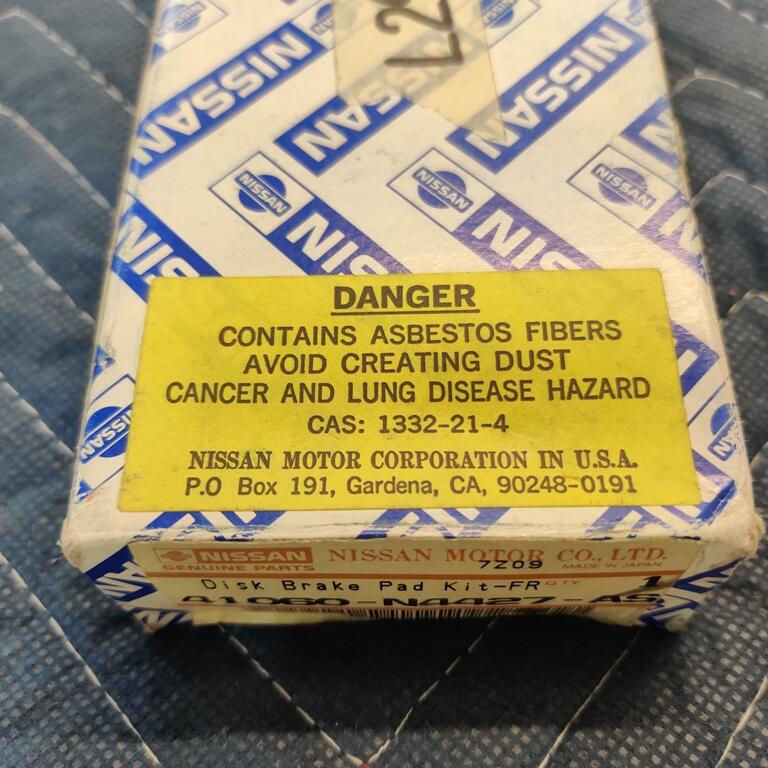
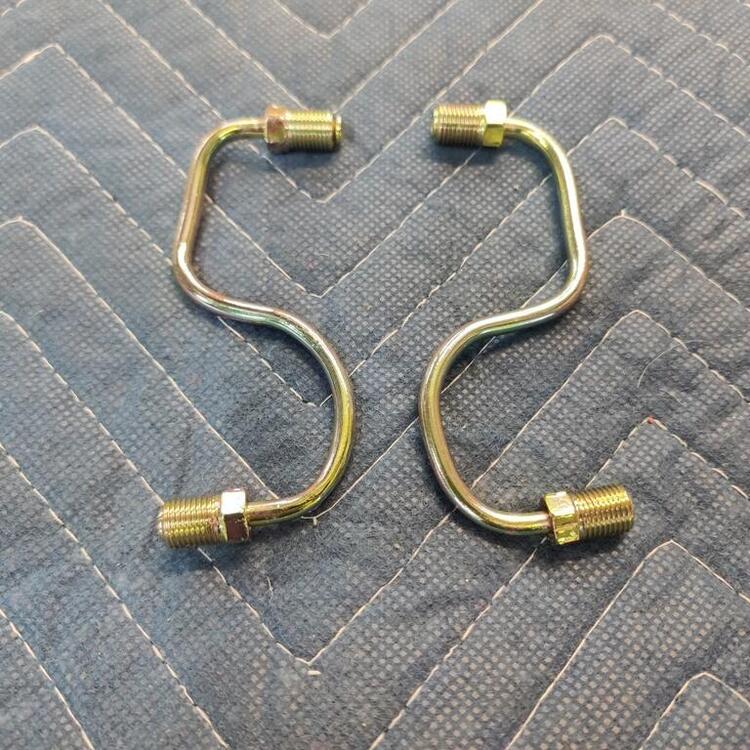
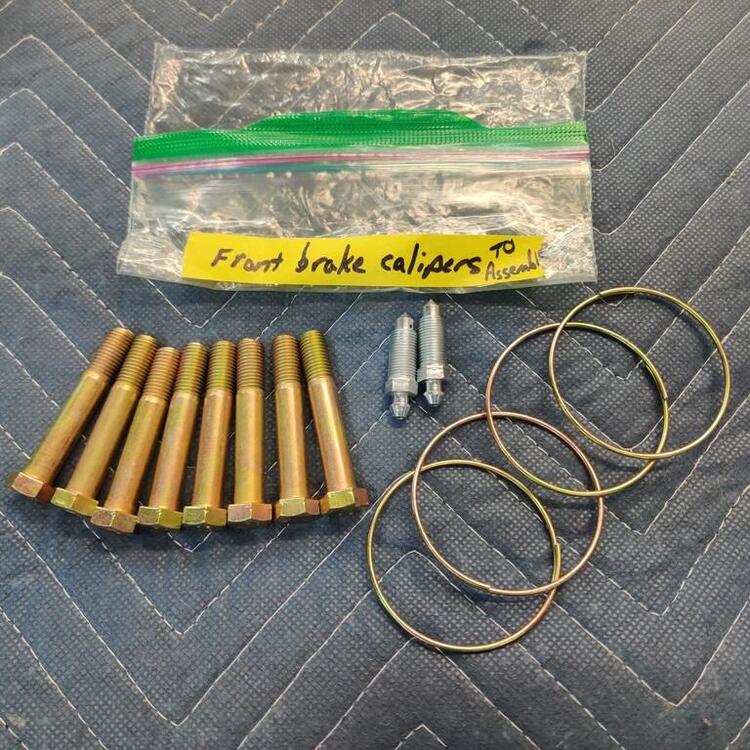
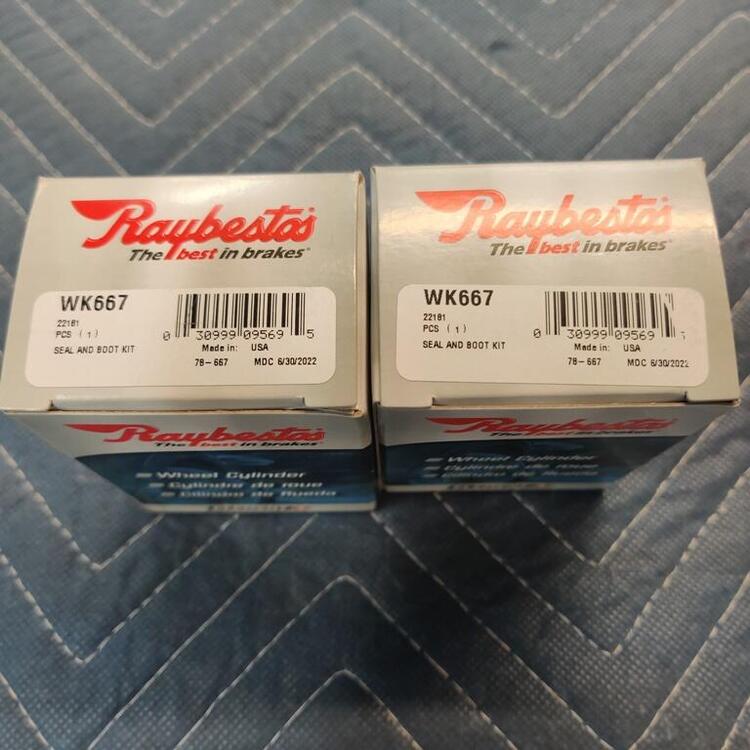
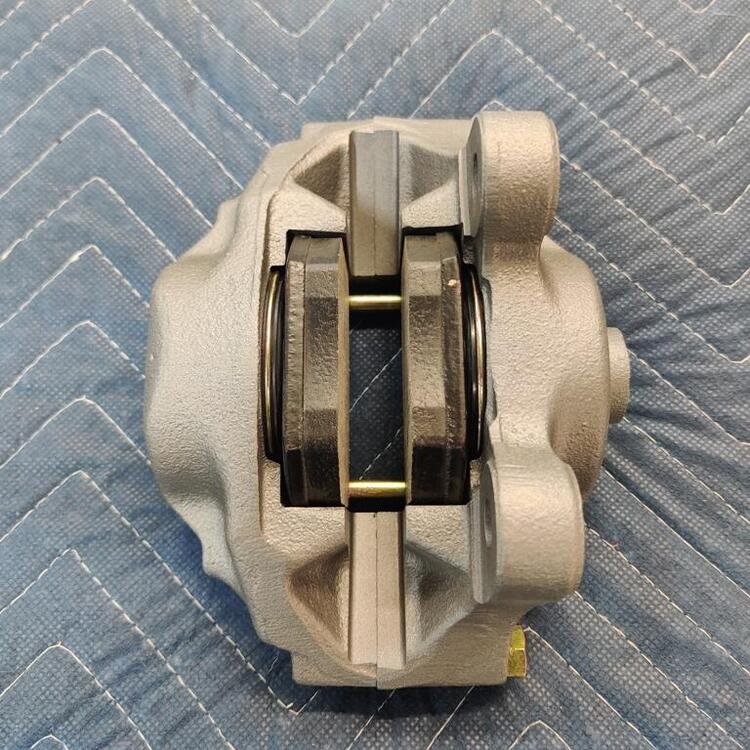
As you point out, the factory shop manual says not to remove the bridge bolts. See a thread I started in the brakes section for a pic of the crud I found in my caliper when I took it apart. O-rings to seal the bridge connection were not available as replacement parts from Nissan that I can tell. Some aftermarket caliper rebuild kits do include them. Some do not. If you don't take them apart after this many years, you are taking chances. In addition to the rust and crud inside the passageways, you are relying on 50 year old o-rings to hold their seal. A leaky caliper makes for a very bad mess - eating paint wherever brake fluid gets. I messed up a new Panasport wheel years ago because of a bridge seal that failed. NOS parts are always cool. But, I don't need them because I had my caliper to strut hard lines re-plated. They need a bit of tweaking which I will do when I install them. I sent the platers a brake master cylinder to brake compensator hard line that was like your NOS lines, with that green coating on it. It came back essentially the same. So, whatever that coating is, it won't accept zinc. Do you have any other NOS items that you won't be using?
-
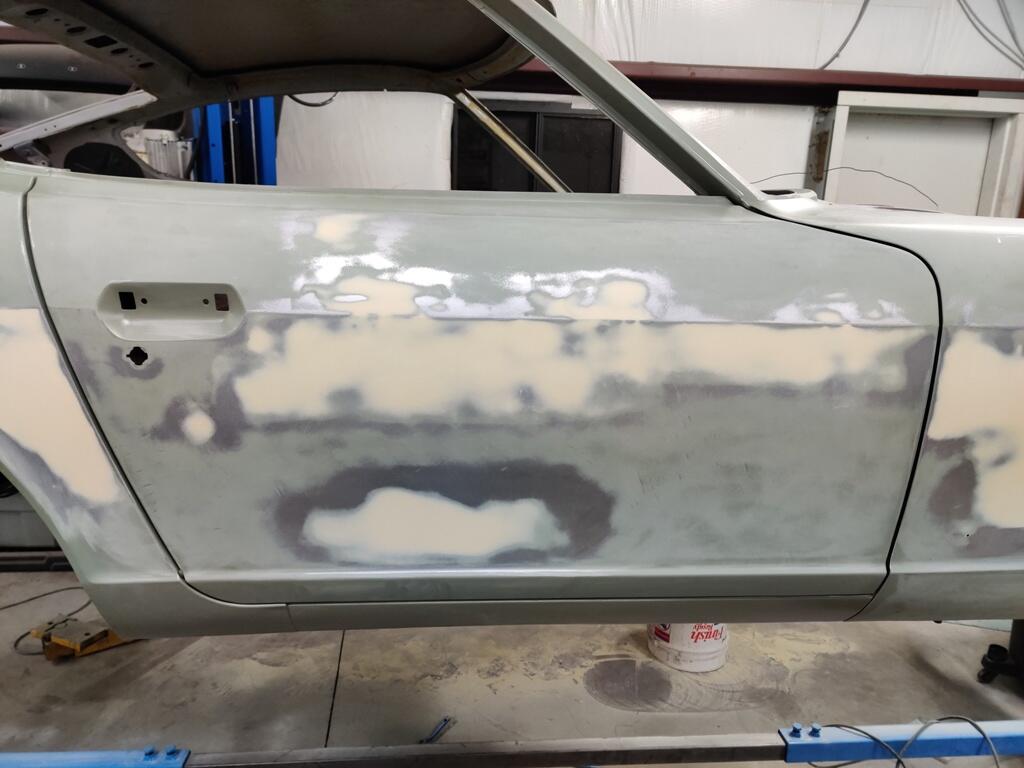
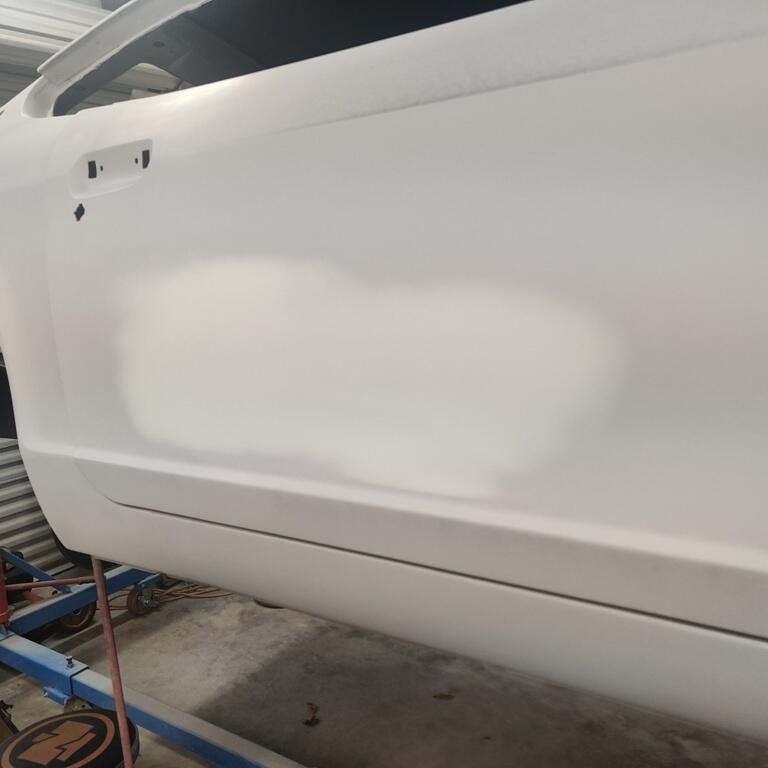
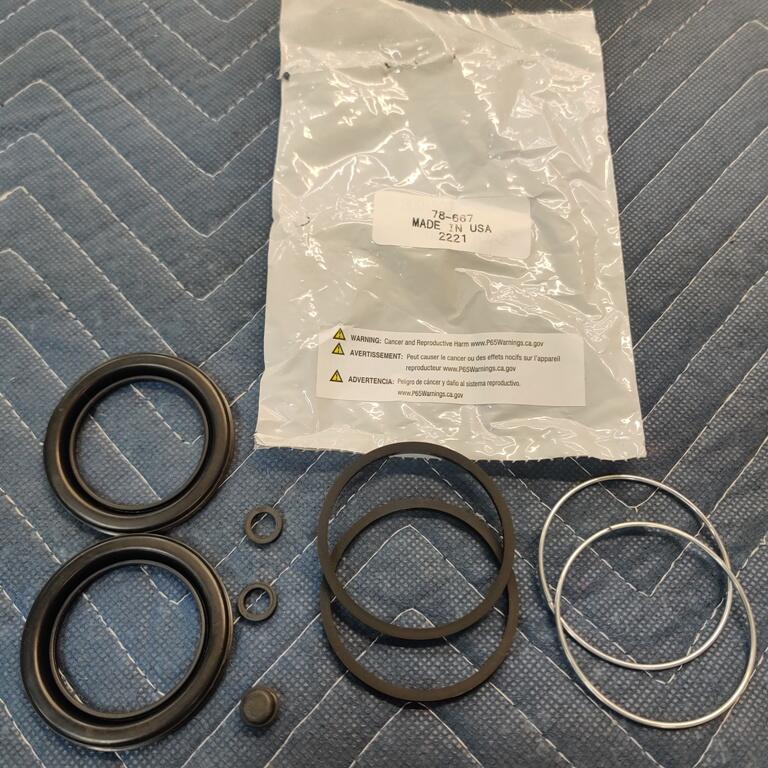
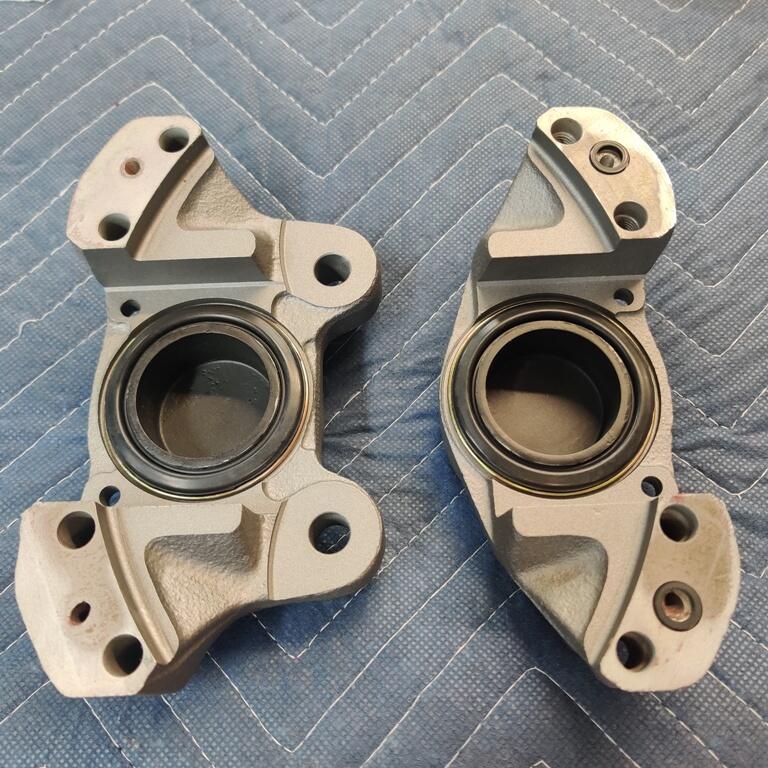
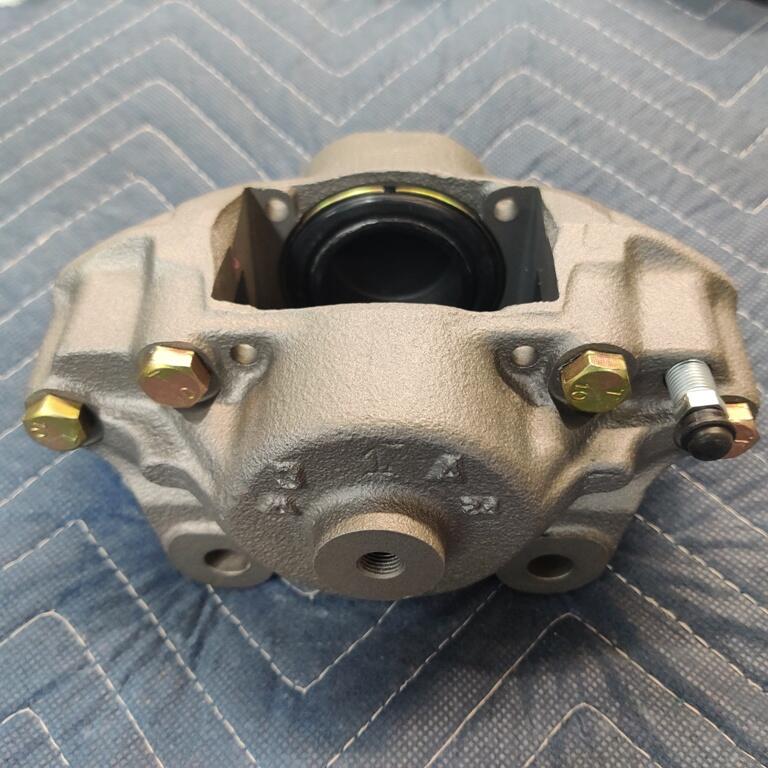
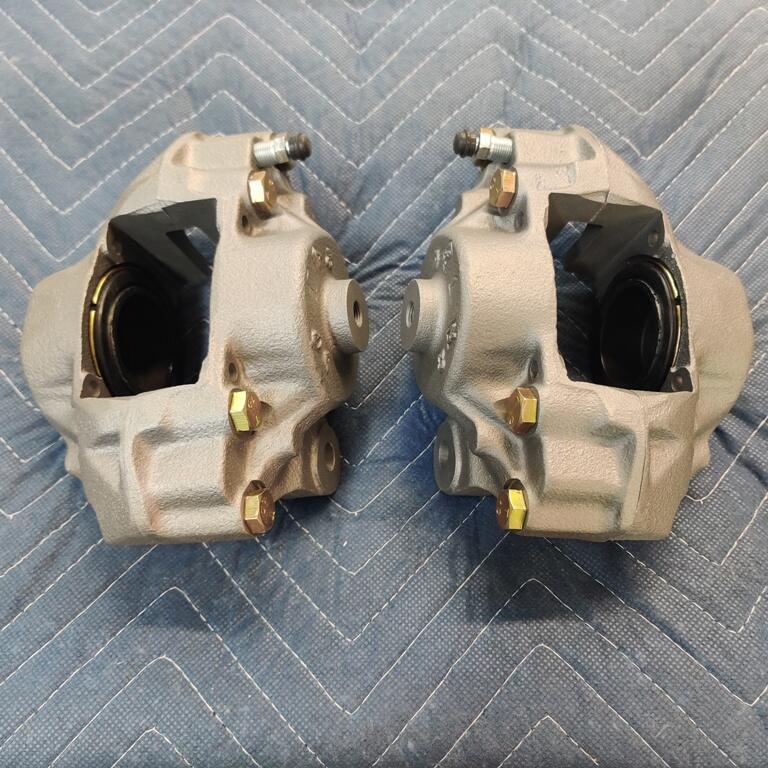
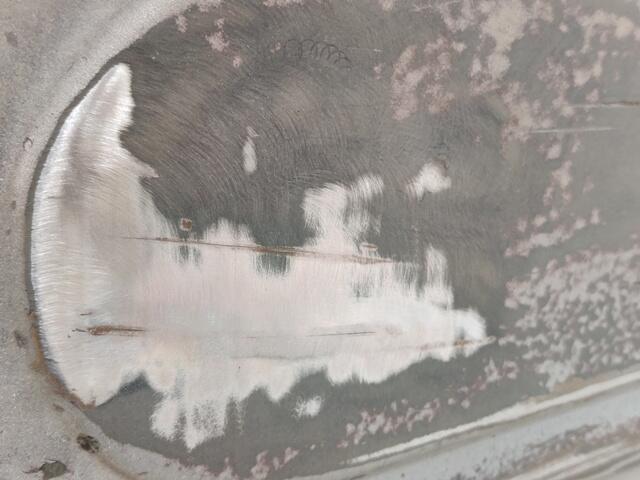
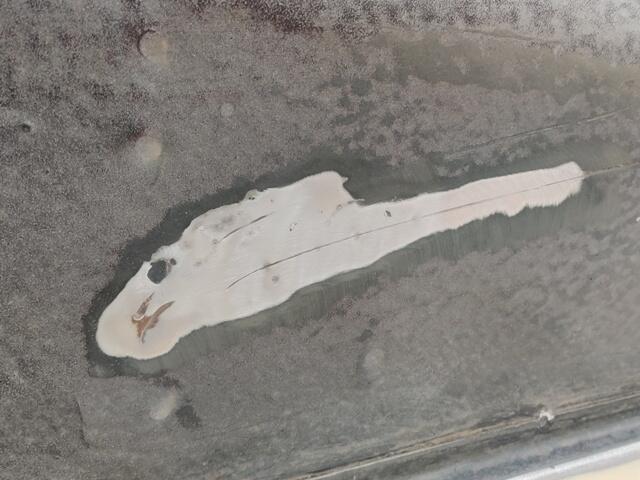
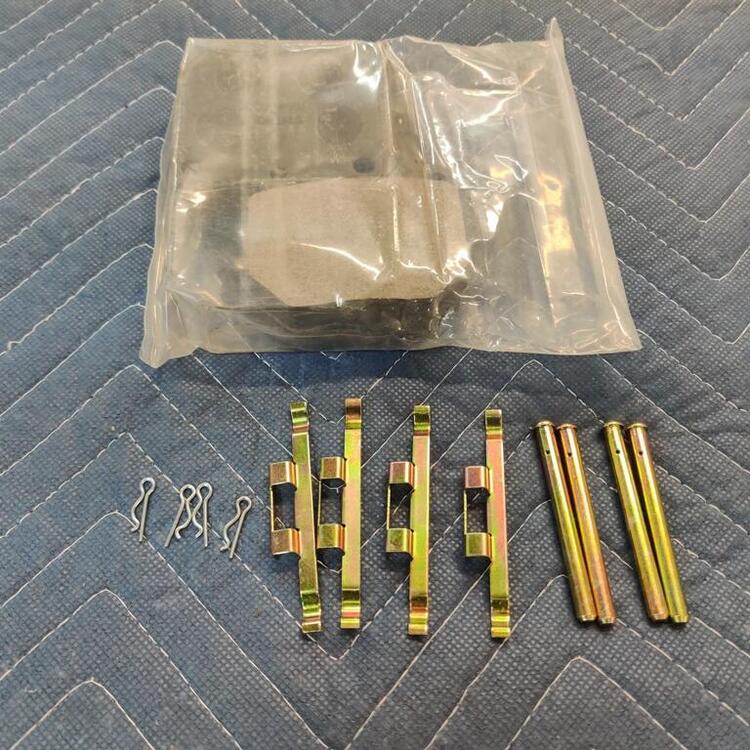
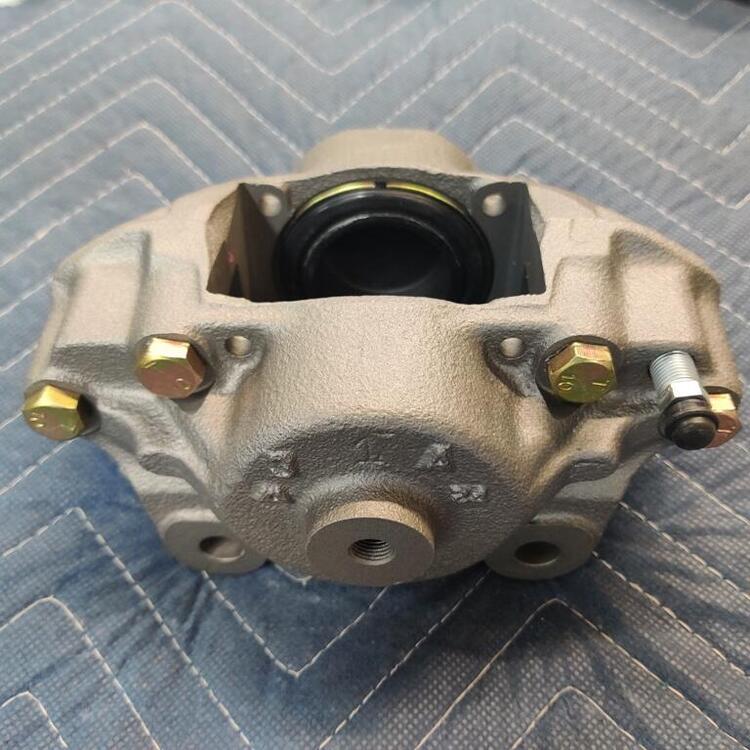
So, my latest learning from doing the bodywork on this car... This is a pretty important lesson to learn with regard to filler work. Here is how my passenger door looked in bare metal: The door wasn't sand blasted. Don't do that, by the way, of course. The paint was stripped off with a 36 grit disc on an air sander. Followed by 80 grit on a DA. Next pic shows body filler which was applied on top of epoxy primer. An obvious issue is that I have over sanded the filler and broken through the epoxy primer to bare metal. The instant you break through to bare metal, unless it is a high spot which will be pretty obvious, stop sanding. But, what I really want to point out is with a large panel, such as this passenger door, you can't assume it is flat enough to just skim coat with filler, sand, and spray a couple of high build primer coats on it and call it done. Note the bottom half of the door and that oval spot of body filler: After more filler applied and more sanding... note the oval spot is still there: In this pic, I have applied high build primer filler... and note the oval spot on the lower half of the door... this time with white body filler added. Are you starting to get a sense of the repetition here? right Almost a year ago, the bodywork on this door still wasn't right. So, here is what I have learned. Don't over sand. Other than possibly being a good workout, it wastes time and materials. Critically, for large panels, use a straight edge, or look at the reflection with a coat of wax and silicone remover on the panel, and check for any concaveness across the span of the door. It is exceedingly difficult to address the panel being ever so slightly concave after you have sprayed primer filler. You need to check it while it is bare metal, and again while it is in body filler stage. Get the panel flat while in the body filler stage. Do not move on to primer filler until the panel is flat. Use guide coat, and wax and silicone remover and check progress. Primer filler is not going to fill a concave panel. That is another thing I was doing that was wrong. A picture from today - note the white filler in the same location as the oval low spot in the pics above, and which can be seen in the video above also: I have learned a lot, but have done it the hard way. And it has cost hundreds of hours and hundreds of dollars in materials. The reflection looked really good prior to application of primer filler today, so I think this door is super close to done, at long last. While waiting for filler to dry, I also assembled my brake calipers today. The original hardware was re-plated, insides of pistons sand blasted zinc primed and painted, caliper halves sand blasted, zinc primed and painted with Eastwood cast iron look paint:


-
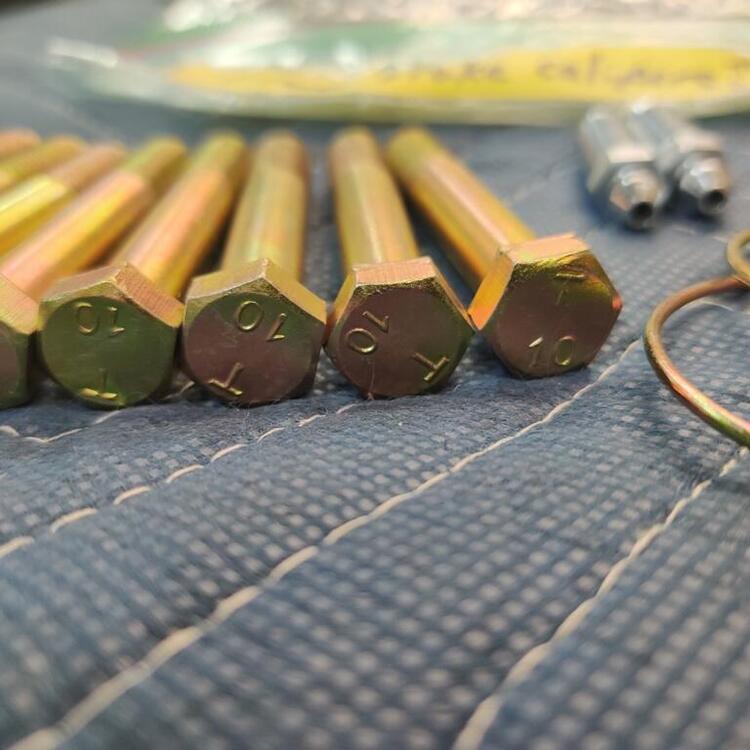
Ok, I will go with 38 ft-lbs.
-
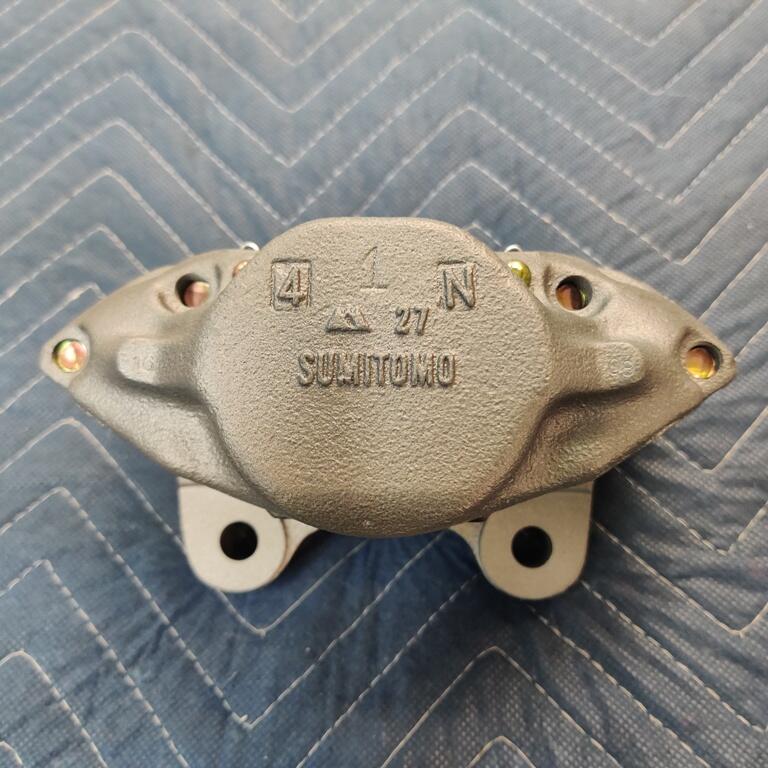
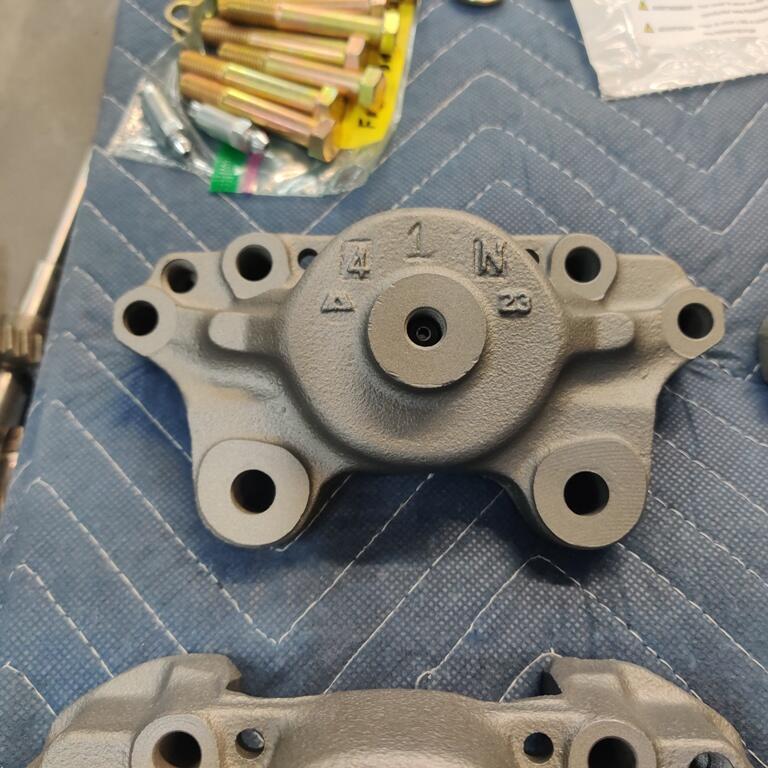
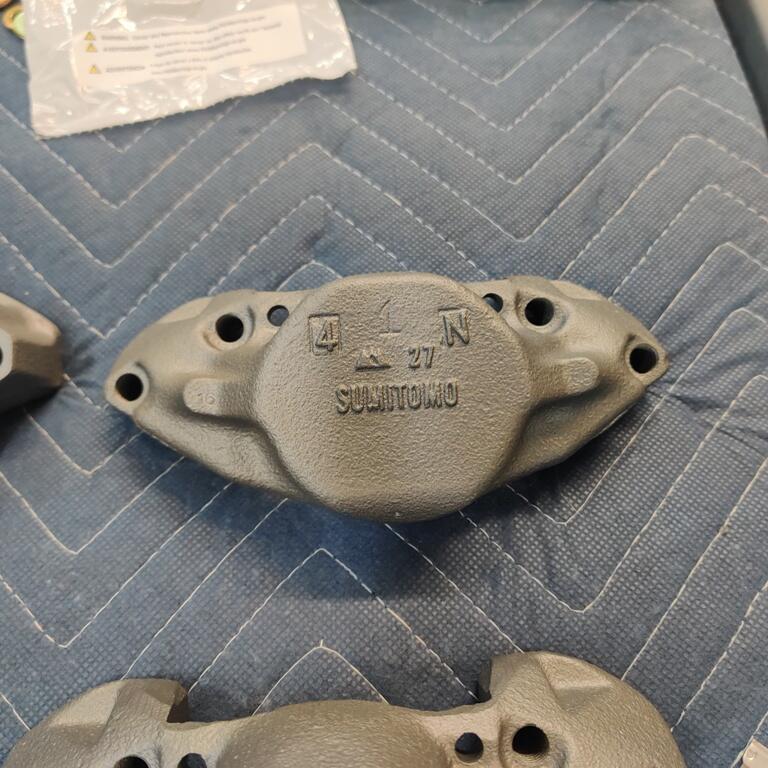
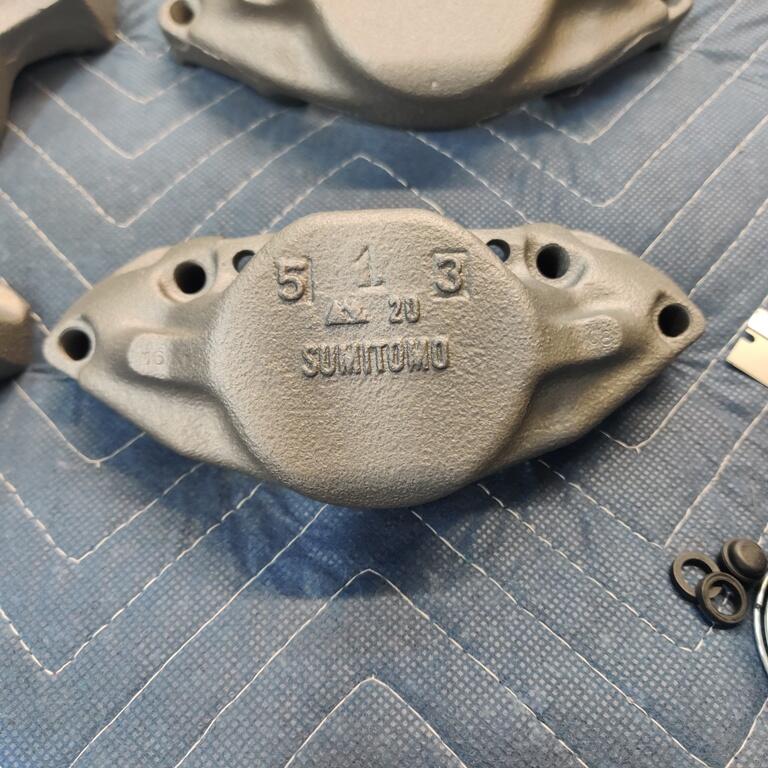
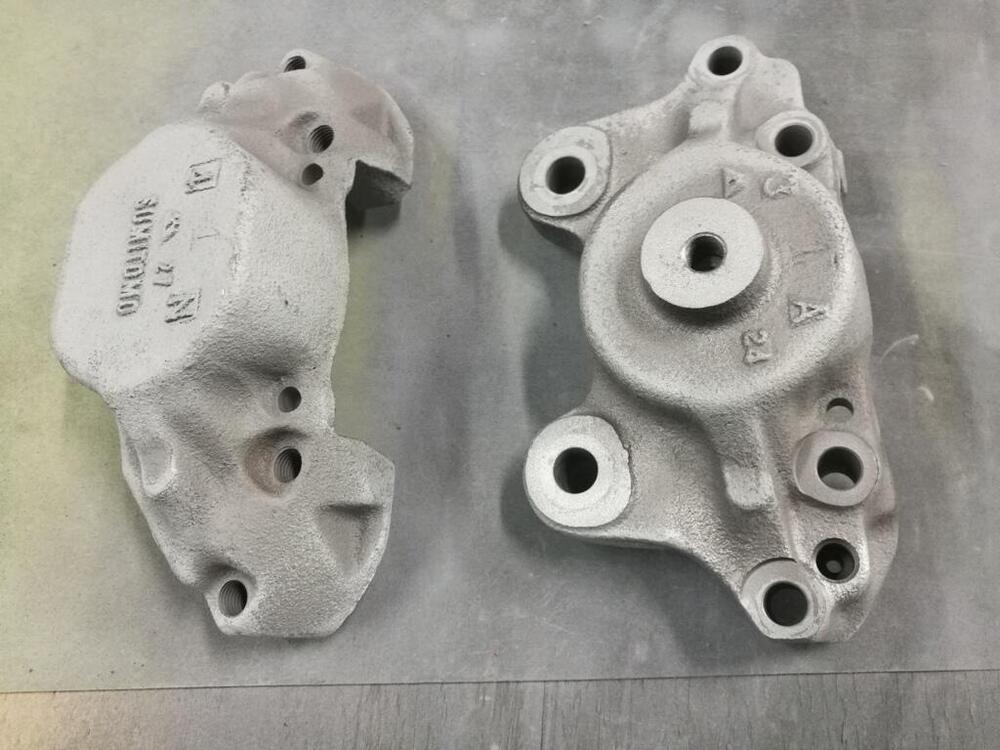
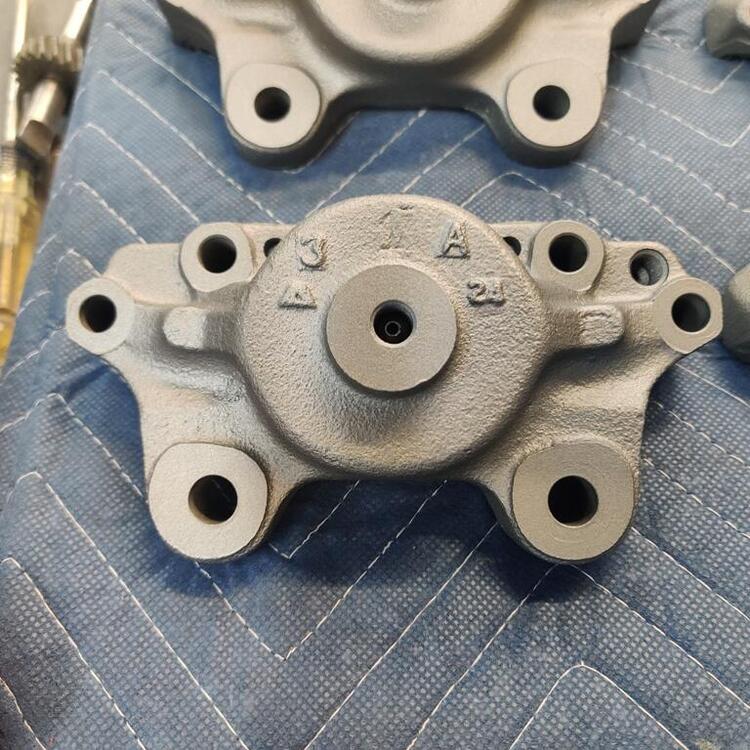
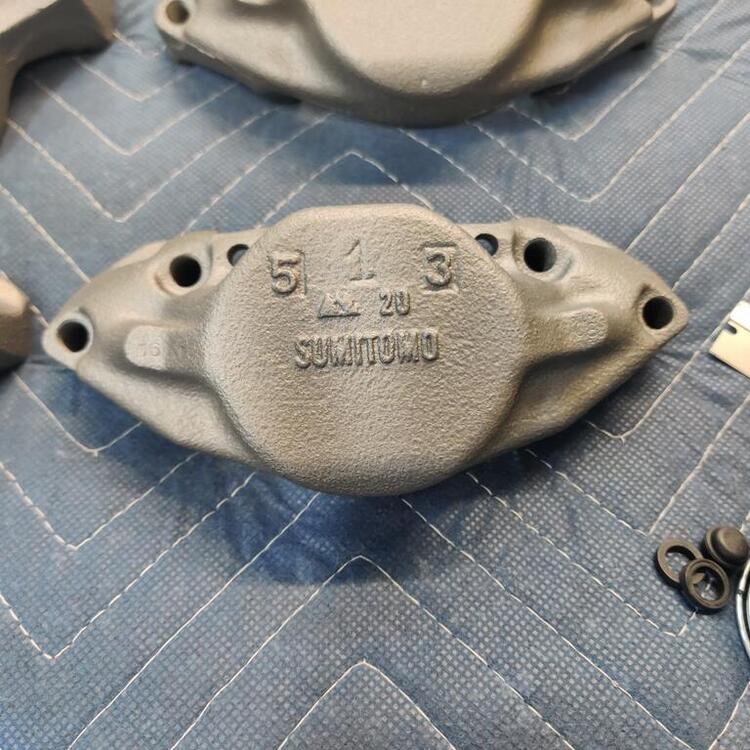
Regarding correct side, I learned the hard way one time. So, always remember, bleed screw location is at top. The calipers were painted with zinc primer, and then https://www.eastwood.com/ew-spray-gray-detail-paint-aerosol-12-oz.html. To me, it looks close to the original finish color of most calipers that I have seen. I like the finish. On this member's page, there are pics of a new old stock caliper. "Zinc rich" primer: Waiting for final torque of bridge bolts:
-
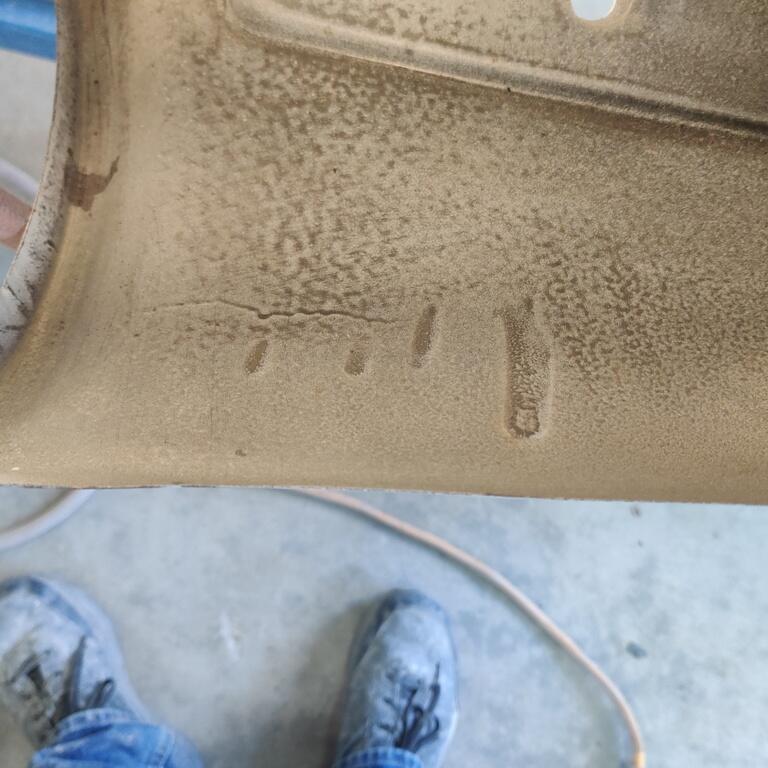
What are the chances that those lines are just marks from where the overriders "hit" the bumper?
-
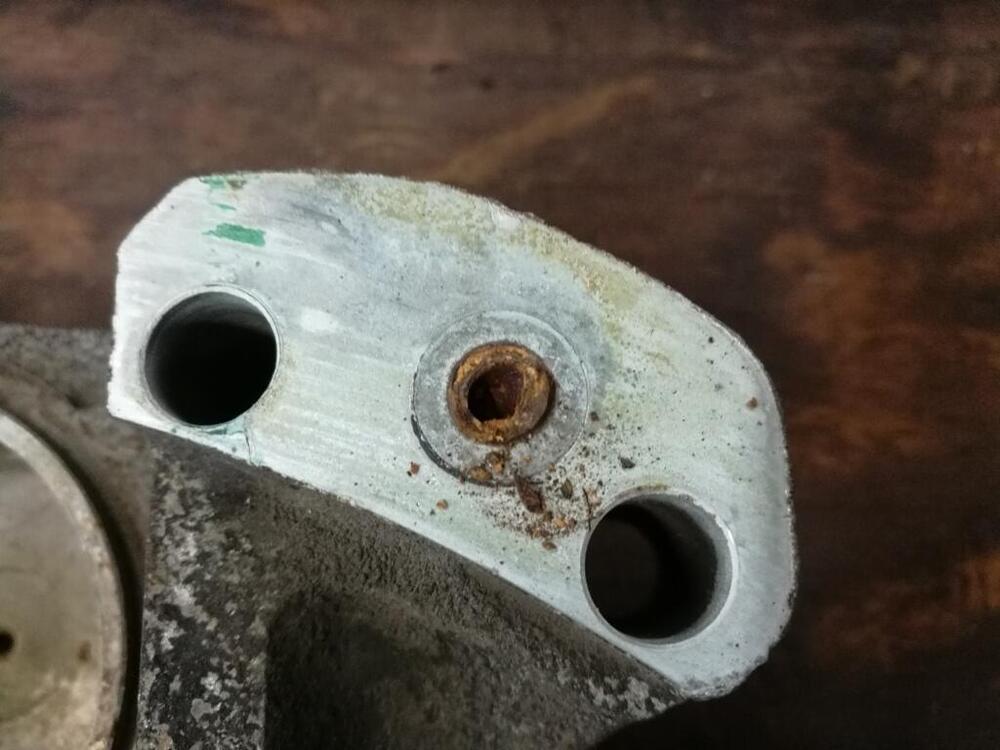
I am re-assembling my caliper parts after bead blasting, painting, getting hardware plated, etc. Looking at the factory shop manual, it says to not take them apart... to replace them as a unit. And it doesn't provide a torque spec for the "bridge bolts". If you don't take them apart, you won't get them clean. And that won't be good, because there is garbage and rust in the passageways after this many years: Bolts are M10 X 1.25 I believe. So, what is a range for torque values? Also, I am curious as to how to decipher these markings:


-
Is that in all locations, or does it vary? Like in the hatch area - same thickness as floors?
-
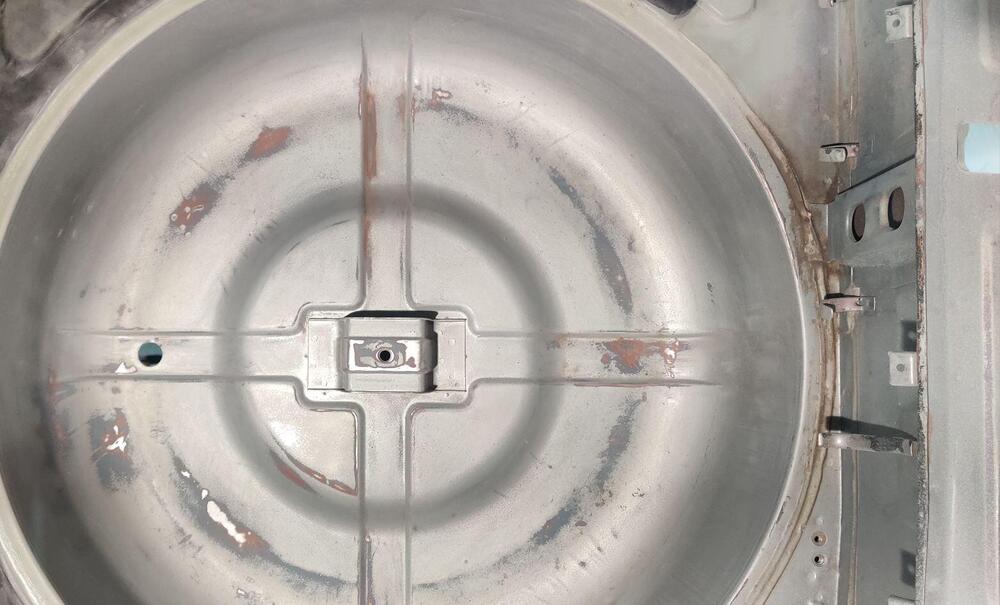
Happened upon a picture of the tube in the tank with no screen) in this live auction on Bring a Trailer - pic #315: https://bringatrailer.com/listing/1970-datsun-240z-86/