


EuroDat
-
Joined
-
Last visited
Posts posted by EuroDat
-
-
My old mount didn't have much movement in it. A litle less than whats on your video. I noticed the difference when I sat it next to the new mount. It had sagged a lot over the years, which is probably what yours has done.
The original nissan mount are not cheap, but the quality is very good.
I would not go with PU bushing set-up. It will transfer a lot of engine noise/vibration.
-
-
 3
3
-
-
Top tranny is a F4W71B 4 spedd and the lower is a FS5W71B 5 speed. Can't really tell if the FS5W71B came from a 280Z, 280ZX 2+2 or the later close ratio versions from the 280ZX NA coupe.
-
1
-
-
-
Edited by EuroDat
A new form of Ransomware?
Im surprised they don't have a bit coin method of payment.
I'm glad I have always uploaded photo's directly into the thread.
-
1
-
-
Edited by EuroDat
50 minutes ago, Dogariffic said:I then started the car and again it briefly hesitated before firing off an idling smoothly. I then checked the AMF and manipulated it a bit at idle and 3,000 RPM. It ran slightly better moving it only a mm or 2 clockwise at idle to lean it up. Manipulating it counter clockwise made the engine run rough at idle. I did not notice a difference at 3,000 RPM when manipulating it clockwise but it ran rough counterclockwise....... I have the glue on my AMF by the way. It has never been adjusted.
I then decided to take my tools and take the car around the block. She ran like a champ. After 5 minutes I turned back toward the house ...not wanting to challenge the Z gods. About 100 yards from the driveway she cut off. No heads up. No miss-fire. The Tach went to 0. I was able to coast back to the garage and immediately gave thanks I was not stuck on the freeway again.
I then pulled the plugs. Photo attached. If I had run it longer more of the soot would have burned off in my opinion, but the tip was hot and clean. So I am determining that I don't really have a fuel issue that is leading to flooding and the car simply cutting off.
I will now move to searching for an electrical gremlin.
I believe I will begin with the ignition module buy will also check connections in the ECU.
Thoughts?
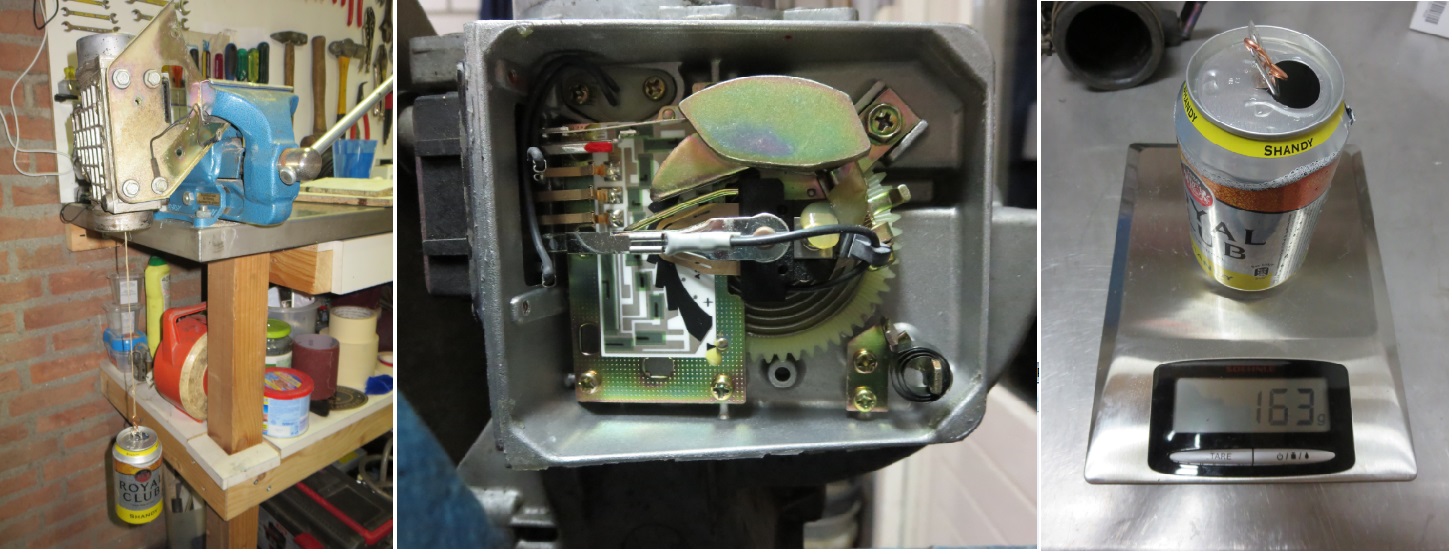
If someone played with the adjustment of the AFM, you can calibrate it by using the coke can method. Here is a link to the Atlanticz website: http://atlanticz.ca/zclub/techtips/afm/calibration/index.html
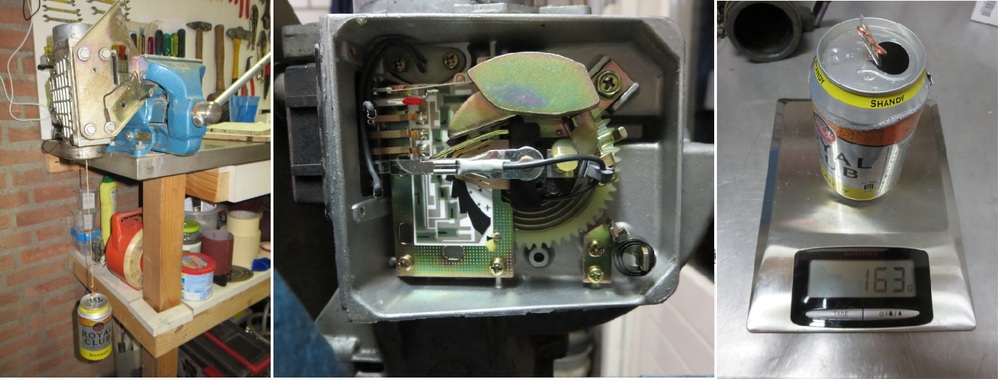
I had problems with my TIU and ended up changing it to a 4-pin HEI module. It use to work perfectly and once it warmed up, say after ten to twenty minutes, it would start playing up fierce and left my parked on the side of the road. I sprayed it with a can of contact cleaner to cool it down and the problem would go away for ten minutes or so.
This thread explains what I went through and it's also in the download section of this site.
Section 9 in the download file has some tests you can do. It wont find a problem that happens at random, unless it's happening while you are testing. Goodluck searching.
-
Here is the leak test procedure I did on mine a couple of years back.
It's good to eliminate possible causes. I know you replaced a lot of items, but some of the parts these days are "remanufactured" items and the quality is sometimes lacking.
Btw: You can not remanufacture 280Z injectors. All you can do is change external stuff like the inlet filter and hose, and run them on a test unit with special cleaner. Not all aftermarket parts are new parts...
-
1
-
-
-
No need to go to another site, you can also download the FSM for this site too.
http://www.classiczcars.com/files/category/13-280z/
Wow. Stand back and throw money at it. I tried that once on an Escort. In the end my pockets were not deep enough and I had to resort to diagnosing the problem and then fix it. I say that jokingly now, but it cost me a lot of money for an eventual $30 fix. I can imagine you have spent a lot on the parts and the problem is disappointingly not solved.
Most people have trouble with running lean. What a lot of people call ecu drift.
You need to start diagnosing stuff and cross it of the list. The things you can check, for starters, are:
1. Is the system holding fuel pressure. You changed the injectors and the csv, but you can't be sure one or two (new or refurbished?) Injectors are not leaking or sticking. I wrote a test procedure on a thread here somewhere. Ill try to find it and post it here.
2. Check the temperature sensor resistance at the pin 13 & 5 in the ecu connector. Check that with the FSM and the 1980 efi supplement (bible) on this site.
3. Check the ignition for good spark while cranking the engine. You can do tests on the ingnition, but a faulty tiu is a process of elimination.
When you do tests, write down what you do and the test results. People like to see figures, it also helps with feedback.
-
Tomo,
Im not sue what your problem is. Are you saying you have 40 degree advanced at idle?
The way I find TDC is to make a tool out of an old spark plug. I punched the ceramic section out and tapped it out with an M10 tap.
That way I could use a section of M10 threaded rod (with the end nicely rounded). Rotate the engine until you see the piston (through the spark plug hole) come up and start going back down. Install the tool and adjust the M10 pin until it reaches the piston. Marked the balancer and rotate the engine forward until the piston comes back up and touches the rod again. Marked the balancer again. Exactly in the middle between those two marks is TDC. If that does not line up with your notch in the balancer, then your balancer has slip and you should replace it.
I have never tried to turn the engine by using the alternator. I doubt there would be enough friction on that pulley to stop it from slipping. Your transmission in Drive or Neutral should not make much if any difference when turning by hand. The drag you are feeling could probably be just the oil pump in the transmission.
Here are some photo's of my distributor. Mine works perfectly were it is set-up.

-
Hi Captain,
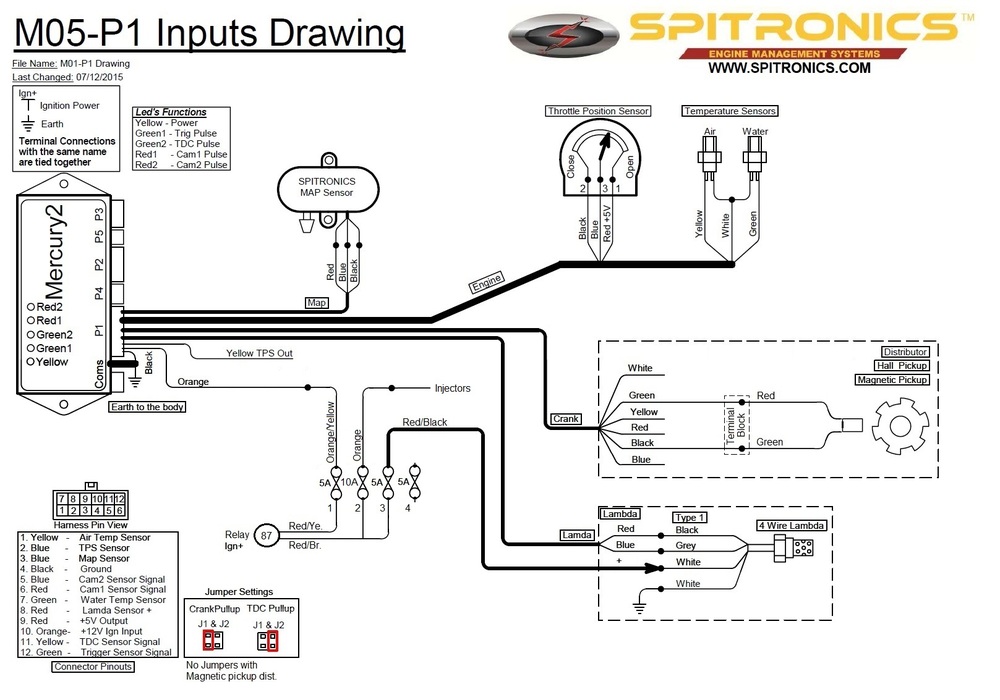
I am having this discussion spitronics as well. The ecu generates an alarm if the voltage doesn't reach 0.5vac. It will start an run, but it keeps genarating an alarm every time you start or if it goes above 0.5 and goes back under. It's not absolutly necessary, because when I crank the engine the fuel pump runs and I can hear the injectors pulsing. Everything appears to be doing what it should do. Im just trying to get it solved while waiting for a new coil driver.
I fryed a HEI module when I modified my TIU. So it seems to be a habit of mine.
Spitronics also have a whatapp group. That is handy, because you just hit record and explain your problem, leave a message or a photo. I even managed to help someone with a wiring issue. Thats surprising since I am a beginner on these systems.
About the pickup coil. I have checked all three pick-ups (2 spare). The new LX-507 is measuring 724ohms at room temperature and the old original was 708ohm. Can't remember the value ot the third one, but I have not used it.
Both were adjusted to 0.3mm and were generating 0.35 to 0.40vac with the occasional 0.45vac peak. The new unit is in the car now.
-
I think the coil driver gave up through my own doing. Its a combination relay and coil driver and I connected the relay section wrong for a brief second, but like all HEI modules etc, they don't like it. It still worked, but gave up after a minute or so running the car.
Because the Spitronics comes in module form, the Coil driver is an external unit and lucky for me can be replaced for €15.
I am planning on using one of my spare HEI module to amplify the trigger signal. That should clear all the error messages Im getting from the pickup. Just waiting for a new coil driver to turn up. It's now in Londen, and probably here early next week.
Project costs:
I kept a note of all the costs so far and its now at €771. Add another €26 for the combo coil driver including shipping and it will come out at €800. That is about $900.
Ill probably go over the €1000 before Im finisded. I still want to tape the harness once all the bugs are out, make a new mounting bracket for the ECU so the kick panel will fit correctly and then odd nickle and dime stuff that adds up along the way.
I could have saved a little by using the original AFM temerature sensor and leaving the AFM in place. Releasing the AFM spring tension on the flap so it will be always open. Spitronics comes with an App for your mobile. I don't think it's available for Apple yet, but it works well on android.

-
I made this list in 2013. It's the best I could find at the time when I was looking for a replacement ECU.
I have a look on some back-up drive for the PDF file. It was a scan from a Datsun workshop manual. It did mention something about the Bosch unit was in the first 280Z and if needed could be replaced with the A11-000-051.

-
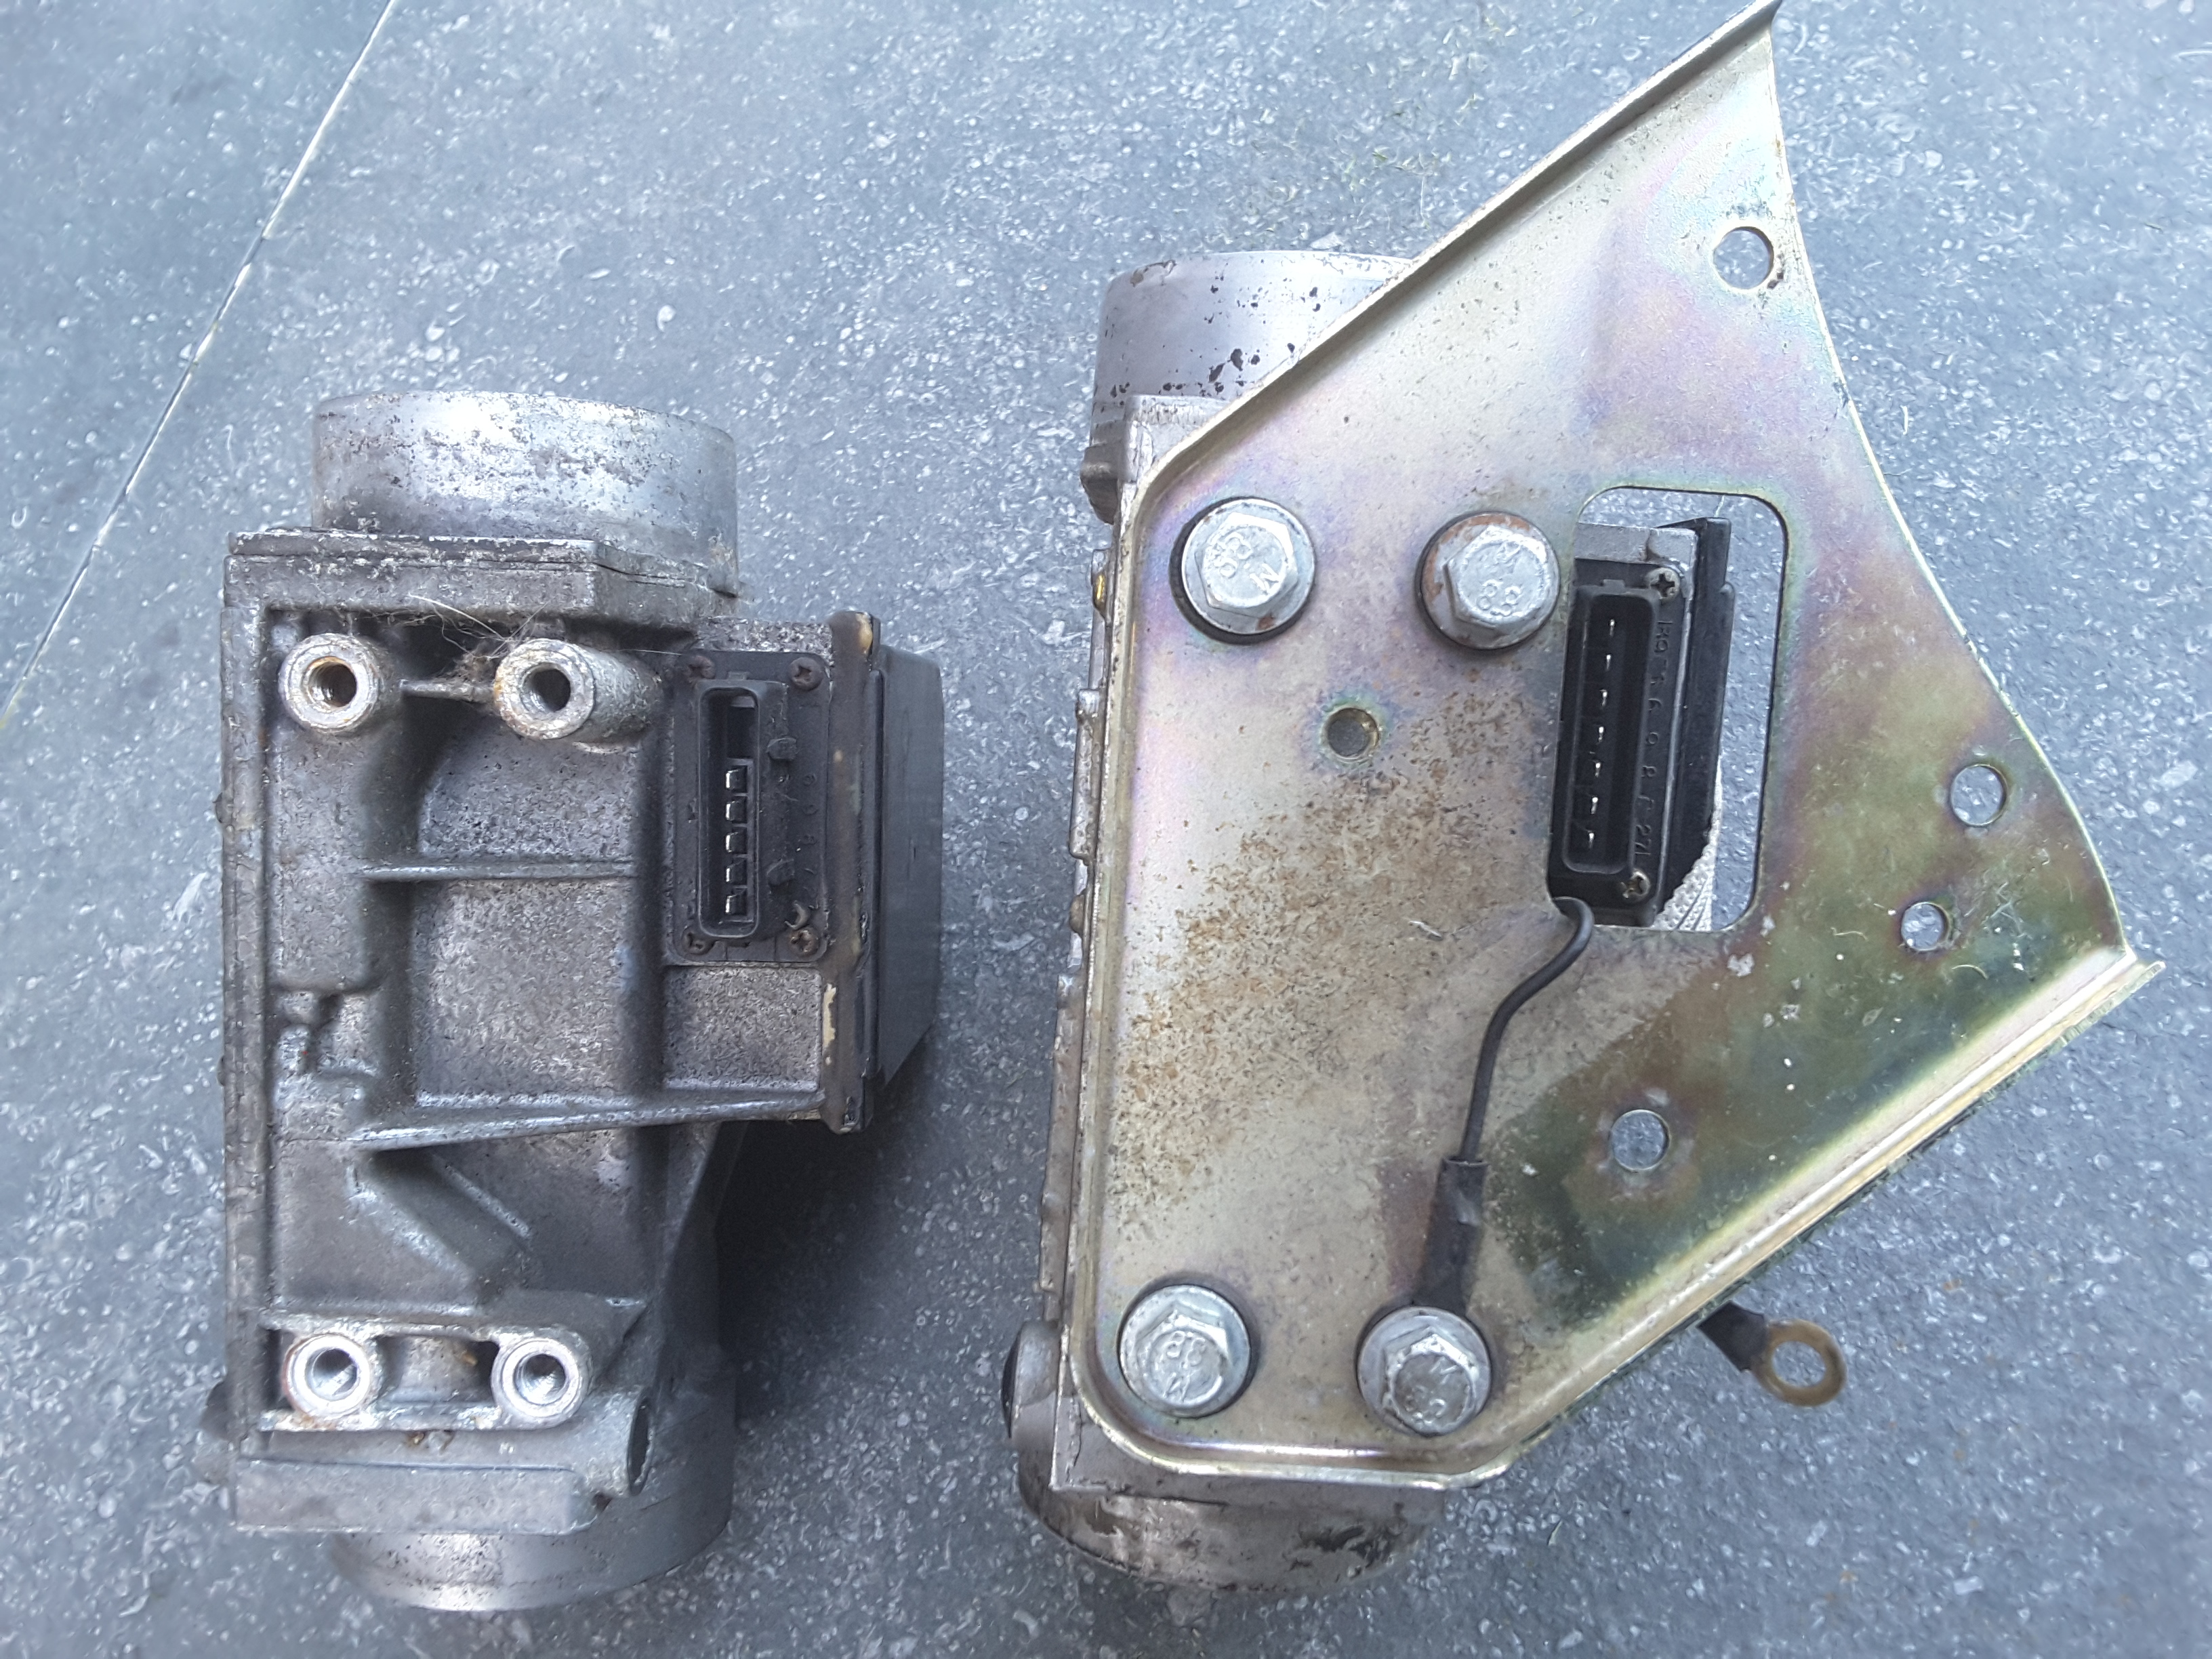
Just noticed, you have a Bosch AFM. Yes, it's all pointing to the very early 75 model. First four months of production I believe.
-
1
-
-
The bosch ecu came on the very early 1975 model. I think I have a datsun pdf file somewhere with it listed as being replaceable with the later version.
It's a rare ecu and some people like them because it doesn't seem to suffer the lean running condition the later units can develop.
I have four AFM's. One is a pre August 77 with all the pins, two are from ZX's and one was uit of a 78, I think it was March iirc. I must say, I don't have any proof the 78 was an original AFM, but all the later AFM's I have don't have the last two pins in the connector or the plug on the afm.
That doesn't mean the factory just kept installing the full afm and simply didn't use the switch function until stocks were depleted. You can test it with a multimeter to be sure. Contacts will close when the vane opens.
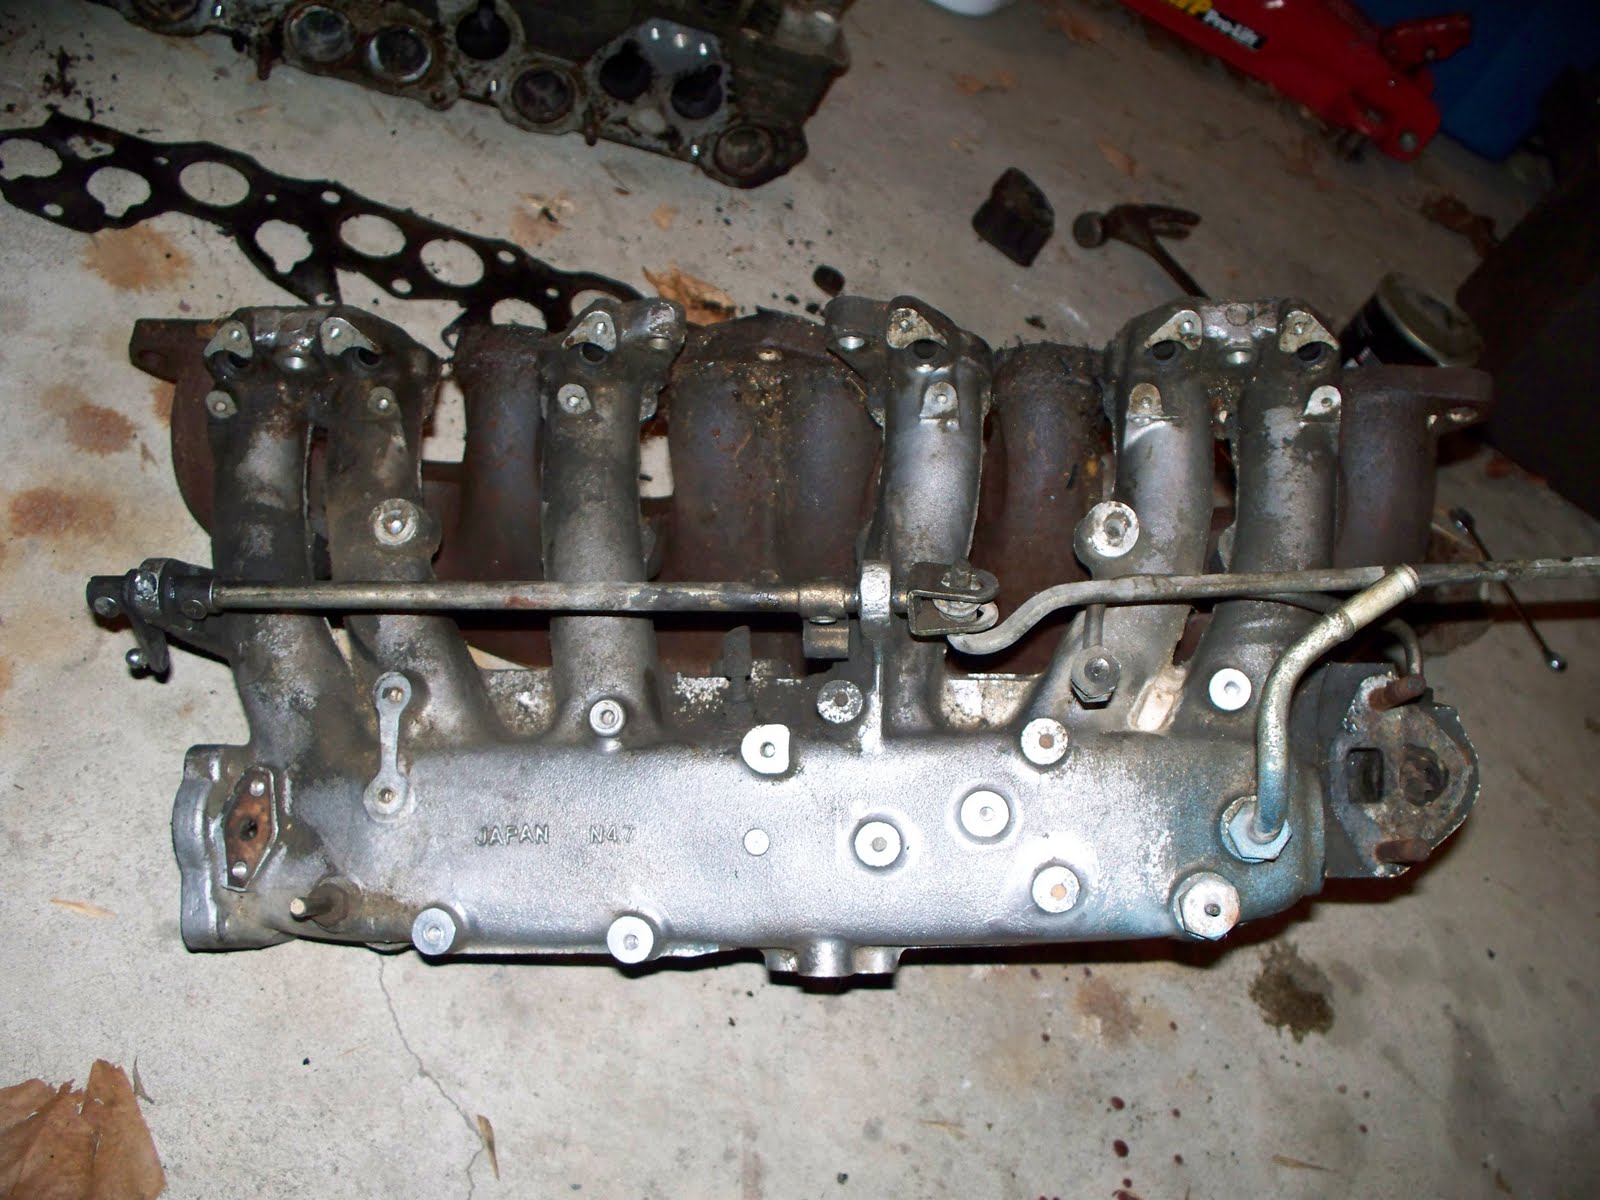
Can you check the stamp on the top of the manifold. You should see N42 or N47.
If its an N42, with the double inlet FPR, the really early ECU and the 7-pin AFM. Looks like it's from a very early Cal 280z.
Here is a photo of two AFM's I have.

-
1
-
-
I always get mixed up with the webbed and non webbed manifolds. Did the N42 have the EGR. I have seen the N47 non webbed with EGR, so it could still be an N47.
Its definately pre August 1977. The fuel pressure regulator gives it away with two inlet and one outlet. The later version only has one inlet. I can just see the last two pins in the AFM 7-pin connector, which means it has the fuel pump switch.
A photo of the ECU sticker would be nice.

-
A quick update.
I have been buzy, but not making a lot of progress.
The O2 sensor is fitted and I calibrated the air temperature, water temperature, map sensor and tps in the ecu.
The engine started and ran for about a minute and stopped. When I checked the components, I found the coil driver wasn't working. How did that happen?
It took me about 4 hours playing with the system and swapping components, but I found my problem is in the trigger coil in the distributor. It produces about 0.35 to 0.45Volts AC and the ecu needs between 0.5 and 1.0 volt AC.
Thinking about my options.
1. Find another model trigger coil that will fit in the distributor without too much modifications.
2. Go to a 60.2 crank wheel with wasted spark. I was planning to go with a bosch 3x2 coil pack 0 221 503 02 later, but I could fast track that project.
3. Use a HEI module to trigger the ECU. I might try this tomorrow and see if that cures my problem with the trigger.
Also need a new coil driver. Luckely they only cost €12. Hope to have the replacement by the end of the week.
-
On 2017-6-4 at 1:18 AM, grannyknot said:
It will need a brace anyway to keep high speed wind from bending it, not much strength to the urethane air dam.
Eibach lowing springs AND 3/4" urethane spacers on the top of the rear springs. Something definitely off about Eibach rear springs.
I made a centre support for mine, but made it so it could bend if the air dam touch one of our dutch traffic calming devices (speed bumps). Hazmatt made a nice set for his. Looked really neat and tidy.
Funny you mention that about the Ebach springs. I was talking to fellow Z guy here that had the same problem. I told him to buy a set of the 280Z tops. They will add 25mm to the height. I don't know what he did, haven't spoken to him since and his e-mail address doesn't work anymore.
The car is looking fabulous. Can't wait to see the end results.
-
From what I have heard about Scarabs, they can be ordrred as a kit where you could build it yourself or you could have Scarab modify your car.
I think Scarab wasn't mass producing these cars, but they were "custom" made to order and the customer could select mods to suit their our desires. I can remember seeing a post with an ad where you could order a V8 kit from Scarab for a Ford or Chevy V8 iirc and you supplied the engine. That would leave it open to all kinds of engine configurations.
If that is the case, it would be near impossible the difine a Scarab as a particular model and option pack. And a "real" Scarab would only be valid with the original documents stating the options the S30 received.
@Randalla I think it's a great project you have going here. Even if it has a fuzy history.
-
8 hours ago, grannyknot said:
Megasquirt Matt says he's going to try to come over on Monday and have a look, I'm going to spend the weekend going over all my wiring again and again.
Chris, you might do yuorself a favor by leaving it alone and let Matt have a look at it. You still have other work to do, which you are very good at.
I look at it this way. I could spend a lot of time and frustrating effort doing it myself, or get someone that knows what he is doing do it for me, then spend my time on the stuff I can do.
Oh and it has taken me years to figure that out. Im a hard learner....
-
1
-
-
-
Hi All.
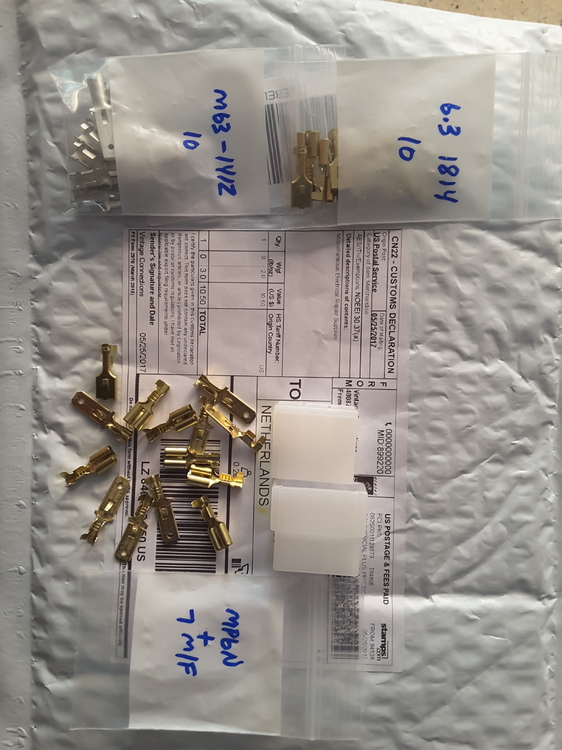
I ordered the connector plug from vintage connectors. http://www.vintageconnections.com
It's the connector plug that connects the main harness to the efi harness under the dash.
Very efficient. Ordered the connectors on the 25th and they came in today the 31st. They shipped through USPS which also kept the costs down low.
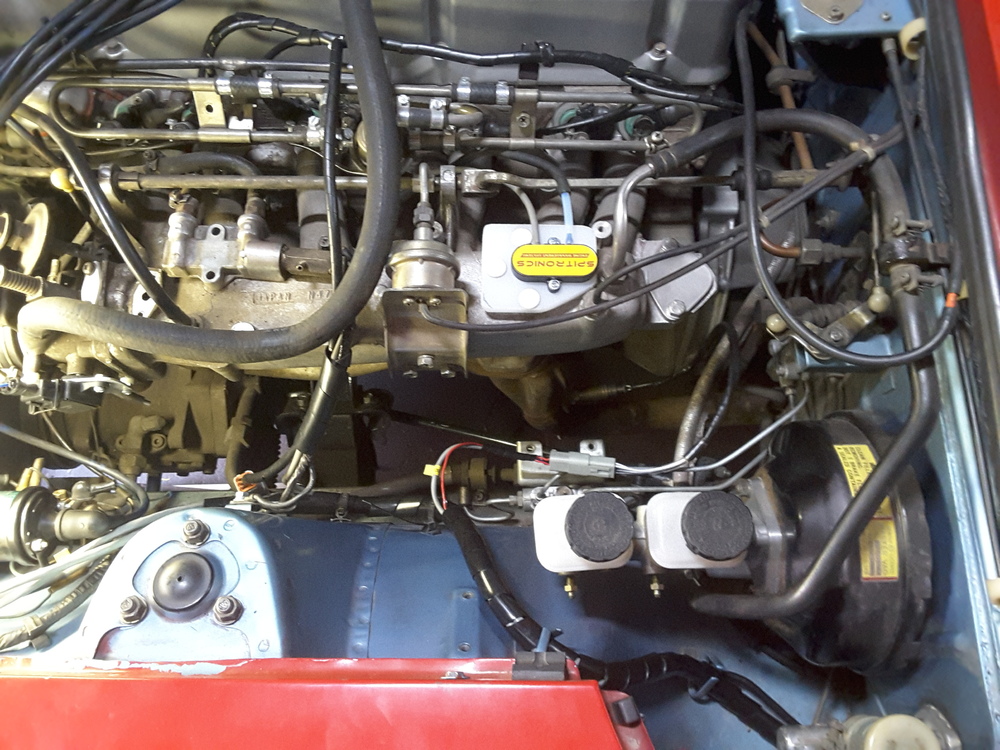
I should have my exhaust fitting for the O2 sensor welded by tomorrow. All goes well I can try to start it up over the weekend.
-
-
Thanks for the offer Munters. I sent the link from Vintageconnections to a friend with a celica. He wants to place a an order and I will try to order a connector there.
In the mean time Ill use simple crimp connectors to get it running. If the vintageconectors don't work out, I'll send you a pm.

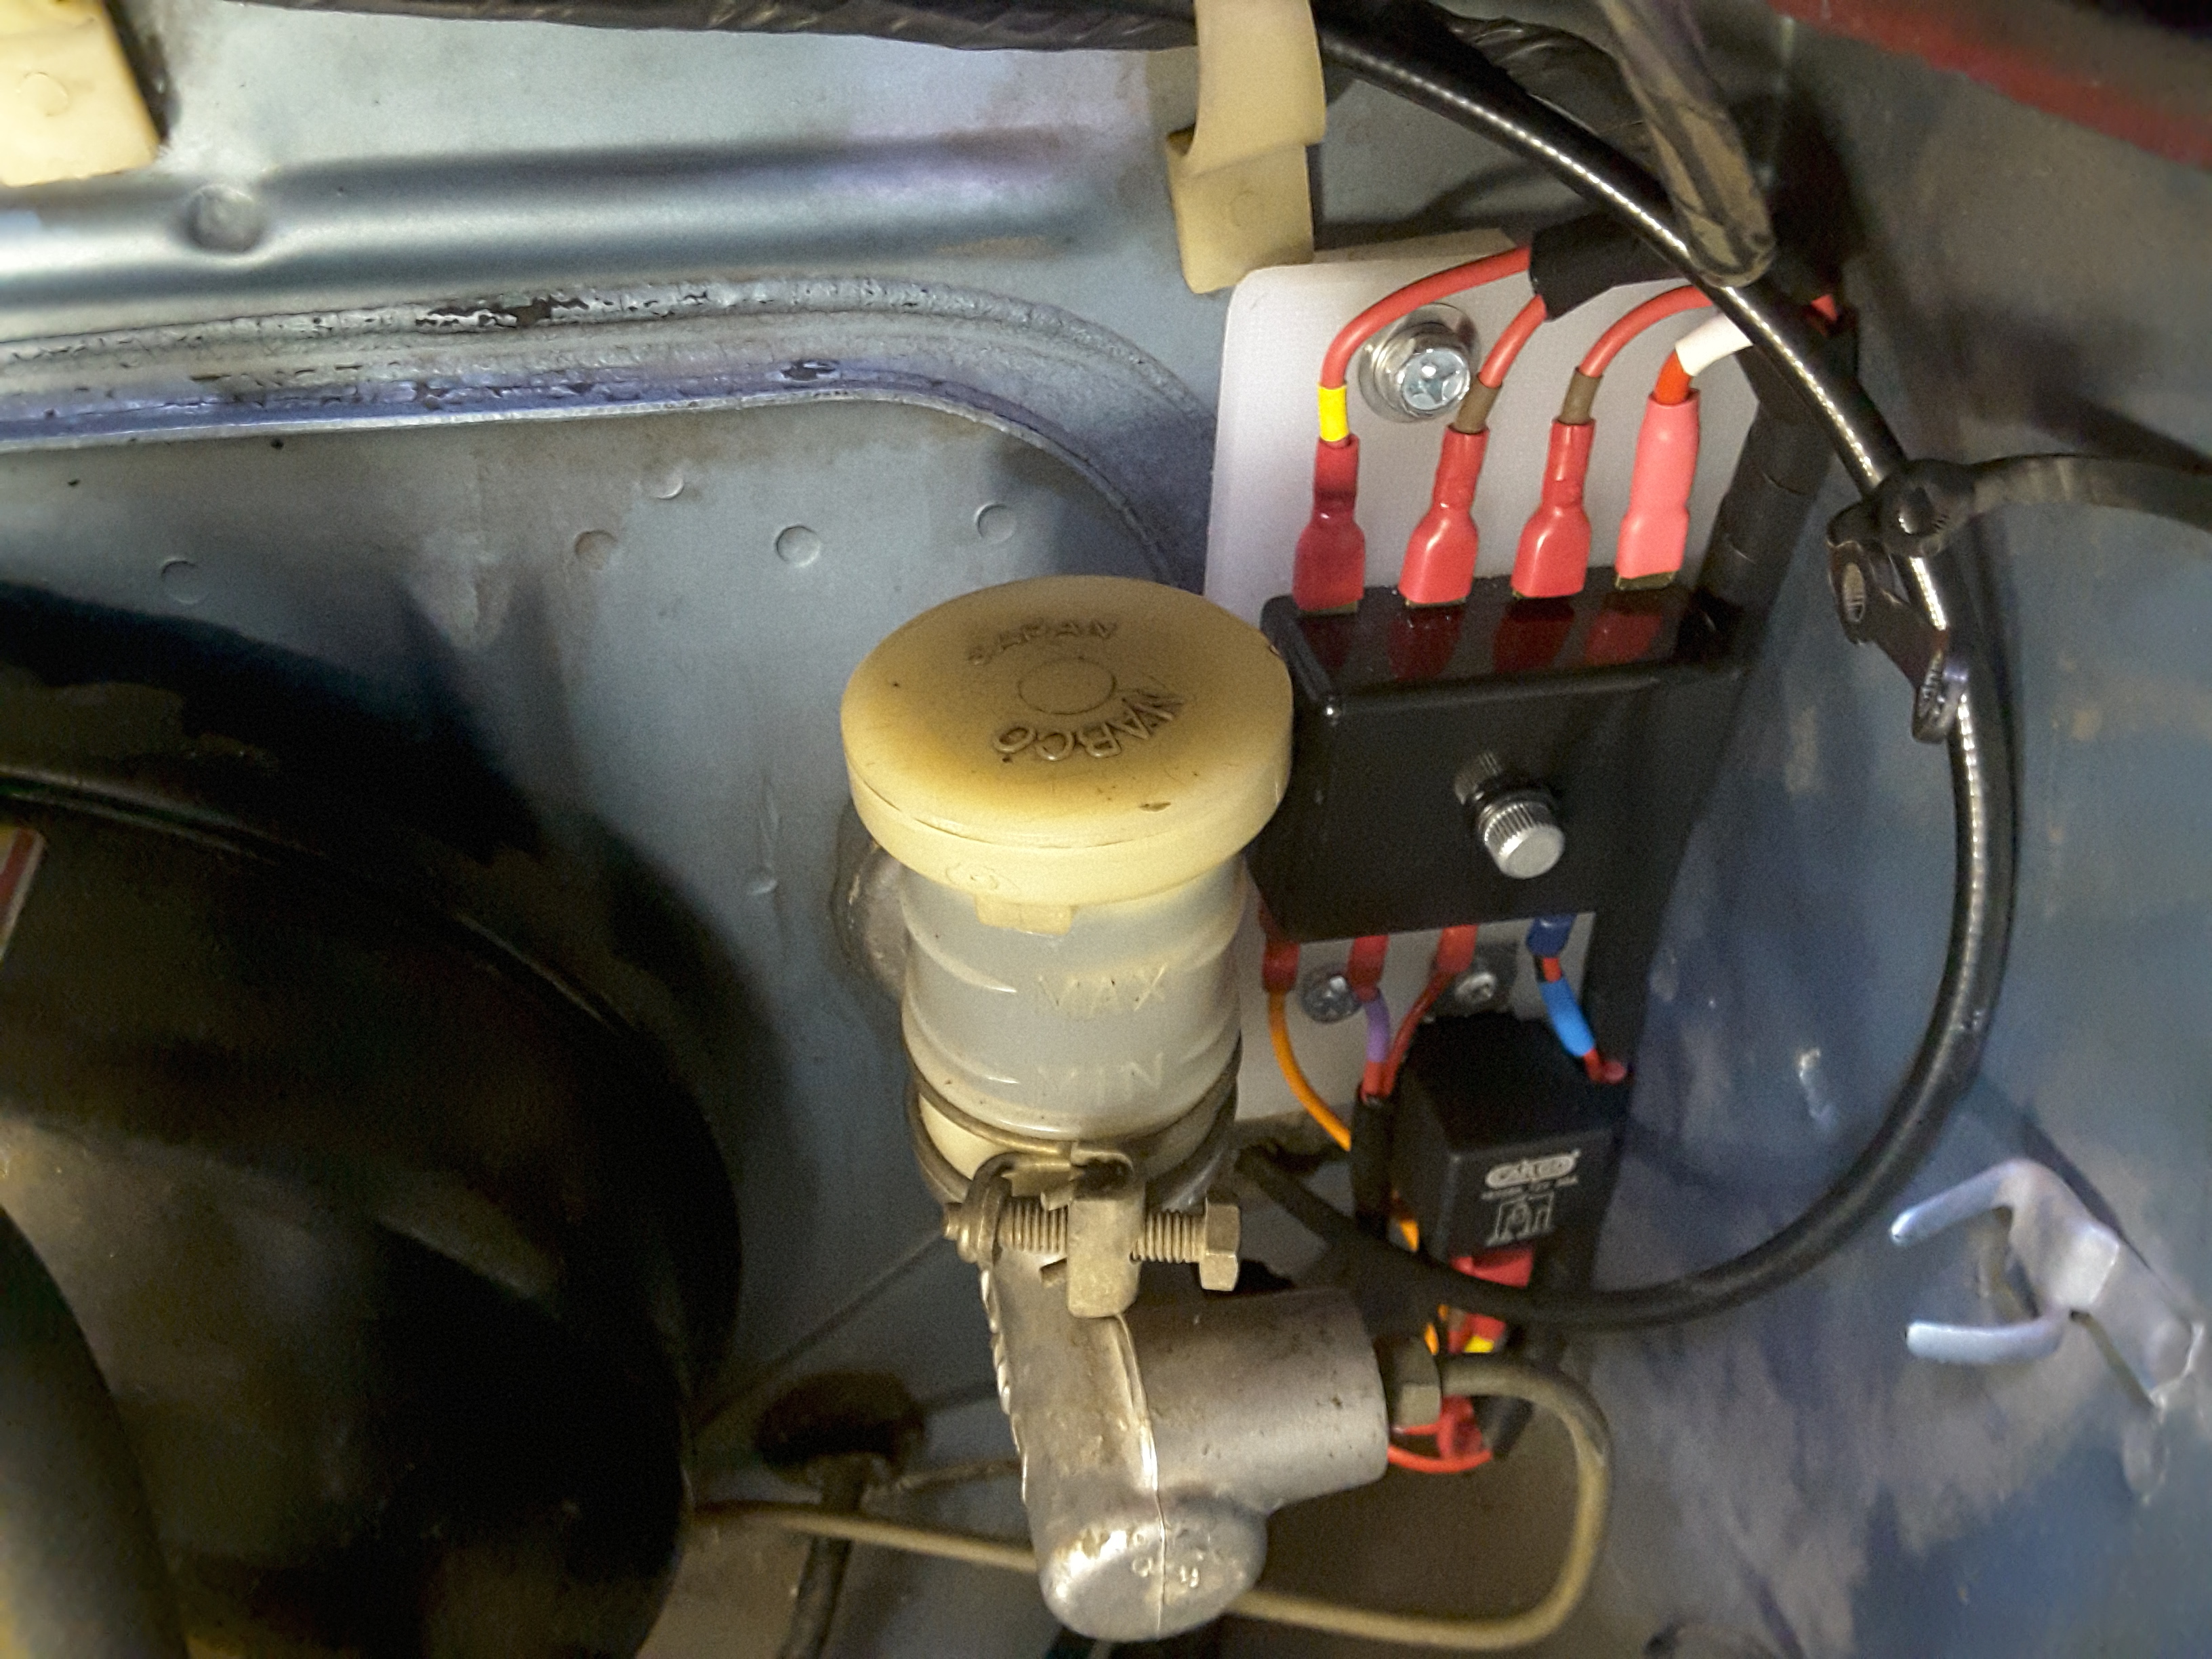
Didn't have much time today, but managed to clean up all the wiring and wrapped it in a simple spiral wrap to keep it tidy and allow easy access.
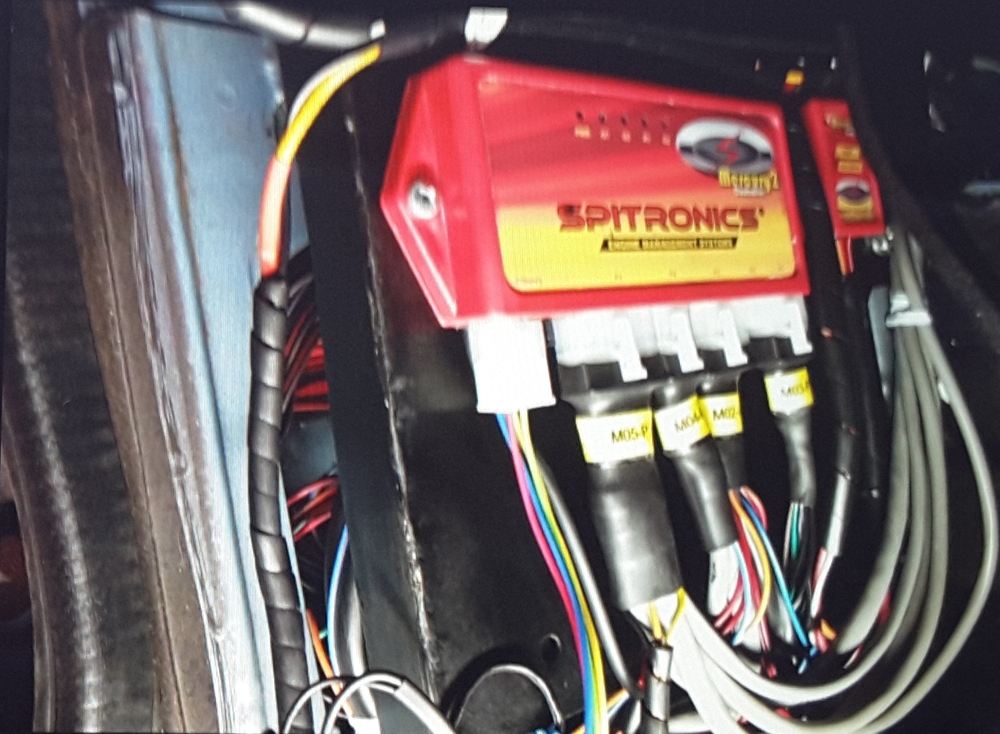
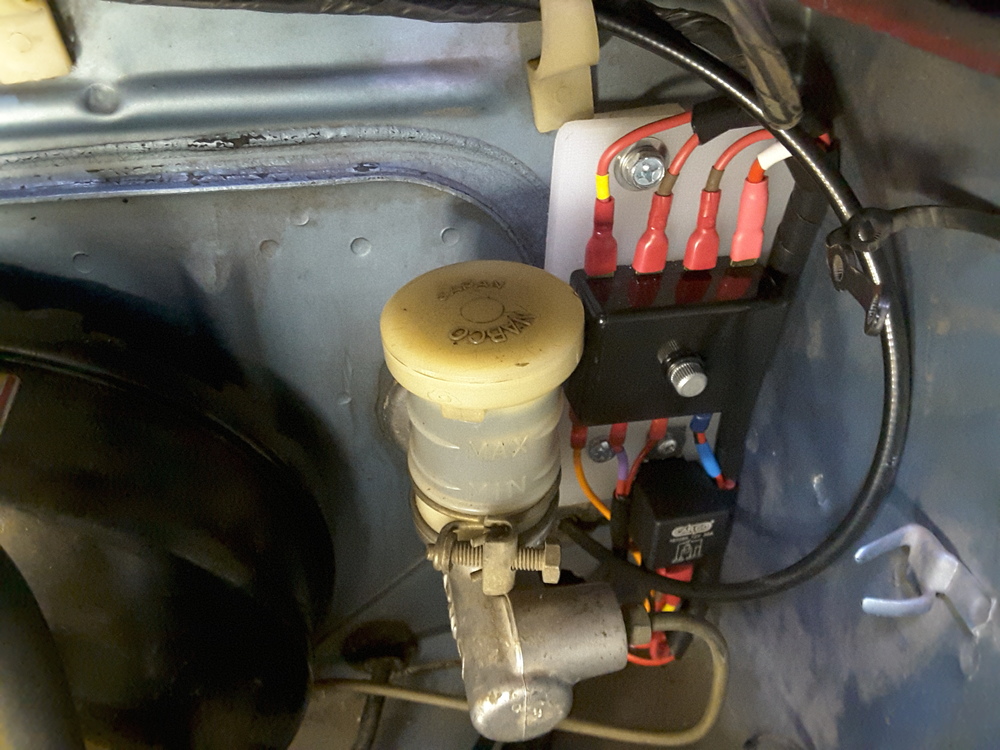
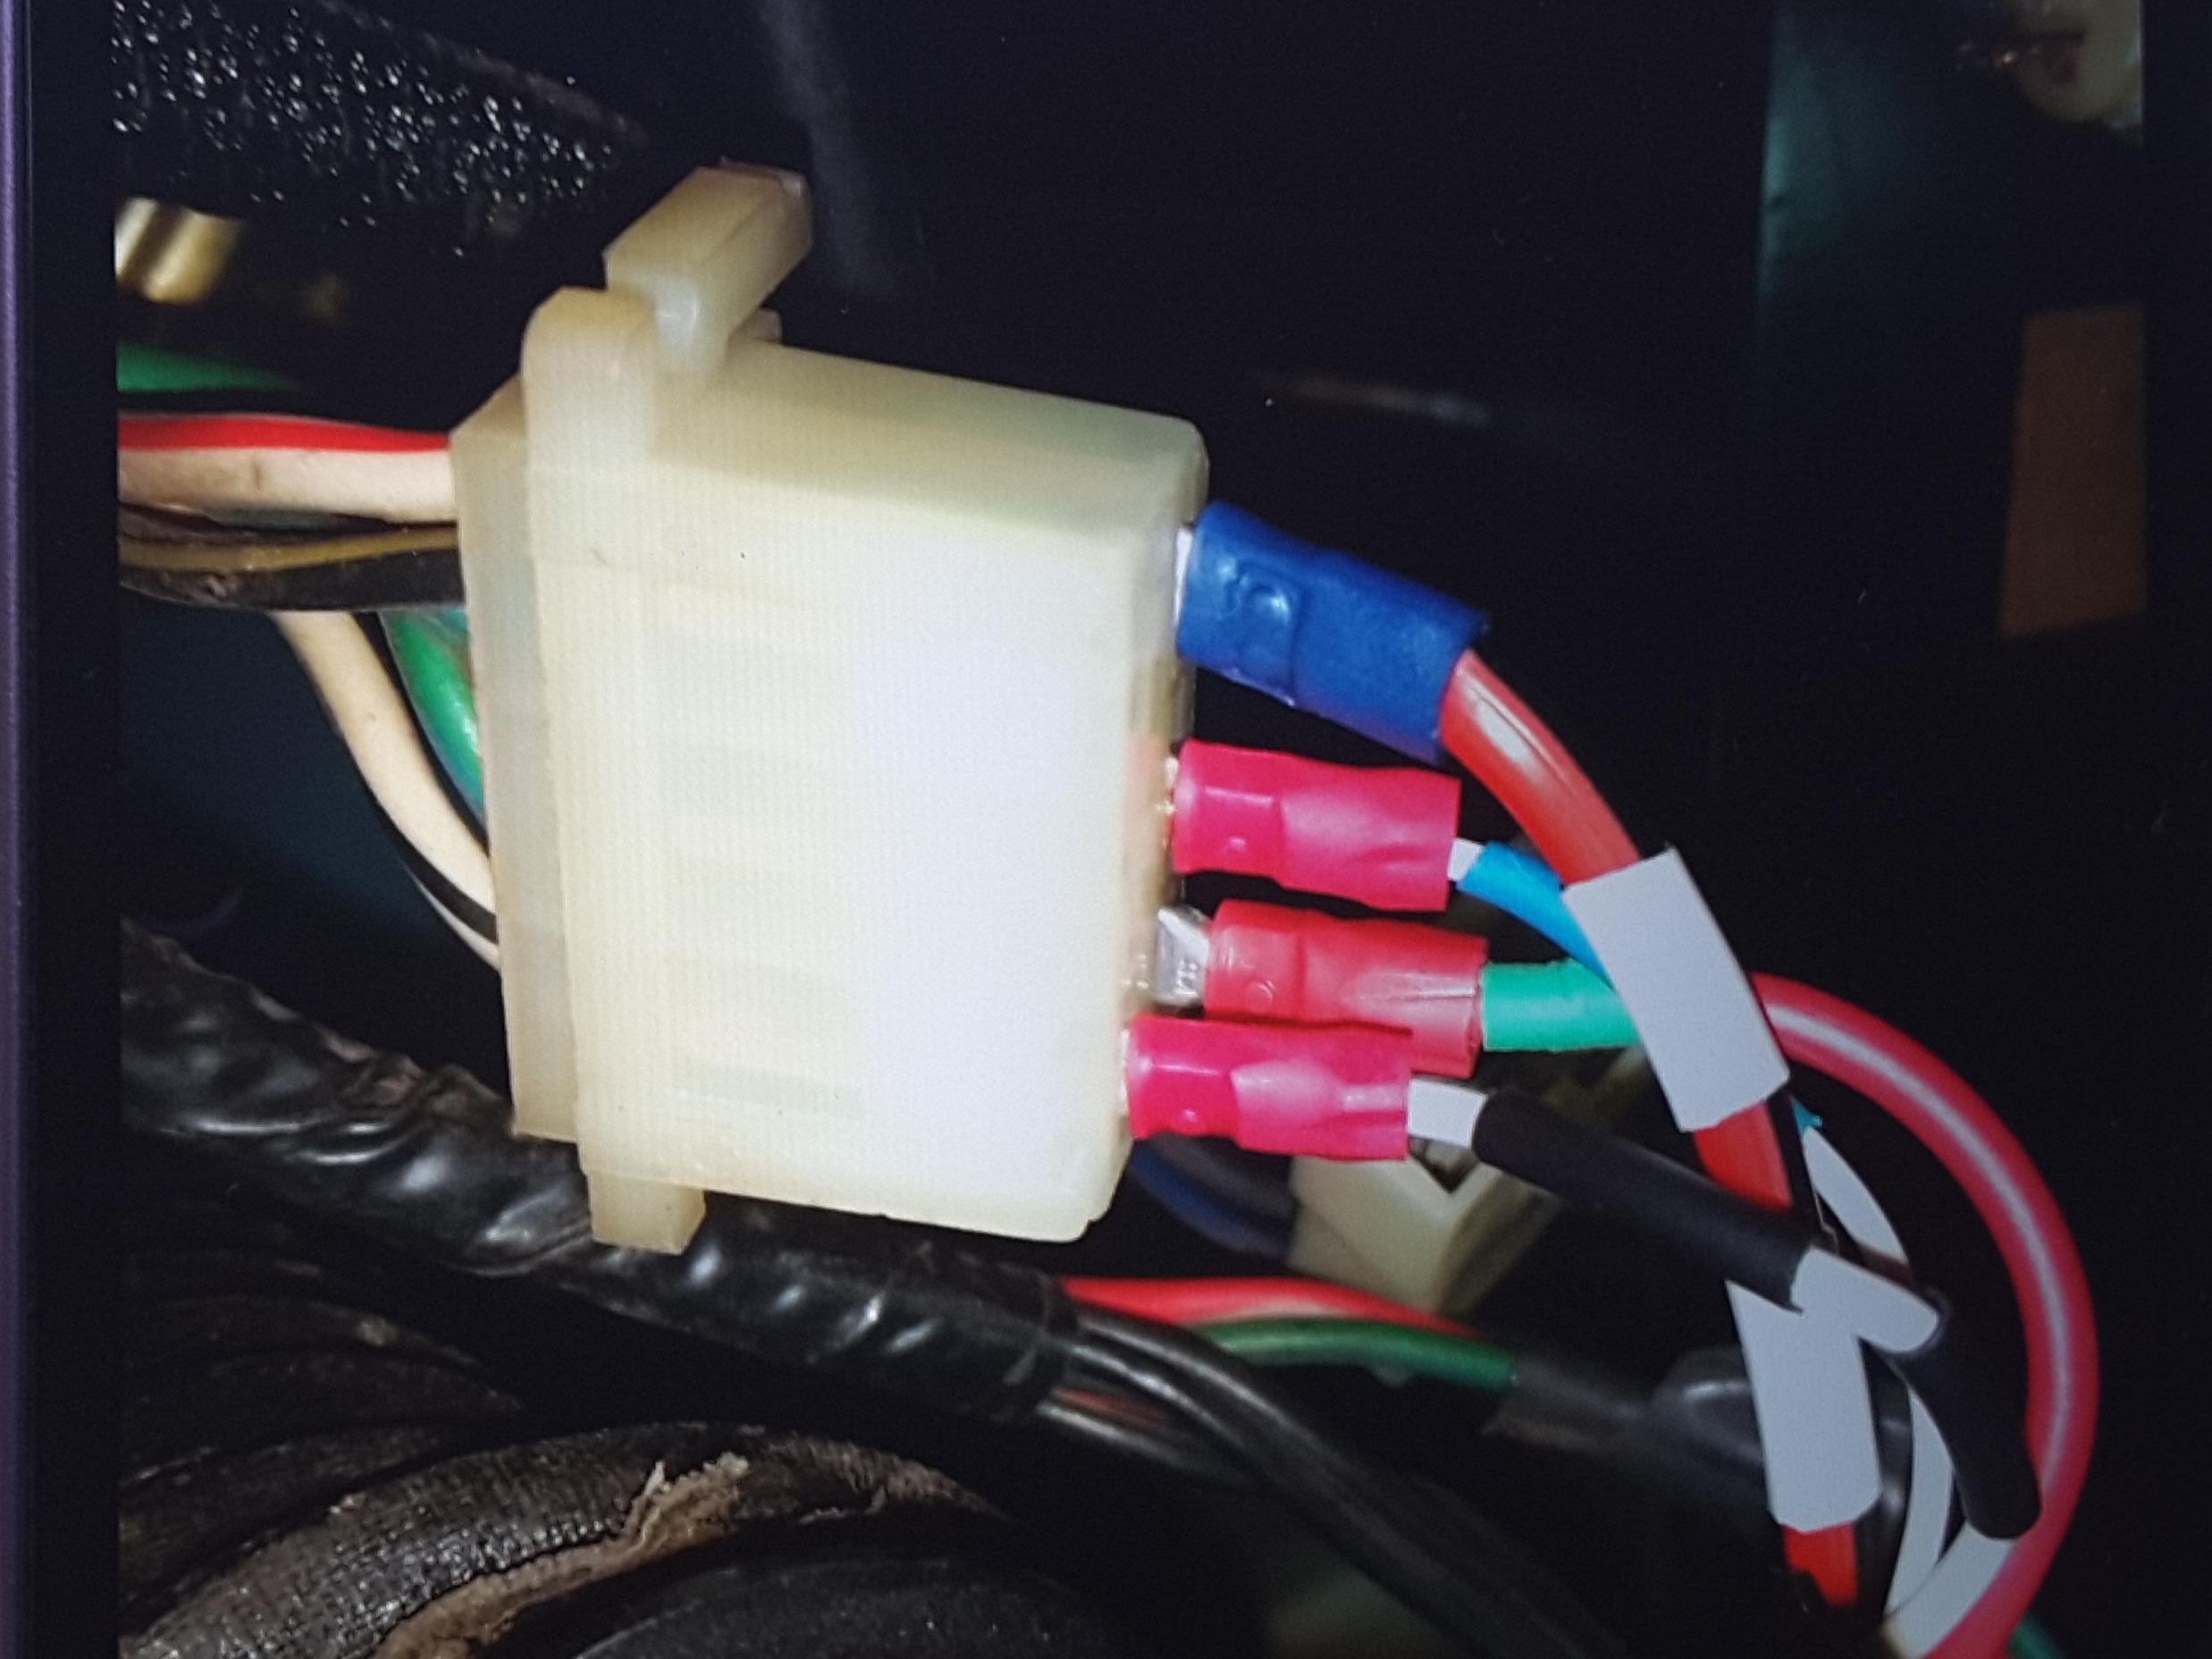
Finished the relay and fuse block and made a bracket to mount the ecu and fuel pump relay /coil driver. I was hoping to mount the new ecu in the old case, but that proved to be too much trouble. Eventually the kick panel will be fitted with an enlarged hole to check the ecu indicator lights and cover up the mess.
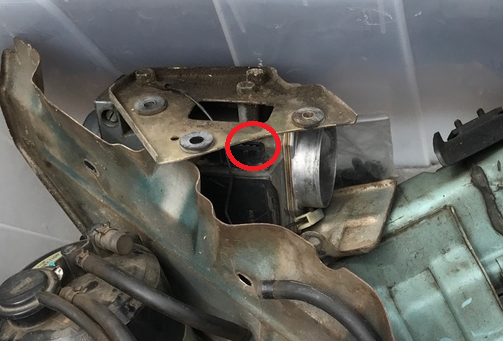
I disconnected the TIU since the coil driver will take over. The coil driver is going through the original harness and connecting via the old ECU blue trigger wire in the photo above.
Stil have a couple of things to do before starting: Distributor advance and phasing, and fitting the new exhaust system plus welding in the O2 sensor fitting.
Tonight I'll play with the maps and download them tomorrow so it will start and run.

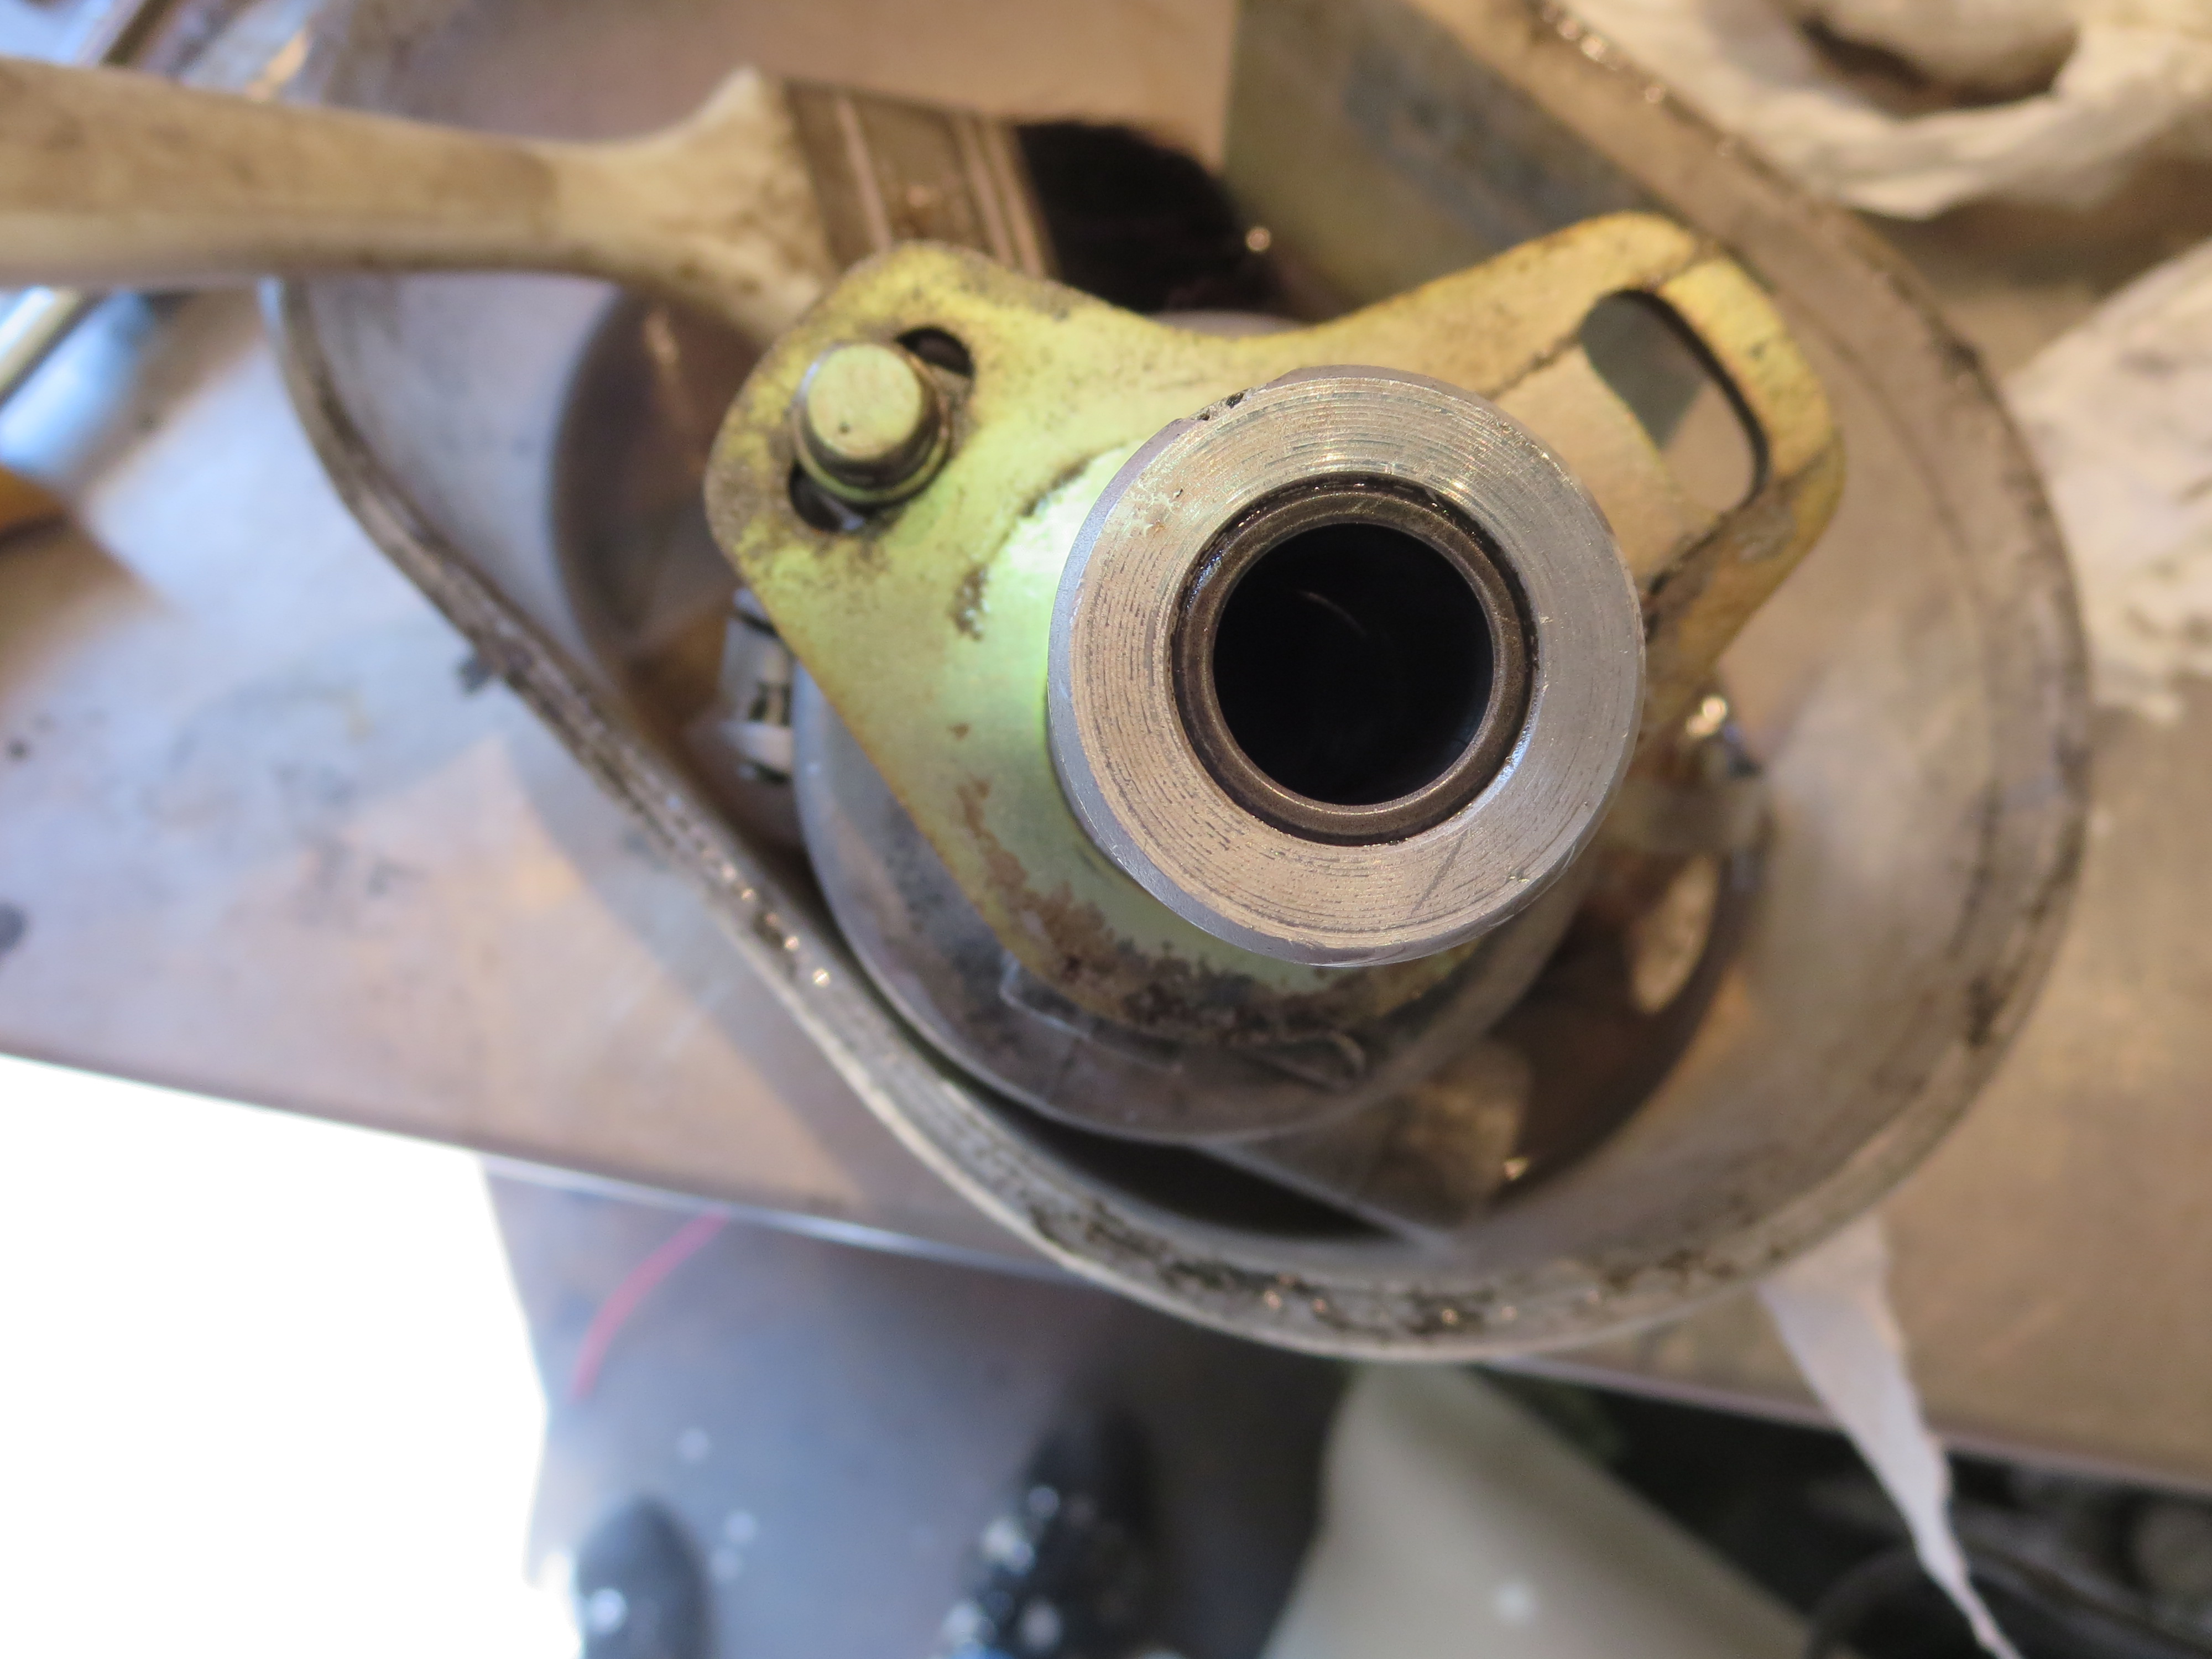


Tracking Down The Clunk - Worn Lower Diff Mount?
in Suspension & Steering
·
Edited by EuroDat
I don't think two part pu would hold up to the stresses on an engine mount. The pu bushes you see in kits is a blended nanoclay-modified PU blend. Can't remember exactly, but it's a little different to what we home hobbiest use, me included.
The engine/diff mount insulators are originally HNBR. Nissan uses HNBR and noted in the price. The NBR aftermarket units are a lot cheaper, but will sage much quicker.