siteunseen
Free Member
-
Joined
-
Last visited
Everything posted by siteunseen
-
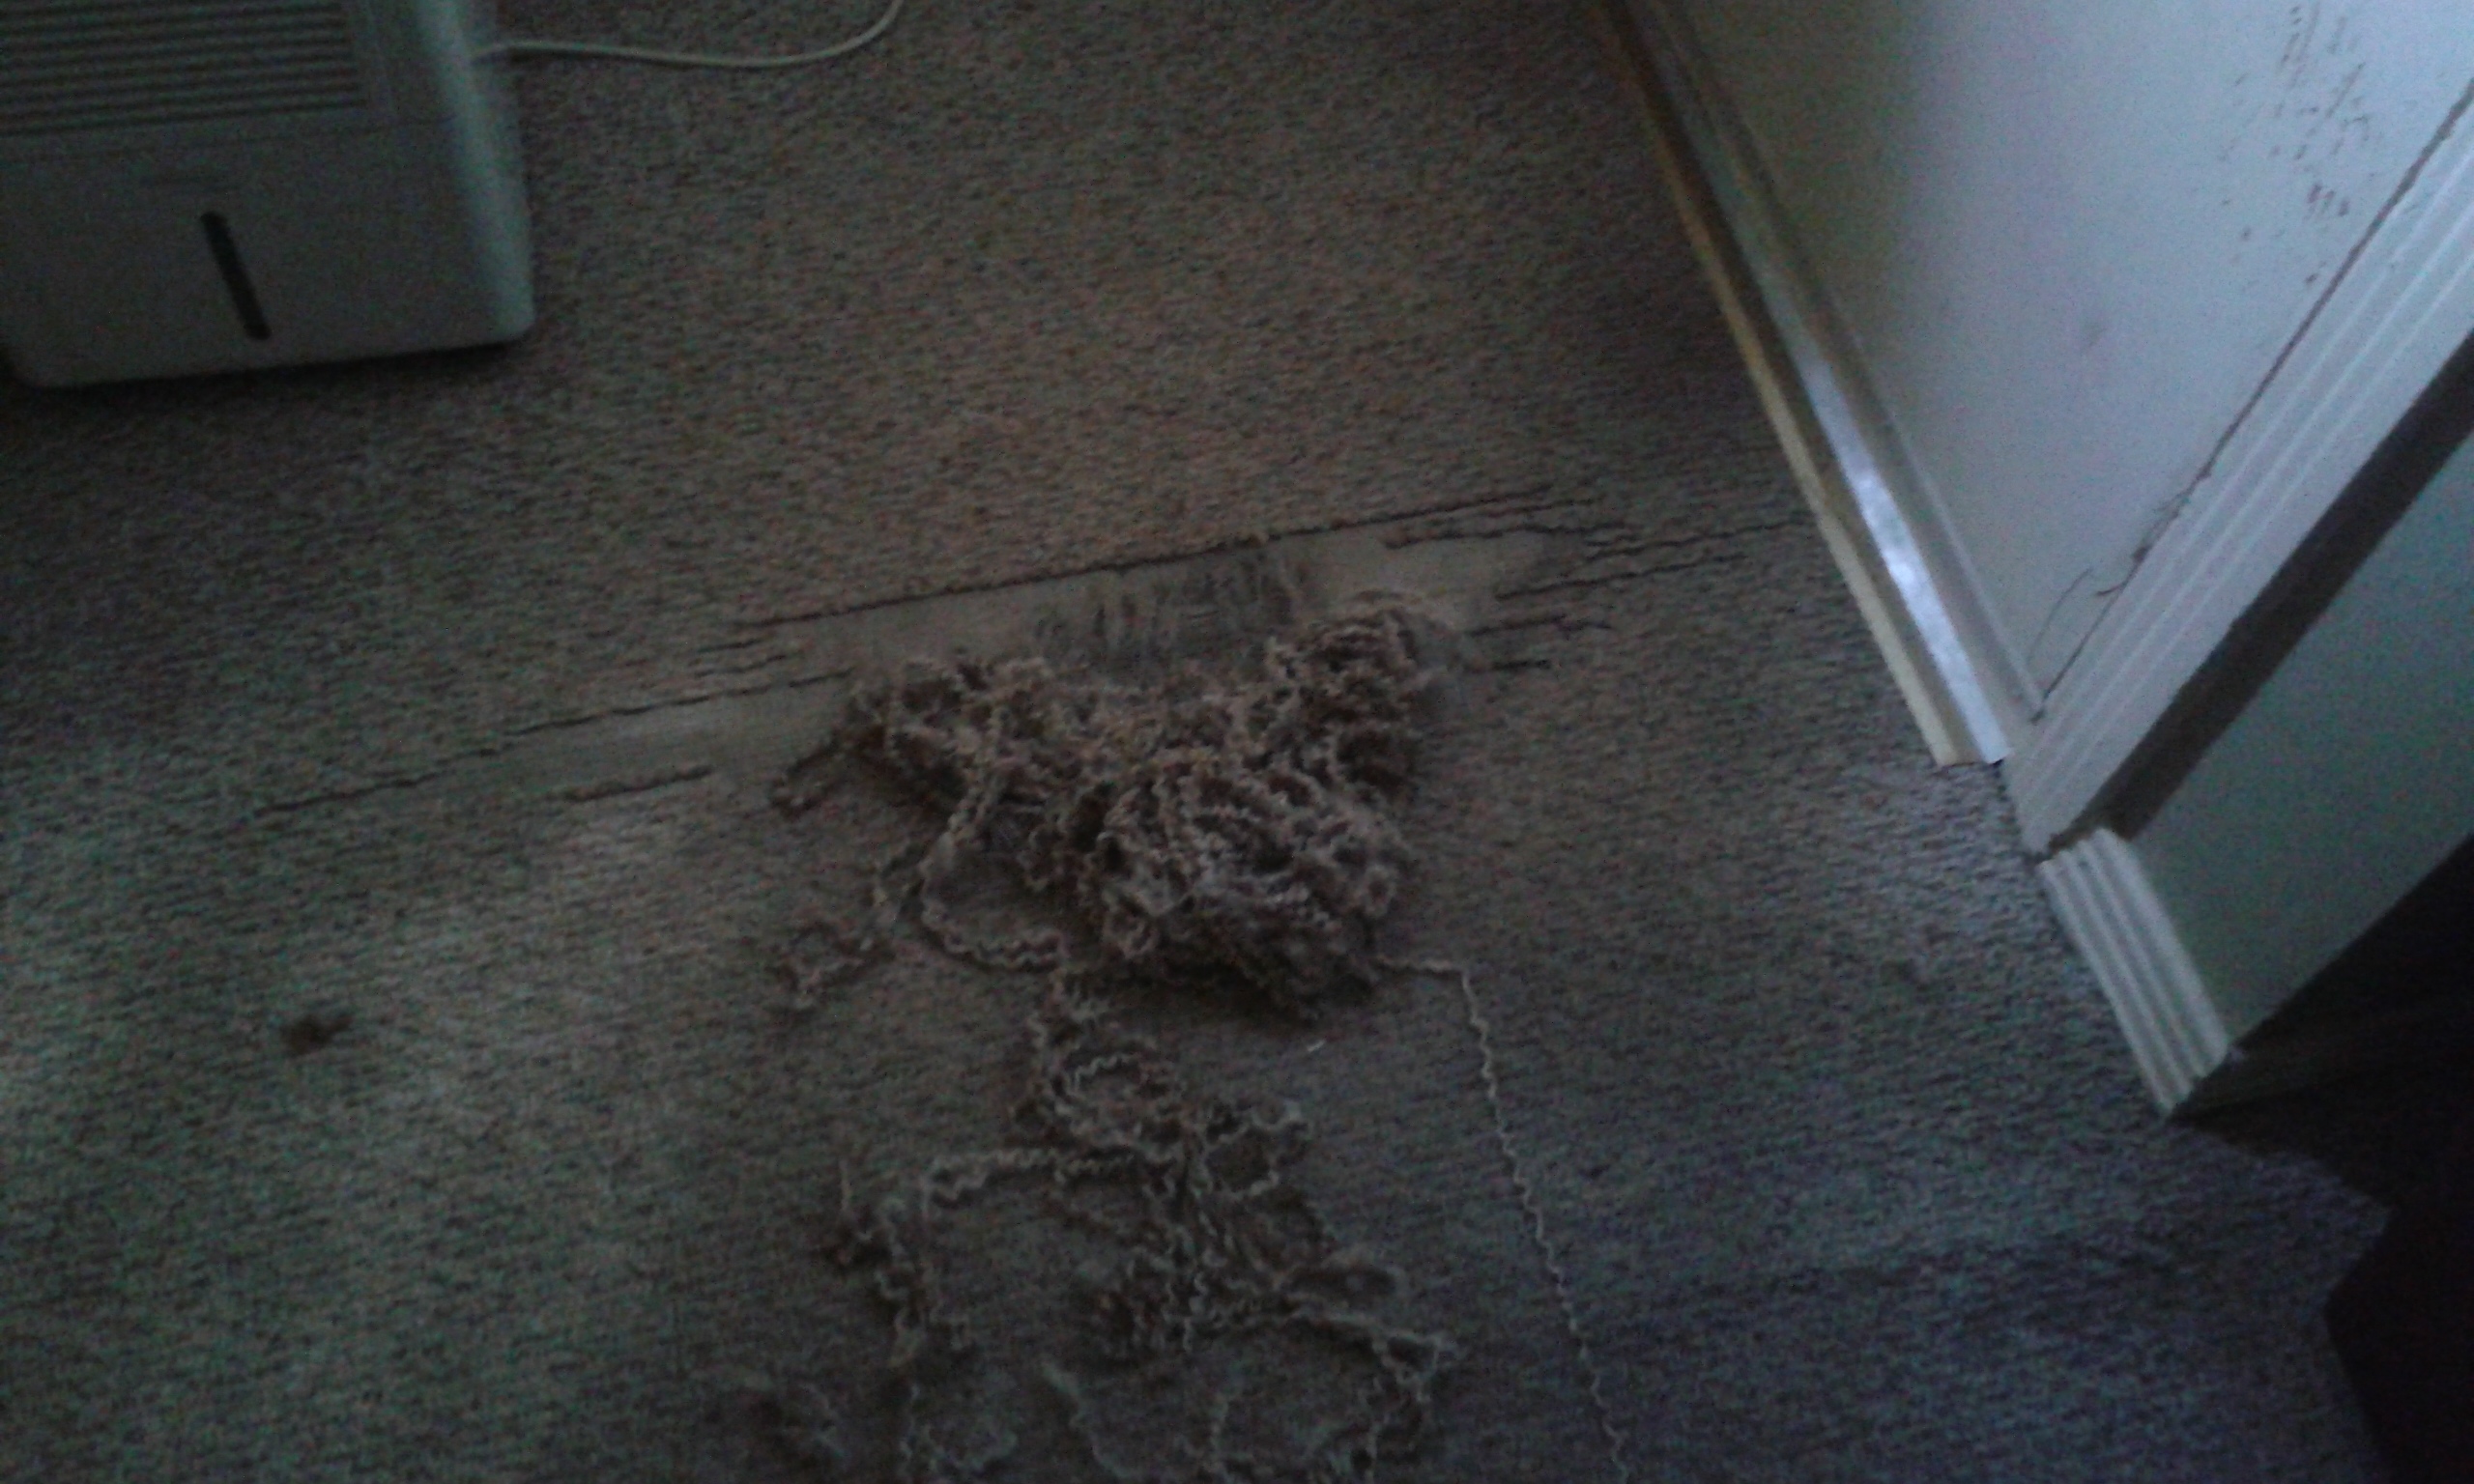
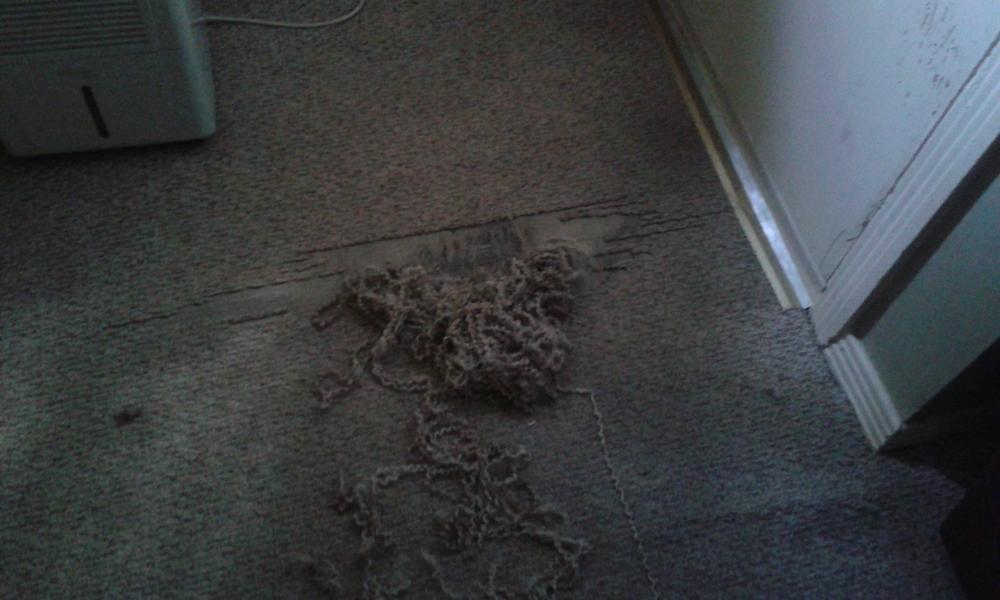
 I'm embarrassed after looking at that picture of my carpet! There's a window right there and it was casting some strange light plus that was my cell phone. It's not nasty like it looks in the picture, I promise.
 -
He chews everything, it's crazy. My female wasn't like this, I miss that dog but I'm liking him more and more. He's got a personality I'm not used to, sorta goofy like me, clumsy as can be and always ready to play. I can't afford chew toys the way he goes through them. I gave him blocks of wood but read that wasn't good to do. I wish he liked to chew on Zoysia.
-
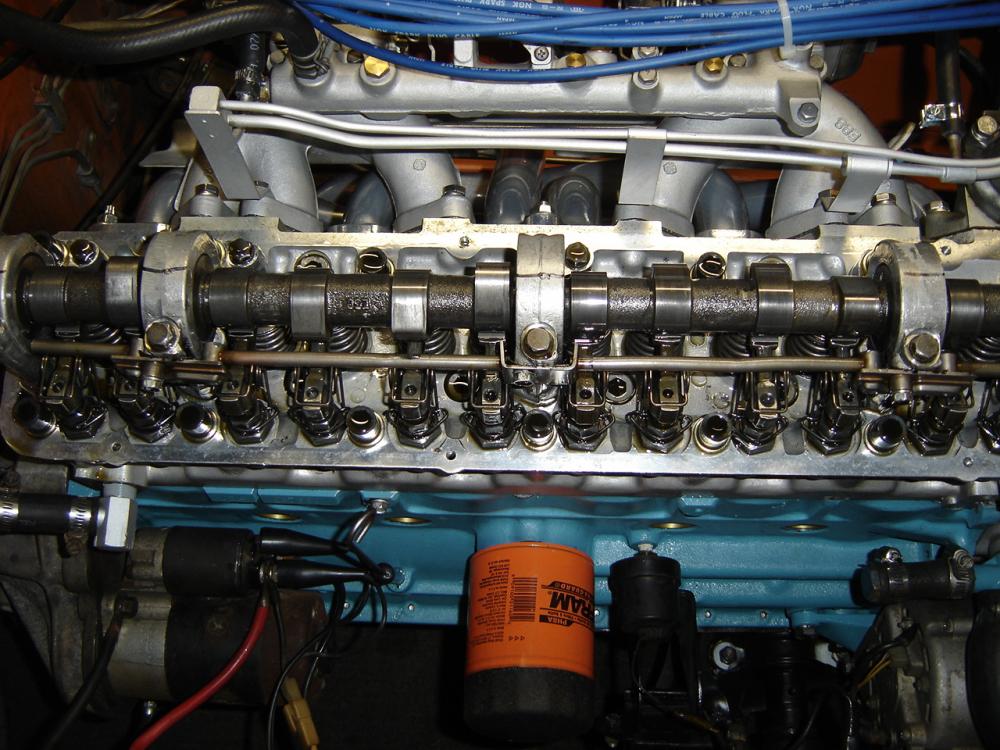
If I had listened to Dave WM's post here I would be waaaay ahead of the game. I'm a little slow to try things like he did but that is exactly what fixed mine. I got a rusty spare to experiment with at the junkyard and ground a little, went 4 feet before it popped out of 5th. Ground some more, 12ft. Ground some more, touchdown! Adjusted the valves too, head looked good. Thanks for everybodies input, it's tough helping a hard headed guy like me. I'm trying! Here's the final grinding that worked, Found some good rubber too.


-
It's Berber! That's like shag carpet now days. He's pretty smart but I don't think his interior decorating skills will allow him to live indoors after many more surprises like this.
-
Ah yeah! That's exactly what I'll do this Saturday. I've temporarily cut it out so he won't pull any more up, the little turd. I'm trying to remember what you have, is it a Lab? I have some 16x16 Travertine I'm going to put in front of the door. After the "chew 'til they're two" phase I want to put that floating fake wood down. This apartment has got hardwood as the sub floor but carpet or something like the laminate wood acts as an insulator in between upstairs where I live and the garage downstairs. It's a little quieter up here with some type of floor covering, it was built in the late 50s, it's not too tight.
-
Have been at the mosquito infested junkyard all day. I have a good rubber boot now so no fumes can get in. Also got a couple of shifters to experiment with. My transmission is a wide 5spd with two exhaust hangers at the tail. I can't explain why but it only works with the short snout shifter or fifth gear only works with the shorter one. I'm going to grind the junkyard one where the scratches are and see if that'll work. If not I will have them cut and welded together. Everything I've read says the long snout will work fine. I don't understand why mine won't? It only works with the close ratio shifter with the short snout. I come home and find my puppy got bored and chewed my carpet up while I was gone. Another day another project.
-
Thanks Mark, I always get that wrong. One day I'll figure it out.
-
Are you originally from Alabama?!?
-
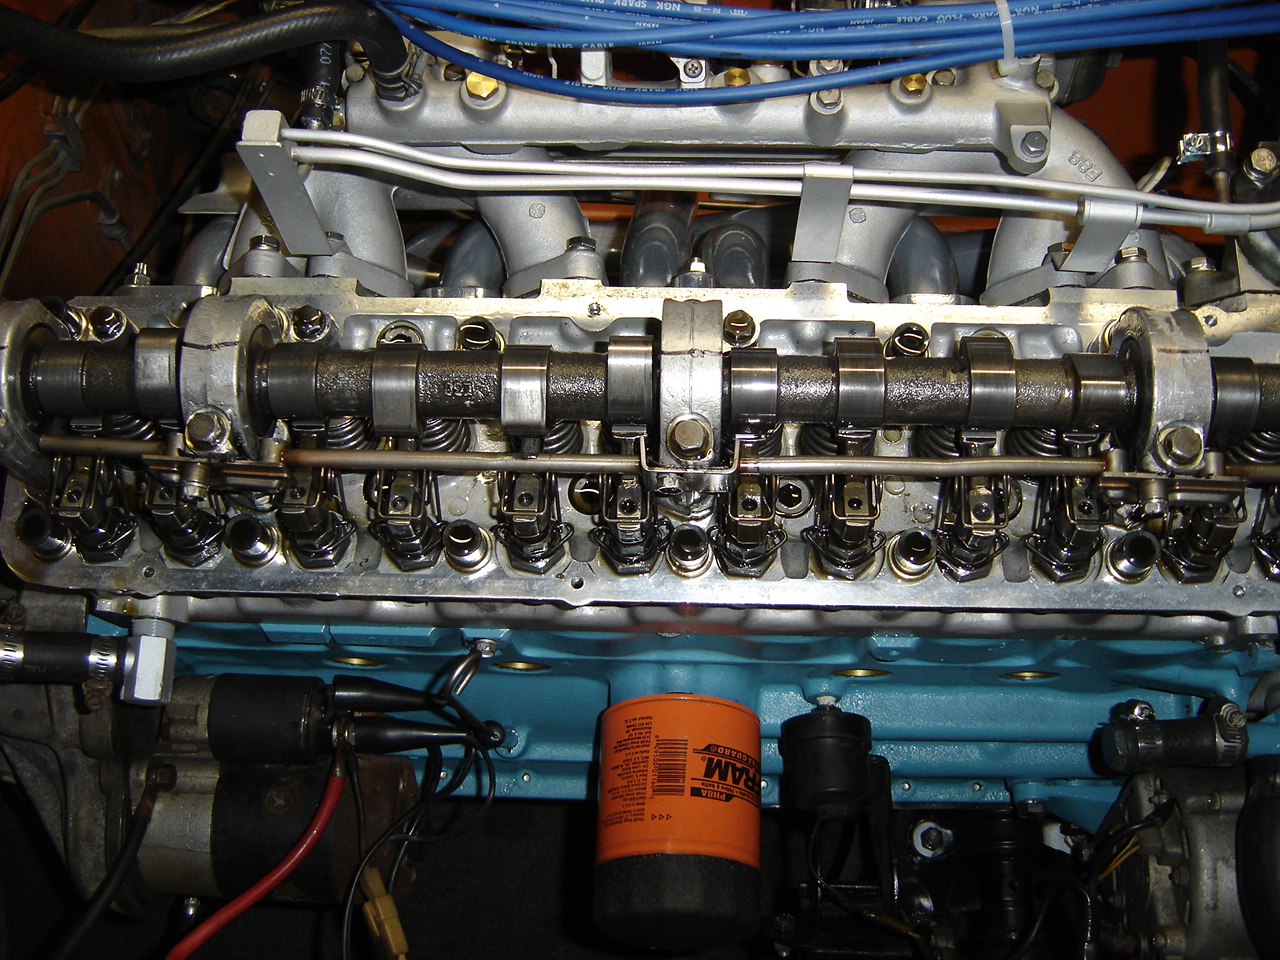
Mine was loose until I bled the slave cylinder once I had everything put back. If you want to get a new rubber boot for the clutch fork they're still available from Nissan. Part number 30542-E9000, $7.00 from my local dealership. There is an adjustable rod at the top of the clutch pedal that will determine where the clutch engages. You need to make it shorter with a worn clutch, I think?? I put in a new clutch and needed to get everything back to normal so I made that rod longer? There's a page in the FSM that explains how and what to do, I can't remember now and I just did it about a week ago. My brain is Z fried but I have a 44 year old car that runs like new now.
-
Were they black from soot? You may need to clean or replace the plugs. What gap are you at? I think 36 to 40 is good.
-
You're right. I'll study it a little more before I go cutting and welding. The little reading I did on the rectangular shifter hole with the spring keeping pressure on it says it keeps vibration out of the shifter rod and the pressure from the spring keeps it in the neutural position when not in gear. Thank you for your input, it helps my decision making. 8^)
-
After looking at a few 5spd shift rods they all have some kind of mark on them. The ones with the square opening and spring do not. maybe Nissan saw this and did a fix?
-
We learn from other's mistakes. There's some good teachers here!
-
I thought it was 11:25? If it turns counter clockwise 11:35 would be retarded, right? Everything happens later than it should. Could you move the cam sprocket to a higher number to advance it and make up for the retard? No answers just questions but I think that would work.
-
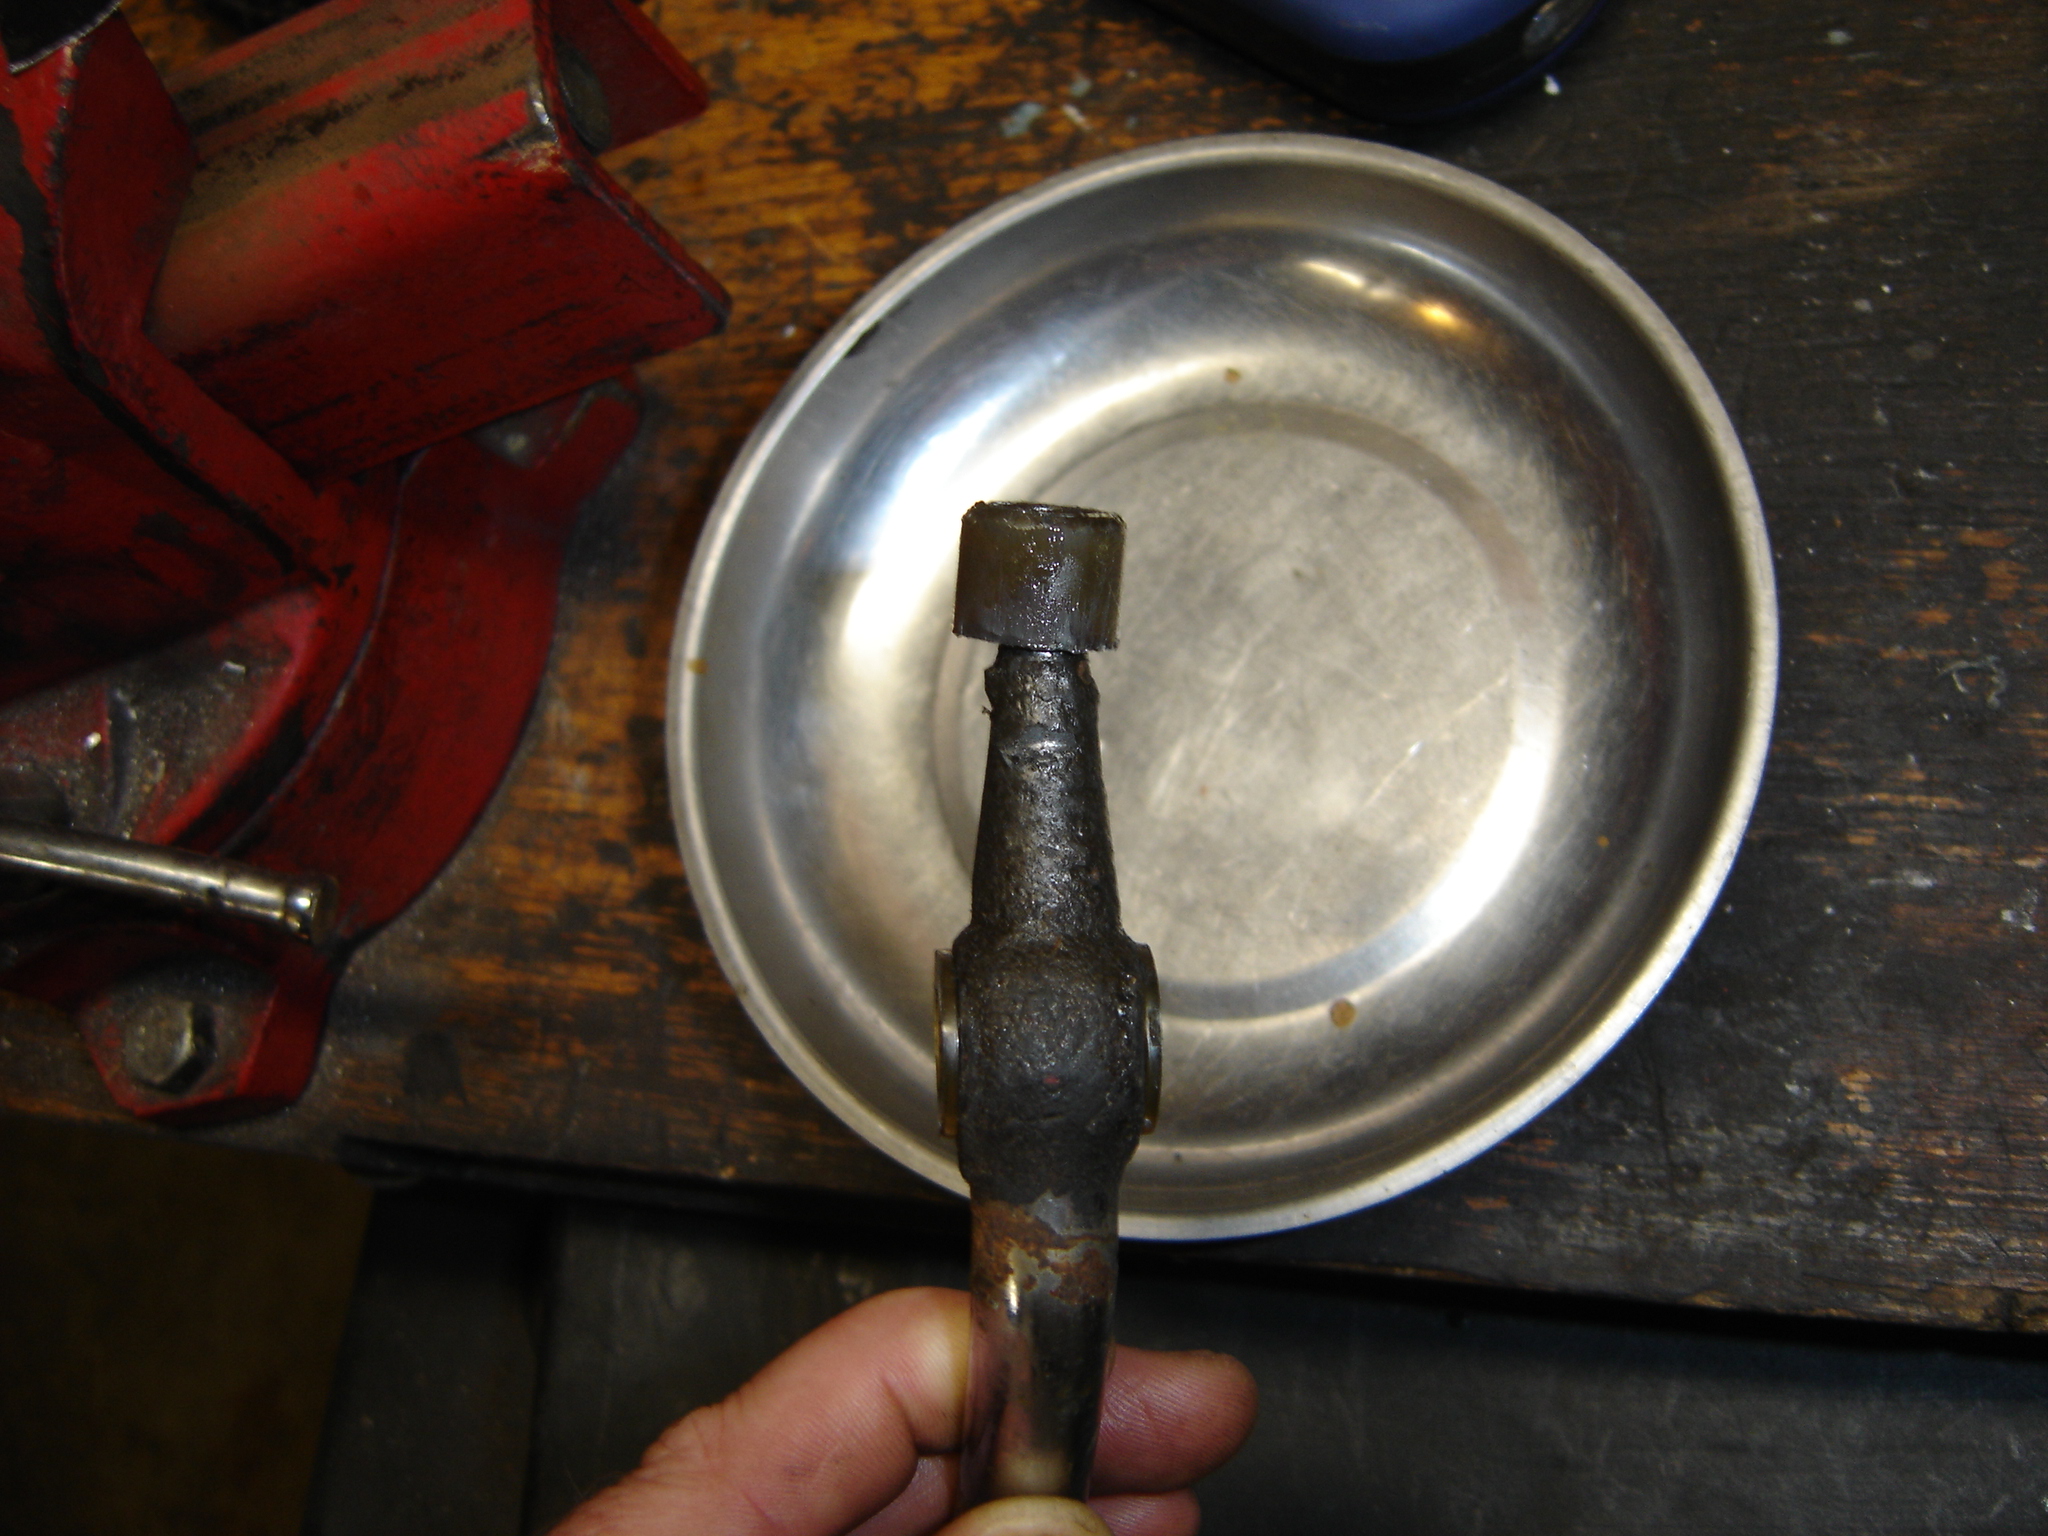
Yes it hits the cast iron part. I don't understand how that works either, sorry. I've been driving it all morning and have decided to have the longer one welded to the short snout one that works in 5th gear. The rubber boot under the leather boot has already torn with the straighter shifter. 8^( One step forward two steps backwards. Makes me want to drink! (doesn't take much, a mosquito bite?) Anyway she's getting aligned as I type.
-
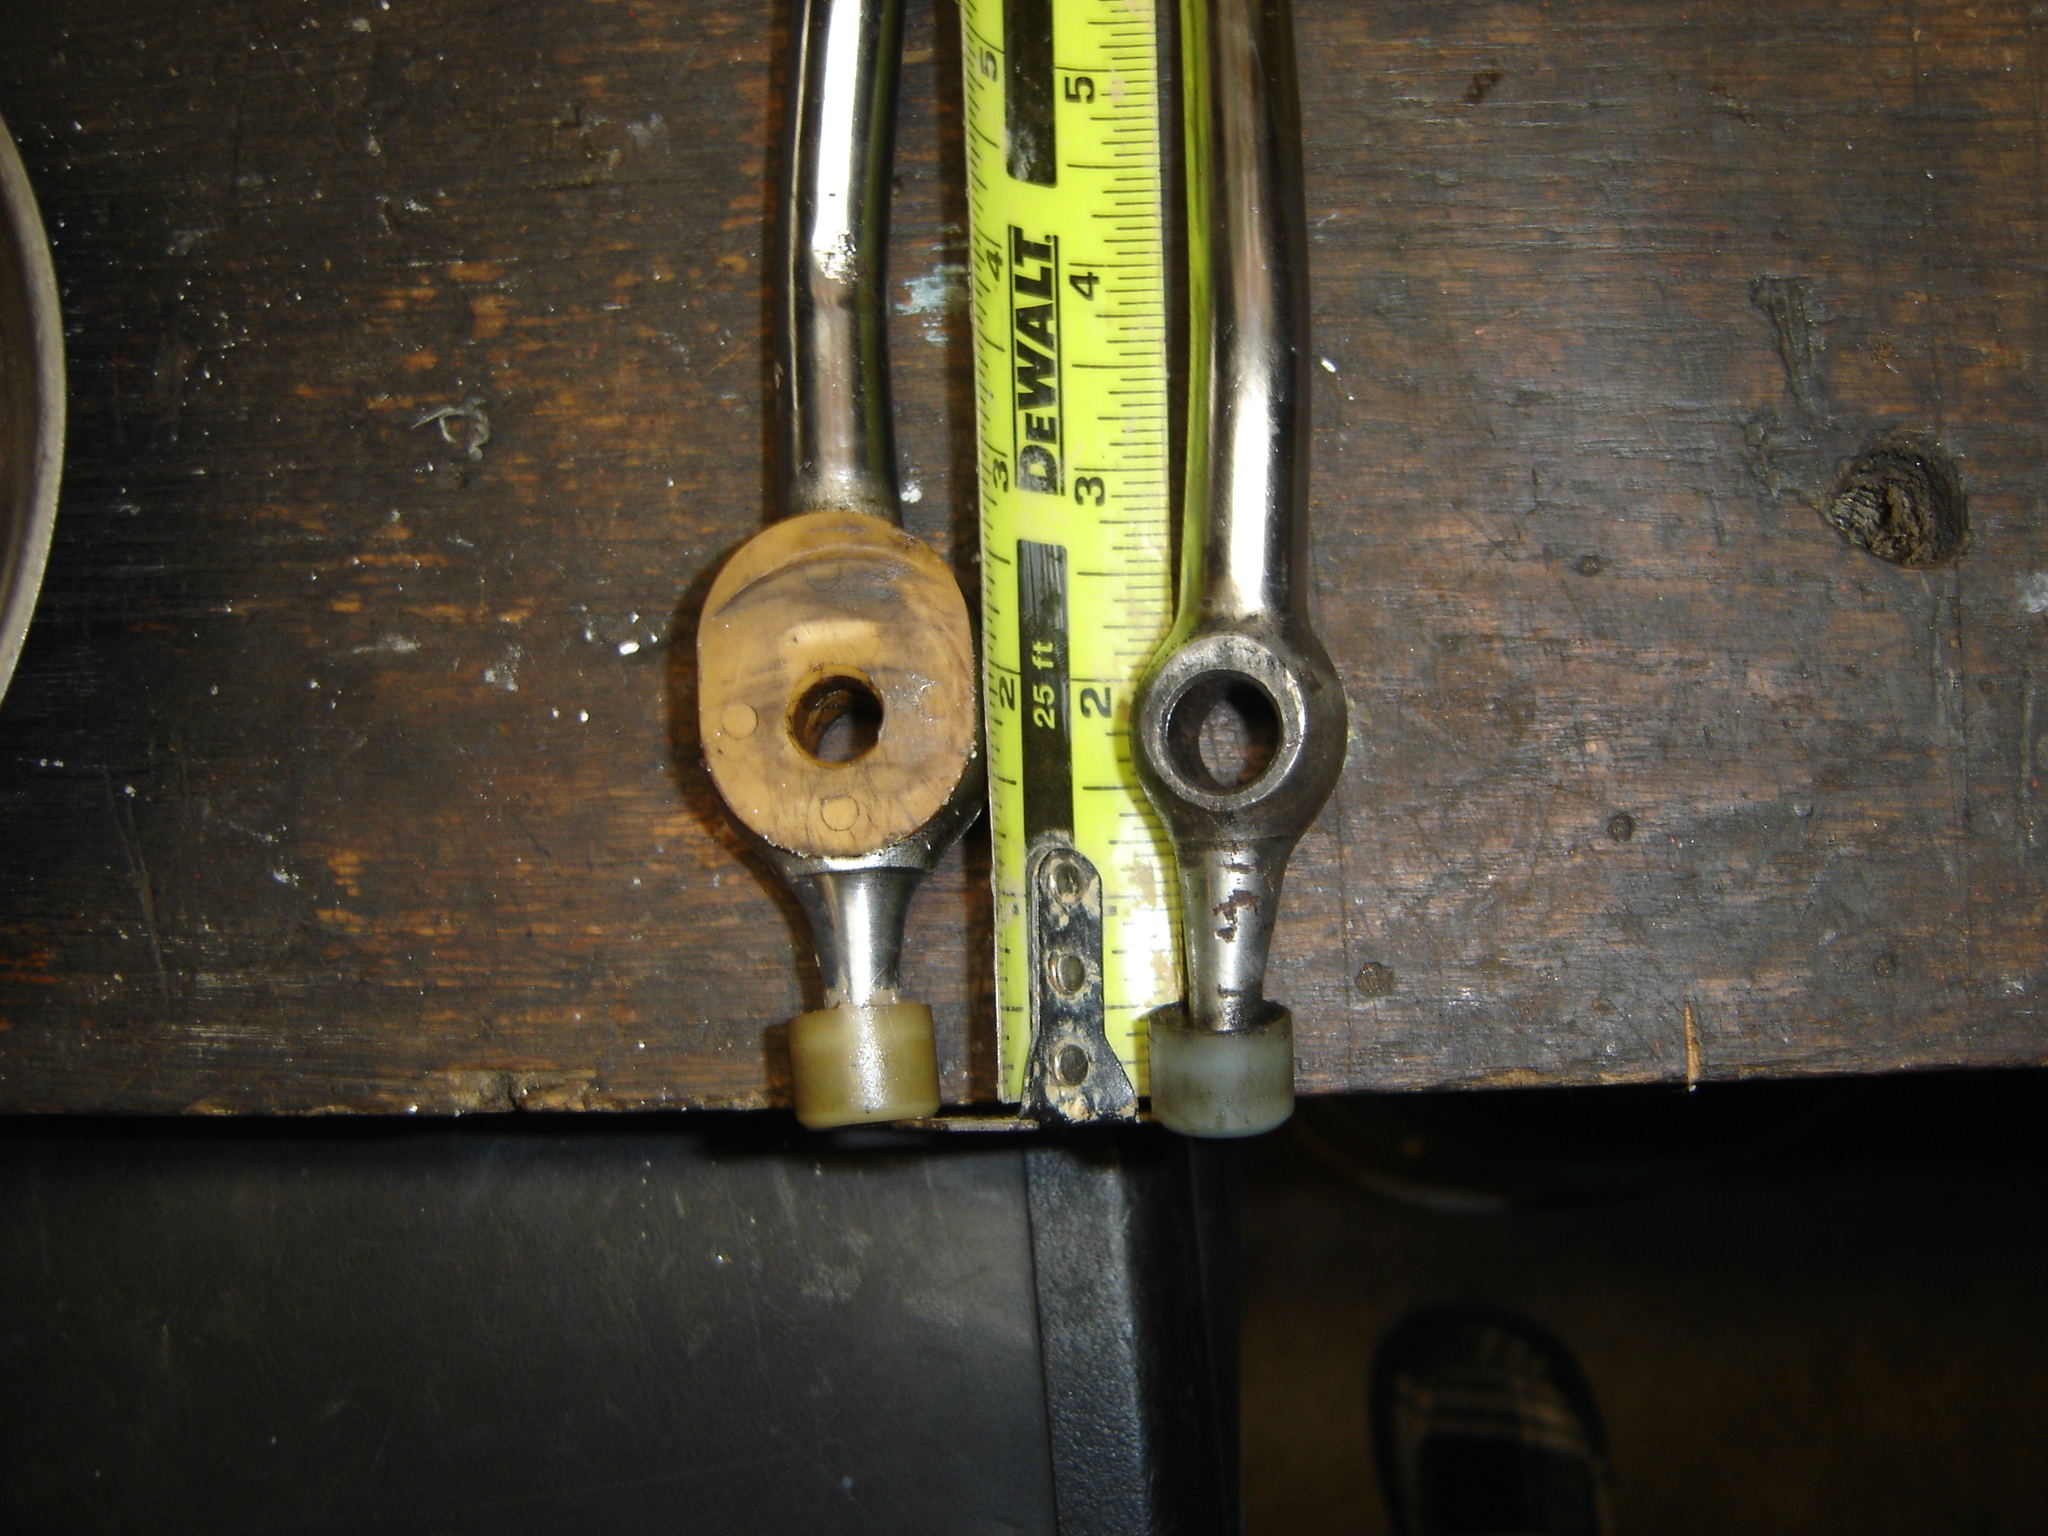
I took a quick measurement of the two. The long snout is 2" from the very bottom to the center of the hole. The short one is 1 3/4". So a quarter of an inch difference is what I'm seeing. The ZX one with the square hole and spring is what I'm using now, it works the best to me. It's in the car now and I have a two o'clock alignment appointment so I can't measure that one yet. Maybe tonight?
-
I think Lumens hit the nail head with the short nose and the long nose differences. I have some measurements to get together for Dave WM and will post later. Thanks Zed Head.
-
I will try to get more movement out of the boot first. If that doesn't do the trick I'll weld two together, I haven't thought of that so thanks. I'll get some measurements from the ball to the pin hole and post them later today. I've read many threads where people use the 4spd shifter with a wide 5spd without problems, that's what has me stumped. This is a wide 5spd out of a 2+2 ZX but also a wide 5spd from a later 280Z. I carried both to my transmission friend and said make me a good one. So I honestly don't know what he did. I do like the action of that little spring loaded shifter, it's short and straighter and a whole lot thicker. It reminds me of the old gated manuals, when I knock it out of gear it goes straight to the center and stays there. Kinda cool but I've only driven it that way one day, but sports cars aren't supposed to be comfortable IMHO. I have a Camry!
-
I don't understand. The old shifter pops out of 5th gear. The ZX shifter stays in gear but with the leather boot on it won't stretch far enough for 5th gear. I was thinking I could remove some stitching and loosen up the boot at the opening where the shifter comes out, or turn it around. It has some extra material that could be utilized I think? I may have to learn to sew.
-
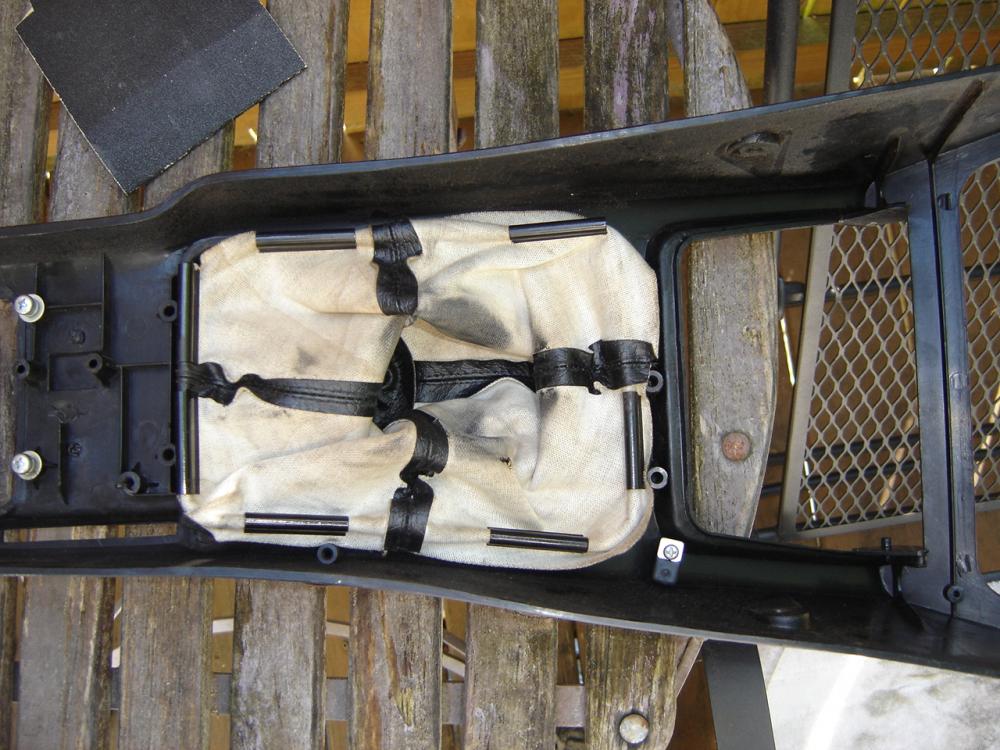
Here's what I've got. The older 5spd with scratches from hitting the shifter cup; here's what I like because it pops in and out of gear and goes back to straight up and down in neutral. borrowed picture from the internet
-
I looked at the bigger Z shifter. It has marks in front and on the backside. I'm thinking that spring in the zx shifter helps it pop in and out of gears, I like that too. Not as sloppy feeling. If I can modify the boot I should be able to use the short throw shifter, the more I drive it the more I like it. I don't have an armrest with the console so I have to reach for it anyway. I've got some reading to do. Thanks
-
I'll check that Zed Head, thanks. I'd rather use that one. The short straighter one doesn't hit anything but the leather boot won't stretch enough. I'm going to take it off and see what I can figure out. I might can turn it backwards with the leather shoe string facing the radio? Or maybe make the hole bigger. Im just glad I didn't go to my transmission friends shop and say I had problems. I would never have lived that little snafu down. Small town, he would've ragged me to everybody. I drove a little while in 5th. It was nice!
-
Damn it man! The pleather shift boot won't work with that shift rod.
-
I just did that. I got 91 mm too.
-
One problem resolved, 100 more to go! I put in a zx transmission but used the wrong shift rod. Now I have all five forward gears. 8^) The one that's straighter is the zx rod. I like the other one better but I'll lose fifth.