


cozye
Free Member
-
Joined
-
Last visited
Everything posted by cozye
-
 do you have new tie rod ends and ball joints and is your alignment good? The wandering could be many things Can you have someone sit in the car and move the steering wheel back and forth while you watch the rack for movement ?
 -
Are you using a two stage paint? Just a tip to help with the orange peel. When you are laying on the clear, for the first coat, put it on a little bit dry, don't try and make it glossy on the first pass. This gives the 2nd coat something to stick too and it doesnt' separate as much. On 2nd coat, you make it a bit more glossy, then the third is when I'll try and make it wet. Since you are only allowing it to flash for 10 minutes between coats, it will still "melt" together and lay down. Especially if you picked a medium hardener and its good and warm where you are painting. If you aren't using a 2 stage base/clear. shame on you! That's how I paint anyway. Here are pics of my race bike I painted, no buffing, color sanding, or polishing. This is straight from the gun..
-
It would be virtually impossible for an ignition problem to cause the slide in the carb to stick.
-
That was my plan as well. I put grease on them and figured I would go back and check on them. Pretty sure my clamps were tightened down as far as they would go, and I figured the bushings would settle in a bit after some use. I've only put a few miles on the car and haven't checked yet.
-
Have you had the chain off? not sure how it would have gone one tooth off? If your tensioner is not keeping the slack out of the chain, I believe the tensioner will need to be replaced.
-
There is an orientation to them, they do have a top and a bottom. That said, I couldn't get the gap to close all the way on mine. They are still tight and the steering is tight with no issues so far.
-
Yeah, I'm talking about that piece that is tacked on, that goes all the way across to cover the gap from the bumper sticking out. It's tacked on I believe and will have to be drilled/ground/cut off. Is that what you did ? I've got the trim panels off already. Probably start back on it Wednesday night, and work through the long weekend on it. I need to finish fitting these bumpers so I can send them off to get chromed.
-
Thanks for the input. I actually made my own front brackets, but they are very similar to these. I thought about buying these but it wasn't hard to make mine and I did use the same bolt holes as the factory struts so I didn't have to drill anything on the front. The rear I will likely do something very similar to the ones you have posted, but will probably just cut and weld some 1.5" steel instead of bending. That way I can mock it up and trim the joints a bit easier for a good fit. Bending and fitting is a bit harder for me since it takes a lot more effort to bend and it's not as precise as cutting and welding. I did get the rear bumper off last night. I still have to get the struts out and will work on that this week. While I've got the trim panels off and while I'm patching holes on the rear apron, I'm going to go ahead and weld in a patch on my rear hatch sill and fix that too. So I'll likely be working on it all week/weekend. I haven't researched yet, but whats involved in getting that rear sheet metal filler off the apron? Looks like its just tack welded on, so I figured I'd have to cut and grind it off.
-
Doh, we were duped by a post digger!
-
i put the eibach springs on my 280 and it lowered it an inch. I've read in a couple of places about it raising the car, but I've not actually seen any physical proof and anyone who has actually posted pictures of their car or taken measurements it was at least 1" lower. I think the "raising the car" rumor is BS. And those OEM struts are worn out and garbage on the 280. I would definitely put some new inserts in there. If you don't want the tokico's and are looking for a soft setup, at least get some oem replacement cartridges from the local parts store and put them in while you are in there.
-
Yeah, I would definitely put the original FPR back on.
-
Yeah, the 001 went in front. I reckon one of the reasons mine went faster is that I didn't repaint everything under the car. I thought about it, but decided I didn't want to redo the whole bottom of the car due to time and the fact that this car is a driver. Additionally the original owner had this car aftermarket undercoated, so most of that undercoating is still in tact. When I paint it, I'll re black the wheel wells and call it good. Also, I had already gone through the brake system thoroughly so I didn't have to go through those parts. I know the rear bumper will be a bit more of a job and I'll need to drop the tank. Thats one of the reasons I did the front first to get it out of the way and get on a roll with it.
-
I have the TC rod kit, I've heard that it offers a nice improvement in bump steer issues over the standard rubber bushings. I still have the poly bushings and could get some rubber ones if I want to go back. FWIW, the TC rod bushings to replace on the car would be a 20 minute job, so you can always go back. my rear strut insulators were in perfect shape. I'd start the job and see if you can get by with what you have. The front strut insulator bearings are available at the local parts store, again, mine were in perfect shape I just regreased and used the stock ones. The front differential mount is very easy to change at a later date as well. Mine was in good shape and hadn't settled at all so I re used it too. Sounds like you've got plenty of parts to start the job. I wouldn't wait for the backordered stuff.
-
Did you set the timing with a timing light ? You can't set it by ear, it will be all off as soon as you step on the gas. Set it for 10-13 btdc at 800rpm and report back. What exactly is your fuel pressure at idle ? What is it at 2000 rpm? Got a vacuum gauge? What is the vacuum reading at idle ? Can you put the idle at 800rpm ? I wouldn't just go replacing a bunch of stuff. you will likely spend a lot of time and money and still wont solve the problem which will add to your frustration. This problem shouldn't be that hard to figure out if you take a methodical approach and use the proper gauges and tools.
-
bonzi, thanks for the SEM color number. I figured I'd have to look that up at some point and figure it out. Now you saved me the trouble. Herb, xmas with the family has been nice! My parents drove up from San Antonio, so we have a little Texas with us. Hope yours has gone well. Mezz, sounds like you did everything right? Did you do the rack bushings ? I'm not sure what yours feels like, only difference is that I used the Tokico HP's. Did you do the steering coupler bushing too? Mine was way loose and suspension was toast before I started, so it was night and day. Maybe yours was better to start ? You did put the longer springs in the back, right ? I seemed to notice that some people have confused which springs go where and it's not easy to tell.
-
-
Cool. thanks for the ideas. My seat belt covers are off due to recent strut installation, so I may test on these and see if I can make a difference without using the dye.
-
Yeah, basically I just use the vacuum to pull most of the air out and prime the line real well. I've not had great success in using a mighty vac as the final bleed solution. It does save a lot of time though since once you've got the lines primed real well it only takes 5 minutes to finish manually. I also like the vacuum pump to keep the fluid in the container and not make a big mess.
-
Thanks. It looks good from 50 ft.. but trust me, I've got at least 3 sections to cut out and weld patches in Thanks! I've got a new mig welder and have been playing with it, getting pretty good results now. I've been practicing on sheet metal and I've got that close to dialed in as well. What kind of plastic polish ? I may try this. SEM and Duplicolor both make the vinyl dye. That's what my plan was for the interior panels. The seats I'm going to have recovered. They are still white but there is a couple of small tears starting and the padding in them is worn.
-
If you are going to do your own bodywork on a Z, you might as well pick yourself up a mig welder and learn how to use it. It will pay for itself in a day. Looks like your car had some previous rust repaired and painted over, and some of those rust repairs are coming back through. The only way to complete eradicate it is to cut it or grind it out. IF it's just surface stuff, you will have to grind it or wire wheel it until you get to clean metal then treat and fill. You will have to decide at some point whether you are just going to live with it, or take on the big project and do it all. I don't think it will be one of those things you can just touch up, however you can do it a little at a time as long as you keep bare metal covered with primer and keep it out of the rain. I think once you start grinding into those areas that are popping up, you will find it's more than it appears. I still don't think you have any huge problems though.
-
because when you pull brake fluid through with a vacuum, I've found that a tiny amount of air still enters the system around the bleed screw threads. Also I suspect that tiny bubbles like to hang around in the nooks and crannies and high spots and don't pull out as easy as they push out. And there is no harm in doing an "extra" good job just to be sure. I figured this out on motorcycles when I would get unexplained brake fade on the race track. Nothing like screaming towards the end of a 3300 foot straight at 165 mph and having no brakes I found that if I manually pumped, then cracked the bleed screw a few times on the hole system after priming with a vacuum pump, a little extra air came out and brake fade was a lot less. I have to flush and bleed brake fluid on my bike every other weekend so I've had a fair amount of practice at it. If you are pushing through the fluid with positive pressure, you shouldn't have that issue. With the vacuum on it though it's different.
-
I use a combination of vacuum pump and an old fashioned 2nd hand. I've got a long tube on my vacuum pump, I suck a bunch of fluid through the system with the vacuum pump while having someone keep the resevoir full. Then to finish it off I just bleed it using a helper with the method in the service manual. Works for me on brakes and clutch. I think the key for me is i'm not opposed to running a half quart of fluid through it.
-
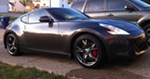
Thanks guys. That's the factor color interior. I'll be recovering the seats and dying the interior panels once paint is done. You can't see in the pic, but those "off white" interior plastic panels have yellow'd with age. I'm also planning on some Konig rewind wheels with graphite center. That pretty much sums up the plans. I may head out there in a few and start on the rear bumper. I know it's going to be a pain
-
wow. nice work.
-
Ok, I snapped a couple of pics. Was out the in the garage and finished making some bumper brackets to mount my 240 front bumper. I tried bending the 240 brackets to get what I wanted, got close but decided I'd be better off to make my own. I've still got the rear to do and will get to it soon. Trying to finish up the bumpers so I can send them off to chrome and get the paint done. It's got a bit of rust in the usual places that I'll have to cut out and weld patches in.