.JPG.51e80f79d93a77e0045673b165973860.JPG)
moritz55
Free Member
-
Joined
-
Last visited
Everything posted by moritz55
-
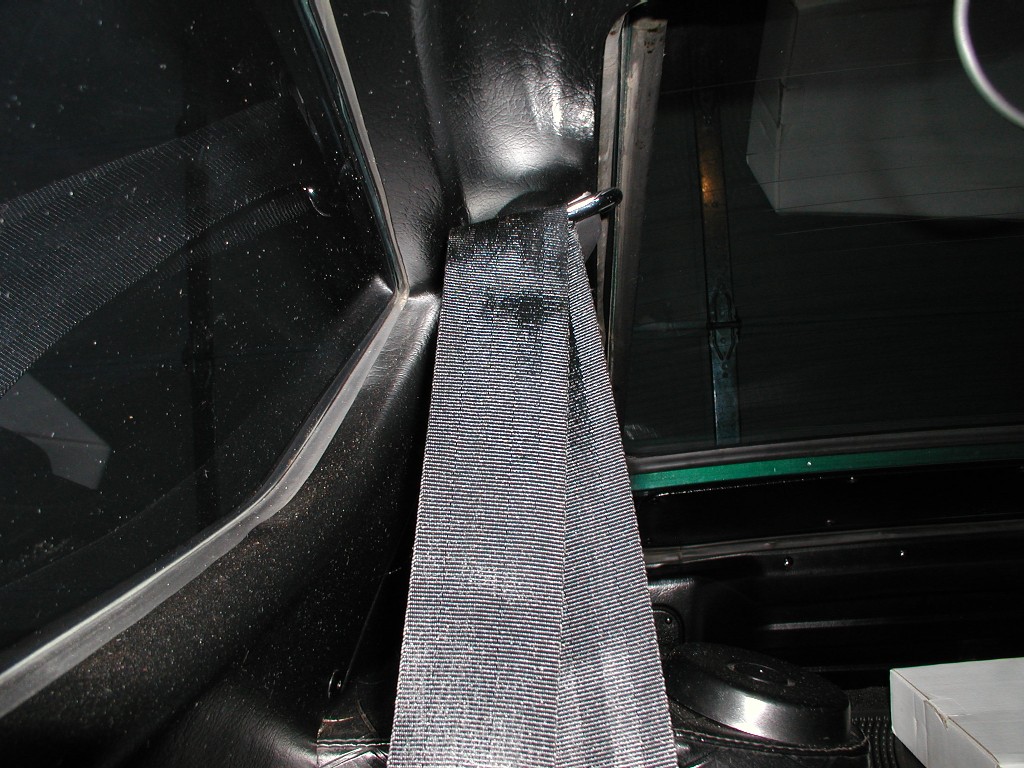
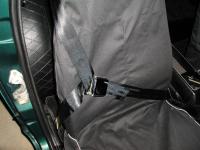
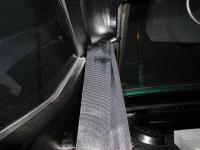
 1973-240z.. This installation of the New MSA - 240z Retro seat belts with shoulder harness. This photo shows the Y Bracket attached to the rool existing hole. Not the shoulder harness belt that clips to the wait buckle rides OVER the retactable belt that is fed into this Y Bracket. This assures smooth operation of the shoulder harness belt.
 -
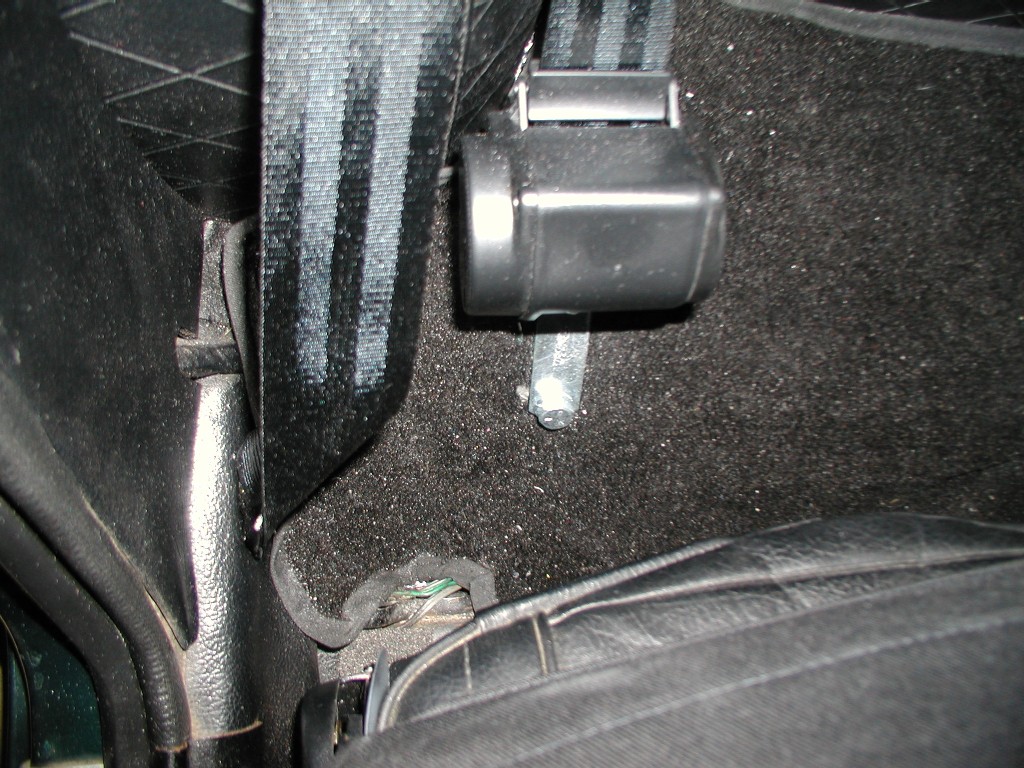
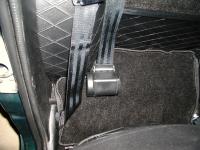
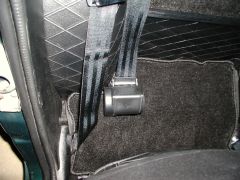 1973-240z .. This installation of the New MSA - 240z Retro seat belts with shoulder harness. The photo shows the retractable harness & shoulder strap attached in existing mounting holes for the 1973-240z. I did slit the carpet under the retractable harness so I can remove them for cleaning. The slit is not visible.
 -
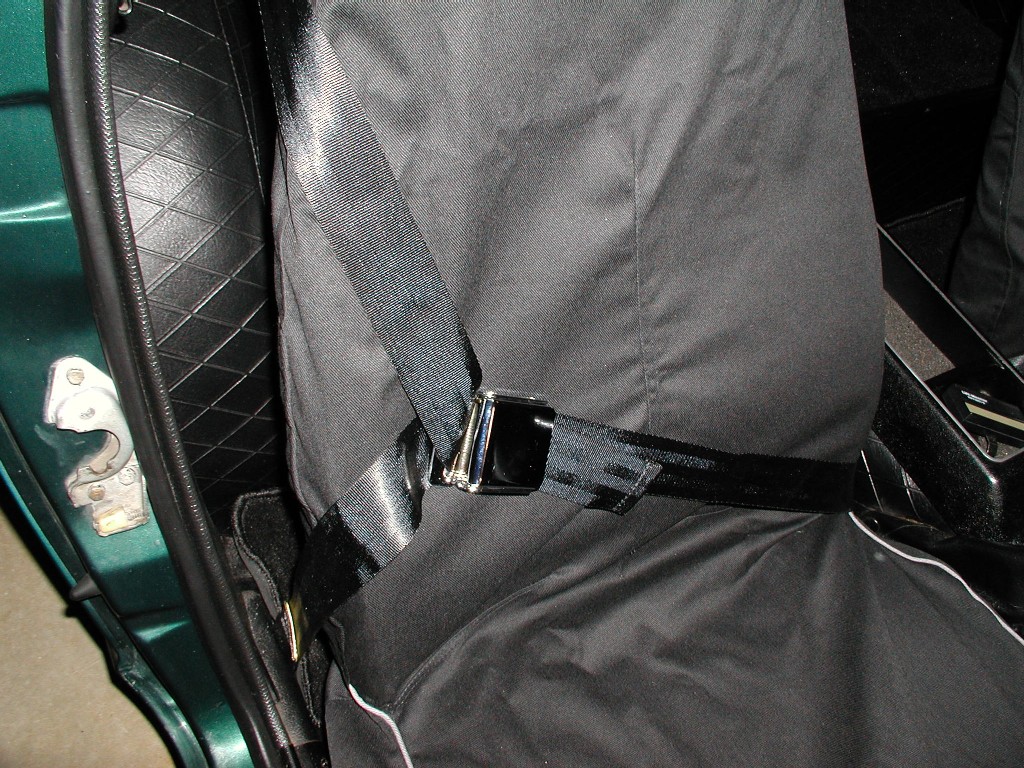
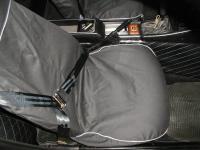
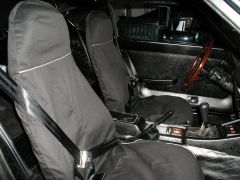 1973-240z.. This installation of the New MSA - 240z Retro seat belts with shoulder harness. Also Installed are the MSA "Black" protective washable seat covers to assure my exceptional looking stock seats are preserved.
 -
 1973-240z.. This installation of the New MSA - 240z Retro seat belts with shoulder harness. Also Installed are the MSA "Black" protective washable seat covers to assure my exceptional looking stock seats are preserved.
 -
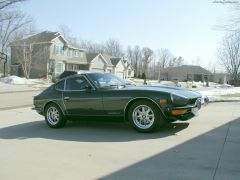
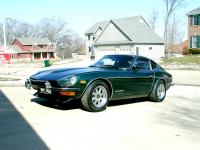
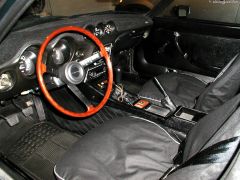 1973 240z, with L24 engine, 5sp 1982 ZX Trans, 4wheel disc brakes, and stock interior with Dual CD/AM/FM/iPod/USB 200amp- quad speaker system.
 -
 1973 240z, with L24 engine, 5sp 1982 ZX Trans, 4wheel disc brakes, and stock interior with Dual CD/AM/FM/iPod/USB 200amp- quad speaker system.
 -
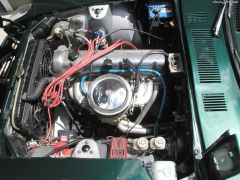 L24 engine, E88 head, P30 block, Magnecor 8.5mm ignition wires, Mallory Unilite Breakerless Distributor, Mallory Promaster (29440) Coil & MAG700 Ballast resistor.
 -
 L24 engine, E88 head, P30 block, Magnecor 8.5mm ignition wires, Mallory Unilite Breakerless Distributor, Mallory Promaster (29440) Coil & MAG700 Ballast resistor.
 -
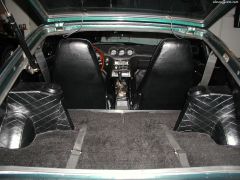
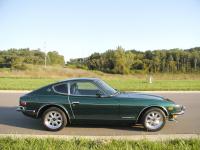
 1973 240z, with L24 engine, 5sp Borg-Warner Trans, 4wheel disc brakes, and stock interior.
 -
 1973 240z, with L24 engine, 5sp Borg-Warner Trans, 4wheel disc brakes, and stock interior.
 -
 1973 240z, with L24 engine, 5sp Borg-Warner Trans, 4wheel disc brakes, and stock interior.
 -
 1973 240z, with L24 engine, 5sp Borg-Warner Trans, 4wheel disc brakes, and stock interior.
 -
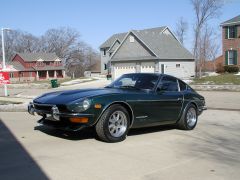 1973 240z, with L24 engine, 5sp Borg-Warner Trans, 4wheel disc brakes, and stock interior.
 -
 1973 240z, with L24 engine, 5sp Borg-Warner Trans, 4wheel disc brakes, and stock interior.
 -
I just saw this posting and did install NGK BP6ES-11 and gapped them to .045" in my 240z L24, E88 head and P30 block. Yes these are the "projective" type plugs and are recommended. Because I have both a Mallory Unilite "Breakerless" Distributor and Mallory Promaster (29440) Coil with the MAG700 ballast resistor installed, the coil puts out a 500us Spark duration which is 5-times longer and hotter than the stock coil - so it's been recommended in many Classiczcar articles that we should gap them to .045" rather than at the stock gap of .030" - .035" . My car starts terrific in the cold with my manual choke since I live in Minnesota and idles flawlessly even in 5F-10F temperatures once then engine warms to 120F or hotter. You may want to try getting a set of the NGK BP6ES-11 they are cheap, $2.19 each through NAPA. Given I had to order them and pay shipping of $6.95, I purchased 12 so I had a backup set. Good luck and hope this helps!
-
I spent a lot of time and concluded the following. For balancing a comfortable ride and strong/aggressive responsiveness 15" or 16" rims are a good balance. I had Yokohoma 205/50/15's on my 7.5" wide rims and the car handled nice, but the tires did not fill the wheel and the car lacked comfort to my liking as well. See photo #1. I just installed BF Goodrich G-Force Sports, 205/60/15 on my 7.5" rims and was extremely pleased. See photo #2. Inflation was also important - the BF Goodrich g-Force tires for the Z-car (1000lb /tire Load capacity) would be 24psi -26psi Cold according to BFG - I keep them at 25psi cold. The ride has been excellent, my Speedometer is now accurate (60.5 MPH actual versus 60MPH on my speedo). I welcome your feedback and thoughts.... many thanks.
-
"cunniwj" .. Thanks .. I agree totally and did not take it as a negative. These seats were clearly years ahead of their time, I just wanted to preserve them with something stylish and looks half way decent. Many thanks....
-
Thanks for the comments... "a7dz" - my 1973 240z stock side buckles had the "Z" logos on them. They must have changed this when they came out with Shoulder Harnesses. It's shaped identical to the "Z" logo MSA has with these Retro Belts/Shoulder Harness. "cunniwj" thanks for the suggestion on the seats and covers. In my case the seats are stock and am fortunate becuase they are in oustanding shape. I did remove them and repair the underside webbing to increase the strength. I also have the original side black plastic covers on the outboard sides where the seat back release lever is. So in my case I bought these seat covers from MSA to protect the seats from normal wear as I drive it regularly and wanted something that blended and looked half way decent. Anyway , many thanks again ...
-
Thanks Xray for pointing this out. They actually have a "Z" emblem for the buckle. I have not placed them on yet. It's cold outside, I'll wait till warm weather. If you look at the MSA link you'll see the "Z" logo. It's looks very authentic. Many thanks...
-
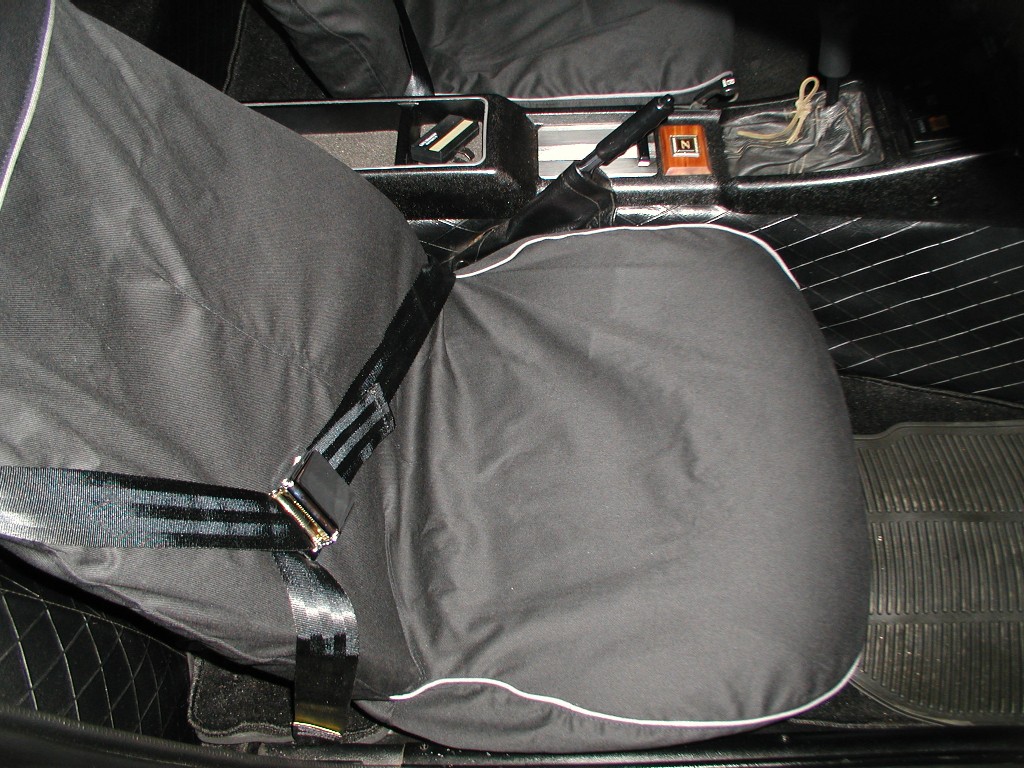
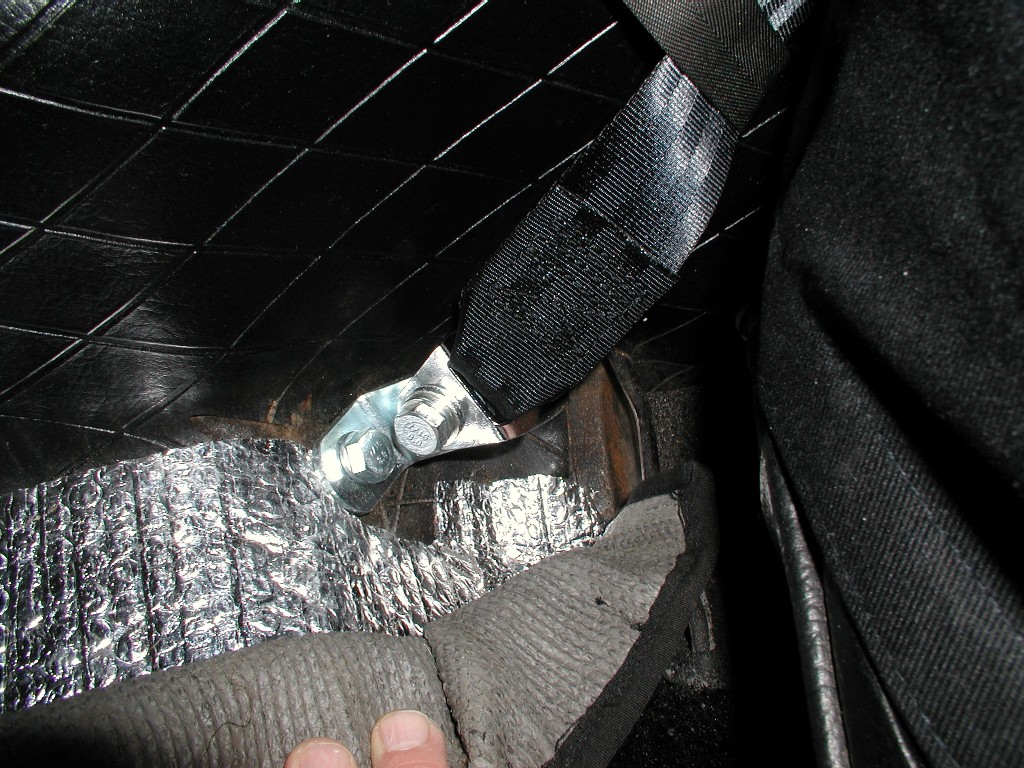
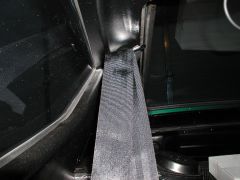
I just completed the installation of the MSA Seat Belts. Driver and Passenger seat belts are identical. Only modification was that I had to flip the Top Y Clamp shoulder harness so it mount facing forward. It was easy, just pulled out the loose shoulder strap before mounting it and re-thread it such that when the Y clamp is facing forward, the Shoulder Harness that's clipped into the waist buckle runs ABOVE the retractable belt that feeds into the Top Y clamp. Note: I did have to cut a slit in my Carpet to allow it to fit slug around the retractable unit so that I can remove the carpet when cleaning the car, however it's not noticable. MSA notes that for 72-73 240z it's a drop in since all the holes are there - they are correct. Plenty of parts are left over. For 70-71 240z cars, one hole is required for the retractable unit - a plate is included to allow you to sandwich the screw holding the retractable unit with a bolt through the floor into the plate with a bolt/lockwasher on the underside of the car. Hope this helps and here's the MSA Link: http://www.thezstore.com/page/TZS/PROD/40-7490 Description of the Photos: Photos 000 & 001 are of the completed Installation. Seat covers are MSA's washable Black covers. Photo 002 is a view of the retractable unit base and the shoulder harness clamp. The carpet is slit under the retractable unit to cover the mounting hardware. Photo 003 is a view of the Y Clamp attached to the roof. It must face forward so the shoulder strap can be pulled and retract easily. Photo 004 is a view with my Carpet removed. I have old carpet down with sound insulation under it, so I did cut a hole to allow the 3" bracket to be attched to the existing hole in the floorboard. Photo 005 is a view of the lapbelt attachment. I used the L bracket that came with the MSA kit so it cleanly fits and is upright nicely against the transmission housing.


-
For those of you interested - I just ordered MSA's new "Z" seat belt with the shoulder harness for my 1973, 240z. Once they come in - I'll install them and try to post some pic's as well. I hope they are top quality and fit nice. I have my stock ones that are a bit combersome and I'm quite honestly worried about overall safety. I'm hoping the MSA ones resolve both my concerns. Many thanks and stay tuned !
-
Thanks... for the immediate responses so I got it!!! The "E" and Arrow pointing to the Engine (the Gray Port) .... allows Air to blow/pass from the Brake Booster to the Engine Manifold. Therfore the Gray Port connects to the Brake Booster side while the Black Port connects to the Engine Manifold side of the vacumm hose. Many thanks....
-
Hi - I just purchased a remanufactured Brake Booster and New Vacumm Check Valve. I'm installing them this weekend . My question is: What direction does the Vacumm Check Valve get installed? There is an ARROW and "E" marking on the gray port pointing toward the black port. Observations: When I blow into the Gray Port - air passes, when I pull vacumm on the Gray port - air is blocked. When I blow into the Black Port - No Air passes (it's blocked), when I pull vacumm on the Black Port - air passes. Any help and guidance is appreciated...Many thanks.
-
Sorry folks. I'm new to all this electrical stuff and am taking guidance from this forum and special help from Dave - Zs-ondabrain. My question above has some errors after I inspected under the hood. New Question: The Soleniod + post connects to the Battery Terminal (Red) post. The Alternator + (Red) wire connects to this Soleniod + (Red) post. Correct ? Many thanks.