
DannDZ
Free Member
-
Joined
-
Last visited
Everything posted by DannDZ
-
That's what I learned from this process, if it works, you don't need to fix it! ?
-
My carbs don't have a drain plug, so I can't use this method. However, I've heard that you want the float bowl level to be the same as the "bridge" in the carburetor. The bridge might be thought of as the part that the carb piston rests on or where the needle and jet first meet. If you fuel level is at that level, you should be good to go.
-
That's what we did. The biggest change was the float was not tipped up quite as much as in the picture and the level was slightly higher. We set both carbs to the same level and that is where we will begin the tuning process.
-
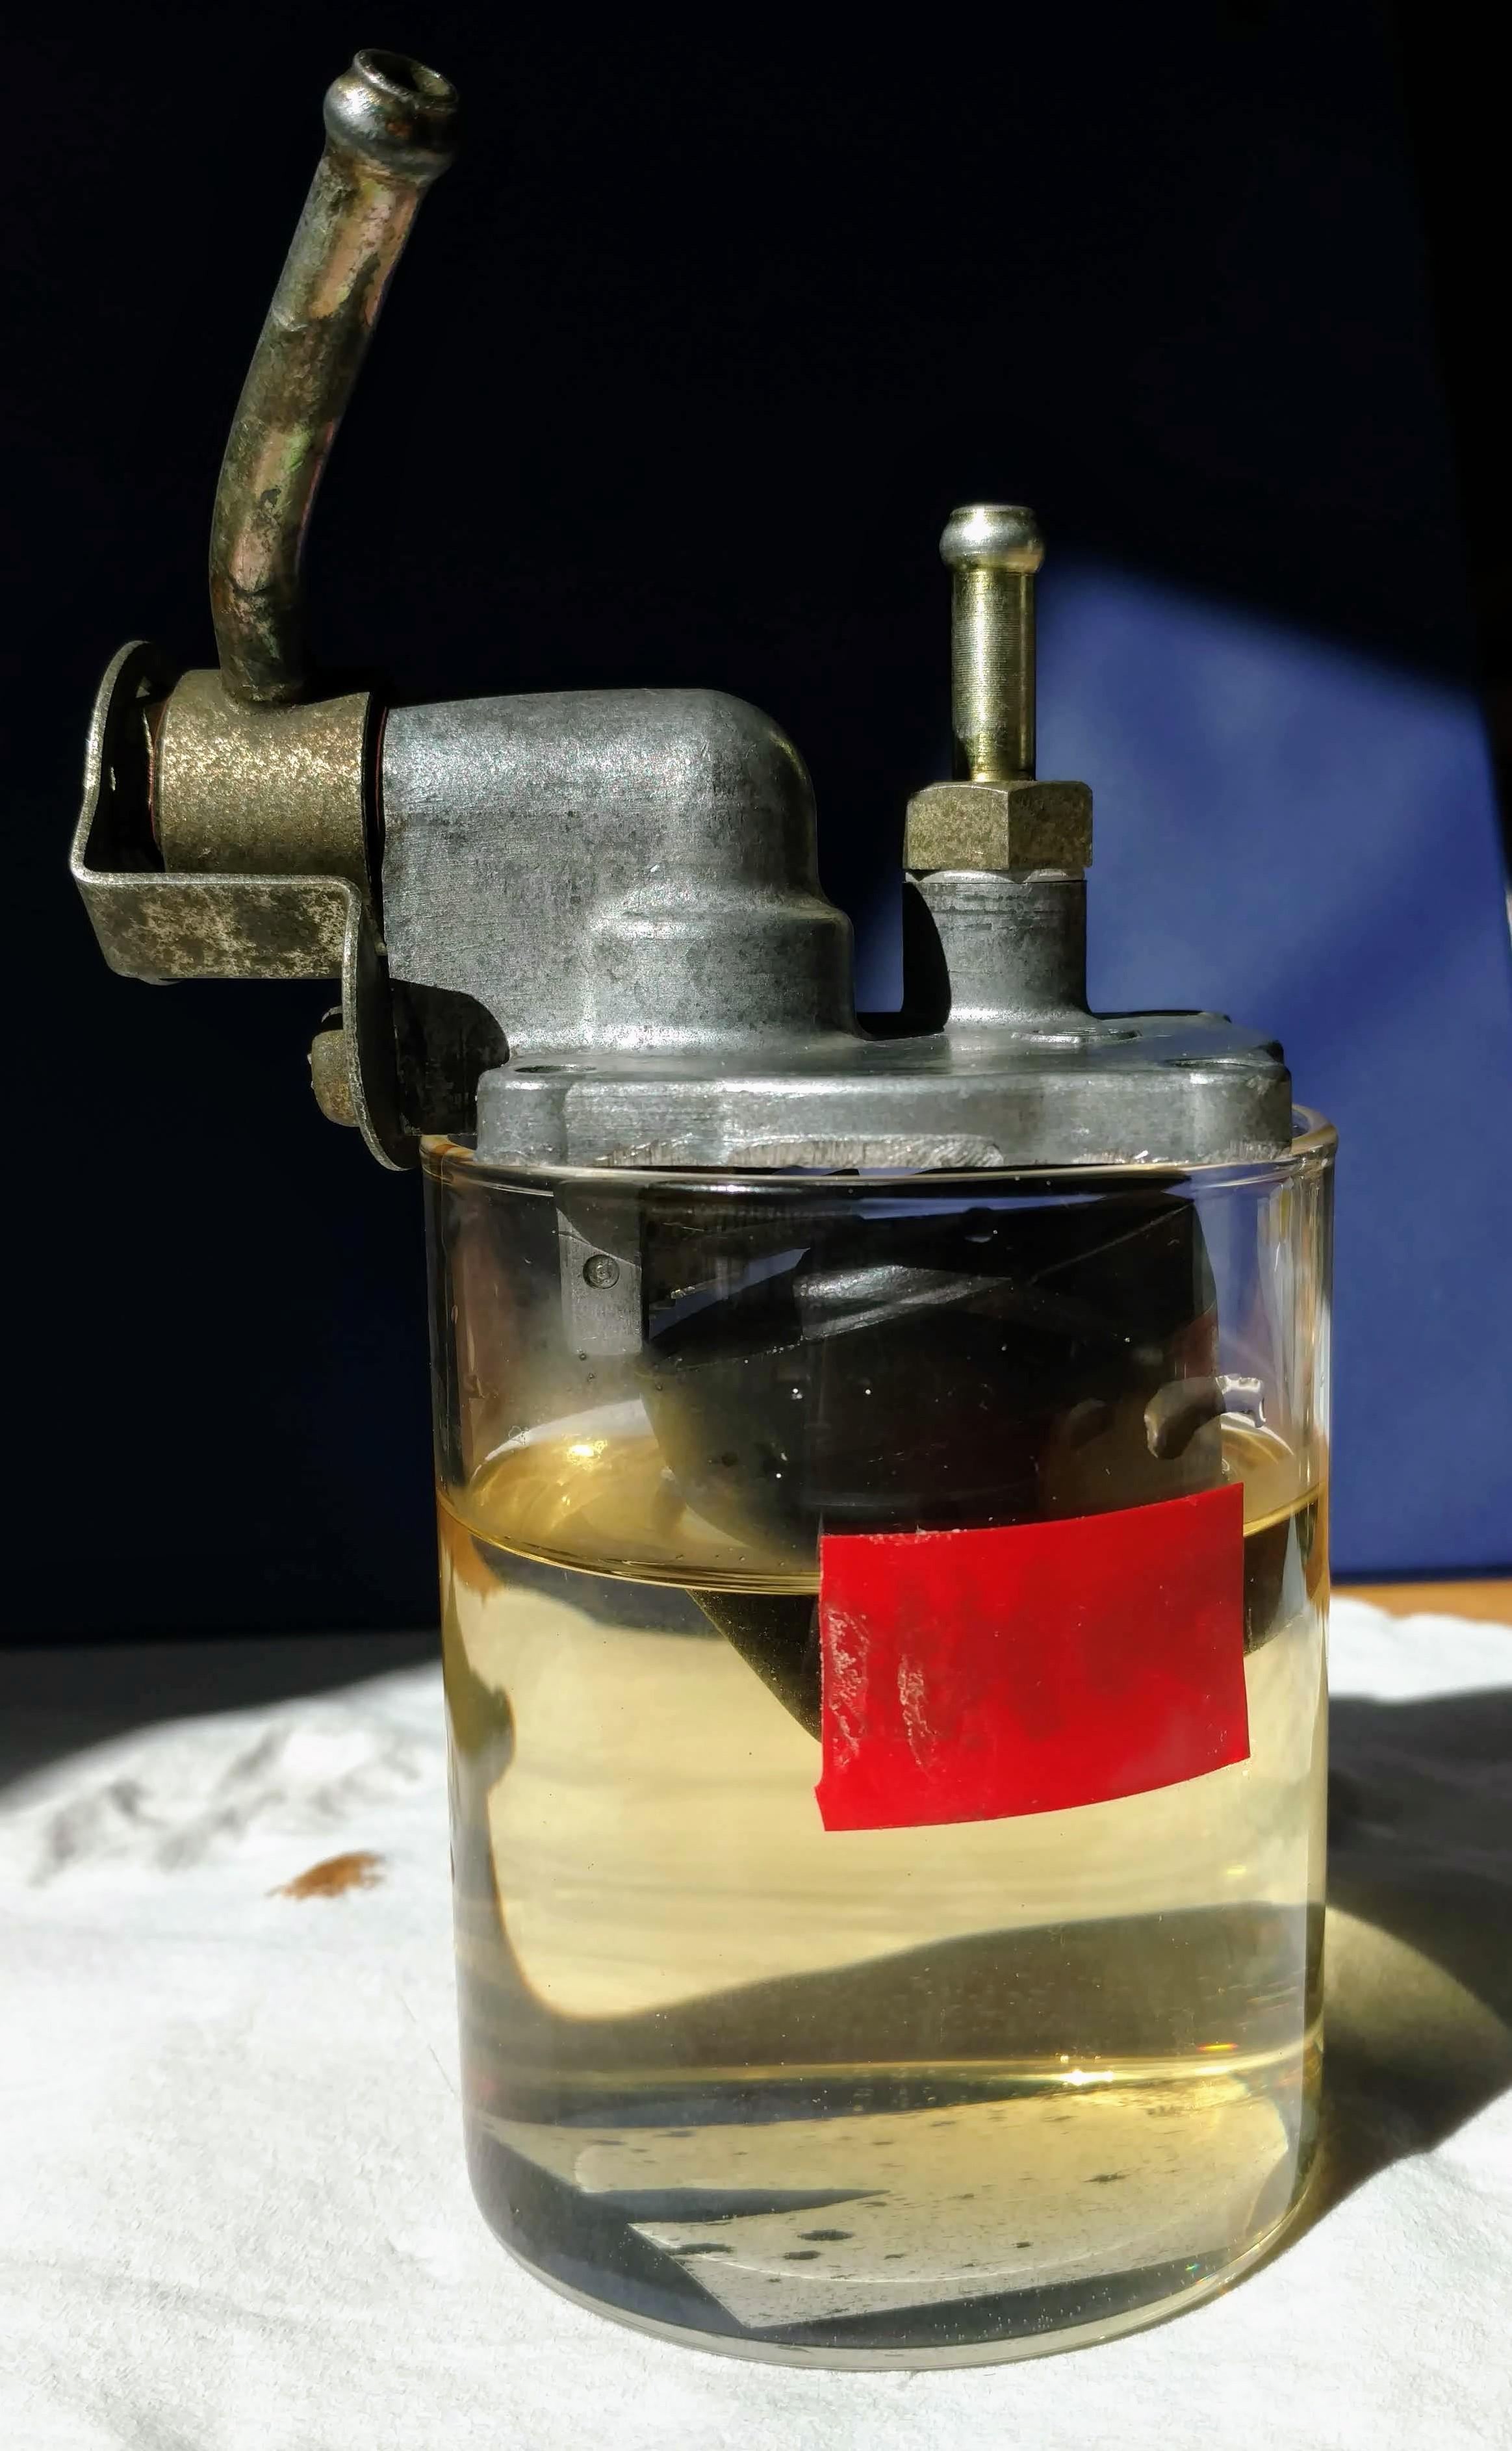
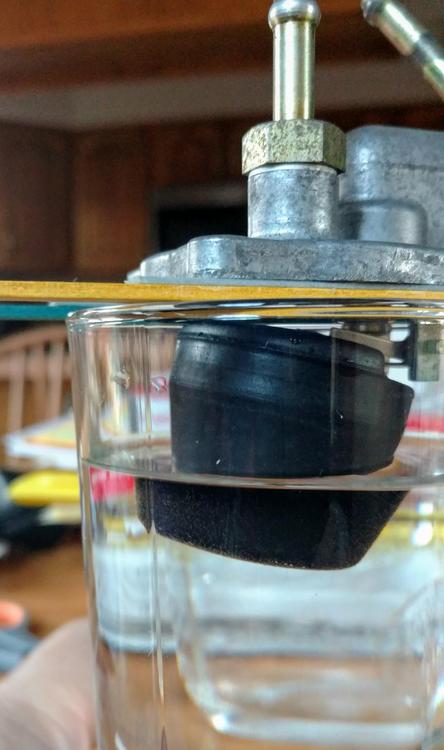
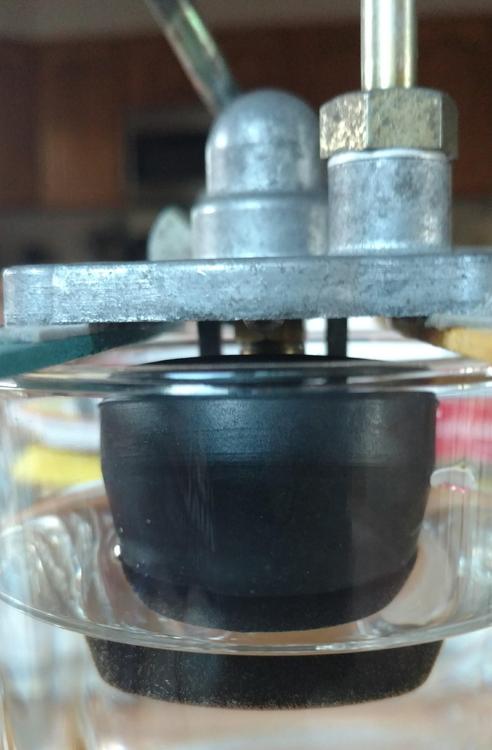
@siteunseen Here is my current state. I purchased a "cylinder jar" for $3 at Hobby Lobby. The cover and float fit perfectly without any additional support. I measured 23mm down the jar and marked it with tape. I then set the level using a 3mm syringe, one drop at a time. This the level of the water when I can no longer blow into the tube. The water is low and I need to bend the float tab to set it. But which way do I need to bend? Thanks for helping with this. I hope we can make it easier for everyone.

-
Looks like I need to go out and buy myself some dried beef! ? Thanks for all your help. Have a great weekend.
-
Sure thing. I put a rule in the background and tried to minimize parallax. I think it looks pretty straight to me. Are you measuring the distance from the fluid to lid? That makes sense. Also, you mentioned the size of the glass, should the volume be closer to that of the carb bowl? Thanks!
-
So, are you measuring from the lid to the "fuel." The distance of the float from the cap is less important? 23mm is about 0.9 inches, significantly larger than the commonly heard 0.55 inches. How important is it to make sure that float is level when properly adjusted. EDIT: I added photos of my rig. At this point, the valve has closed. I cannot blow past it. The final level was set using a syringe and adding water drop by drop. -Dann
-
Can you explain this rig?
-
You are so right. I talked with Bruce at ZTherapy and he specifically told me that NOT UPSIDE DOWN ... regardless of what your version of "Just SUs" you have. (Mine is by the original owner. In VHS with a 1996 date!) He said, as you do, to hold the lid and float assembly just as it is oriented when installed. That means RIGHT SIDE UP. Blow into the gas line and slowly raise the float. When the flow stops, that's what you need to measure. On/Off. The distance from the top to the top of the float should be 0.55 inches. But, he also said this is not rocket science, close is good enough until you really start fine tuning. (Living in a digital world it kind of hard to think of "good enough" working. At least I do.) -Dann
-
-
-
-
-
-
You might want to contact some paintless dent repair or detailing shop. They have some new vinyl repair techniques that may allow you to save your dash. This is based on YouTube videos. It is not something that I have seen myself or heard of anyone doing with a Z dash. But, it certainly is something to investigate before investing in a new dash. -D
-
@bartsscooterservice "Datsun 240Z HLS30 32581, Production date : 5 / 1971 Matching numbers. Complete engine rebuild late 2015. First owner found back in 2014: How did you find the original owner so many years later? I understand that mine was the first one sold by the Nissan dealer in Sioux Falls, South Dakota USA. I've called the dealer and they don't seem to have any interest in learning more about the car. I have record of the original owner. I'd love to hear tips on finding previous owners. Thanks, -Dann
-
I'm in the process of a major tune-up on my early '71. What is the consensus about the keeping or removing the pollution control system, in particular those items connected to the carburetor/fuel system. My primary goal is to maintain as much collection value as possible, since it #8225 made in 8/70. I don't live in a tough registration state, but could this modification keep the car from being registered in any states? (Not concerned about Alaska and Hawaii.) If the suggestion is to remove components, can you point me to some good instructions or videos? -Dann
-
I'm sure they do. I have to tools to tweak them as needed. These were just very difficult to adjust to begin with. The biggest problem was that I could not get the body nozzle to level with the bridge on the front carb. I simply could not turn the adjusting screw up high enough. So we removed the carbs to take a look. It was never my intent to attempt a rebuild. I found the reason for the initial problem, some bent washers were preventing the full range of adjustment. But, since I had them off.... Probably should have left well enough alone and reinstalled them at that time! My expectation is that if I get the right kit, especially from ZT, I can probably get it together. OTOH, the car is 49 years old and treating it to a professional rebuild may be the thing to do. -Dann
-
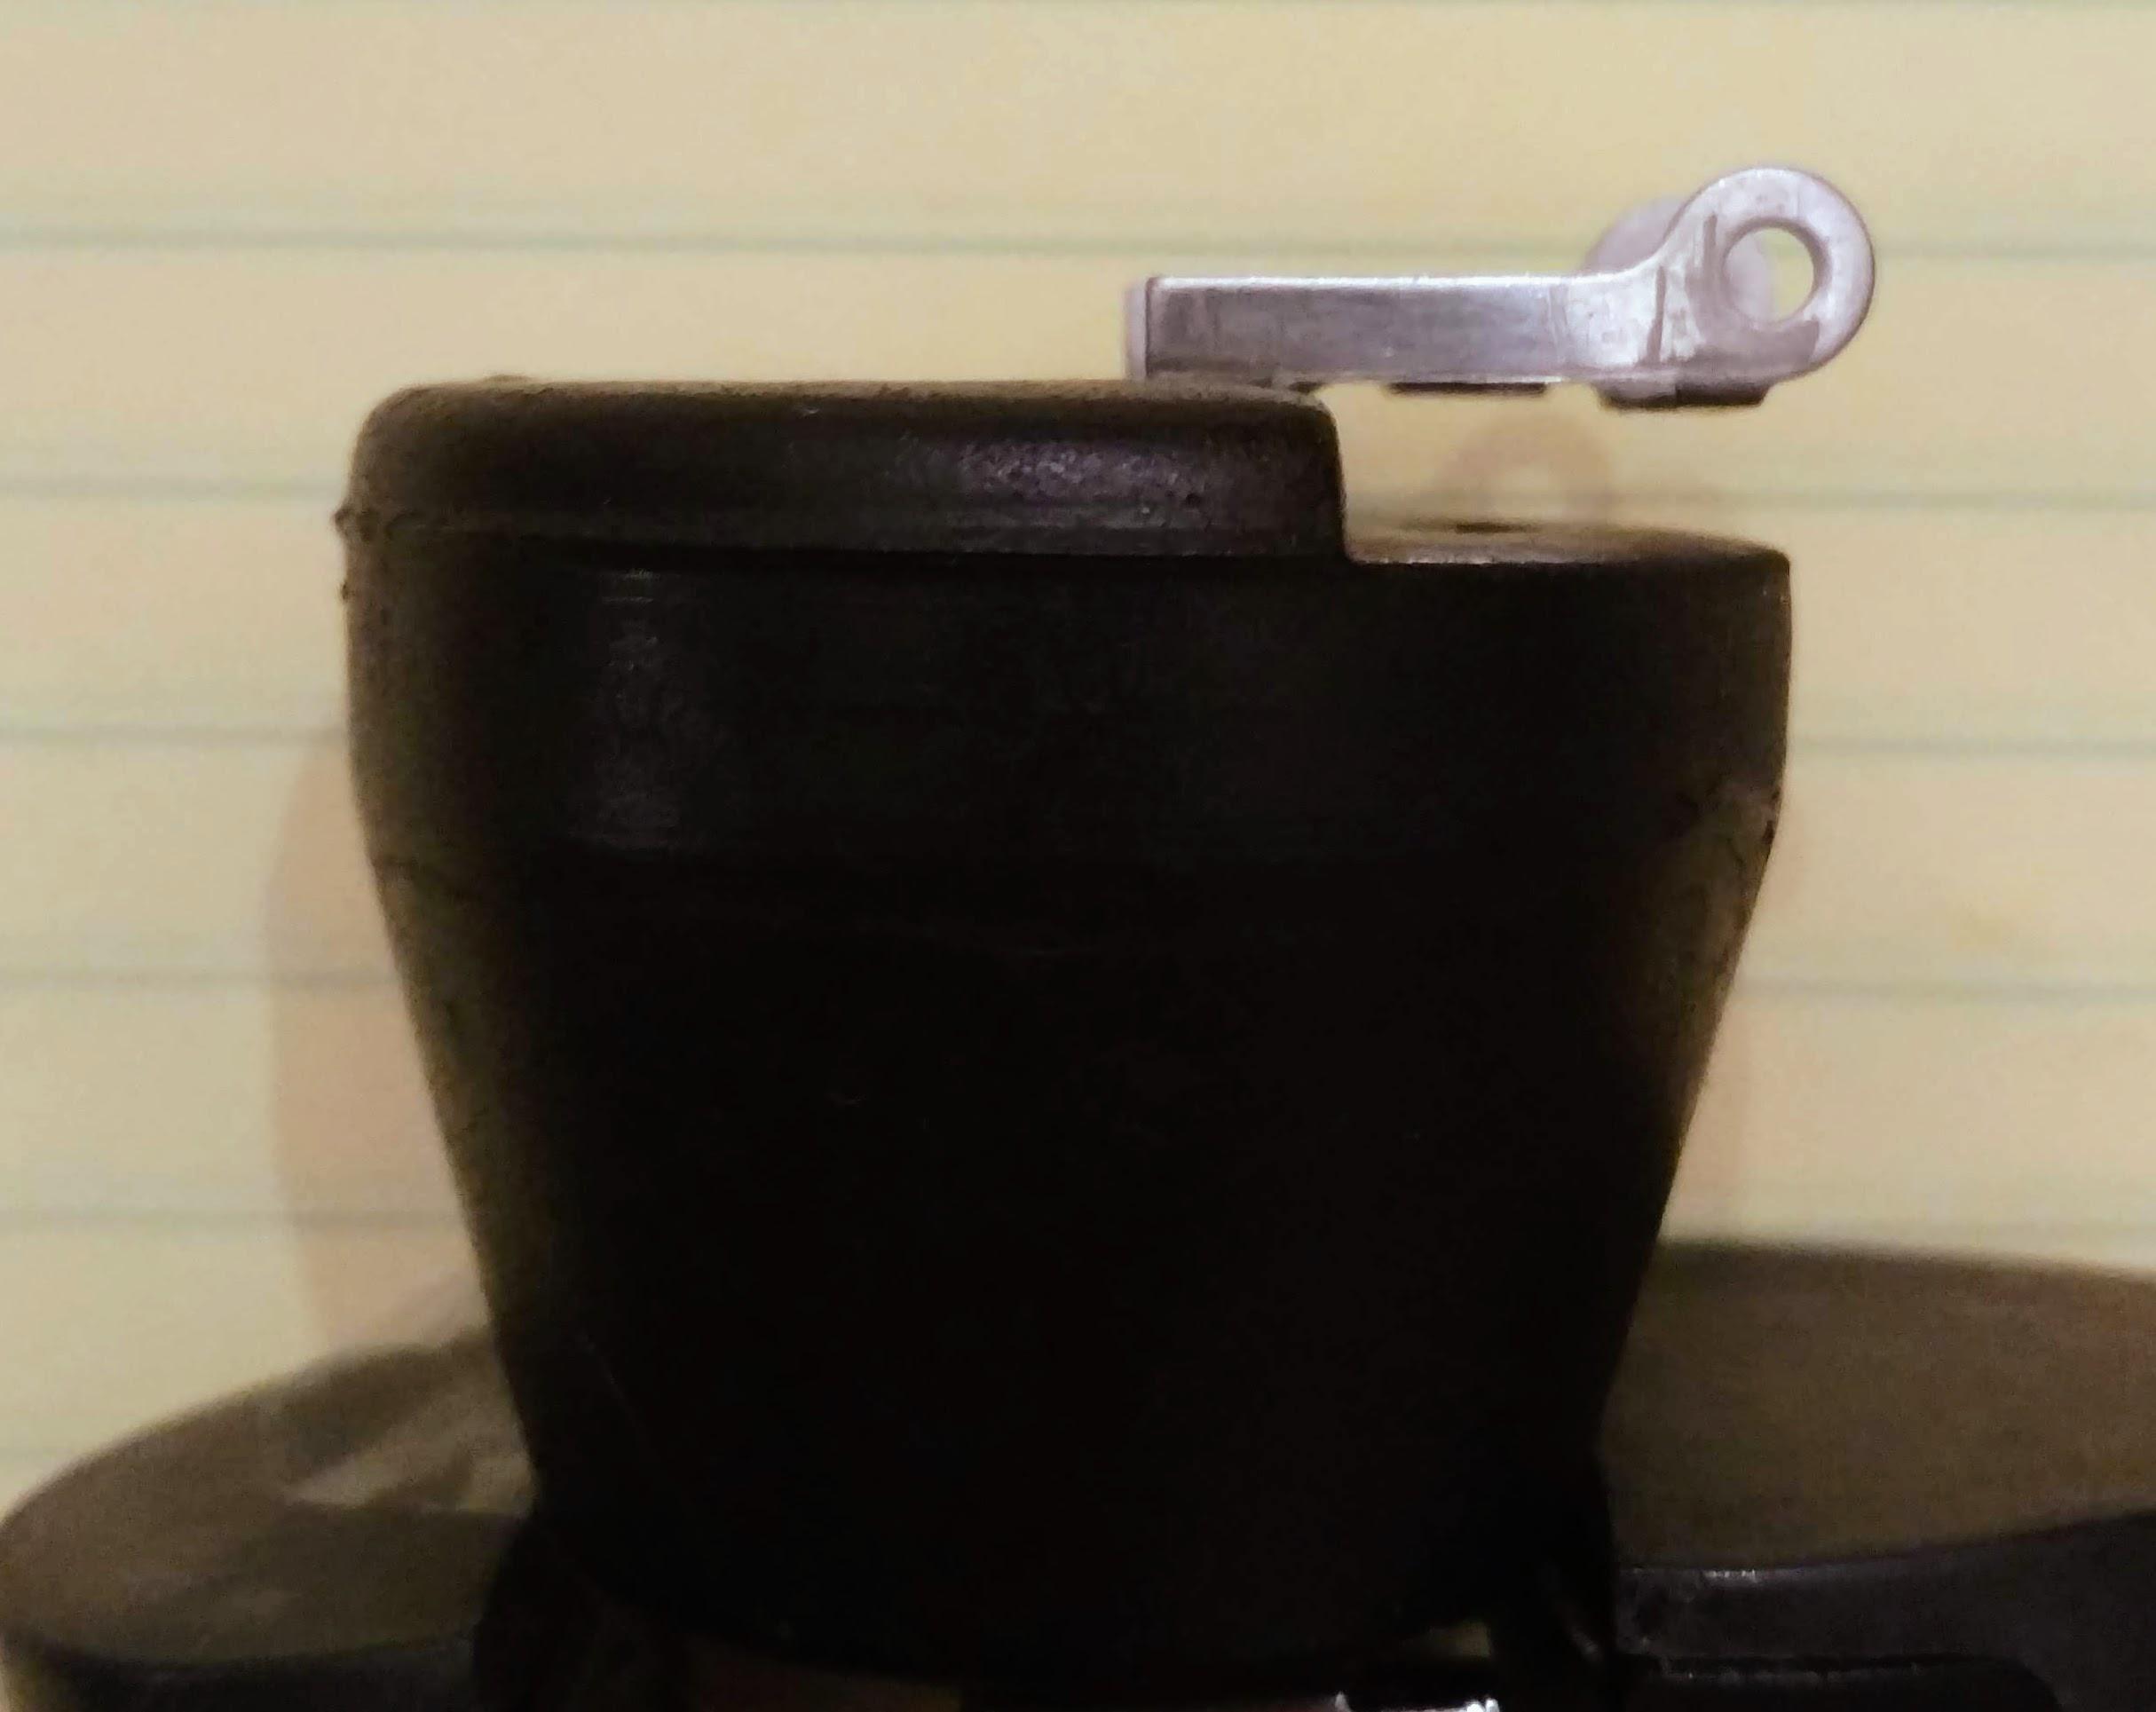
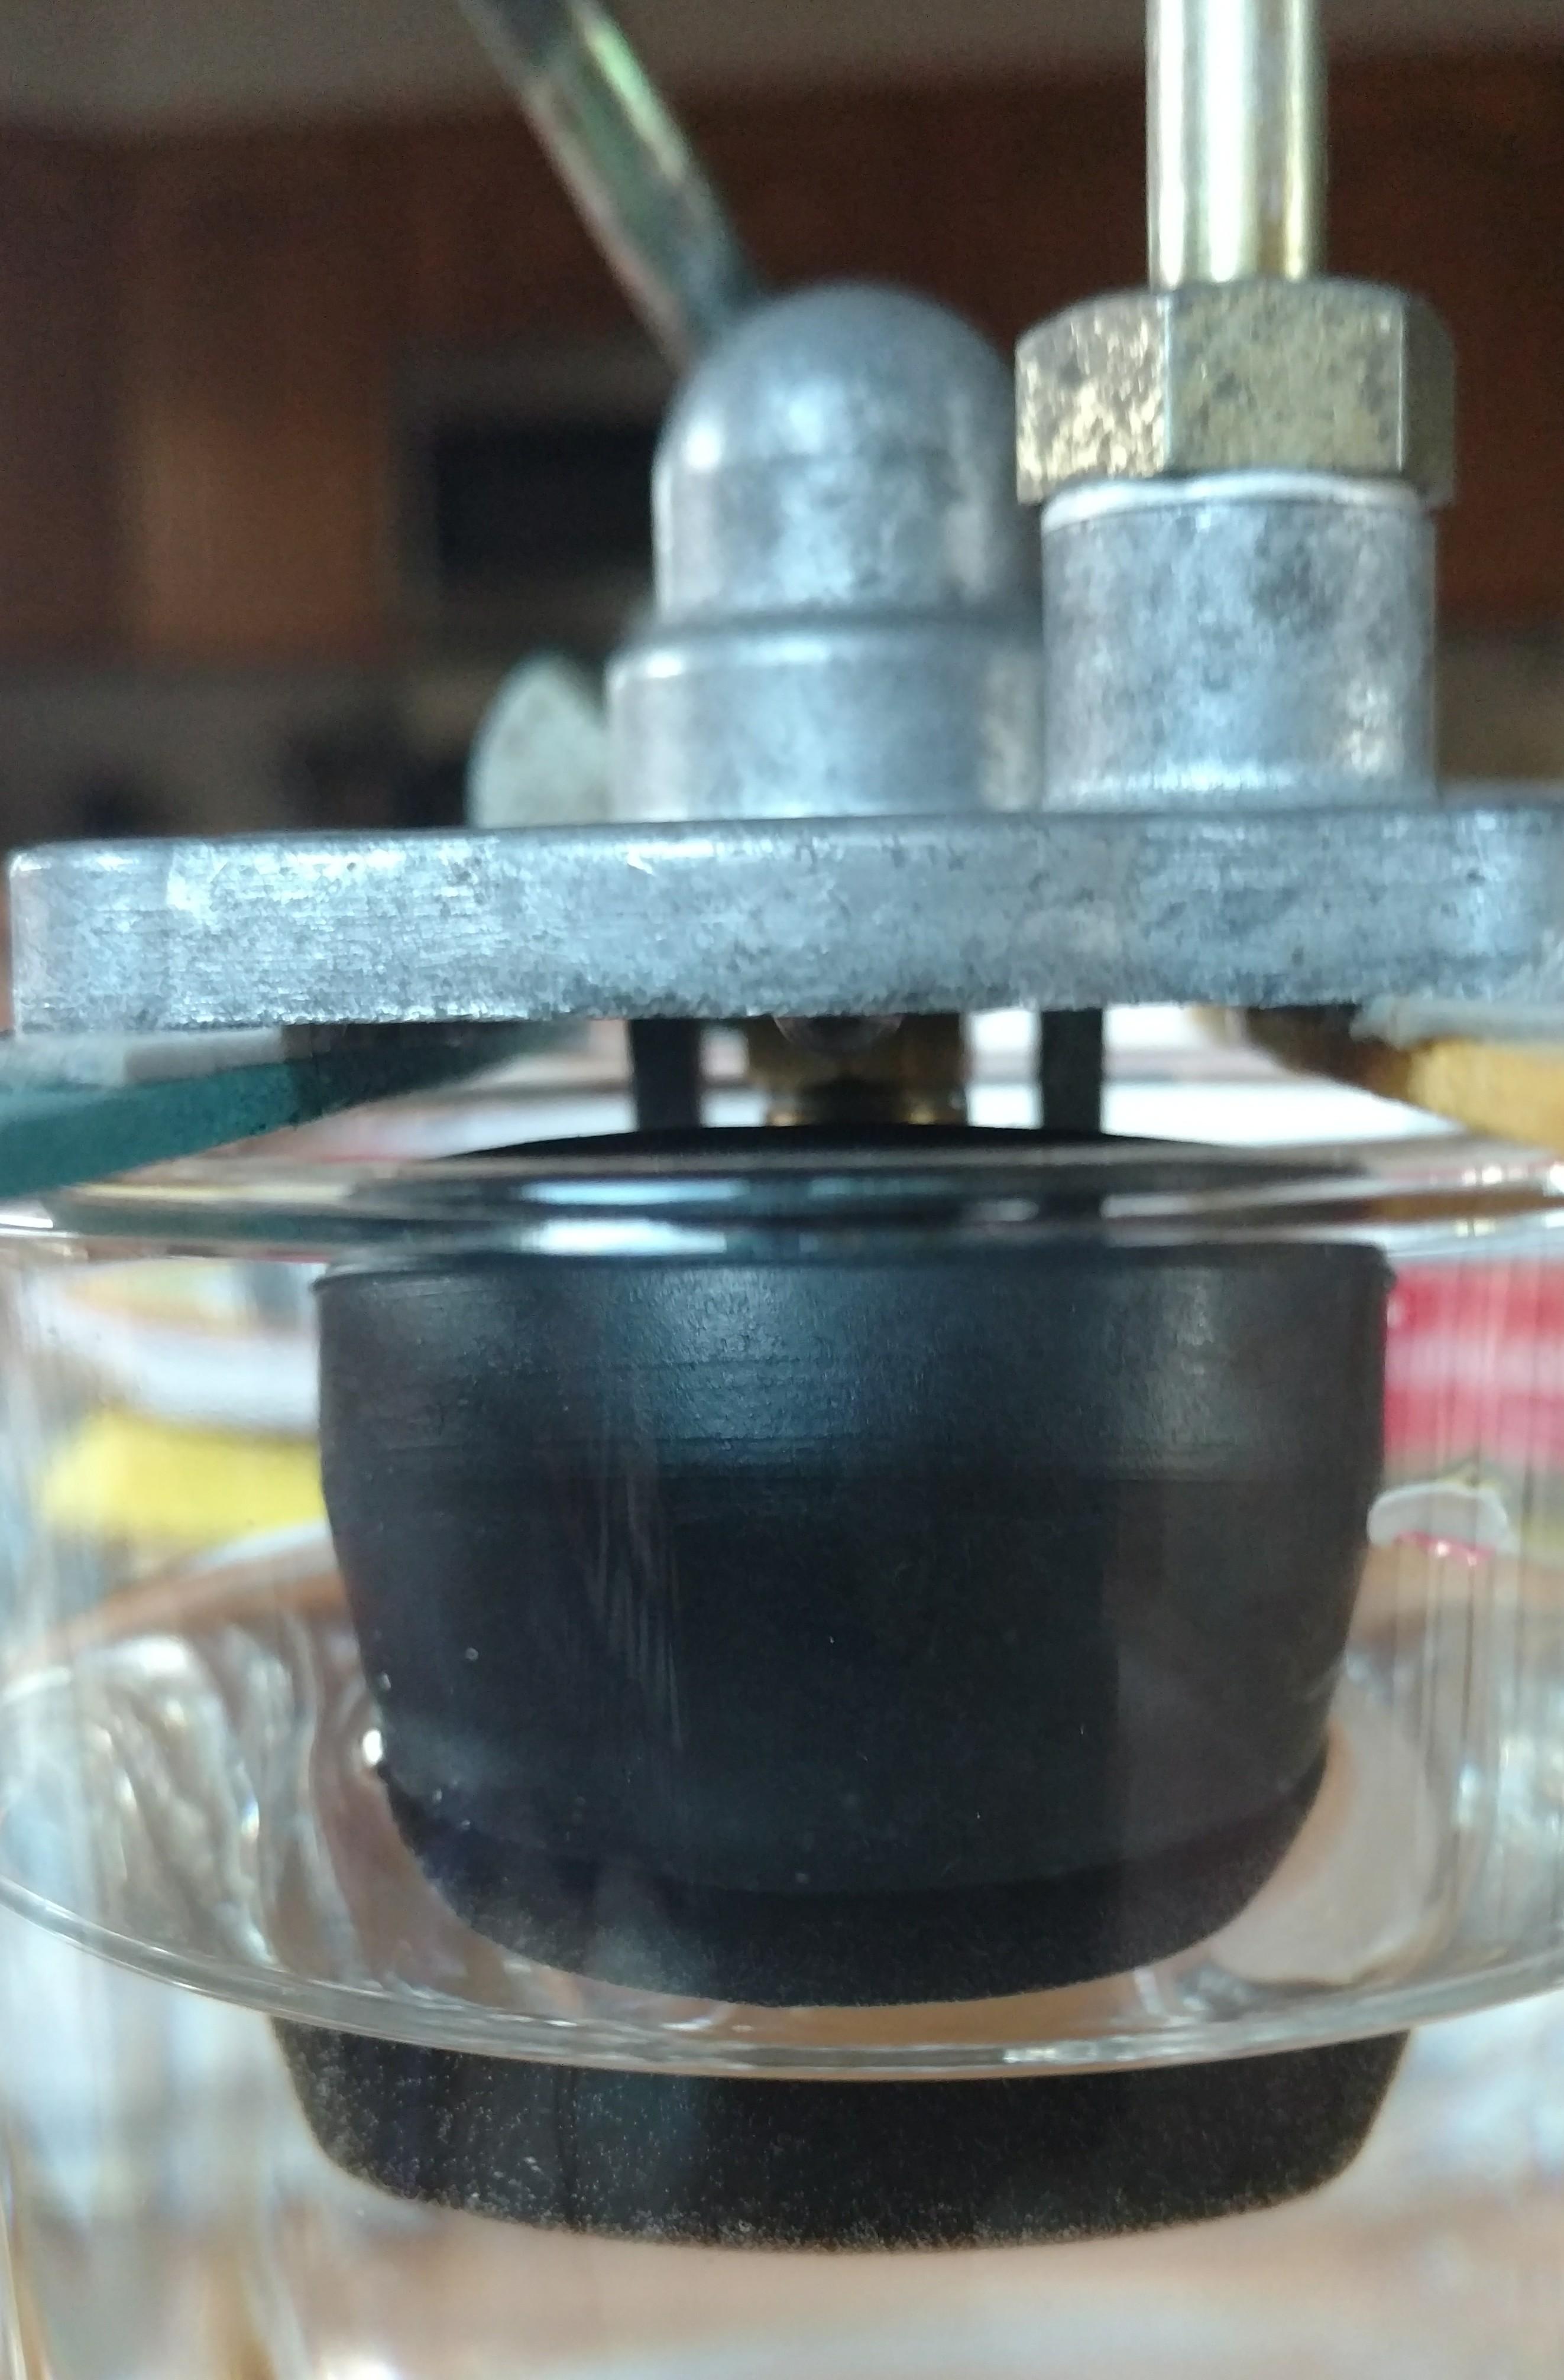
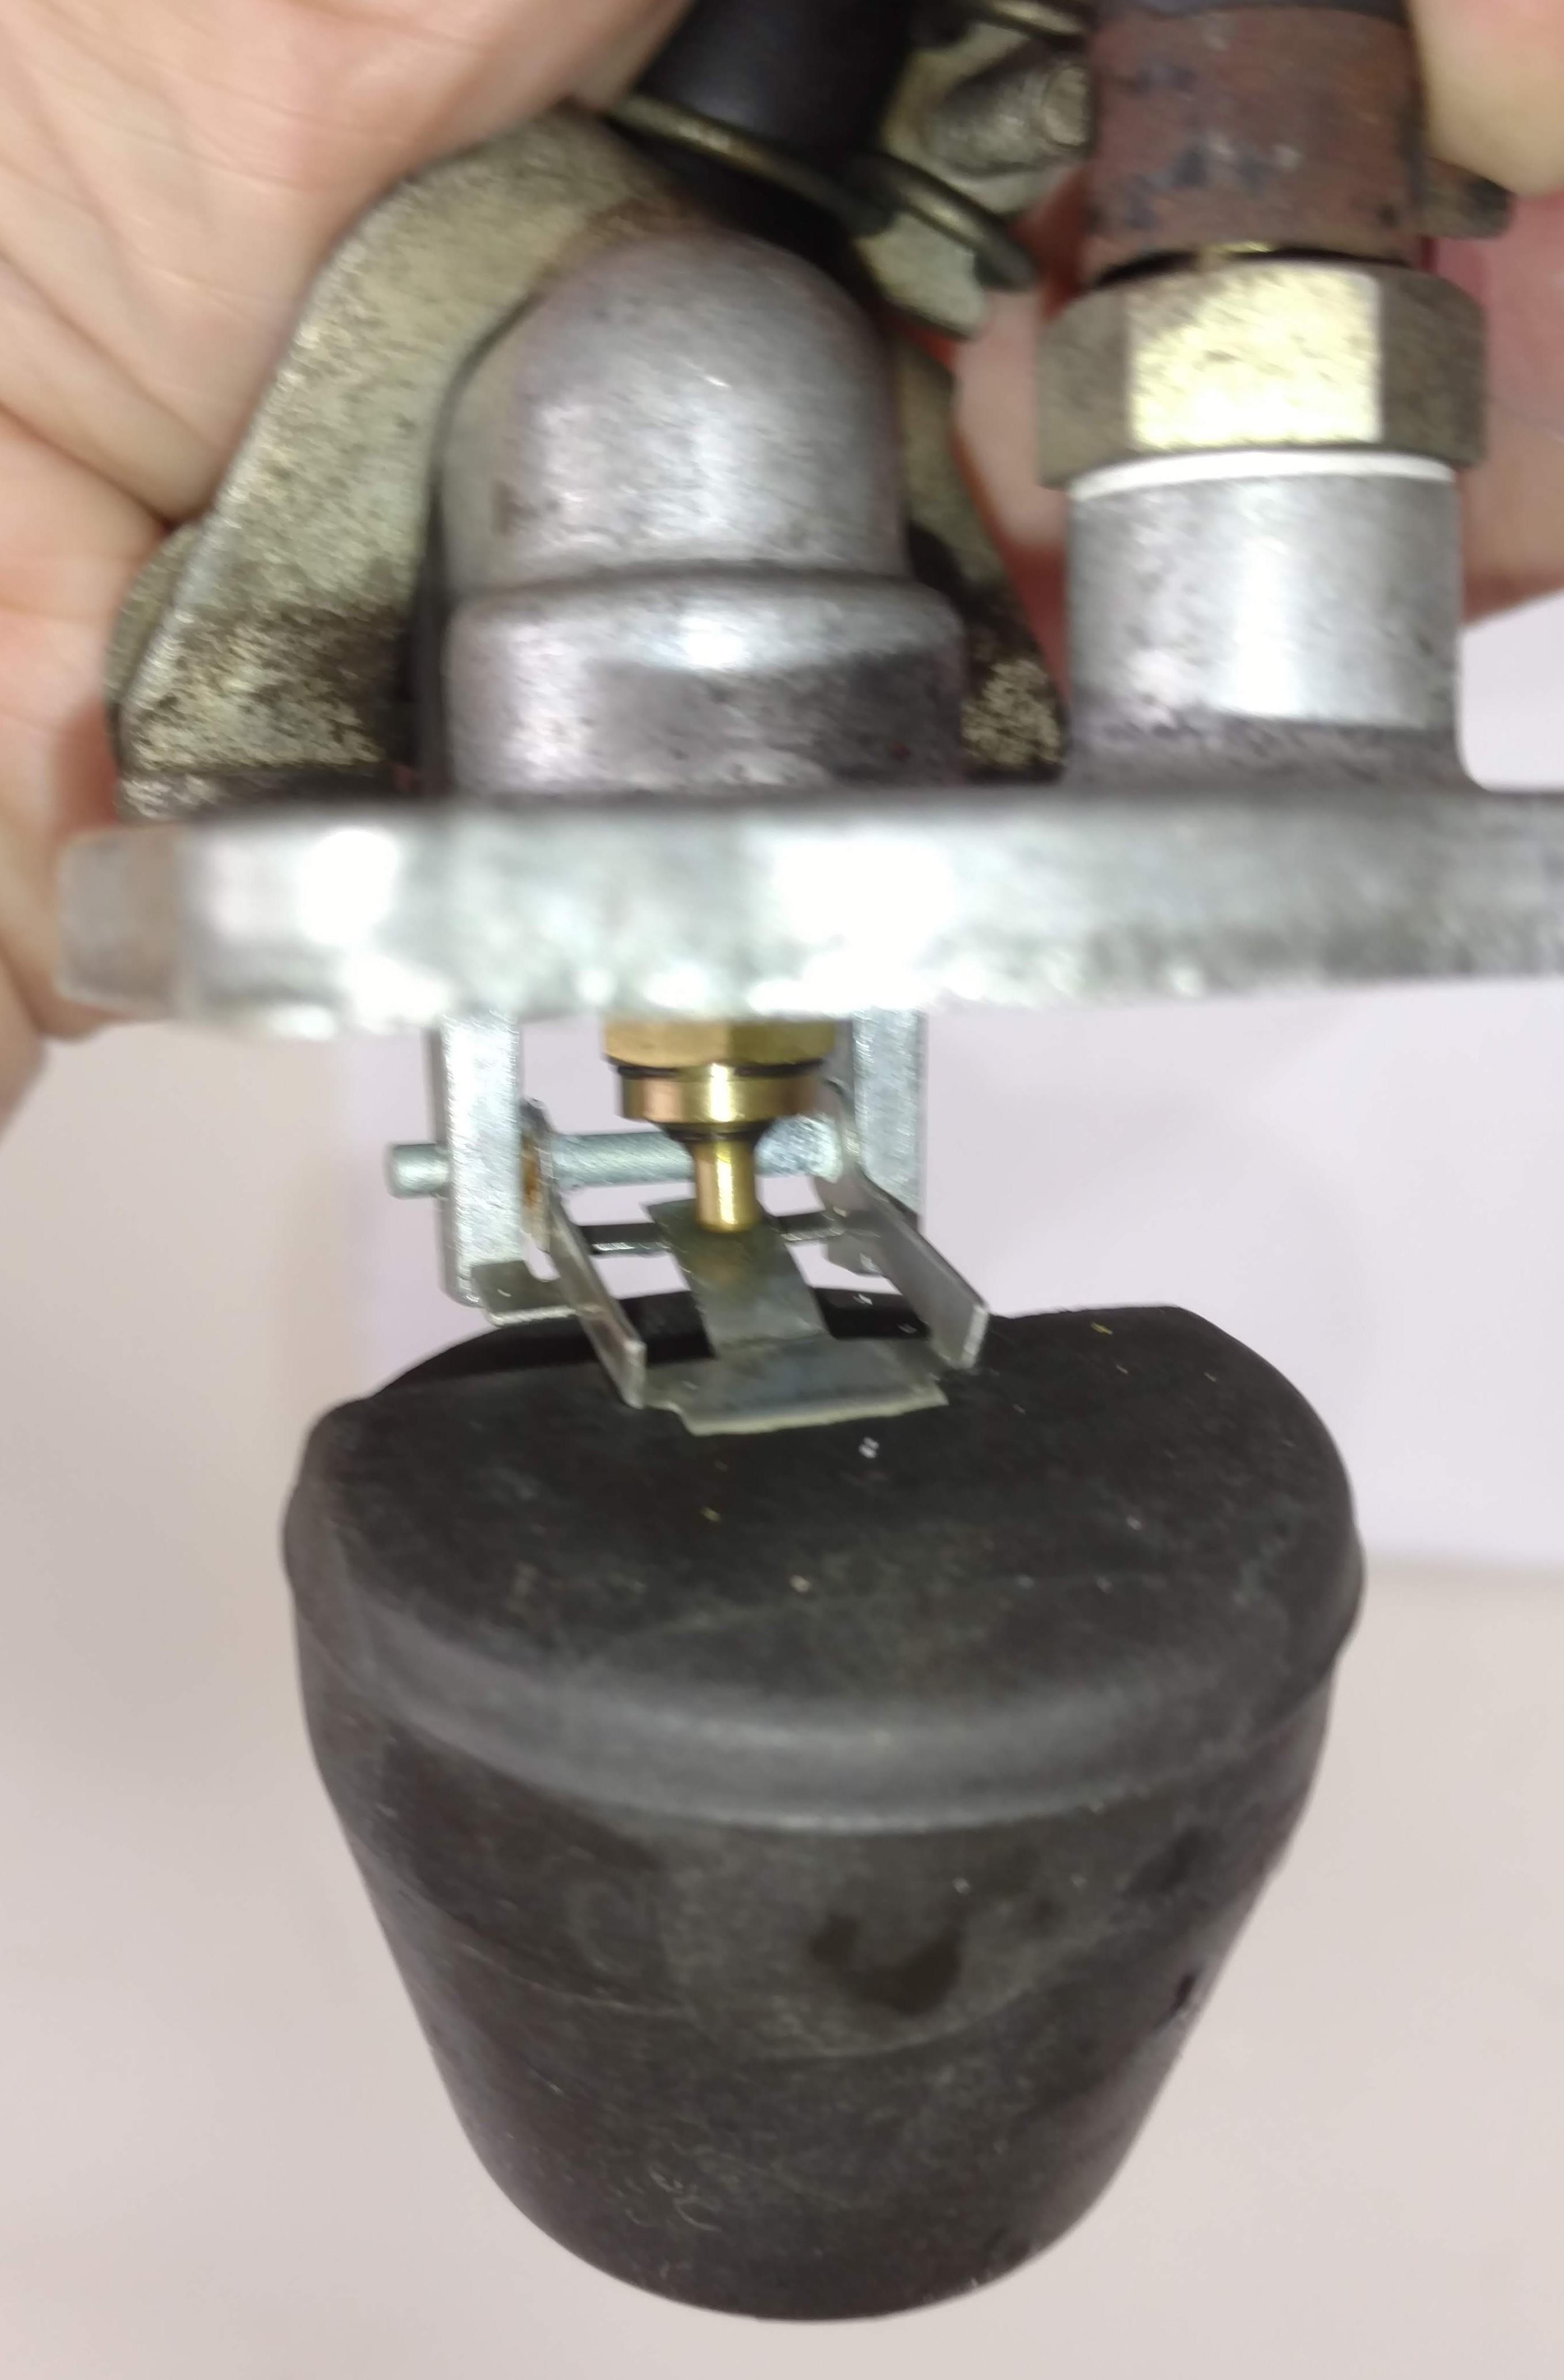
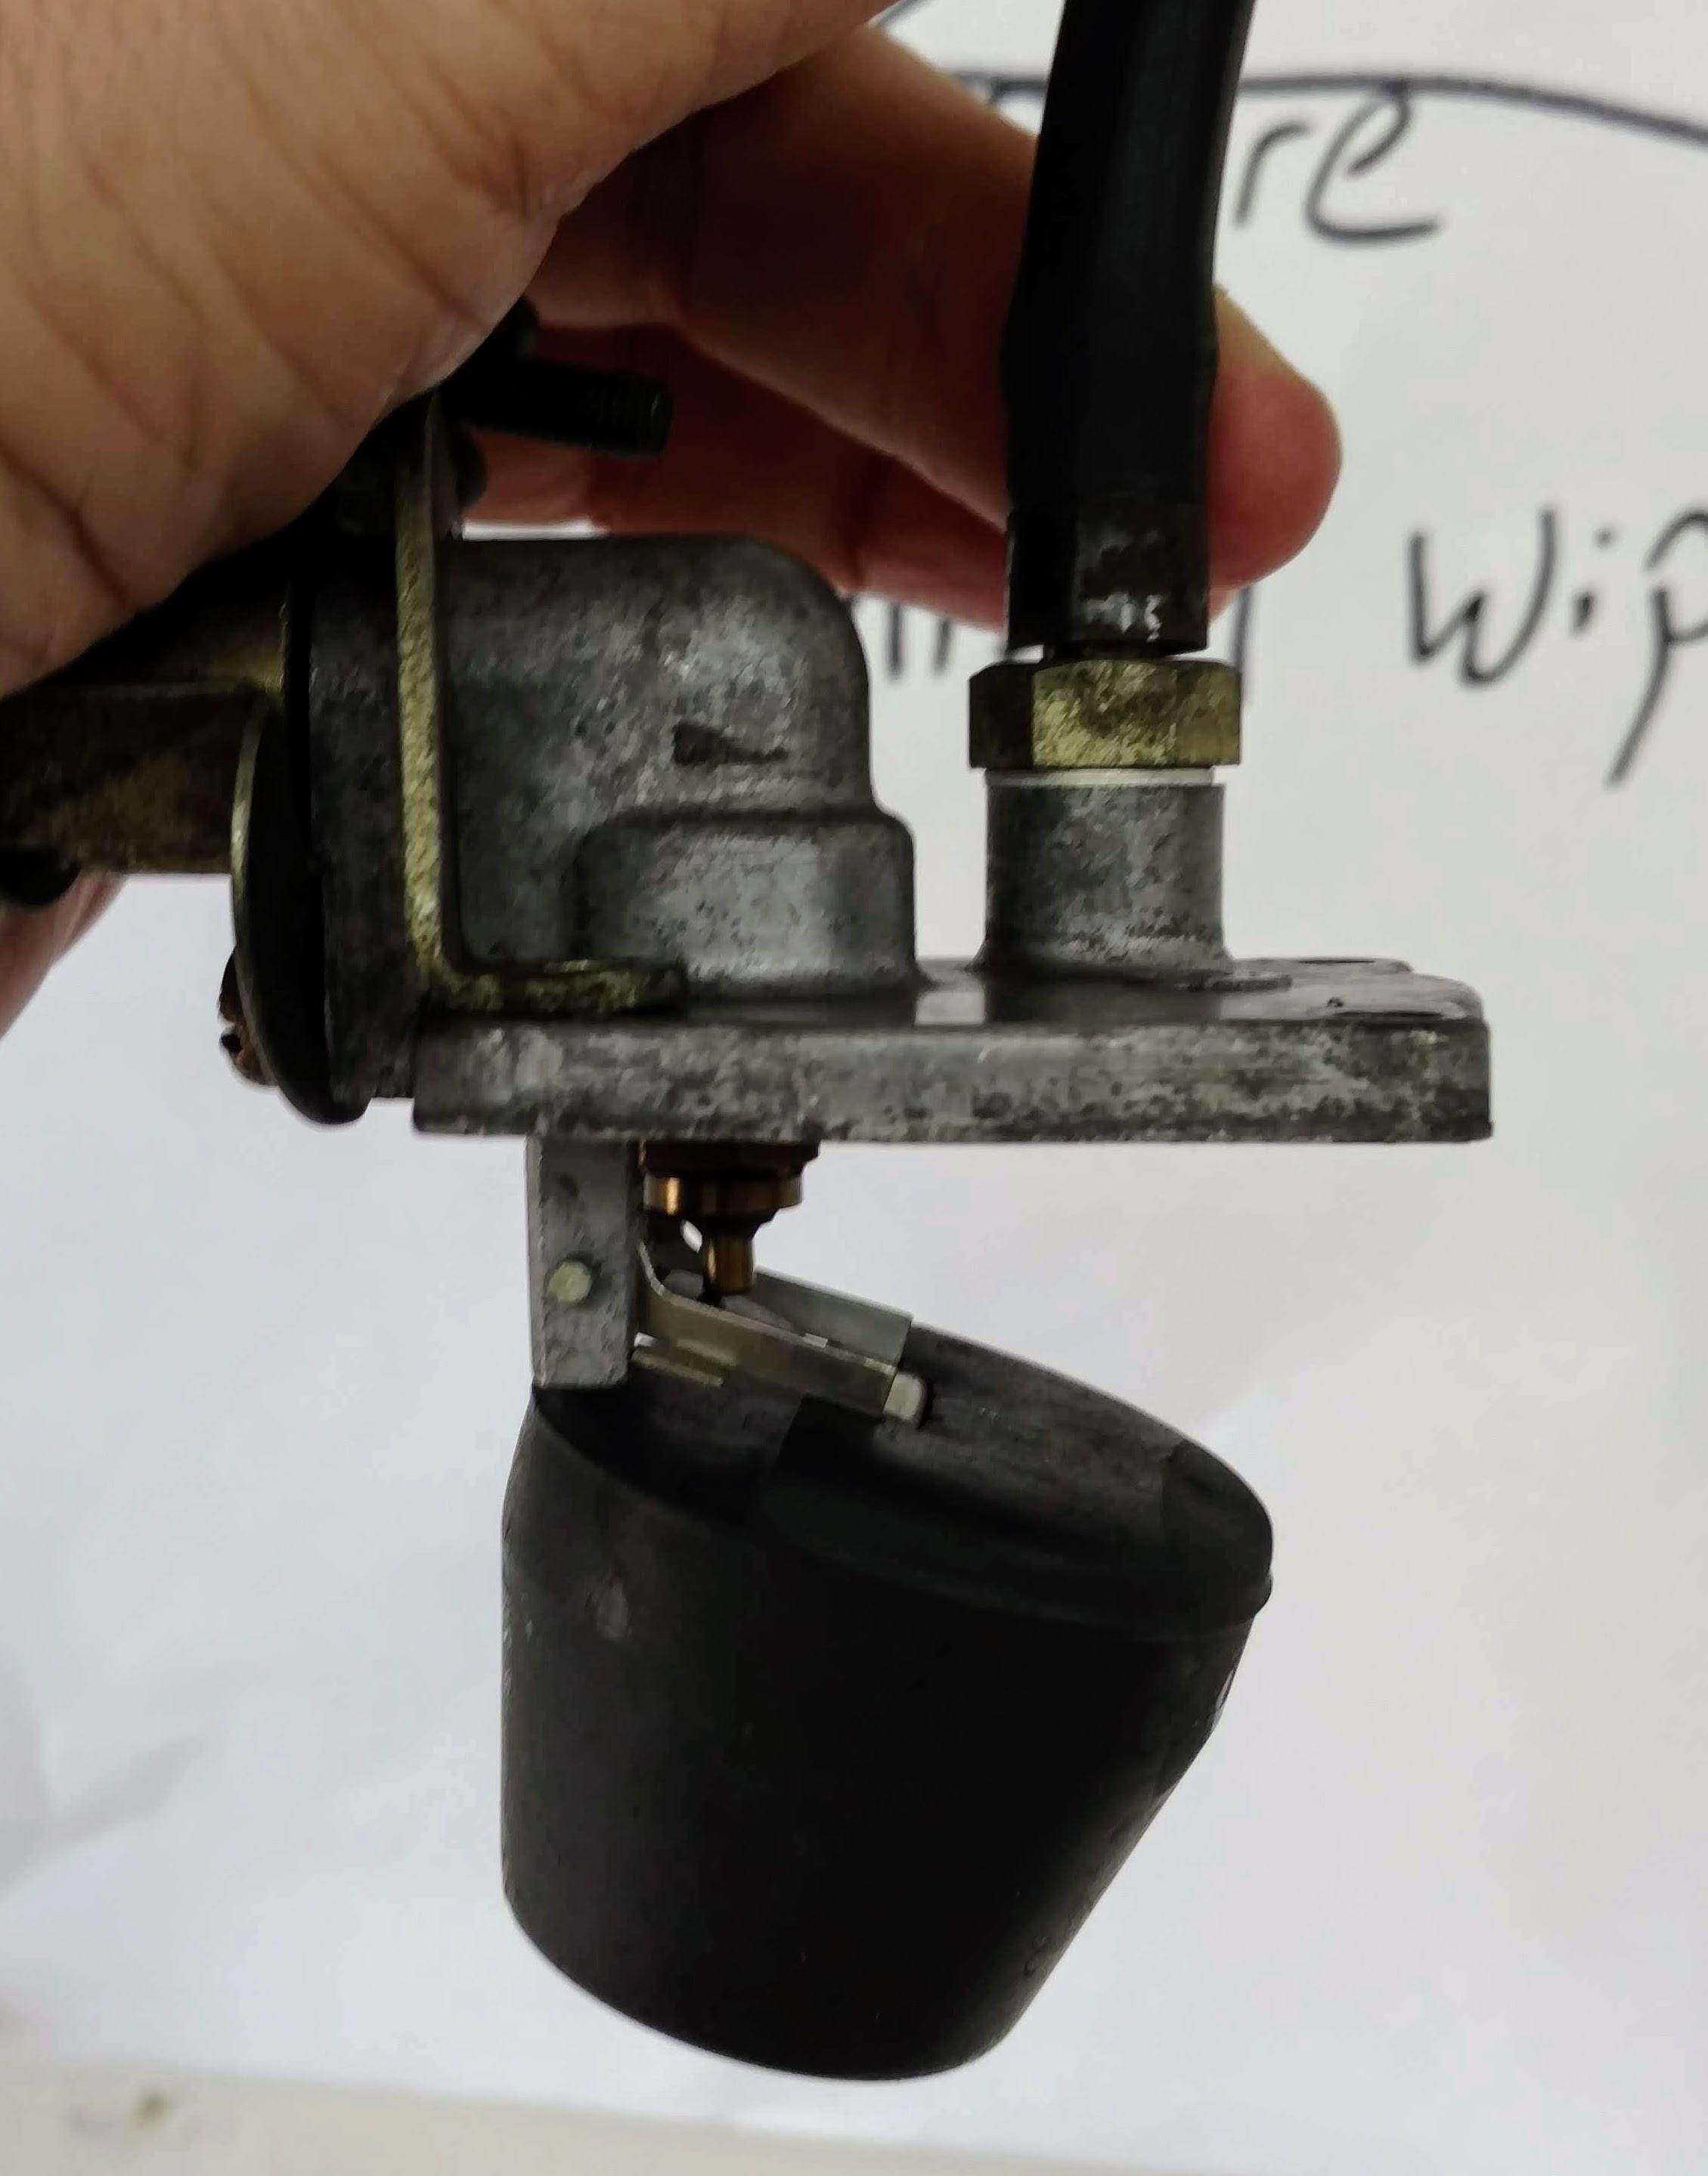
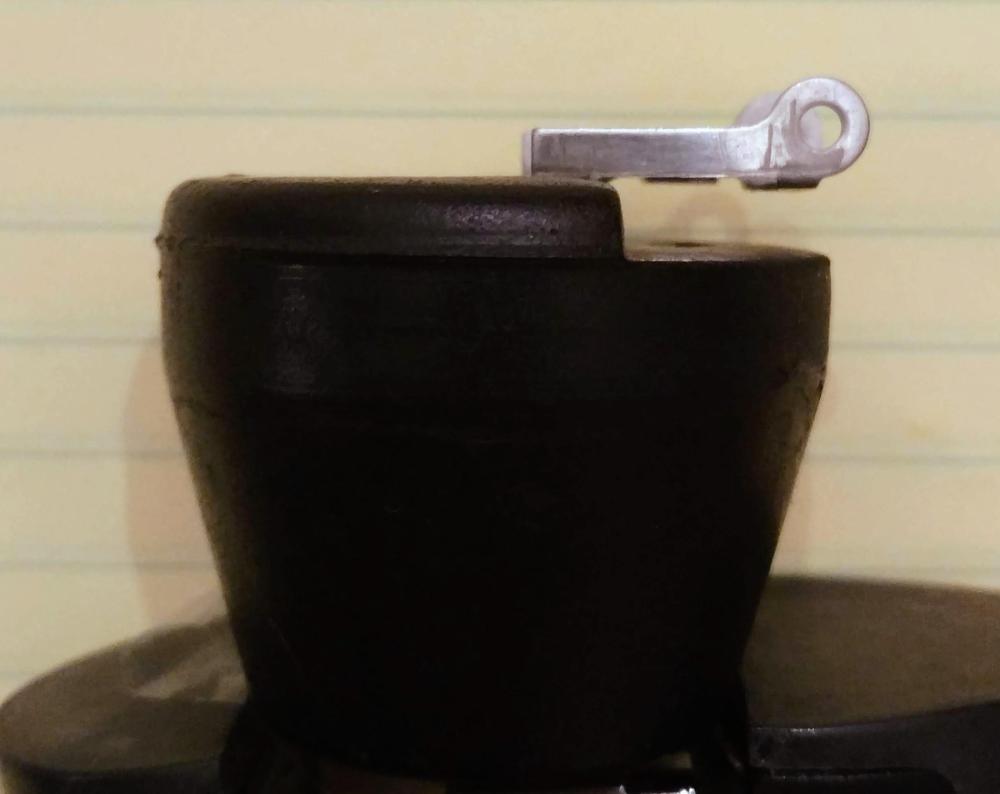
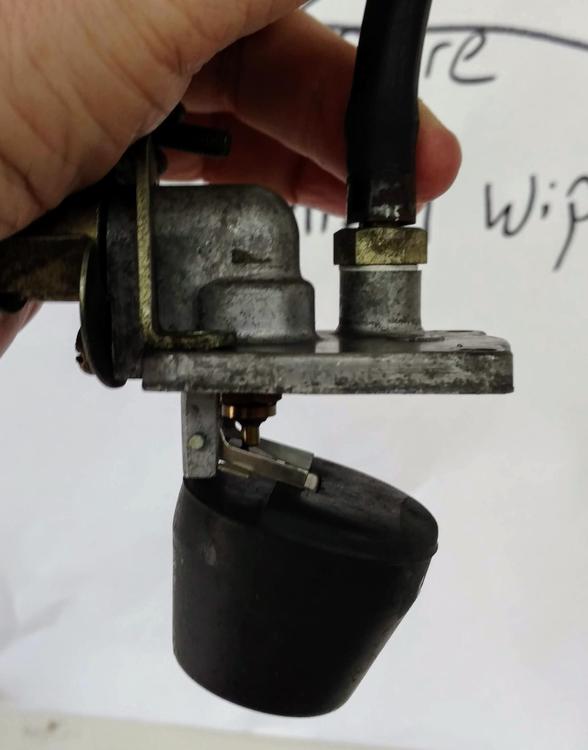
So should the tab be above the "armature?" By armature I mean the body of the pressed metal tab and by above I mean closer to the lid. It was above when I took it out, but in my attempts to set it correctly, I pulled it down substantially and below the rest of the tab. My measurements and comments about the length of the nozzle was not very clear. I am not very good with "fancy" measuring tools. So I took out a good ol' metal ruler and alighned everything. It gives you a much better picture of the difference between the two nozzles. Thanks again for you help, -Dann

-
You are right, what they do beyond a rebuild kit adds a lot of value. I have a very tough decisions. My history with rebuilding carbs on motorcycles many years ago is not too glorious. So, maybe I should turn it over to the pros. It would be great to know that the carbs I install are balanced and set to go.
-
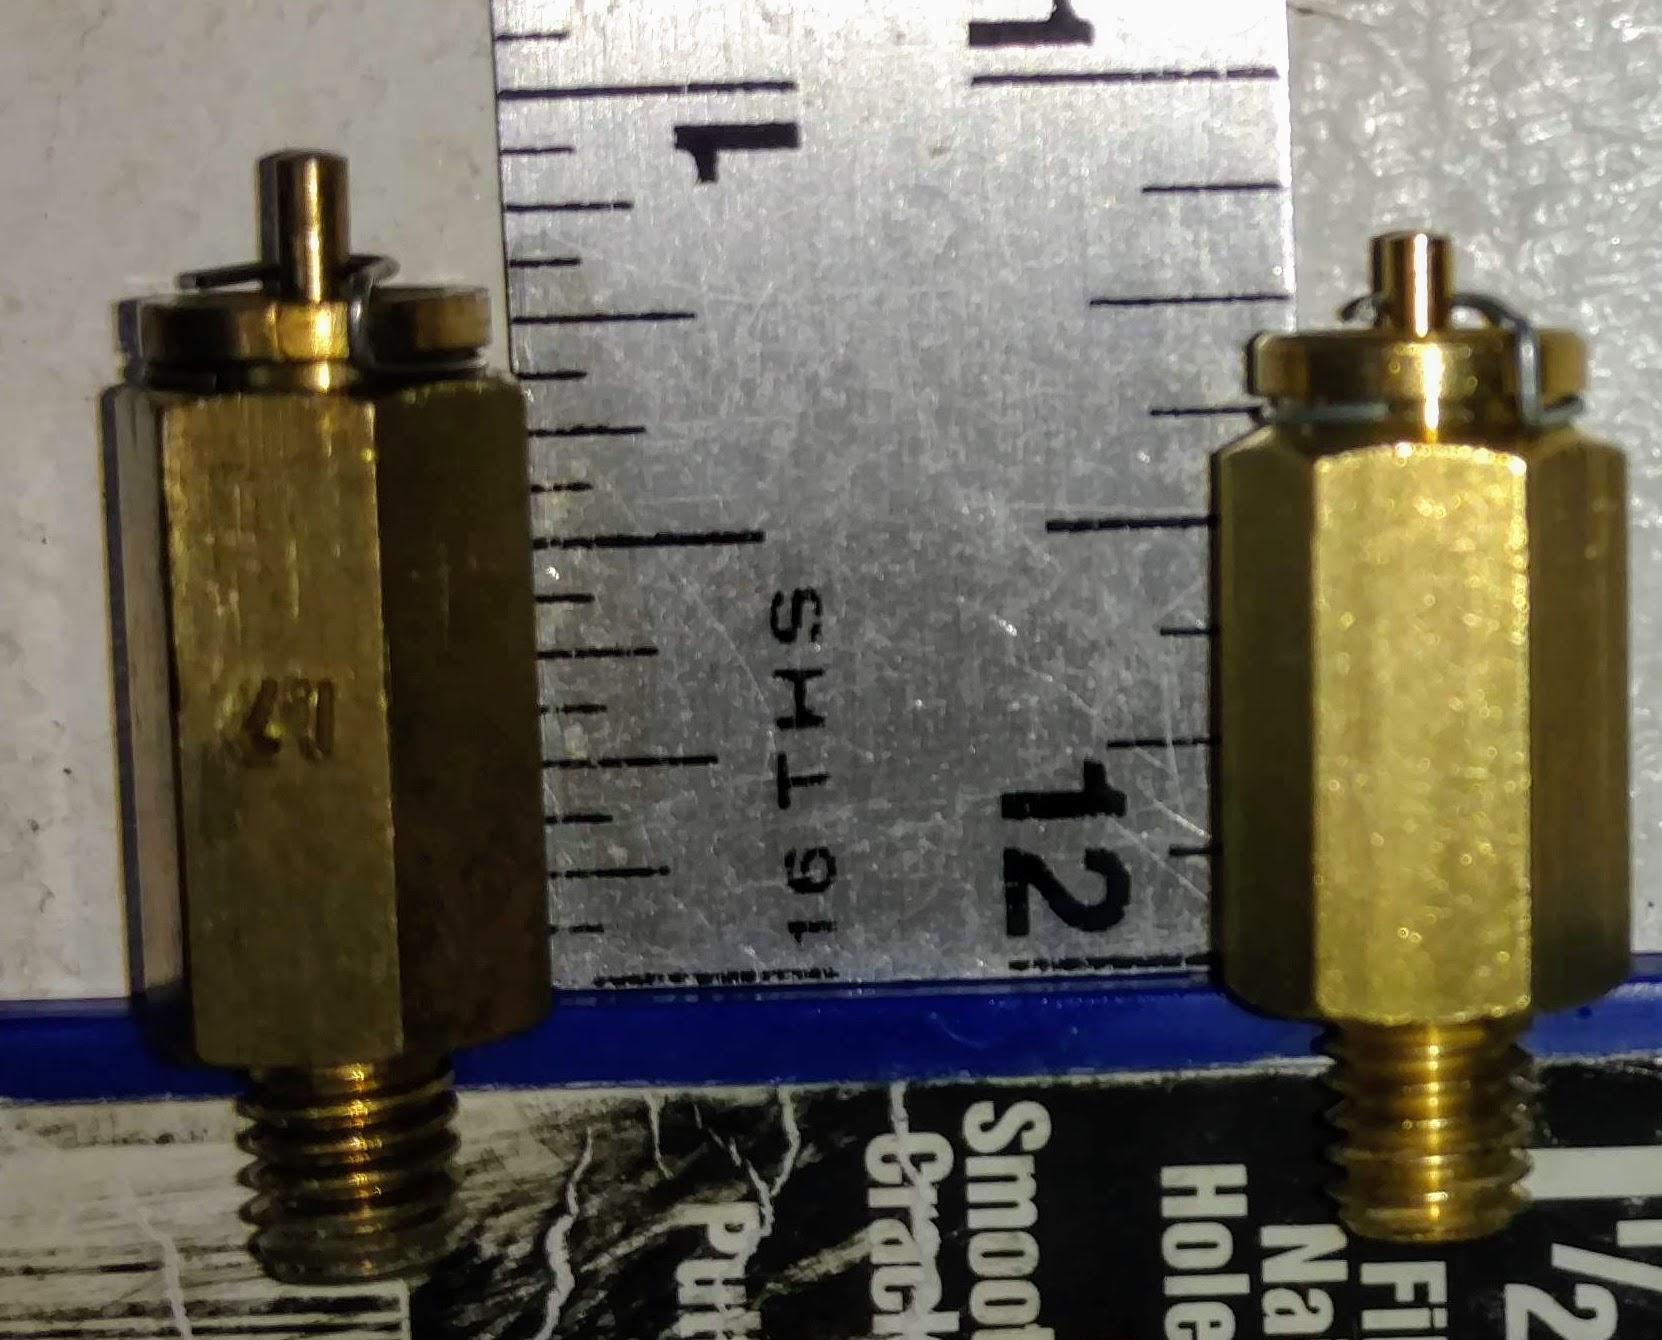
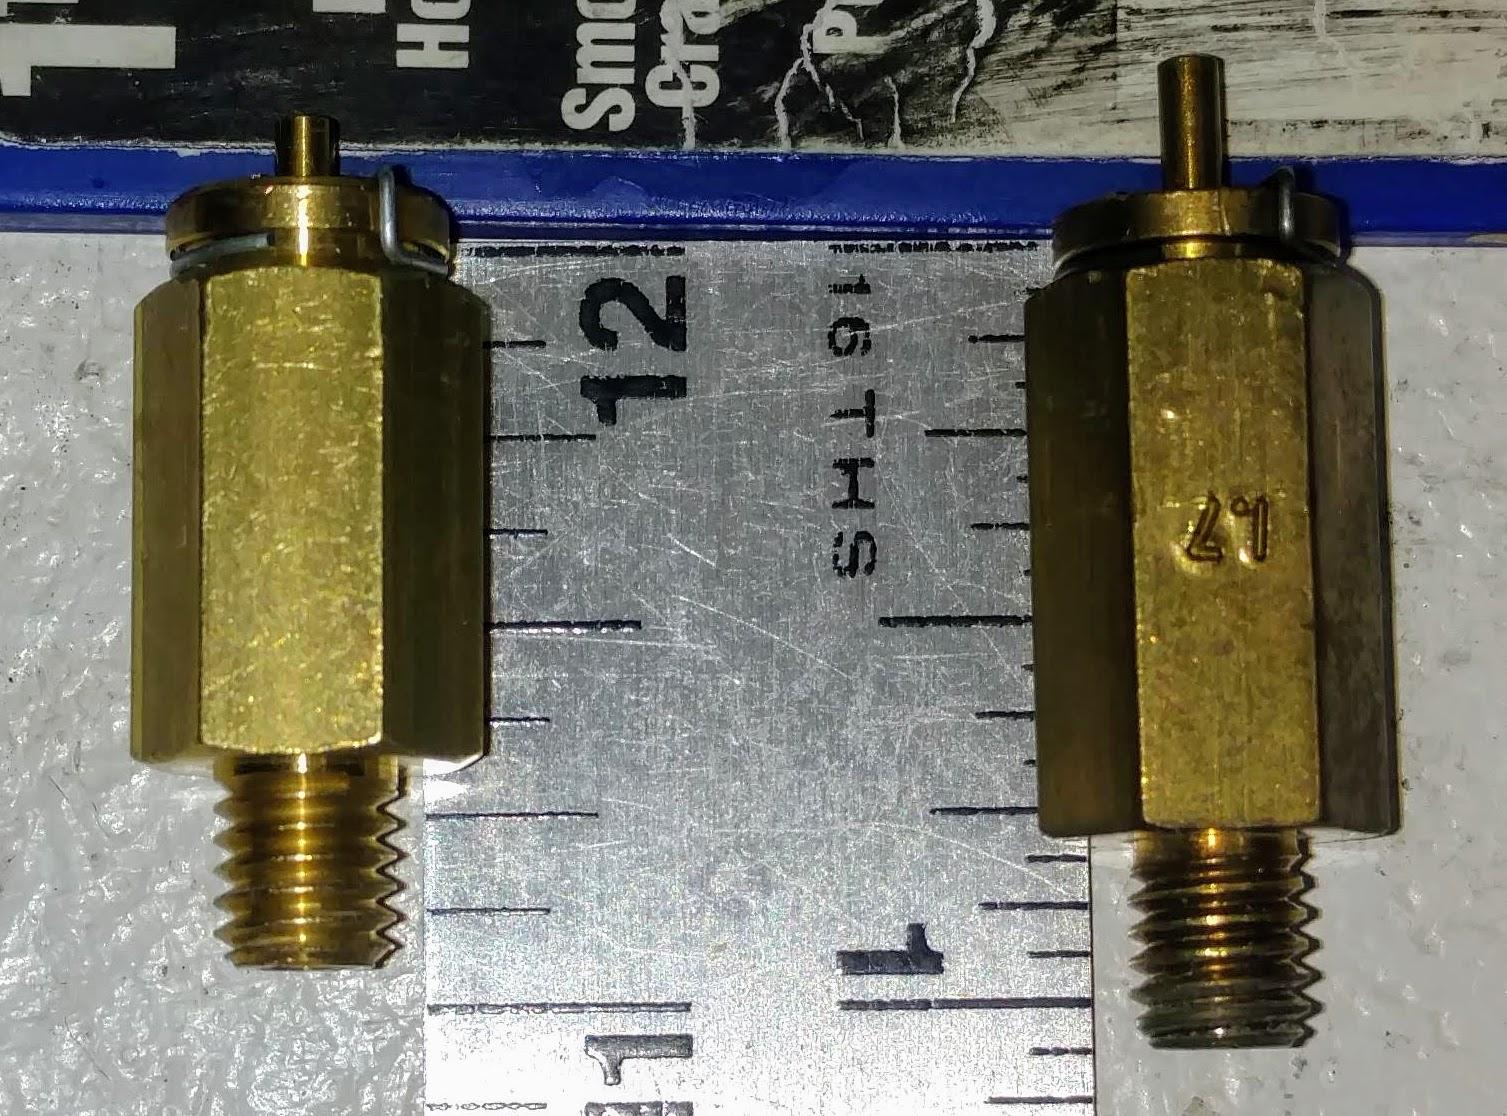
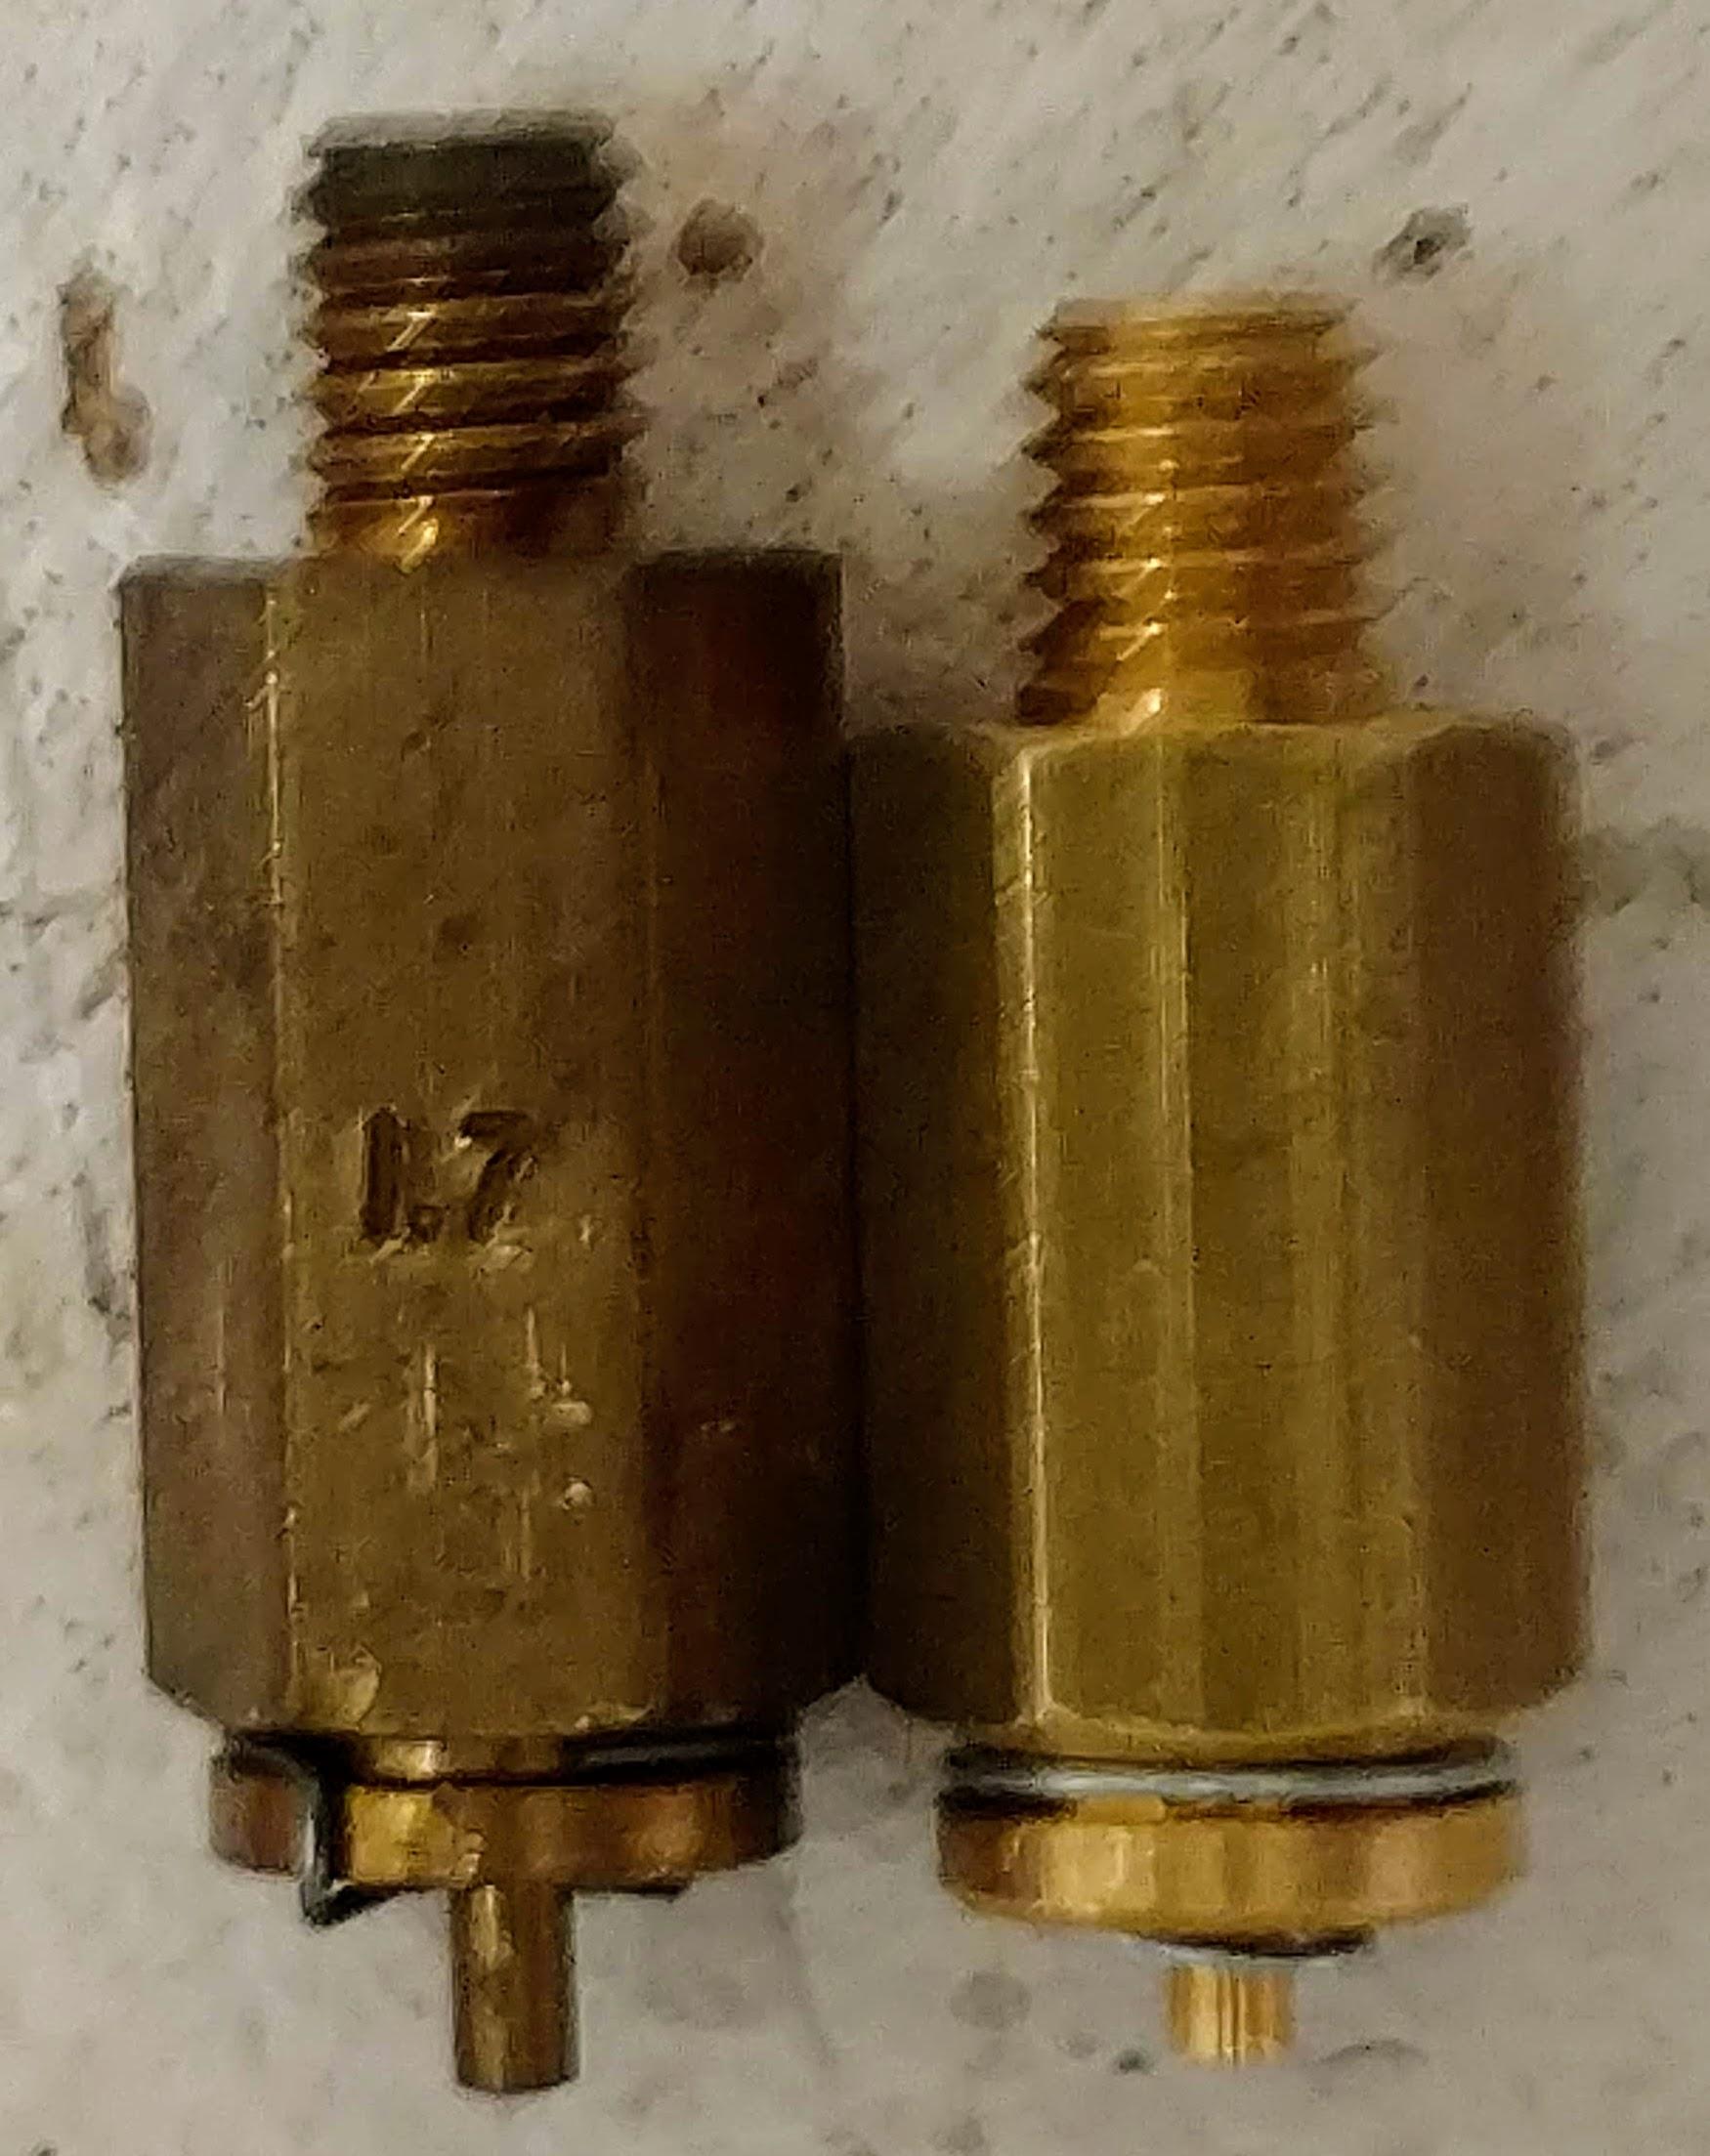
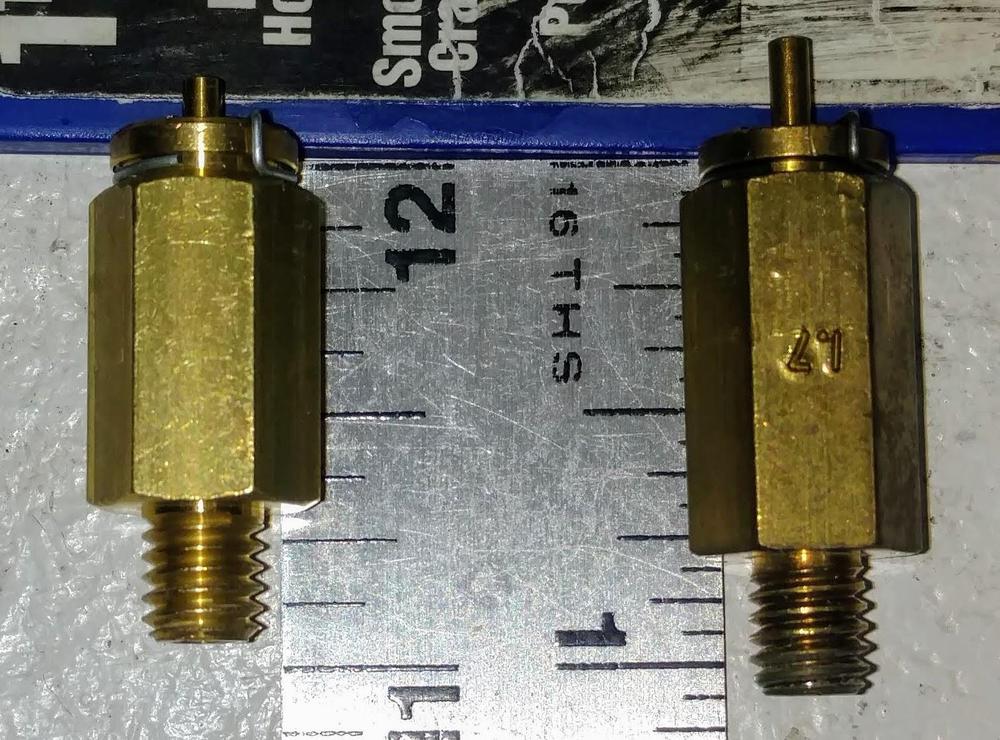
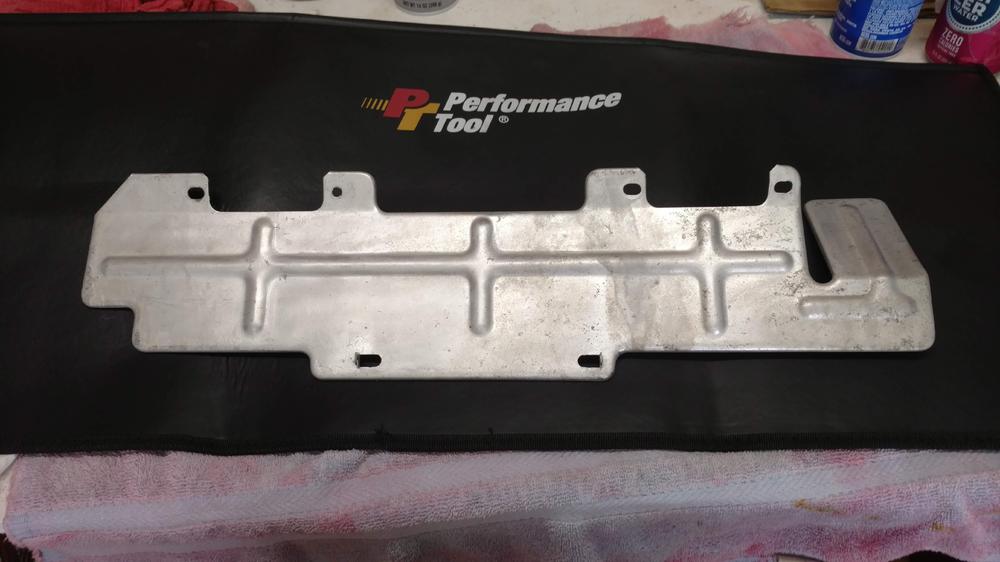
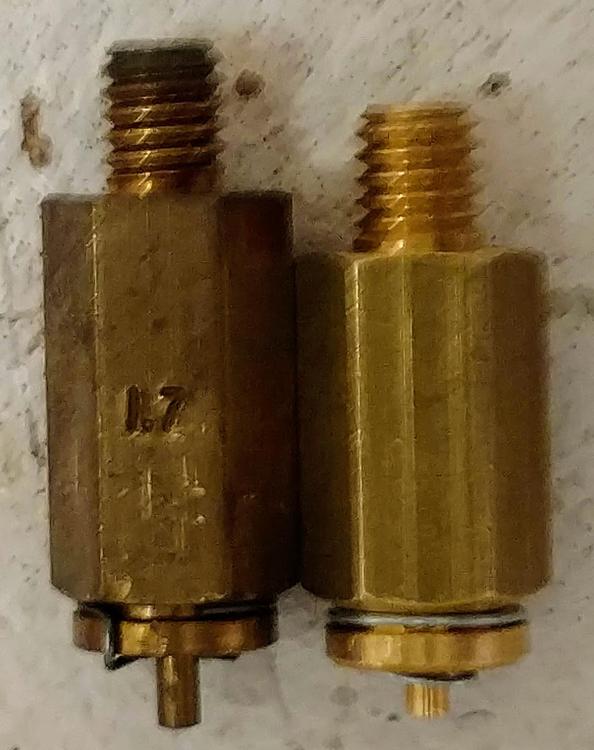
I measured the length of the needle jets. The rear is 1.1" or 27.94 mm. The front is 1.0" or 25.4 mm. Given the crude old tool I'm using to measure and my "great skill ;)" is strongly suspect that they are both the same length and in the ball park of the 25.25 mm that you reference. The replacement is 1" or 25.4 mm. That seems like the same length, but if you look at the pictures you will see that while the total length is the same, but the body vs threads are very different. I measured the towers and they are all about .58" from the top ridge of the lid to the top of the tower. Same front and back. I've added some pictures, including the heat shield which, based on the photos on ZTherapy site, this is the earliest form. I also show the jets. The one on the left is the original. Note the 1.7 on the barrel. You can see that even though they are the same, there is a big difference in the body vs the threads between the two. Just for reference I also included two pictures of the tops with the float installed. Don't expect that they will be very helpful, but I include them just in case someone sees something that I am missing. -Dann

-
-
@siteunseen @Mark Maras Thanks for your responses. I can tell that the braided hoses I have from another source are not right. They were actually too large for the original hose clamps, although I was able to get them on with some help from a needle nose pliers. I will get some proper replacements. I think I have moved to either getting the ZTherapy rebuilt kit or have them do it for me. That's been a bit of a dream for 20 years! (About the last time the updated the look of their website! Good information, old design.) Finally, while the suggestion is logically sound, there is no way that I could add enough washers to position it correctly. The difference is greater than the length of the threads on the valve. -Dann
-
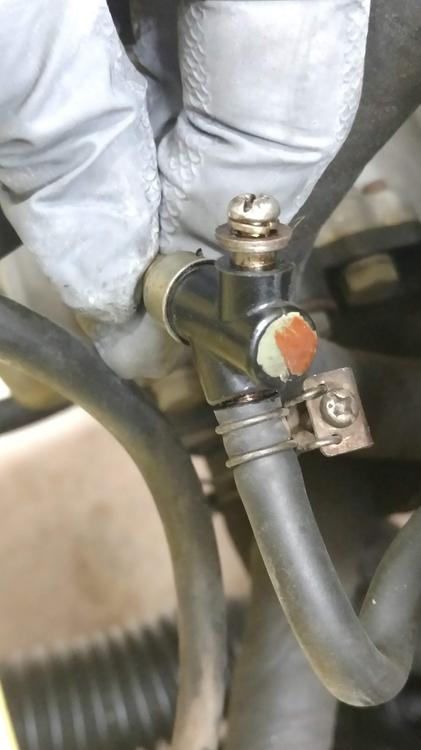
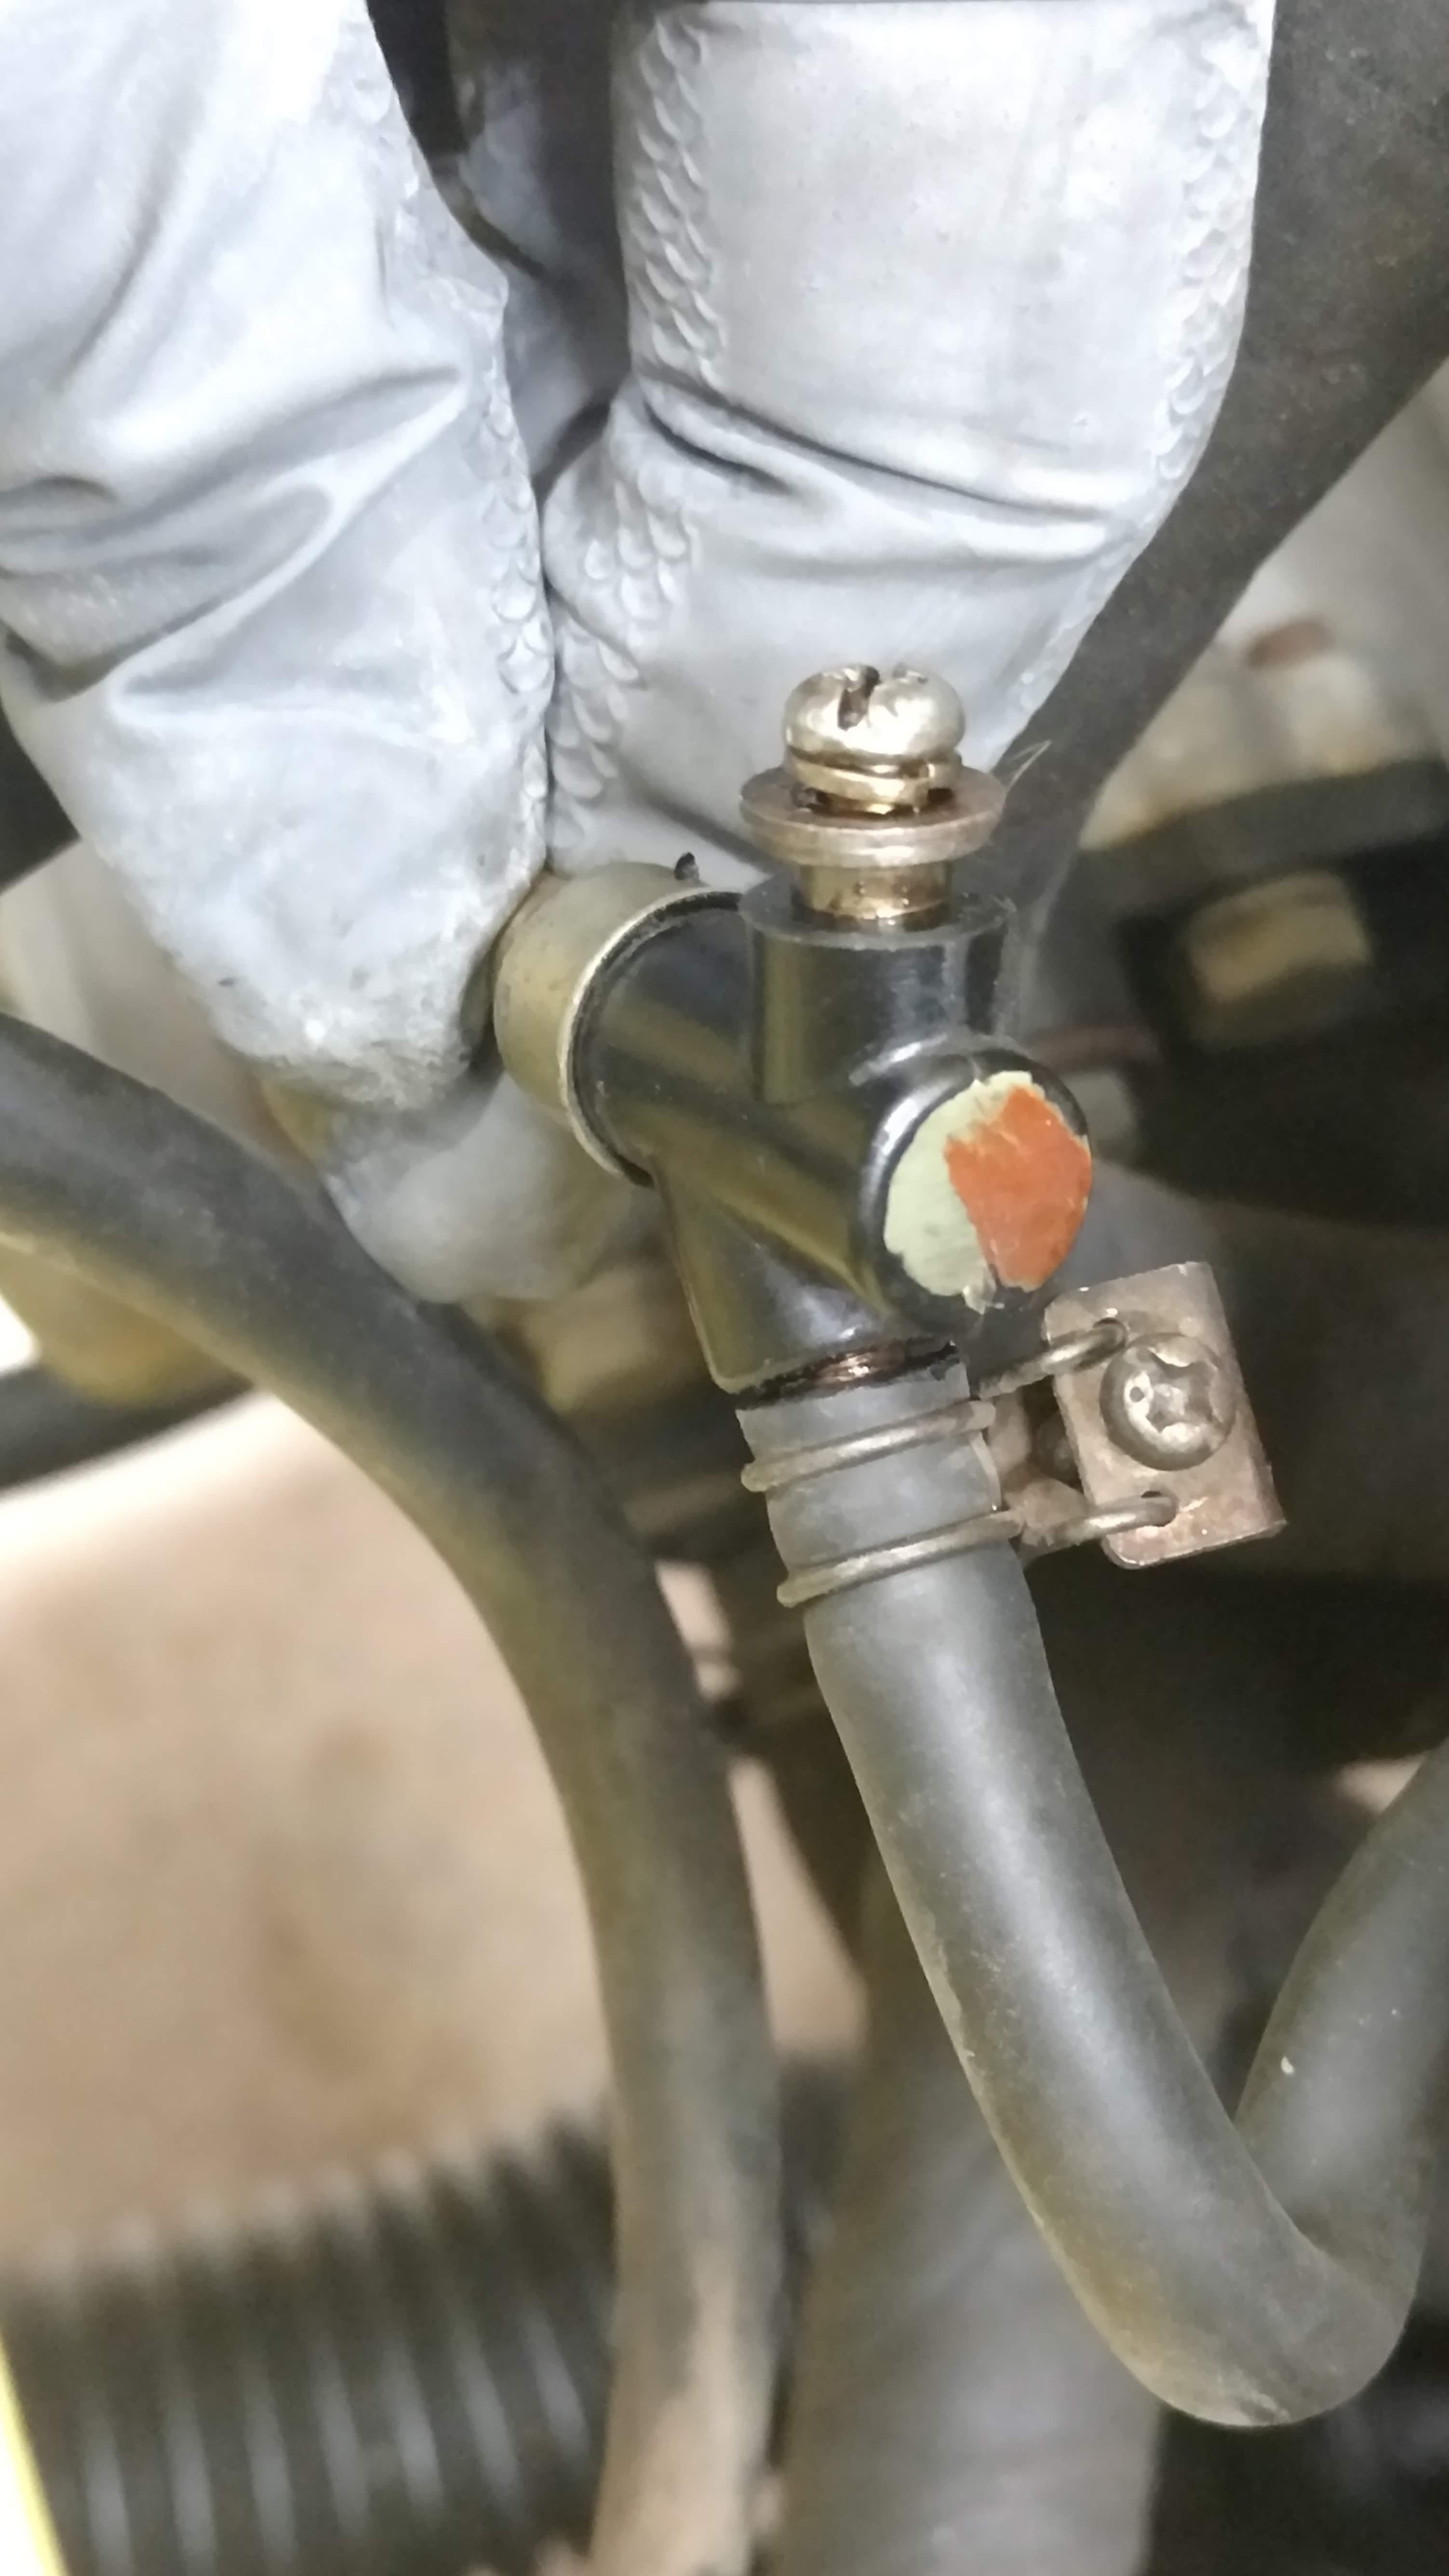
I have an early 1971 Z with four-bolt round-top carbs. I am rebuilding both carbs. I was told by a number or sources that the Walker 15566 was the right kit. Imagine my surprise when I compared the provided float needle and seat to the original. It was about 0.25-inches shorter than the original, or at least the one that has been installed for at least 20 years! The shorter assembly would not allow the float height to be set correctly. Is this the wrong kit or am I missing something? I did pick up some OEM braided hoses for the connecting the float bowl to the body of the carb. Can anyone confirm that the originals were in-fact braided? Where do I go from here? Dann
-
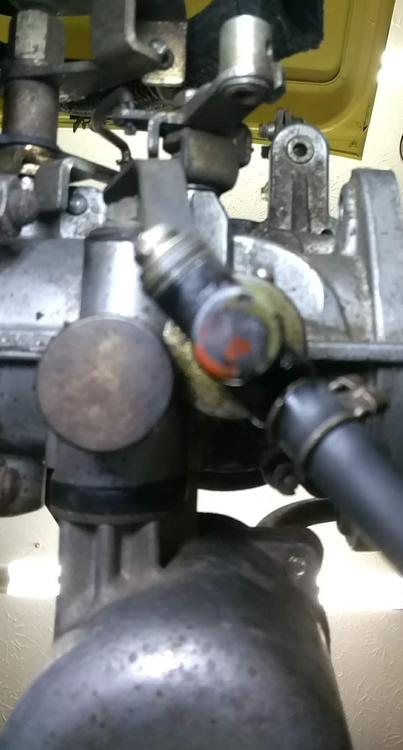
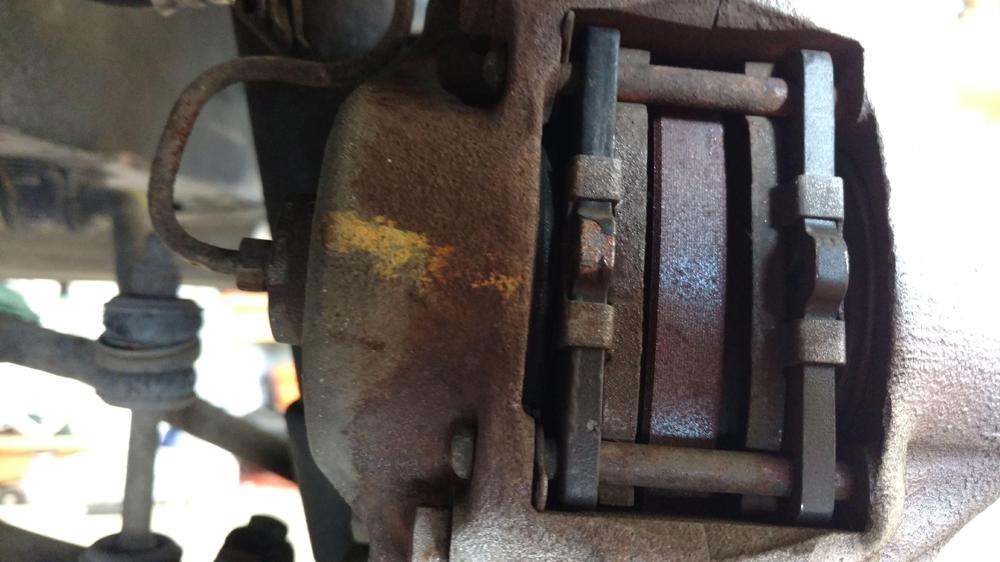
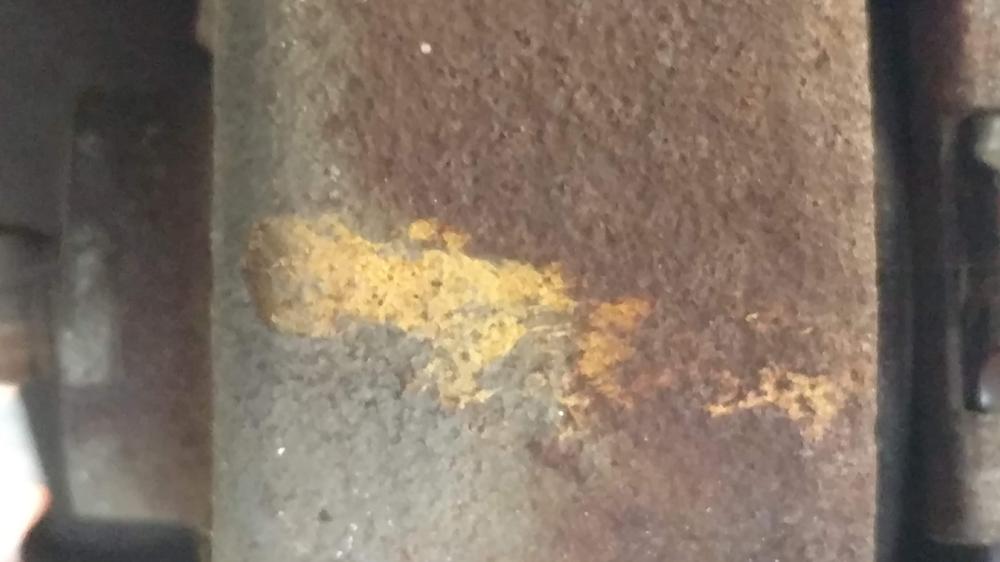
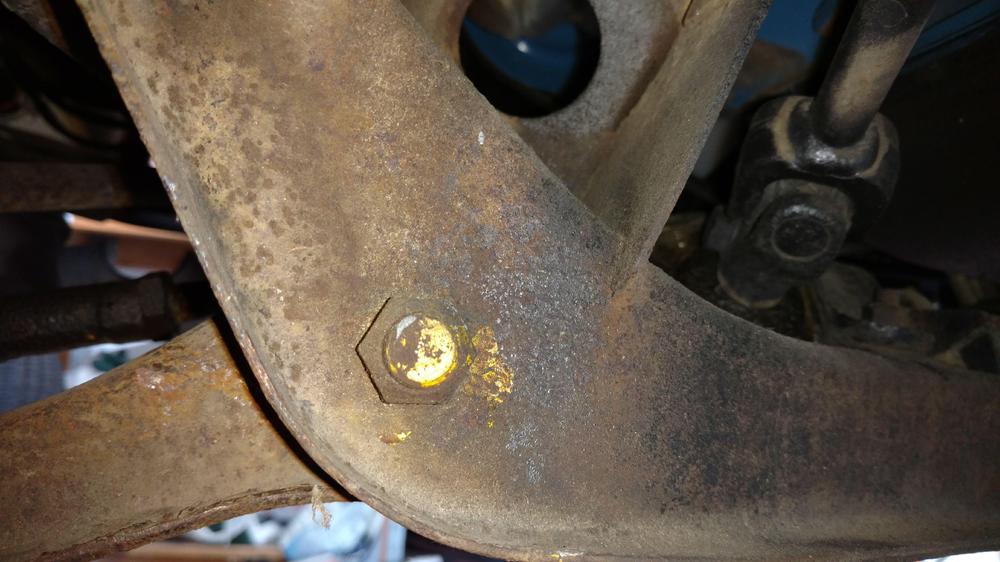
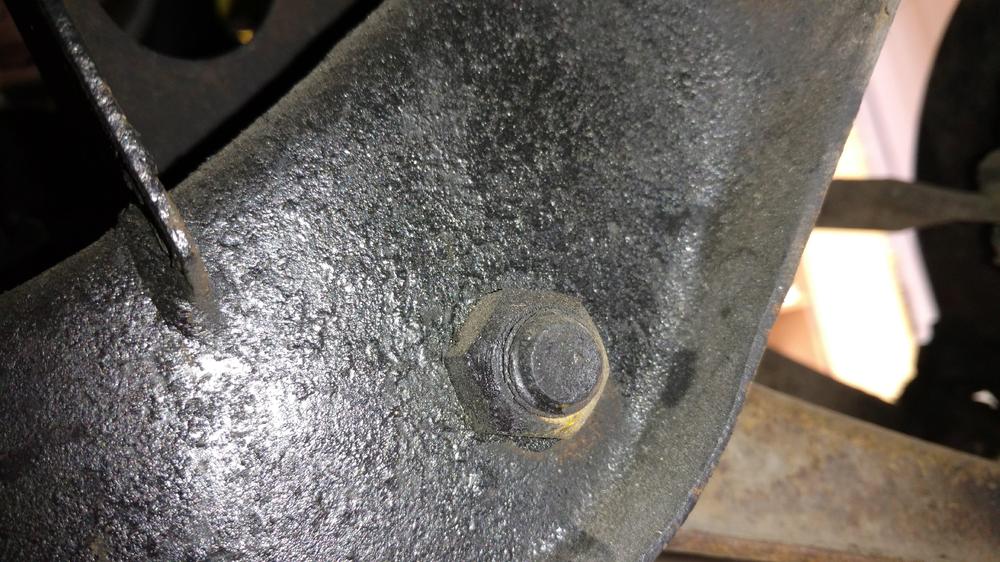
I found these marks on the brake caliper, both sides of a front support and on the bottom of the carbs "jet assembly."