


240260280z
Free Member
-
Joined
-
Last visited
Everything posted by 240260280z
-
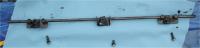
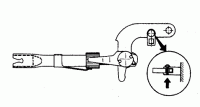
 I see lots of poly bushings in your photo so it may be a tie rod/alignment issue or slop or wear in your rack. However the steering can become sloppy if the steering rack to cross member bushings fail or if the U clamps holding them are loose : You may also wish to try this easy adjustment: http://www.atlanticz.ca/zclub/techtips/steering/racktension/
 -
Ditto
-
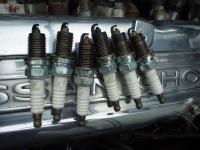
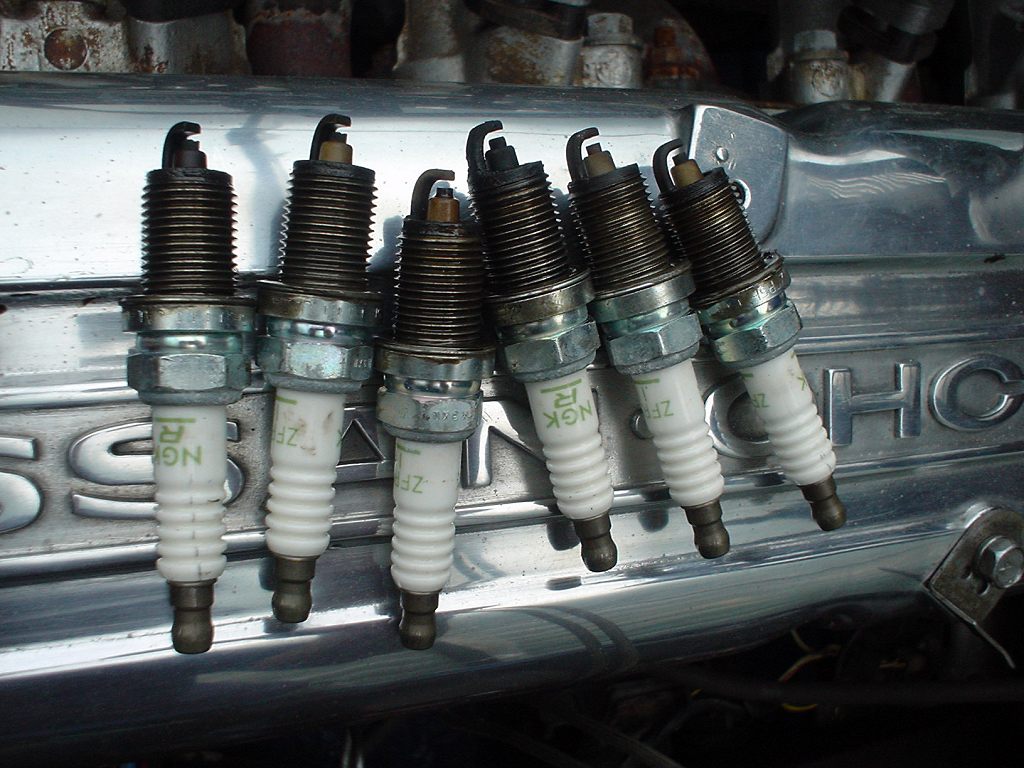
You are loosing coolant at a significant rate according to the above. (Indicating leak in coolant system caused by bad hose, faulty coolant component, leak in head gasket, or crack in head) You observe external coolant at back of motor. (Indicating leak in coolant system caused by bad hose, faulty coolant component, or leak in head gasket) You have white substance in oil (Indicating leak in coolant system caused by leak in head gasket or crack in head or your PCV system is not working and it is just contamination from acidic erosion and condenstaion internal to motor) Cylinders 3 & 4 may be getting oil according to the plugs. (indicating bad rings or leak from oil passage due to bad head gasket) A compression test shows ~ 150 psi across all cylinders. (Indicating no apparent head gasket leak to cylinders). It is possible that a re-torque will not hurt and may help but the prudent action would be to double check where the coolant is leaking and then take action. Here are some things to double check 0. Have mechanic observe exhaust gas colour and smell when engine is warm... white exhaust puffs after engine is at temperature on a non-humid day indicate coolant burning. 1. Clean off dirt and discoloration on the head-block interface as well as all coolant hoses in the areas. Dry. Then idle the car to see more accurately exactly where the leak is. It may be from one of the hoses or fittings near cylinder 6. 2. Go to a radiator shop, have them pull plugs and pressurize coolant system and see if any leaks can be observed. 3. Have experienced mechanic look at oil to see if white substance in oil is coolant. There are two typical causes for white stuff in oil system: Here is coolant in oil from blown head gasket: Here is condensation/blow-by gunk in oil system caused by bad PCV, driving distances, engine temp, oil type: http://forums.bimmerforums.com/forum/showthread.php?p=19417099 4. If no luck above: remove all plugs and then have someone crank engine. Observe spark plug holes and see if small drops of water spatter out of hole while cranking. You can experiment with re-torquing as it will not hurt but after doing more tests above, you should have a better idea of what is going on.
-
yes that is good
-
Part 35 here: http://carfiche.com/fiche009/s30/6/b08.gif M10 X 1.25 25mm
-
Just buying a welding helmet tonight at harborfreight in NJ. I head back to Canada tomorrow after work 1,600km drive. I wired a 240V outlet in my bro's garage last Sunday and I will be able to finally use a 240V welder I bought a few years ago. I hope the higher heat will help the weld stick and I hope I develop welding skills fast. I 'll update this post when finished
-
Comments in blue:
-
Nah, I just cleaned it up with a scotch-brite pad and sprayed it out. It seemed OK when I inspected it. btw these photos are from 2005 I think. Just never got around to posting them.
-
John has a great solution as always! If you want to drum up a sheet/flat piece of bakelite from an old household object then it may work as a substitute. This material may even be what the original spacers are made from. Have a look: http://en.wikipedia.org/wiki/Bakelite
-
Wow you really were reeling-them-in on that last corner in the top video! NICE!!!! Too bad that 911 wasn't still air-cooled
-
"Just tap the hole for a barbed fitting and run a hose with a loop in it." Clever!
-
Nagano : 長野 NNN (長 NN) ぜ ze [ze]
-
Here is a guide to removing EFI head: 280z head removal guide It should help.
-
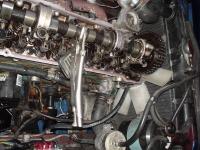
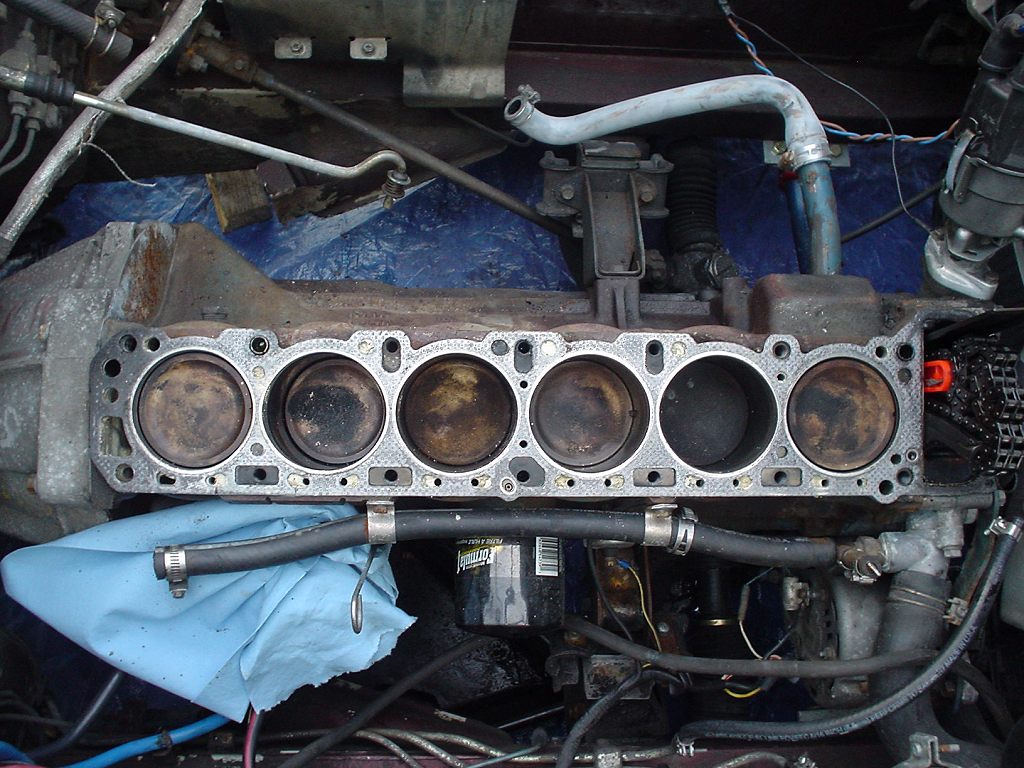
41 Place chain in timing cover area. 42 Remove head bolts and pull head. Loosen and remove head bolts from outer bolts towards inner evenly from both ends of the head. 43 Done.

-
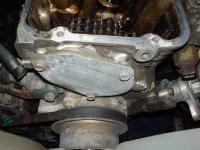
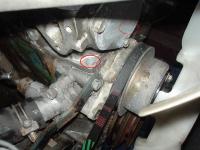
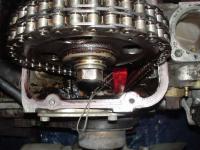
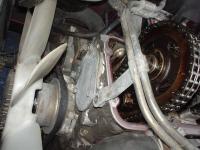
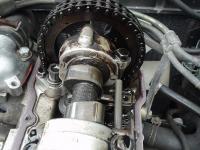
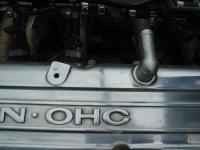
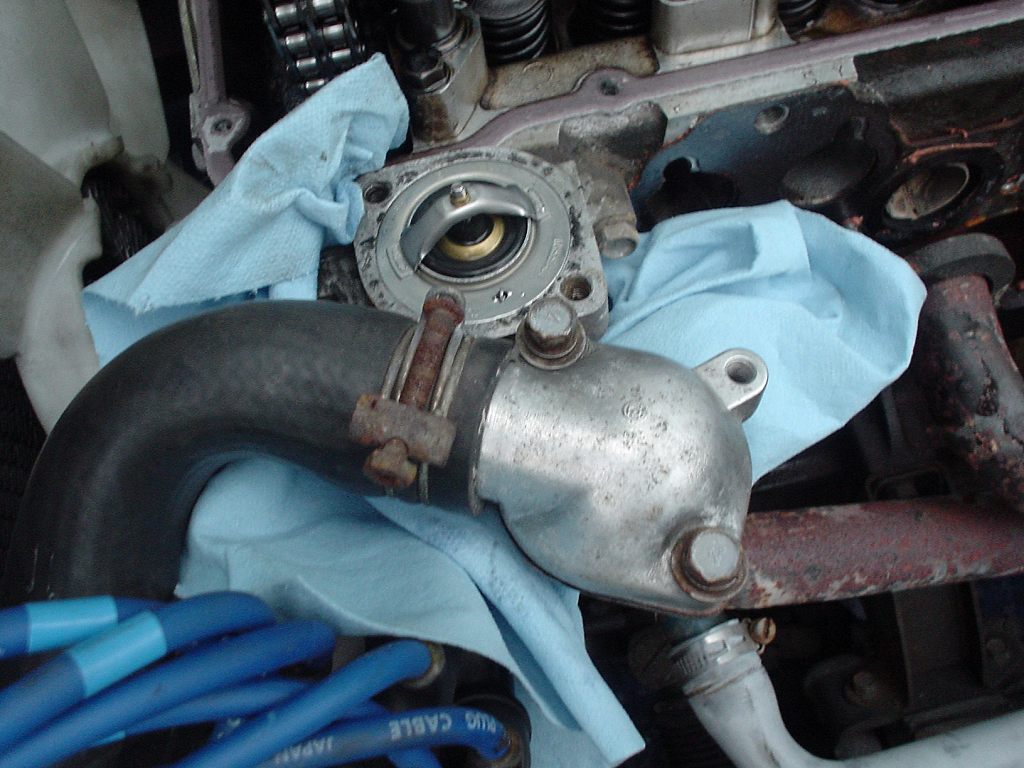
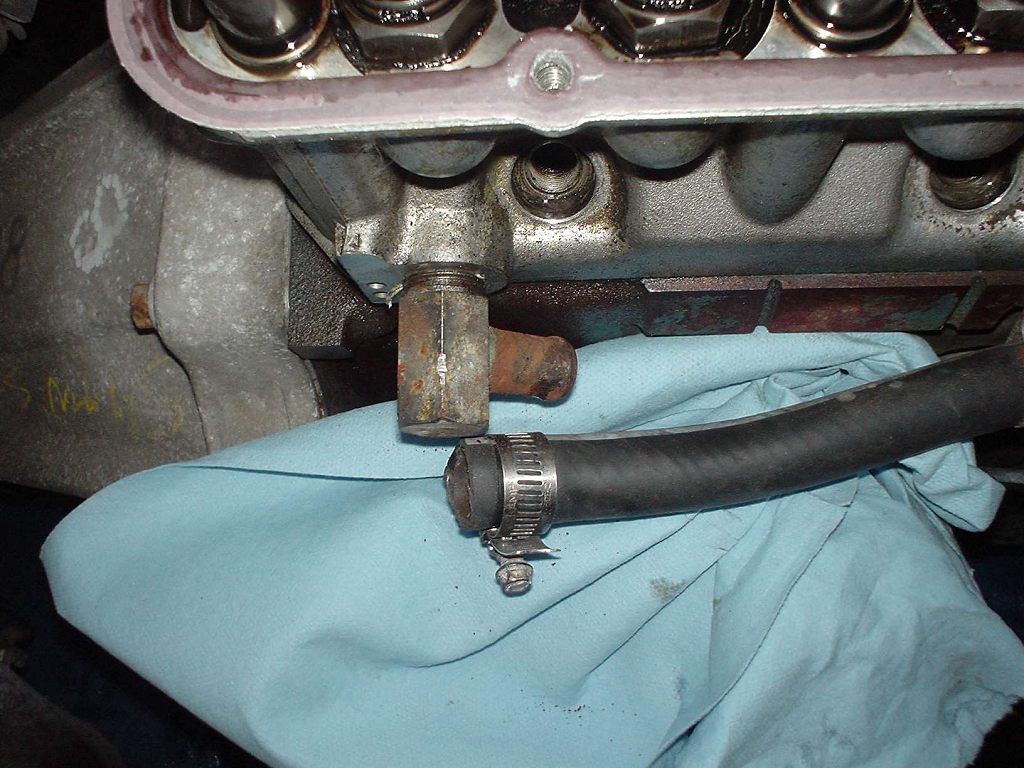
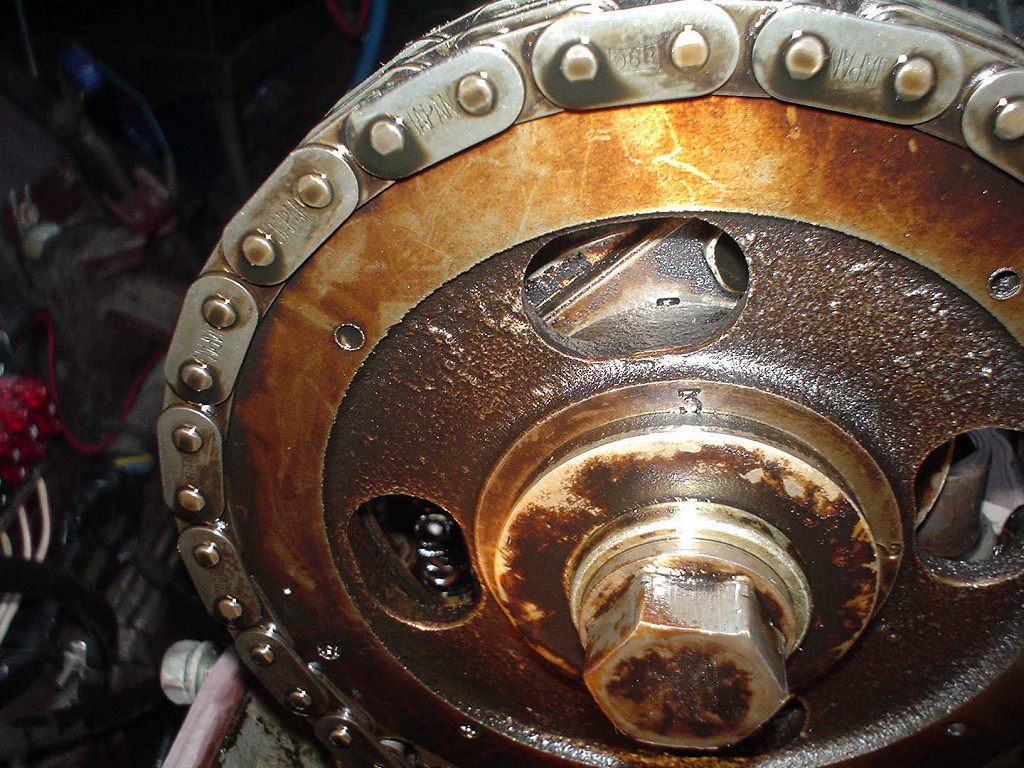
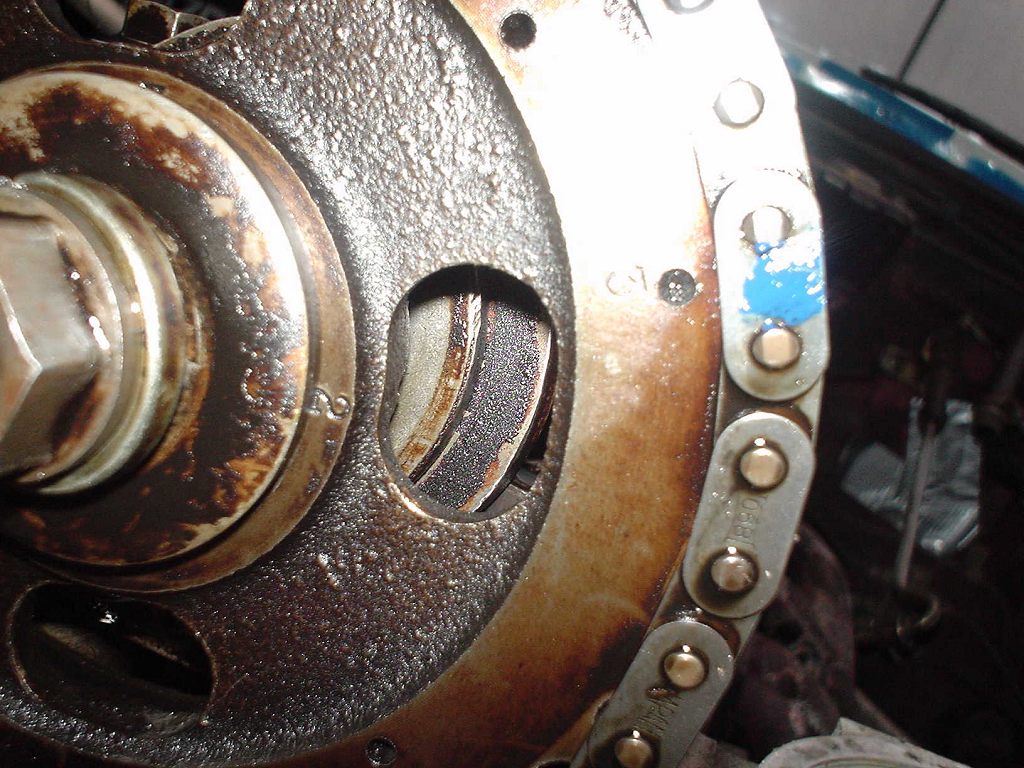
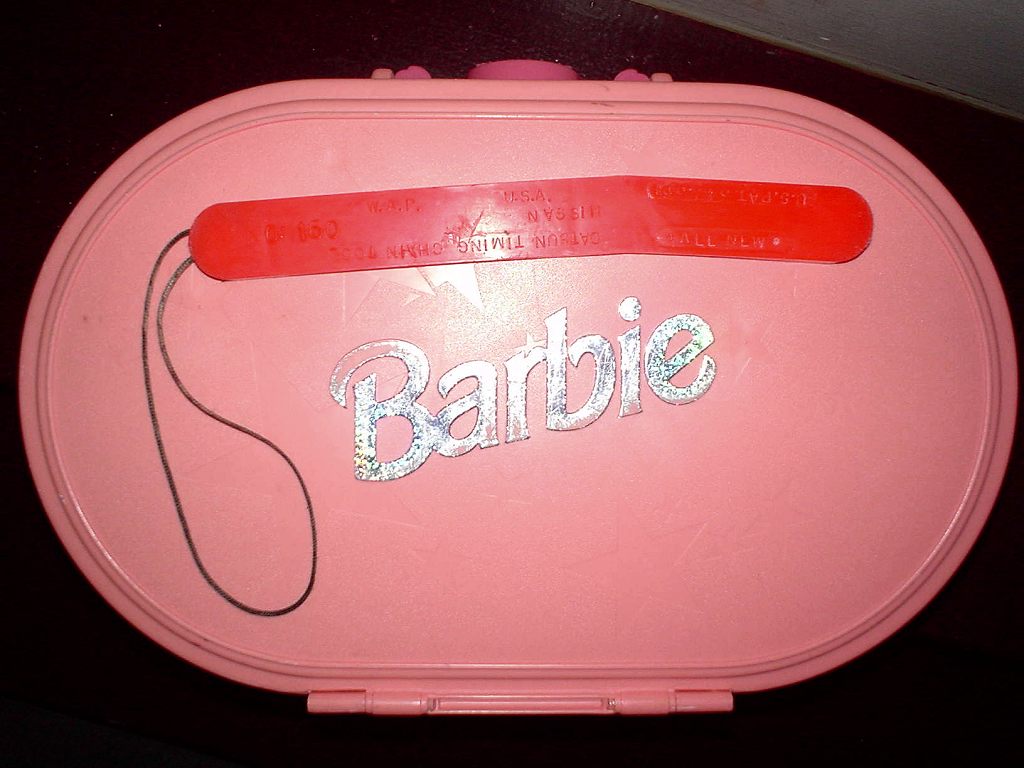
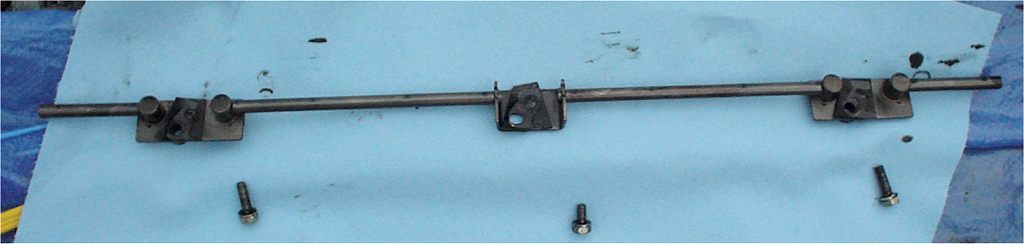
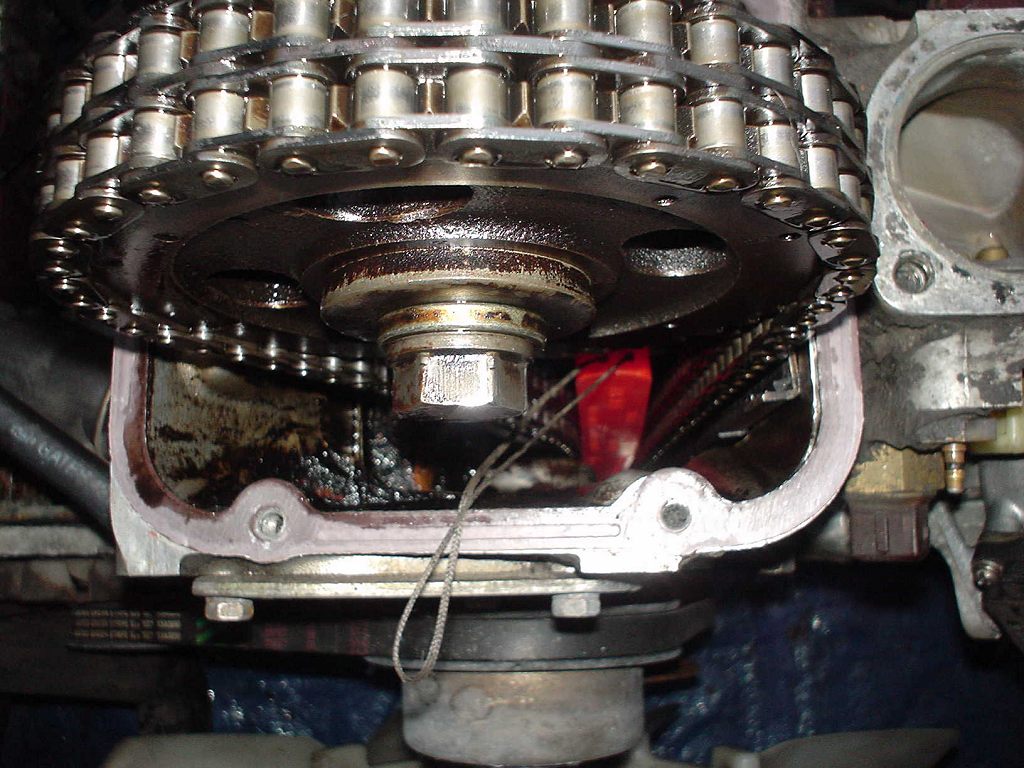
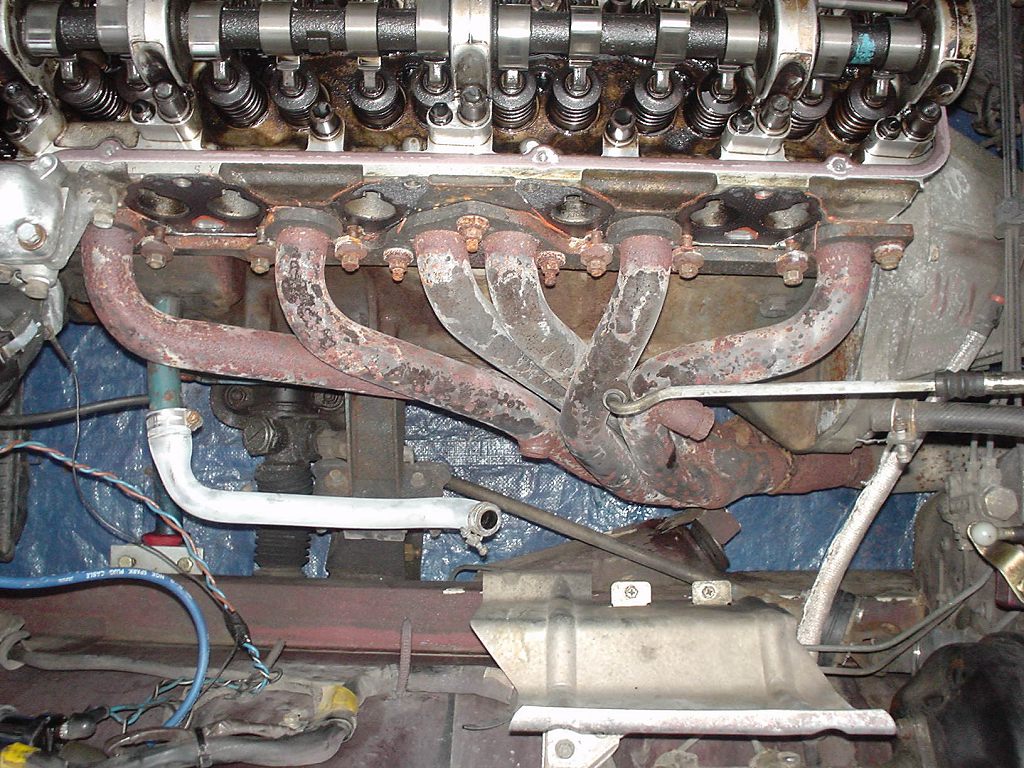
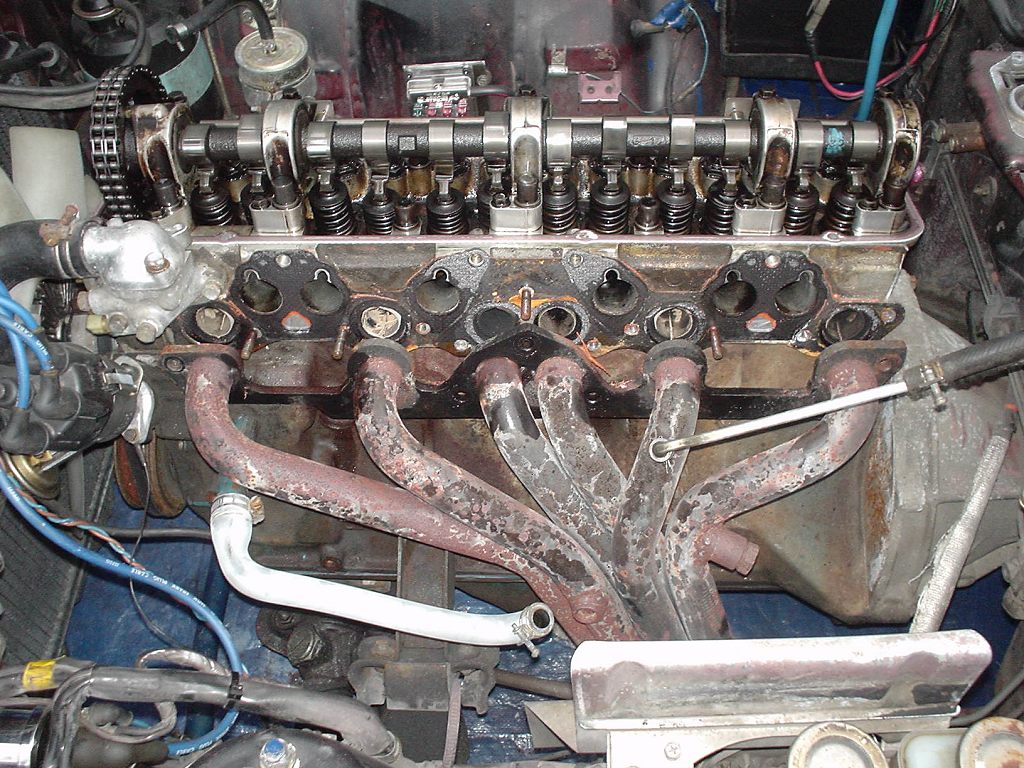
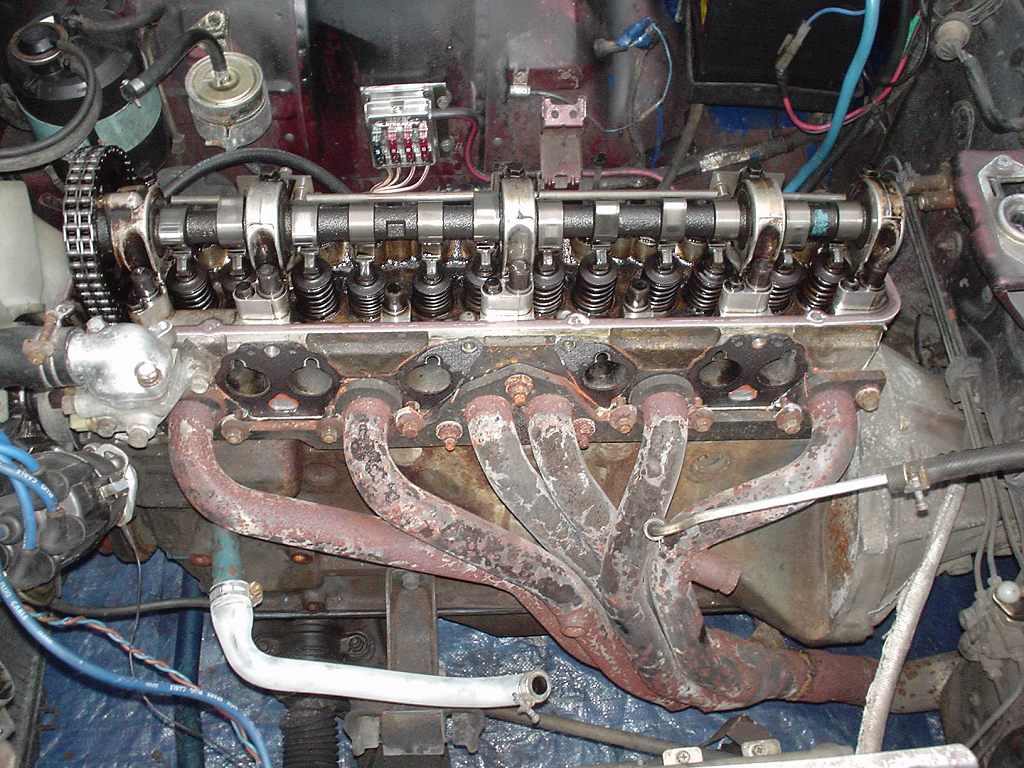
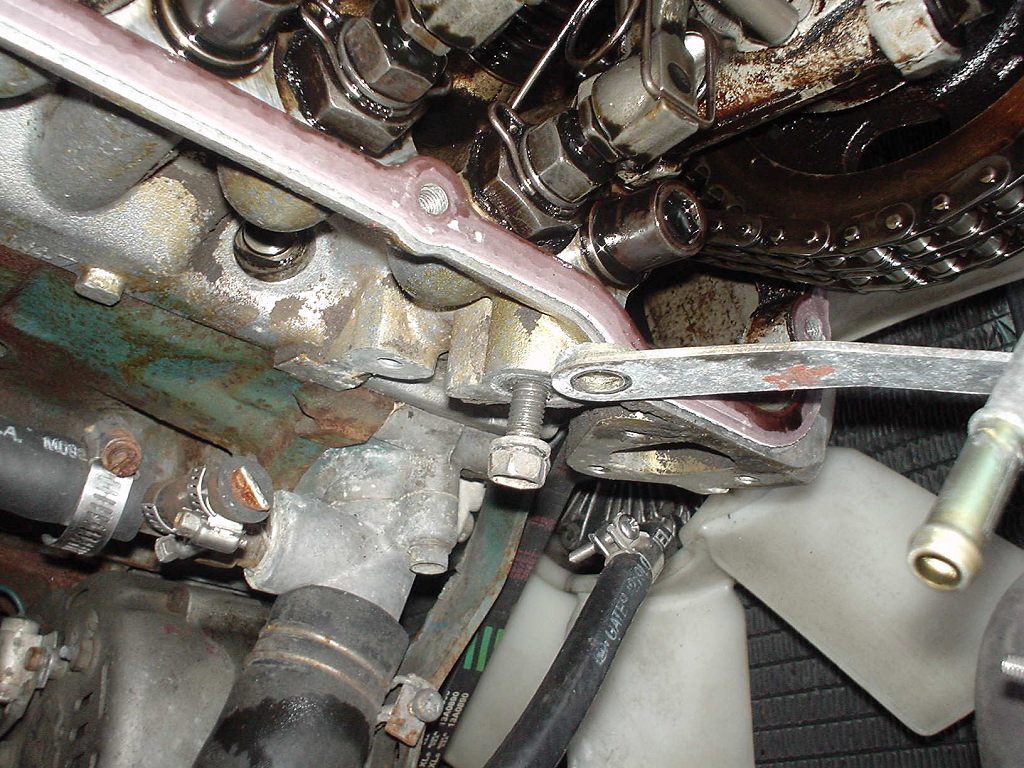
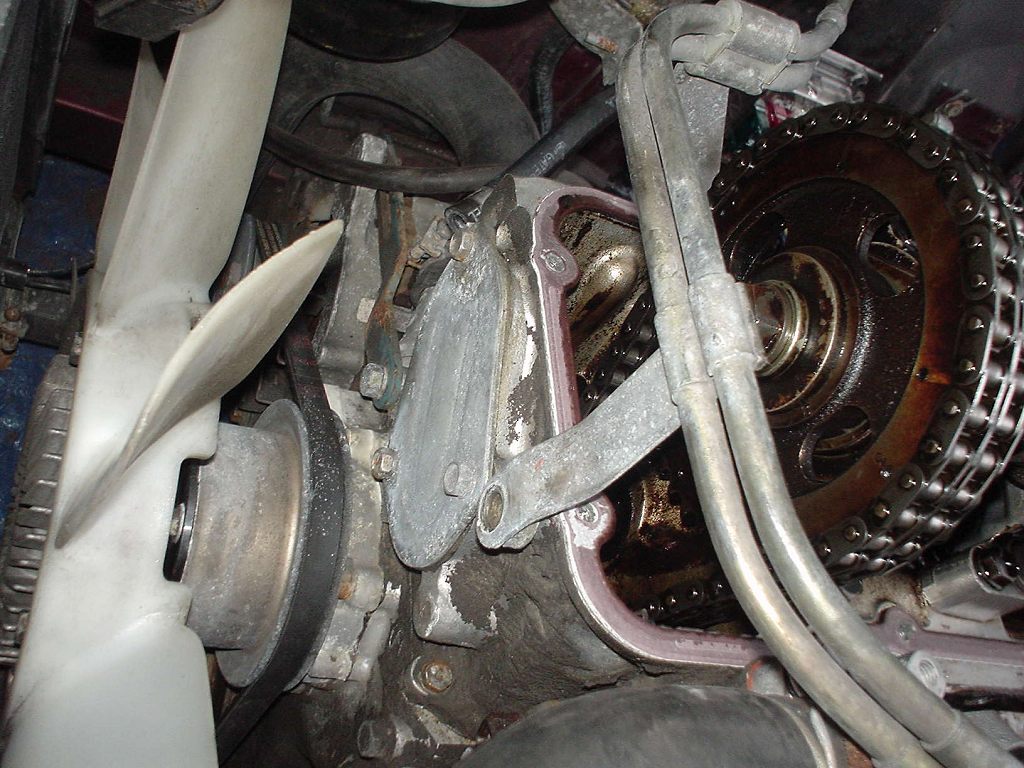
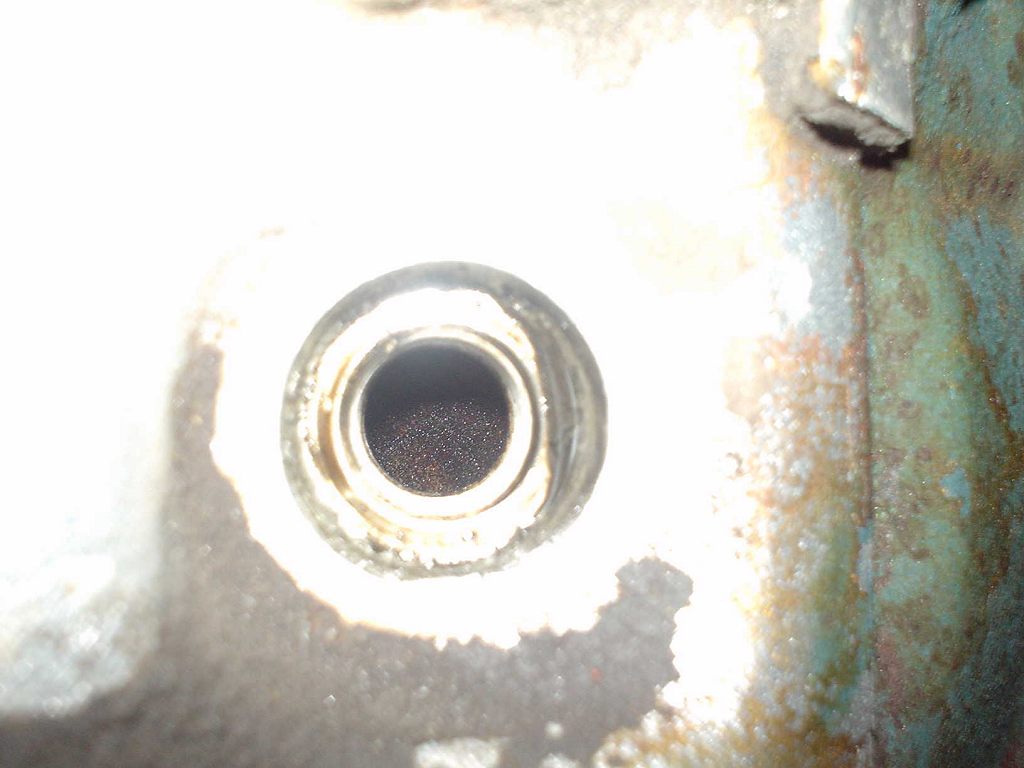
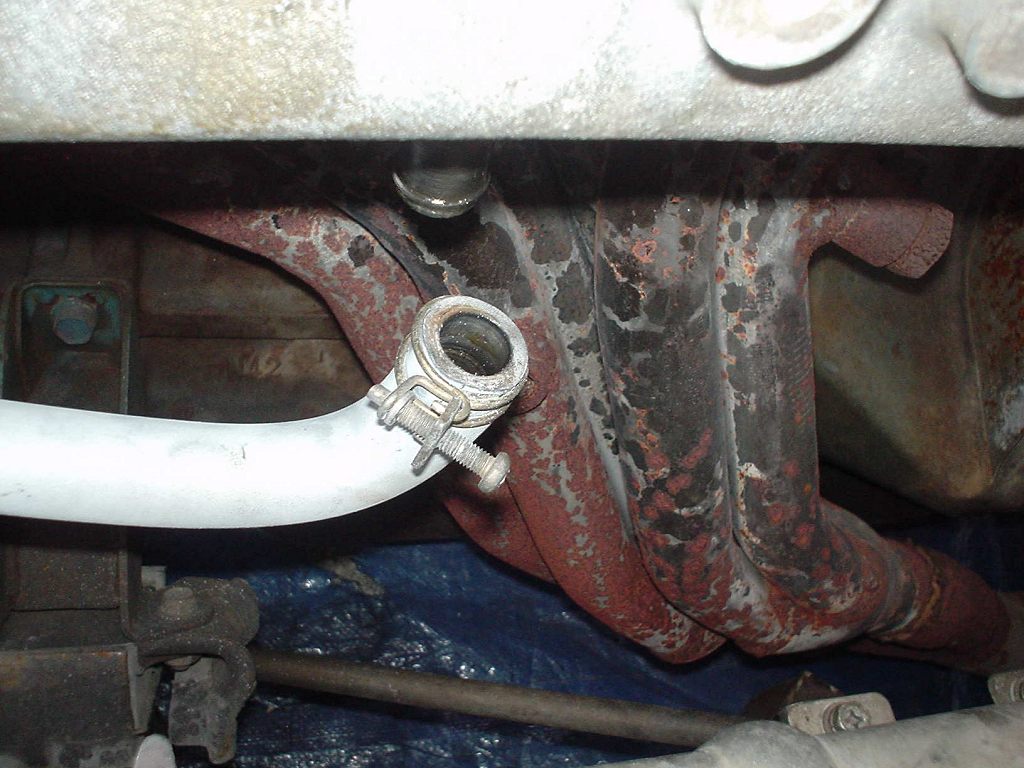
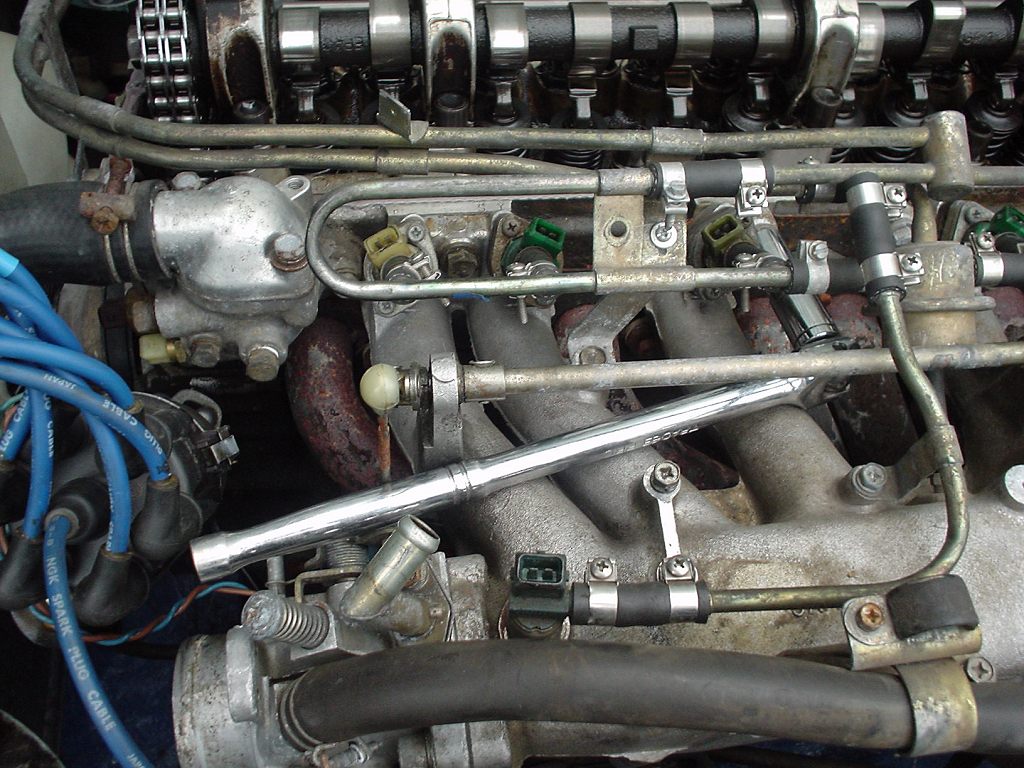
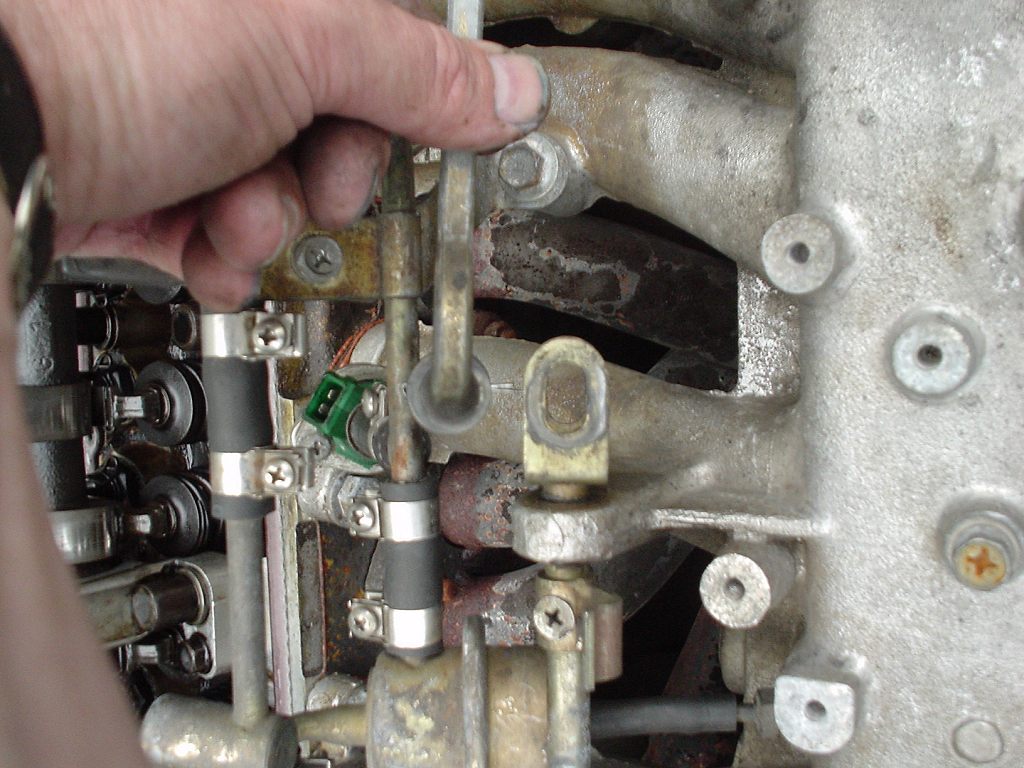
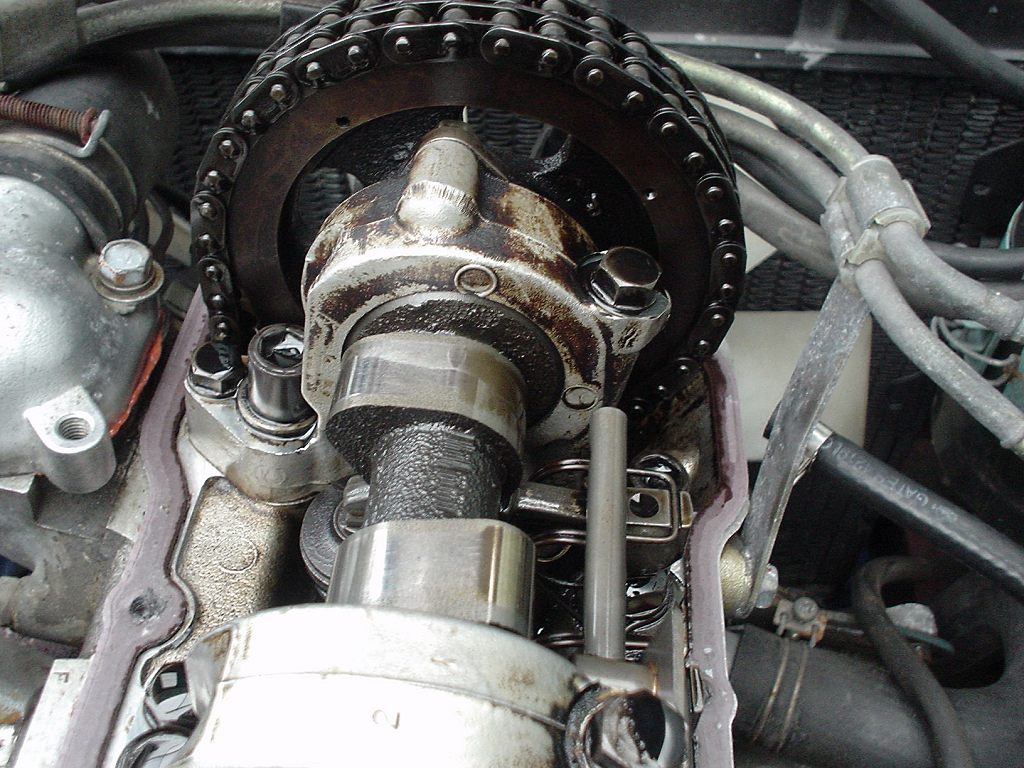
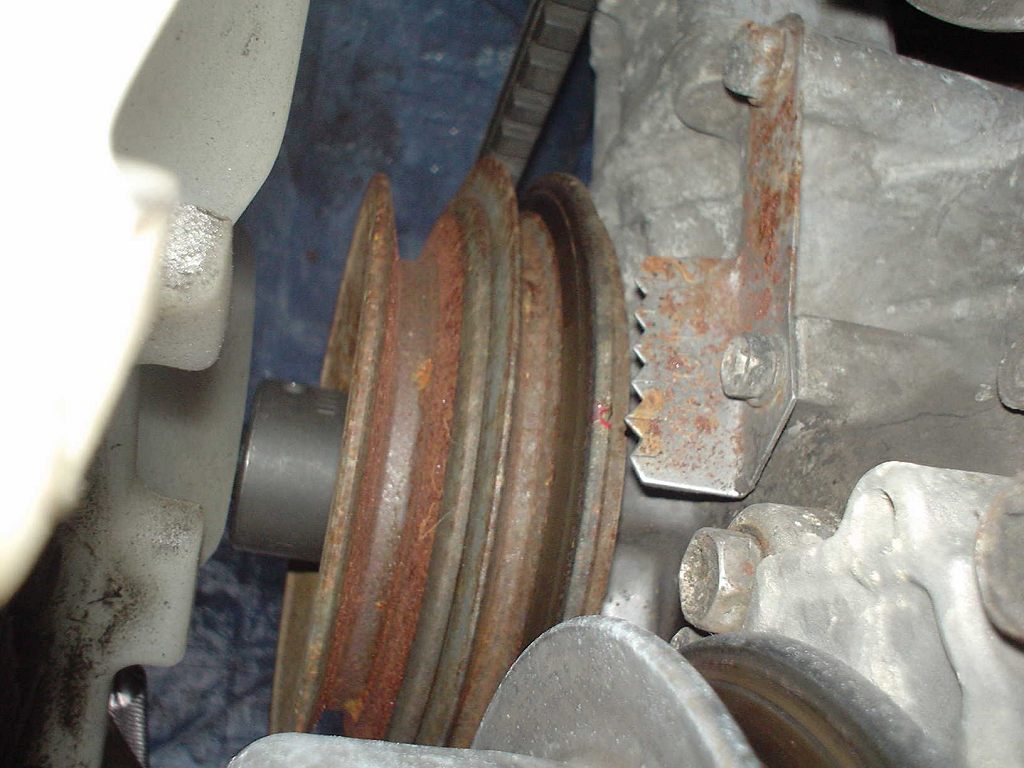
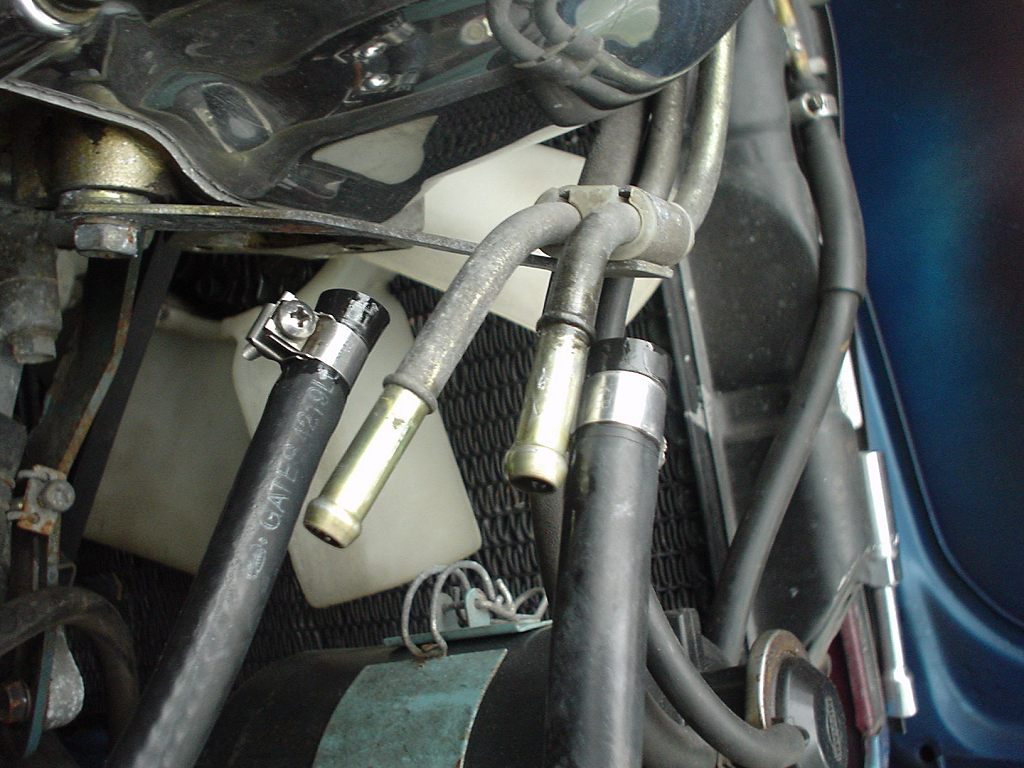
DRAIN COOLANT AT RAD 31 Disconnect coolant lines to head. 32 Disconnect coolant lines to head. (note, my AAR coolant lines have been removed). 33 Remove thermostat. 34 Remove 2 small bolts at front of head. 35 Remove oil bar and bolts. Careful with the gaskets. Note later z's have internal cam oiling. 36 Get a tool to hold back the timing chain tensioner. Here is the famous "Barbie Hockey Stick" that all of us manly Canadians use and store in our Barbie accessory cases. I'm lumberjack and I'm OK. 37 Timing tensioner tool in place. 38 Showing timing at position #3 on my Z, yours may be 1, 2, or 3. 39 Use solvent to remove oil then paint the link that meshes with the #3 (1 or 2) dimple on the cam sprocket ~ 2pm. This reference is needed when reinstalling the head. 40 Hold cam at correct location (where the two bumps are cast) then remove cam sprocket bolts, washer, sprocket, etc.


-
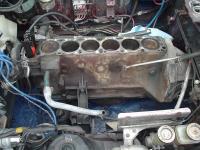
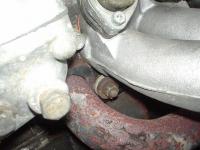
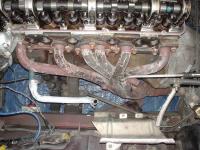
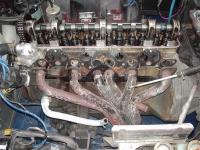
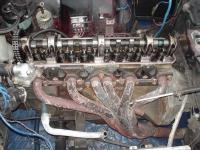
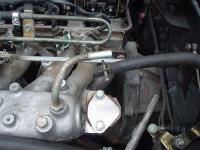
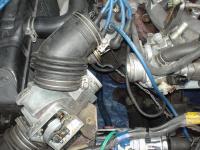
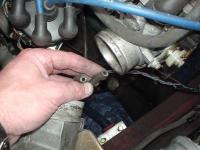
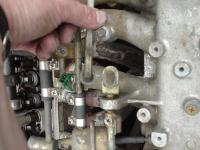
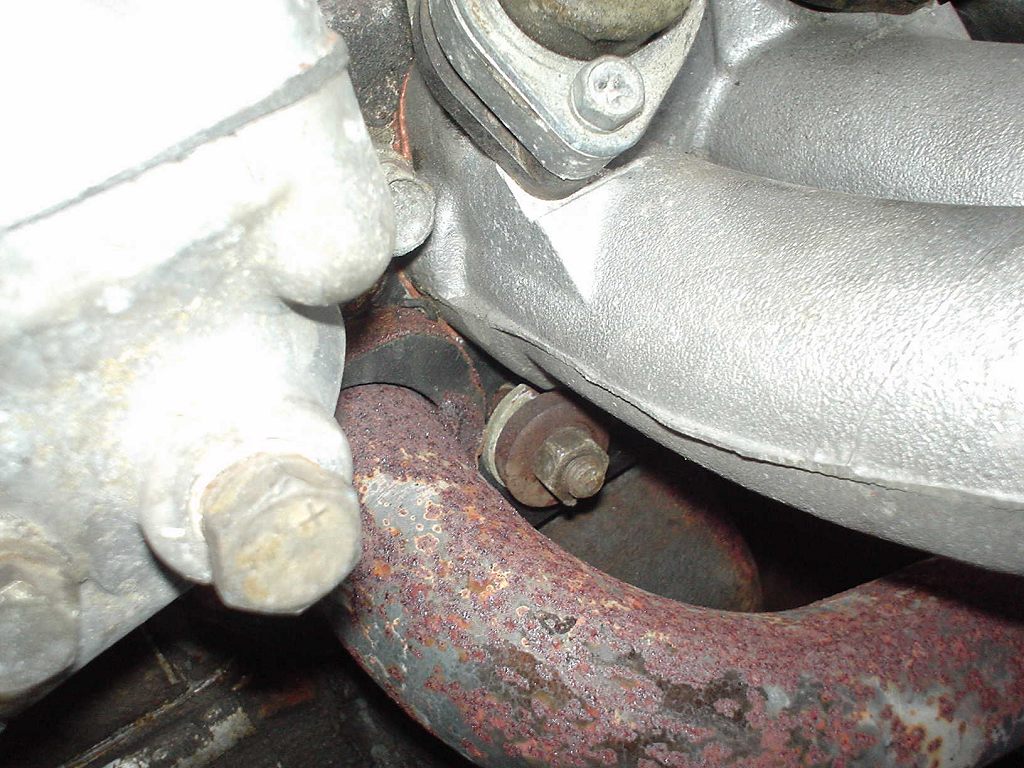
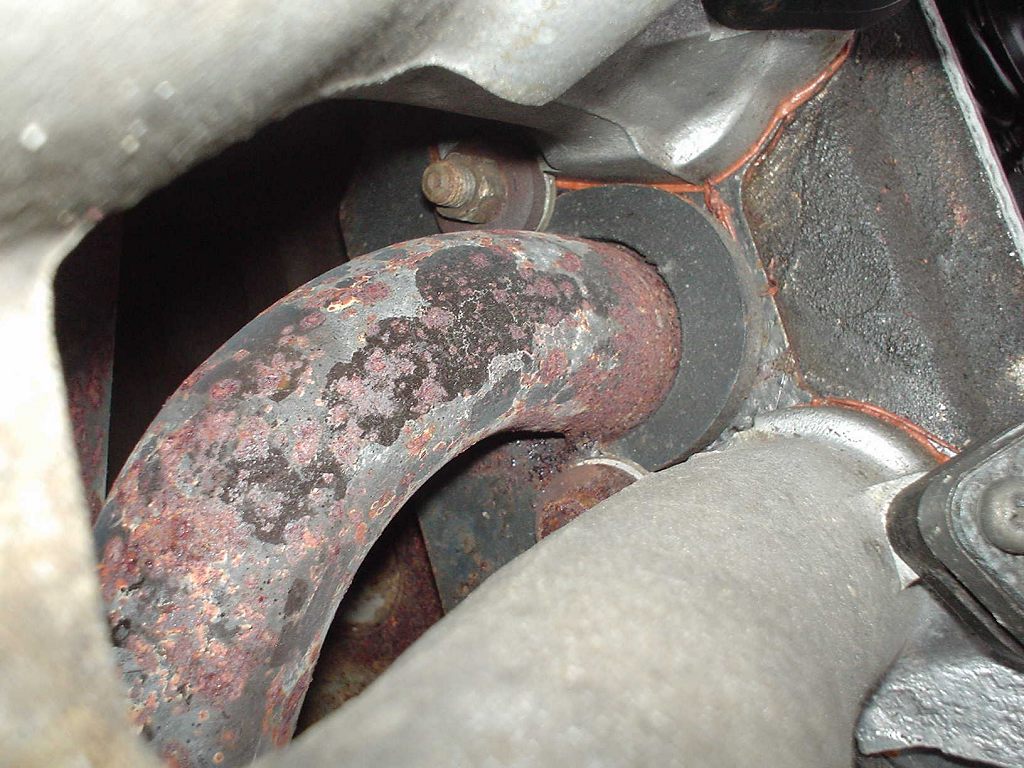
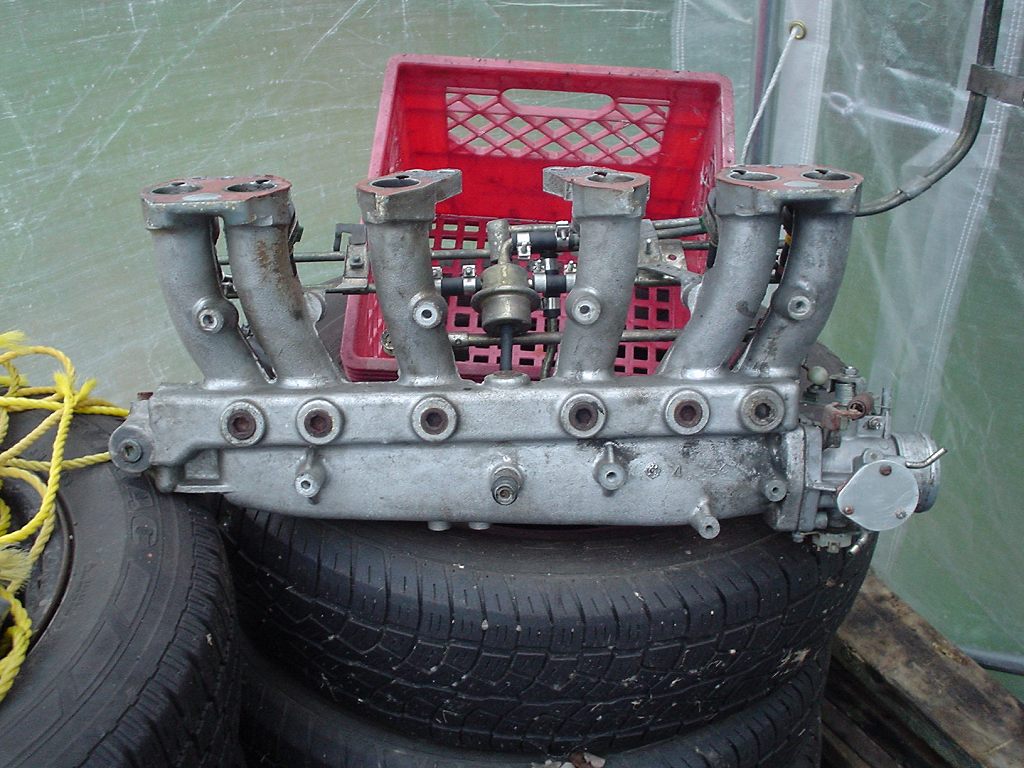
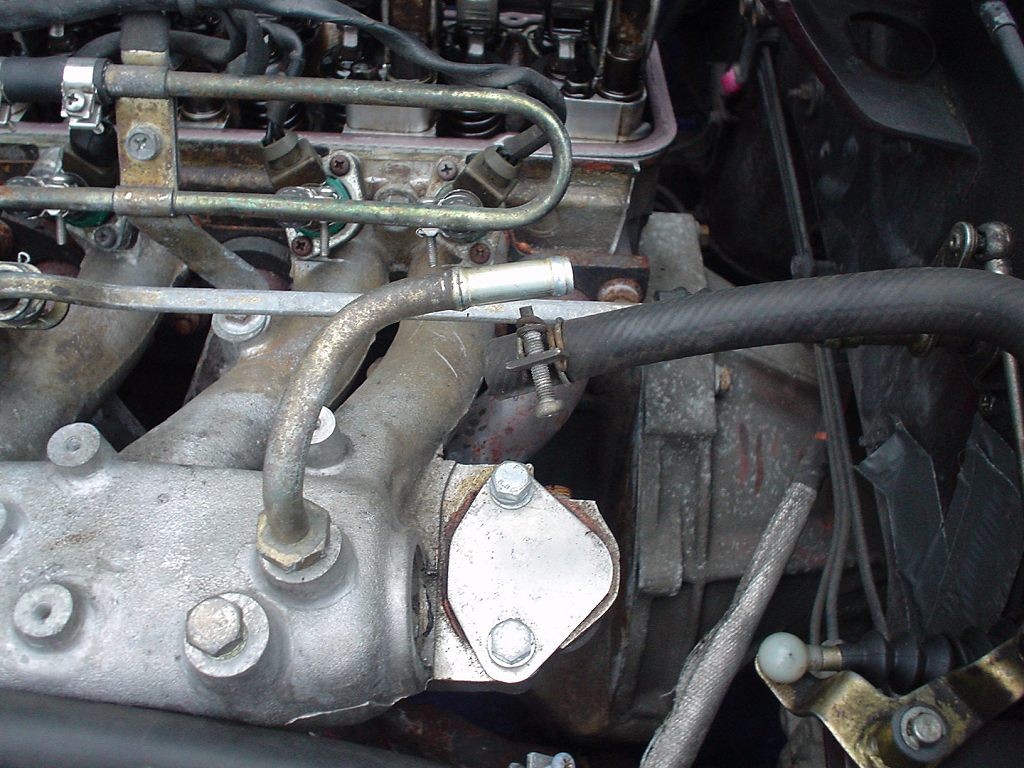
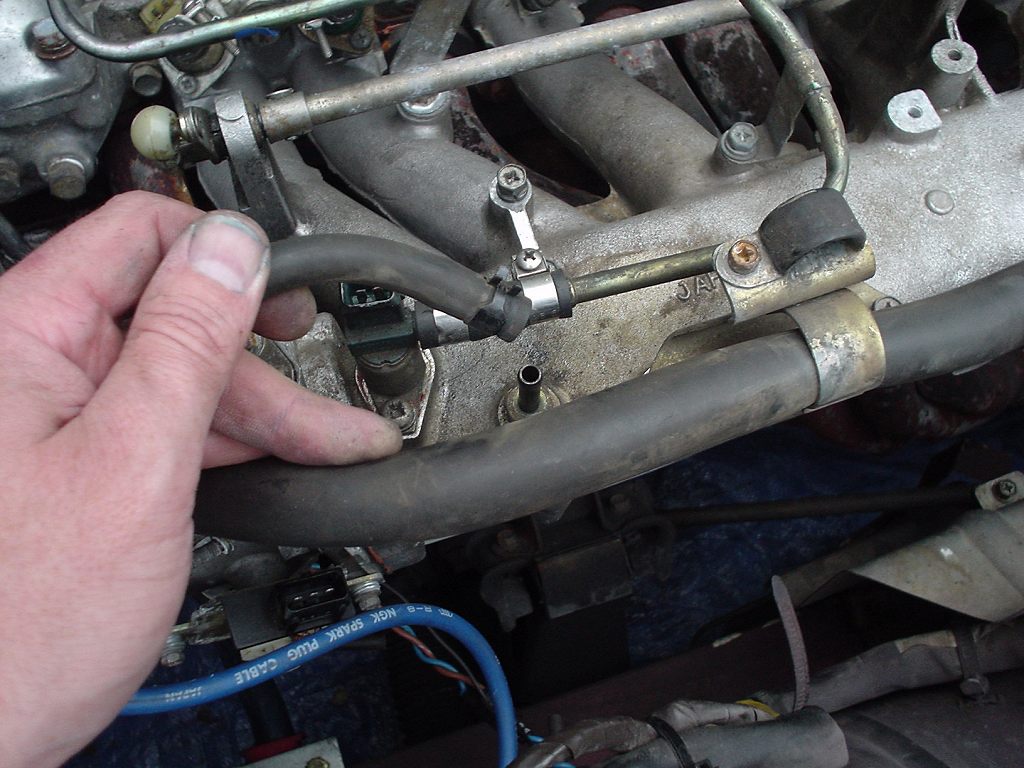
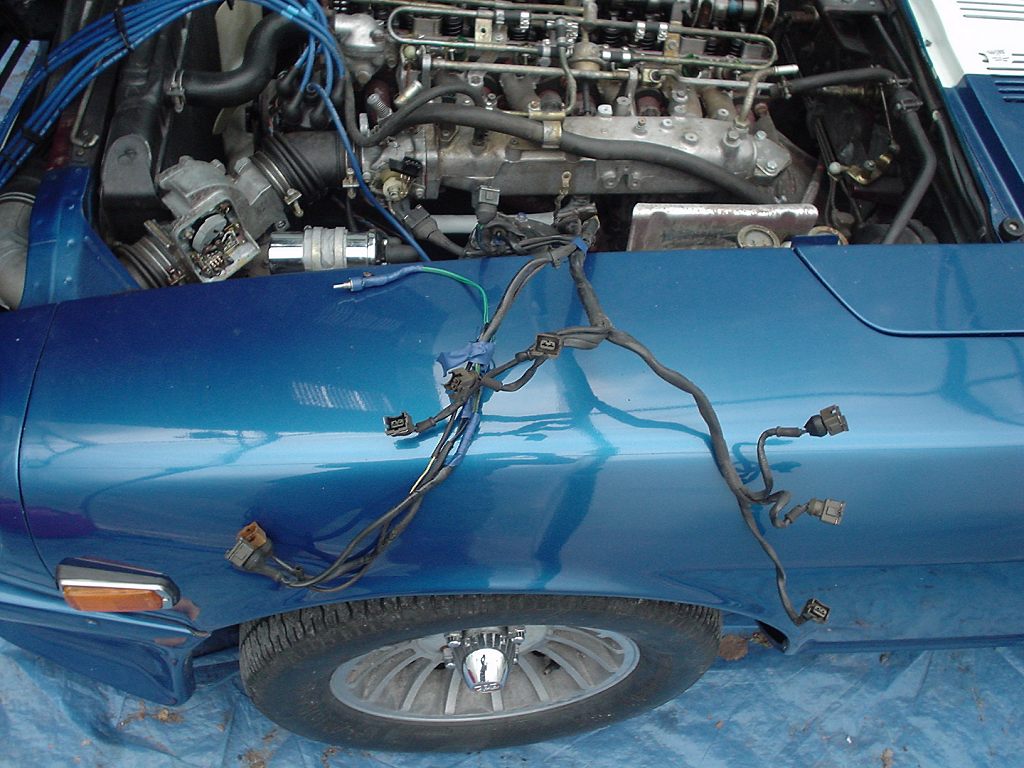
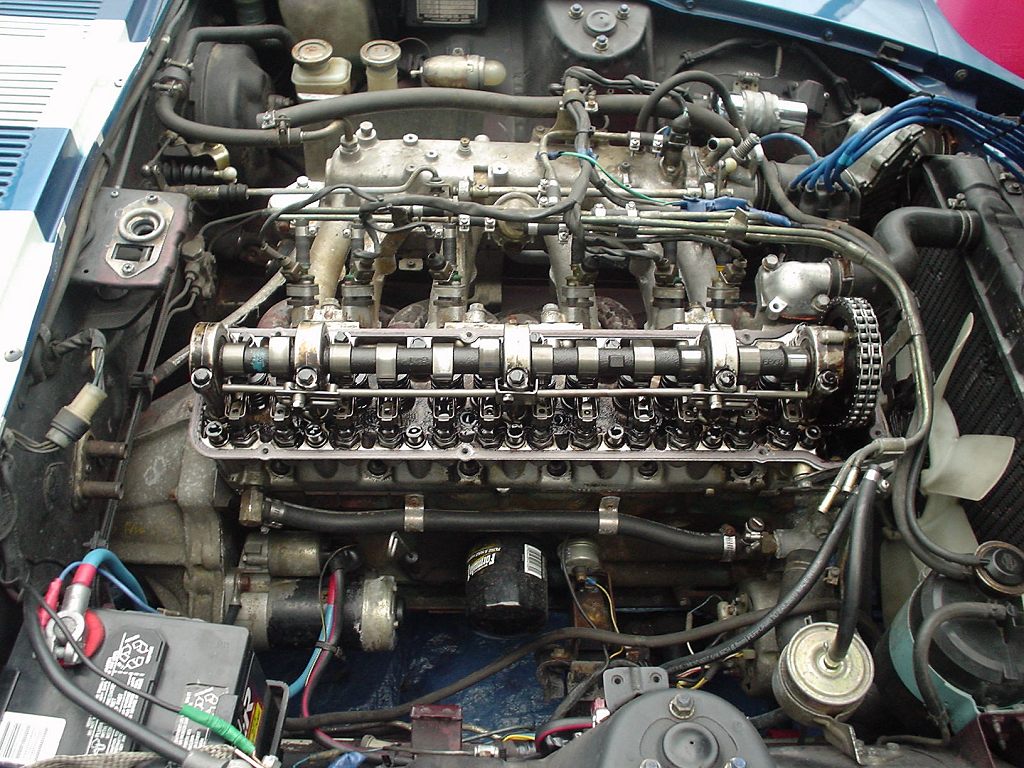
21 Underneath intake manifold are nuts and washers that secure both the intake and exhaust manifold. Remove these common nuts and washers. My Z has a header so it looks different from stock in these photos. Prepping the hardware with penetrating oil the day before helps ensure that nothing breaks. You can wrap your arms around the manifolds and attack these nuts from underneath with just small hand tools. 22 2nd verse same as the first 23 ditto 24 This is intake runner #6. The photo is 180degrees rotated. Don't drink and document. 25 Disconnect fuel rail from head at front of head. 26 Disconnect fuel rail from head at front passenger side of head. 27 Double check that nothing will snag then pull off the intake manifold 28 Loosen nuts and remove exhaust manifold. 29 Loosen nuts and remove exhaust manifold. 30 Loosen nuts and remove exhaust manifold.


-
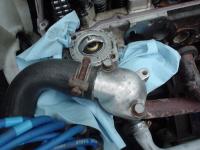
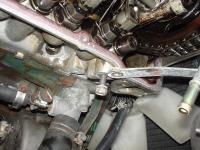
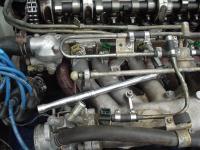
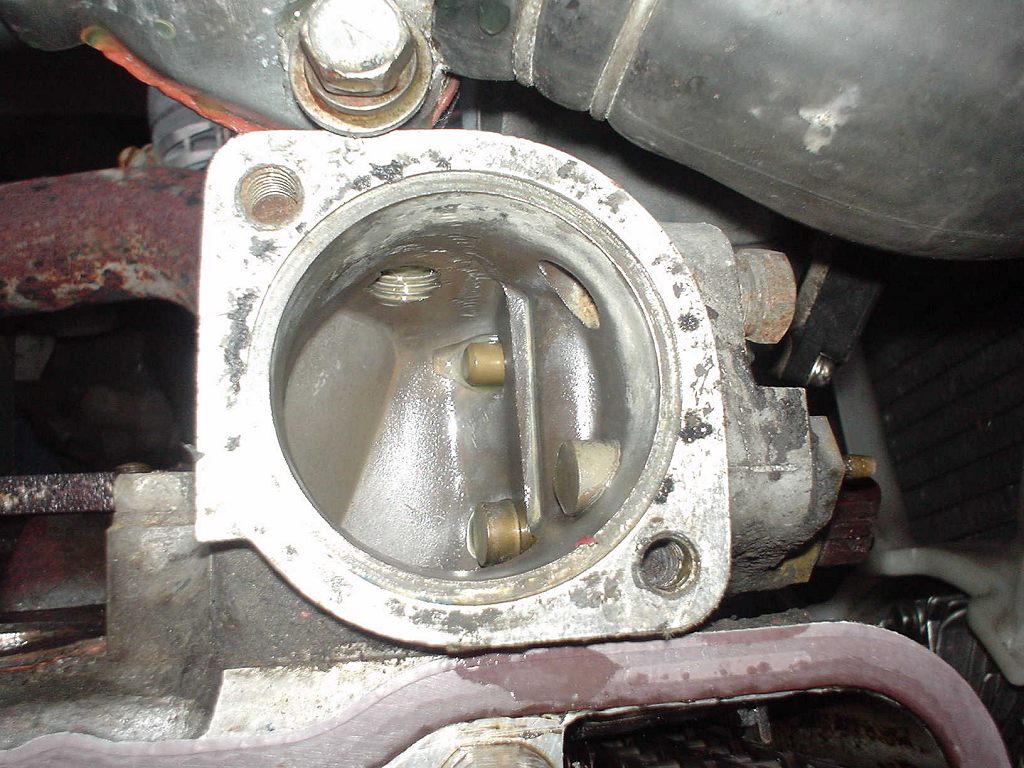
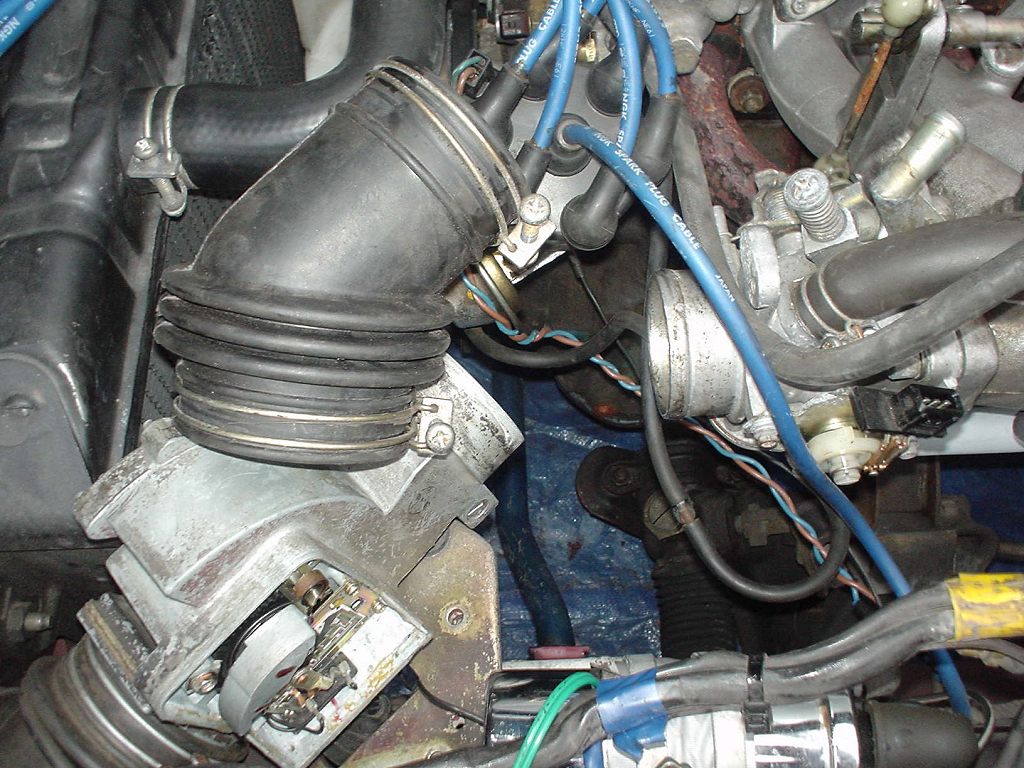
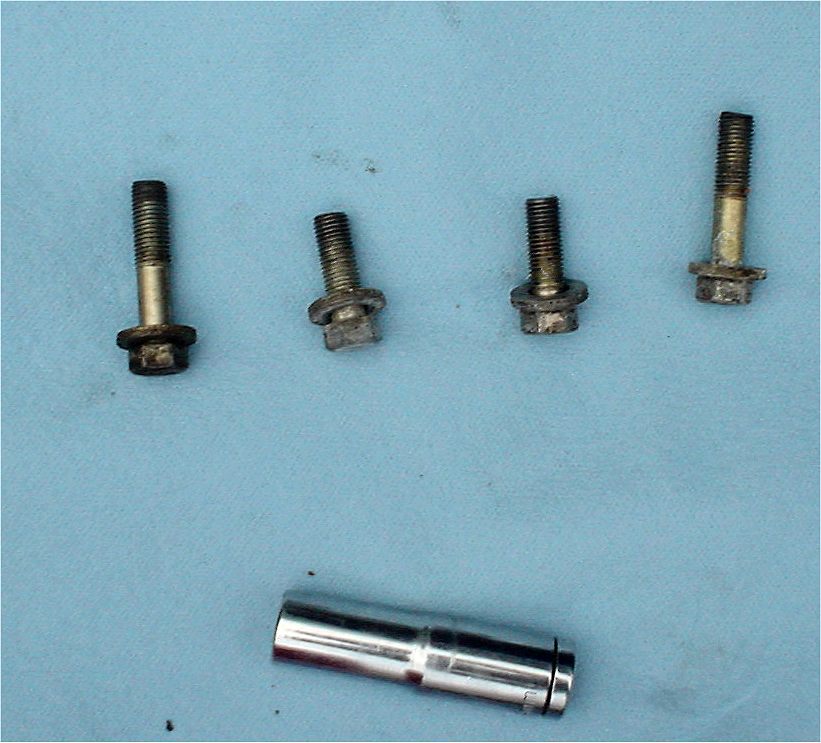
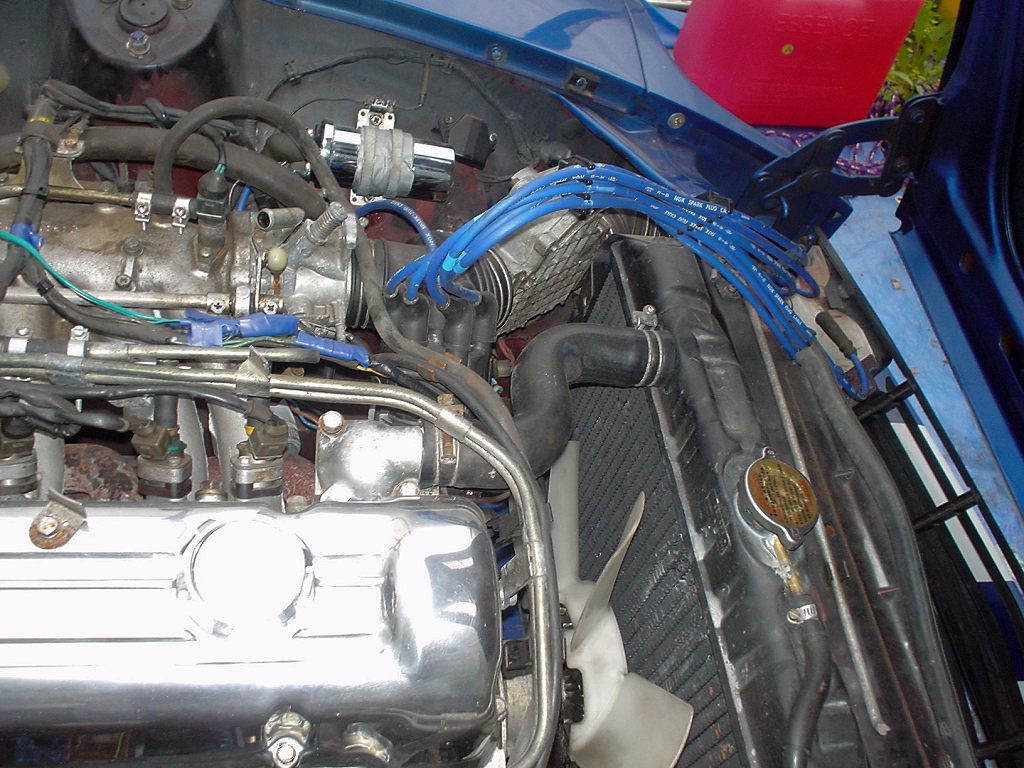
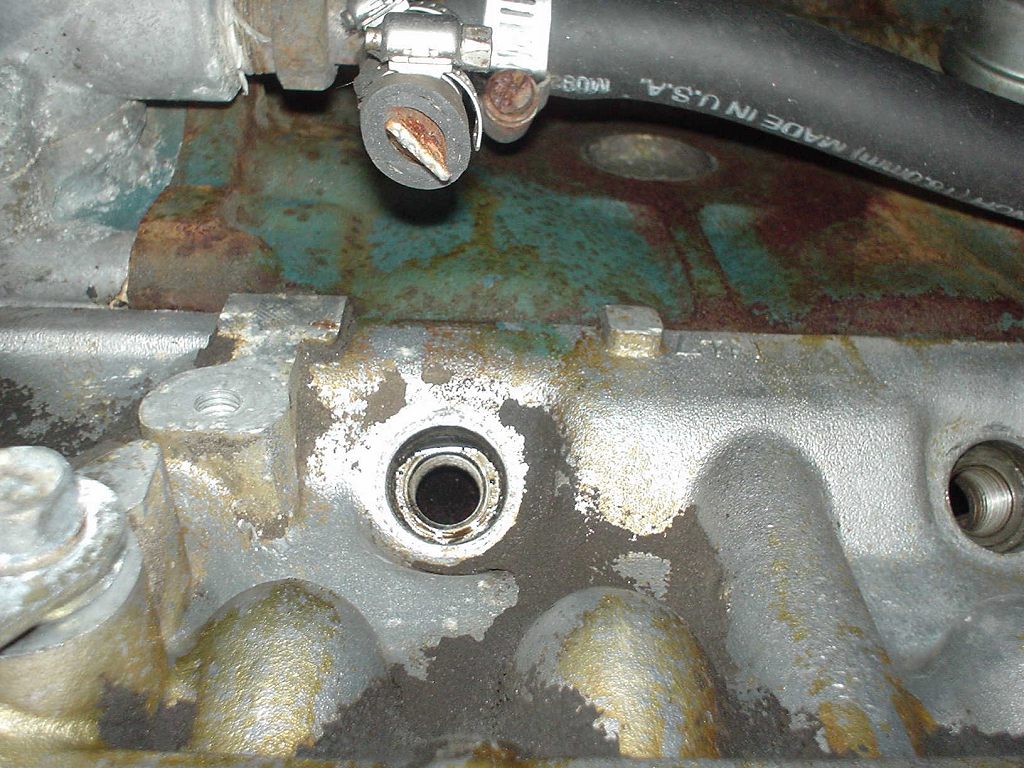
11 Piston #1 is at TDC. 12 Disconnect vacuum hose to brake booster. 13 Disconnect wiring harness to intake (fuel injectors, throttle valve switch, ground, sensors, etc.) and fold back out of the way. 14 Disconnect ducting to throttle valve. 15 Disconnect vacuum lines to throttle valve. 16 Disconnect vacuum lines to intake. 17 Disconnect throttle linkage. 18 Remove 4 upper bolts holding intake to head. 19 Upper intake bolts and size differences. 20 Disconnect PCV hose to intake (under manifold).


-
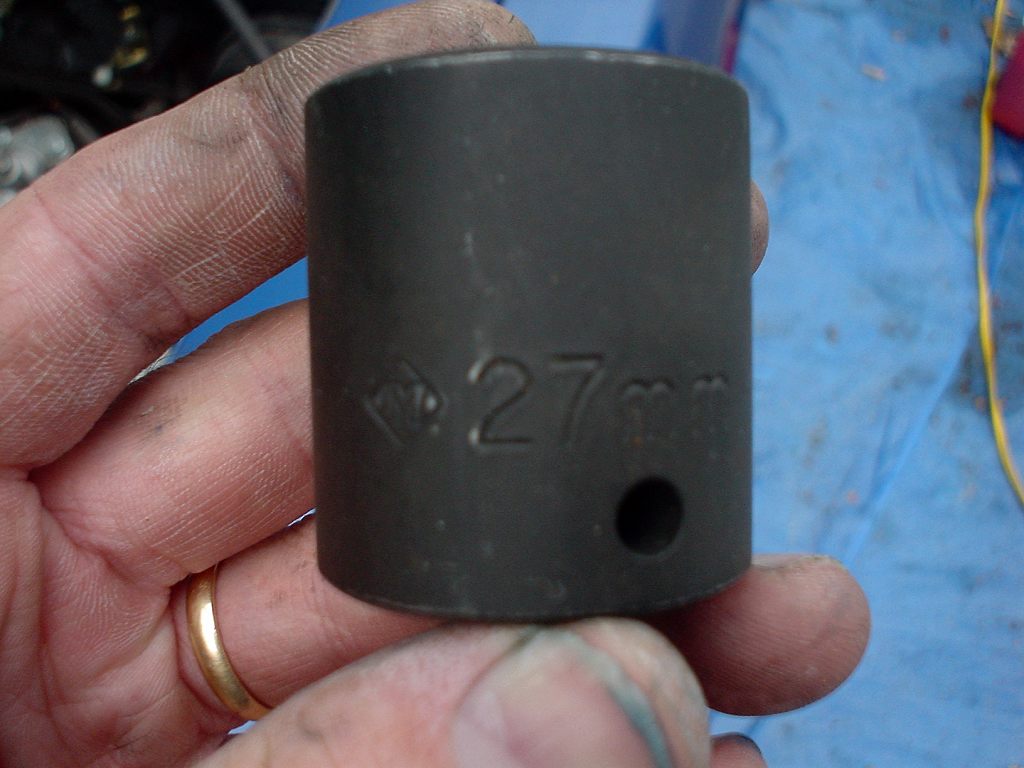
\ 1 Disconnect spark plug wires and fold back out of the way. 2 Remove spark plugs. 3 Disconnect fuel lines (send and return) at fuel rail near front of the head. Observe all high pressure fuel safety precautions. 4 Disconnect valve cover vent hose. 5 Remove valve cover. 6 Put transmission in neutral. 7 Use short 27mm socket to turn engine at crank. (when viewed from standing in front of car, turn crank clock wise) 8 Turn until timing mark on damper is lined up with "0" mark on timing gauge. This is top dead centre * 9 In cylinder #1 at front on engine, the piston top should now be visible through spark plug hole (flashlight or pokey screw diver can verify) 10 Since the piston #1 can be at its highest position two times in the 4 cycles of the engine, we need to make sure the head's cam and piston is at the top of the compression stroke rather than at the top of the exhaust stroke. An easy way to tell is by looking at the cam lobes for cylinder 1. They should both be upward.


-
I just cleaned up photos giving step by step removal of 77 280z. I will post tomorrow...1am here now.
-
Looks like you can get one here: The site does not seem to have Z's so I entered a 280zx automatic (which I believe has an R180 differential) http://www.nissanpartszone.com/online/Page_Cart/ListShoppingCart.aspx?previousURL=(%2fPage_Product%2fPartDetail.aspx%3fModelName%3d280ZX|ModelYear%3d1979|ModelSeries%3dS130|FileType%3d268|SelectConditions%3d(1%3d2S%3b2%3dL28E%3b3%3dJ%3b4%3dAT%3b5%3dF3%3b6%3dC%3b7%3dFED%3b)|ShowConditions%3d(1%3d2S%3b2%3dL28E%3b3%3dJ%3b4%3dAT%3b6%3dC%3b7%3dFED%3b)|seeDesc%3dFalse|goBack%3dTrue|SectionNo%3dF|ComponentsNo%3d380|ComponentsIndex%3d15)
-
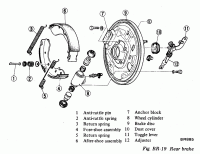
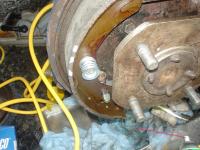
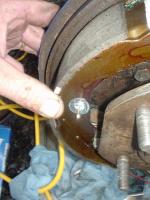
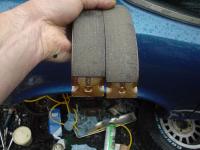
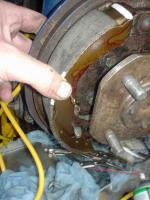
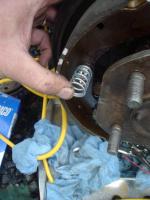
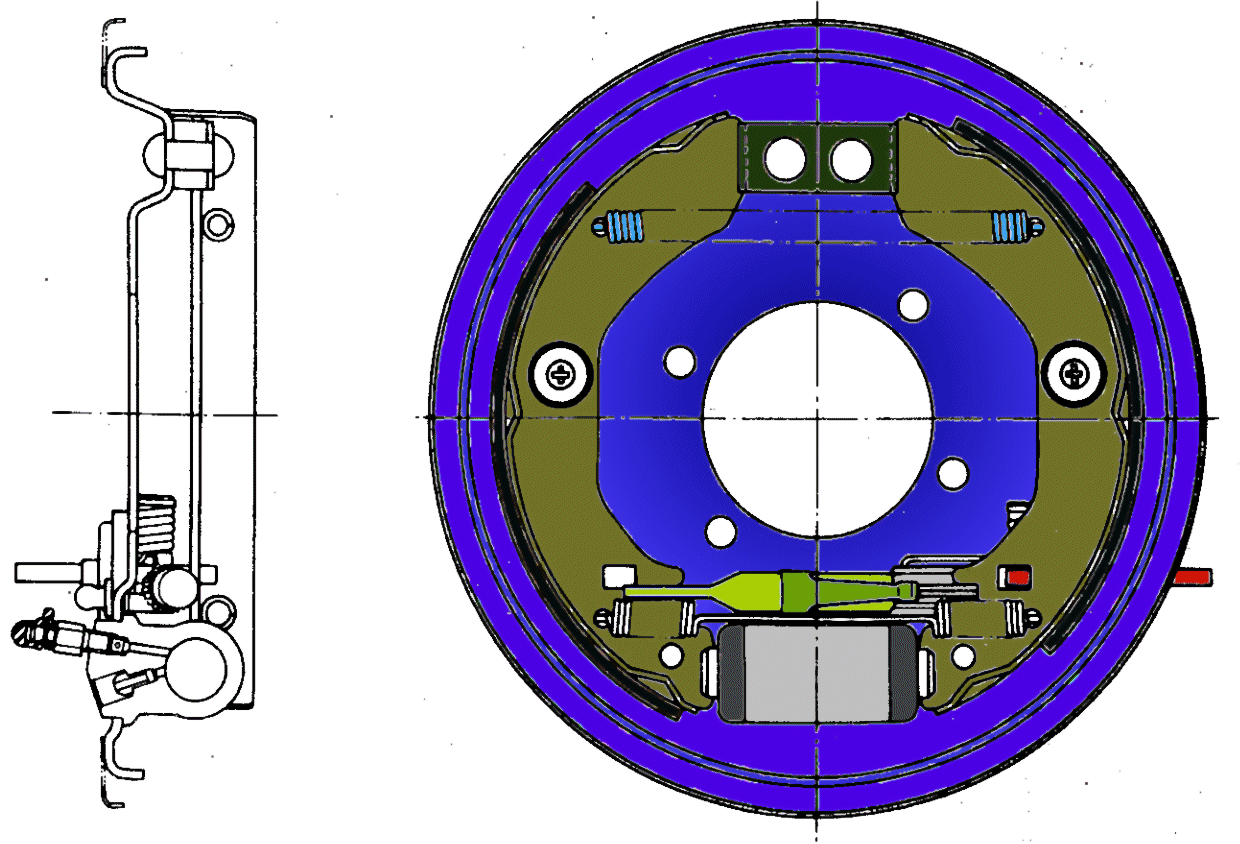
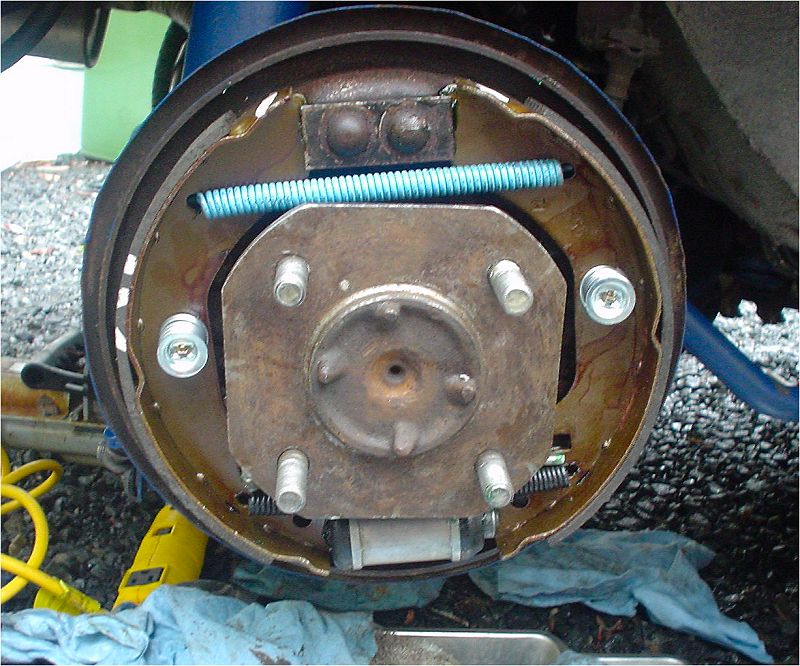
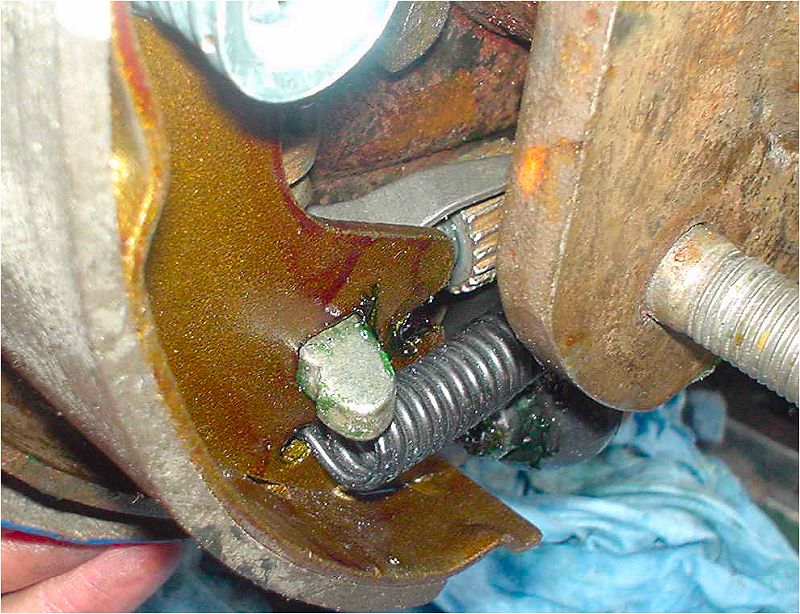
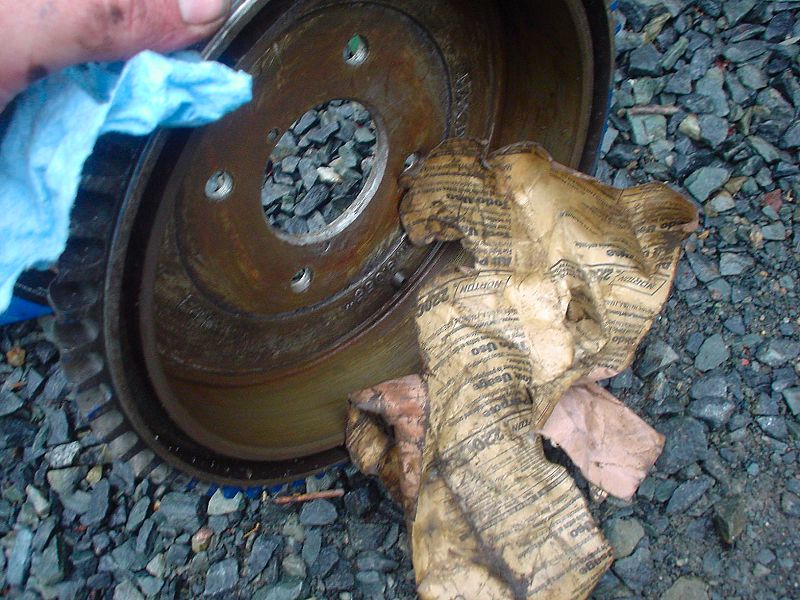
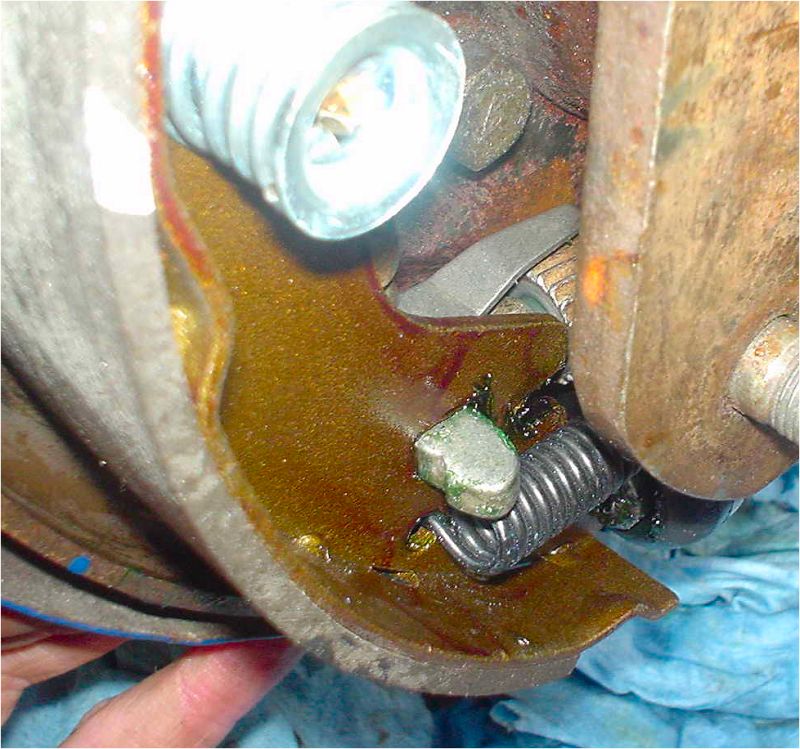
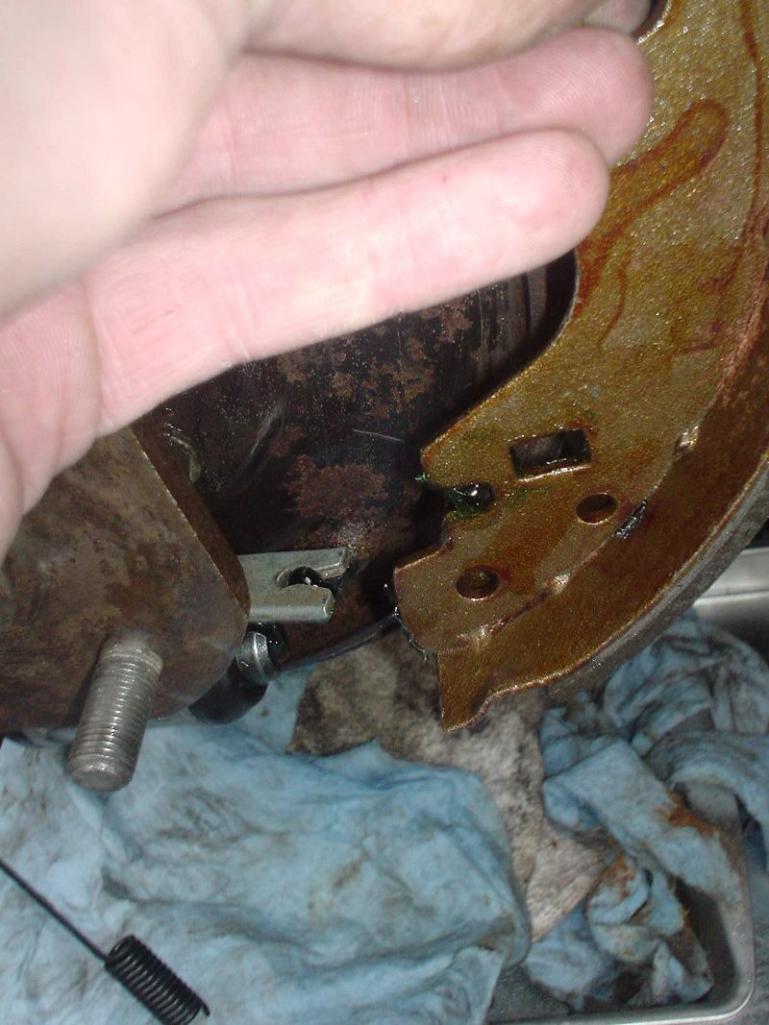
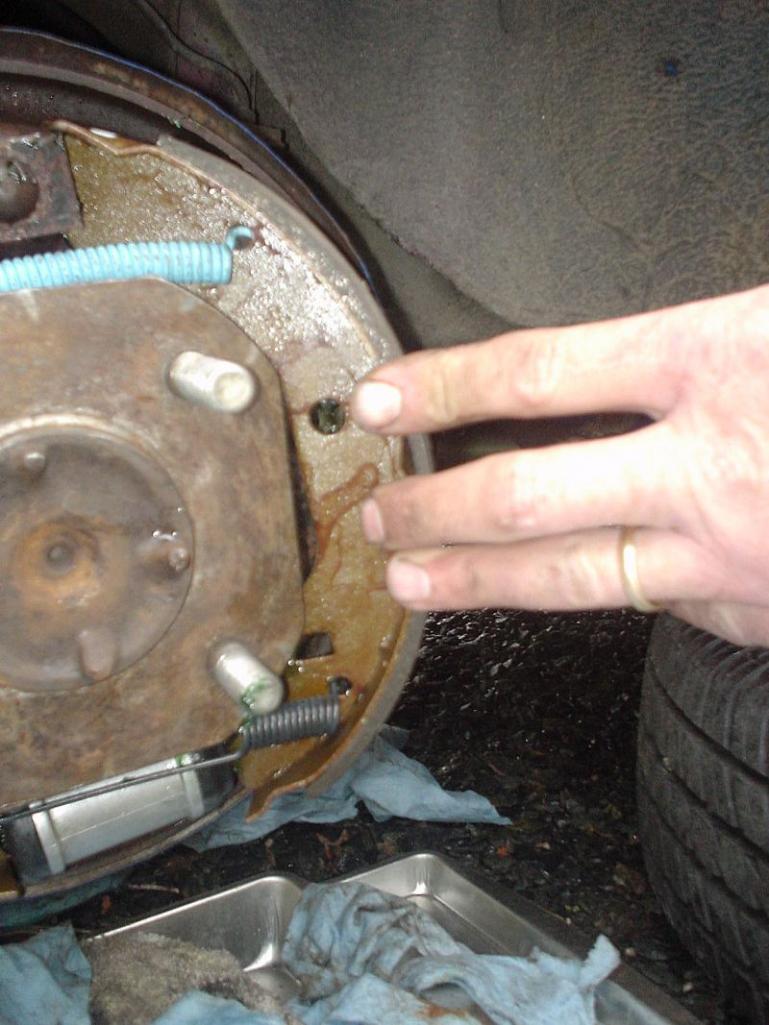
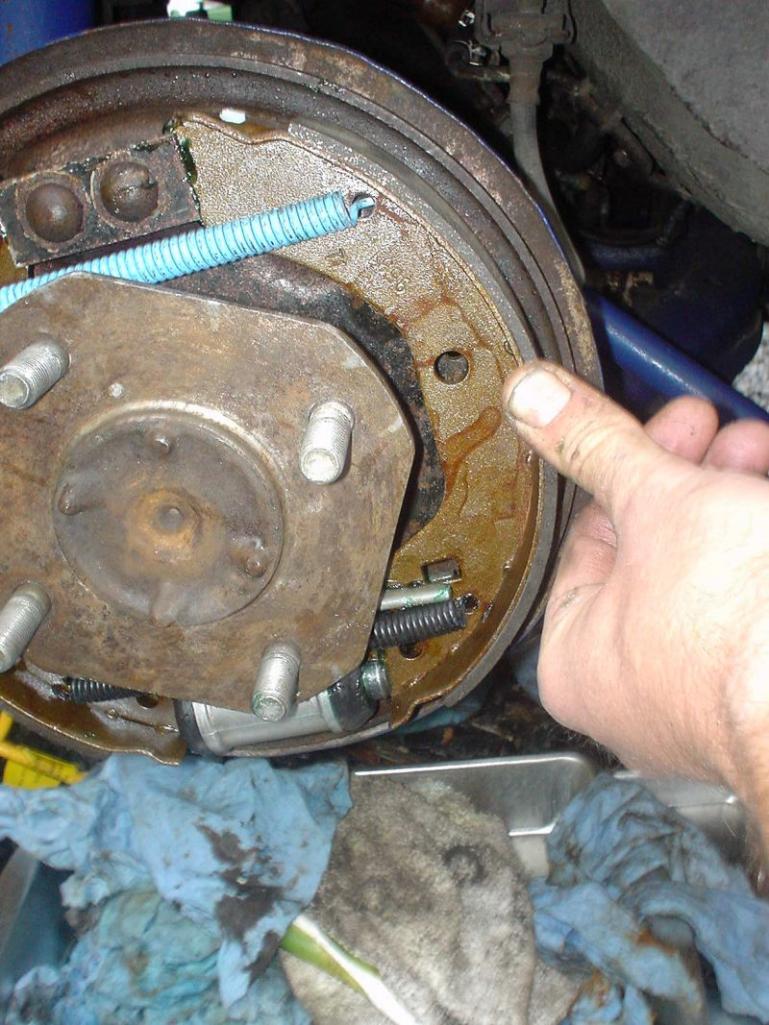
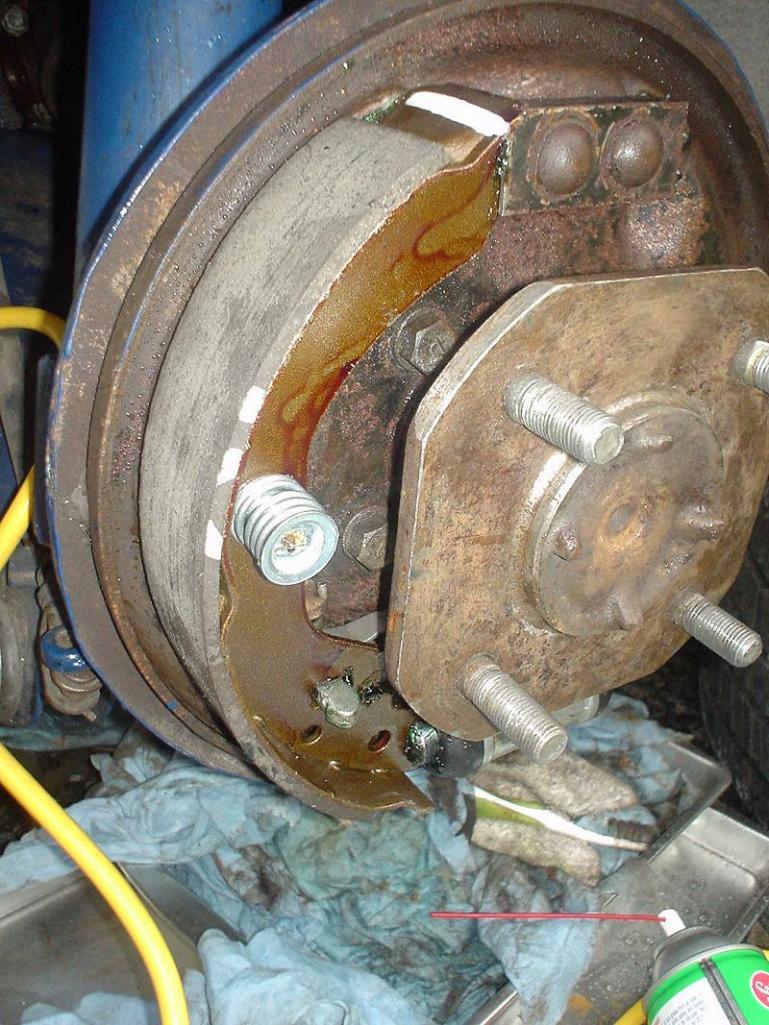
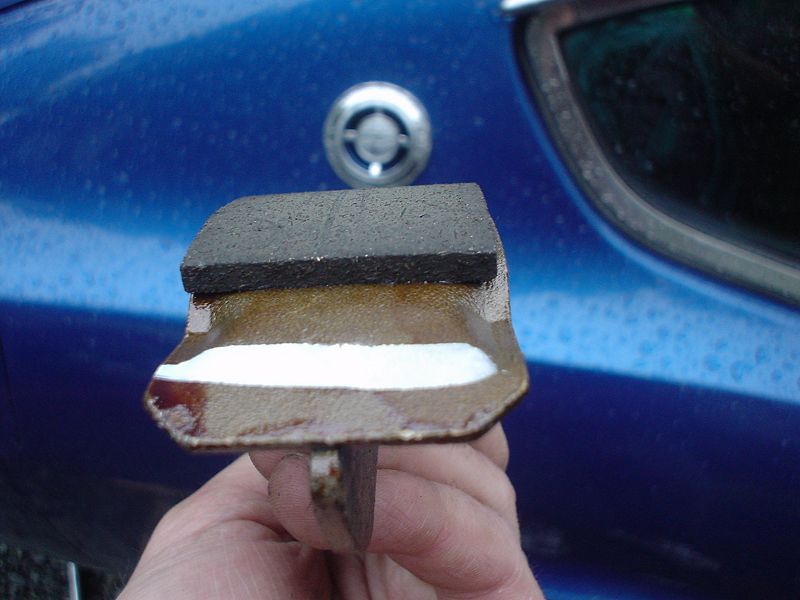
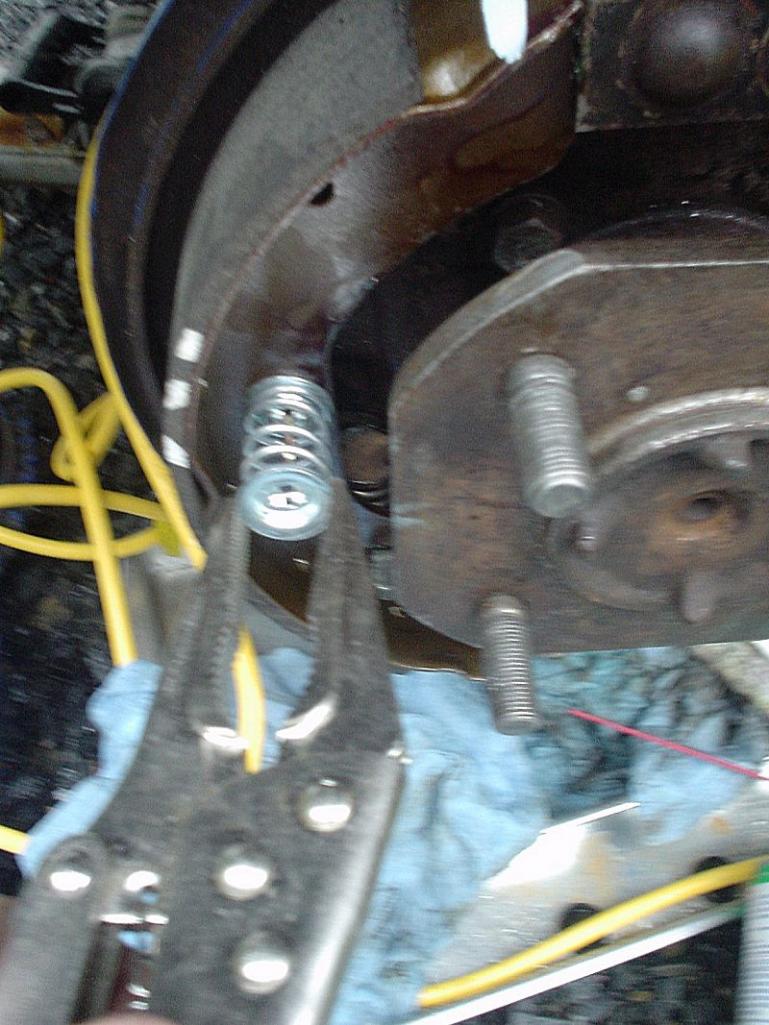
Note where the liner starts on the front and rear shoe. (The front shoe is on the left)

-
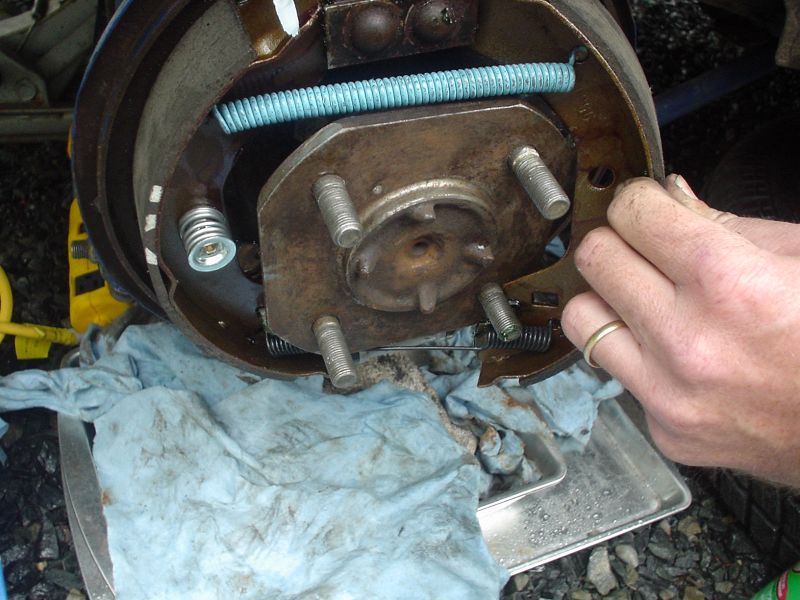
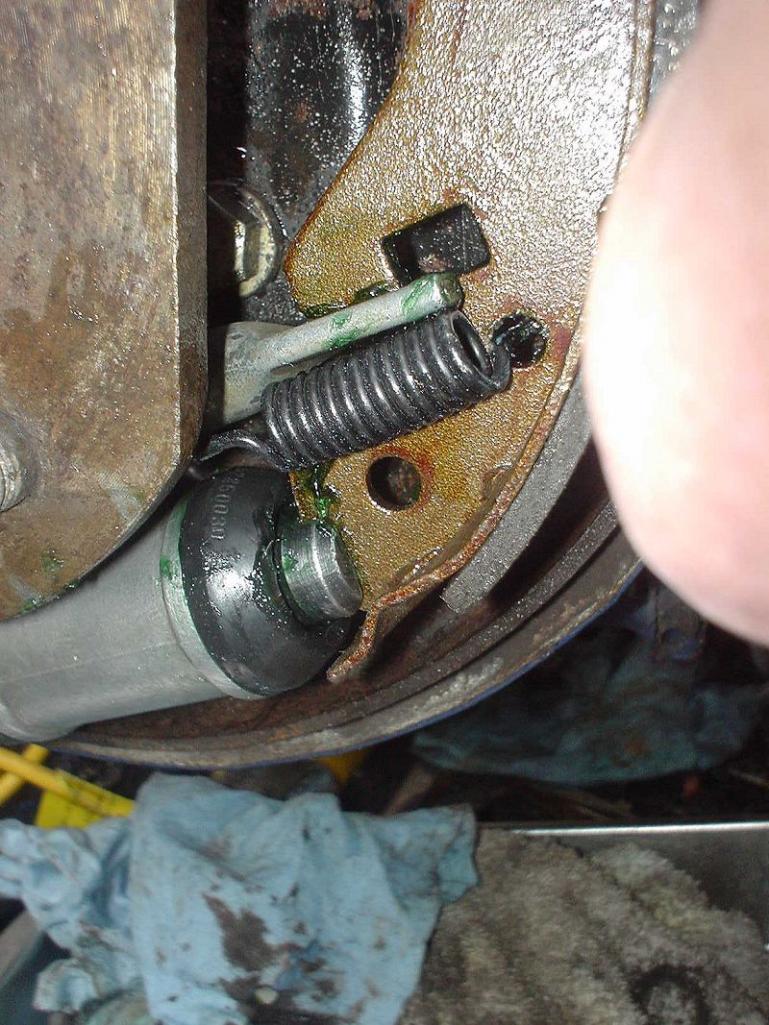
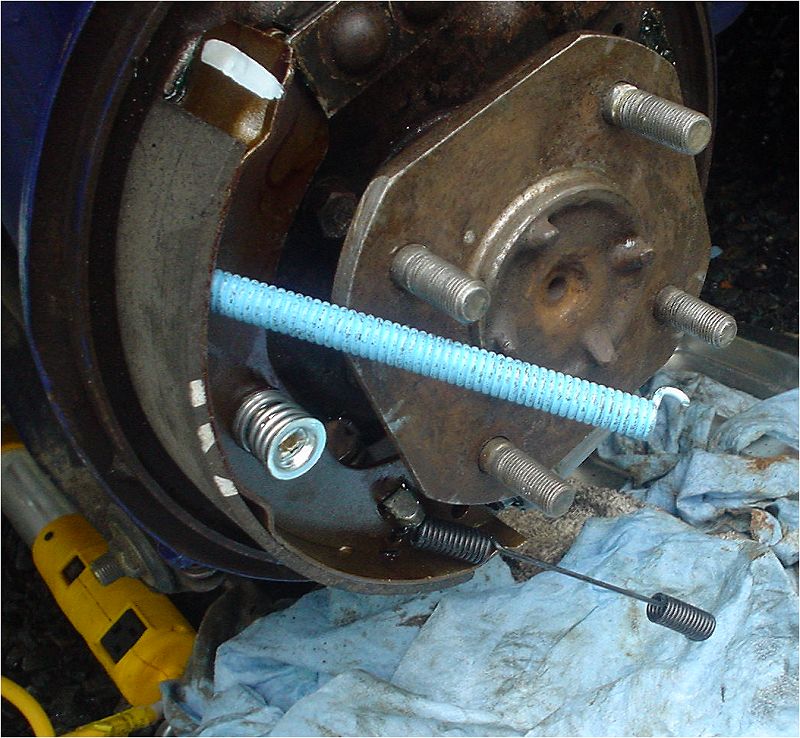
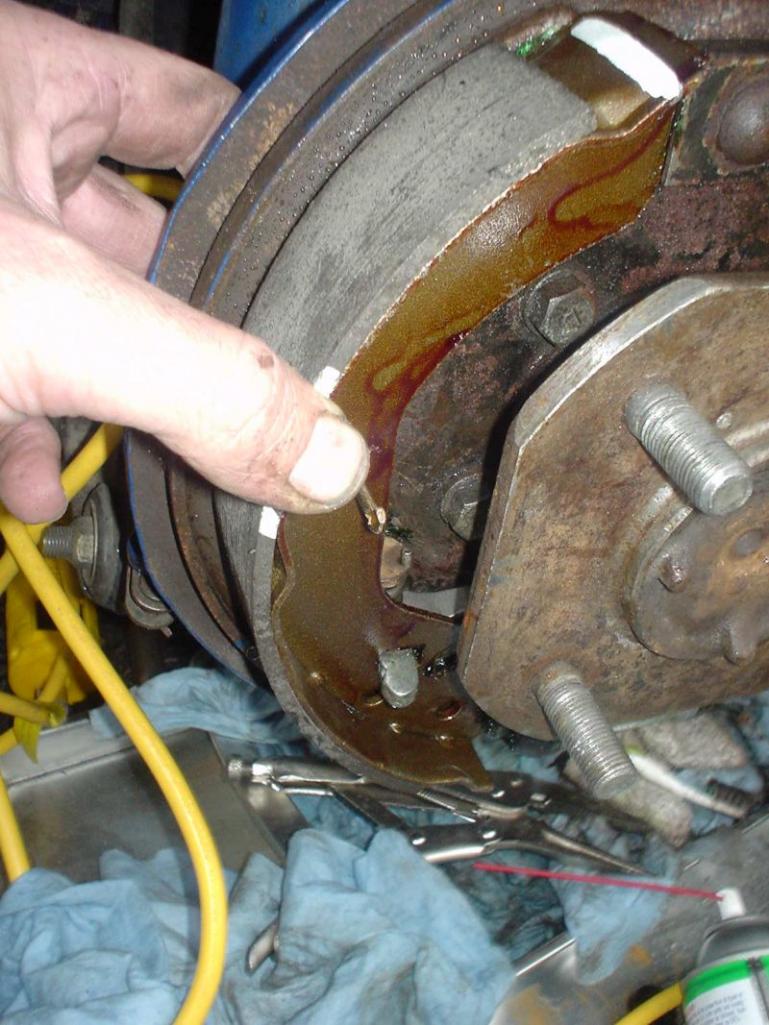
Front shoe on right and rear on left


Important Information
By using this site, you agree to our Privacy Policy and Guidelines. We have placed cookies on your device to help make this website better. You can adjust your cookie settings, otherwise we'll assume you're okay to continue.