ChrisA
Free Member
-
Joined
-
Last visited
Everything posted by ChrisA
-
 I went to Hooters in Tittsburgh once!! Chris
 -
Hey Bill, you want to respond to this one? Or do you want me too? Chris
-
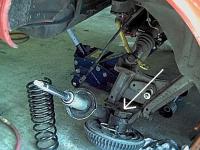
Larry, there is a locating pin in roughly the center of the rear spindle pin(your first picture). It holds the pin in the control arm. Did you remove it first? You must remove it to get the long pin out. If you did, then you are fighting the same thing that most Z owners fight. The spindle pin is a pain to get out sometimes without mushrooming the ends. If you search the forum's you will find many references to removing it. I made a tool from some specs Beandip (Gary) gave me. It makes the job easy. If you thread the nut on about half way and hit it with the right sized drift in an air hammer you can get it to slide a little which might loosen it up to come out all the way. On the front bolt, just hammer it out. You can get new bolts for that. Much luck to you, Chris
-
When my Dad and I rebuilt his 72 Cutlass engine, we relied on the knowledge of Joe Mondello. Most folks in the Oldsmobile circles know of him. His reputation speaks for itself. If he says "use wd-40 on your ball hone" then that's good enough for me. No different than using any of the advice from this group. No disrespect intended. Just facts you can use. Chris
-
Ditto, when I was younger and thought I could just look at something and take it apart I ruined a stub shaft. With a 1" impact gun, the nut comes off really quick but like Panchovisa said, I ruined the end threads on the stub shaft to the point where the new nut would not go back on. DUMBASS!!!! Chris
-
Any time you install new piston rings you need to hone the cylinder walls to break the glaze in order to allow the new rings to wear in and seat properly to minimize oil consumption. The hone has a flexible drive shaft and is typically driven with a 3/8" electric hand drill at speed under 1000 rpm. A pro shop might use a hone in a drill press to run it as straight as possible and to have better control over axial motion to produce a cross hatch pattern on the cylinder wall. If the cylinder is fairly clean and not significantly scratched you could use a flex hone (often called a ball hone) to break the glaze and remove minimal material. These are quick and easy to use but need to have a fairly close match to the bore size. If it's smaller than the bore it won't work. If it's much larger than the bore it will be difficult to keep the balls inside the cylinder with close approach to the ends of the bore. If you have more than one bore size to work with you need multiple tools. If the cylinder wall is slightly scratched, and you need to remove a little more material to get it to clean up, then the flex hone is not the best tool. It can remove material more in the middle of the bore and less at the ends, therefore causing the bore to be less straight. Use it almost dry or the balls will clog, you can use a little WD-40 as lubricant that's my own experience talking. The articulated three stone hone is a more universal cylinder tool. This may have a much greater working range to work with small bore and large bore engines, so you only need one hone. It should also help to keep a more constant bore size (straighter cylinder) when removing a little more material to clean up a slightly scratched cylinder. An abrasive hone is subject to wear as it is used, so the abrasive may need to be replaced occasionally (maybe every 30 to 50 cylinders or so). The straight stones are cheaper to replace than buying a new flex hone. If you like to use various grit grades, the straight stones are also fairly easy to change, as opposed to buying multiple flex hones. With any honing process some of the abrasive grit wears off of the tool at the same time that fine metal powder is bring removed from the cylinder bore. This stuff is VERY bad for an engine if it is left inside. So it is best to do this honing on a completely disassembled and bare engine block, and clean it thoroughly before assembly. It is possible to hone cylinders with an engine still in the car and partially assembled. If you do this, pay special attention to keeping the grit off of the crankshaft as well as possible, and do your best to clean everything thoroughly before reassembly. It would also be a good idea to install a magnetic oil drain plug, and to drain and change the engine oil soon after initial run in Much luck to you, Chris
-
Good going Mark! Nice job with the jig/rig. Chris
-
Larry, I might be wrong on this but I thought you had to remove the peening or you would destroy the threads on the stub shaft if you back the nut off with a big gun. The peening is where the nut has been hammered down on the edges as a sort of locking method to prevent the nut from spinning off. It flattens the edge of the nut making it kind of square on a round shaft. Some of our engineers could probably get more technical. Chris
-
Larry, I drew an arrow to the location of the nut we're discussing. Chris
-
Edited your picture.

-
Luke, I'm your father! Might I suggest heating up the nut with a torch then trying your impact gun again. I have used this trick on many a stuck nut. Much luck to you, Chris
-
Here's a so-so link. http://www.midsouthvw.com/TechTips/GasTank.htm Chris
-
Thanks for that information Alan. Very nice. Can you tell us about the emblem that is centered in the grille? Chris
-
Can you please post a link to this car. Others may want to look at it. Thanks, Chris
-
That'll be 34D please!!!!! Chris
-
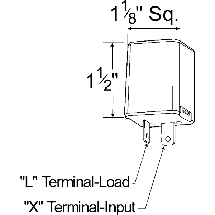
Hi Ed, Using a Grote 44530 flasher, I hooked the positive side of a 12 volt battery to one of the leads on a test bulb. The other bulb lead went to the X terminal on the flasher. Then a wire from the L terminal on the flasher goes to the negative side of the battery. The lamp flashed. Hopefully your flasher is marked like mine was. I can only assume this would work for you. Good luck, Chris

-
Yet another waste. Chris
-
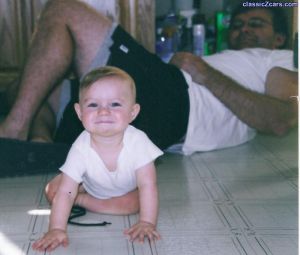 My boy Alex helping with the plumbing.
 -
 Most likely I was ordering Z parts!!
 -
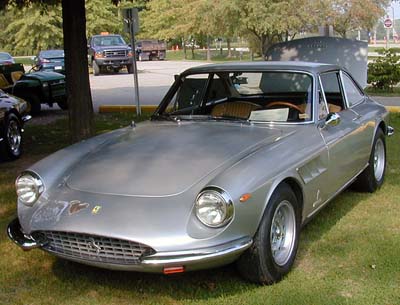
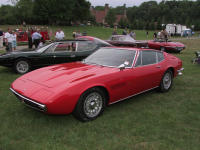
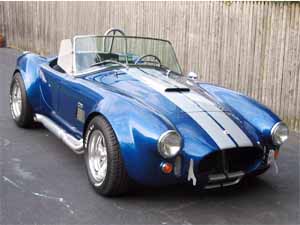
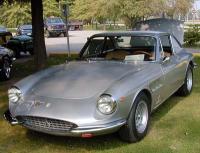
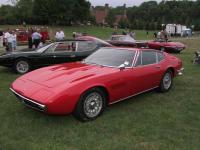
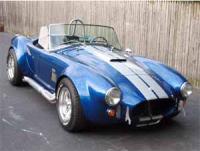
Here's some of mine. 1967 is the year. Ferrari, Maserati, Cobra Chris
-
Bill, Bill, Bill, you'd think having the fastest car in your town, you'd be more careful. Chris
-
Here's a picture of Bill Ramsey's 72 which has the 75 280Z seats. It used to be my car. You can clearly see the velour material in the picture. Those seats were original to that 280Z. Not arguing with anyone, just making it clear that apparently there was some differences in 280Z seats. http://www.classiczcars.com/photopost/showphoto.php?photo=13119&sort=1&cat=500&page=2 Chris
-
I checked this site and he said Z22E also. So maybe he and I are both wrong. He owned one, although he was 16. http://www.v6-s12.com/History.htm Chris
-
Hey Robb, welcome to the group and again, nice car! About your seats, I think those could be original. I pulled a set from a 75 280Z a few years back and they had a velour type material on them. Not to say yours weren't "recovered" but originally I think the 280Z was a little more plush. Some of the other members here will have a definite answer about that. Enjoy your car! Chris
-
I'm not sure on this but I believe the "NAPS Z" engine is what you're after. It was in some 200SX models in the 80's. Around 82-83 I think. Was called a Z22E if I recall correctly. Good Luck, Chris