inline6
 Subscriber
-
Joined
-
Last visited
Everything posted by inline6
-
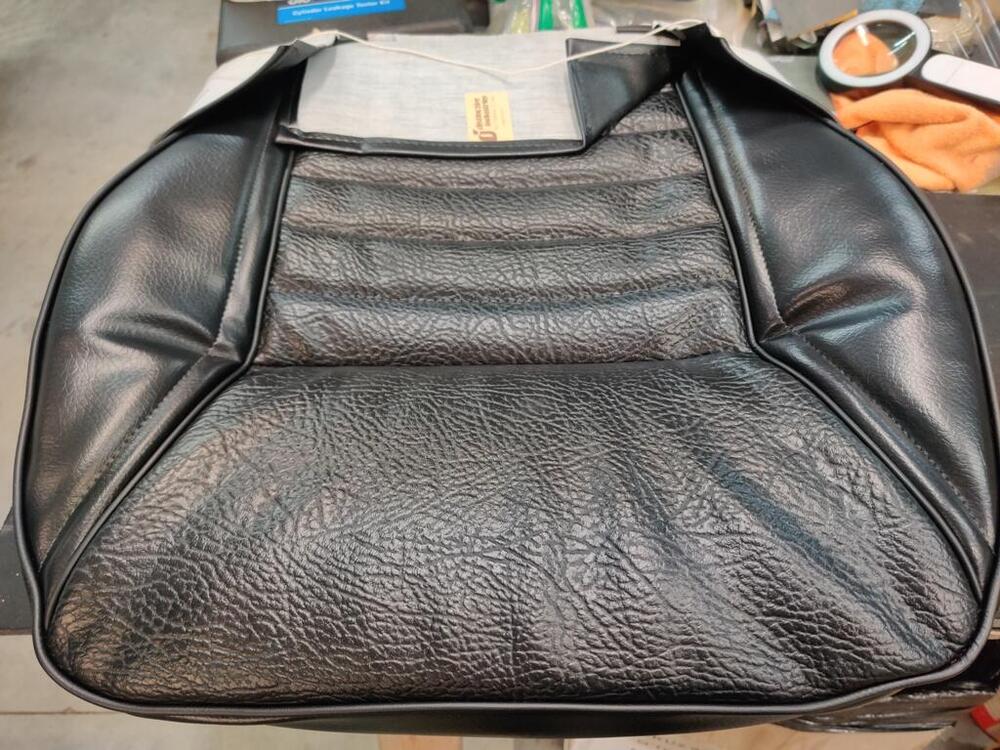
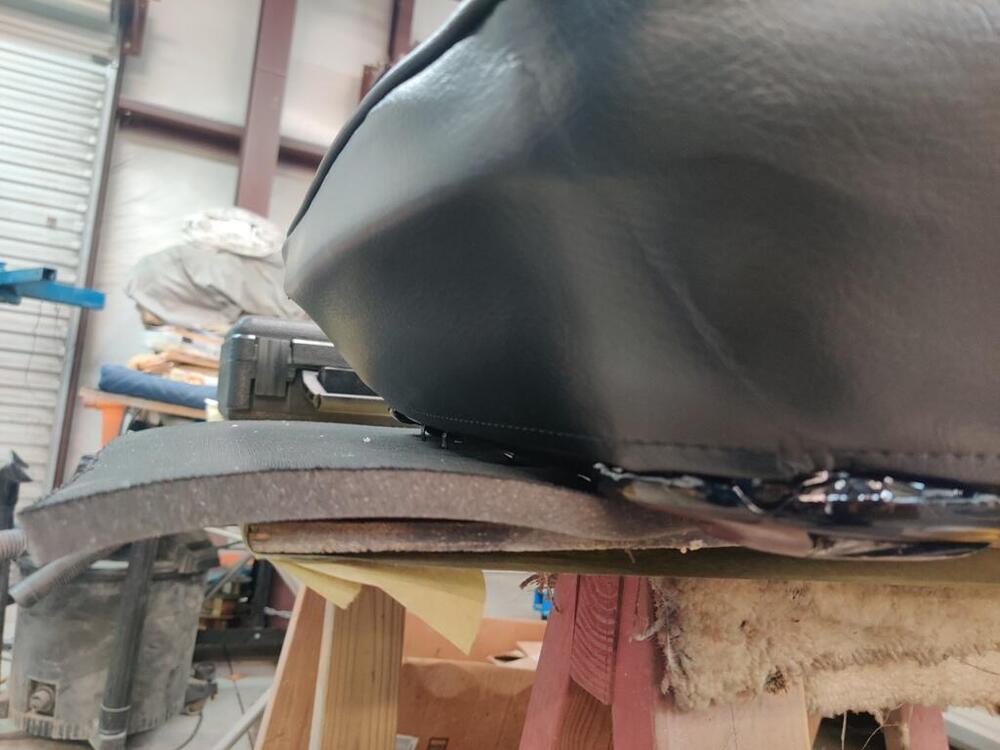
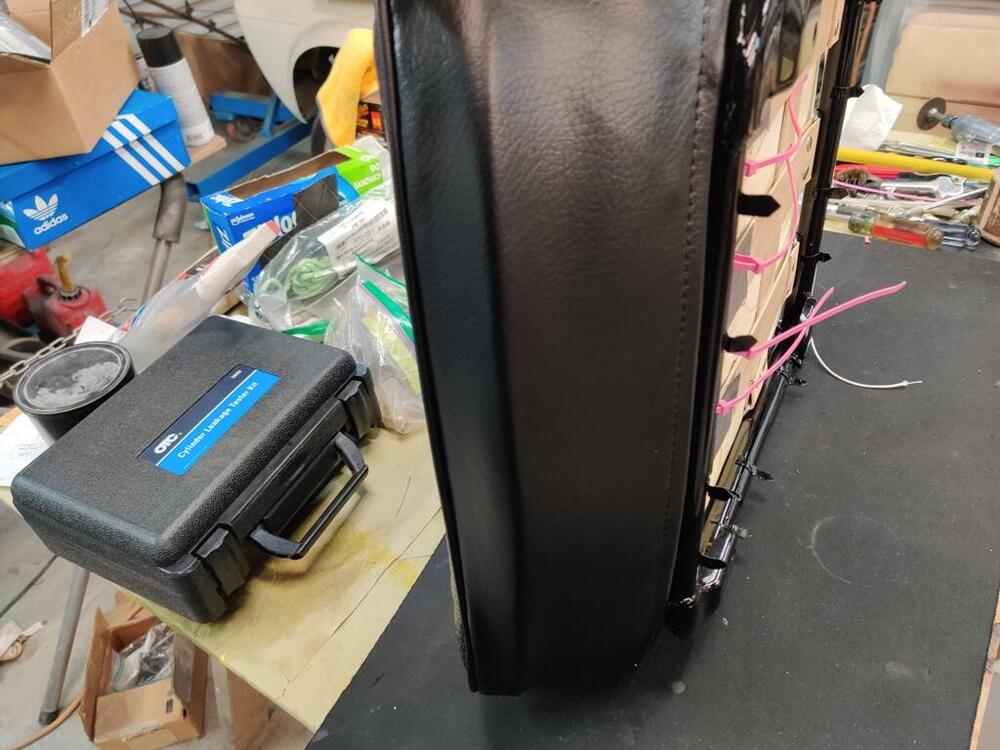
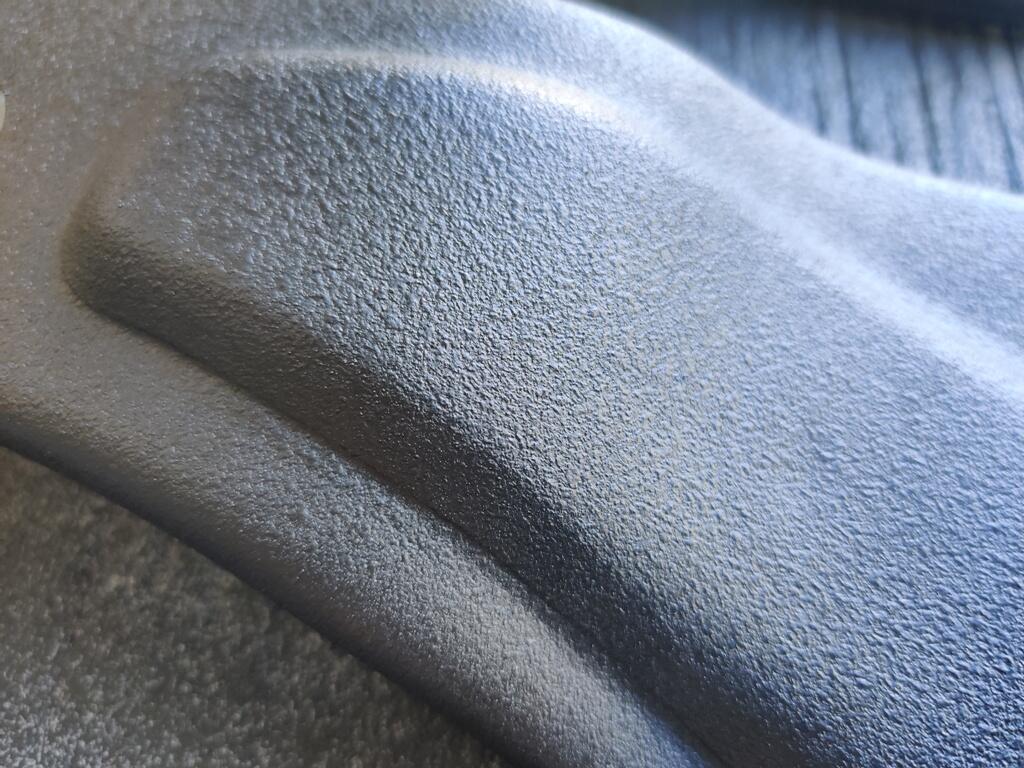
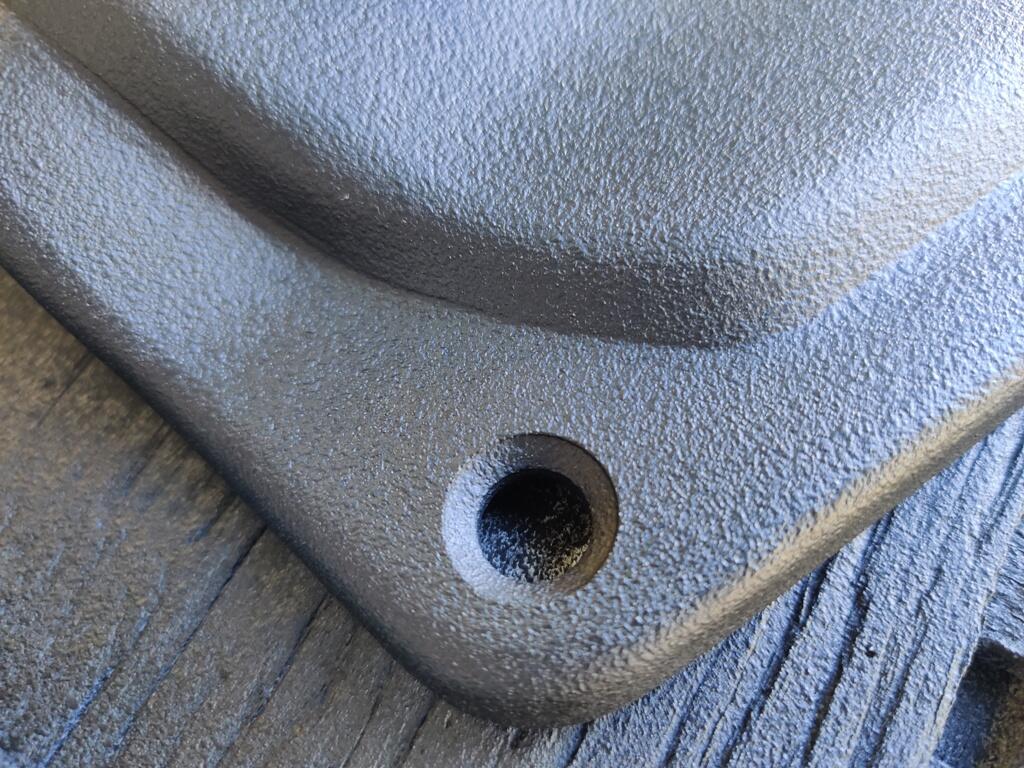
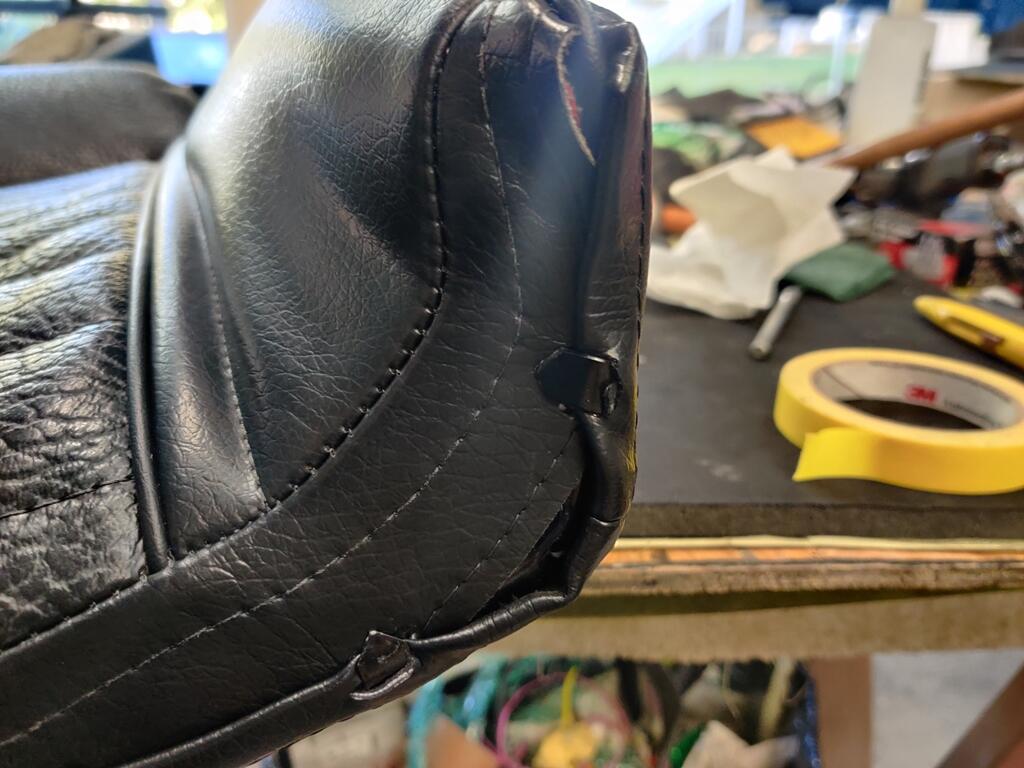
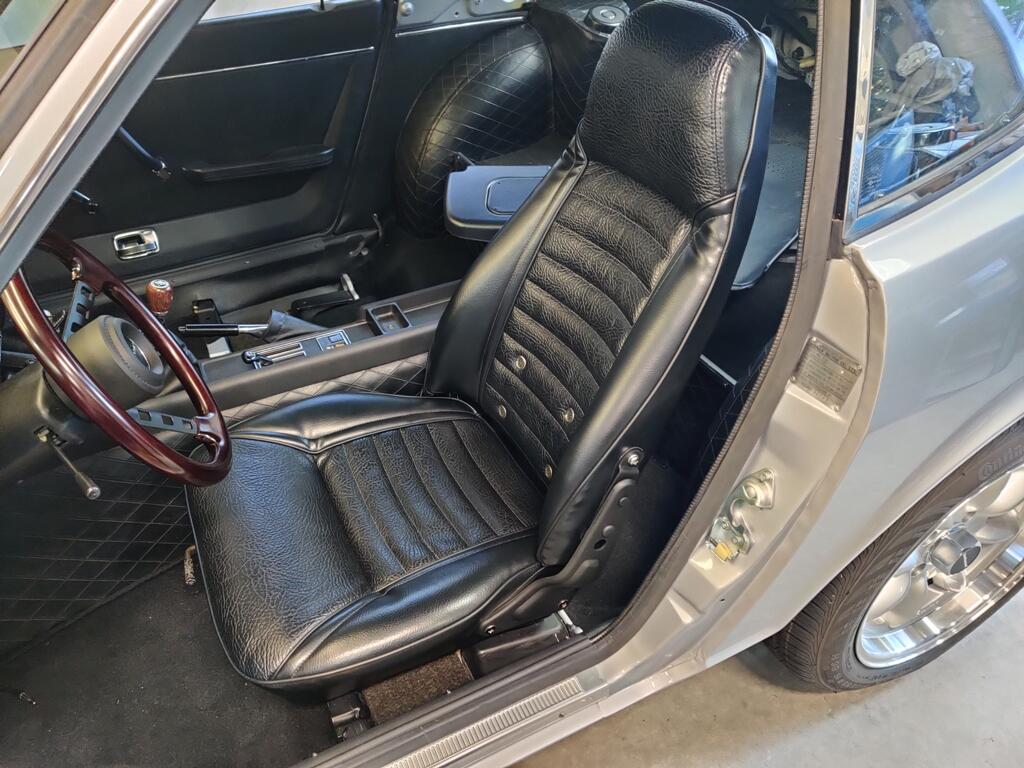
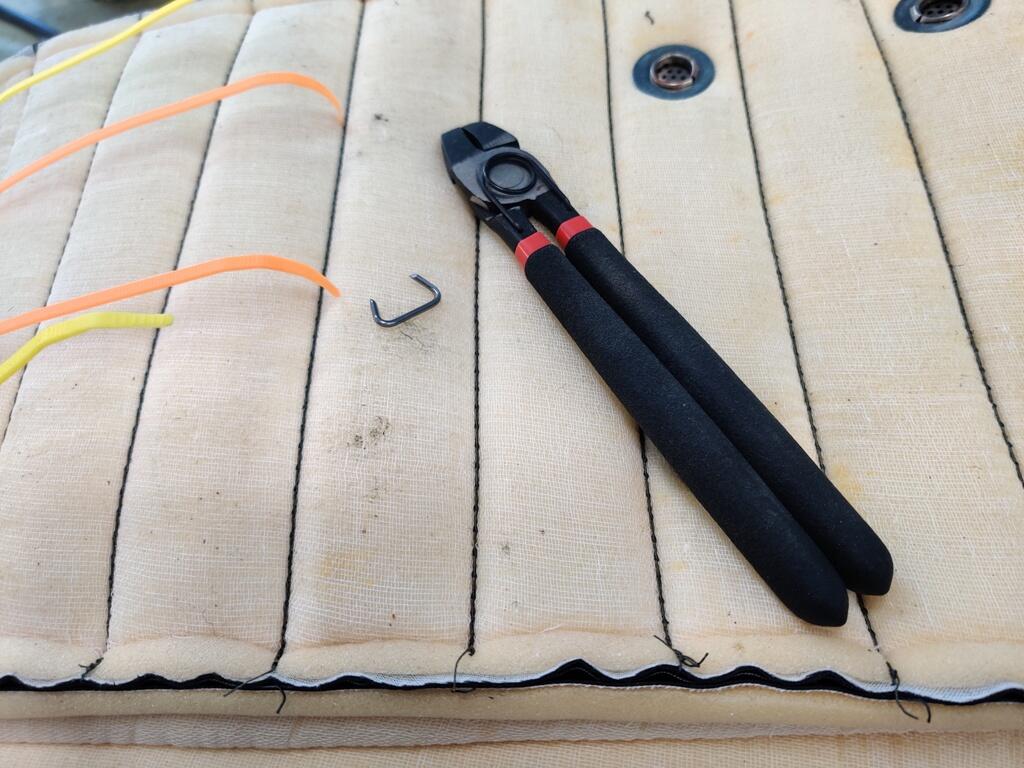
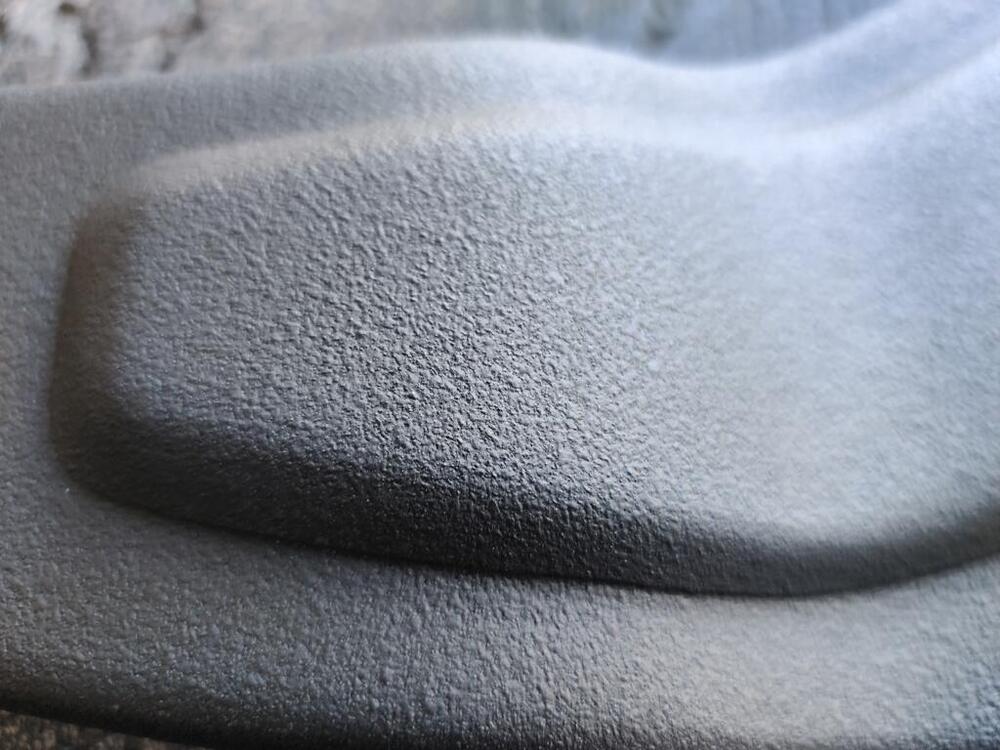
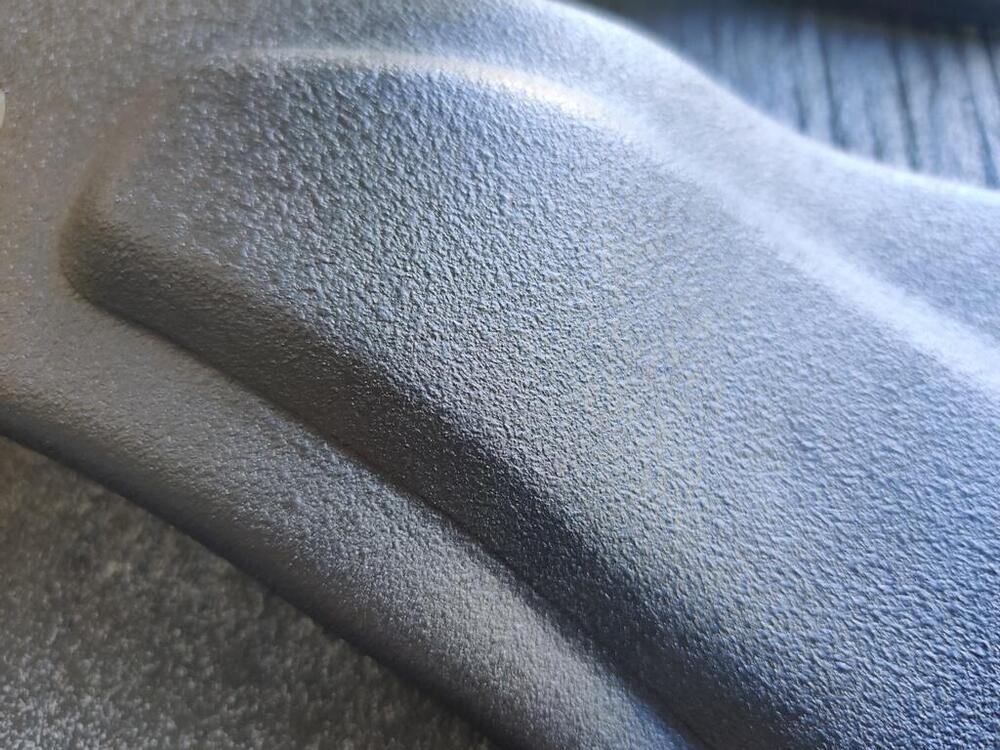
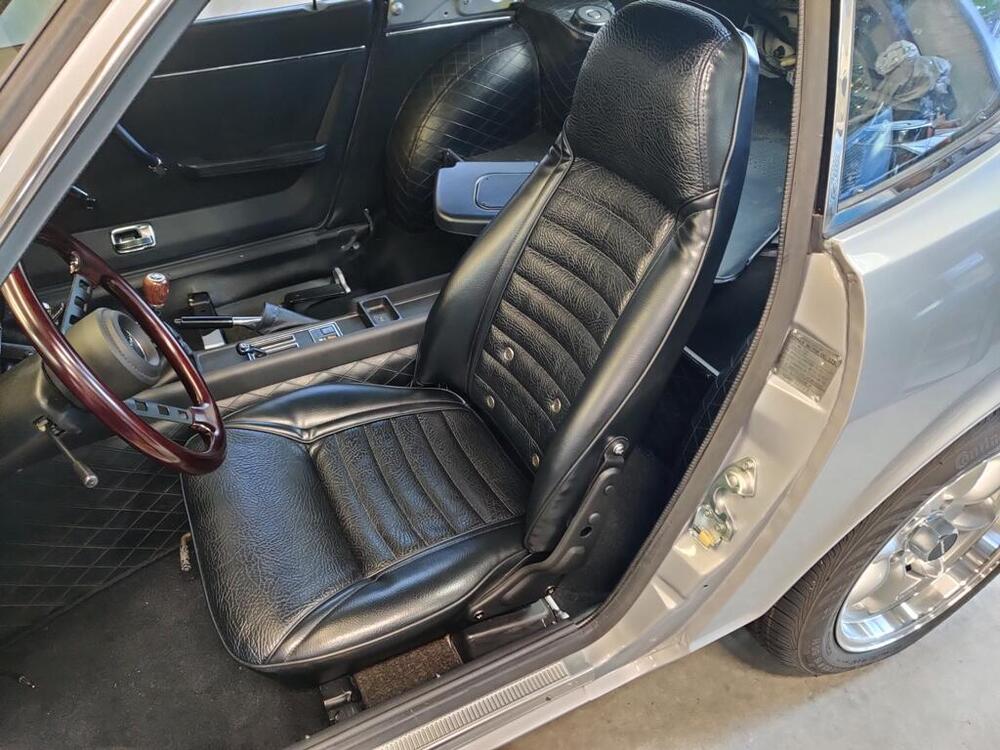
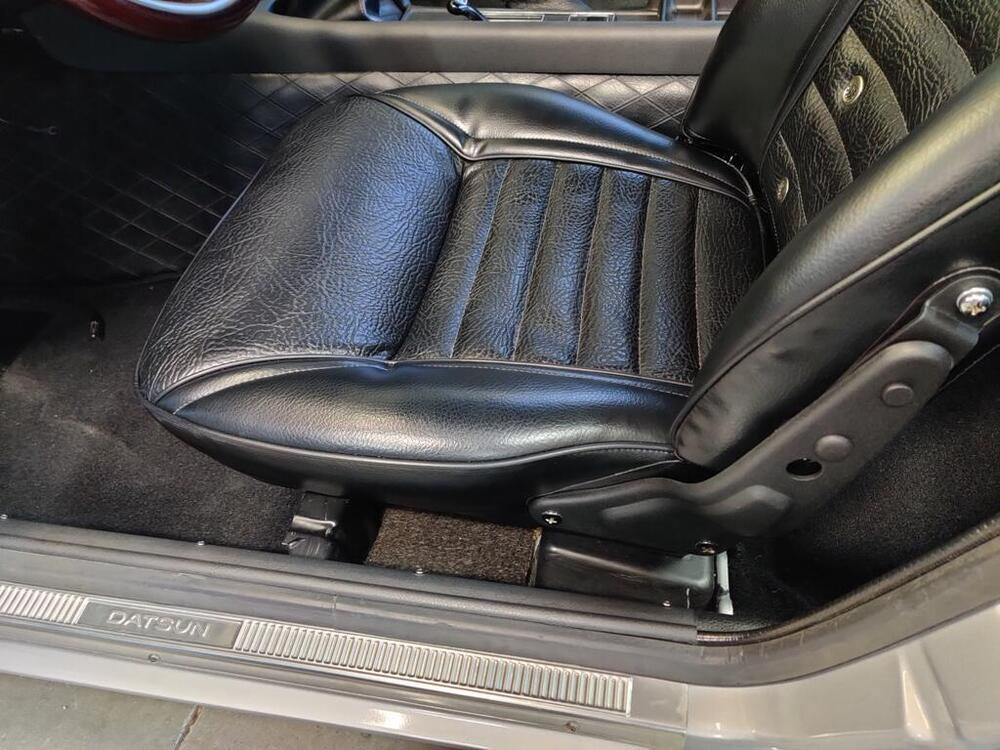
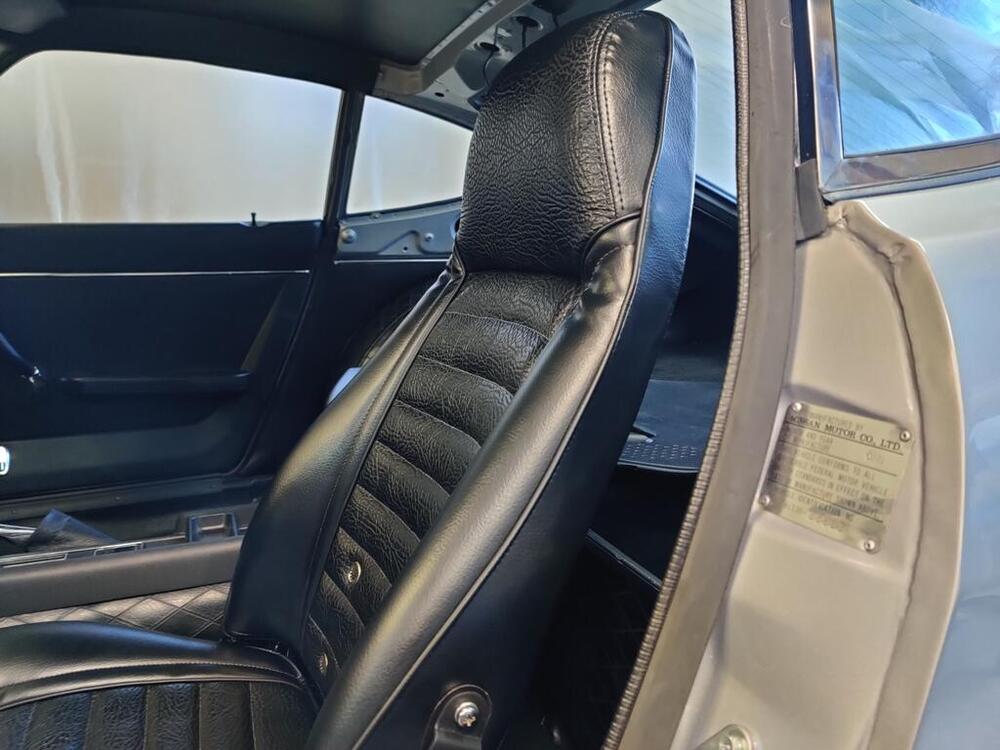
 I was able to get one seat finished today! It was difficult to get the seat back upholstery stretched enough. Putting the seat back in the sun and working the material down the frame, as well as from back to front around the side bolsters, I was able to get the front flap on all the hooks. I also was able to run a piece of wire inside the bottom loop on the back side. The hooks now hold onto that wire which runs the length of the rear vinyl piece. Everything is nice and tight! When bending down the hooks, one of them was fatigued and broke. I ground away a spot weld and removed the old hook. I made another from scratch and drilled a hole in it so I could attach it to the frame with a rosette weld. It was tricky welding this with the upholstery on. I used a wet rag to protect from splatter. Thankfully, all came out well in the end - the hook I made is the last one here in the second picture. I also finished the seat brackets today. I had painted them gloss black when I sprayed a large number of parts a while back. To finish them properly, I scuffed them with green Scotch Brite pad, and then used the same SEM texture paint I used on the center console. I shot this at a distance of about 2 feet. And again, sprayed a satin coating on top of the texture, as it has to be top coated. I have never sat so high in a Z! I may have to remove the two plastic spacers under each seat - we'll see. I think I will try to get the car moving under its own power tomorrow - pretty exciting! All I have to do is check the hard line fitting for the clutch and brake system, add fluid and bleed those two systems. Oh, and torque the lug nuts to spec!


-
I'd like to have the dimensions. I had a NOS one until I sold it a few years ago. Now, I need to fab one. What part number did you use for the round rubber replacements? McMaster Carr?
-
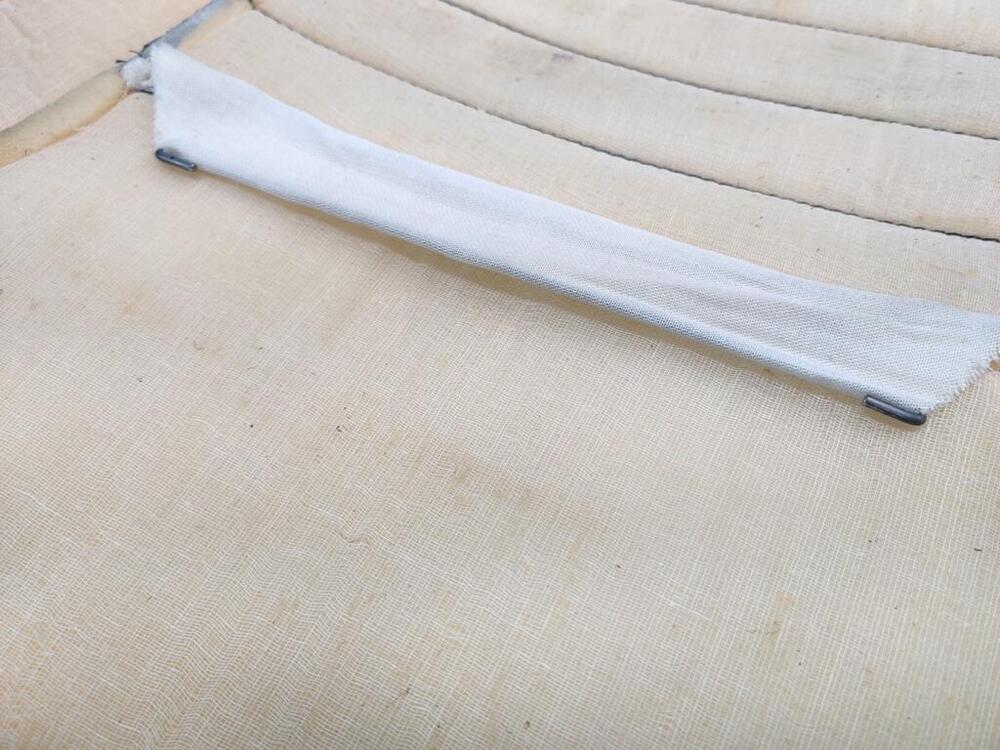
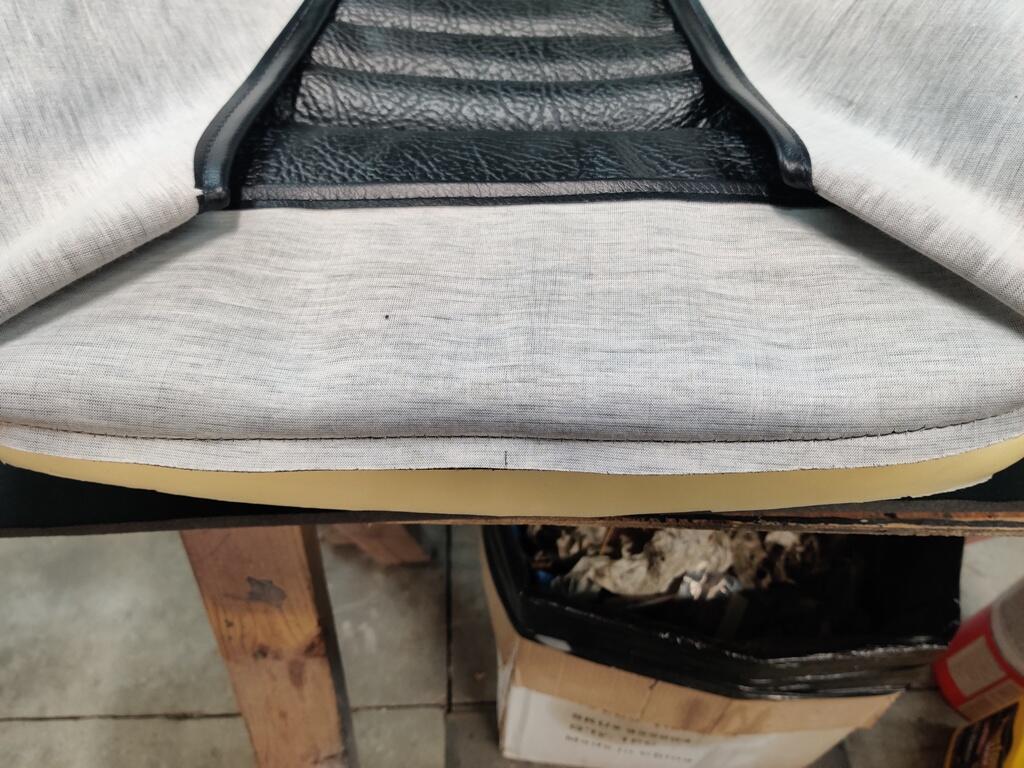
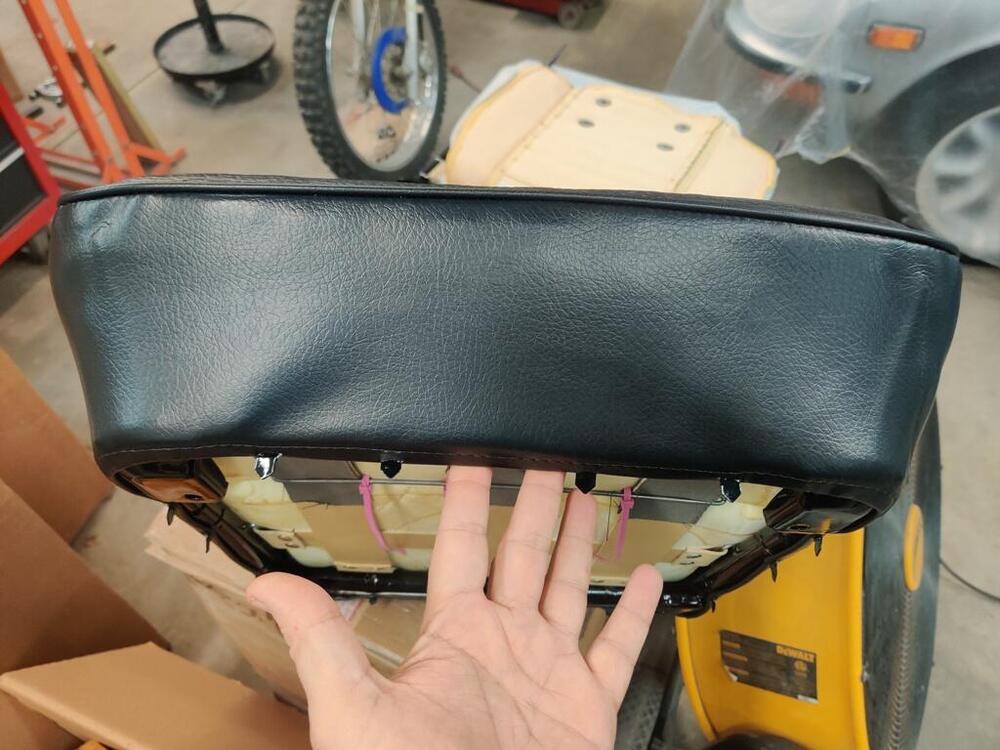
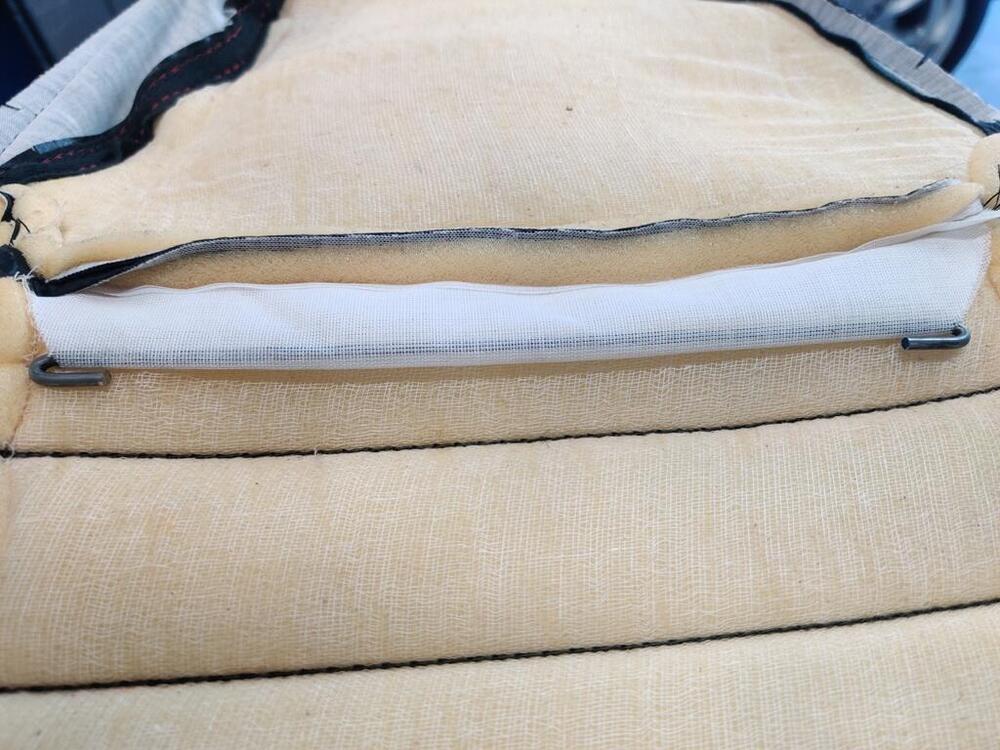
Some pictures from where I left off last Sunday: It was a battle to get the front edge of the upholstery down far enough to engage the hooks on the frame. As you can see, there is a stitch seam that the hooks are catching. If that stitching wasn't there, the vinyl would simply tear all the way through. The hooks were originally hammered down towards the front surface of the seat back. In order for me to progress this far, I had to bend the hooks to point out from the frame at 90 degrees. When the hooks get bent back down finally, they will again point towards the front surface. If I did that right now, the vinyl I have holding on the hooks would simply slip off. So, it is important to note that the only thing that holds this front vinyl from slipping off the hooks when you tap them down to their final position, is the back vinyl part of the seat back upholstery. When the back vinyl portion gets pulled down over the hooks, and they are tapped down toward the seat front, the back will not be able to slip off. The only reason the front won't slip off will be due to the front vinyl being put on first, and thus it will be trapped under the back part... with the back vinyl portion unable to work loose from the hooks. What I also notice is that the back vinyl does not have any cord, or wire running through the part where the hooks will go through. Because of the high amount of tension, and the fact that "the back has to hold the front also", I am going to run some wire through the back, bottom edge. It is stitched there, so I will be able to run wire through the loop that has been created when the bottom edge was folded over and stitched. With the hooks engaging the wire, the full length of the vinyl material will be holding the seat upholstery to the frame, not just the tiny portions of vinyl which are in engaged by each of the hooks. To get the back upholstery to where it is now, I had to use the sun to warm it up. While I was doing that, I put the seat bottom in the sun last Sunday also, and it really helped improve the look and fit of the vinyl upholstery on there as well. I still only have zip ties holding the seat bottom upholstery down to the frame but they are pulled all the way tight, and I am satisfied with the final look here. So, I will put on the hog rings and remove those, and tap down the metal hooks on the frame to finish out the bottom upholstery installation. Trimming the excess "bar" off of the foam front of the seat bottom was the right call: Hopefully, it will get warm enough today (sun is out) for me to continue.


-
I still think the replacement seal (#1 in your parts book picture) I bought from Banzai may be thinner than the original. Unsure if that is part of my issue.
-
Actually, the earlier back plate is the one with the choke cable bracket. So, the car your recently bought has the correct back plate and housing.
-
Excellent! However, I do believe your orange back plate should be paired with your purple cover. And purple backplate with your orange cover.
-
Possibly... but I don't see any evidence yet that there was a difference in the back plates from inception until 6/1972. However... I also only see one part number for the cover, and we know there were different versions of that from inception, but before the 73 models: So, perhaps there are differences in the back plates also (before the 73 models).

-
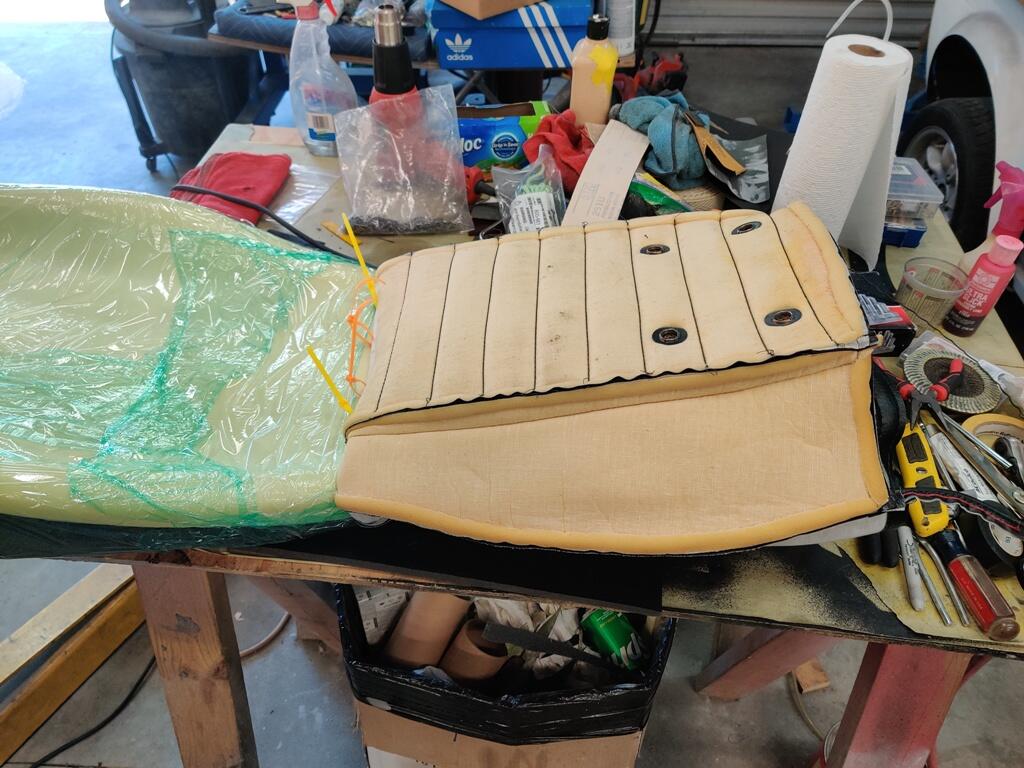
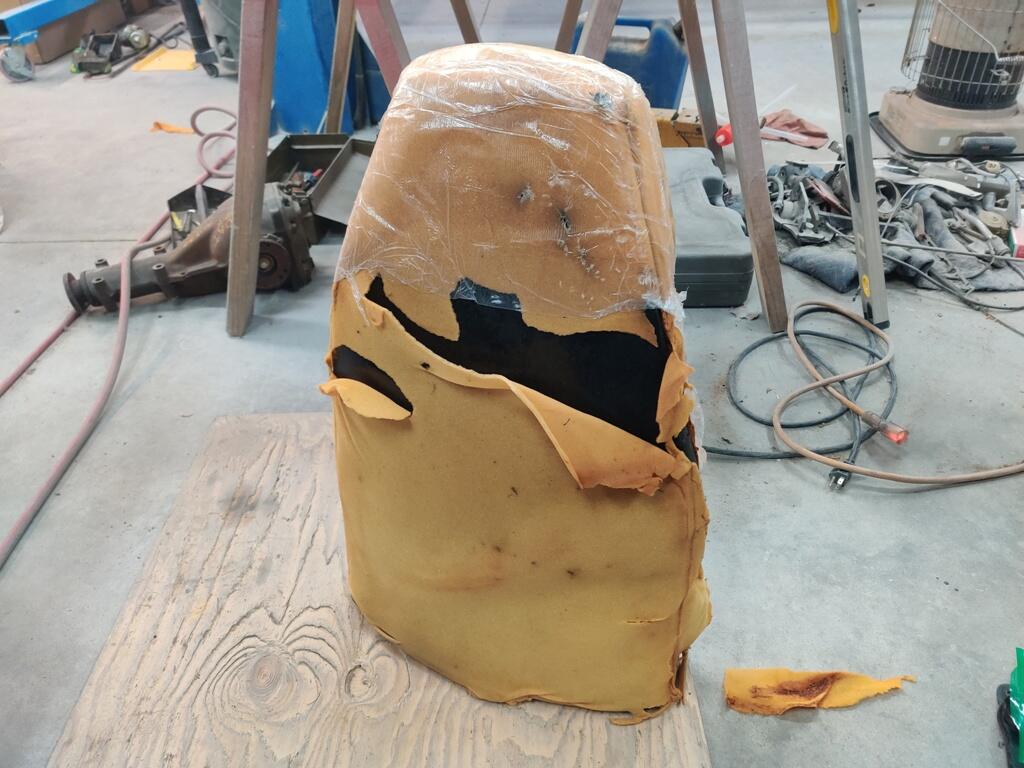
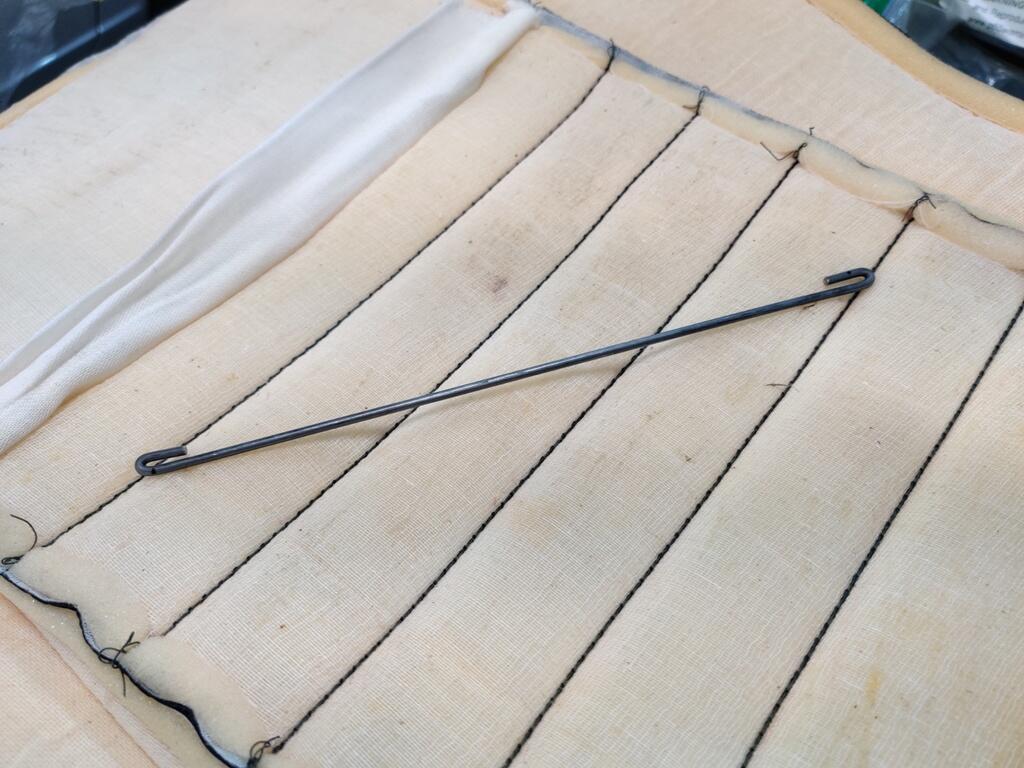
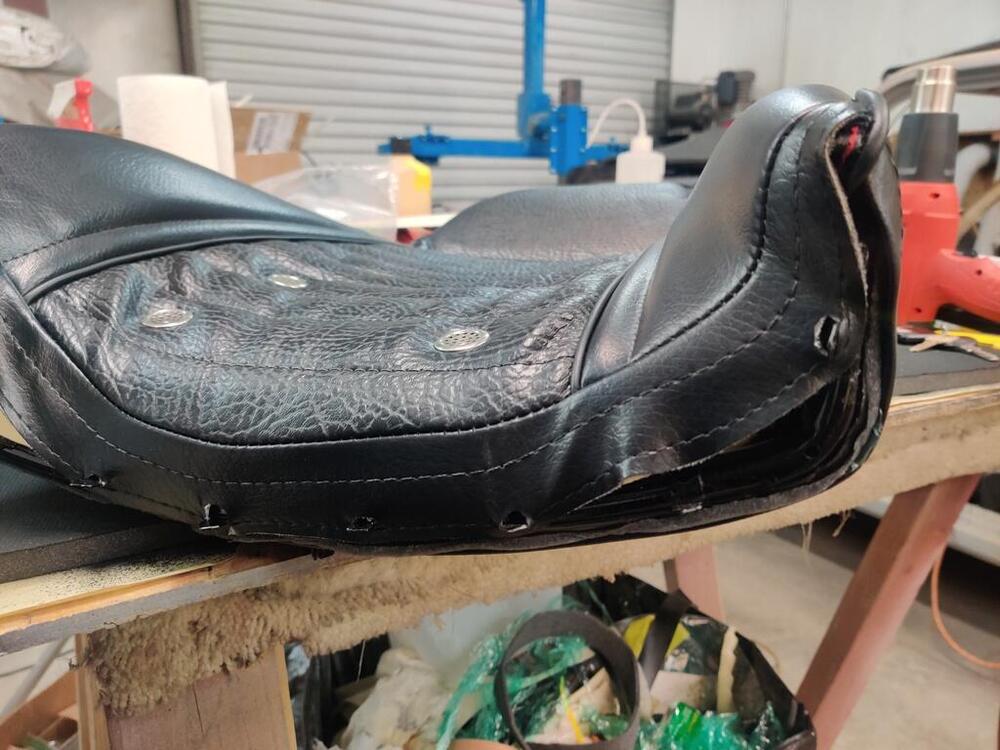
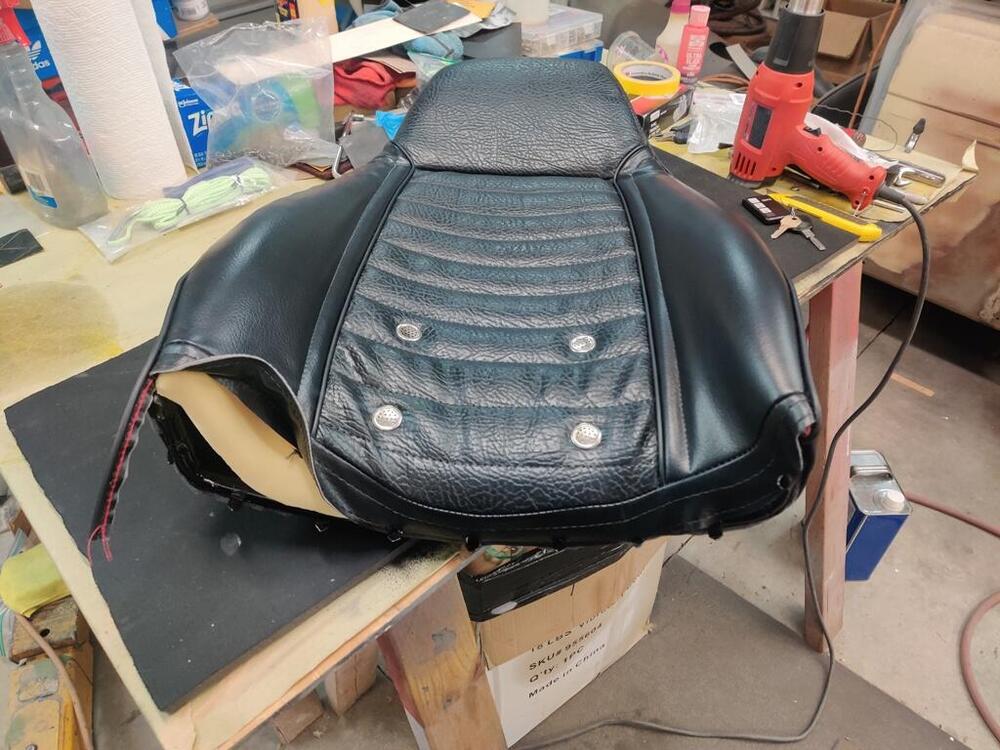
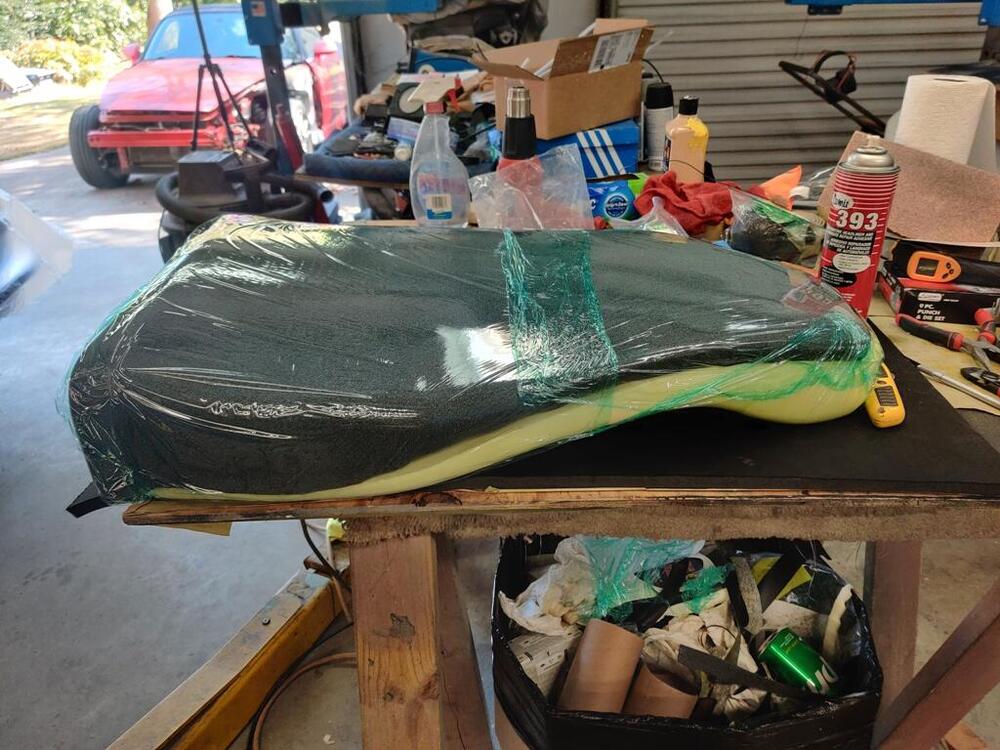
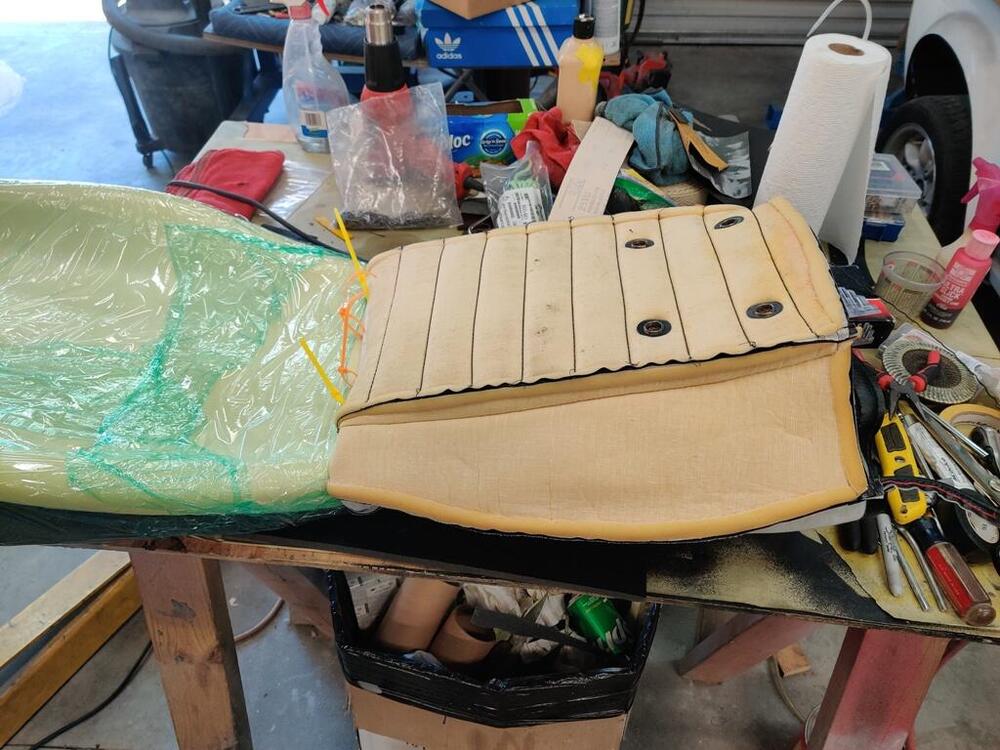
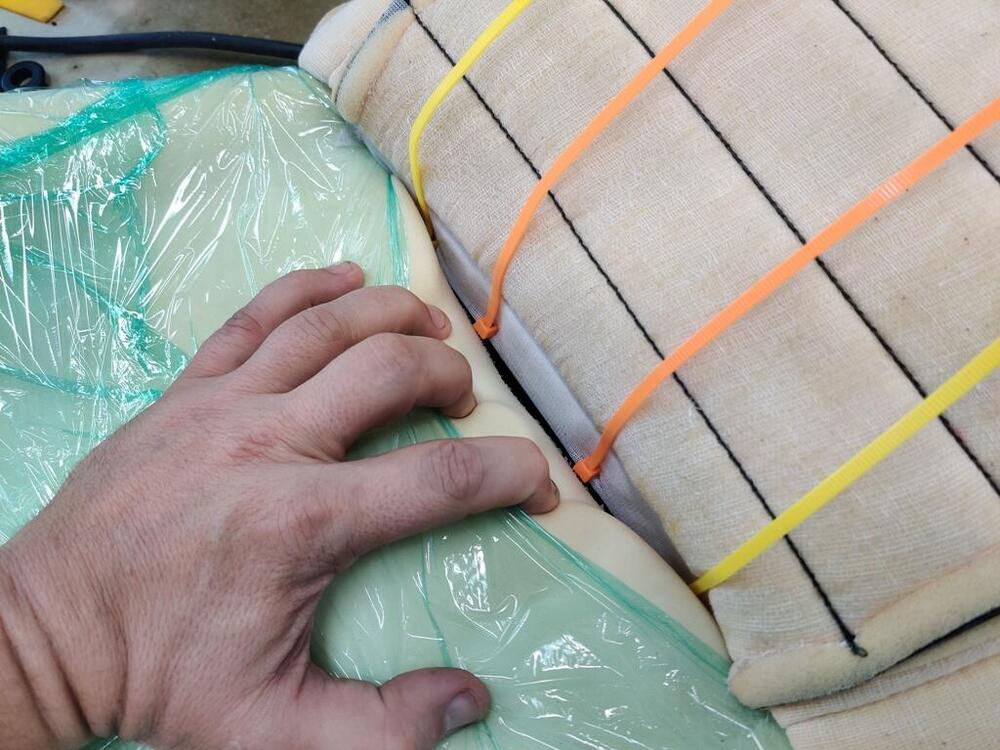
I picked back up on one of the seat backs on Sunday. First, I used some spray can adhesive to put this 1/8" grey foam sheet on the seat back: I used this plastic wrap around the seat back to aid with sliding the upholstery on: The I made another listing rod for the back upholstery. If you are needing to do this yourself, you will want the seat upholstery to be installed on the head rest like shown before you attach the listing rod to the wire on the seat frame (second pic). At this position, you can put on zip ties: Next, I installed about 6 hog rings, cut away the zip ties, and unfolded the rest of the material: As you can see by looking at the last picture above, the seat upholstery is "short". This is where it got interesting (read very difficult). As I yanked, tugged, pulled, massaged the upholstery from the head rest area downward, it fought back mightily. The foam seems to be a tad bid oversize to me. Anyway, I decided to put the seat back in the sun for a while and let it bake. I put the bottom seat cushion out there as well. After an hour, I gave the wrestling match another go (while I also was out in the sun). With what I'd call extreme effort, I was able to get the flap on the front of the seat back upholstery onto a couple of the hooks. But, it was super tight and quite a bit stretched. I brought it into the garage again to get out of the sun and again tried to convince the upholstery to find a lower position on the metal seat back. After getting the material on about 2/3rds of the hooks, I had to leave for a soccer game. That is all I have of pictures for now, but I will pick this back up again soon.


-
Interesting. Any idea what they are called?
-
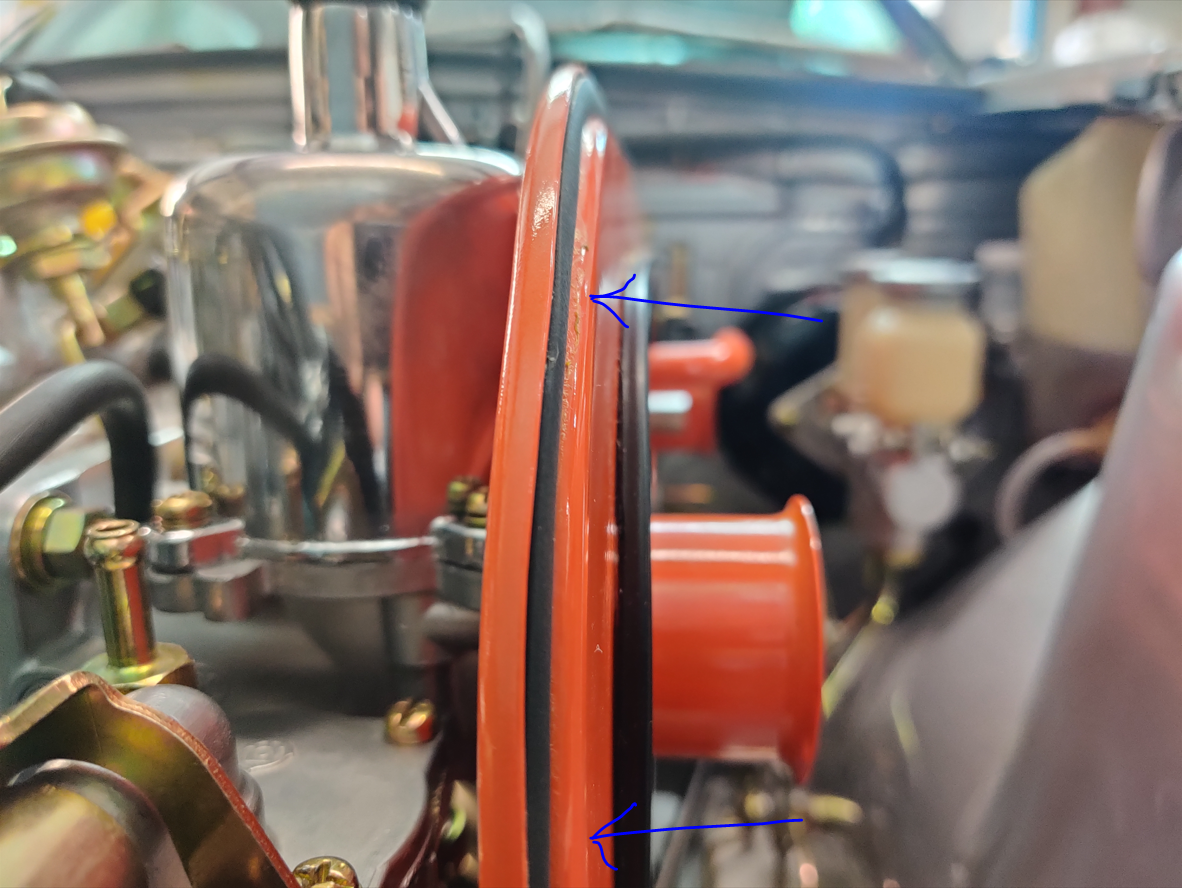
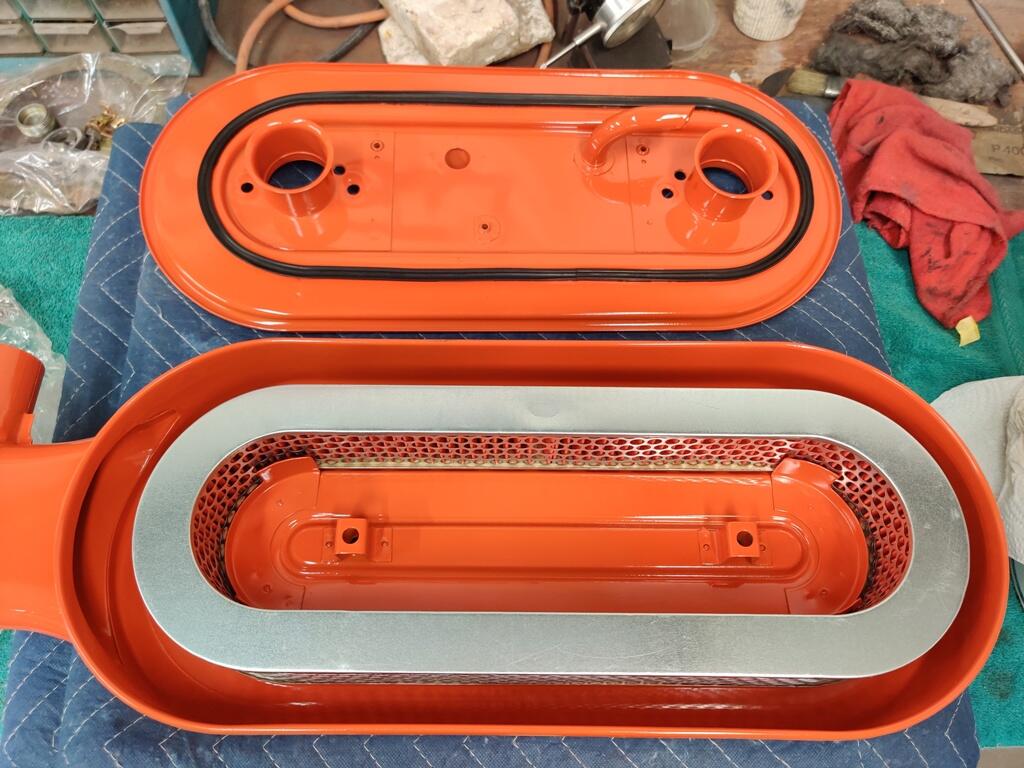
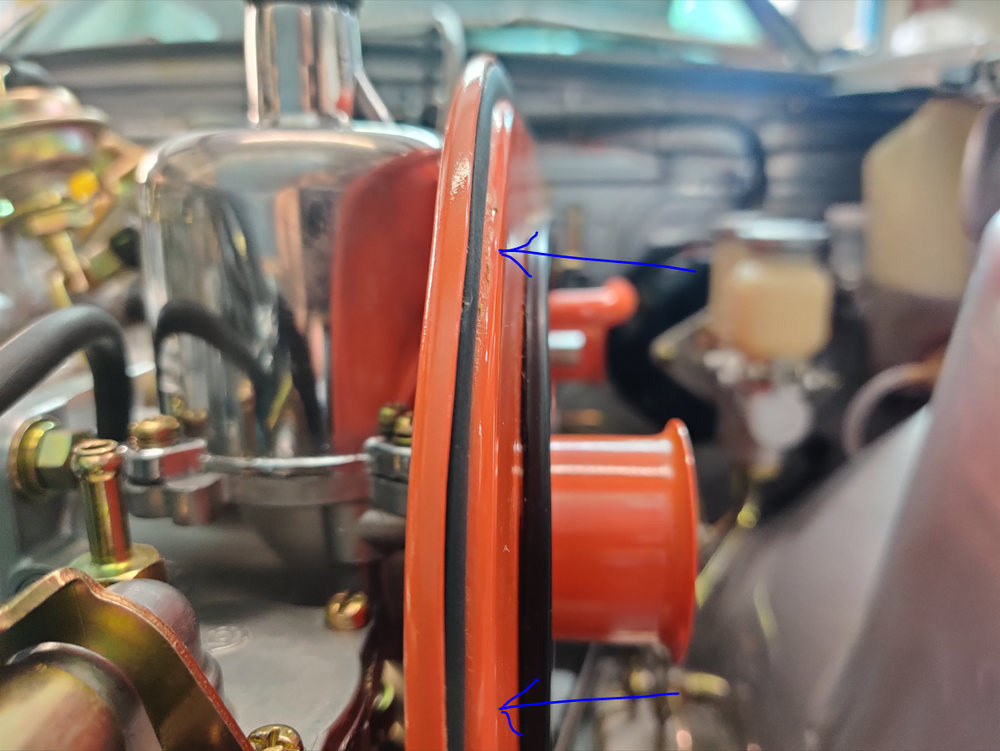
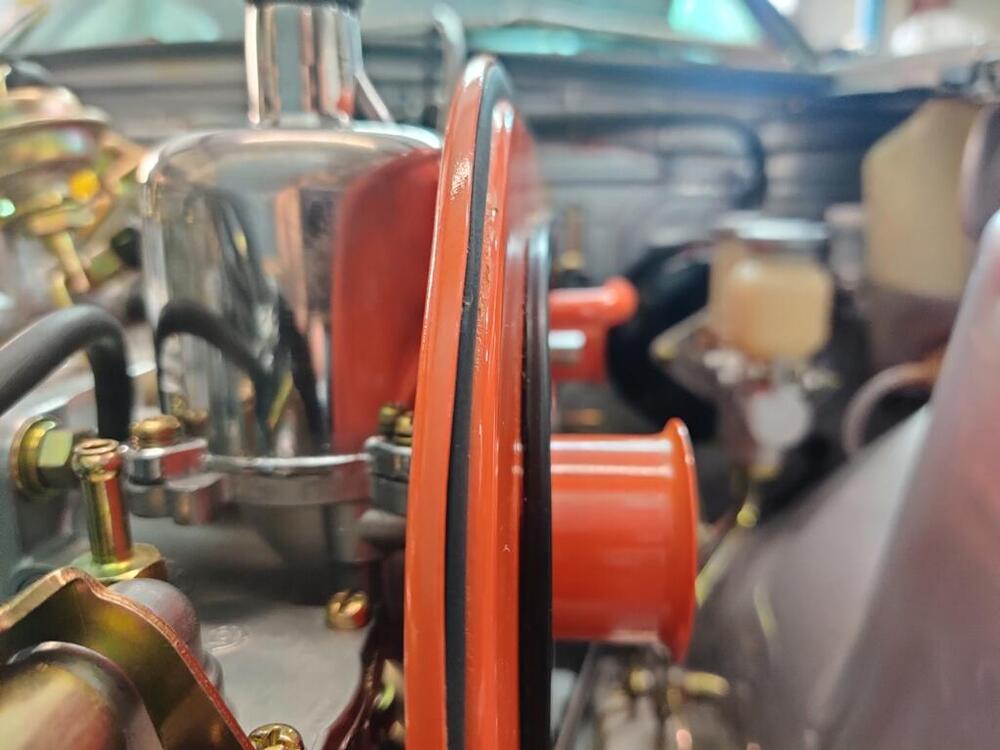
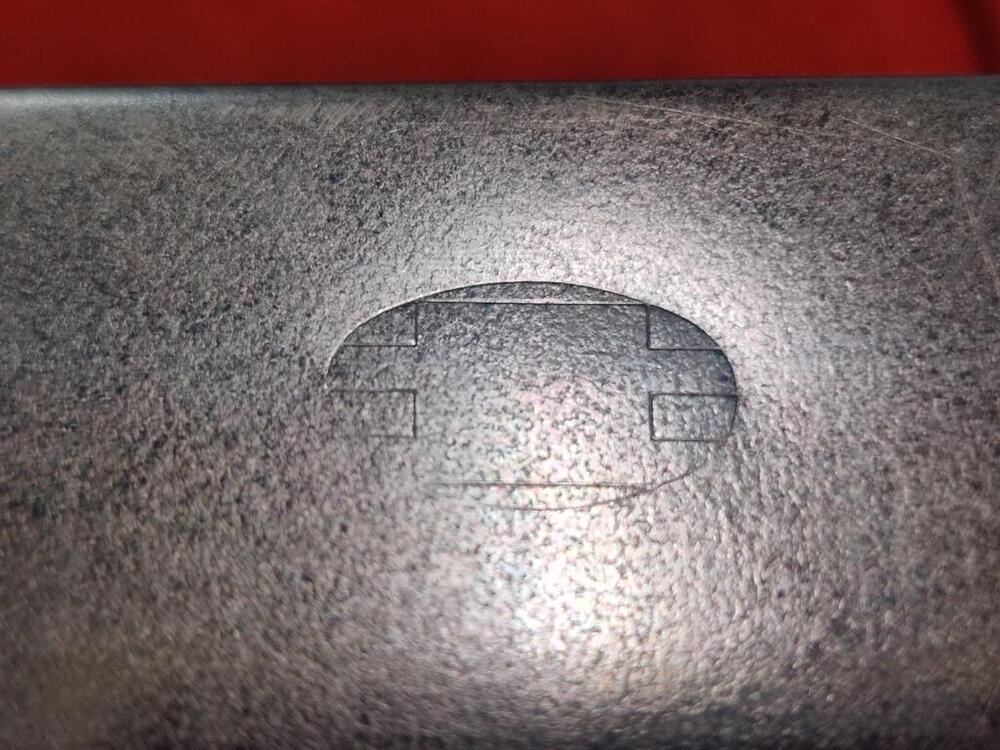
On your first observation, know that the picture you are referencing was a picture supplied by @CanTechZ Something to point out is that I am unaware of differences in the back plates for the "earlier" cars. The parts book shows the same part number until June of 1972. I think it is the camera angles... and possibly that these back plates are relatively easy to "damage" by bending. The front of mine is (was) bent as can be seen if you look closely here (compare at two blue arrow locations: That said, I worked on the filter back plate a bit yesterday in my hydraulic press. I corrected what was obvious to me, but the filter doesn't really fit much better, maybe a little bit at the front. So, I don't know. I do know that the car came to me with two air filter housings. Out of the two back plates and covers, I selected the best ones and restored them. I don't seem to have to other pieces. I think I sold them with a batch of parts some time ago.


-
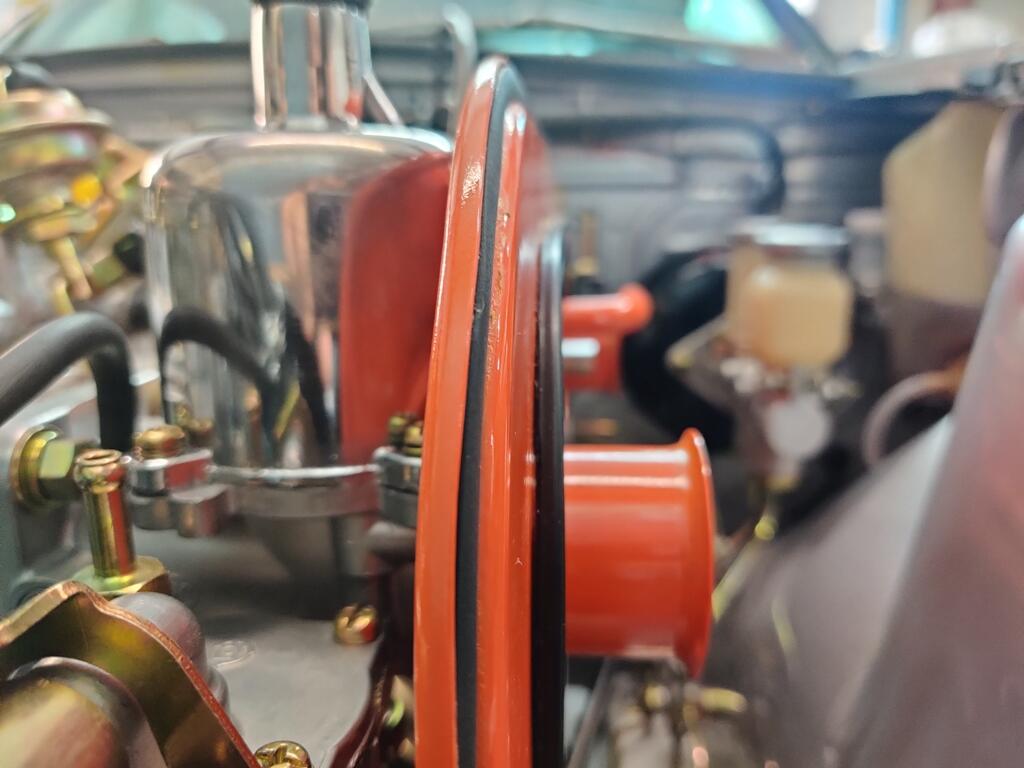
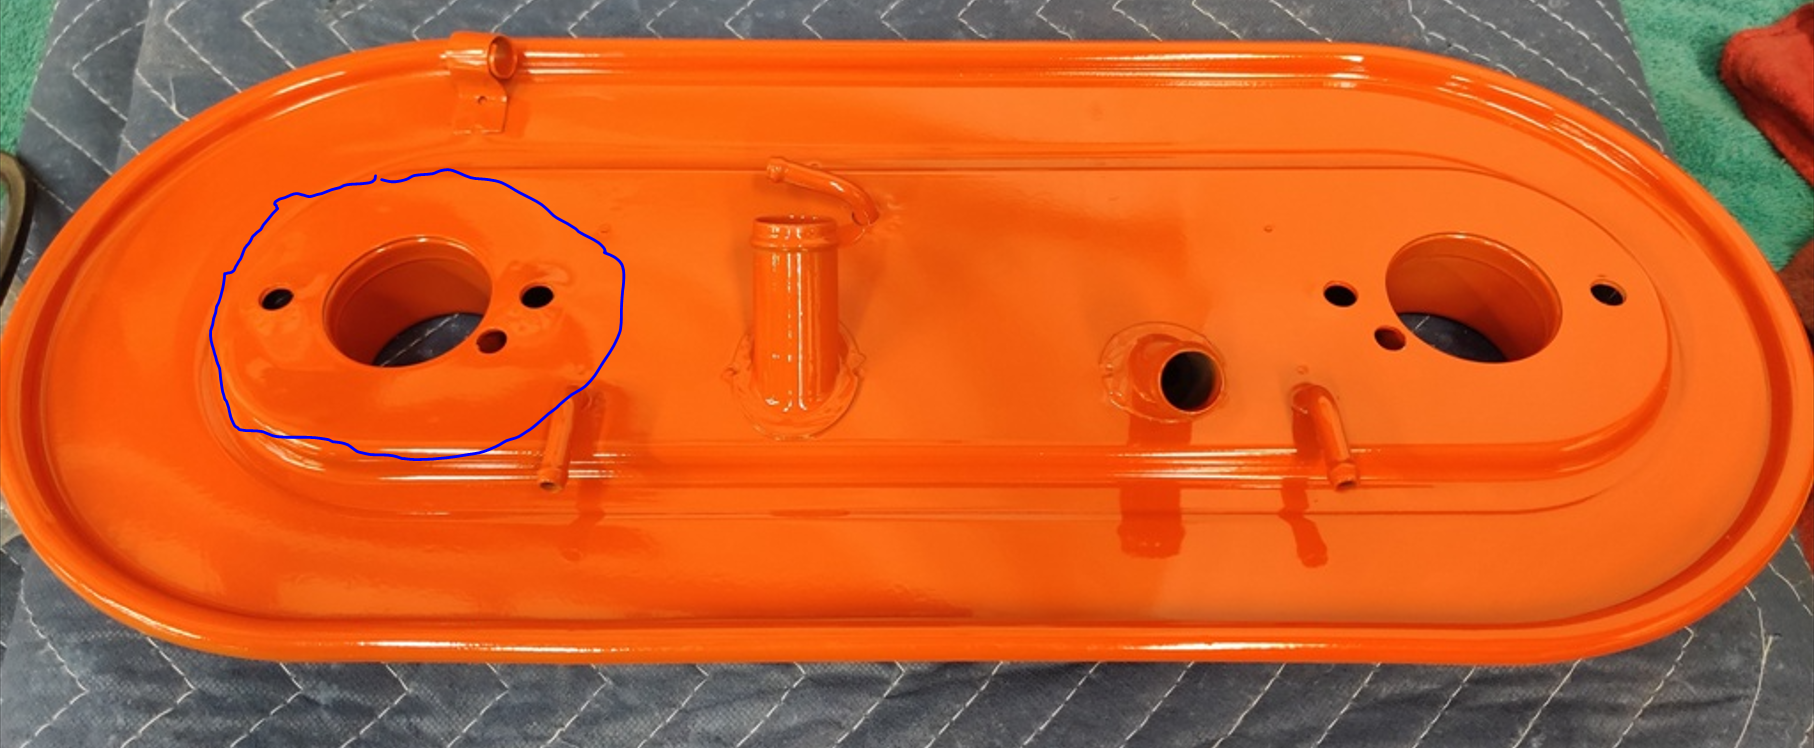
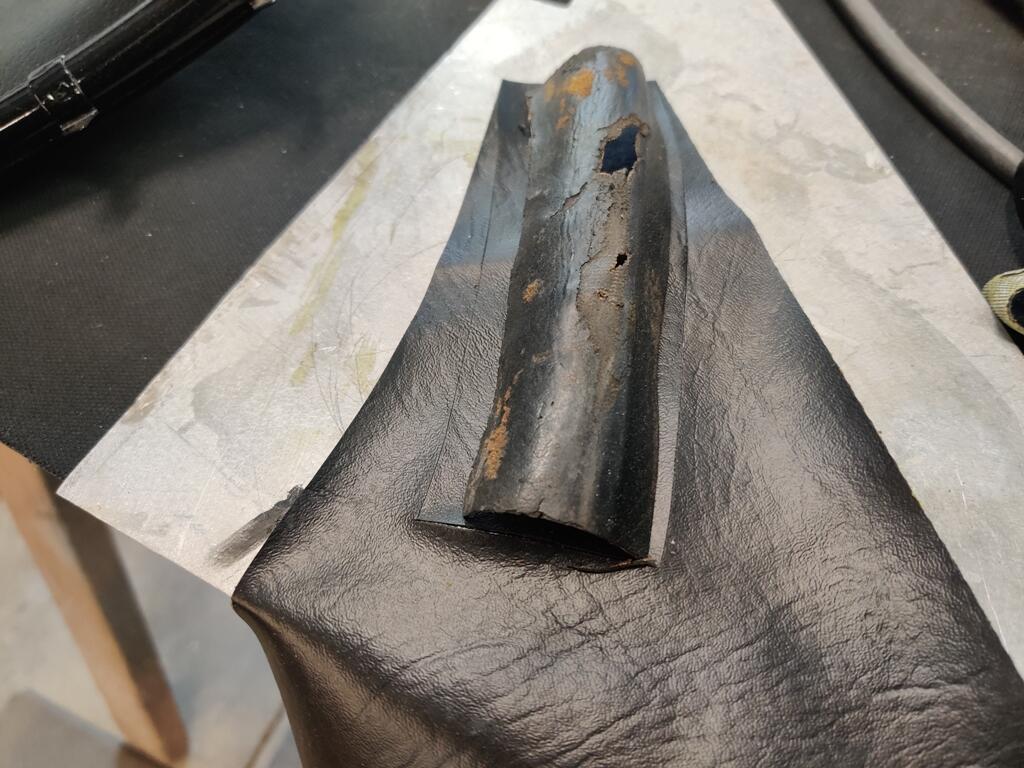
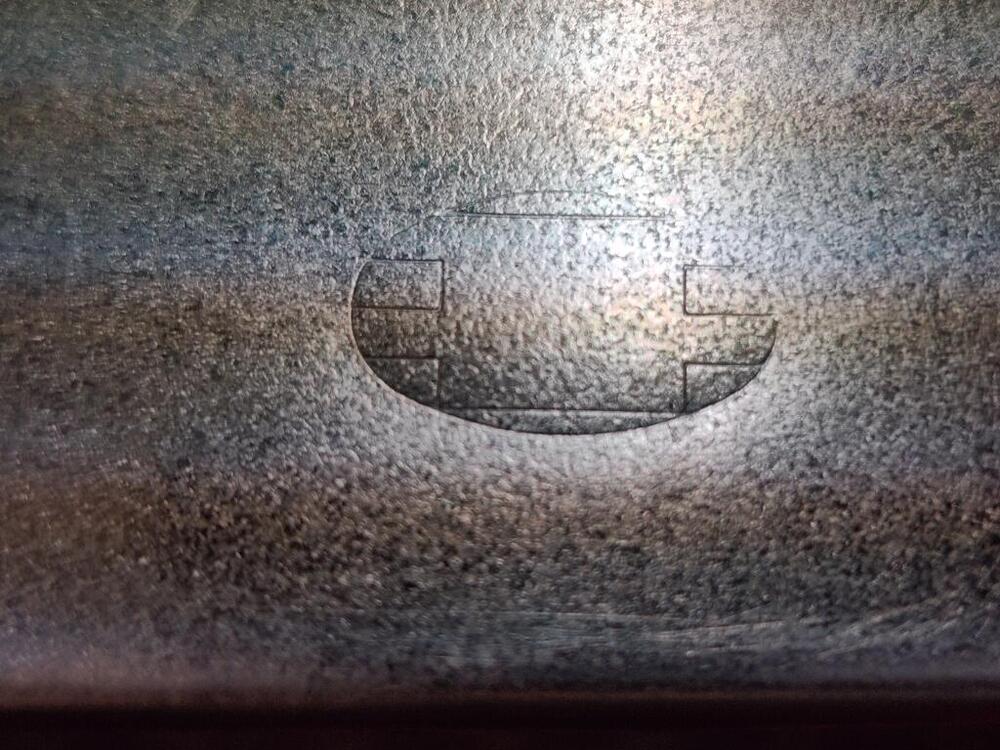
The seals inside are original. They are made of a type of rubber that I don't think ever compressed much. I am beginning to think that my problem is the back plate. I suspect that somehow it the outer edge has been bent back... If you envision it mounted to the carburetors, then I think the outer portion of the plate has been bent towards the engine. I took my back plate off the engine last night and set it on a work bench. I examined everything very carefully. At the front of the filter housing, the gap (to the cover) is a bit larger than at the rear. Though it is hard to see, upon close examination, I see that this circled area of my filter back plate is pushed in a bit. With this surface pushed in, the outer part of the housing moves away from the housing cover. I found this picture of a back plate on eBay - note the "plane" of this surface: And here is mine: While I think this is part of the issue, I am not sure it is all of the issue. At the back carburetor location on my filter housing back plate, I don't see evidence that it is bent like the front. And the filter cover doesn't contact the seal there either. I'd say the distance at the back is about 1/8". While at the front, the gap is about 1/4". I am going to try getting creative with my hydraulic press to attempt to address this. I have in mind putting the front air horn down face first, and then using some plates or boards to bridge across the backside of the plate, and then use the hydraulic pressure to push on the plate on the curled edges. Effectively, the area where the horn is should move "up" (horn will be face down in the press) and the back plate will move "down". I will try to protect the paint with soft rags placed in suitable locations. If anyone can do some examination (to see if bent) and measuring of their back plate (if not bent), that would be helpful.

-
AAAAAAAAAAAAAHHHHHHHHHHHHHHHHHHH! Jeez! Sorry that happened Charles!
-
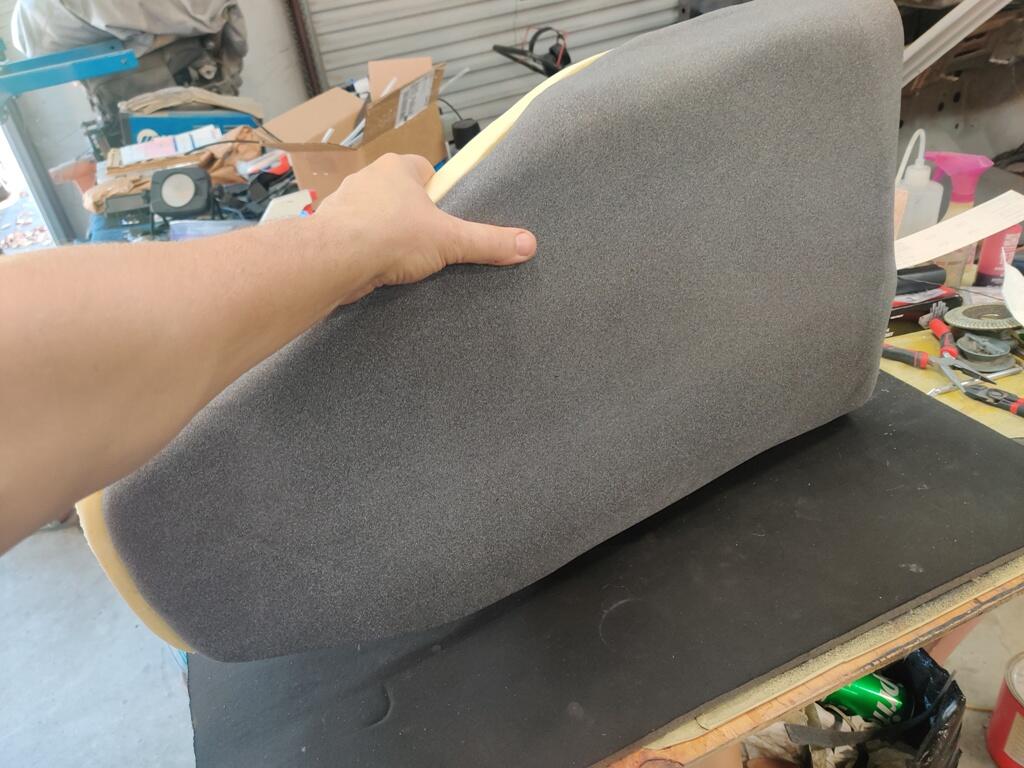
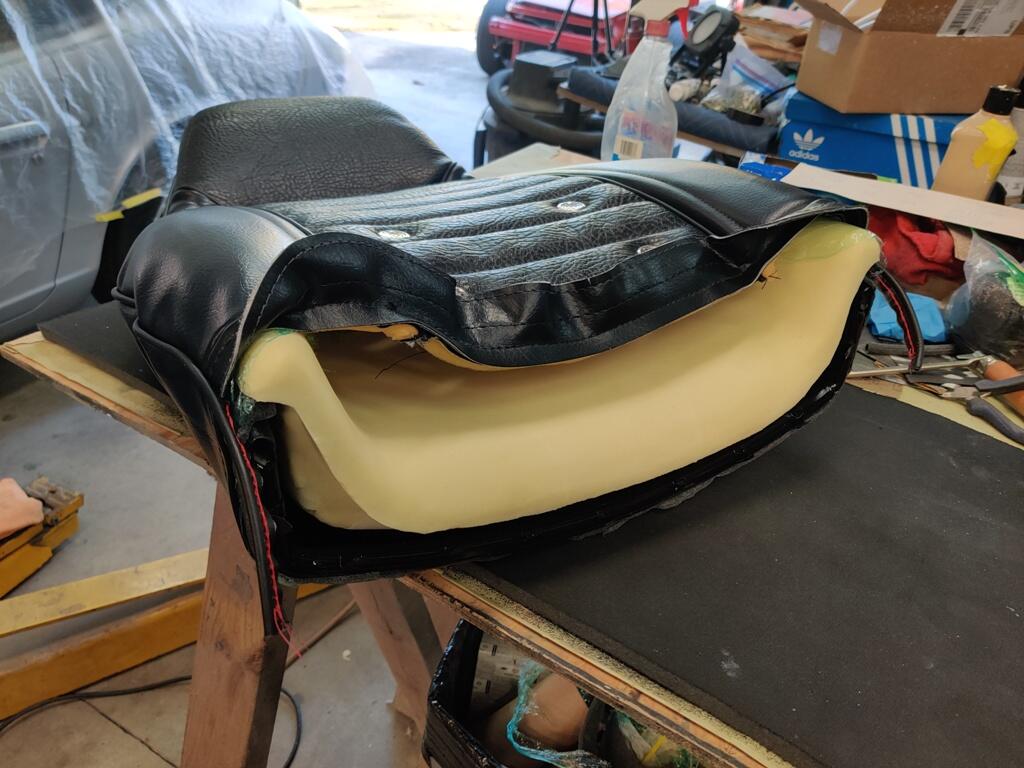
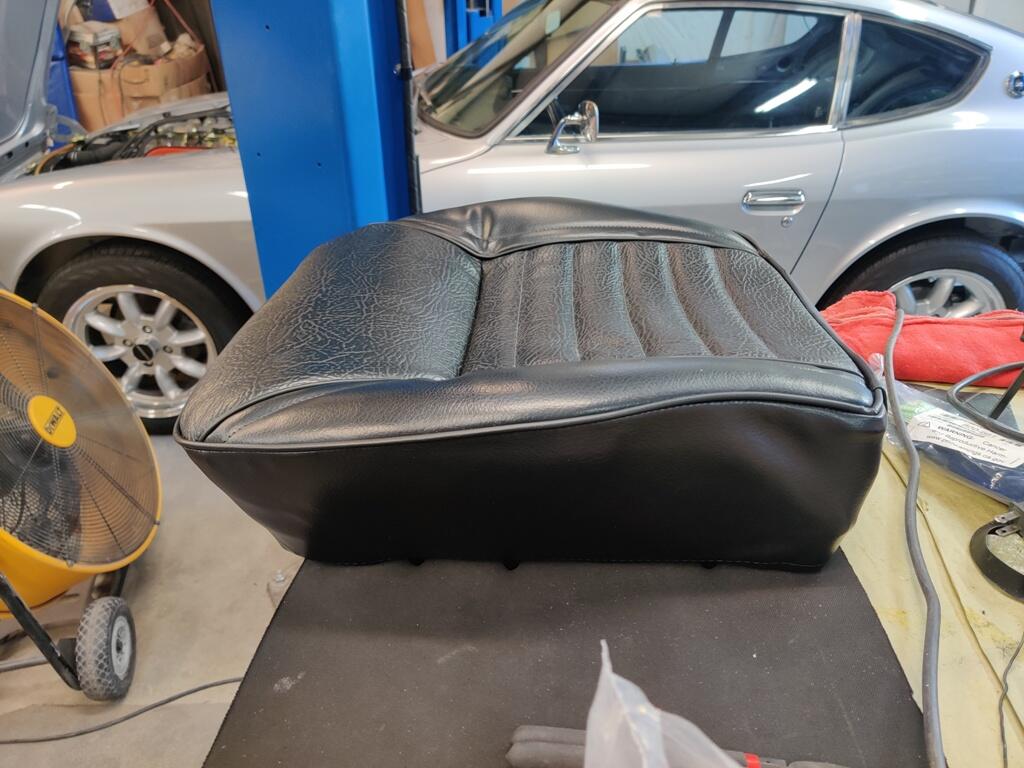
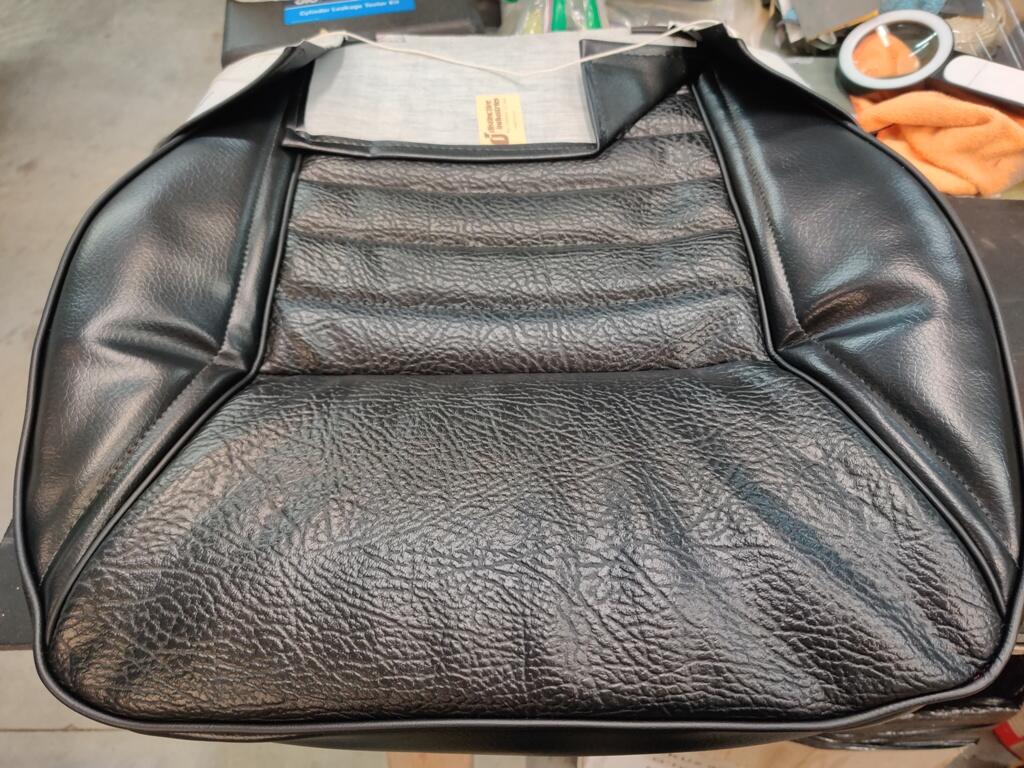
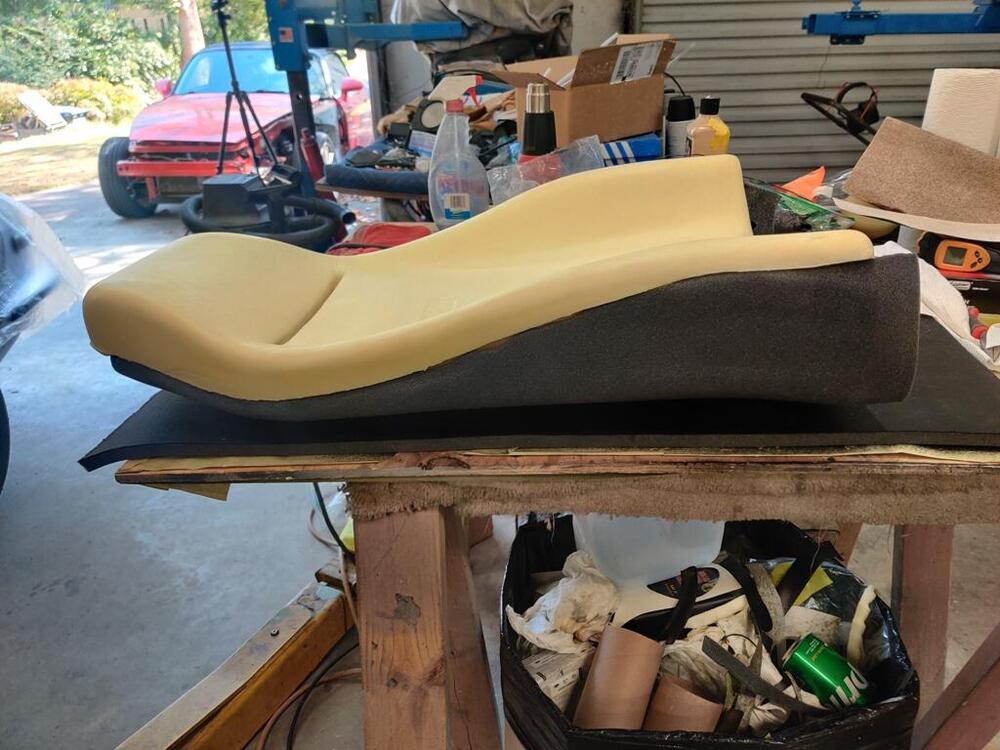
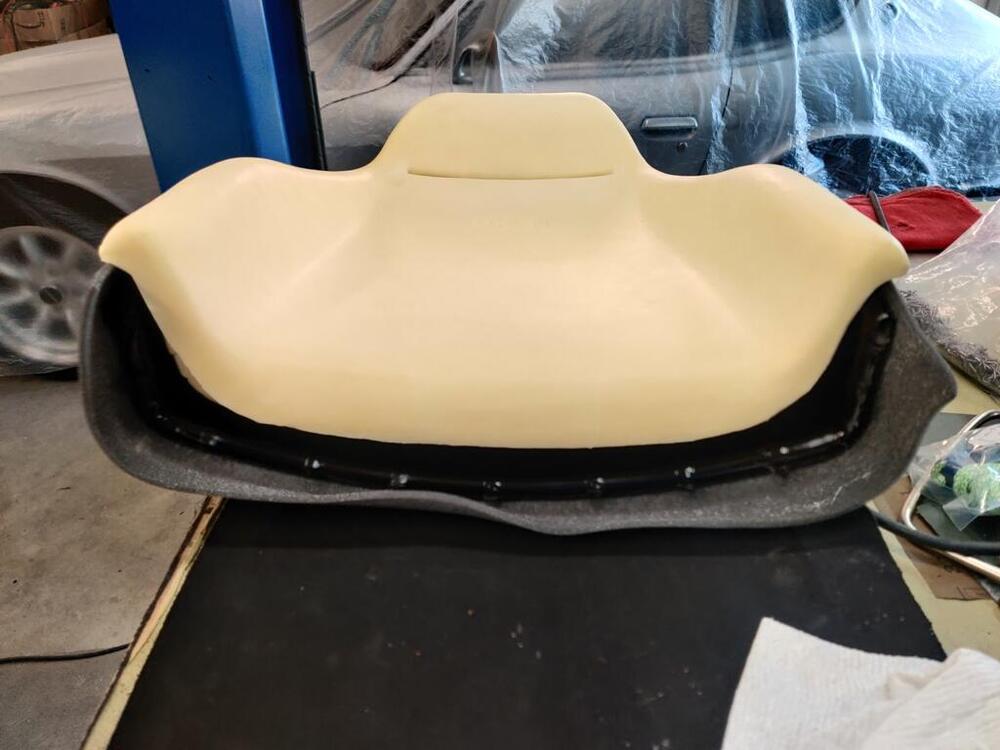
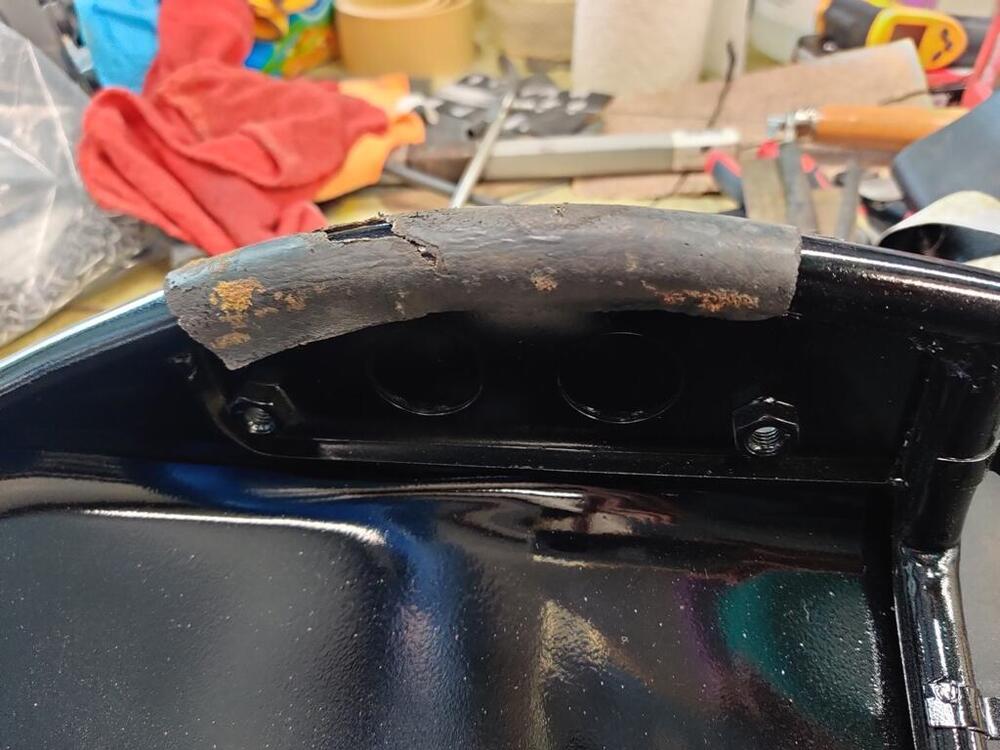
Today I set the car down on blocks under the tires to load its suspension so I could torque all of the suspension fasteners to factory specifications. Then I pulled the rocker cover to have a look at the cam and valve train. I was pleased to see that all looks good. Then I switched back to attempting to put on the seat upholstery. I worked with one seat bottom for quite a while. First, I made the decision to trim down the funky lip of foam at the front. I used as scroll saw to remove a portion of it from across the front of the seat cushion. Then I used some 36 grit sand paper to smooth out where I had cut it. I loosened the zip ties that are holding the upholstery to the seat frame. I still do not have any hog rings installed. Then I very carefully started working the upholstery onto the metal points/blades which are on the seat frame. I started at the front of the frame. I worked point by point from the front, around both sides. When I had the upholstery on all of the front and side points, I pulled on the cord that is inside the piping and this cinched the corners of the upholstery nicely. I tied this cord, (there is one each side) and tied them together. Then I installed a piece of wire in the piping of the back seat flap, and folded that flap onto the points which are on the back of the seat frame. I did not hammer the points down yet. So, I can still take the upholstery off and redo things. Finally, I pulled the zip ties so they are fully tight. Here is how it currently looks. I think it was the right call to trim the front of the seat cushion. I no longer have that odd bulge at the top front. But, pulling the zip ties all the way down, which I believe will be equivalent to when I install the hog rings, I still have the wrinkles in the top side panels. I don't care for them. I may experiment with adding some foam in this top side panel area. I started on one of the seat backs as well. From the factory, there were some vinyl pieces glued to the seat back on the edges: I checked location in my reference pics, and then made and glued some new ones in place. I believe the very thin sheet of foam that was on the backs of my seats was original. The new seat back upholstery from Distinctive Industries only has a pieced of reinforced vinyl for the back (of the seat back). So, I plan to install a thin layer (about 1/8") of the grey foam you see in the pic above to the metal seat back. And then install the upholstery over top of that. I have heard that it can be difficult to the install the upholstery on the seat back. I see that there was some very thin plastic originally as well. I may wrap the seat back (with 1/8" foam glued in place) in thin plastic also. I think the plastic will allow the upholstery to slide on easier.


-
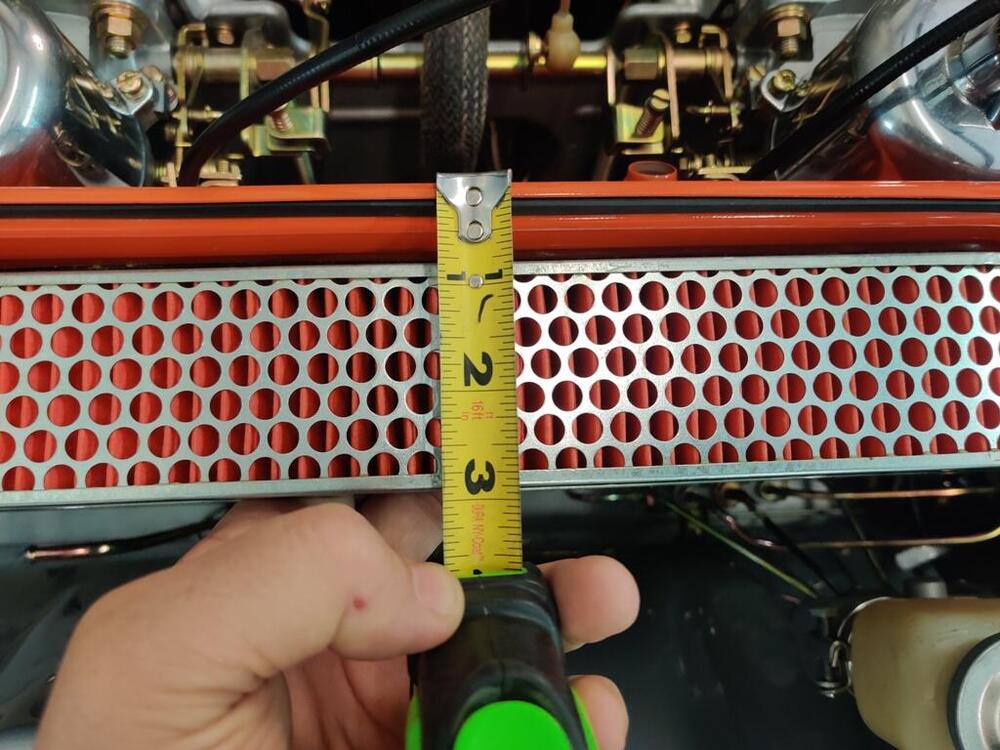
Yes! I took a few more measurements today. Outer filter case is not quite 2 7/8" from front surface to curled lip. With the filter sitting inside the outer cover, laying against the seal, there is only about 5/16" left of "depth" to the edge of the curled lip on the back. Filter is against seal on the back plate. So, again, when the cover goes on, seals are seating on both sides of the filter element, and leaving about an 1/8" inch gap between the seal and the curled lip of the cover. Is this the correct back plate?

-
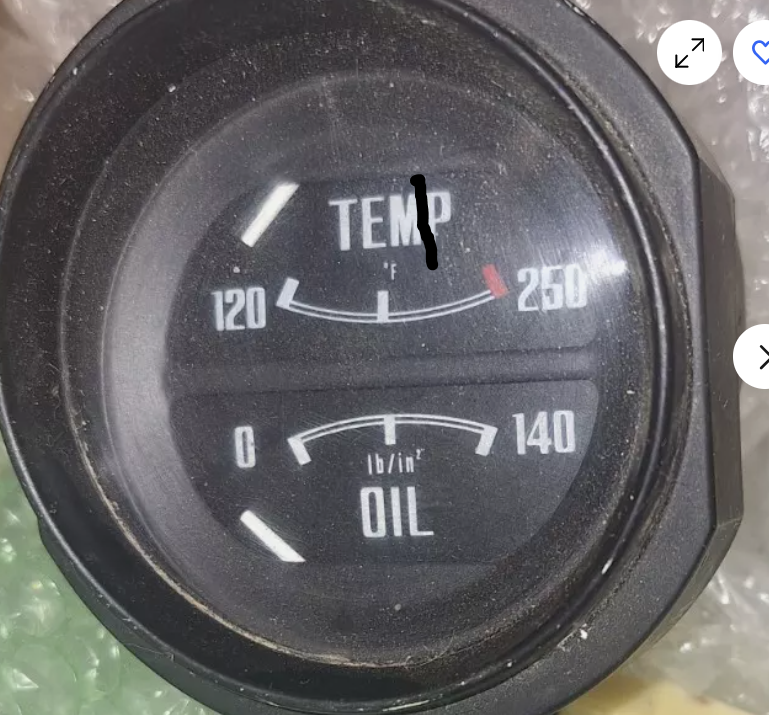
It's debatable if this raw video footage is more interesting than watching paint dry, but I was able to get the engine started and running for more than 1 min finally. The temp gauge was working its way well past normal, so I shut it down. I did grab my laser pointer and it was saying all was well - temp gauge was not. The needle was partly in the P like this: So, I decided to run it again and restart it to break in the cam at 2000 rpm for 20 min.
-
Wild. I found this on the motorsport auto site - it looks to me that the genuine filters are too tall now.
-
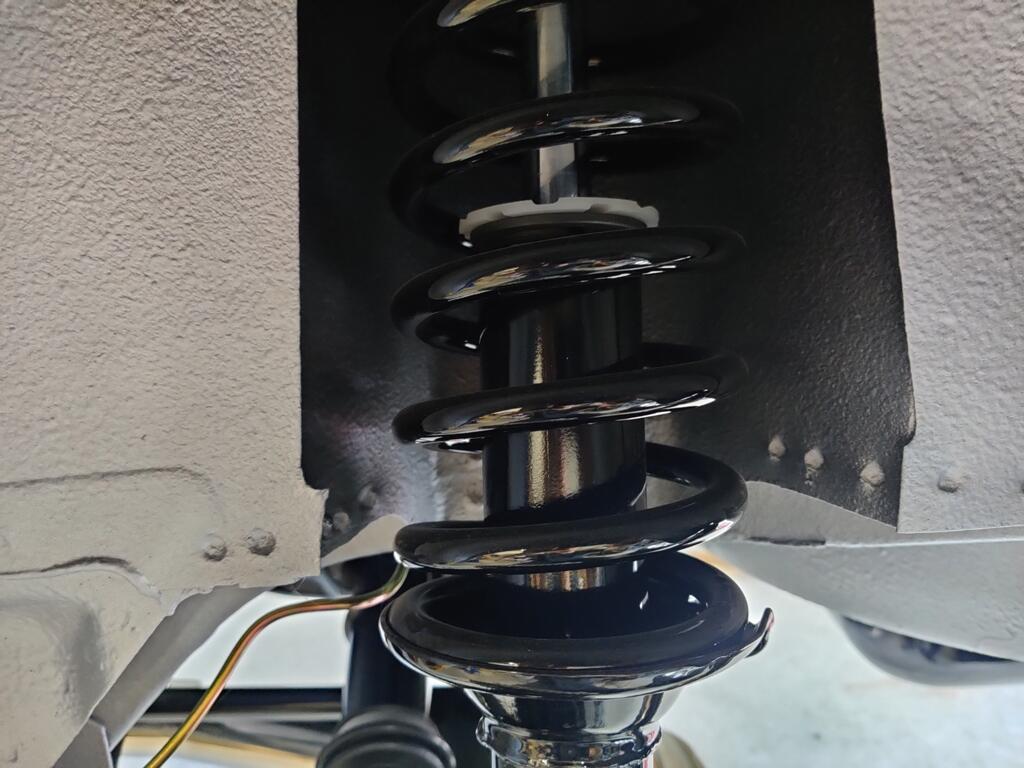
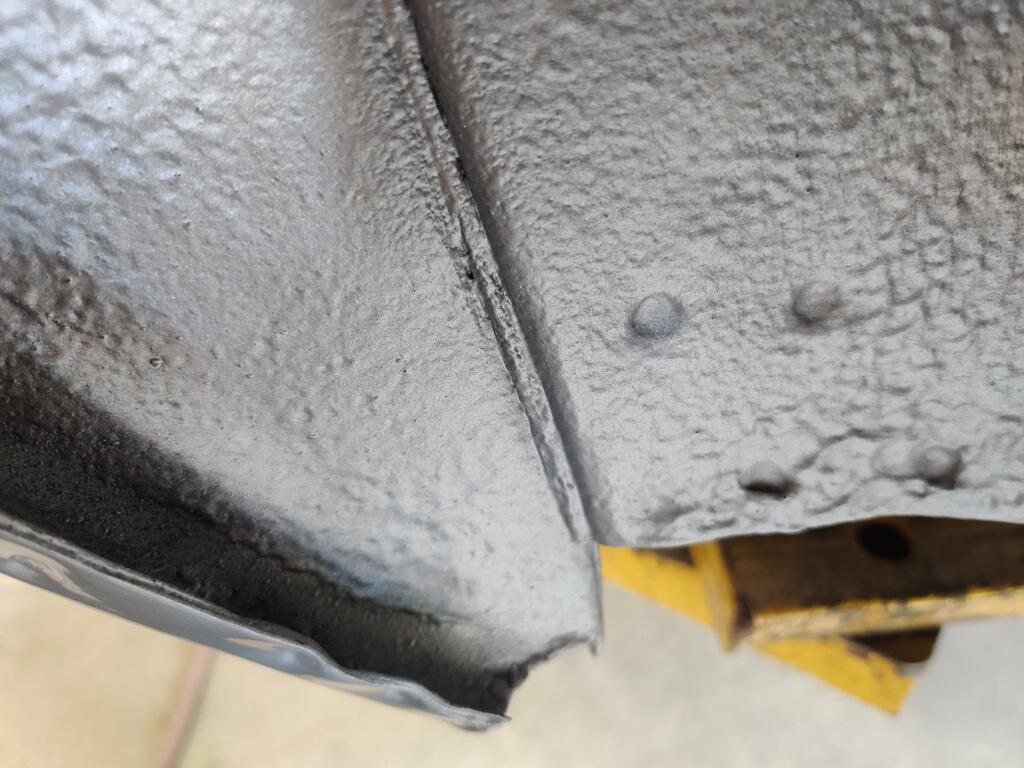
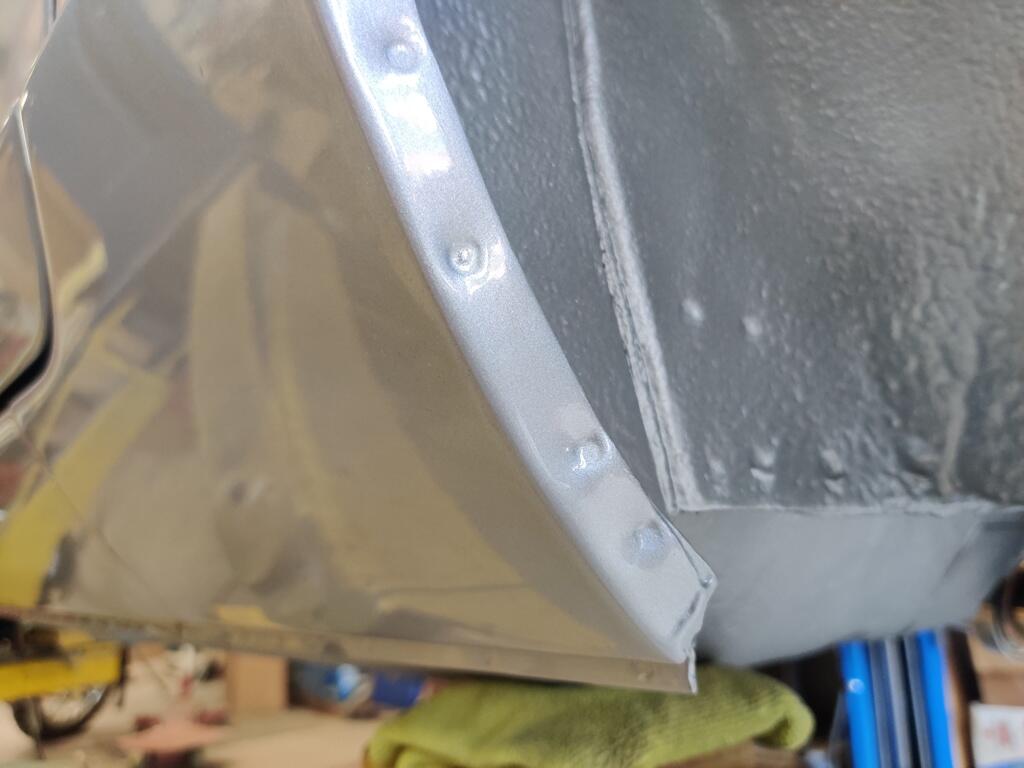
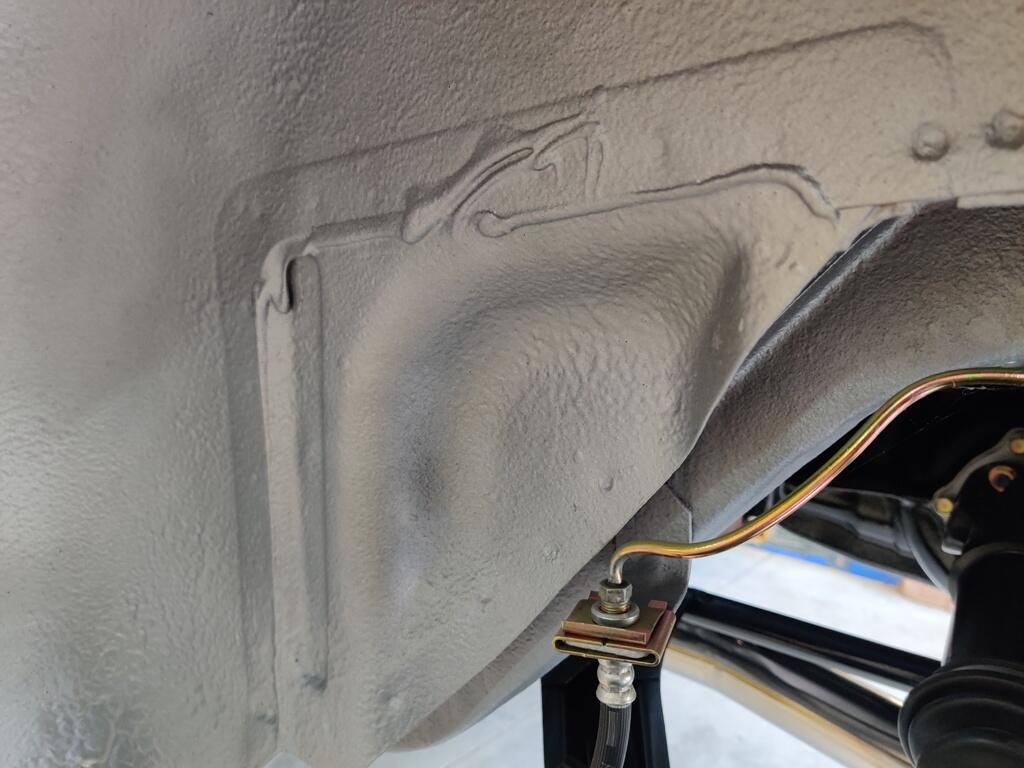
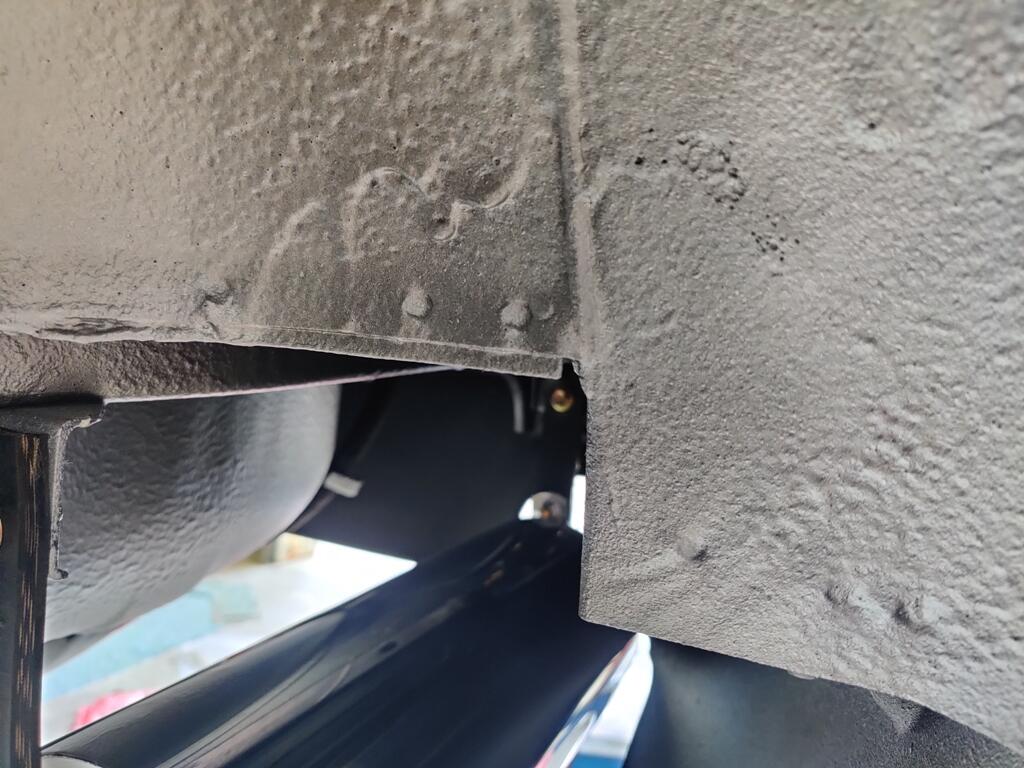
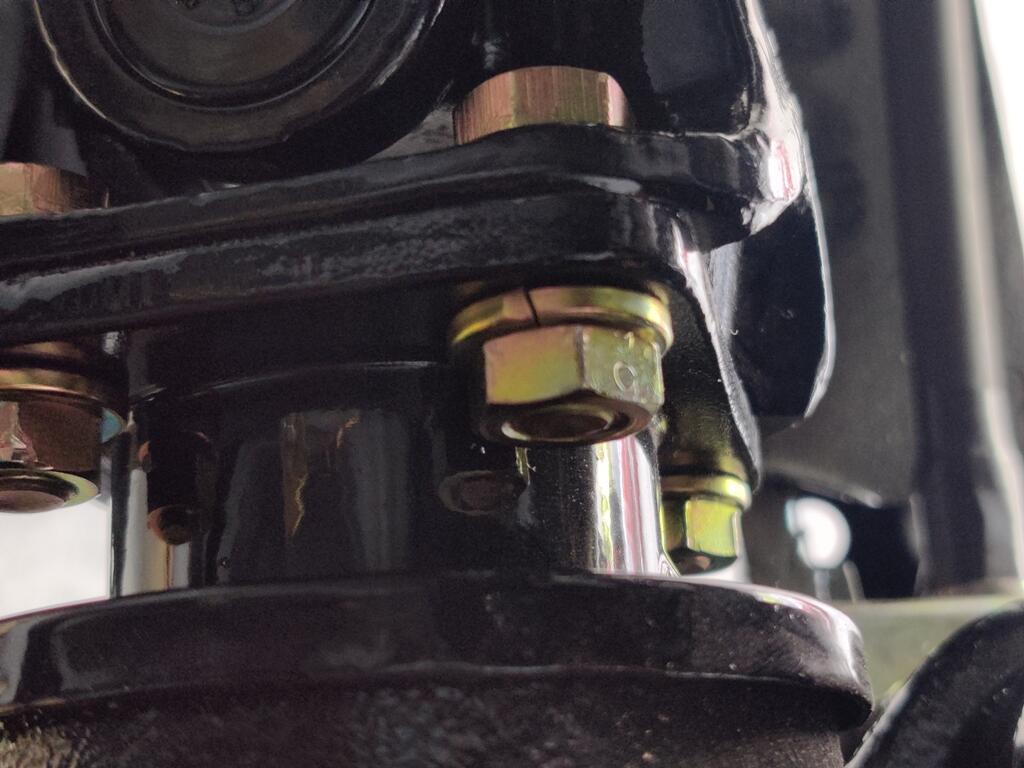
As I was working on the car this past weekend, I took a few pictures of some details. There are still a small number of not insignificant things to do, but I see that I am nearing the end. I expended a lot of effort to keep the factory spot welds in the lower dog leg part of the rear wheel opening. I am very pleased with this outcome. Replicating the original factory undercoating didn't go as well as I would have liked. However, I do like that some of the old shows through and not in a way that it is obvious that there is old and new: I painted the aftermarket Suspension Techniques springs black so it would not be obvious that they are not original. I disliked the bright blue they were originally. Original rear drive shaft installation hardware - note the "9" stamped into the side of the nuts: The modified spring retainers should arrive back to me tomorrow. After I install them and check cam wipe patterns, I should be able to fire the engine up and break in the cam.


-
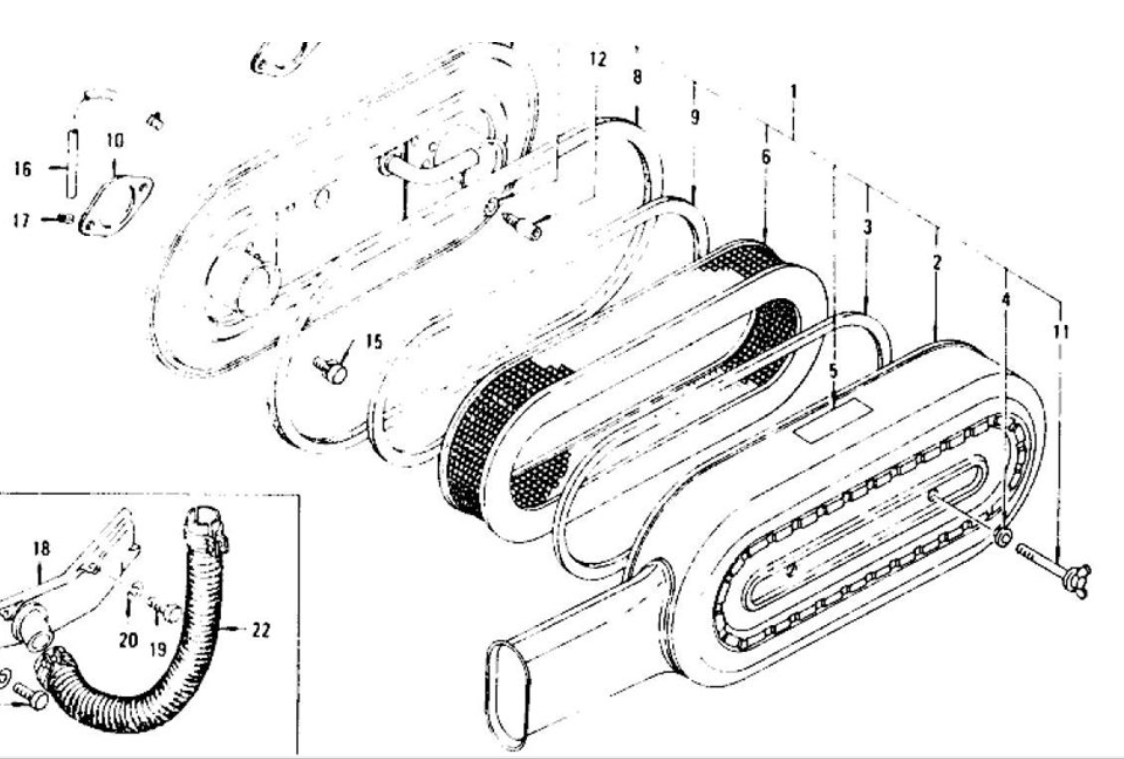
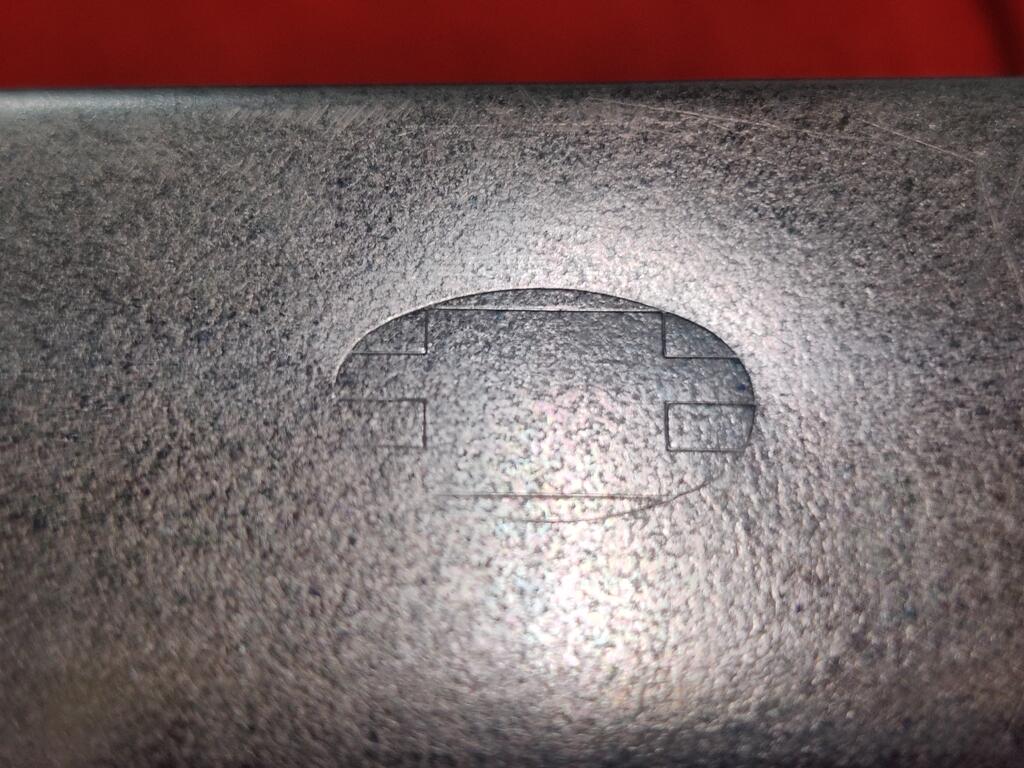
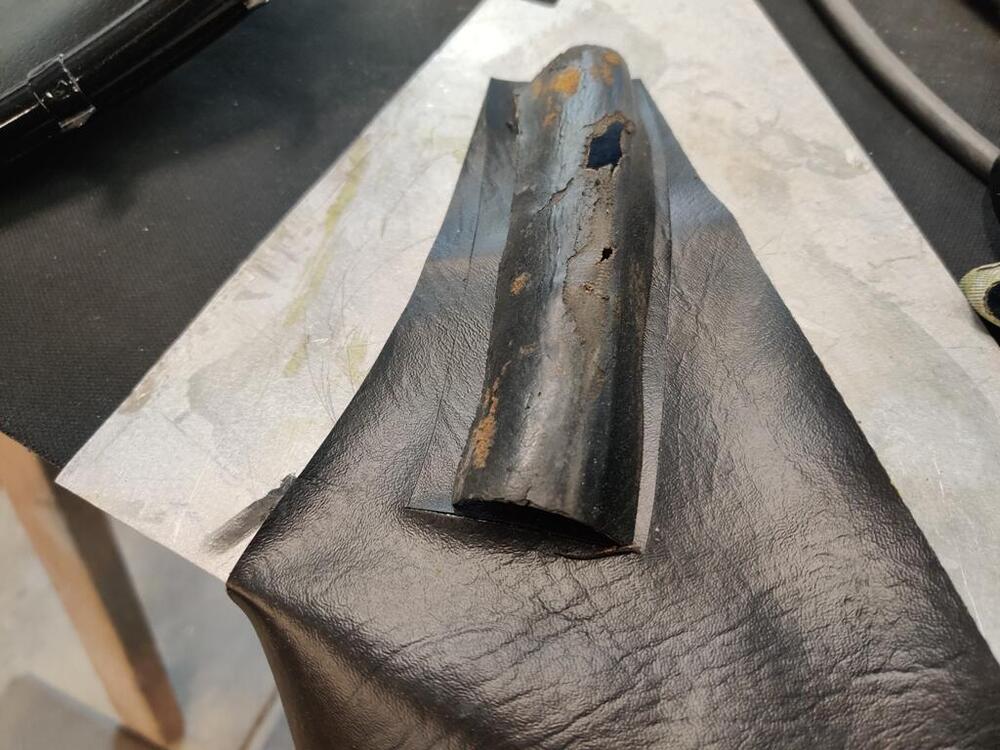
Here are the markings on my air filter element - there is one of these stamps on each side, and the U8308 is only on one side of the element:

-
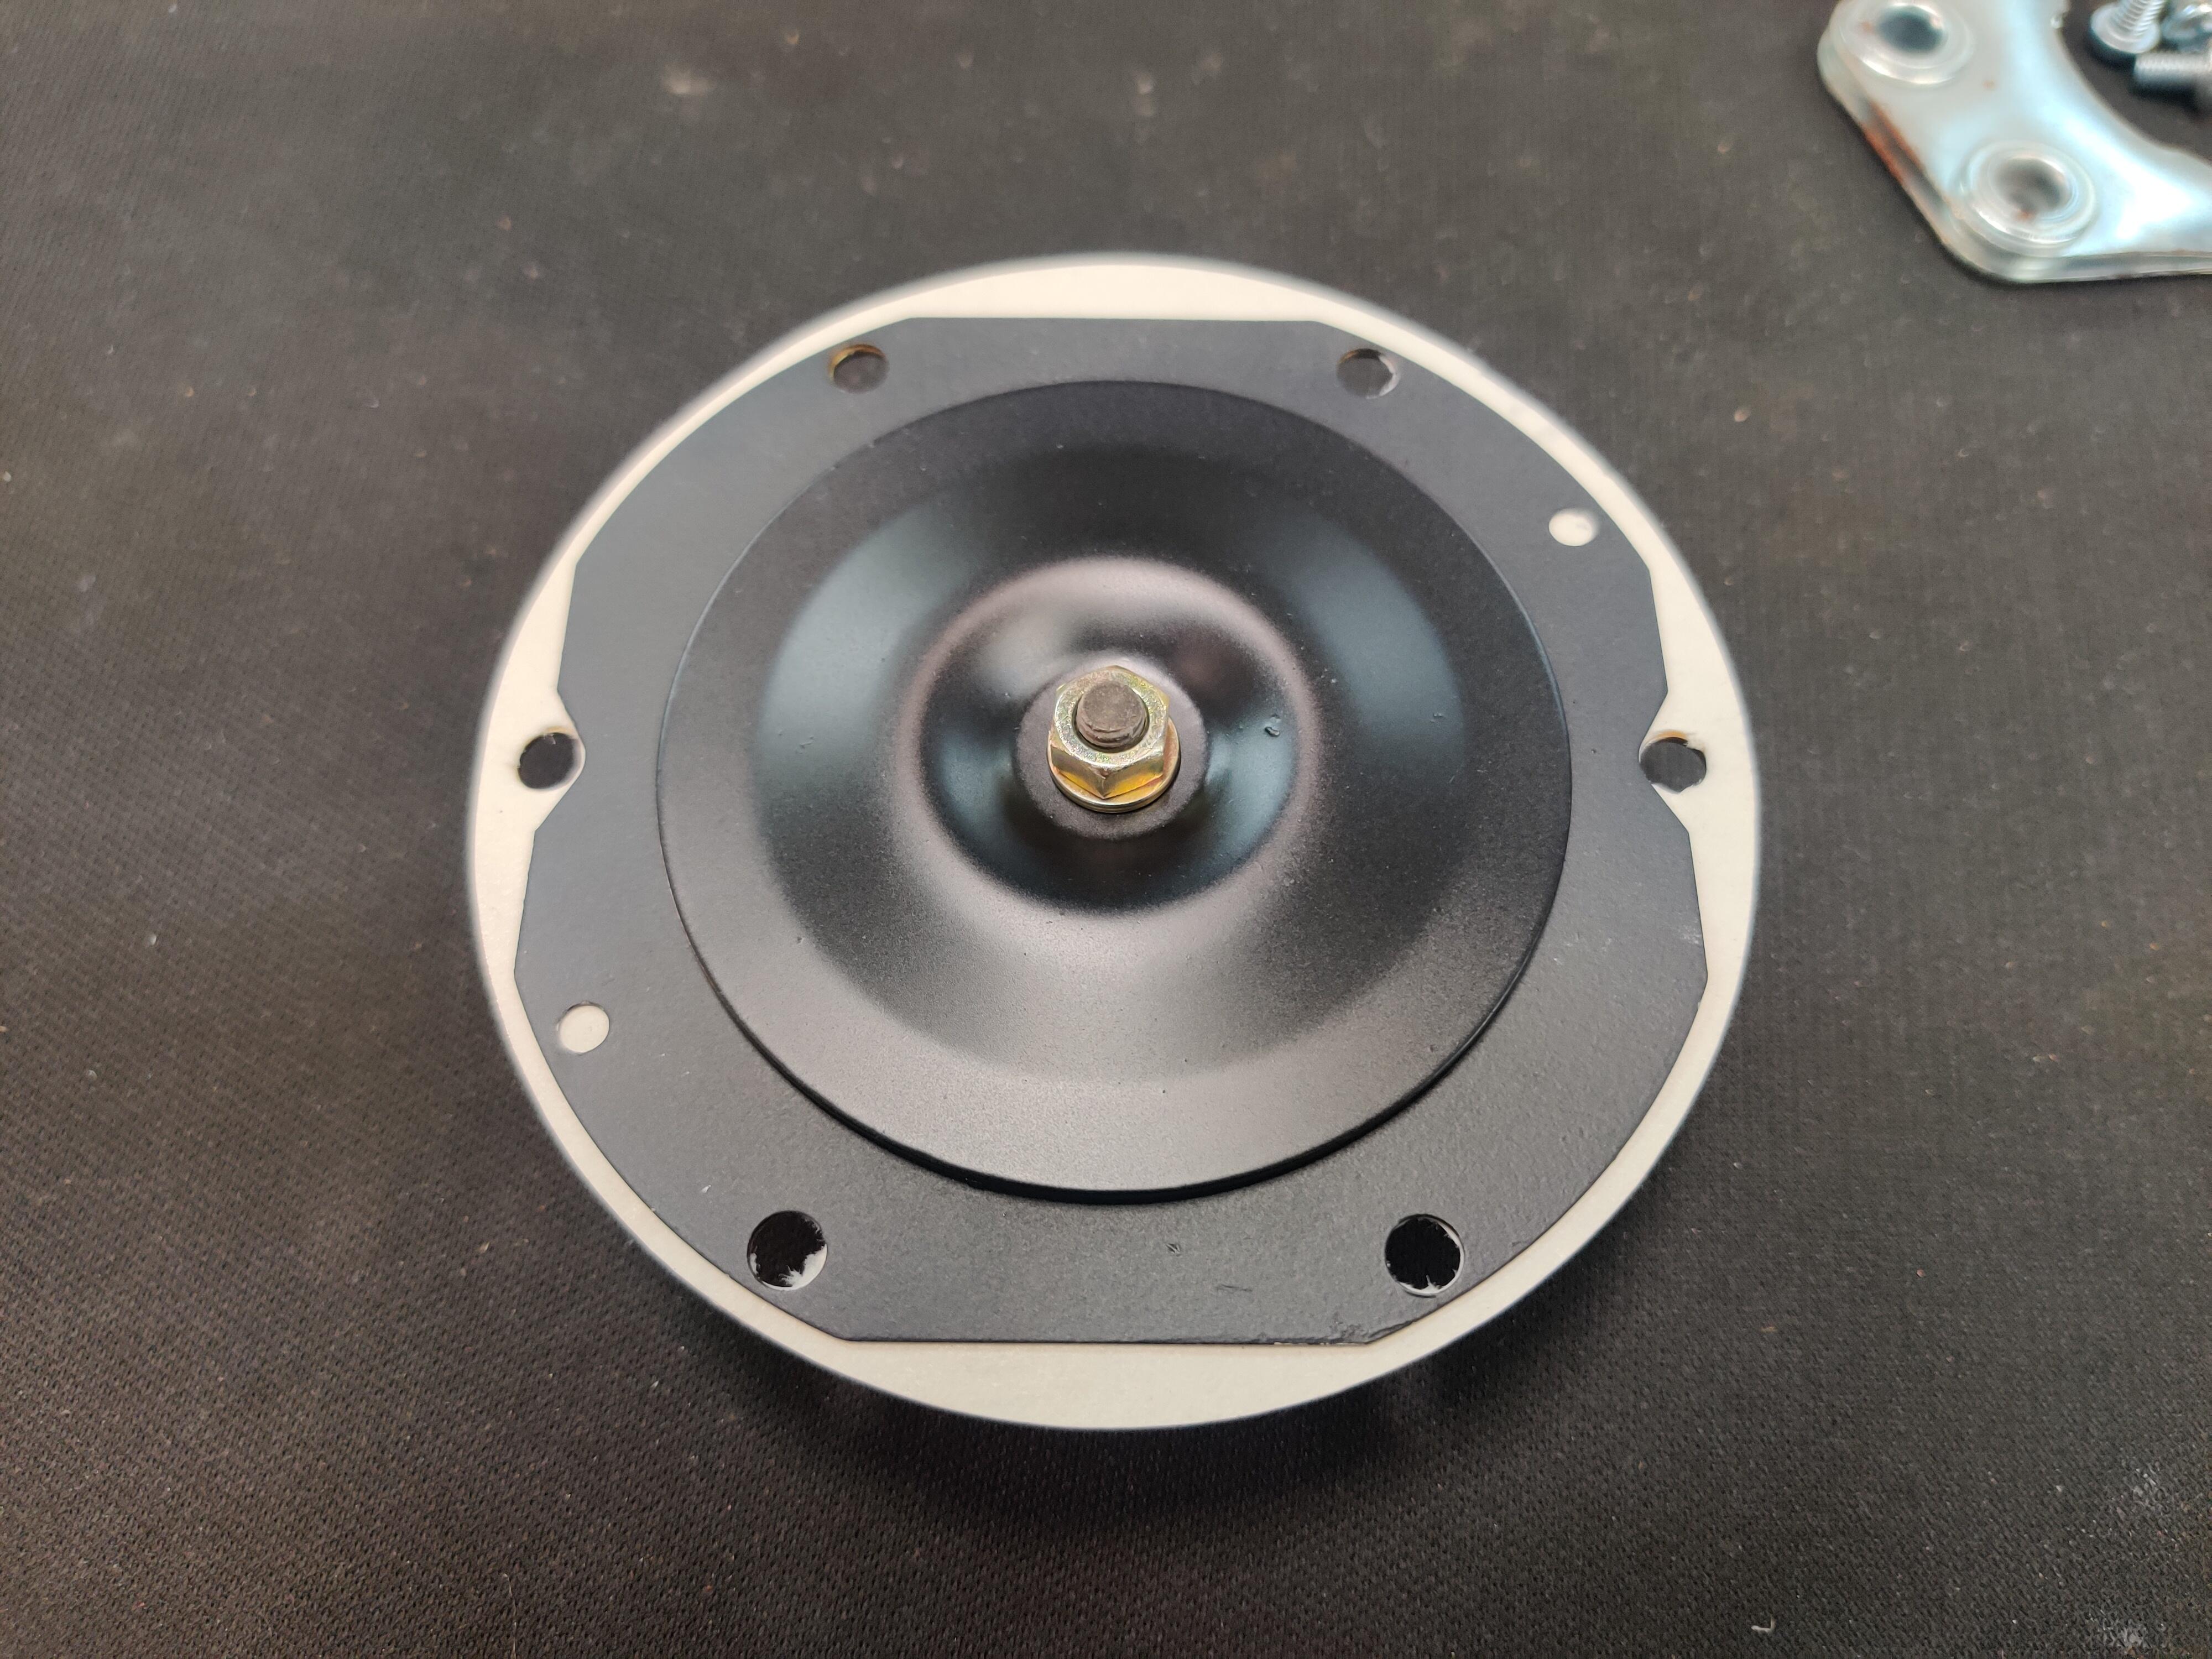
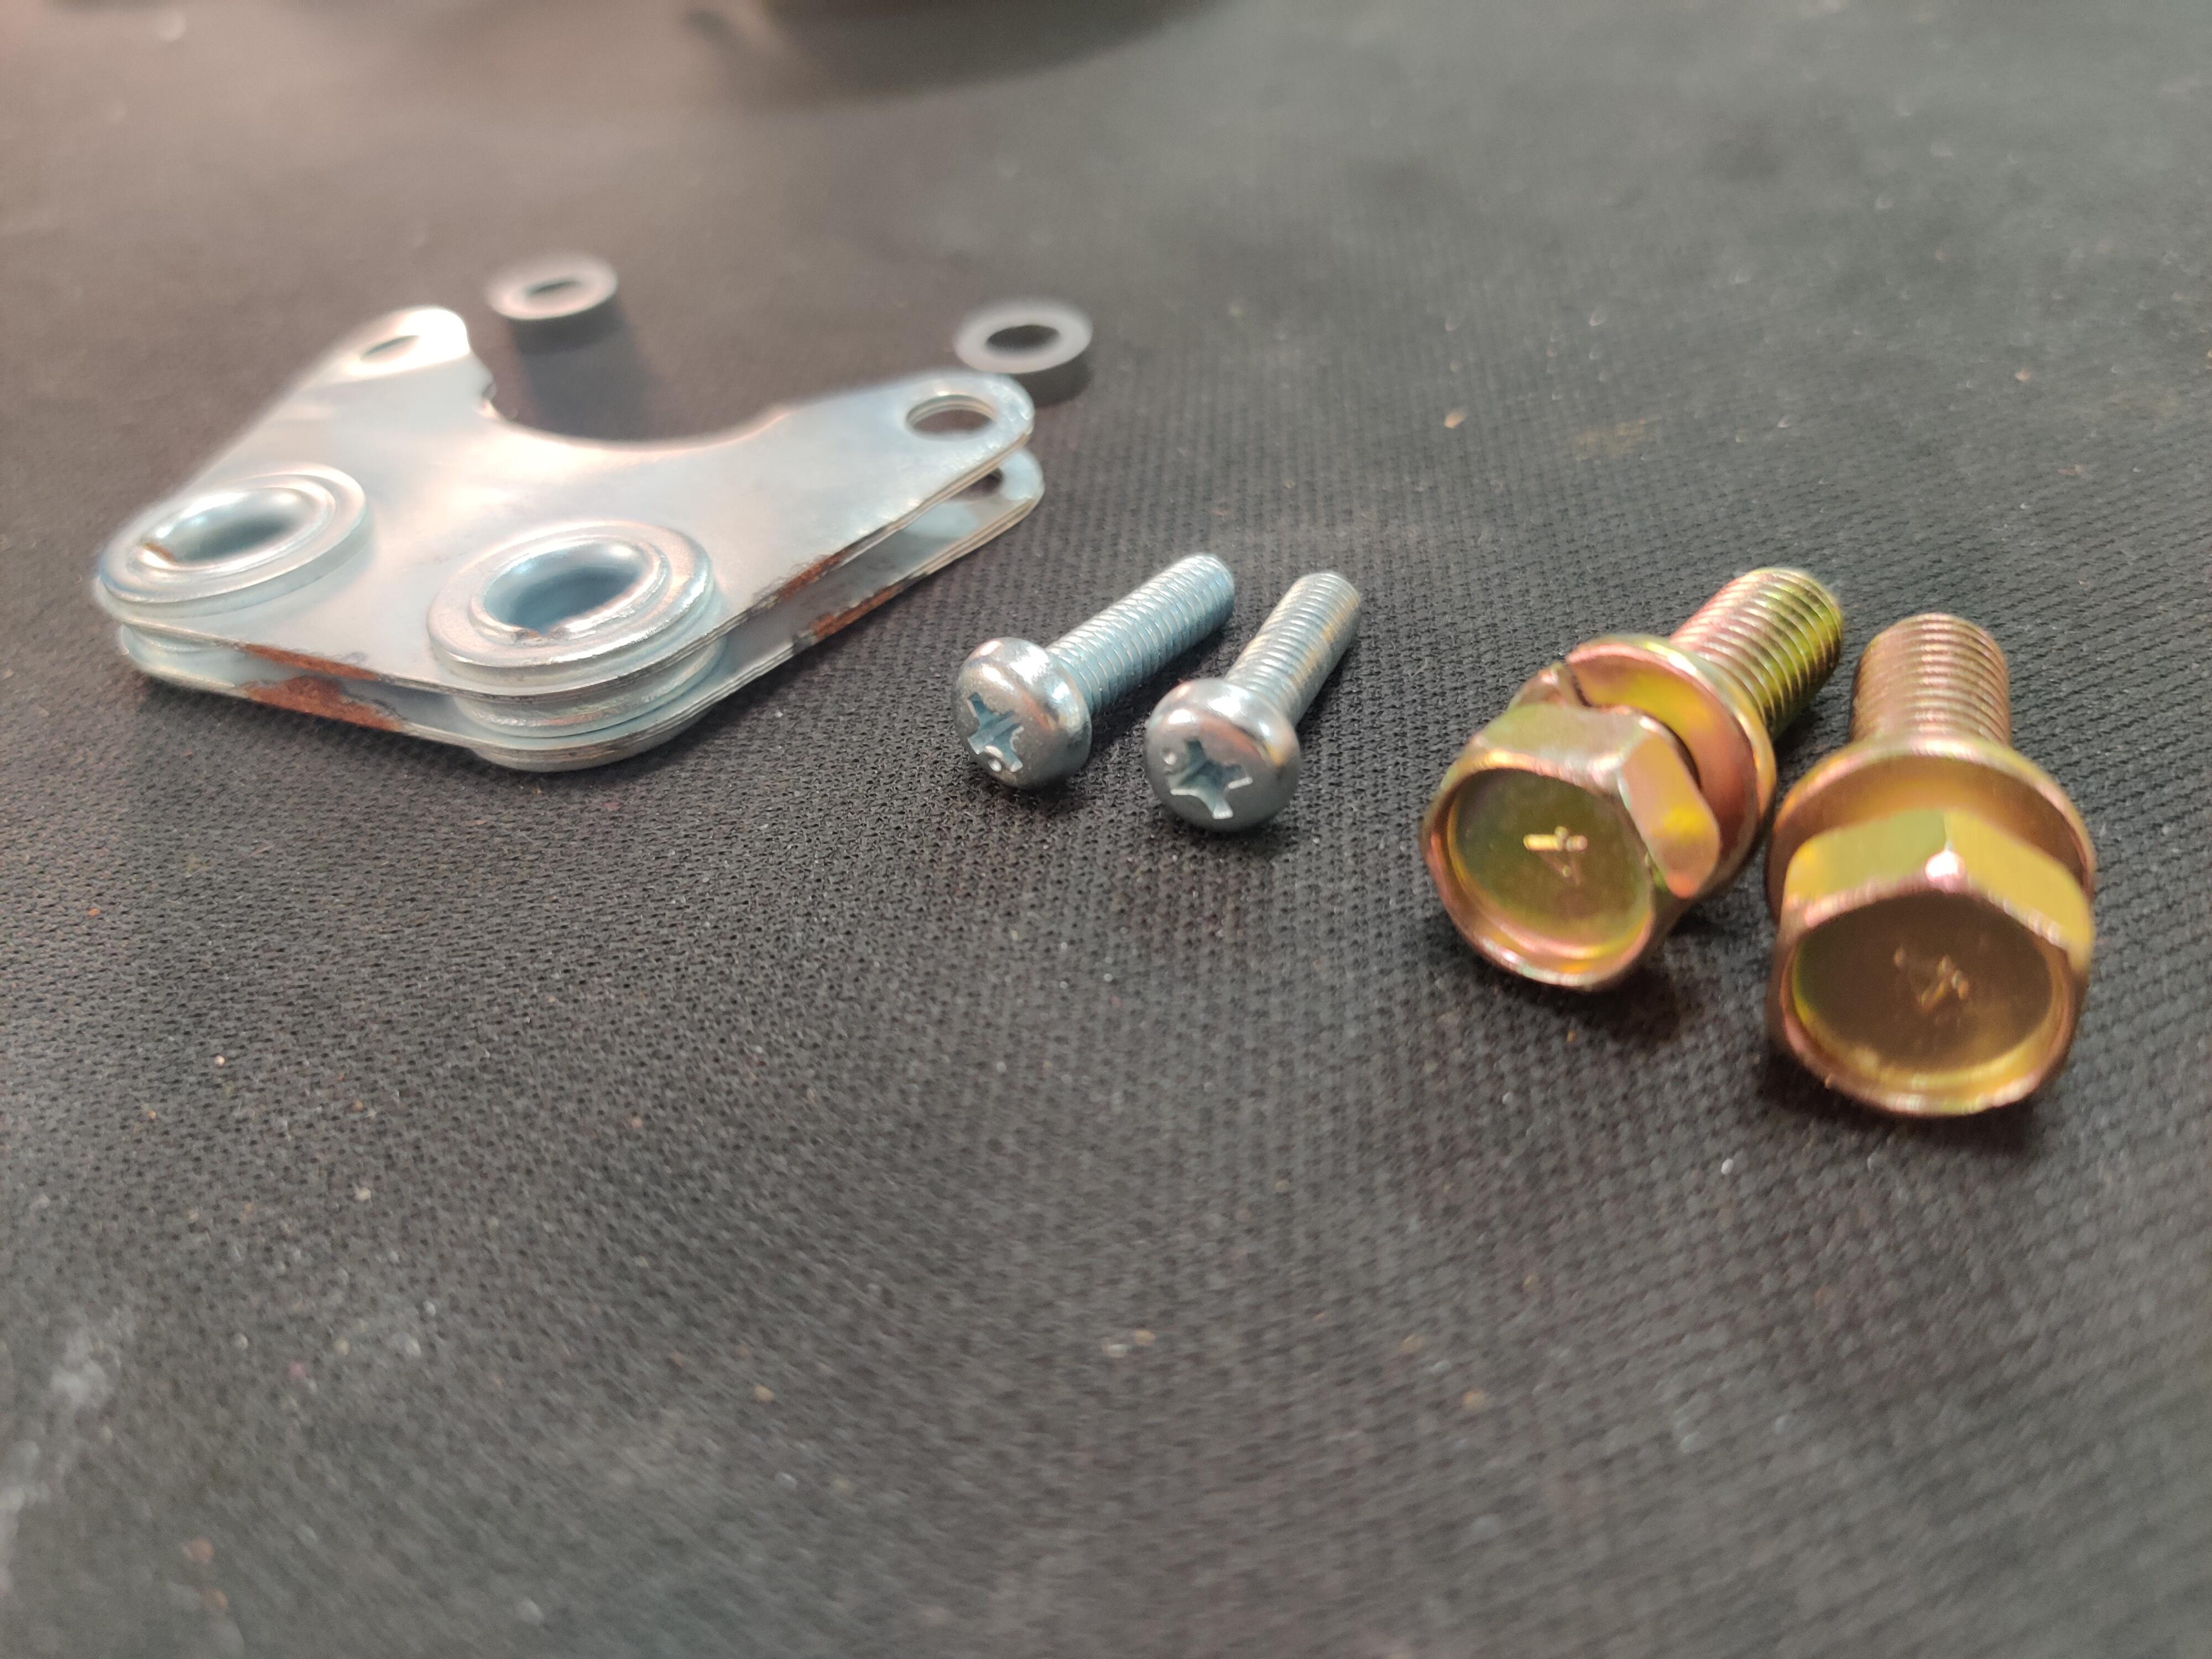
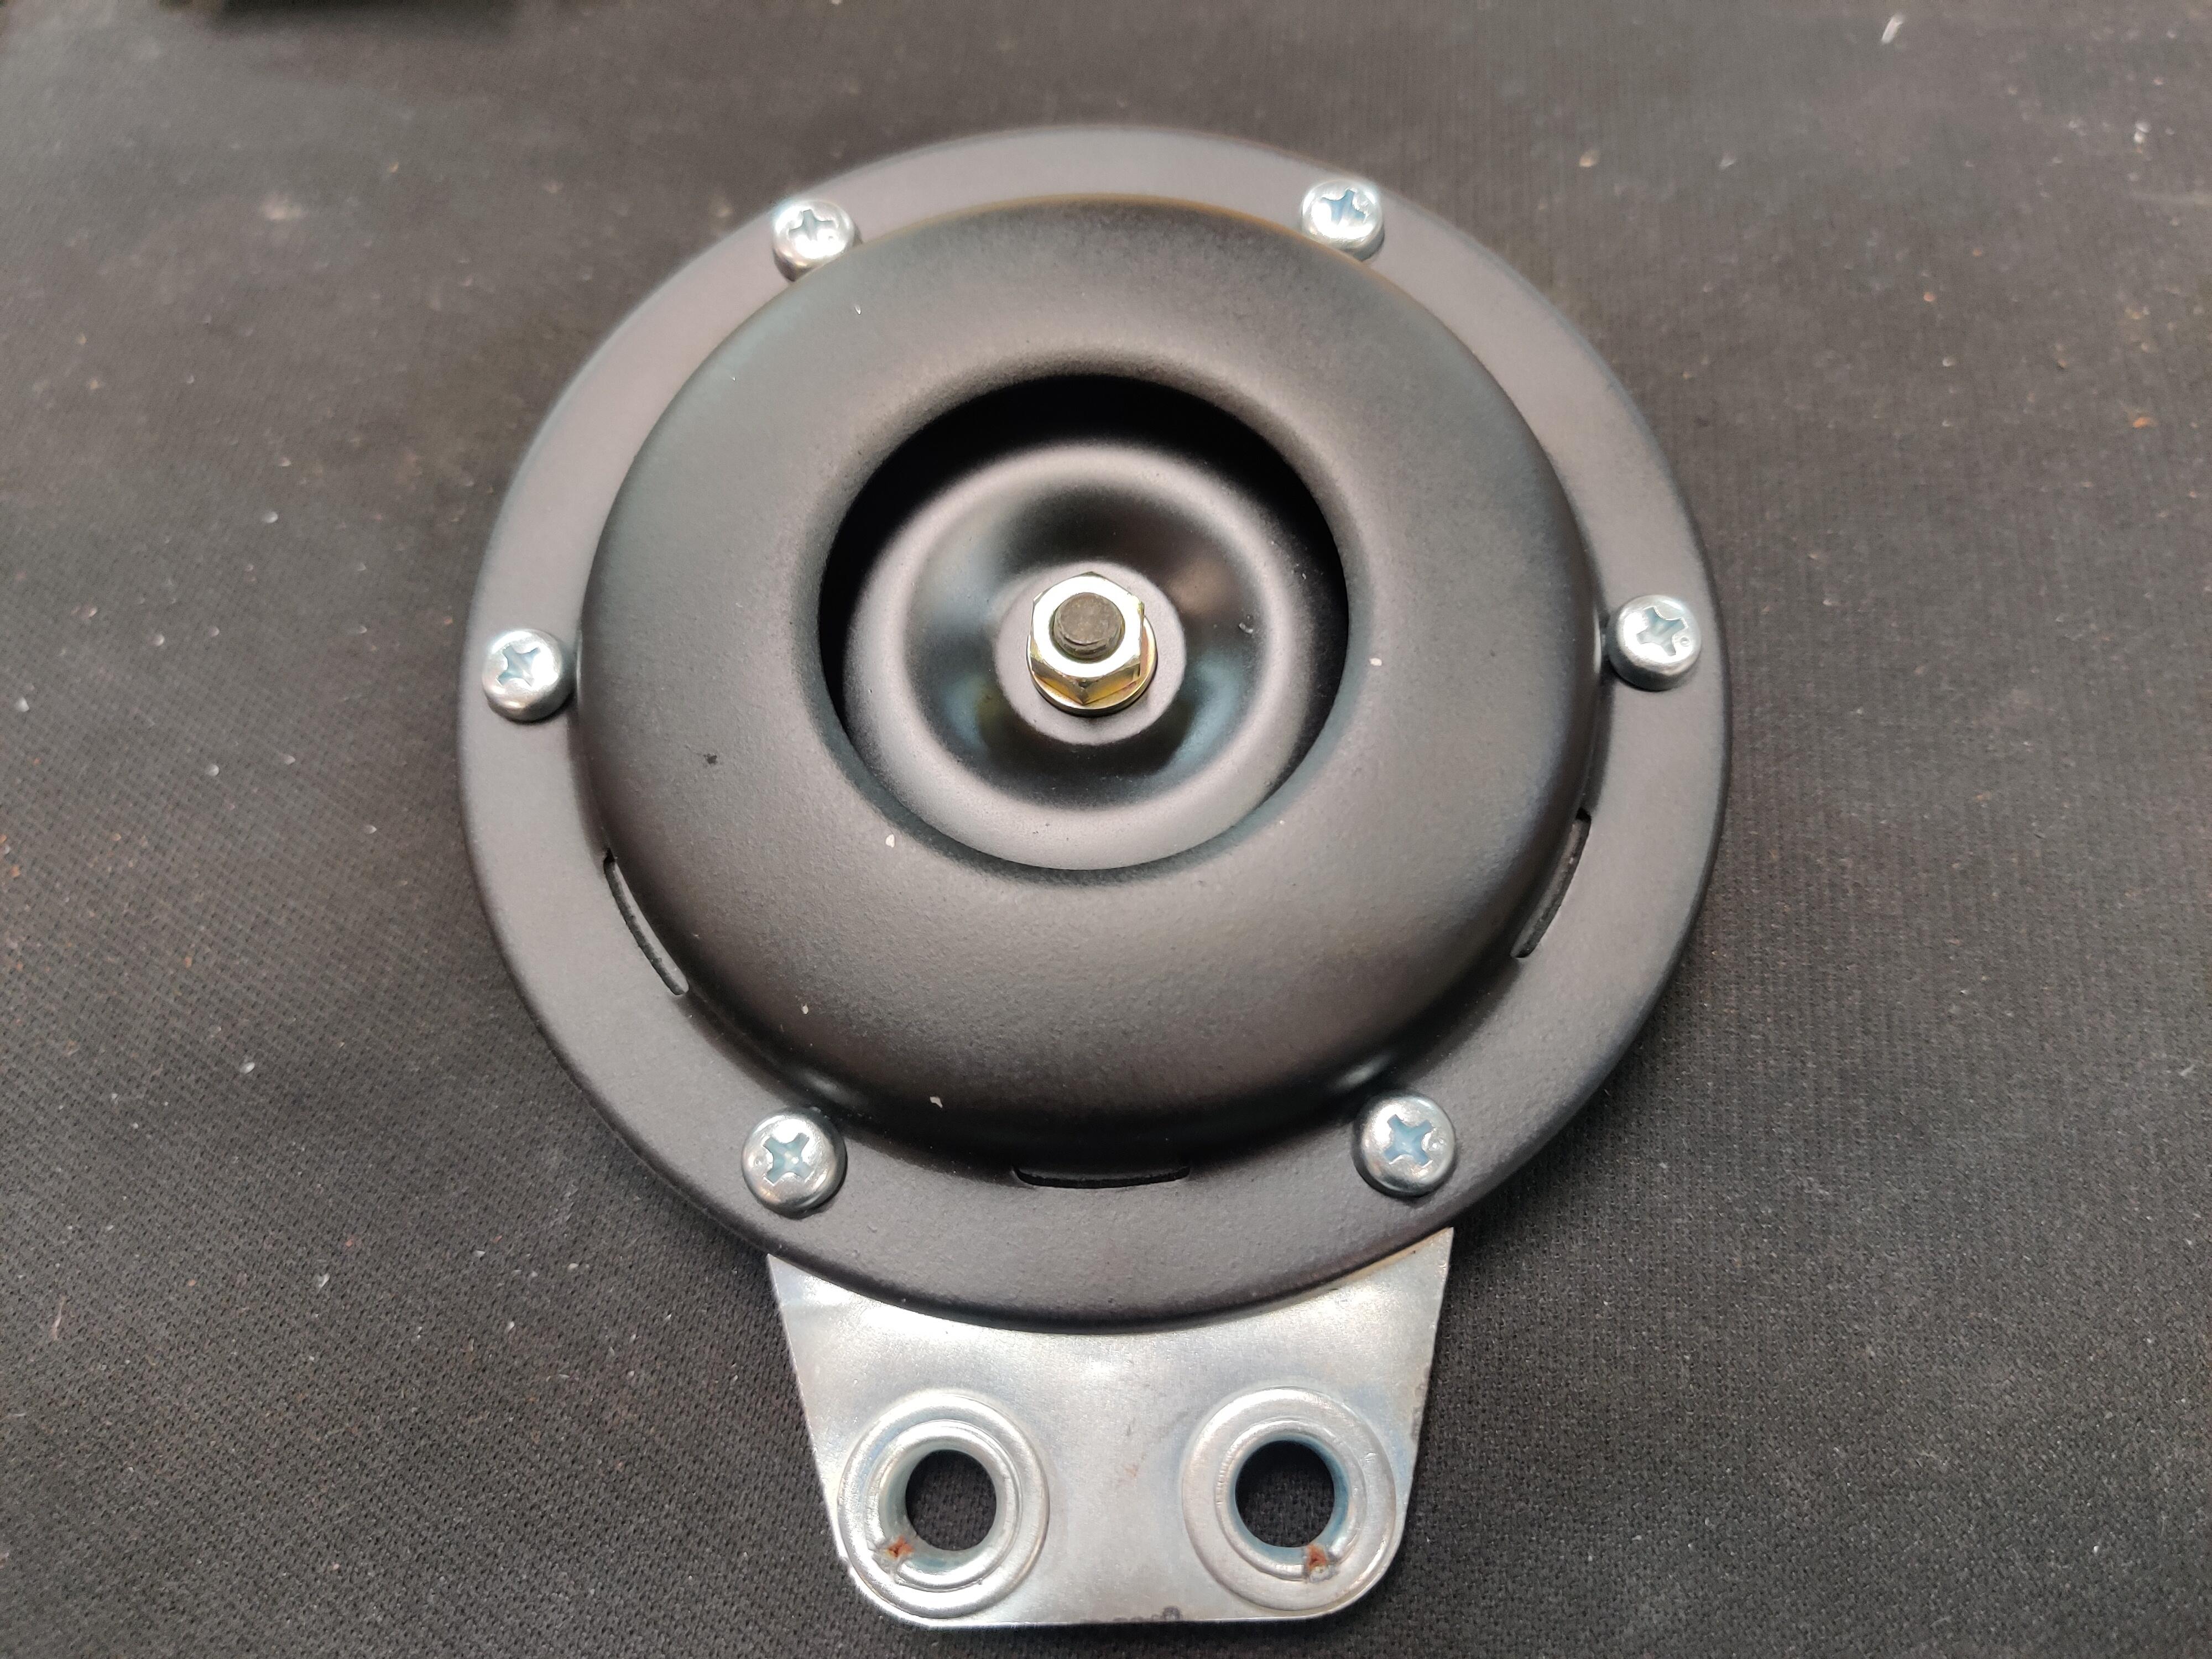
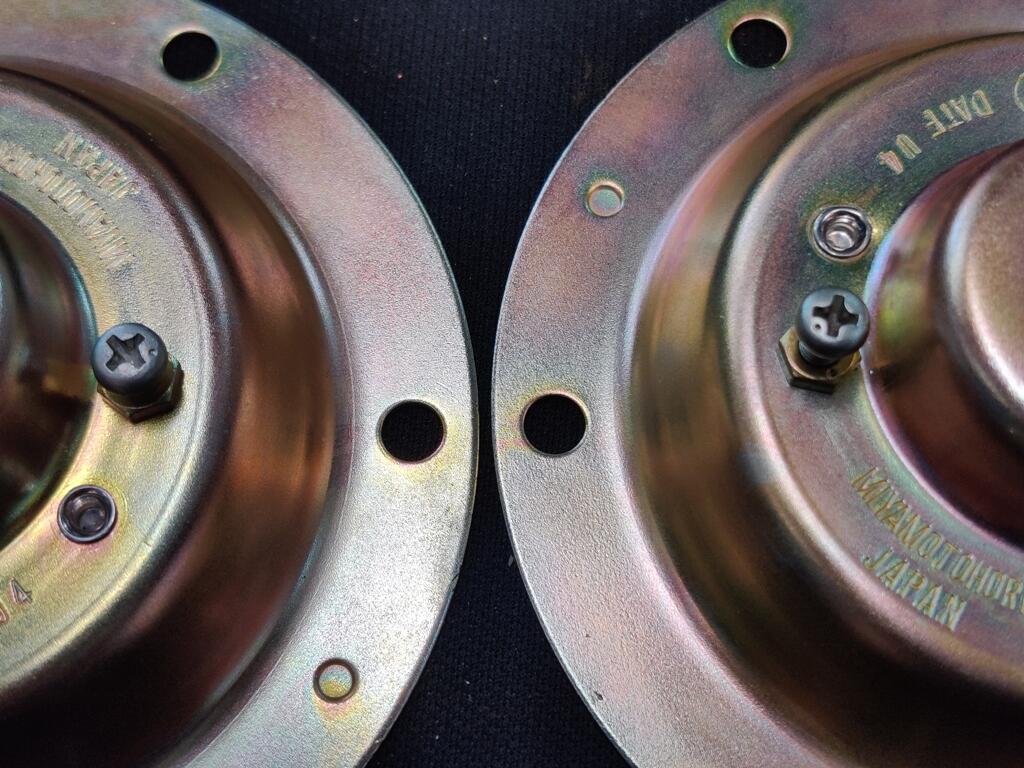
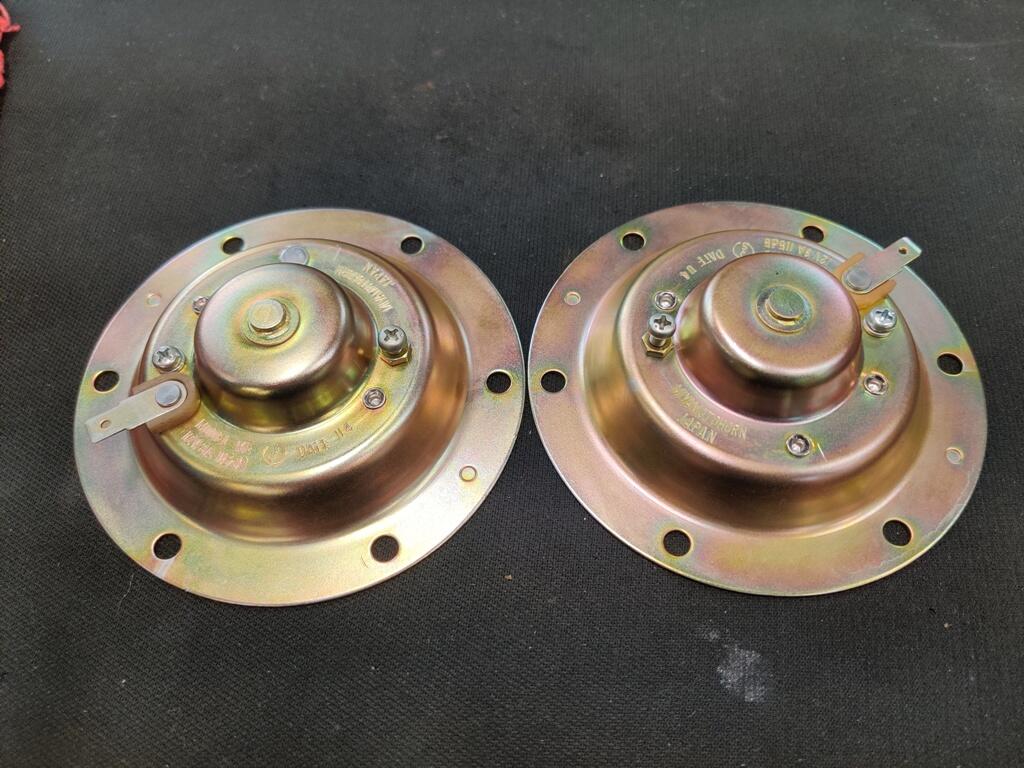
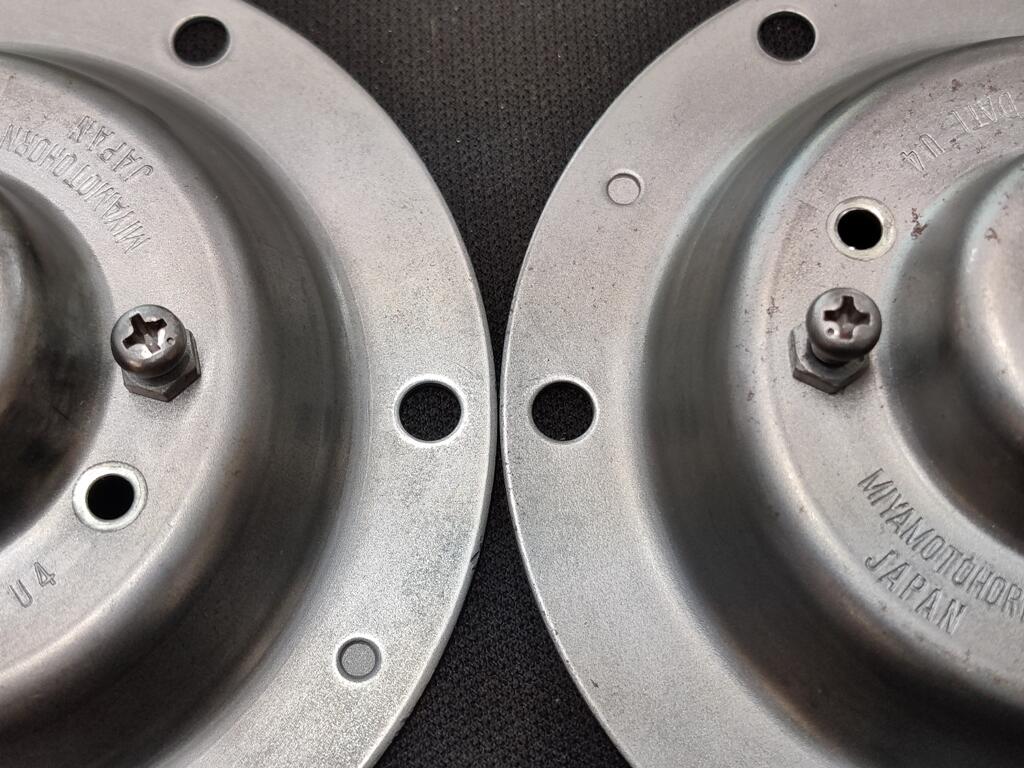
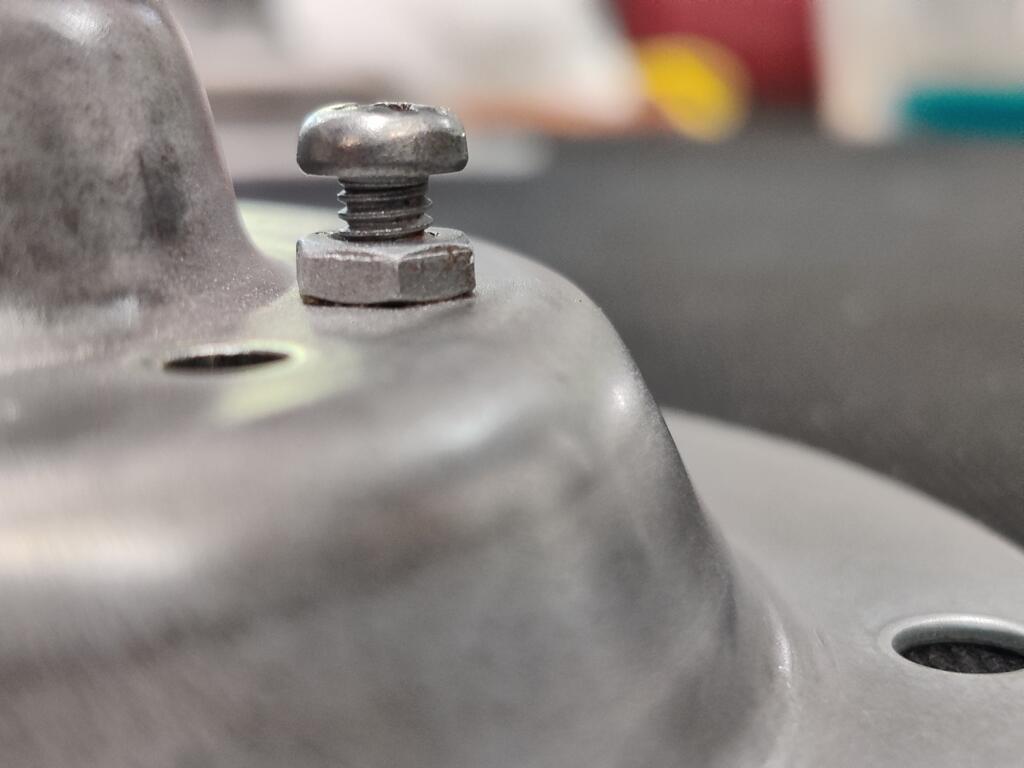
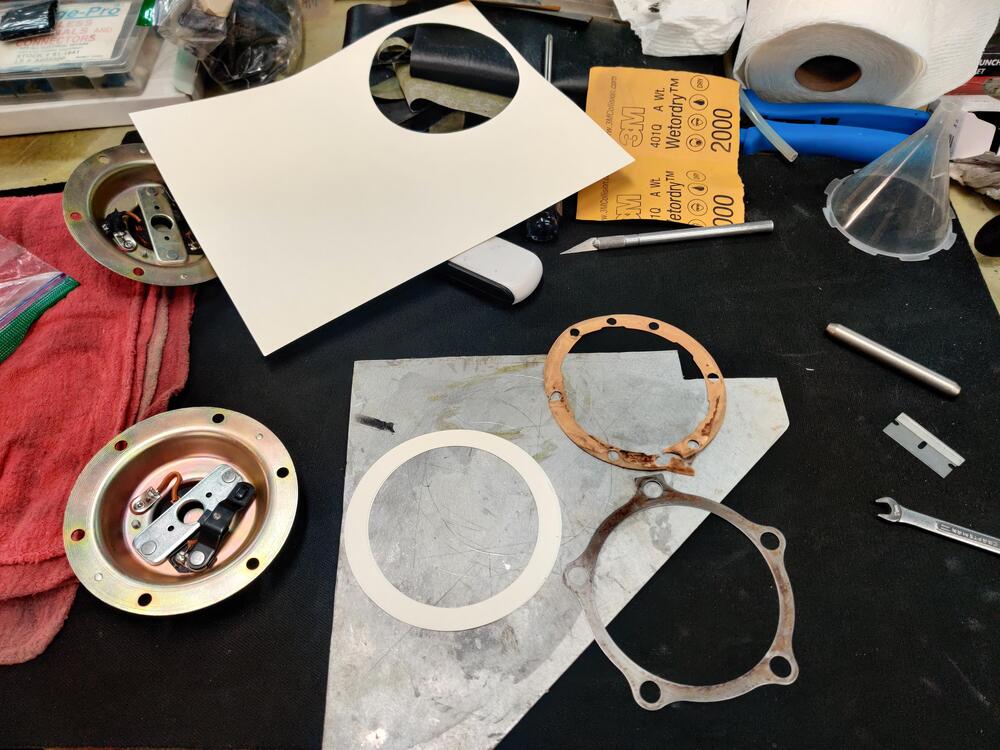
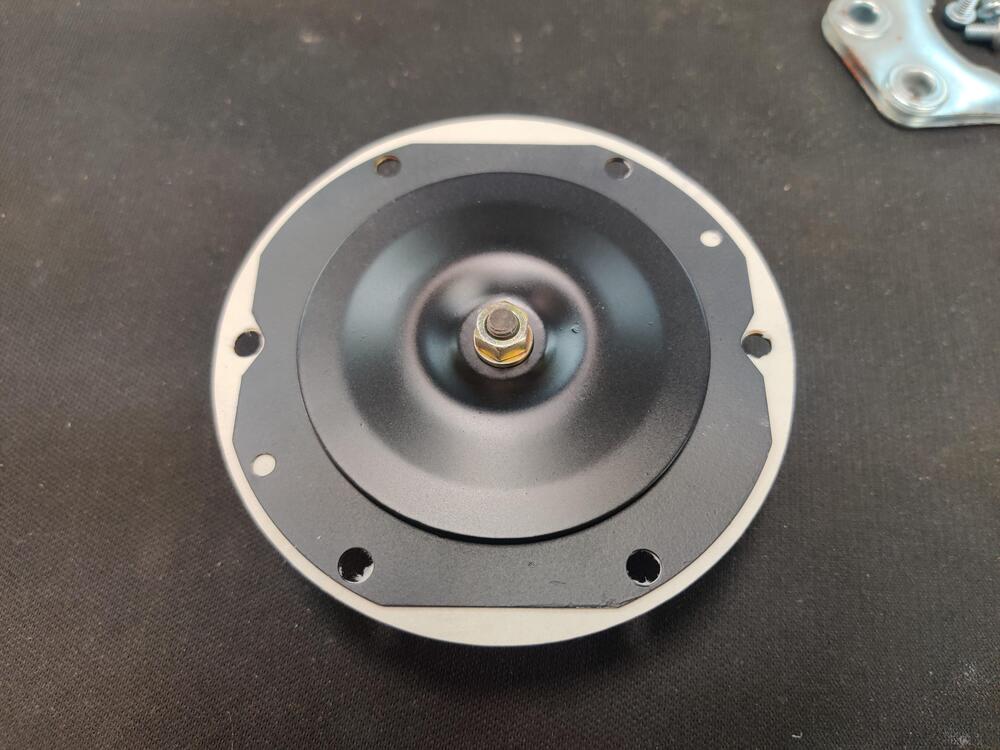
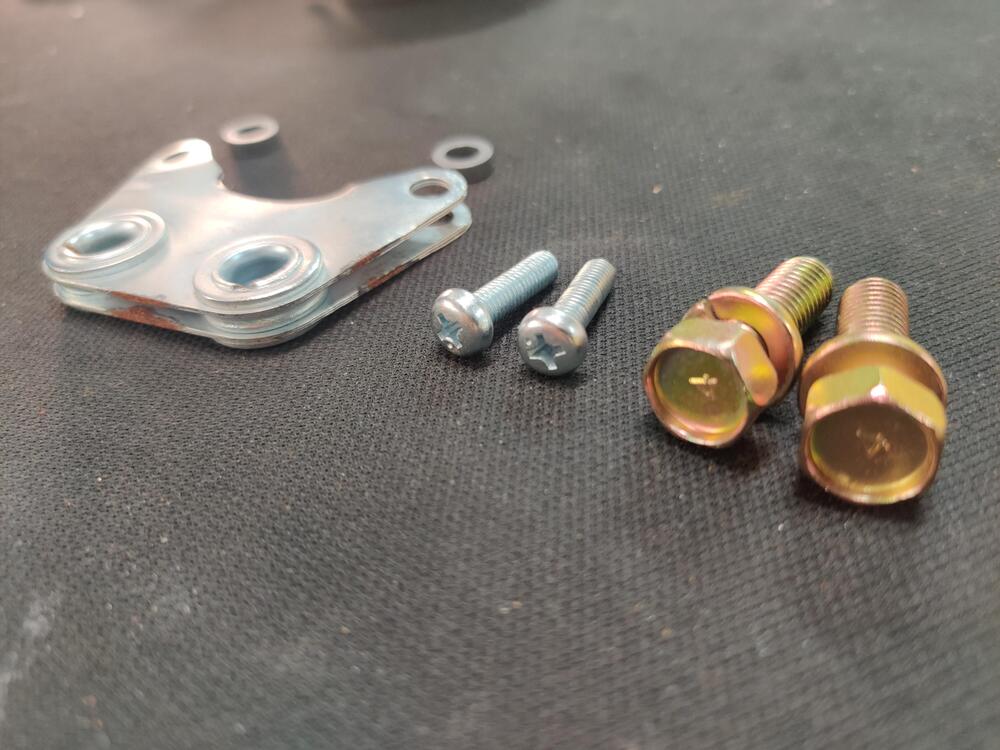
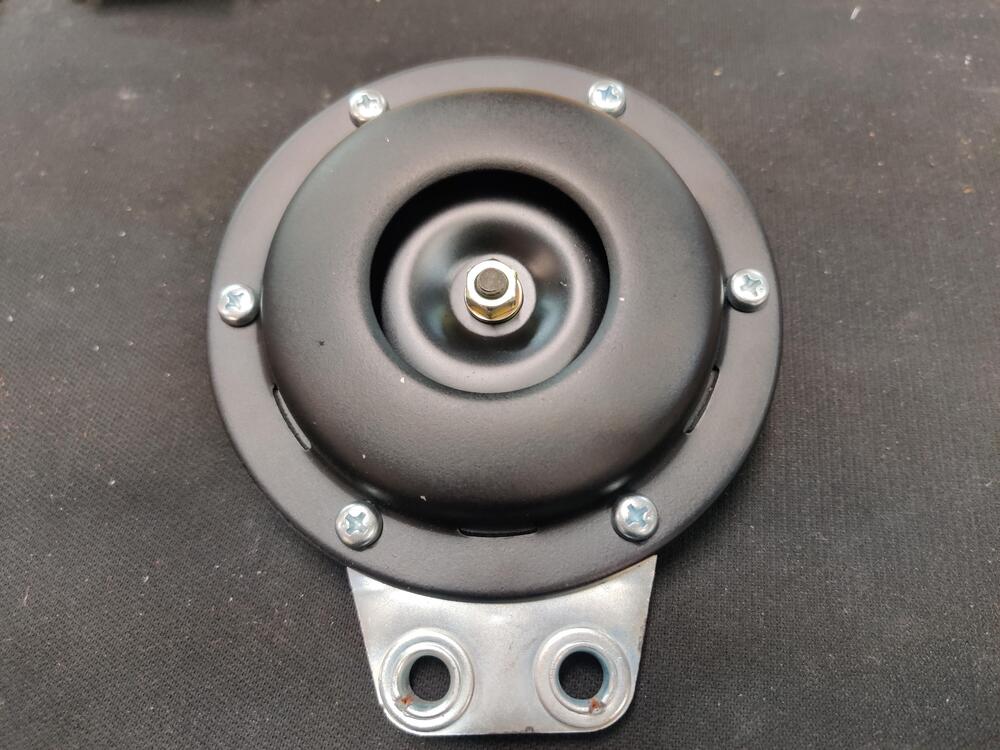
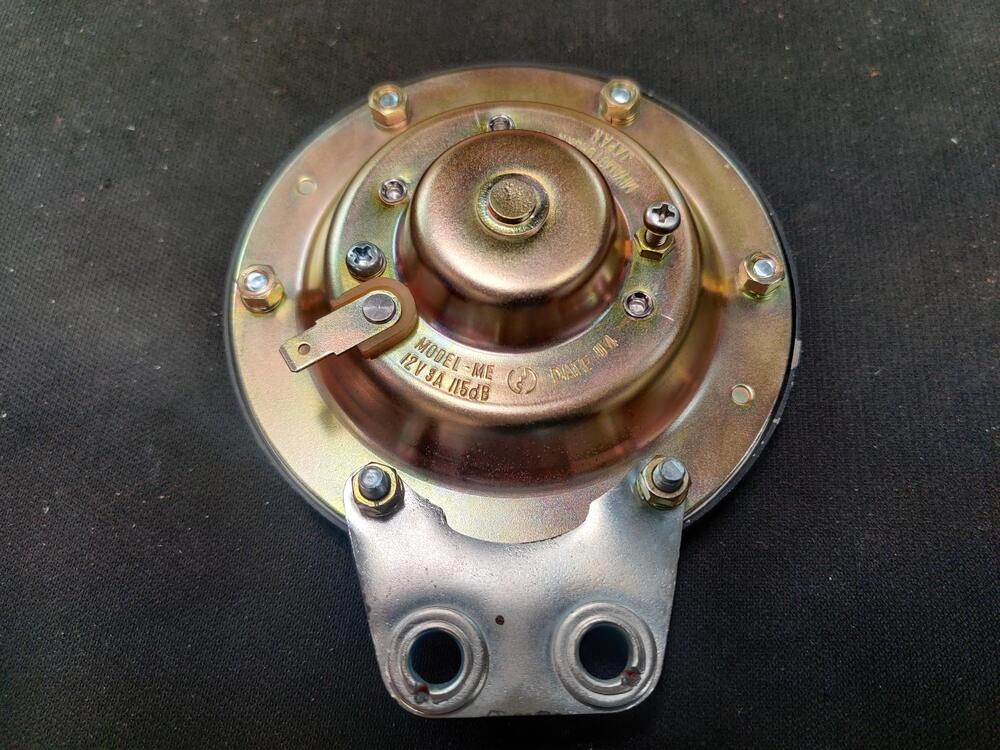
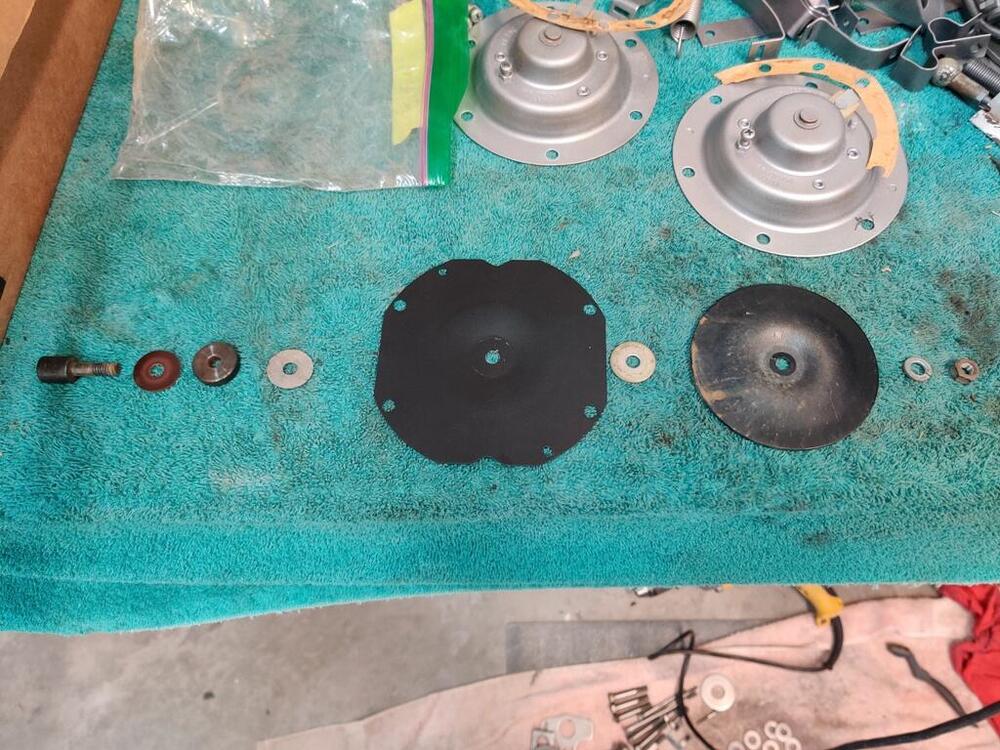
Today, I finished reassembly and testing of the horns. I made some gaskets out of some old "resume" paper I had. It is high quality paper in a slightly off white color. I sprayed a couple of coats of clear coat from a spray can on each side of the new gasket. The differential side flange shim was a good template for the ID. I used the horn for the OD. Some people have said that their horns have a very dark brown finish on the front. Some have said they were other colors. Mine sure looked to be black to me. Condition the horn was in when I took it apart. This plate is aluminum and was painted black on one side. That paint looked to be done at the factory to me. I cleaned it and resprayed it with Krylon semi-flat black. I forgot to take a picture of all the hardware, but here is some of it. The mounting bracket has two little aluminum spacers that go in between the plates. Two longer 6 mm screws secure the mounting bracket to the horn. The other four 6 mm screws are much shorter. Horns installed. It is interesting what makes the horns high vs. low pitch. I think all of the parts are the same except perhaps the piece to the far left in this picture. I think the height of it is different for each horn. And to get the contacts operating properly, the volume adjustment screws have to be set differently for each. I found this out by having to adjust my volume screws differently from what I did yesterday. The screw that was tall, I had to make short. And the screw that was short, I had to make tall. It was an interesting learning experience, but now they are both adjusted and nice and loud.


-
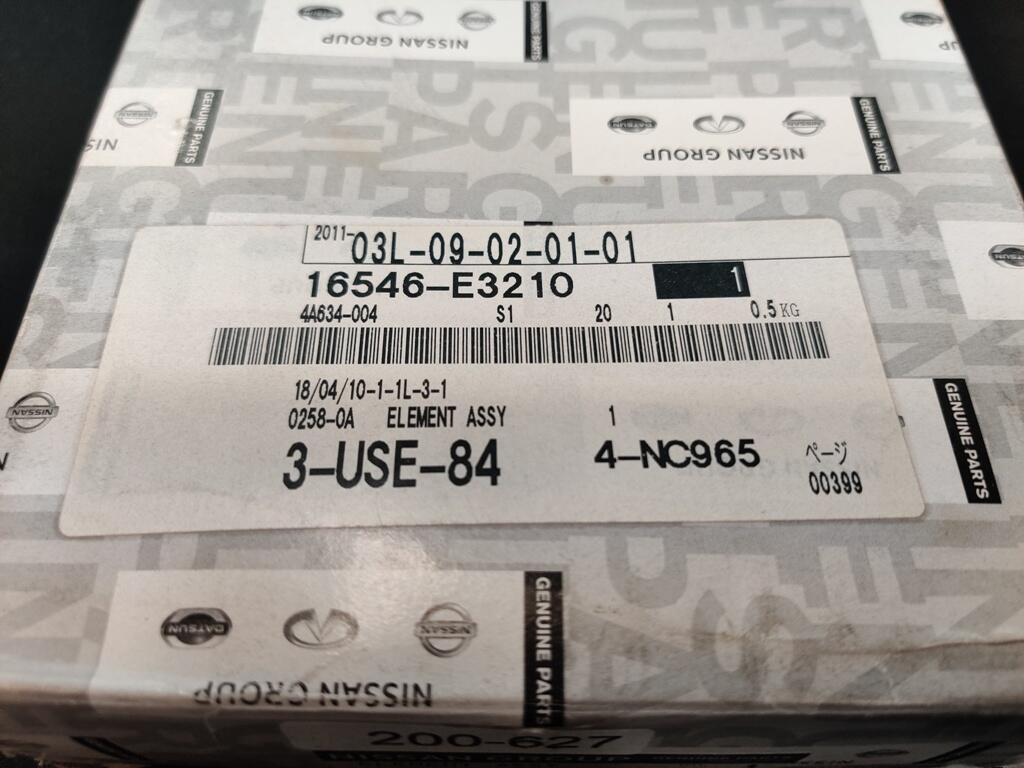
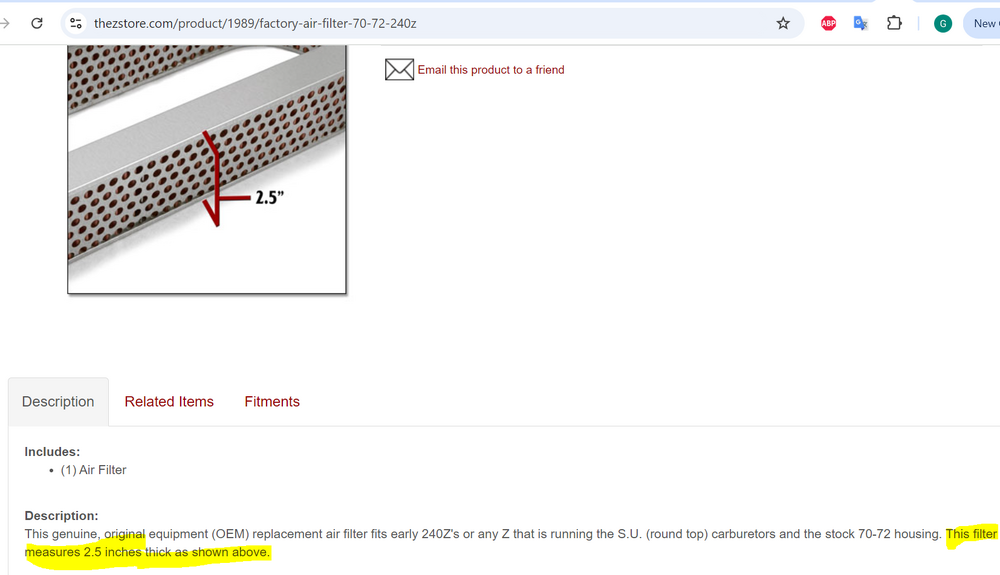
Where do you see 800-627 on the end? Oh. I see the 800-627 on the end now. Interesting. I thought I purchased this from a Nissan dealer. However, the Nissan part number on the box is correct for up to 06/1972. The filter I have is 2.355" thick as measured with calipers in several places. That is 59.8 mm thick. So, do I have the wrong filter housing?
-
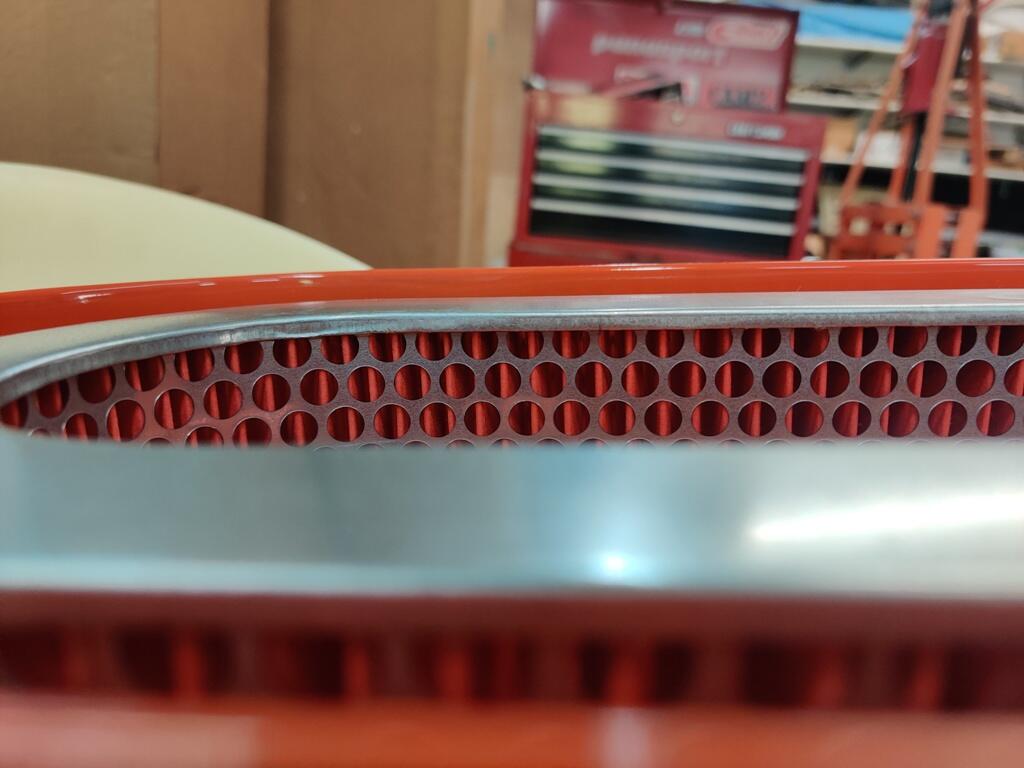
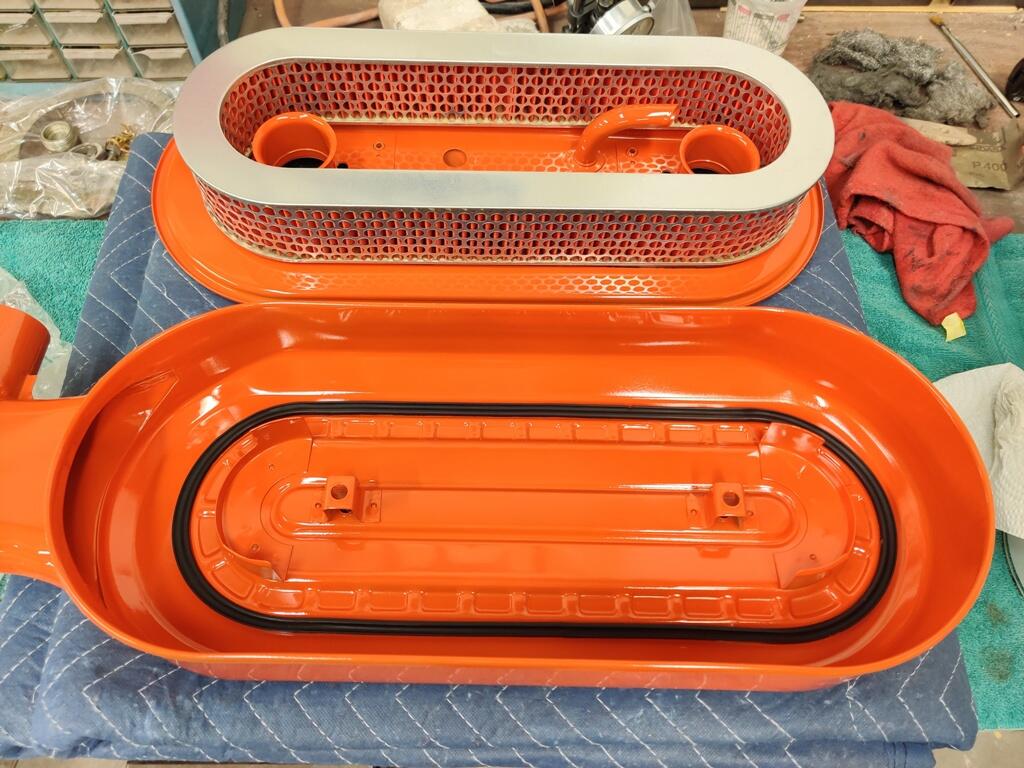
Has anyone else seen that their air filter housing does not seat fully against the seal even with an OEM air filter installed? I painstakingly refurbished the air cleaner housing. I re-used the rubber seals inside. The only replacement seal is the one that goes all the way around the periphery that is not making contact with the cover in the photos above. That seal came from Banzai. There is a gap of about 1/8" there - the outside periphery of the air cleaner cover is not touching the seal. The seals on the inside of the air filter back plate and cover are bottoming out on each side of the air filter. Is the factory air filter a bit thicker than the original?


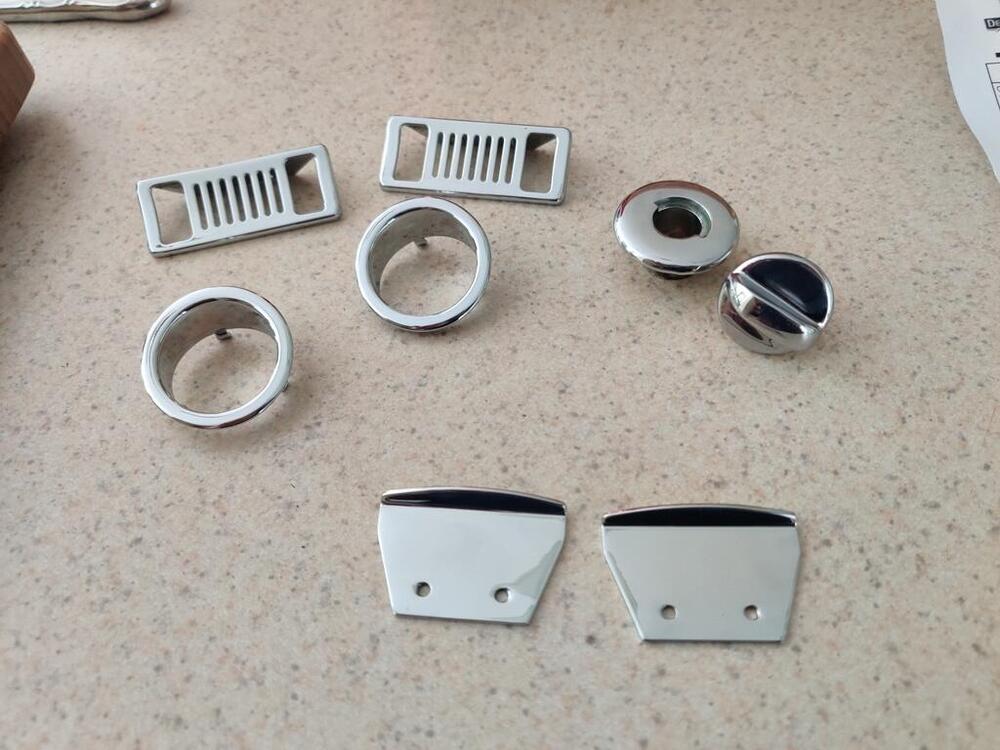
-
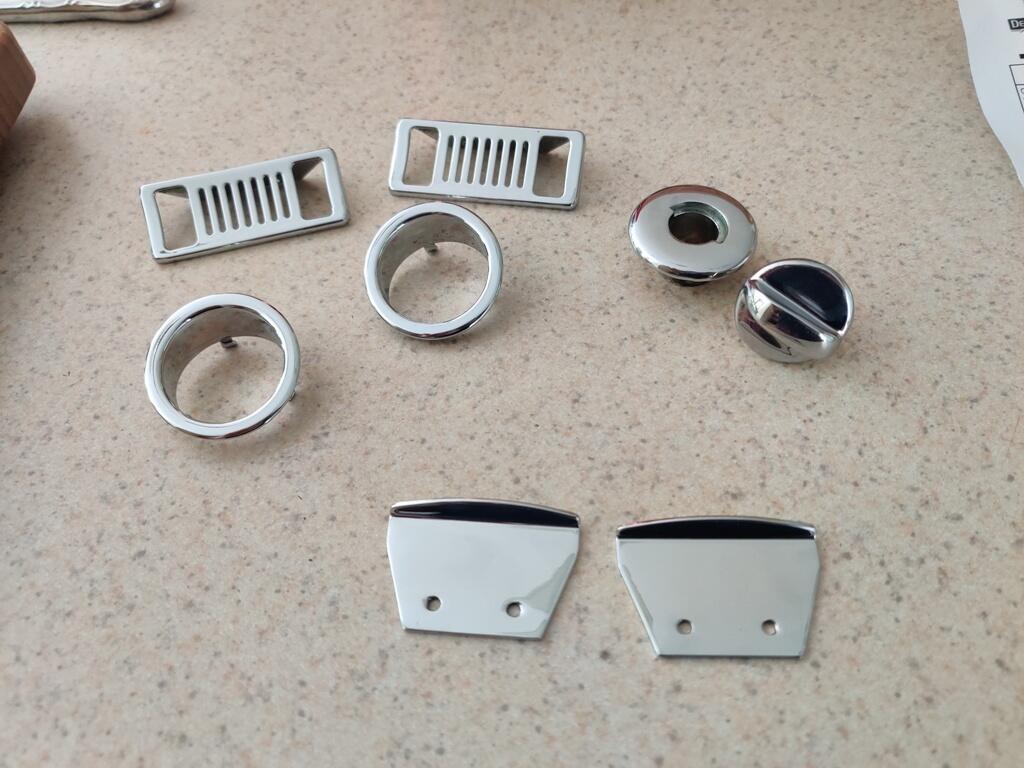
I am pausing on the seat bottoms for now. I need to think about how to make them look right. It is going to require something other than just hog rings to secure wire in the flap to the wire under the Pirelli straps. More distance will be required to keep the material from being yanked down too far. In the meantime, I got the small parts back from the chrome plater. They came out nicely. These cost about $250 to have redone. Before removing the horn tone adjustment screws, I took some reference pictures: Today, I put the re-plated parts back in the horns: I attempt to put the adjustment screws back in their original positions. Now I just need to make some gaskets out of paper so I can finish assembling them and then test them out! I also was able to remove the rest of the exhaust valve spring retainers early this past week and get them shipped off to the guy that did the head for me. He turned the retainers in a lathe to shorten the "hats" and will get them coming back to me on Monday.


-
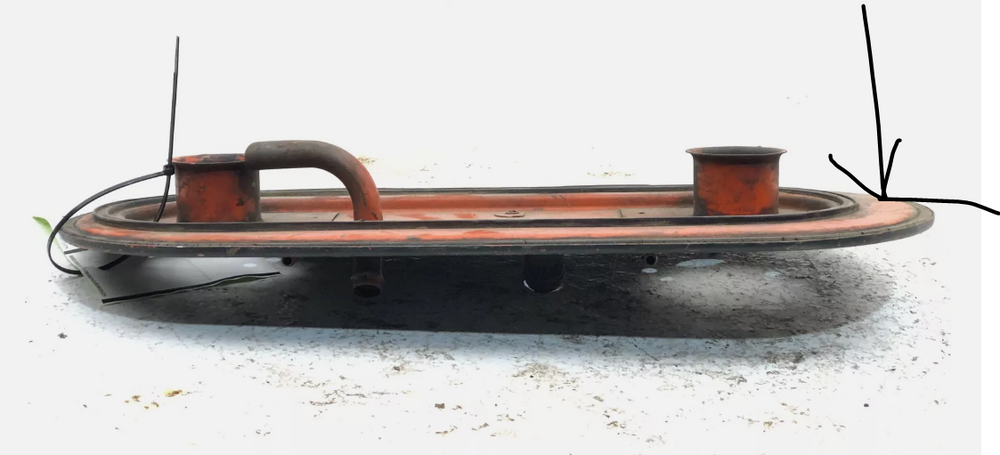
I think there may be another. I don't see the numbers in these cushions like on mine: https://interior-innovations.com/product/datsun-replacement-seat-cushions/
-
Correct. The wafers for the ignition have a slightly convex edge on the bottom or top (can't recall which). If you look closely, you can see that in my pictures. If you start with two door locks that are keyed to the same key, you save yourself a fair amount of work when replacing the covers. The thought crossed my mind that I could sell you some of the wafers which might be a good option instead of waiting for the kits to show up for sale. I could send you a few of each size and you could map out what you need. Let me know what you think.
-
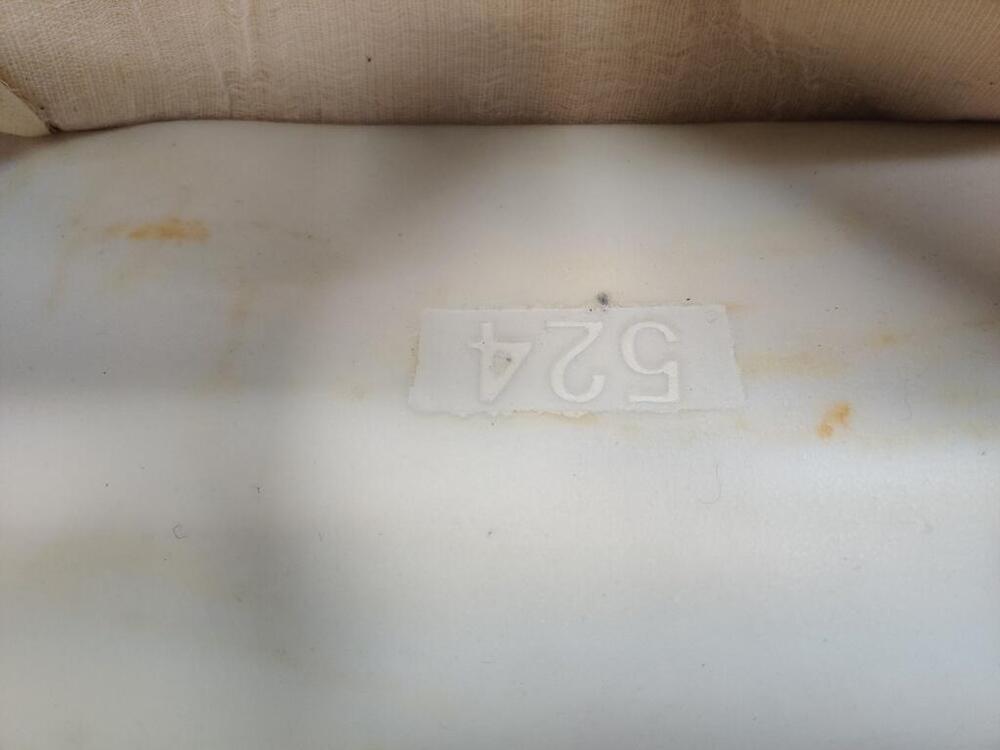
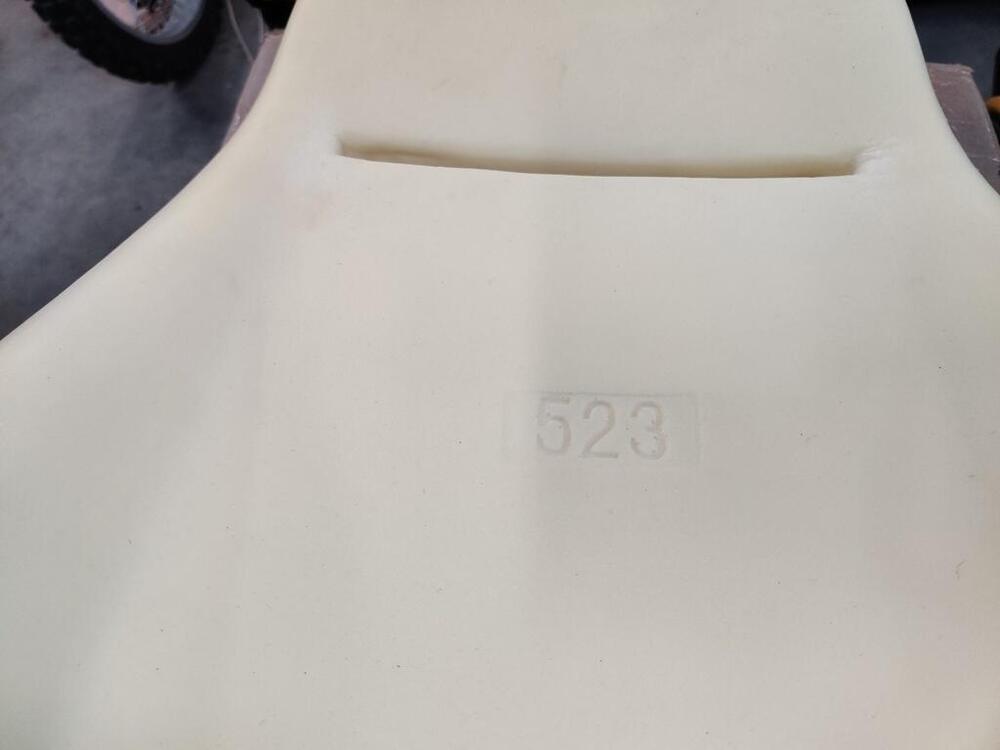
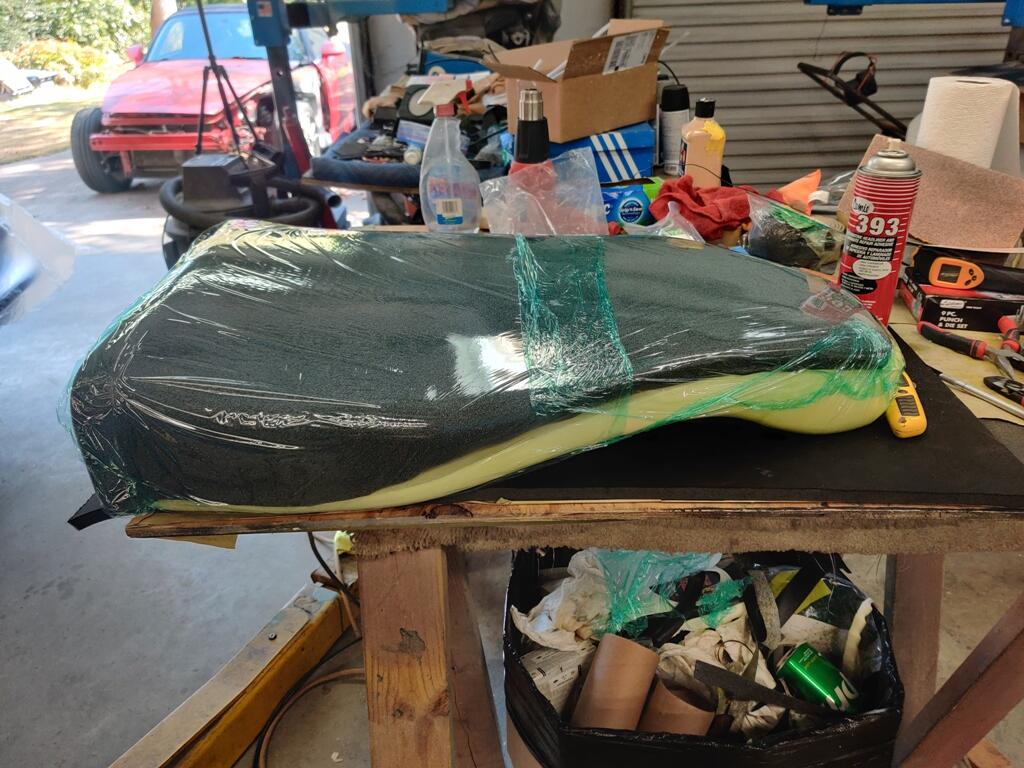
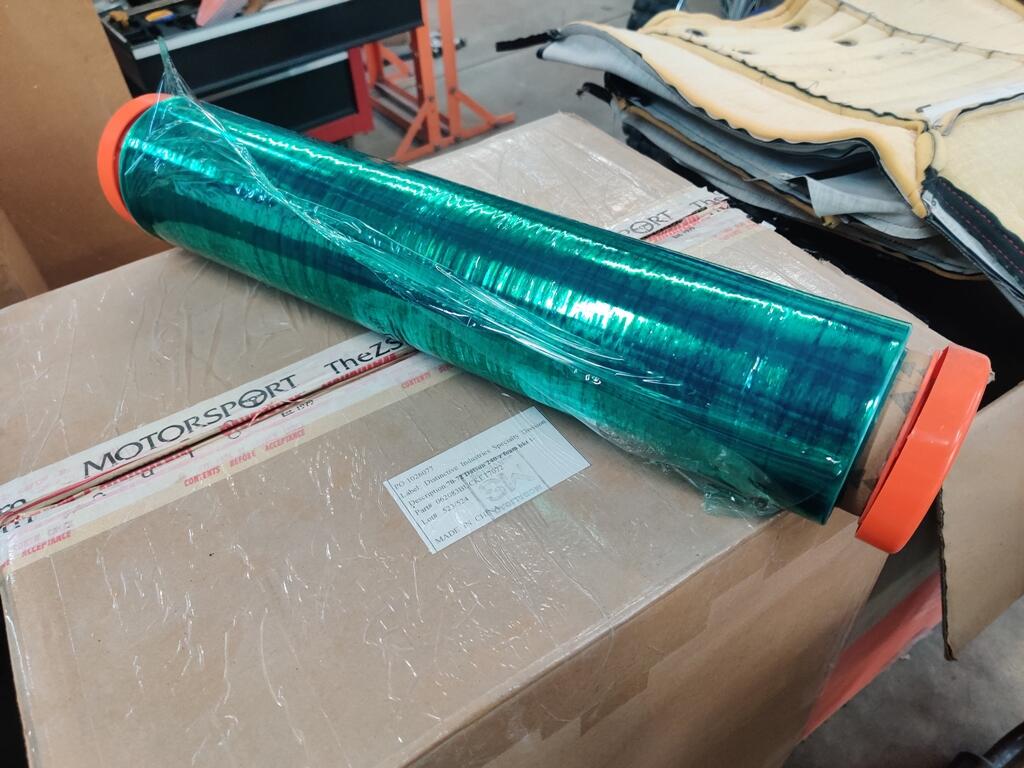
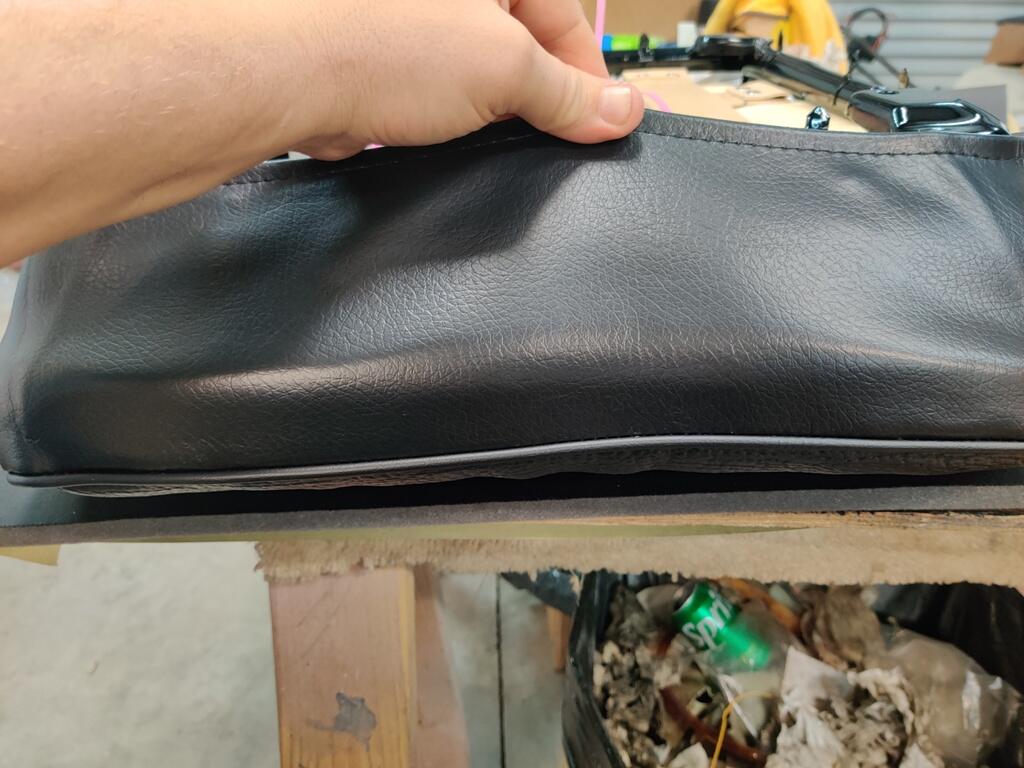
Thanks Keith, I worked on the one seat bottom for a couple of hours today. I made a rod for the flap and used my Exacto knife to put holes in the foam and run zip ties through. When I cinched them all the way down, I did not like what I saw. None of the edges of the upholstery are attached to the frame, however the amount the seat upholstery got "pulled down" in the center seemed to be excessive. I couldn't really get pictures while doing so, but even pulling very tightly and holding the upholstery down along the front and sides, the creases in the side panels on the seating surface would not go away. I also found myself examining the front of the foam closely and not liking what I was seeing. The front of the upholstery is a simple, flat piece. Why is there a step here in the cusion? The step causes the flat section of vinyl to bulge. I don't like it. When you pull the front really tight, that lip basically crushes and becomes far less noticeable, but why is it there at all? So... I suspect that this is not the foam I should be using with my upholstery. The upholstery kit I have was made by Distinctive Industries. And the foam, (though when I ordered it, I asked if it was made by Distinctive Industries and was told yes), I think was made by Seatz. I purchased the foam from Motorsport Auto. And doing a lot of searching online, I keep seeing that they use Seatz as their supplier. See the numbers cast into the foam - can anyone confirm that this foam was not made by Distinctive Industries?