inline6
 Subscriber
-
Joined
-
Last visited
Everything posted by inline6
-
 I don't think I am exaggerating when I say I have probably 20 weekends of time invested in fasteners: going through all of my labeled zip lock bags, measuring and writing down details regarding nearly all of the fasteners on the car, identifying any non-original hardware that was on my car, replacing it from my 510 fastener collection (I was young ok... and I wrecked a couple!). I may have more than two hundred hours of glass bead blasting, lots of hours of dremeling, and a dozen hours of polishing with #0000 steel wool - all "invested" in prep for plating at this point. Today I spent a bunch of time going through all the boxes of parts on my shelves looking for any fasteners I missed. I found a couple of clips for side marker lights. I found a couple of clips that hold the chrome tail light trim bar to the lens. I found that my throttle rod that Paltech did is just ok, not great - so I will have it redone. I found a few other odds and ends. Soooo... I'd love to find out that my time spent glass beading and tumbling and steel wooling... was completely unnecessary. I am tired of it. And my restoration is just dragging on. I thought I had a chance at getting the car painted last August. Now it is this August, and I haven't done any additional bodywork since last year. I've got a 510 sitting in the corner of the garage that will go through a similar level of restoration sometime after I finish this car. It would be great to just dump all the fasteners in a couple of boxes and send them off, and have them come back like new. It sounds like that may be possible based on a few of your comments here. I plan to use http://tfcplating.com/. I forget how I heard of them. Anyway, if anyone can share more detail about their platers, maybe some before and after pics, then maybe I can discover the even easier way than my "easy" way of getting good results.
 -
Thanks for these pics - again... I was able to reference them and bend my front tube to the appropriate shape using this reference. I appreciate it.
-
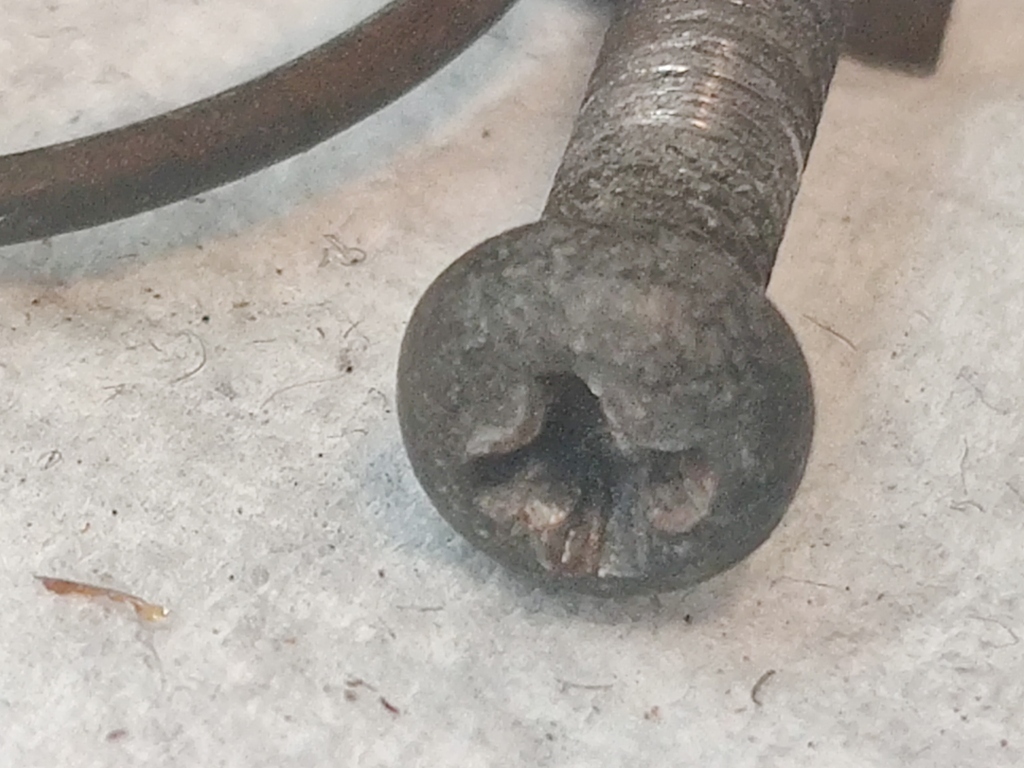
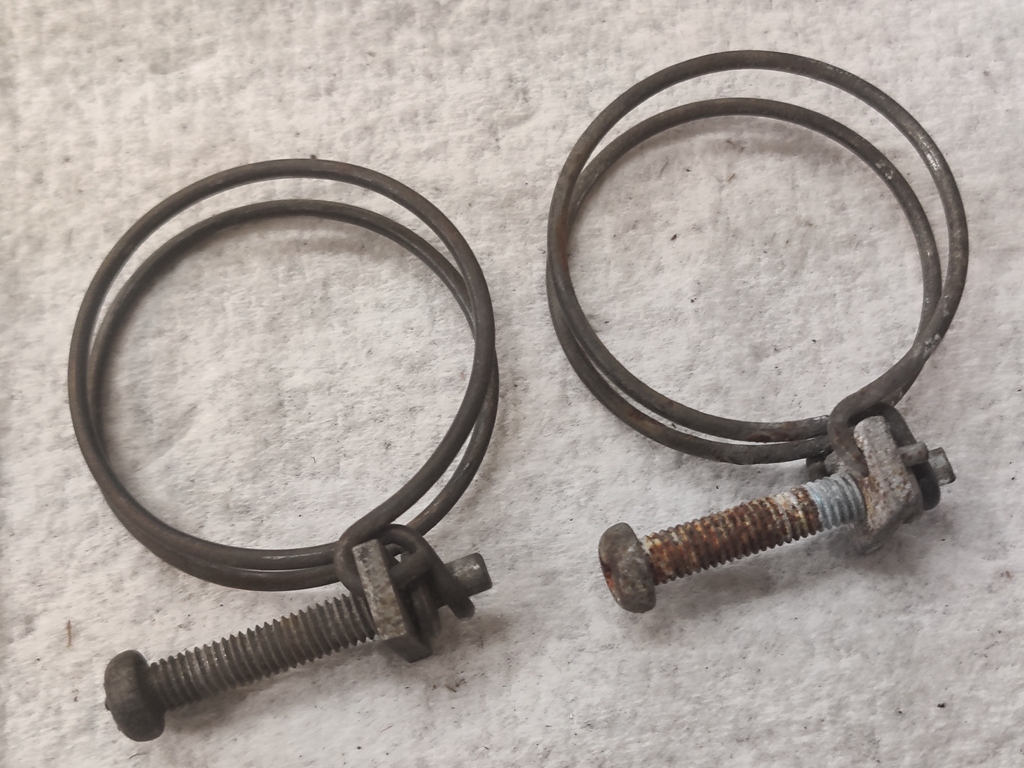
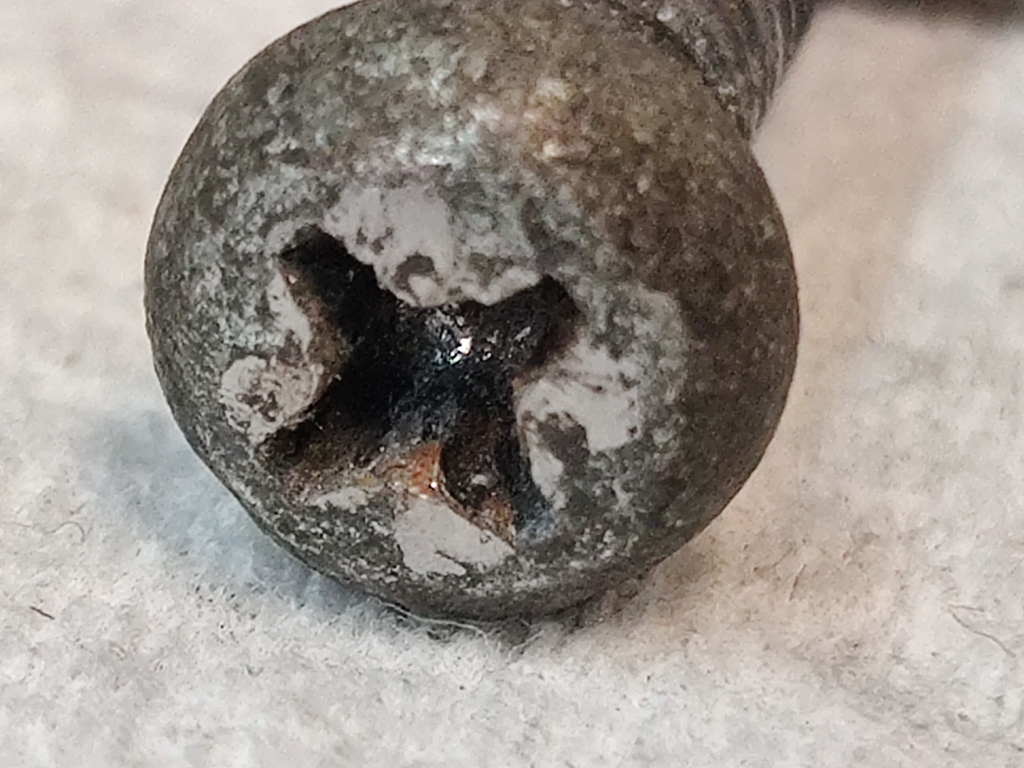
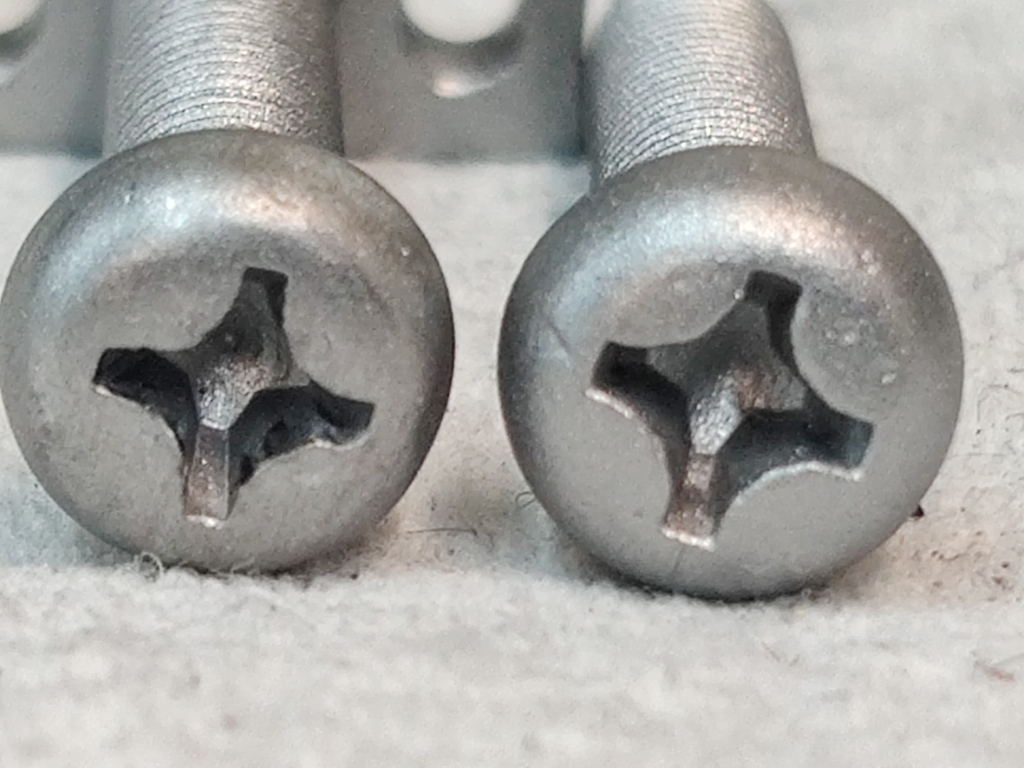
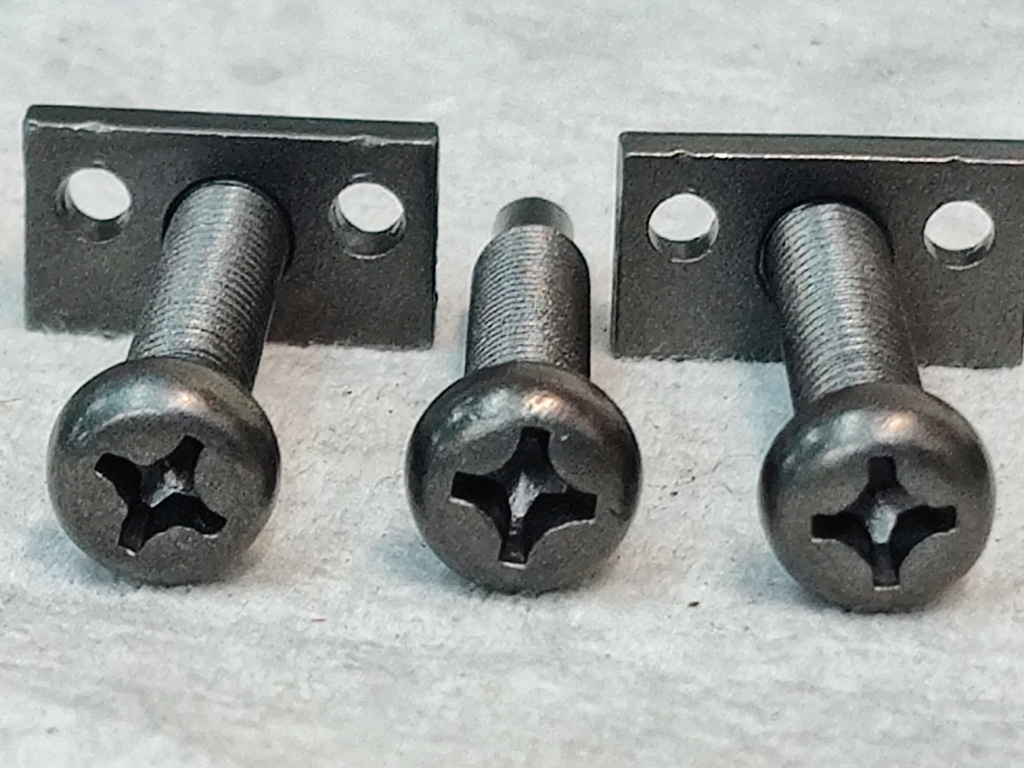
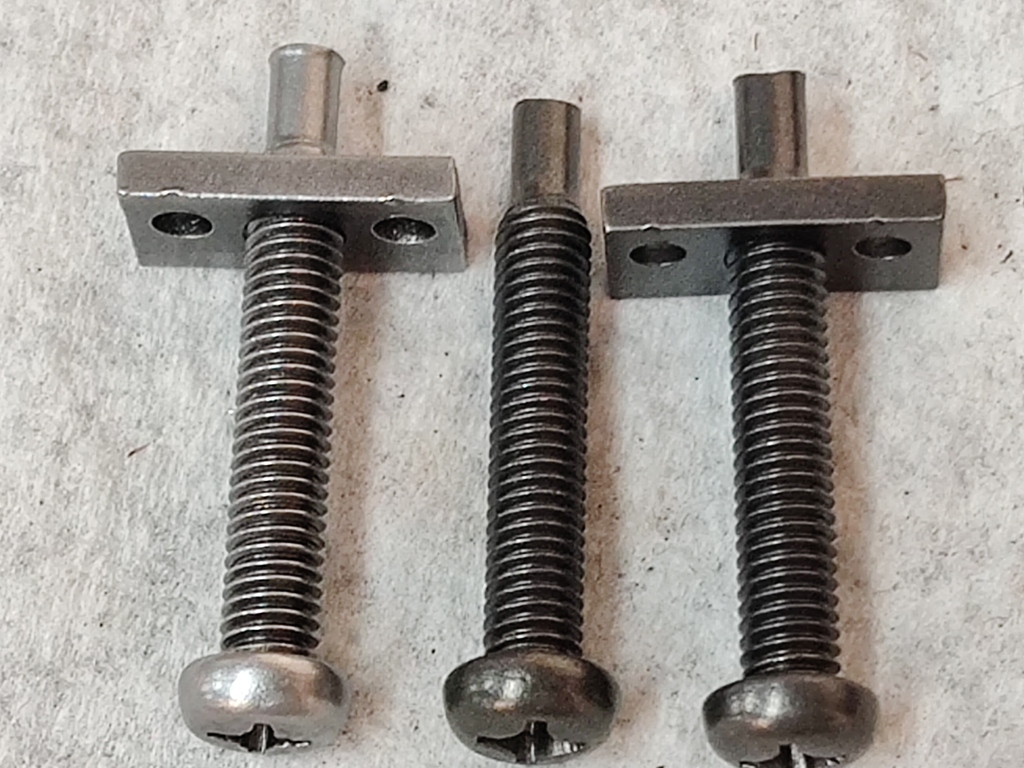
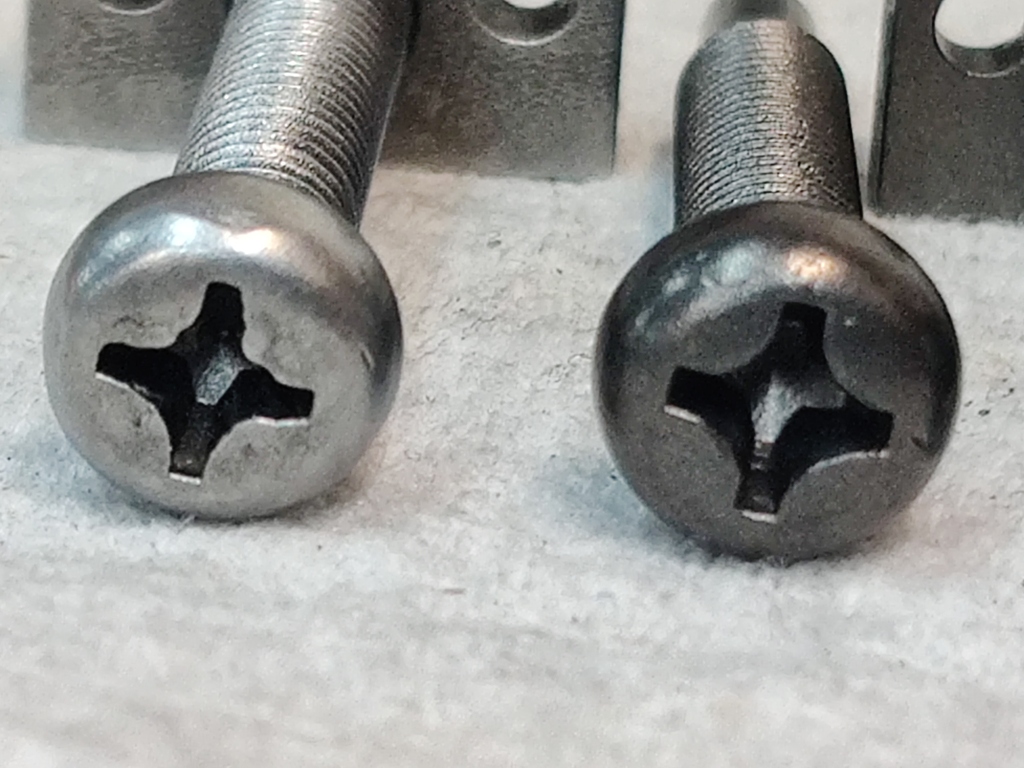
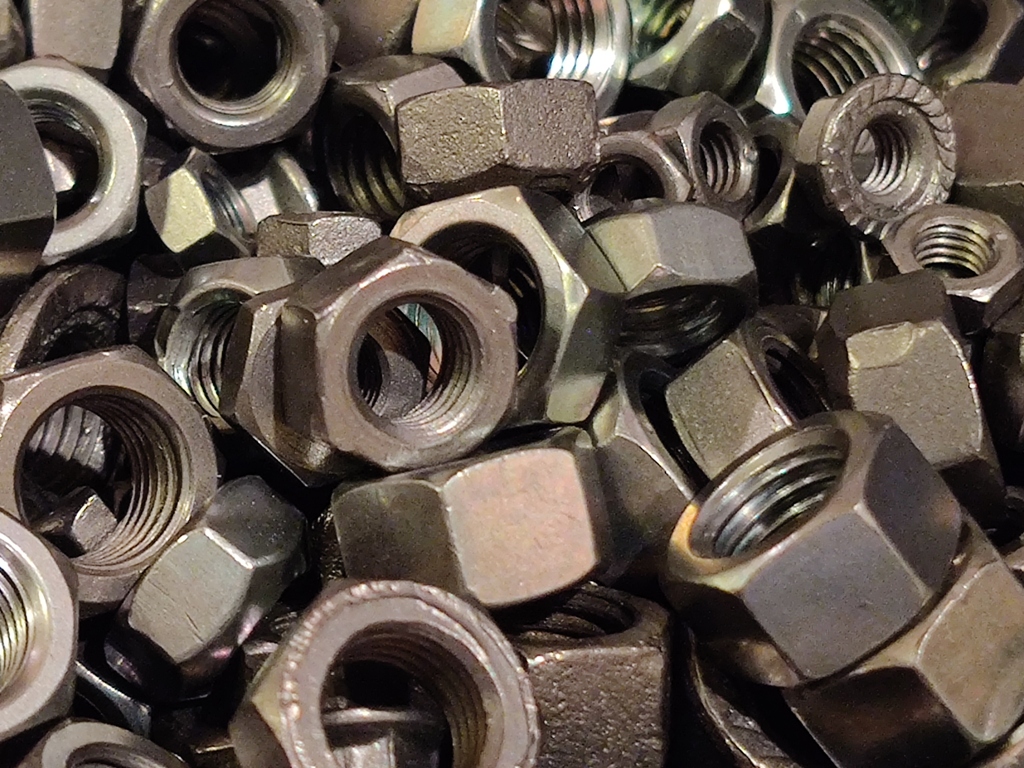
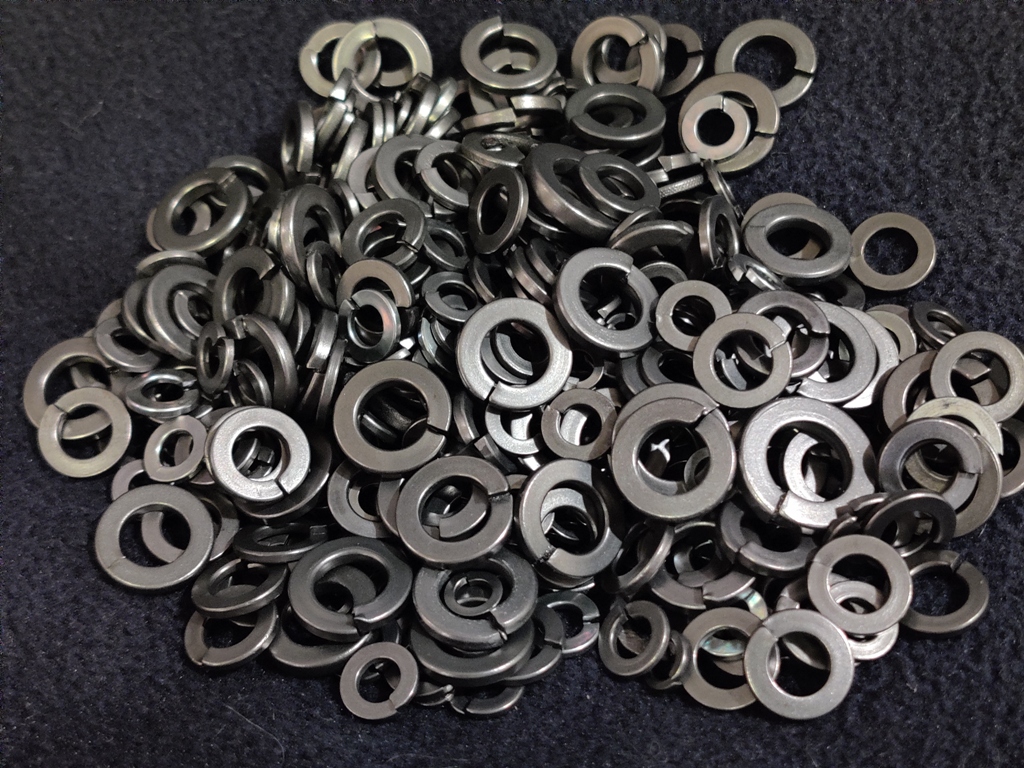
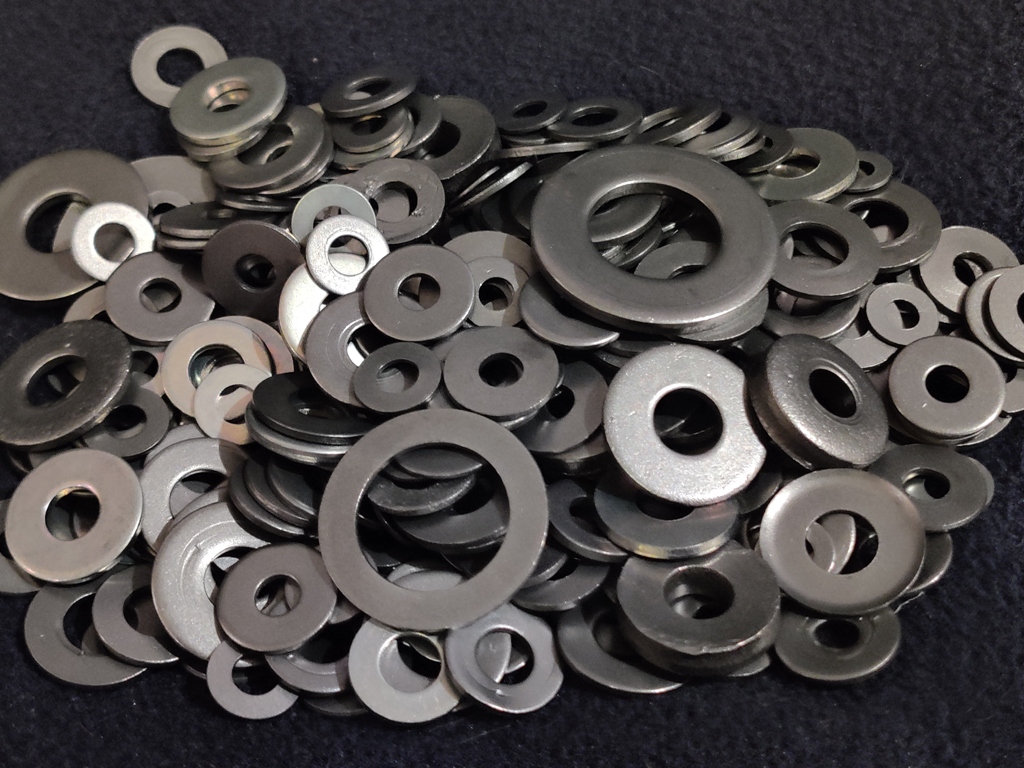
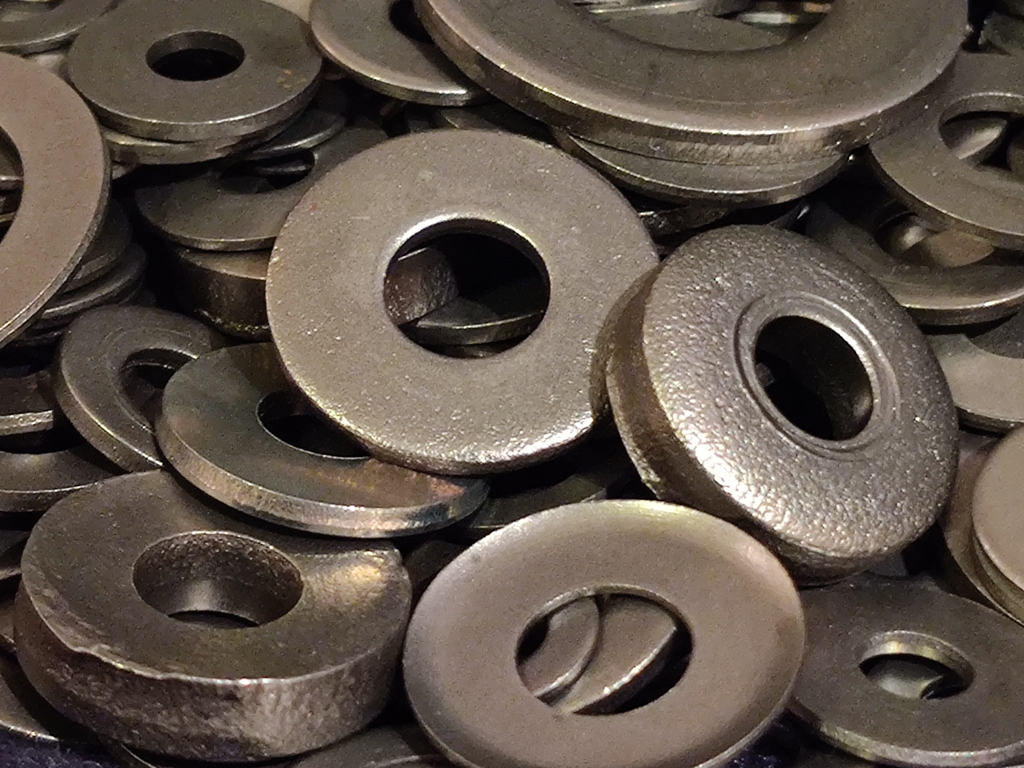
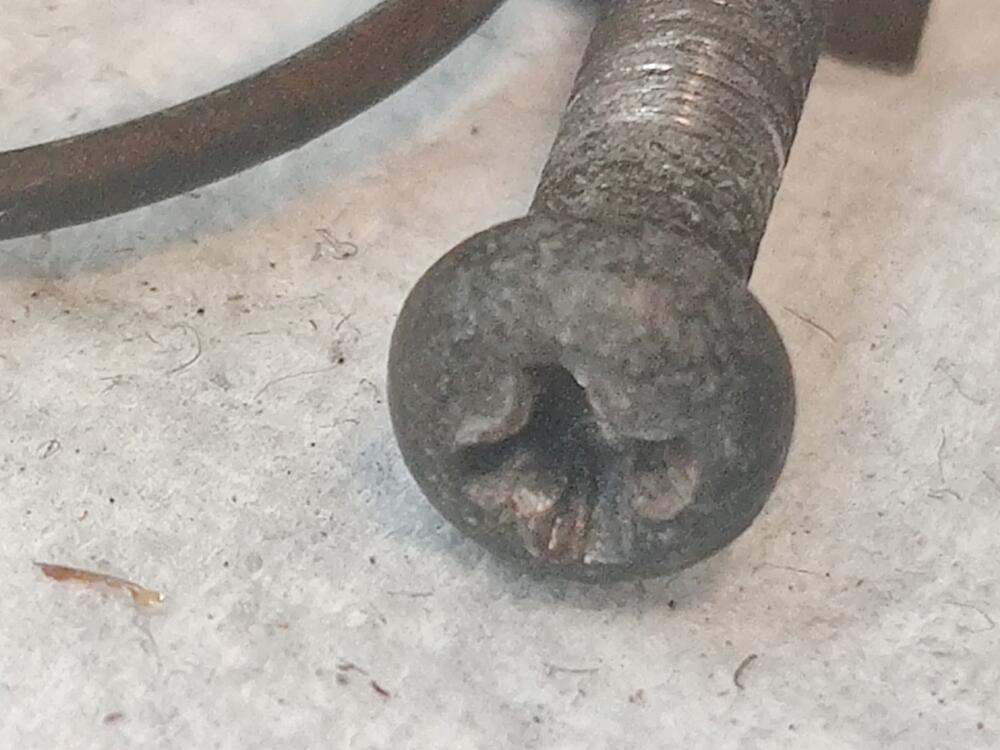
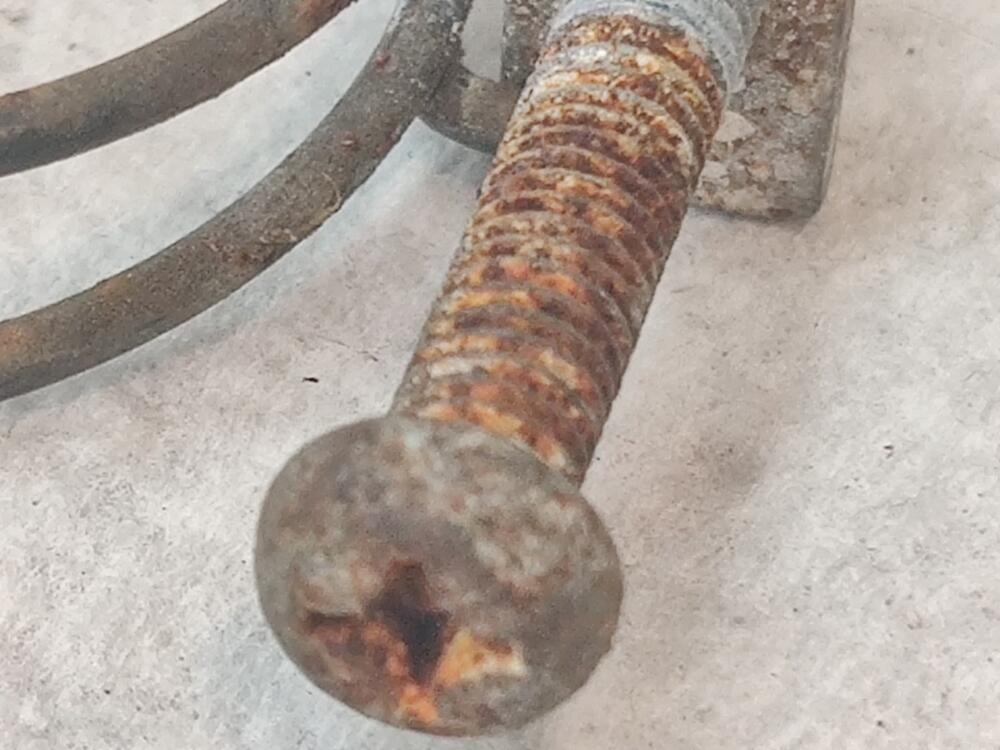
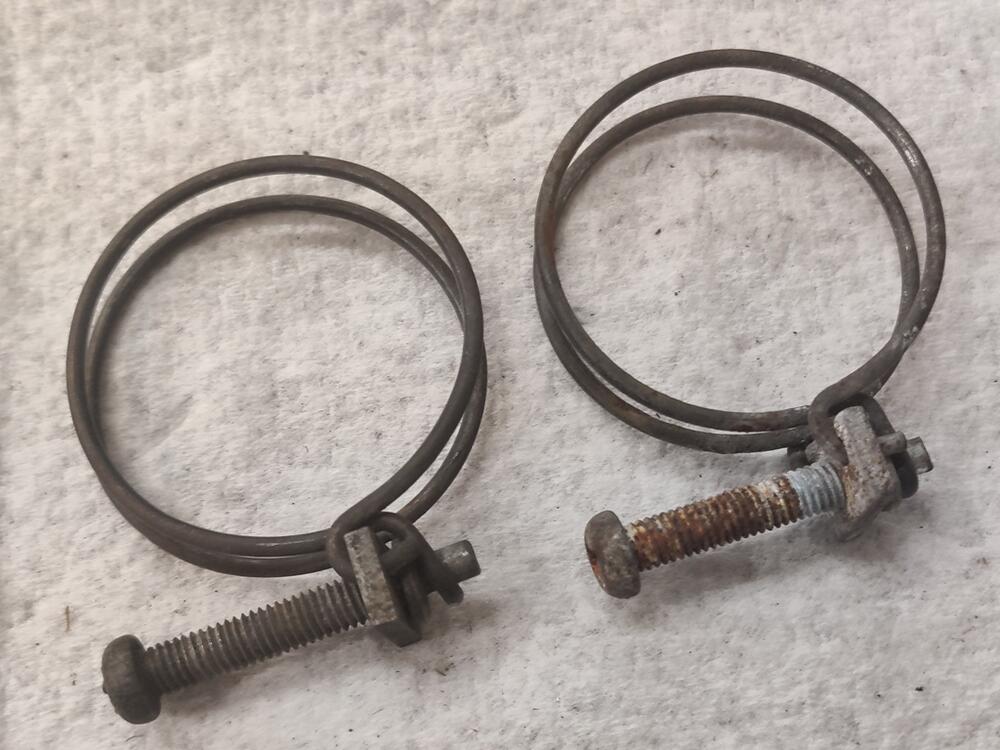
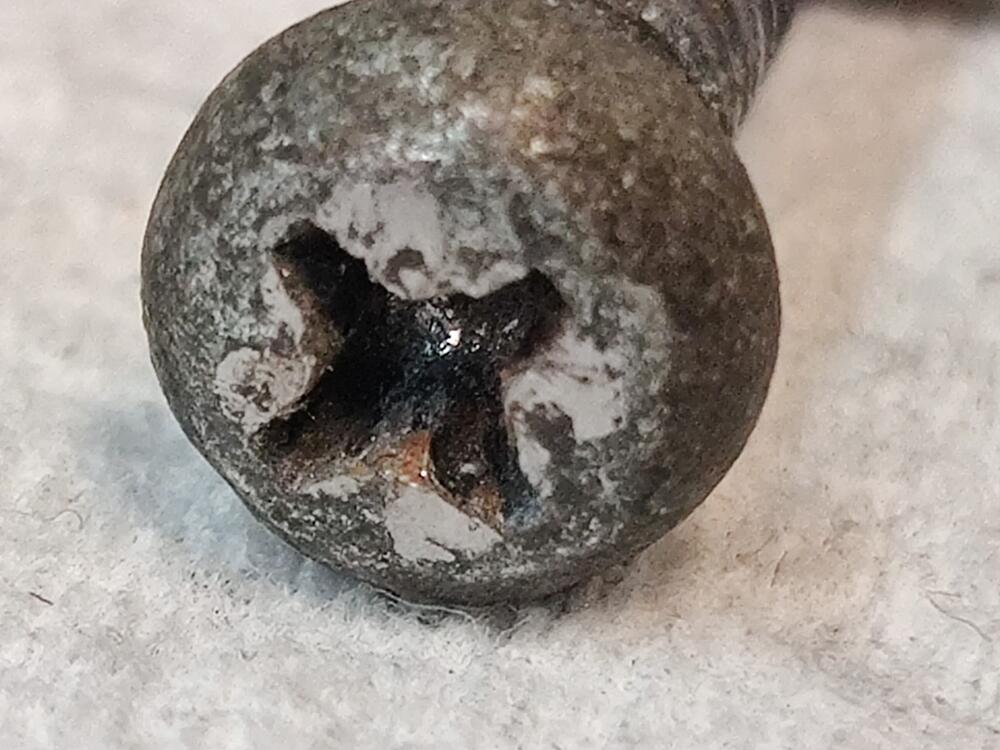
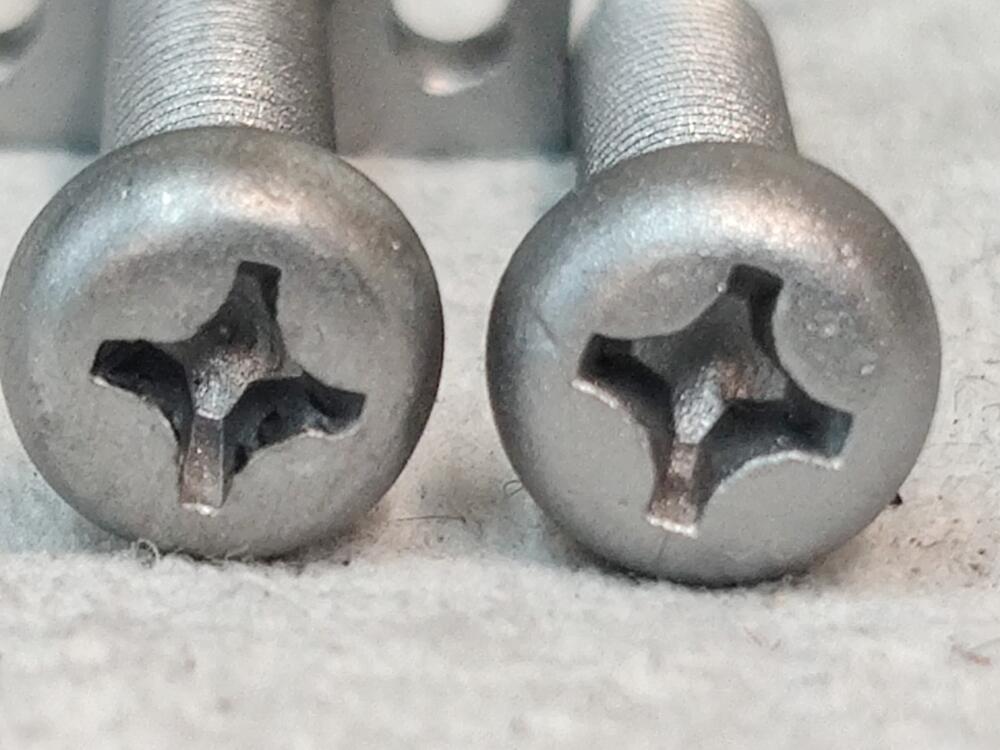
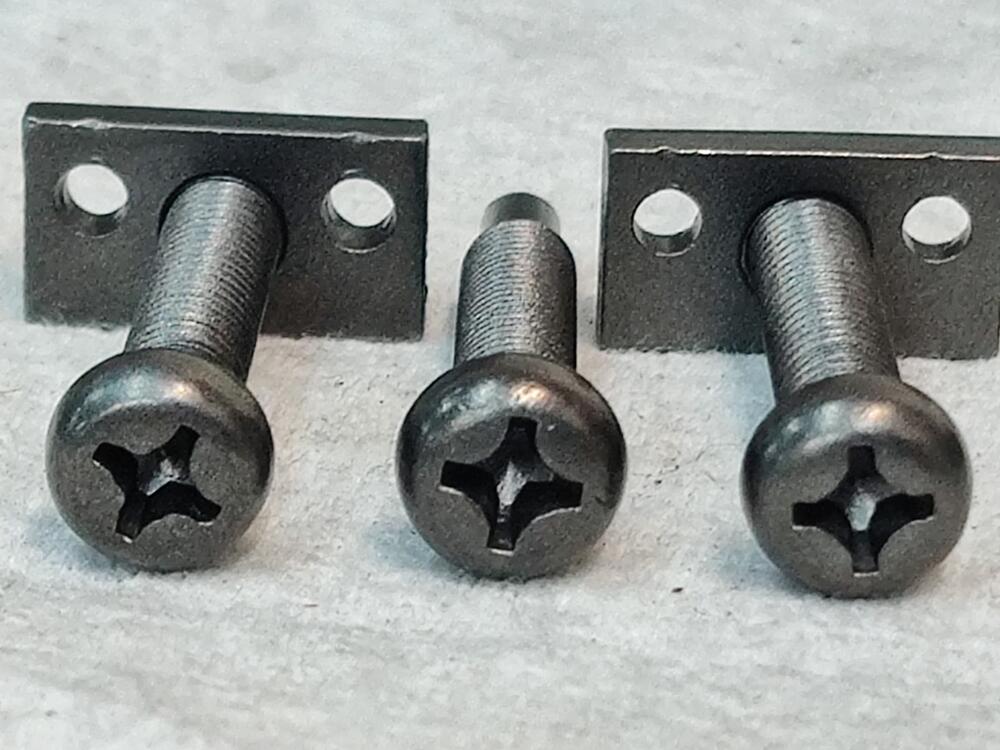
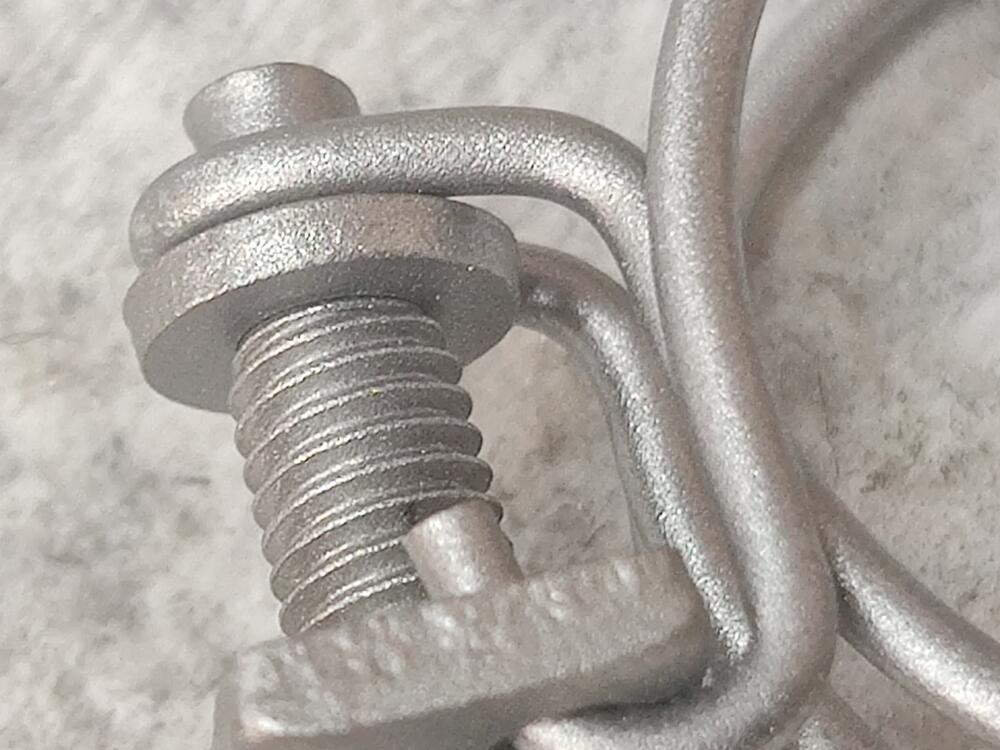
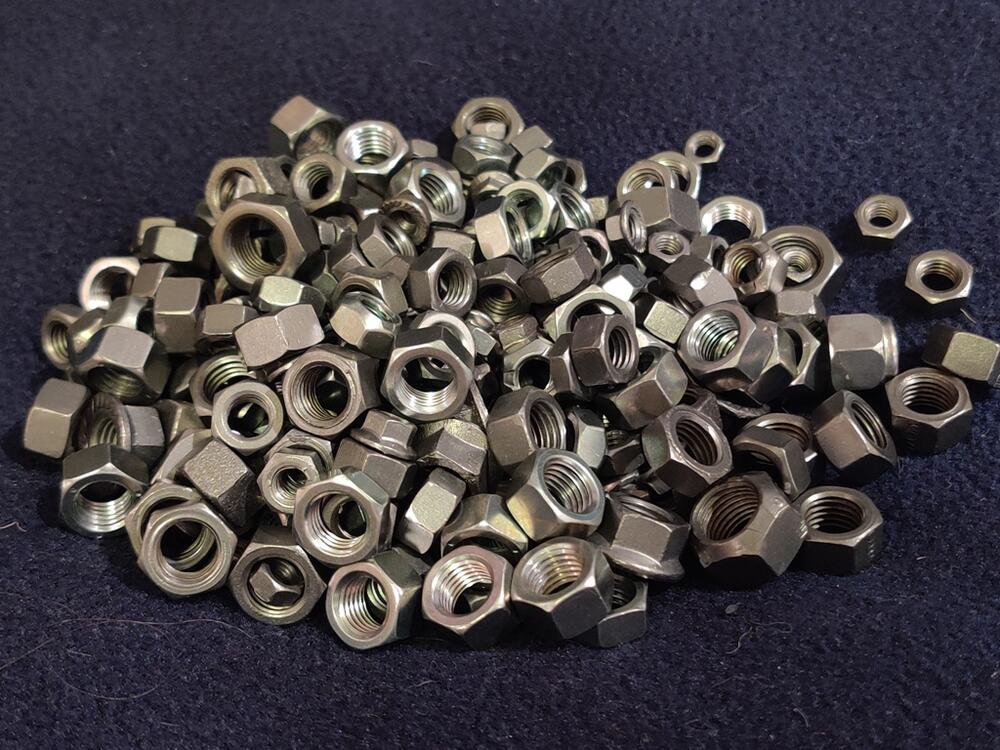
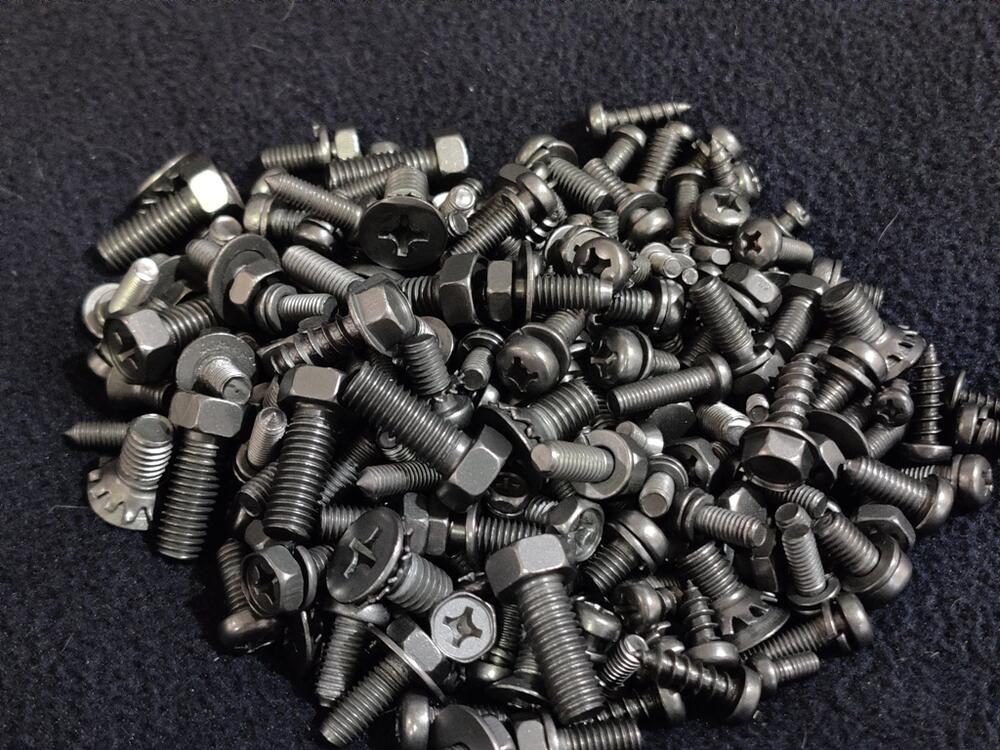
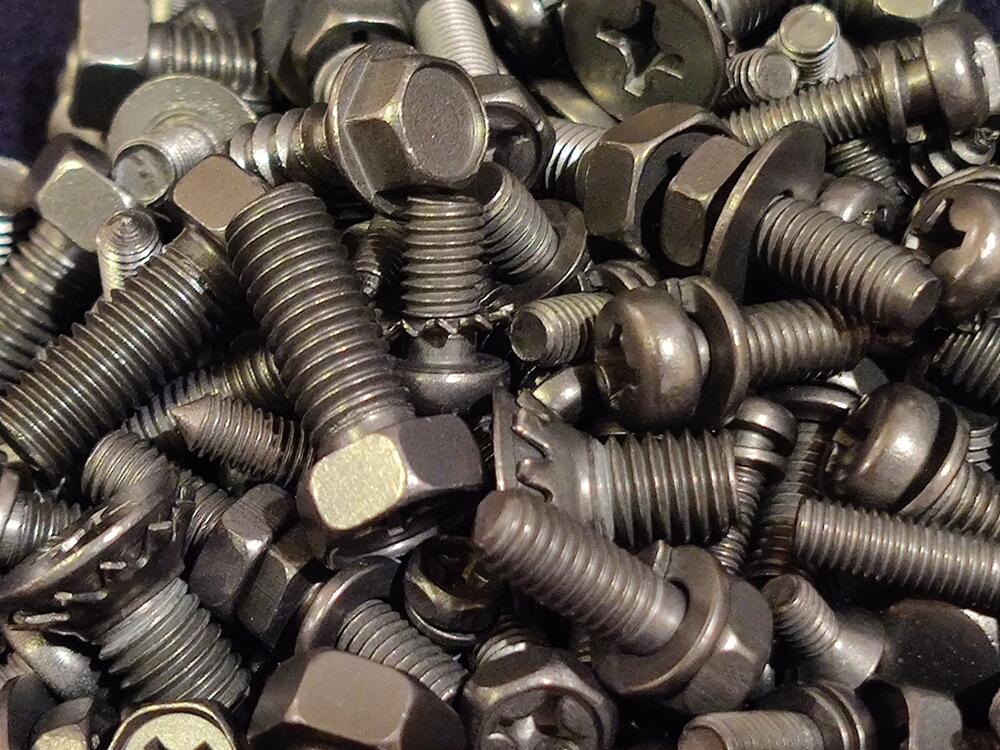
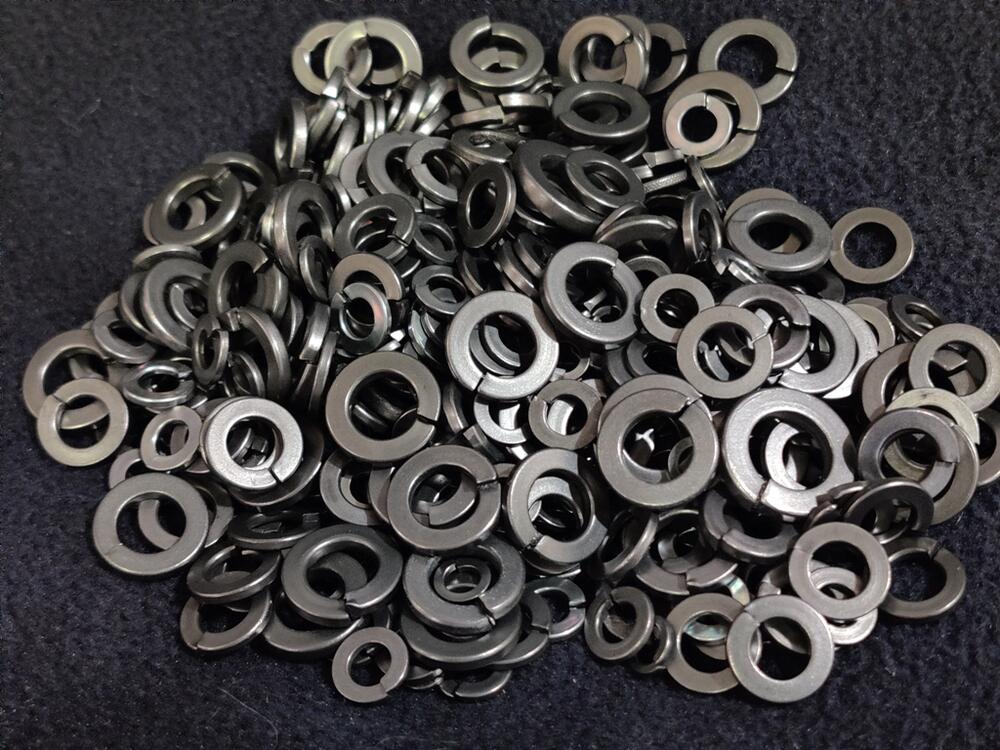
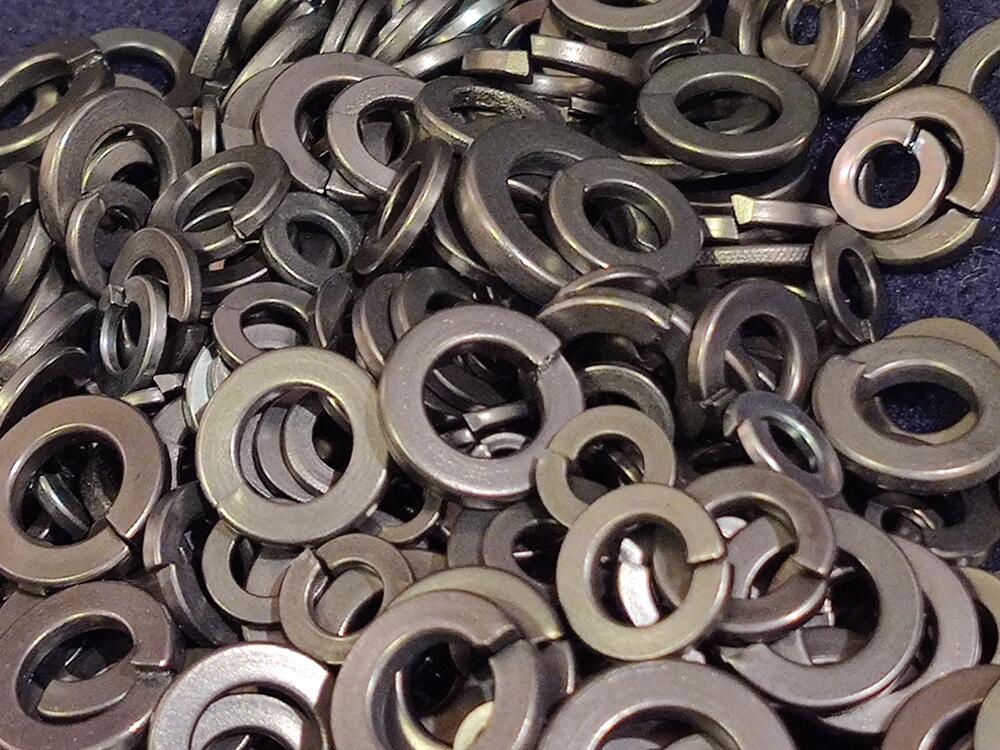
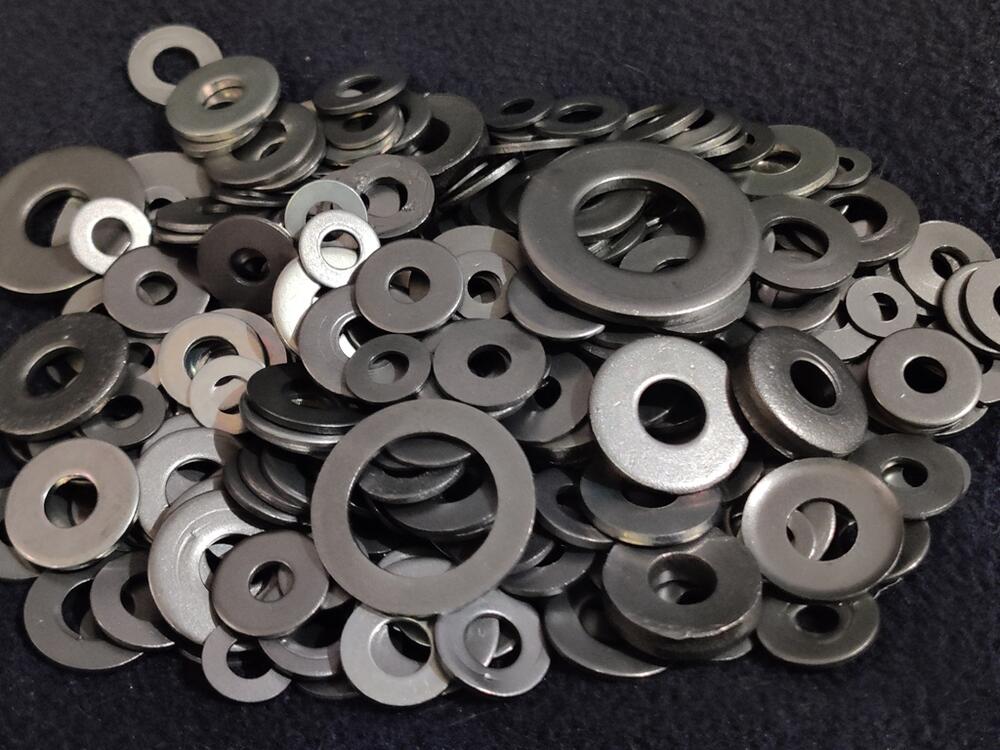
I thought I would take content from a post in my "build thread" and share it more broadly here. I've been working to prepare almost all of the hardware for my 6/1971 240z for re-plating, and have learned some, improving my process along the way. Here is some example hardware I ran through the process this week: These hose clamps are in pretty average condition after 50 years. Note that the less rusty one has some common damage on the phillips head. It has been mangled a bit. Something I have learned is that you can restore most philips screws with this type of damage by tapping the area with a hammer. I place the bottom end of the screw on the flat surface of my vise, and then use a hammer with a smooth face to tap on the top of the screw, working the metal back down where it belongs. I chose this one as an example to show that even when mangled this badly, decent results can be achieved (more pics below). So, here is a description of the process. Use these glass beads from Northern Tool and Equipment, important for size of grain, and bead blasting at 90 psi with a 1/8th inch nozzle to remove all rust, and to establish a consistent finish. I use one of these baskets and find that putting a variety of hardware (big and small) is great for trapping the parts in place so I can blast them without them flying around too much. For large parts, you don't need to use the basket, and you can then go back over them with the pressure at 50 psi to put a smoother finish on them. This smoother finish allows "second stage prep" by hand with less work. After glass bead blasting, all hardware (bolts, washers, nuts, screws and odd small bits) then goes straight to tumbling in one of these vibratory tumblers. I now use a stainless steel media (bought from Southern Shine Tumblers on Facebook). See pic below. It consists of tiny little bits of stainless steel that are good at getting into tight spaces, like between threads, phillips head recesses, etc. And I now use it dry. I was using water and a bit of citric acid, but I think that is best for doing brass shell casings. I was fighting keeping the parts from starting to oxidize/rust, and have found that the media works better and faster dry... to put a nice finish on the hardware. Minumum time in the tumbler is about 2-3 hours. You can add 2 to 3 times that and get an even nicer finish. For large parts that I can't tumble, I use a Dremel tool and the little wire wheel brush attachments after the glass bead blasting (first) step. For final, more consistent finish, I follow that wire brushing by hand rubbing the large parts with #0000 fine steel wool. It doesn't take a lot of work at that point by hand, but the combination of using the Dremel followed by fine steel wool by hand does end up taking some time. After hammer and top of vice on the screw head, then after glass bead blasting - with comparison to head that was not damaged, and lastly, close up of bead blasted texture: After tumbling, the hardware has a dark grey look to it. After wiping with lacquer thinner, the repaired screw in the second and third picture here is notably lighter in color. Sanding the top of the screw briefly with 320 grit or 240 grit would have been a good idea before tumbling, as I see some surface imperfections, but the screw looks pretty good compared to its initial state. Most of the screws I have done this to were not in as bad a starting point as this one. If you want to get the same media, send an email to Southern Shine Tumblers first to inquire on pricing and availability: southernshinemedia1@gmail.com They accept PayPal.


-
Several questions... expense relative to something like Black Diamond? Can it be cycled many times? How aggressive vs. glass beads or soda? Subjective, but your opinions are fine. I will look into plastic availability and cost. Maybe buy some and experiment.
-
I have used Play sand... yes Play sand with good results. Play sand is a finer grain (smaller) than is oftentimes recommended for sand blasting. You may want to check out my restoration thread and pictures. The sand that is typically used is larger grain, more jagged, and is very likely to cause panel warpage. That said, sand is too dangerous because of silicosis. Look it up. Basically long term exposure will cause a build up of particles that are too small for your lungs to do anything with other than trap. Lung capacity is negatively impacted. Using masks (various types) is not sufficient protection. Glass beads, as far as I know, do not have the same problem. They are finer still than Play sand though. I don't have experience with soda blasting or dry ice blasting. Dry ice might be a really good option if it is available to you.
-
I think it likely that it was applied with the fenders attached and before the suspension and fender liners were installed. That would be the same treatment my car received from the factory, judging by where the coating was and was not upon inspection at dis-assembly. With regard to color, my factory coating has a semi-gloss appearance. Paint overspray covers a whole bunch of it though.
-
Have any pics? Lots of factory overspray in that area on mine. Interestingly, they used tape of some sort over the holes in the rail for the rear suspension hangers to keep the threads from being coated with the black "undercoat".
-
I am not familiar with the 280z undercoat. I have seen some evidence that the factory coating changed near 72-73 to a much rougher texture. If you look through some of the cars on Bring a trailer, you can get an idea of what is original and what is not.
-
Agree totally. With regard to my car (two cars actually), I think my investigation and my conclusions about the origin of the black coating being at the Nissan factory are accurate. Evidence is there if you take the time to look.
-
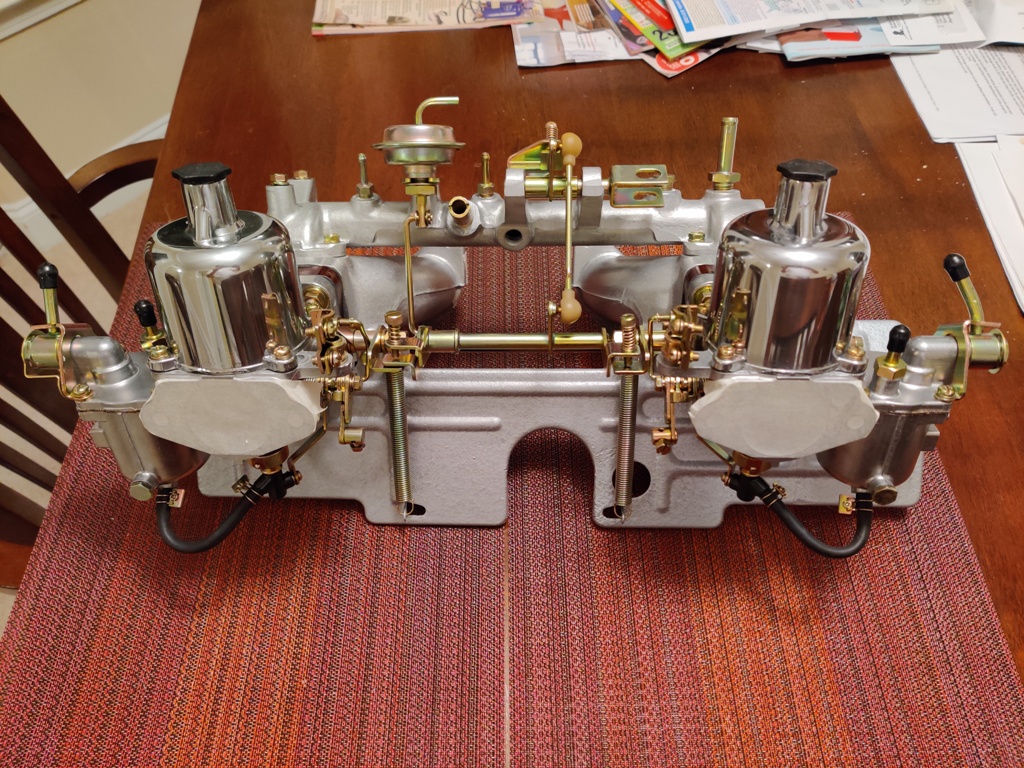
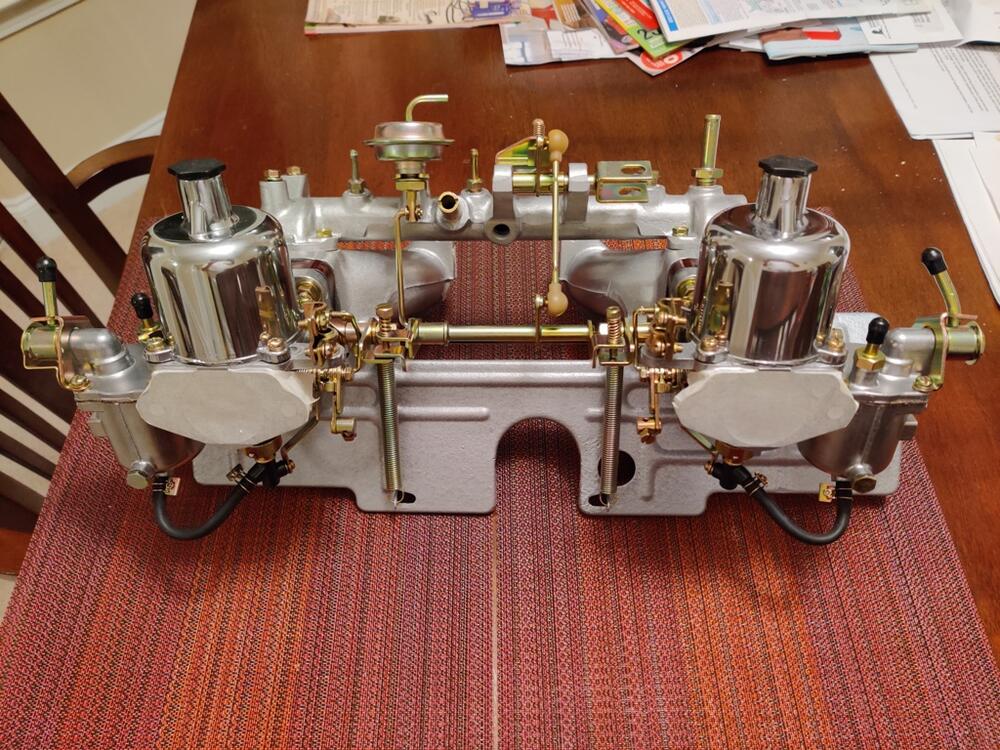
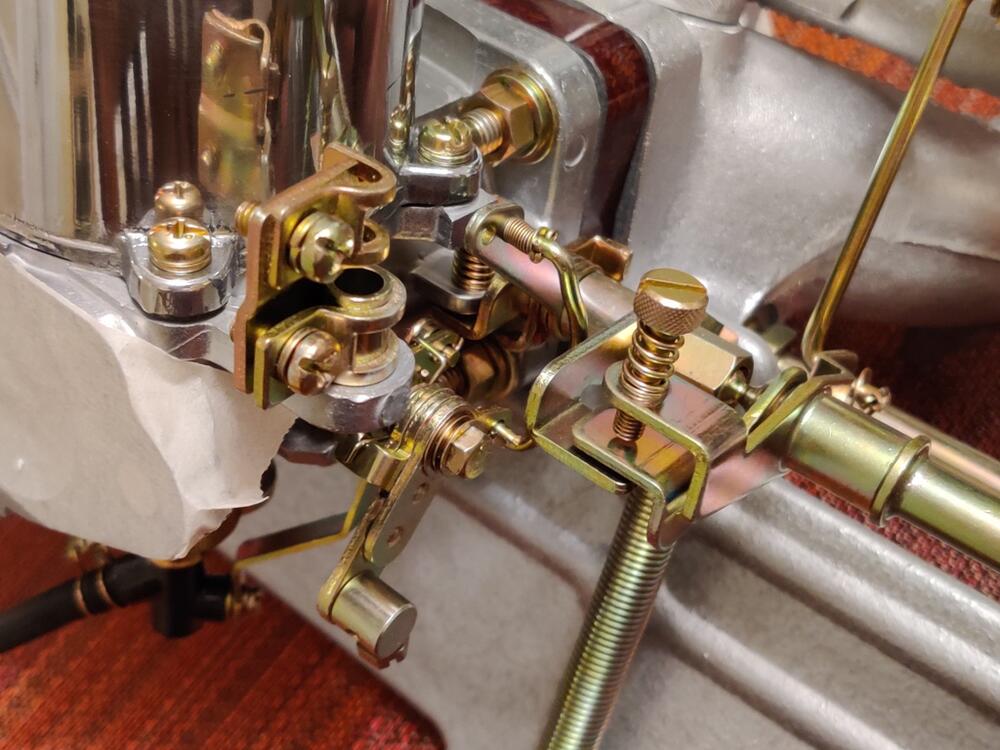
Paltech, actually. Jeff was great. My 4 screw carbs were in very good condition and I wanted them to be the ones I got back. ZTherapy told me that I had to accept an exchanged set - they would not rebuild mine and send them back to me. That works for most I guess, but my first 240Z SU carbs had a few issues that I would not have liked if I received a set with "repairs", and I didn't want to take the gamble. I dis-assembled a bit too far evidently, as some of the parts are plated as an assembly (choke linkage I think), and I had some extra parts plated at the same time, so the charge was a bit more, but I am very happy with them. It's going to be a lot of fun pulling all of my stash of new and refurbed parts out when it becomes time to put the car back together.
-
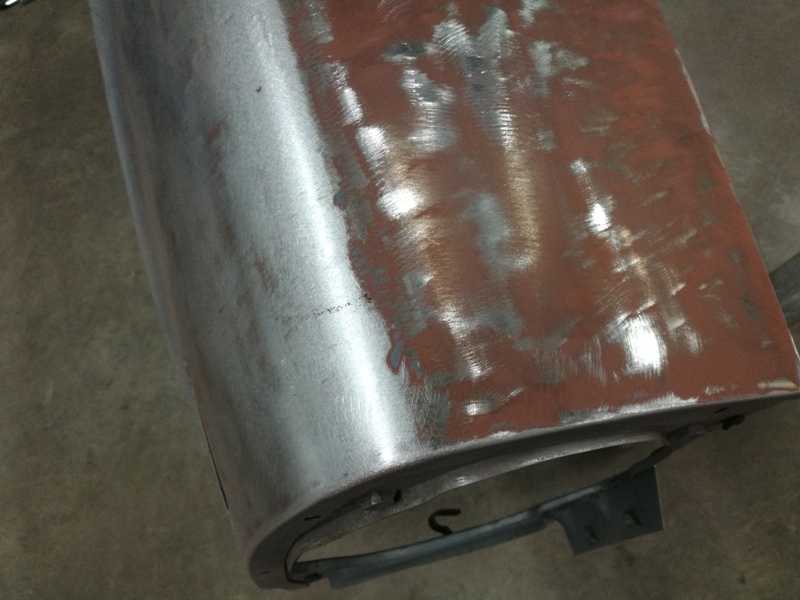
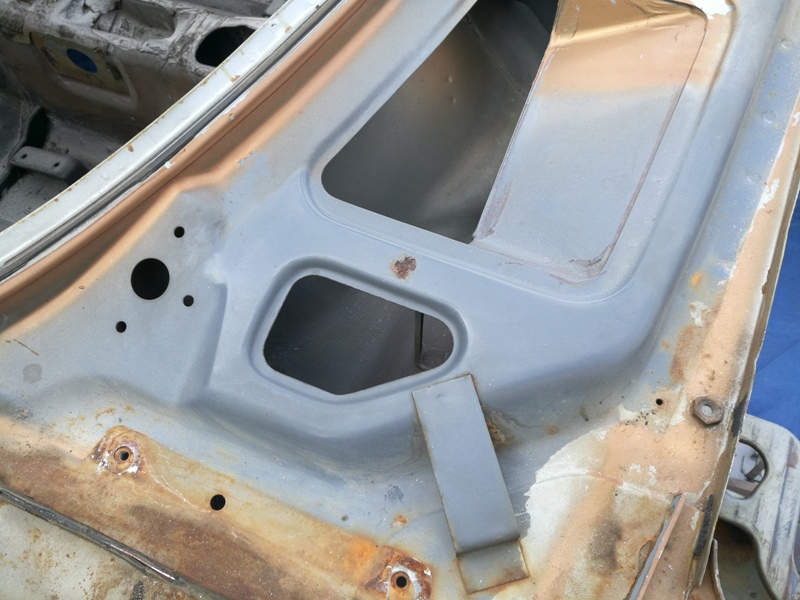
Have a look at this thread. Both my 12/70 and 6/71 cars had this tough, black coating applied to the bare metal before the bodies were sprayed with color. Additionally, if you look very close at the pic showing the transmission tunnel in that thread, you will see a reddish over spray that came through the shifter opening onto the black coating. That overspray... is the first coat of primer that was applied at the factory. You can see it here on the fender I stripped back to bare metal: Over this red "oxide" primer, which was sprayed over the entire top surface of the car, they sprayed a coat of grey primer before the paint: Note that this picture is of the front wheel well area where the cowl drain hose passes from the inside of the passenger compartment of the car to the outside - left hand side of the car. We are looking at the place where the fender support panel bolts to the unibody. To the left of where the support was bolted, you can see a "black" coating in the picture. To the right of where the support was bolted, you see no black coating. The support panel also had the black coating on it. The same is true for the front fender. The black coating is only on the inside of the fender, in front of where the support panel contacts the back of the fender. Those last facts are a bit off point, but circling back the thread for which I provided a link, you can clearly see the silver is on top of the black, and the black is on top of bare metal. All of this is what I provide as facts that the black coating was applied at the Nissan factory. I also have chips of the black coating which flaked off in some places. And I have sanded it in various places. So, I know it is the same stuff all over the car. No other black substance was sprayed on this car (6/71) after the original silver paint.
-
View Advert Fair price paid for 240z parts I need Hi, I am attempting to restore to a high standard, a 6/1971 240z. Here is my wish list of parts I'd like to track down: speaker bracket, cover and mounting hardware tool box liners (foam backed that go inside storage compartments) seat belt parts - need the the black plastic covers which snap on but will buy whatever part of the seatbelts you need to sell to get good plastic covers driver side (left) window roller (small rubber roller clips onto top edge of door) 1 original "old" style fuel hose clamp 4 pieces rubber trim which are glued to corners of tool door compartments (compartments are in the front of the rear hatch deck/floor area) original radiator - without automatic transmission cooler fittings - need upper and lower tanks to be in good to condition for the radiator to be usable seat recline knobs (not cracked) -- item #6 in the picture here: http://www.carpartsmanual.com/datsun/Z-1969-1978/body-240z/seat-slide/type-1-adjuster-seat/6 metal engine fan blade assembly and possibly mounting hardware Amco - aftermarket rubber floor mats Hard to find and will pay top dollar for excellent condition items: original 14" 175HR14 RADIAL spare tire. Prefer DOT code (check DOT code on tire) "221", "231", "241" or "251", but let me know what yours is original carpet padding "jute" (brown horse hair like stuff). This "jute" was originally installed under the front floor carpet mats, under the seats, under the center tunnel diamond textured vinyl trim, and under the carpet in the rear hatch deck/floor. This stuff is fragile, and it would be nice, if you have any that is in good condition, to take some care with removal (it was glued to the tunnel). battery cover (plastic) related parts for 1971 240z yellow wheel chocks with correct date stamps - 1E or 1F original scissor jack. There are letters stamped into the base of the jack. I need one that has letters starting with Q (1971), and then be followed by F (June) as the second letter, then followed by any letter S through Z as the third letter ---- or, if there are four letters... then AA through CC as the third and fourth letters. As best I can tell, I need a jack with any of the following letter sequences: QFS, QFT, QFU, QFV, QFW, QFX, QFY, QFZ, QFAA, QFBB, QFCC. Any condition considered but I'm not looking to spend $2000 or more for a set: 4 original hubcaps for a 6/1971 240z Garrett 434-227-2333 Marietta, GA 30062 Advertiser inline6 Date 07/31/2021 Price Category Parts Wanted Year 1971 Model 240z
-
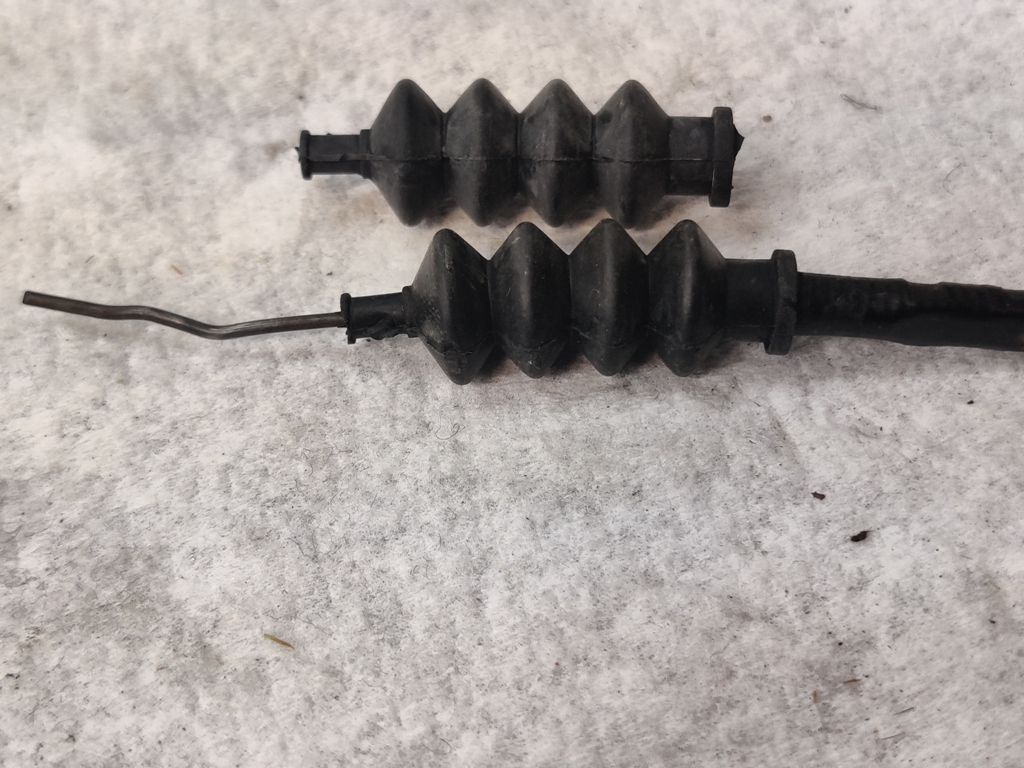
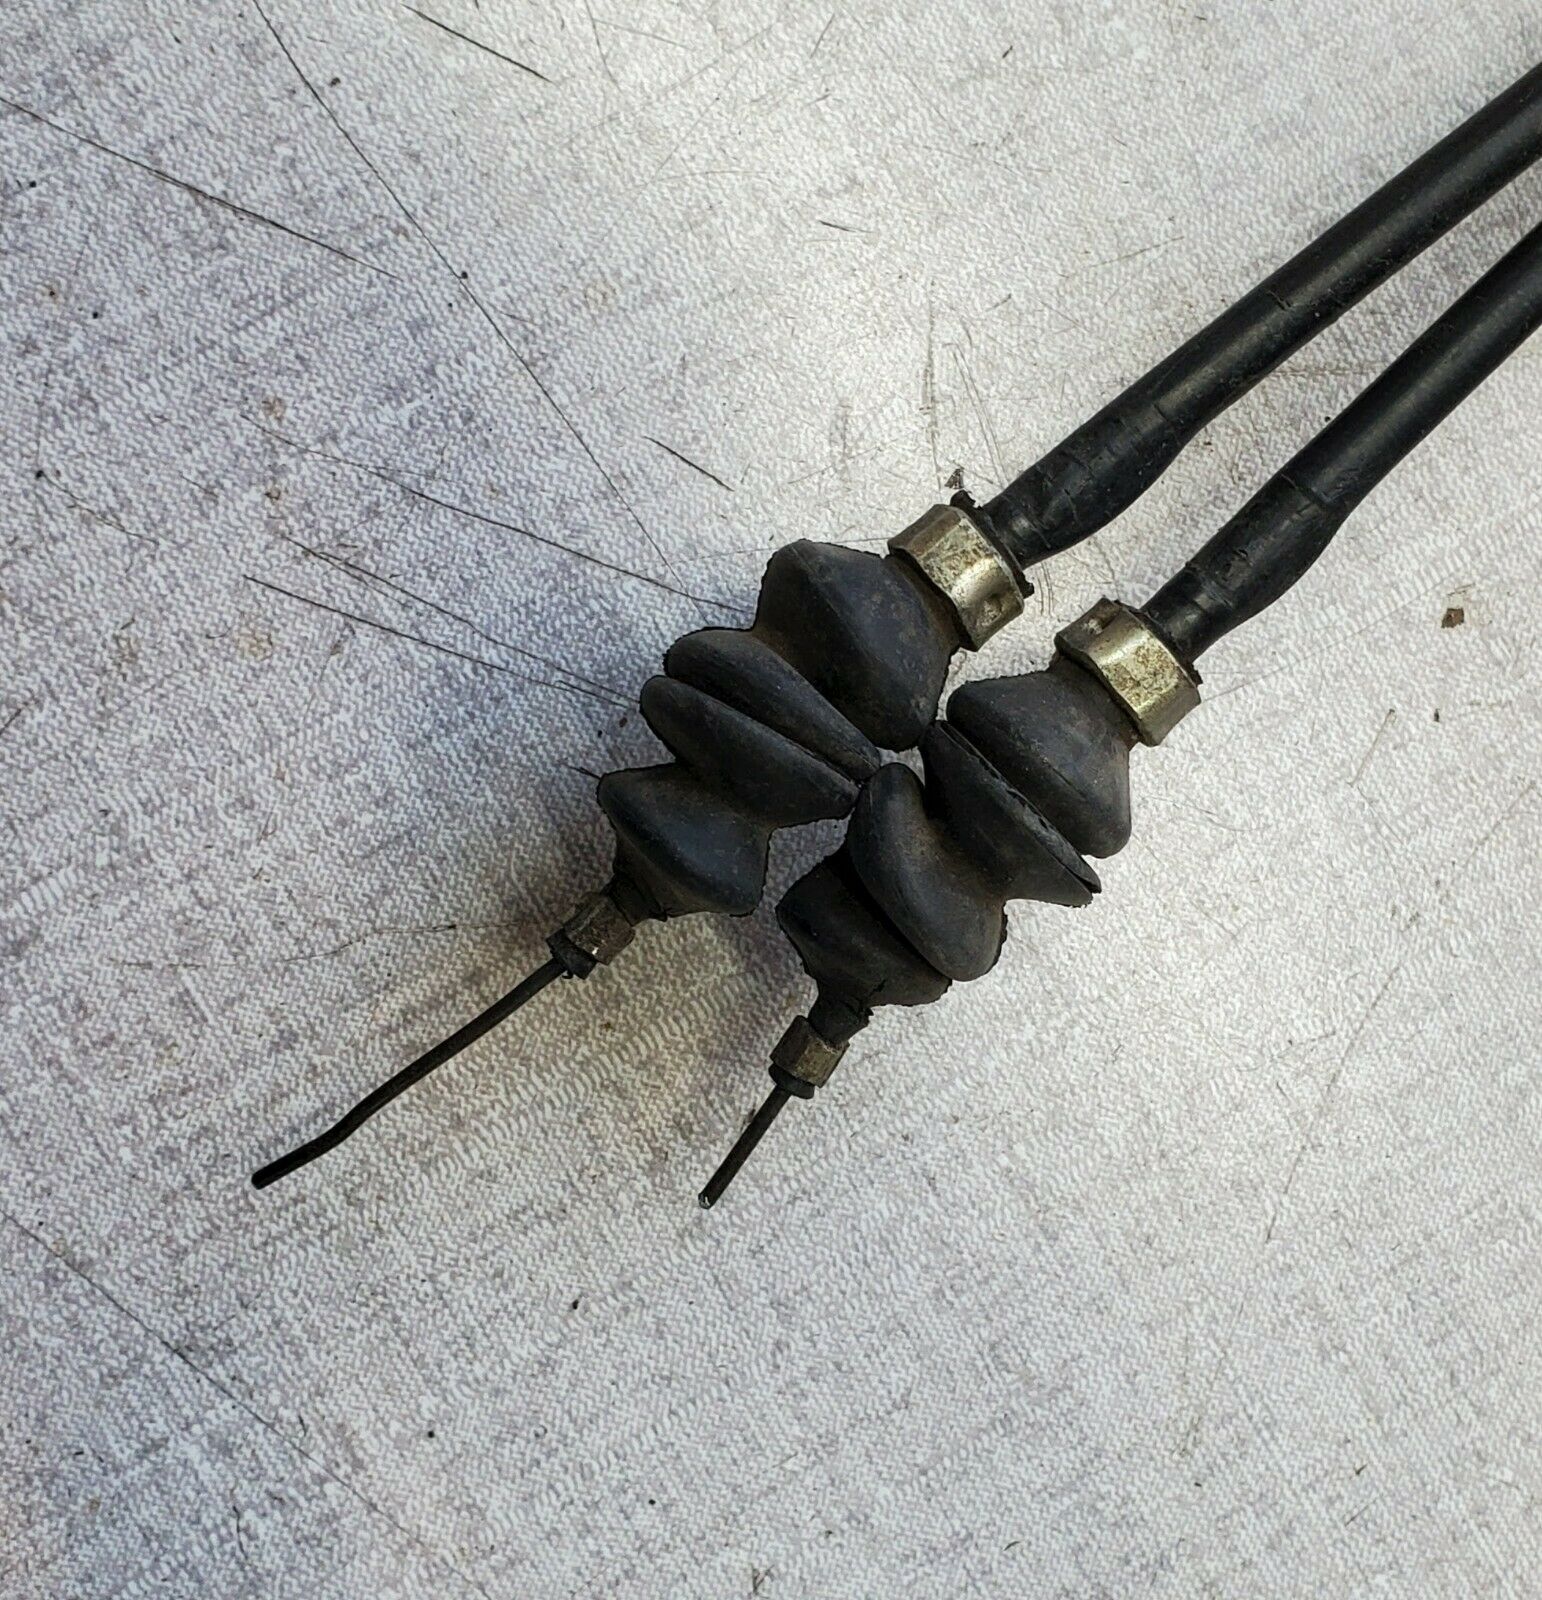
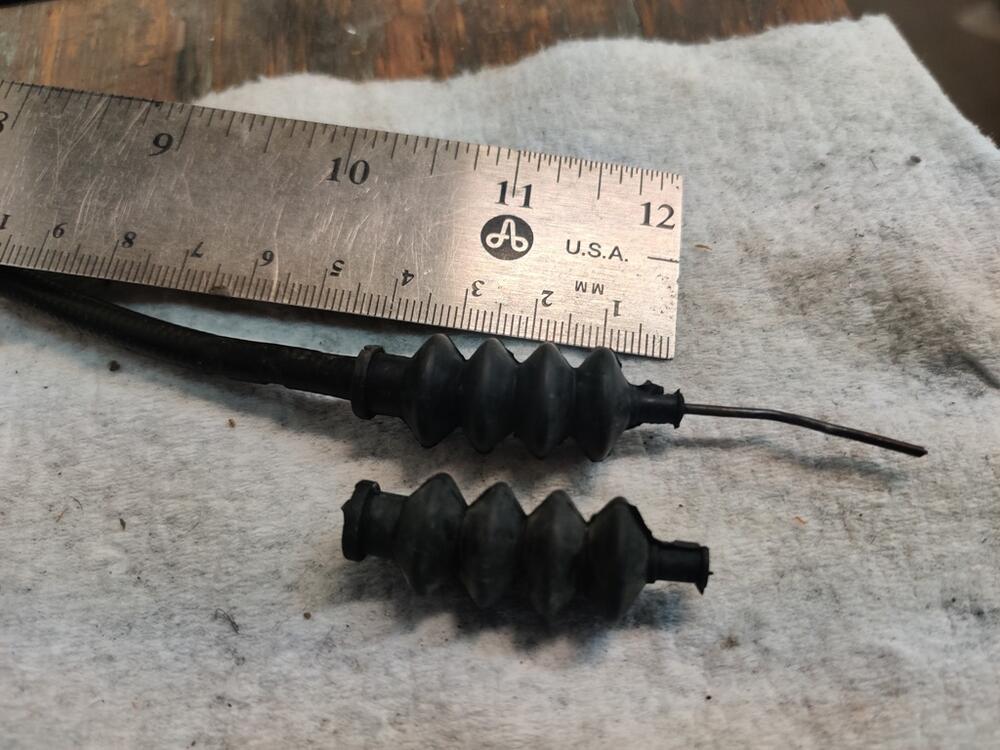
Thanks for the measurements. The boots I have a bit small. They are not as wide at the fat part of the bellows and they are only 1.6 inches long from end to end. I put one on the cable and the id on each end is a good fit. I think it is 1 mm id on one end and it is 6 mm id on the other. Maybe the info here will help someone else, as my carbs don't utilize the later style cables with boots.
-
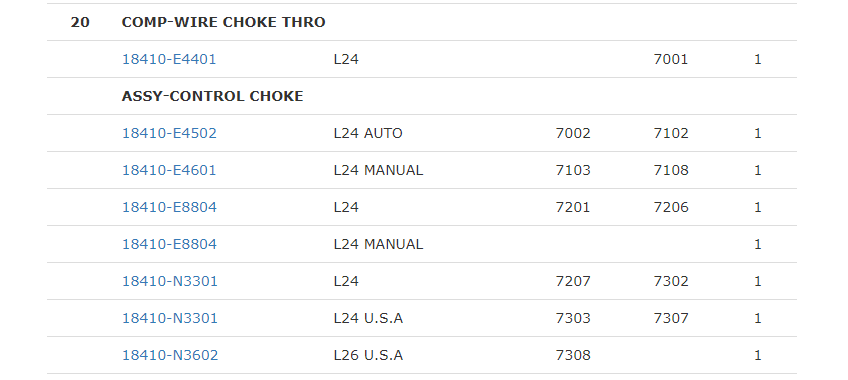
Interesting. I may not need these after all. I am looking at the fitment information. How can I tell when the later type was utilized? Assembly is #20 in the image:
-
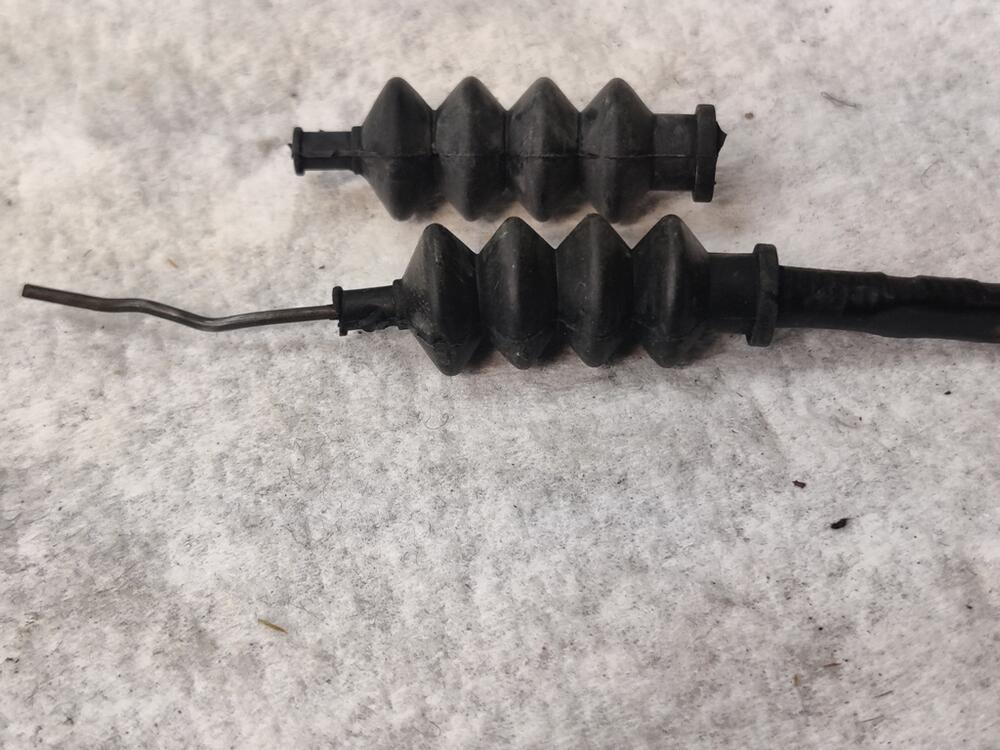
Nice - thanks for grabbing those and a pic. So, are you able to provide any details about the collars? Looking at the pic, it seems there were differences in how tall the collars/bands were. How thick is the metal they are made from? Is there just one dimple on the circumference, or more than one? Are they 6 sided? They don't look round... which I find odd. For the bellows, can you measure the rough overall length? How wide are they at the fat part of the bellow, and at the thin part? I have cables and can measure the outer diameter (OD) of the cable housing. I just haven't done so yet.
-
Did you see the link to their facebook page? Send an email to them first to inquire on pricing and availability: southernshinemedia1@gmail.com They accept PayPal.
-
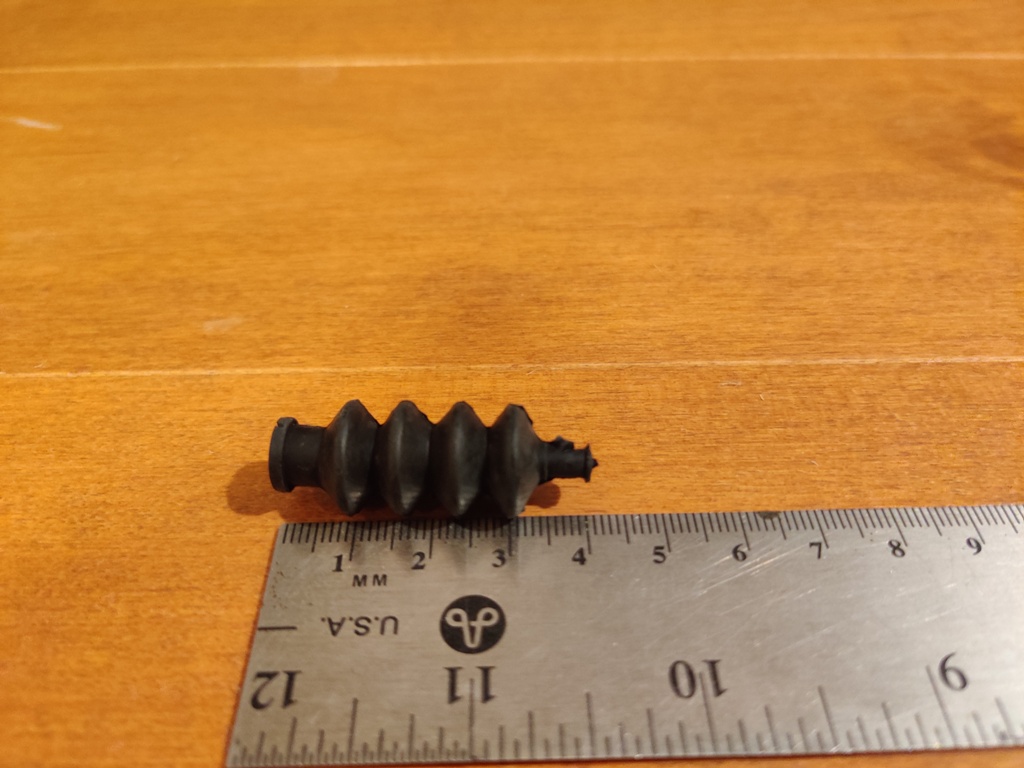
I came across them after doing searches for rubber bellows. It seems remote control boats use them. Search "rubber bellows boat model" on ebay. I had to buy a pack of 10, but they are cheap.
-
Interesting... That is a running production change to improve a problem, in my opinion. 240Z rear hatches do not have that bracket, nor any support in that area. So, the entire outer panel moves inward when you press on the lock button if you are not careful. I will be making a support for my hatch to eliminate that issue. It seems that Nissan did the same thing on the later Z.
-
Hi Wally, Color and type of finish depends on the year. My two 240z's had a black coating applied at the factory What model and year are you working with?
-
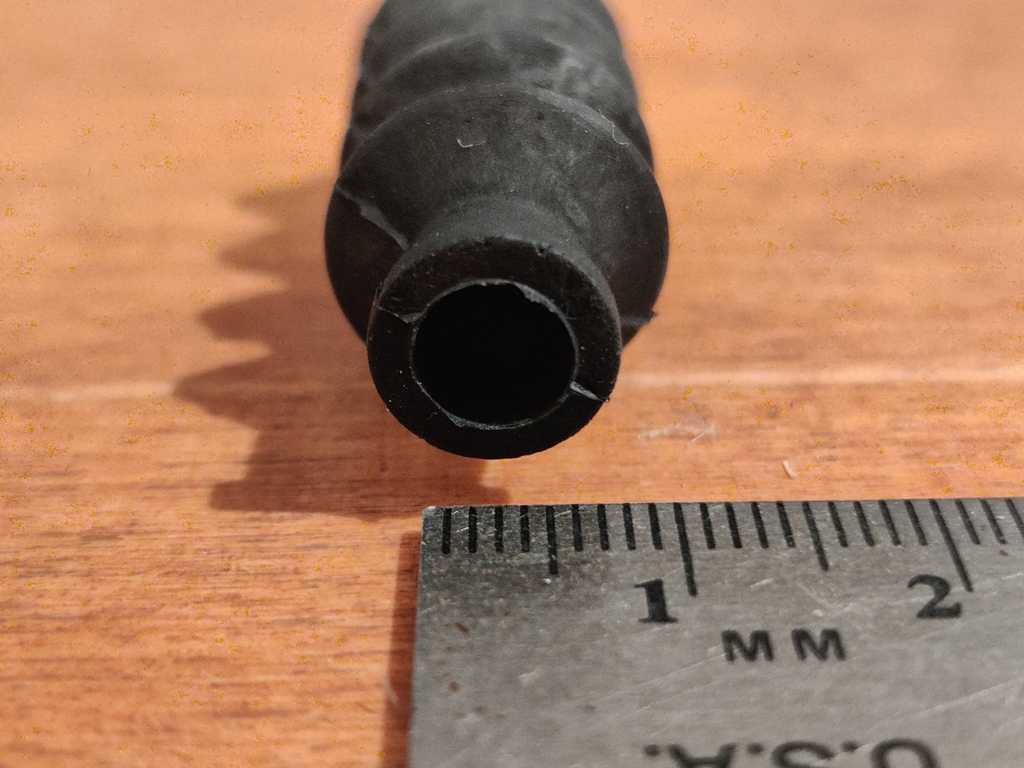
A part that is almost always long gone on our 240z's, I am hoping to find a nearly identical to factory replacement "rubber bellows" for the choke cables for the car I am restoring. Somewhere in my thousands of hours of web-surfing, I found this picture of some of the originals: Does anyone have any originals that they could pull some measurements off of? I am looking for dimensional details of both the boots and the collars/clamps that secure the boot to the cable and sheath. I would like to fabricate the collars... but I need more info. Here are some boots I am hoping are close enough:


-
It has evolved some, and now it consists of: Using these glass beads from Northern Tool and Equipment, important for size of grain, and bead blasting at 90 psi with a 1/8th inch nozzle to remove all rust, and to establish a consistent finish. I use one of these baskets and find that putting a variety of hardware (big and small) is great for trapping the parts in place so I can blast them without them flying around too much. For large parts, you don't need to use the basket, and you can then go back over them with the pressure at 50 psi to put a smoother, easier to "second stage prep" by hand, finish. For all hardware (bolts, washers, nuts, screws and odd small bits), I go straight from glass bead blasting to tumbling in one of these vibratory tumblers. I now use a stainless steel media (bought from Southern Shine Tumblers on Facebook). See pic below. It consists of tiny little bits of stainless steel that are good at getting into tight spaces, like between threads, phillips head recesses, etc. And now I use it dry. I was using water and a bit of citric acid, but I think that is best for doing brass shell casings. I was fighting keeping the parts from starting to oxidize/rust, and have found that the media works better and faster dry... to put a nice finish on the hardware. Time in the tumbler is about 2-3 hours. For large parts that I can't tumble, I use a Dremel tool and the little wire wheel brush attachments after glass bead blasting. For final, more consistent finish, I follow wire brushing by hand rub the large parts with #0000 fine steel wool. Doesn't take a lot of work by hand, but the combination of using the Dremel followed by fine steel wool by hand does end up taking some time. The glass bead finish can be altered on aluminum parts, by the way. It can look really nice, if after going over it once with 90 psi, you lower the pressure and go over the part slowly. Extending the distance from the gun tip to the part also smooths out the finish, giving it a nice satin look. I am still experimenting, with some aluminum parts, but a once over with 90 psi to clean followed by a once over with 50 psi achieves a really nice finish.

-
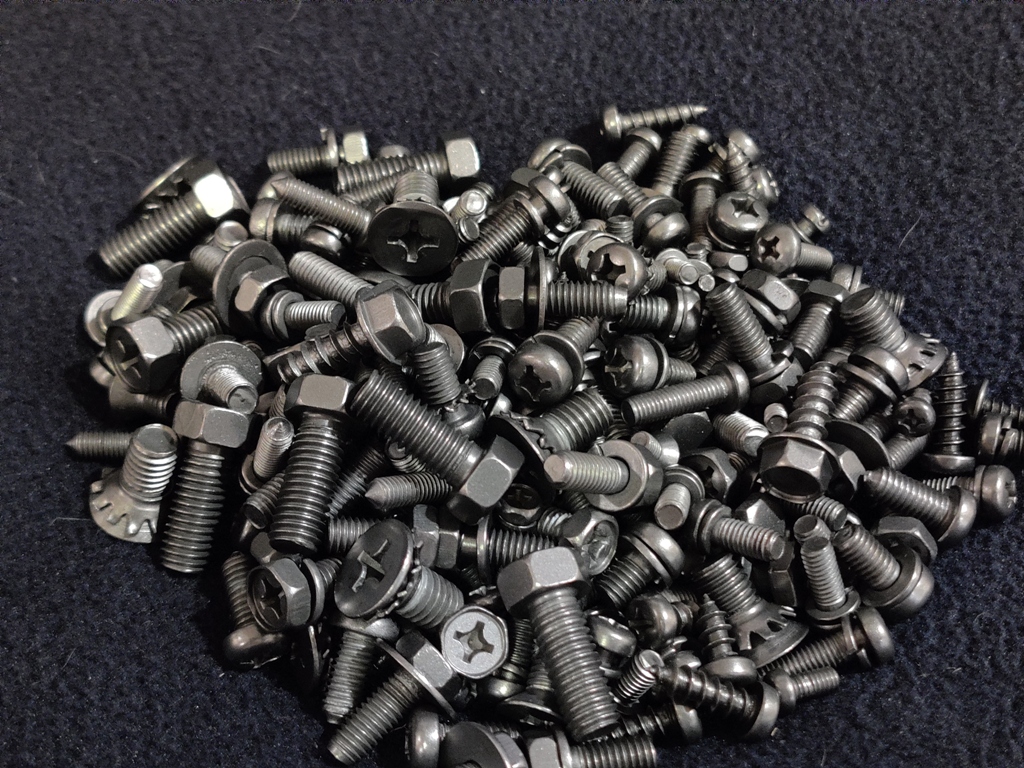
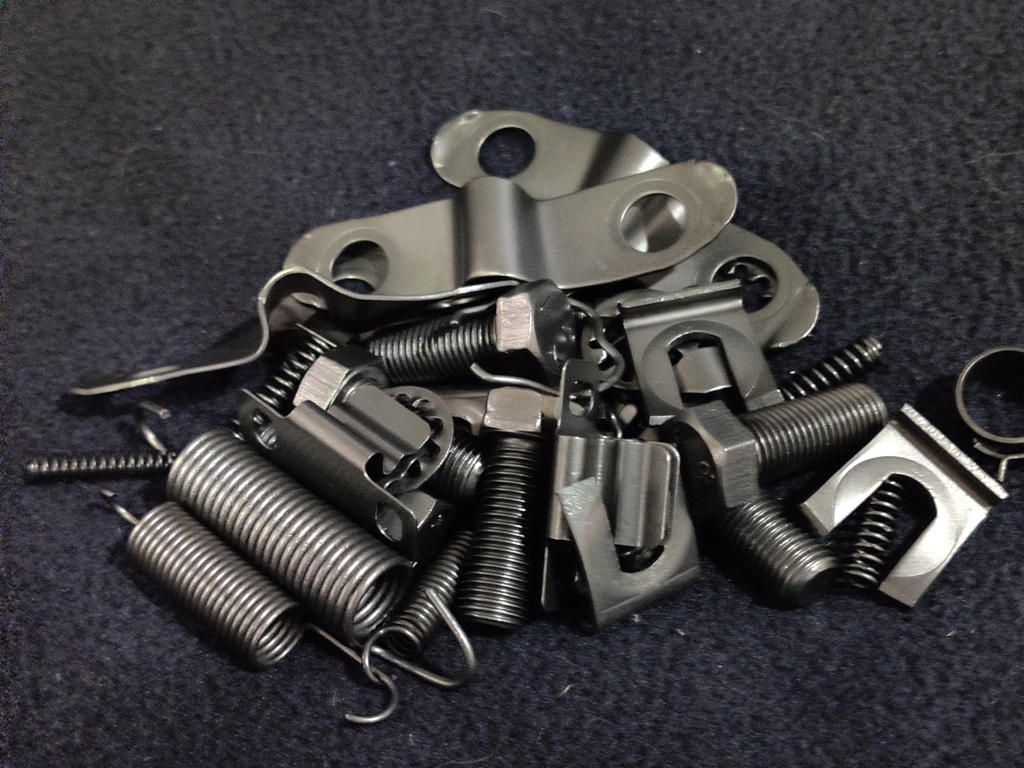
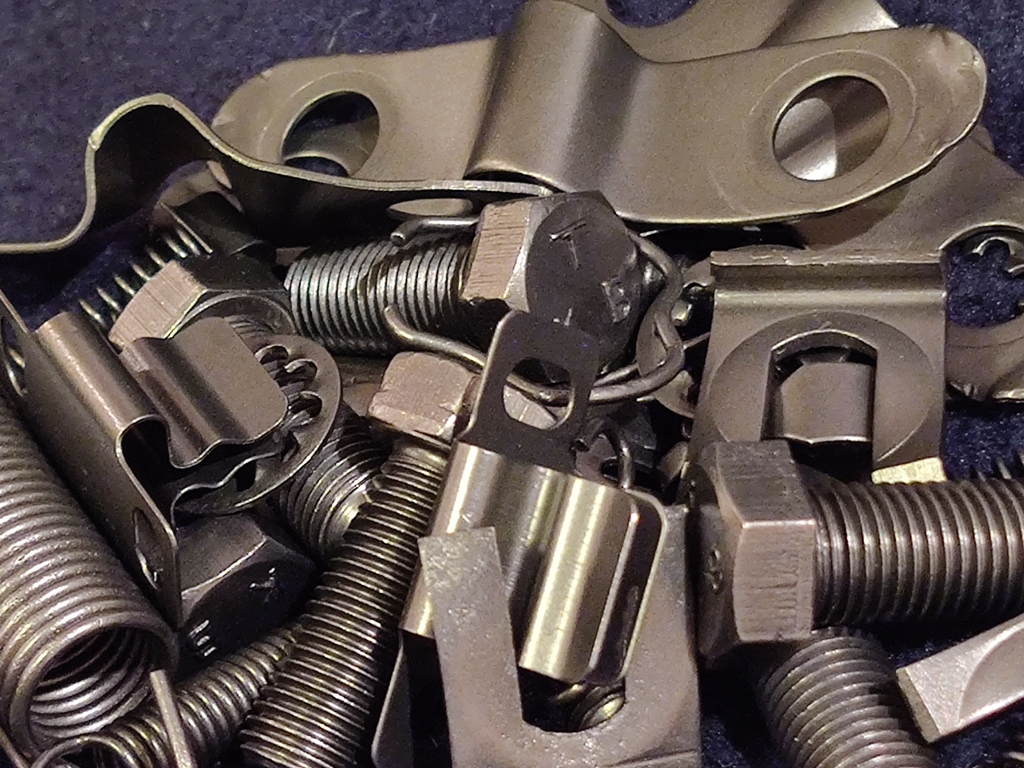
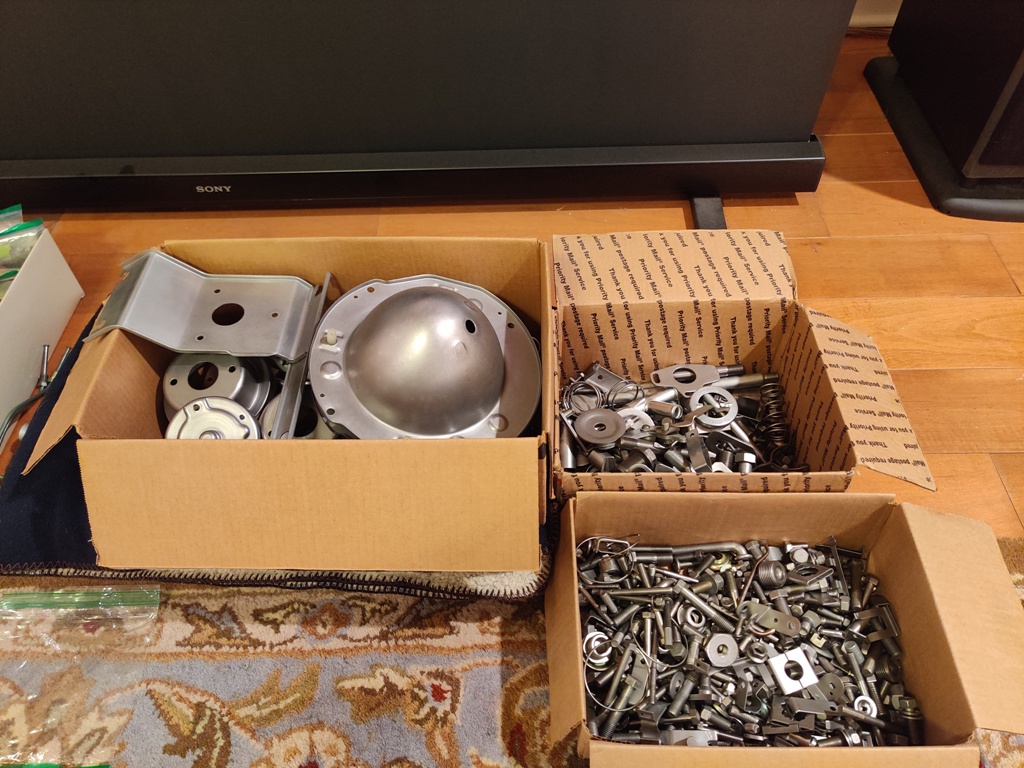
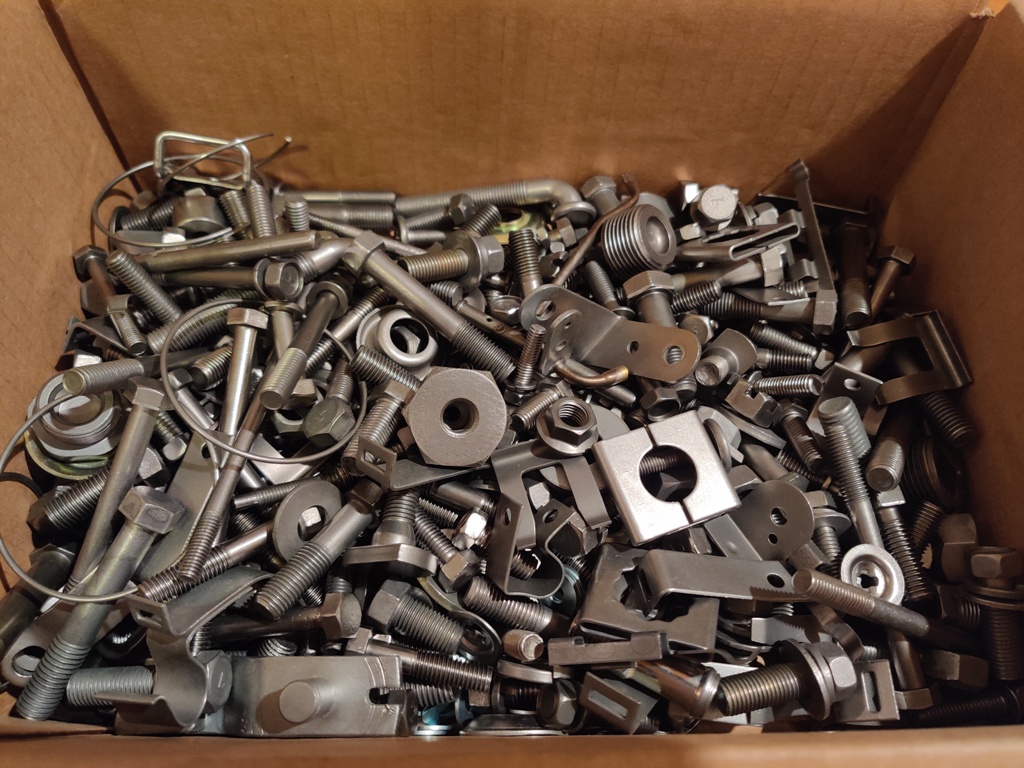
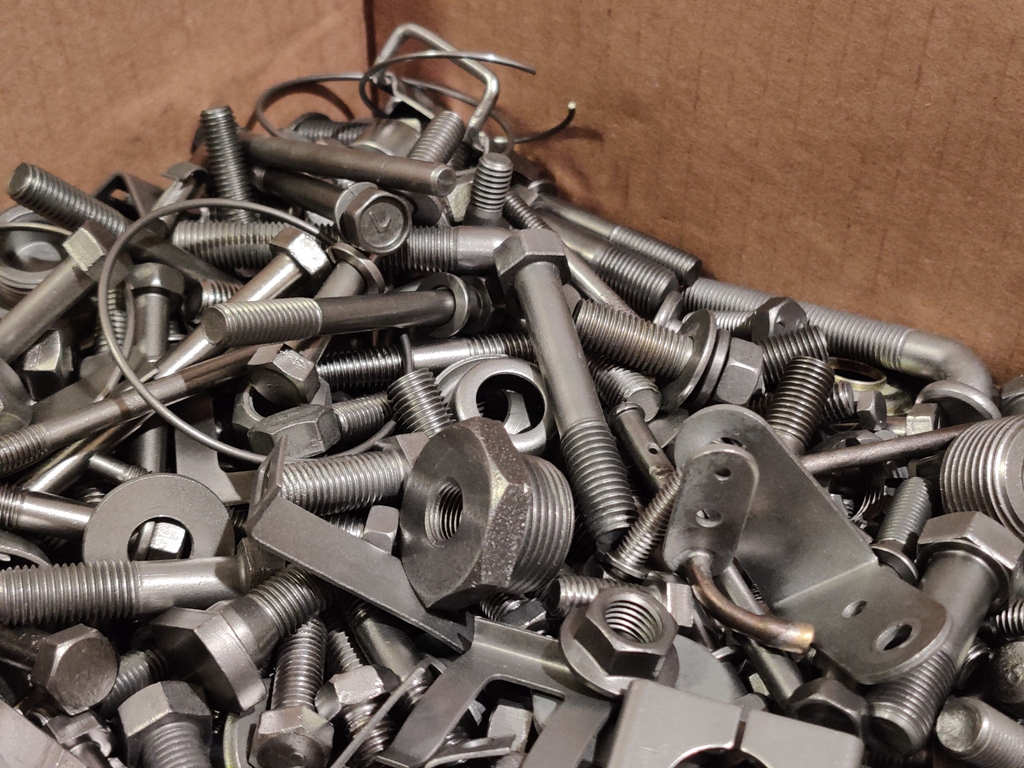
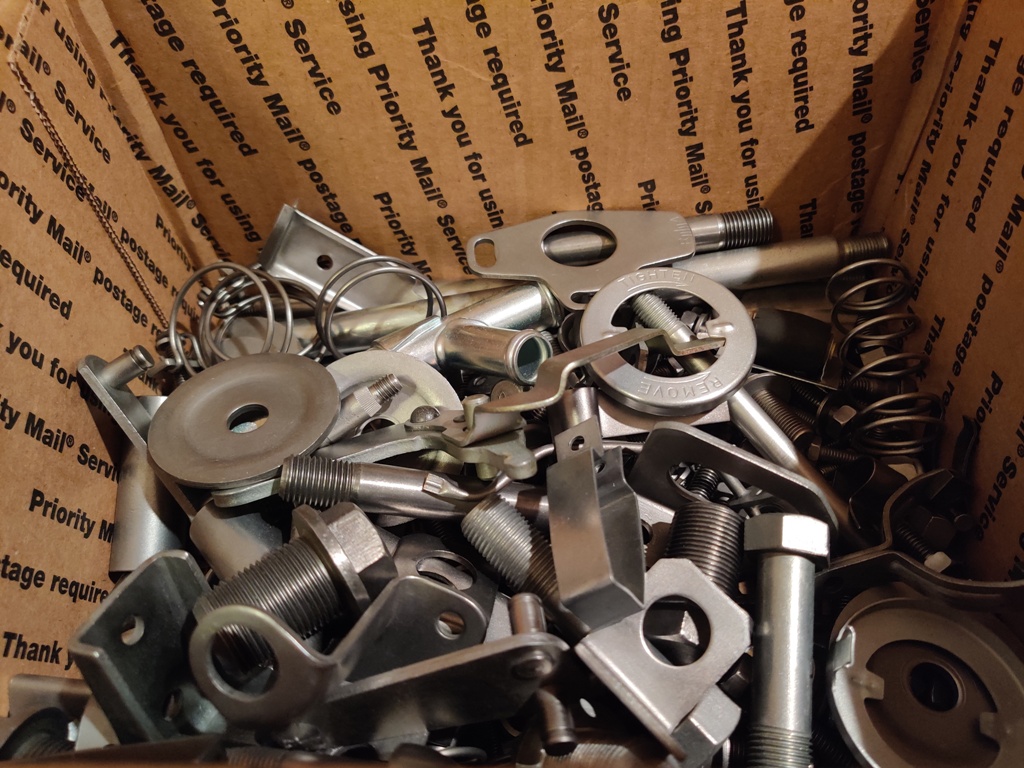
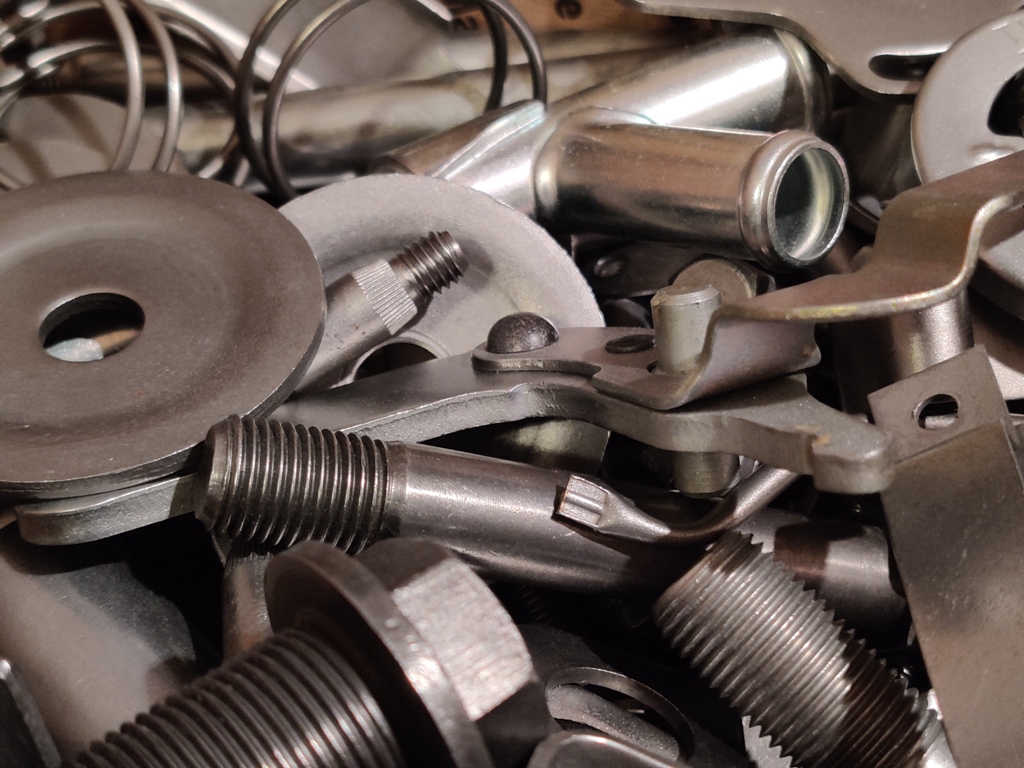
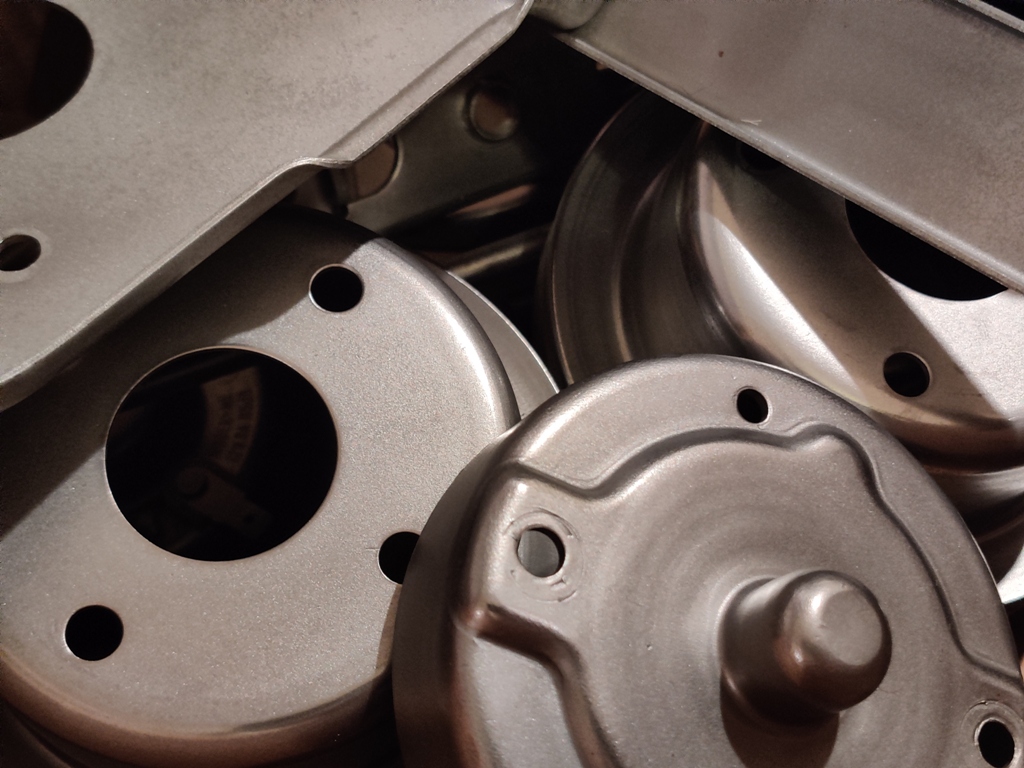
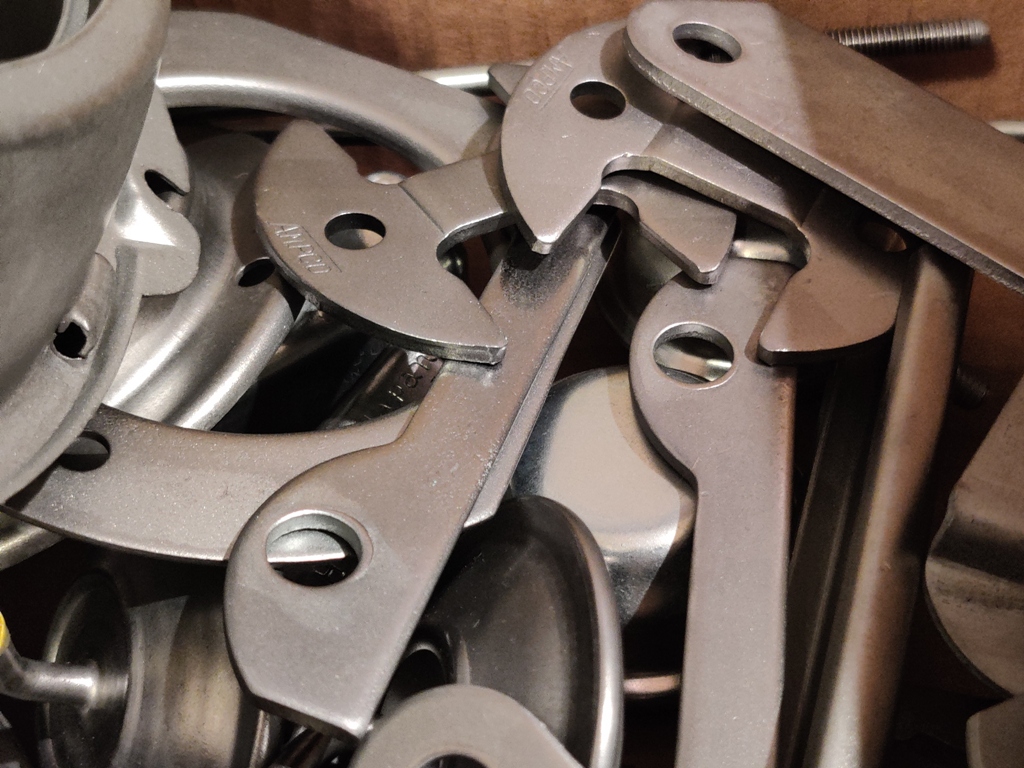
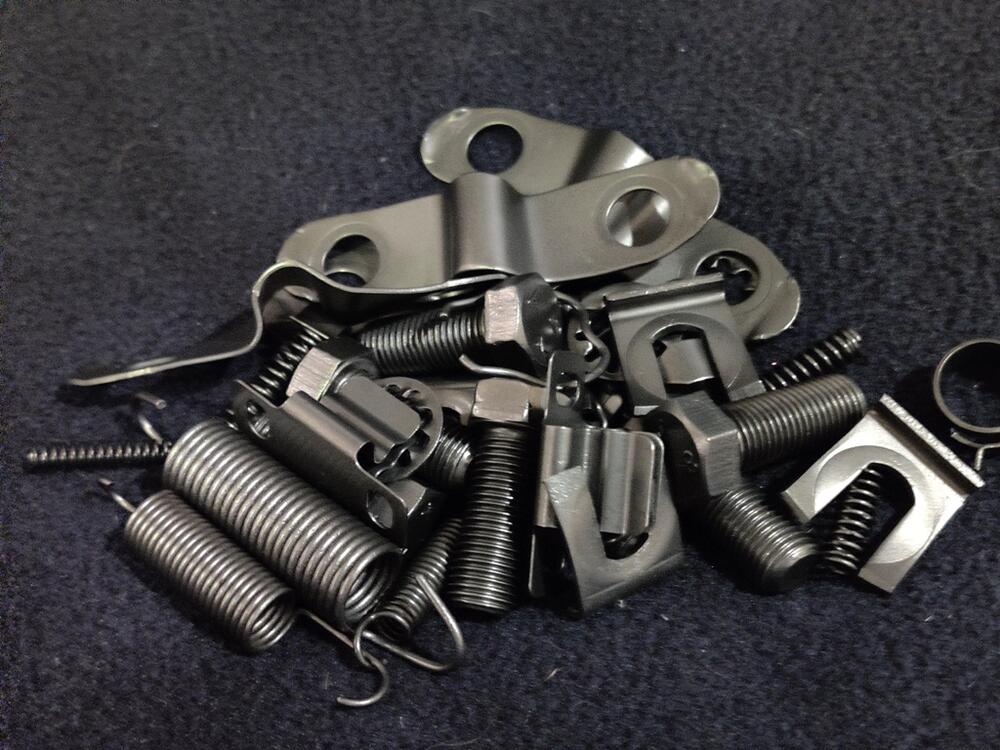
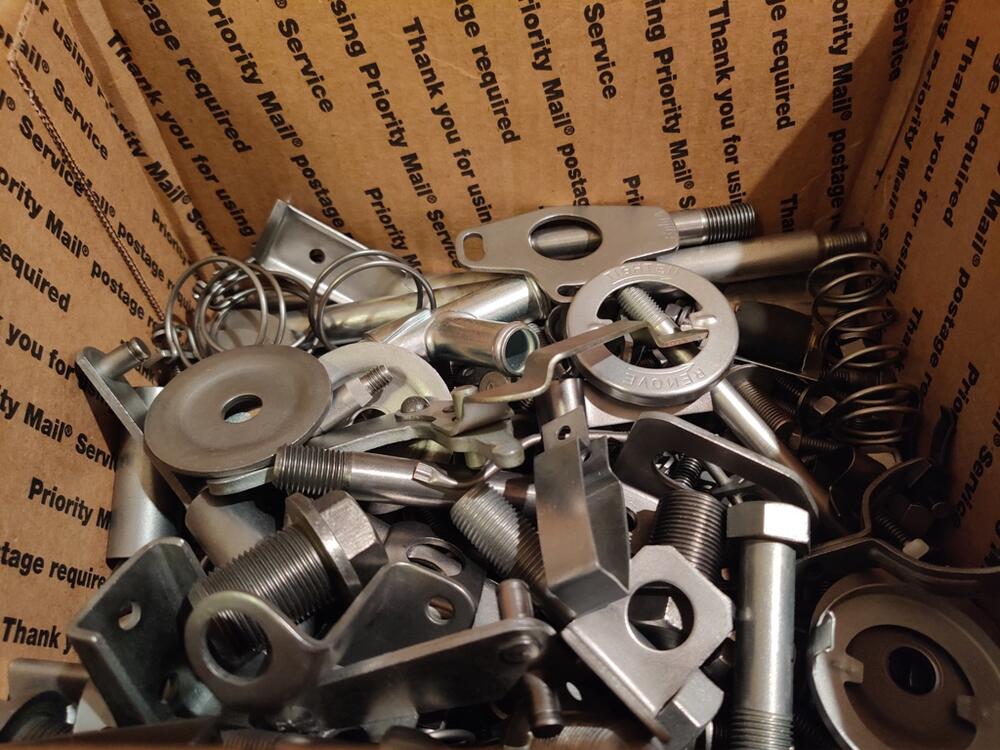
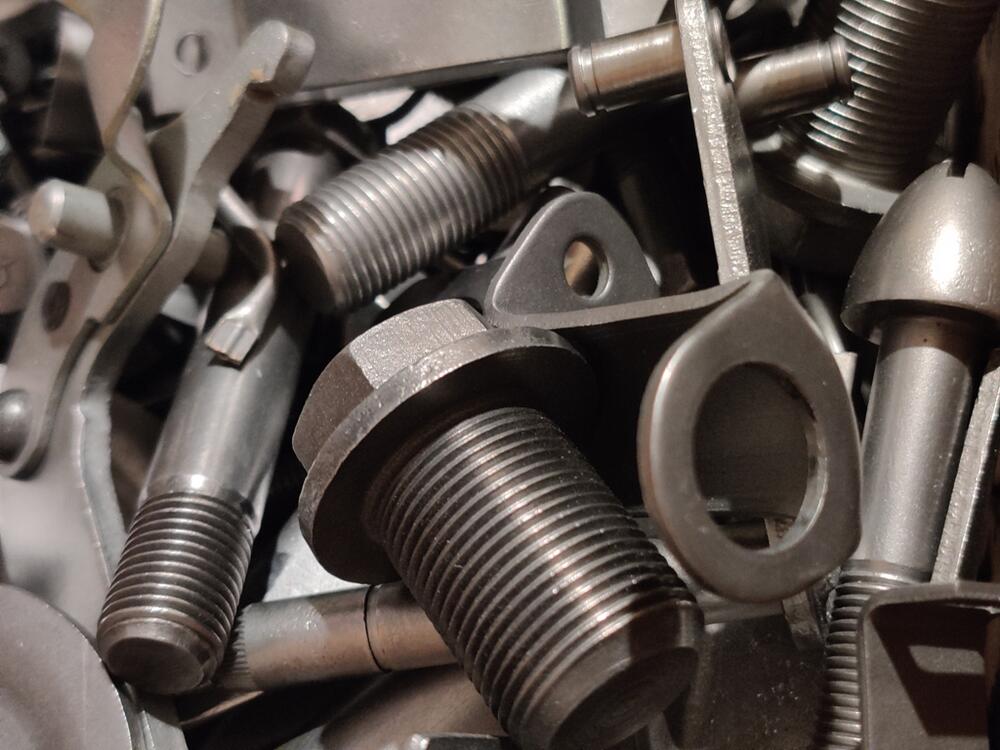
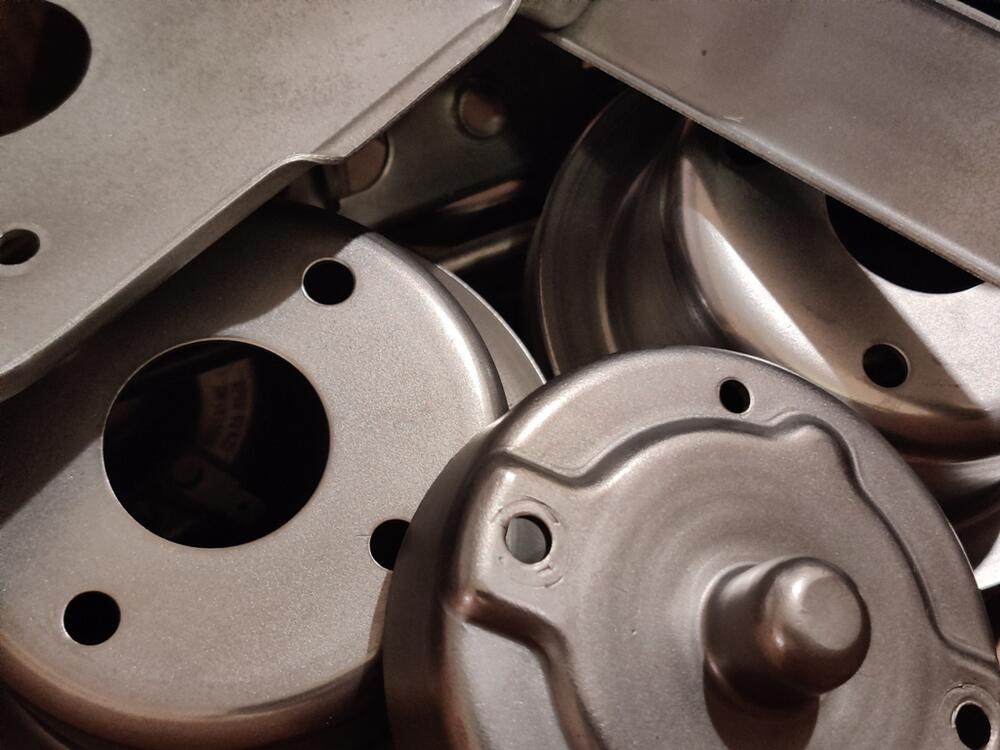
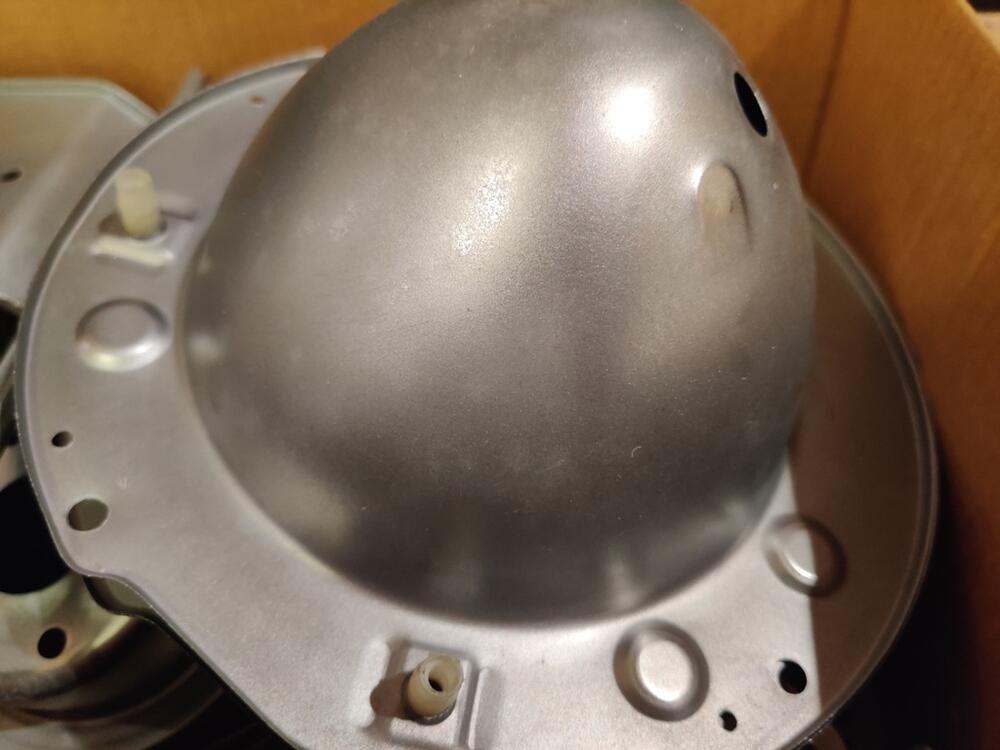
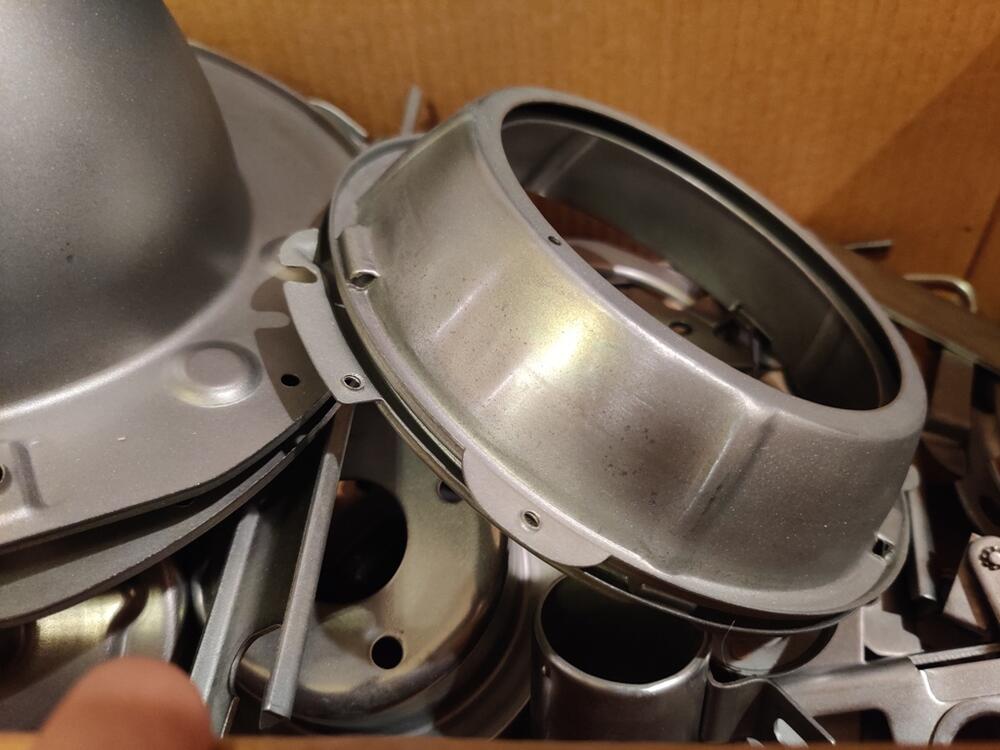
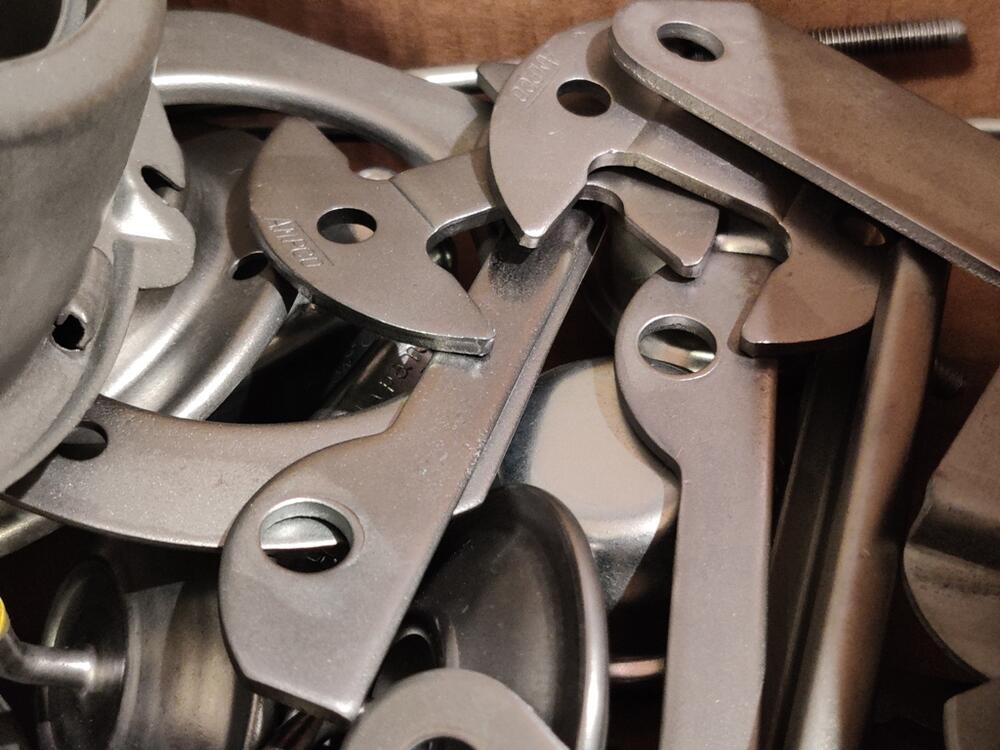
Prepping hardware... Will it ever end??????????? 🙂 Only a vague idea if this is good enough. Perhaps, some of it is overkill. Thanks for the guidance about prep level on the hardware. I have probably been going overkill on some. I hope I can finally send everything off in a couple of weeks. A lot of the larger stuff (wiper linkage, hard lines, etc.) is not shown here:


-
So, two separate requests - for a bell housing to mod for the SX trans swap, and I need a replacement "reverse check sleeve" for a spare 280ZX trans I have. I only included a pic of the reverse check sleeve. I have a spare 4 speed bell housing, but I would prefer a 5 speed one so I don't have to drill a hole for the reverse switch in a thin area of the casting. Hmmm, I guess I could add an aluminum boss to that area of the casting...
-
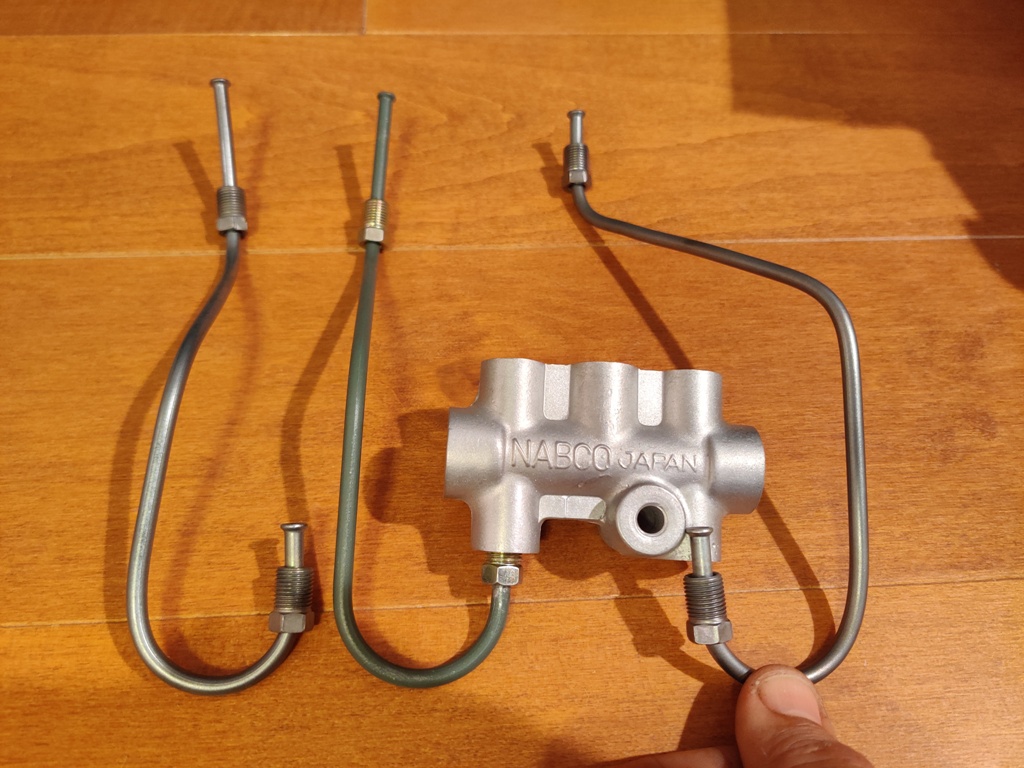
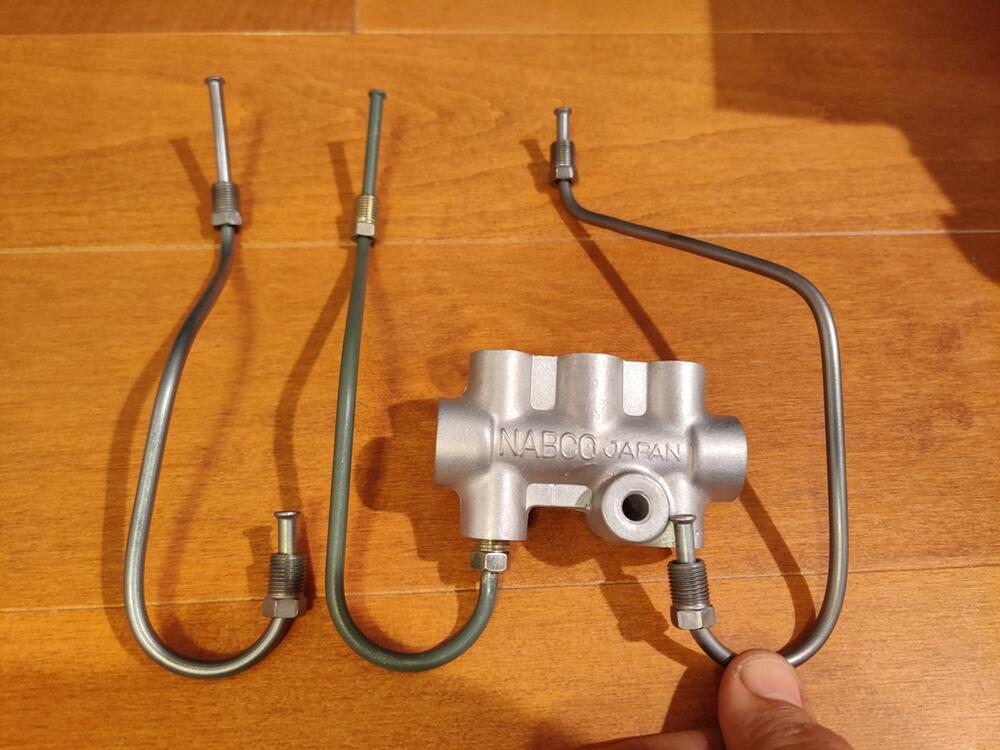
I found the time to pull the lines out of the box of hardware. Here's what I have: The line which is attached to the compensator is the NOS (new old stock) one. It is series 1, or per the parts manual up to 9/1971. The line just to the left is one of two that came with the car. Other than the bend towards the top, it looks like the same part as my NOS one. The line at the right in the pic is the other one that came with the car. It looks very similar to the correct series 1 line for the front circuit, but it won't line up with the correct master cylinder as is. It would need to be twisted a bit if attached to the compensator to align with the front circuit on the correct master cylinder. It looks to me like the car still has the original hard lines... that they were tweaked a bit to fit the later cylinder.
-
View Advert Need a bell housing from an FS5W71B 5 speed I am putting a 240sx transmission in my Z and would like a FS5W71B bell housing to do the swap. Looks like a bell housing from pretty much any Datsun/Nissan 5 speed from 75-83 will be right. Also, I would like one of these in the pic. Not sure what you call it, but it does something with the shifting rods. Advertiser inline6 Date 07/25/2021 Price Category Parts Wanted Year 0 Model 240z