


Captain Obvious
Community Member
-
Joined
-
Last visited
Everything posted by Captain Obvious
-
Spot The Bot!! ☺️
-
In all seriousness, I alllllllmost flagged him earlier today before he even ever posted. I think there was about an hour between him joining the forum and his first post. I should have followed my gut and done it. Would have looked like a master bot—spotter. Bonus points for those who see what I did there. Hahaha!
-
The flat top fuel rail should be perfectly fine to use with round tops. It has a restrictor orifice in the return line just like the rail used with the round tops. Other than the relocation of the outlet nipples that lead to the carbs, they are interchangeable. The engine uses a small amount of fuel at idle. In fact, if the carbs are tuned properly, the engine should idle for about 30 seconds or so just consuming what is in the bowls. No fuel pump supplying fuel necessary. So you should be fine running off the bowls until the pump turns on. It'll run for a surprisingly long time. First thing I'd do is look for vacuum leaks. A hose you forgot to connect, or a nipple you forgot to block off? If no joy there and you're double dog sure you have no vacuum leaks, I'd drain the bowls (disconnect the tube on the bottom and let the fuel run into a cup) and then refill the carbs with known good fuel. You can easily do that by disconnecting the inlet fuel line and sticking a small funnel into the hose. Pour fresh fuel in from a little cup until the carbs won't take any more. At that point, your bowl levels should be good and you should have 30 seconds of fresh fuel. Maybe disconnect the fuel pump so it doesn't push any more questionable fuel back into the carbs.
-
-
Time to play "Spot The Bot!" @siteunseen It's a two-fer. >> https://www.classiczcars.com/forums/topic/58853-if-its-good-enough-for-a-sema-car-then/#comment-680341 I'm totally winning this round! Hahahaha!!!
-
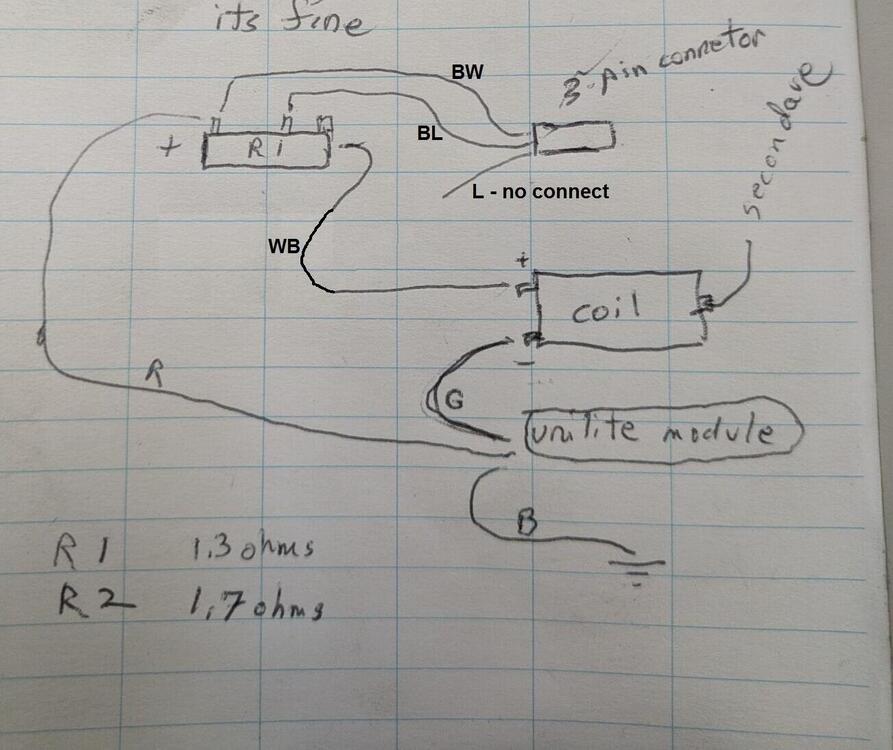
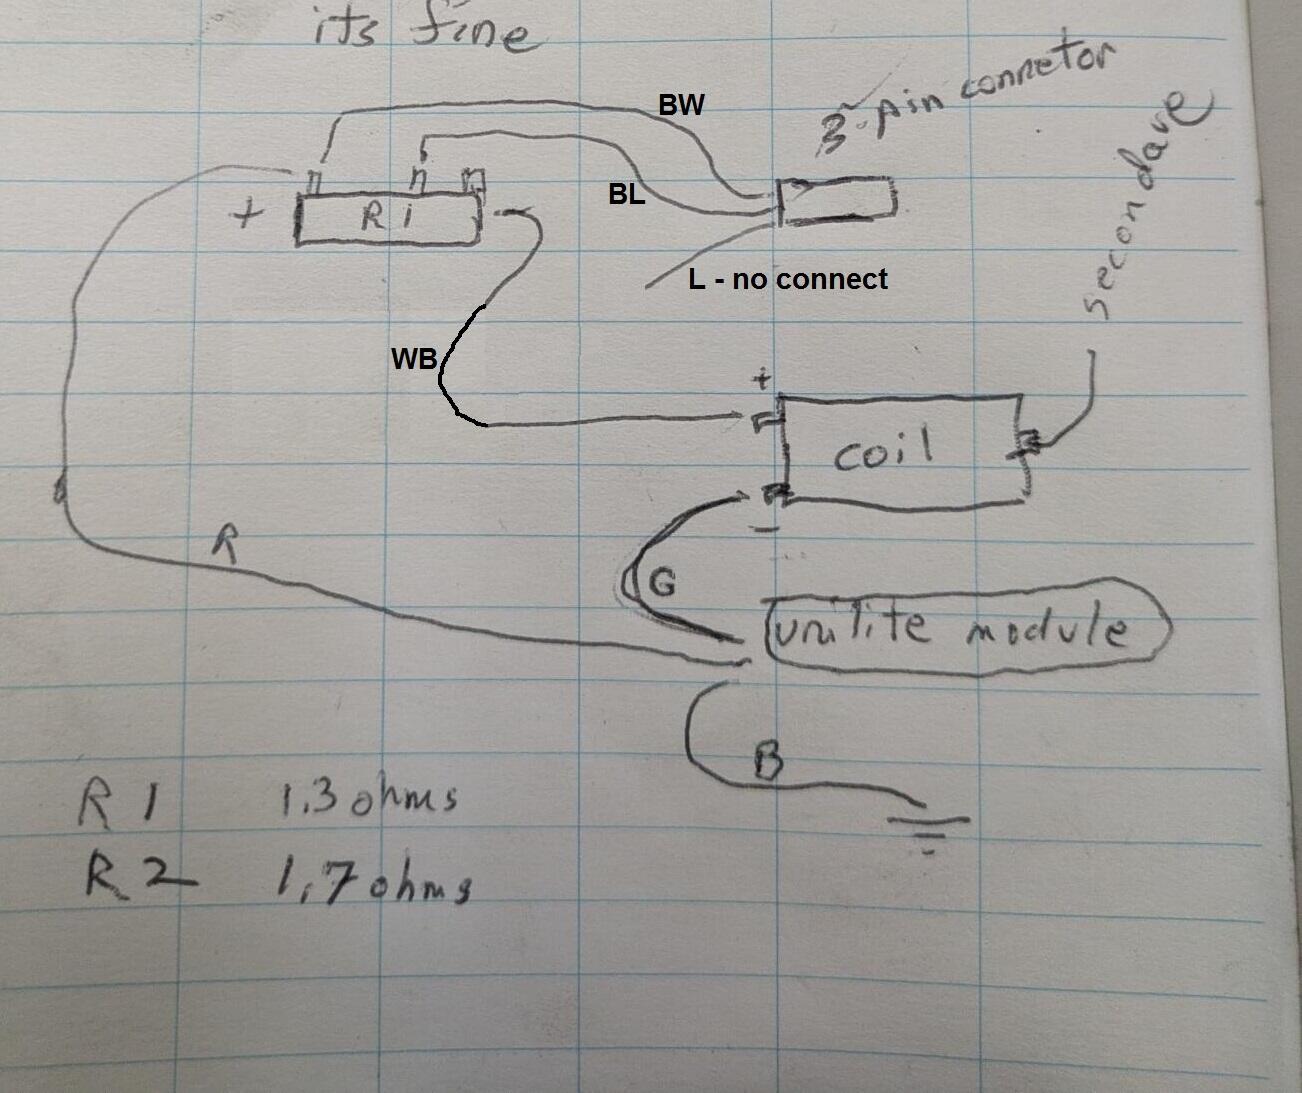
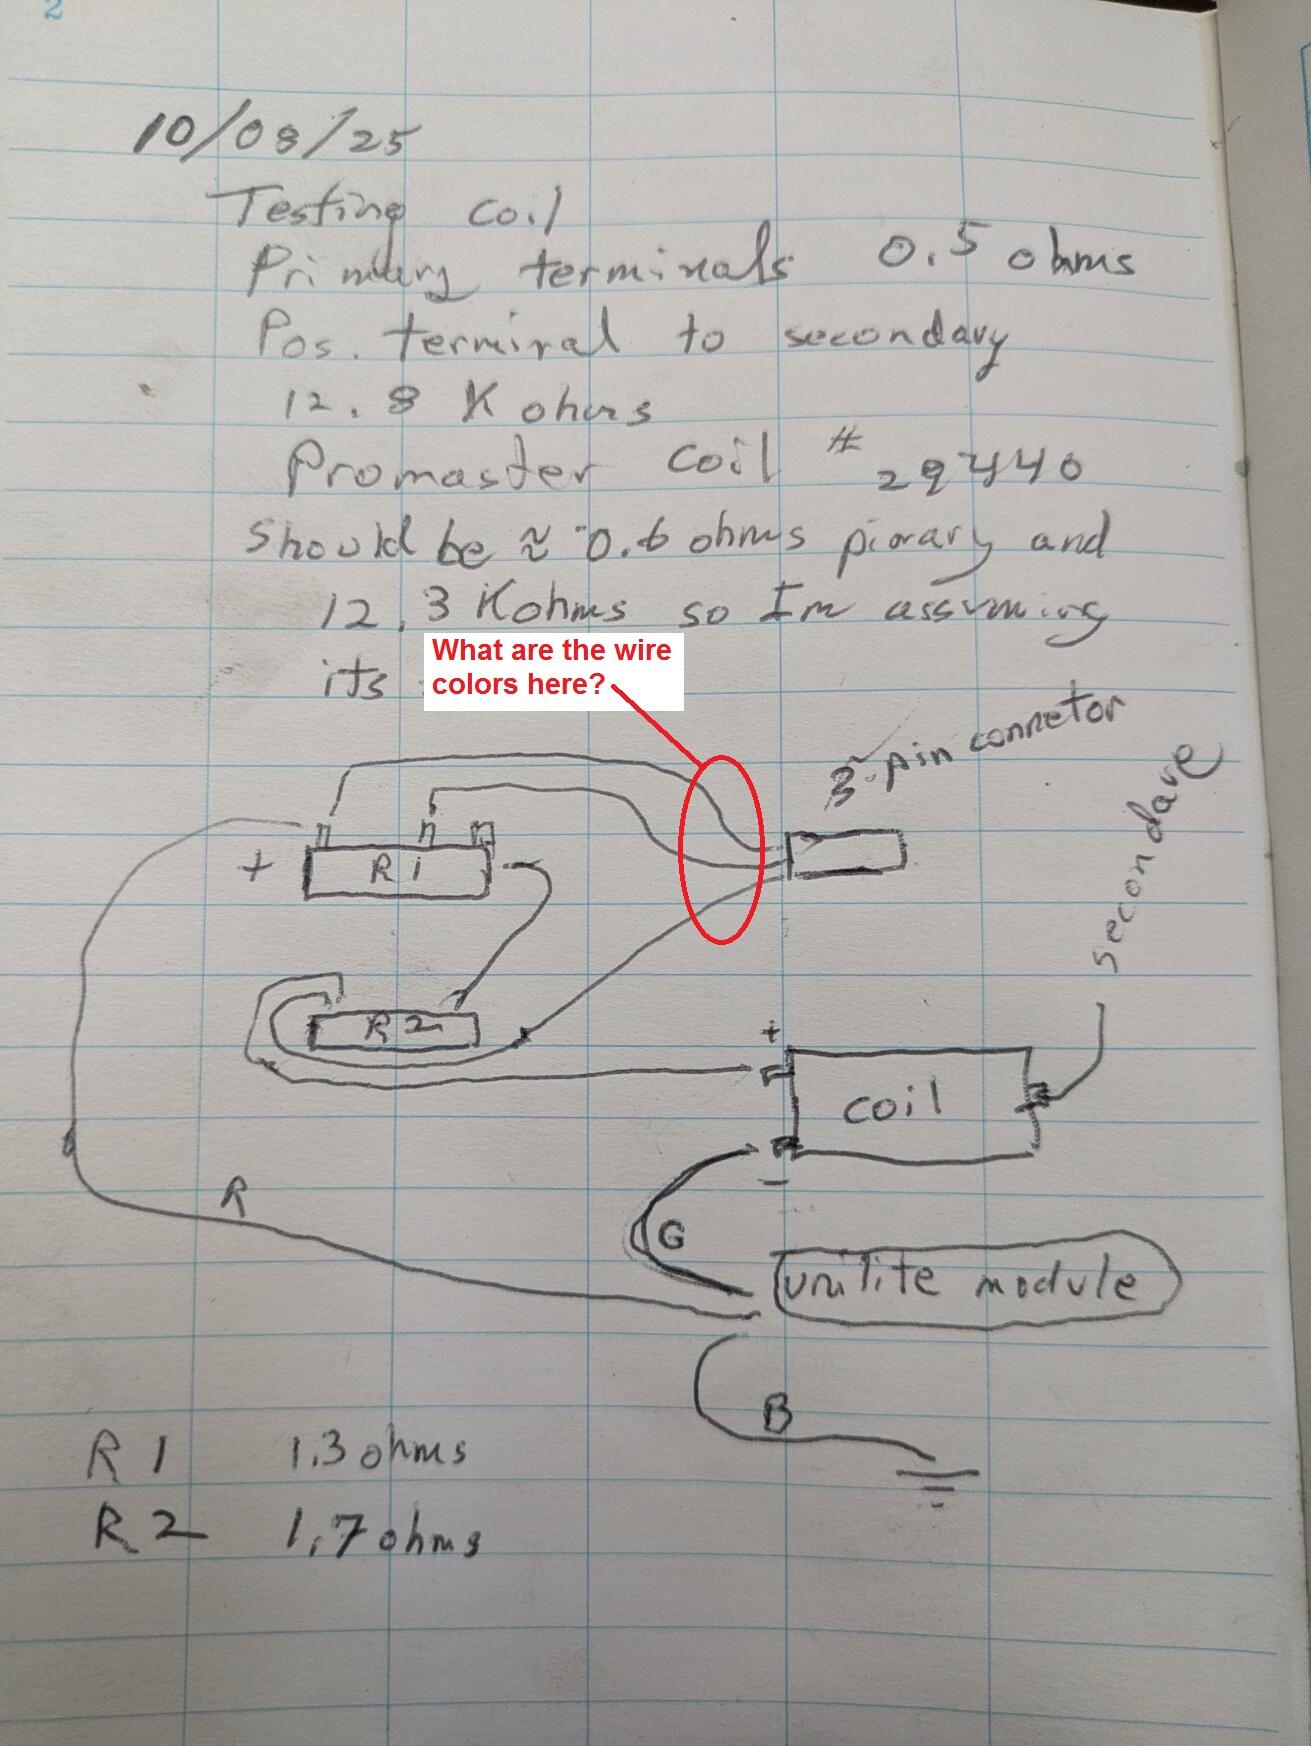
Excellent! Glad it's working. And I agree with the assessment that it was either the second ballast resistor or just a bad connection. And the schematic sketch you posted looks good. It's the same thing as suggested earlier with the inclusion of the tach (blue) wire connection. Glad that worked out as well!
-
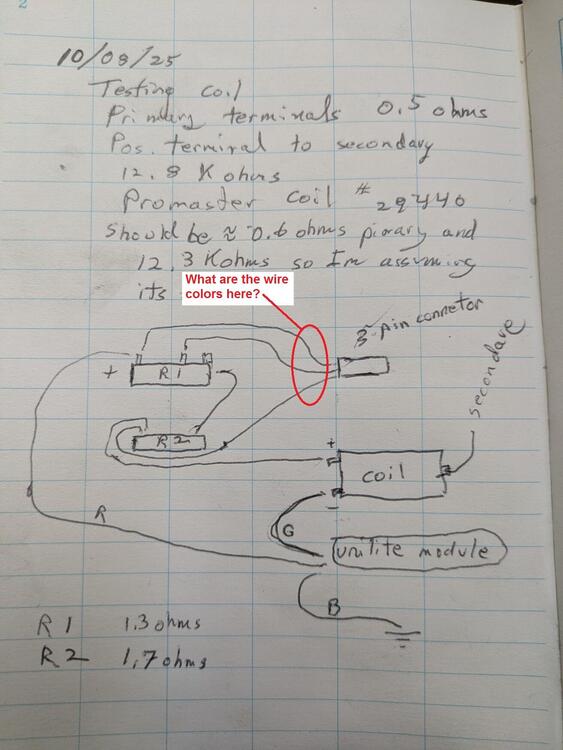
Sorry, but I kinda lost sight of the moving target... Can you make up a fresh picture sketch schematic of how you have things connected right now? Make sure to show both sides of the stock original four pin (not three?) connector. And include wire colors on everything?
-
Excellent analogy. That's a great philosophical thought exercise. Wonder what the right answer is.........
-
Gotcha. In that case, try this. The tach won't work, but the car should run. If this works, we'll deal with the tach next.
-
I'm with Zed Head. That thing is all kinds of wired wrong. There is no reason to have two ballast resistors. I'd start over and clean that all up. To help the process... Is the "three pin connector" a stock connector, or is that something that came with the unilite? Can you provide the wire colors going to that connector?
-
Hahaha! Exactly!
-
Wait..... Mitchel0407... How do we know you're not a bot???? Can you prove you're not AI? Anyone remember the scene from The Thing when they are all standing around accusing eachother? Hahaha!!!
-
Haha! I doubt that has anything to do with it. I'm sure he's just a busy guy with a job and a family and a car to work on. I don't think he's hiding or has been replaced by an AI. ☺️
-
Mike has been active on the site in the past couple hours . He knows about these posts and is choosing to let them continue on. There is significant credence in your theory Zed: I don't think it's training though... I think it's straight-up spamming and it seems we're going to have to live with it. @siteunseen , I challenge you to a game of "Spot the Bot". Hahaha!!!
-
That reaction from the bot is very reminiscent from the hot "Asian woman" who liked fast cars. Remember that one? "I'm just an Asian woman who simply likes cars. But I don't get the respect I deserve. There are always some idiots who question... Don't you have a mother? Always surfing the Internet and questioning others. I don't have that much free time to talk nonsense with you."
-
Yeah, it's another bot of the same style I've been flagging the past couple weeks. And this is an interesting concept: Maybe @Mike is partnering with the company that is creating and powering the bots. Maybe this is the latest venture by Mike to provide some additional income from the forum by monetizing posts like the above. "If you allow us to spam your forum in this way, we'll give you $.000001 for each post you let us put up." Your theory would certainly explain why Mike hasn't been getting rid of the fake members as they are called out. Maybe they're paying him? Hahaha!!
-
My early wiring diagram shows a red wire coming off the accessory relay connected to that blue wire. So I'm thinking they might have changed colors at the bullet connector. They did some weird stuff like that on the early cars. Next time I have my HVAC panel off, I'll take a look, but it might be a couple days.
-
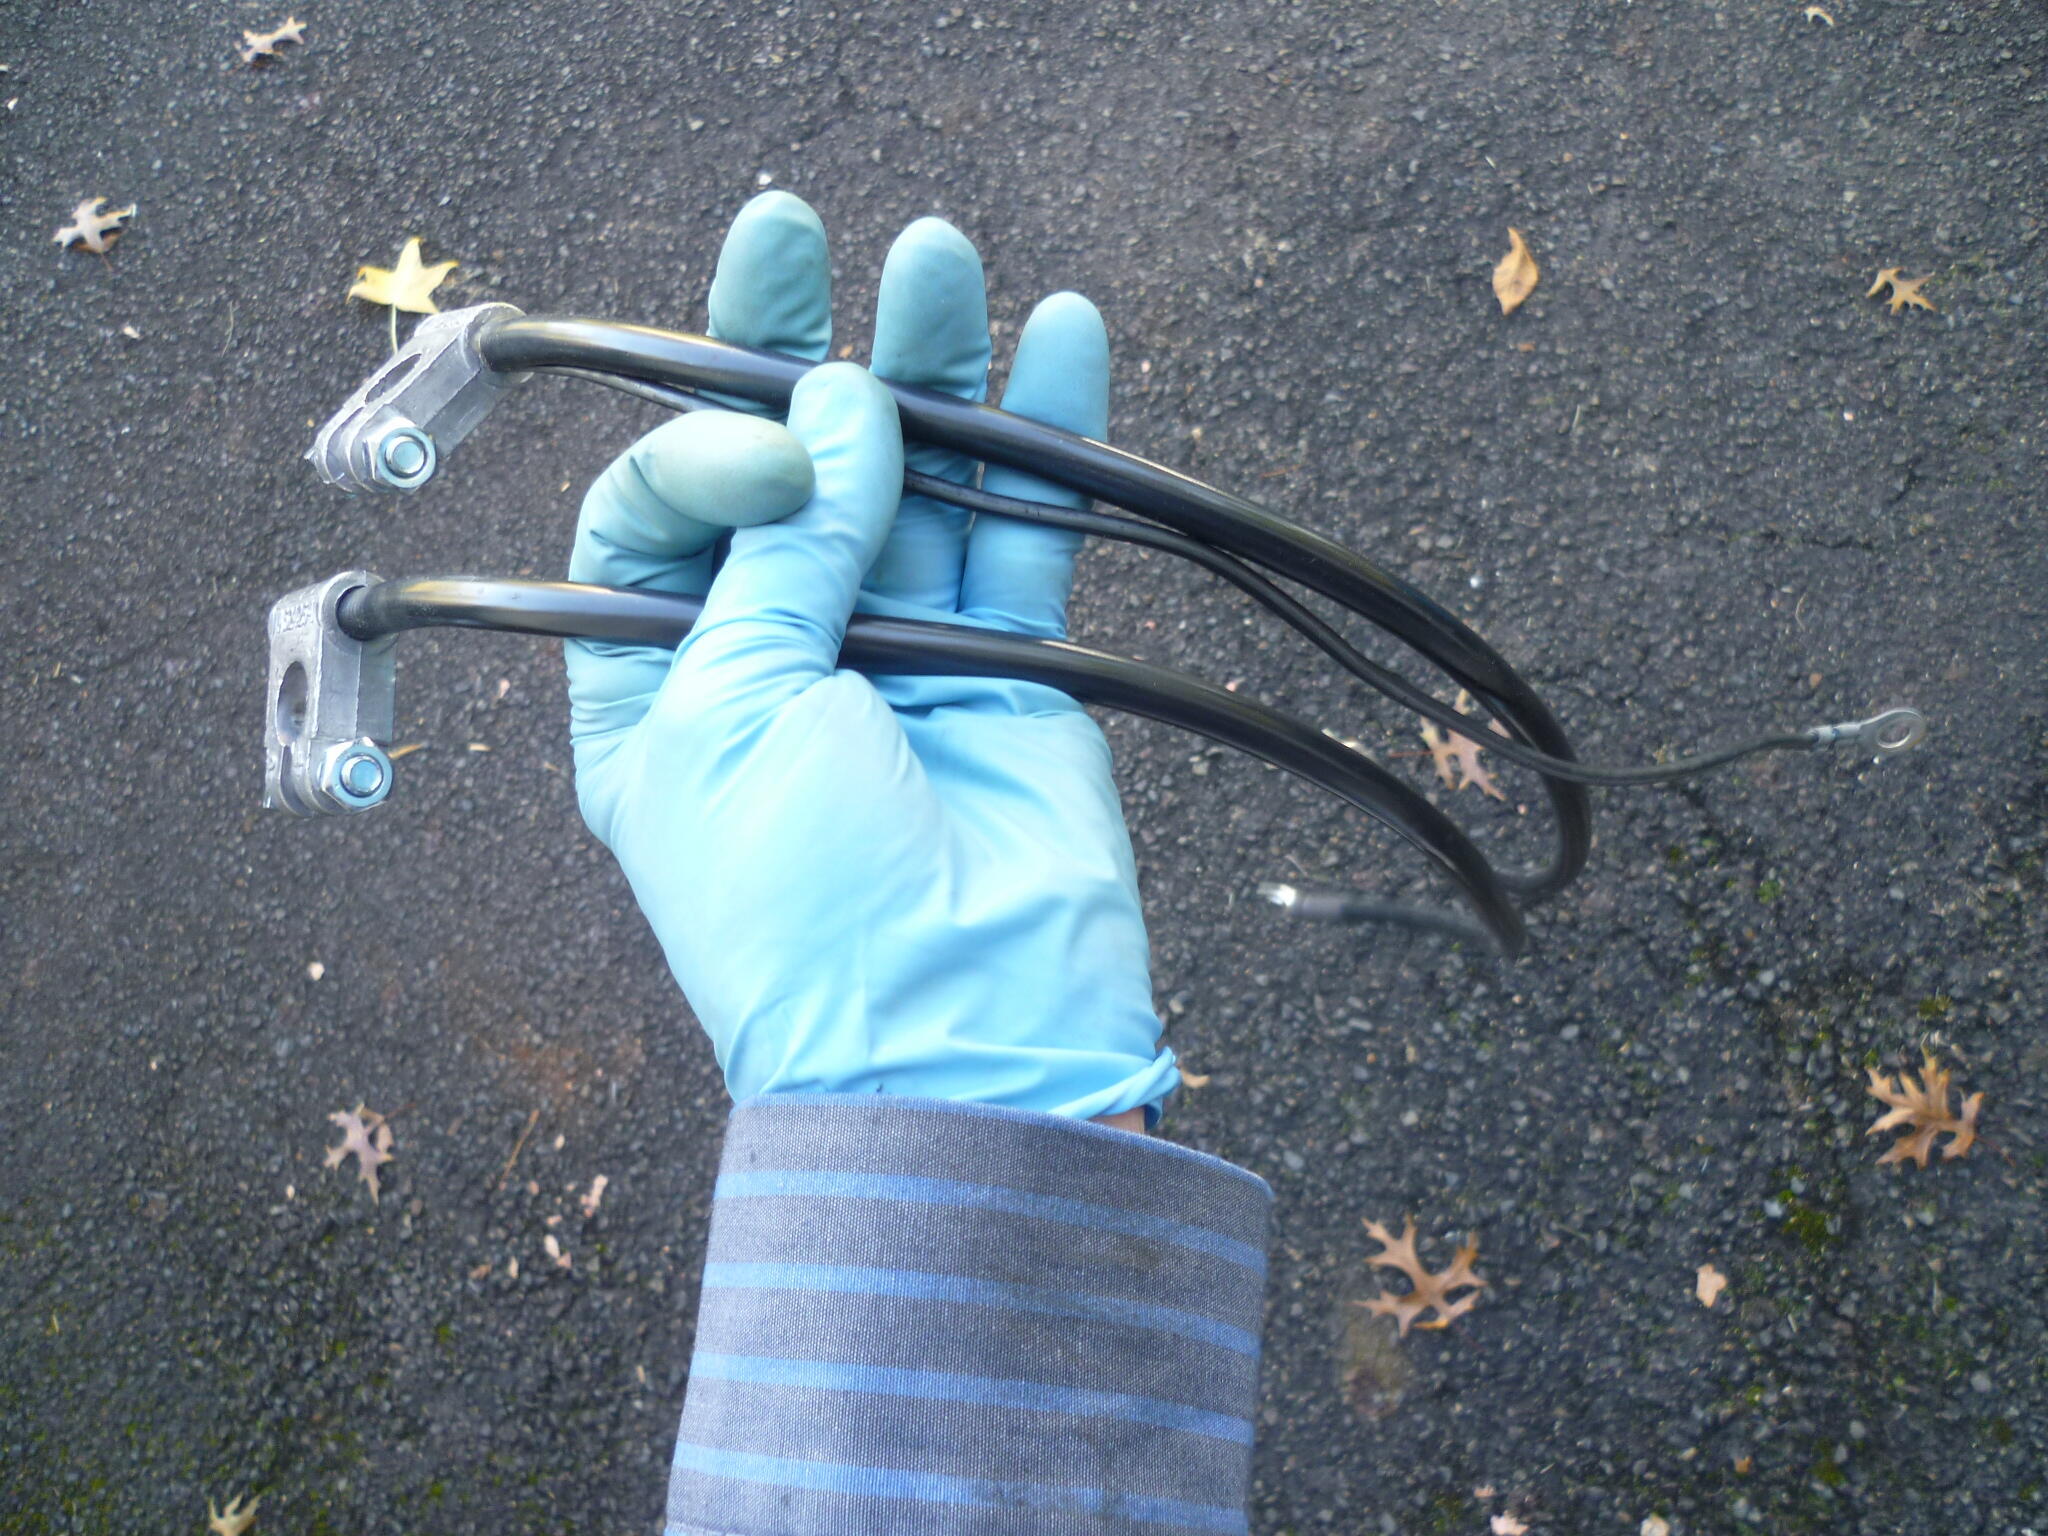
I used #4 gauge cable. Bought a 60 inch length off ebay with 5/16 lug on one end and 3/8 on the other. Cut it in half* to make two cables. Was cheapest that way. I don't know if this is the exact vendor I used or not, but here's an example: https://www.ebay.com/itm/141679228250 Today's price for the cable(s) is about $16, and the military lugs were $10. So my out of pocket for my two original-ish looking cables was $26 for the pair. *After having been through this once, I would skew the cut point maybe two inches towards the positive side. In other words, I would steal two inches of cable from the negative and add that length to the positive making the positive four inches longer than the negative.
-
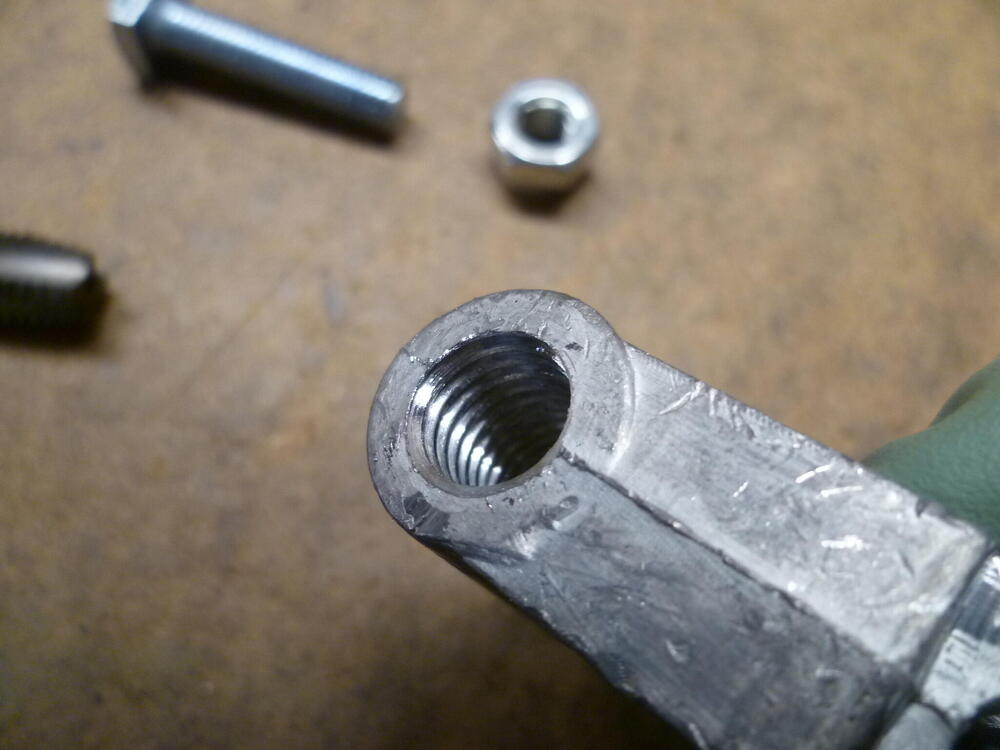
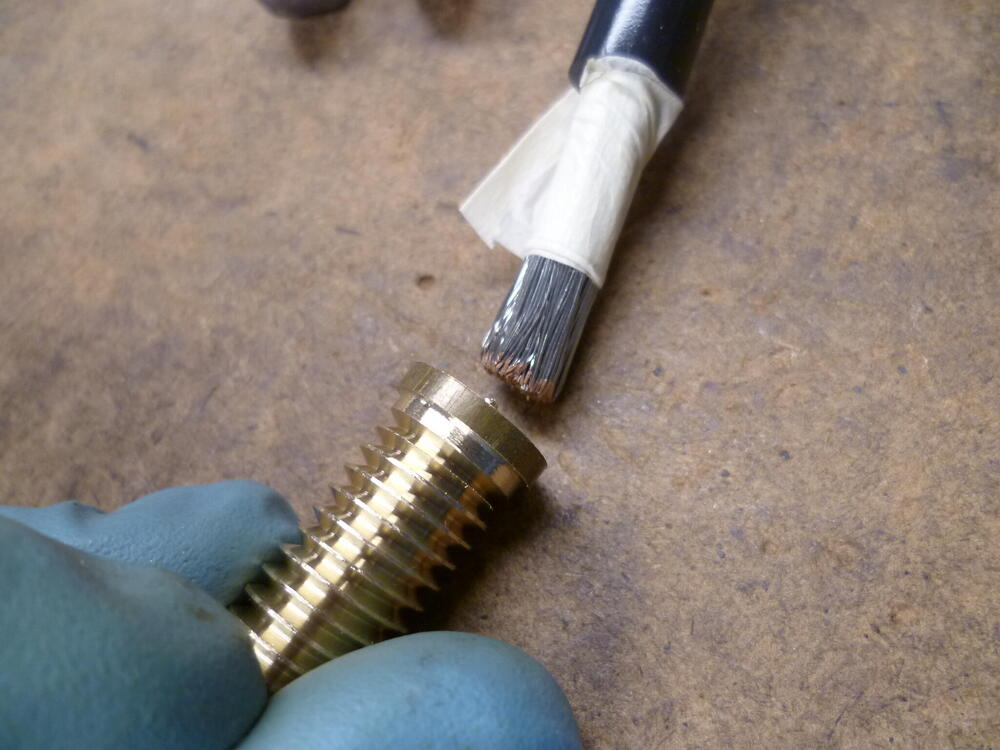
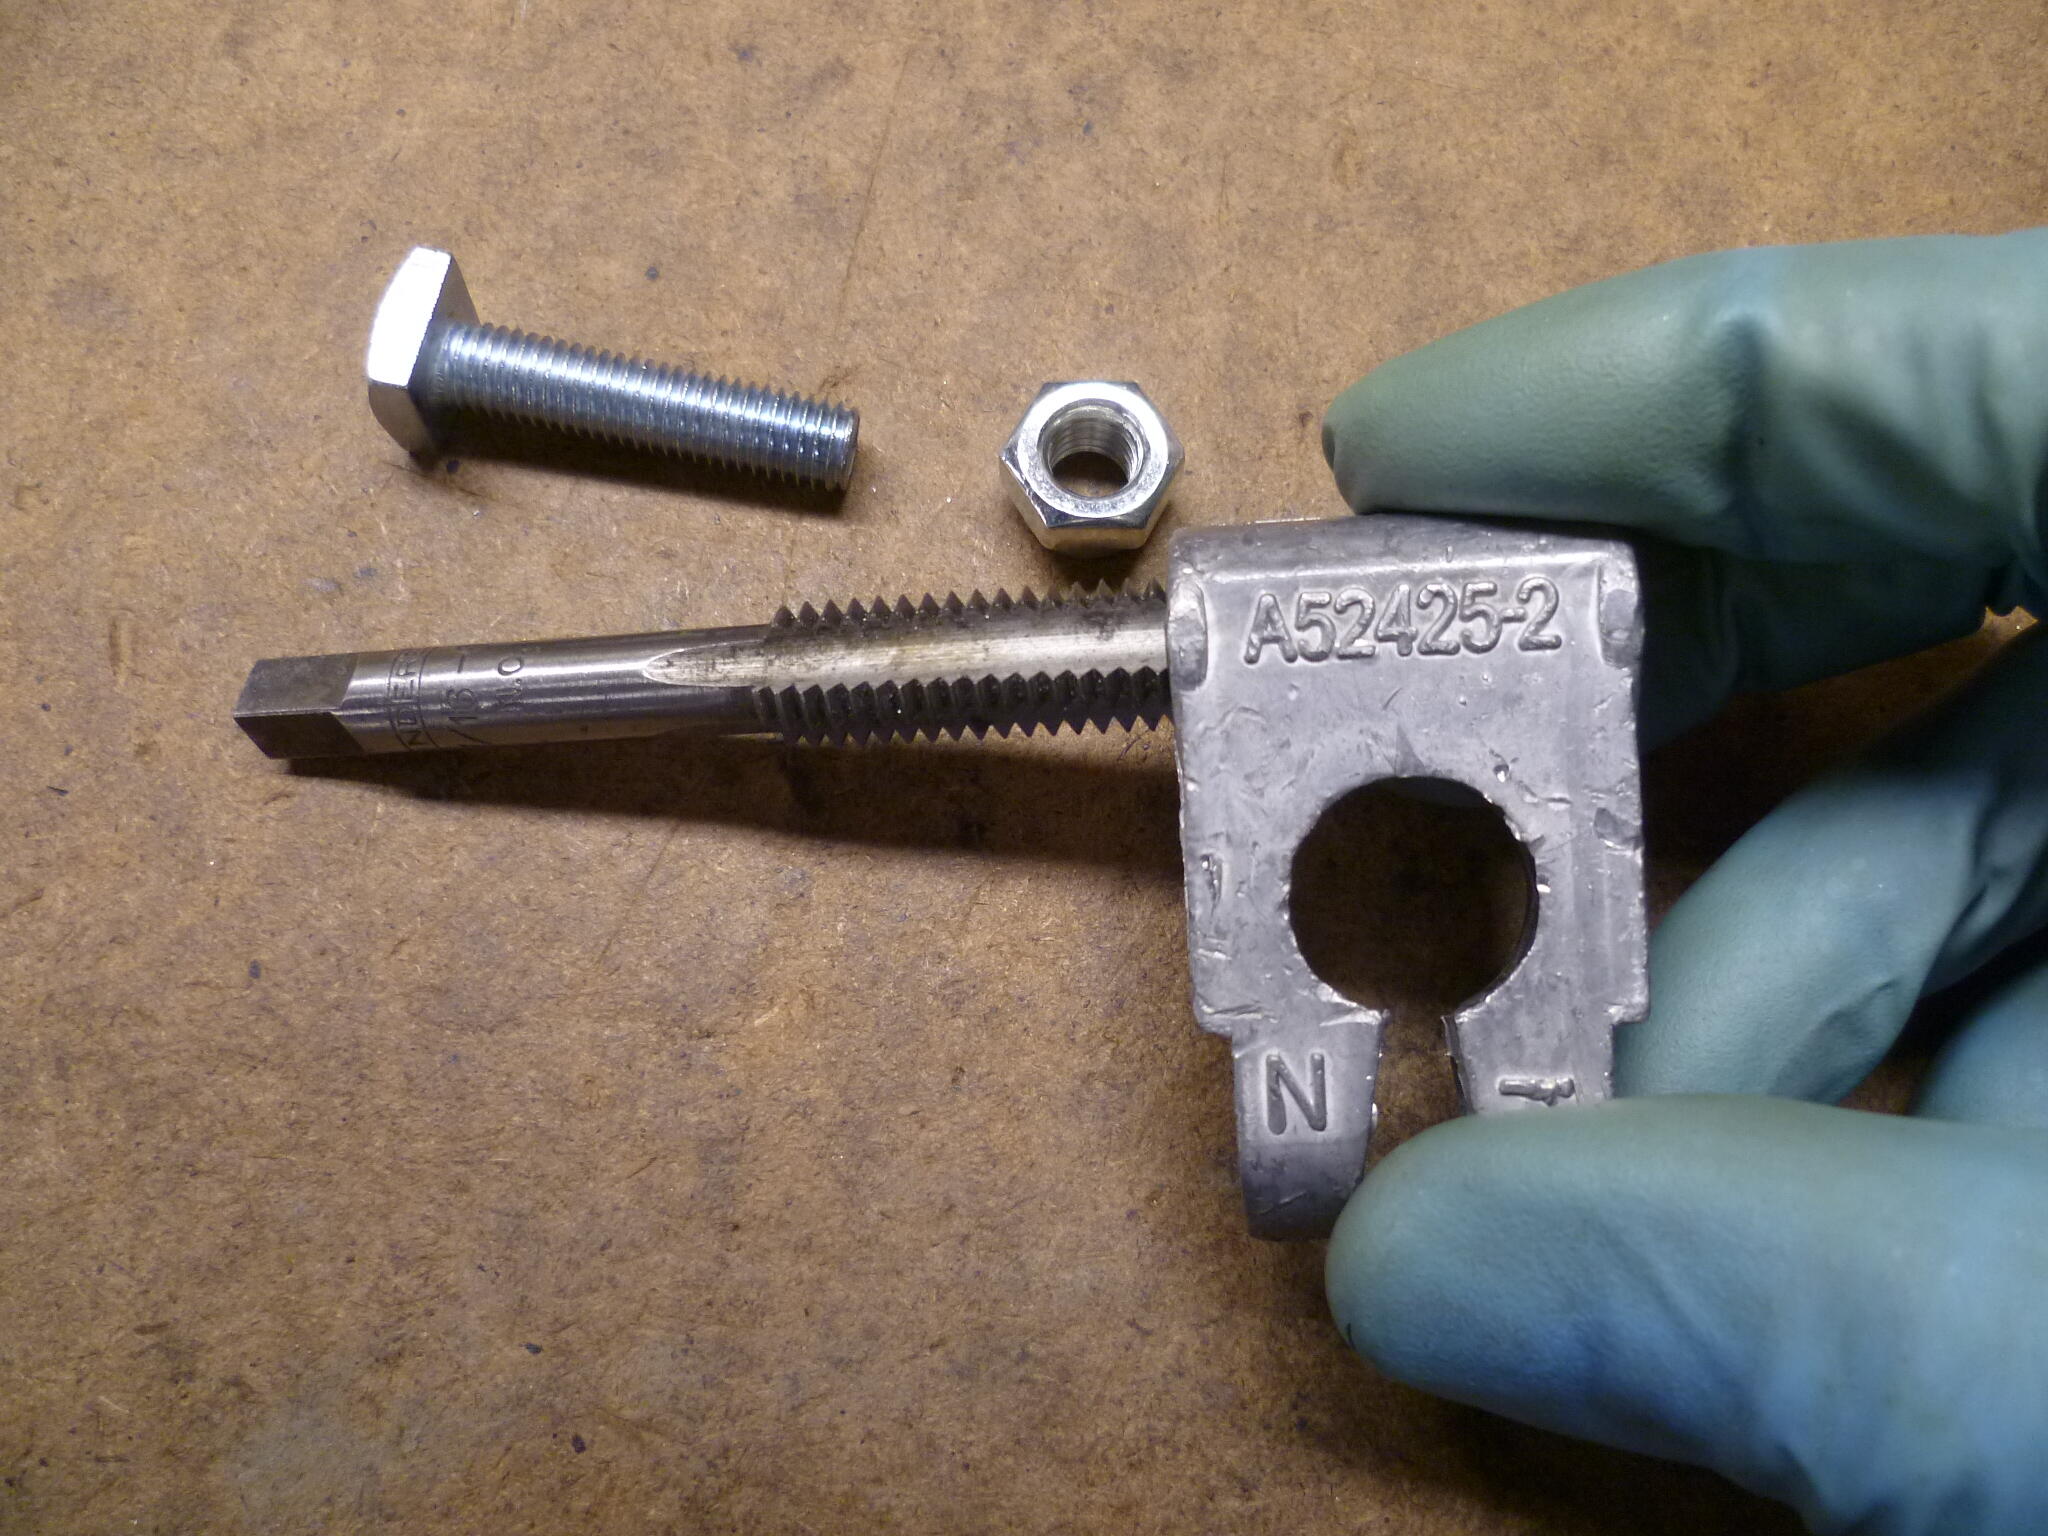
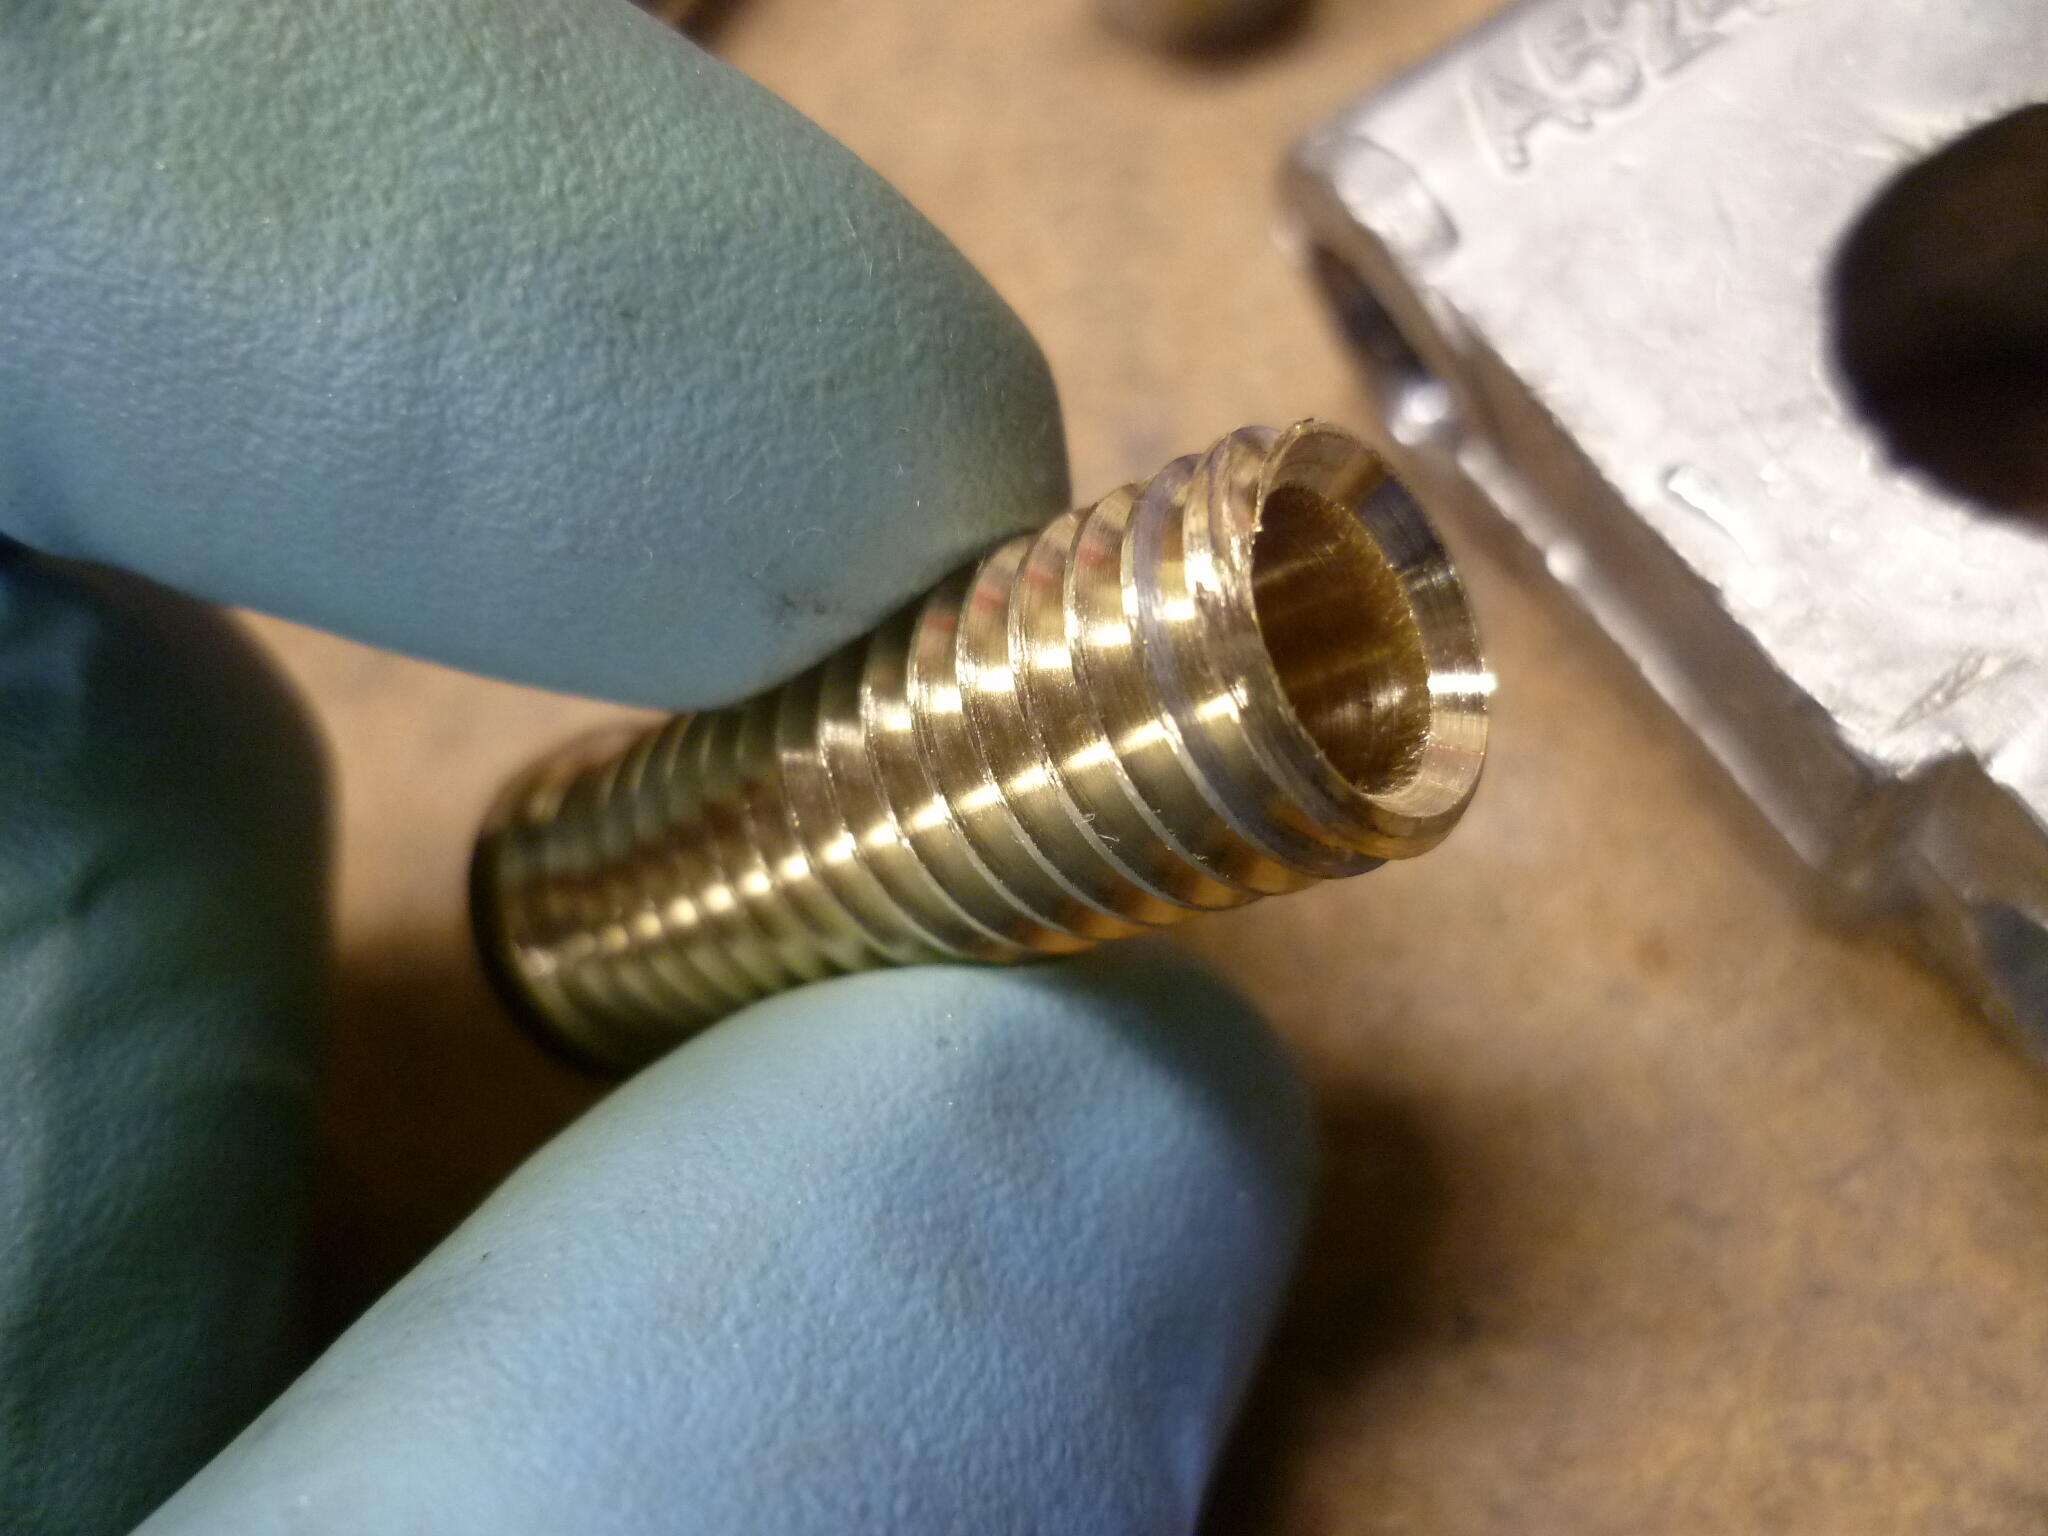
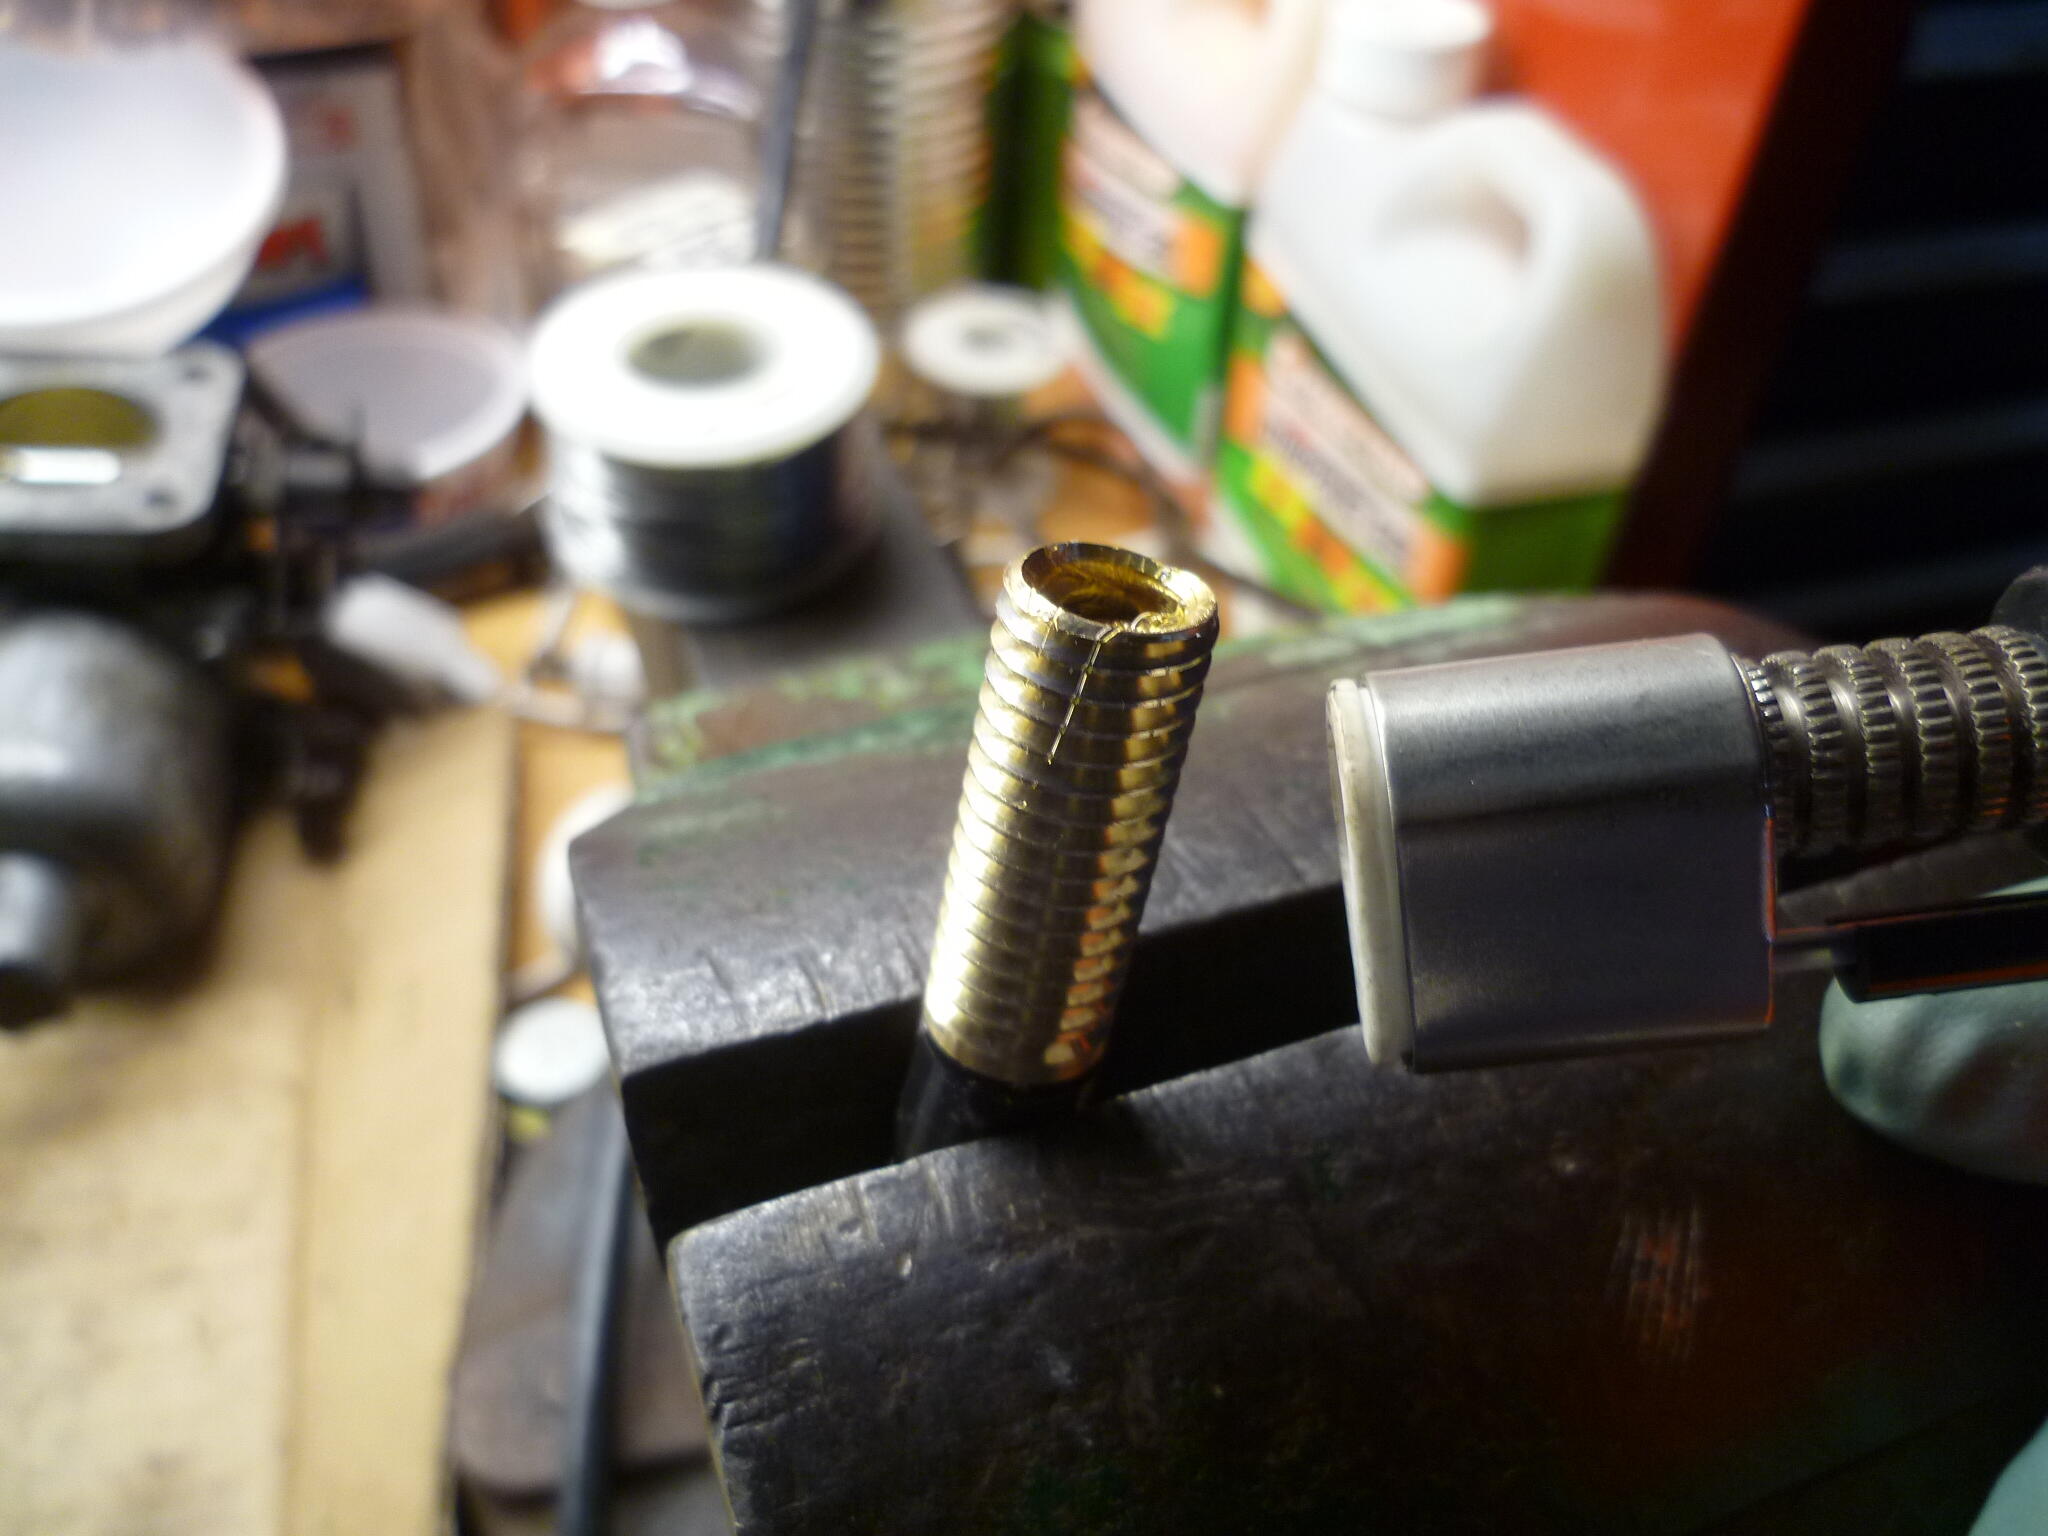
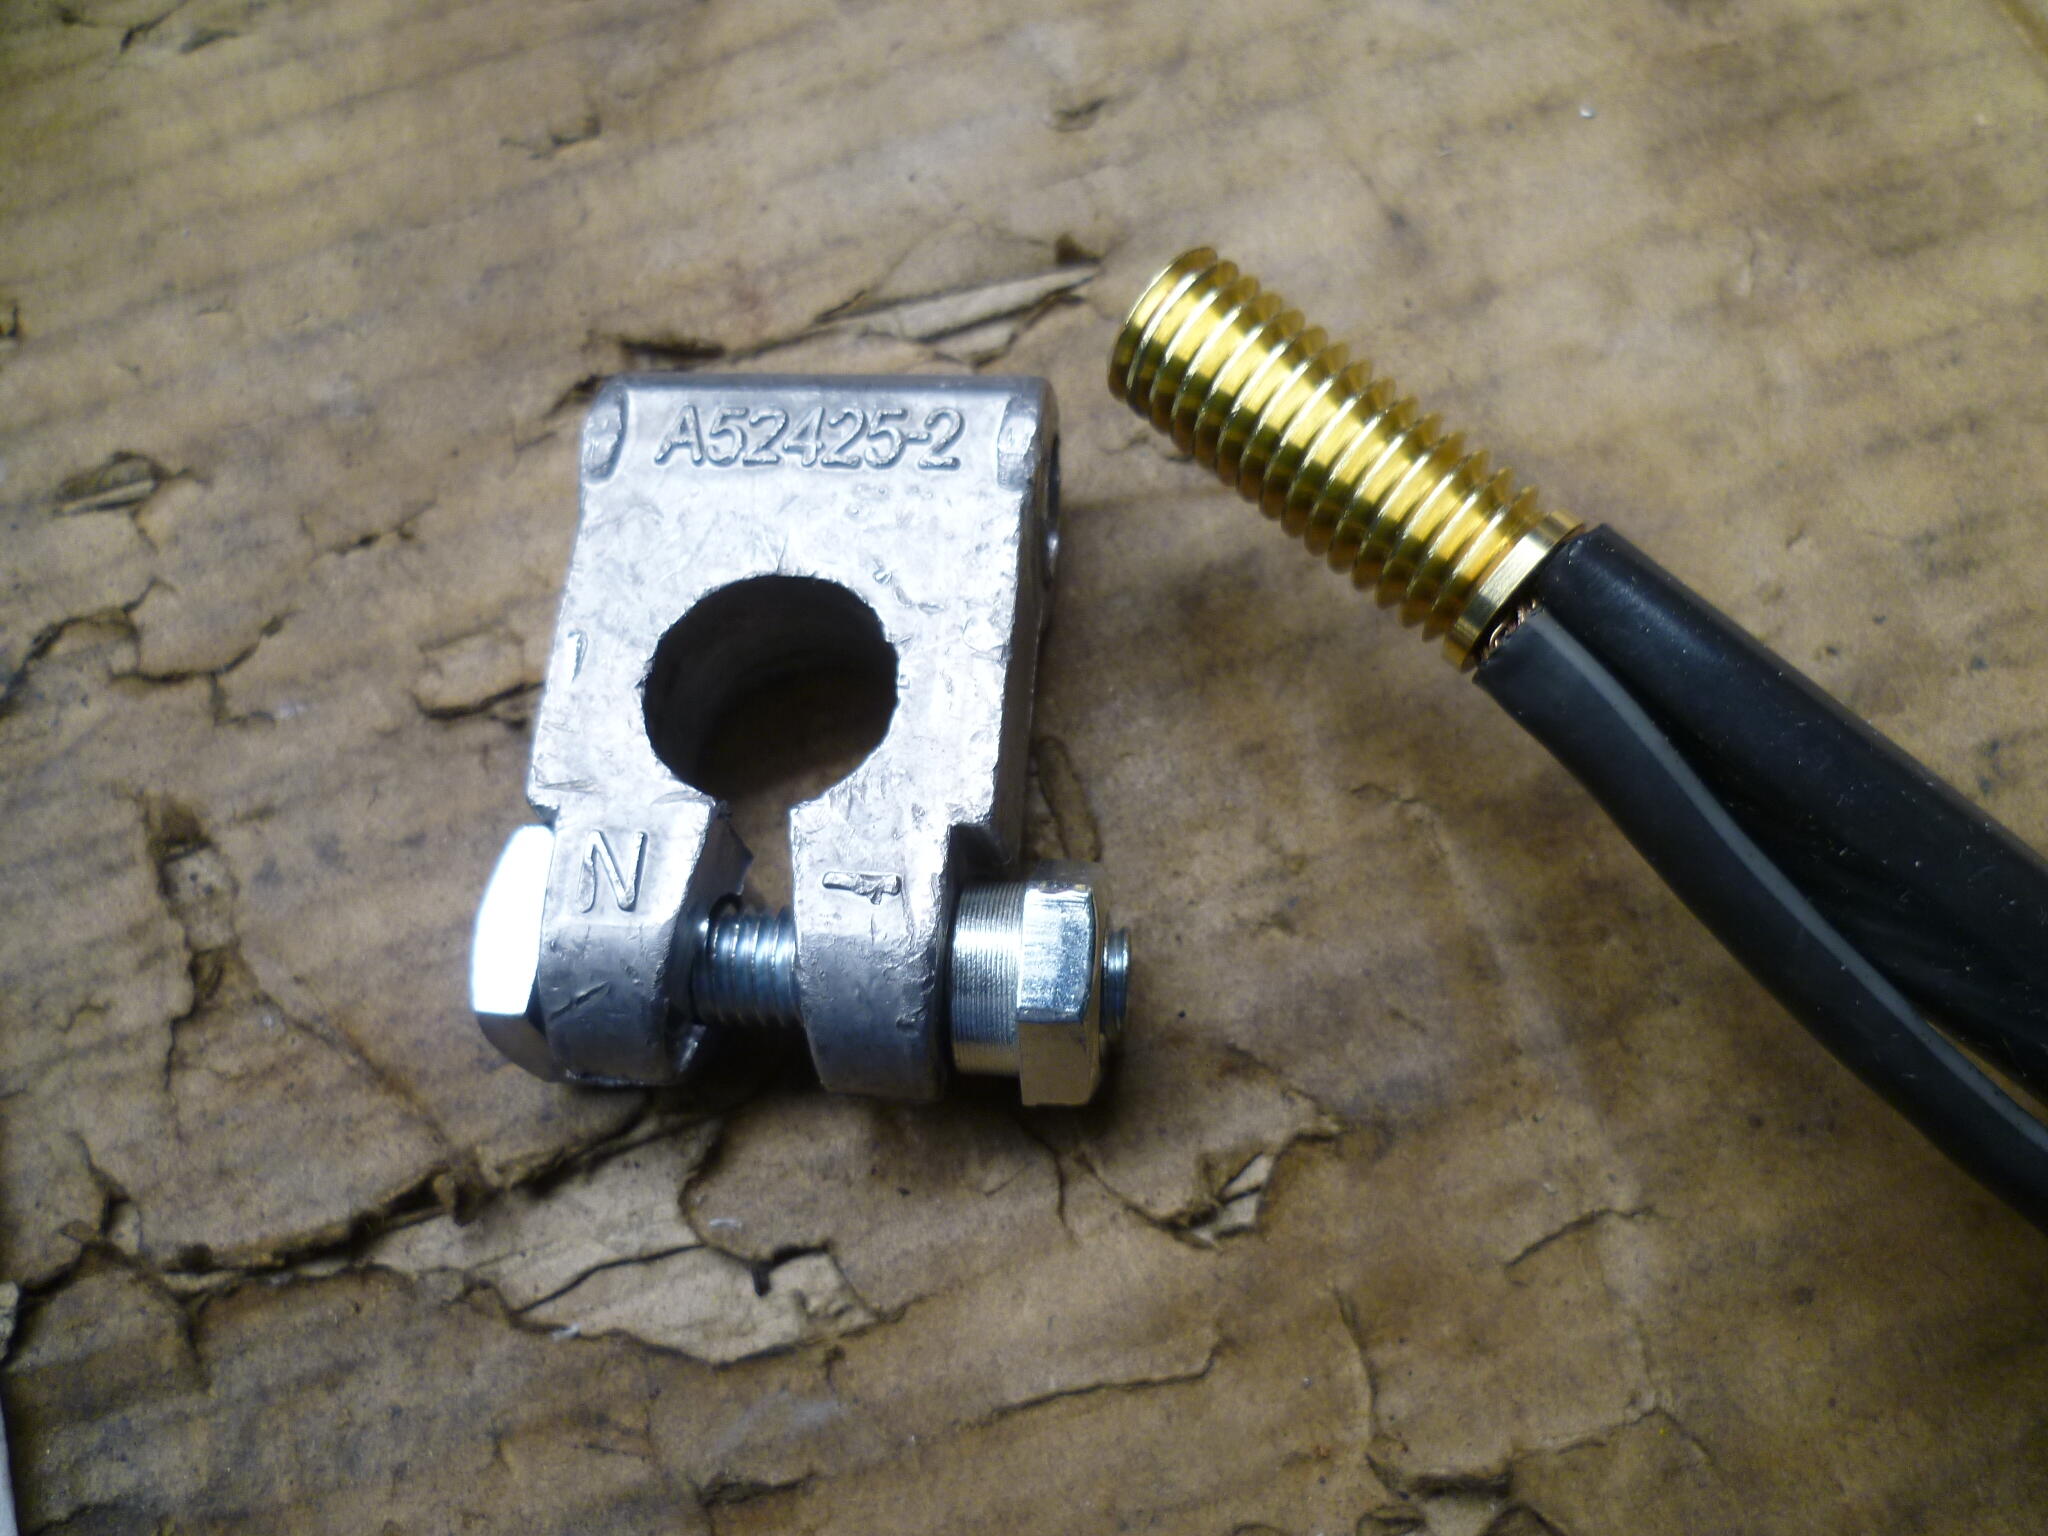
My battery cables? I was poking around online and discovered these things called "military battery terminals". Sometimes also called "Marine". The neat part is the basic shape is similar to the OEM lugs, so on a whim, I bought a cheap set off Amazon. So the shape is similar to OEM, but they use a bolt/nut to hold a cable onto the lug. They look like this: Then I removed the original bolt and threaded the hole that the bolt goes through. My first experience tapping lead. Went OK and I learned some about the process. 1) Easiest if you don't have to reverse the tap, and if you DO reverse the tap, do it often, like every half turn or so. 2) It's much easier on a (shallow) through hole because you don't have to reverse the tap, just run the tap all the way through. If the part you're tapping isn't shallow enough to do in one pass without packing the flutes and binding, then you're going to have to reverse the tap, which is a PITA because you have to do it so often. So, all that said... I took the bolt out and tapped the hole: Then I made a brass threaded insert on the lathe: I bought a length of battery wire off ebay. Came with lugs crimped on both ends. I got 5/16 hole on one end and 3/8 on the other. Cut that piece of wire in half (so now I have two lengths with different holes on the ends. Larger for the starter mounting bolt, and smaller for the starter solenoid connection. Stripped back the insulation on the ends, and inserted the cable strands into the brass piece I made: I used a small torch to solder the cable into the threaded insert: Looks like this after sodering: Screwed the threaded brass into the lead lug, and a completely unprofitable amount of time later, I have this: It's not OEM or one of the aftermarket replicas, but it cost a grand total of maybe thirty bucks in parts*. *And at least six hundred dollars in unrealized labor cost. Hahahaha!!!


-
Only the third one? Someone at the show suggested that combo is rare, but I've not looked into it. The current paint on the OG bugs me. A previous owner sprayed the outside blue, and the inside black. So it left the factory white with blue, but now it's "blueish with blackish". I spent some time before zcon working on taking the black off the inside, but ran out of time against other higher priorities. I also spend a little time experimenting with taking the blue off the outside, but could not find a chemical that would work on the blue, but not the white. In other words... I can take the blue off, but the white always comes with it. The car is very original in so many areas, but the paint is not. Bugs me.
-
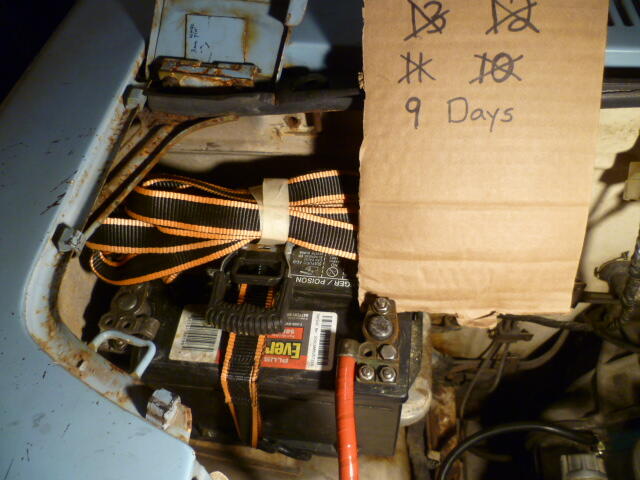
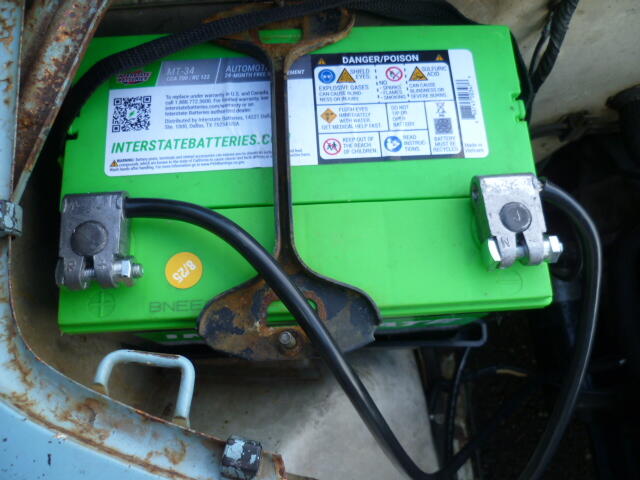
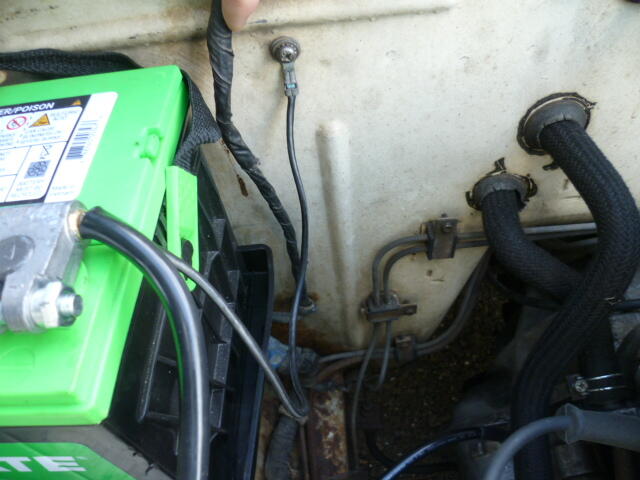
I also made a set of battery cables and swapped out the ratchet strap hold-down for something a little more appropriate. I know it loses some of that road-kill character, but it's much cleaner now. Here's what I started with: And here's what I got now: And I included the ground wire directly from the battery to the firewall now. Didn't have this before:
 I swapped out the 160 thermostat for a 180, and here's where the gauge stabilized. Higher than the 160 thermostat (duh), but still lower than I was running with NO thermostat and the old questionable radiator. Good deal! Here's where I am now:
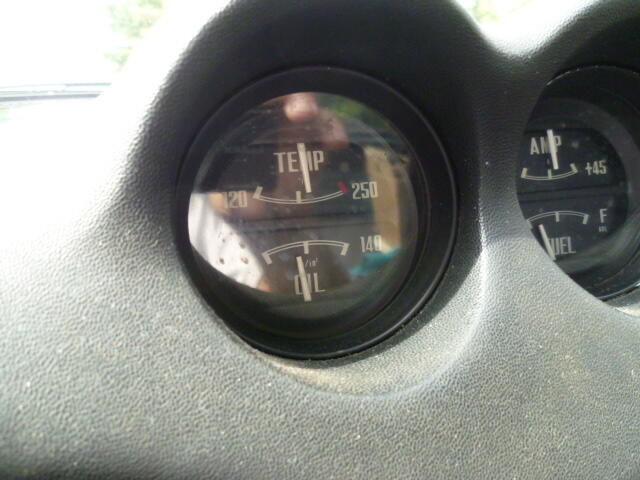 I reported the post above, but still not sure the report function is working. There are other bots I've reported that are not yet nuked so I'm not sure if I'm doing this right.Hey @Mike , Here's another bot. They are still multiplying.


Important Information
By using this site, you agree to our Privacy Policy and Guidelines. We have placed cookies on your device to help make this website better. You can adjust your cookie settings, otherwise we'll assume you're okay to continue.