Patcon
 Subscriber
-
Joined
-
Last visited
Everything posted by Patcon
-
 Intake manifold leaks...maybe. Although I would suspect lean not rich on manifold leaks
 -
I wondered about width as an issue. I am waiting on the bumpers to come in to verify everything is correct.
-
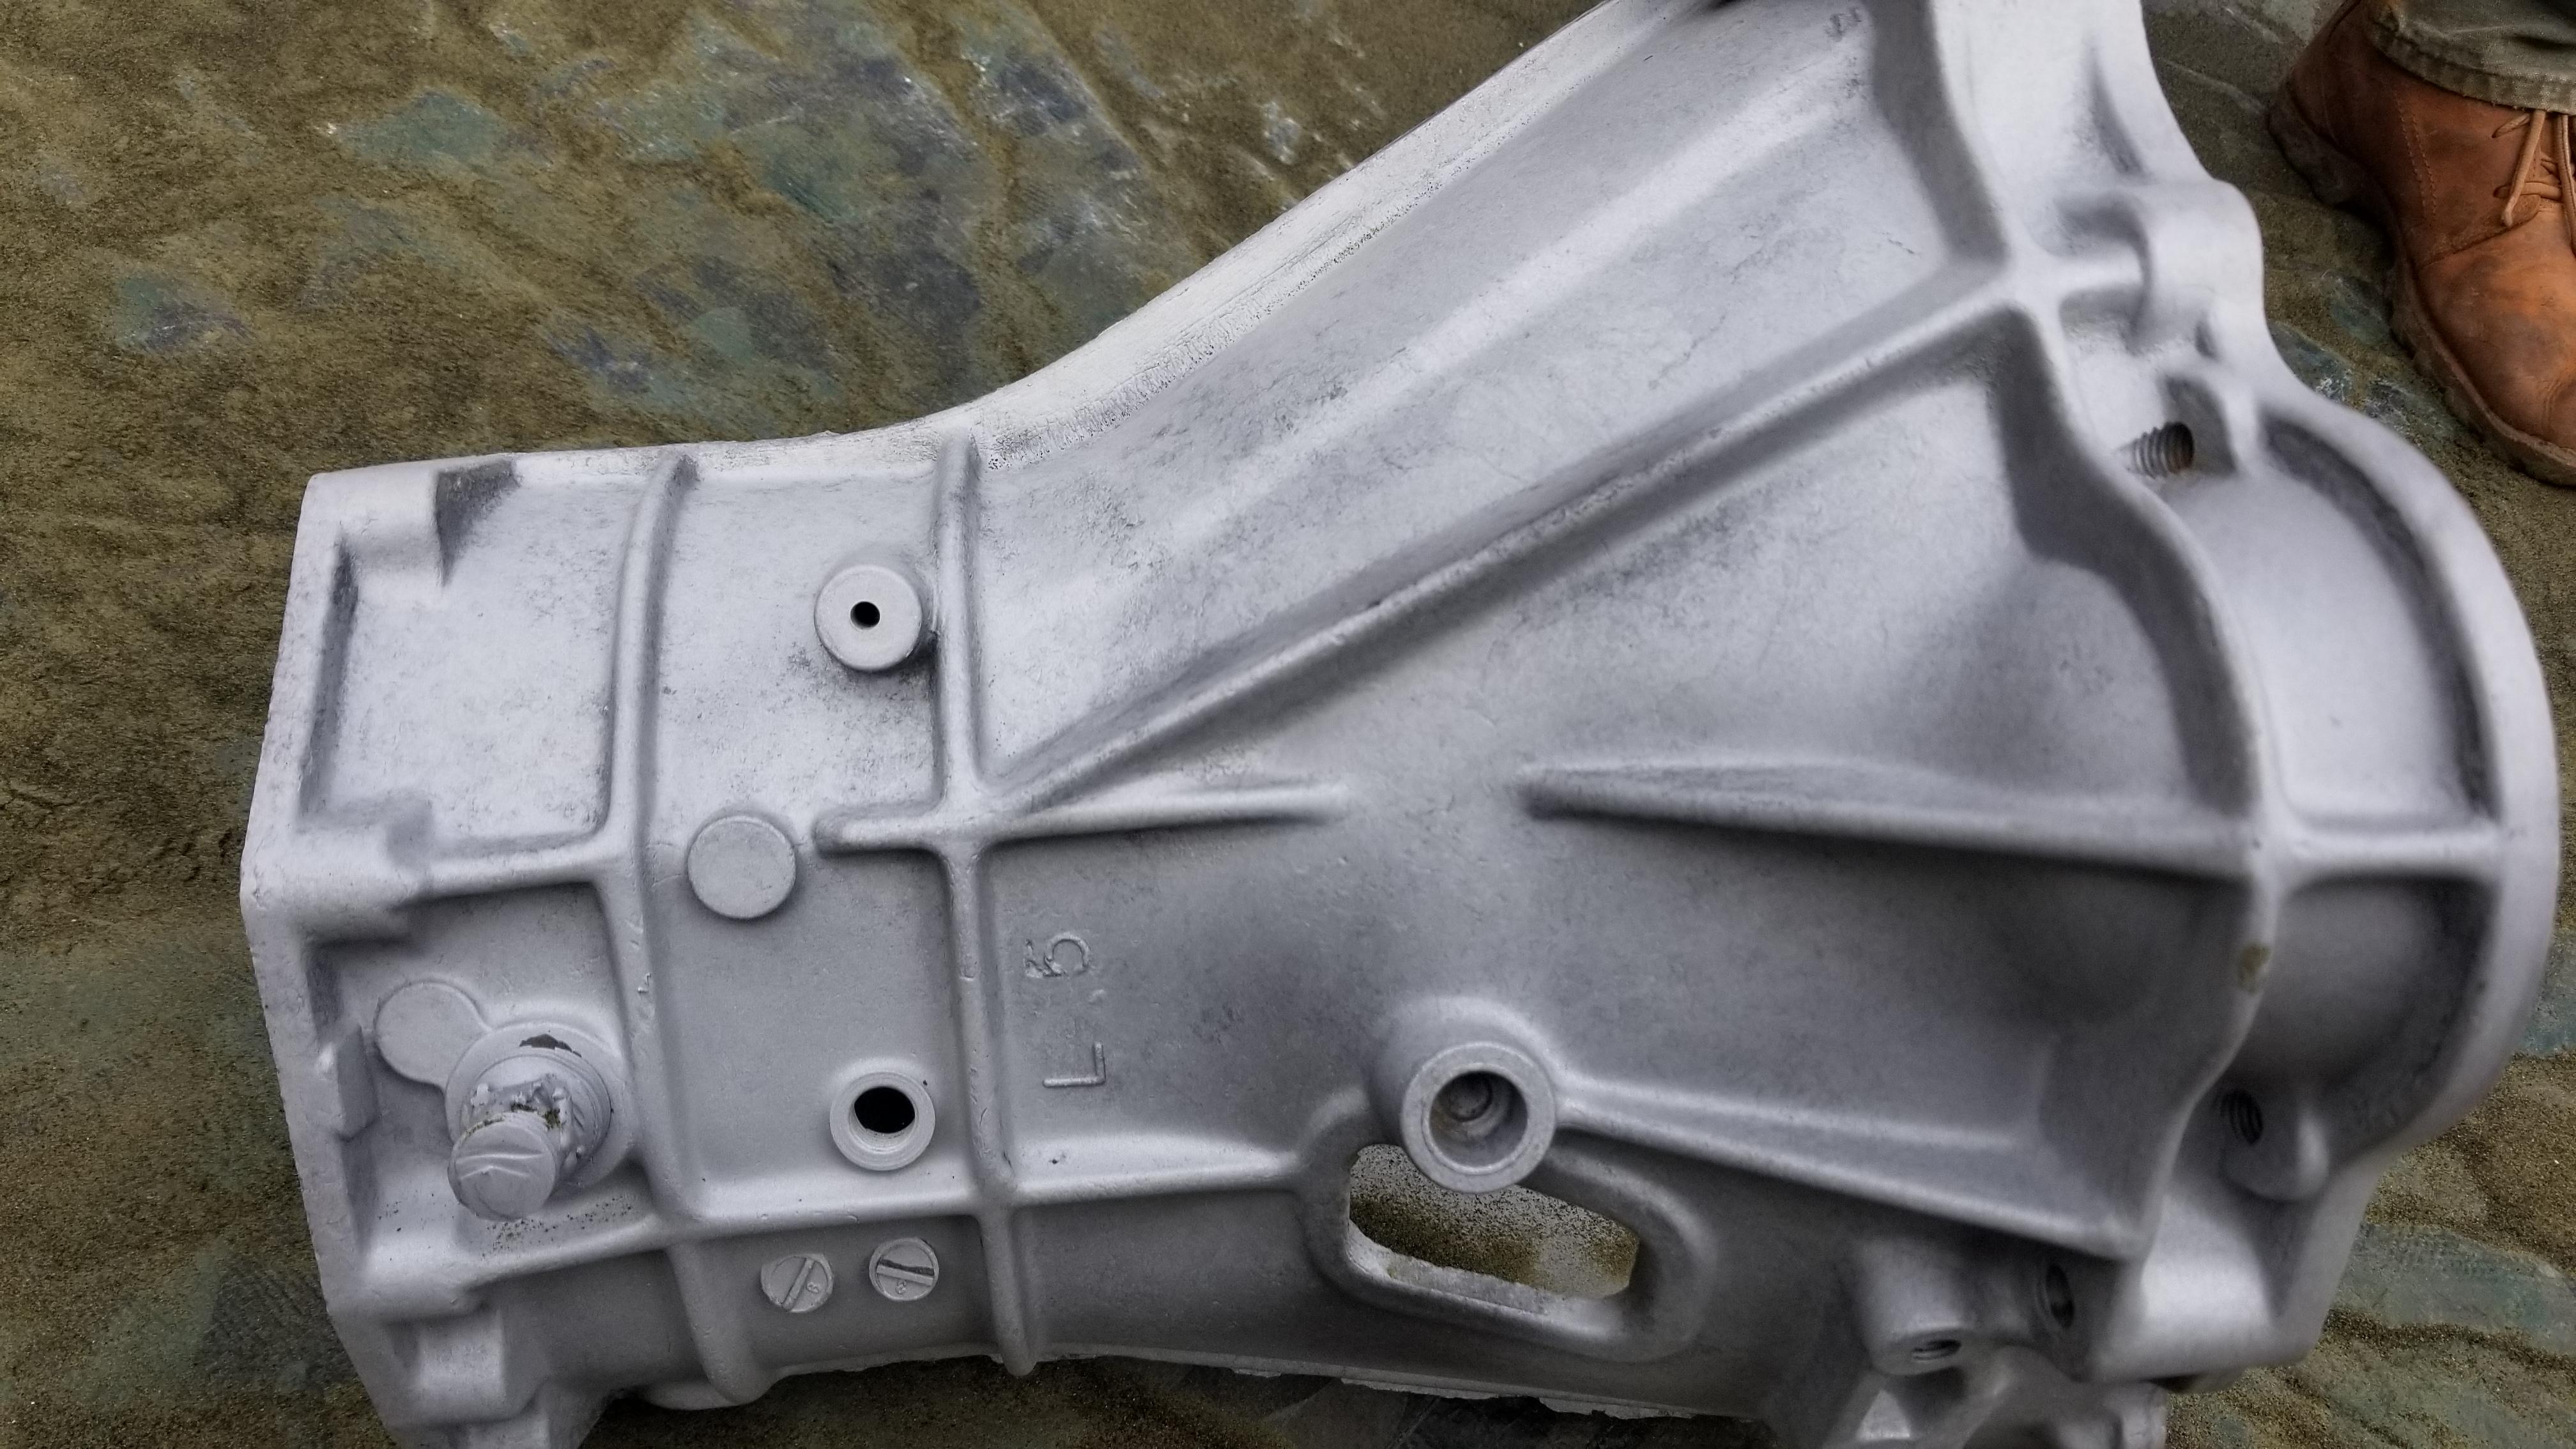
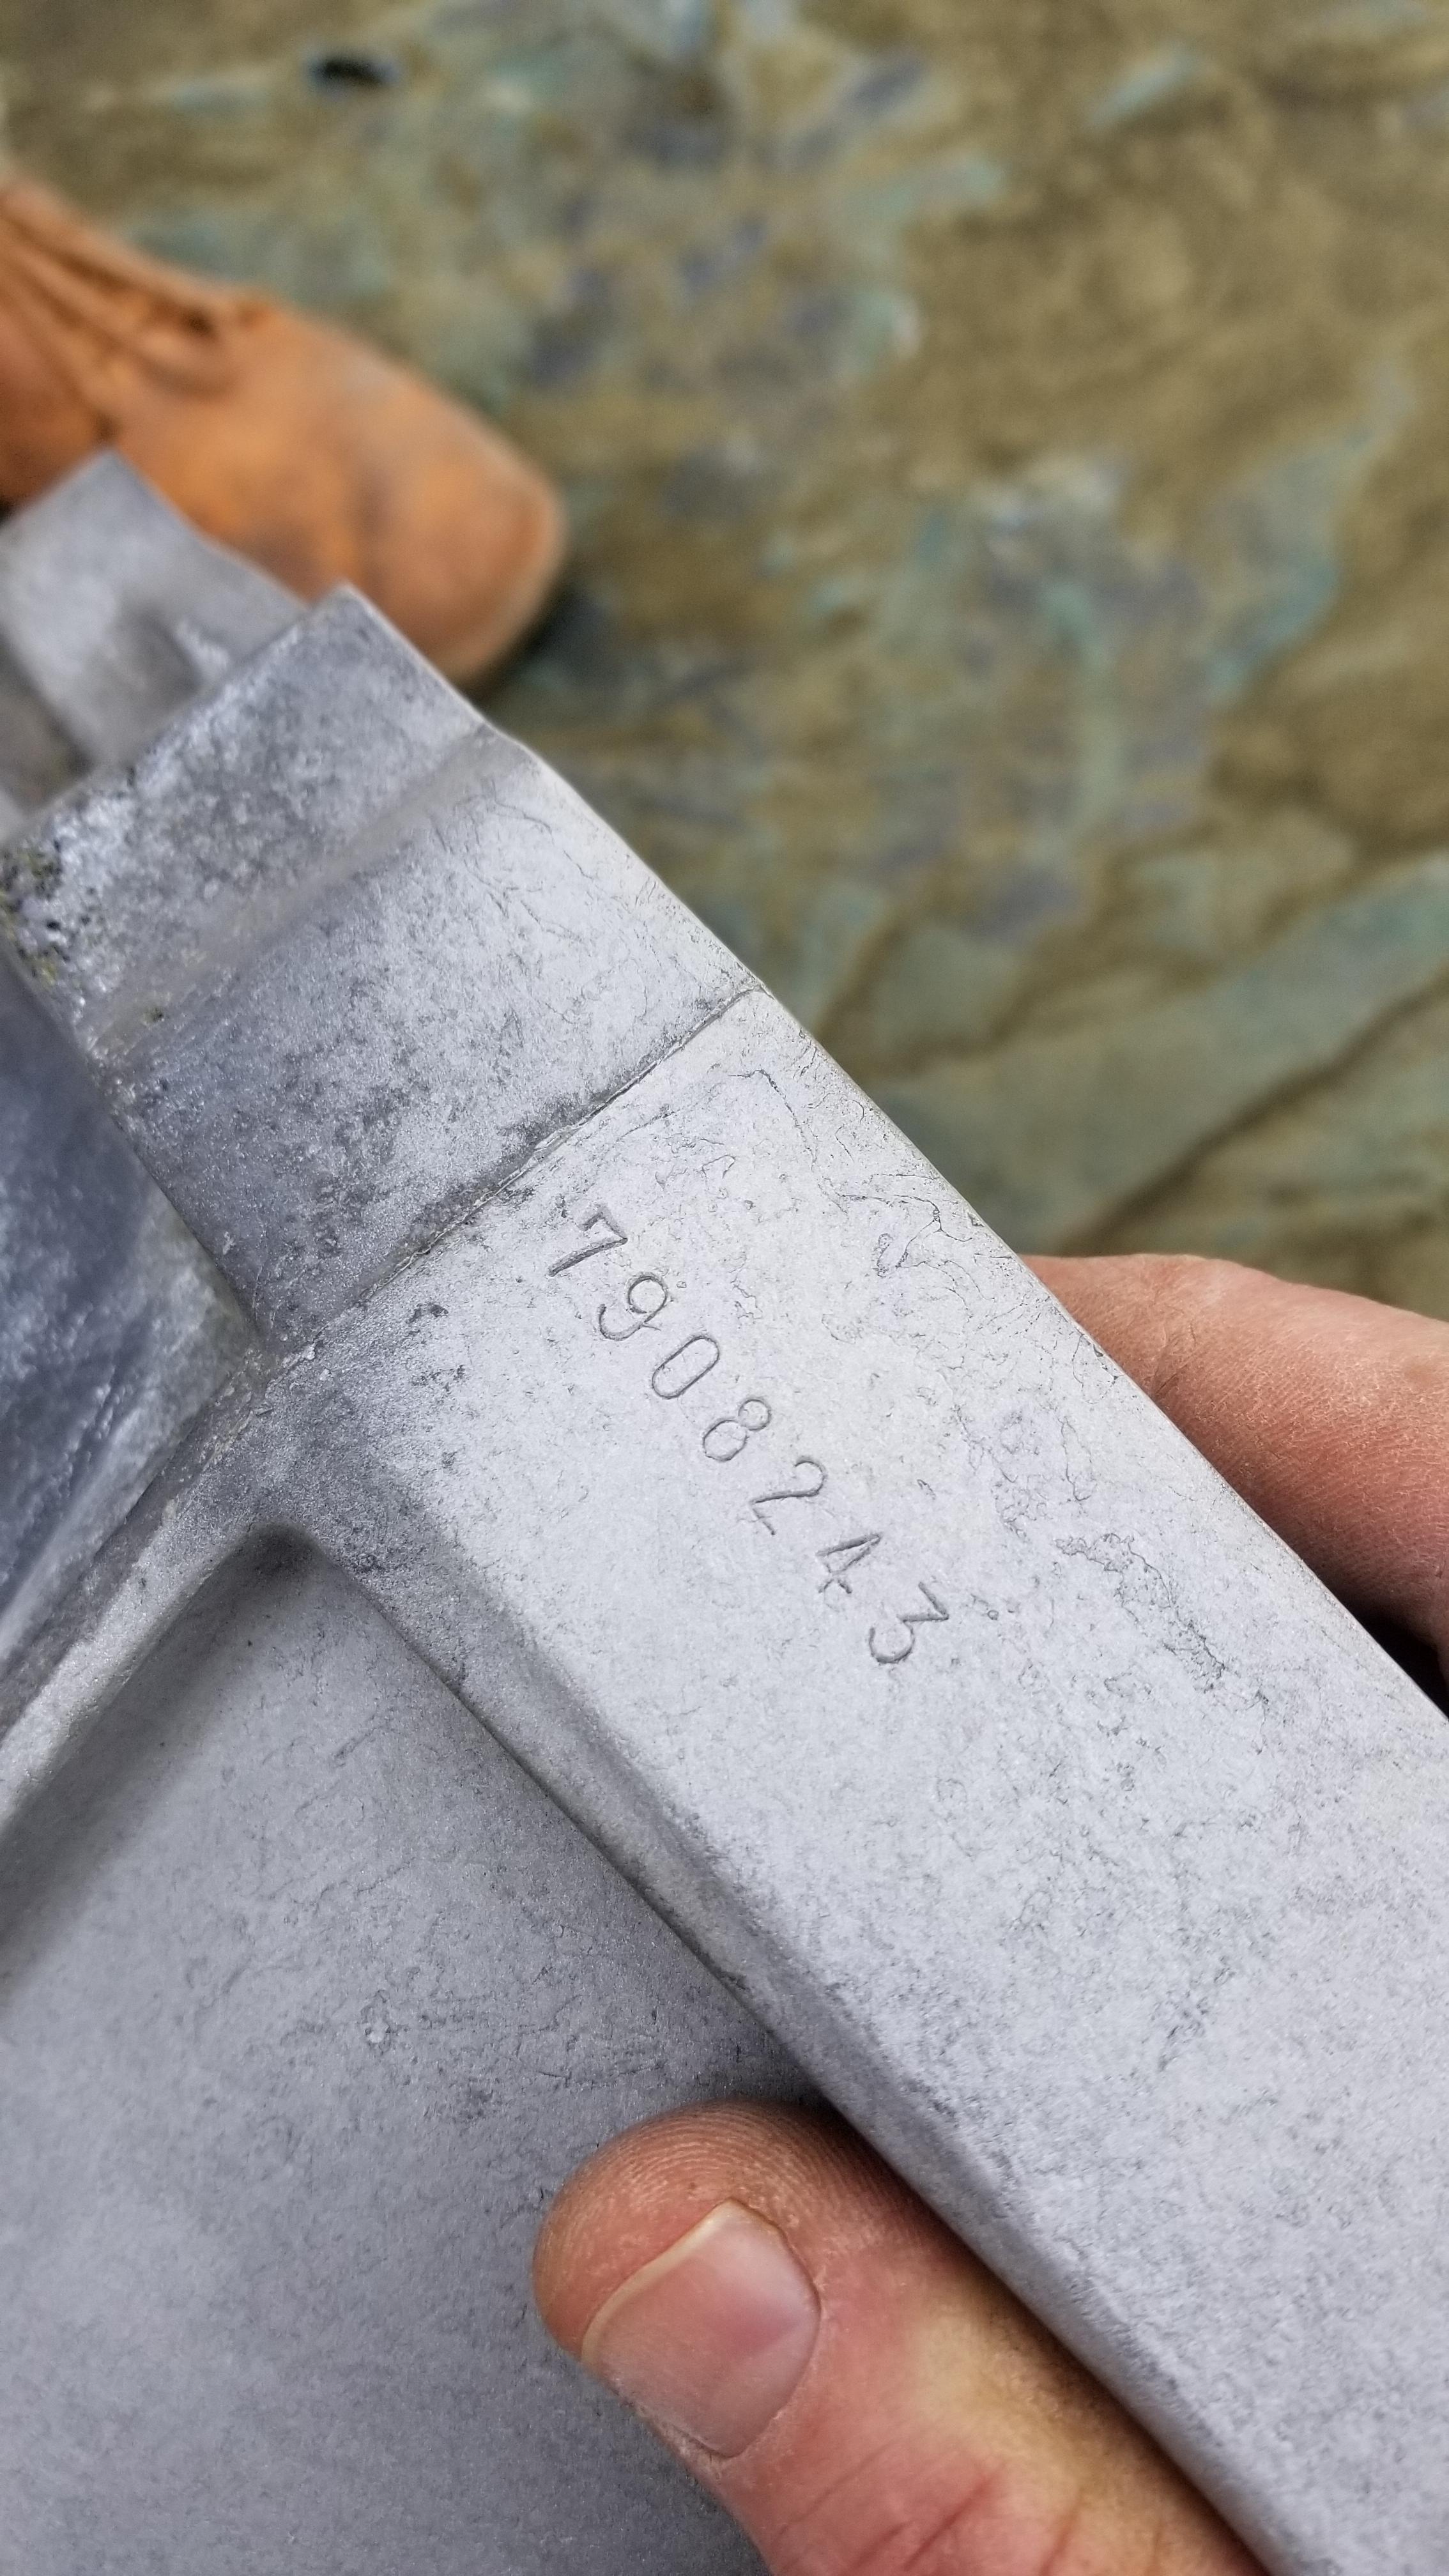
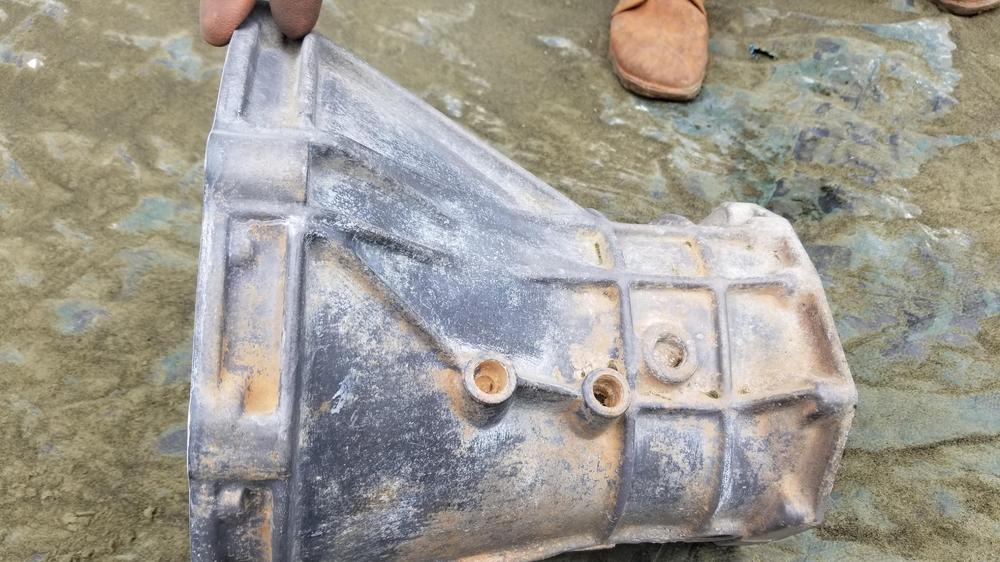
I finally got Cody to do something today. I am waiting on just a few pieces for the tranny but in the meantime he needs to get the cases clean. This was after oven cleaner Thanks Cliff @siteunseen This was after blasting. We used the pressure pot because it's too big for the blasting cabinet. I need a bigger one... There was an interesting number on the top of the belllhousing He then shot a couple of coats of Diamond clear on it. Hopefully he will do the back half this weekend. In relation to that, does the shifter arm have a slot for the locking bolt to position it? We need to strip the rear case and I wouldn't think the shifter would have to be set in a certain position. I am assuming the rod is notched to allow the bolt to pass beside it and set the arm in a specific position.


-
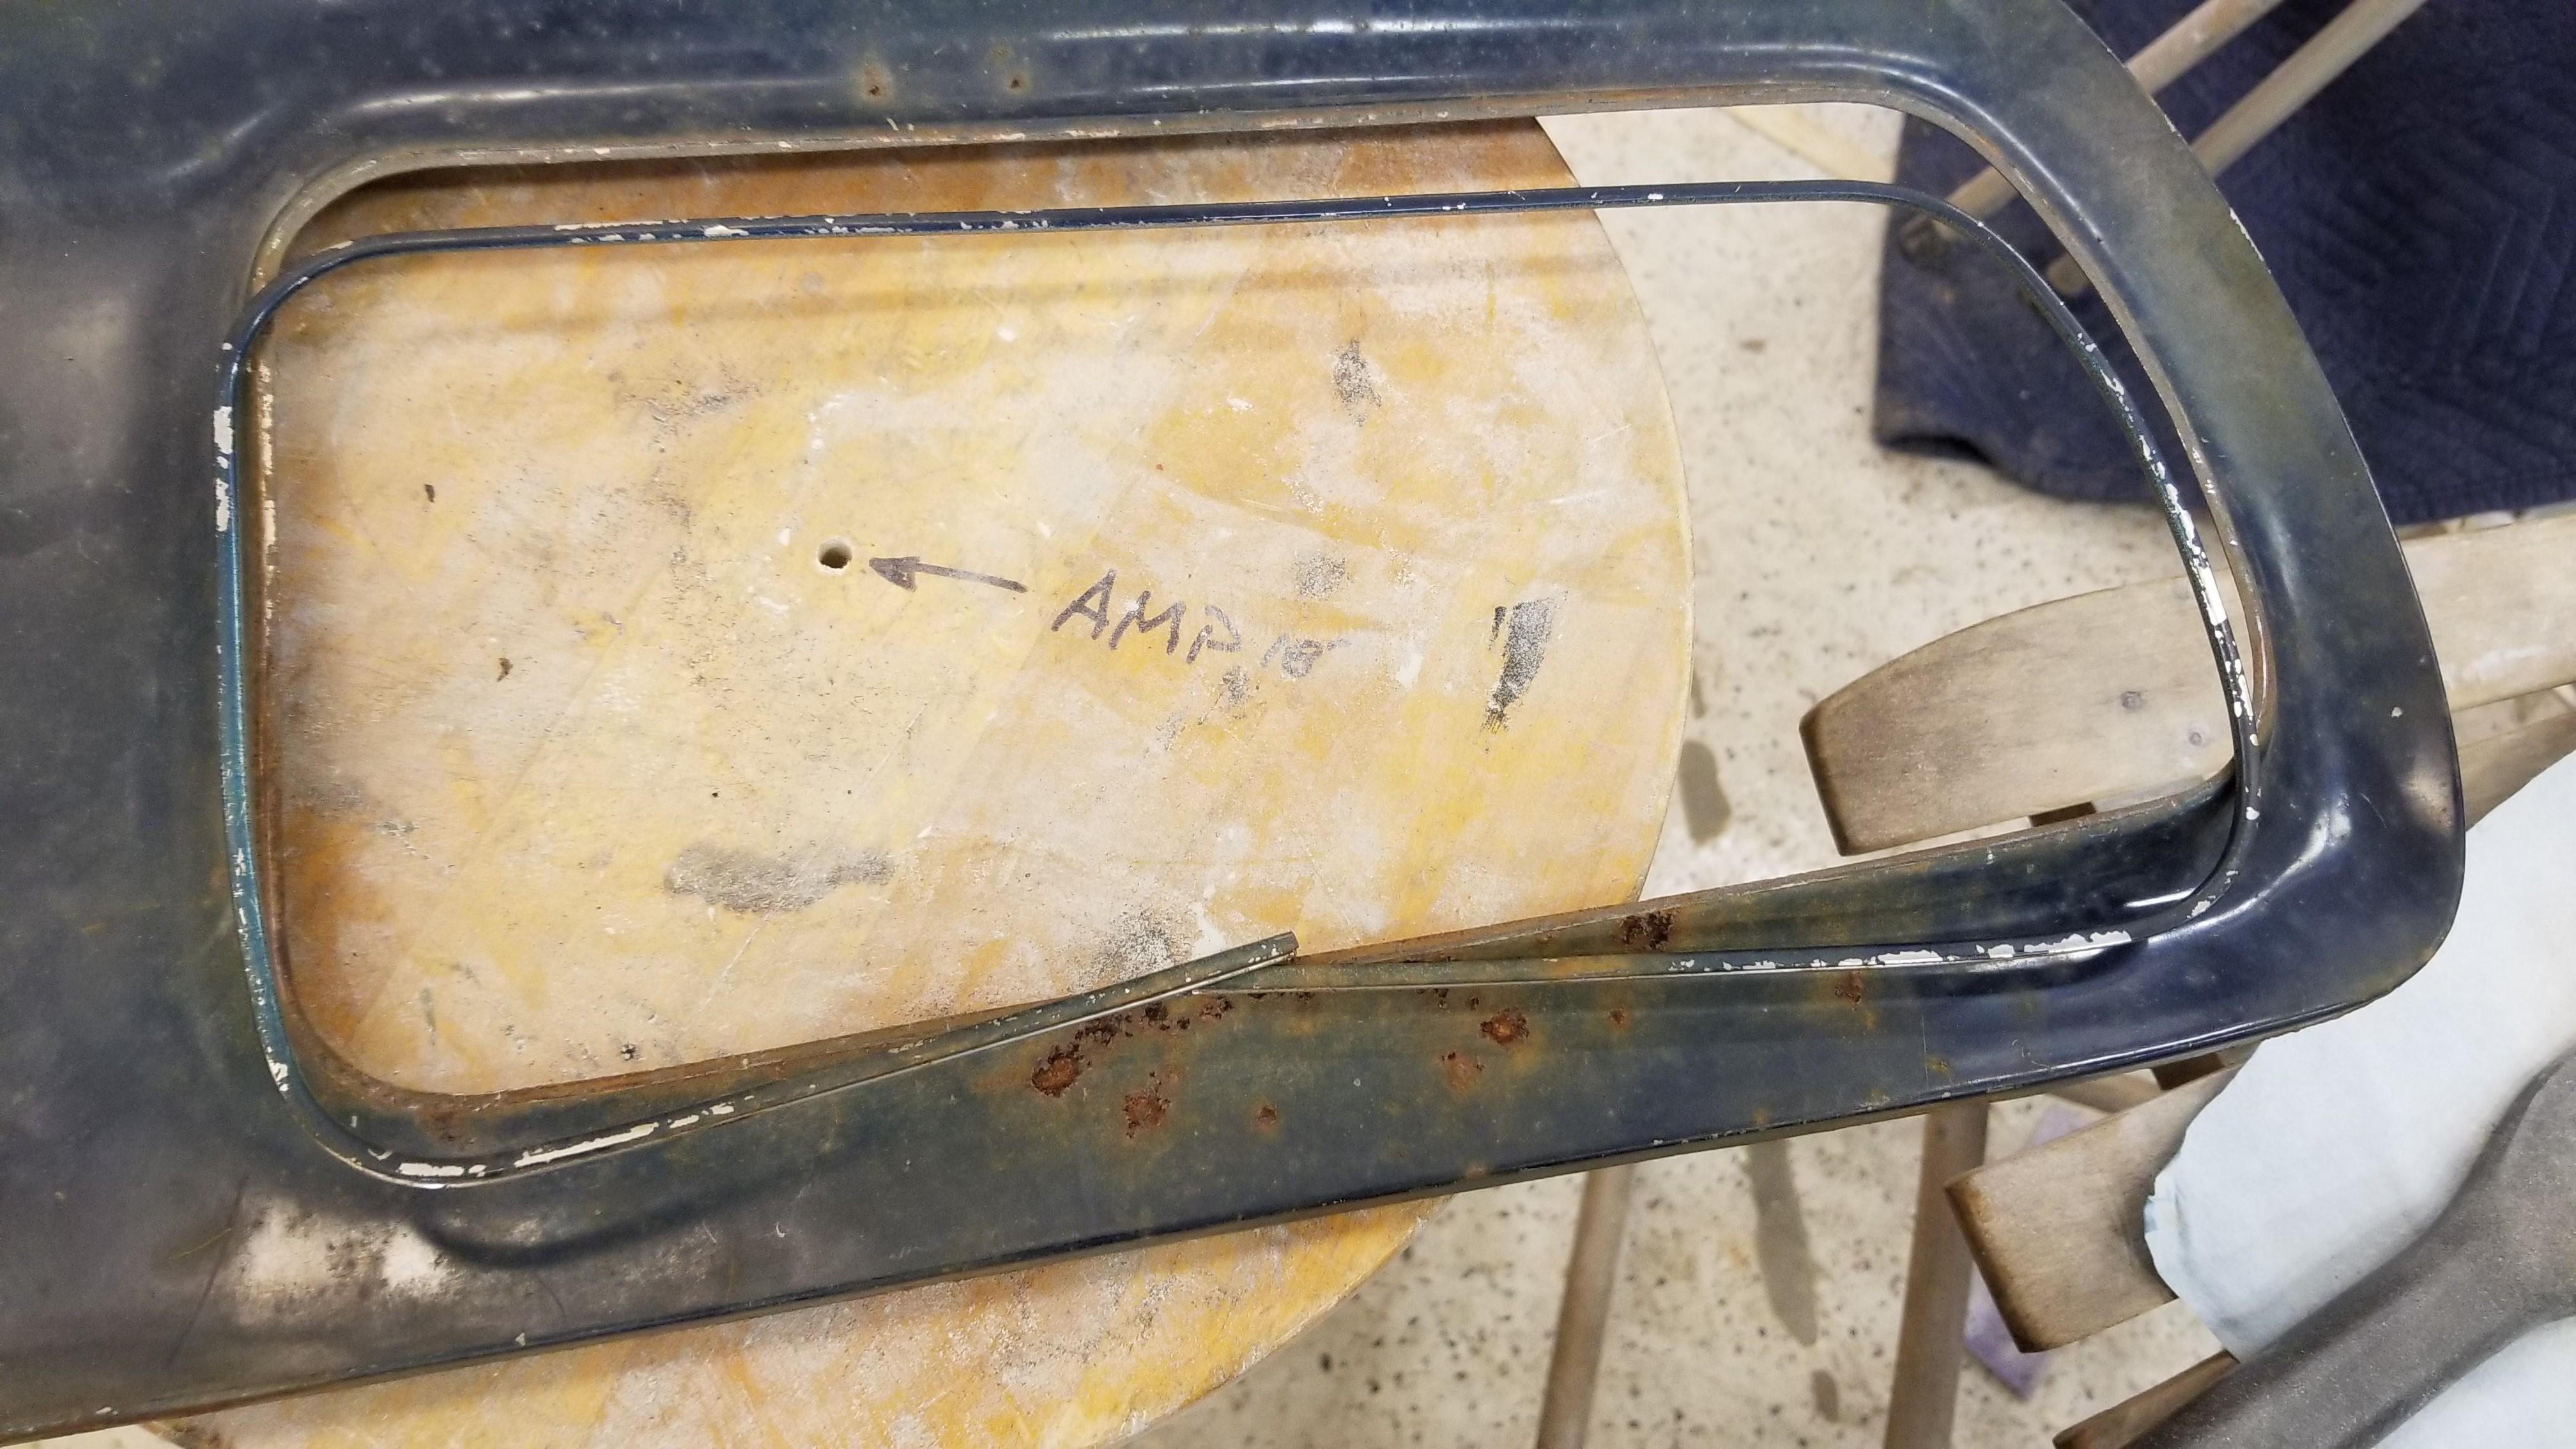
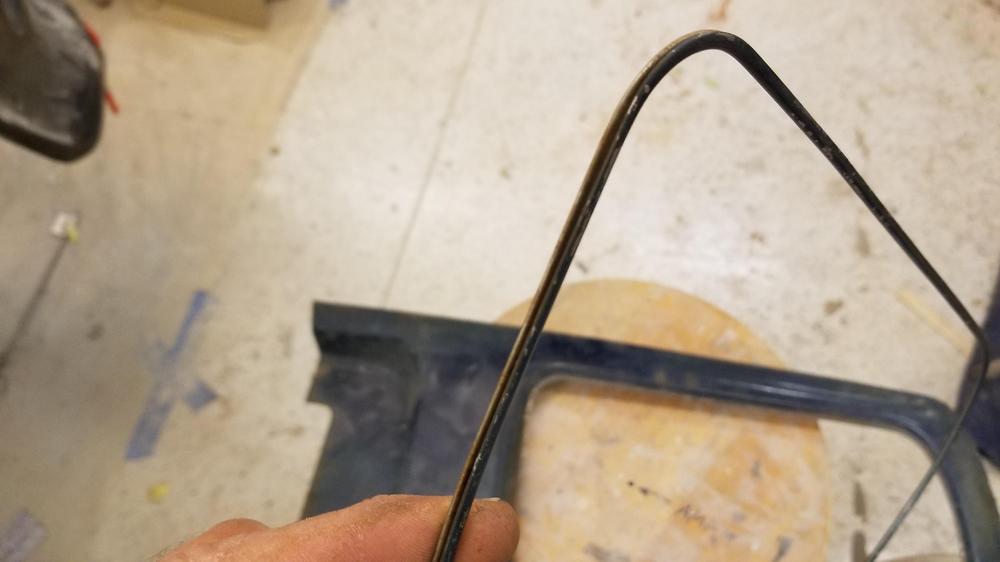
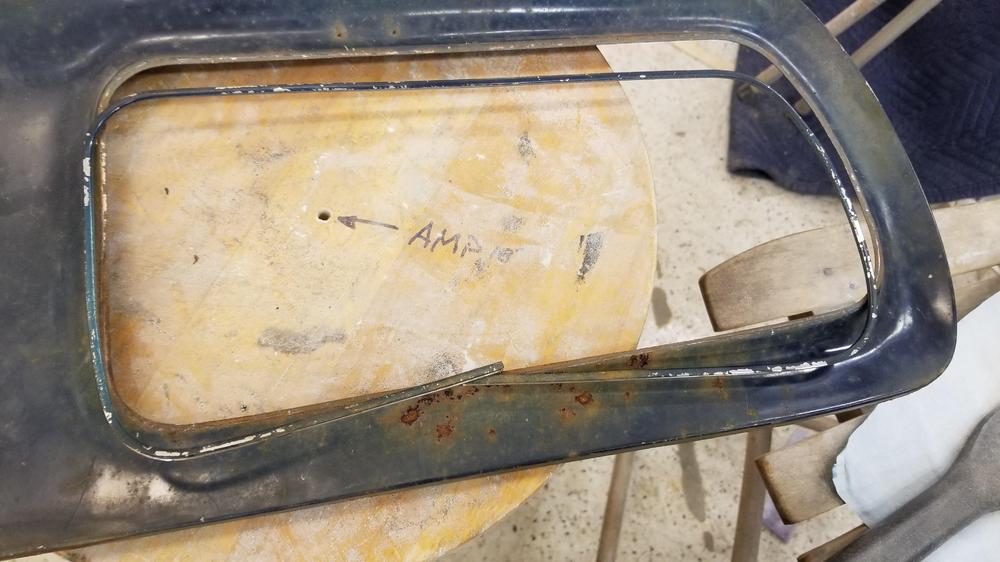
I considered that. I got the top pulled together with out too much trouble The bottom, not so much. I got a lot of it back, but not all of it. There is a good bit of tension on that chain I need to figure out a solution for these clips The little clips that hold the tail light finisher are actually a loose piece. They are just clipped onto the brackets. Anybody got any ideas? I would think someone could find a suitable replacement. @240260280 Hoover?? I also worked on the rear finisher trim. I wanted to get the trim off so I could strip the panels and paint them. I did manage to get it off. So I can clean it and polish it. Then I will reinstall it, I hope. My two big concerns are, can I get it back on and will it scrape the paint off when it goes back on. We'll see...


-
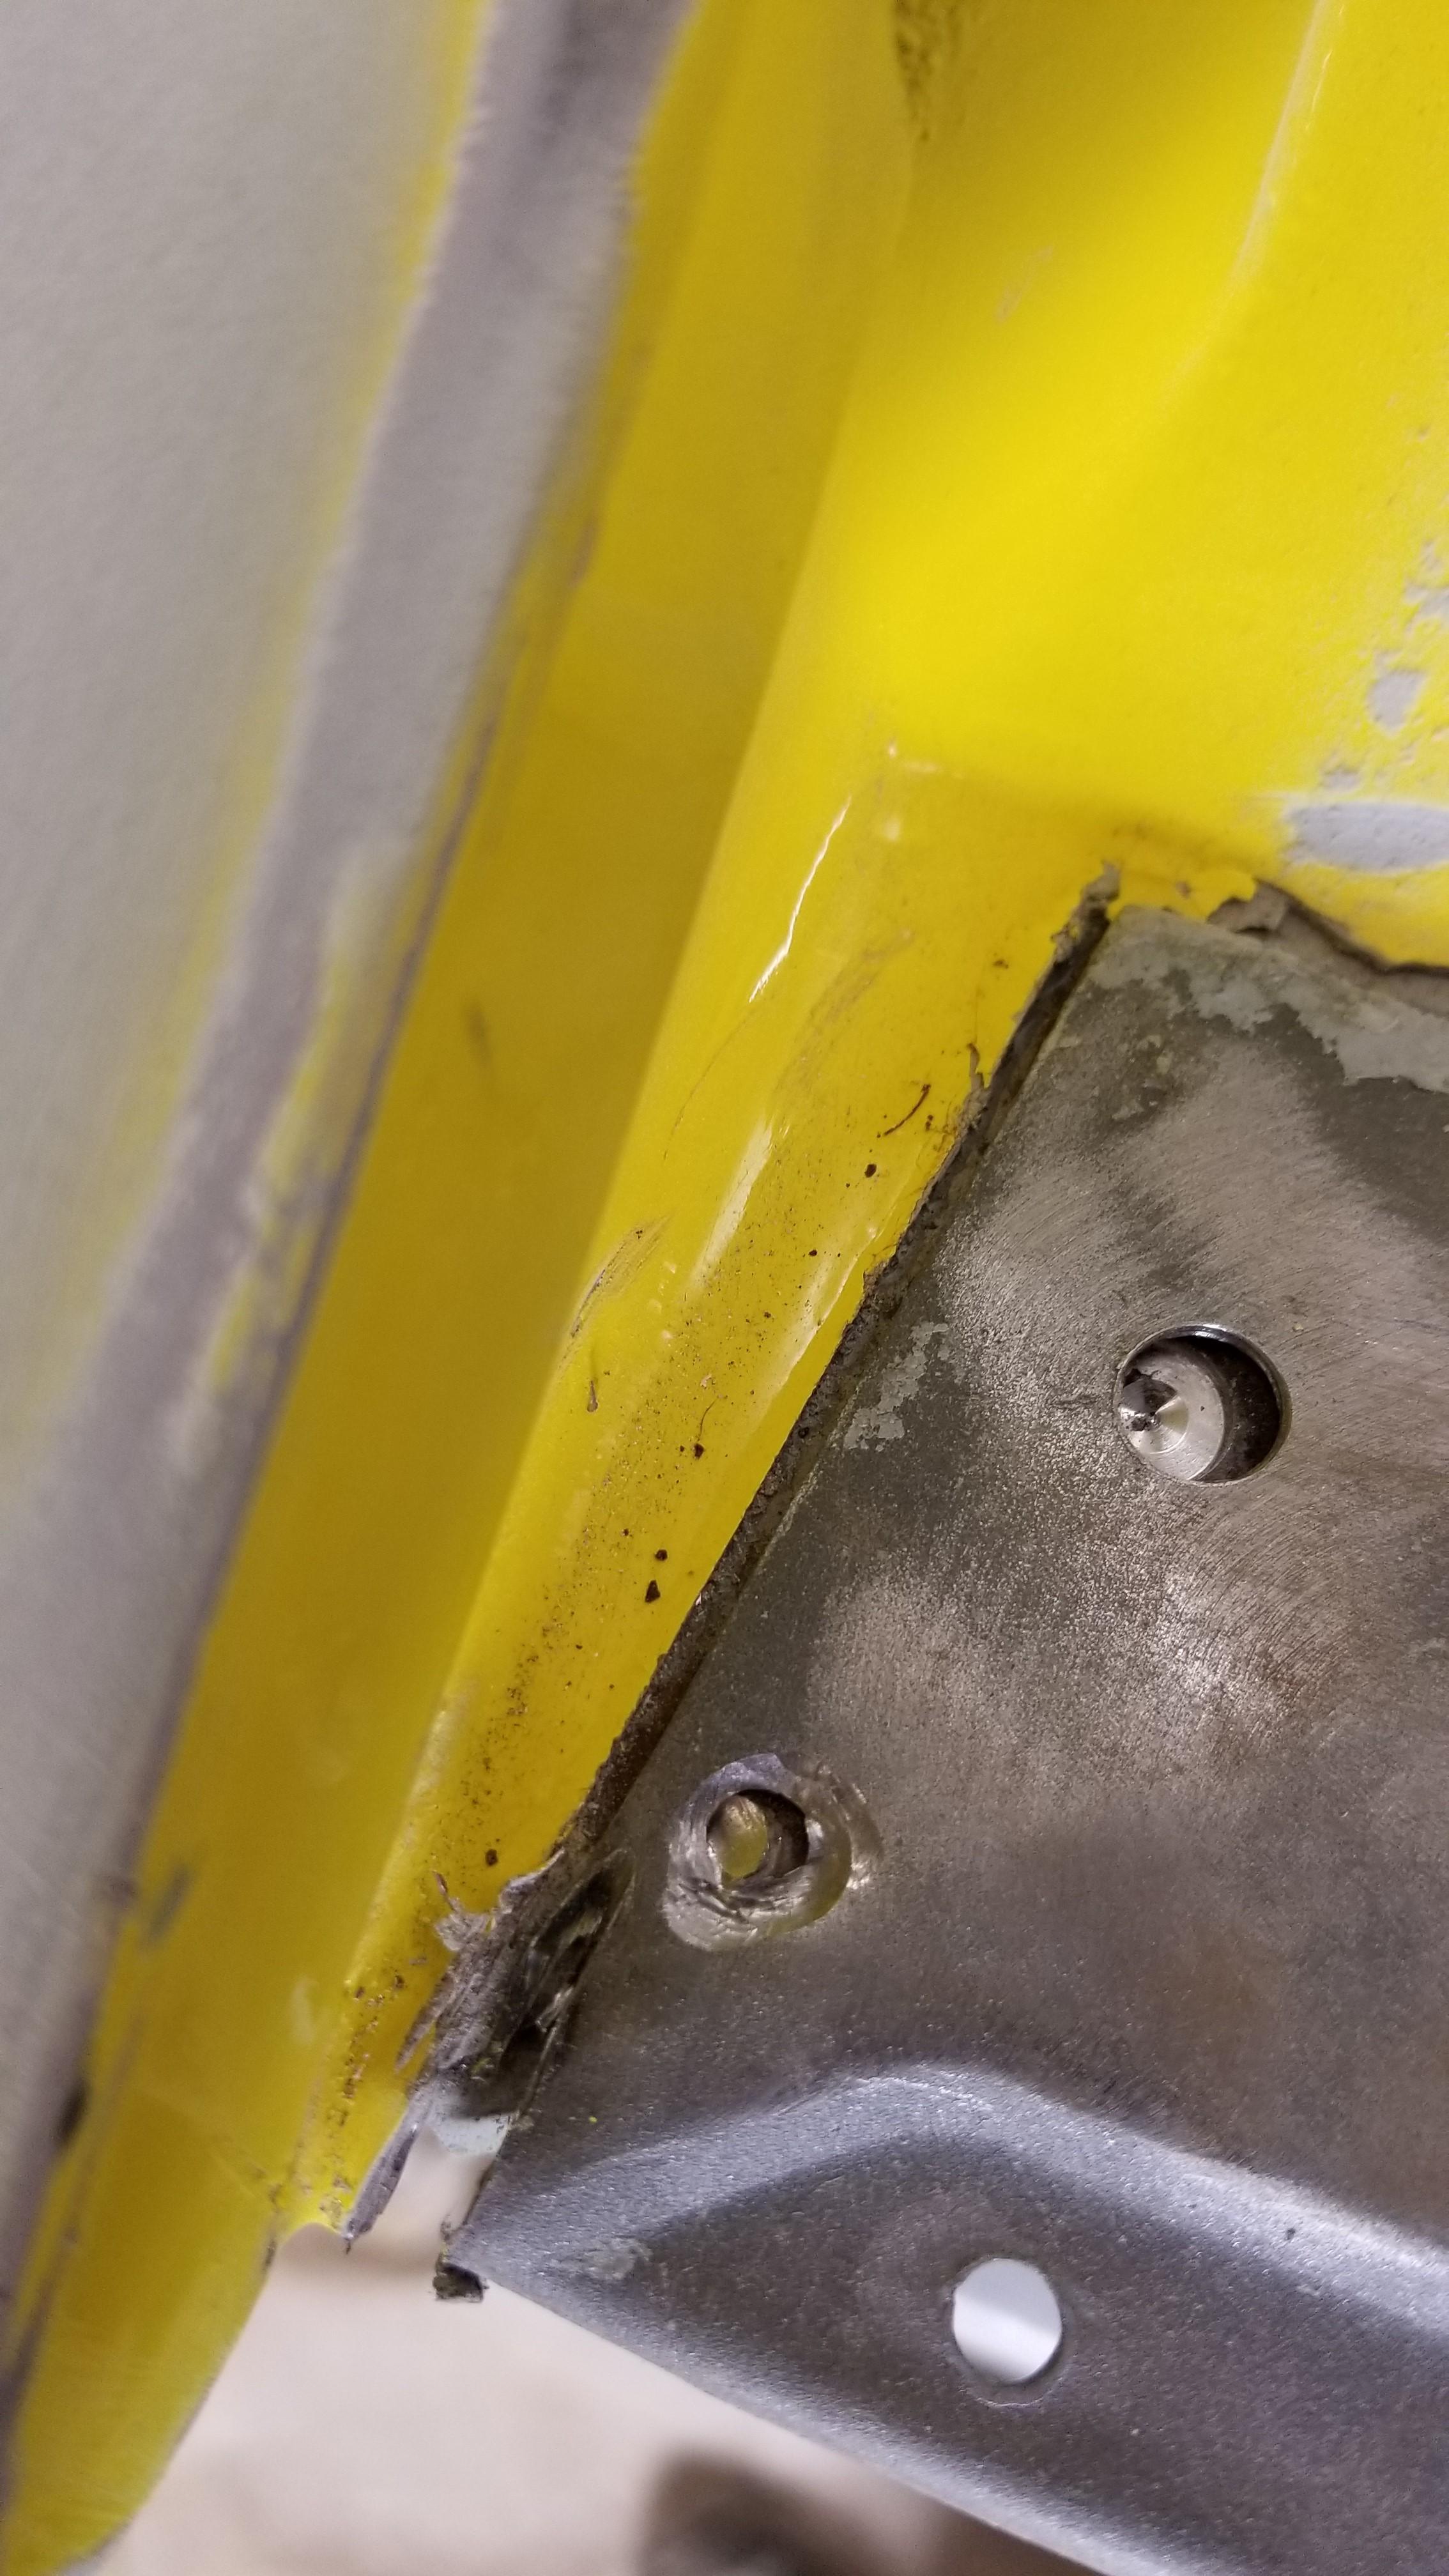
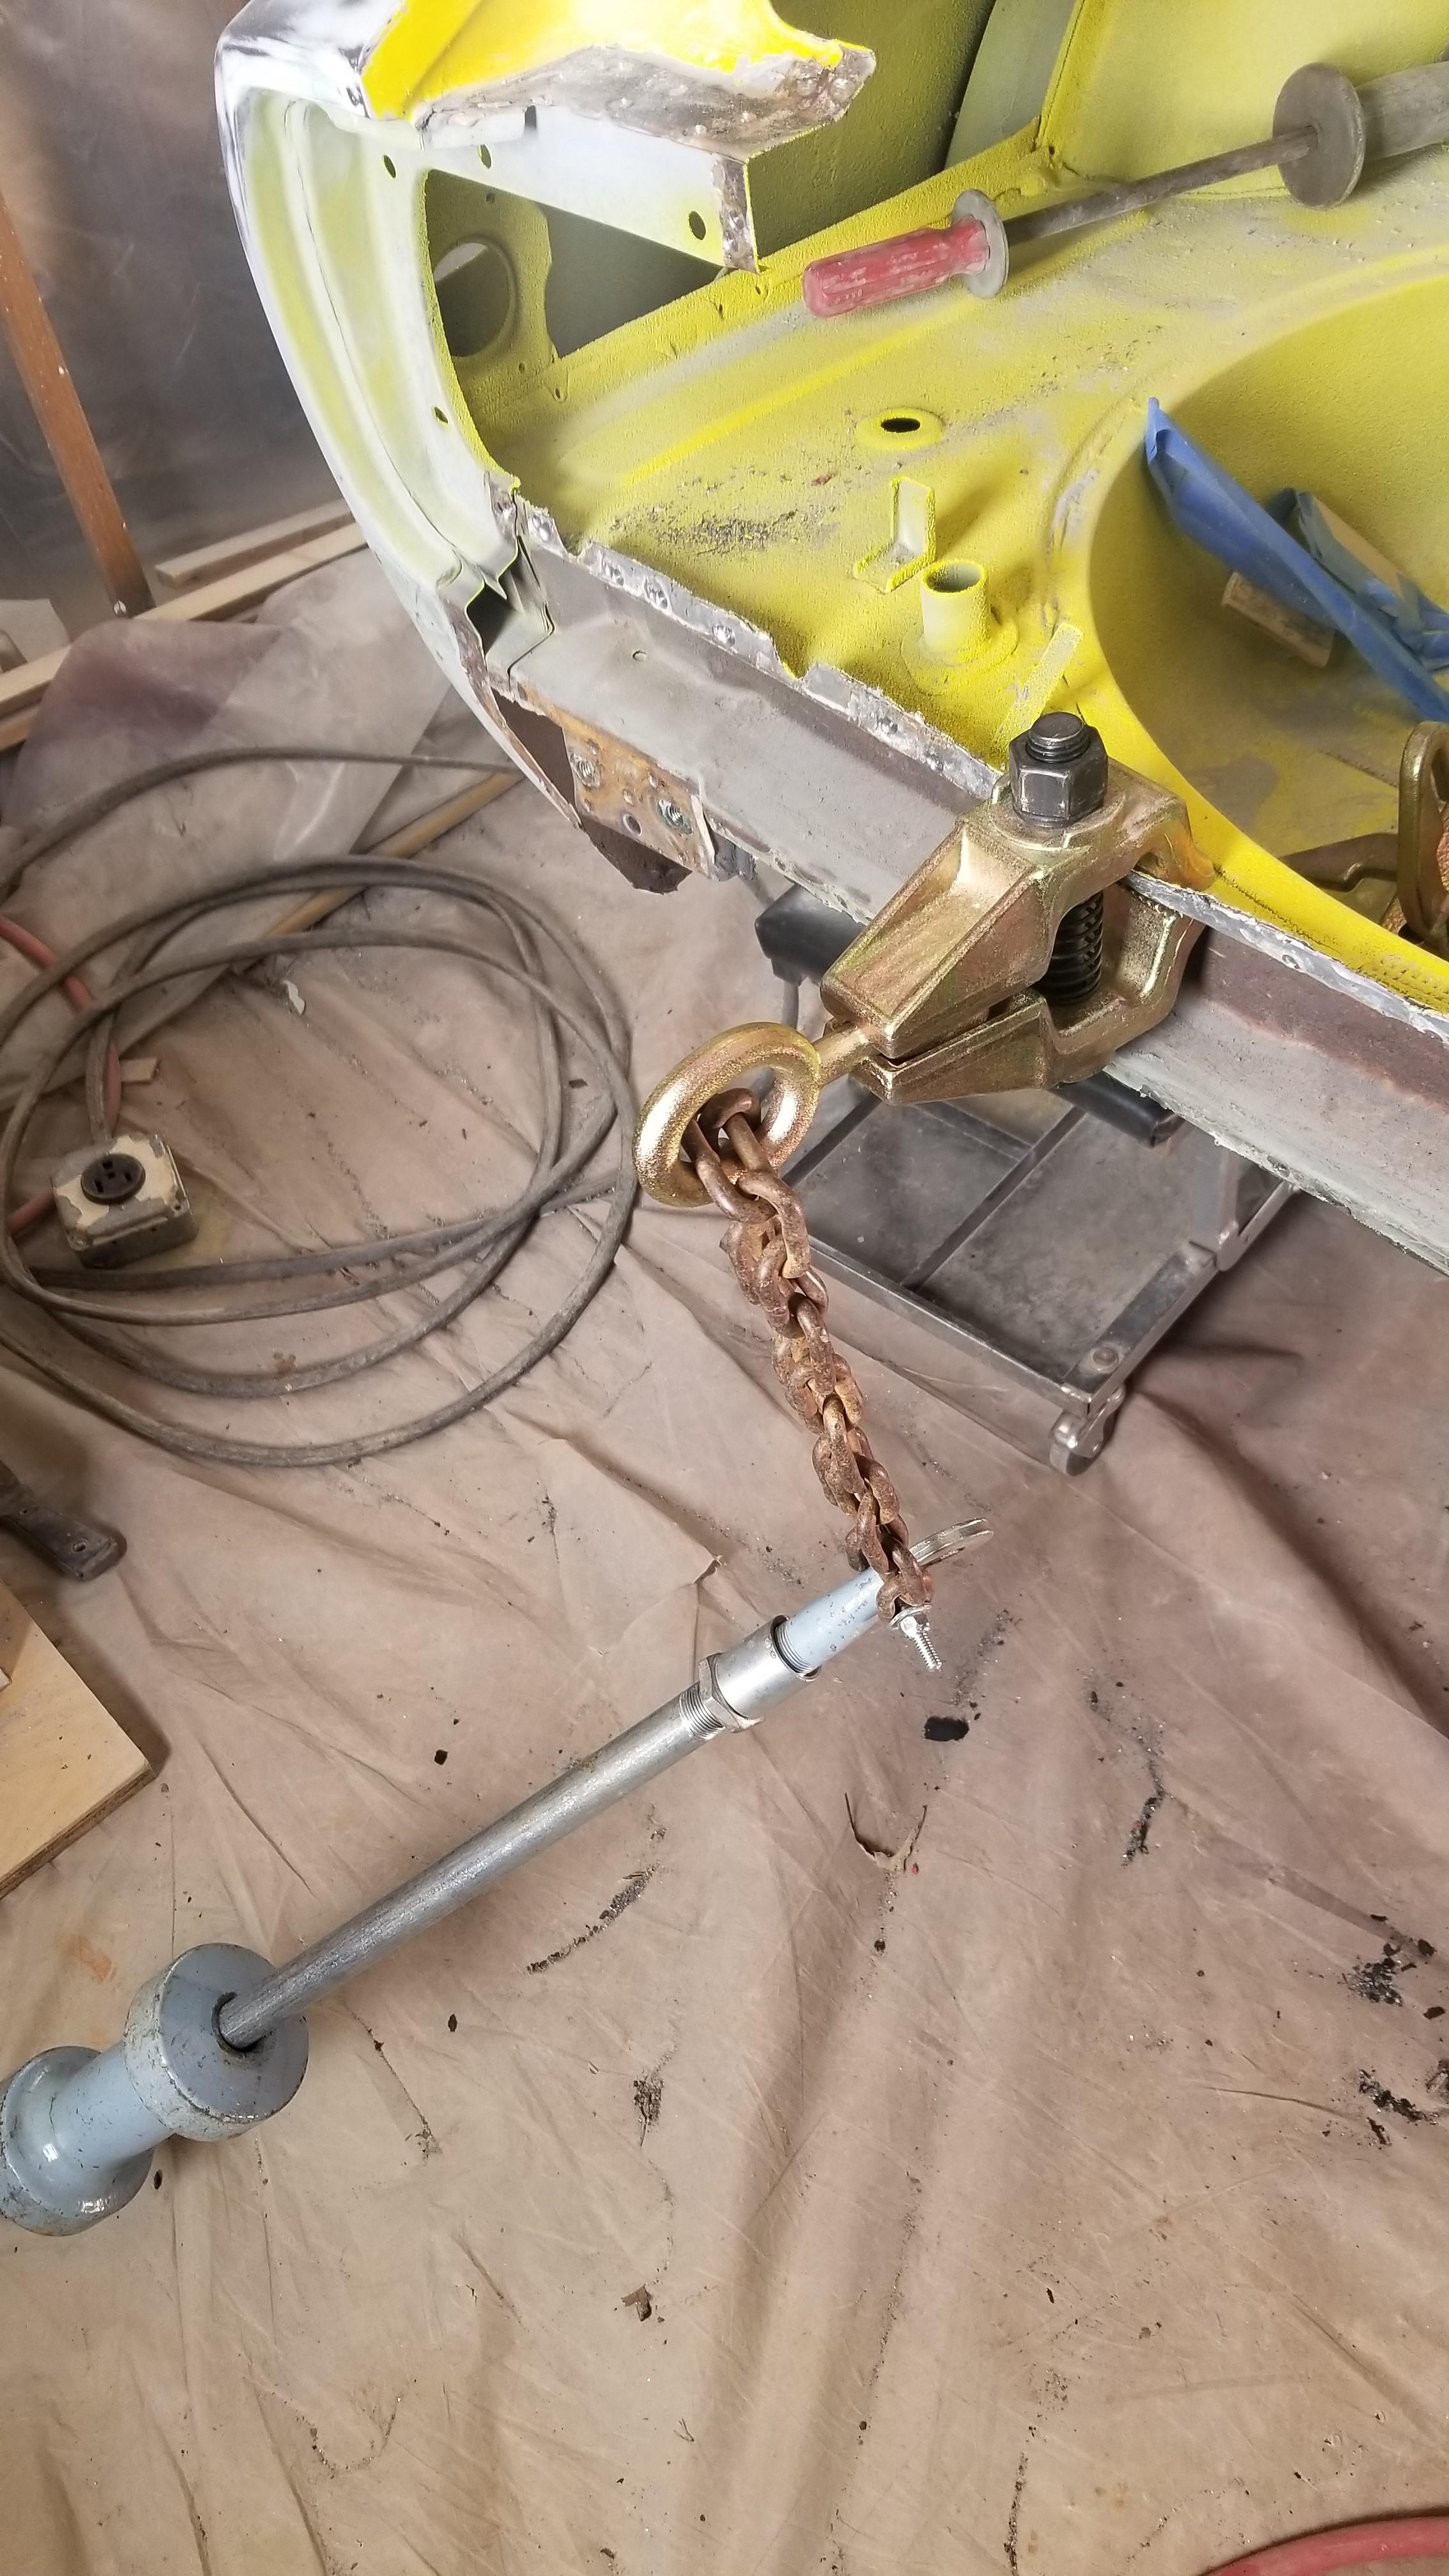
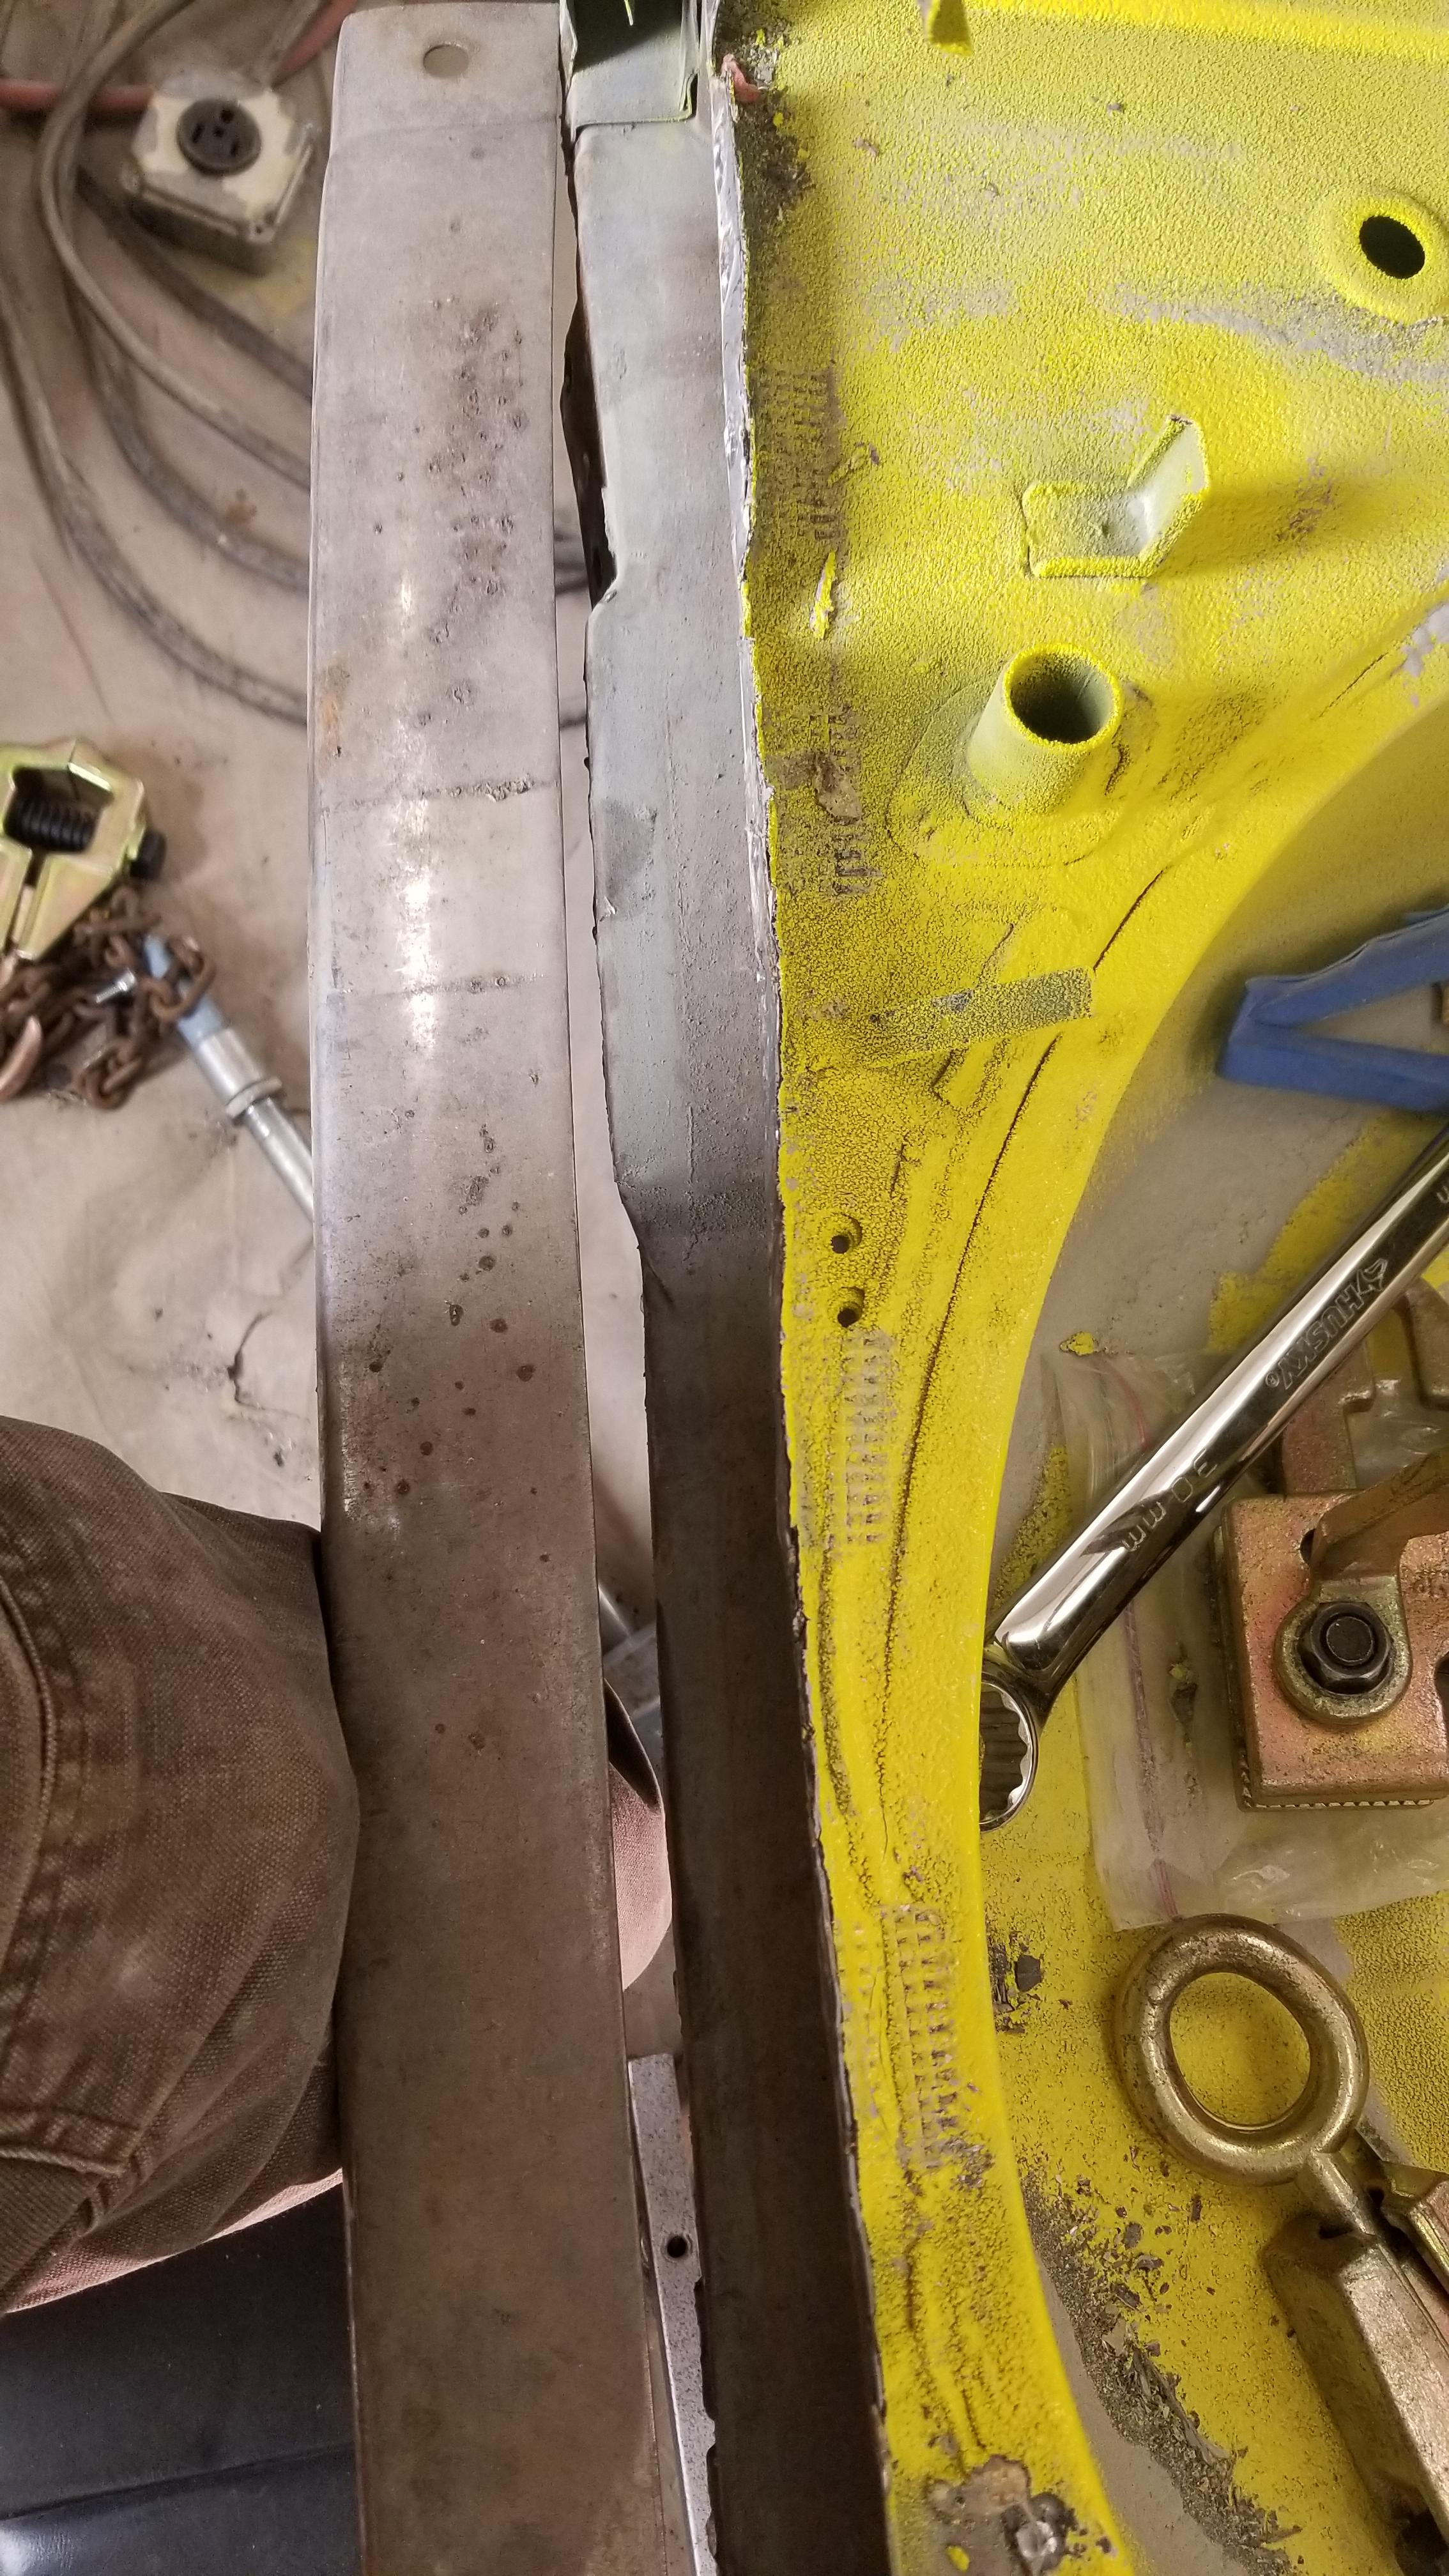
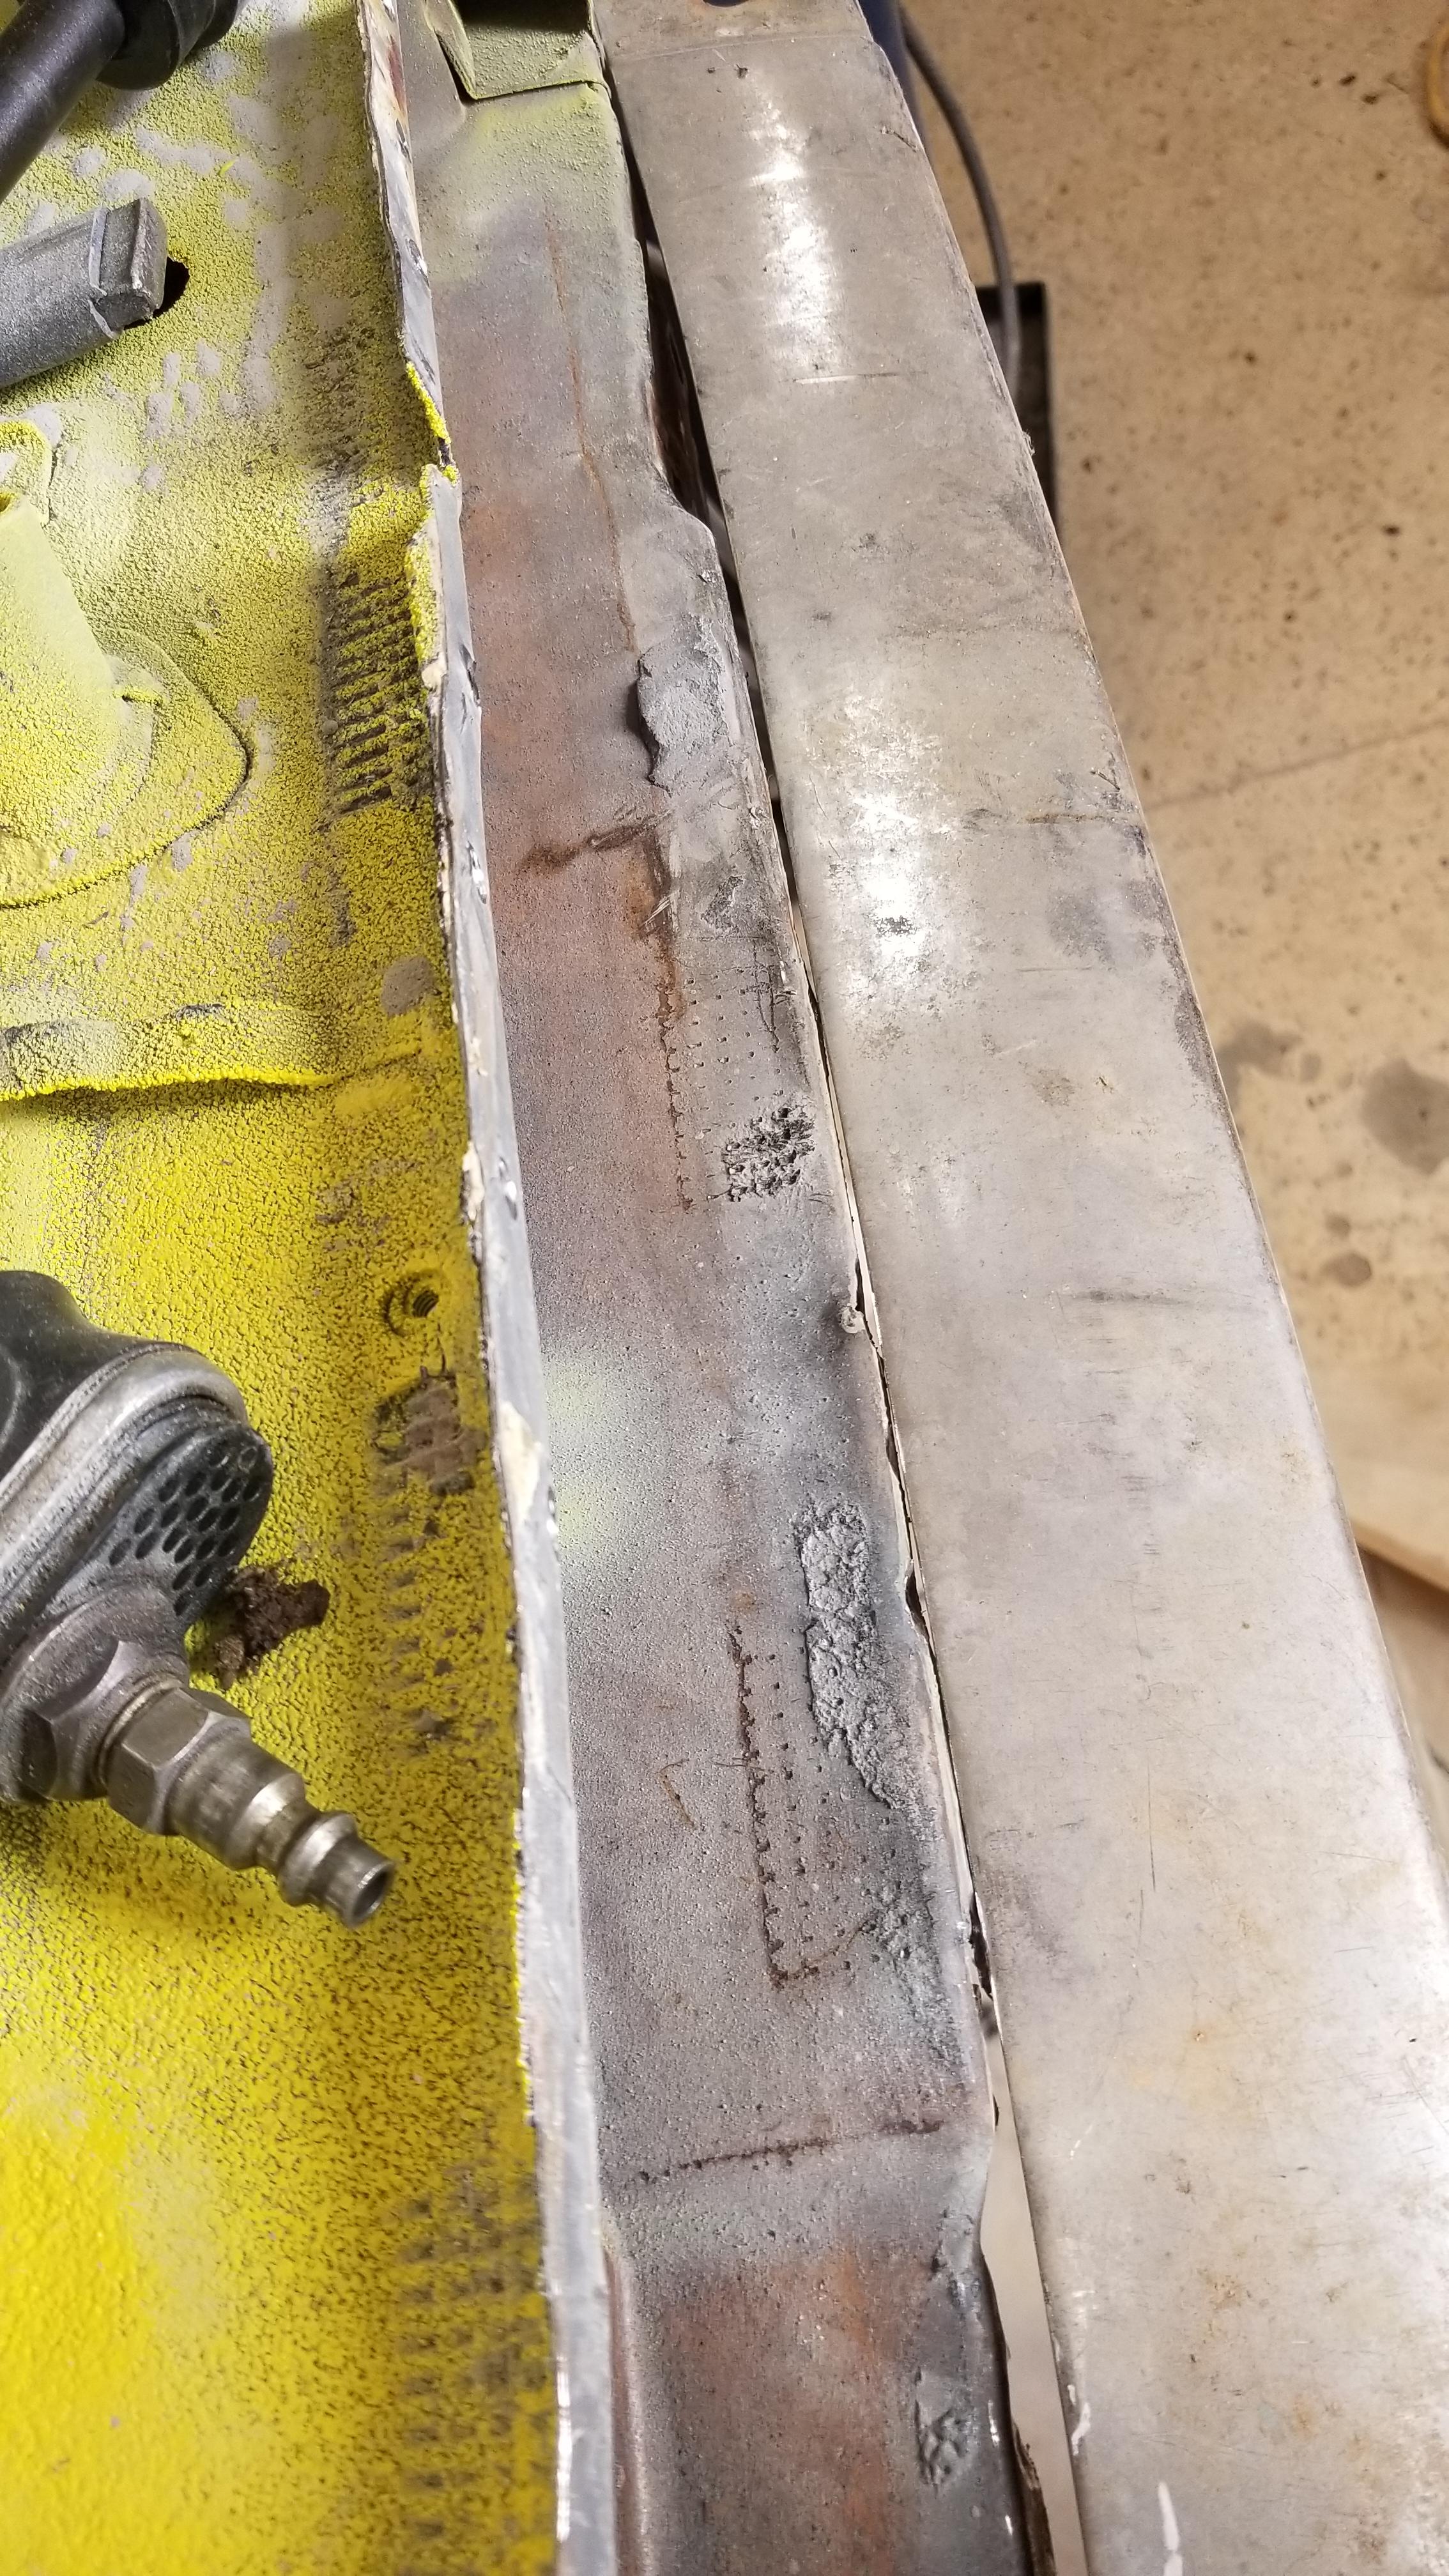
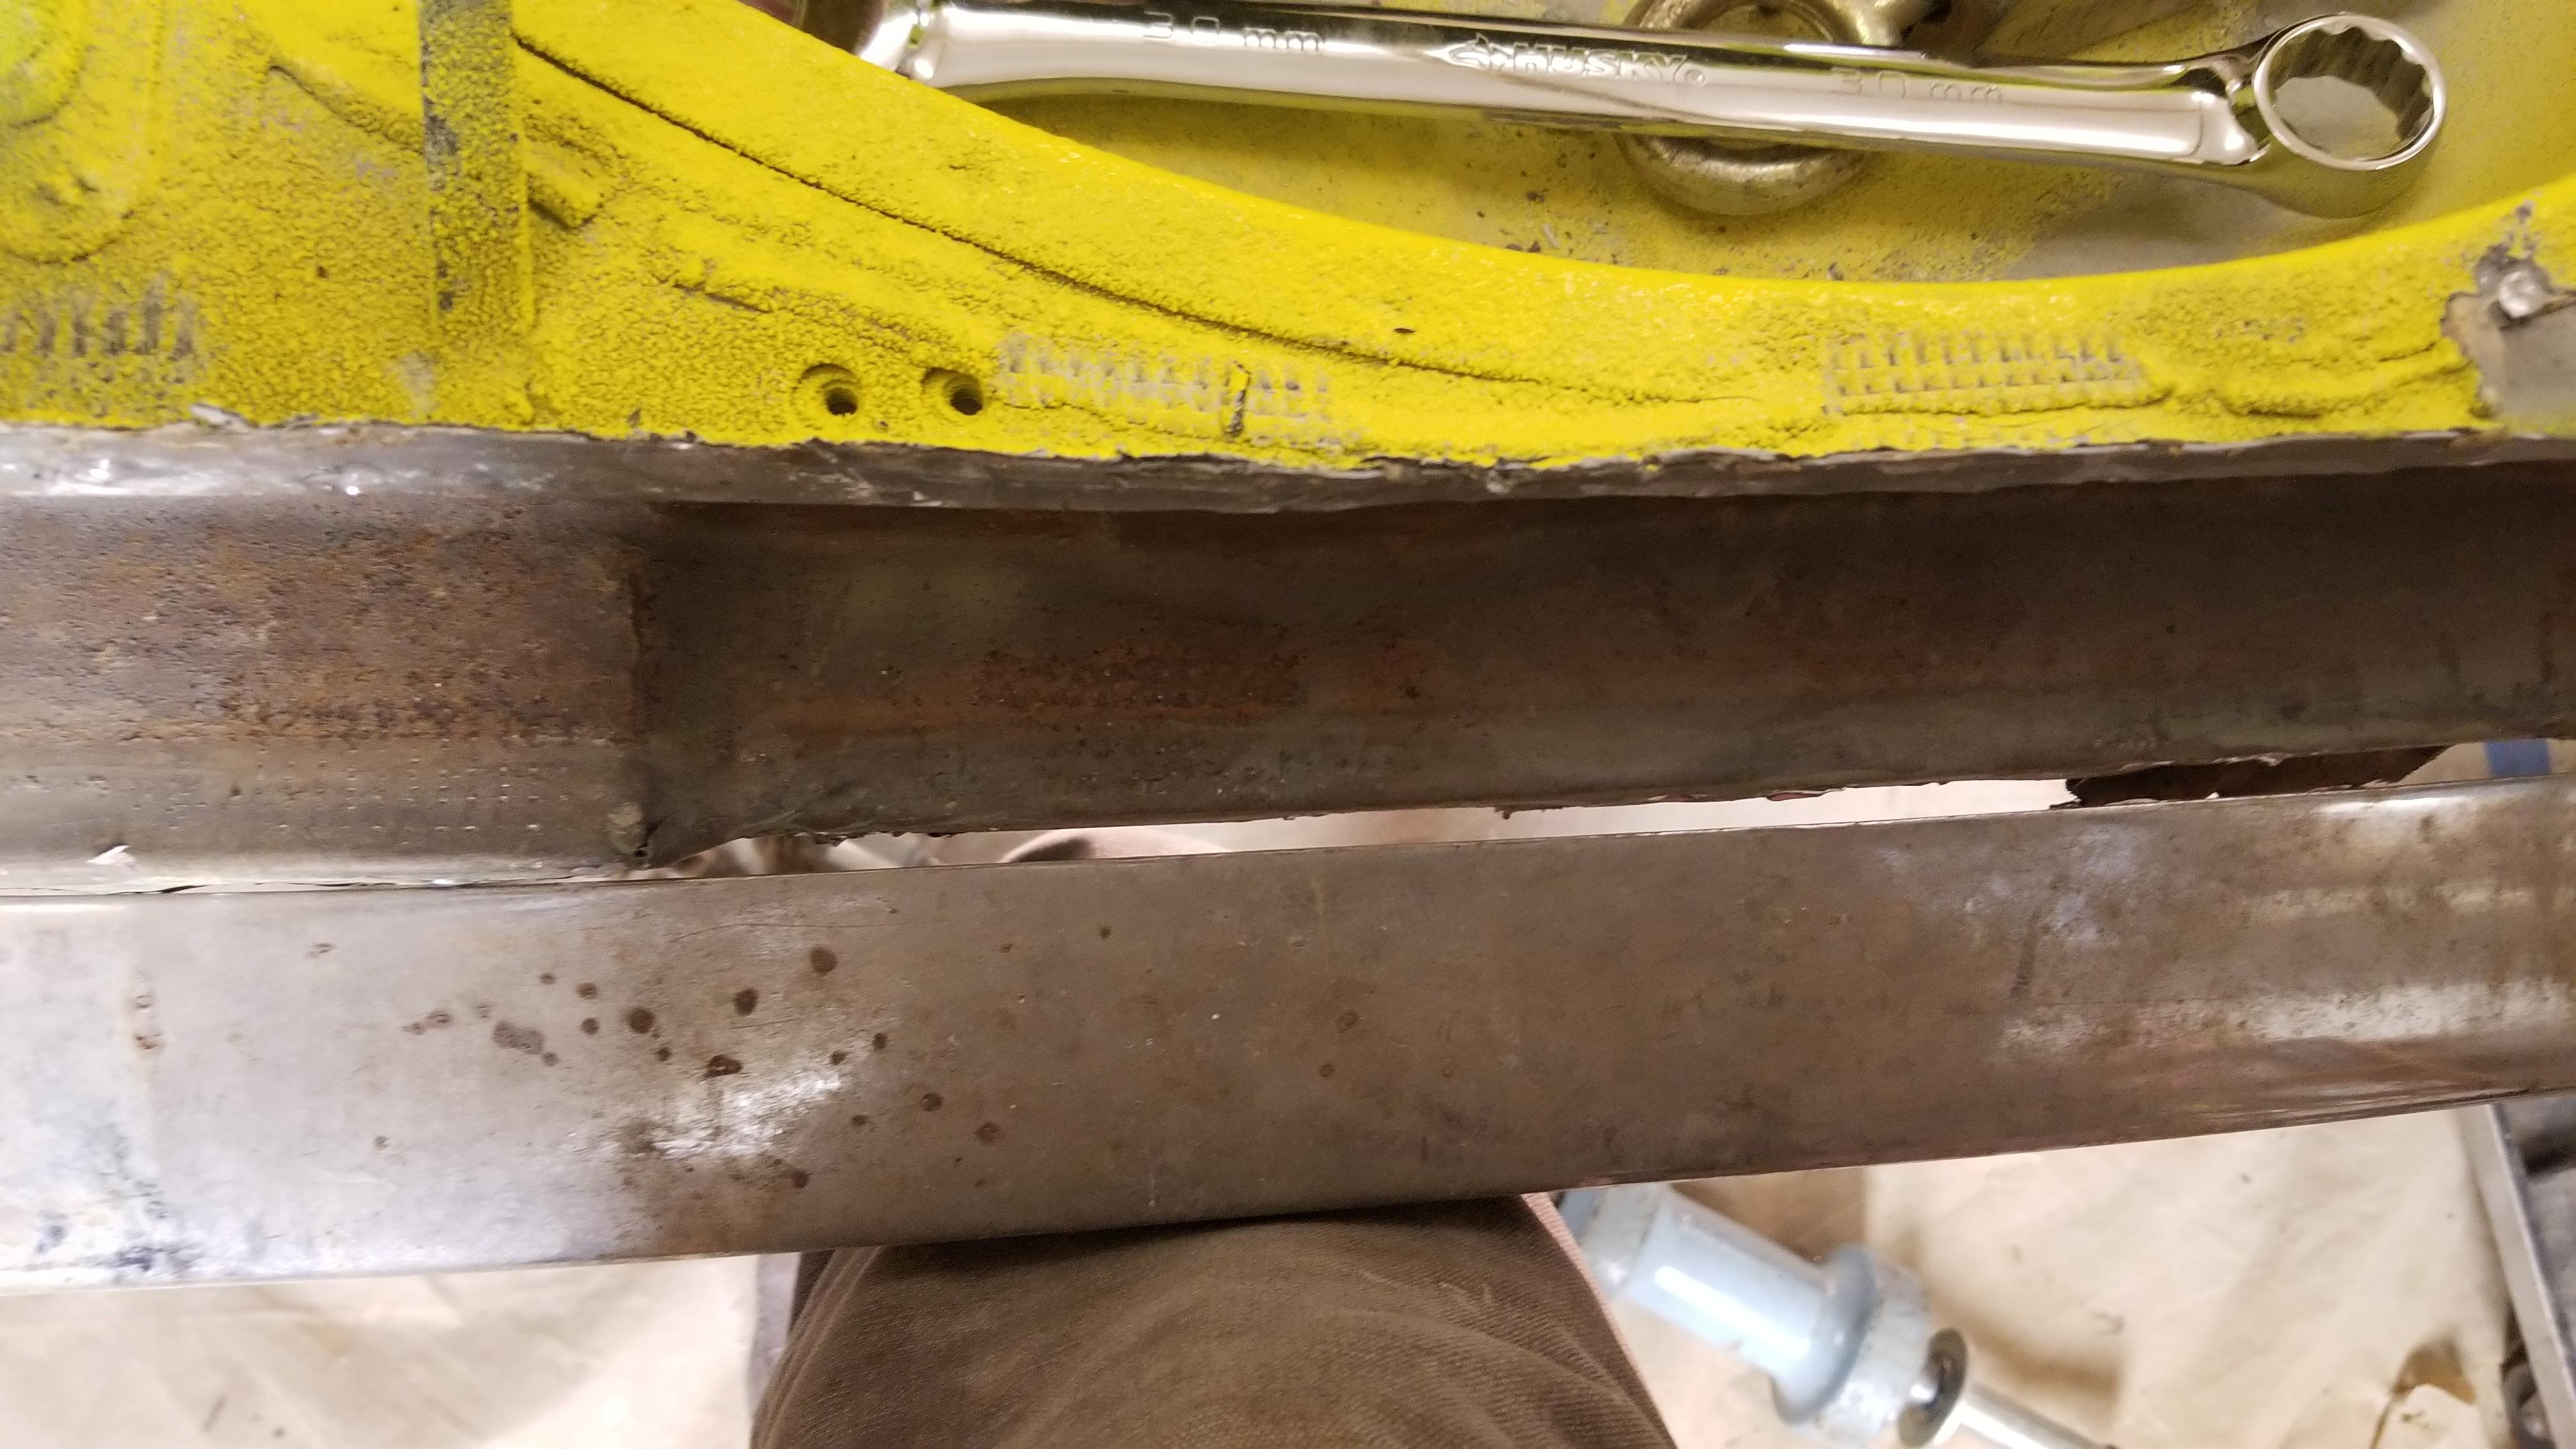
Thanks! Yes, it can be frustrating. Here is the latest frustration. The car got wider above and below the floor!!!! I don't see how that's possible The slam panel aught to go all the way to the yellow line, it's about 1/16" short now The lower valance aught to cover all the rust and there is a small tear that aught to fit into the corresponding rip This is probably off by an 1/8" The car doesn't really flex. I don't know if I can pull it back together. I also don't see how the car could have gotten wider from the pulling. If anything it should have gotten narrower. ?


-
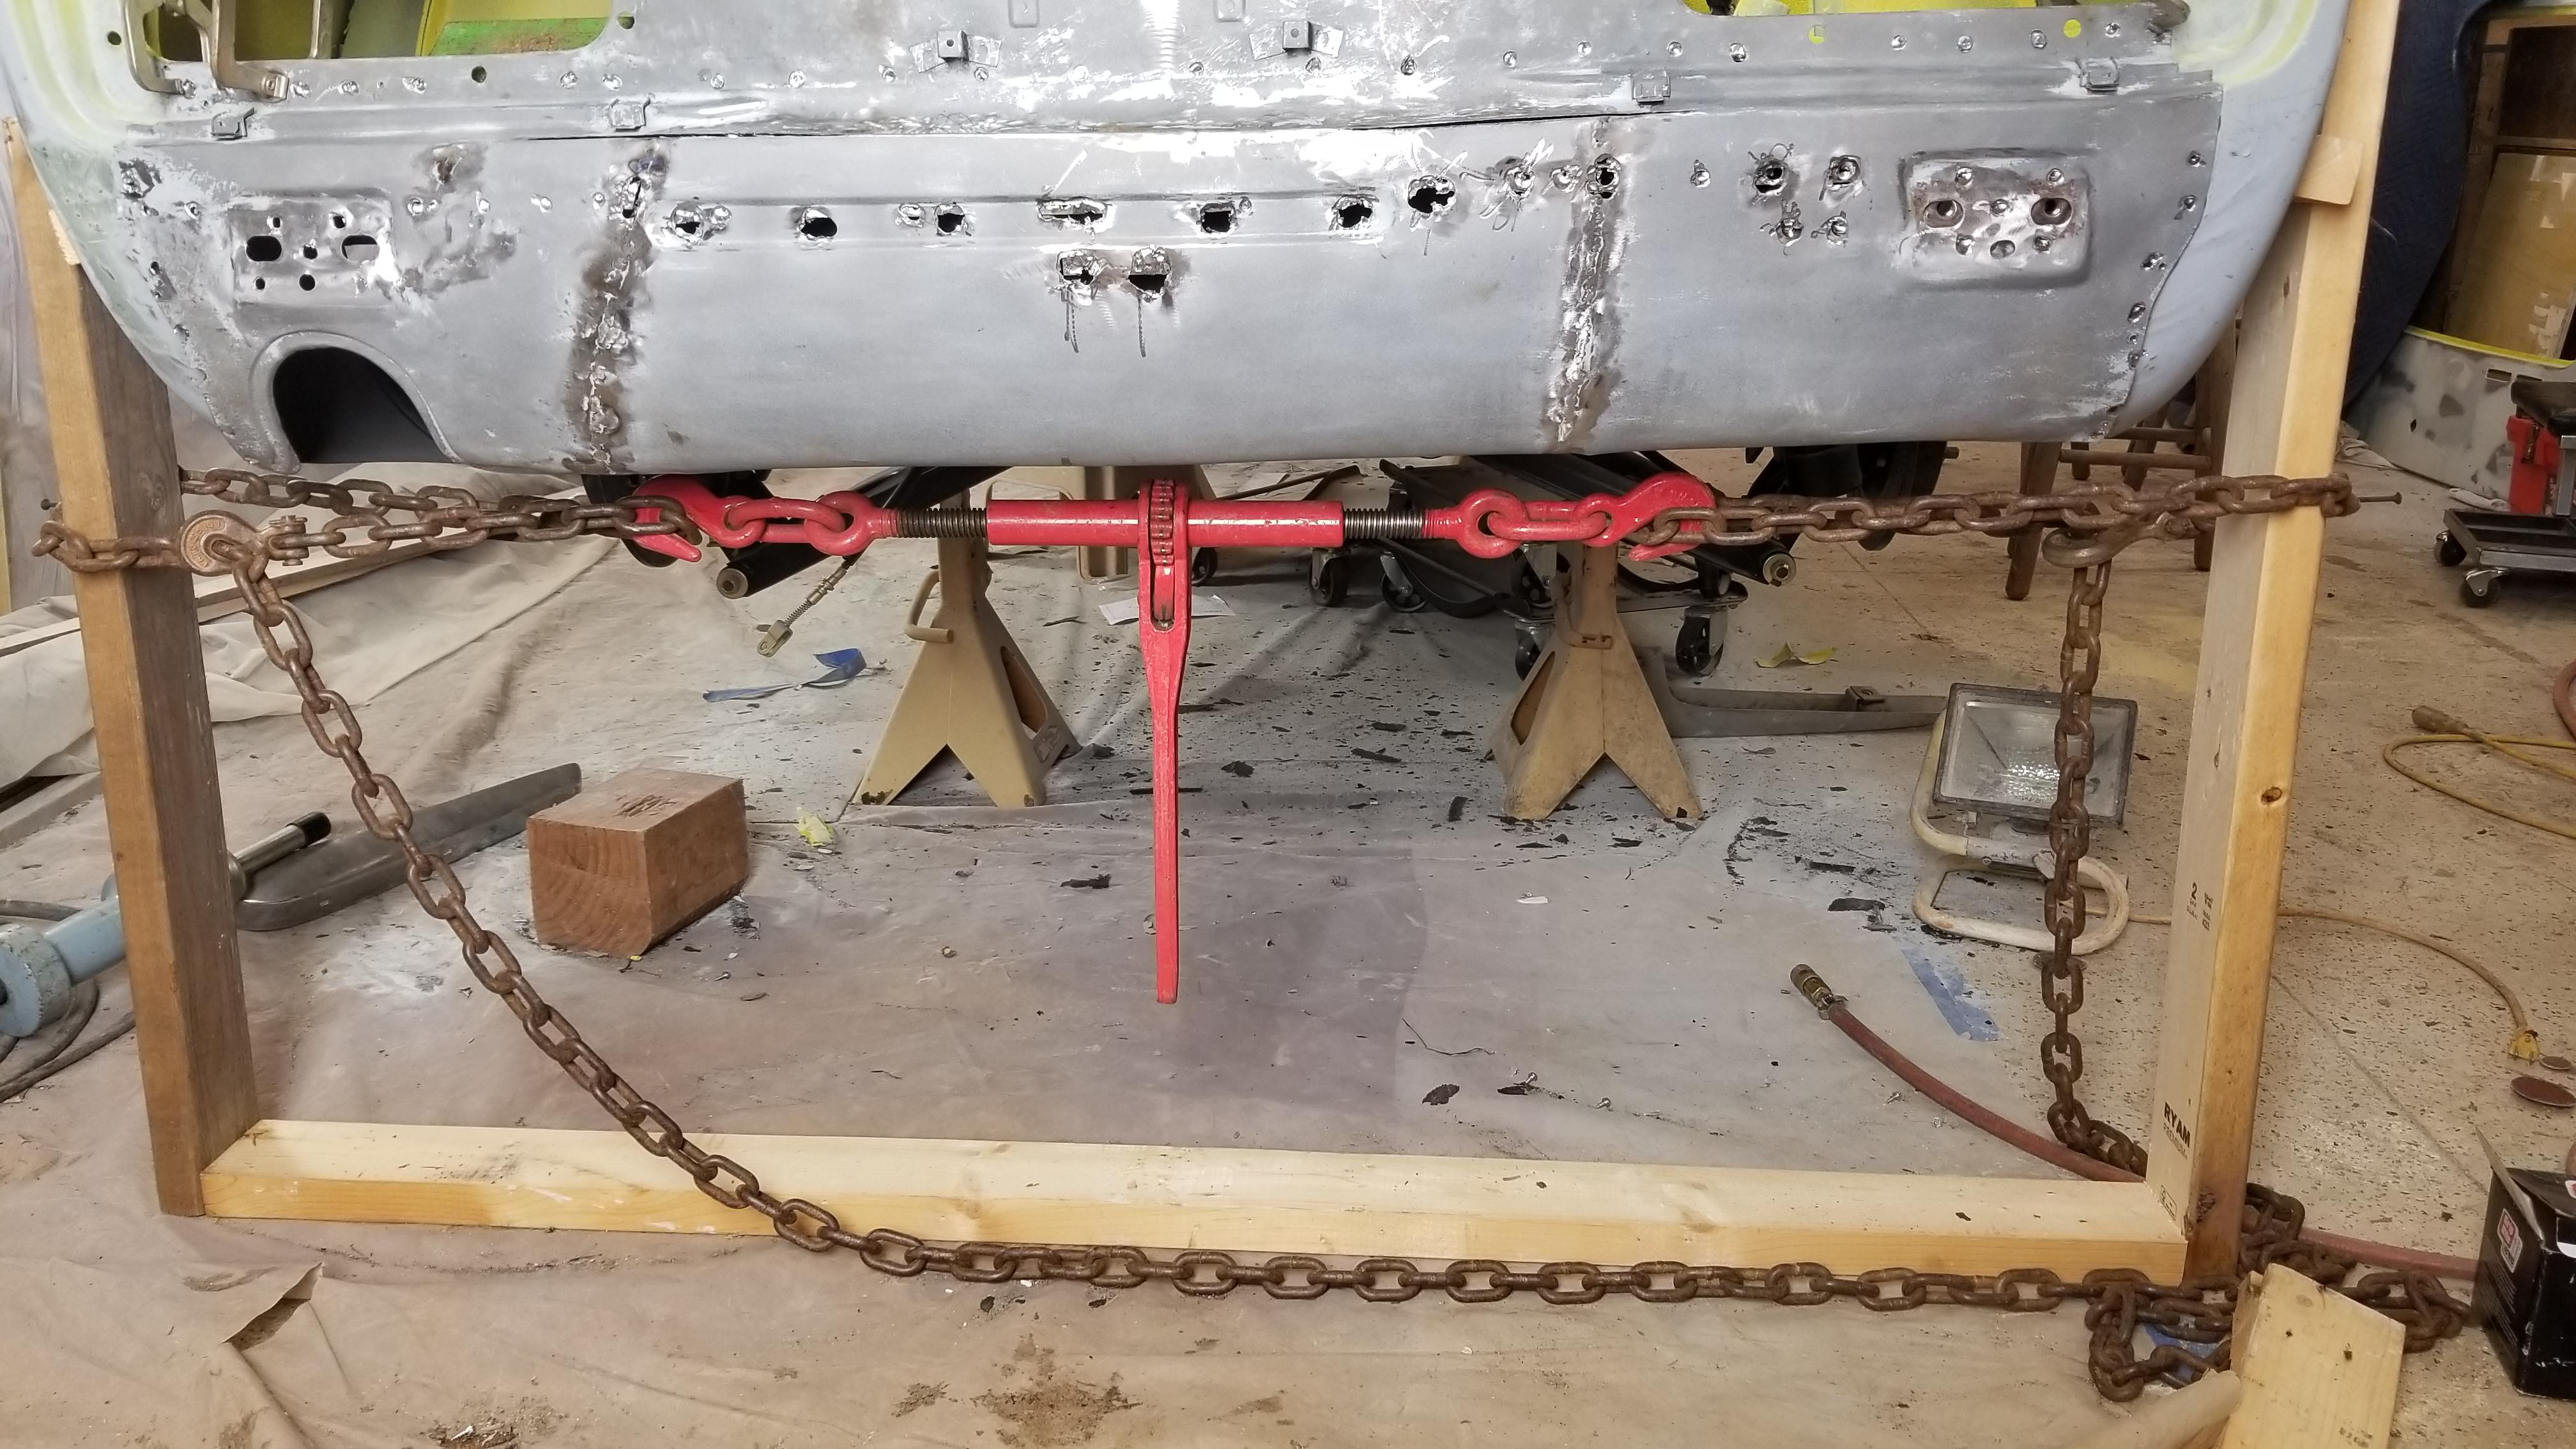
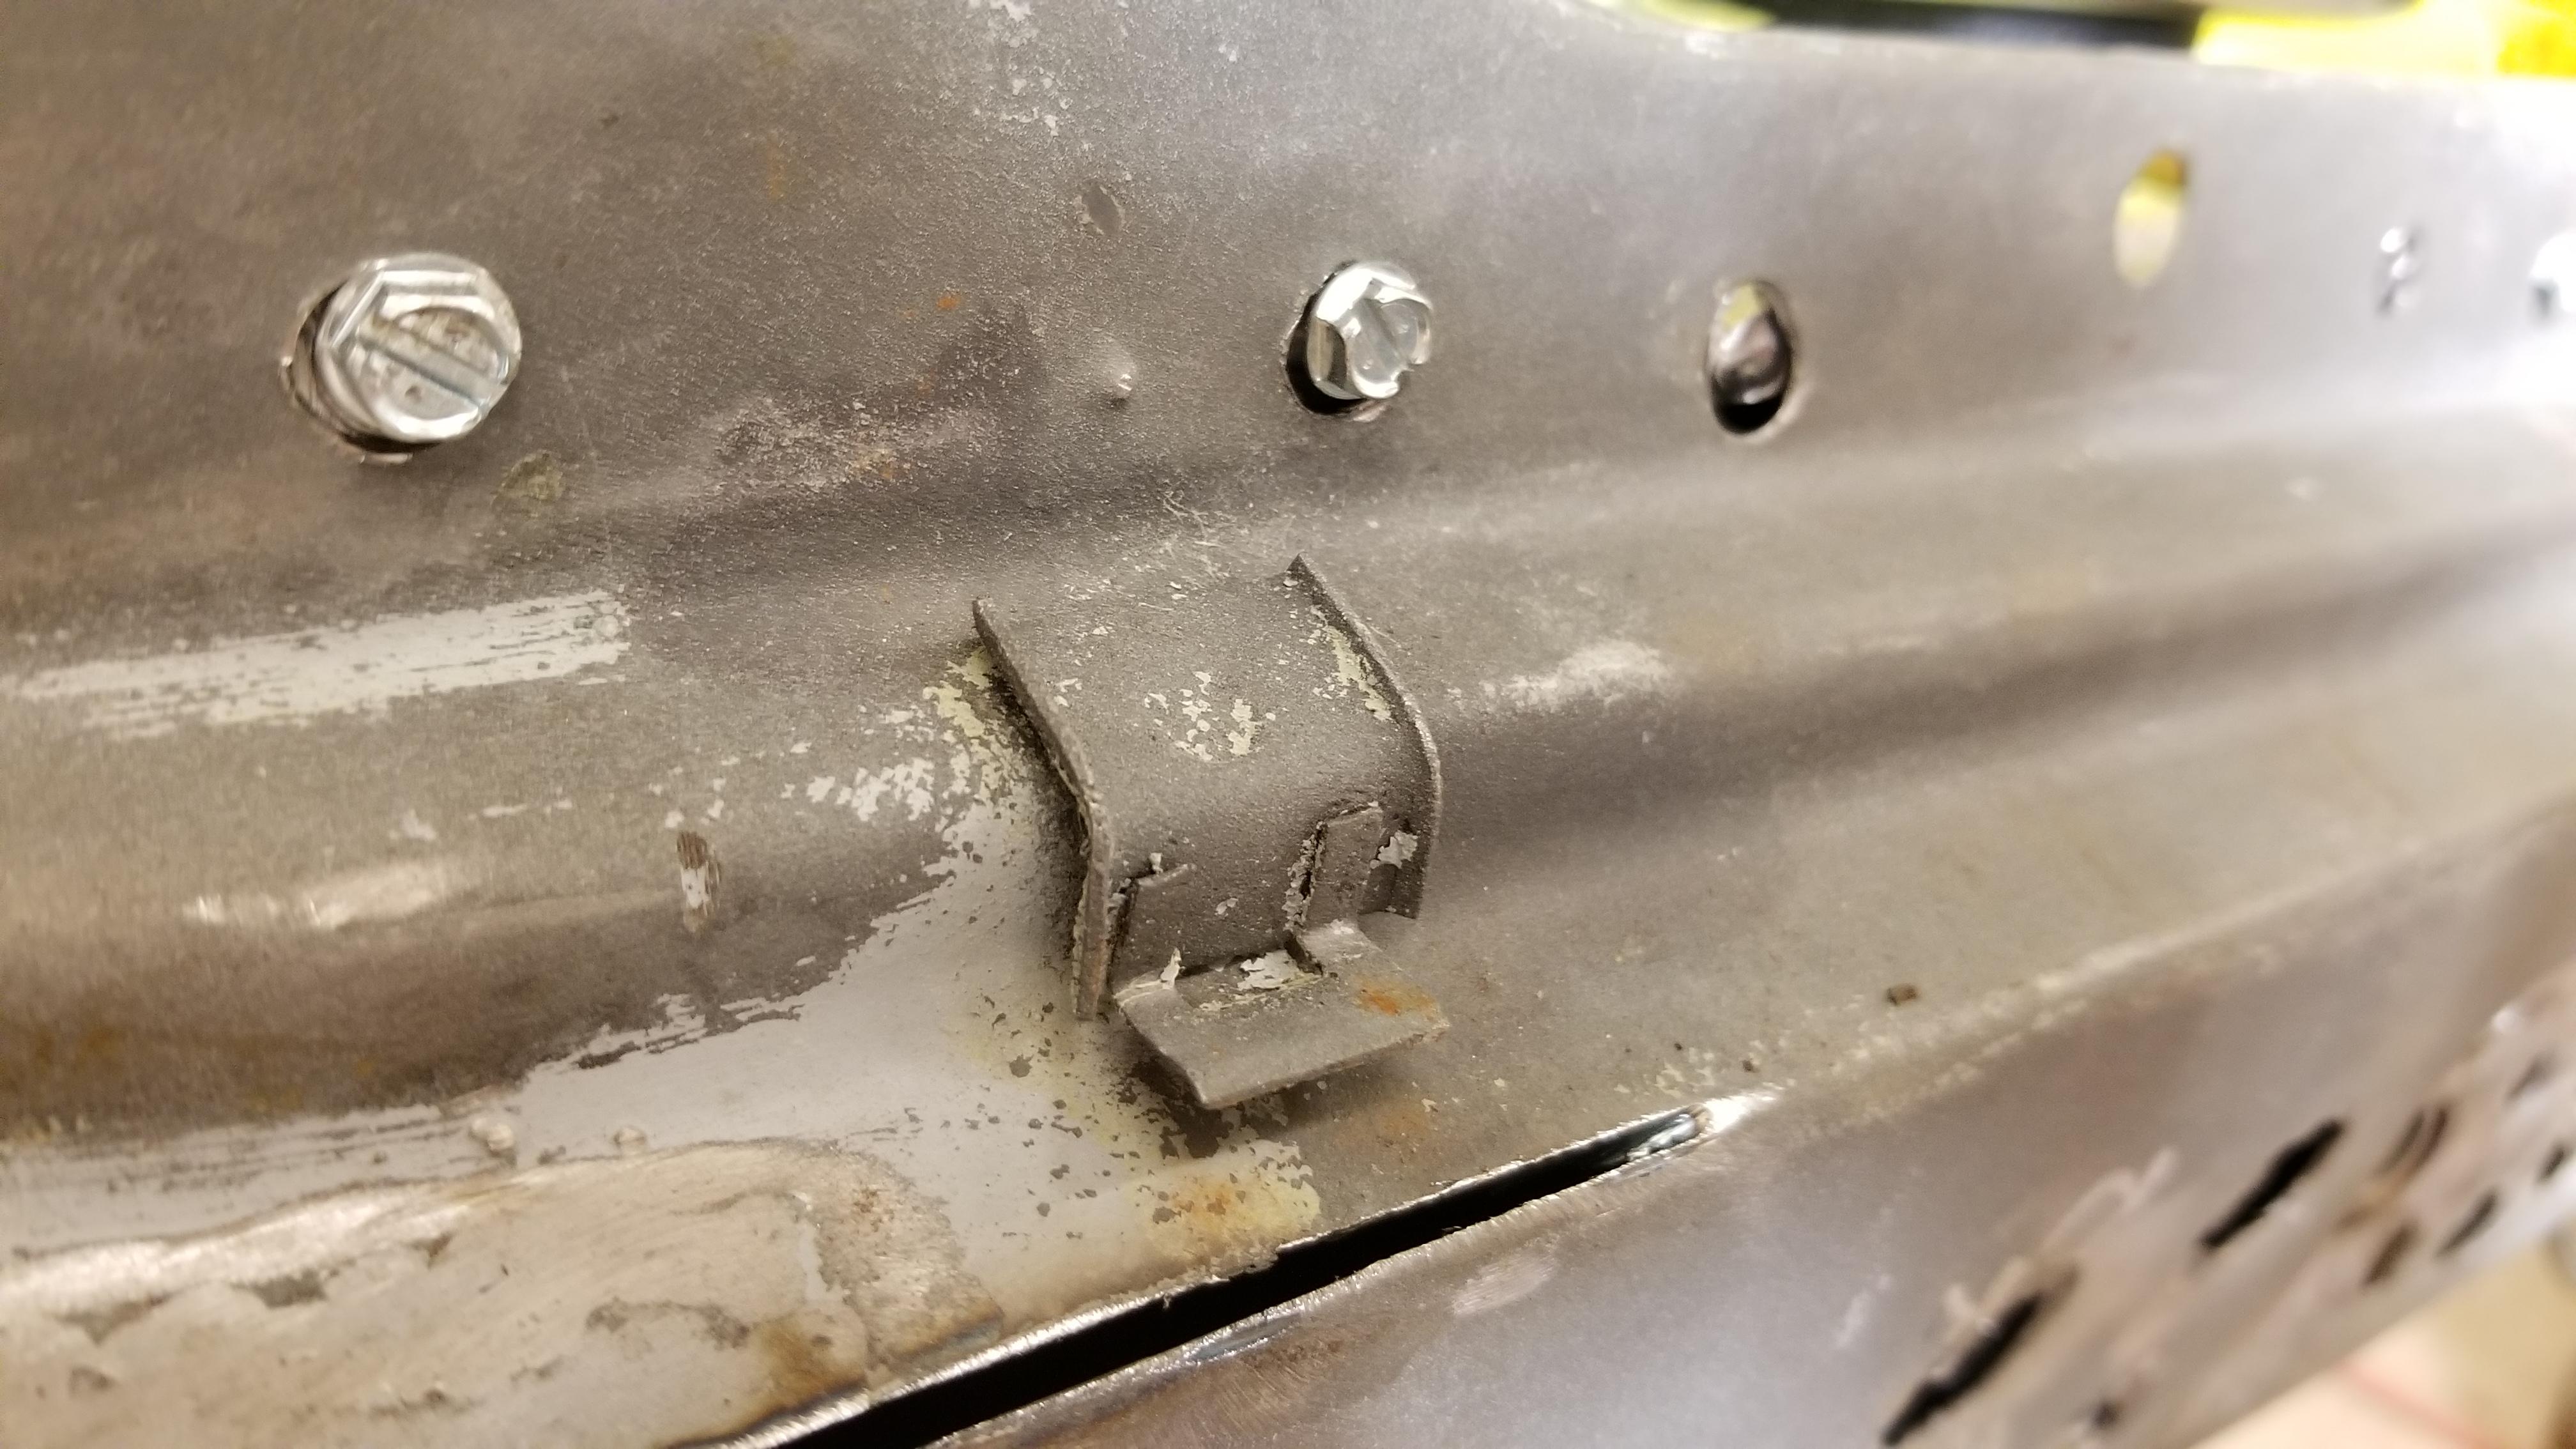
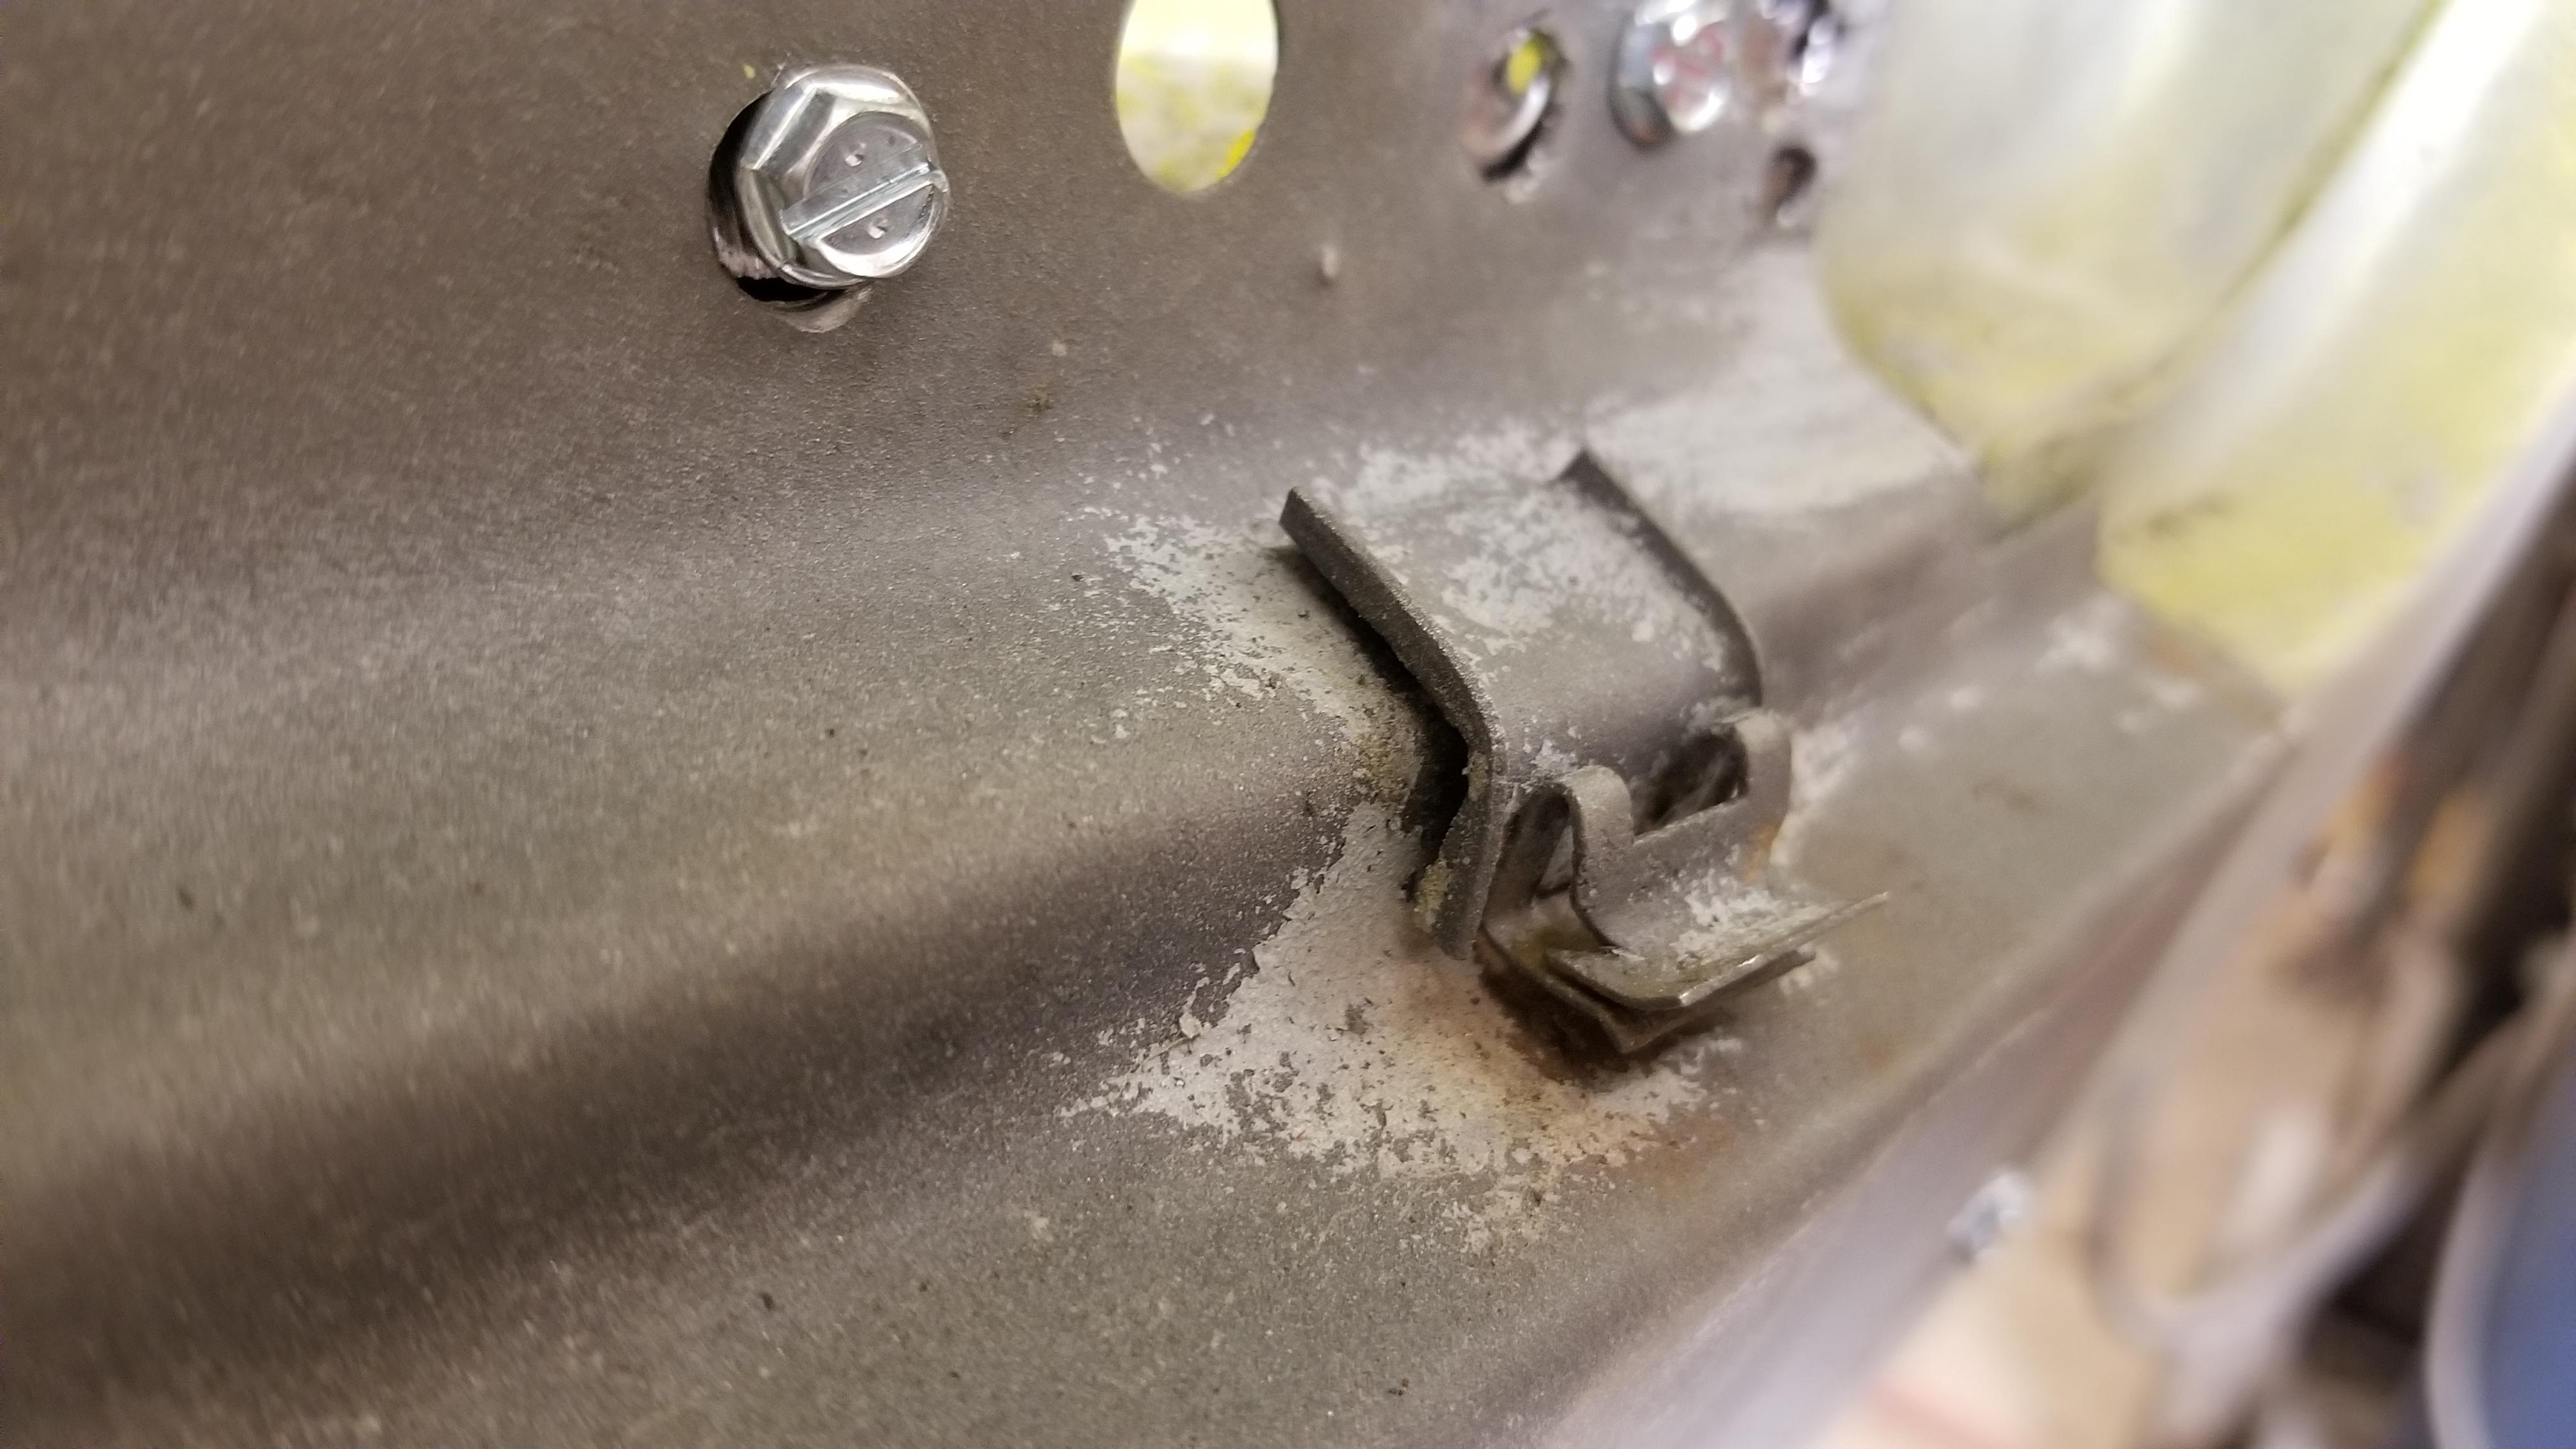
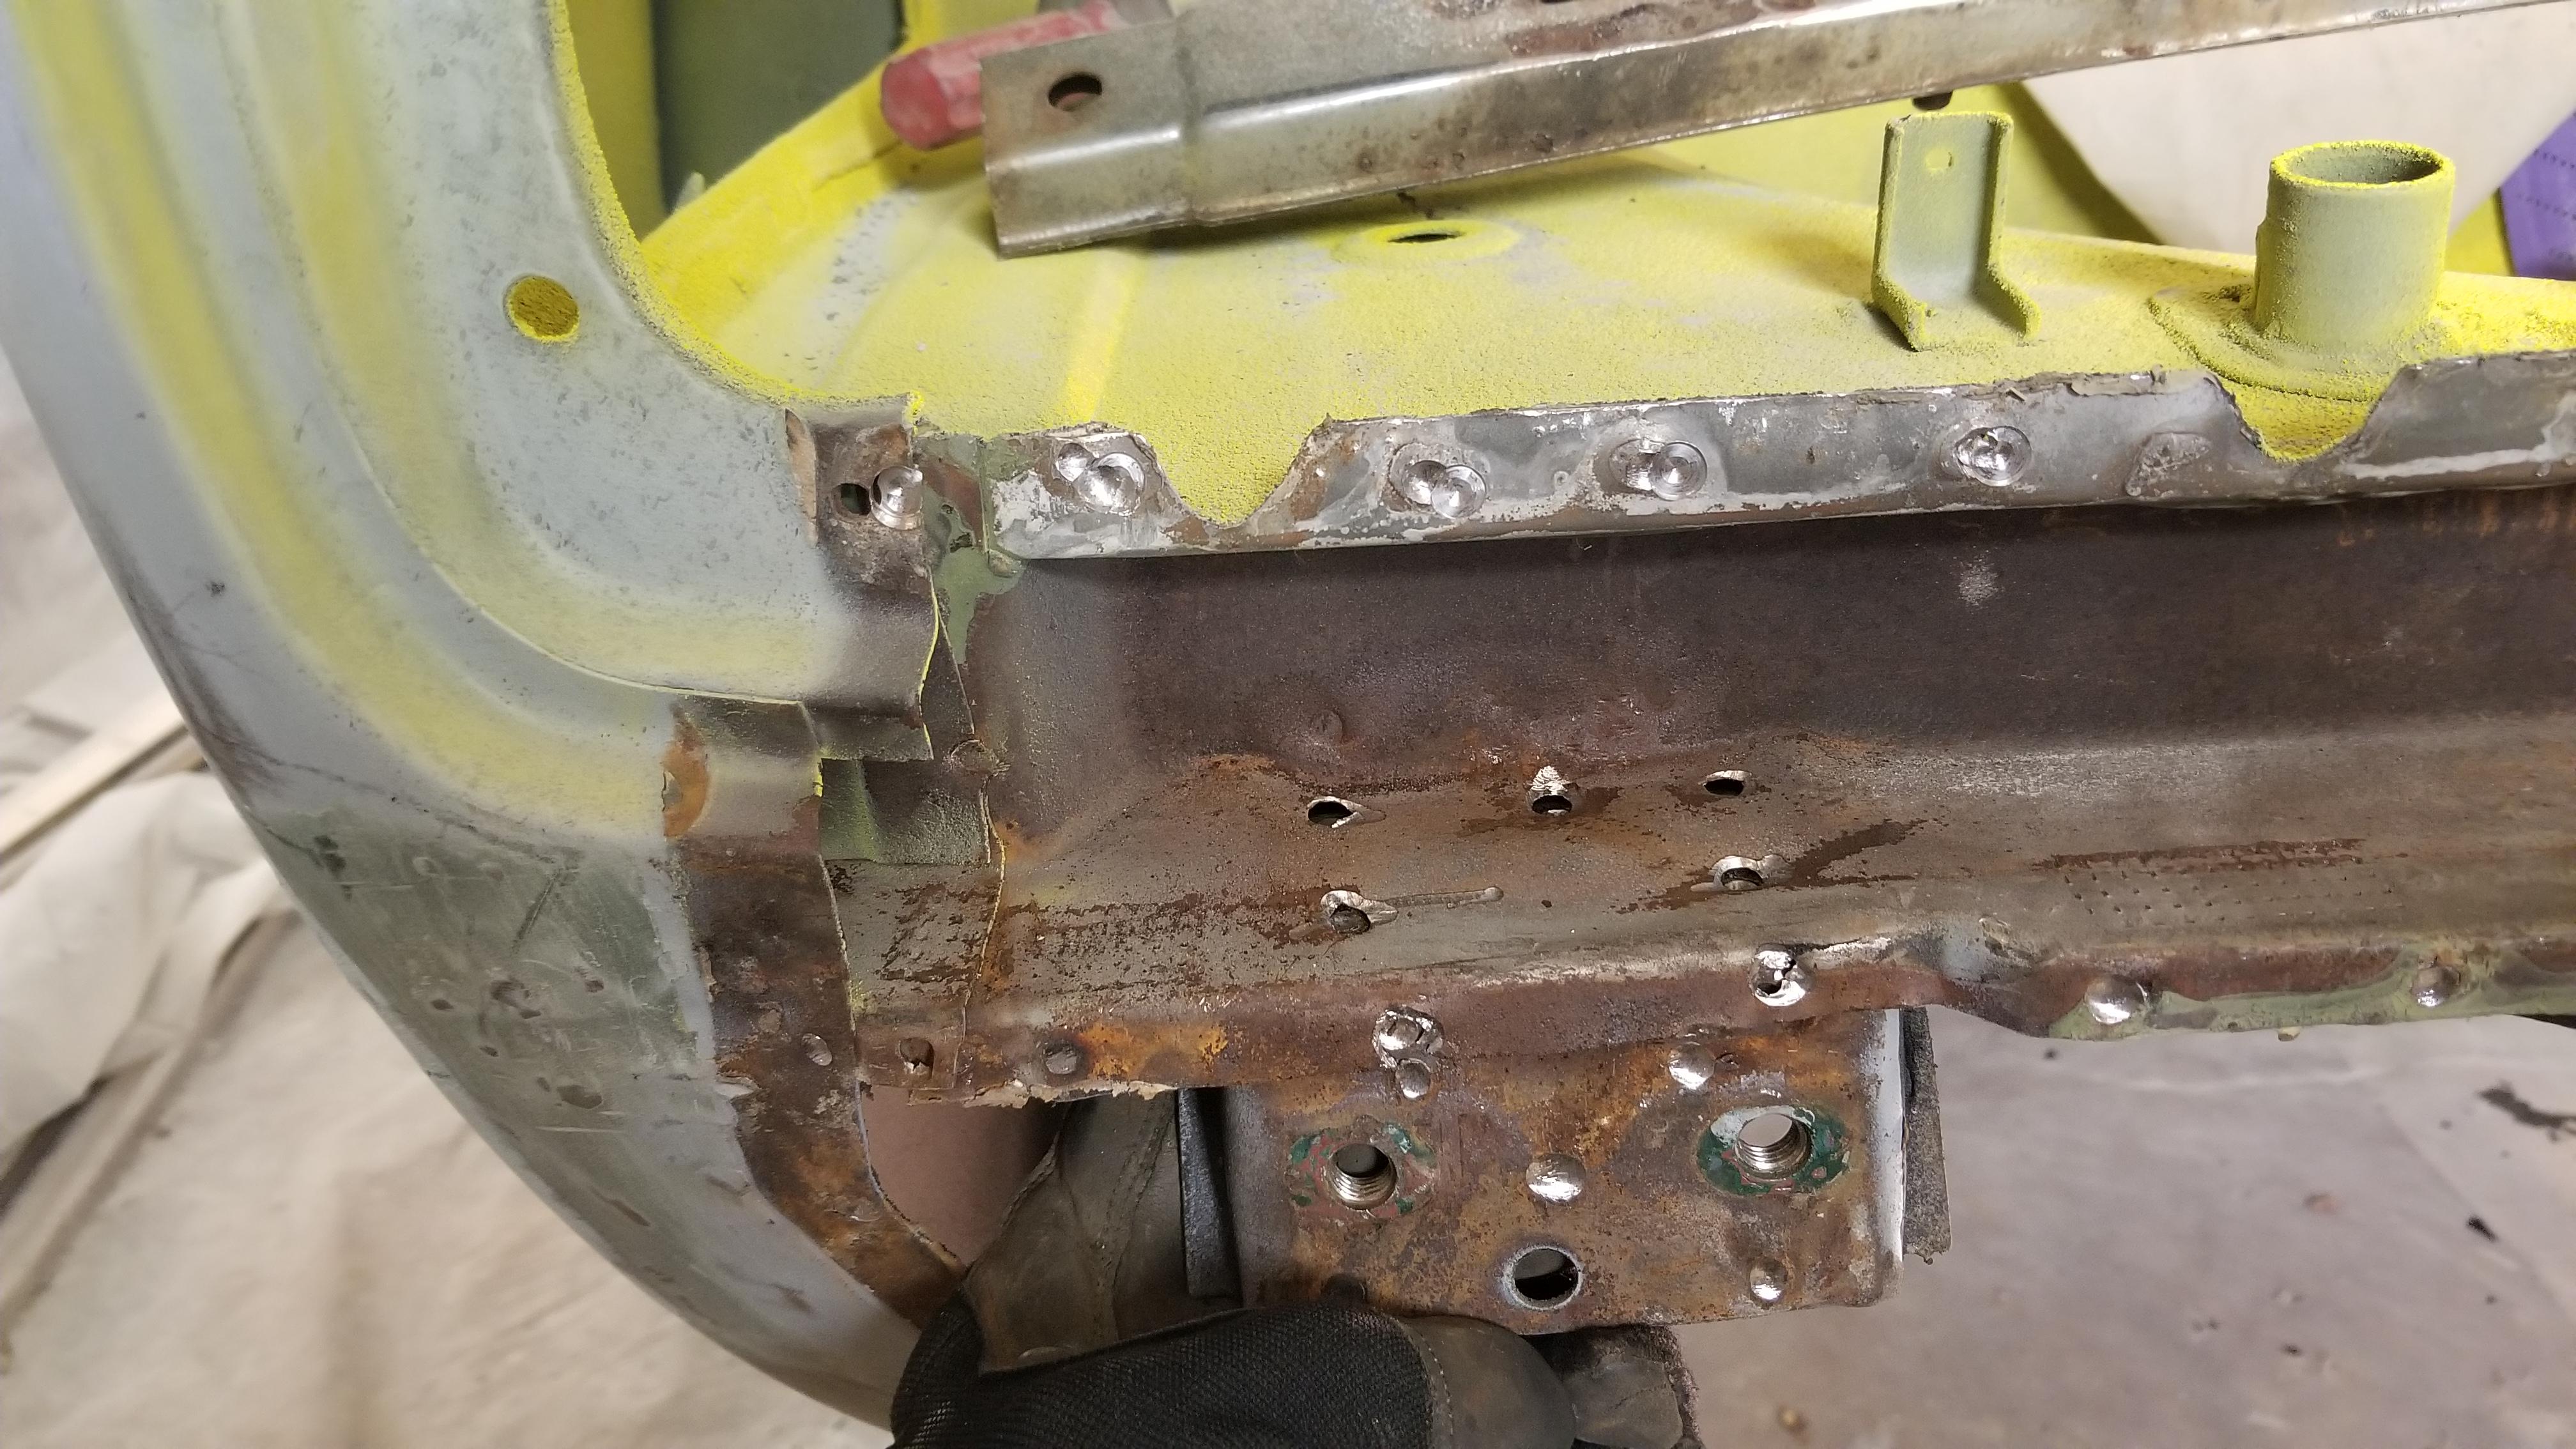
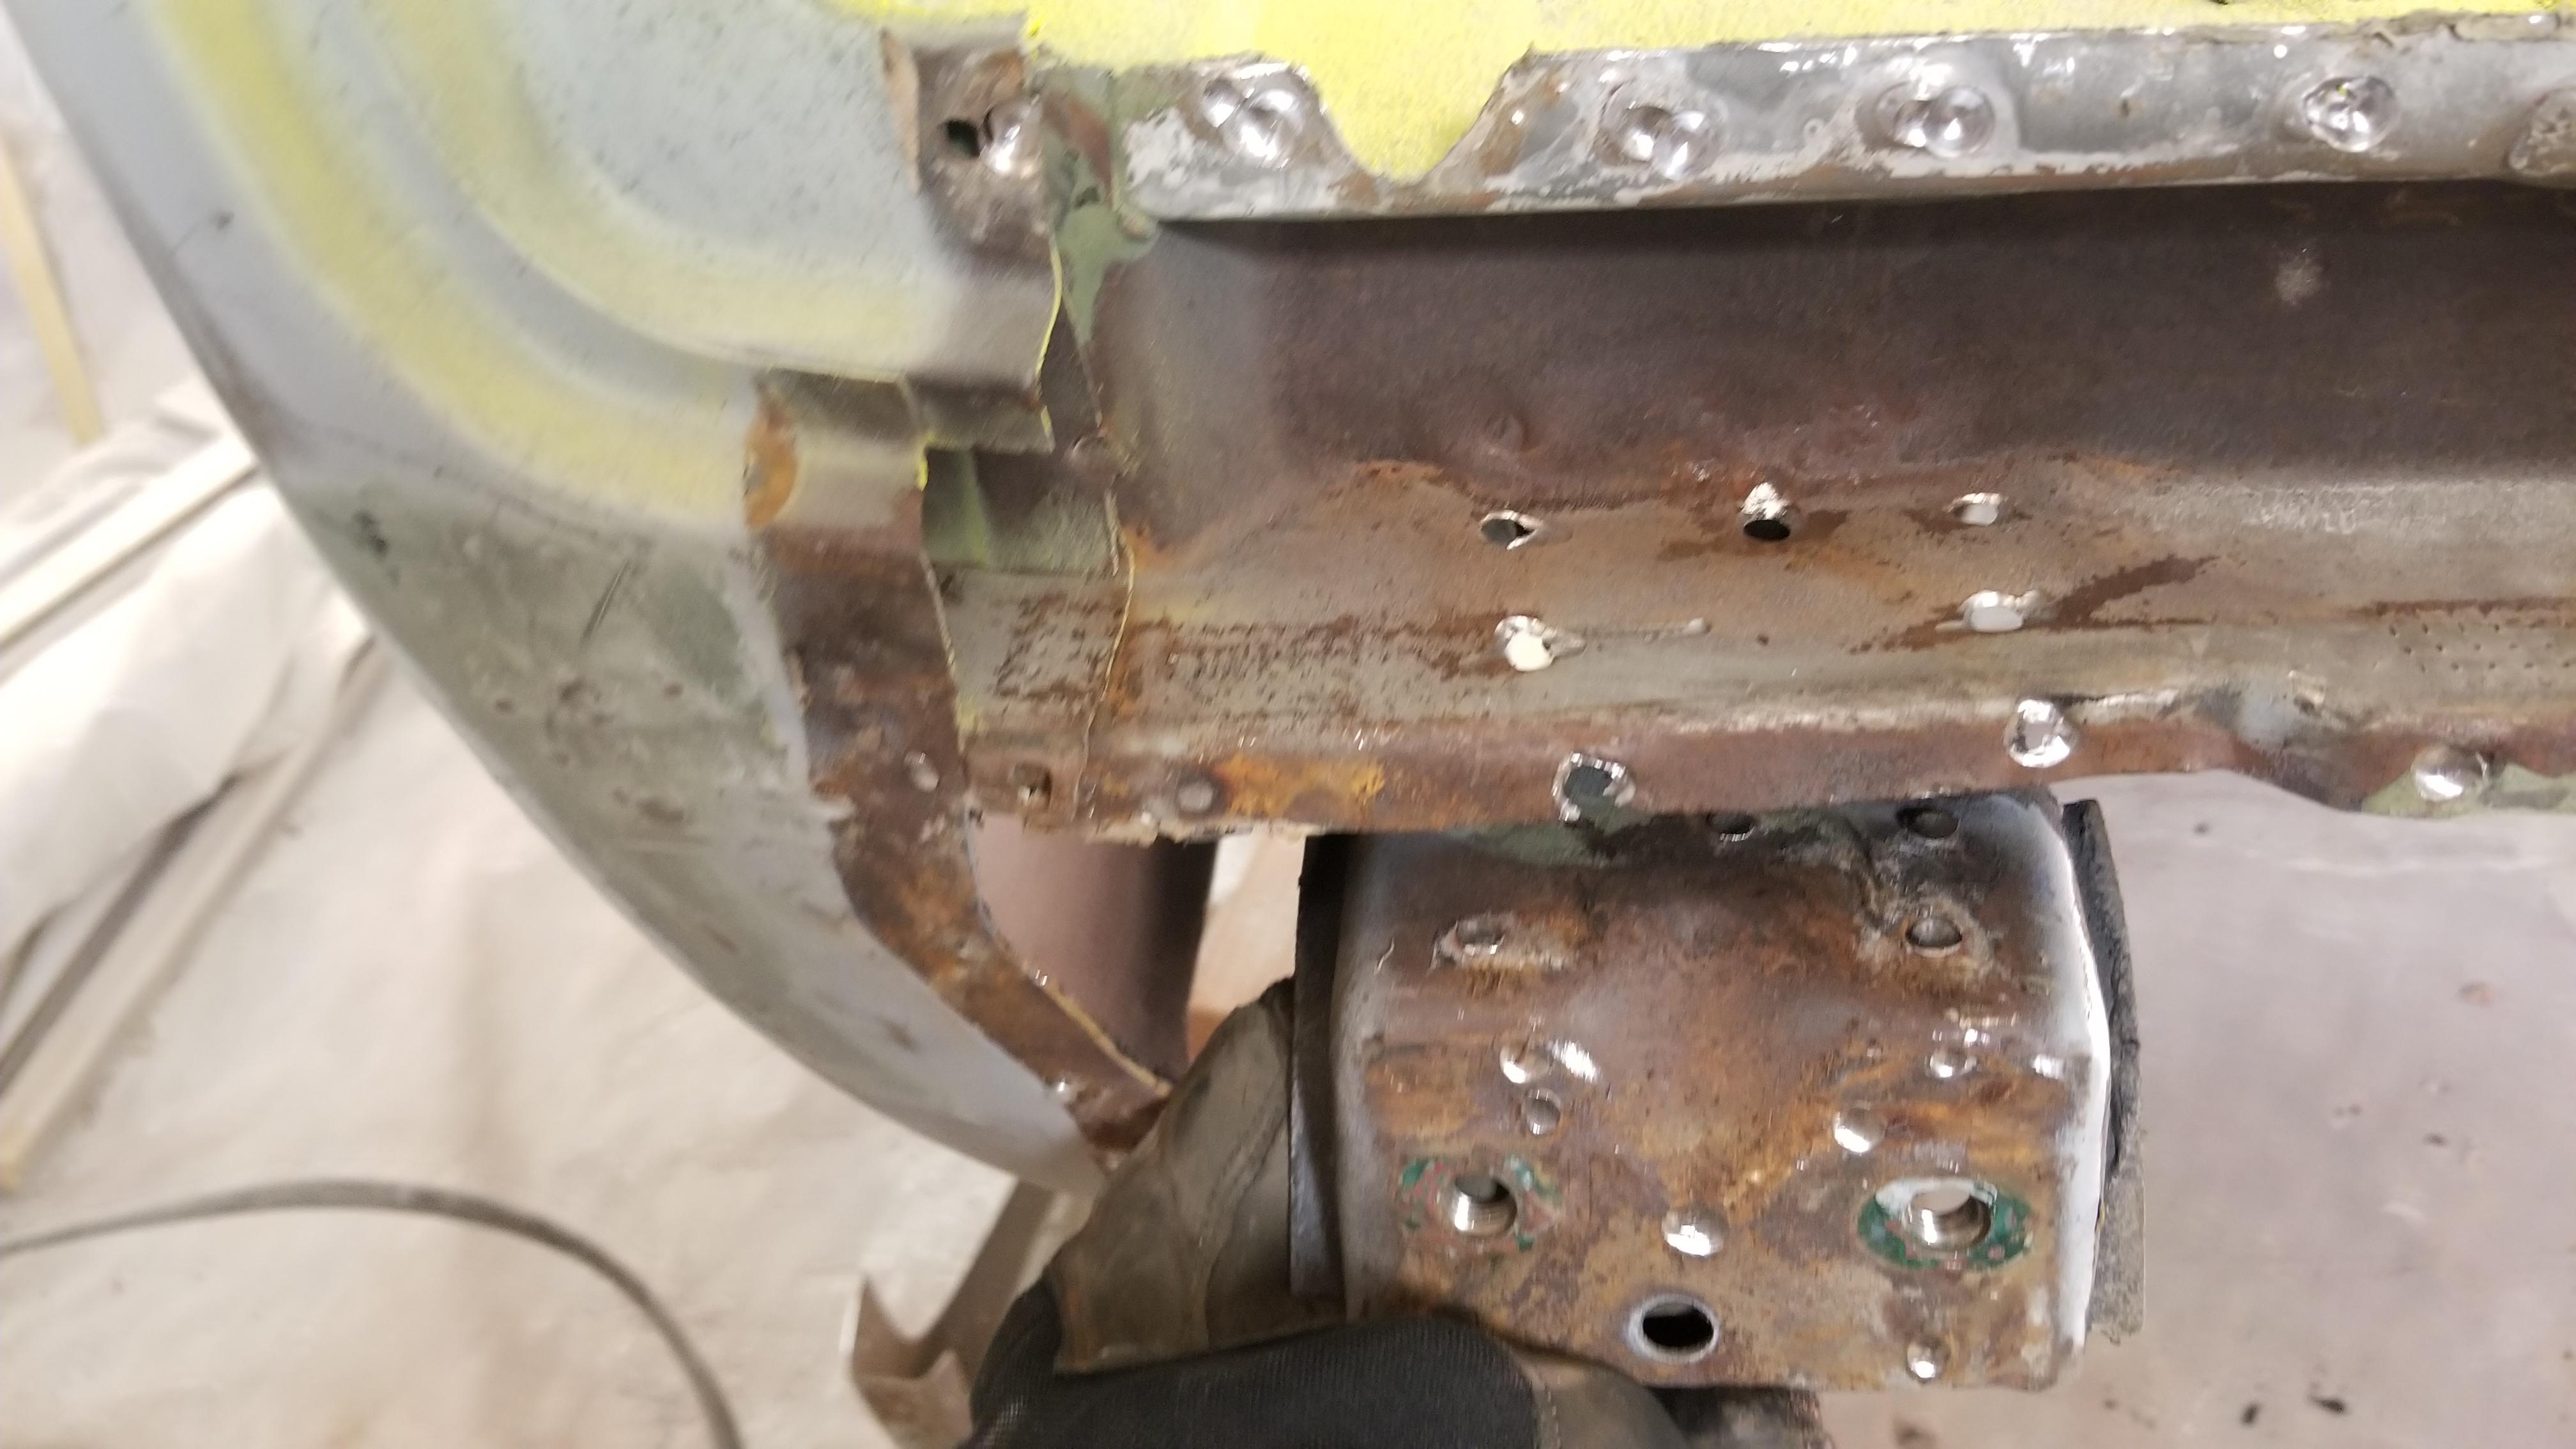
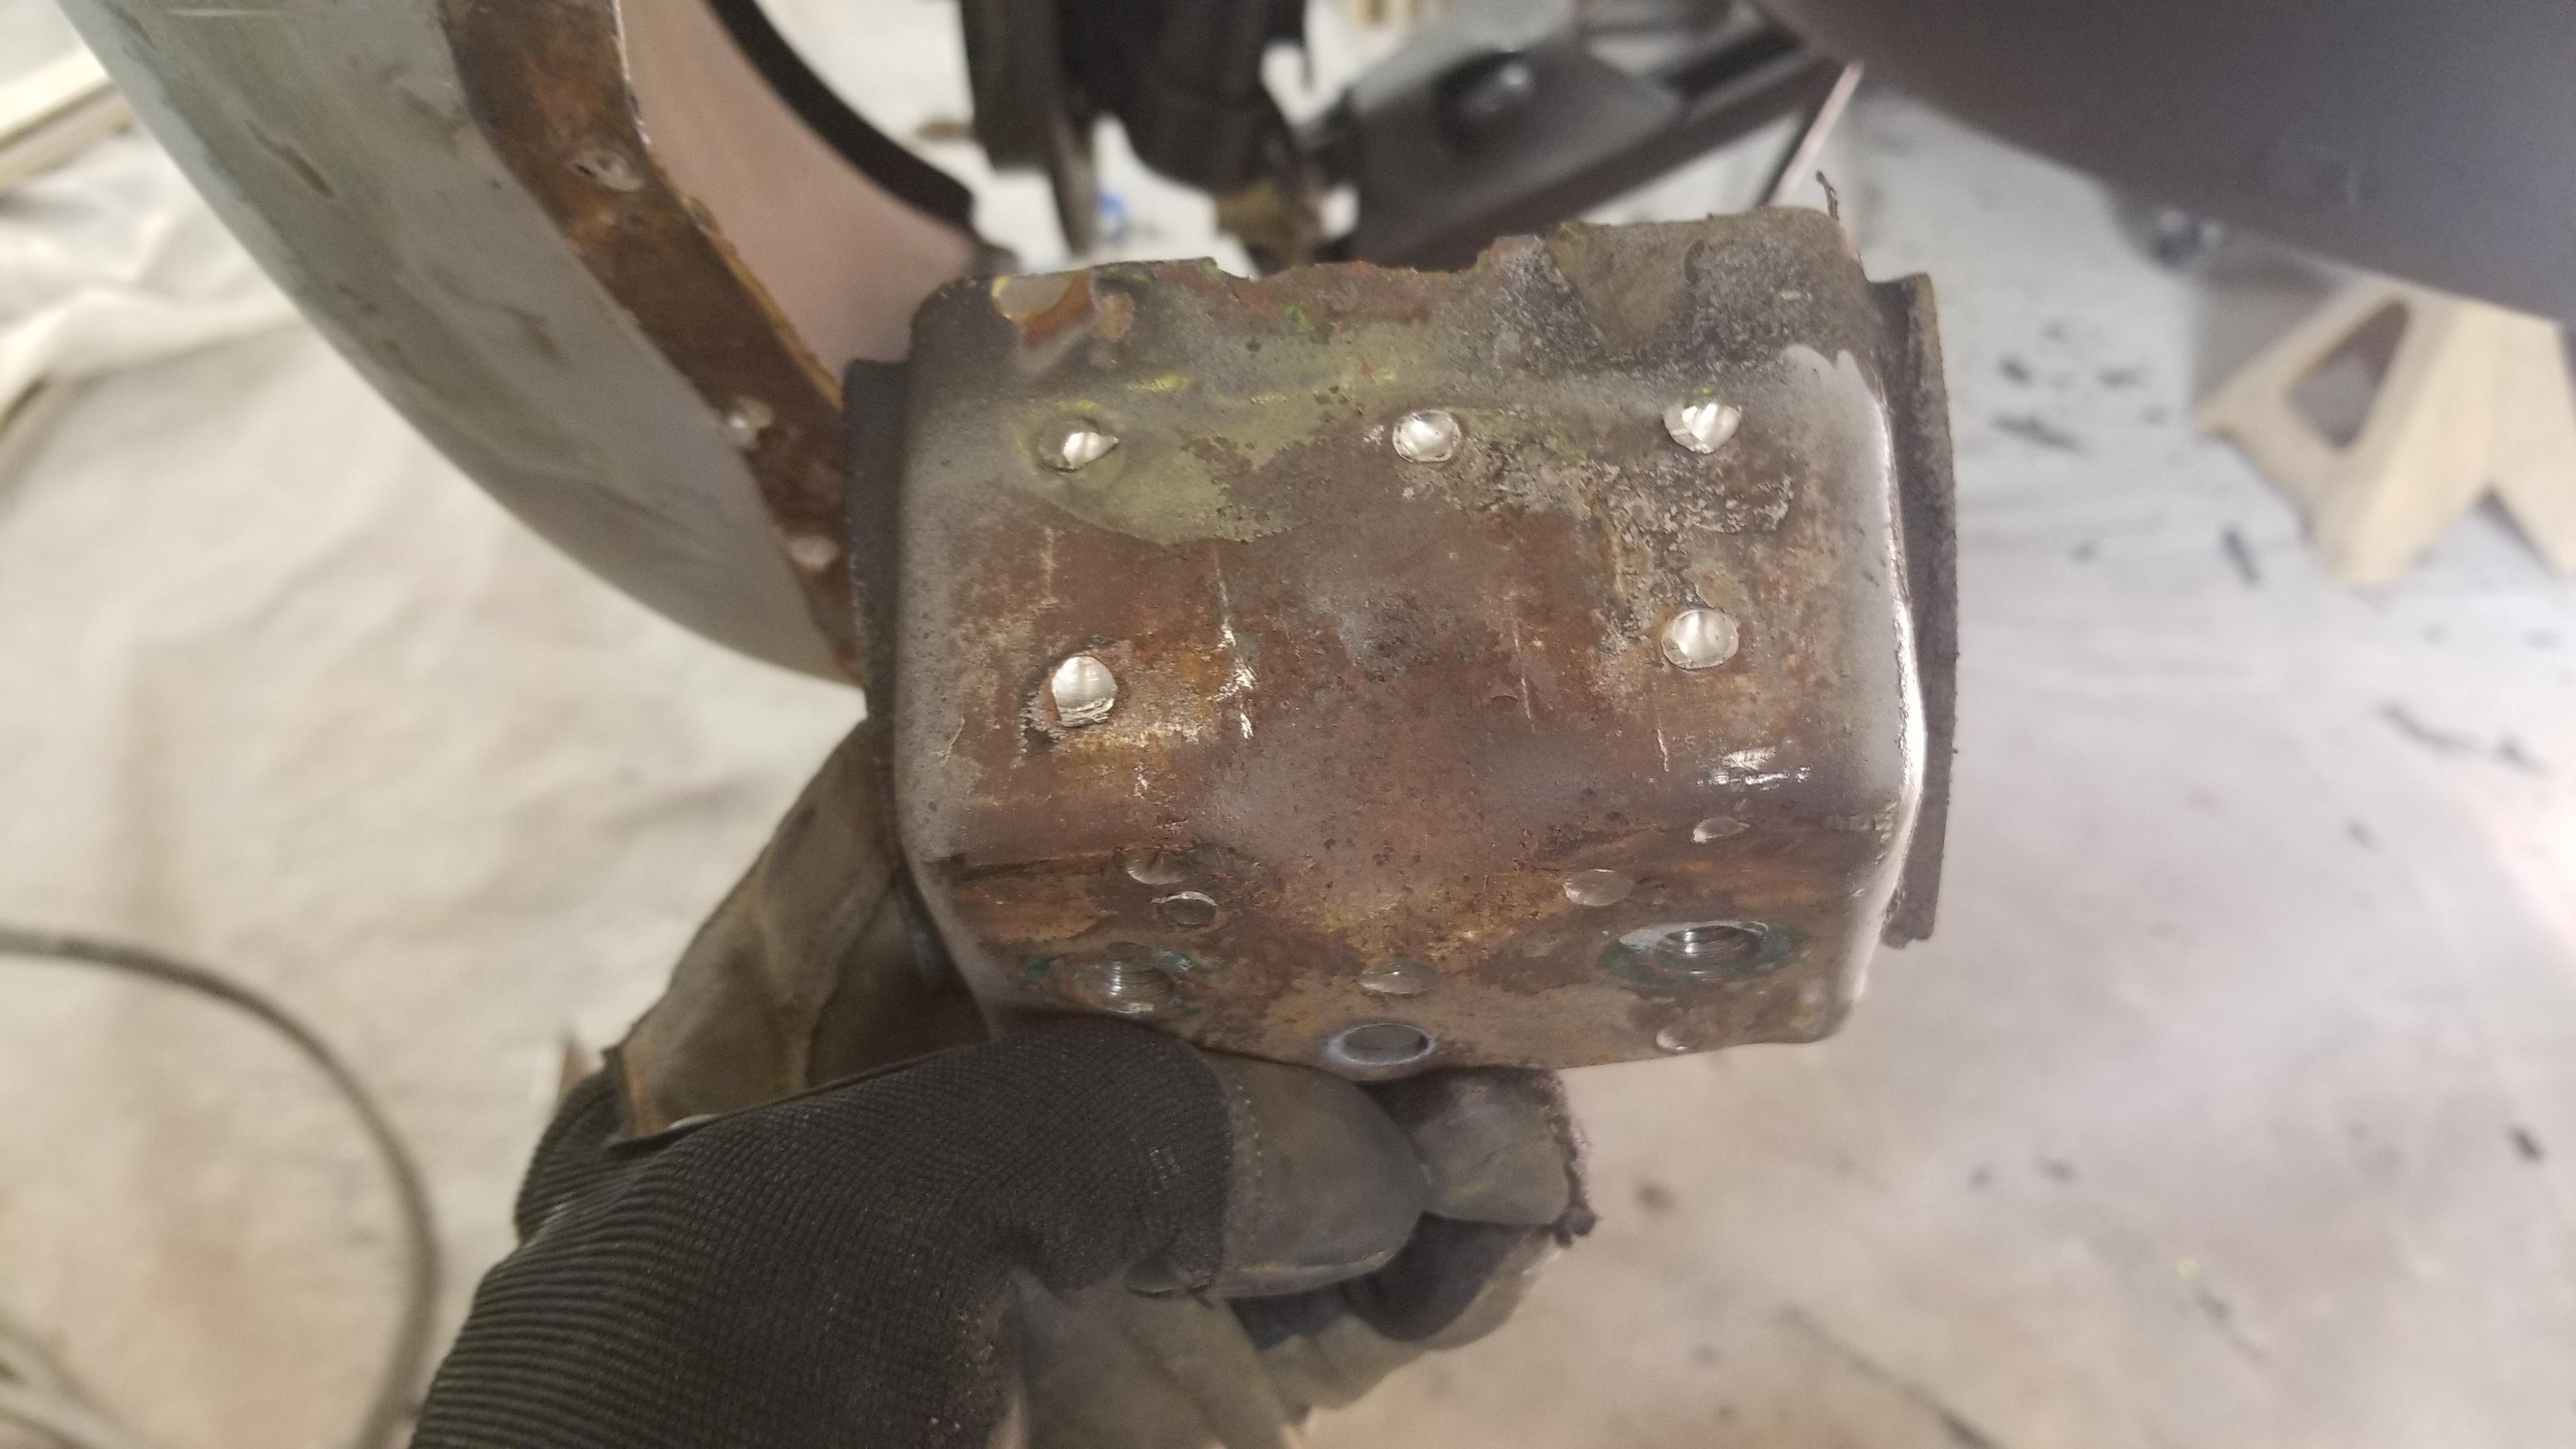
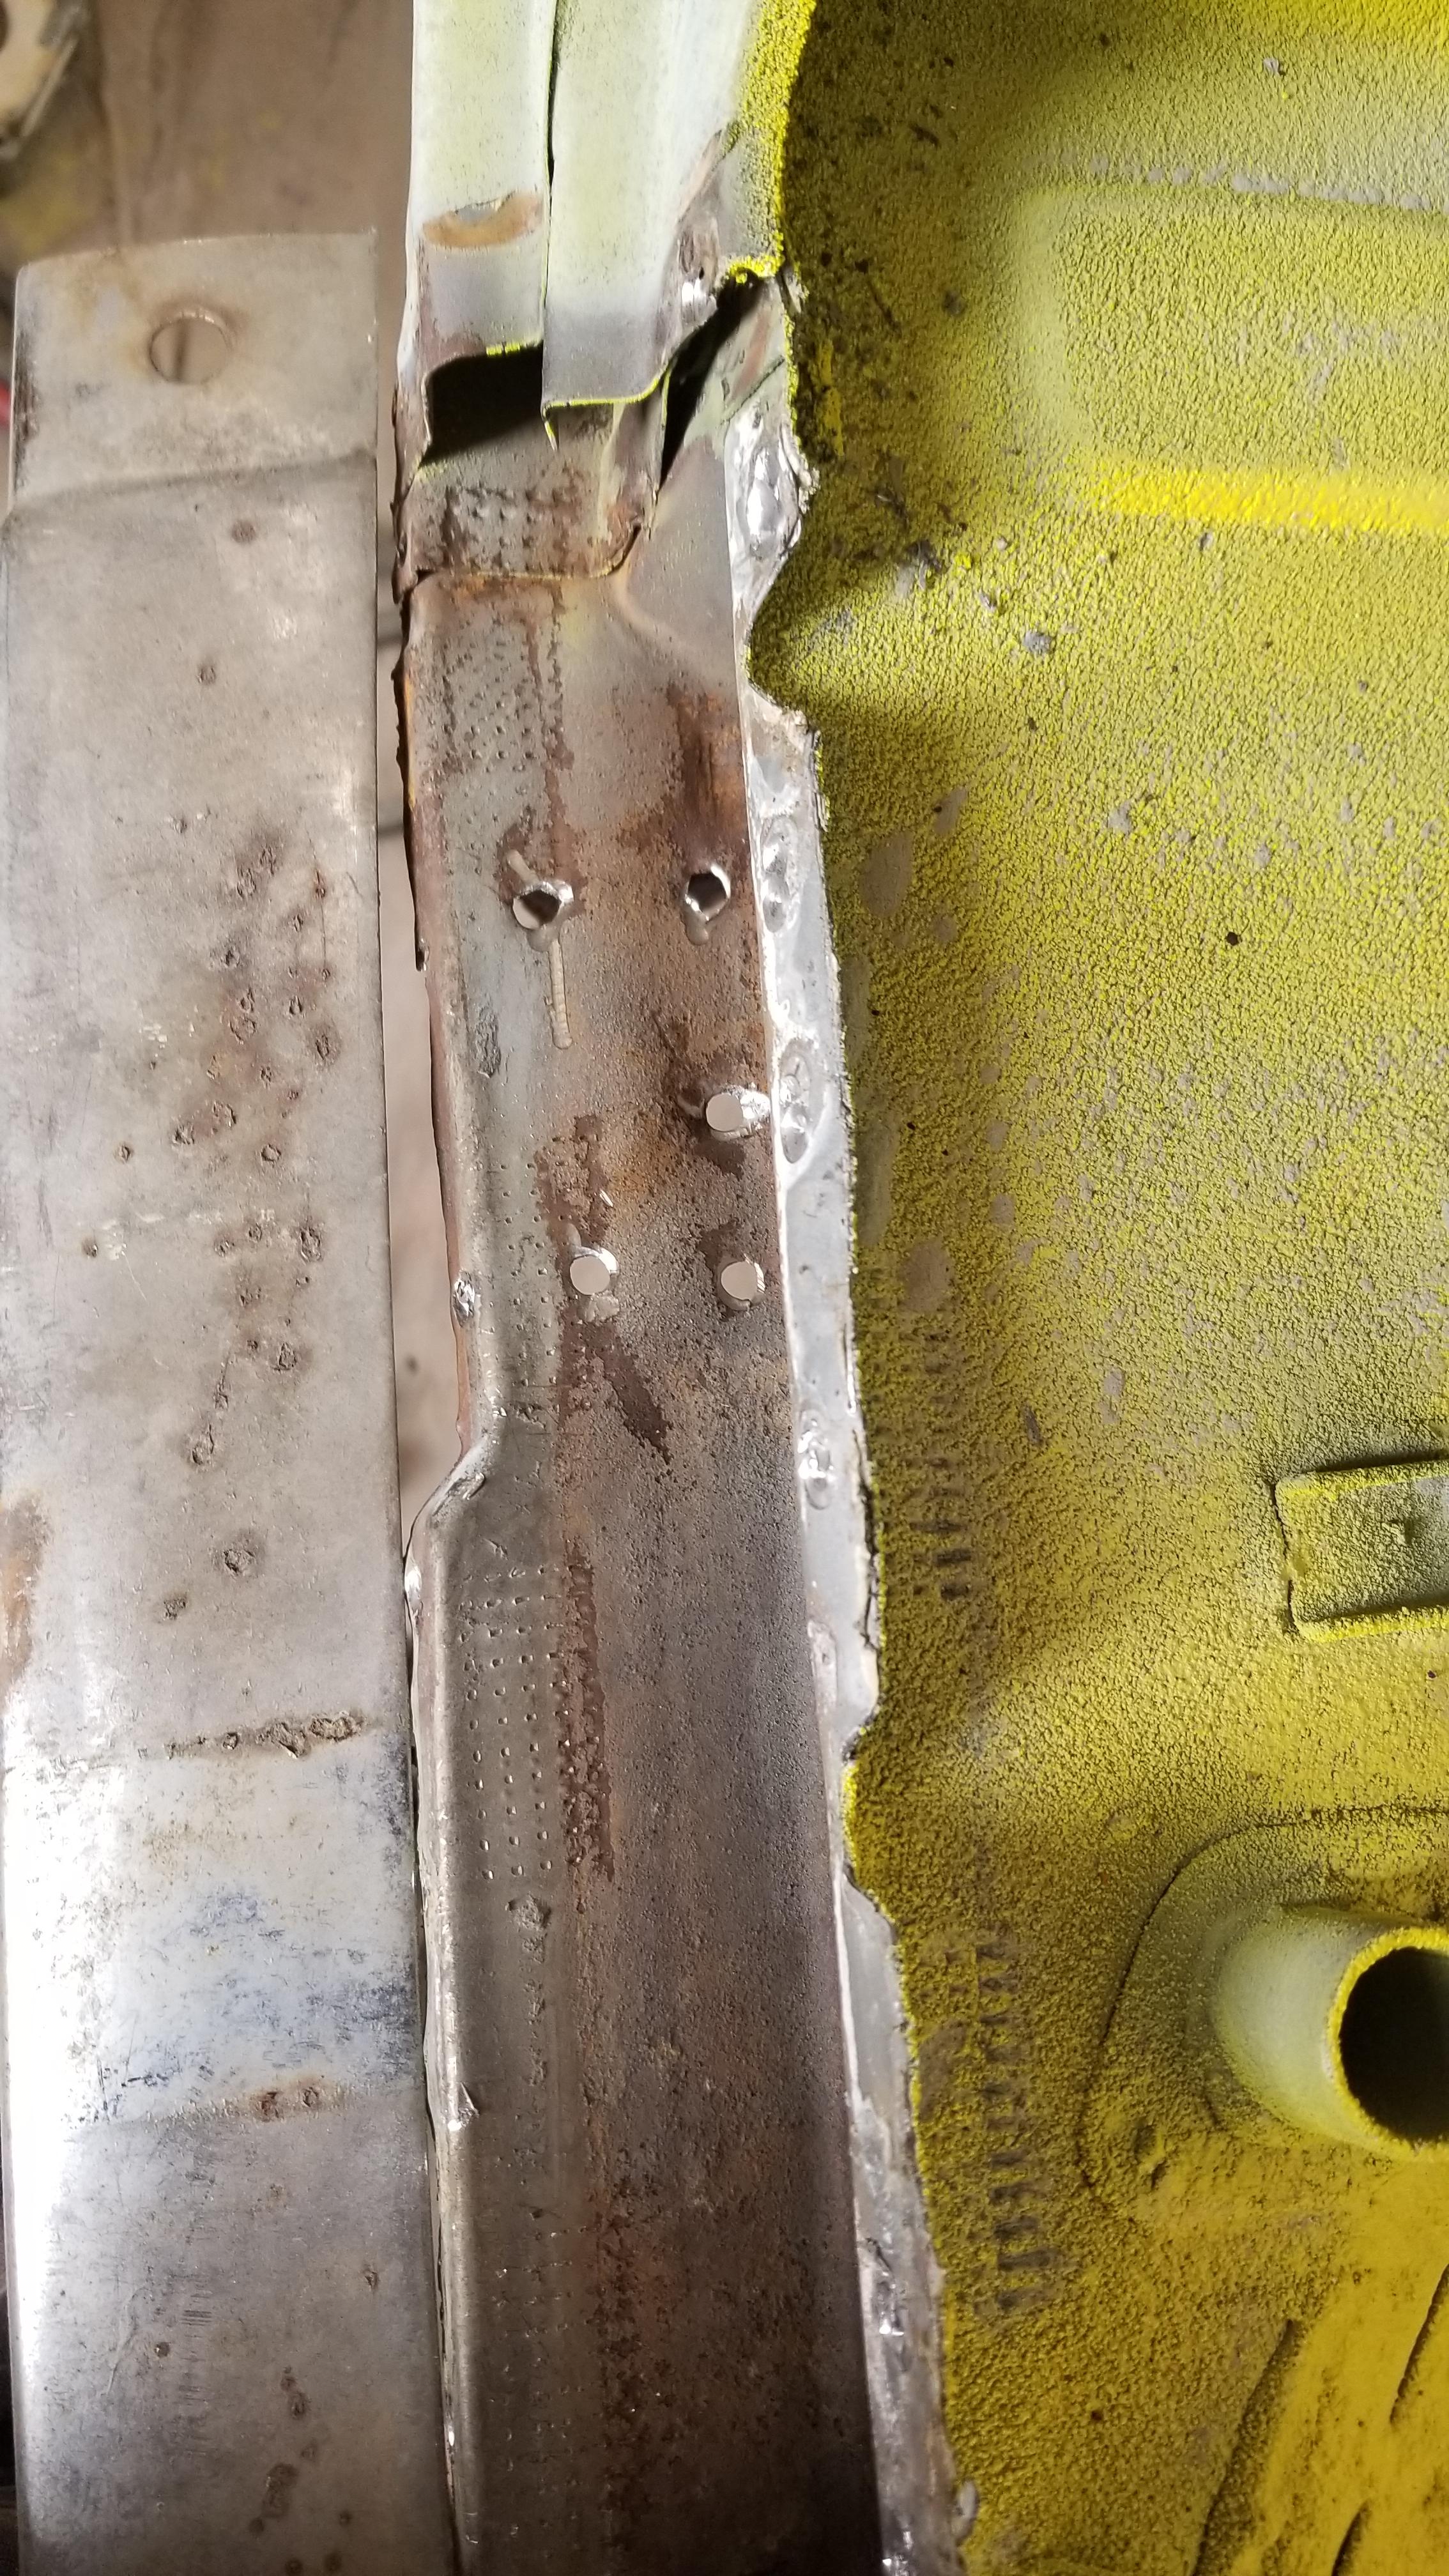
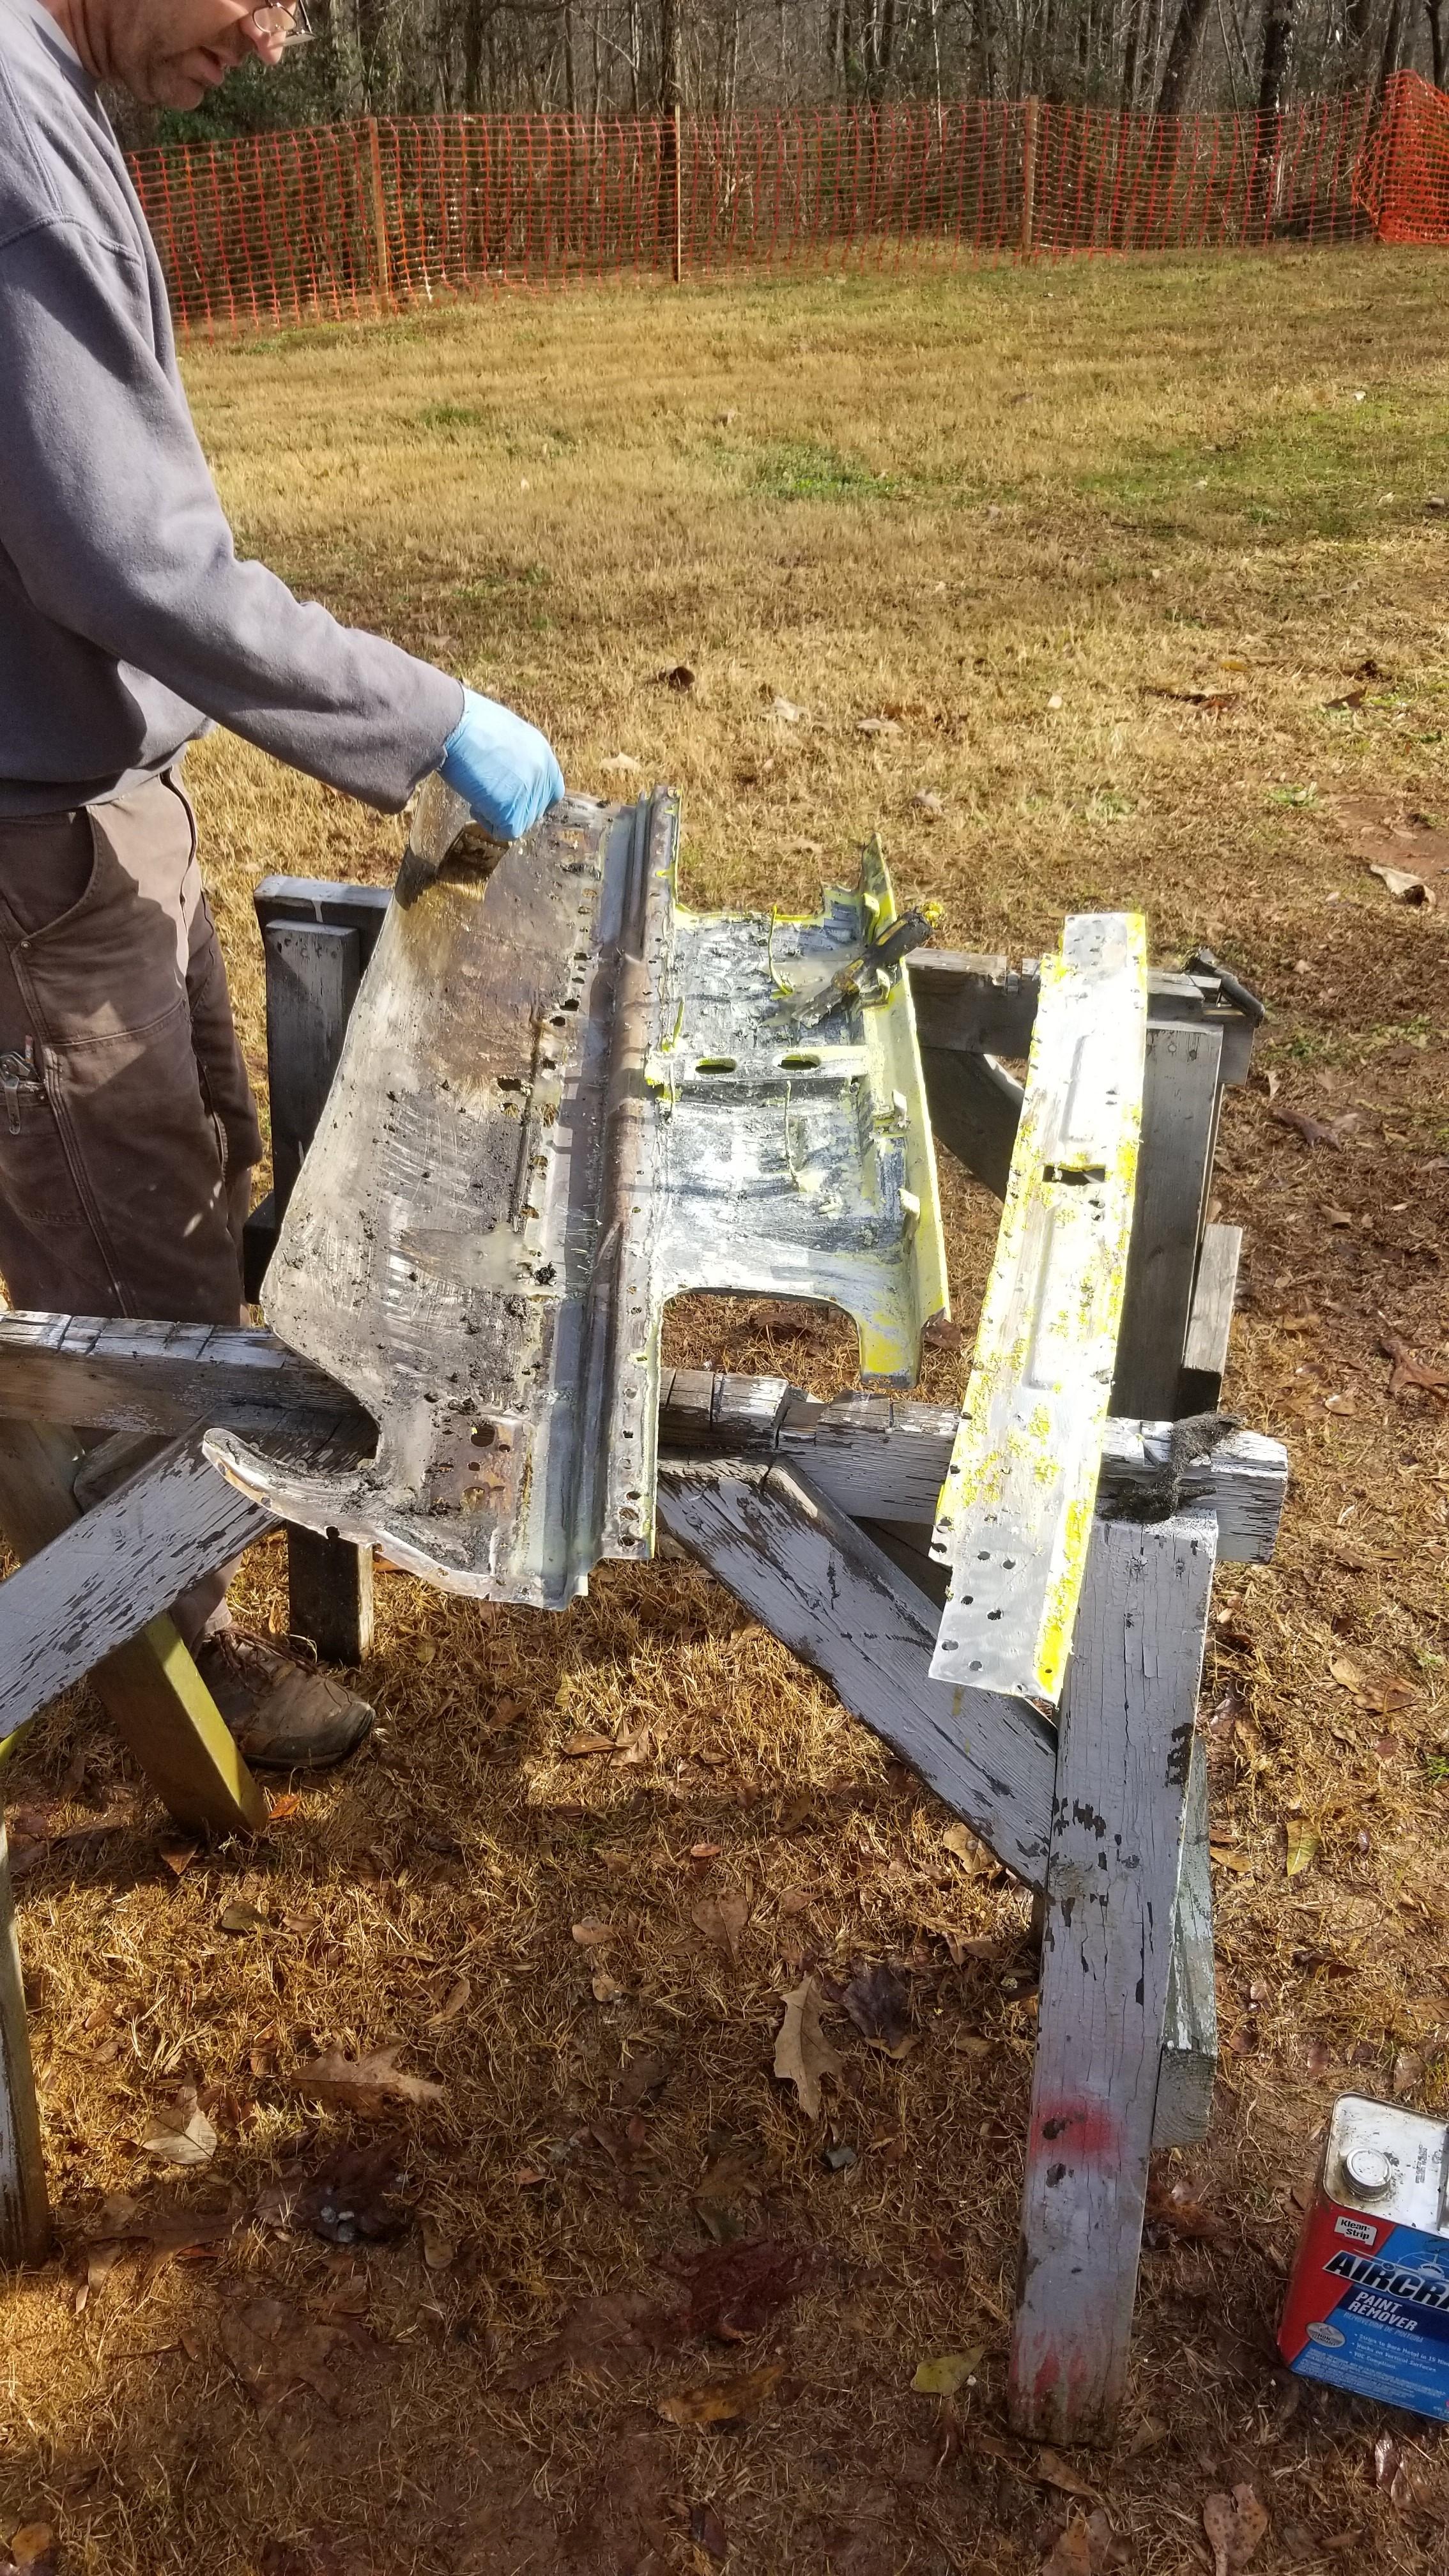
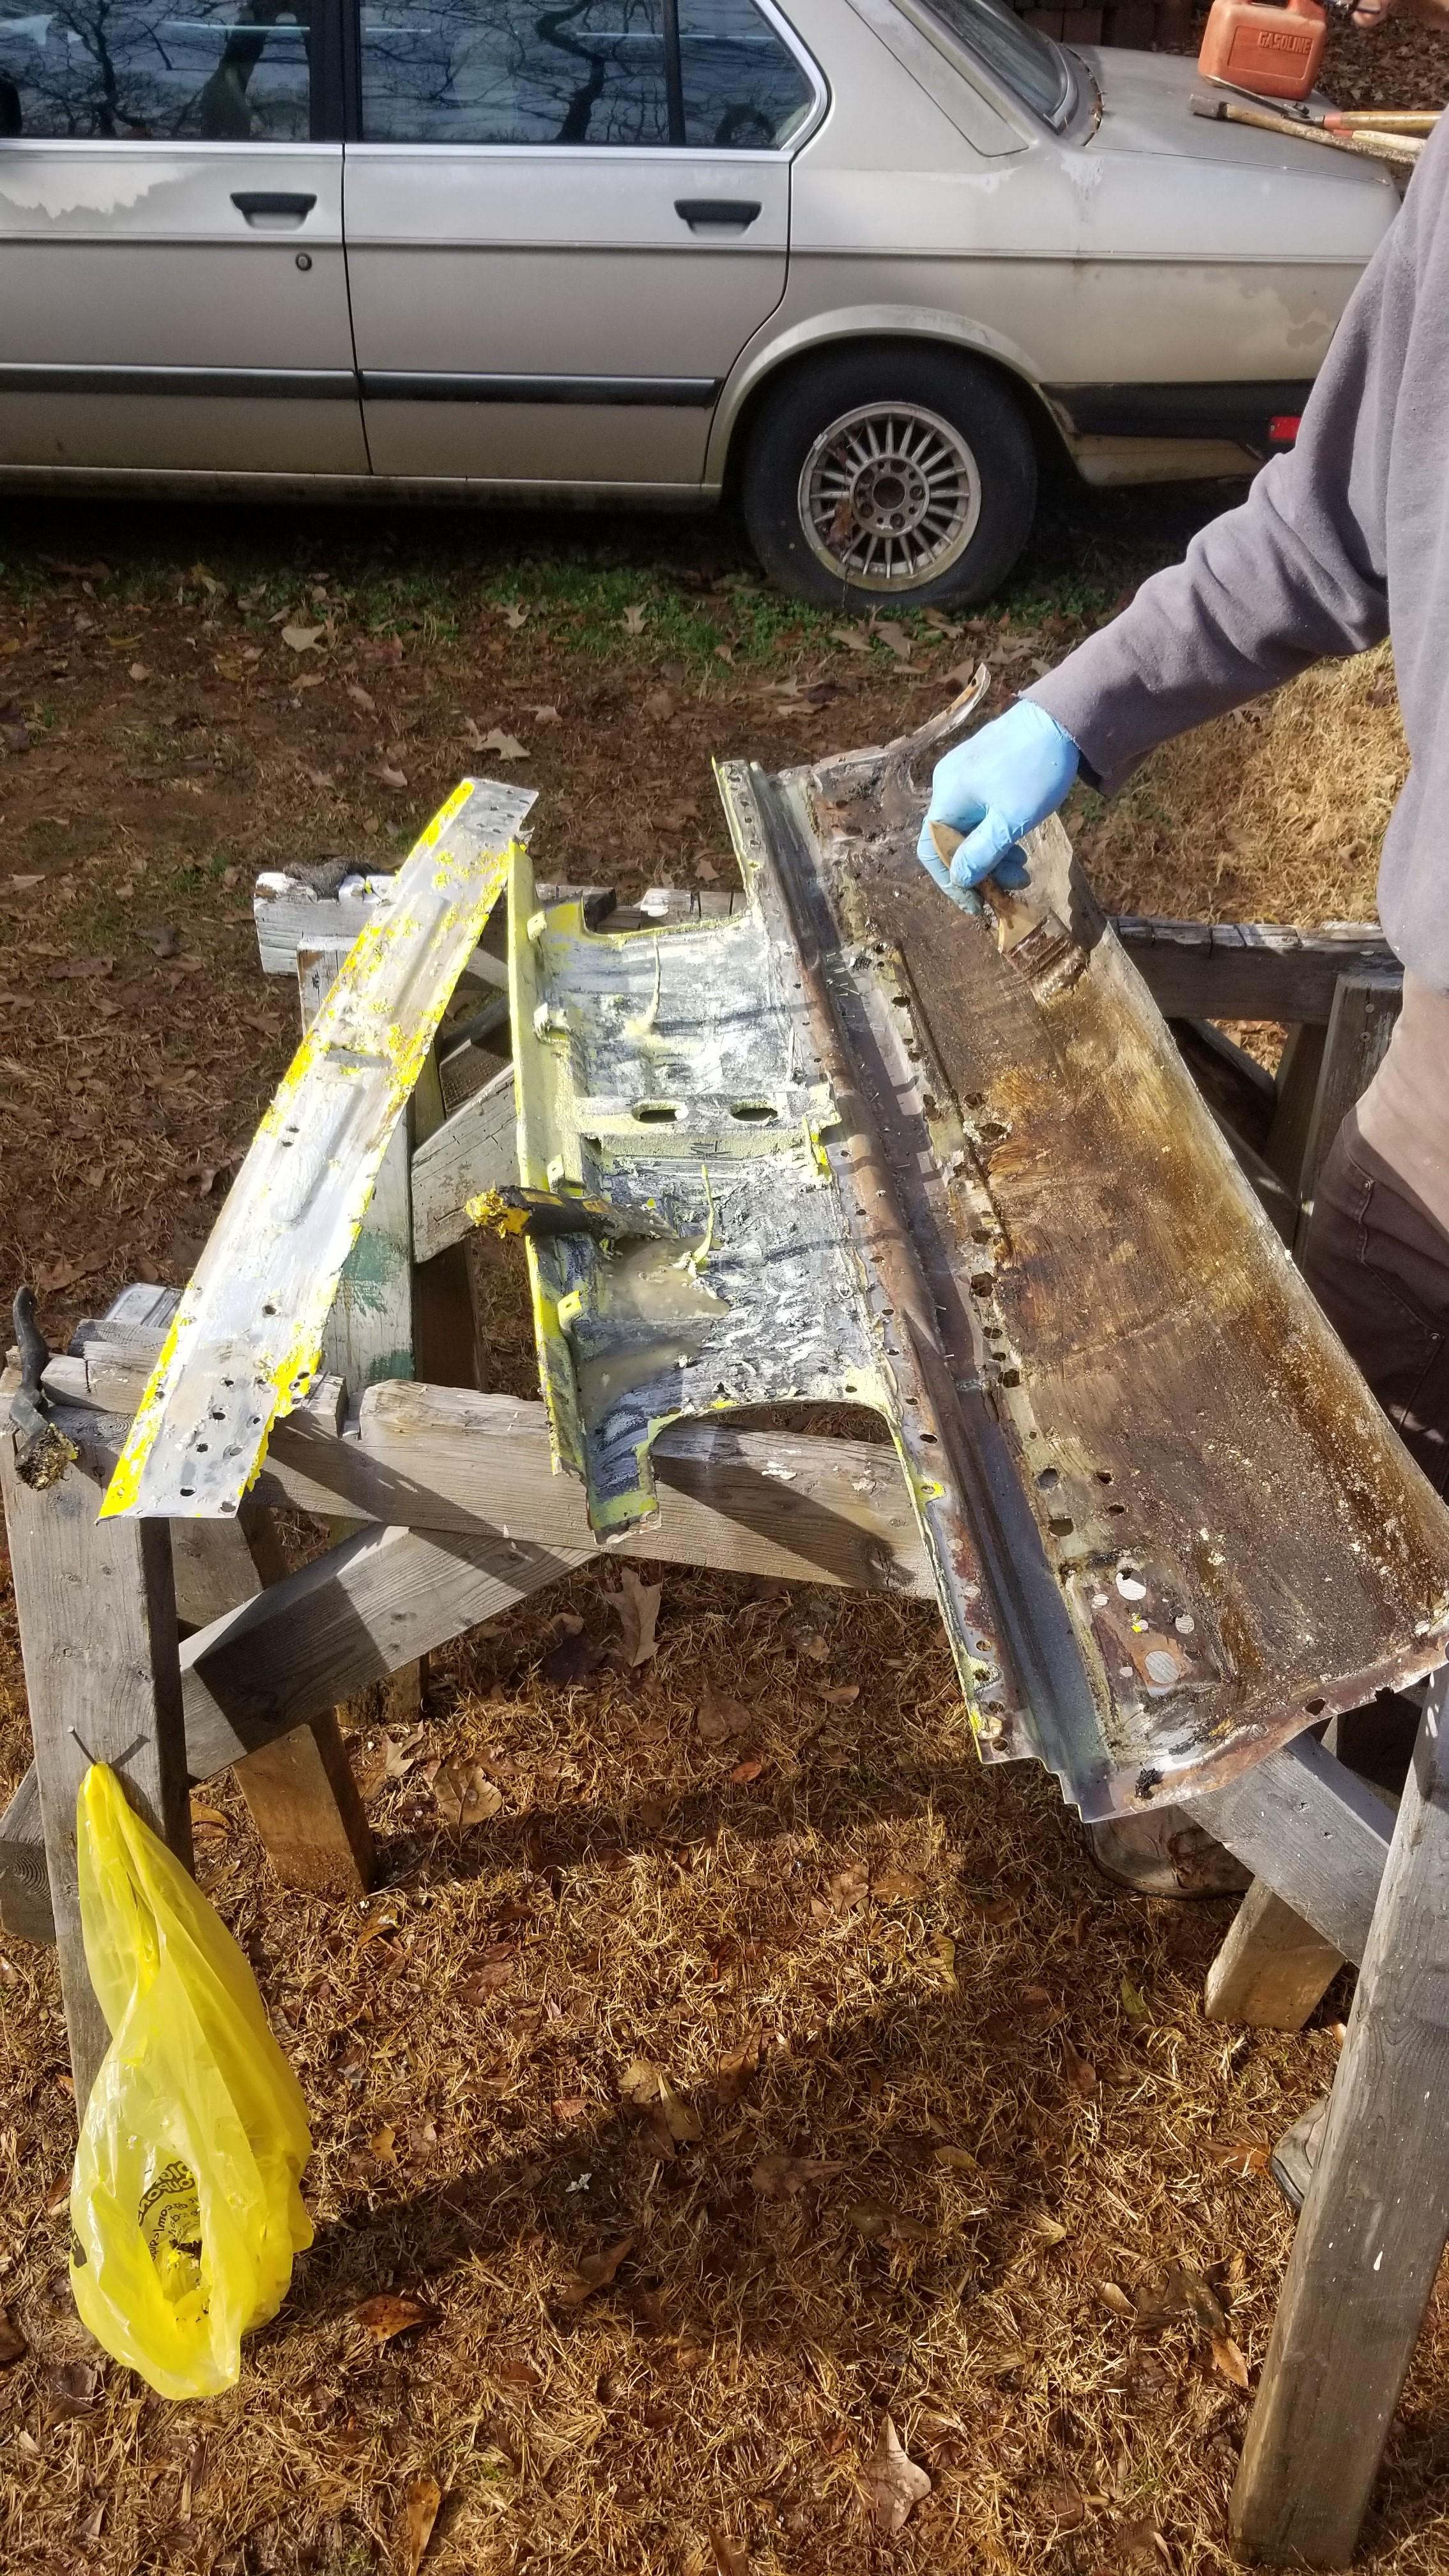
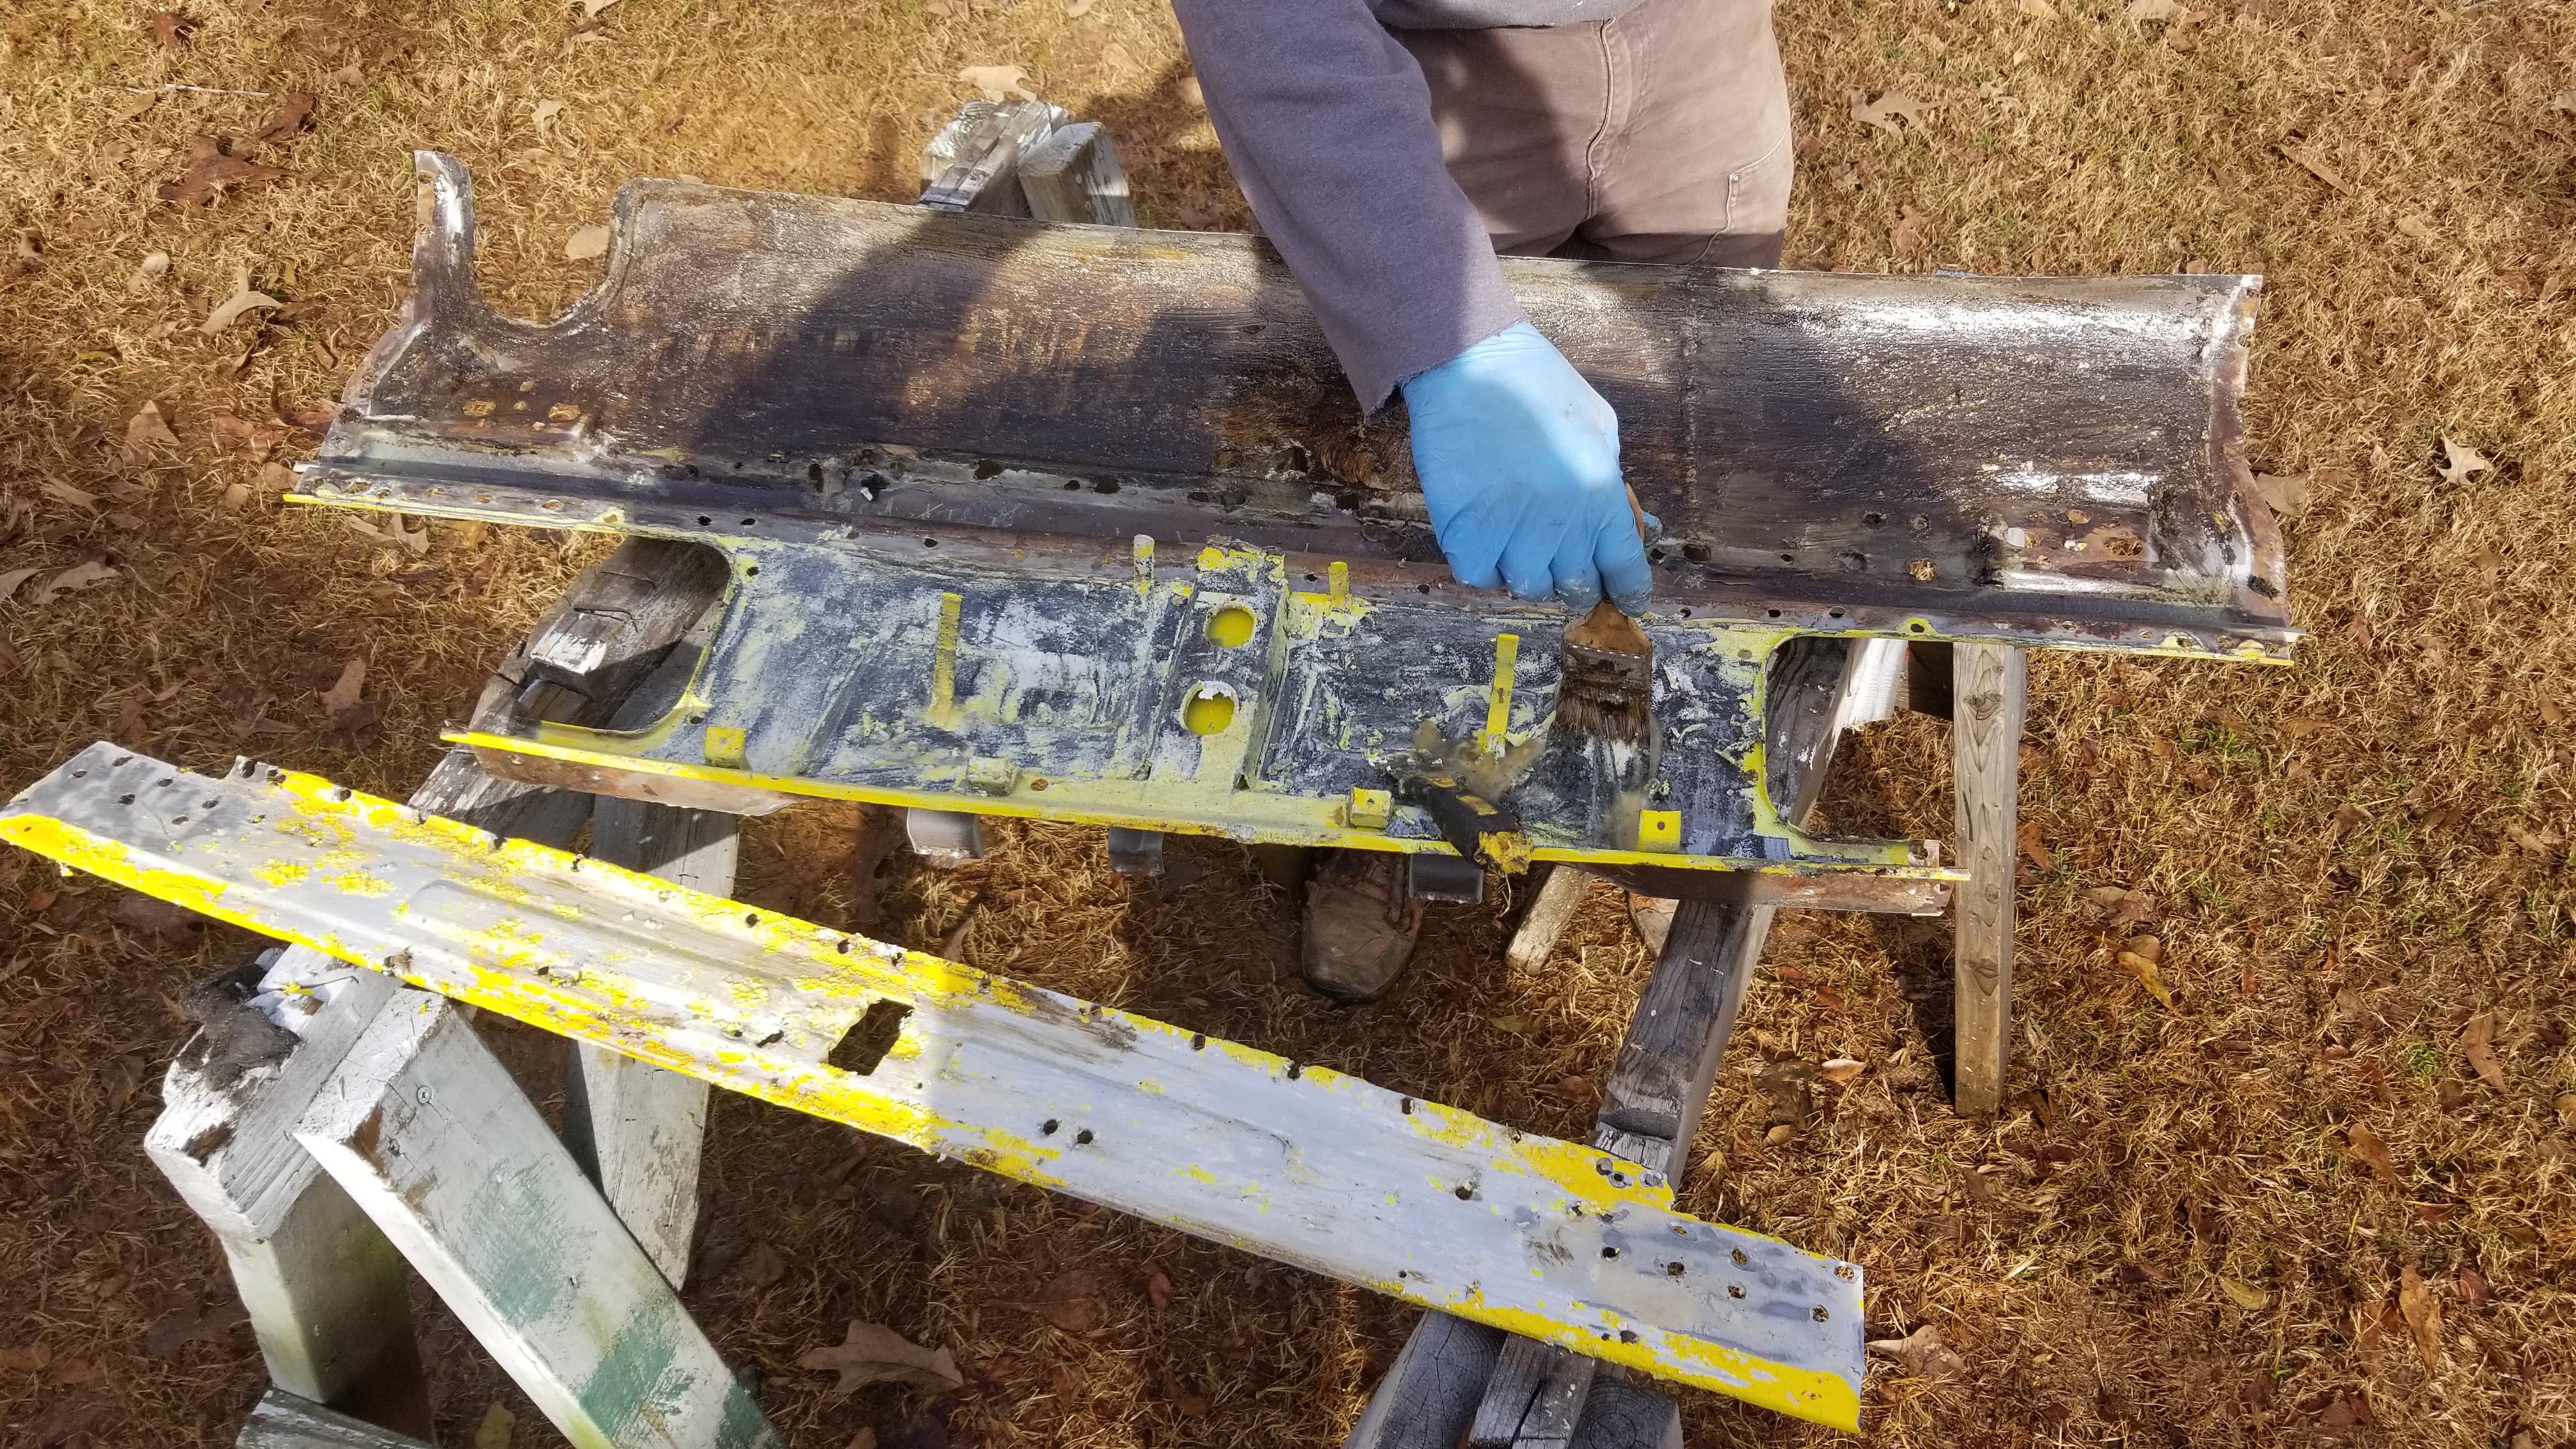
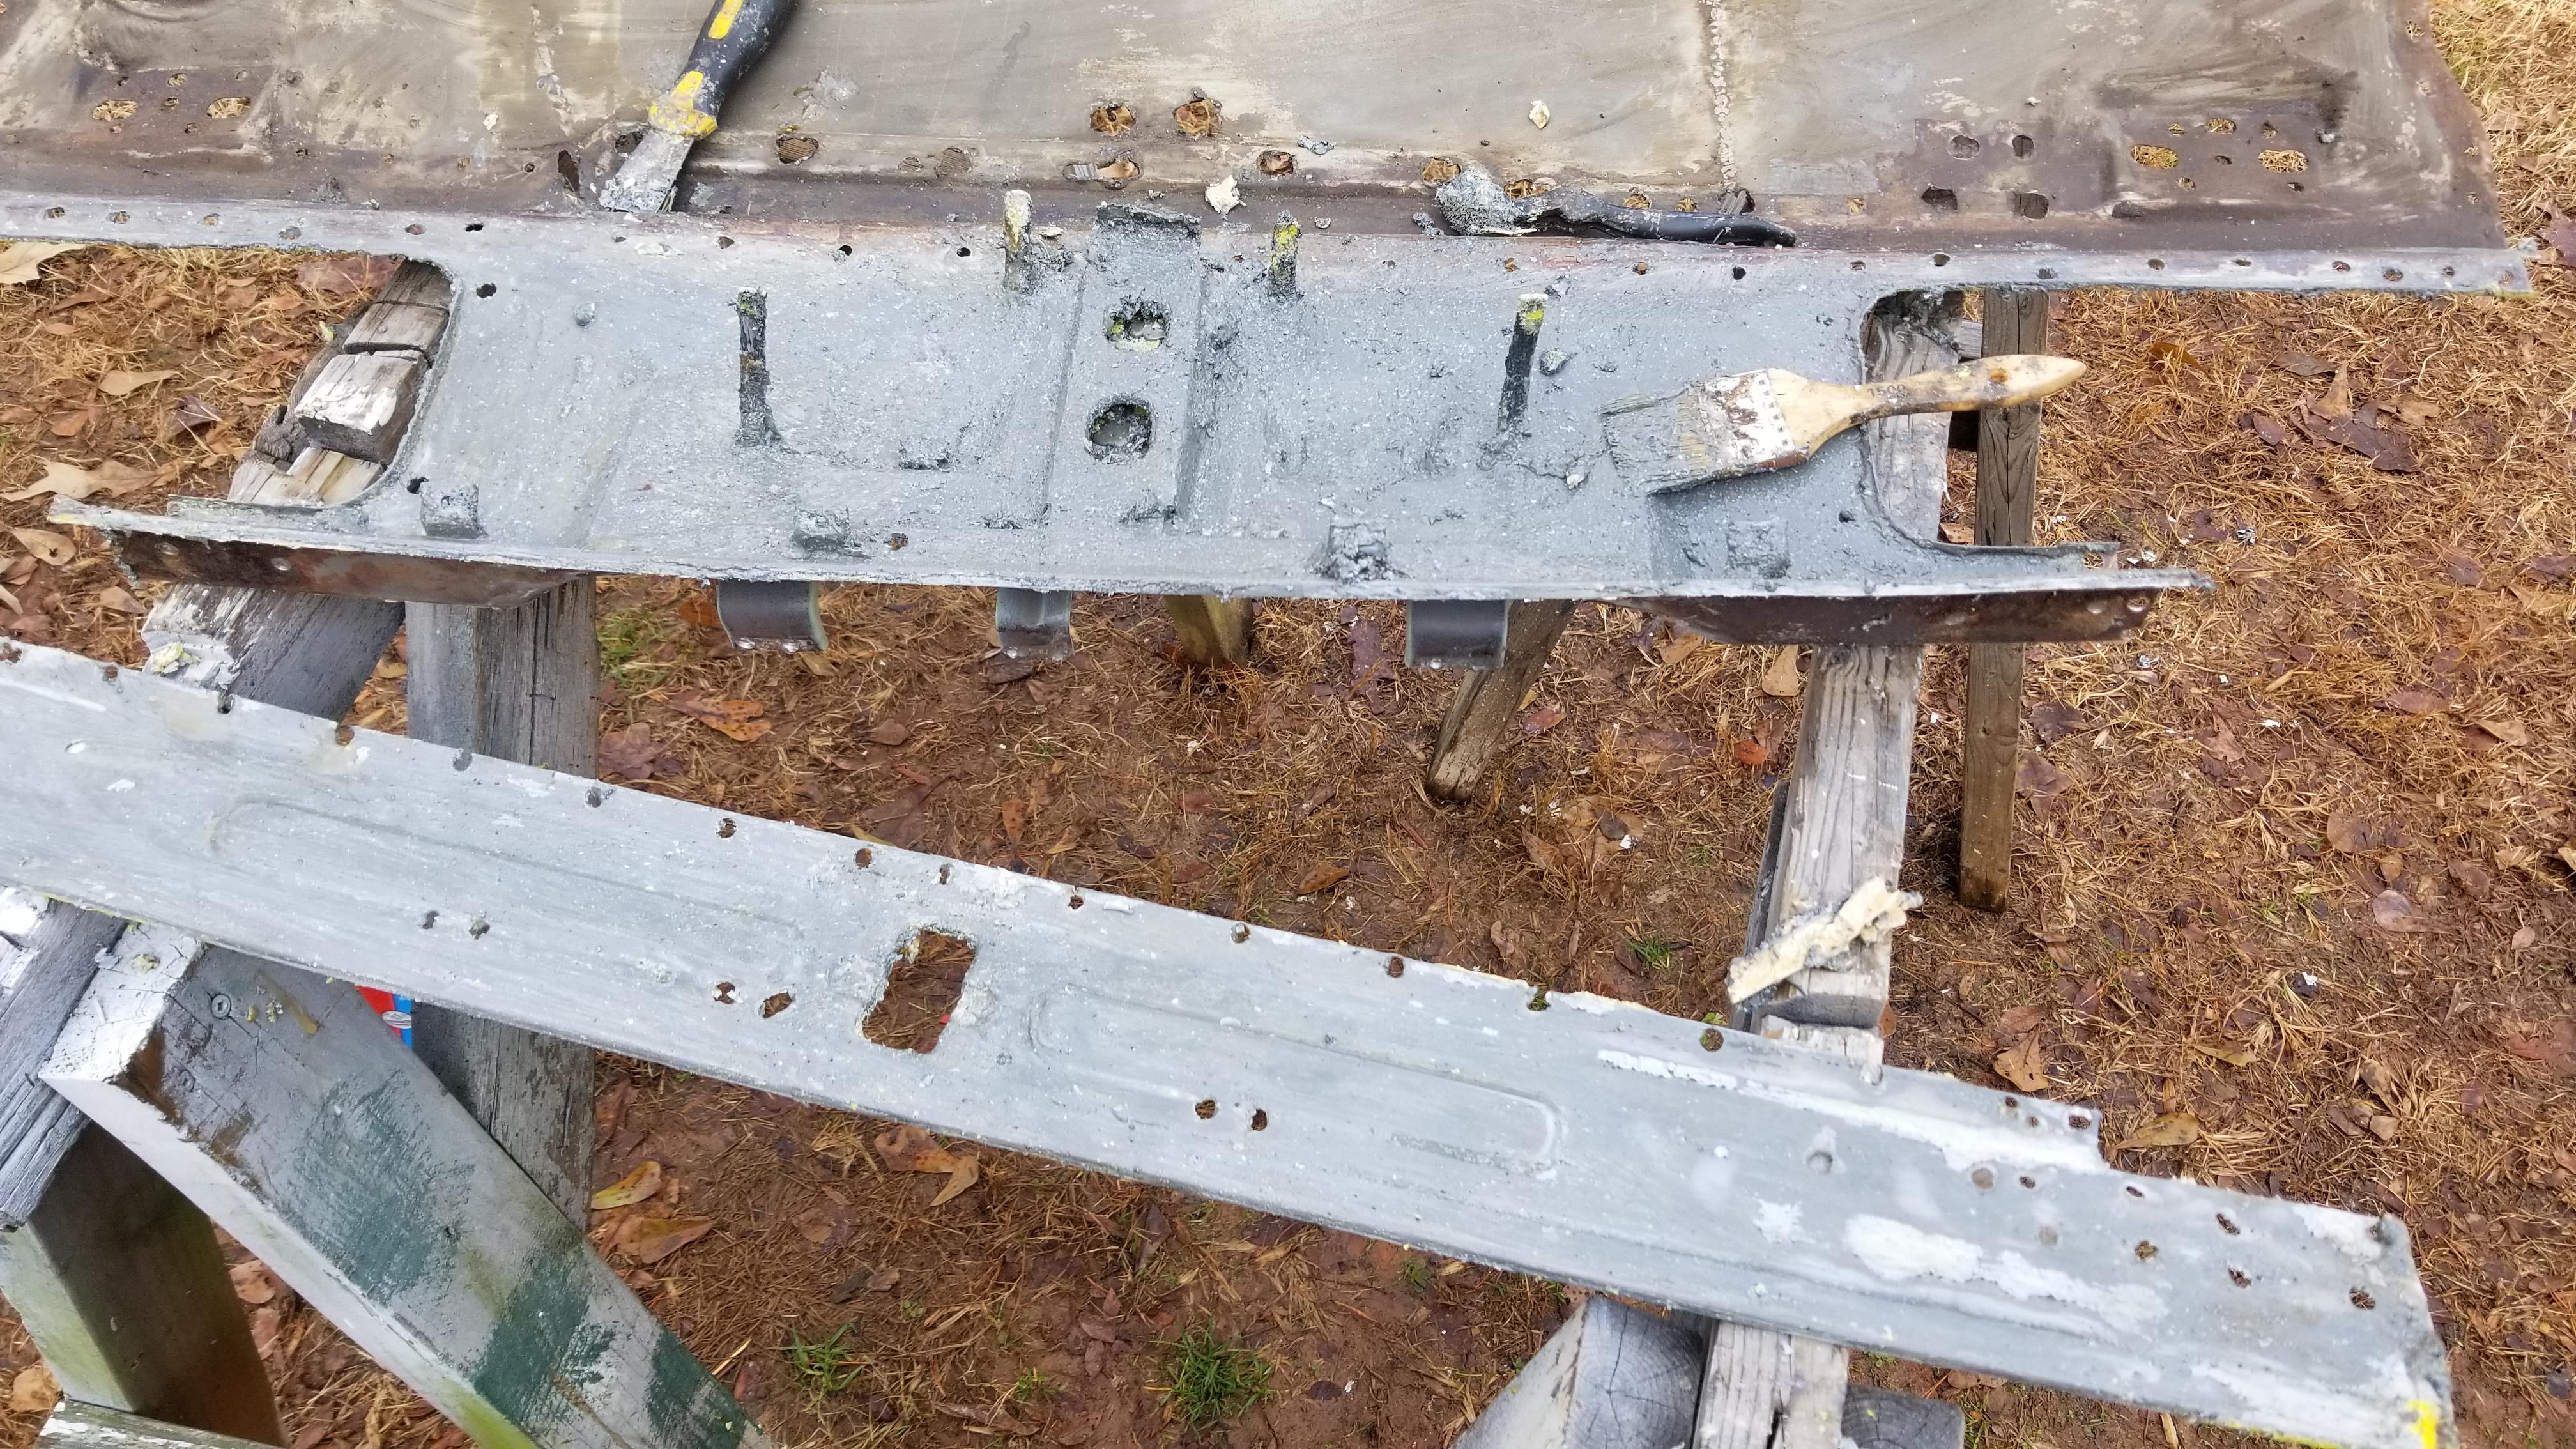
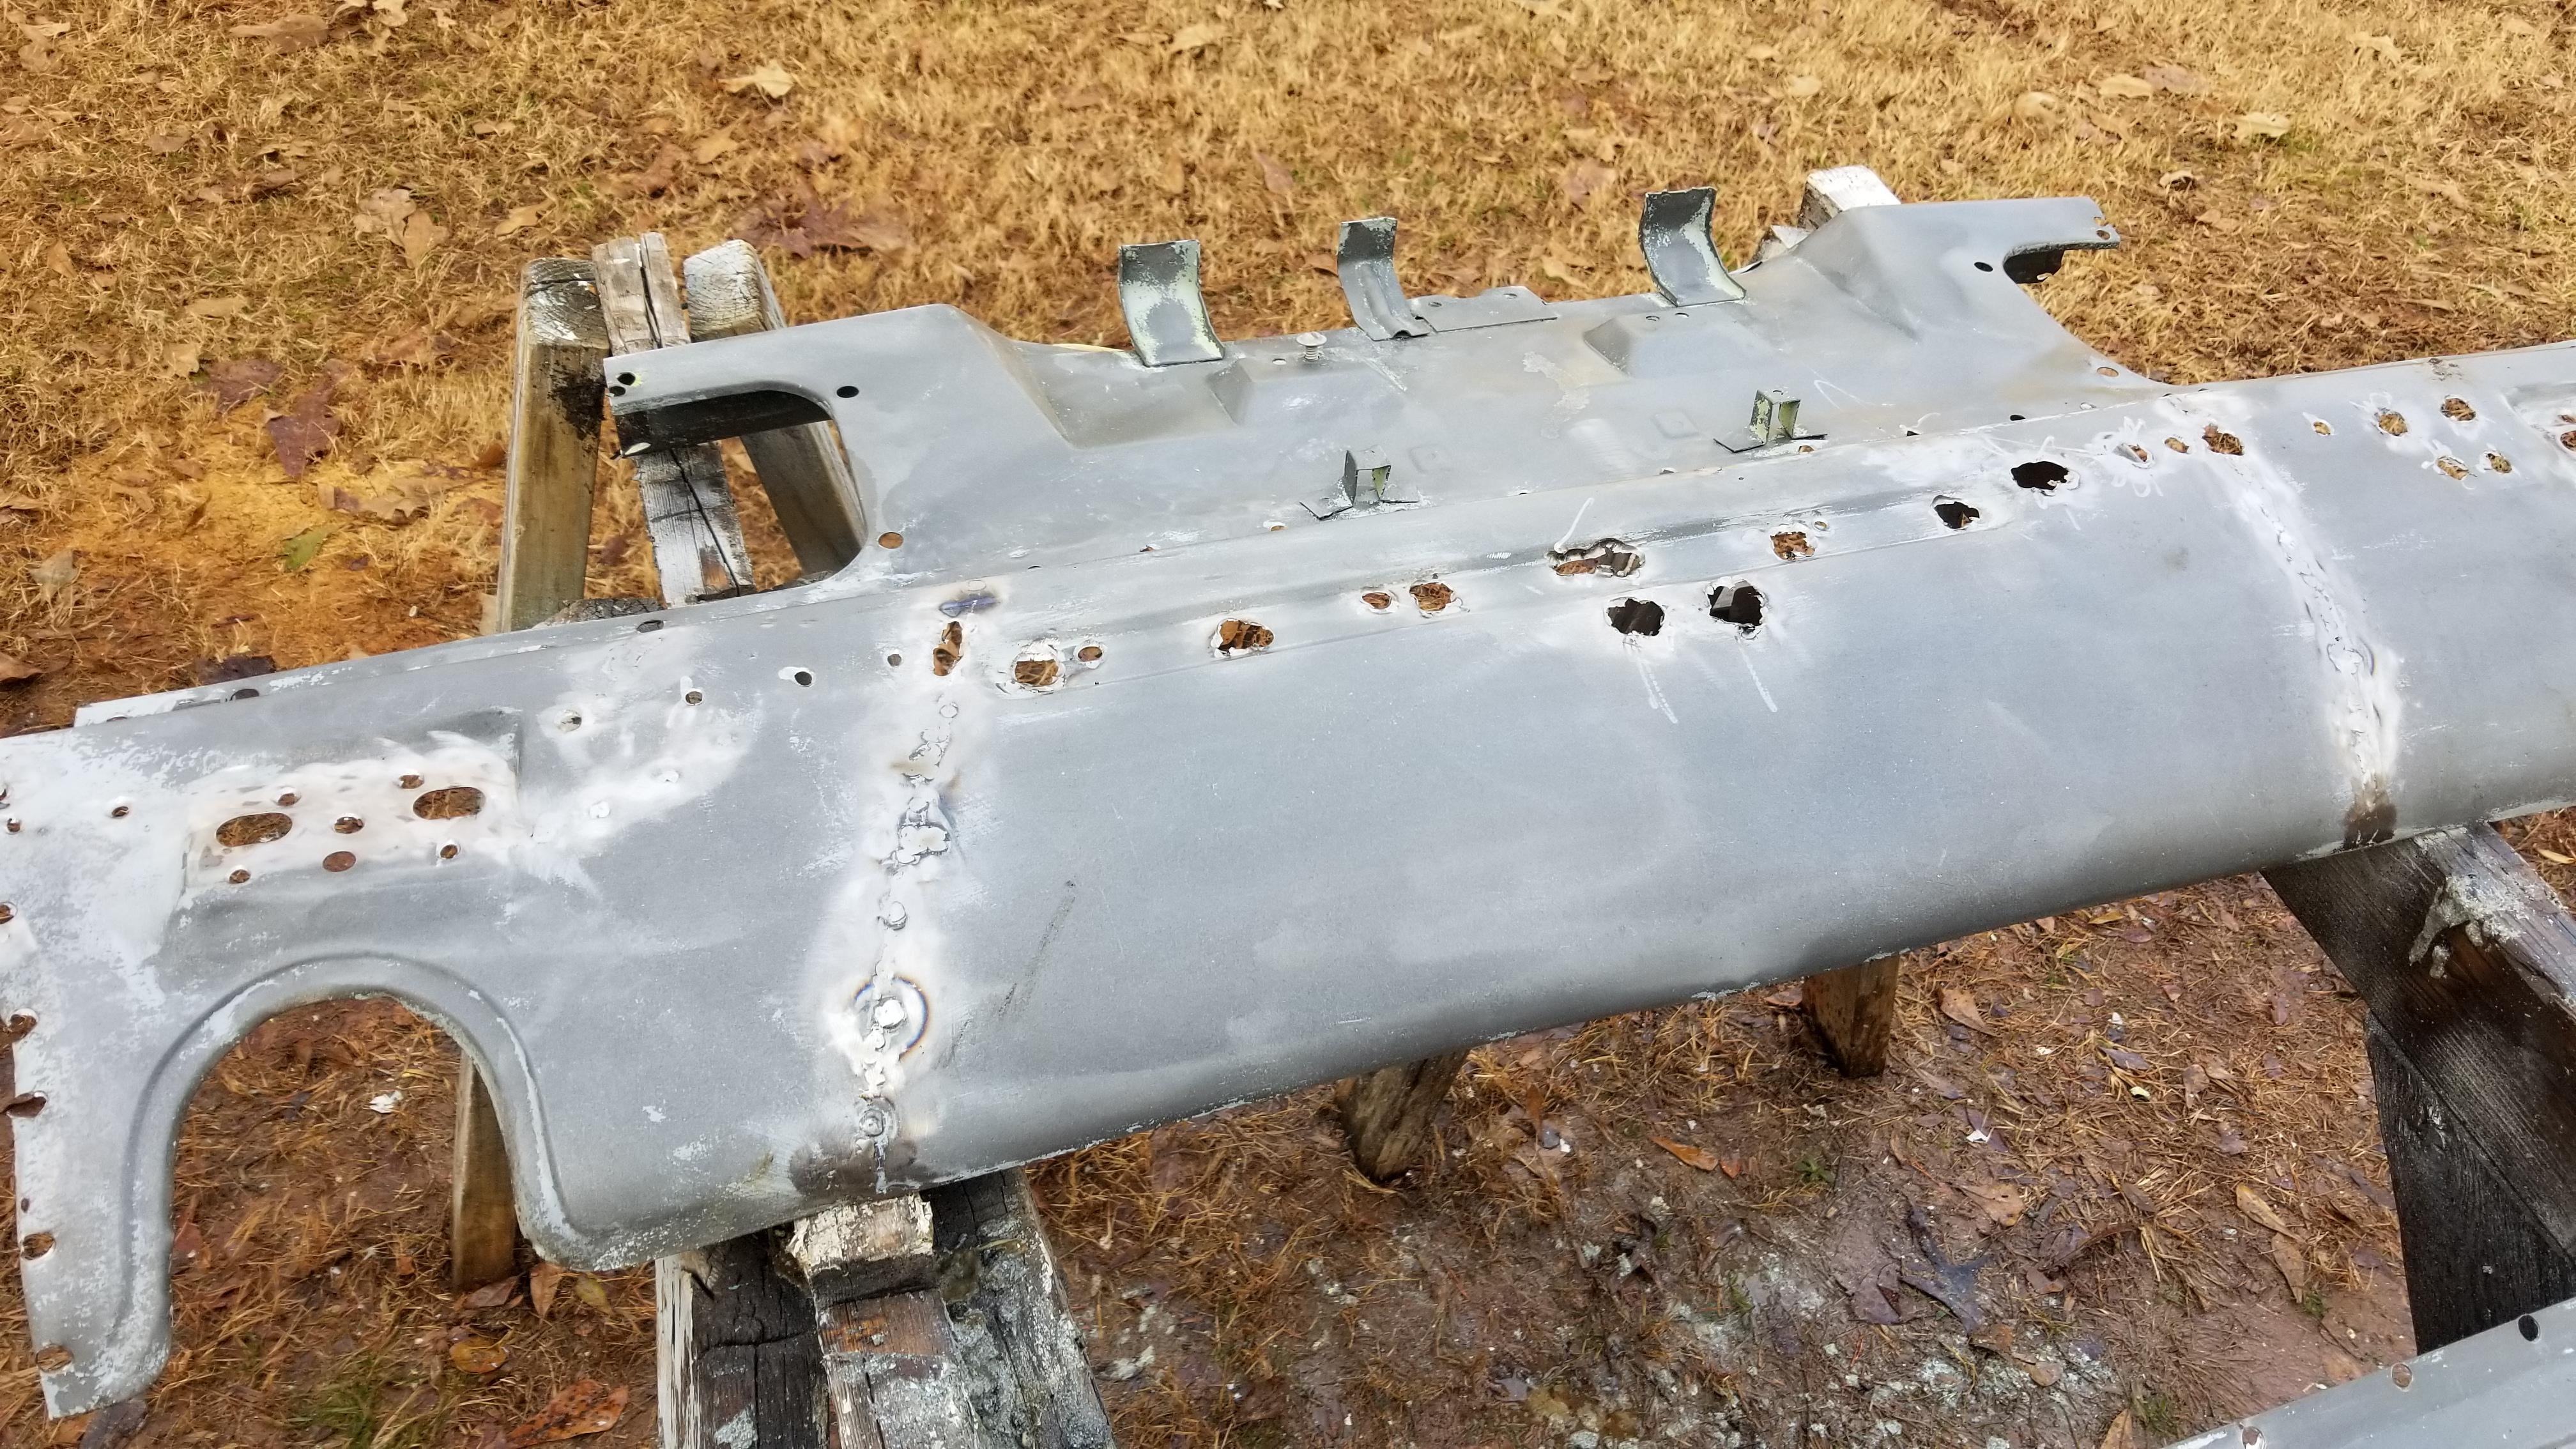
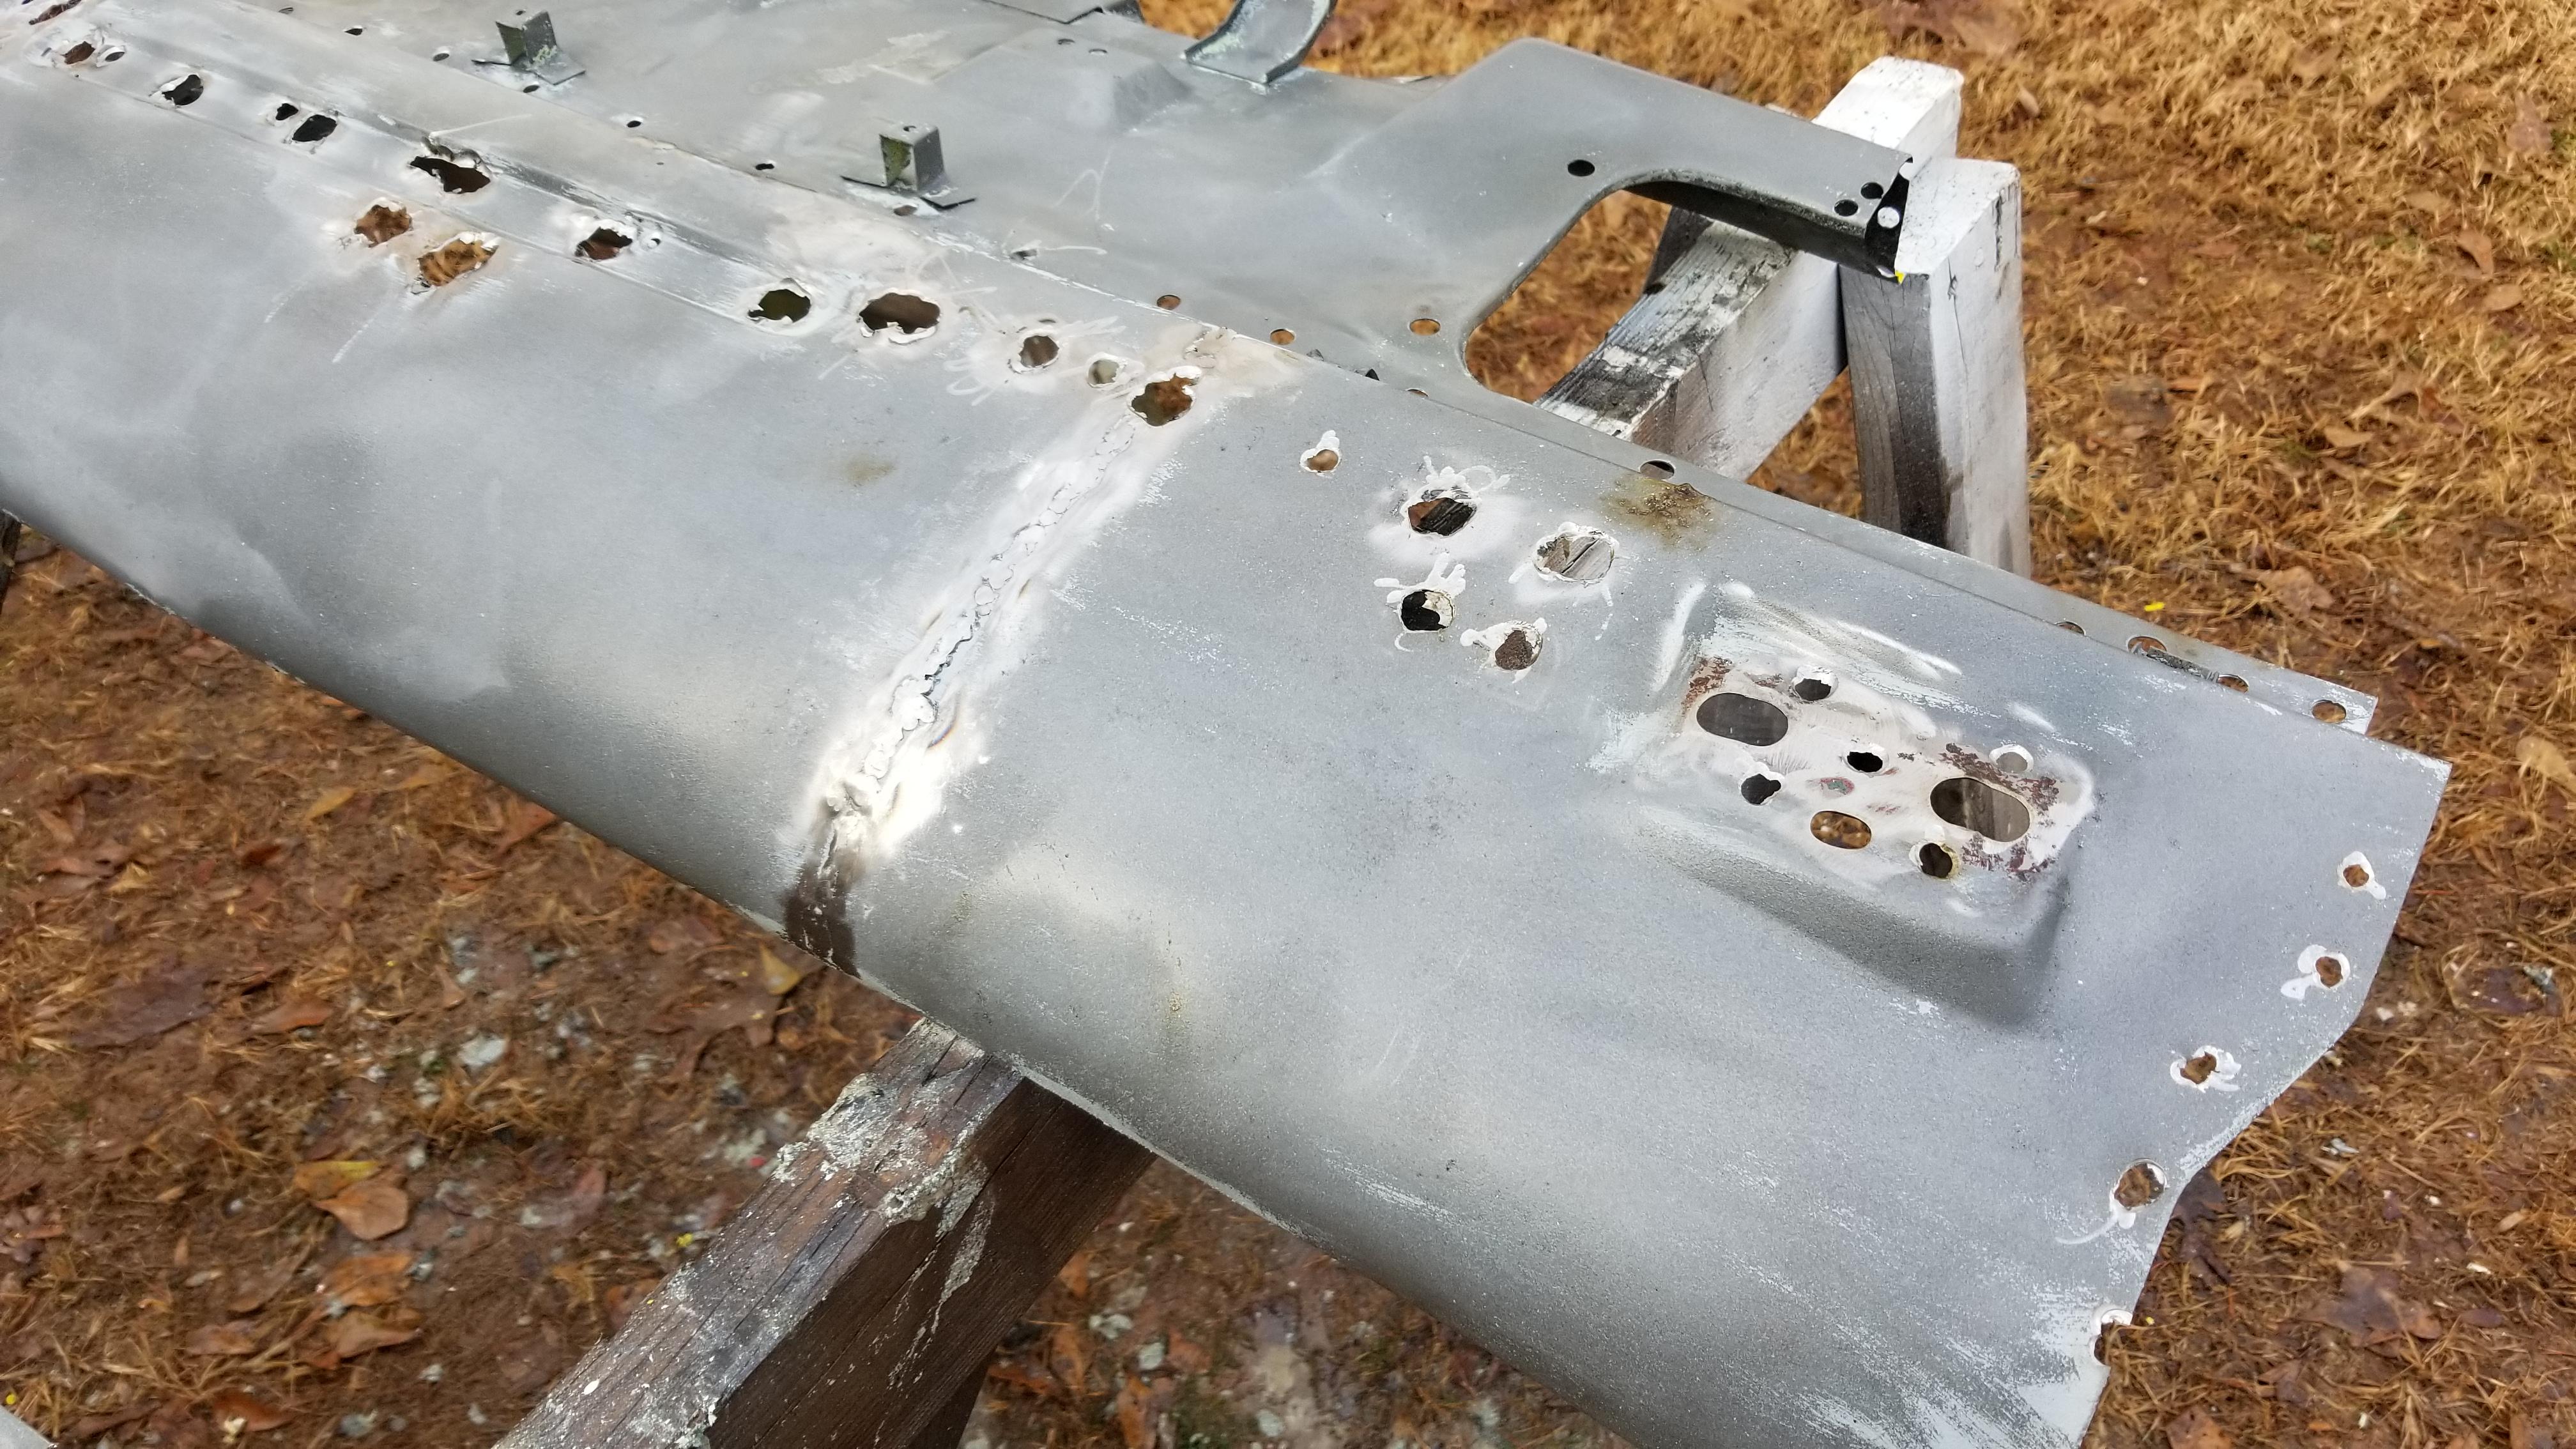
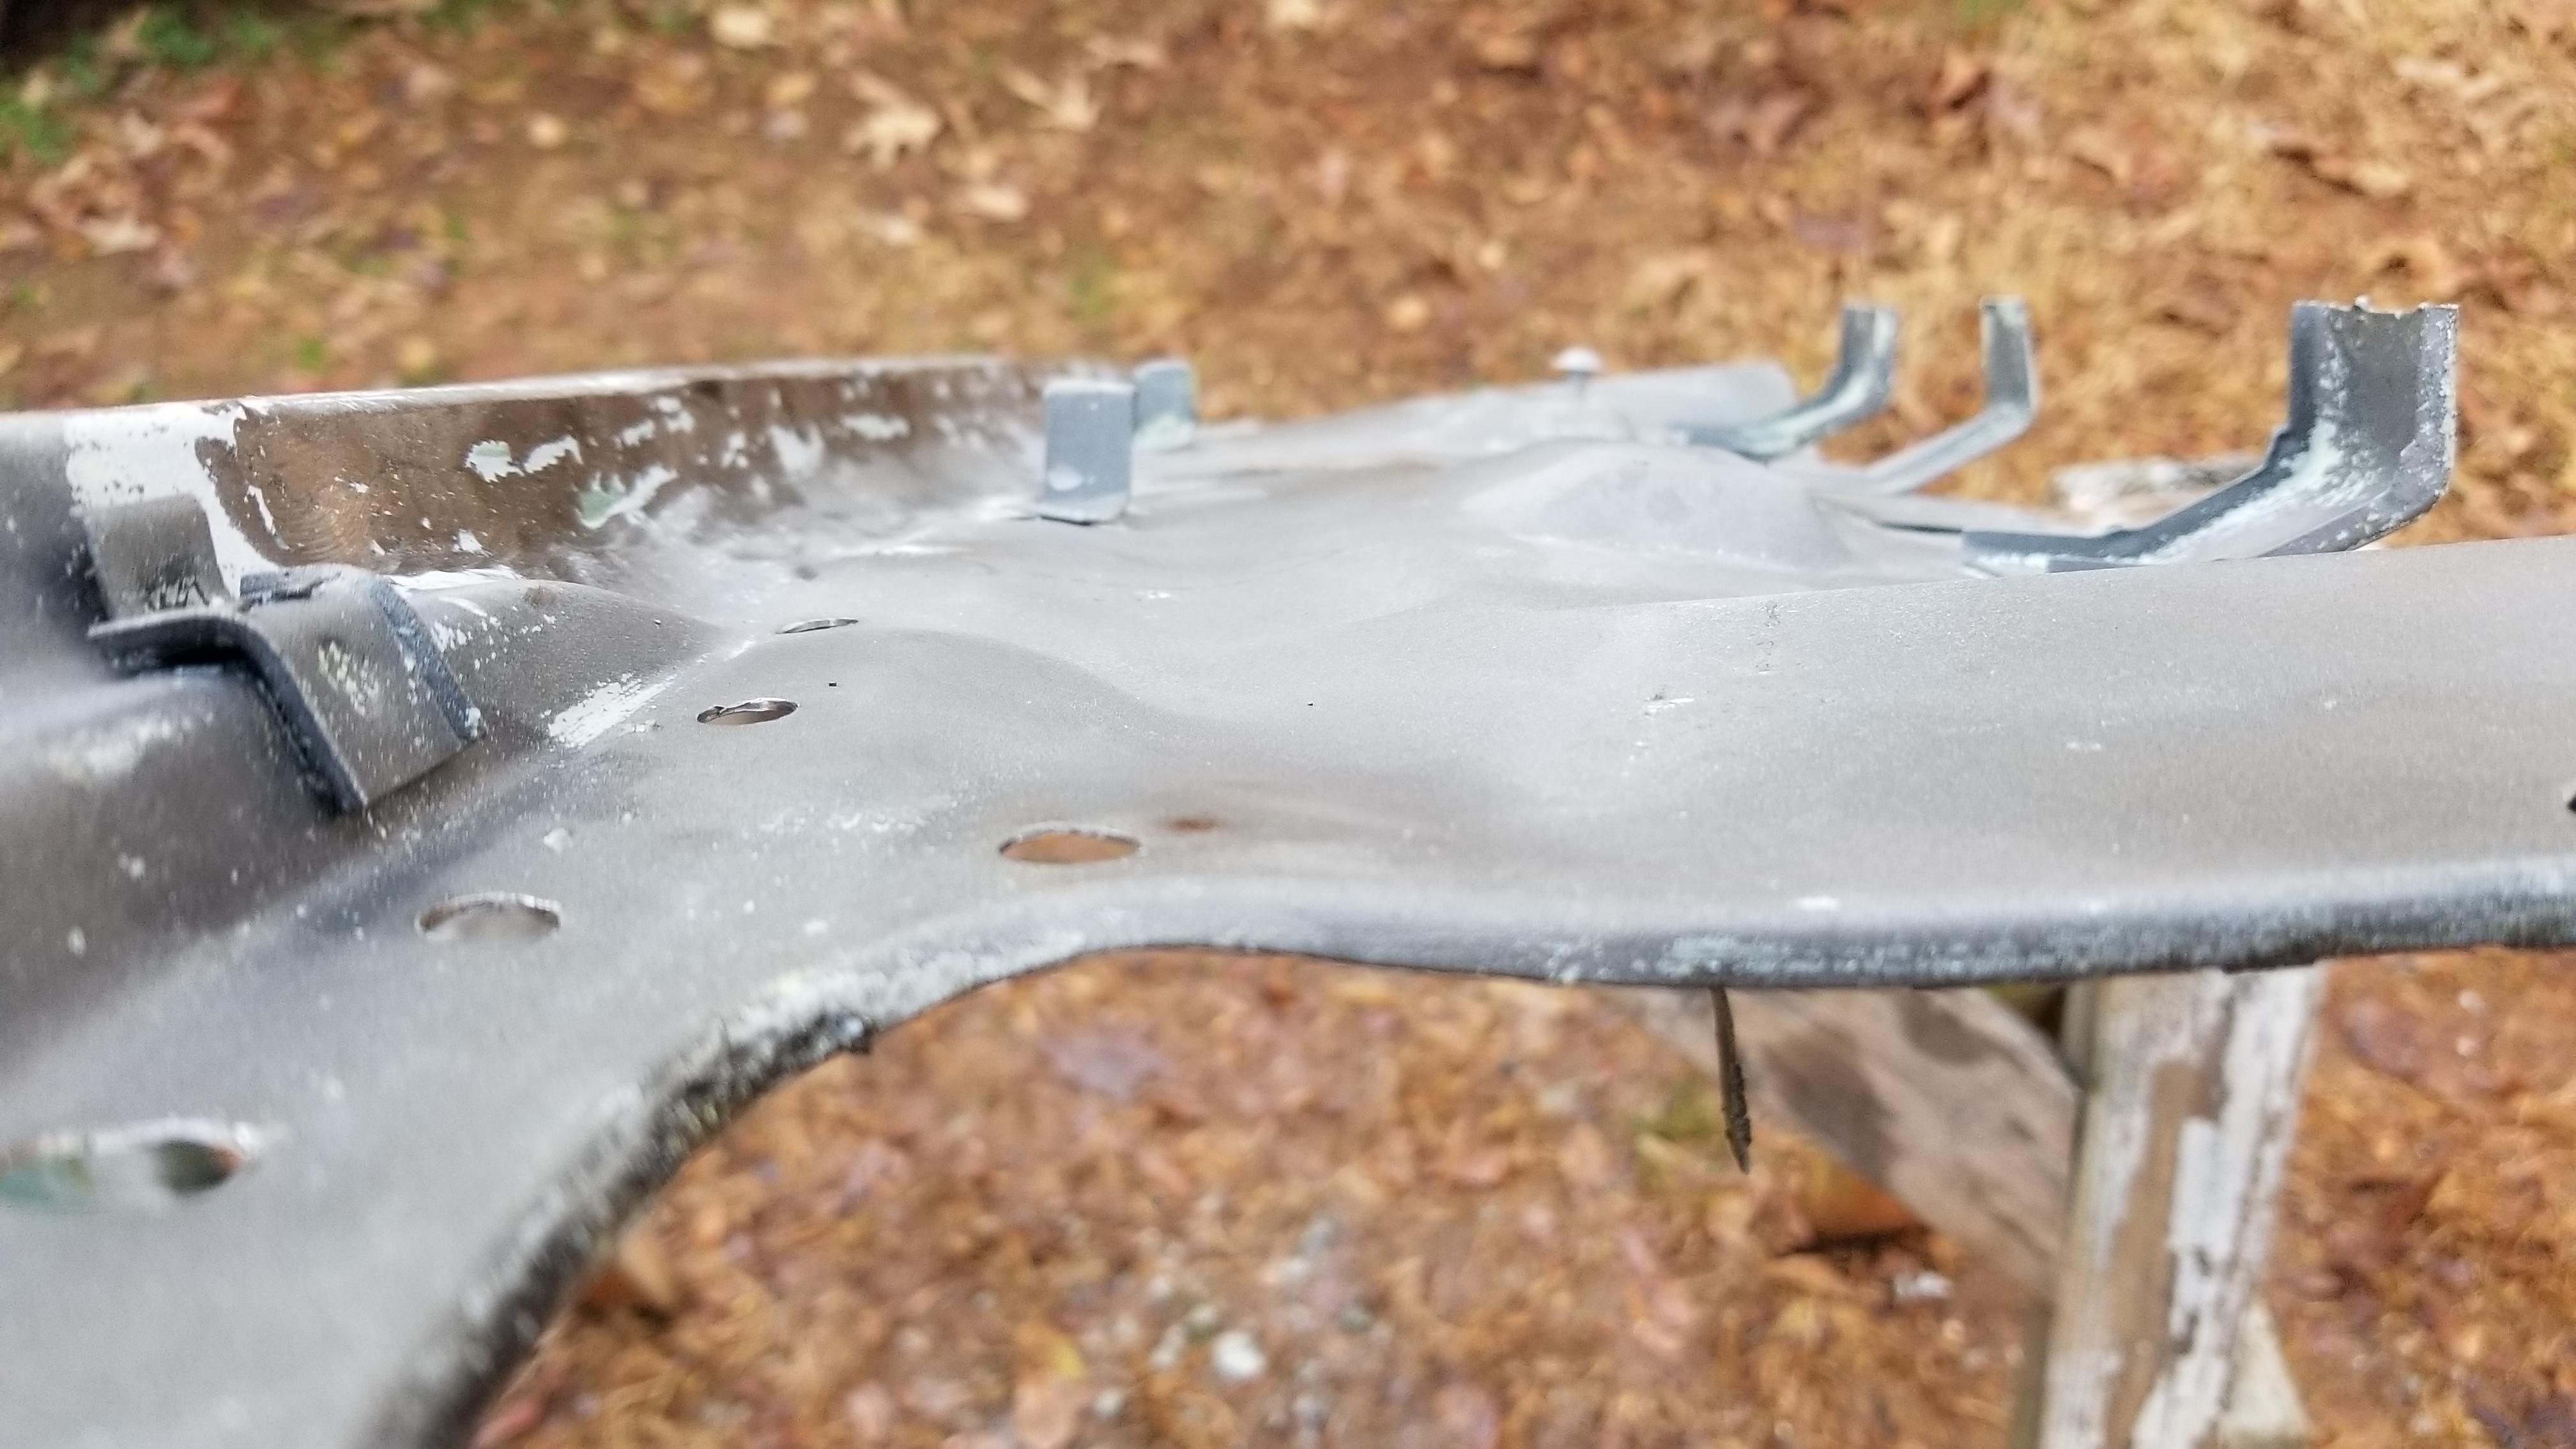
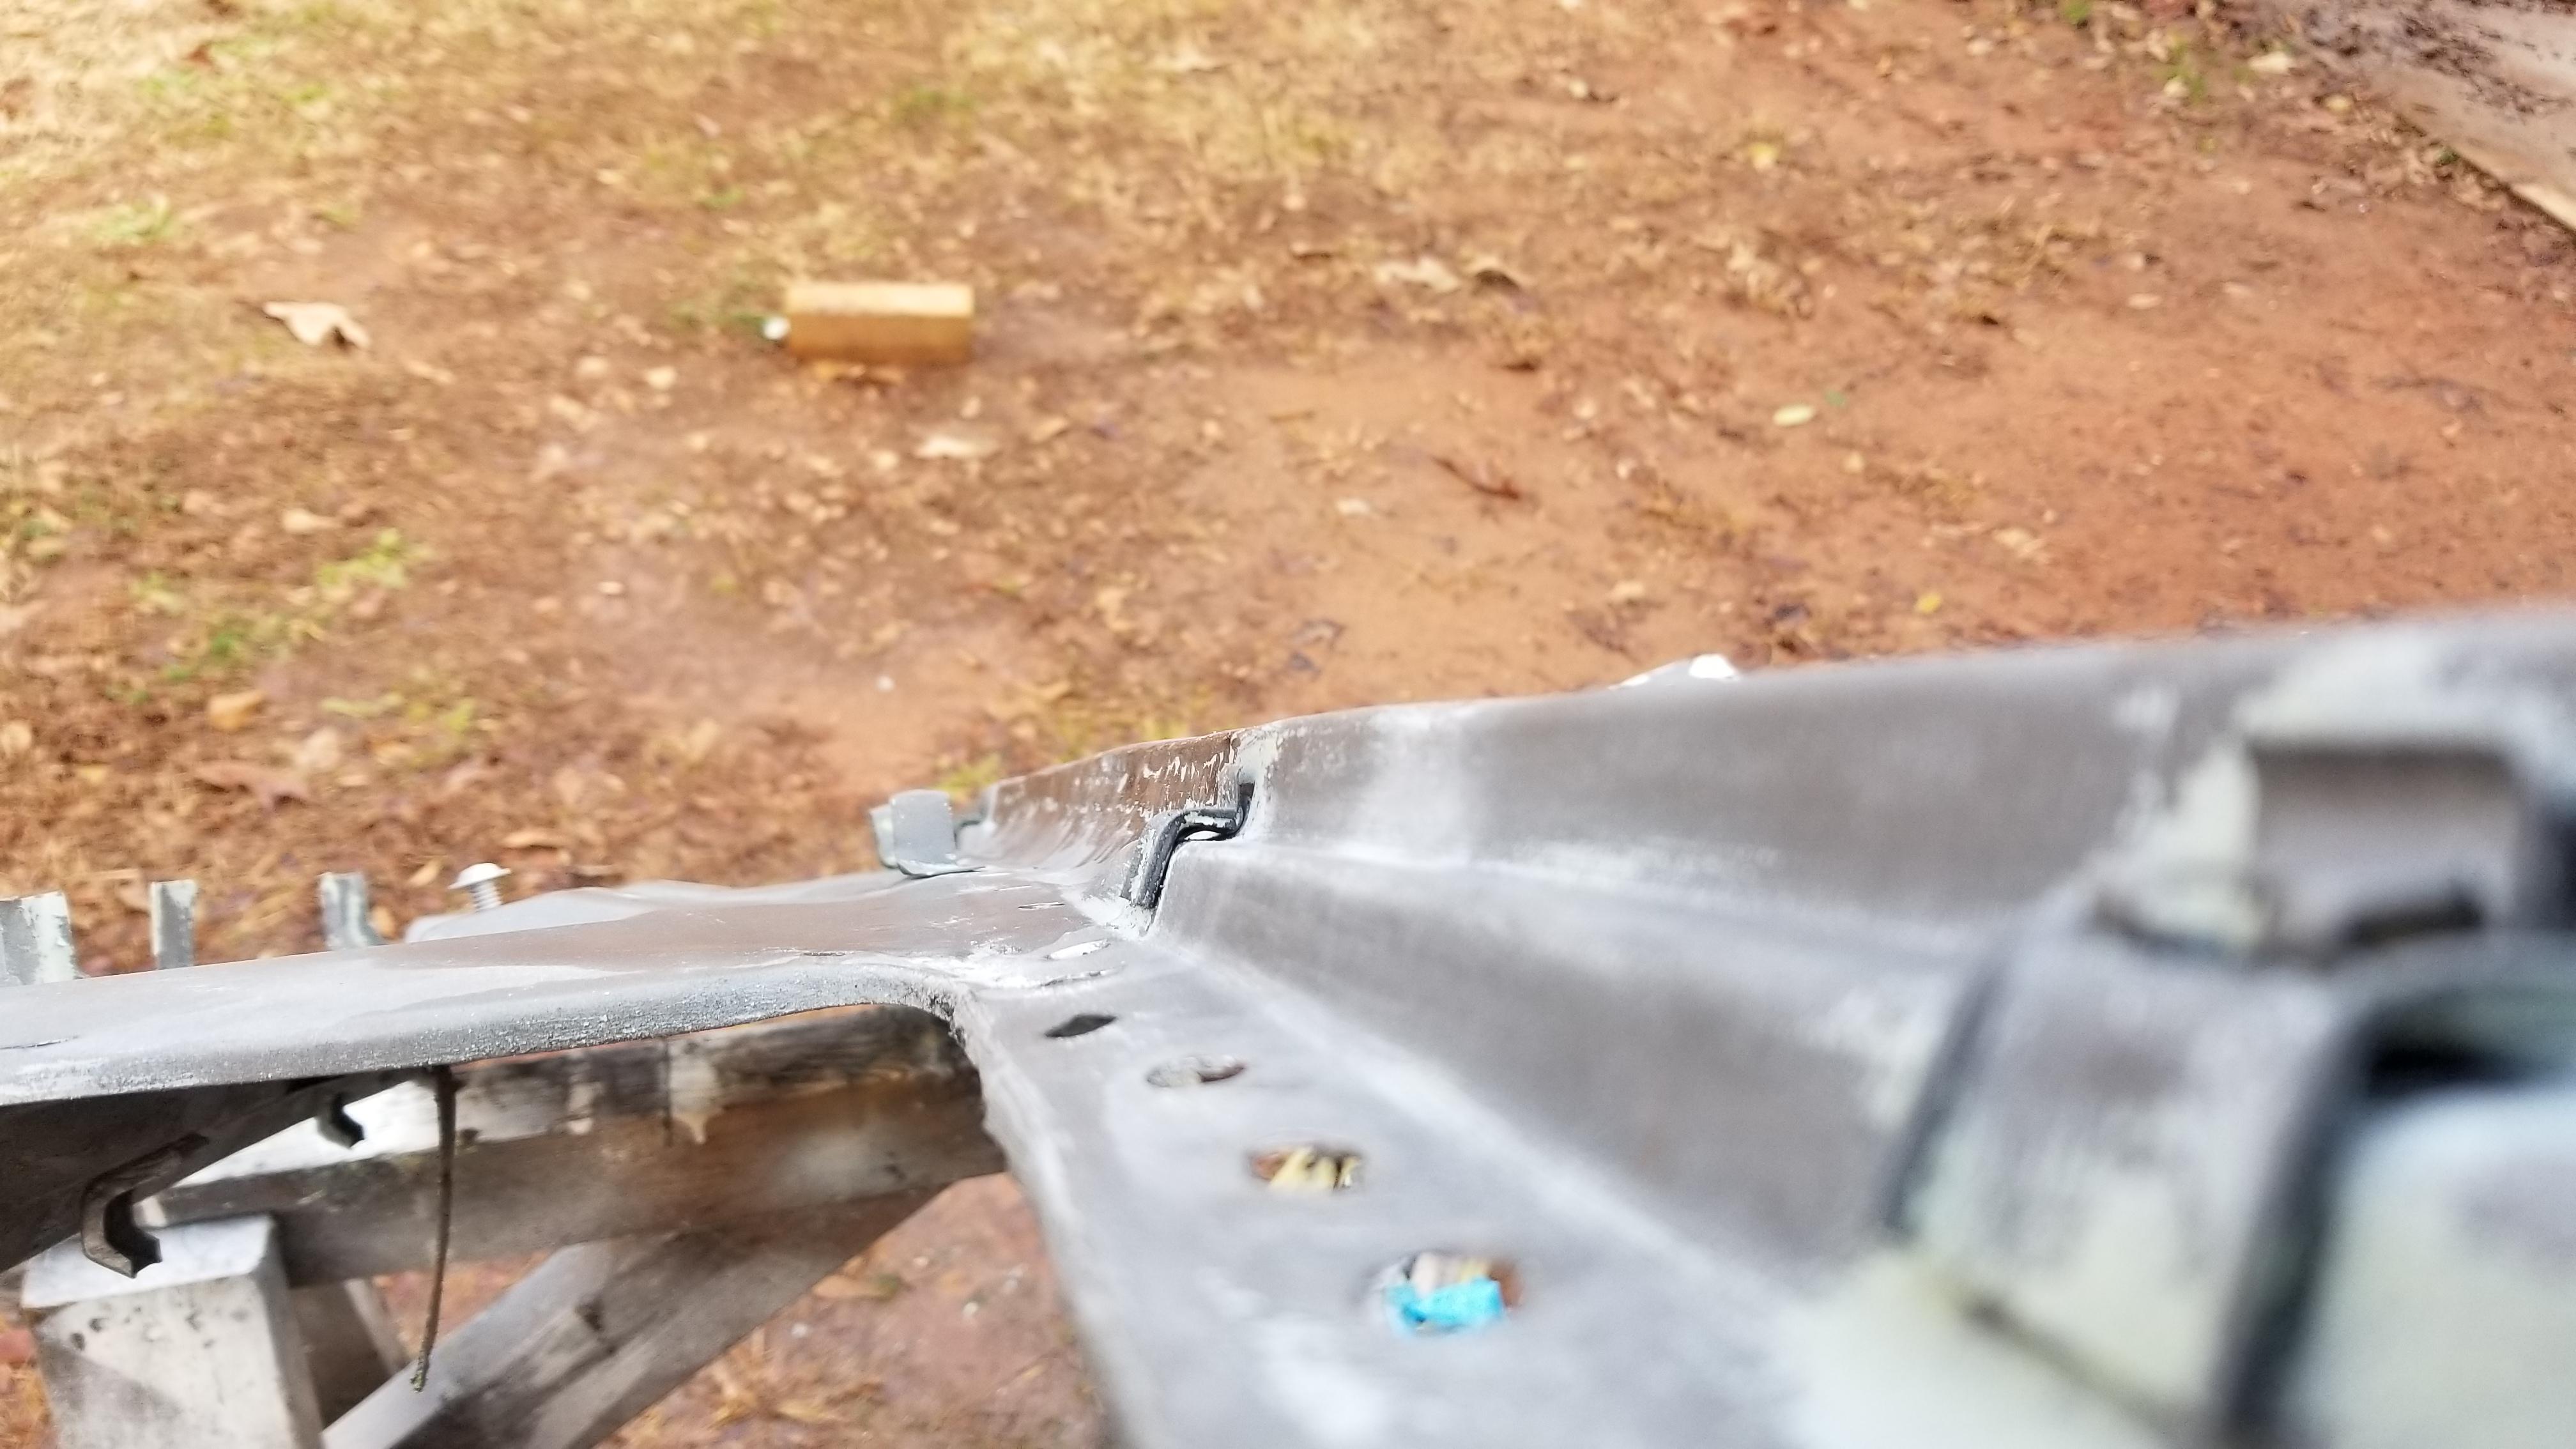
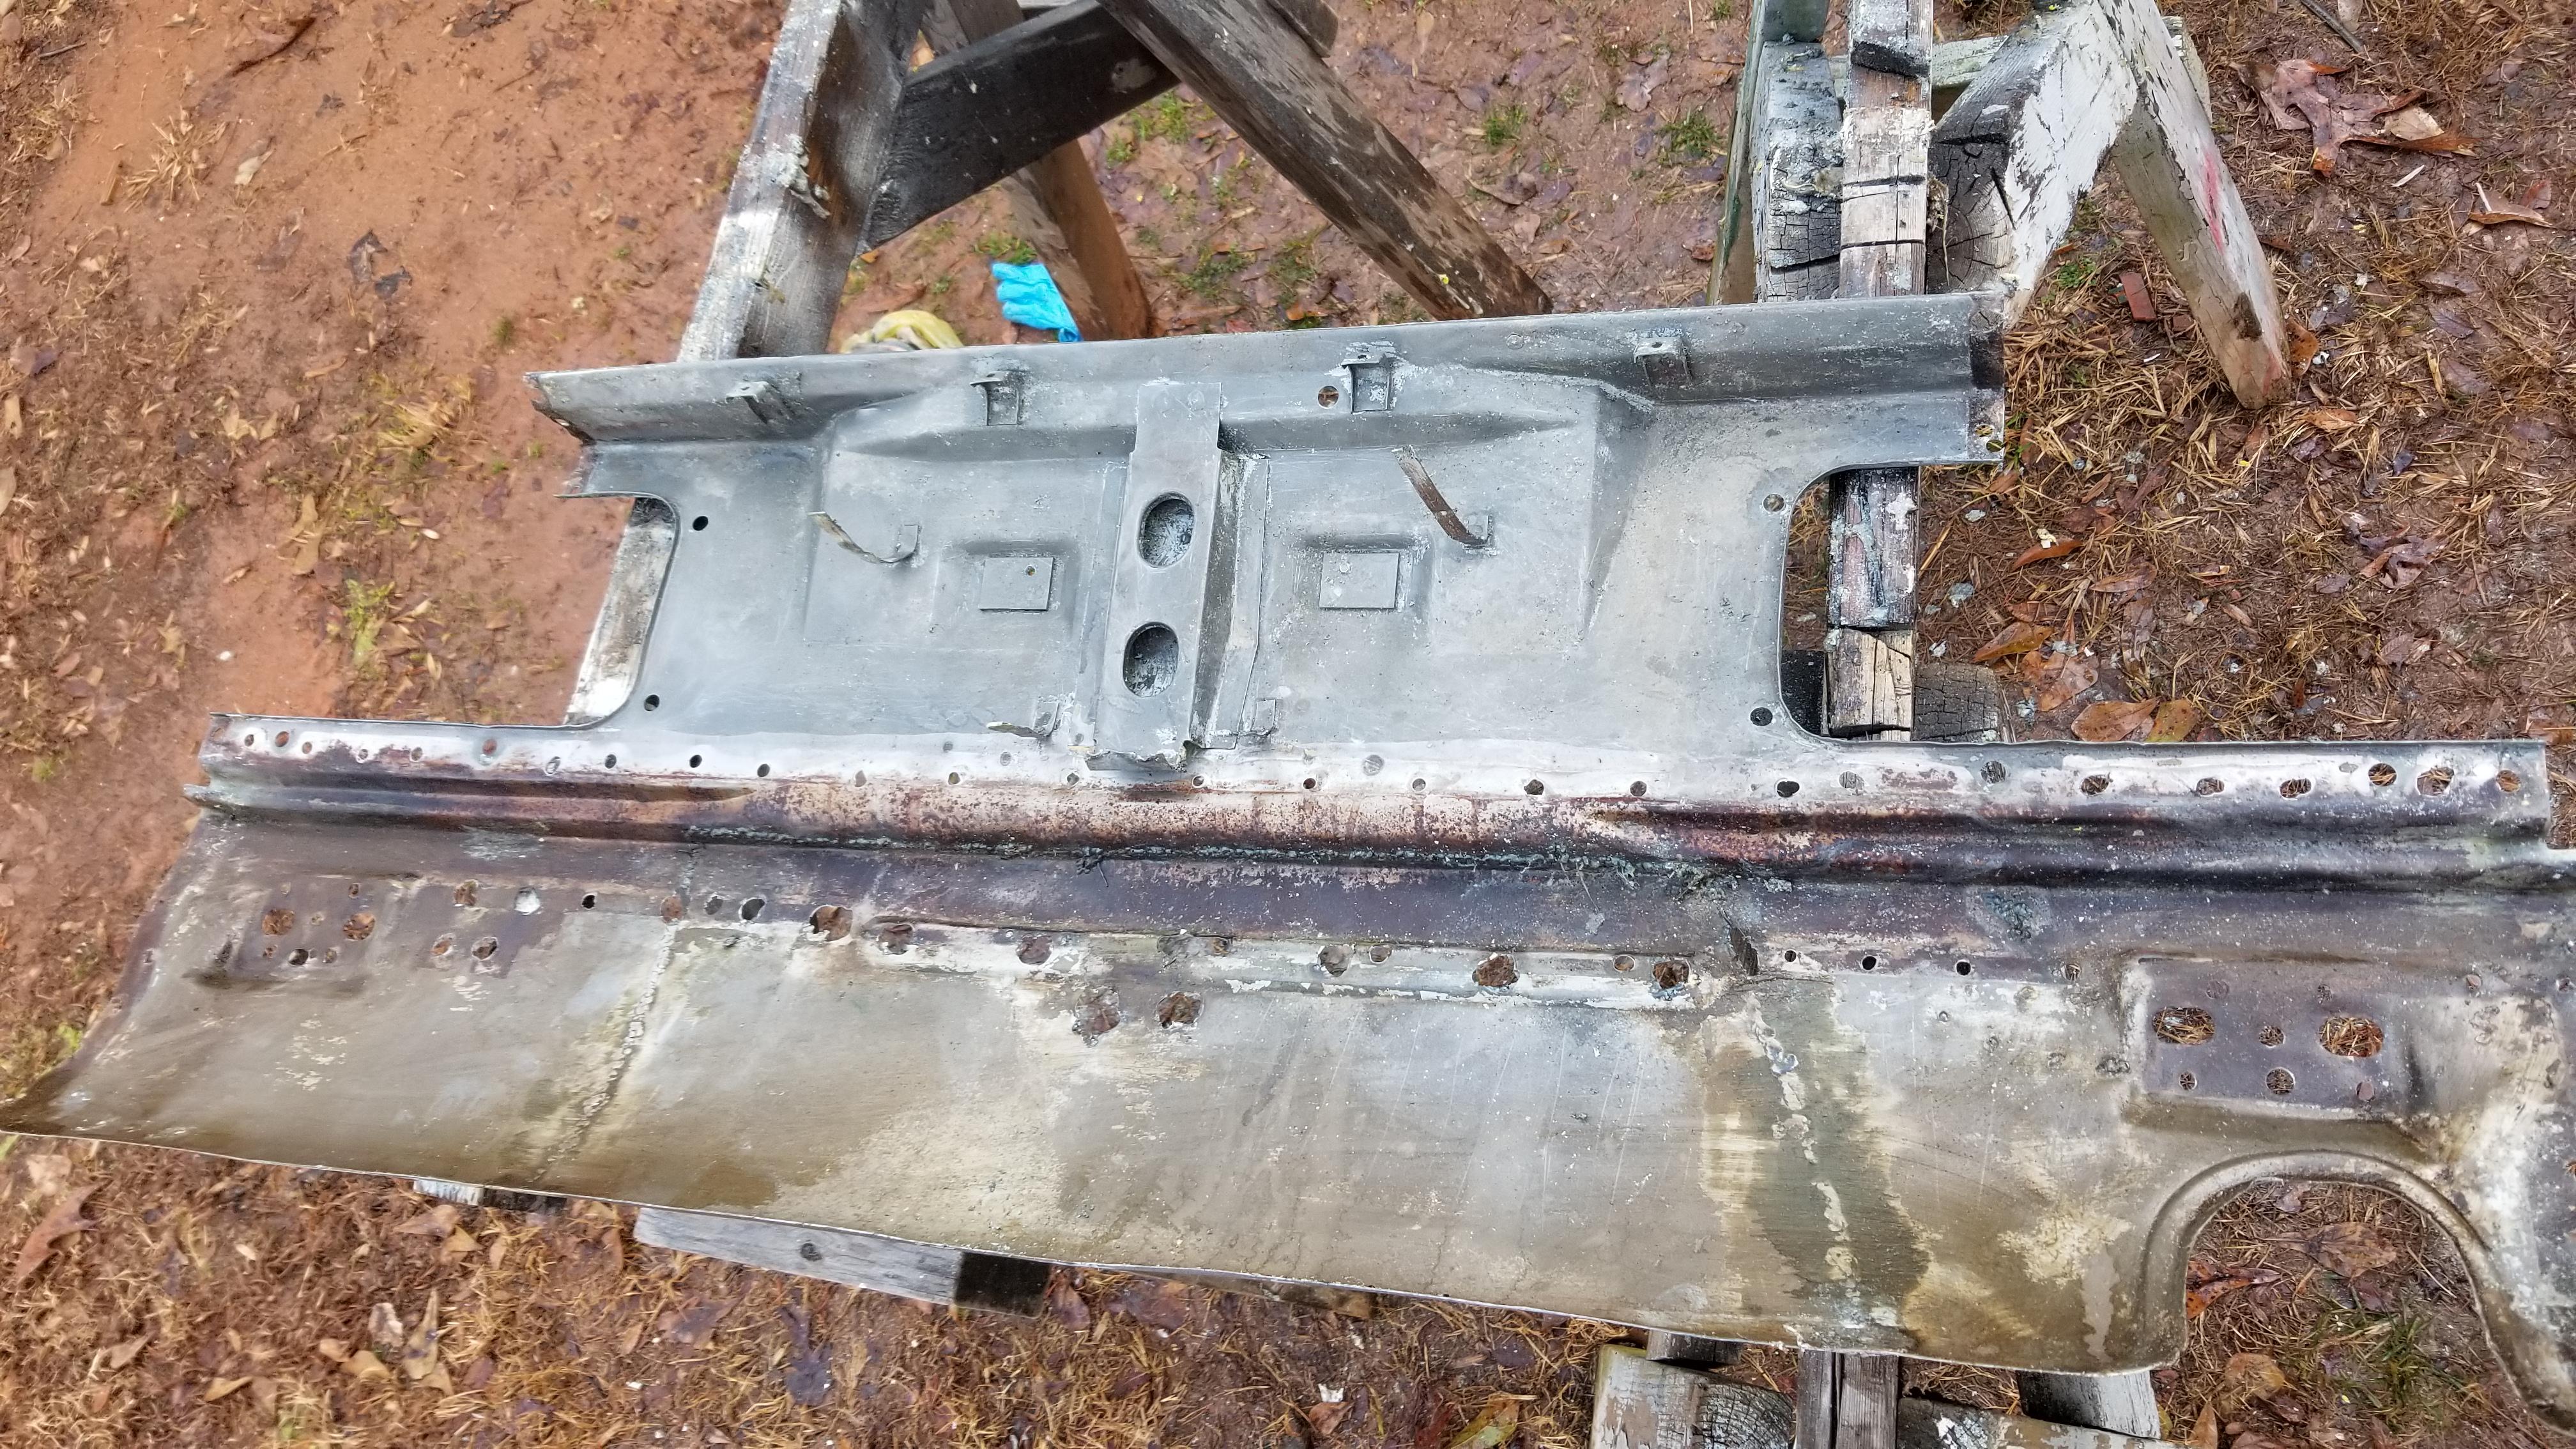
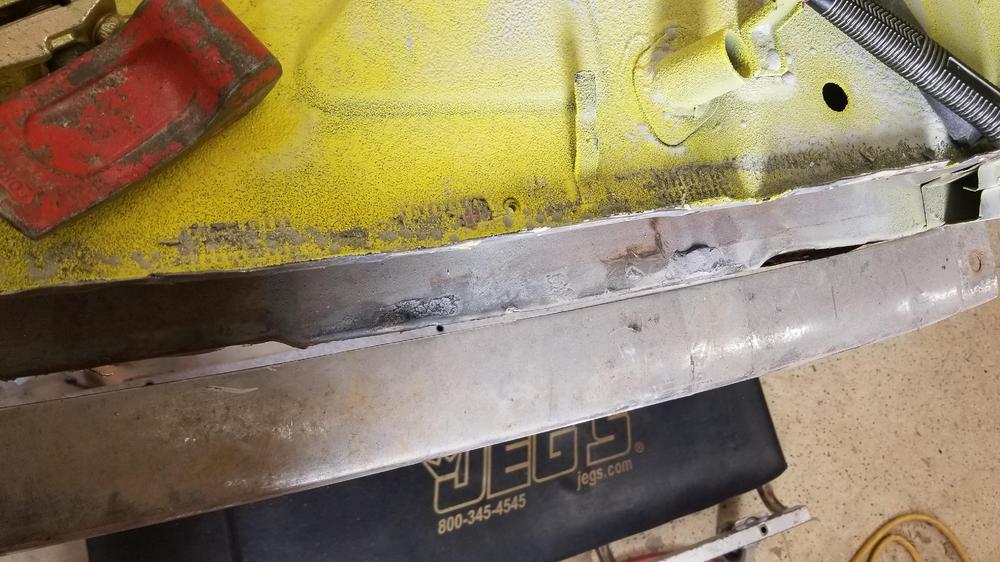
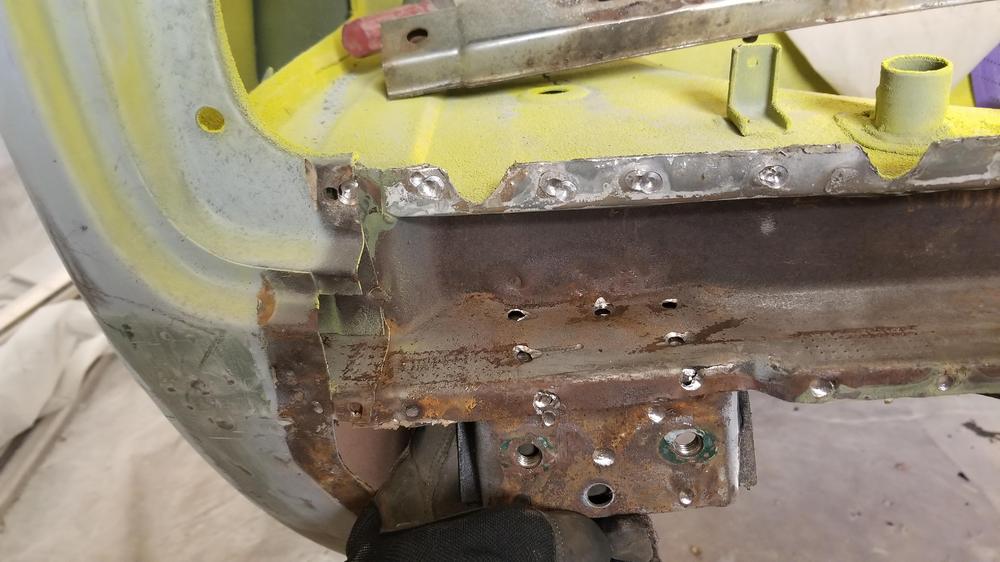
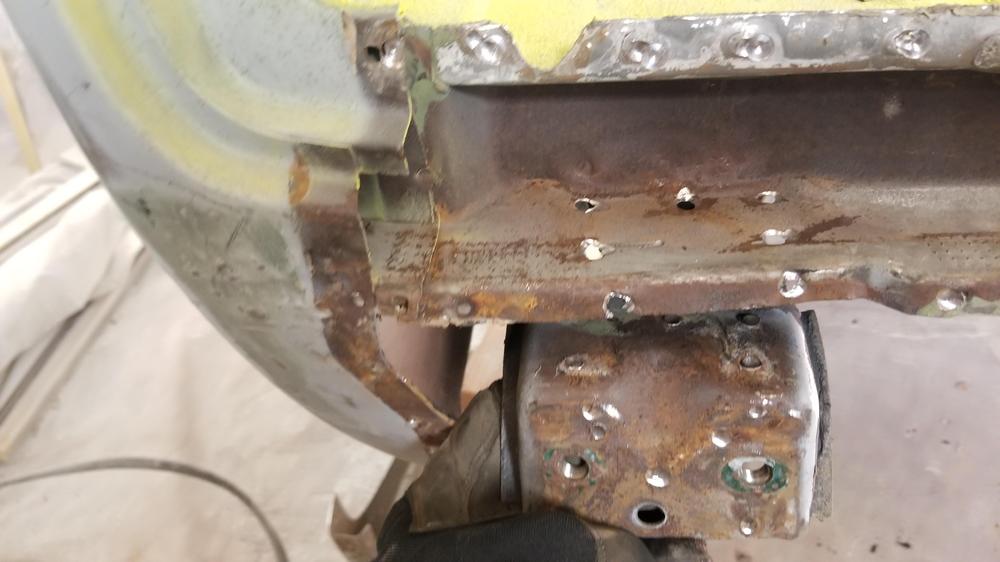
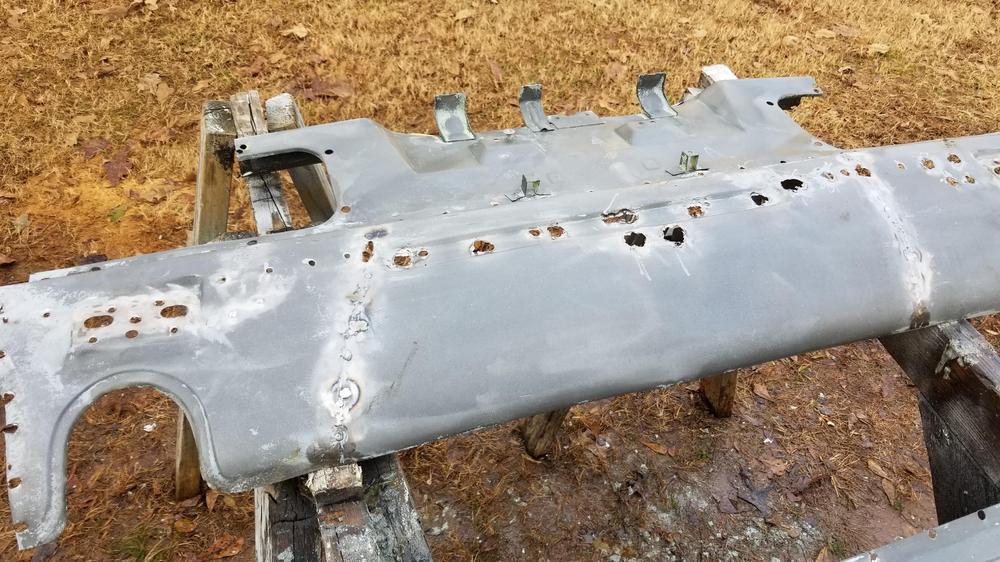
I worked on the sub frame some on Sunday afternoon So this is where I am starting at I had already pulled the floor pan back out at this point We got one side pulled out but the drivers side, that took most of the impact, wouldn't come all the way out The drivers side bumper mount had been pushed back and no amount of slamming on that hammer was going to move it. So more spot weld cutting! the results It will take some dolly work now, but I will wait on the new bumper before I refine it. The new problem is after several hours of dolly work on the rear panel it looks much better. But it needs some shrinking and where I welded in my patch I set the curve in the incorrect shape. I will probably have to slit it and reshape it so it will fit the car properly


-
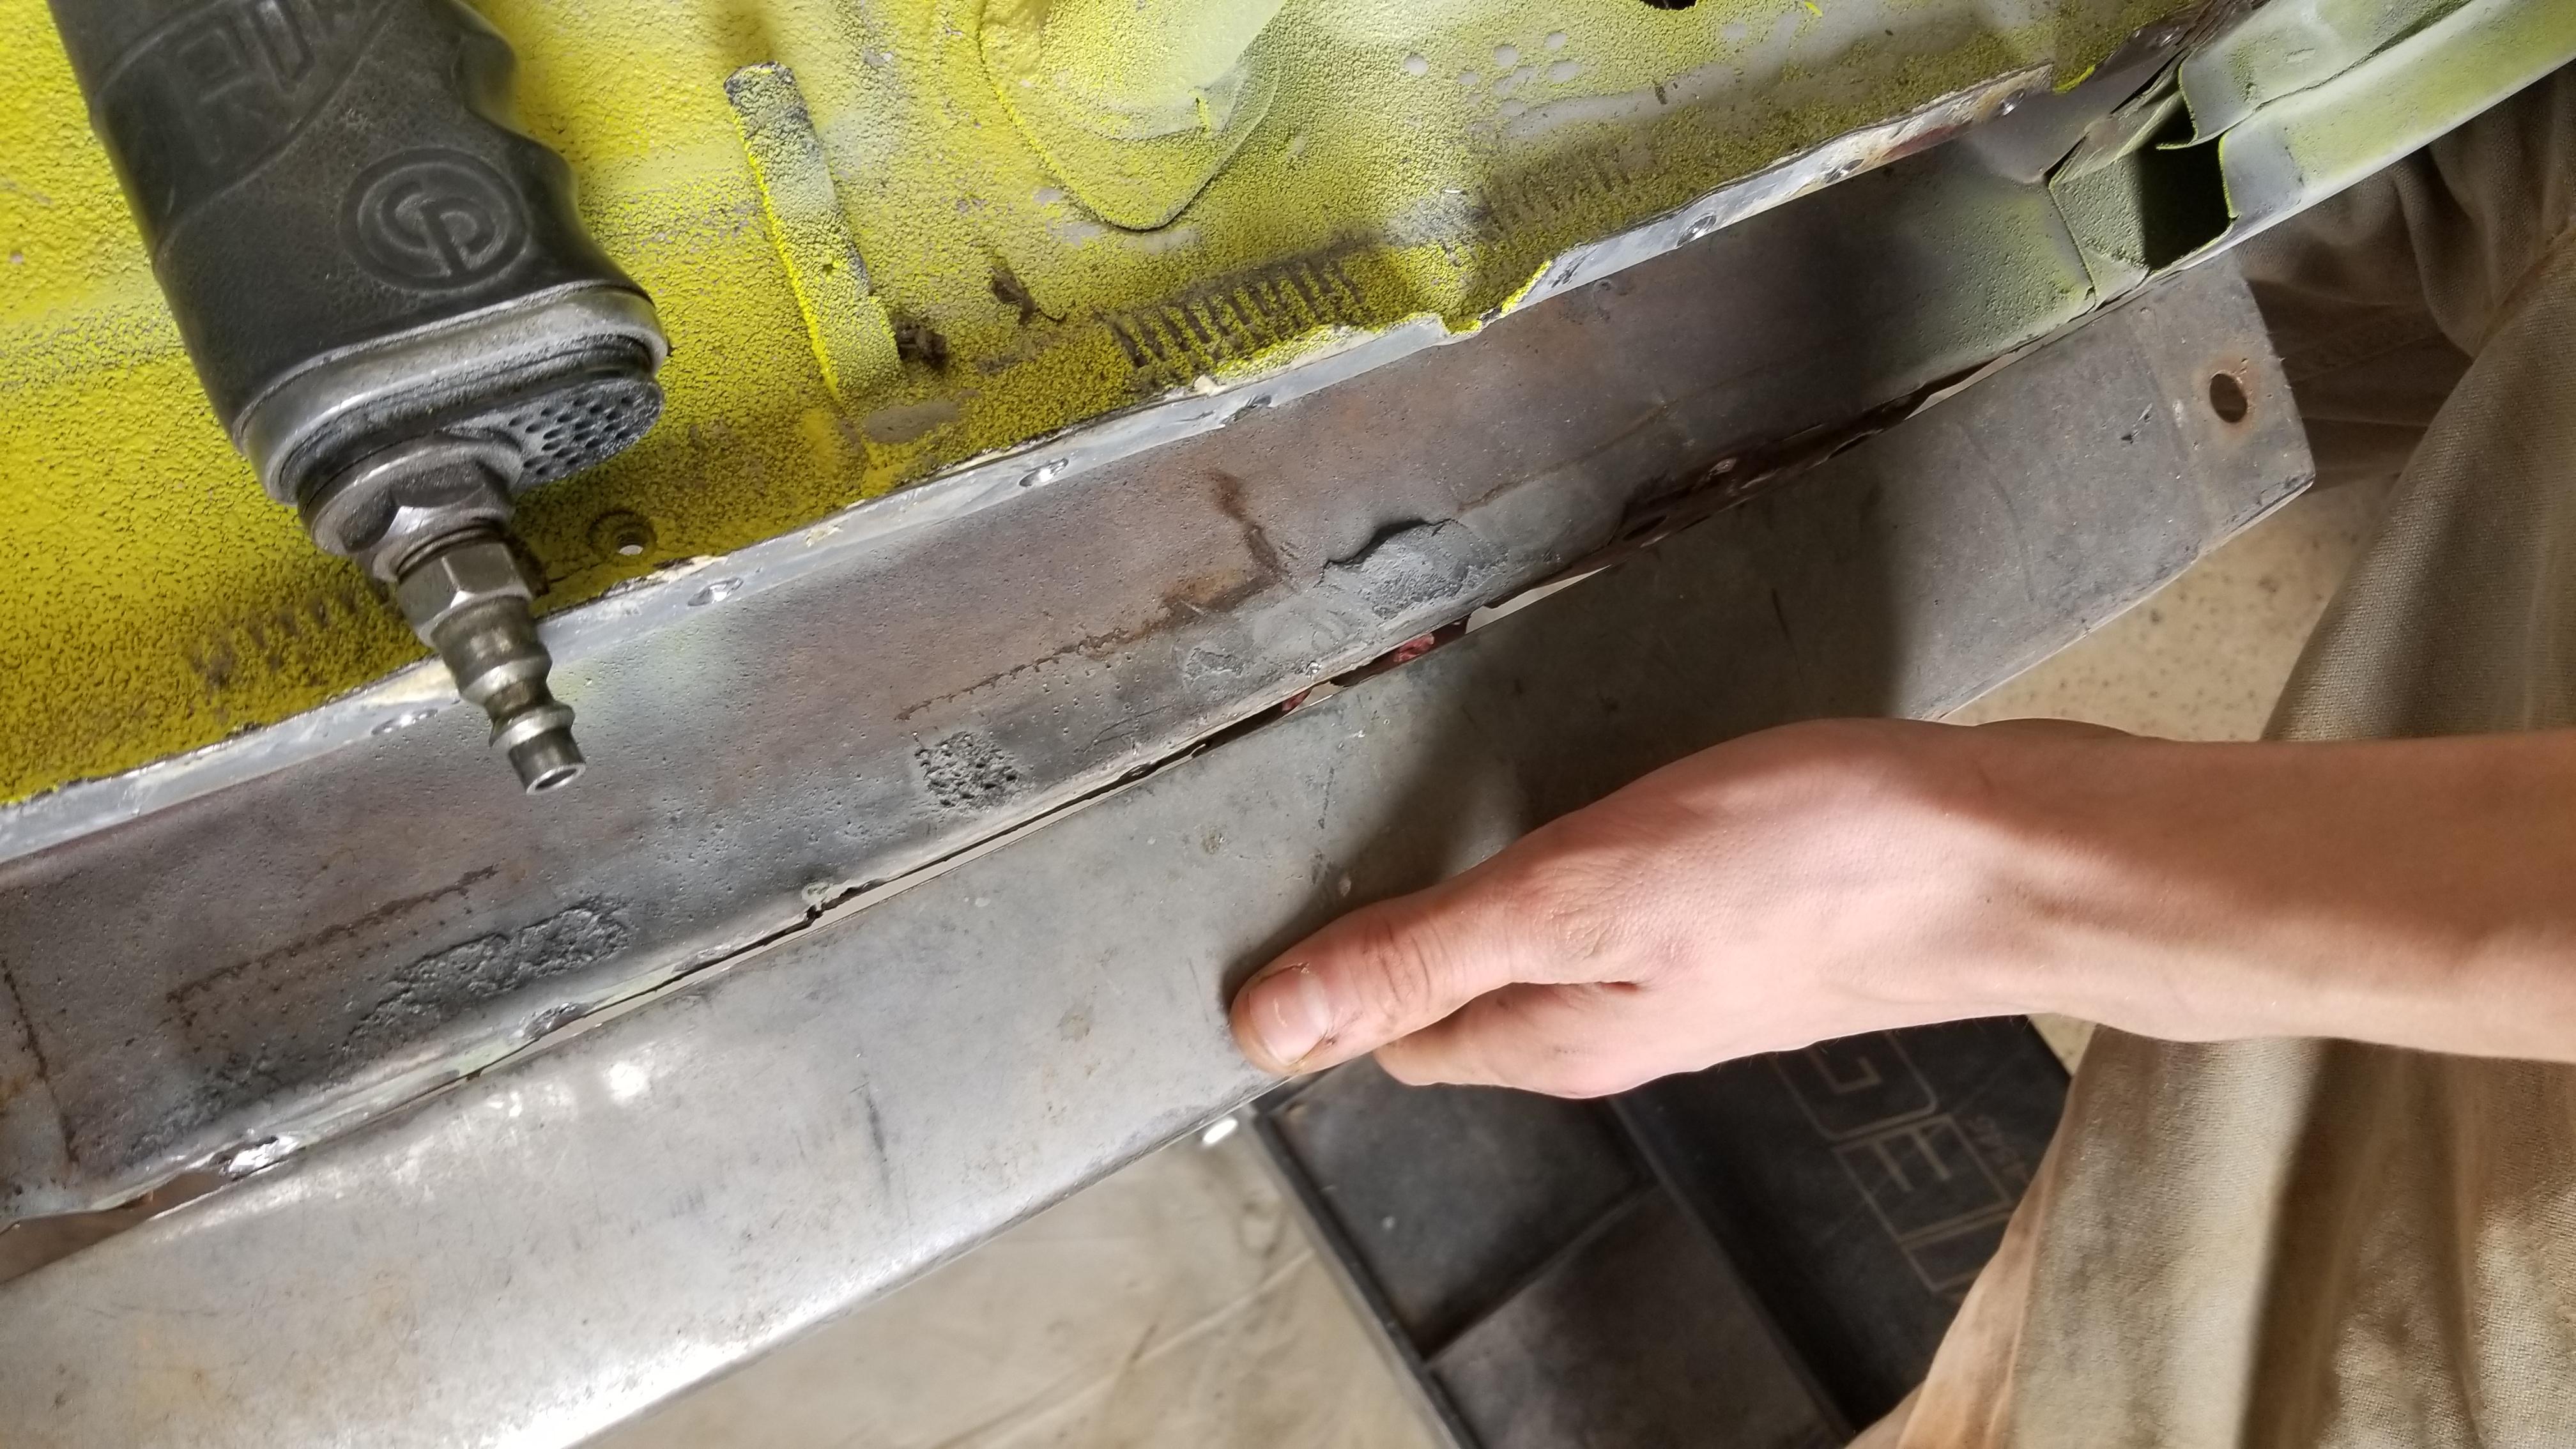
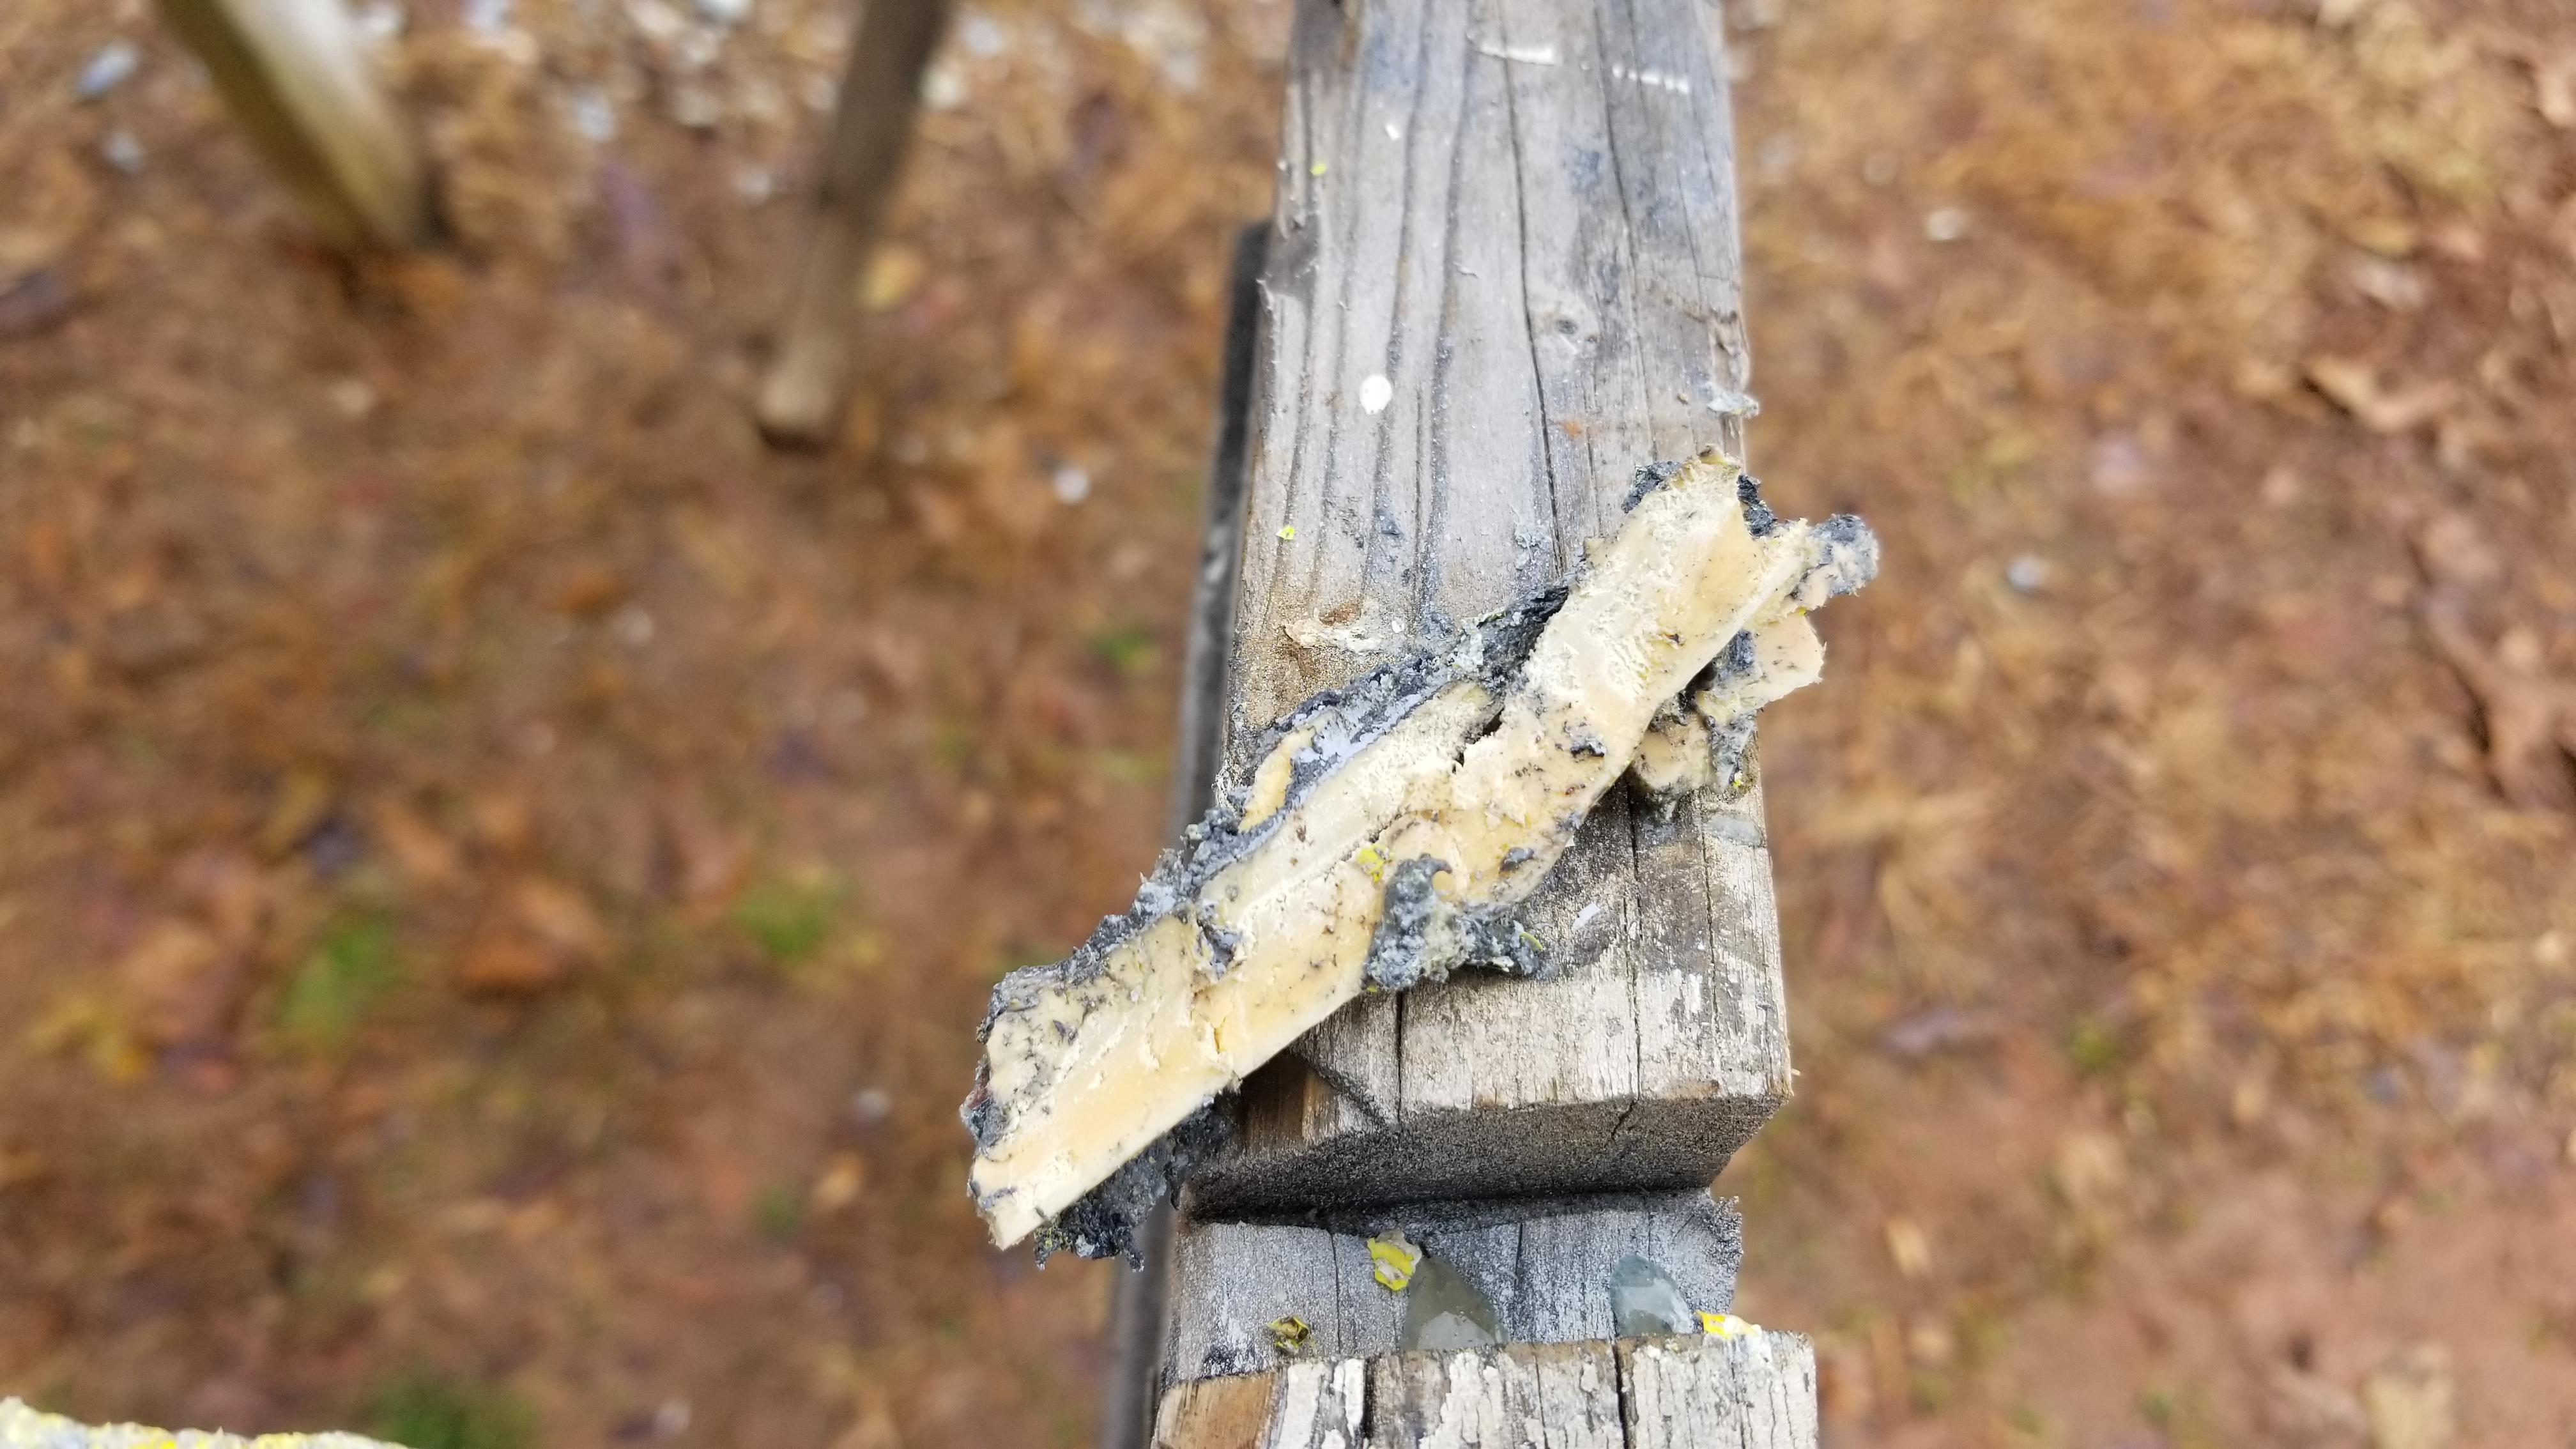
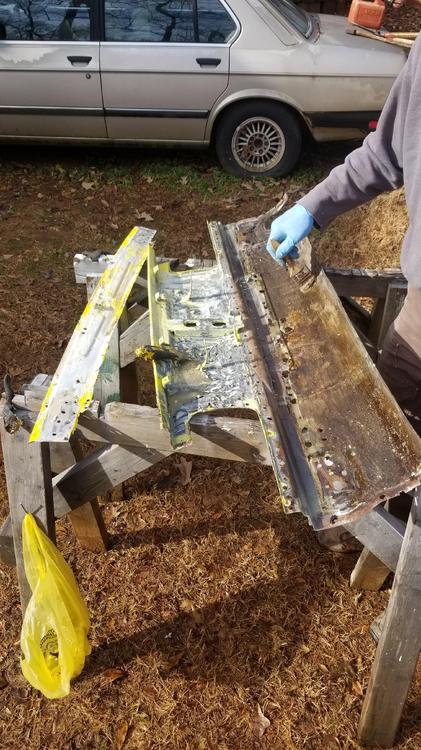
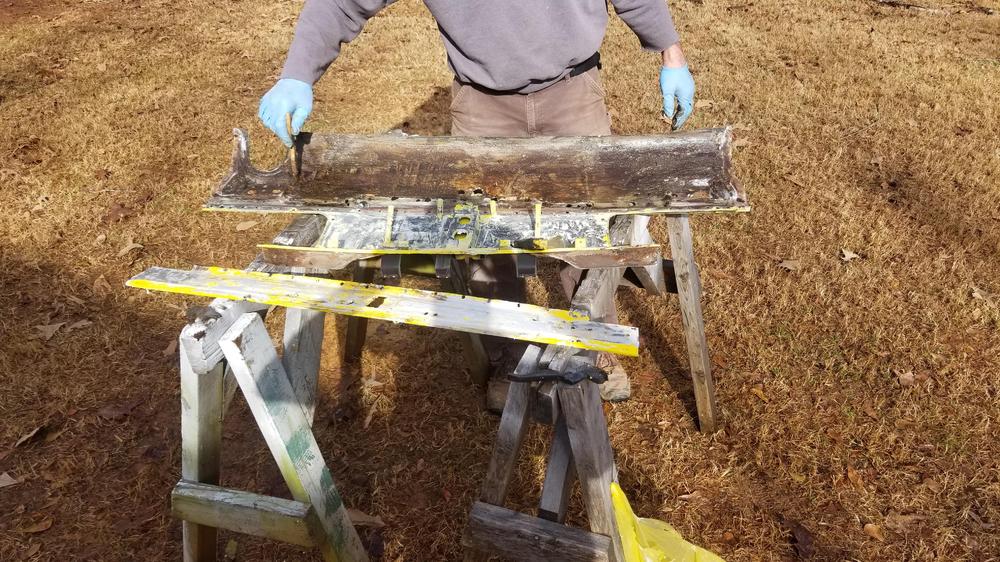
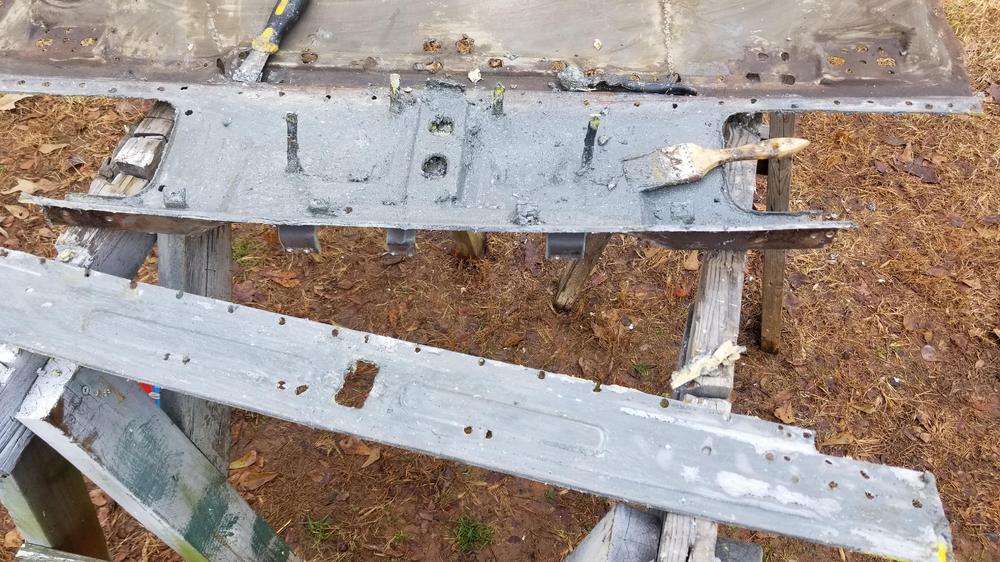
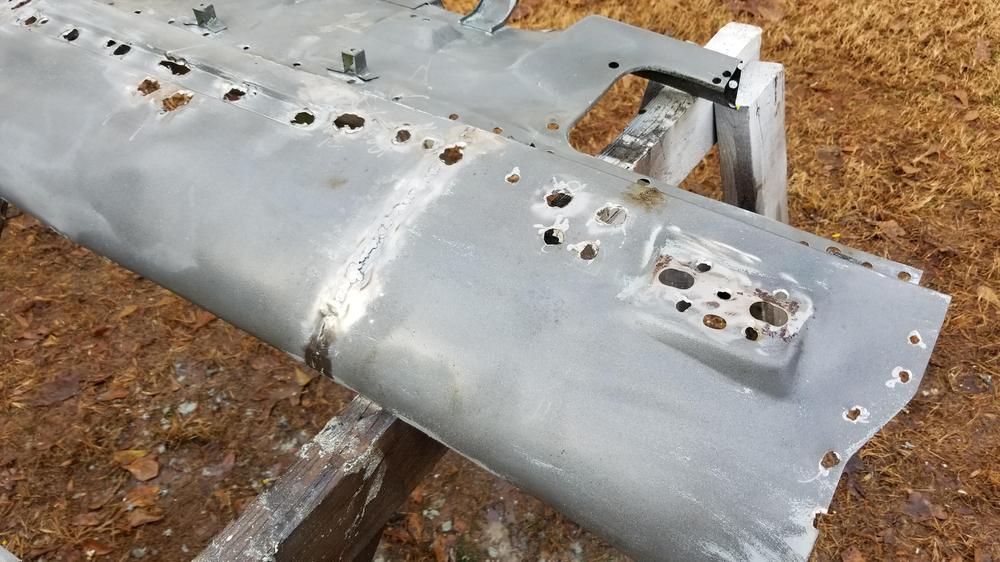
So 4 hours spent stripping panels on Satuday the epoxy primer was really difficult to get off. Also I don't know what Nissan used a s seam sealer, it's sort of beige, but it's really tough stuff even 50 years later Also "Lizard Skin" takes some work to get off too. It is basically a rubber type product when it dries You can see where I worked on the center section in the past. That must have been my old welder because the new welder makes better welds than that. It's hard to see in the pictures but the panel has a lot of dents and warping


-
I may have one laying around, if you want me to look?
-
Much better!
-
There are plenty of 40 yr old wiring harnesses working just fine. If it were mine I would try to repair what you have or source a better harness if the one in the car is all hacked up. It's a time intensive project to rewire a car and that makes it expensive
-
I hope she feels better! I can put the hood on and off by myself if I'm careful. Put some towels on the upper fenders. Get the hinges on the car. Lay the hood down flat with the front edge against your legs and with the upper bolt holes lining up, lay it down. Put the upper bolts into the hood, then pivot the hood up and add the lower bolts. Got this from @Home Built by Jeff
-
I hadn't ever seen it. It is a nice clean solution and appears to have no return line provided.
-
Super Cool!!! You need to start a thread on what you've picked up? Grannyknot's metal working tips
-
It's a nice clean looking rail, although it might still have some heat issues, but it looks nice.
-
Had you seen him before? I just found him recently. He is very good and you can tell what he is actually doing but I have to watch in small doses. One advantage he does have on us, is it seems like most of the cars he is working on have much thicker panels which are much more forgiving and can be filed to be perfectly smooth.
-
Are they on the car yet?
-
Is that where we're staying? Bama looked really good in the first quarter. Not so much later in the game. My daughter is talking lots of smack C

-
Also Jeff, the part you refer to as the proportioning valve below the master cylinder is actually a brake failure switch. It will light the brake light on the dash if you have a circuit failure. The proportioning valve for the 240z is in the rear of the car. It is a small brass part that acts as a tee connector for the two rear brake drum lines. If you add a hand valve remove the stock proportioning valve in the rear of the car.
-
What are these fuel rails? Are they made from a factory rail or sourced some other way?
-
I believe I have seen one of those fans in a junk yard. I will need to look again. How does this compare to the 280zx AC?
-
I don't think I can answer that question, sorry.
-
Yes, you should be able to remove it and clean it but I don't see how it will help
-
Ouch!!
-
Fluid won't show up in the car. It all ends up in the vacuum booster. Which ruins it. That's what ZH was alluding to
-
Put them on the car and adjust them before you paint them to see if you can get them adjusted properly. Did you try loosing the hood bolts (not the hinge bolts) and pushing the hood down then re-tightening? I know I have had the same issue and gotten rid of it. So I believe it's possible