Richard McDonel
Free Member
-
Joined
-
Last visited
Everything posted by Richard McDonel
-
Two more pics

-
REALLY not sure what is happening. Try again: For $12 for a kit consisting of three tiny pieces, I think Motorsport should be providing some instructions. As seen on this forum, we, a number of people who are familiar with Z-car repairs, have all been uncertain as to how this job should be done. How many of those $12 kits are going to remain unused? For now, I'll attach the relevant photos. Thanks again All


-
Not sure what happened there. Must have pushed a wrong key. Anyway, the point I was making was that for $1
-
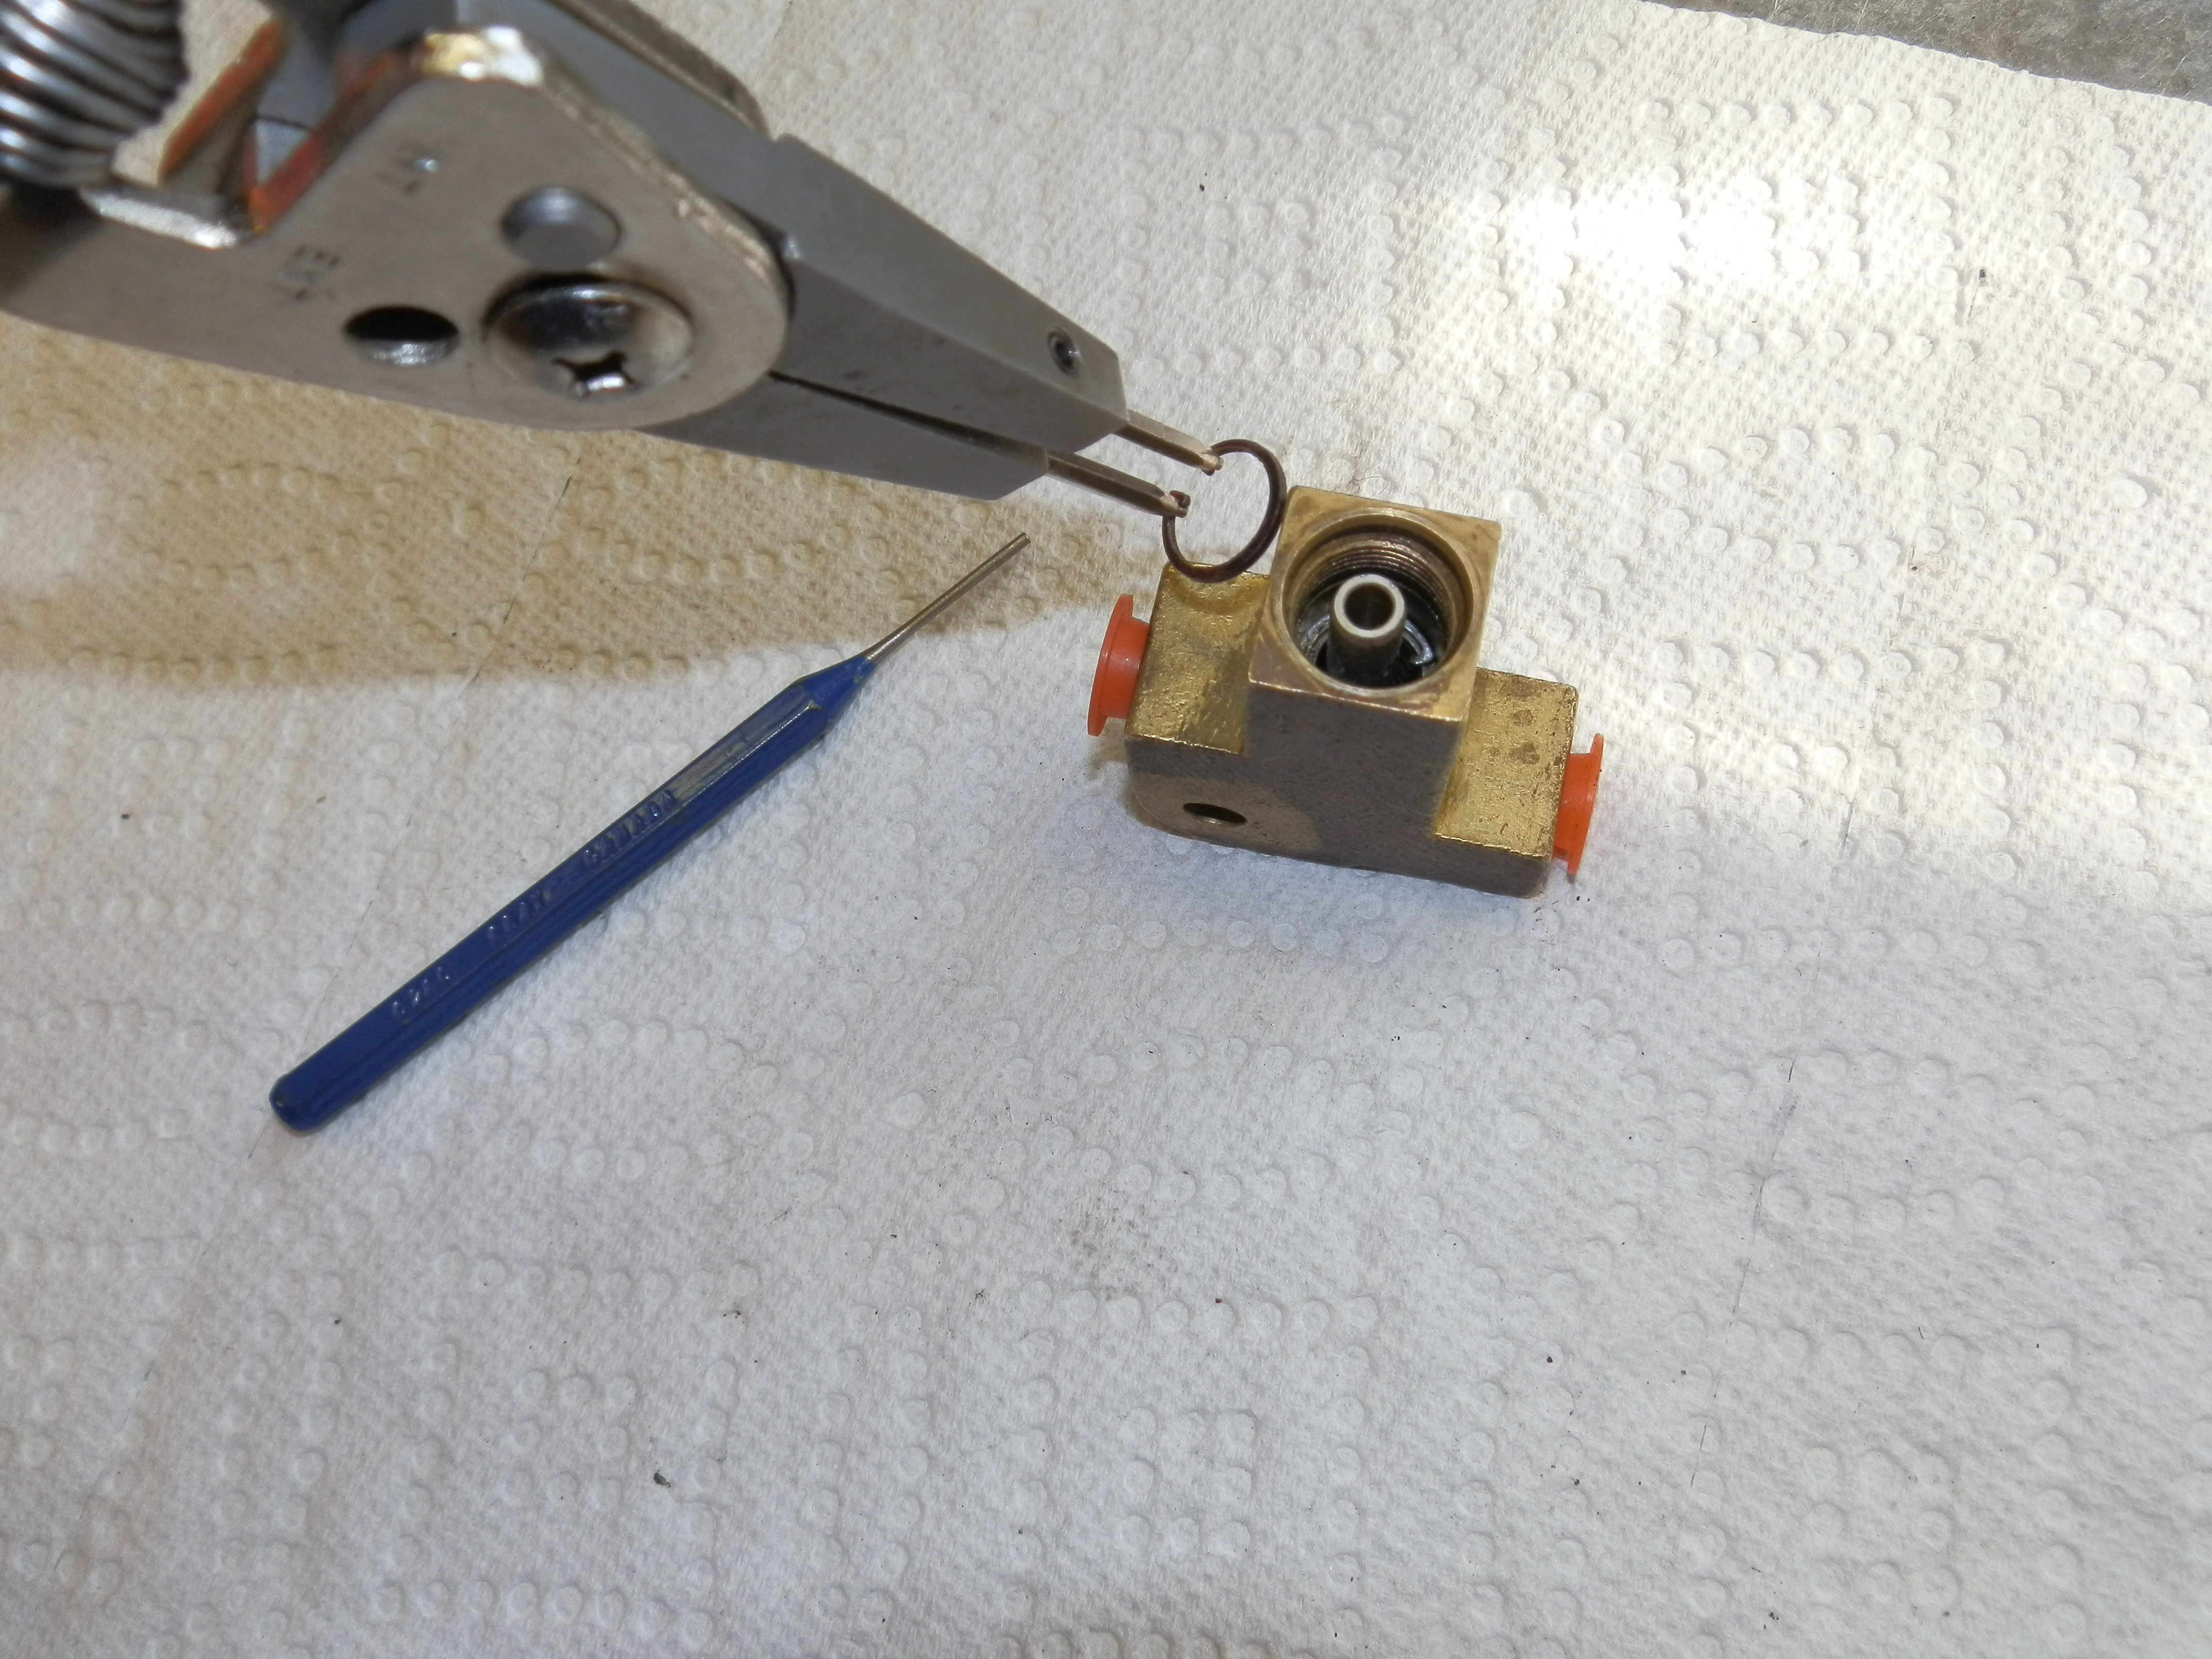
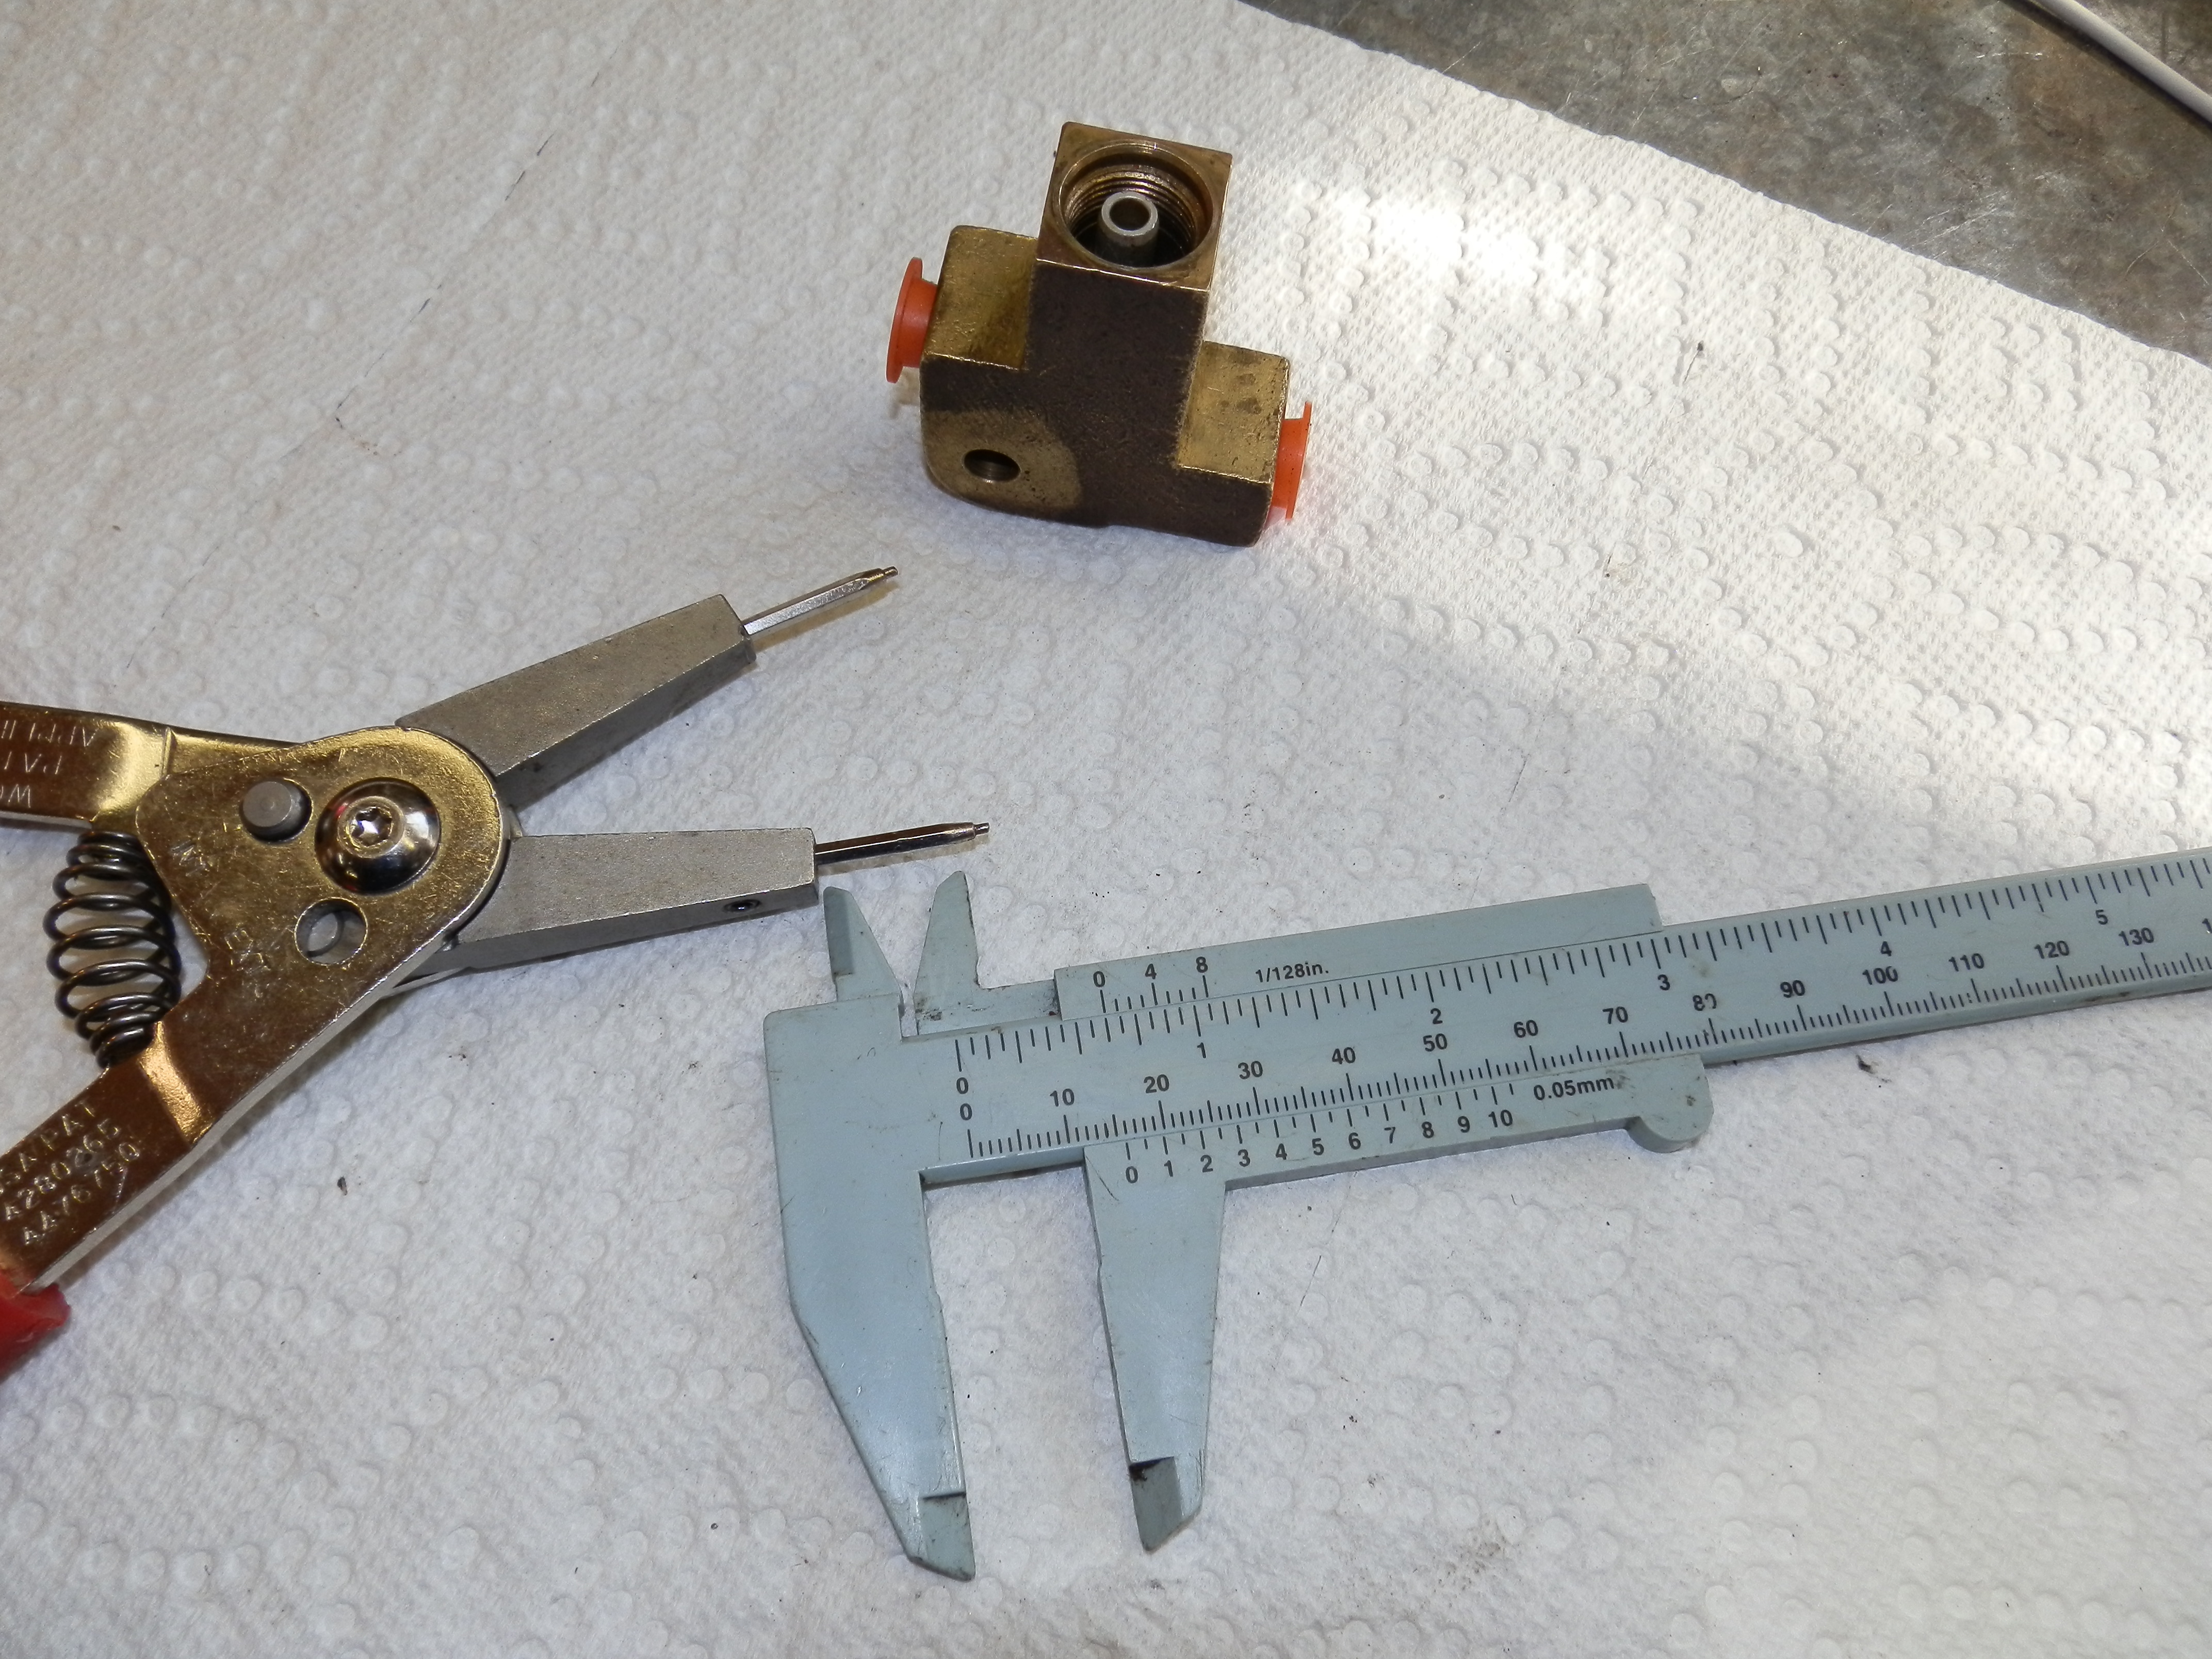
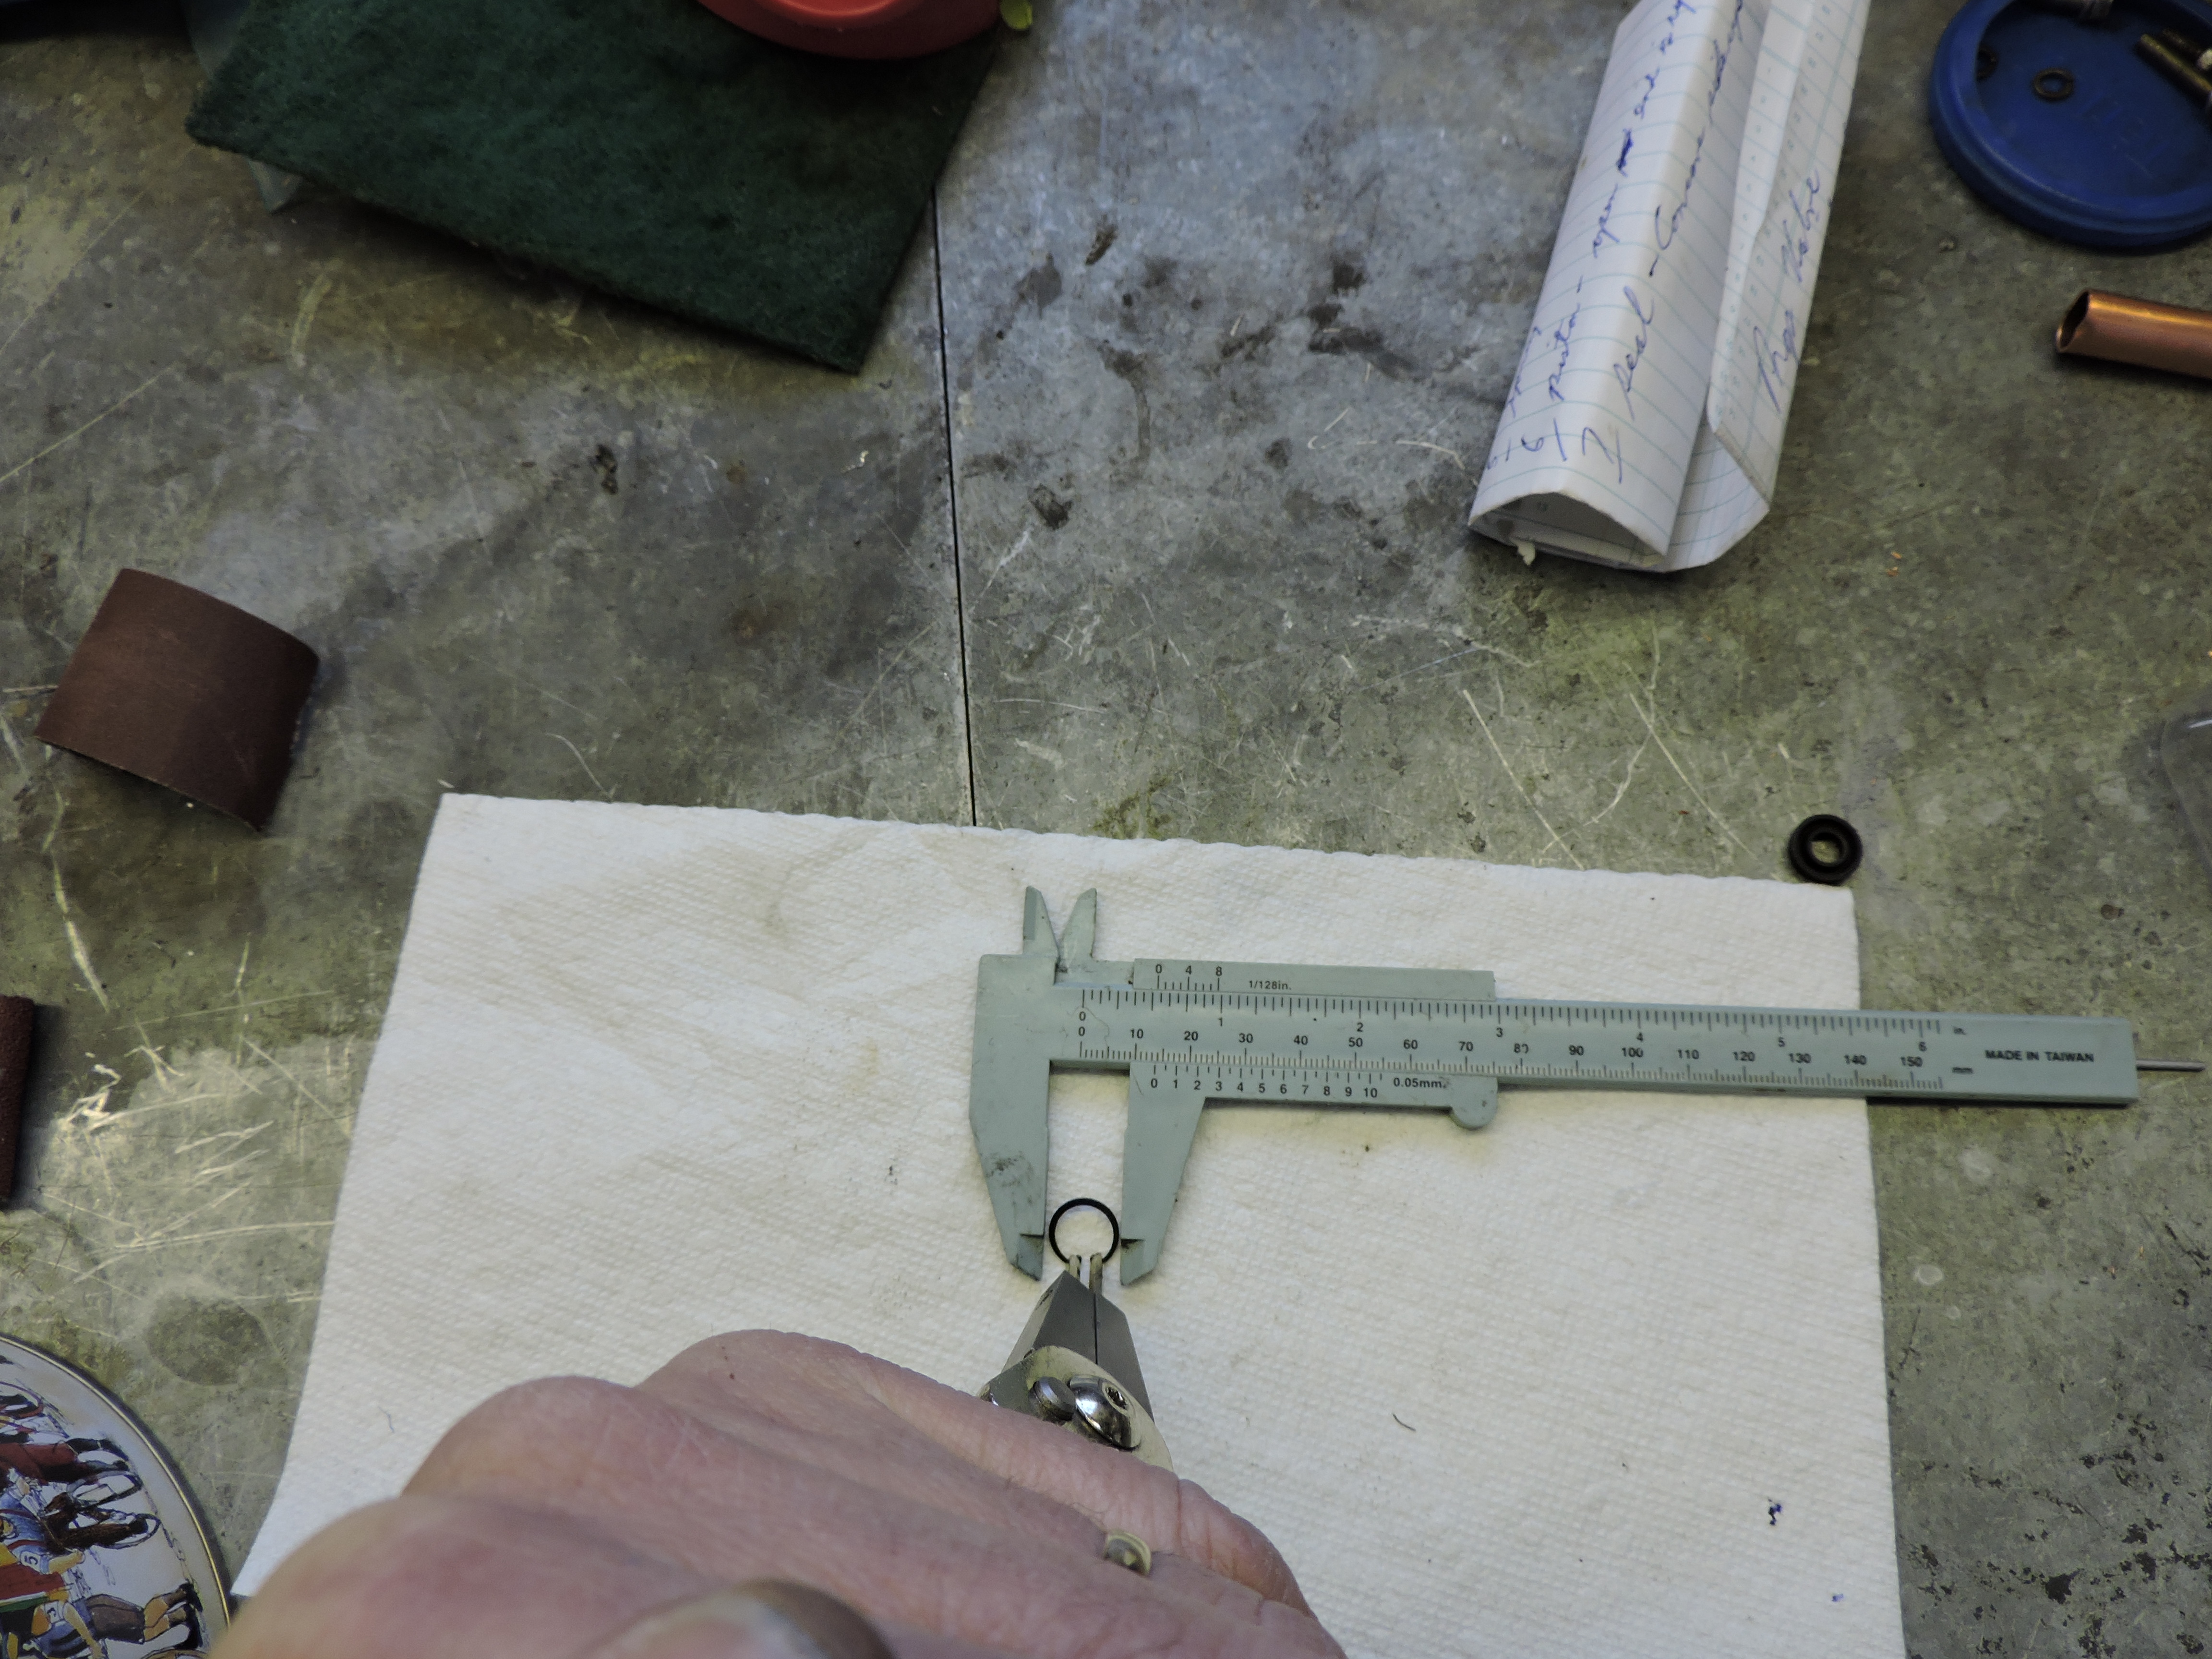
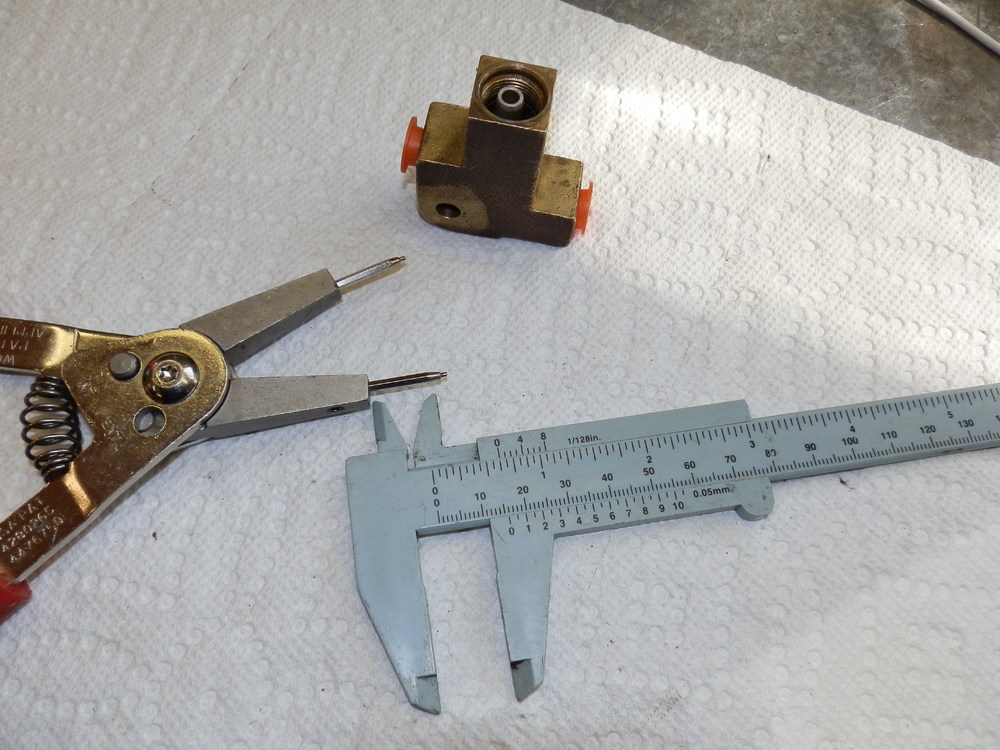
"Eureka." Or "Mr. Watson, Come here." That`s how I feel today. Thanks for all your thoughts and ideas guys. After more than a couple of hours fiddling, pondering, writing, reading, and more fiddling, I have the spring and its snap-ring in place. While I think there is some merit in SteveJ's suggestion of compressing the spring with fishing leader, the only fishing line I have is about 40 years old, and it was not up to holding a steel spring in compression. I tried Cap't Obvious's suggested of carrying the clip into position by squeezing it into a tube or pipe, then compressing the spring using the resultant assembly, but as you can see from the first photo attached, the clip was simply too big to fit into a 3/8" i.d. piece of pipe. Finally, I took my snap-ring pliers, and set the pins in for maximum exposed length (see photo), as the groove is 16 mm. below the outer end of the cylinder. On this latter point I should mention that the factory service manual drawing BR-8 is just about exactly to scale. It took many tries, and in fact the notches on first spring clip I used simply wore out. Fortunately I had another old proportioning valve, courtesy of ZKars (thanks Jim), and was able to salvage its spring clip. With the spring in place, I set the clip on top and pressed down with the snap-ring pliers, while simultaneously forcing the opposite side down with a small pin punch. After xx tries, it finally set. So it`s done. But having said that, I remain a bit concerned that the inevitable scratches on the side of the piston may cause some grief down the road, although it appears to me that the real work of the piston all happens at the bottom end. With respect to the repair kit from Motorsport, i think I`ll drop those folks a line and suggest that for $1
-
Patcon, SteveJ, Cap't. Obvious, Thanks for your suggestions. It might take a day or two for me to get back into the shop, but I'll try them. The fact that the piston / push rod has to be in place before the spring, may crowd things a bit in there, but we'll give it a shot. As for the order of the spring clip and the flat washer, I thought of that too after looking at the photo I took. I did look back on my notes, and that's what I wrote at the time. Also, if the flat washer was between the spring and the spring clip, that would leave the other side of the spring clip pressing on the rubber seal, and I would question the rationale for that. Mind you, if everything on Z cars was rational, we wouldn't need this forum, would we? Thanks All
-
SteveJ, The kit was purchased from Motorsport Auto, part number 24-5556 Thanks,
-
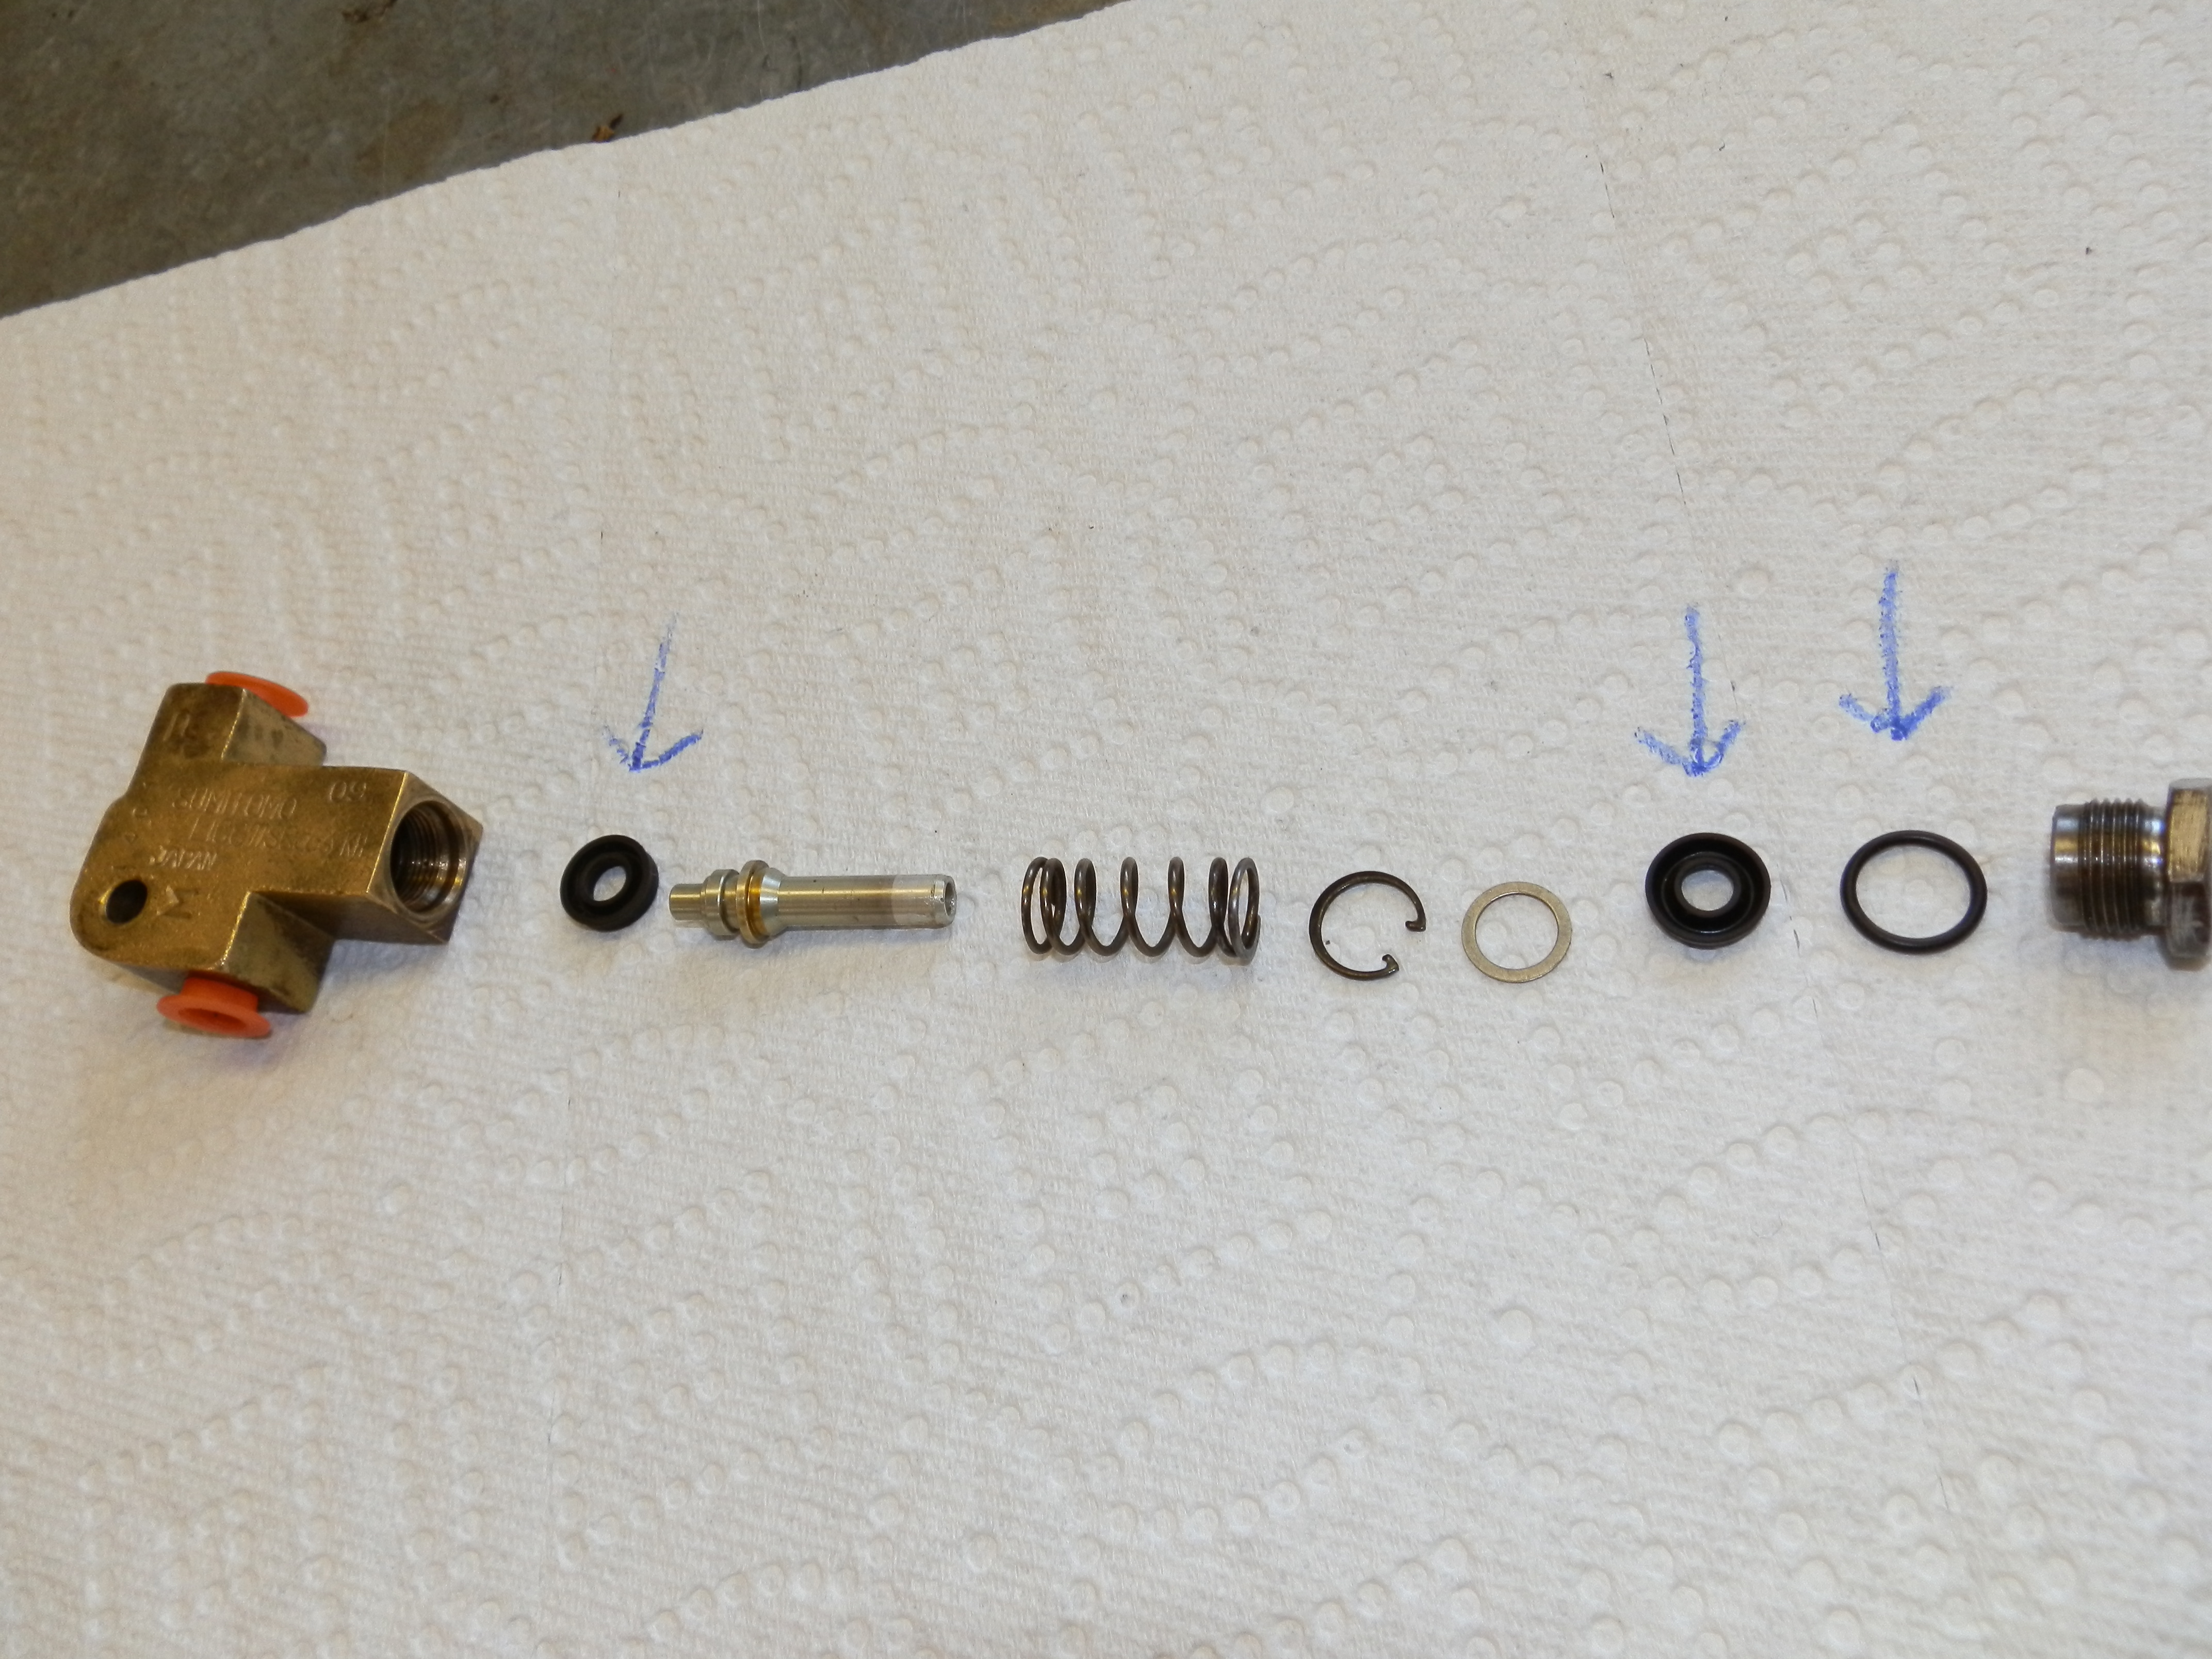
EuroDat, Thanks for replying. Here is a photo of all the bits and pieces, lined up in the order of disassembly. Arrows point to the three parts of the rebuild kit. They are two seals, and an o-ring that fits on the threaded end plug. To hold the spring in compression while inserting the washer and spring clip is the challenge. Given that the original rubber seals were in not-bad condition when they came out, I'm wondering if seal replacement is even needed. There was dirt and grime inside, so should I find another old valve, leave it assembled, and clean it out with air and brake cleaner, alcohol, naptha or whatever?

-
I recently purchased from a popular on-line Z-car supplier a rebuild kit for the rear brake proportioning valve on a '71 240. The problem is that rebuilding of the valve assembly appears all but impossible. Somehow a spring has to be compressed about half way into a cylinder and held in place while a spring clip is pinched, inserted and pressed against the top of the spring. I have read some comments on this forum that no, it is not possible to rebuild, but then why would a reputable supplier sell the kit? Is there a special tool to enable the job? Your thoughts would be appreciated. Thanks
-
Thanks guys!
-
I am restoring a '71 Series 2. I have three sets of the dual fuel rails above the manifold. All three are grimy and rusty. Once they're cleaned up, what is the correct finish; plating, paint, or bare metal? Thanks
-
Well done! Thanks for sharing.
-
You've got a bit of work ahead of you. I've seen rust on fenders, rockers, doors, radiators, control arms, etc. but this is the first time I've seen rust on an oil filter. This tells us two things: 1. The oil filter seal is OK 2. We'd all like to see photos of the engine once you get it disassembled.
-
I have two worn, but complete, S30 factory service manuals for body and chassis. I keep them in three-ring binders. I would like to sell one ($50 fair?), or trade for either a complete engine manual, or a complete owner/operator manual. Richard McDonel
-
Grannyknot, As you predicted, zKars (Jim), who lives not far from me, understood the problem and had the part I needed (nice guy too). Thanks for the suggestion. Forums like this are a remarkable source of knowledge and wisdom. Cheers All,
-
Betty, Someone out there might know the answer to your question; but not me. What I have learned is that detail changes on the 240s did not often follow model-year designations. Mid-year changes do not appear to be uncommon. I guess it gives councours judges something to puzzle over. Cheers,
-
Betty, Someone out there might know the answer to your question; but not me. What I have learned is that detail changes on the 240s did not often follow model-year designations. Mid-year changes do not appear to be uncommon. I guess it gives councours judges something to puzzle over. Cheers,
-
Siteunseen, Thanks for bringing that up. On my filler hose, the #18 line you refer to has been shut off by someone at some time. The plastic fitting #14 appears to have been heated to the point of melting, then crimped shut. As between you and Dennis, this is becoming more interesting / confusing. If the reservoir is meant to catch fill-up overflow via Line 18, then I should make very sure the tank is sound. Or, if we ditch Line 18, as appears to have been done on my car, one would have to be very careful on refueling. Another thought with respect to the reservoir - if I patch-repair it as has been suggested, would the application of a fuel-tank slush compound (as I have already done on the fuel tank), ensure a good seal? And yes, I should track down the "young fella who lives just south" (about 1.5 hour drive). This is my first 240Z project, and it sounds like he has vast experience. This proving to be an interesting conversation.
-
I appreciate all this help folks. Question for "Granny." What is that small canister (?) towards the bottom centre of your sketch? Cheers, and Happy New Year.
-
Dennis, Thanks for writing. Yes it can, but I'm a bit uneasy about relying on a patch job on a plastic gasoline vessel. Am I being overly cautious? I see you are the original owner of the same year as mine. Still running the original tank?
-
Restoring 1971 (HLS30 28726). I have the believed-to-be original plastic fuel reservoir / vapour tank. It is however damaged, and I'm not comfortable with the idea of patching it. I also have the steel version that came off a later 1973. It is sound, but will take some metal bending and / or cutting to install. Does anyone know if original-dimension plastic units are available? Or alternatively, does anyone have any experience making the newer steel tank fit the earlier car? Many thanks,
-
Charlie, Thanks a bunch, Start in the middle rather than at one end makes sense. Also the part about enlisting the aid of one's wife! Cheers
-
In his book on restoring Z cars, Wick Humble makes installing the roof / ceiling liner sound tricky, but not all that hard. But as he warns, once you've stuck the first bit on, you can't go back. Now given that if you are just a few degrees out of perfect alignment when you start, you're likely going to be inches out when you get to the other end.. Does anyone have any tips for getting it right the first time, or alternatively any at-all-costs-avoid-this-mistake warnings? Many thanks.
-
Thanks everyone! Where the fender seals originated I don't know. They came, unpackaged, with a rusted-out parts car I bought. I'n OK for clips, they with the parts car too. Thanks for the weatherstrip tip. I'll see how the stock material works, and if I don't like it then switch. Best regards,
-
This has probably been asked before, but I've gone back to 2013 on this forum and haven't found it , so here goes. I'm trying to install the front-to-rear rubber seals that attach to the welded seam between the upper and lower front fenders of my '71 240Z. I'm told they go thick-side down, and curve outward . So far so good. What I'm unsure of is whether they attach on the inboard or outboard side of the welded seam. Also, the rubber seals (new) I have are a bit shorter than the length of welded seam available to them - do I set them to the front or the back of the seam? Or does it matter? Second question is with respect to the battery tie-down. The nearest thing in my pile of parts is an unusual three-sided plastic frame. Is that OE Datsun? If not, can someone describe what a 240 should have as a tie down? Many thanks
-
I apparently have some serious work to do on my brake hydraulics, and it would seem to involve the front proportioning valve warning switch, and/or the rear proportioning valve. The rear is discussed in the FSM, and I'm about to get to work on that. But as for the front warning switch unit, the manual is quite stern in demanding that you don't even try to fix it - just get a new one. Easy enough said, but unless I've been misled there aren't any new ones to be had. Any thoughts on safety concerns on a DIY rebuild? Thanks