zKars
 Subscriber
-
Joined
-
Last visited
Everything posted by zKars
-
 After about 15 minutes of drilling, and pushing it in and pulling it out, I saw some magic at the other end of the line. A slow and steady drip of goo coming out of the other end! C9116DD0-8DCC-46B1-BB93-33EA809B0F06.MOV
 -
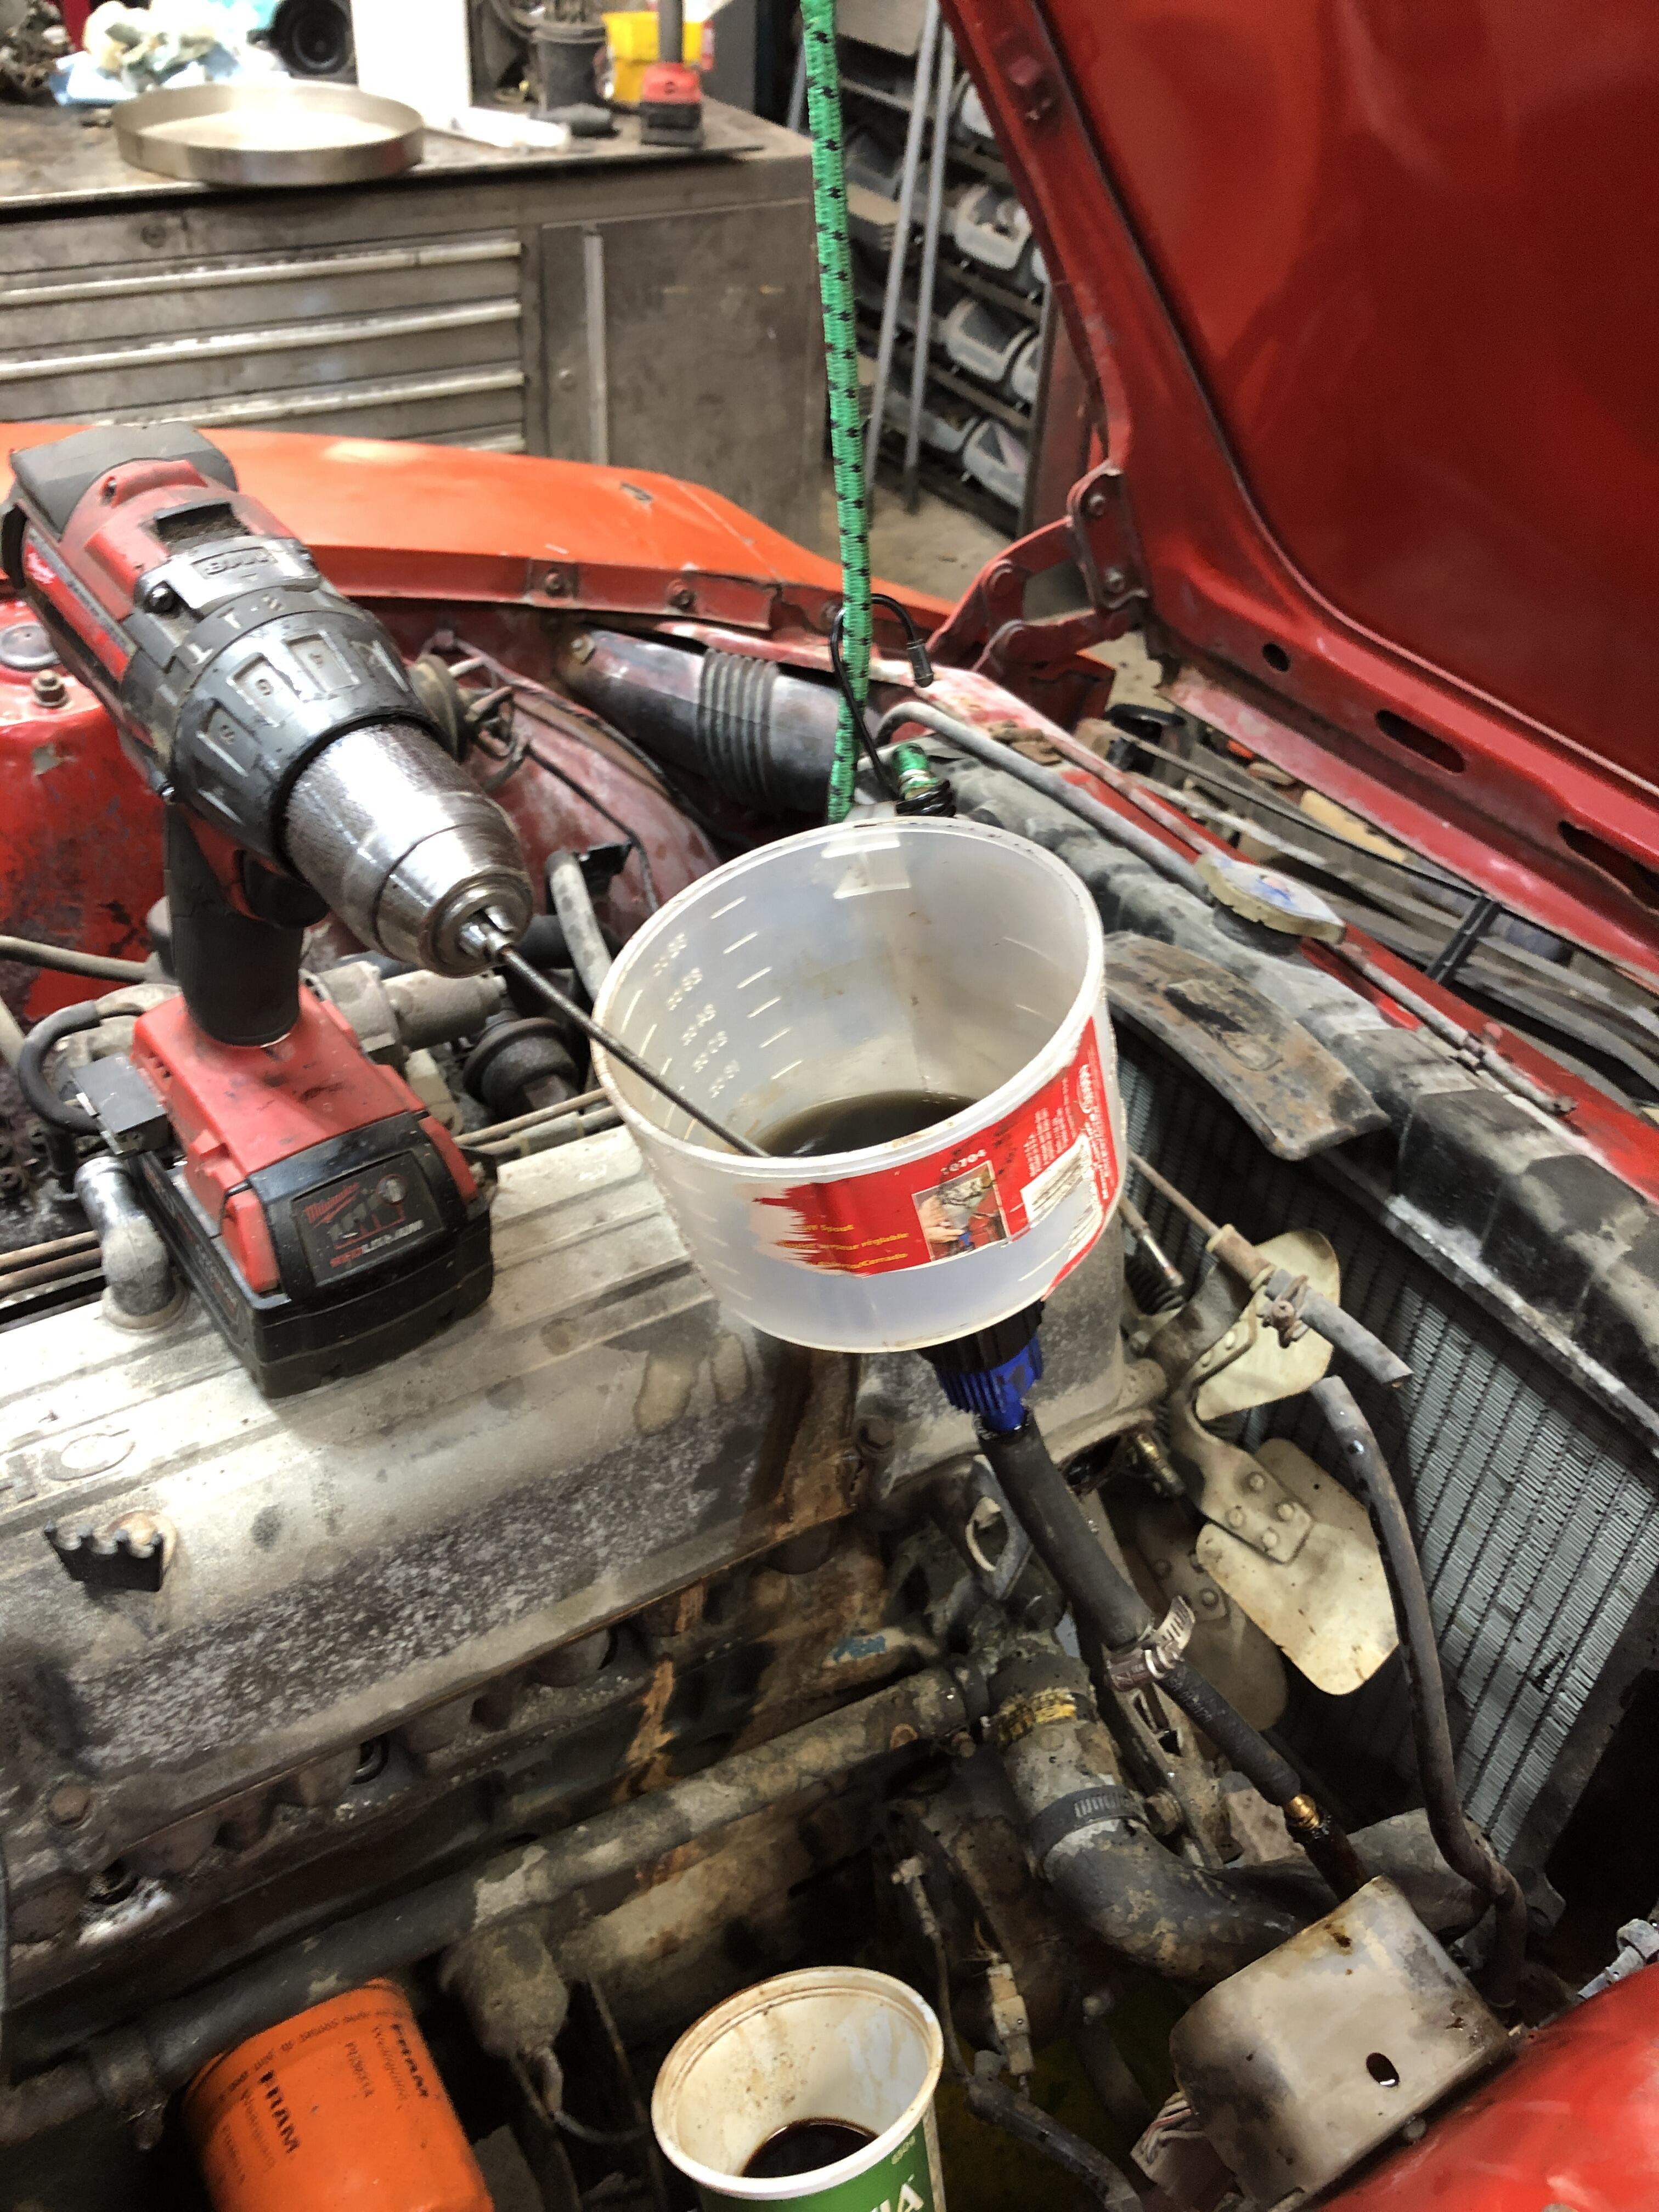
Now the pretty pictures cause you’re getting bored of my lengthy explanations….. Now I have to explain something. While I could drill the line, it didn’t clear it. I had to then move to stage two, which was to hook up my lacquer thinner soak funnel and line, then drill down through that, which got the thinner down into and distributed through the fuel line. 11D0252B-B714-45B5-8269-D969D272A91C.MOV

-
Last week I was parting out a rotten old ZX and one of the things I pulled out and tossed was the speedo cable. Got one of those in stock already and they don’t work on S30’s. Then I start thinking about the rotating core wire. You don’t suppose…….. I go grab it, and have a look. Its pretty long, like about 7 feet long, and has a diameter of about 1/8” or so. real flexible, but the end has stiff part about 1” long that ground down square, like they welded that section to lock the spiral outer core to the center so it would grind down without fraying. It’s too long to make any decent turn in the fuel pipe. Dang it. But if I cut it down to about 1/4” of hard square end it might! Chopped it off, and I chuck the other end of the thing in a drill, and start stuffing the chopped off end down my fuel line. Well I’ll be horn swaggled! That thing digs in and heads on down the line making all the bends along the way.
-
So my usual approach with fuel line blockage is Lacquer Thinner. That stuff eats fuel deposits like nothing I’ve seen. With a blocked line, you hang up a funnel with a hose into the hard line in the engine bay, fill it with lacquer thinner and wait. And wait, and wait. Eventually the stuff will eat through the goo and clear the line. Eventually 24 hours later and the level of thinner in the funnel hasn’t moved much….. oh oh….. I start thinking of alternative methods. And start the process to remove the tank. Easier to the thinner wash and line clearing with it out. My mind wanders to ways to stick something mechanical into the line to drill it out. Try a hunk of stiff wire, but only goes a bout 2 inched and then the line does a 90. Nope. Think Roto Rooter with the snake. Nah, ain’t nothing that small around. Is there? Hmmmmmm
-
One of the issues I constantly deal with during a restoration is a gummed up fuel system. Not unusual that it ends up with new hard lines and/or a new fuel tank when things are just too far gone. I try to restore the existing lines and tank when ever possible, but it can be a time consuming and often fruitless endeavor in the end. Yesterday I came up with a new method that allowed me to save both a tank and the main fuel line from replacement. Sometimes it’s rust in the tank, sometimes it’s old fuel that has turned to solid or semi solid black tar or even hard crystals mixed with that tar. In yesterdays case, it was semi solid black tar. I have 11292 under the knife right now, it has sat a long time without attention. (20+ years). Tried to blow air back from the fuel filter end to the tank, nothing. Oh oh…. I pulled the drain plug with a big drain pan ready to catch whatever might come gushing out, but there was nothing. Initially. I looked in the hole, and it was covered with something black. WTH. I grabbed a stiff wire and stuck it in there and poked around and shortly I had a very very slow drip of incredibly viscous black goo begin to ooze out. Wonderful. Let that drip for a while, not very exciting. Took the rubber hose off the tank outlet pipe and then blew shop air into the line from the engine bay end. Nothing. Crap. Pushed a hose on the tank outlet pipe and tried to blow air into the tank. Nothing. Crap crap. Hard line plugged, tank outlet line plugged. Tank filled to some extent with something just like Northern Alberta Heavy Crude. My old nemesis is back to haunt me….
-
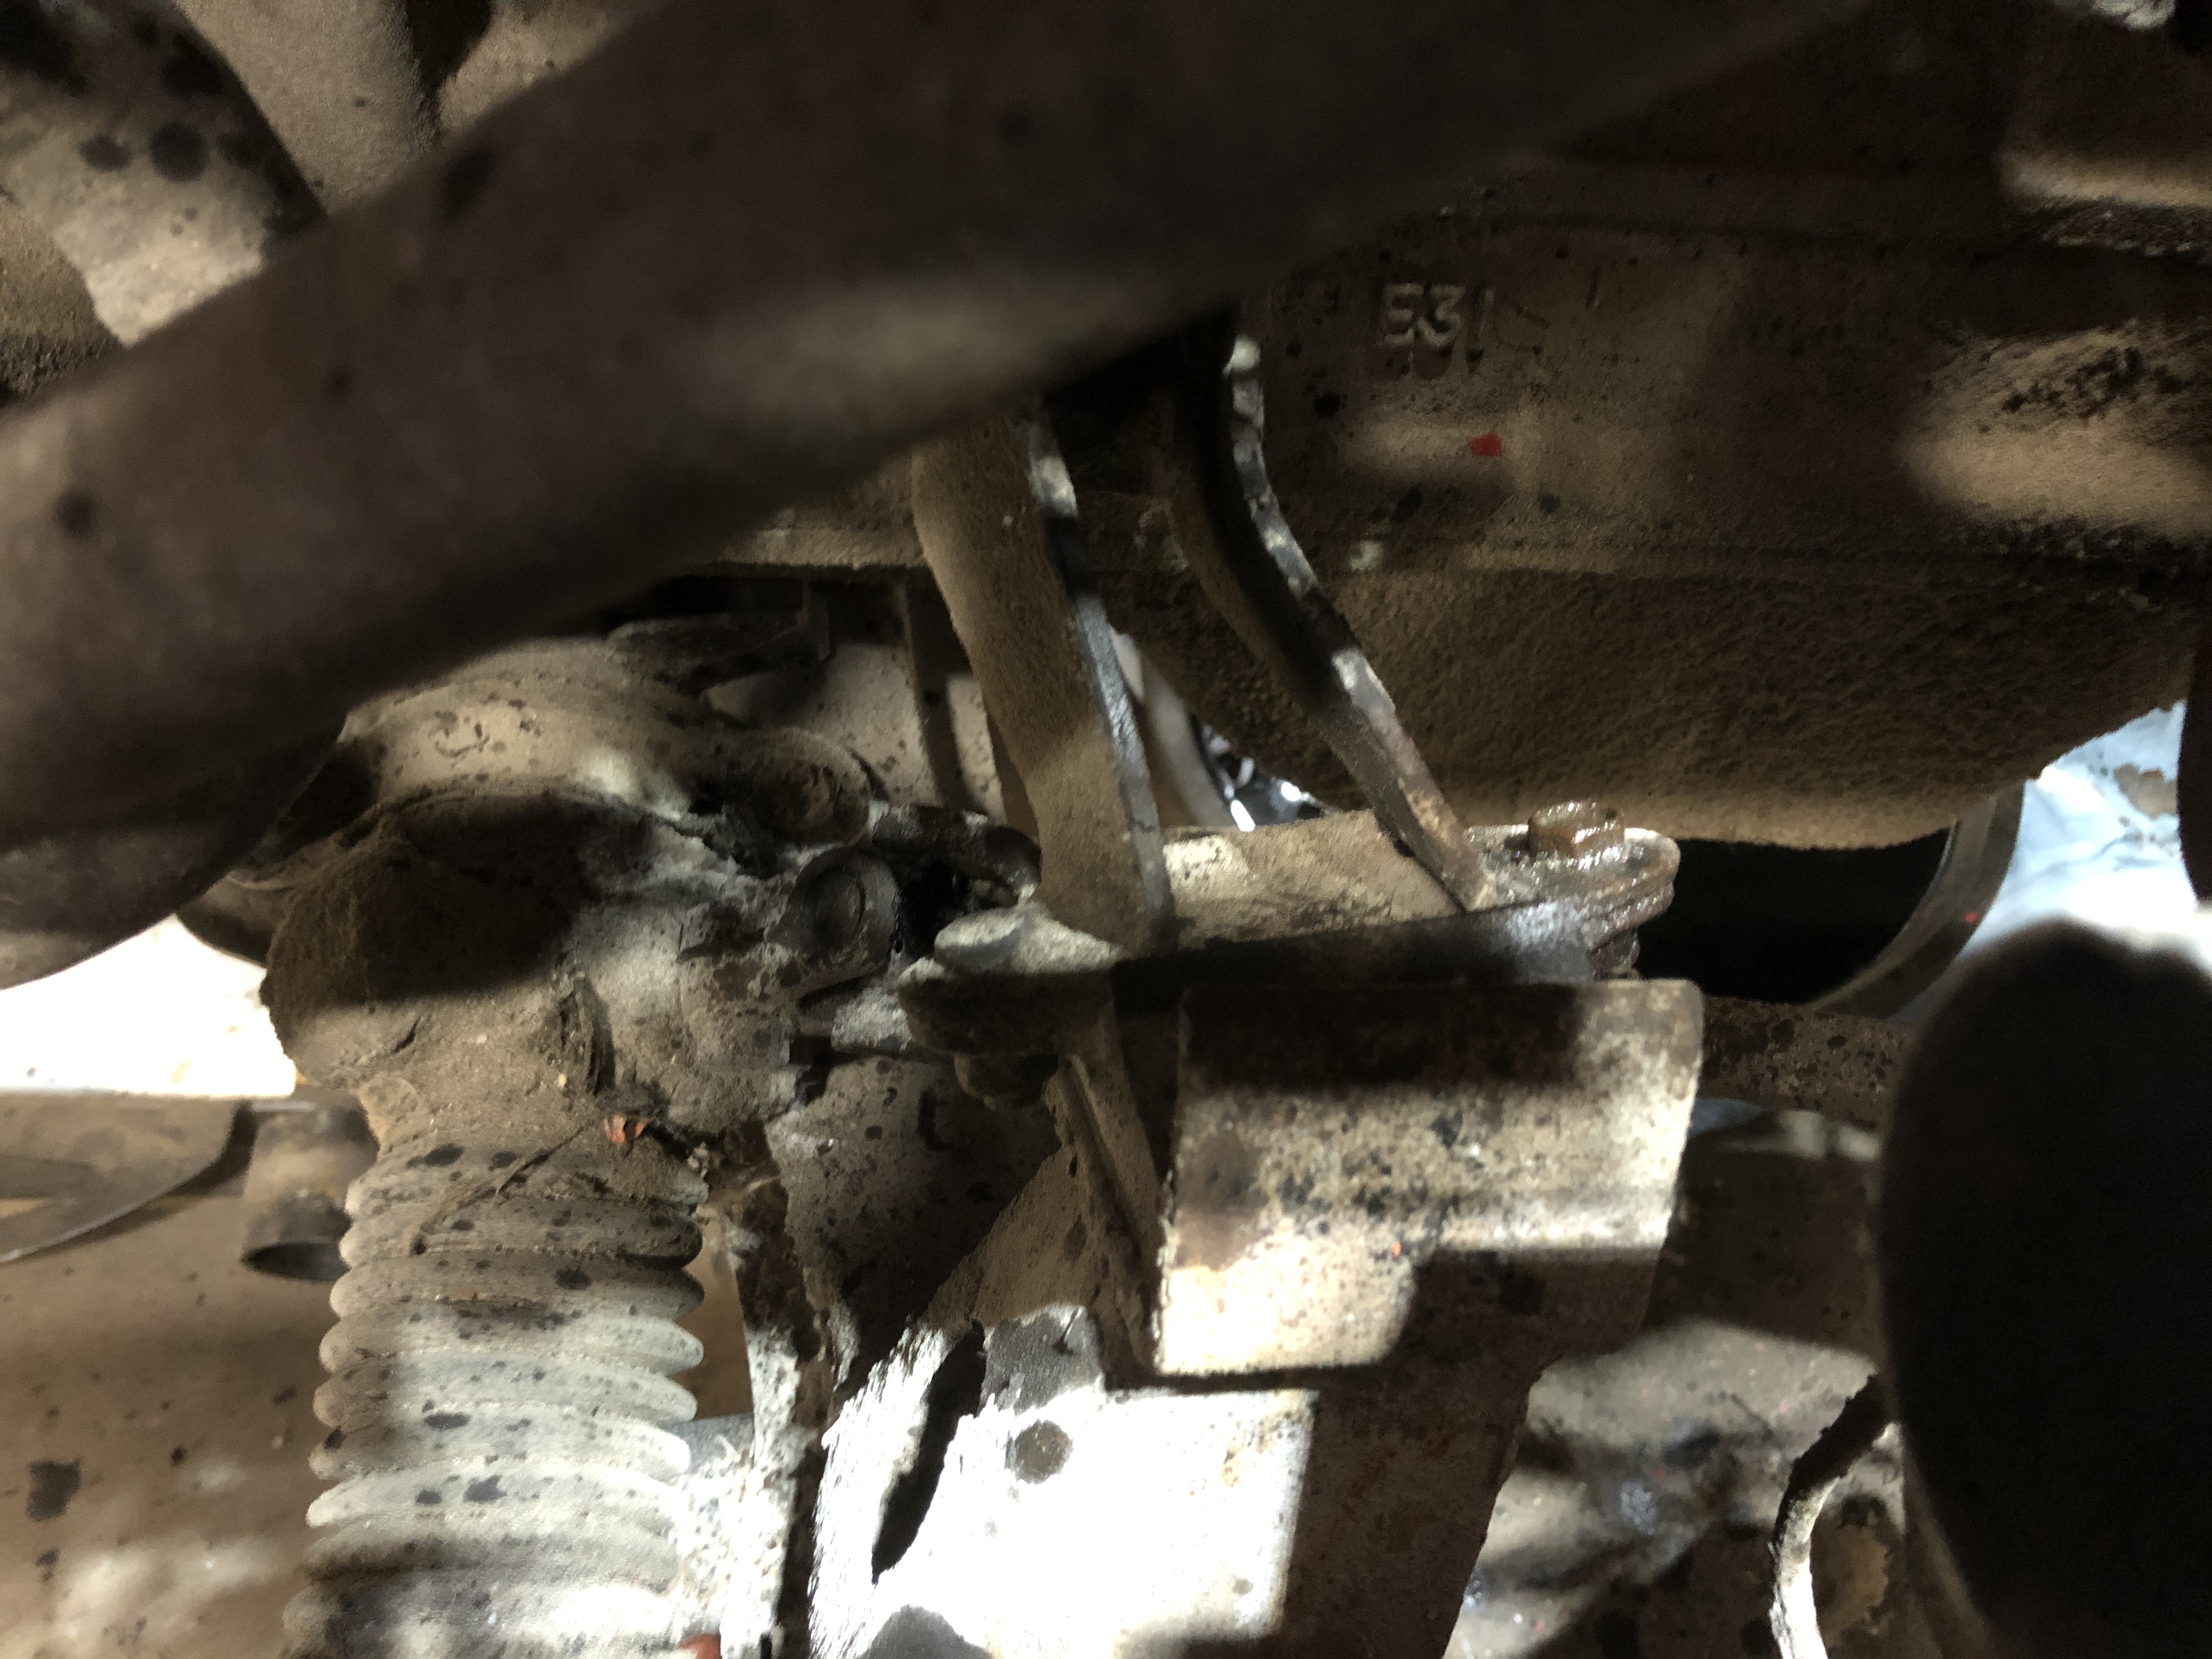
Ok, working on another early Z today and find the worst case of crooked engine mount I’ve ever seen. Mostly I want to know if any one else has noticed this and actually found the reason. I’ve seen it on several cars, all “early”. 70-71. Yes I know they vastly strengthened the later ones, maybe starting in 74 with bracing across or between the two side pieces, so it must have been noticed by Nissan. Feels like its in the time line of the early cars that had the diffs mounted too far forward, I suppose with age, the bushings in the diff and trans all get weak and the engine tends to move forward. But this one is bad. Mind you the rust on this one is pretty advanced. The floors and trans tunnel might not be the best supporting cast in this situation.

-
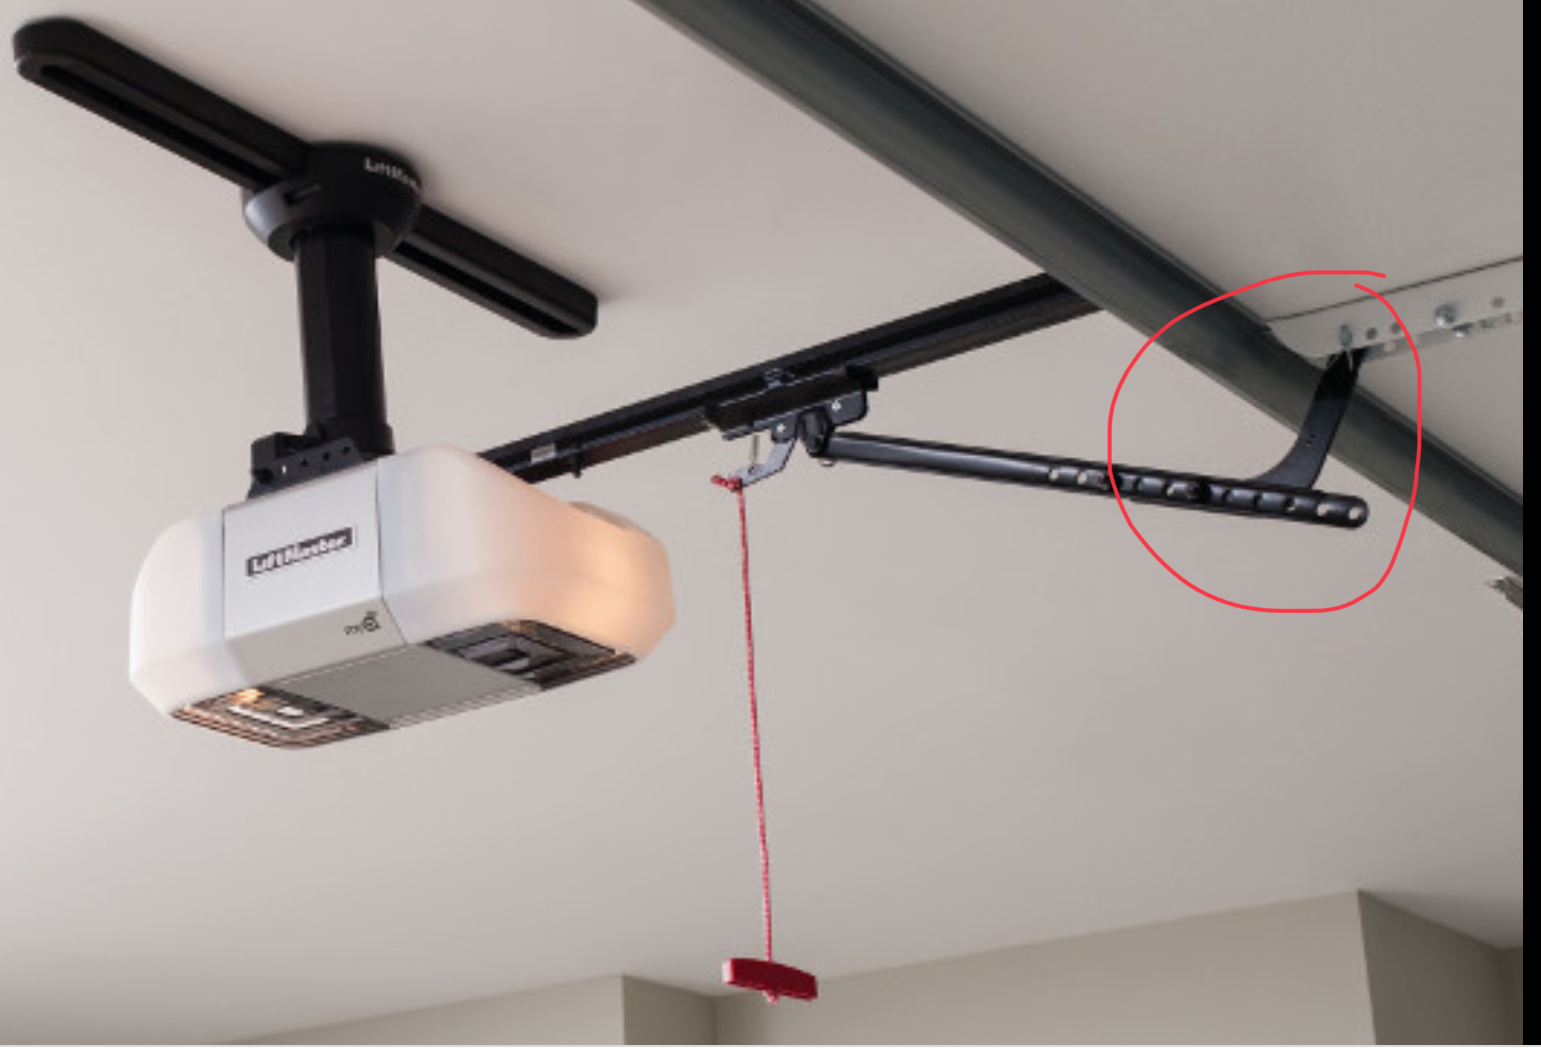
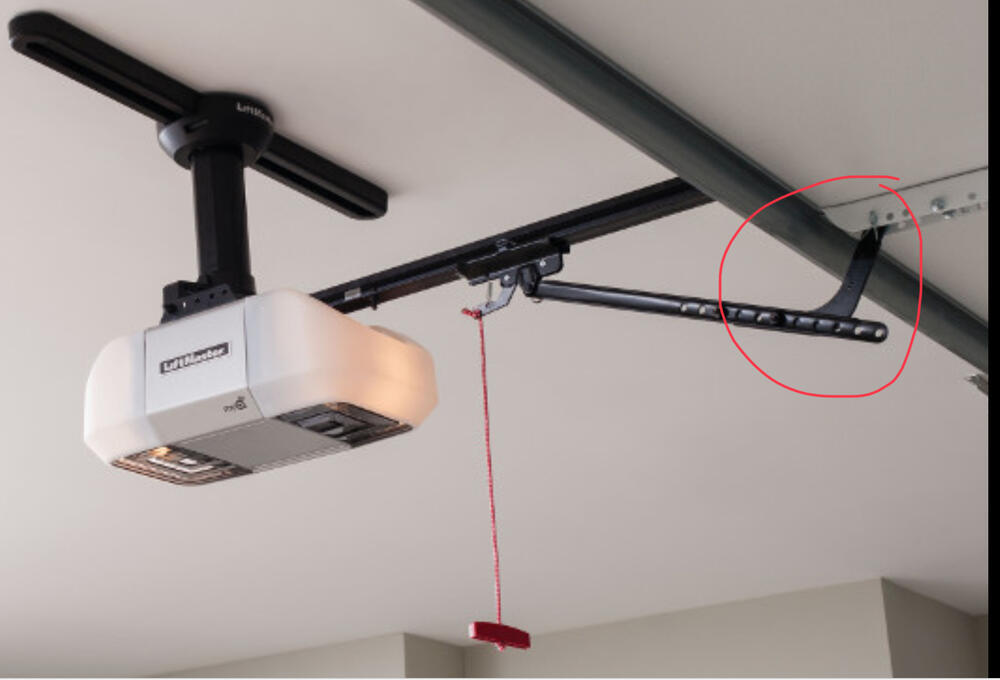
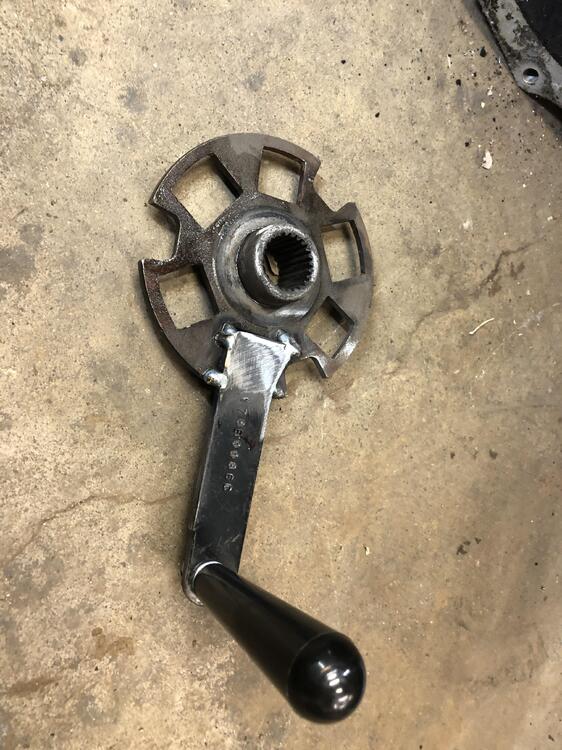
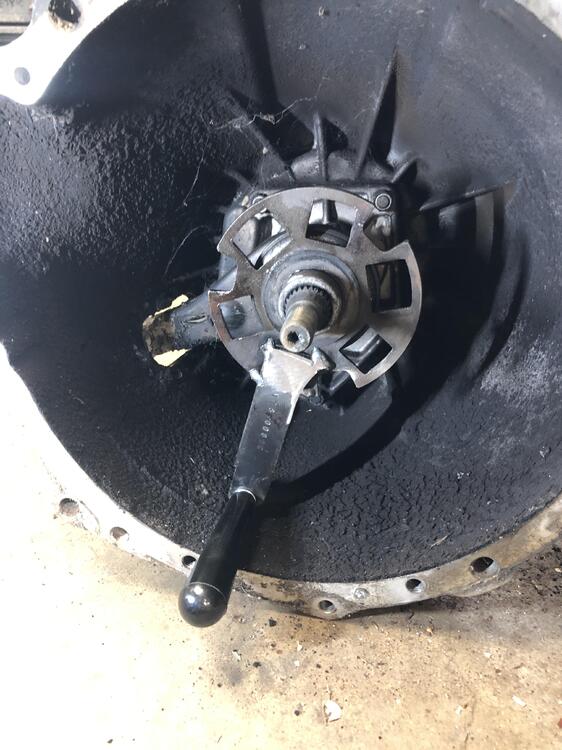
And finally life makes sense! I just realized what that piece of scrap used to be! And only you would zoom, google that PN and find out what it was. I first thought that on certain garage doors of a certain period or place could be manually wound up or down with a crank and you were just wondering why I repurposed mine to this use. Silly me.
-
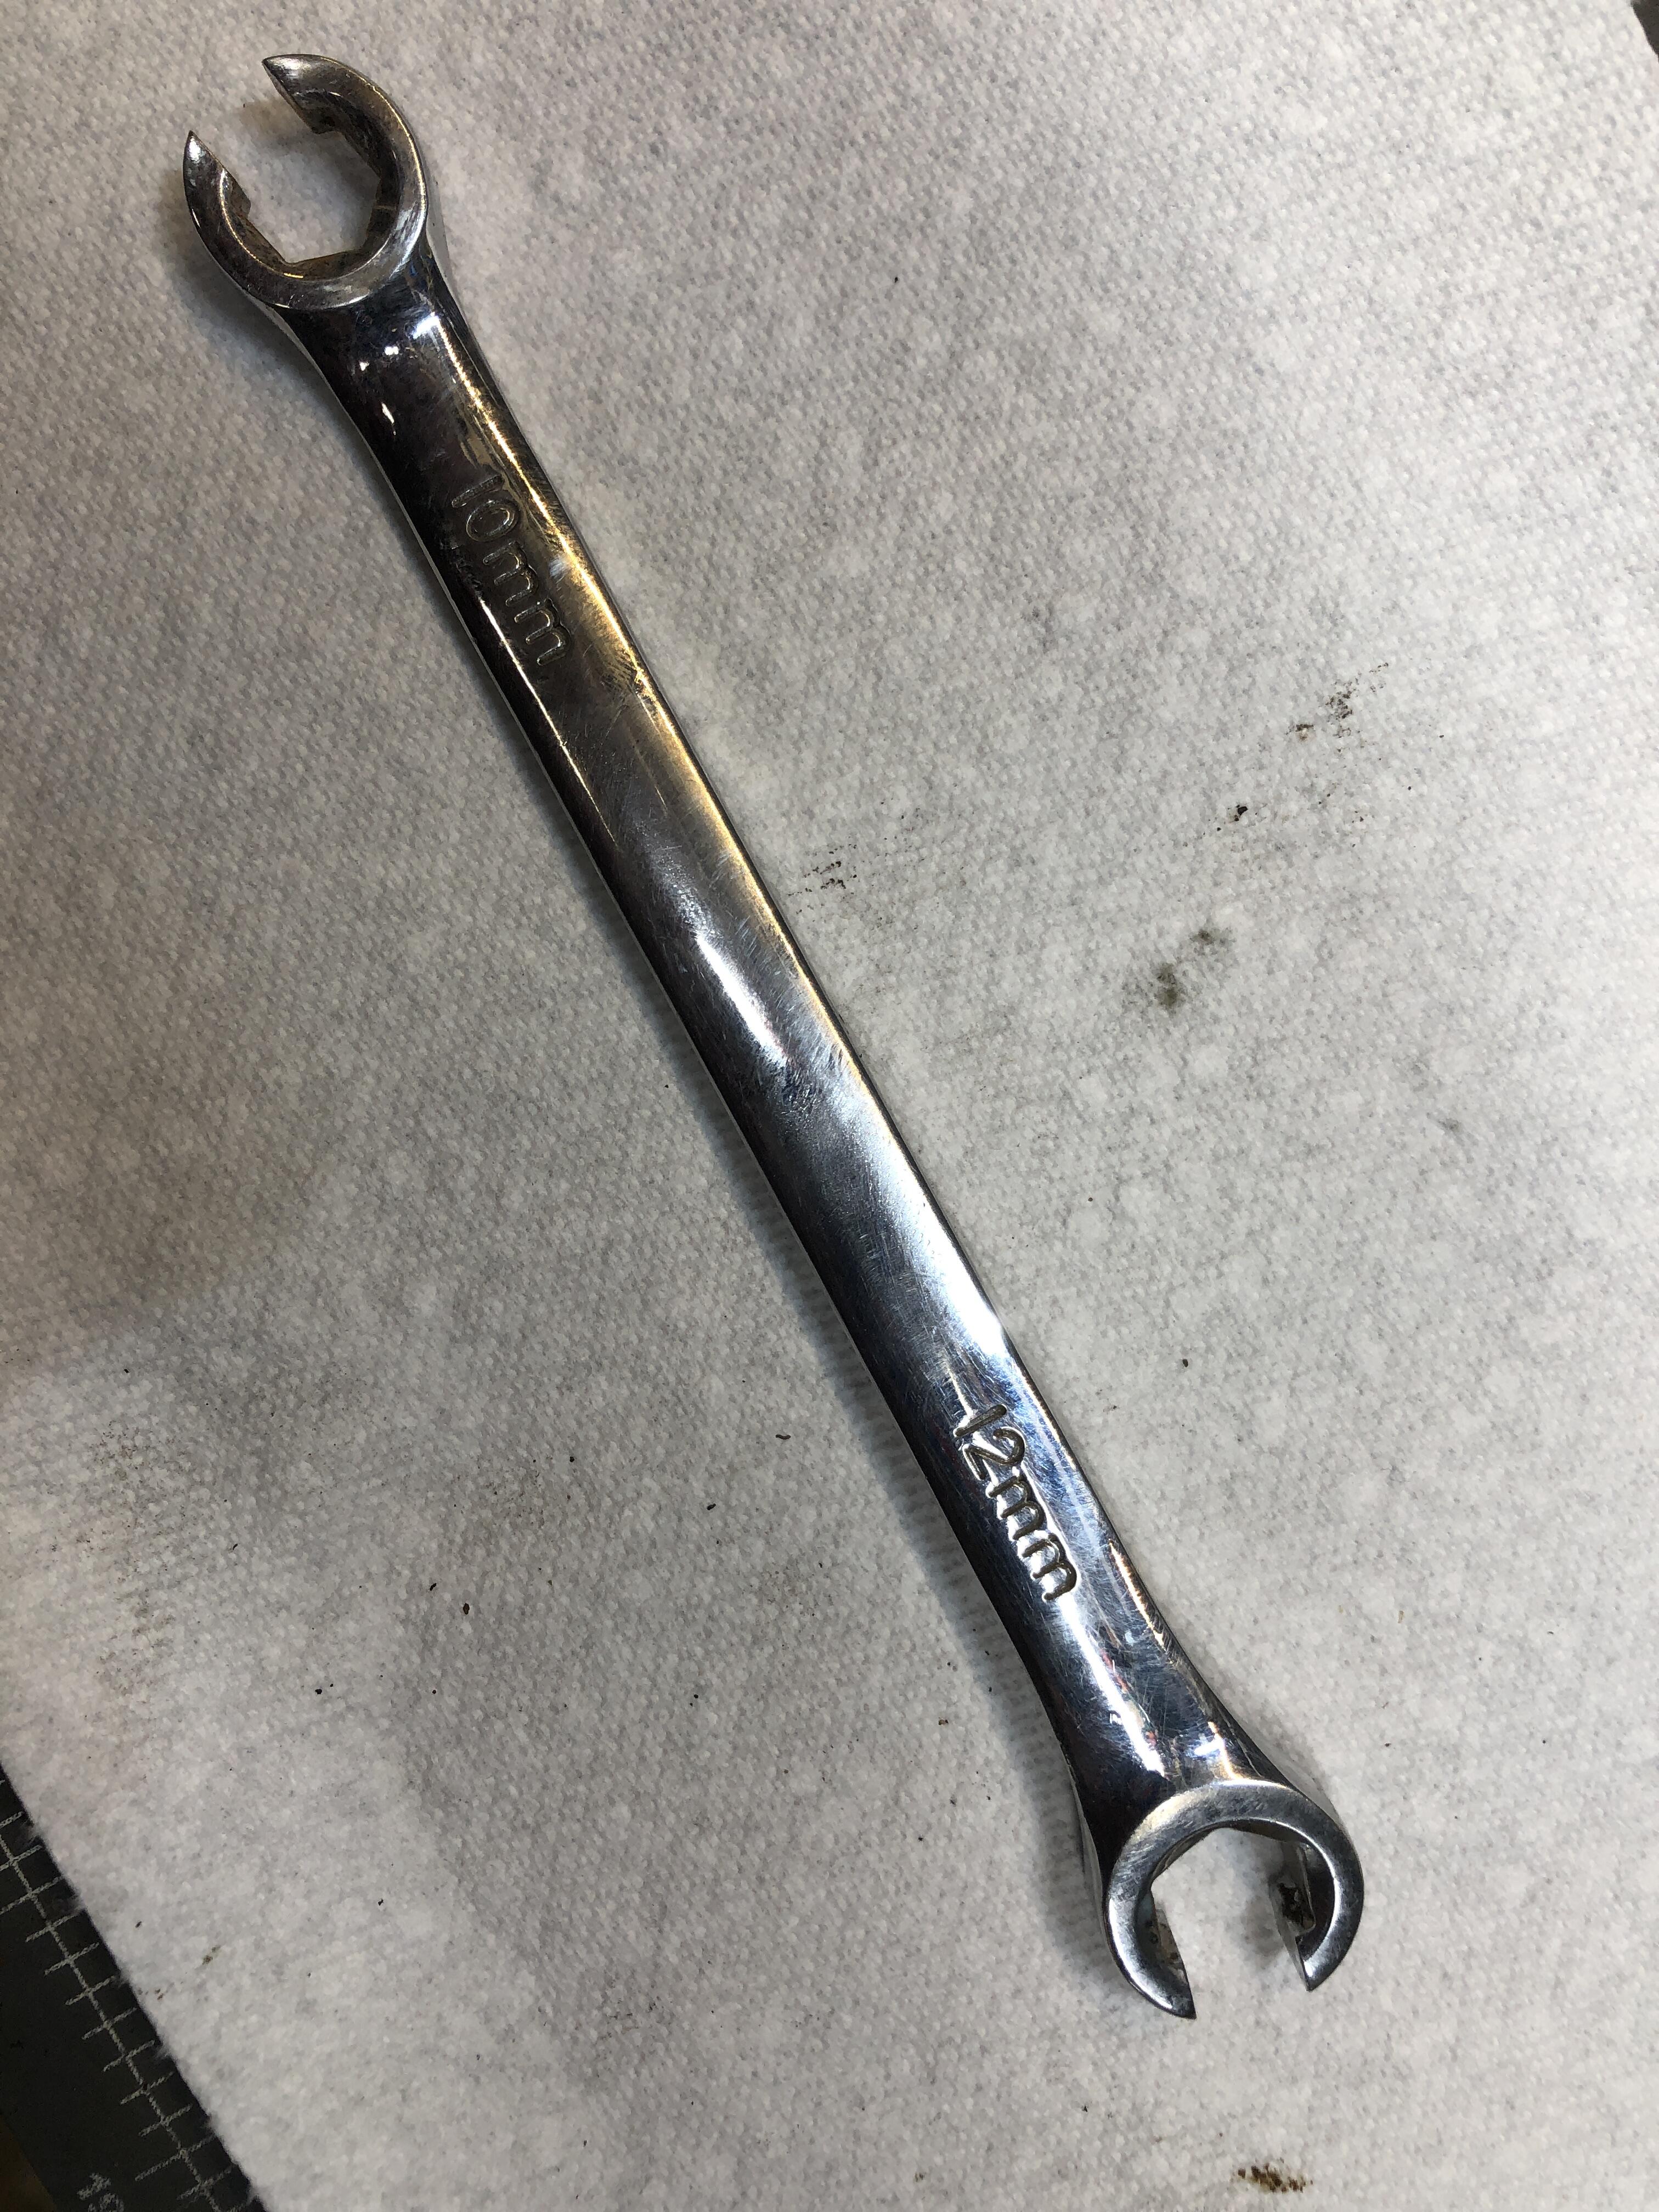
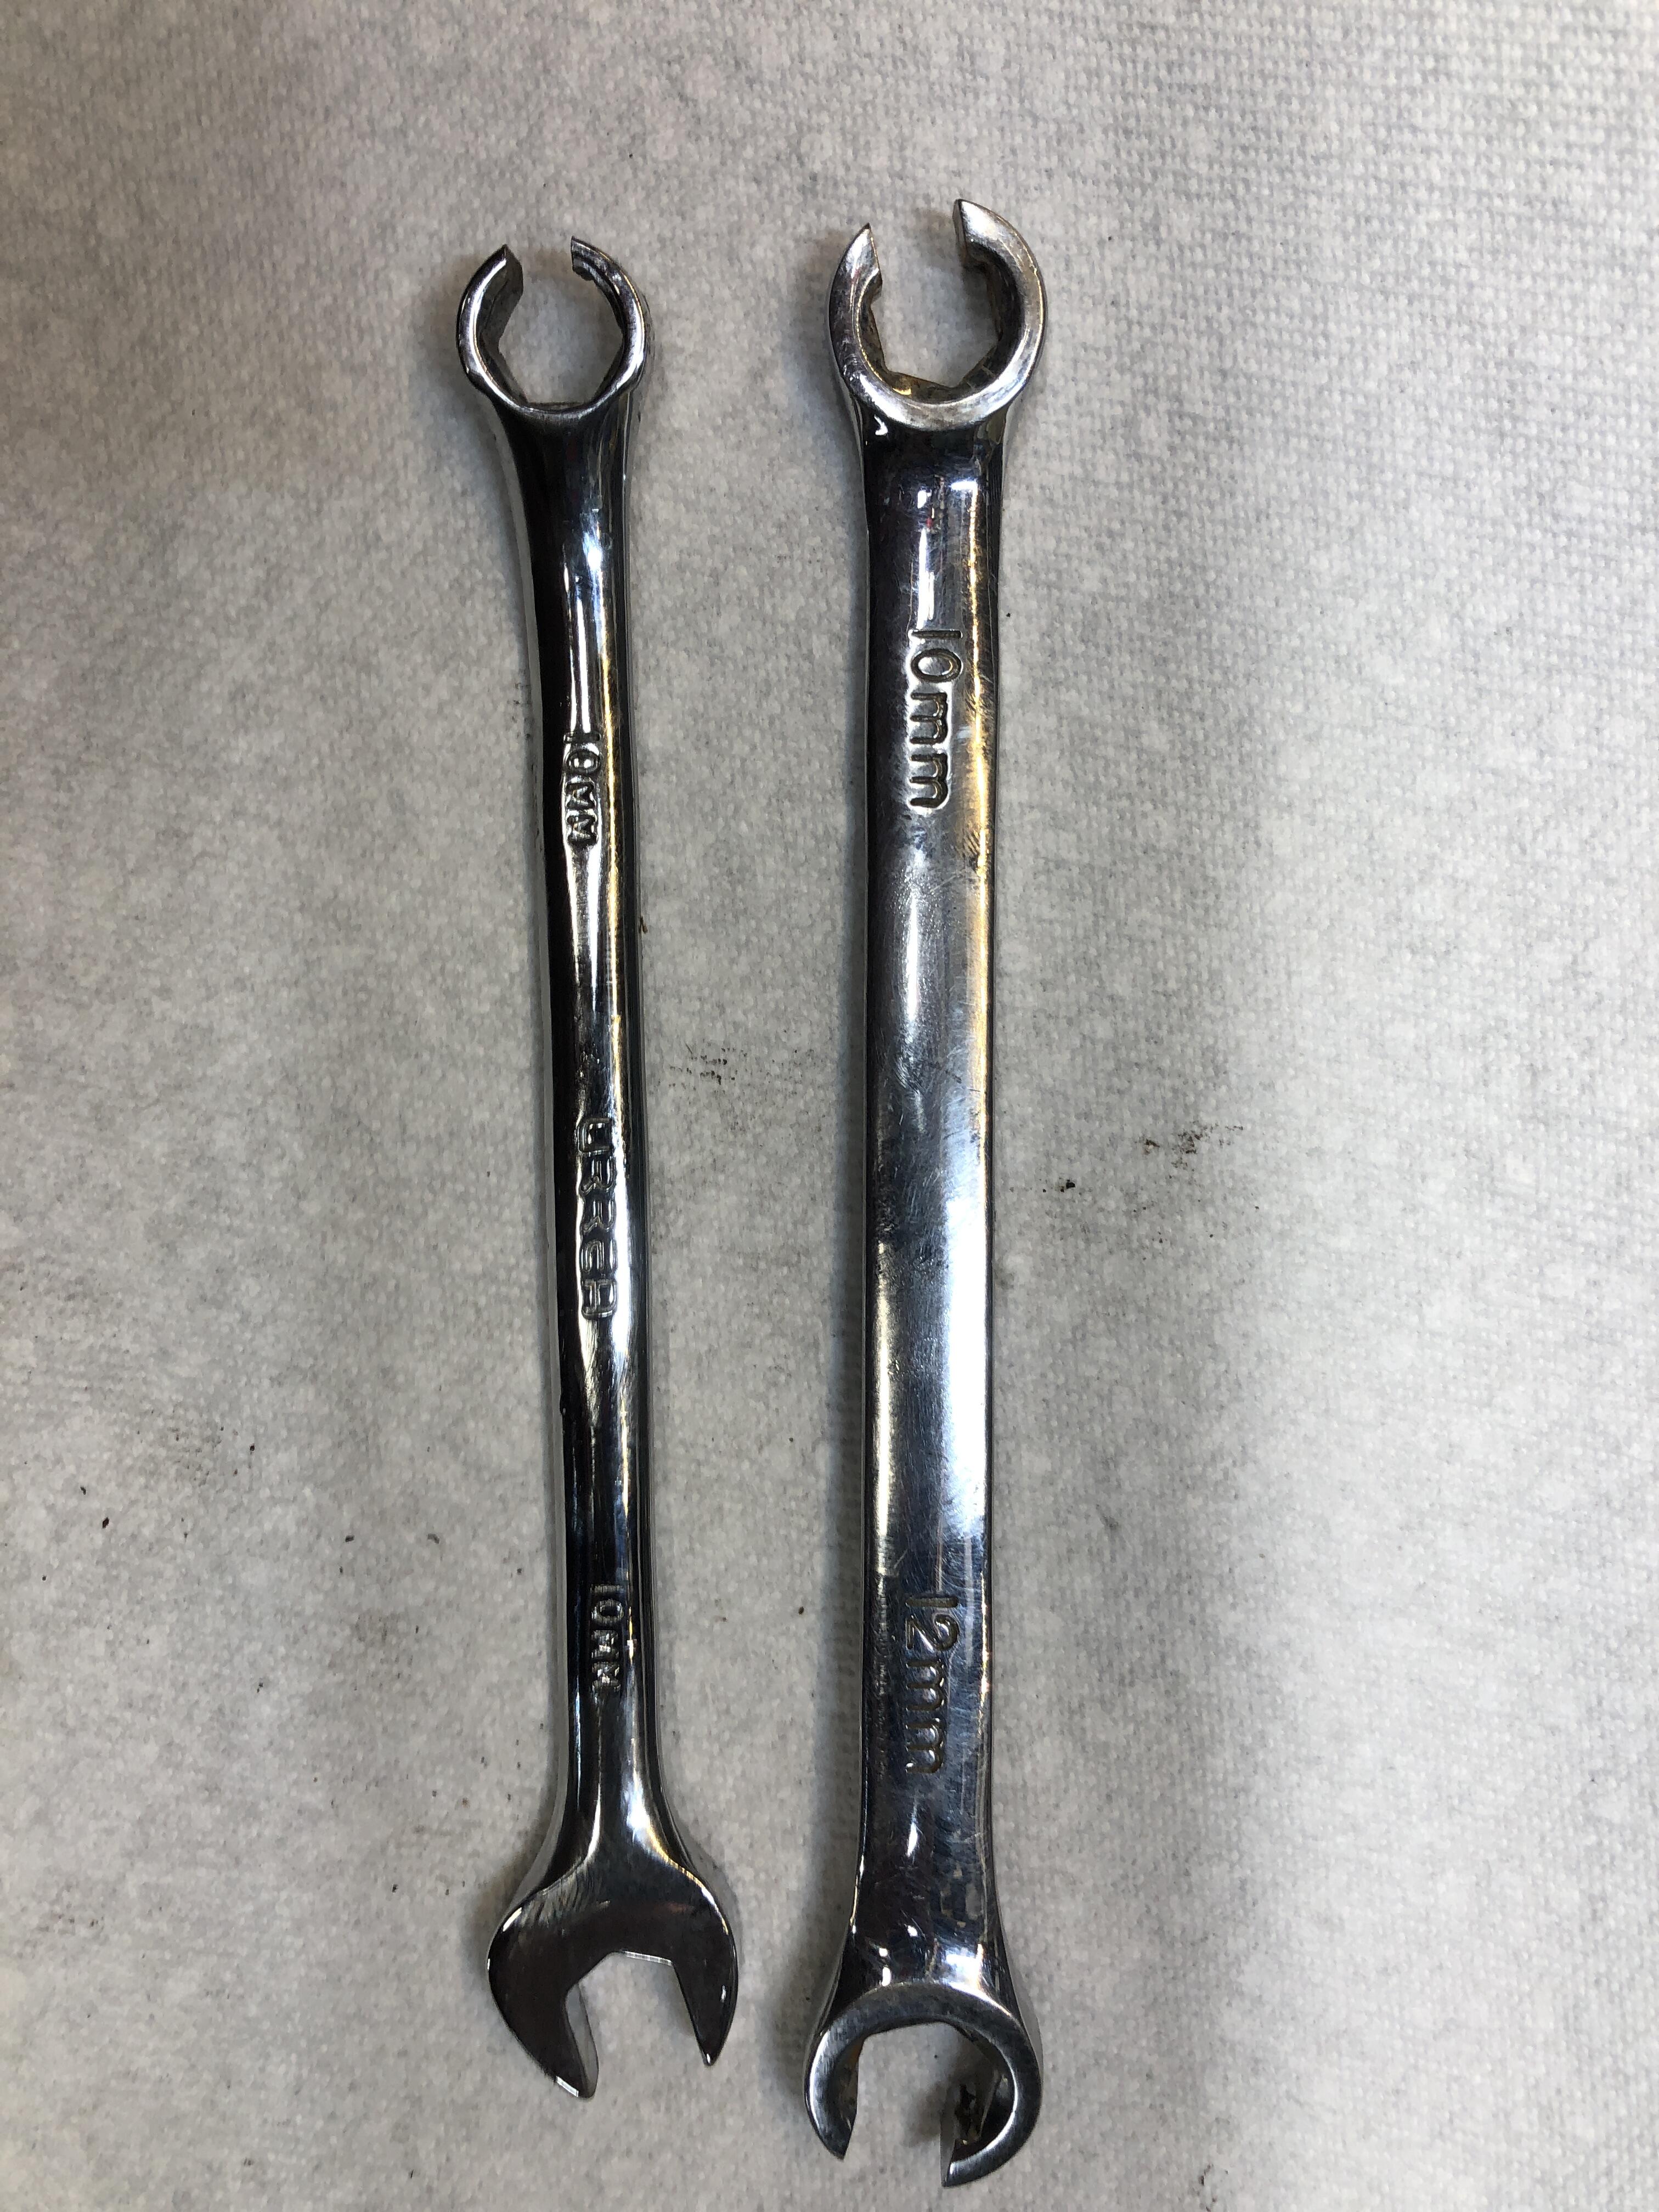
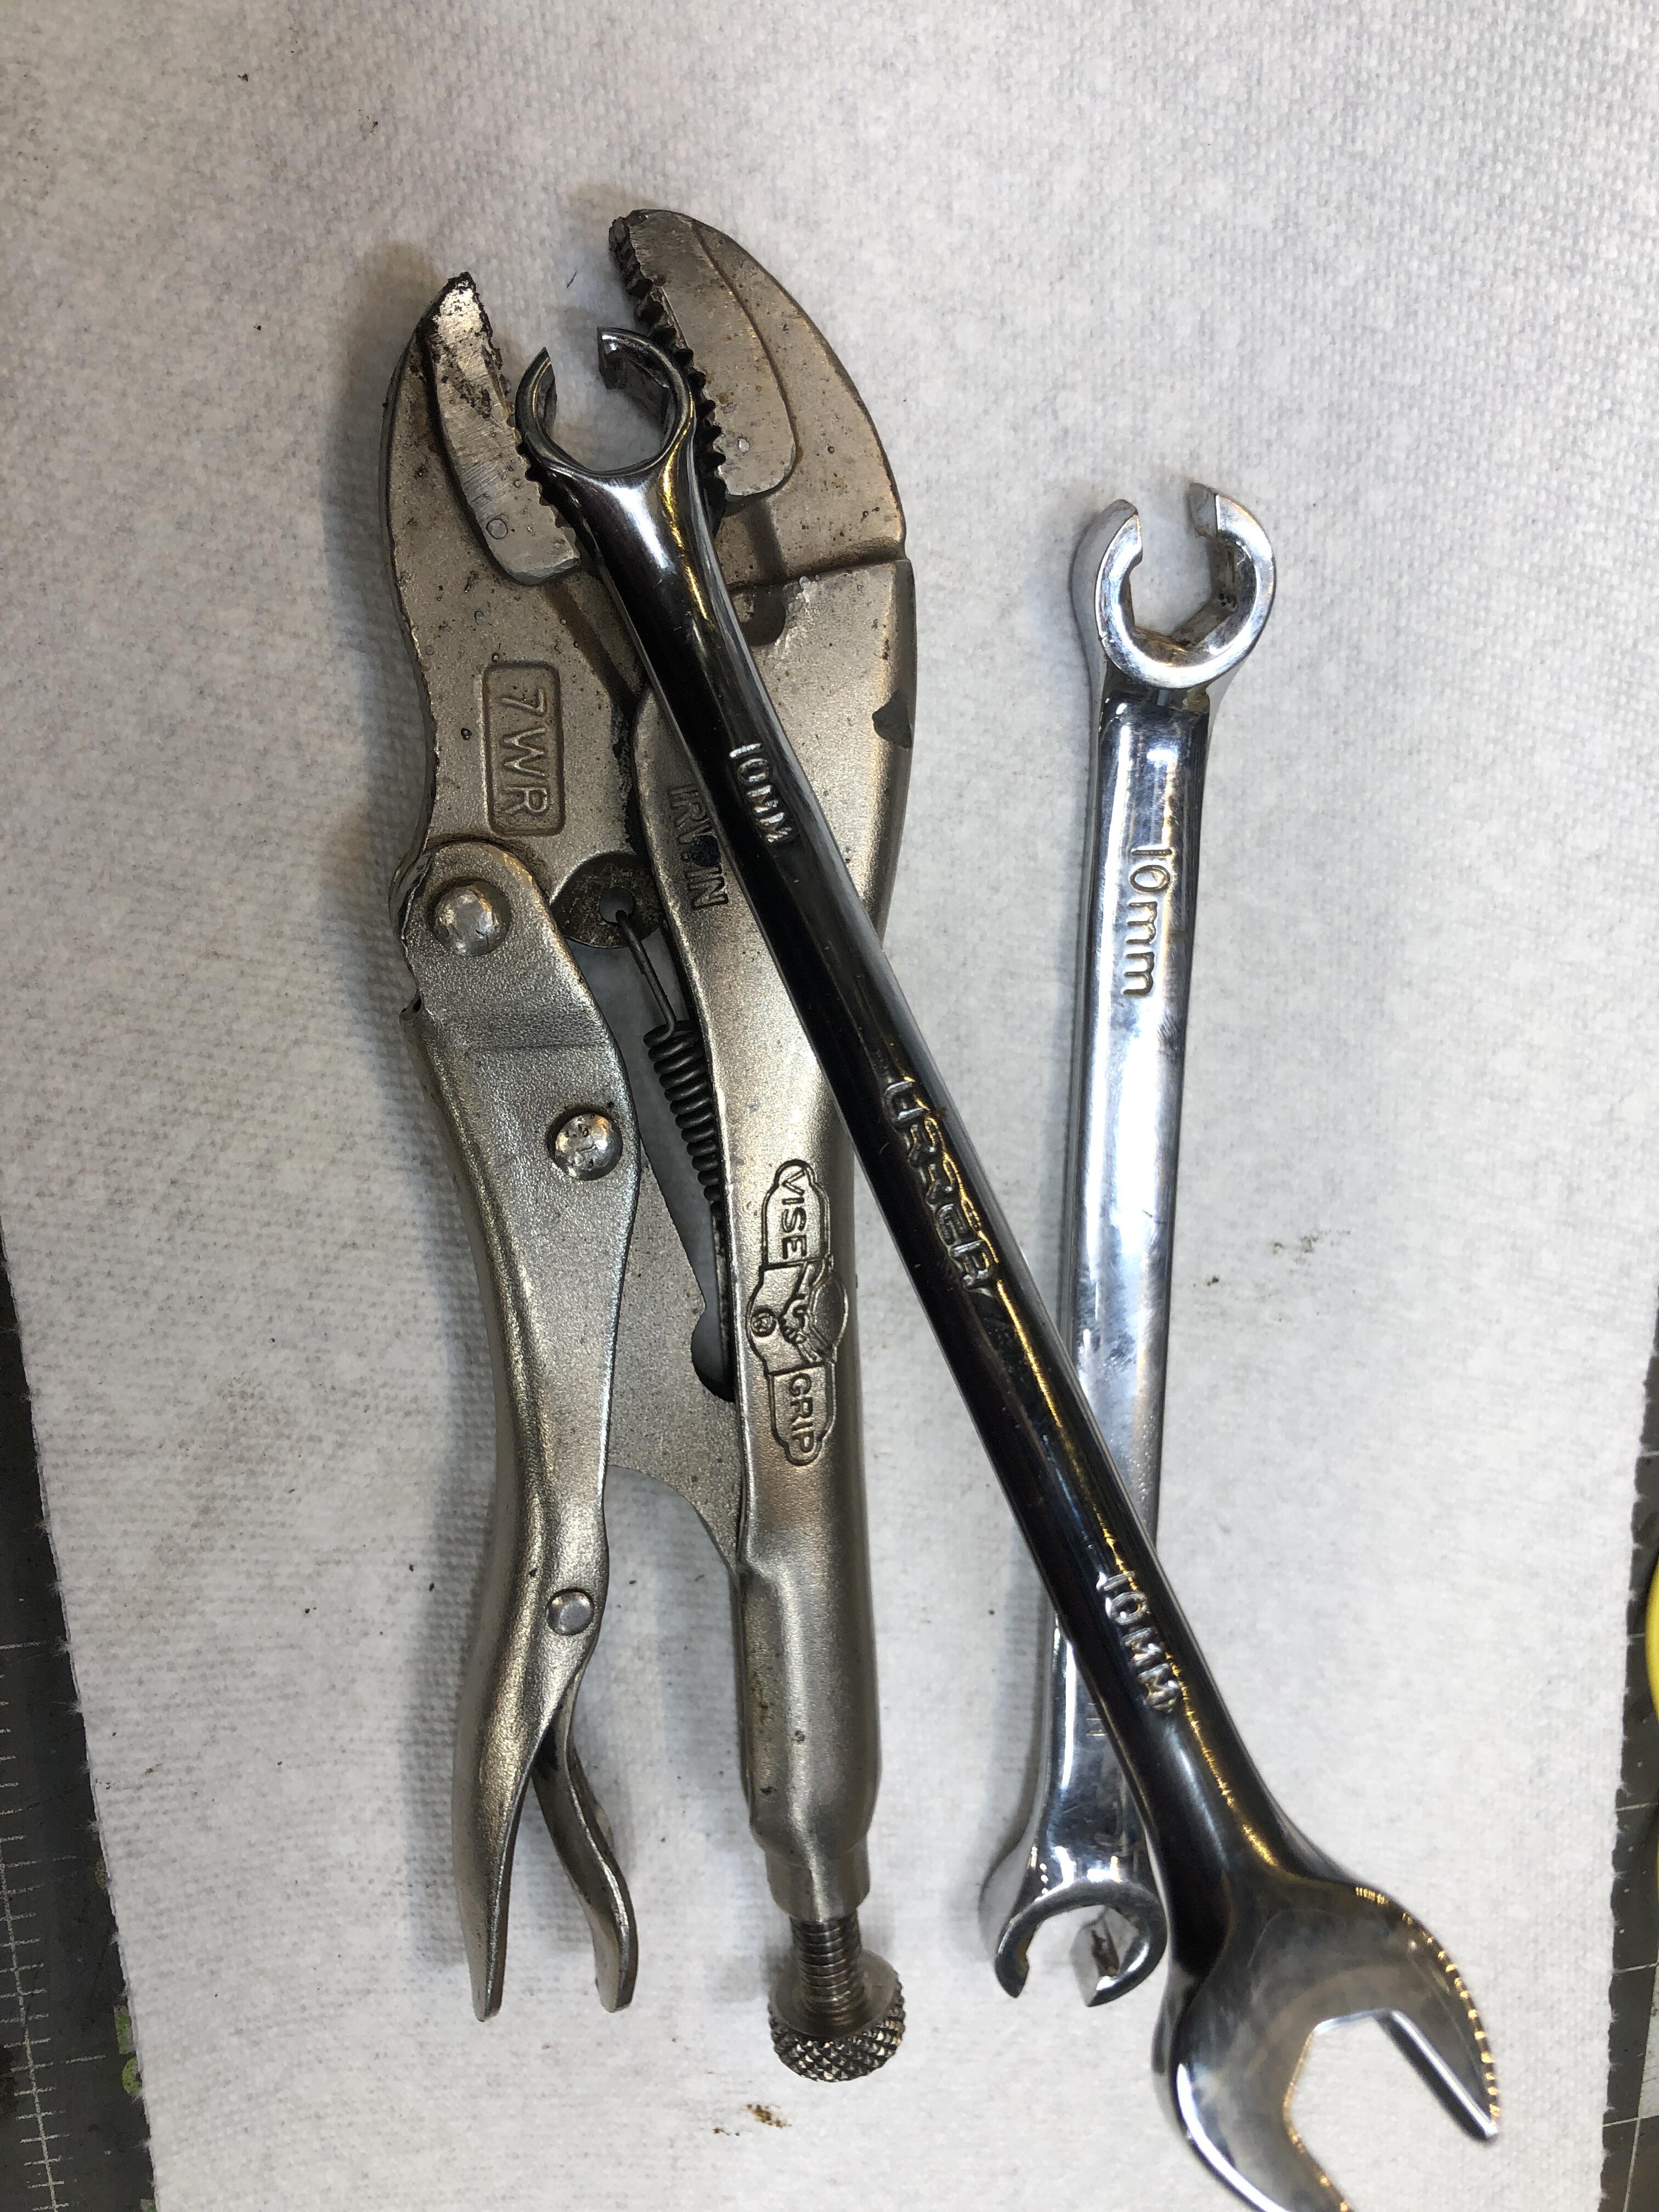
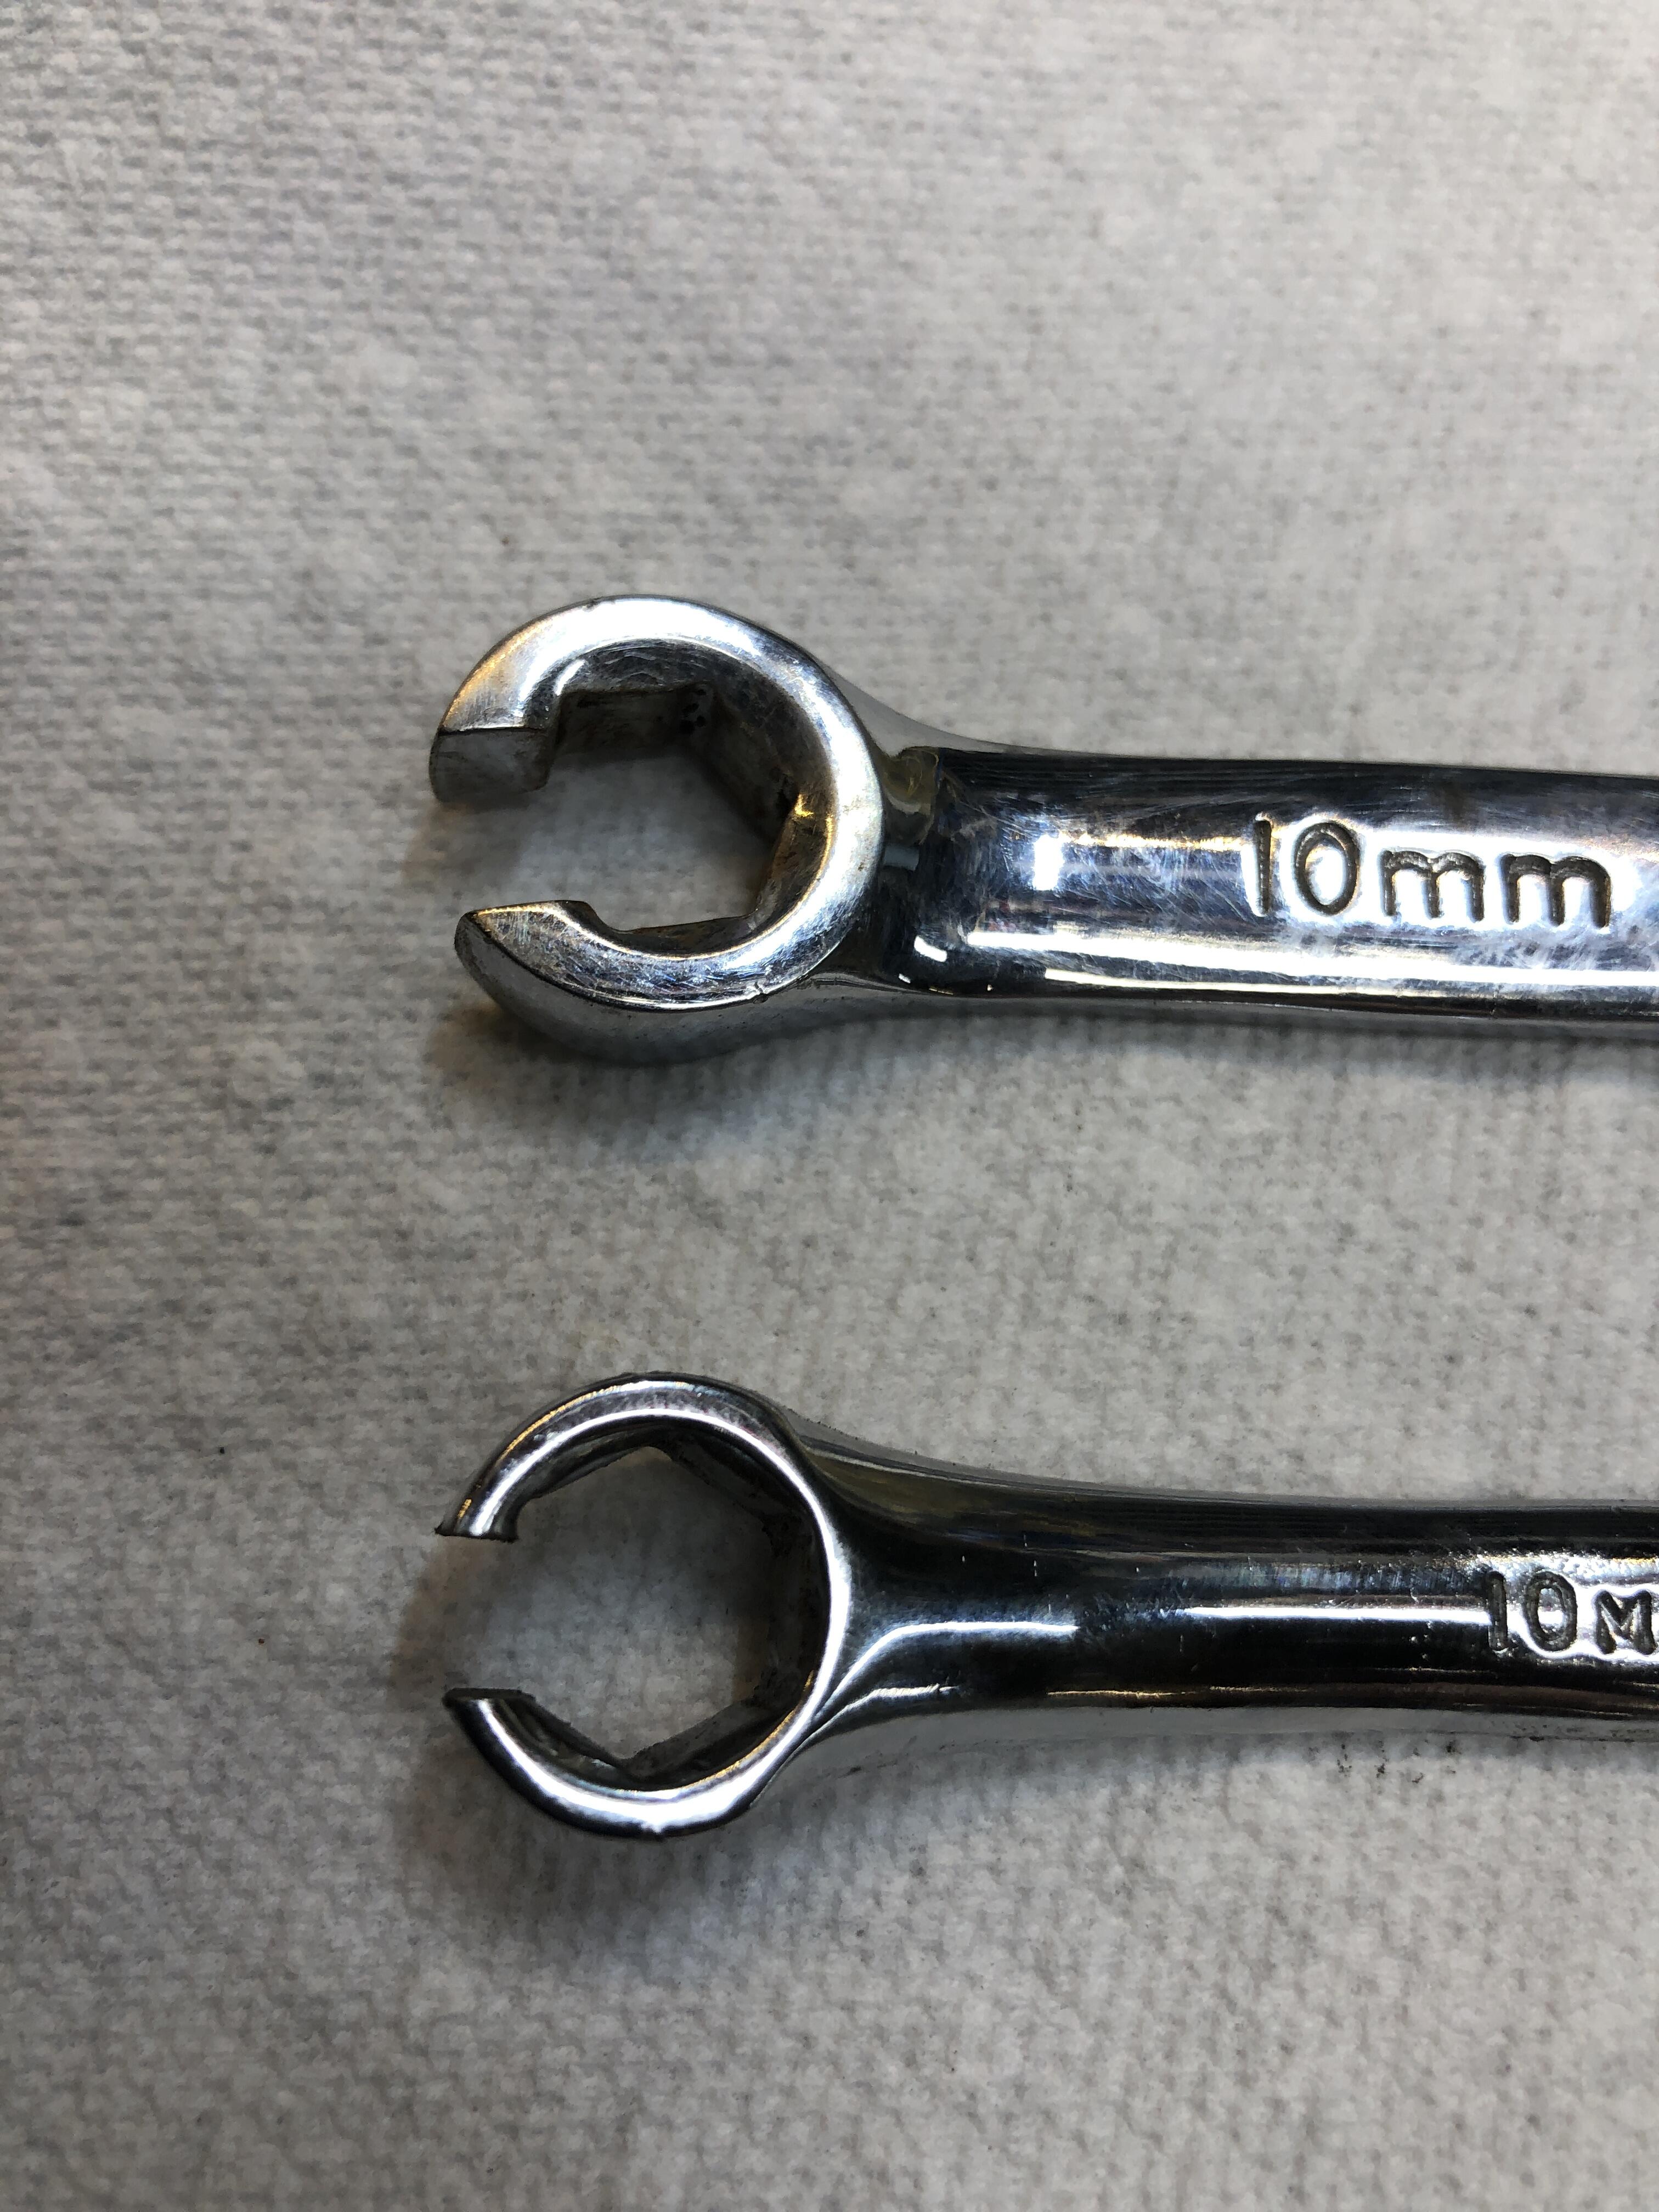
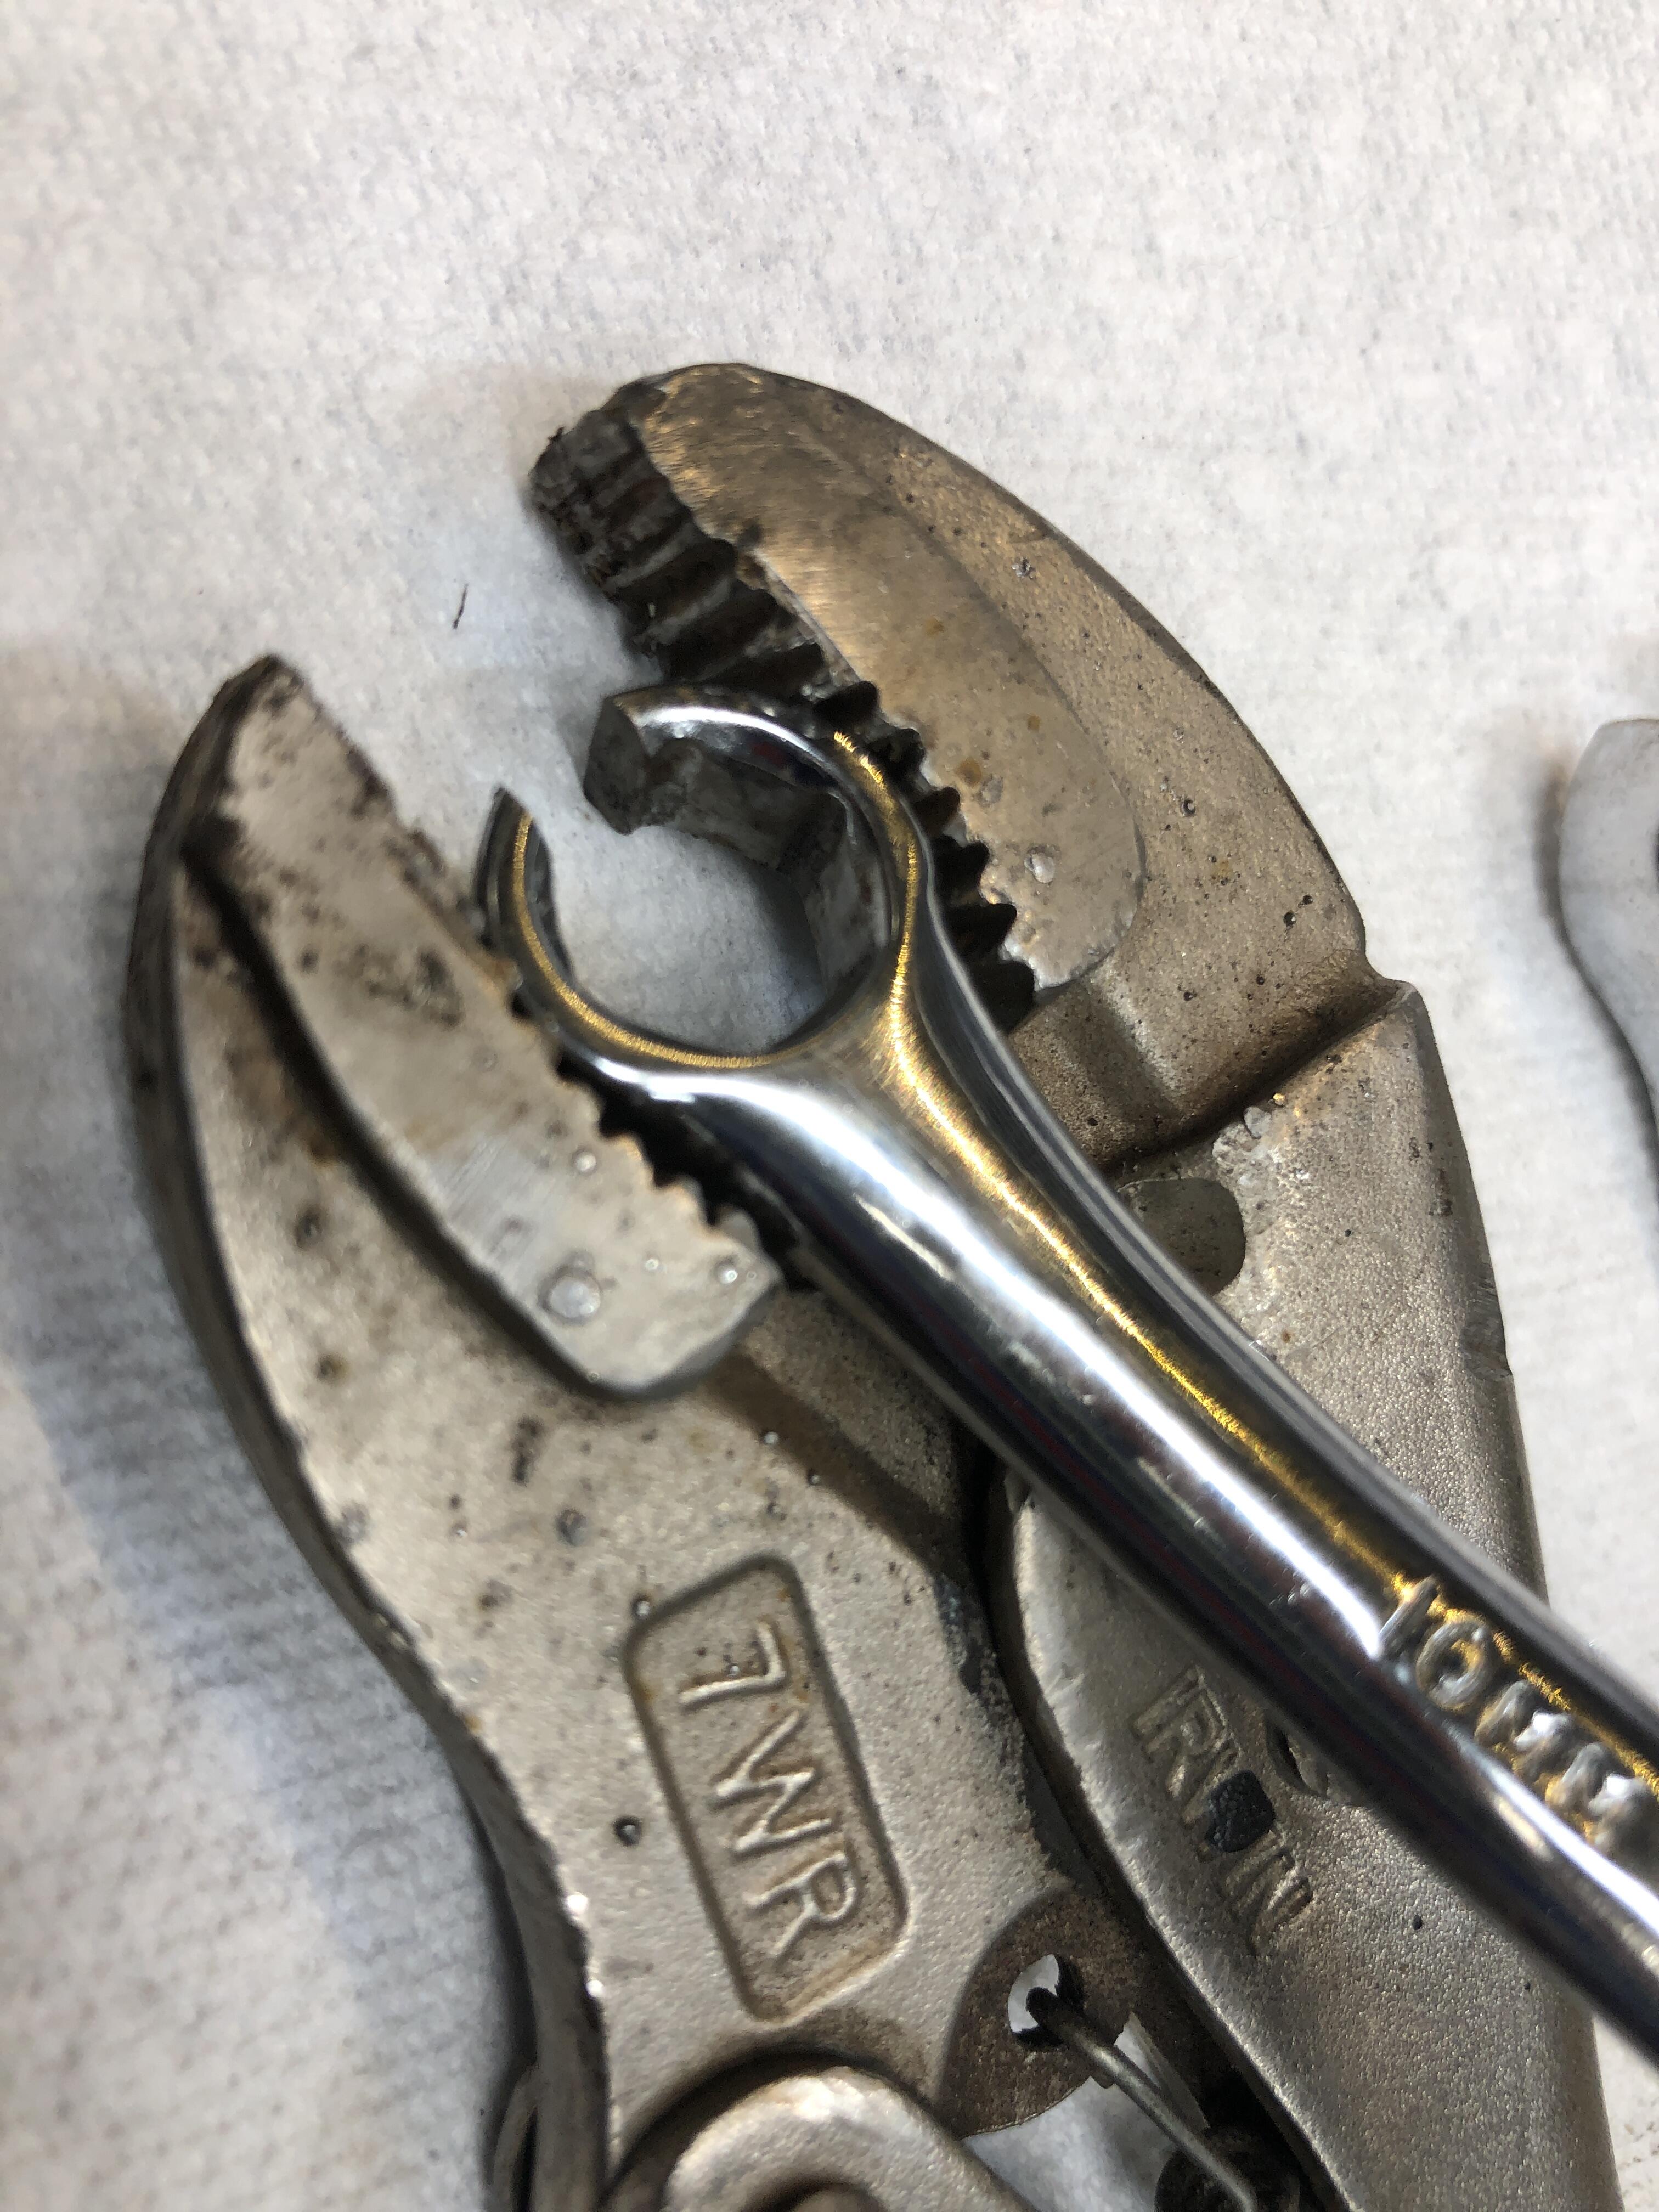
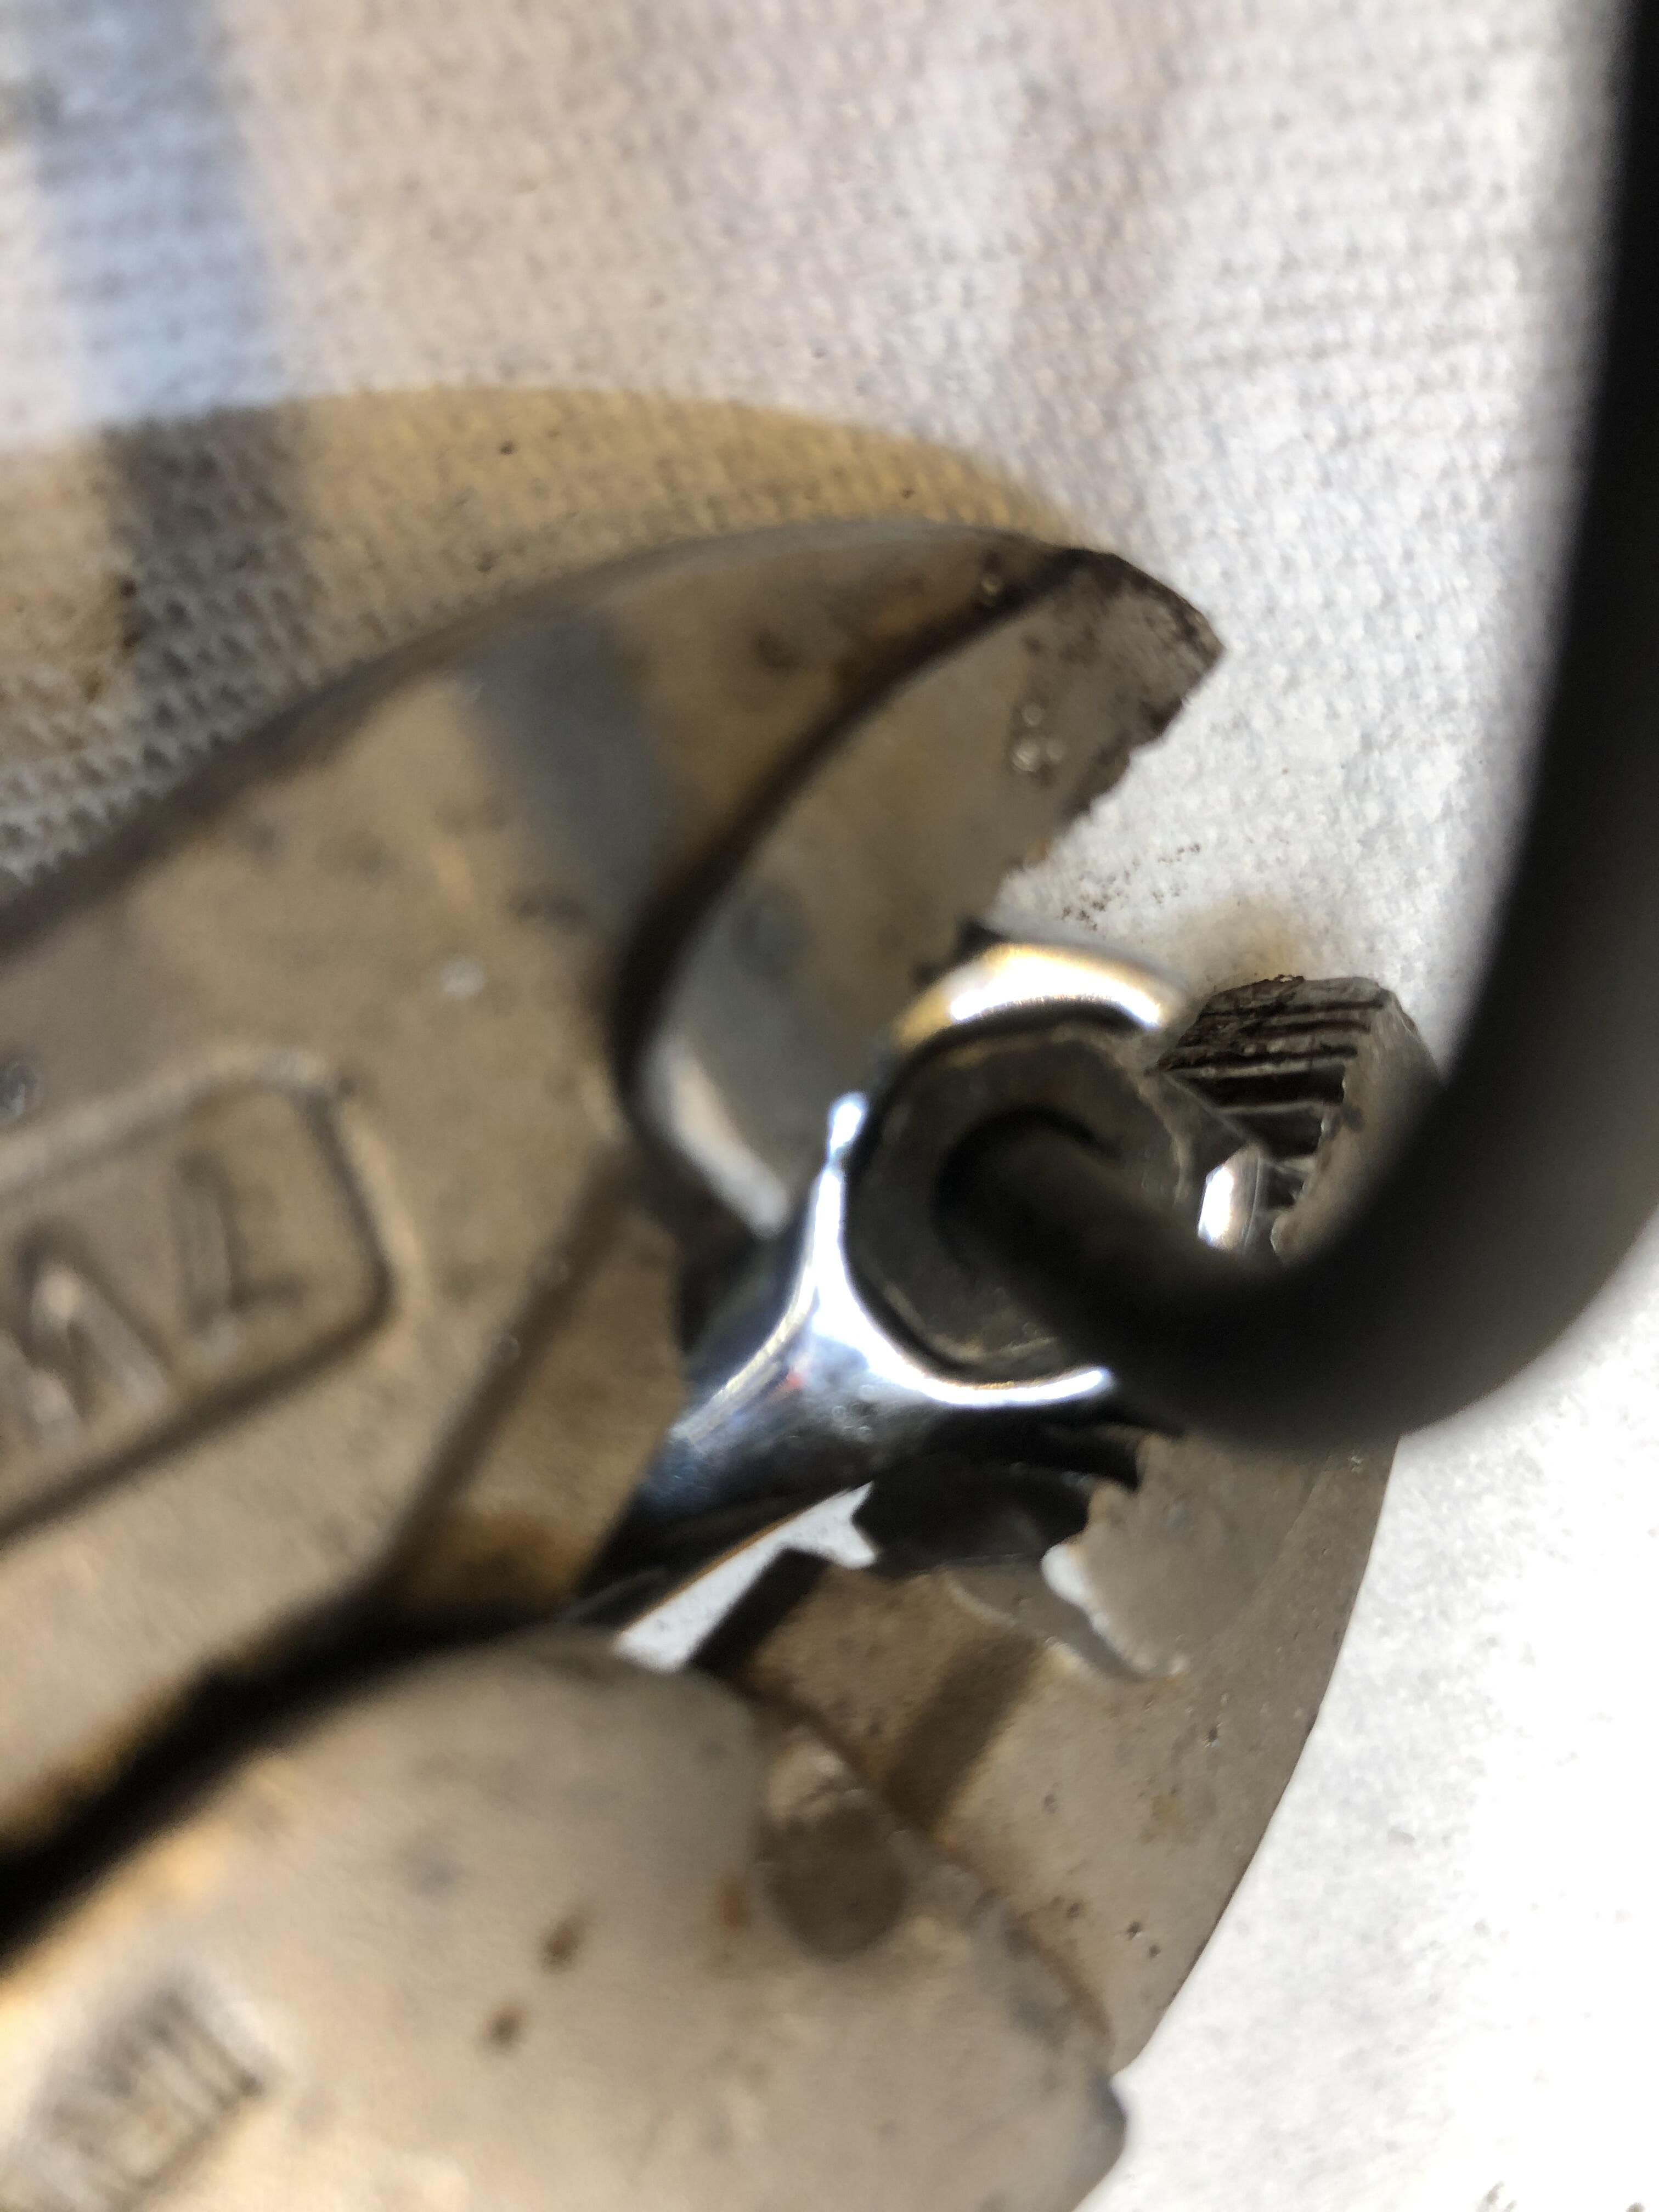
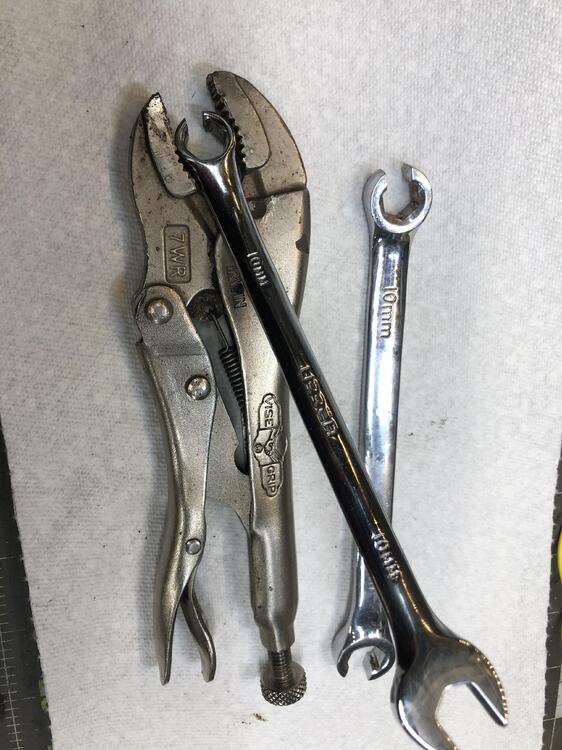
Ok here is the second tool I promised. Didn’t have pics last night. It relates to loosening old rusty brake line nuts. How many of you have been forced into vise grips on a brake or clutch line nut because your fancy flare nut wrench spreads and slips around a really old and tight one? Come on, fess up, we all do it. You get it loose, sure, maybe with some heat, but the hex of the nut is invariably wrecked. When you go to put the line back on, now you HAVE to use vise grips to tighten it, and the hex soon becomes a circle…… I have tried MANY brands of flare nut wrenches, all are simply not good enough. So, I made my own! With a special feature. Here is the standard heavy walled flare nut wrench. My idea was to add some way of squeezing that wrench hex closed to tightly grip the hex of the line nut, so it CAN’t slip around. First approach was to dream of fancy levers and threaded things to apply the needed force to close down on that heavy open “C” and squeeze the nut, but even with my largest vise grips, I really couldn’t apply enough force to collapse the opening. Ok, so maybe grind down the wall thickness until its thin enough to give? Maybe, but why not find a thinner walled wrench to start with? Well there is no such thing. Unless…. So I just bought a cheap Amazon 10 mm 6point box end wrench and turned it into a flare nut wrench by using a thin cutoff wheel and making a 3/16 gap in the end! My creation on the left, standard flare nut wrench on the right. Now its easy to squeeze that gap with a 8” vise grip So you just place the wrench on the line nut, then close the vise grips over the “C” and squeeze it shut. Then apply all the force you want with a hammer or pipe or whatever it takes to break the nut loose without fear of stripping the hex. After extensive testing on several cars recently, this little jewel is working perfectiy! The only thing I need to do is make the handle longer so I can tug on it by hand without beating on it with a hammer all the time, especially when the room around nut is tight.


-
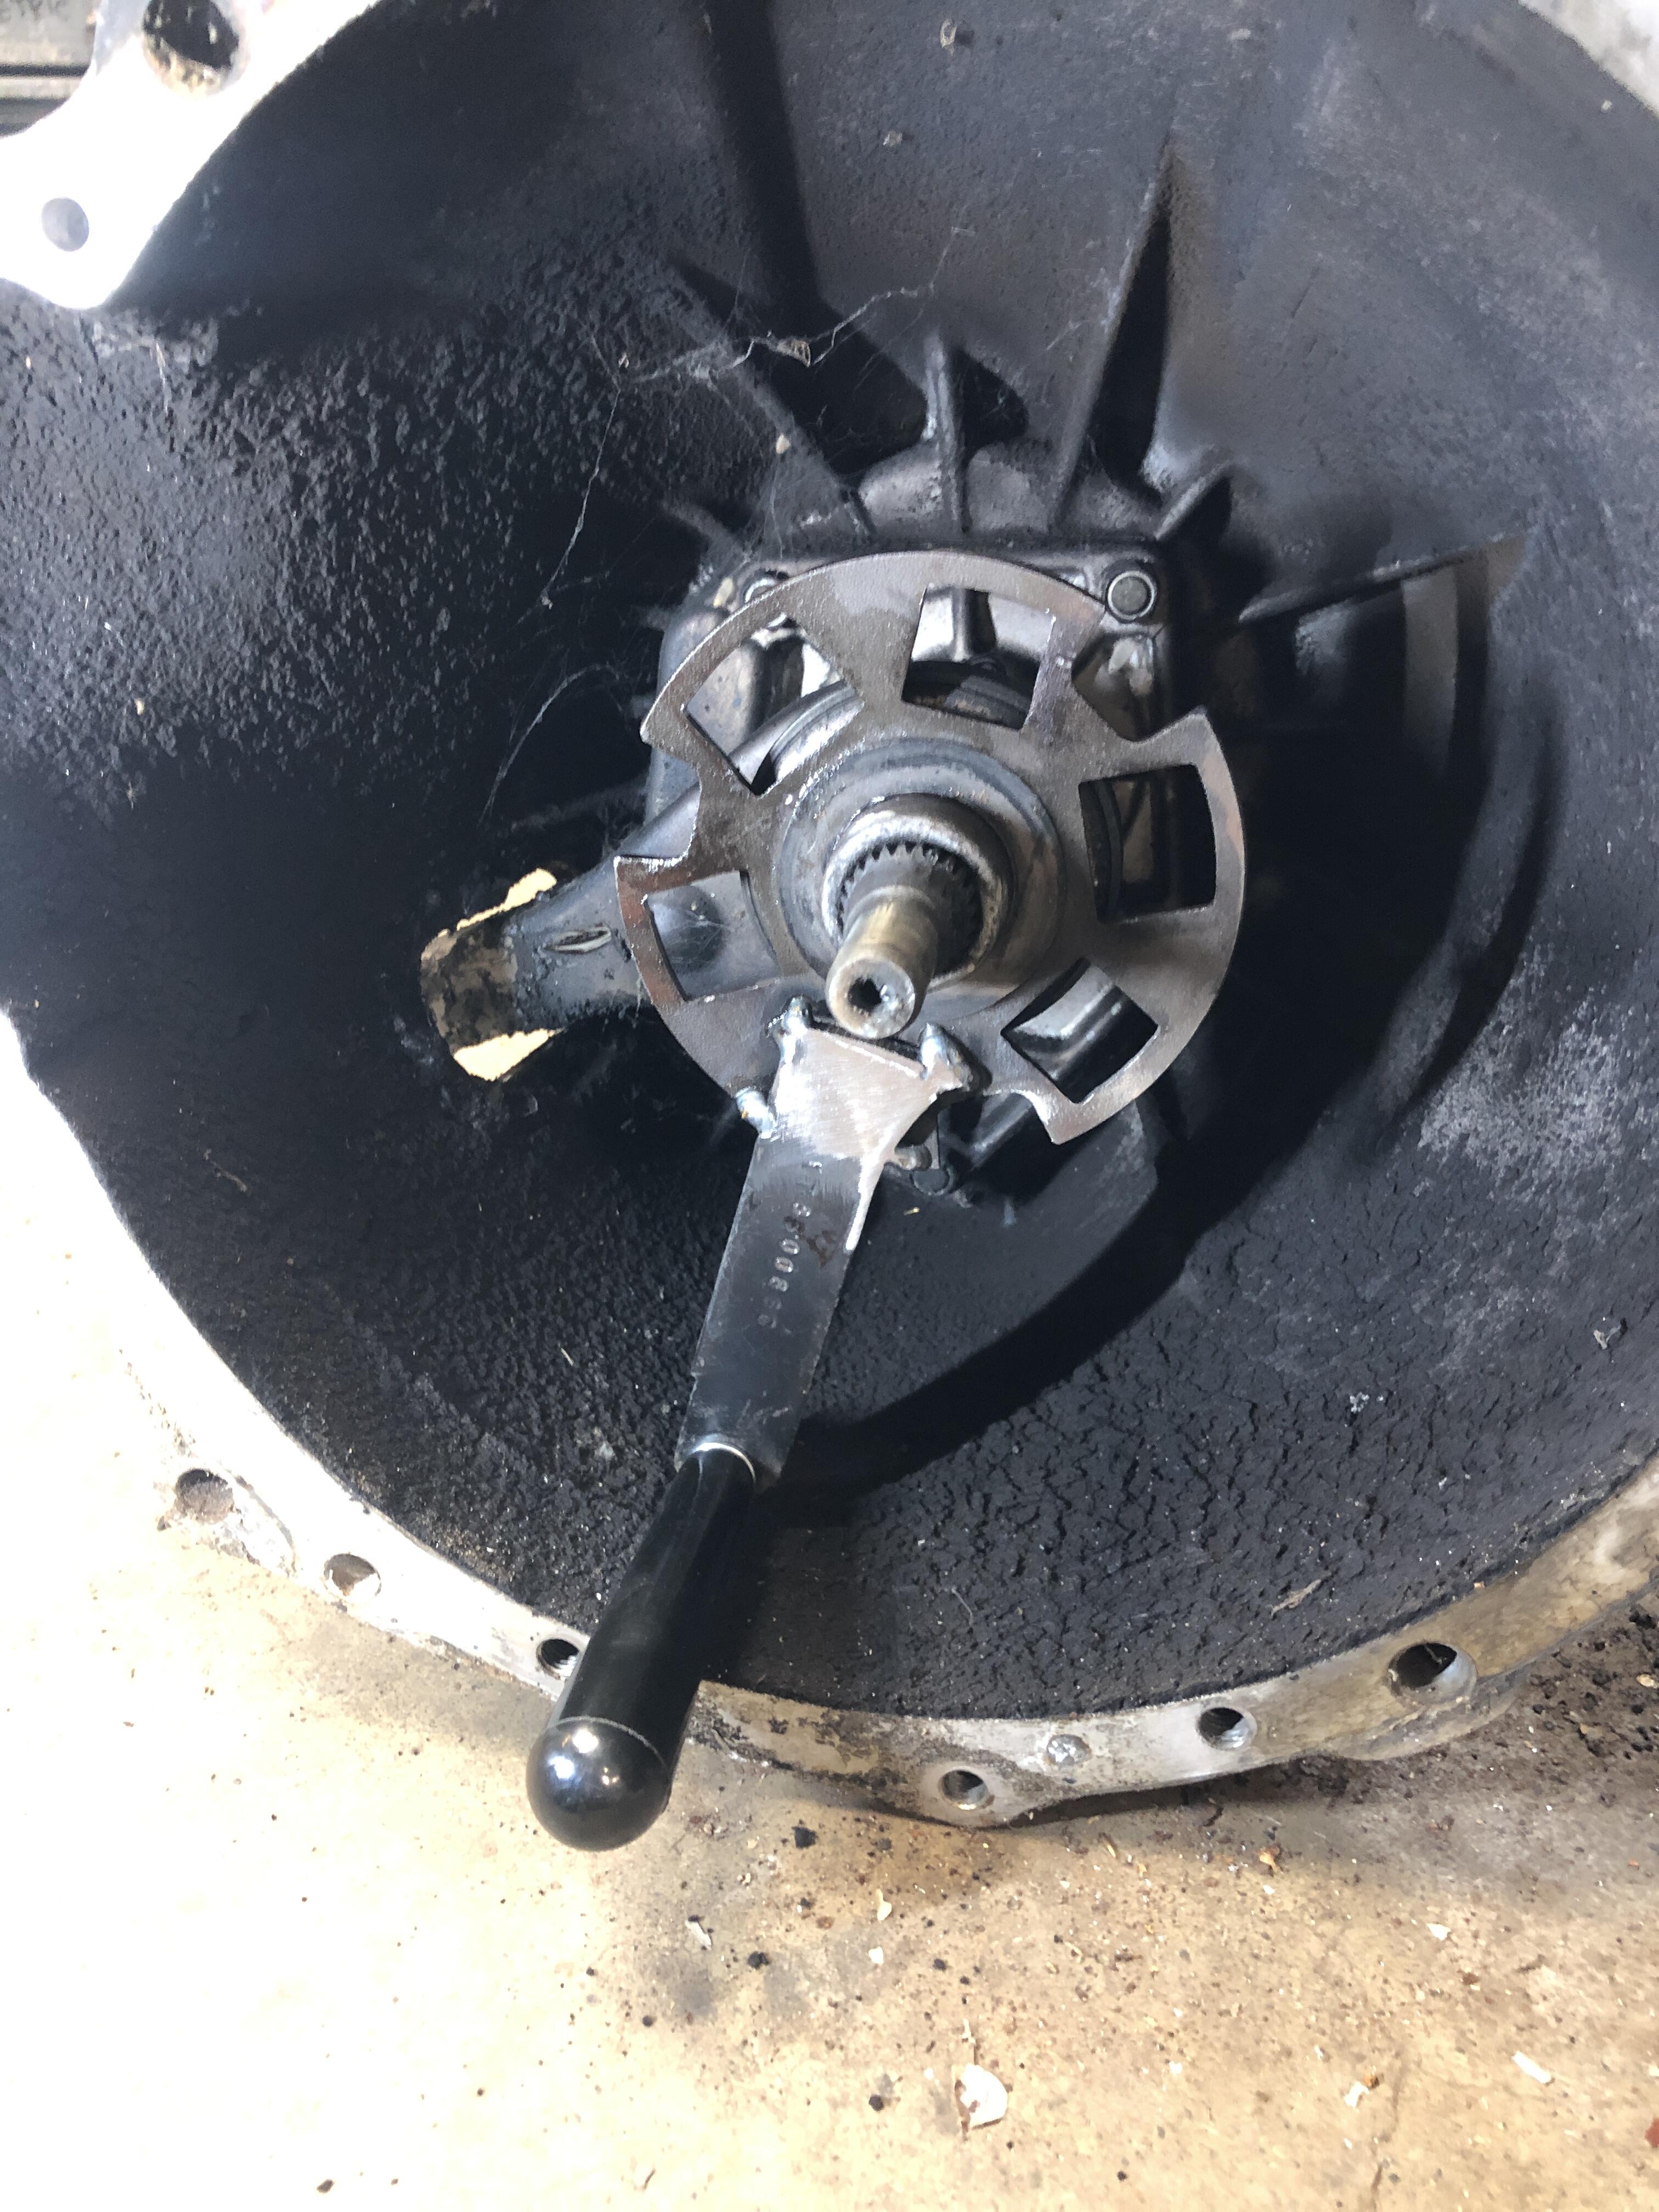
Two submissions today the first is a little “make a job easier” tool for testing manual transmissions or computing ratio’s in various gears. Its just the center spline of a worn out clutch disk with a hunk-o-scrap welded on with a handle. Now you prevent yourself (ok myself) from clamping vise grips on the trans input shaft splines to make it spin.

-
If you can’t find any closer, I have lots. Let me know.
-
Love a good necro-post! Thanks Do your bolts have a smooth round head with a flat on one side? Orient the bolt so that flat prevents the bolt from turning when you tighten the nut. Memory says the nut faces the back…..
-
The silver tin sill plates with (or without) the embossed DATSUN sit flush on the rockers. Better make that a butt weld patch.
-
Oh dear, I’m afraid it’s another case of YNUABEH (you’re not using a big enough hammer) With the bolts out, it free to rotate. Put a large pair of pliers, BA pipe wrench etc on it, and whack it with a BEH (see above)
-
Nasty job, no fun at all. I can only add to the above excellent advice with a small warning. I have tended to clamp vise grips on the turned lip of those clamps then found that in some cases, depending on the angle of applied force or degree of rust degradation, that the lips tend to break off. Then you’re in a real pickle. The true key to removal is to get them to rotate first to break the rust bond, THEN they will slip off more easily. You can use a chisel, screw driver etc to drive the clip to rotate it, just a bit, back and forth until that becomes easier, THEN work on applying force to pull them free.
-
I have brake switch and prop valves available. Let me know. I think MSA or one of the major vendors sells o-ring kits too.
-
Not really. By the time 280’s came out, I suspect any other model that might have the same item would have the M10x1.00 threads. But take nothing for granted
-
As long as you joined the ring terminals that were on the ammeter posts, then everything should work just fine. If you left them separated (and insulated I hope!) then ain’t nothing going do much of anything.
-
That is a very ingenious way of measuring/gauging wear on a timing chain. It doesn’t say much about stretch, but it does say something about pin wear. I’d have to compare it to a new chain to get idea of how much deflection is meaningful. Given the pretty reasonable price of a timing set (gears and chain and tensioner) I wouldn’t hesitate to put in a new set if I had the engine apart. I’ve never ever heard of a chain breaking, and stretch just means some mild adjustment of cam timing. At the extreme end of stretch you risk skipping a tooth or teeth and having your valves have a new angle on life (a very short life after that), but that is also extremely rare.
-
-
-
I am pretty sure the third image is not S30. Nothing there I recognize.
-
I can send you two of the ones I got, or you can order your own from : megazip.net 48128-78500 is the part number. Took less than two weeks to get to me. $30 USD to get them via EMS shipping. Remember they are the long right side ones, so the left side will need to cut flush once its pressed into the housing. Haven't done any yet, so help tips about how to do it, but I would heat the housing to 300-400 F in the over to expand it and freeze the bushing to make insertion easy(er). They are bronze or similar, so not very hard.... Jim
-
It is a 280 center valance. The lower and larger rad opening and bumper changes required the 280’s to have changes in the shape and fitment valance components. They are are interchangeable with the 240 parts. Even the signal/marker lights were moved out of the outer valance pieces
-
Just make sure you have the shift fork with the hole in it before you purchase the slave with the adjustable length rod. It’s ball shaped stopper seats in the spherical recess and the rest of the threaded rod pokes through the hole.
-
The symptom is that you can move the shifter to 1st and 2nd where they used to be, but nothing happens. It feels like there are no shift forks in contact with the end of the shift rod. I first though the end of the 1-2 shift rod fell off. But no, without that pin in place the shifter can’t rotate over enough to get 1-2 lined up so it essentially stays in neutral. 3-4 and 5-R feel normal and engagement is fine.