


By Mikes Z car
· 1,125 views
Hi all,
This has been done before by others, the following is my experience. I added a second hood release cable so now I have two of them in case the original cable breaks. Getting the hood open after the cable breaks is not particularly easy in my view of how others have done this. The easiest way to do this IMO is to do what someone else did, loop a steel wire through where the original hood release cable attaches to the latch under the hood, run it through the firewall grommet for the speedo and make a loop in the end inside the car. I didn't do it that way as I wanted to use a spring sheath pull cable like the original with a knob on the end hidden above the existing hood release handle.
Materials needed:
A. 5 foot long pull cable from auto parts store, eBay etc
B. Wire cutters if desired, to shorten "spring like" sheath and center steel wire.
C. Needle nose pliers for wrapping steel center wire around hood pull point
D. Clear packing tape used to slide new cable through hood release firewall
grommet using existing cable as a pull tape.
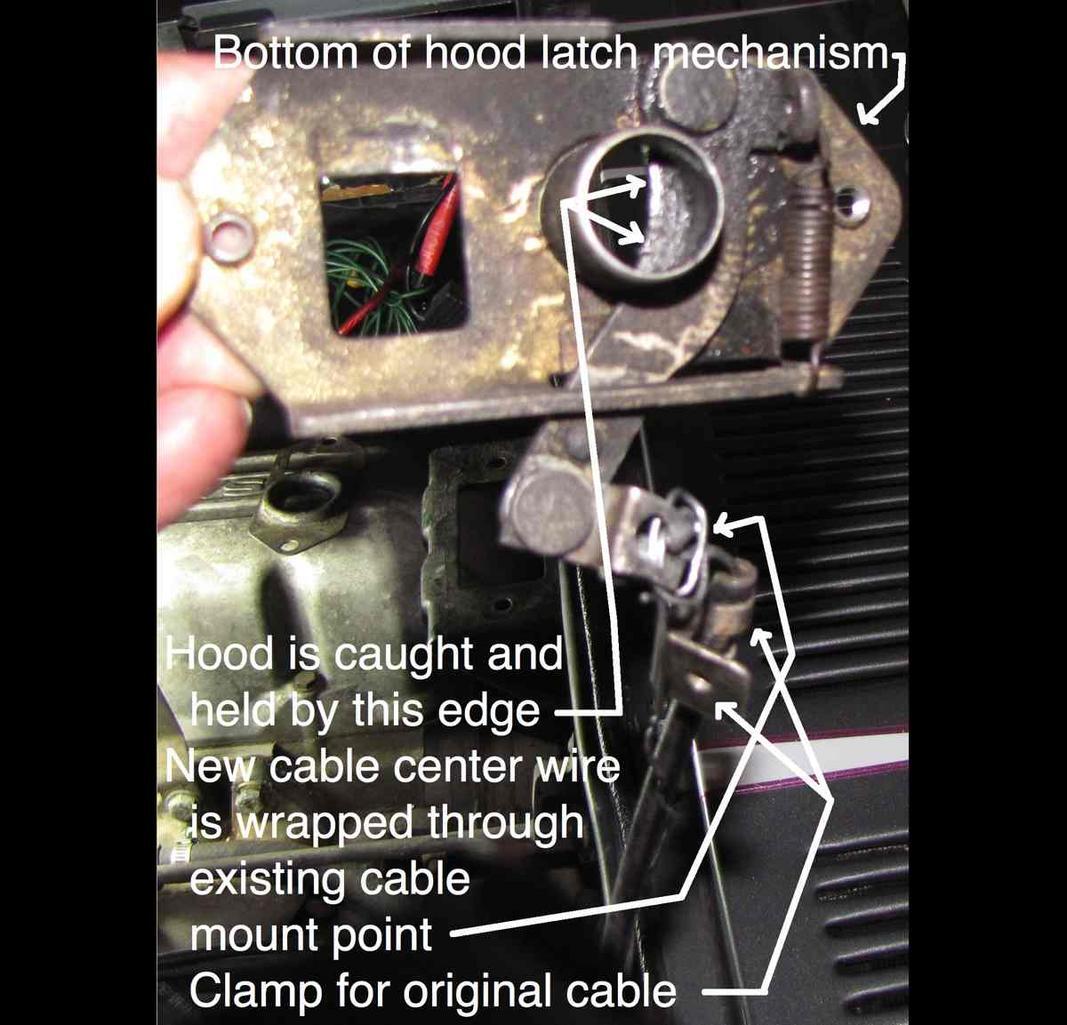
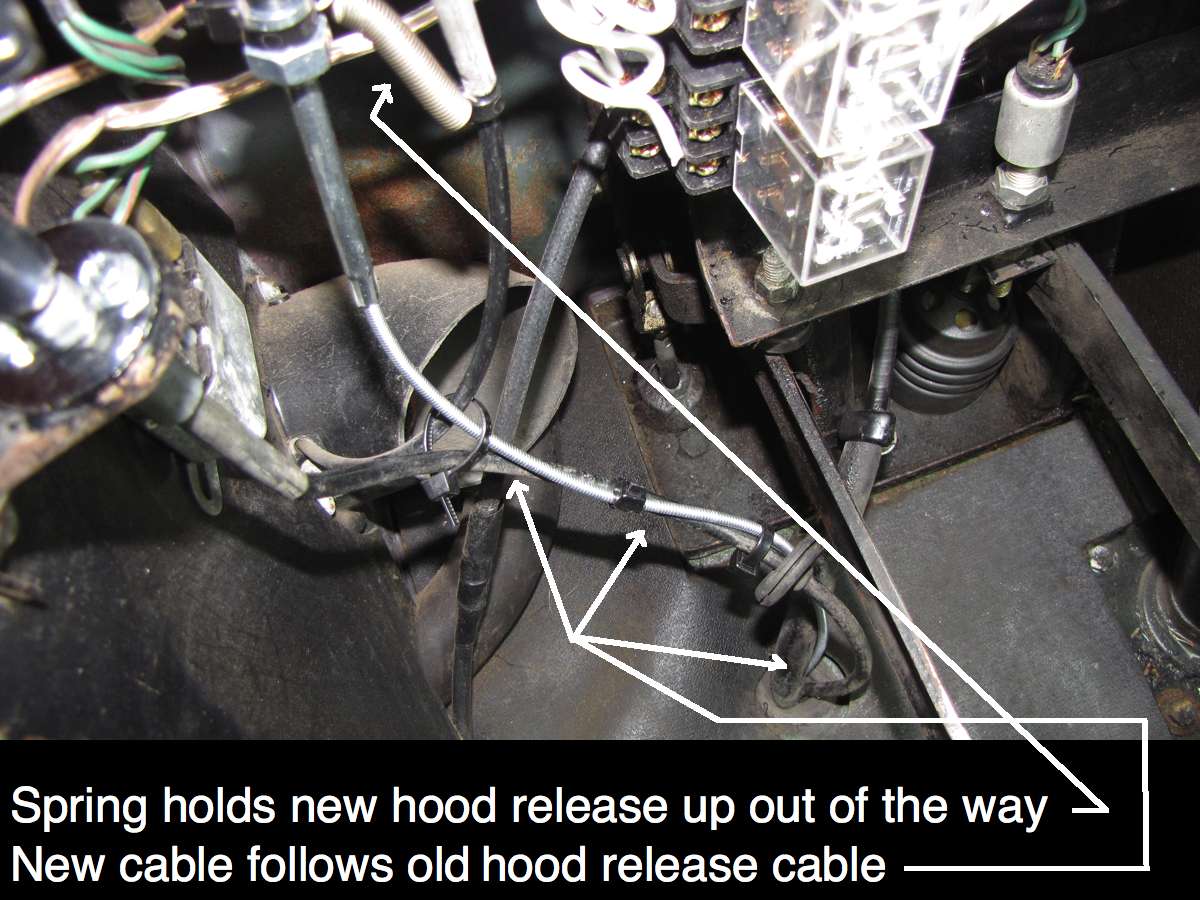
The new cable was pulled through the same firewall grommet the original hood release uses to make it look like it belongs there, painting it black would also help. An easy way to pull the new cable through the grommet is to use slippery clear packing tape to tape the new cable to the old one and then use the old one to pull the new one through the grommet. This has to be after the old one is unfastened from the hood latch connect point so it can be partially pulled back inside the car. Don't use duct tape! That stuff will never go through the grommet unless there is a big hole in it. I shortened the spring like cable sheath to be the same length as the existing cable so it would lie next to it all the way to the latch assembly to hide it. An idea to shorten the sheath would be to pull on the knob to pull the solid center wire out of the way before cutting the spring like sheath (NOW I think of it). I did this the hard way, I carefully used wire cutters while the center wire was still there. The easiest way is to skip this and let the extra cable loop in the engine compartment avoiding the carb linkage or anything else that moves. I clamped the new and old cables together 10" from the hood latch though it wasn't clear to me that a clamp was needed. I tried clamping them together at the hood latch and that didn't work; too much friction for the return spring. I made a clamp out of a small piece of sheet metal about 2"X1" that I clamped around the cable pulls with vice grips. Another idea might be to use a very small hose clamp with a rectangular piece of solid metal held between the two cables, otherwise the cables are too small for most hose clamps. The pull knob for the new cable is right above the handle for the original to keep it invisible until it might be needed. It has a spring holding it up out of sight and is zip tied to the original cable closer to the firewall to keep it from flopping around. I was driving with the hood ajar before adding a backup hood release but the new cable works great and I now get to drive with the hood closed.
Inside car:________________________Spring to hold new knob up out of sight:
Hood latch:

***** Fixing stripped threads on handle mount*****
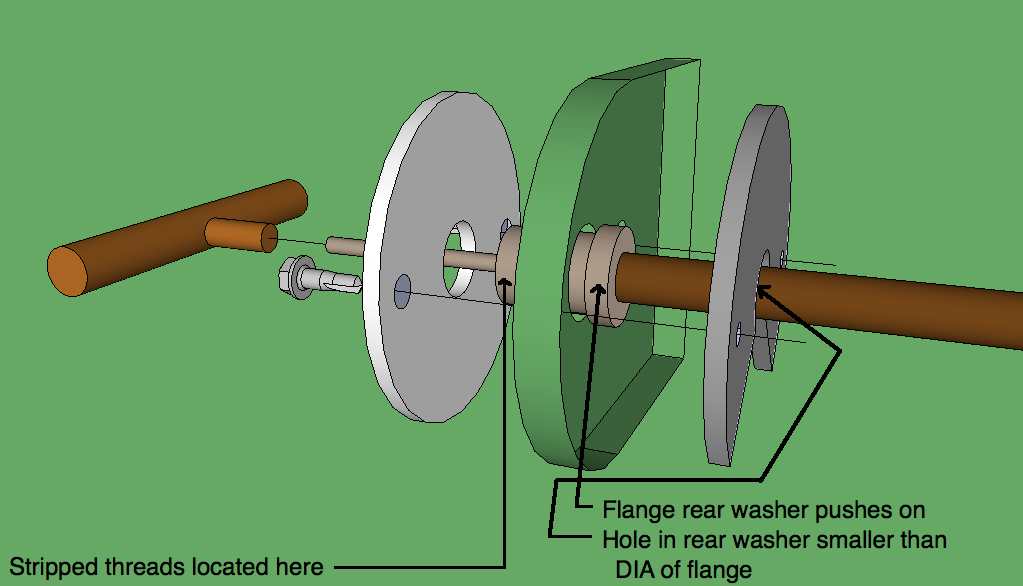
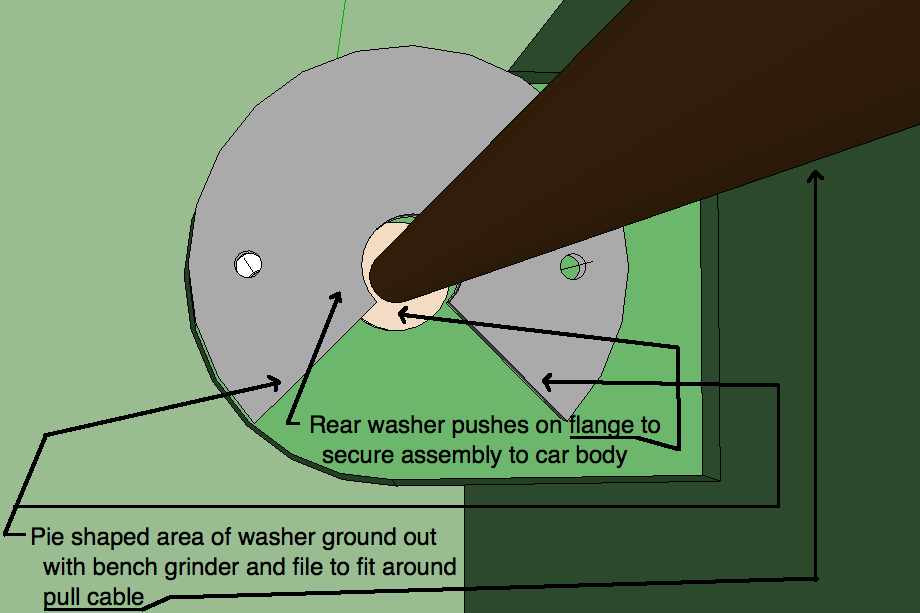
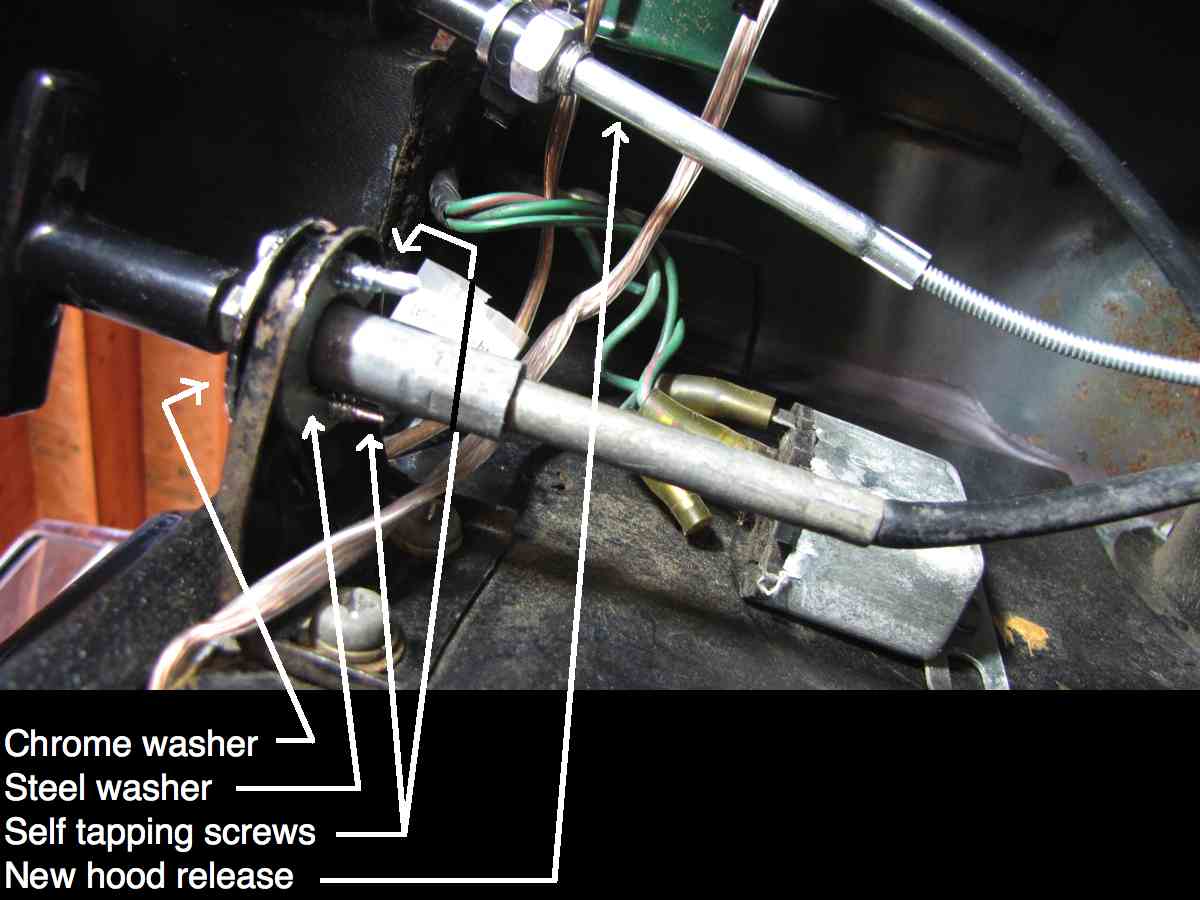
I may be the only one who has had this problem but, the threads the chrome colored nut under the pull handle screws onto on my car were stripped when I bought the car. This nut secures the handle pull to the frame of the car. The loose nut allowed the handle to flop around which I didn't like. The threads (10MM, pitch=1) were too far gone to be fixed by chasing them with a die. A new cable was going for $75 so to fix the loose handle I used two washers about 1 inch in diameter, one chrome and one ordinary steel both with large center holes in them. The chrome washer was used under the pull handle to improve appearance and is slightly larger than the steel washer, all hardware came from Thrifty (Ace) hardware. Two tiny pilot holes were drilled in the chrome washer in line with where two holes were going to be drilled in the steel washer with 3/4" self tapping screws. The steel washer was cut through on one side with a bench grinder (could use a hacksaw) to allow the washer to fit over the cable behind the handle mount. Further enlargement of this cut was done with an ordinary file. The drilled holes in the chrome washer were made a little larger than the self tapping screws I used to drill into the steel washer to allow alignment. Note that the screws have to clear the flange on the back of the cable mount; mine didn't entirely clear the flange so to fix this I used a file to grind off the side of the flange to get it out of the way. The steel washer was placed behind the handle mount, the chrome put in front and the self tapping screws securely hold the two together. Although this violates a prime directive of not drilling holes in the car they are only visible with the door open. Also, the drilled part can be easily replaced as it is attached to the car with two screws. The handle is very secure now.
Front exploded view:_________________Side view showing stripped threads:
Back view:
Picture of install:
Recommended Comments