Jump to content

  • entries
    24
  • comments
    15
  • views
    8,500

Horn Button DATSUN label printed


Mikes Z car

762 views

I had a horn button but no badge on it with the word "DATSUN" so

I selected a font similar to a real badge and resized it to print at the right diameter to tape to the horn button. See below the asterisks for another print option using a scan of a real badge that I obtained after I originally wrote this. Continuing here, the font selection came out okay, see attached picture of result and the file I printed the word "DATSUN" with. Printing the label on photo paper if your printer supports that or having it printed at a kinkos type of print business might significantly improve print quality and make the background print blacker. I covered the printout badge with clear packing tape and cut out two round circles from a document protector plastic to put on both sides of the printout to keep the printout badge looking okay. I used a bench grinder and a flat abrasive tool to grind down the edges to a fairly round shape. I taped three little pieces of clear packing tape from the front outside edge around to the back to hold the assembly together. Then I rolled four pieces of clear packing tape around on itself with the sticky side out to tape the whole thing to the horn button. I may get a real badge someday but this printout will work until then.

To make the size correct in print preview select 100% as the size or 72 DPI which mean the same thing in this case. If the print is the wrong size adjust the DPI to be different than 72 DPI, maybe try 80 or 65 or some other variation. Printing at 80 DPI will make the print a bit smaller, 65 will make it larger.

Mike

blogentry-18366-14217593812922_thumb.jpg

blogentry-18366-14217593813674_thumb.jpg

***************************************************************

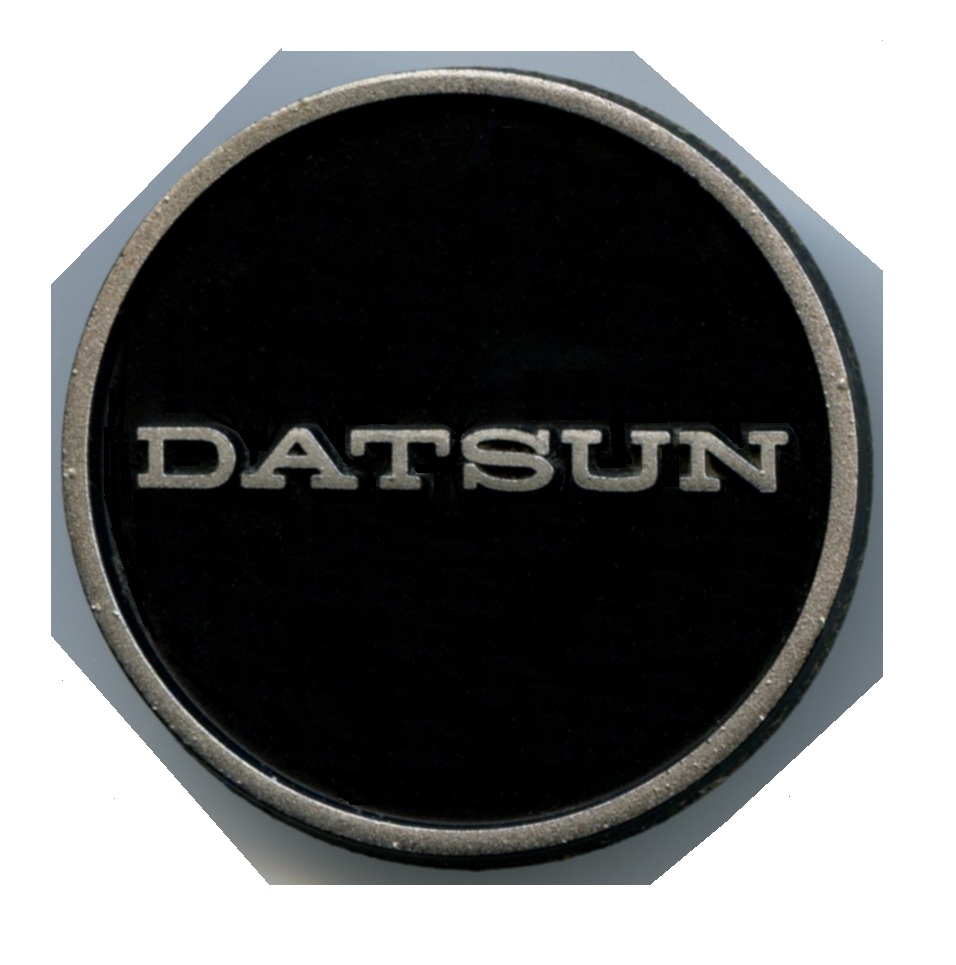
Note that since I originally wrote this I obtained a horn button with the metal label Datsun on it. After I removed the metal label I scanned it in and it can be seen below. I touched up the scan to get rid of dust particles etc that were visible. It was scanned in at 400 DPI, using that resolution when printing should yield the correct size.

blogentry-18366-1421759389899_thumb.jpg

Back of horn button and badge label dimension information:

blogentry-18366-14217593899713_thumb.jpg

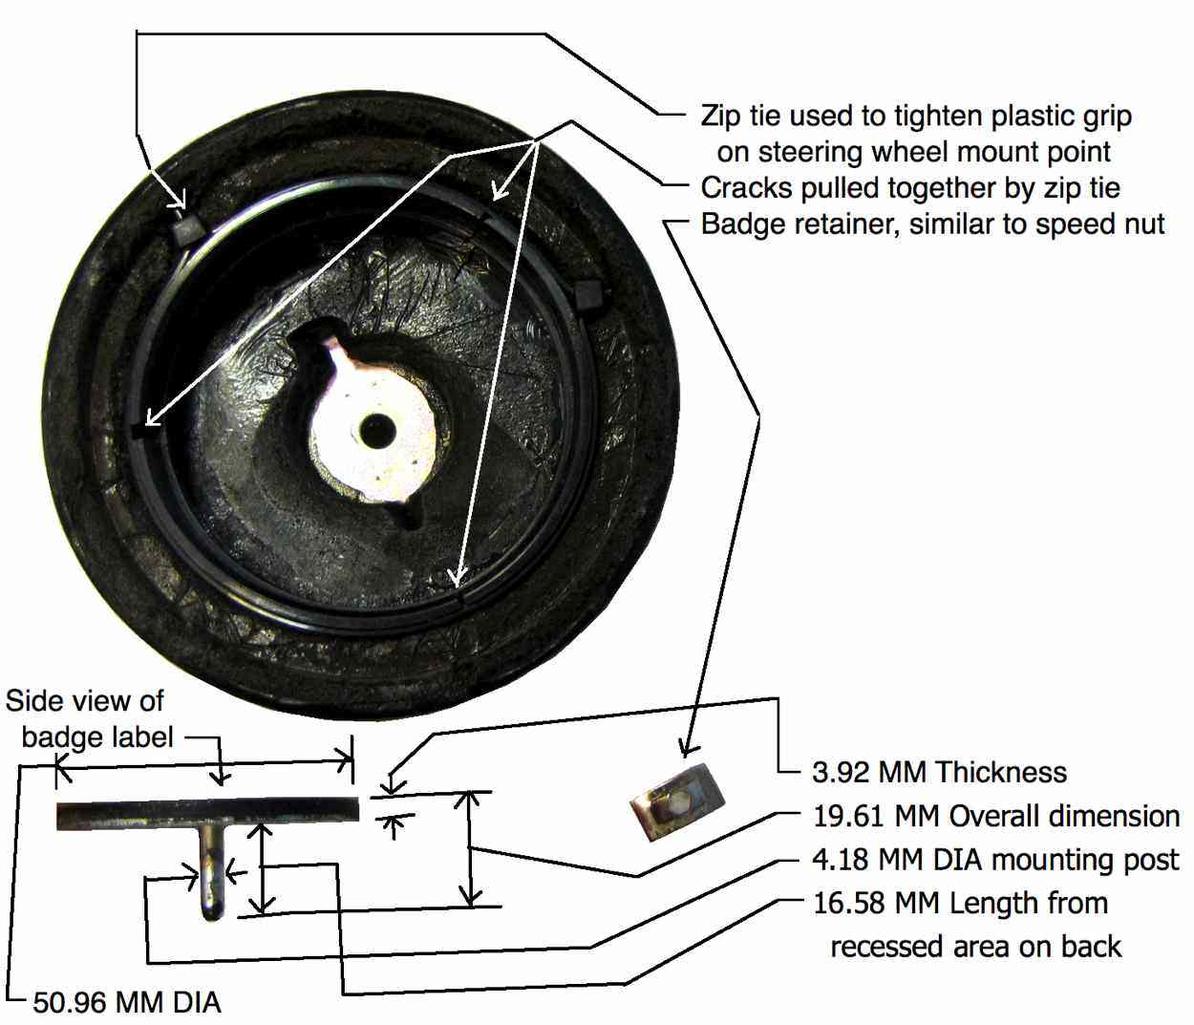
The mounting post is in a recessed rectangular area so that the length of the post

and the thickness add up to more than the overall distance from the

end of the post to the other side of the label if that makes any sense.

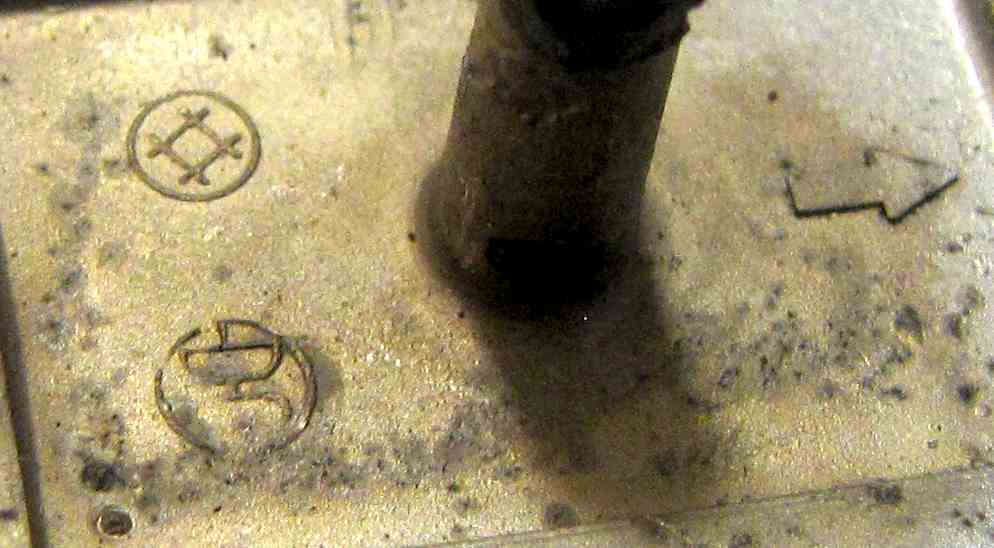
Symbols on back of badge label:

blogentry-18366-14217593900523_thumb.jpg

0 Comments


Recommended Comments

There are no comments to display.

Create an account or sign in to comment

You need to be a member in order to leave a comment

Create an account

Sign up for a new account in our community. It's easy!

Register a new account

Sign in

Already have an account? Sign in here.

Sign In Now


  • Blog Statistics

    • Total Blogs
      167
    • Total Entries
      251
  • Blog Comments

    • I'm still waiting on a hoist to free up before I can start bolting the new brake parts on my Z, but I did make the drill jig today.  I started with a 12mm thick Mustang wheel spacer with a pilot.  I then made a drawing to layout the holes needed.  I transfered the drawing onto the spacer and I drilled three new 1/8" holes through the jig (spacer) so I'd have the correct 4x114.3mm holes.  One hole is shared from the original 5 lug rotor.  I then bolted the jig onto the Mustang rotor and simply dr
    • Local radiator repair shops used to be plentiful but getting harder to find.  Some of them just specialize in big truck-heavy equipment radiators.  I will be needing to do the same for my project.  I have heard good reports on gas tank RENU but there are none of those franchises in my area.  Good luck, John-Lugoff, SC
    • Decided to go with the 240sx conversion. Main reason is it’s strictly for the street and the parts were easy to source. What I didn’t realize was the 14” wheels won’t clear the caliper. Now looking for a set of 4 lug 15” rims and tires I can use during the build process. Can anyone recommend a temporary solution as far as make and model preferably a steel wheel that I can use until I’m ready to buy the wheel and tire combination at the end of the project? Thanks again for all the help out there.
    • There are several reasons to use the S197 rear brakes.  The rotors are larger diameter than the SVO rotors and they are vented.  The calipers have larger pistons to give them more power.  The big beef with the Maxima rears is that they don't offer as much stopping power as the stock drums.  The S197 rears allow the addition of an adjustable proportioning valve.  The Maxima rears cannot utilize an adjustable prop since the prop needs to be all the way open to get close to enough rear bias. 
    • Any particular reason to use S197 Mustang 5-lug brakes?  The Fox body SVO Mustangs had rear discs with 4-lug.  It's a popular swap to use SVO or T-bird Turbo Coupe rear brakes to retrofit discs to other Fox body Mustangs.  These parts are still pretty common (probably available as a kit).  Might be worth checking to see if they'll fit.
×
×
  • Create New...

Important Information

By using this site, you agree to our Privacy Policy and Guidelines. We have placed cookies on your device to help make this website better. You can adjust your cookie settings, otherwise we'll assume you're okay to continue.