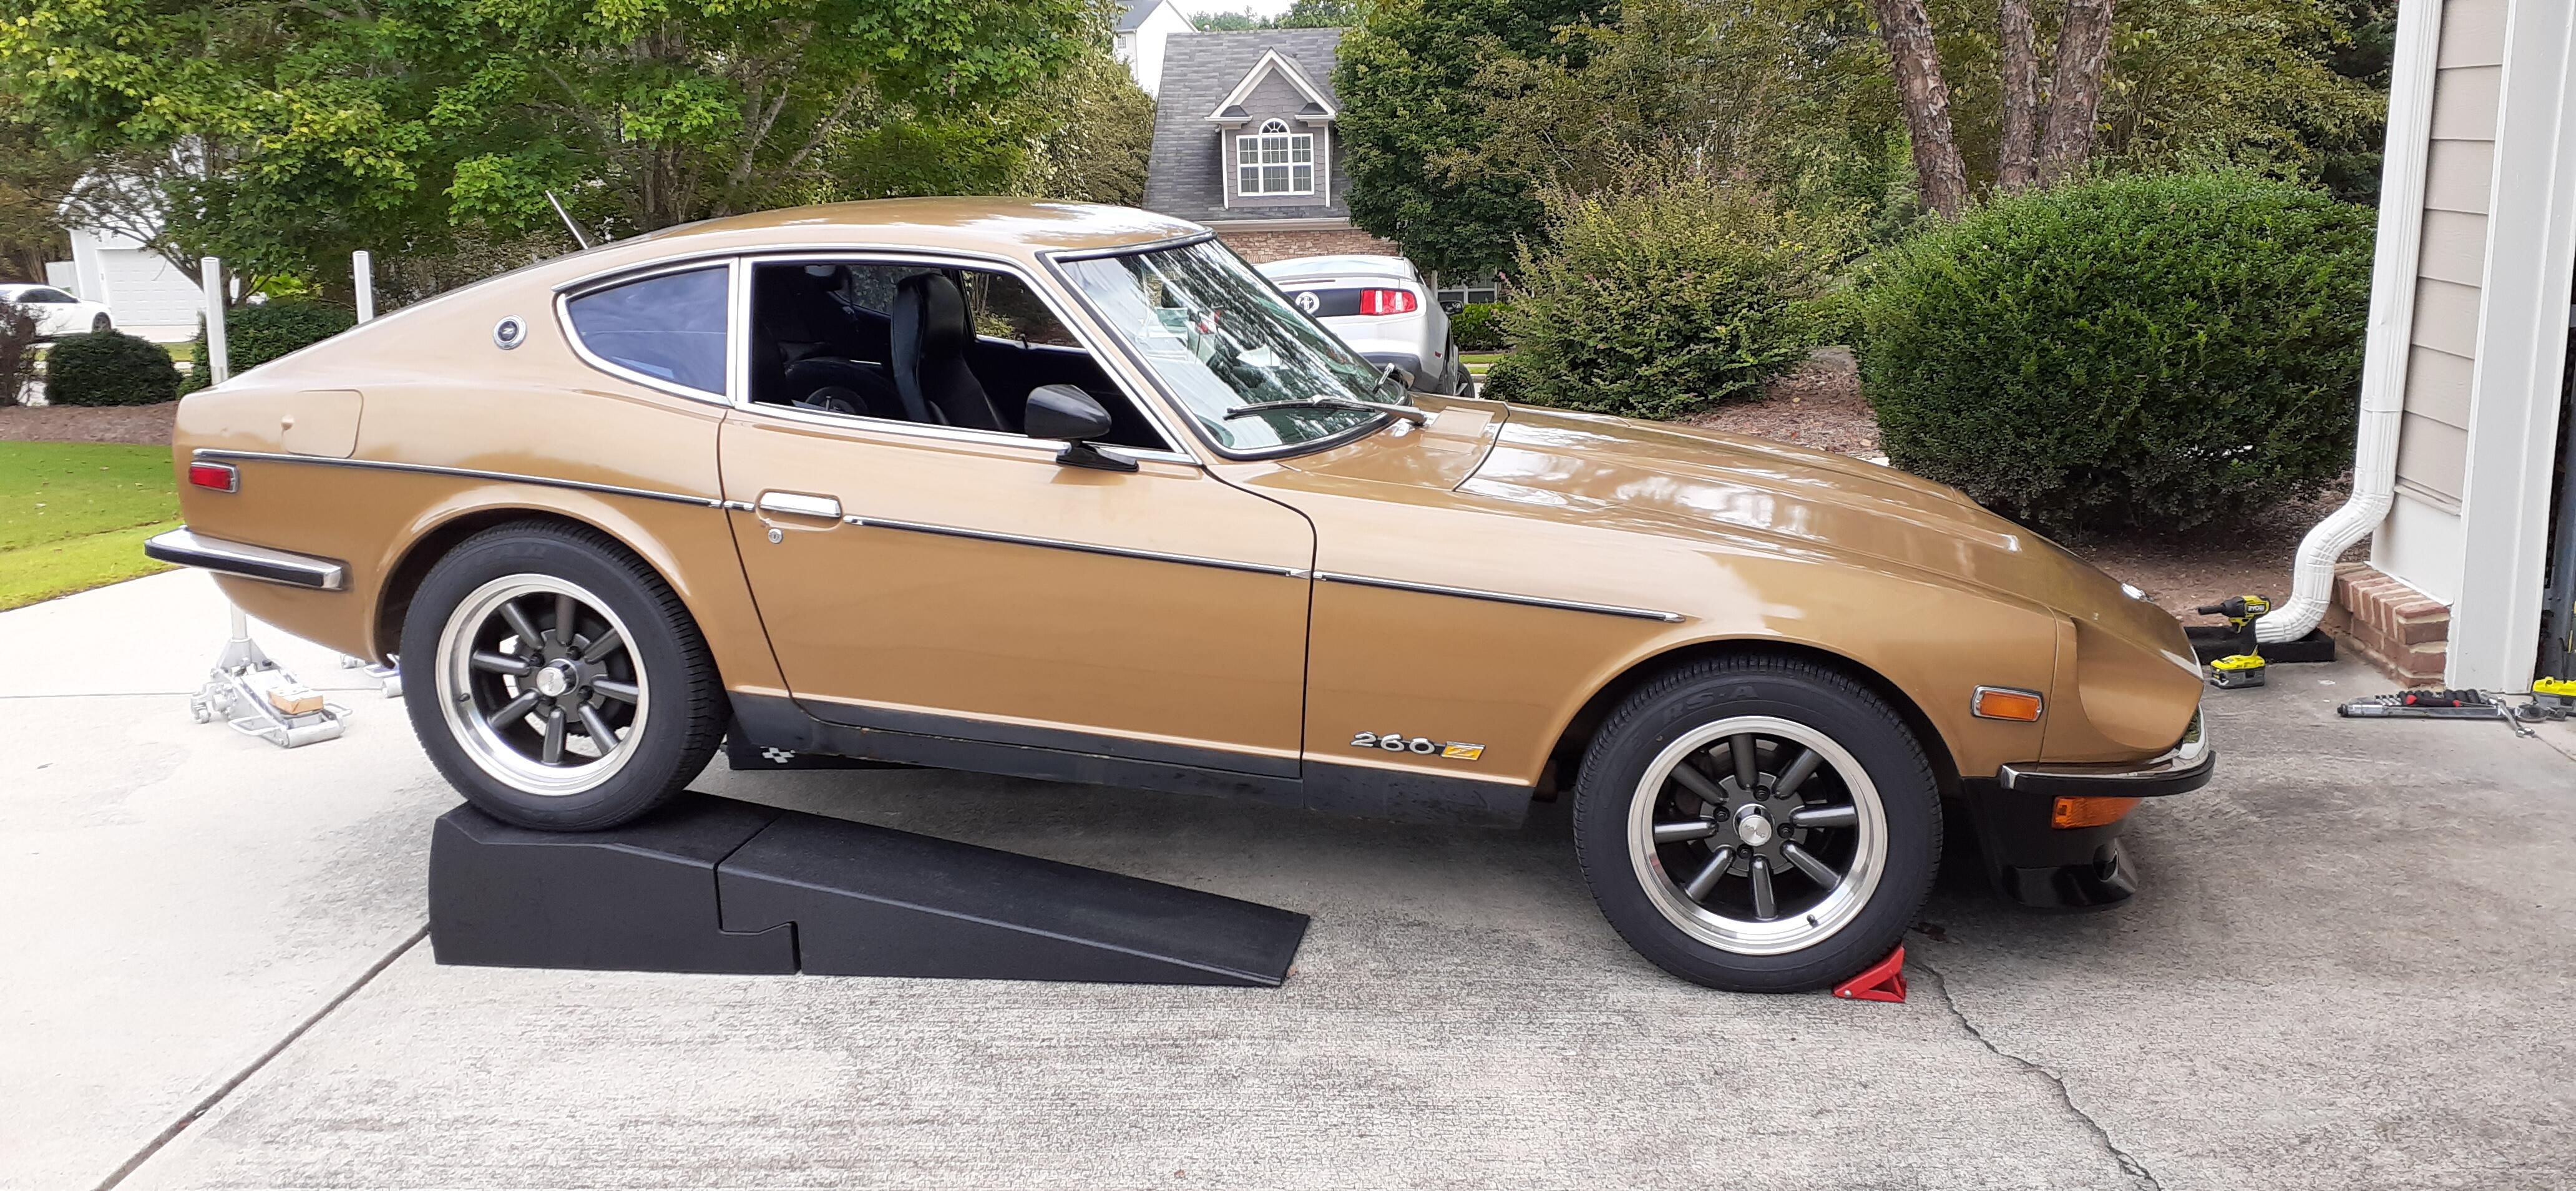
.JPG.cfcada9cf1c1b502df3f5f2f2ca3ff36.JPG)

SteveJ
Free Member
-
Joined
-
Last visited
-
Currently
Viewing Topic: Gas Tank removal problem on my 72 (12/71) Z car
Everything posted by SteveJ
-
 Also, here is a picture of the resistor in the passenger footwell of my 260Z. As @Zed Head said, it's taped up like a mummy. It might have different connectors in the 280Z, but this should give you an idea of what you should be looking for. It will probably be below where the engine wiring harness comes through the firewall.
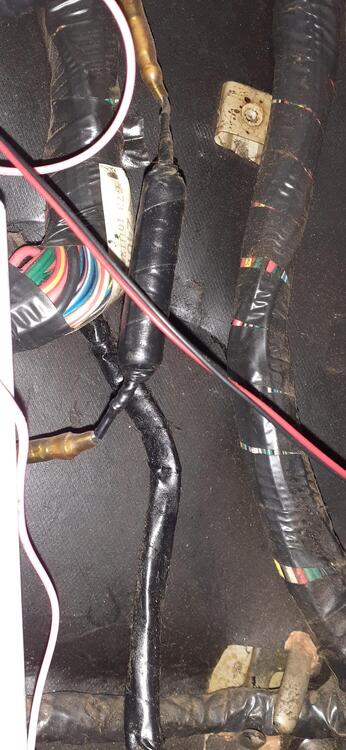
-
First he needs to take out the TIU and 10K resistor to see if he has a problem. I would not be surprised if getting rid of those (along with ensuring the stock resistor is in place) fixes his problem.
-
Just to complete the explanation, the TIU does the same thing as the "matchbox" module on the ZX distributor. Several years ago, a friend did a ZX distributor conversion on a 260Z and brought the car to me because it wasn't running right. The first question I had was, "Did you disconnect the TIU?" After he unplugged it, the car ran like a scalded dog. Verify that the stock resistor is still in place. It should reside in the passenger footwell and plug into the wiring harness.
-
So if you converted to a ZX distributor, why did you leave the TIU in place? It should go bye-bye. Also why did you solder in a 10K ohm resistor? The value should be 2.2K ohm if I remember correctly, though on a Google search @Zed Head gave a value of 2.3k on another thread. Double check the FSM. I know it has the value.
-
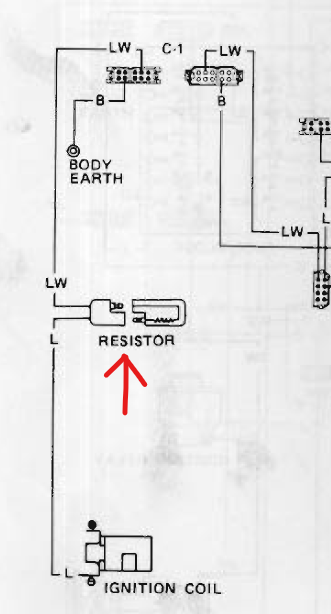
Here's straight from the FSM troubleshooting guide:

-
If they are both moving all back and forth, I would think it would be the voltage regulator.
-
Unfortunately, it seems to be true. The message said they stopped taking new orders as of 9/9.
-
Did you remove the TIU from the car? Do you still have the resistor (not the ballast resistor) in between the tach and the ignition circuit?
-
I read on Zcar.com that Z Car Source closed. I called their number, and the outgoing message confirmed it. 😞
-
What? You didn't use a 4 pole double throw switch? That would have been even faster to switch over. 😉 Nice wiring.
-
It is interesting that in looking at the coupe vs 2+2 part numbers for the windshield page in the parts catalog, only the seal number is different. Maybe someone like @zspert might know.
-
Nice. Take a picture of the connector that the sockets go to. Since it has lamp sockets, it's most likely just a matter of modifying the connector at the steering column, running the wire in the dash harness and body harness, and maybe changing the connectors at the taillights to work with the modifications. As I said before, since the harnesses are not likely in the car, the wire can be run and wrapped into the harnesses. No cutting, no slashing, no ring around the collar.
-
Okay, so there is one place in the taillight harness you may have to cut wires unless you can source bulb sockets that work in the taillight sockets. (I just ordered a likely candidate, and I'll provide an update when I get my grubby paws on it.) Anyway, since the wiring harnesses are out, it wouldn't be a big deal to add a wire to the harness and wrap it to protect the wire. I've attached an example of how to do it on a 72. Turn Signal Modification for JDM Taillights.pdf
-
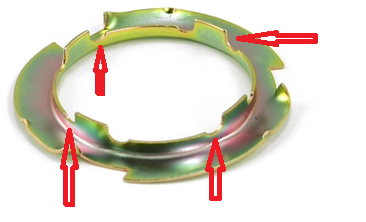
I'm not sure where it might be, but it's not too difficult. You will need to get the car high enough to get under the back. If that means jackstands, I suggest you drain the tank as much as possible first. Otherwise, you'll have fuel spilling out. I advise you to get a replacement lock ring and o-ring before you attempt to do this. If the lock ring gets warped, it won't seal. The lock ring has 4 tabs on it. I have arrows by where you need to turn it to remove the ring. Remove the wires from the sending unit Some people will place a screwdriver against one of the tabs and strike the end of the screwdriver to turn the ring. If you are worried about sparks, you may want to use a brass drift instead. I fabricated my own tool out of angle iron to turn the ring. You could also carve notches for the tabs in a piece of 2 inch PVC to turn it, though the height of the tool has to be small to fit unless you're dropping the tank. Pull the ring off. Remove the sending unit and o-ring. Re-installation Check the ring for flatness. If it is not flat, replace it. Put the new o-ring on the sending unit Thread the float though the opening in the tank and line up the sending unit with the locating tab on the tank. Holding the sending unit so that it stays aligned with the locating tab, put the locking ring on, and turn the ring using the tabs until it locks into place.
-
There's ALWAYS a way around cutting, but it can be a challenge.
-
The ZX went from a box bolted to the passenger side firewall (Transistor Ignition Unit or TIU) down to a small module on the side of the distributor. If your distributor and TIU are in good shape, you won't see any performance difference. Also, ZX distributors are getting rare. If the TIU dies, look into converting to an HEI with your existing distributor. I believe @EuroDat did a nice write up on doing that many years ago.
-
I got an inexpensive analog ammeter and used a potentiometer to simulate the fuel gauge sending unit. So per @Captain Obvious's suggestion, here's a video of the fuel gauge with an ammeter to demonstrate the operation of the voltage regulator.
-
Thanks, Jonathan. I'll try to keep that in mind...and see what I have left over from buying bushings for the 240Z 25 years ago.
-
It actually looked to be in good shape. It might have been replaced by a previous owner.
-
It felt pretty good on the road today. It actually seemed more quiet than before. I don't find that surprising considering how bad the old bushings were. Also, I'm pretty confident that going underneath with a torque wrench today took care of securing the control arms adequately. I shot video of the process. I just have to edit the video now.
-
Doing the wholly incorrect and dubious accuracy method of having the straight edge wedged against the tires, there is hardly any difference between the front and back of the rear tires. It has to be a significant improvement from before. Thanks for the guidance and advice @Jeff G 78 & @Captain Obvious.
-
@Captain Obvious, it was a good thing I got under the car again. I hit the bolts with a torque wrench and found many could use the extra torques.
-
Too late. But I am shooting a video of the work. Besides, I found one loose bolt on the front passenger side shackle. 🥺 I think I can fit under the rear end like this.
-
The threads are either BSPP or BSPT. I'm not sure which. The FSM says to use conductive sealant, but I have no idea what that is, and Google hasn't been my friend in my efforts to see what it might be.
-
I tossed the old bushings, but they were pretty distorted. No, I didn't remember to leave the big bushing bolts loose until the suspension was loaded. I guess I need to put the car back up in the air the morning, loosen the bolts and load the suspension.