kcpope
Community Member
-
Joined
-
Last visited
Everything posted by kcpope
-
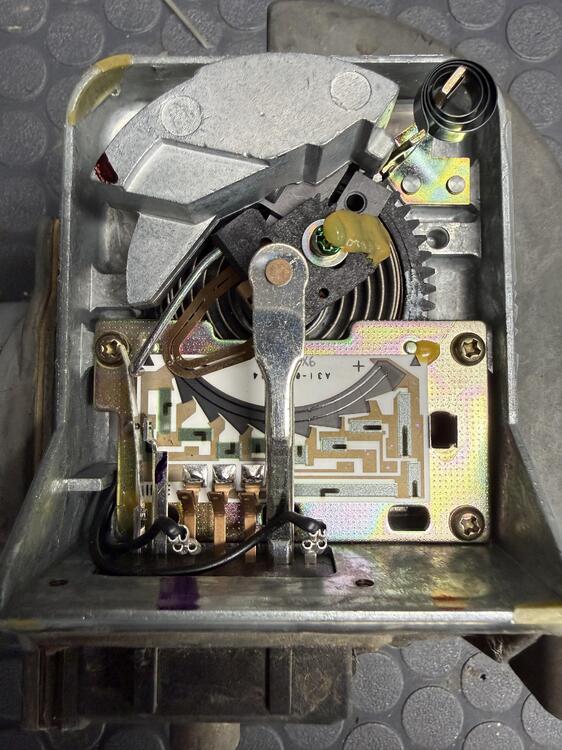
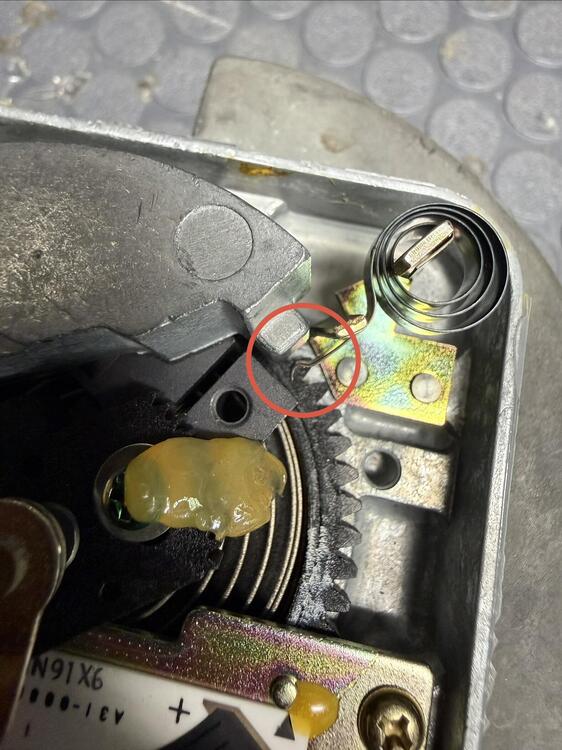
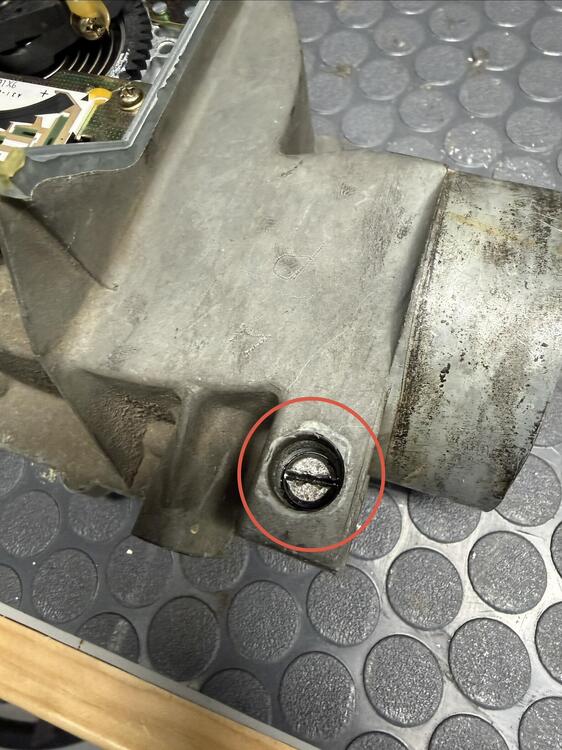
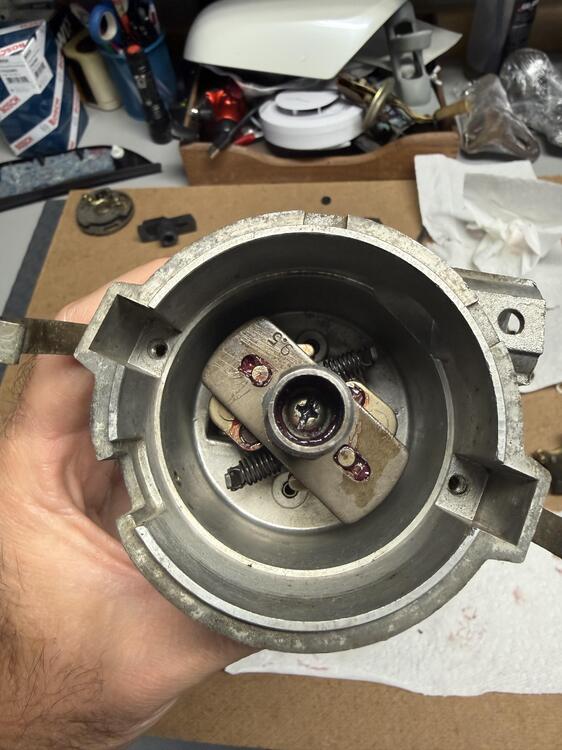
I know I'm jumping around all over the place, but trust me, I'm staying organized! The AFM. Man, been doing a lot of reading, and I want to get thoughts. Here's mine, freshly opened up. As far as I could tell, I didn't see any signs of anyone having been in here before. All glue blobs in place. I followed the atlantic Z writeup and measured resistance across the pins he mentioned. Everything checked out OK. It all looks pretty good in here, except for one thing, the coil spring "back stop" for the weight. Mine is not making any connect with the weight when in the fully closed position. Here's a pic of what I mean... I wanted to get input before just bending the spring back to make contact. Is that the right move here? Also, unless you guys see something obvious, my plan is to just seal it up and make no changes because it appears to be untouched and I know this could have an effect on my smog readings. Secondly, the AFM bypass adjustment screw appears to have been played with. Mine is 7 turns out from the bottom. I wonder if there's a factory spec for this, and if it being a CA car makes a difference...
-
I had the same idea as I was drifting off to sleep last night. Had a couple minutes today, so I tried it out. Was able to get one terminal “free” without cutting any wires. Felt like a surgeon with my dremel tool. Looks like it’s going to work decently well. I’ll prolly pour epoxy into the void I dug out after I crimp on a new spade. I’ll post pics when I finish…
-
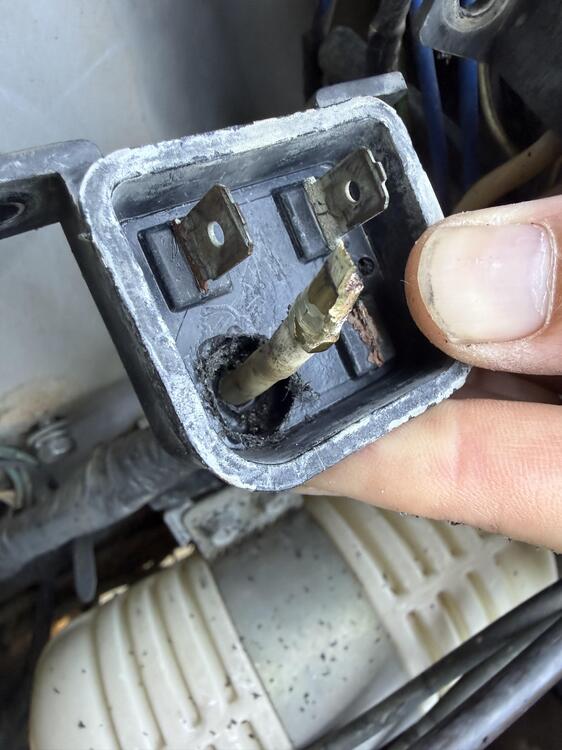
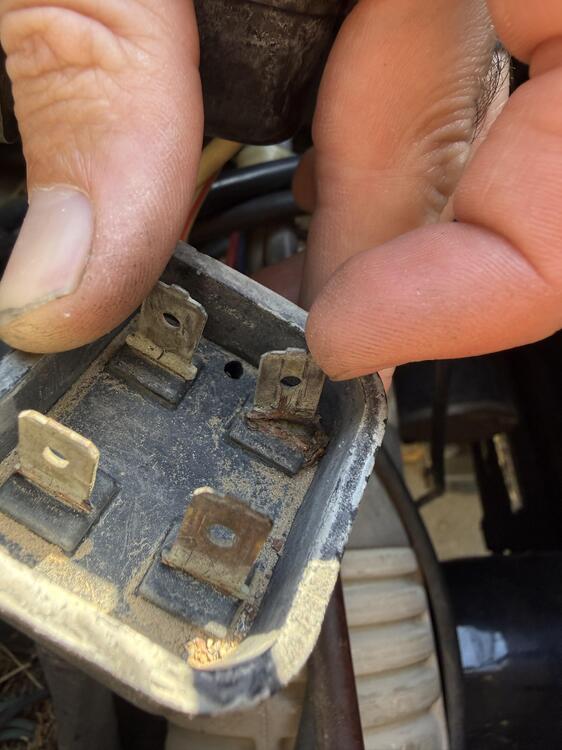
Was getting started on cleaning up all my electrical connections and noticed one of my fusible link blades is hanging on by a hair. Ugh, anyone have a spare they’d be willing to sell? Alternatively, if anyone has ever successfully repaired one of these spade connectors, I’d be curious to know how, because I believe it’s molded into the plastic holder base. Did some research on just taking the opportunity to “upgrade” to a fuse block setup, but as far as I can tell, there doesn’t seem to be much benefit in doing that, so I think I’ll just keep it stock.
-
Interesting. Yeah, only option I can see would be to physically cut the can open, change out the charcoal media, then glue it back together somehow. I'm going to assume mine is functional for the time being, and cross that bridge only if I have to. Thanks for the link, glad to know that exists.
-
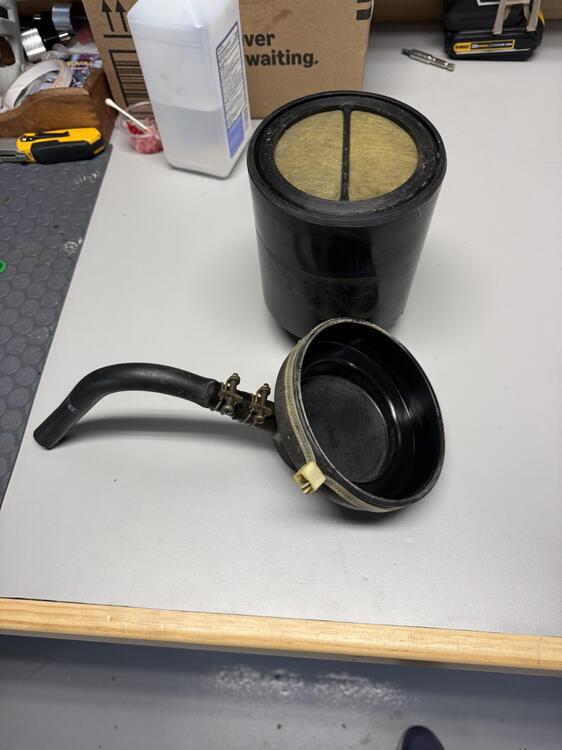
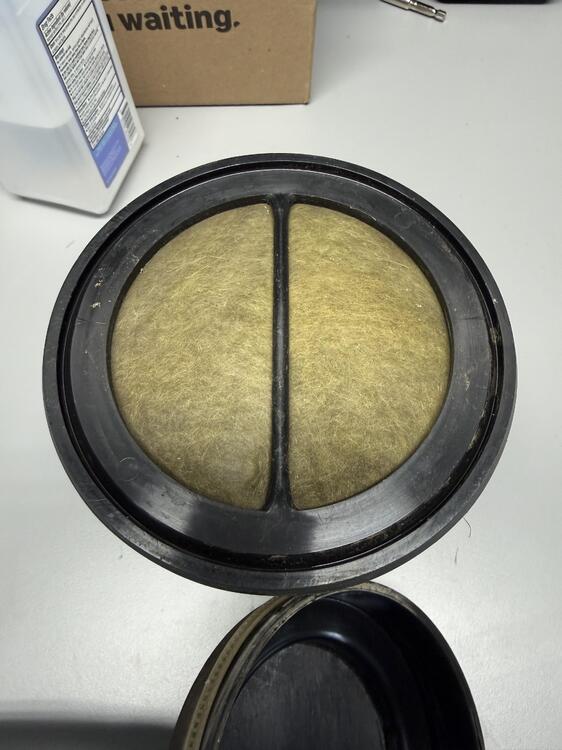
Had a few minutes today. Removed and inspected the charcoal canister. Not much to report. I understand these aren’t really serviceable. Filter on the bottom of the can looks acceptable enough.
-
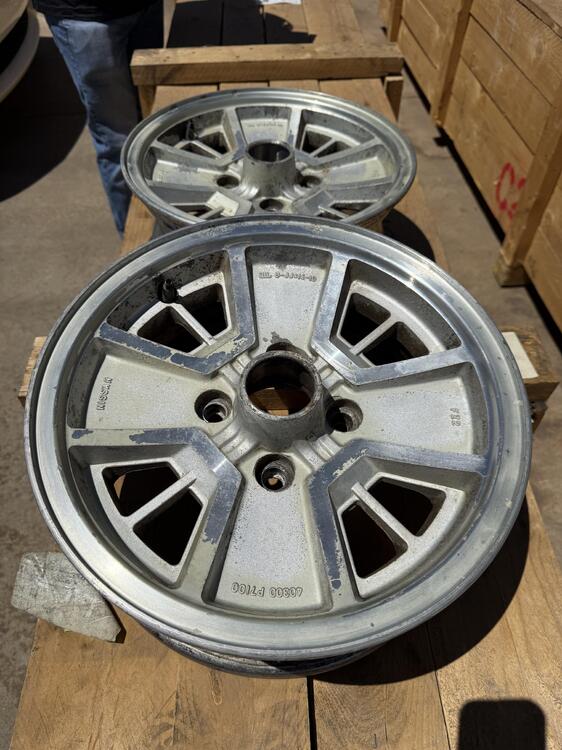
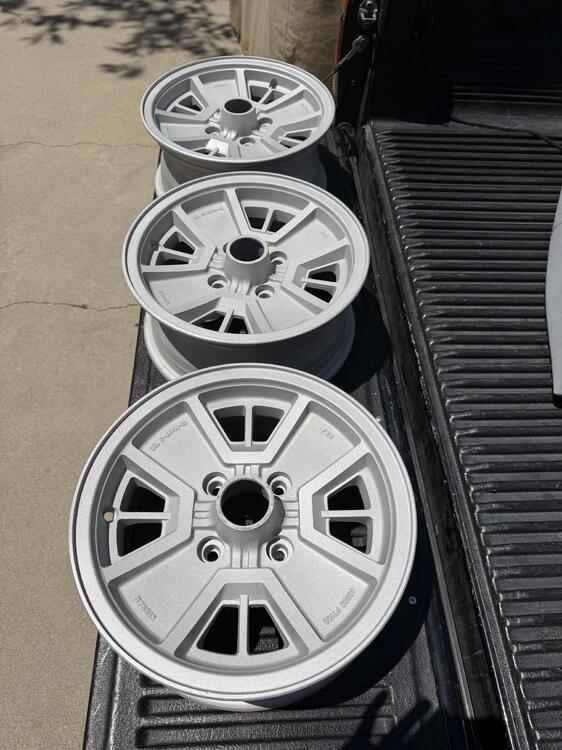
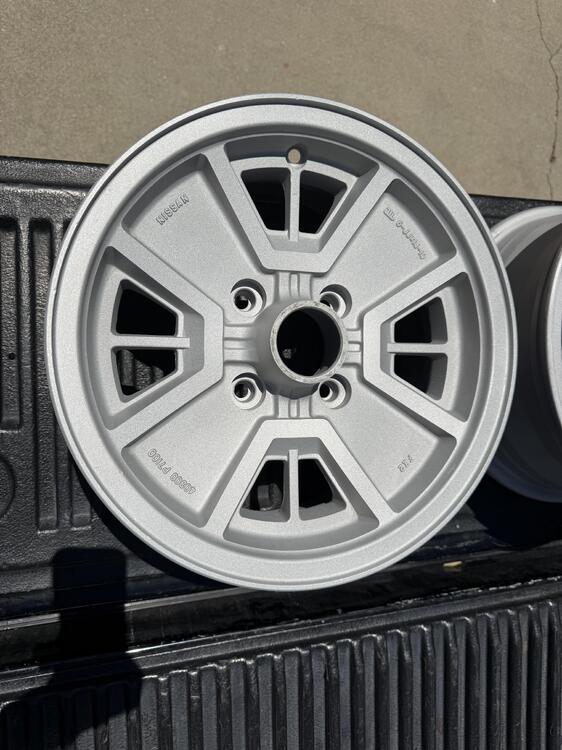
Hot dog! Picked up some iron cross wheels this week and immediately dropped them off to be glass media blasted. Man, they came out great! Got home and noticed some small areas in the corners that they missed and still have coating on them, so I’m gunna see if I can clean that up myself. But overall, pretty pleased. Now I just need to decide how I’m gunna paint these up, then I’m going to SprayMax 2K clear them. If my car wasn’t already a matte grey patina, I’d be tempted to just clearcoat them as is. 😅 I didn’t much care for the iron crosses, but I’ll admit they’ve grown on me after seeing them on that blue car. Before and after…
-
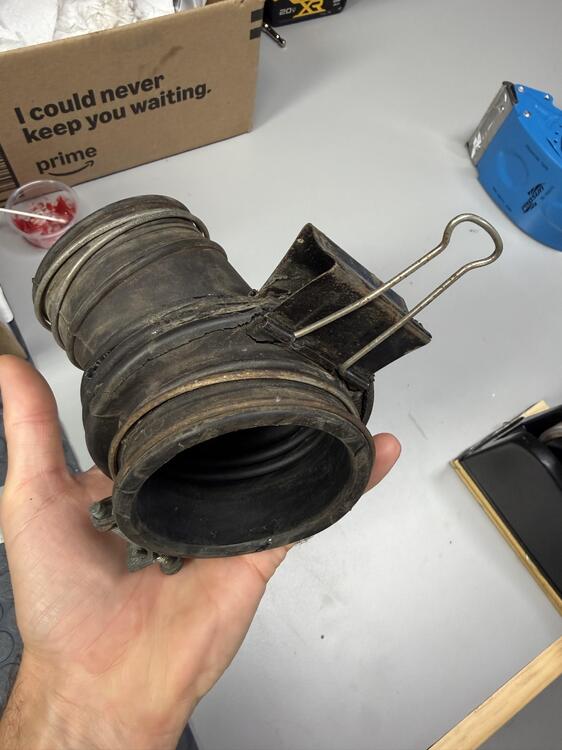
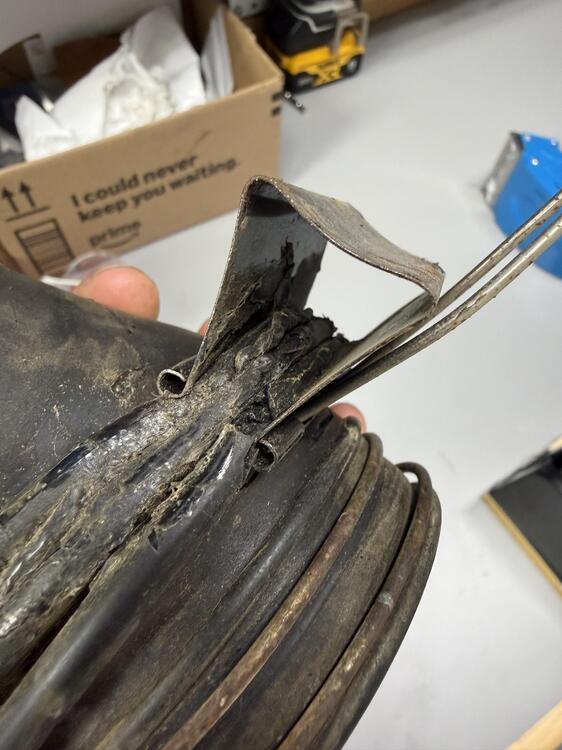
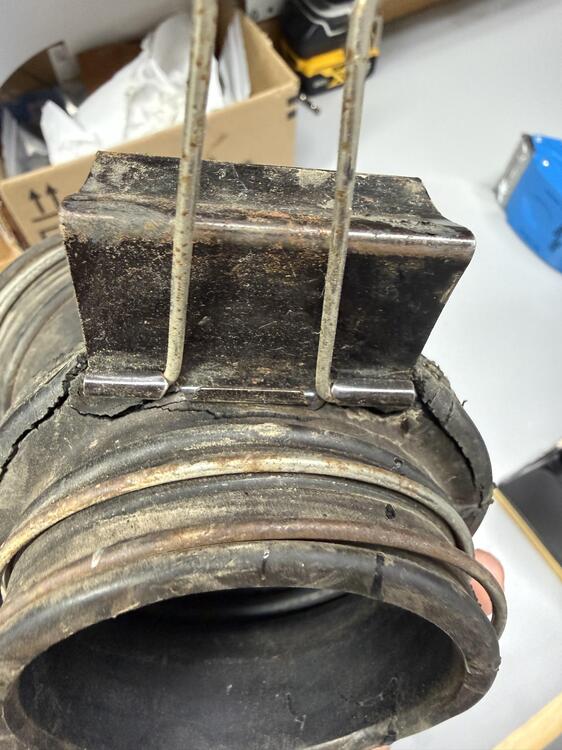
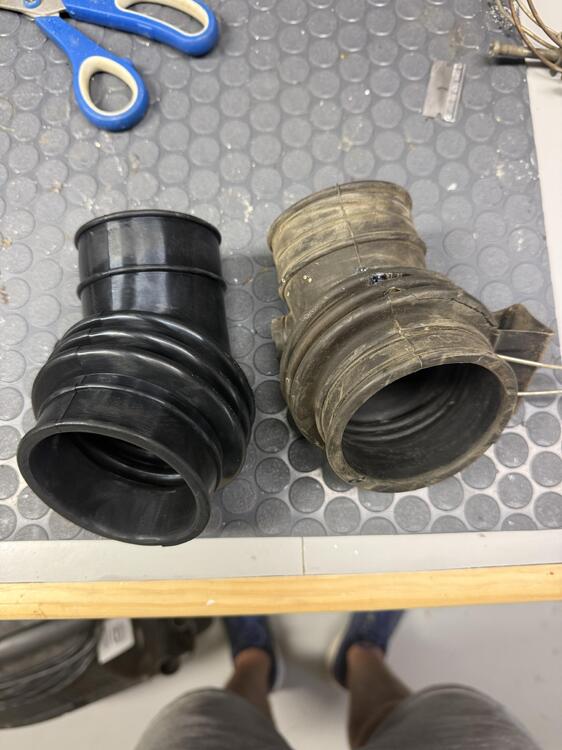
A couple pics of my rubber intake pipe, AFM to manifold. lol, gotta love the “just gotta use what ya got fixes” that you find on these cars. The massive paper clip + RTV is a new one for me.😅 Prolly fine, maybe I’ll reuse it. Just kidding, new piece from resurrected classics also pictured below. Well, that’s one possible vacuum leak solved.
-
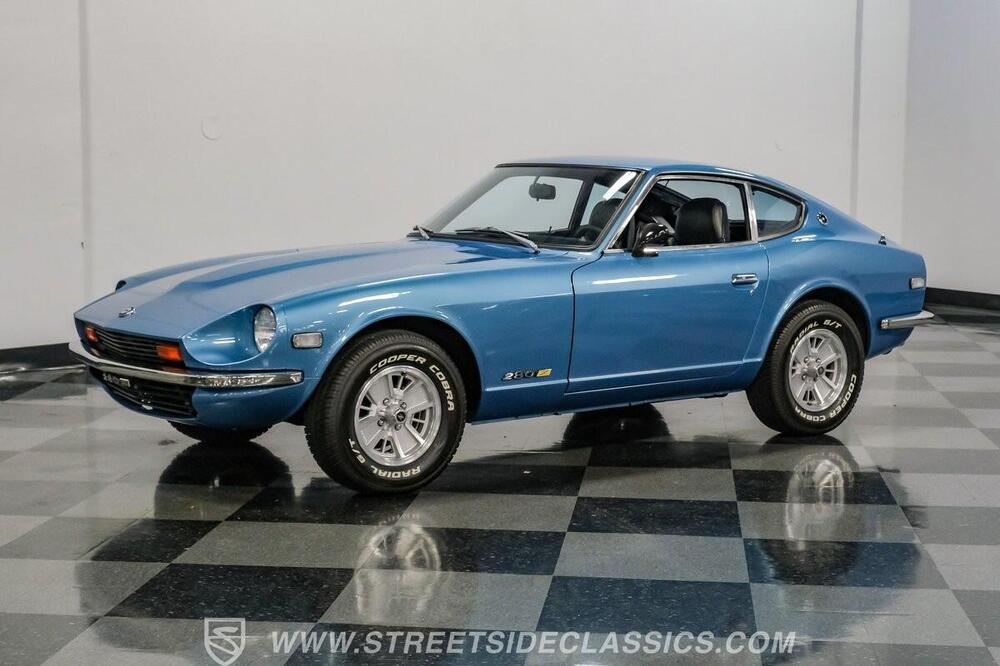
Yes, the ones I have on right now are (I believe) the most common of the 280zx wheels. And just a bit too shiny and modern for me. If the seller doesn't back out, I'll be picking up the iron crosses this week. 215/70R14. Either the Cooper Cobra's, or Futura GLS. Futura is owned by cooper, it's just their cheaper non name brand option. Slightly different tread pattern. Either way, white letters are a must🙂 Yes, I realize that these tires are technically "too big". 1.2 inches bigger than the stock recommendation of 195/70R14 to be exact. But on stock springs, I'm thinking it will be OK and I'm hoping the stance is very similar to the blue car pictured above. We'll see. The current tires are completely shot and dry rotted anyways, so this is an expense I'll be bearing regardless of how the smog test goes. 4 Cooper Cobra Radial G/T 215/70R14 96T SLCooper • Cobra Radial G/T • 215/70R14 • Load Index: 96T • Load Range: SL • Rim: 14-inch • All Season • Passenger • Touring • Made in: Mexico • Raised White Letters • 50,000 mi/WarrantySet Of 4 Futura (by Cooper) GLS Super Sport 215/70R14 96TFutura • GLS Super Sport • 215/70R14 • Load Index: 96T • Load Range: SL • Rim: 14-inch • All Season • Passenger • Touring • Raised White Letters
-
Fixed the photo. See above👍🏼
-
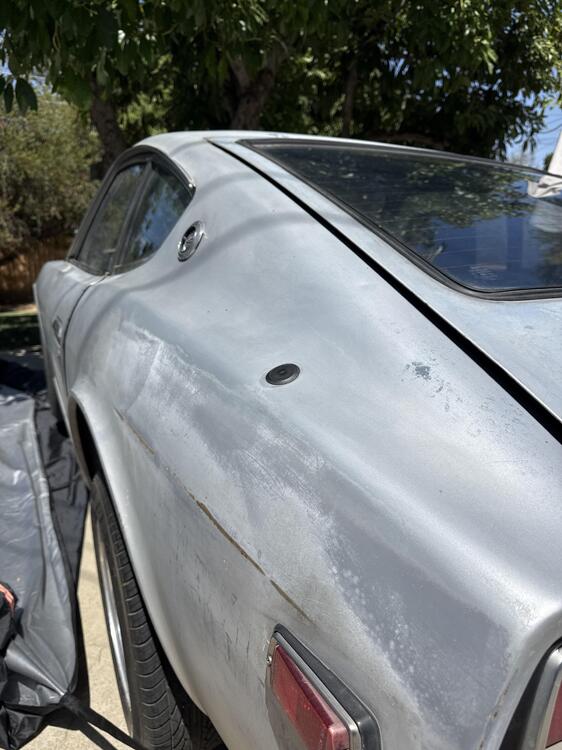
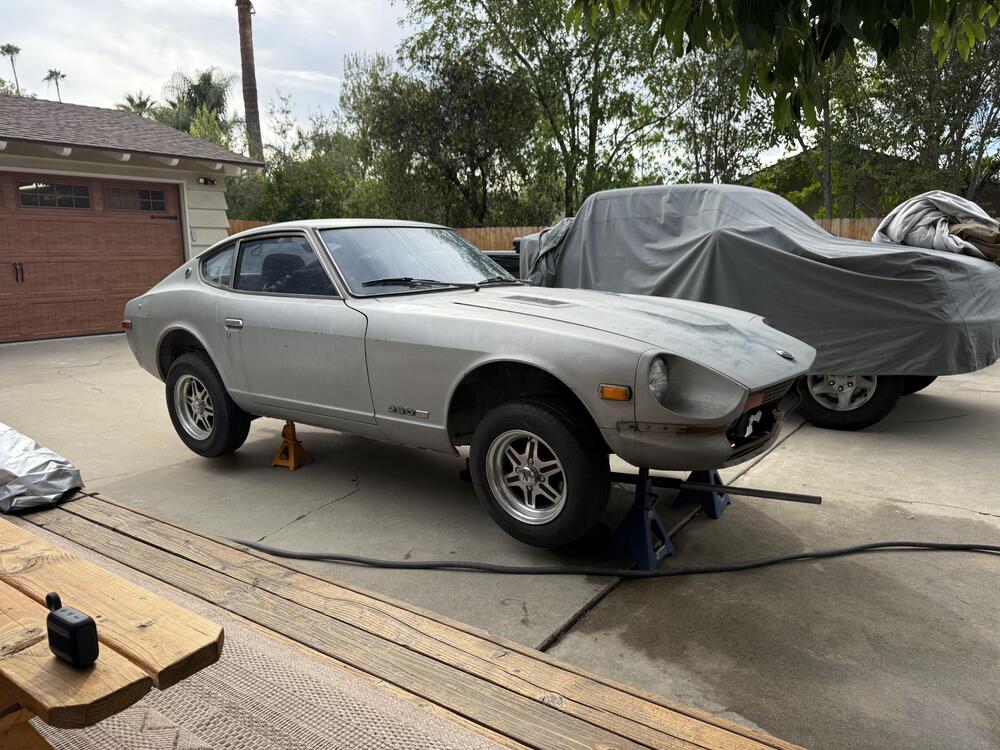
@AndysPlit Great points. Most of those are on my list, minus testing the EGR and the hot valve lash adjustment, so thanks for mentioning that. I'll lookup the procedure. That being said, when I heard this engine run, I was surprised at how quite it was. Hopefully that's still the case when I'm done😄 I'll be sending a full set of OEM injectors out for rebuild shortly, so I'll be able to cross that off the list. I couldn't help myself this week from making just a couple non-smog related changes. Removed front and rear bumpers, removed power and antenna that was bent beyond repair. Also I'm hoping to pickup a set of 280zx iron cross wheels this week that I plan on restoring. The blue car below is the final inspiration. Love that meaty sidewall and white letter tires. Ideal for performance? Probably not. But visually, I dig it. Oh, and my car will be a bit less shiney 😅
-
You've convinced me.🙂 Adding it to my list. I'm especially easily convinced when I've already got it all torn apart and accessible!
-
Zed & Yarb, thanks for the info on the connectors. I might just end up replacing all of mine. Man those Bosch connectors are pricey devils. I'll do some shopping around and see how well I can clean up my existing ones. I've found some 220 grit adhesive back sandpaper, stuck to the end of a popsicle stick is a handy tool for cleaning up those blades inside the connectors👍
-
@siteunseen is kindly hooking me up with 3 injectors, so I should be all set. @Terrapin Z Curious though, any idea what car those green ones in your pic came out of? They do look to be a bit of a more vivid green than what I've seen. Maybe that's what mine looked like back in the day😅
-
@siteunseen Appreciate the offer, and I'd take the whole thing if I didn't think shipping would be an arm and a leg, but just the 3 injectors should be all I need and will keep shipping reasonable. If you happen to snip off 1 or 2 of the injector electrical pigtails too, that would be awesome, however many inches of the wire you can easily get. I've got one that's halfway chaffed through the wires. Again, thanks so much☺️
-
@siteunseen Appreciate you looking! Don't worry about tearing the place apart looking for them, either. If you can't find them, I'll happily try my luck with the first 3 you found. Like Zed mentioned, and as long as they appear to have light green tops, they'll probably be just fine.
-
Zed Head, you're probably right. The more digging I do seems to confirm what your saying, and these injectors were used all over the places, some made by JECS and others by Bosch, but the same at the end of the day. Annoying that they don't have a part number on them that's worth anything. But I suppose if Siteunseen has a few that he knows came from a 77 280z, I'll try my luck with those first. One thing I've learned after much wasted money on these cars, I'd rather purchased old, crusty, used OEM parts than shiny new aftermarket parts. More than once I've noticed that a properly cleaned up and maintenanced OEM part will work properly, while the brand new aftermarket part doesn't perform right, or doesn't fit right. Doesn't apply to every aftermarket part, but I really suspect that injectors would fall into that category.
-
No problem at all, enjoy that AC! 😁
-
@siteunseen Appreciate you digging through your stash! I'll gladly take you up on that generous offer, thank you.👍 One thing I'll ask. In my research online, apparently many injectors carry that A46 part number, but they don't all interchange. I'd specifically need injectors from a 75-78 280Z. The ZX ones have the same A46 number, but they mount differently and won't seat right in my manifold. Do you happen to know if these came from the 77 280z you mentioned? Thanks again!
-
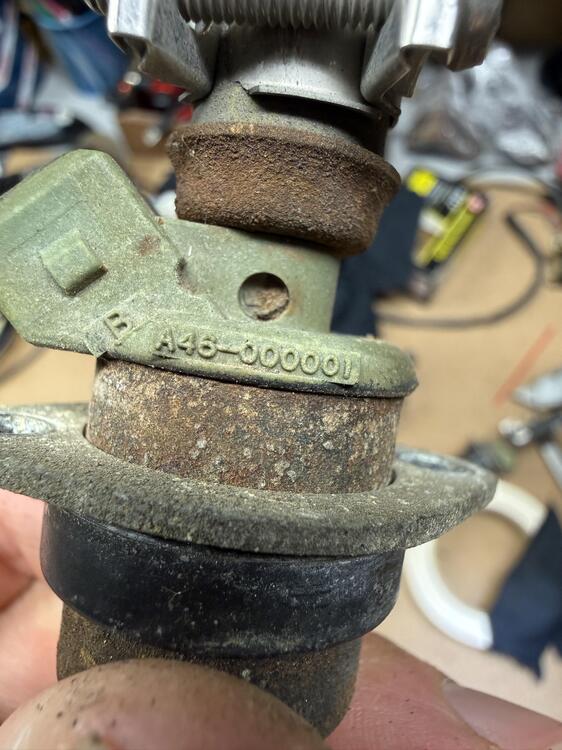
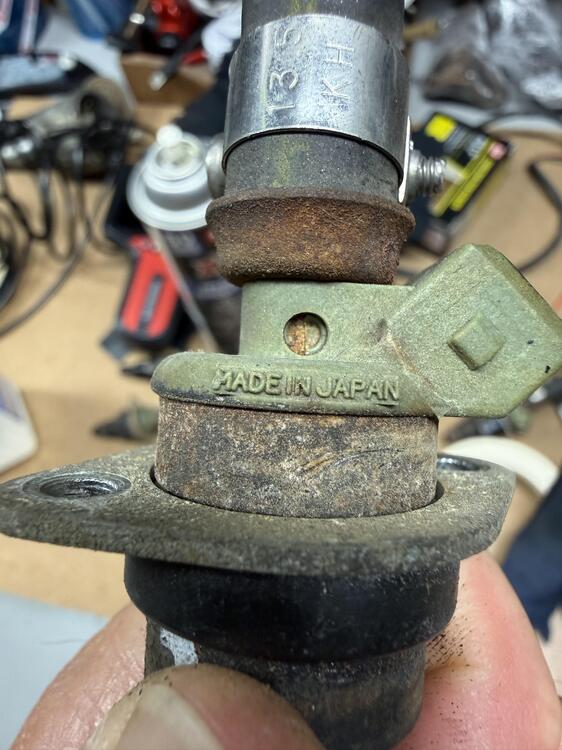
I’m considering sending these injectors out to be professionally cleaned, rebuilt, and flow tested. I found two small shops that will do it. Prices seem very reasonable around $17 per injector. I usually like to DIY almost everything, but this seems like a good value. I wonder if anyone here has used either of these shops… https://injectormasters.com https://injectorrepair.com Anyways, before I pull the trigger and do that, I’d like to replace my one odd ball aftermarket injector with an OEM injector before I send them off for rebuild. I’m searching eBay for my injector part number, A46-000001. I’m finding lots of applications that apparently use that part number. This one for instance: https://ebay.io/m/KcFyfR These say they came off a 300zx. Will they work properly for my 280z, proper flow rate and all? Or am I missing something? Here’s a pic of one of my factory injectors, just fyi…
-
@Zed Head Awesome, thanks for that info👍🏼 I’ll clean and test each of them and report back…
-
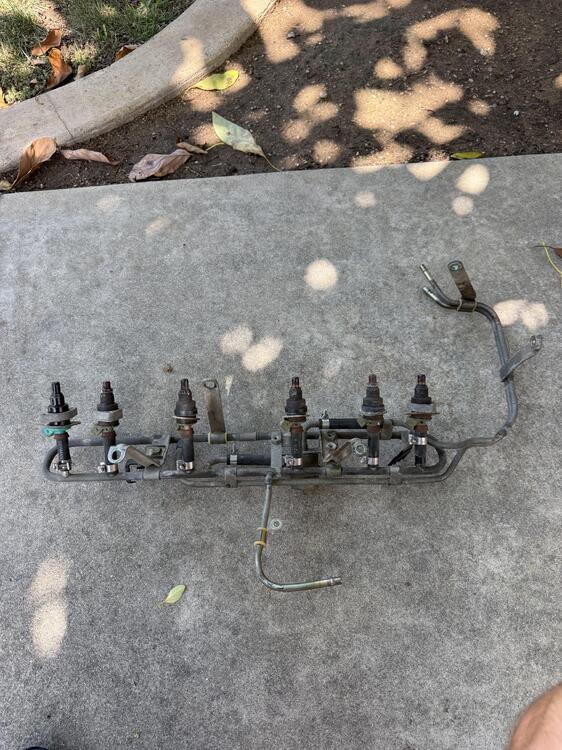
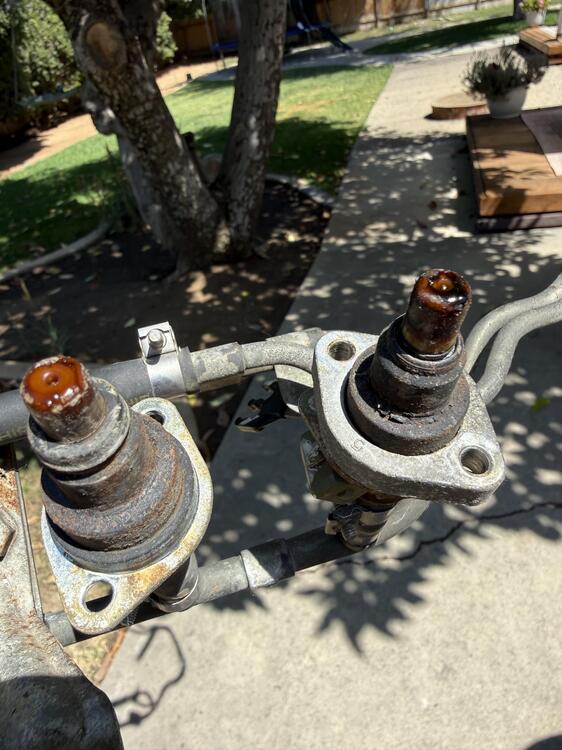
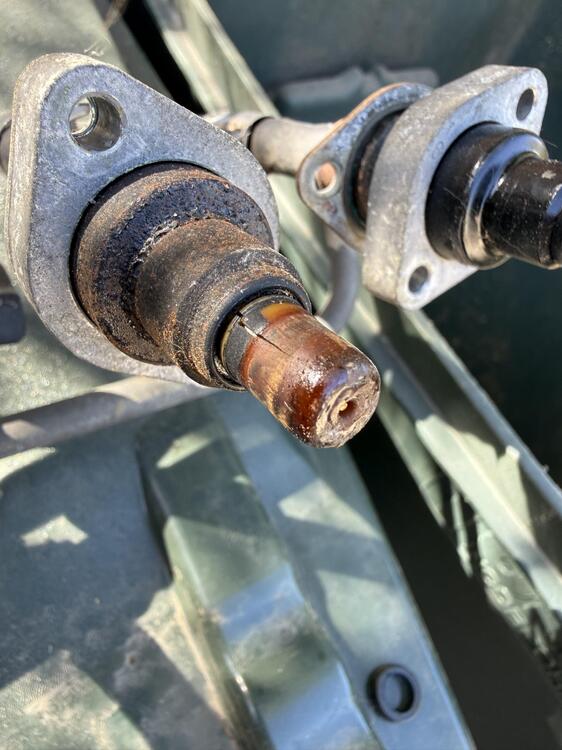
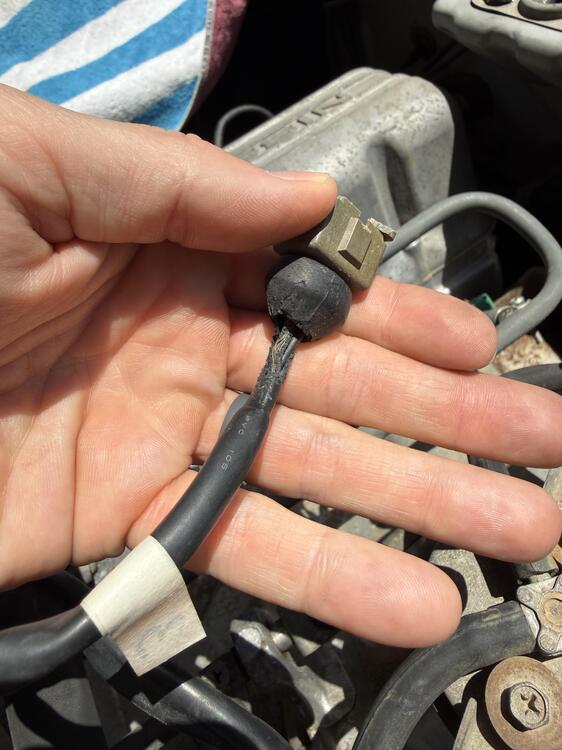
I’ve been on a roll this weekend. Pulled the fuel rail today. 5 factory injectors and 1 aftermarket that says “Germany” on the injector hose. Maybe a decent aftermarket unit from years ago 🤷🏼♂️ The cylinder #5 injector has some very fine cracks forming on the tip. See pics. I assume that’s no good? Maybe I’ll try and source 2 factory replacements. Nonetheless, I’ll start by cleaning them up using carb cleaner and a power source. Off to YouTube I go. Fine cracks on #5 injector tip. I assume that’s a no-go? Another gremlin found during the process, one injector wire harness was chaffed with wiring exposed…
-
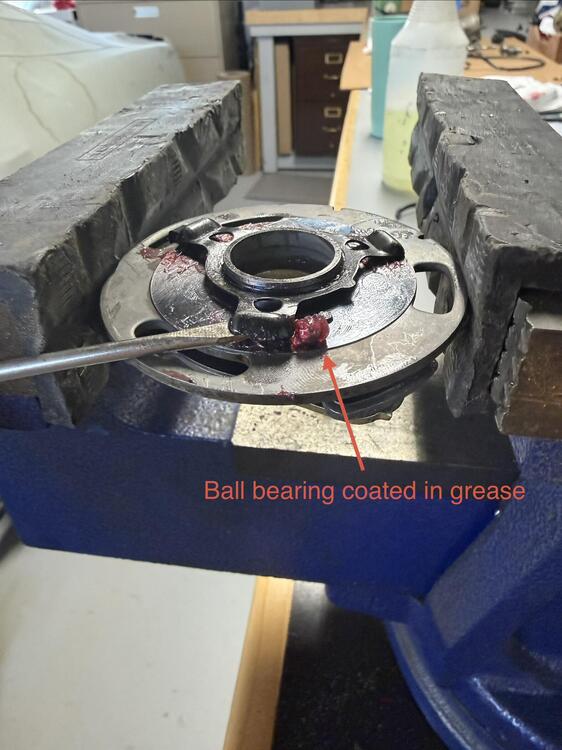
@Zed Head you’re right, scary thought of how much other gummy residue is inside the engine from years of sitting. I might run a quart of trans fluid in the oil before changing it to flush it a bit. Also, can’t remember where I saw it, but when rebuilding the breaker plate, it’s a much easier experience if you insert the 3 outermost ball bearings AFTER assembling the whole unit with the retaining circlip. Just gently lift the bearing “cup holder” arm and slide the ball in, with grease of coarse. Here’s a pic…
-
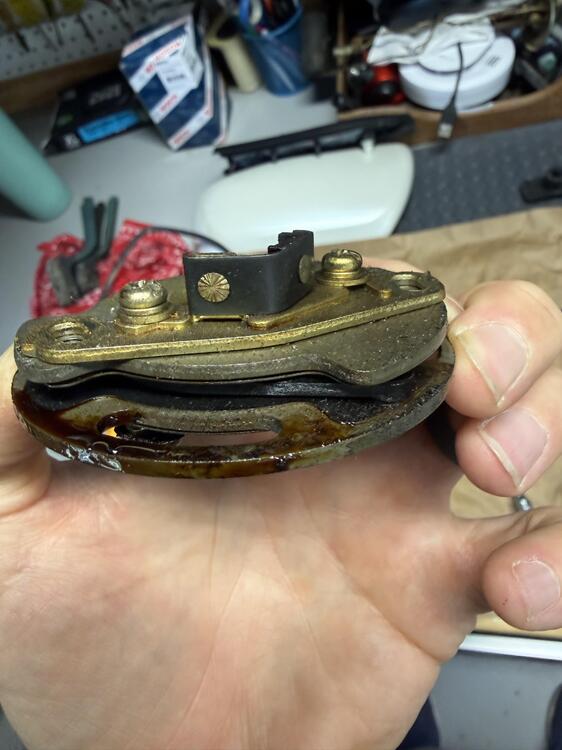
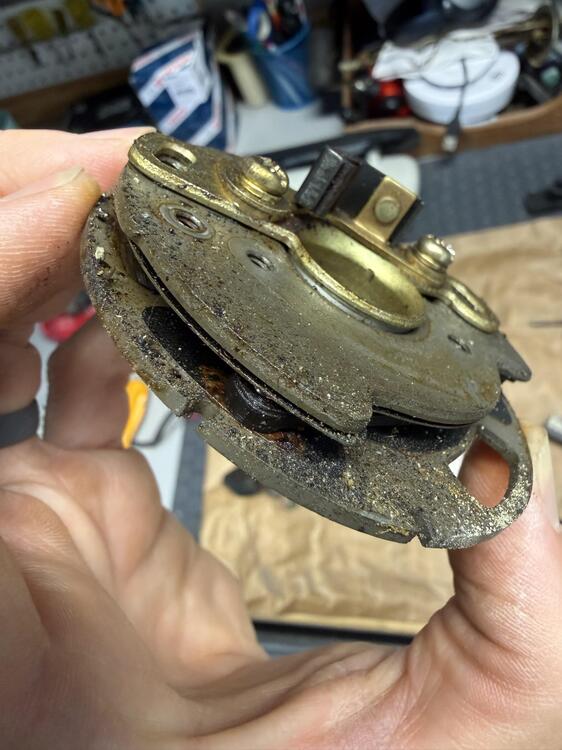
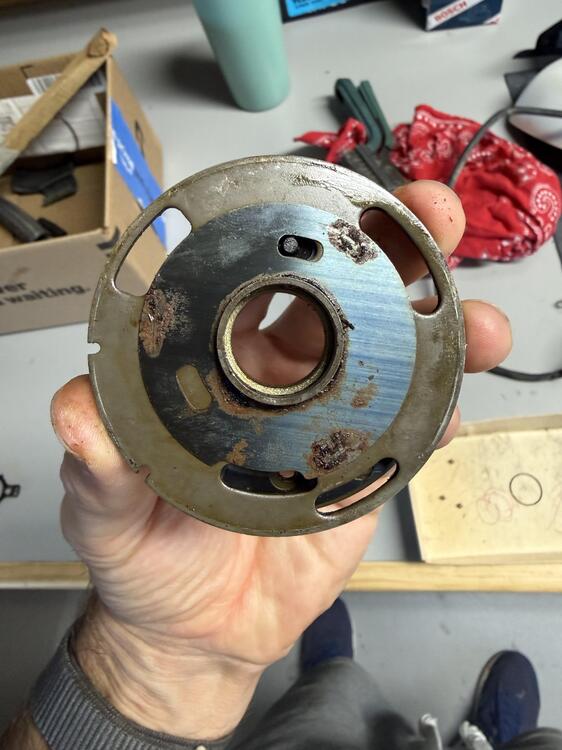
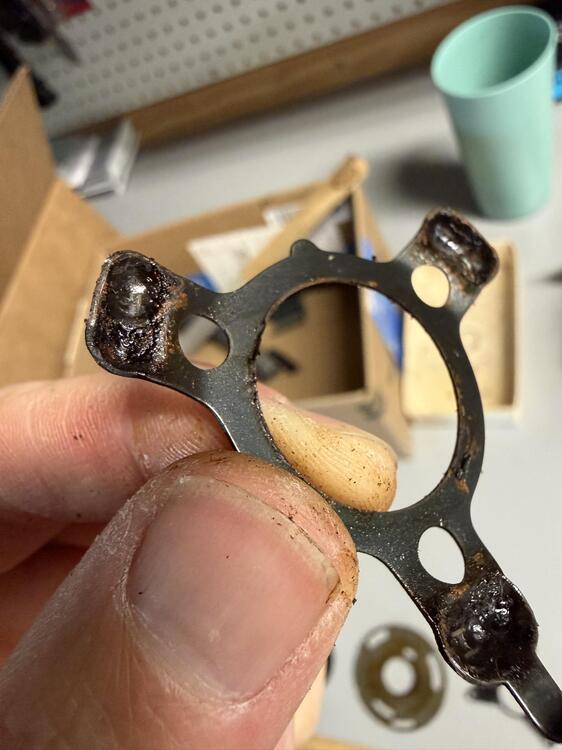
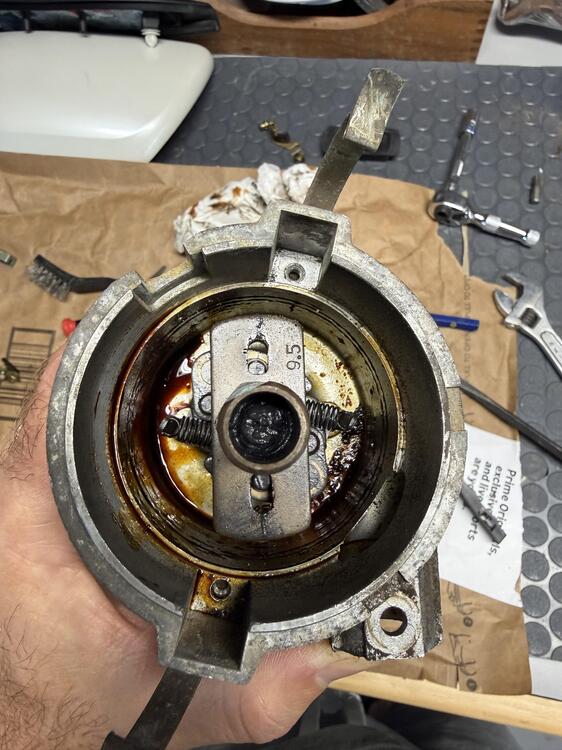
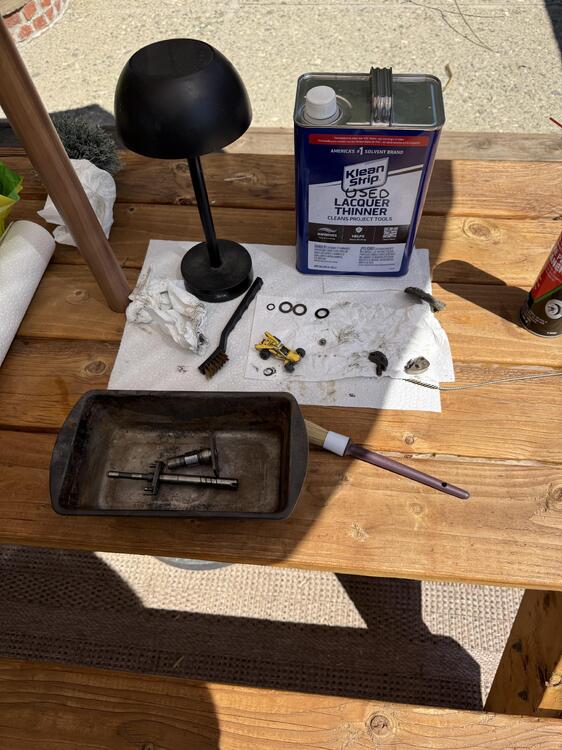
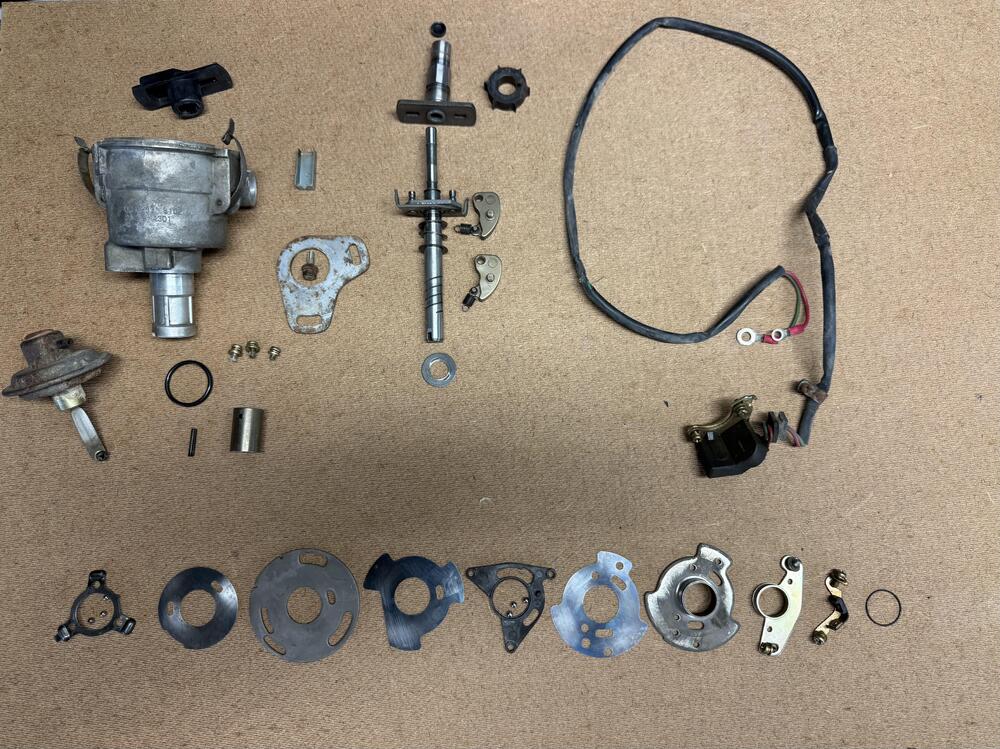
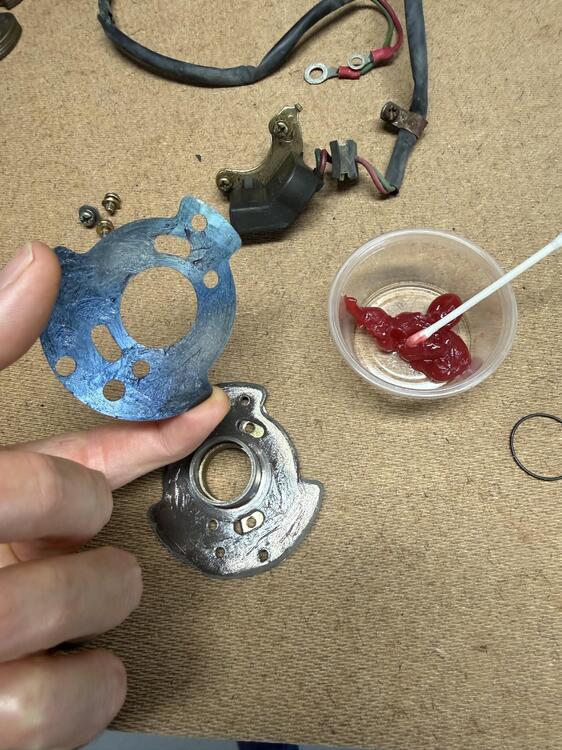
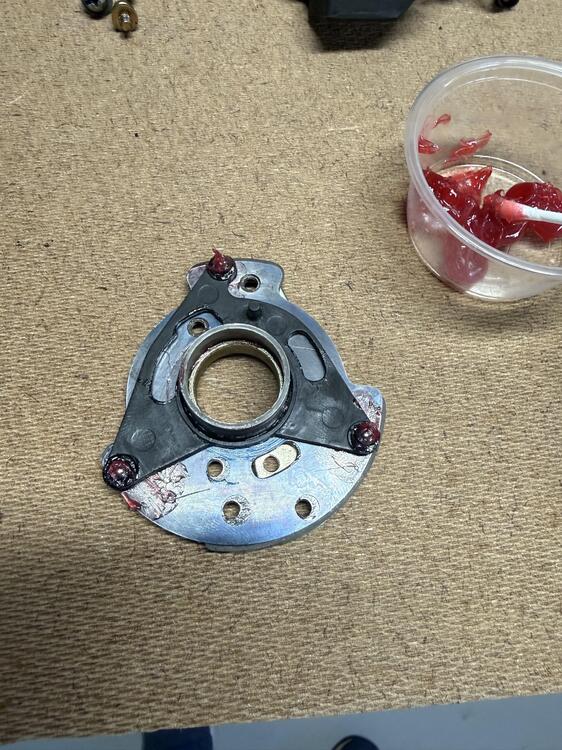
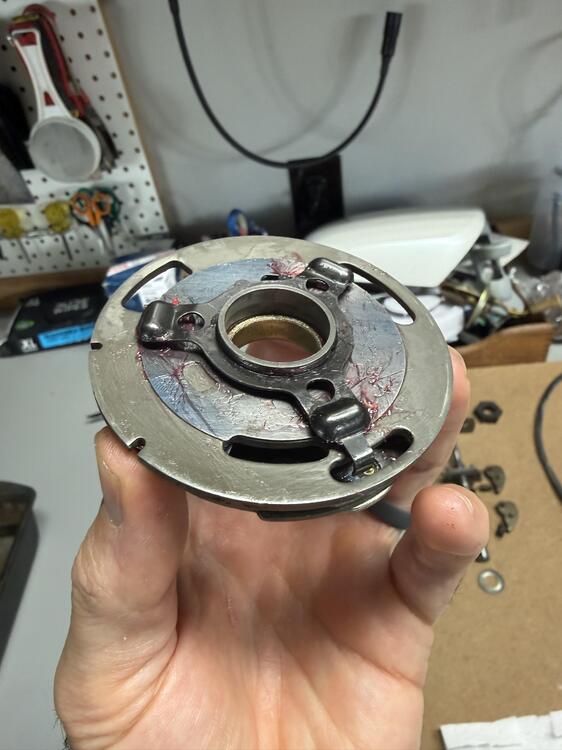
Alright, got the dizzy rebuilt today too! The dist. shaft spun nice and easy before the rebuild, but I could tell the breaker plate vacuum advance was a bit gritty. Shockingly, the plastic breaker plate wasn’t broken! Everything else was just gummy. Old dried up grease I suppose. Cleaned everything up with lacquer thinner and reassembled with grease in all the right places Everything moves nice and smooth. Applied vacuum to the vacuum advance and it did indeed move the breaker plate, maybe 5 degrees or so. Took an exploded view pic of all the pieces in case it helps someone down the road. Specifically, the breaker plate pieces assemble right to left in that order, just fyi. QUESTION: In the last pic, is there a rule of thumb for how to properly set this little pickup? I see that it’s adjustable. Onto the fuel rail and injectors next… pics before rebuild… Beautiful day to clean some parts. Brass brush and small scotch brite pad was great to remove the gum and small bits of rust on the metal plates… Cleaned up and ready to reassemble… This is the part that I’m wondering how it should be positioned, it has an adjustment slot…
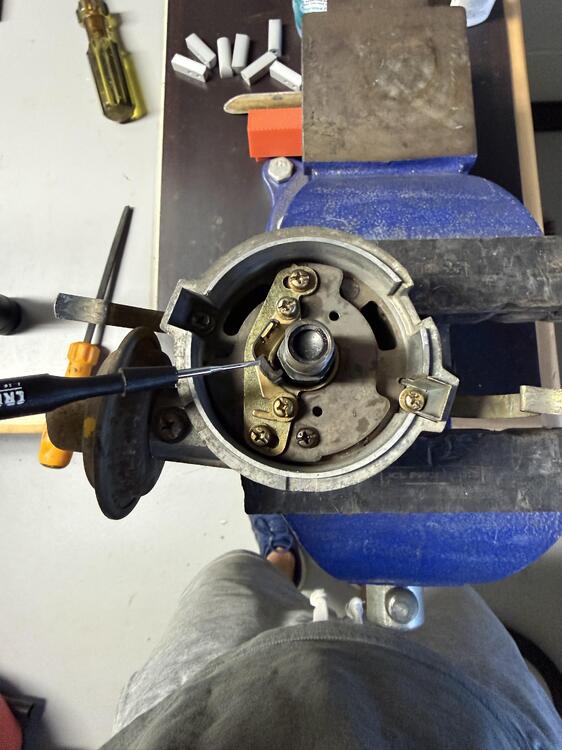
-
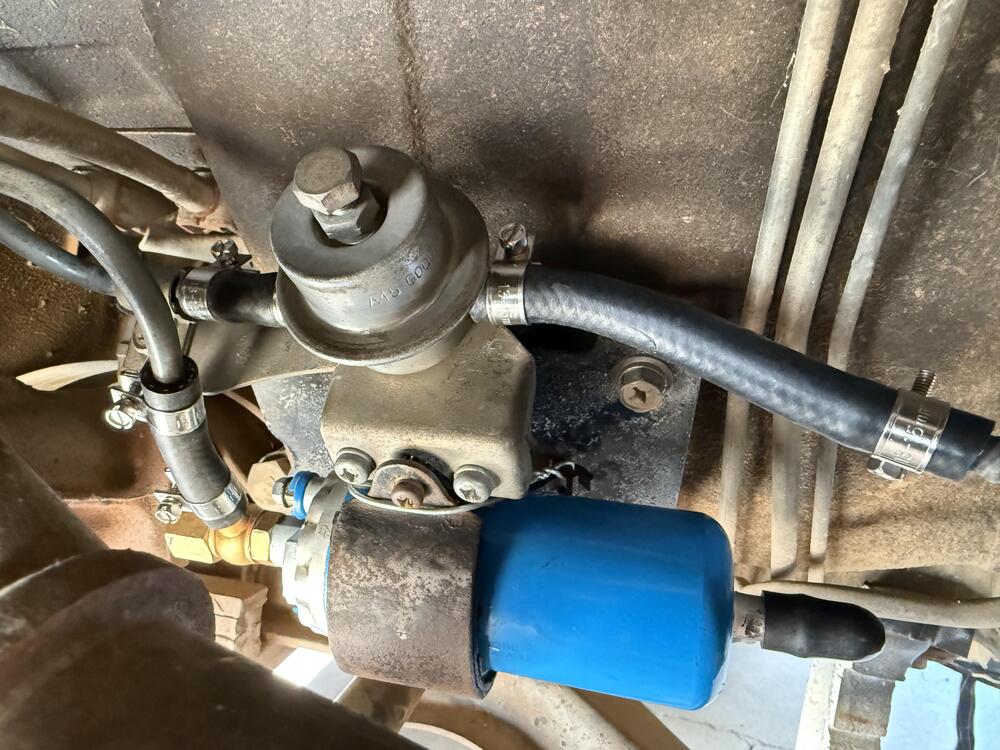
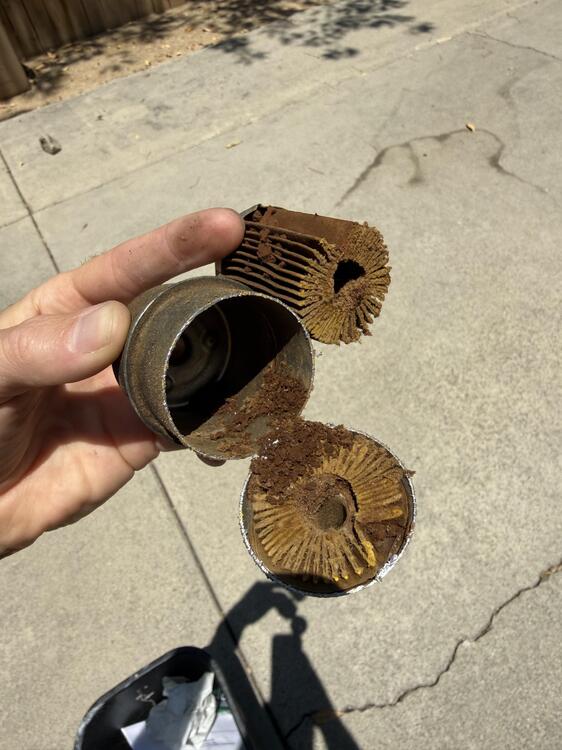
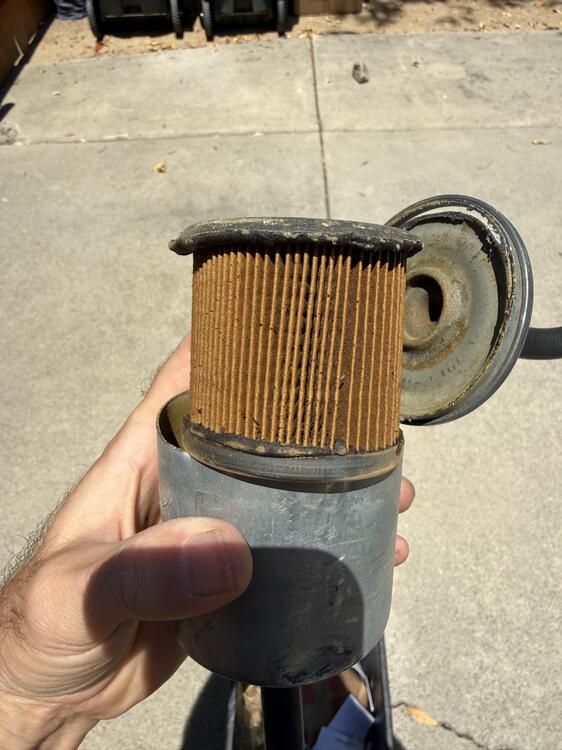
Another little progress update... Cleaned up the fuel pump assembly with proper fuel injection hose and fuel injection clamps. Used a little mechanics wire around the fuel pump clamshell to keep everything tight because my rubber dampers look a bit tired. Cut open the old fuel filters just for the heck of it. As expected, full of varnish flakes and crud. Amazed this engine started, ran well, and idled along at all, even with clogged filters. Now moving on to the distributor. It's been a few years since I've rebuilt an old ZX dizzy for my 240z. We'll see what we find inside. Does the 280Z dizzy also have that plastic breaker plate that likes to fall apart?
-
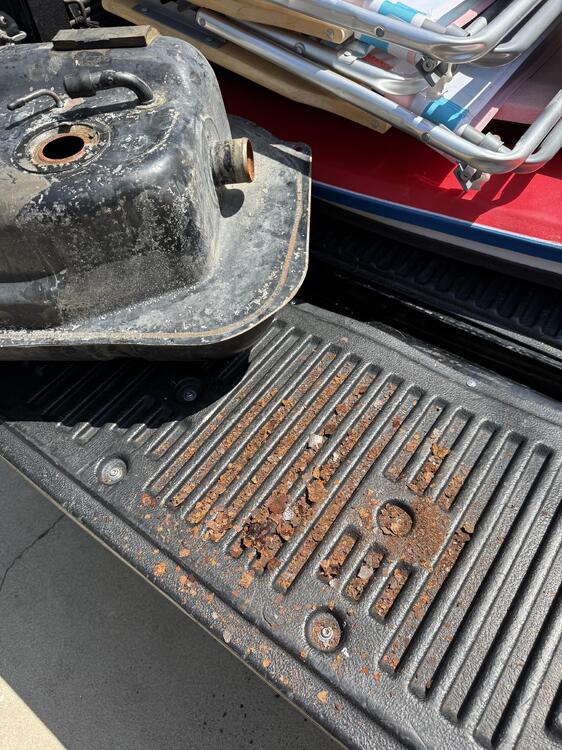
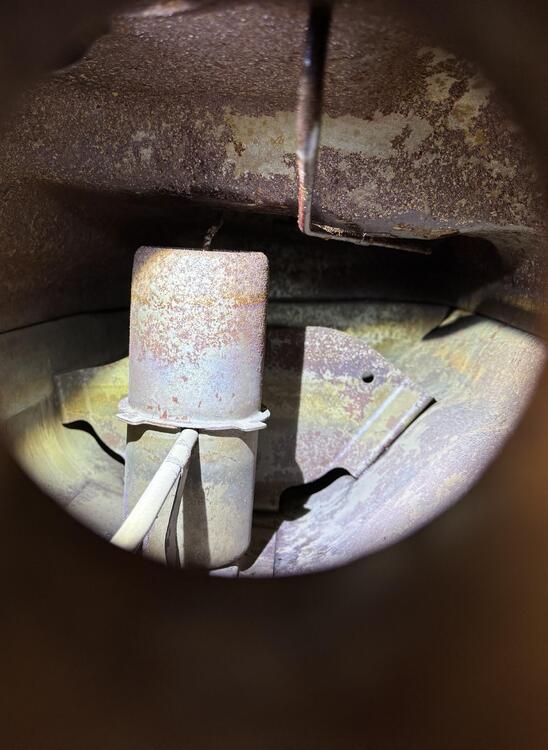
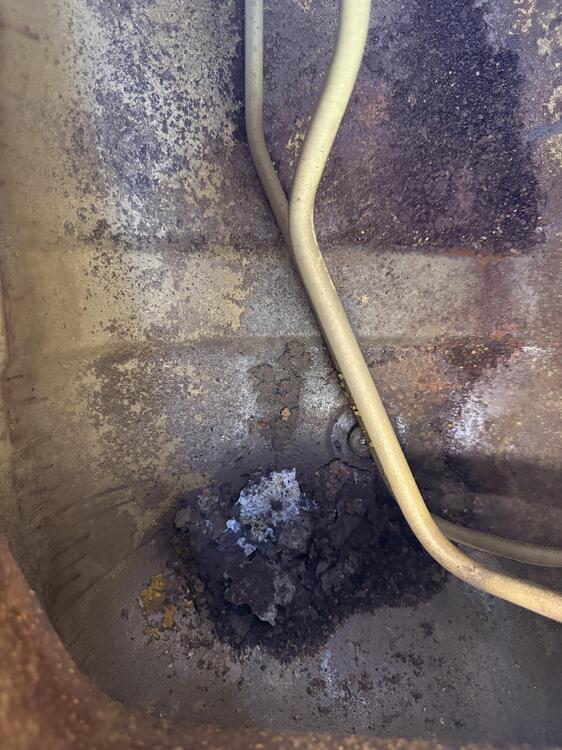
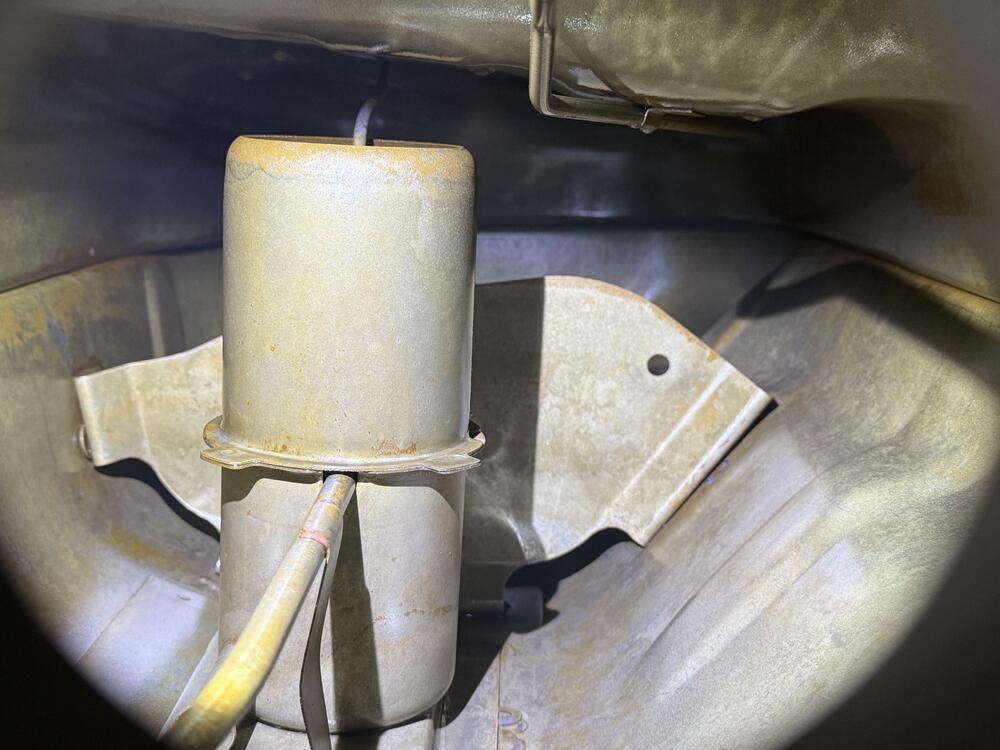
Little progress update. Drained all the varnished gas from the tank, and then dropped the entire tank. Lots of old dry varnished gas flakes in the tank. Safe to say gas doesn't dissolve these chunks. You can see them on my tailgate in the first pic. It's not rust (non-magnetic), just old gas I suppose. Smells like death too. Used a gallon of lacquer thinner to first dissolve the varnish in the tank, then followed that with a 1:4 solution of muriatic acid and water. Dropped about 50 quarter sized washers in there too for some mechanical scrubbing action. Results speak for themselves. Kind of a pain in the butt, messy process, but it does work. Probably could've spent more time and got it perfect, but even this took me 2 days. Still a 95% improvement. I'm glad I dropped the tank and flushed out all the lines. My return fuel line in the tank was definitely restricted and gummed up. It was flowing maybe at 20% of what it should be. So that's one culprit checked off the list of things that could cause poor engine performance. Also couldn't resist removing the rear bumper and shocks while I had the tank dropped.🙂 Couple before and after pics attached. Next up is the fuel pump assembly and sending unit...