


240260280
Free Member
-
Joined
-
Last visited
Everything posted by 240260280
-
 Testing_Canada.mp4
-
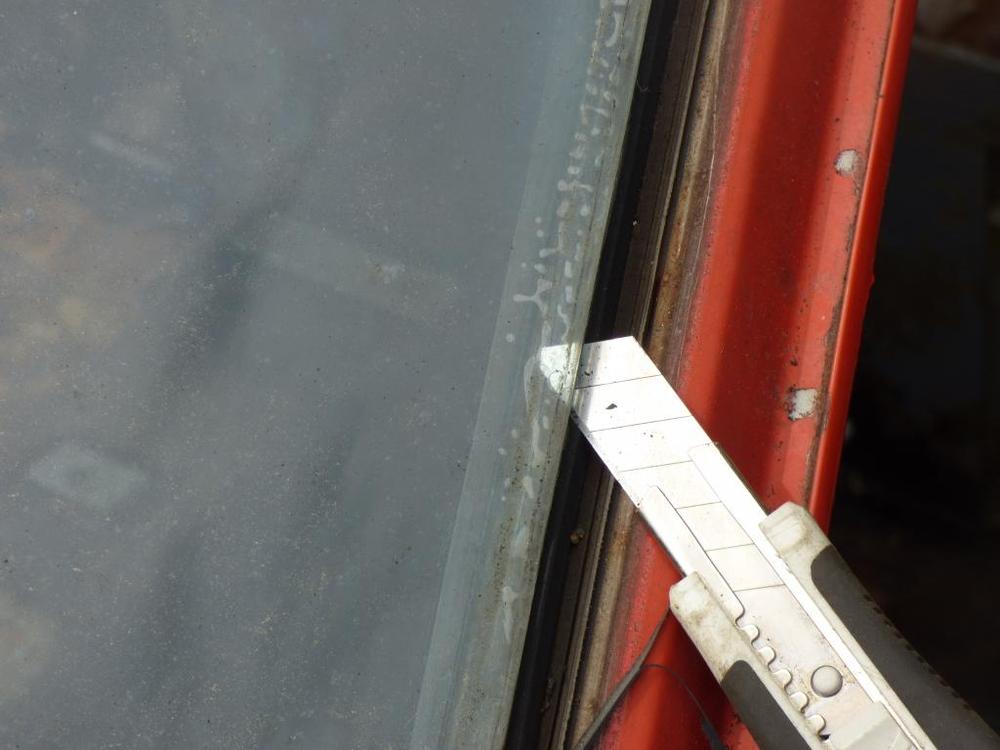
Cut away rubber then cut behind glass. It comes out easy after cut away:


-
http://zccne.org/ @BadDog
-
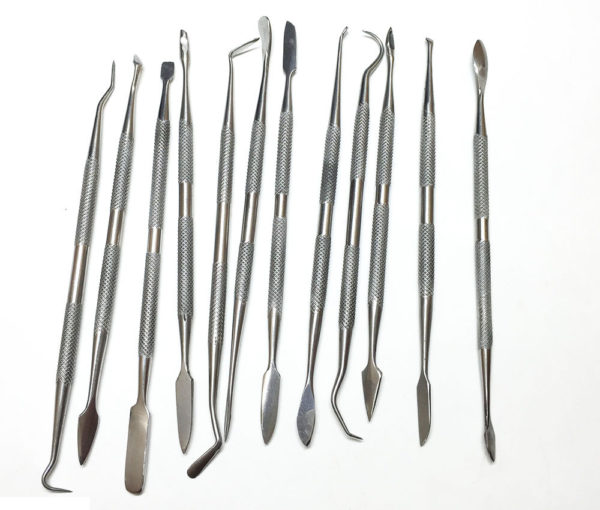
This is good to watch: https://www.youtube.com/watch?v=Ku6Kl74gxFQ Also, blunt dental/sculpting tools work great to help fit the ss trim:
-
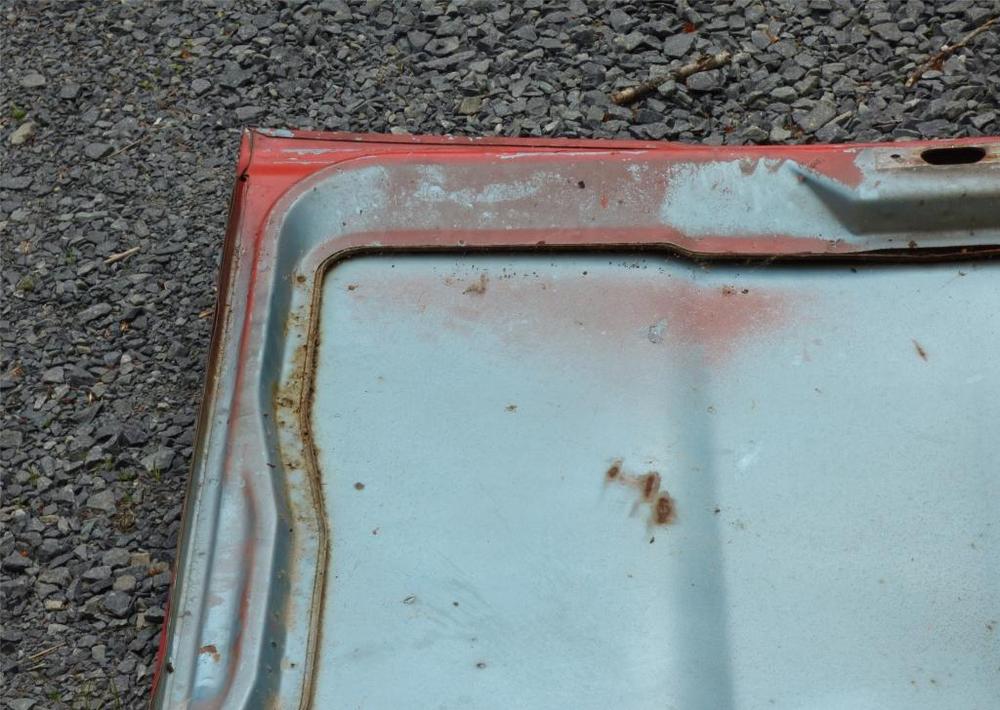
Beware of most autoglass companies... I've heard of many sad results. Find one that can do the trim and has experience. One guy in the club just had the glass installed by the experts who would not install the metal trim Another just had the experts install and tear up the rubber when installing the metal trim Boston has a great Zclub.... find someone there who can do it or recommend a careful installer. Want to install the trim on this? This one got torn ?

-
Sure: Cut out the original rubber seal as much as you can before taking out the old glass. First cut out above the glass so that the edge is exposed then get a knife blade behind the glass to free it. Do all around before lifting. Remove all old seal and sealant. Address any rust on the pinch weld Install new seal on new glass Install stainless steel trim Fit weed wacker monofilament line inside seal where the pinch weld will go Fit glass into position with 2 helpers (1 inside and 2 outside) Inside person slowly pulls line while outer two push/gently hit glass into place. Start from middle of bottom (or top) and work outward to both sides evenly. Optional: Once fitted, use a long nosed tube of silicone to place sealant between glass and seal Optional: Once fitted, use a long nosed tube of silicone to place sealant between body and seal Tips: Watch some glass installs on Youtube where they use a cord/rope Use a spray bottle of soapy water as a lubricant
-
Incorrect timing makes mufflers explode.
-
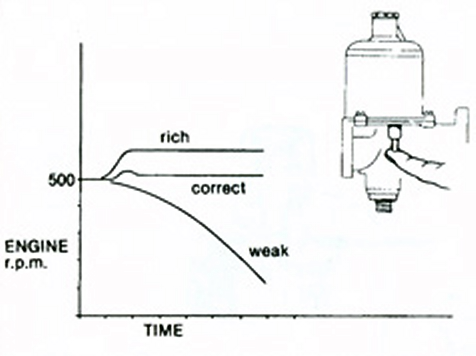
The one thing that Jim's car did that I never ever witnessed before is the 1/64" carb piston lift rod trick check for a/f at idle. It must have been the Z Therapy excellent restoration (no leaky bushings) and the fact that everything in Texas is in great repair and done right! One of my fav states!
-
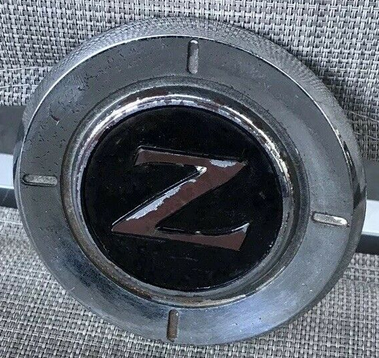
Thanks! I thought it was a rare never-seen piece lol
-
Had a wonderful time visiting with @jfa.series1 for a few hours yesterday. We enjoyed his well stocked and orderly garage while turning wrenches to tune his carbs. It was a pleasure to work on a gold medallion car and to work with Z Therapy restored carbs. So clean and mechanically perfect! Thanks for the privilege! @siteunseen will be pleased to know that Jim is now a believer in "Equally Shitty" 3 cylinder tuning!!!!
Kats, I just picked up a 9/70 240z with the small tab.
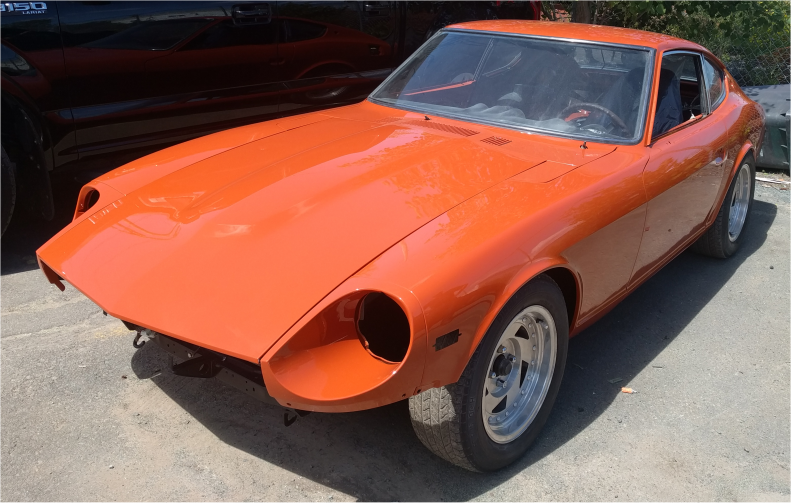
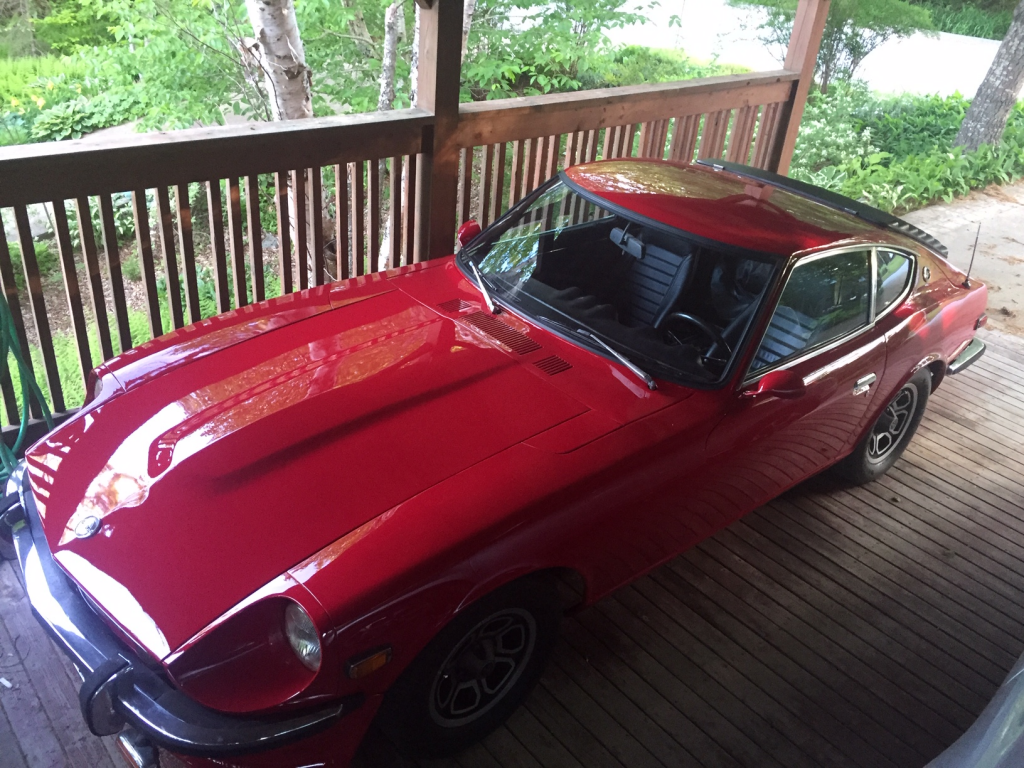
 Looks great! All shades of red look great on a Z!
Visited the Z barn: @kats Picked up three hen's teeth today... well a set of 4.5" wheels with tires and a gnose too. Thanks to Jim Hildred! Also got a 72 going that has not run in 15 years... gas tasted like water lol.
Looks great! All shades of red look great on a Z!
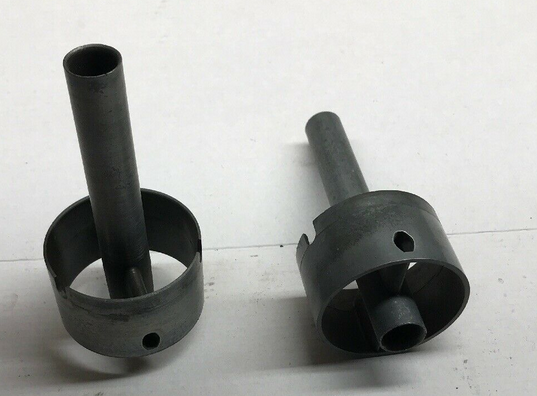
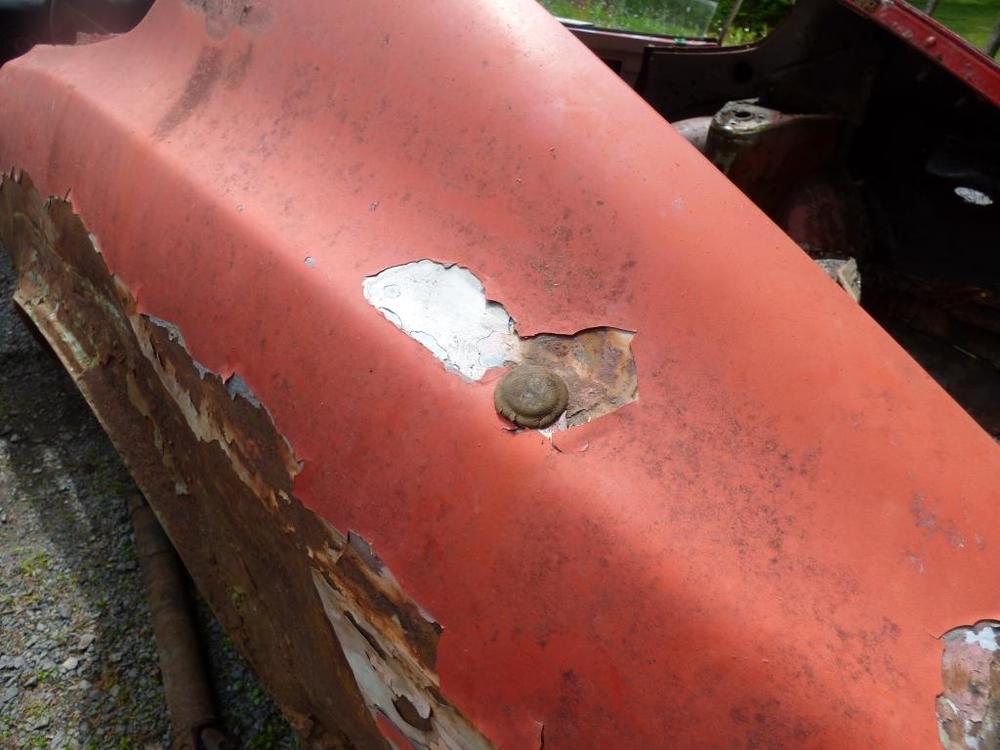
Visited the Z barn: @kats Picked up three hen's teeth today... well a set of 4.5" wheels with tires and a gnose too. Thanks to Jim Hildred! Also got a 72 going that has not run in 15 years... gas tasted like water lol. Pedal bolt head (9-70) Both Ends
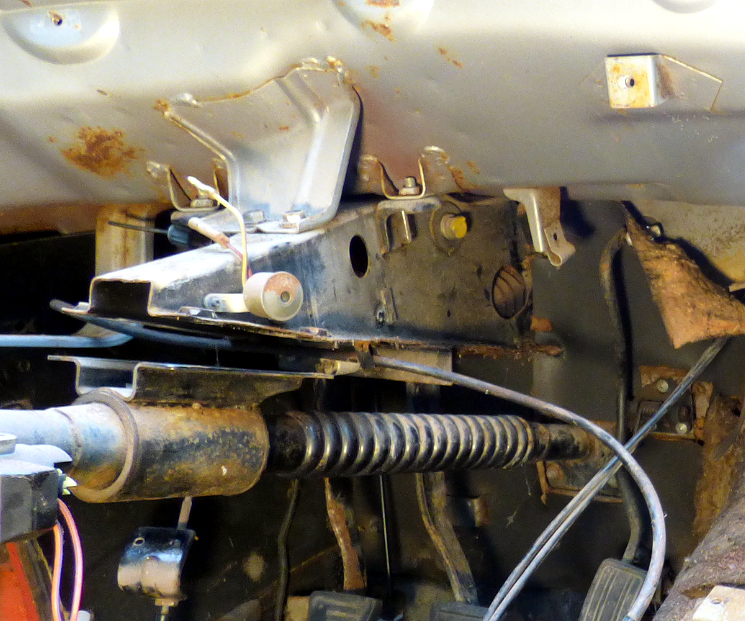
 John Passini covered most of these items in the 50s and 60s on Webers. He does not like balance tubes. He also and talks about different ways to deal with "pulsations" in the intake tract that reduce pull on the fuel from the well. I would guess that the SU is similar. Your analysis of the SU seems reasonable (3 pulsations (more) affecting a carb) however it also differs from Webers in that it draws fuel from the edge of the tract whereas fuel drawn through the Weber main is in the thick of the pulsations in the middle of the tract. The pulsations may not affect the fuel flow at the side of the throat on a CV carb. I would expect the fog you see is caused by the high velocity atomized droplets after reflecting off the closed valve. Here is a video of a DCOE and the "fog". http://www.240260280.com/Tech/Carbs/Weber/images/1 throat 3.mp4 Passini mentions that an extended (tall) aux venturi can be used to help the low end from pulsations but it makes little difference at higher rpms.
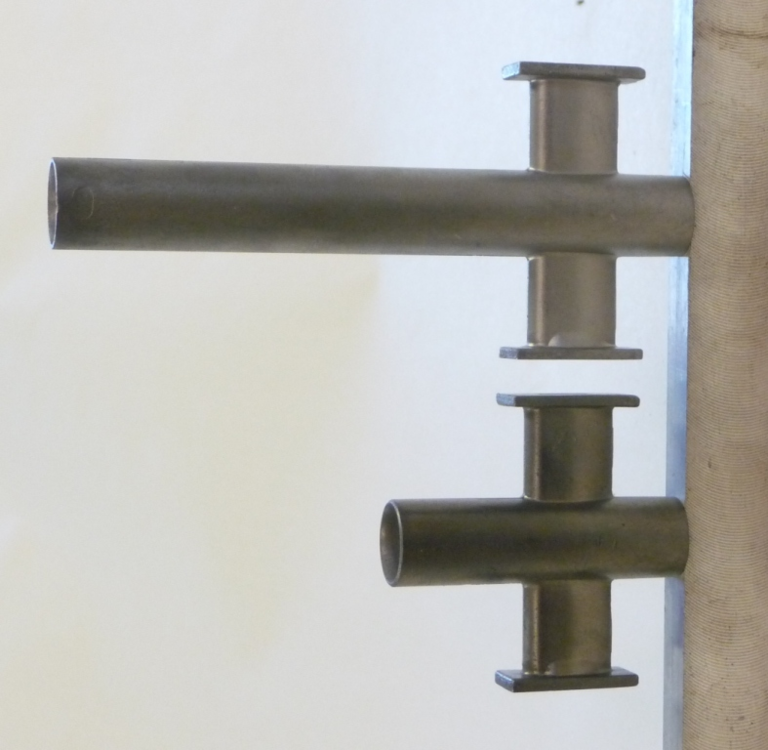
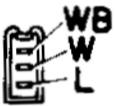
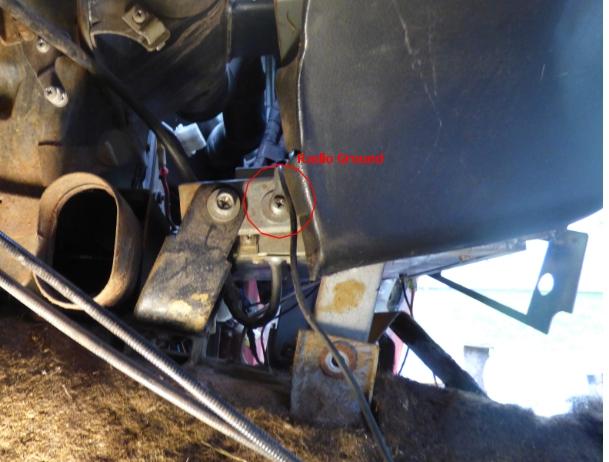
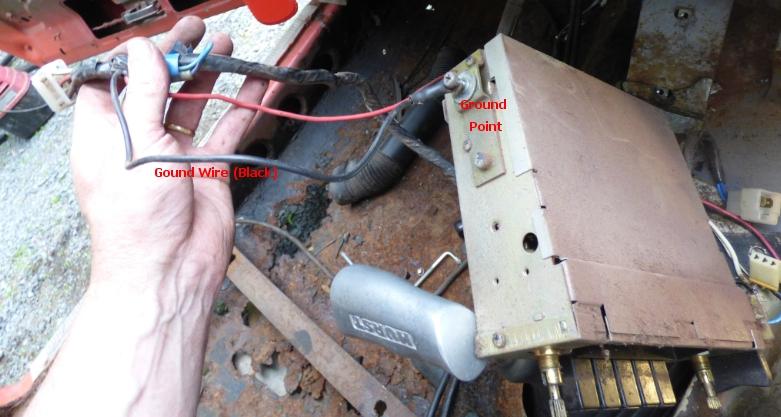
 Just took these today and now they are helping a friend. Thought I'd share Figure 1 is from the 240z schematics. The schematics are more or less logical connections and do not show connector details. It shows the power, ground, antenna and back light wiring to the radio. (figure 1) The FSM gives details of the connector from the body wiring harness (from the back of the car). Figure 2 shows the 3 pin Molex-type connector. It has the two speaker wires (white and white with black stripe) and one back light power (blue). (figure 2) The photo below shows the corresponding connections on the radio unit. The molex connector has 3 male pins carrying the backlight signal(blue with red stripe) and the speaker signals (white and white with black stripe). A separate wire (red with blue stripe) carries the power. The power cable has a male bullet connector. The radio case is grounded to the metal brackets holding it. A ground wire from the small harness to the heater and fan unit has a ground wire that secures to the driver's side of the radio mounting screw (round head Philips) The photo below shows the wiring harness where the radio connects. The power connects to a female bullet pigtail (blue) of an inline fuse. The 3 pin molex has a female counterpart in the harness. Below is where the ground wire attaches (on driver's side of radio) Below is photo showing the extracted radio and heater harness mock-up. On the 9-70z, the heater harness has the ground wire to the radio.
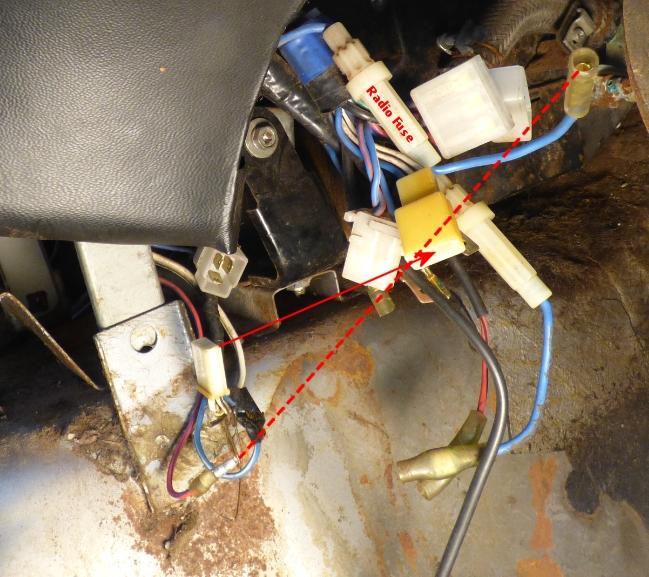


 Amazing before and after!
? I bought Bquiet on your recommendation... still in boxes...Blue.
The sad thing is that it is a Canadian company but sells in USD... I lose on convert and they lose on convert.... not really a Canadian spirit ?
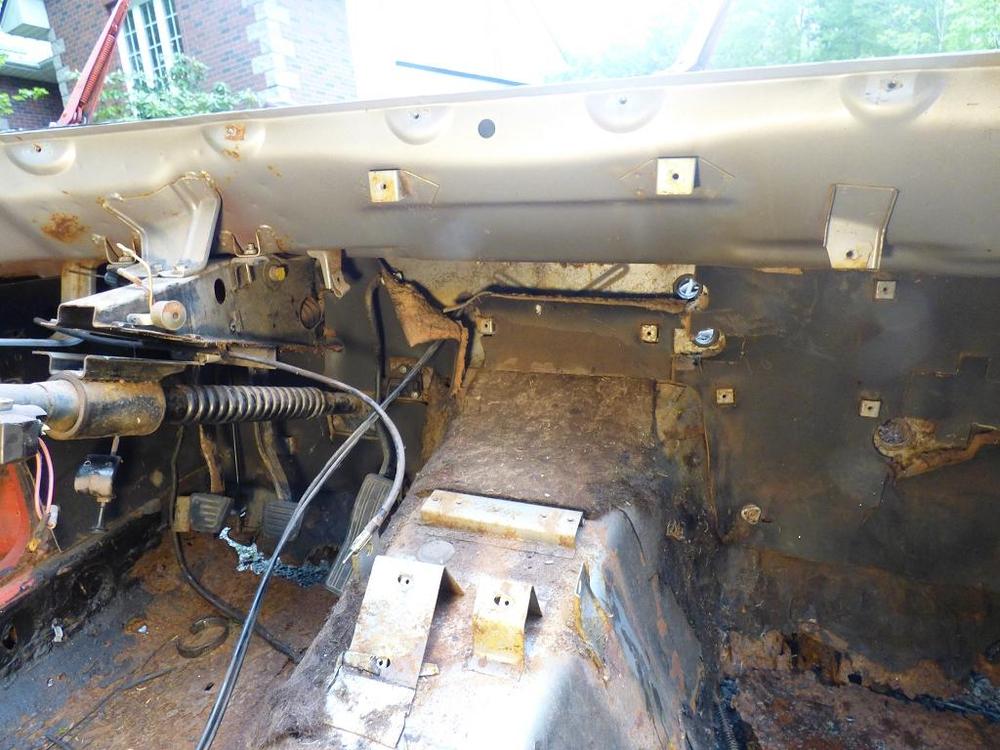
Parts Car Disassembly. Removed: windshield centre console radio dash heater blower Next: Moving to engine compartment. btw photo documented everything!
Amazing before and after!
? I bought Bquiet on your recommendation... still in boxes...Blue.
The sad thing is that it is a Canadian company but sells in USD... I lose on convert and they lose on convert.... not really a Canadian spirit ?
Parts Car Disassembly. Removed: windshield centre console radio dash heater blower Next: Moving to engine compartment. btw photo documented everything!
 Have a look at this. http://atlanticz.ca/zclub/techtips/carboncan/index.html btw one of the hoses has a reducing orifice in it
This motorcycle tuner had similar problem with rich dip at the start of acceleration. He could not tune it our with carbs so he set up reflectors in the exhaust to deal with the issue. http://www.drdyno.com/AIM_2006-06.html
Perfect timing @SteveJ I'm about to put the dash into my buddy's 73 and get it going. A zx dictributor also needs the wiring attended to. Not looking forward to the safety interlock delete issues.
Have a look at this. http://atlanticz.ca/zclub/techtips/carboncan/index.html btw one of the hoses has a reducing orifice in it
This motorcycle tuner had similar problem with rich dip at the start of acceleration. He could not tune it our with carbs so he set up reflectors in the exhaust to deal with the issue. http://www.drdyno.com/AIM_2006-06.html
Perfect timing @SteveJ I'm about to put the dash into my buddy's 73 and get it going. A zx dictributor also needs the wiring attended to. Not looking forward to the safety interlock delete issues.


Important Information
By using this site, you agree to our Privacy Policy and Guidelines. We have placed cookies on your device to help make this website better. You can adjust your cookie settings, otherwise we'll assume you're okay to continue.