


240260280
Free Member
-
Joined
-
Last visited
Everything posted by 240260280
-
 great pun!!!
 -
Another good day:
 1. 2. Use 27mm socket on crank to turn the engine clockwise as viewed from the front of the car. If you overshoot TDC on the crank, you can back up CCW then re-approach CW. (Don't go backwards (CCW) and stop at TDC). 3. Removing plugs makes turning easier and more precise.
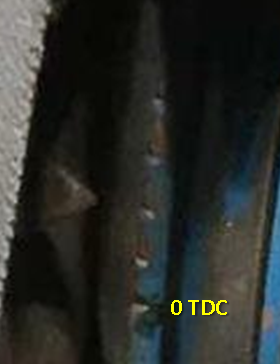 That Blue Truck is similar to That Blue Z!!!!
very cool!
We used to play in even older trucks as kids. Our family moved to a very rural area with abandoned small saw mills. They ran the mills using trucks on blocks with belts fastened to their rear rims. As kids we had the "run of the mill" in the abandoned sites. ?
Weather sounds so much like Weber.... change in the weather/ change in the Weber. A slightly bigger main should help.... more HP with that one! btw did you see F1 on the weekend where the high altitude thin air caused less HP? Very interesting.
Facebook throws data into a long scroll..... like toilet paper......try to find that interesting link you saw a month ago. When will the masses realize it is toilet paper programming?
MORE!!!!! MORE!!!!! ?
We have Cheapy Tire here in Nova Scotia.... must be a commonwealth thing....
Remember '69
That Blue Truck is similar to That Blue Z!!!!
very cool!
We used to play in even older trucks as kids. Our family moved to a very rural area with abandoned small saw mills. They ran the mills using trucks on blocks with belts fastened to their rear rims. As kids we had the "run of the mill" in the abandoned sites. ?
Weather sounds so much like Weber.... change in the weather/ change in the Weber. A slightly bigger main should help.... more HP with that one! btw did you see F1 on the weekend where the high altitude thin air caused less HP? Very interesting.
Facebook throws data into a long scroll..... like toilet paper......try to find that interesting link you saw a month ago. When will the masses realize it is toilet paper programming?
MORE!!!!! MORE!!!!! ?
We have Cheapy Tire here in Nova Scotia.... must be a commonwealth thing....
Remember '69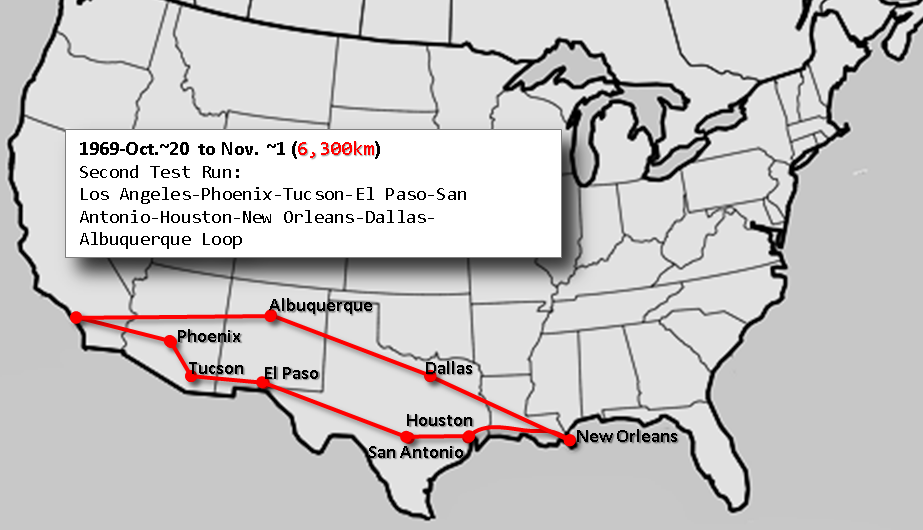
 Lets have a 50th in Q3/4 2019 and again at ZCON ~ 6months later.... twice is nice.
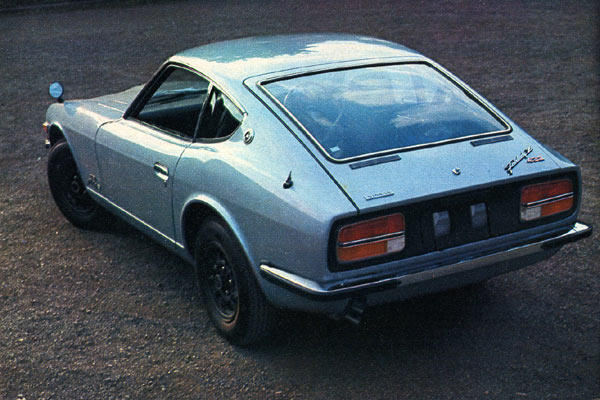
I think the cars in these photos from Alan & or Kats posed for that brochure ? They are from ~ Oct. 18, 1969 when, at the same time, two silver Z's were tearing up the USA and Canadian highways. @kats @HS30-H
Lets have a 50th in Q3/4 2019 and again at ZCON ~ 6months later.... twice is nice.
I think the cars in these photos from Alan & or Kats posed for that brochure ? They are from ~ Oct. 18, 1969 when, at the same time, two silver Z's were tearing up the USA and Canadian highways. @kats @HS30-H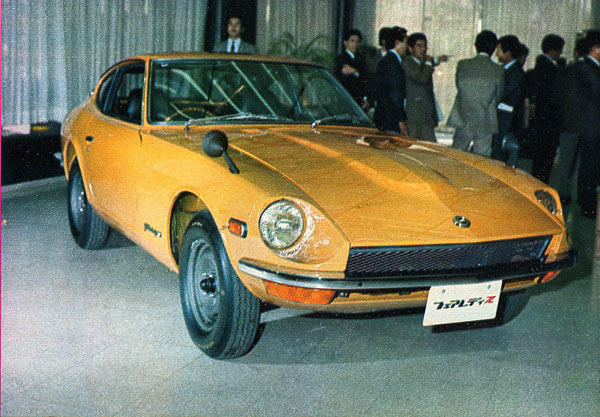
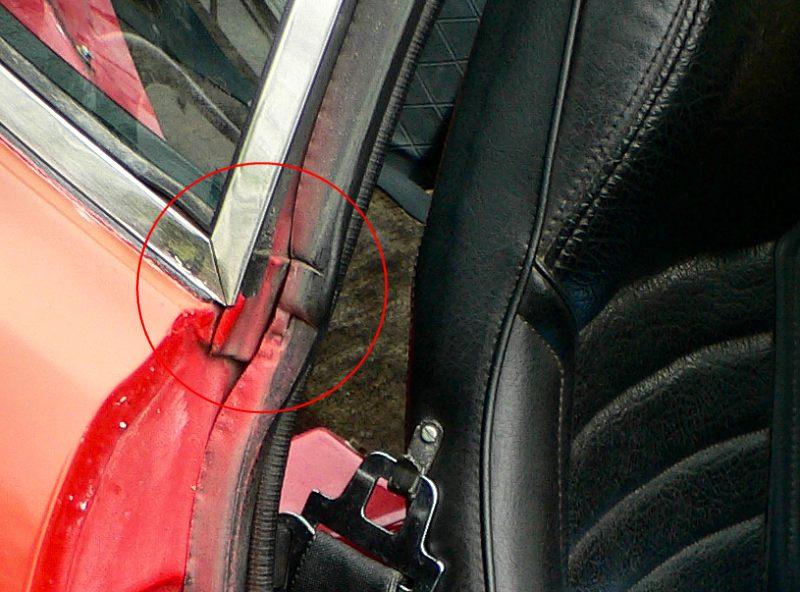
 The only time when "You broke it, you bought it." feels good.
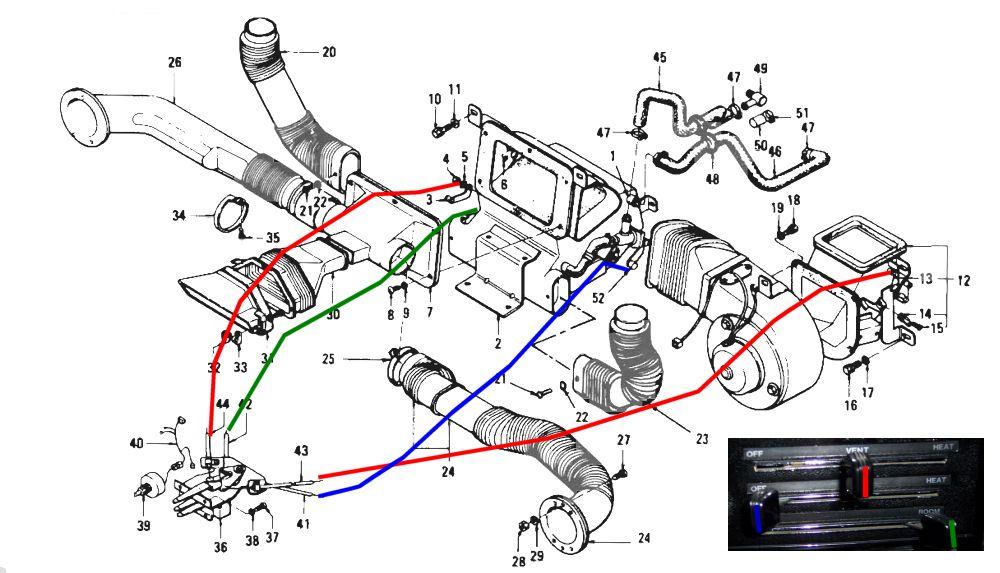
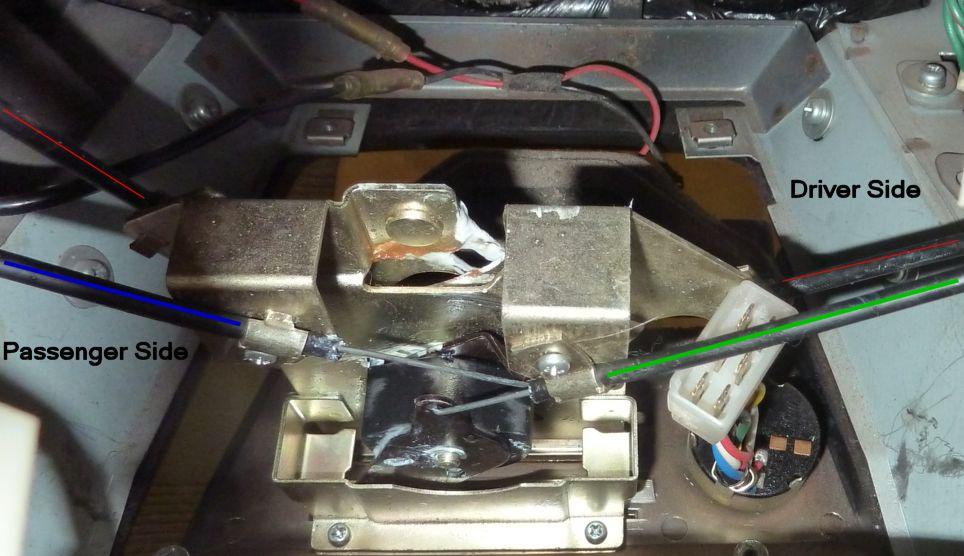
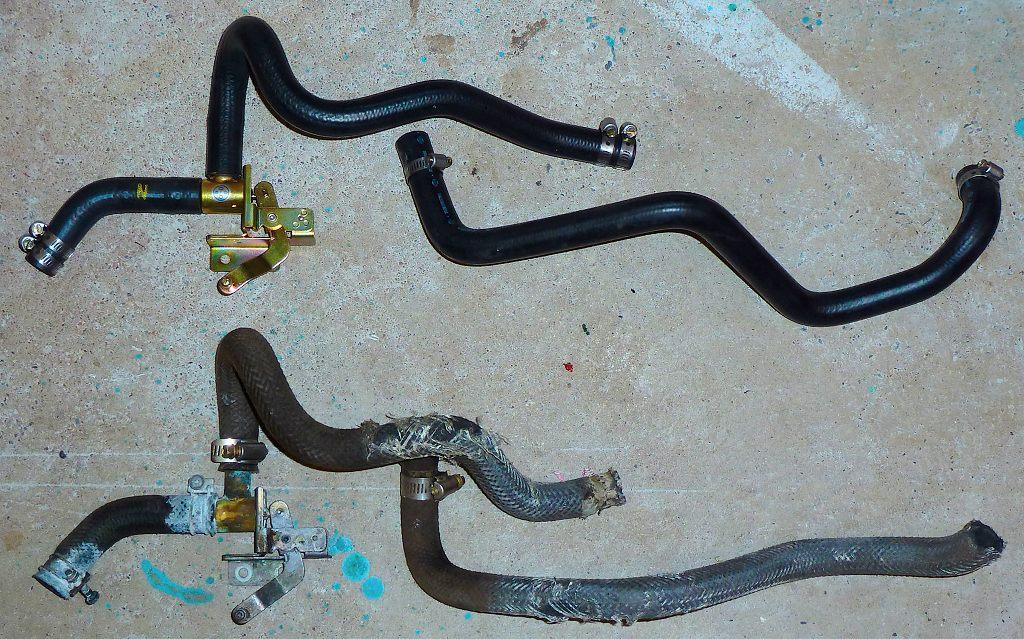
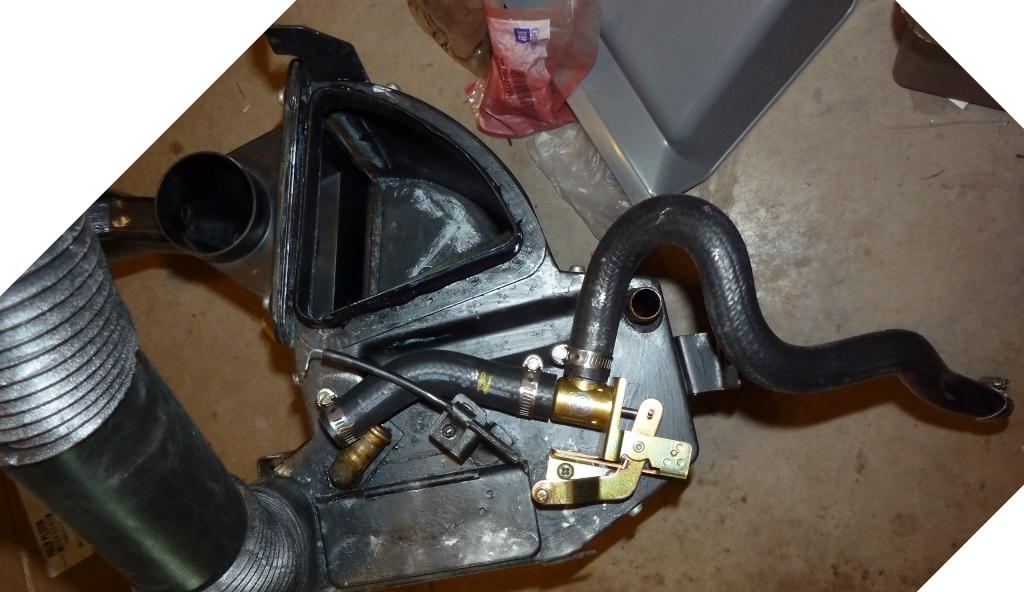
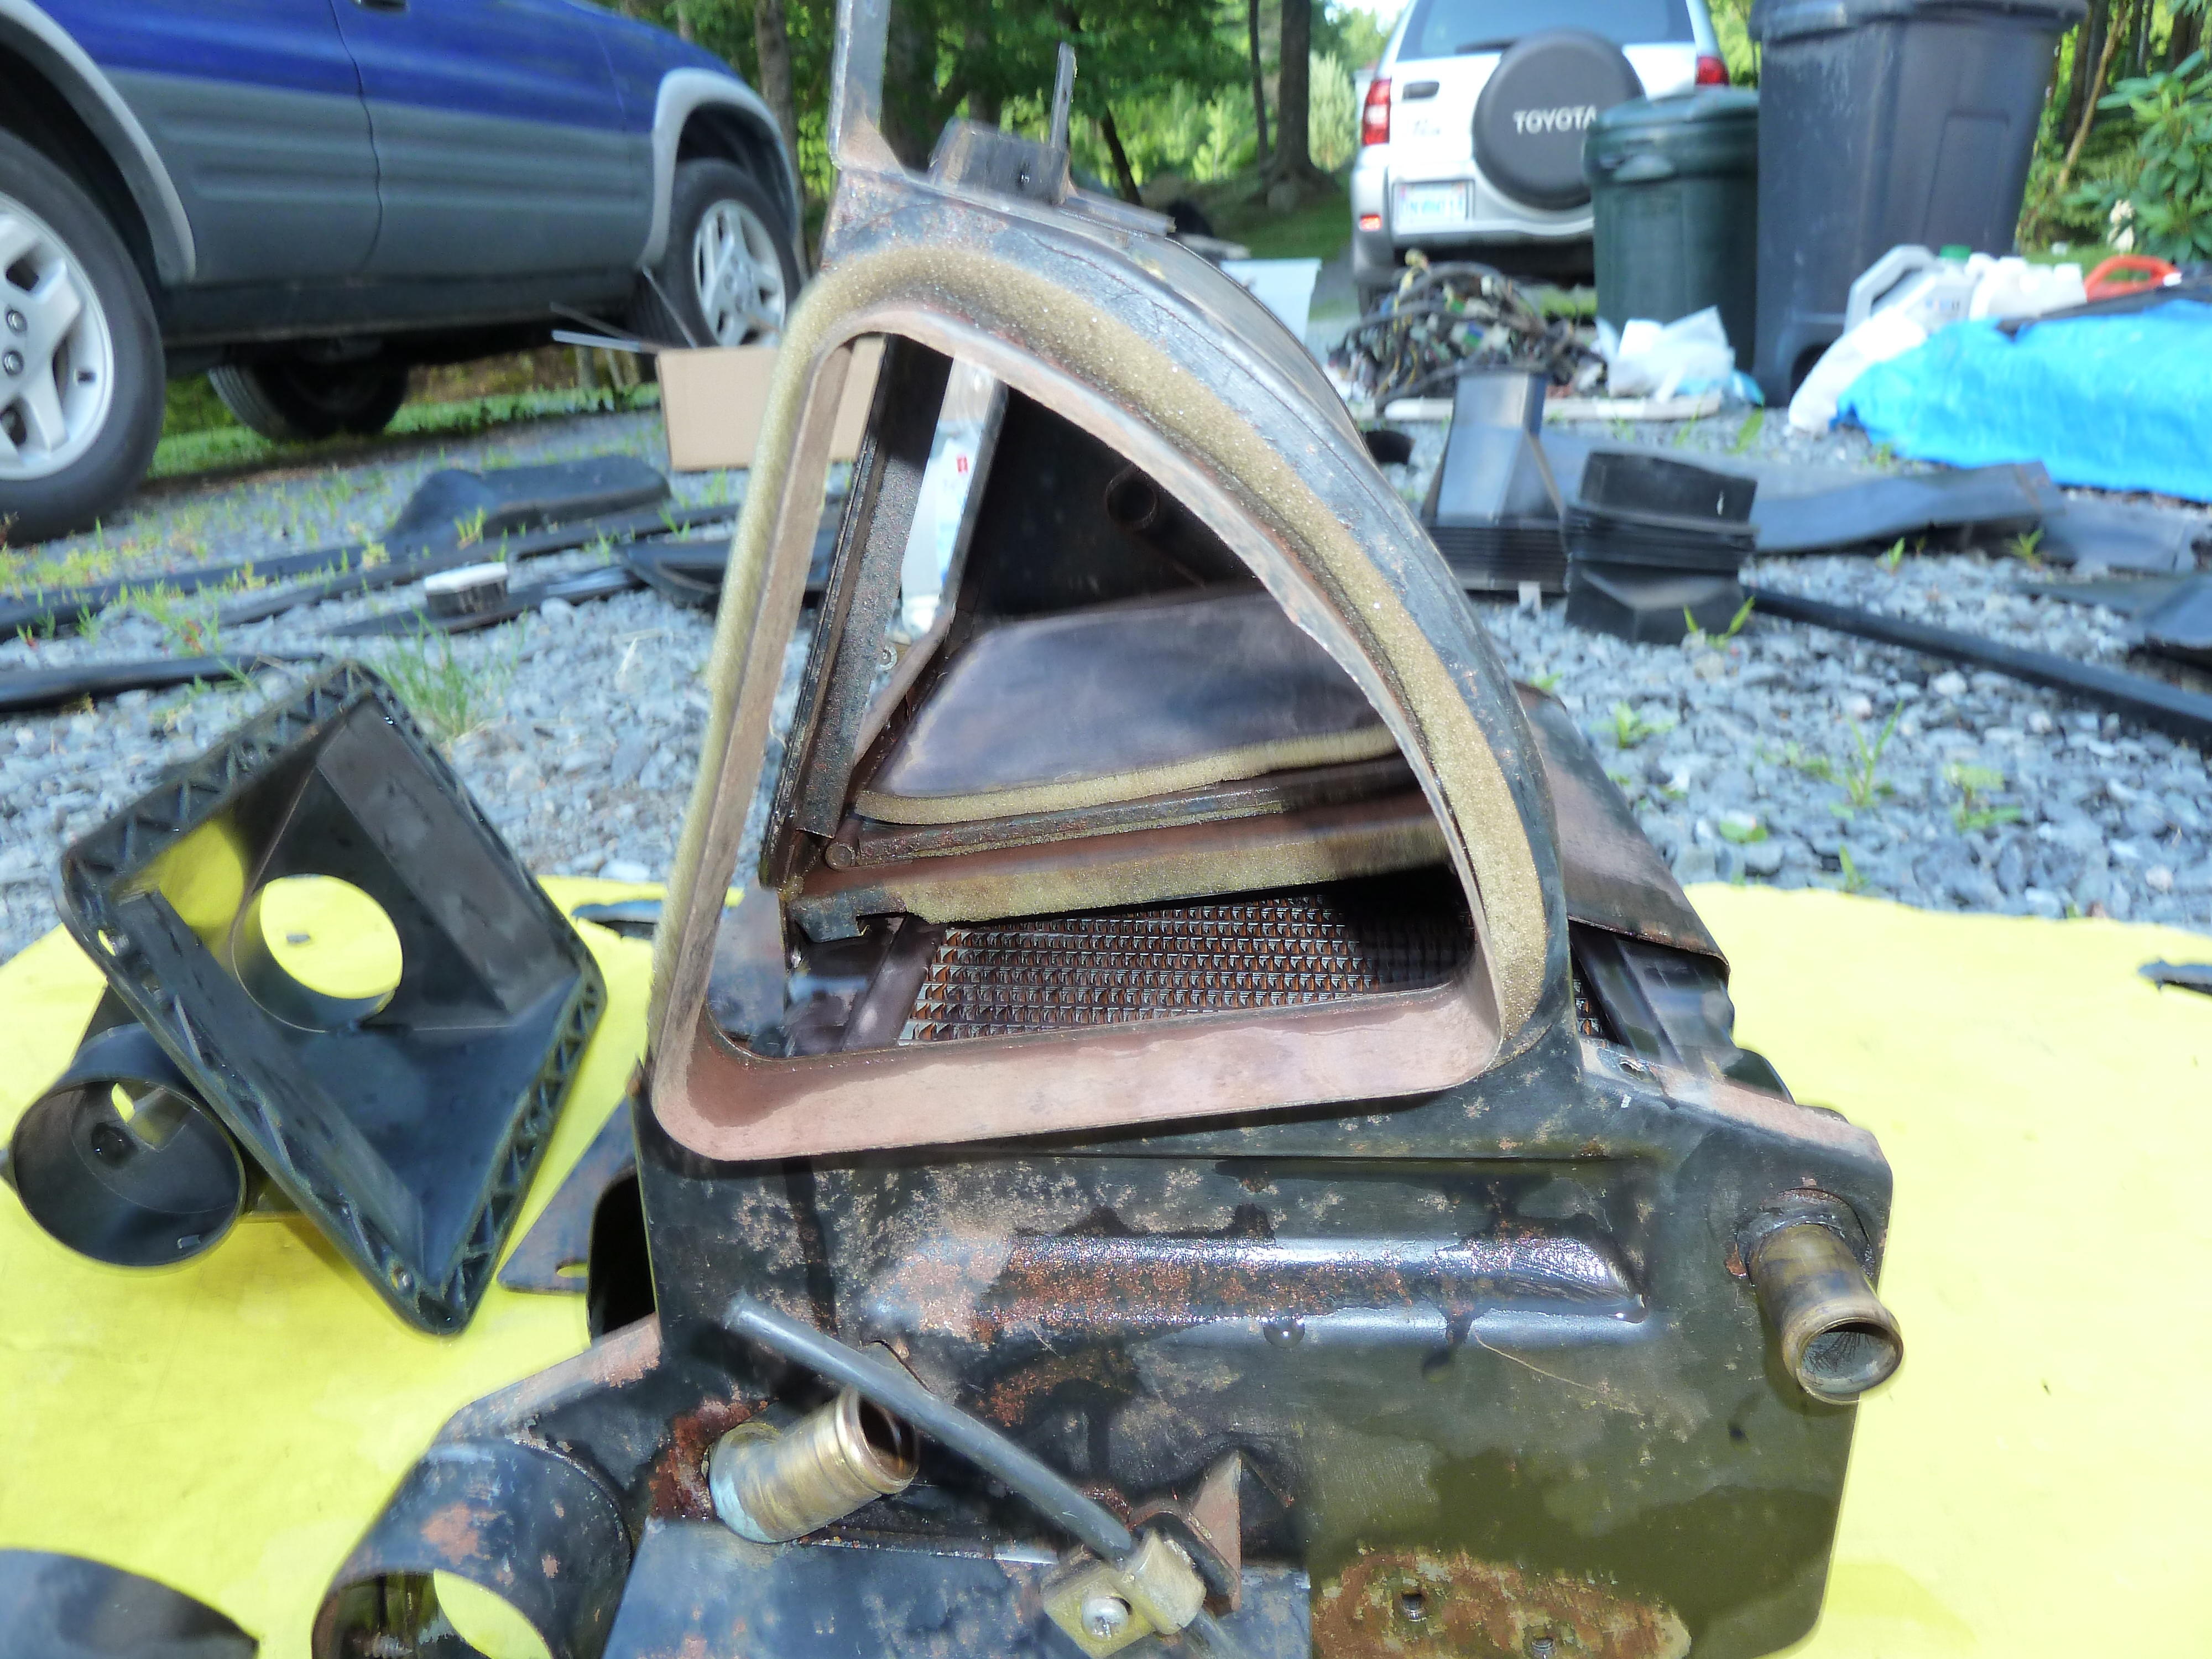
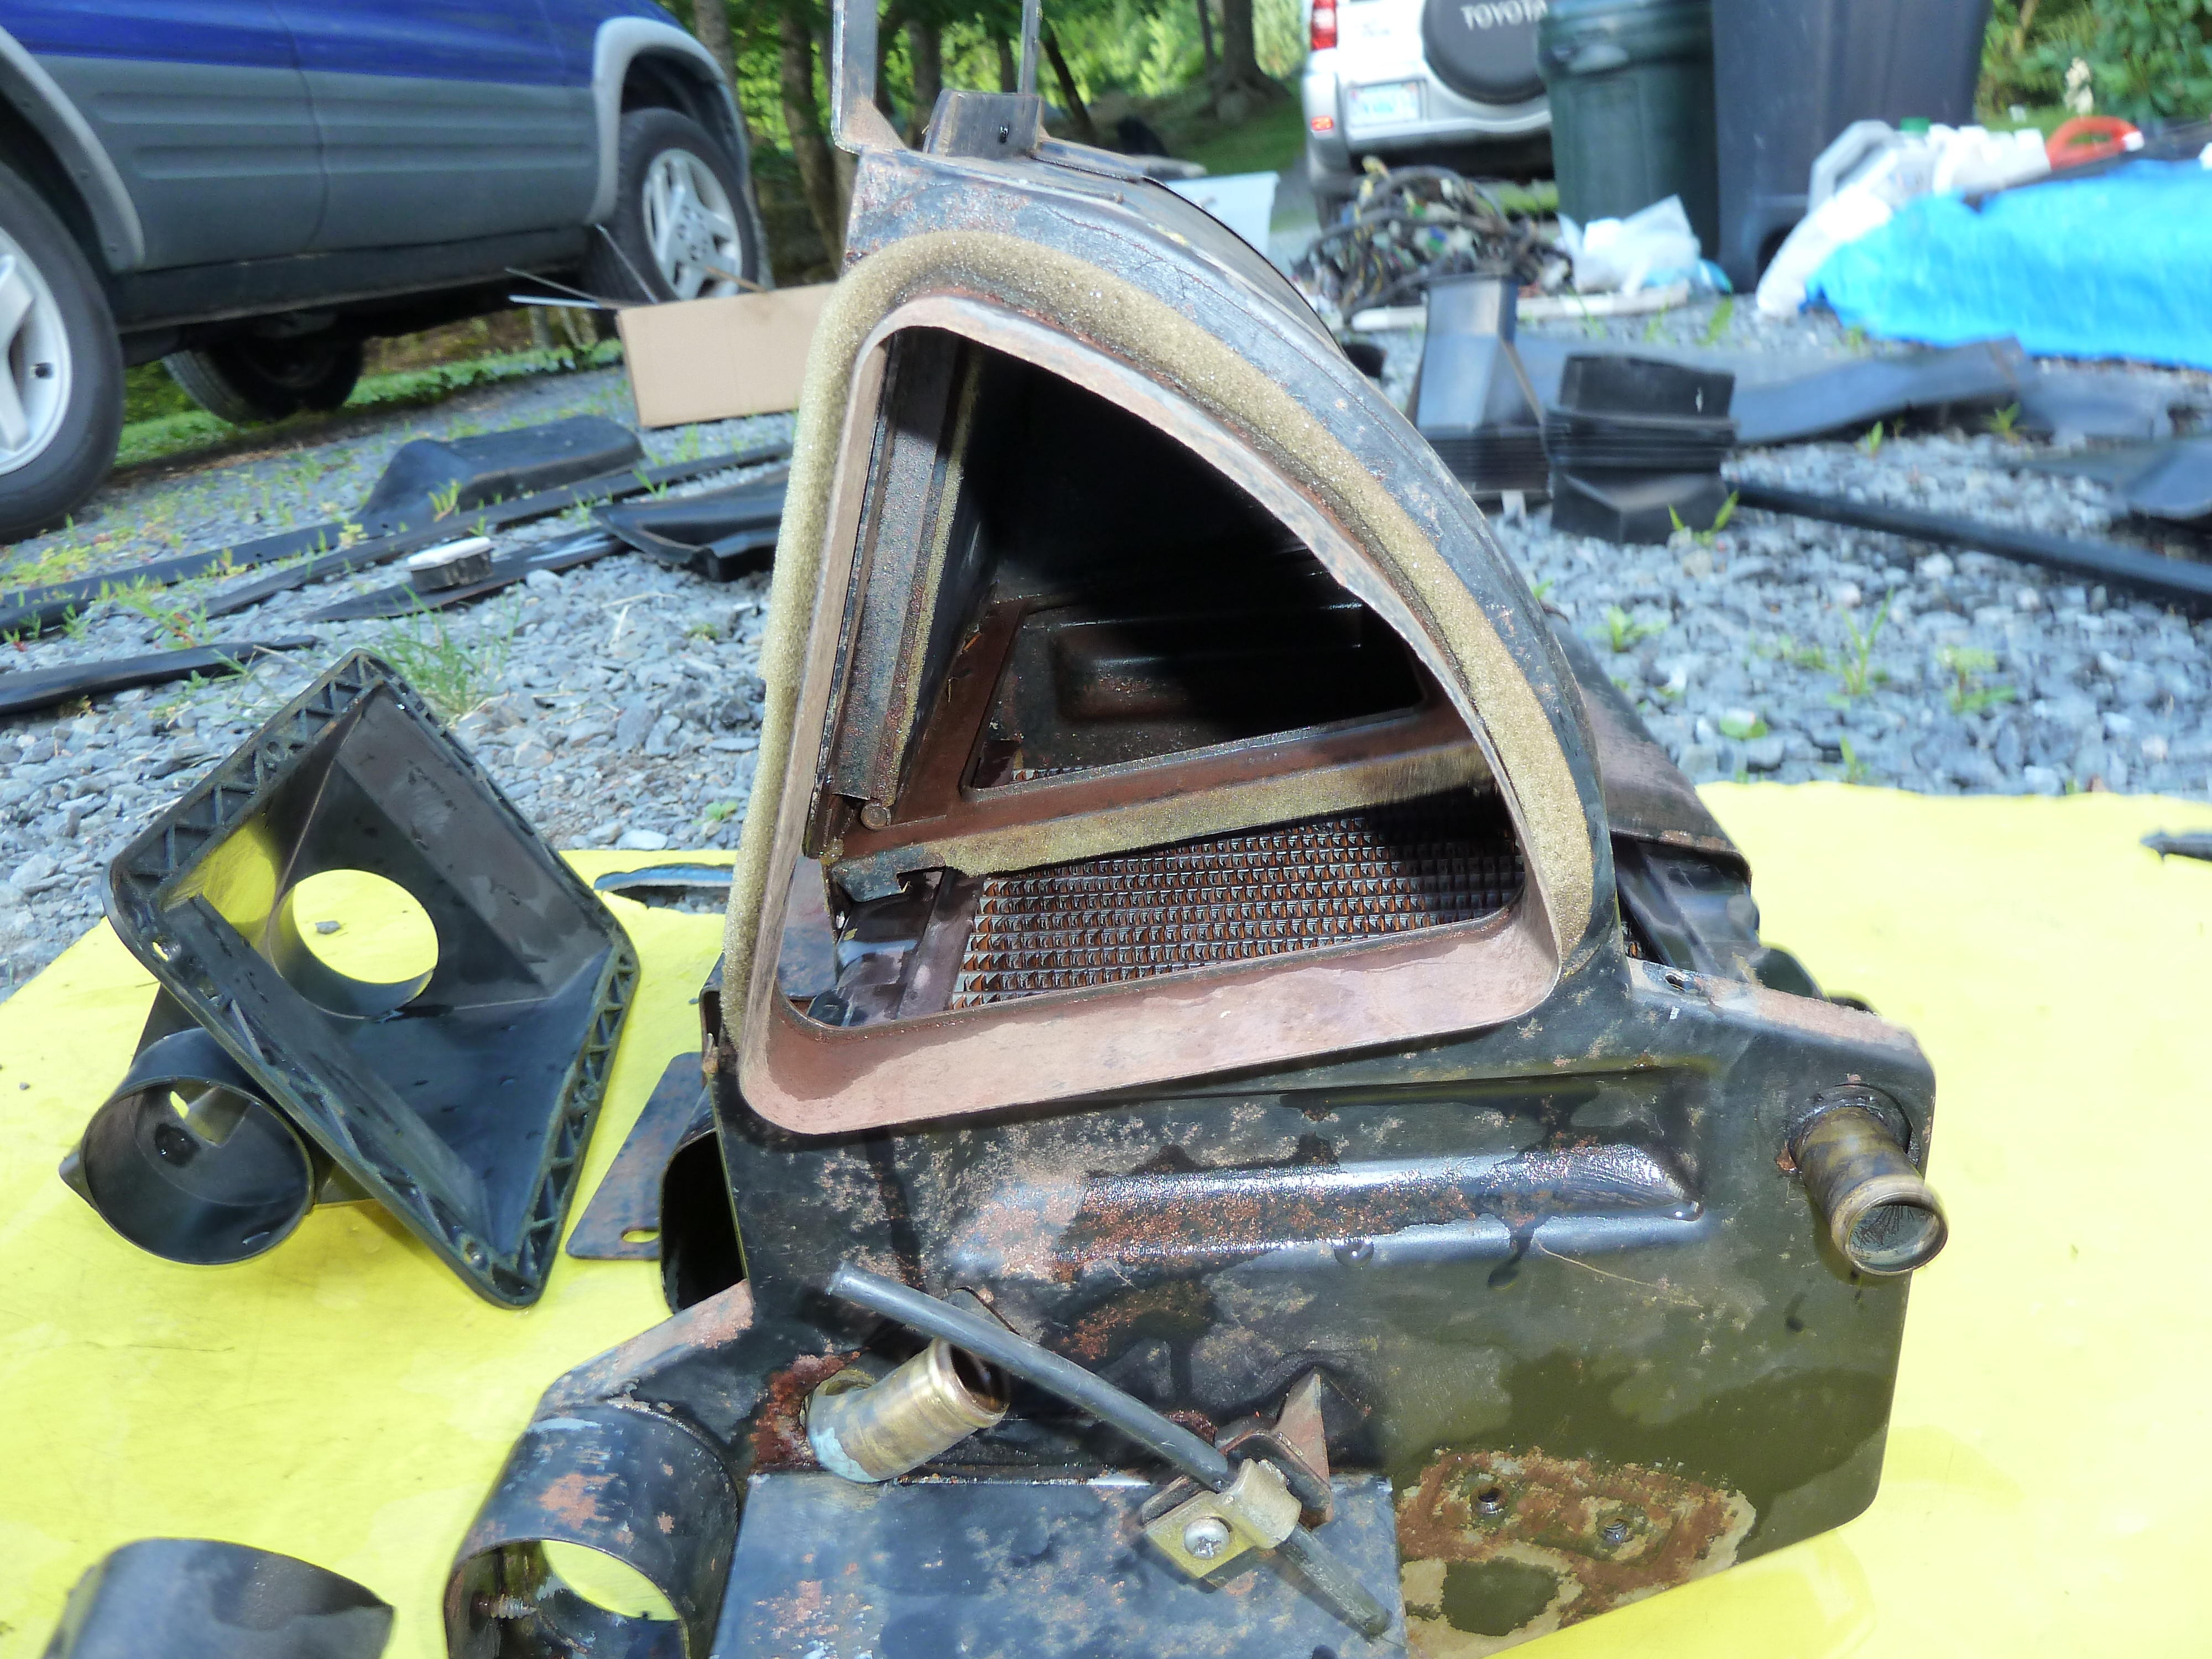
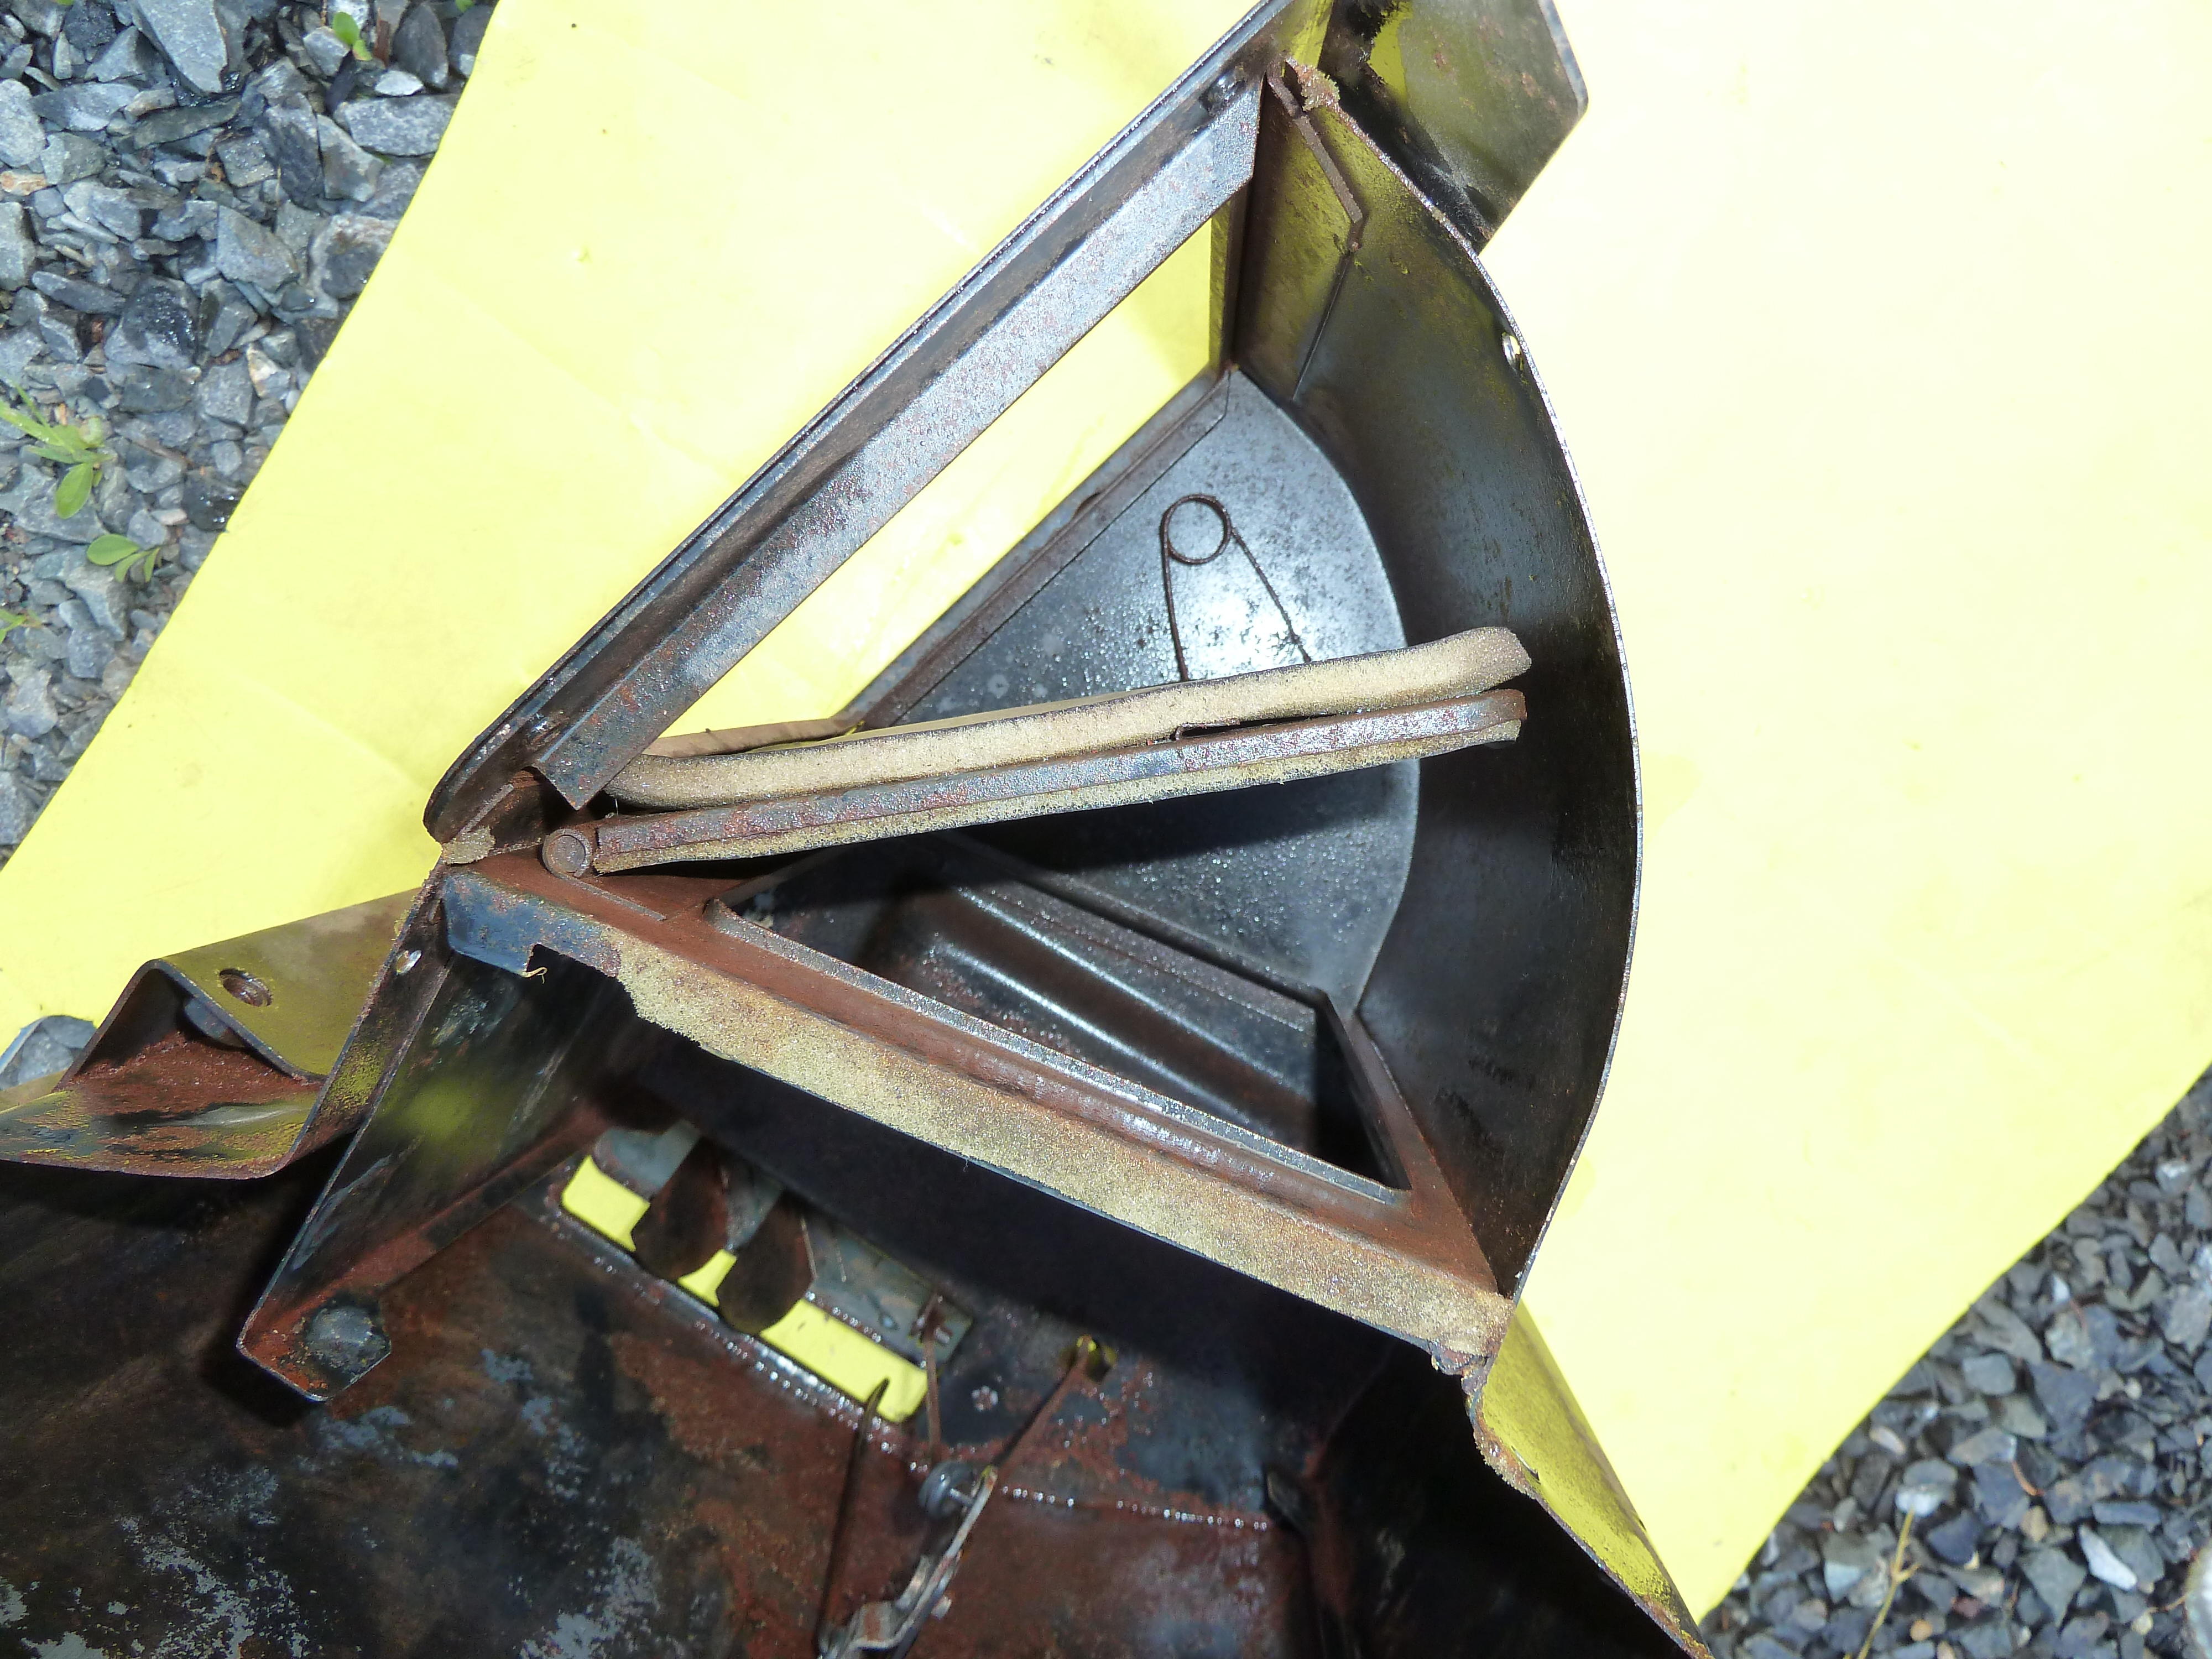
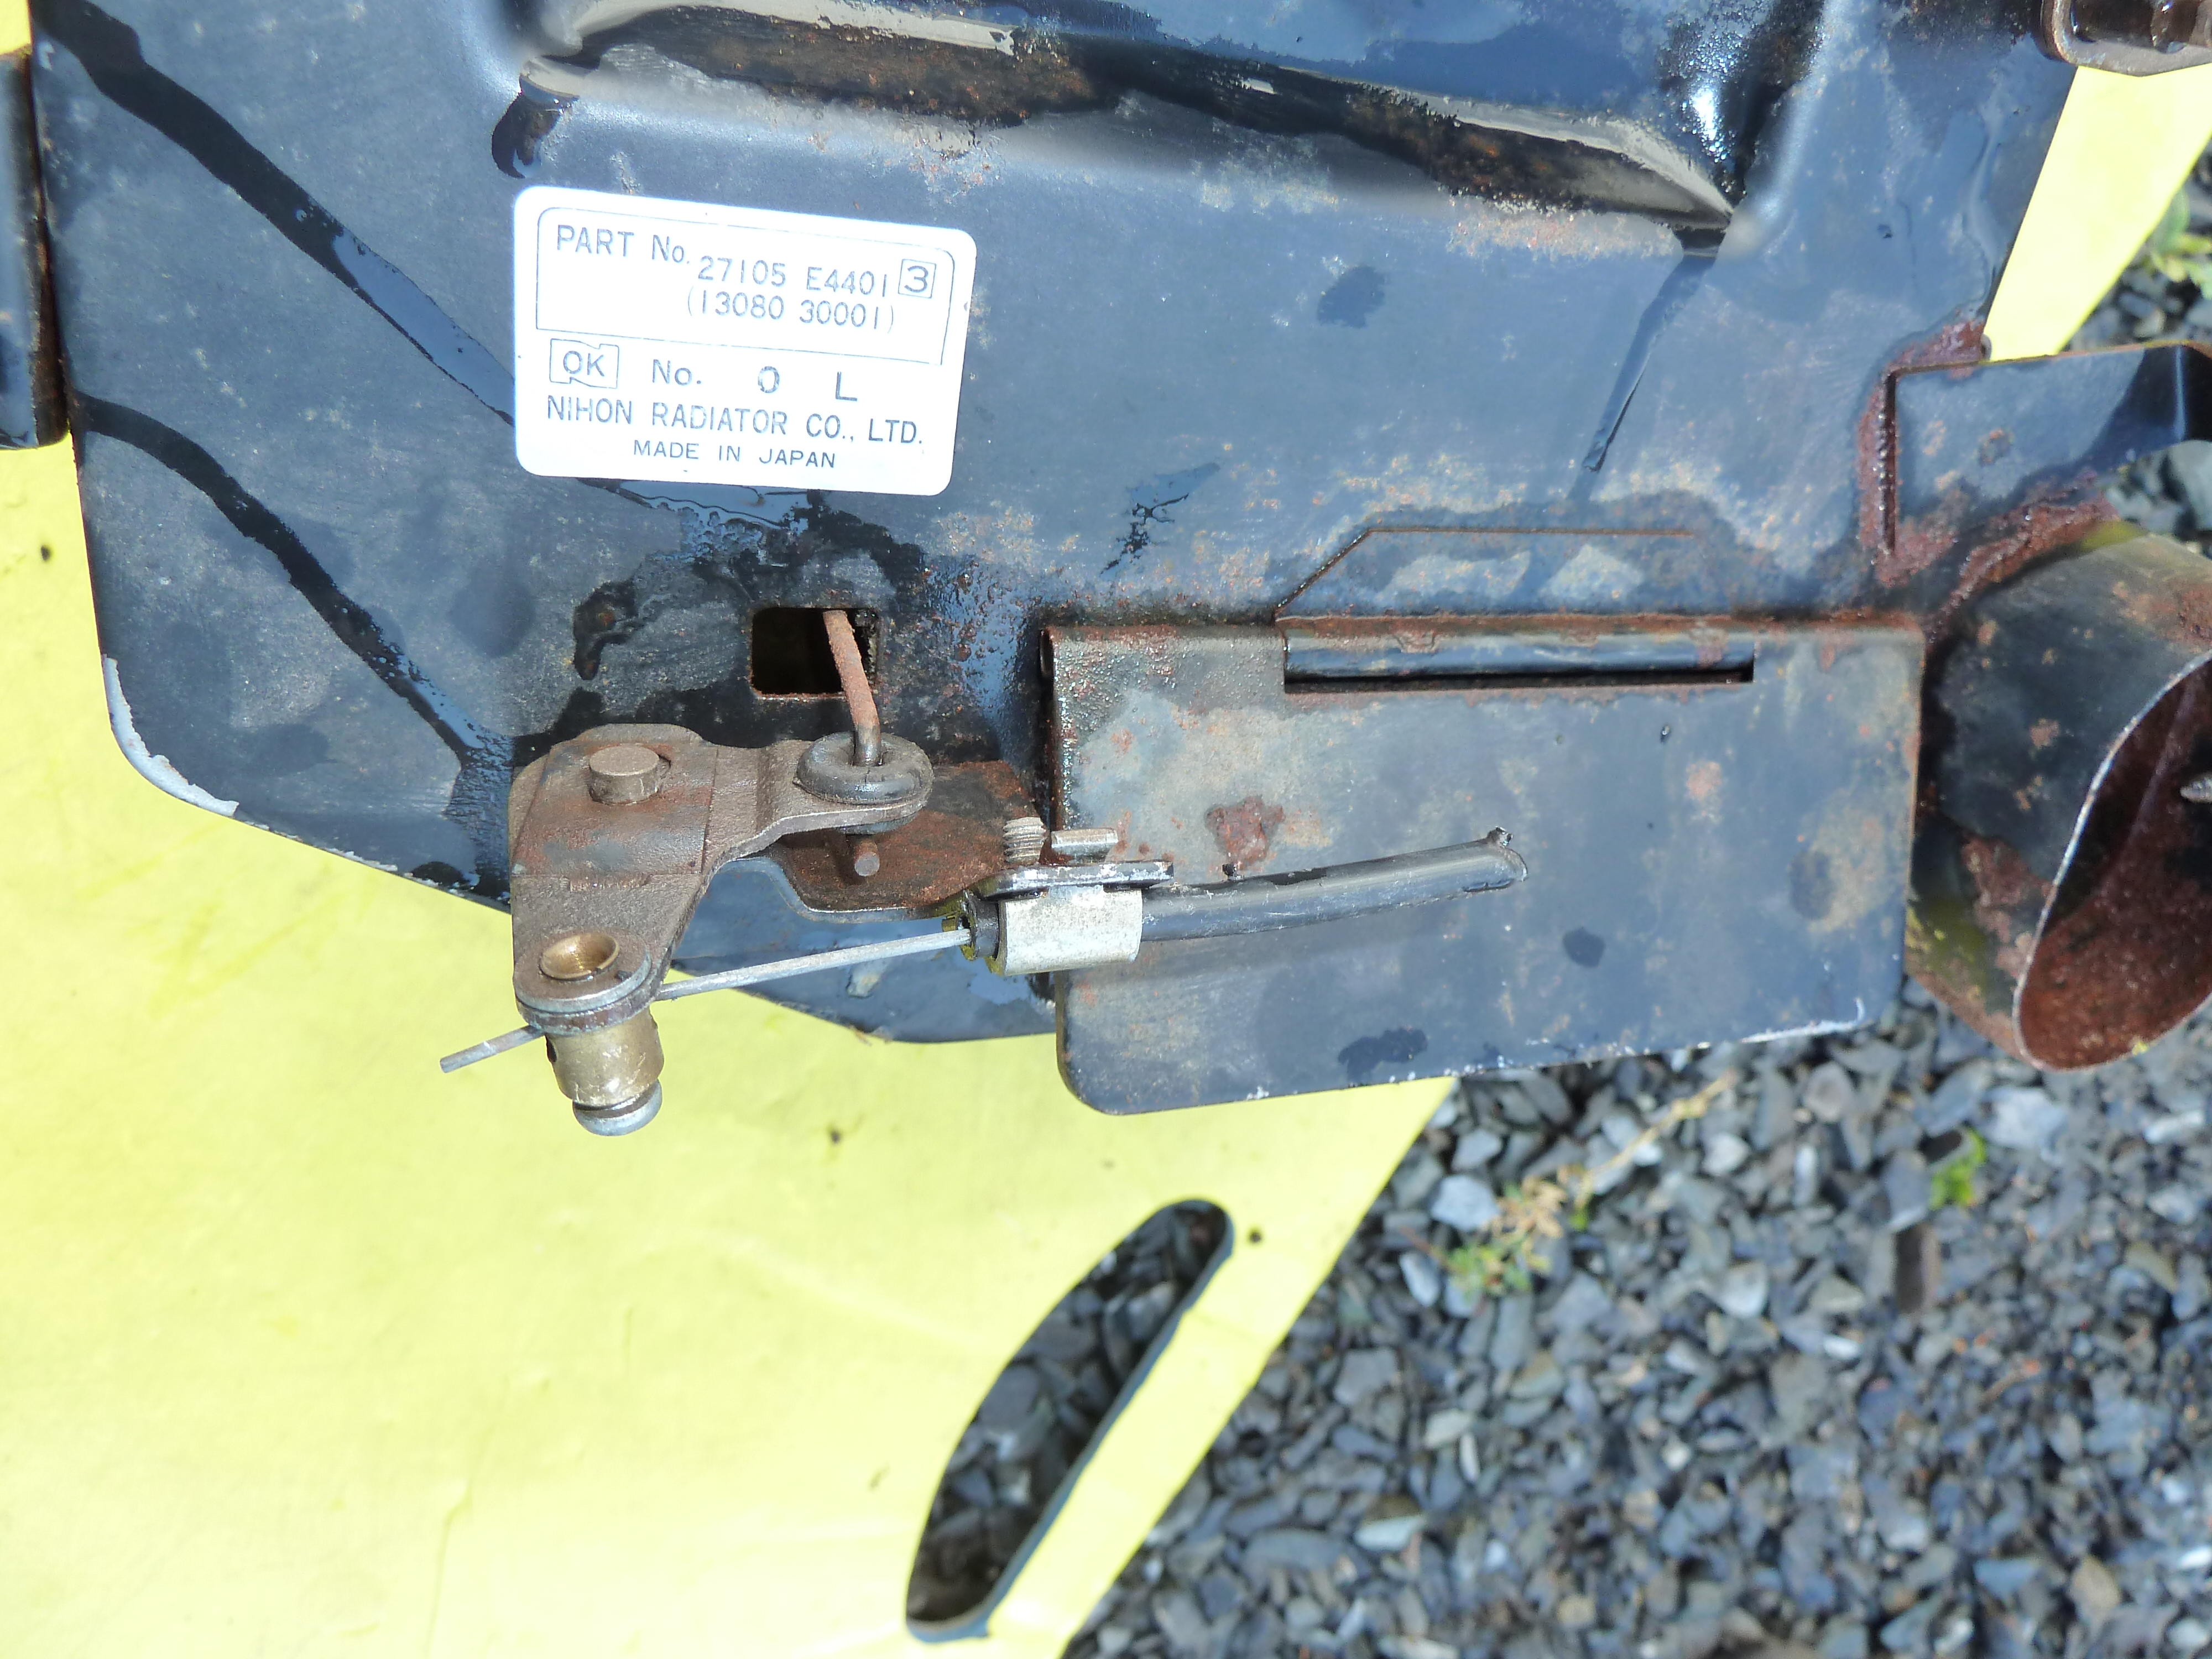
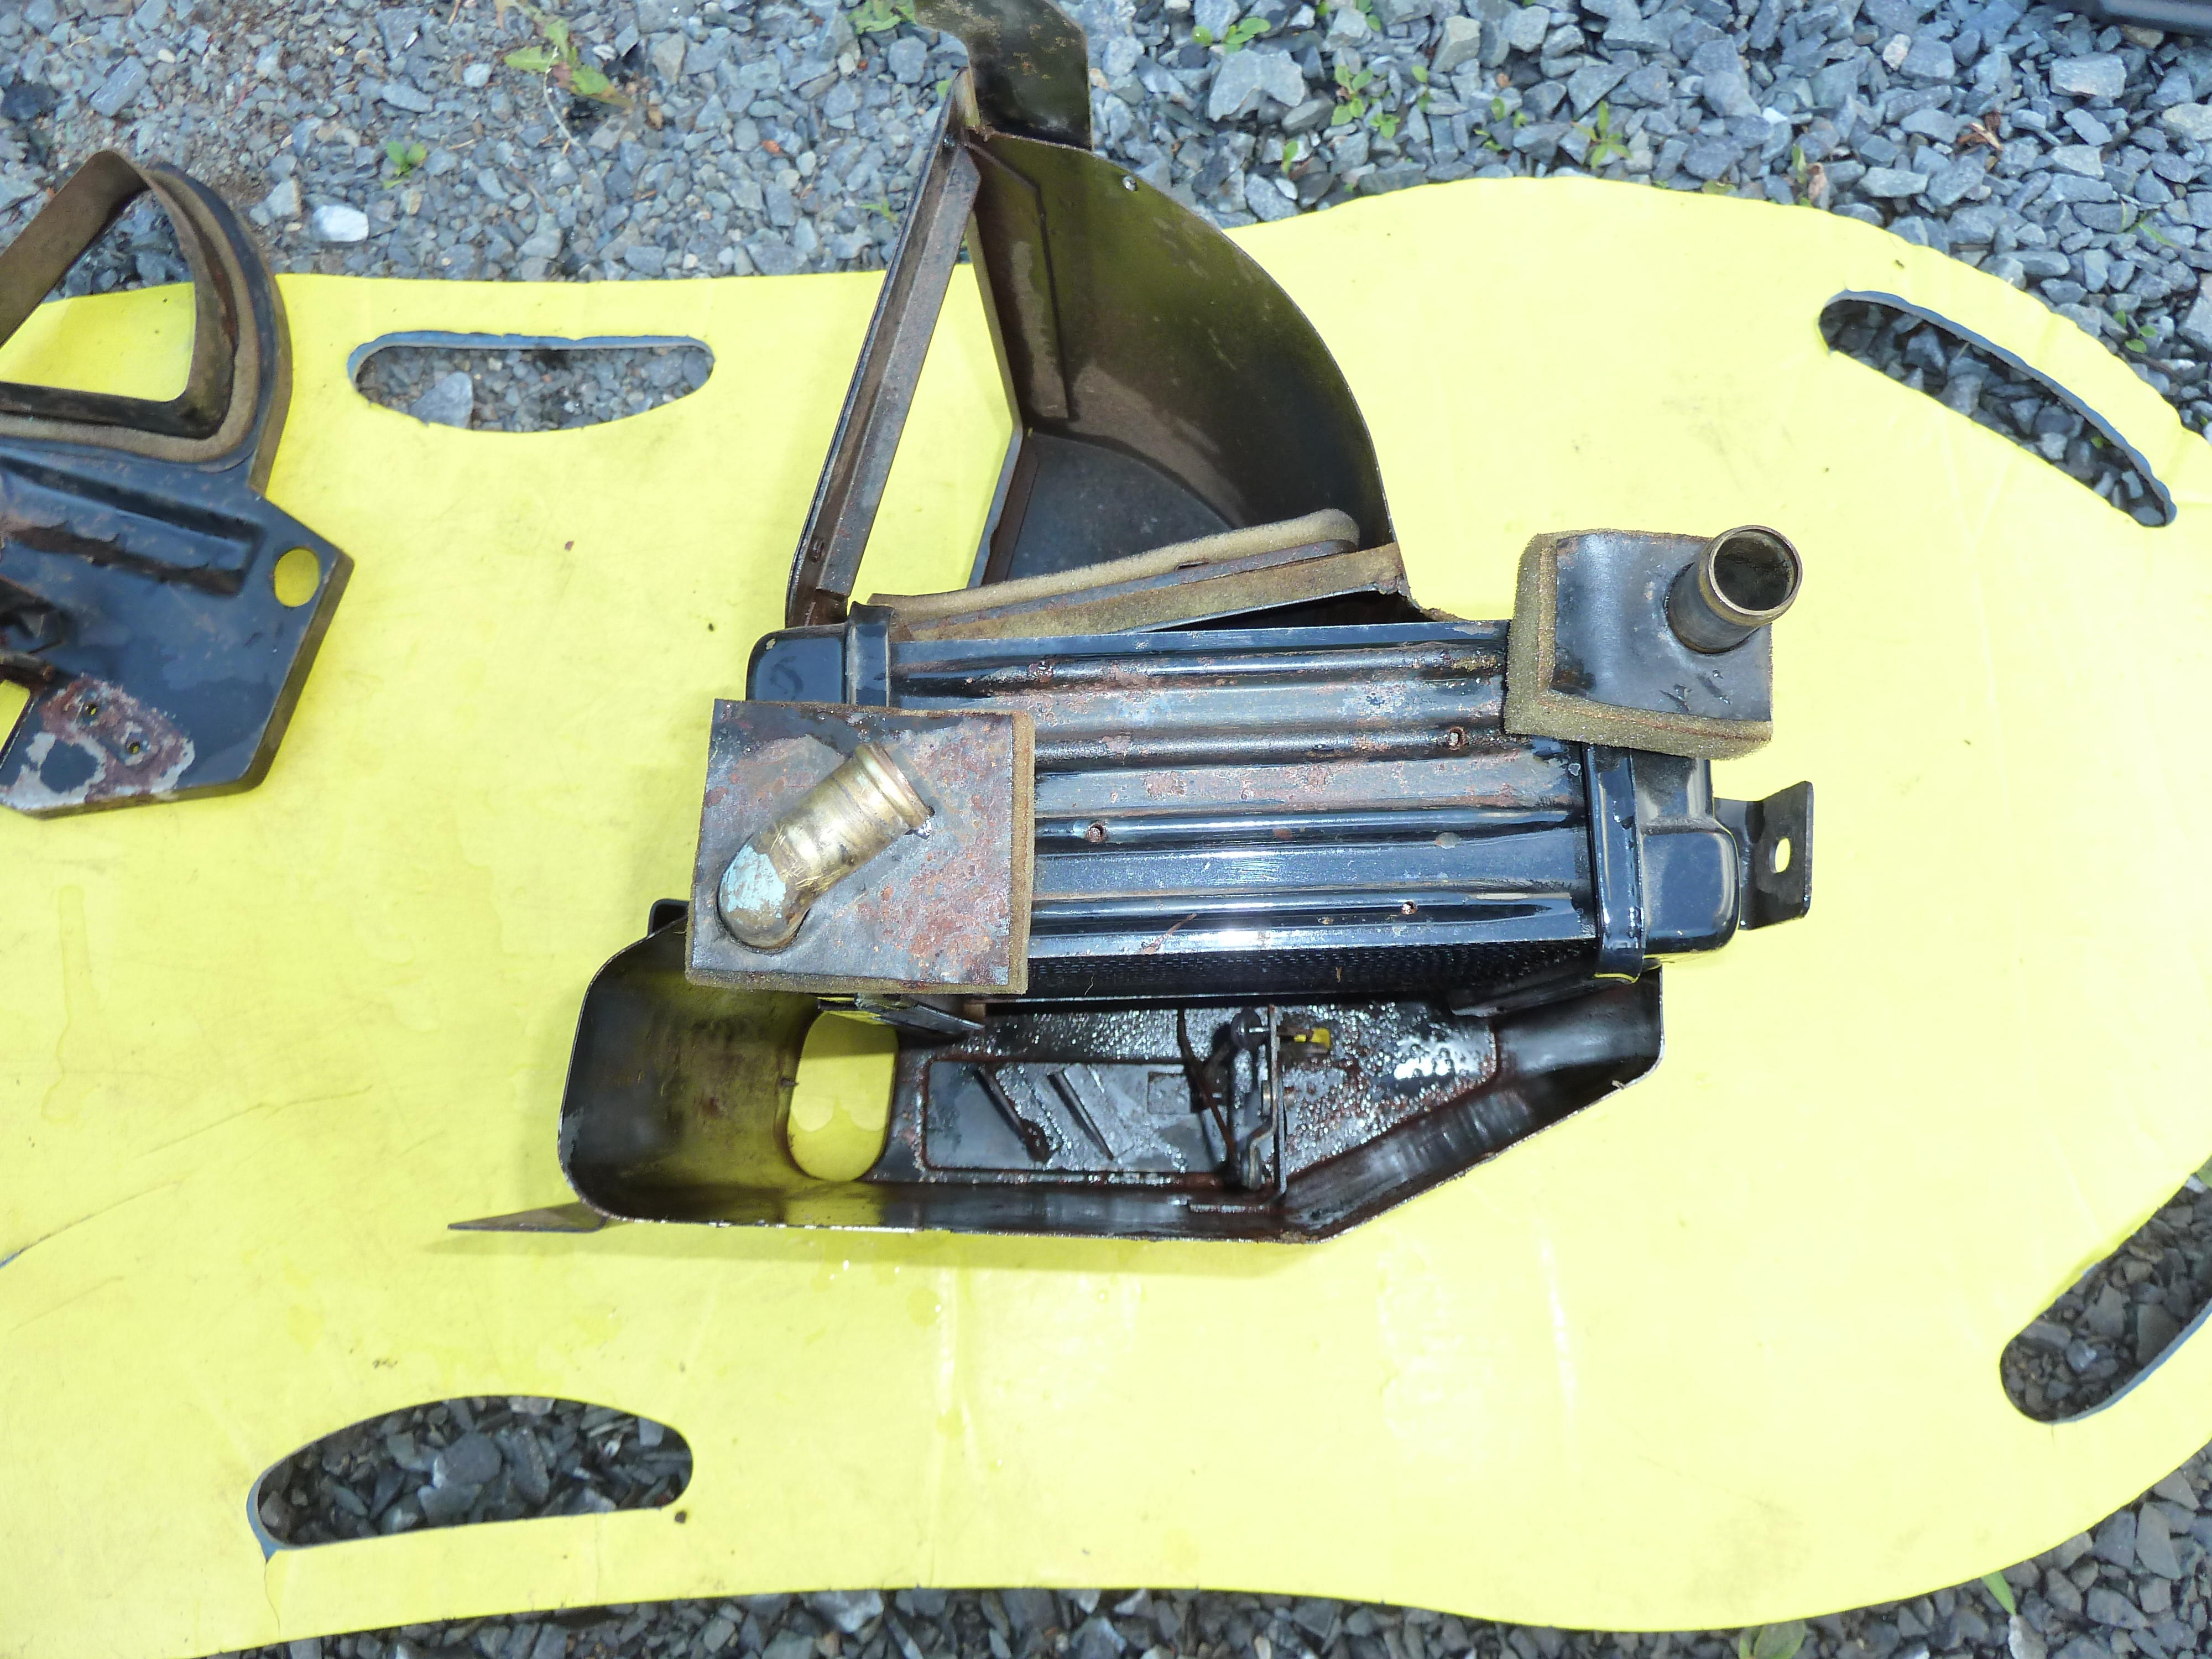
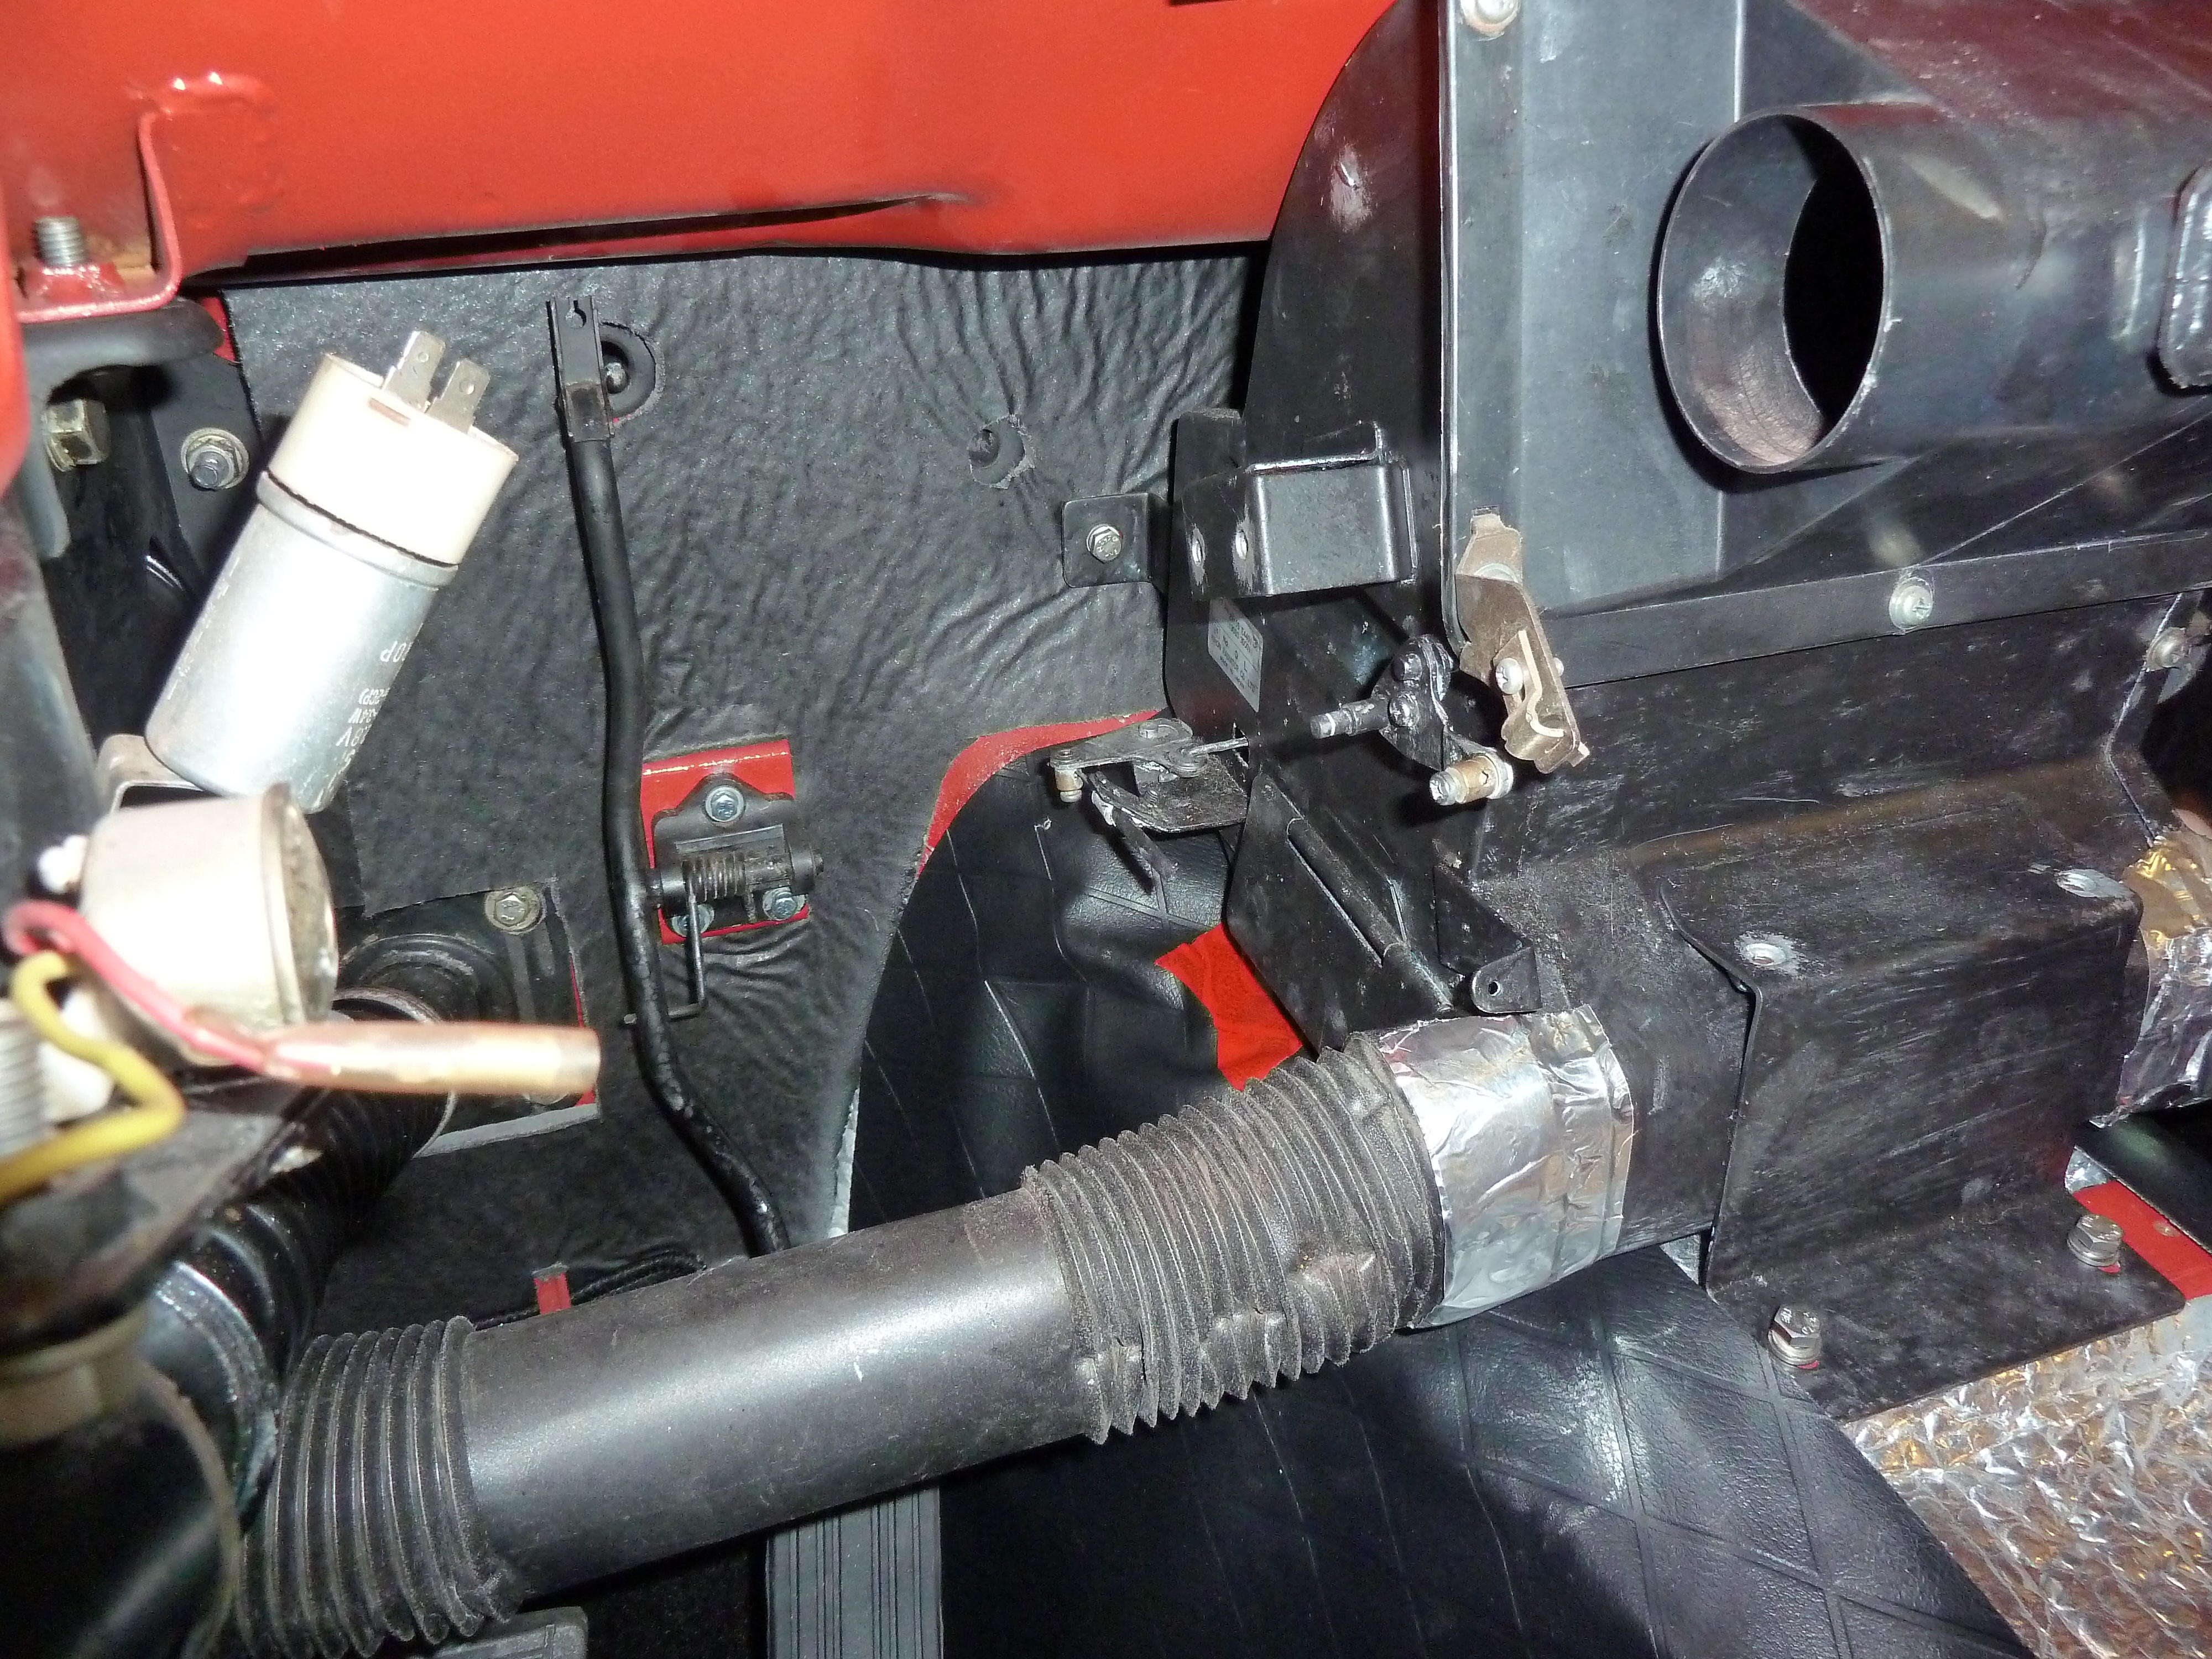
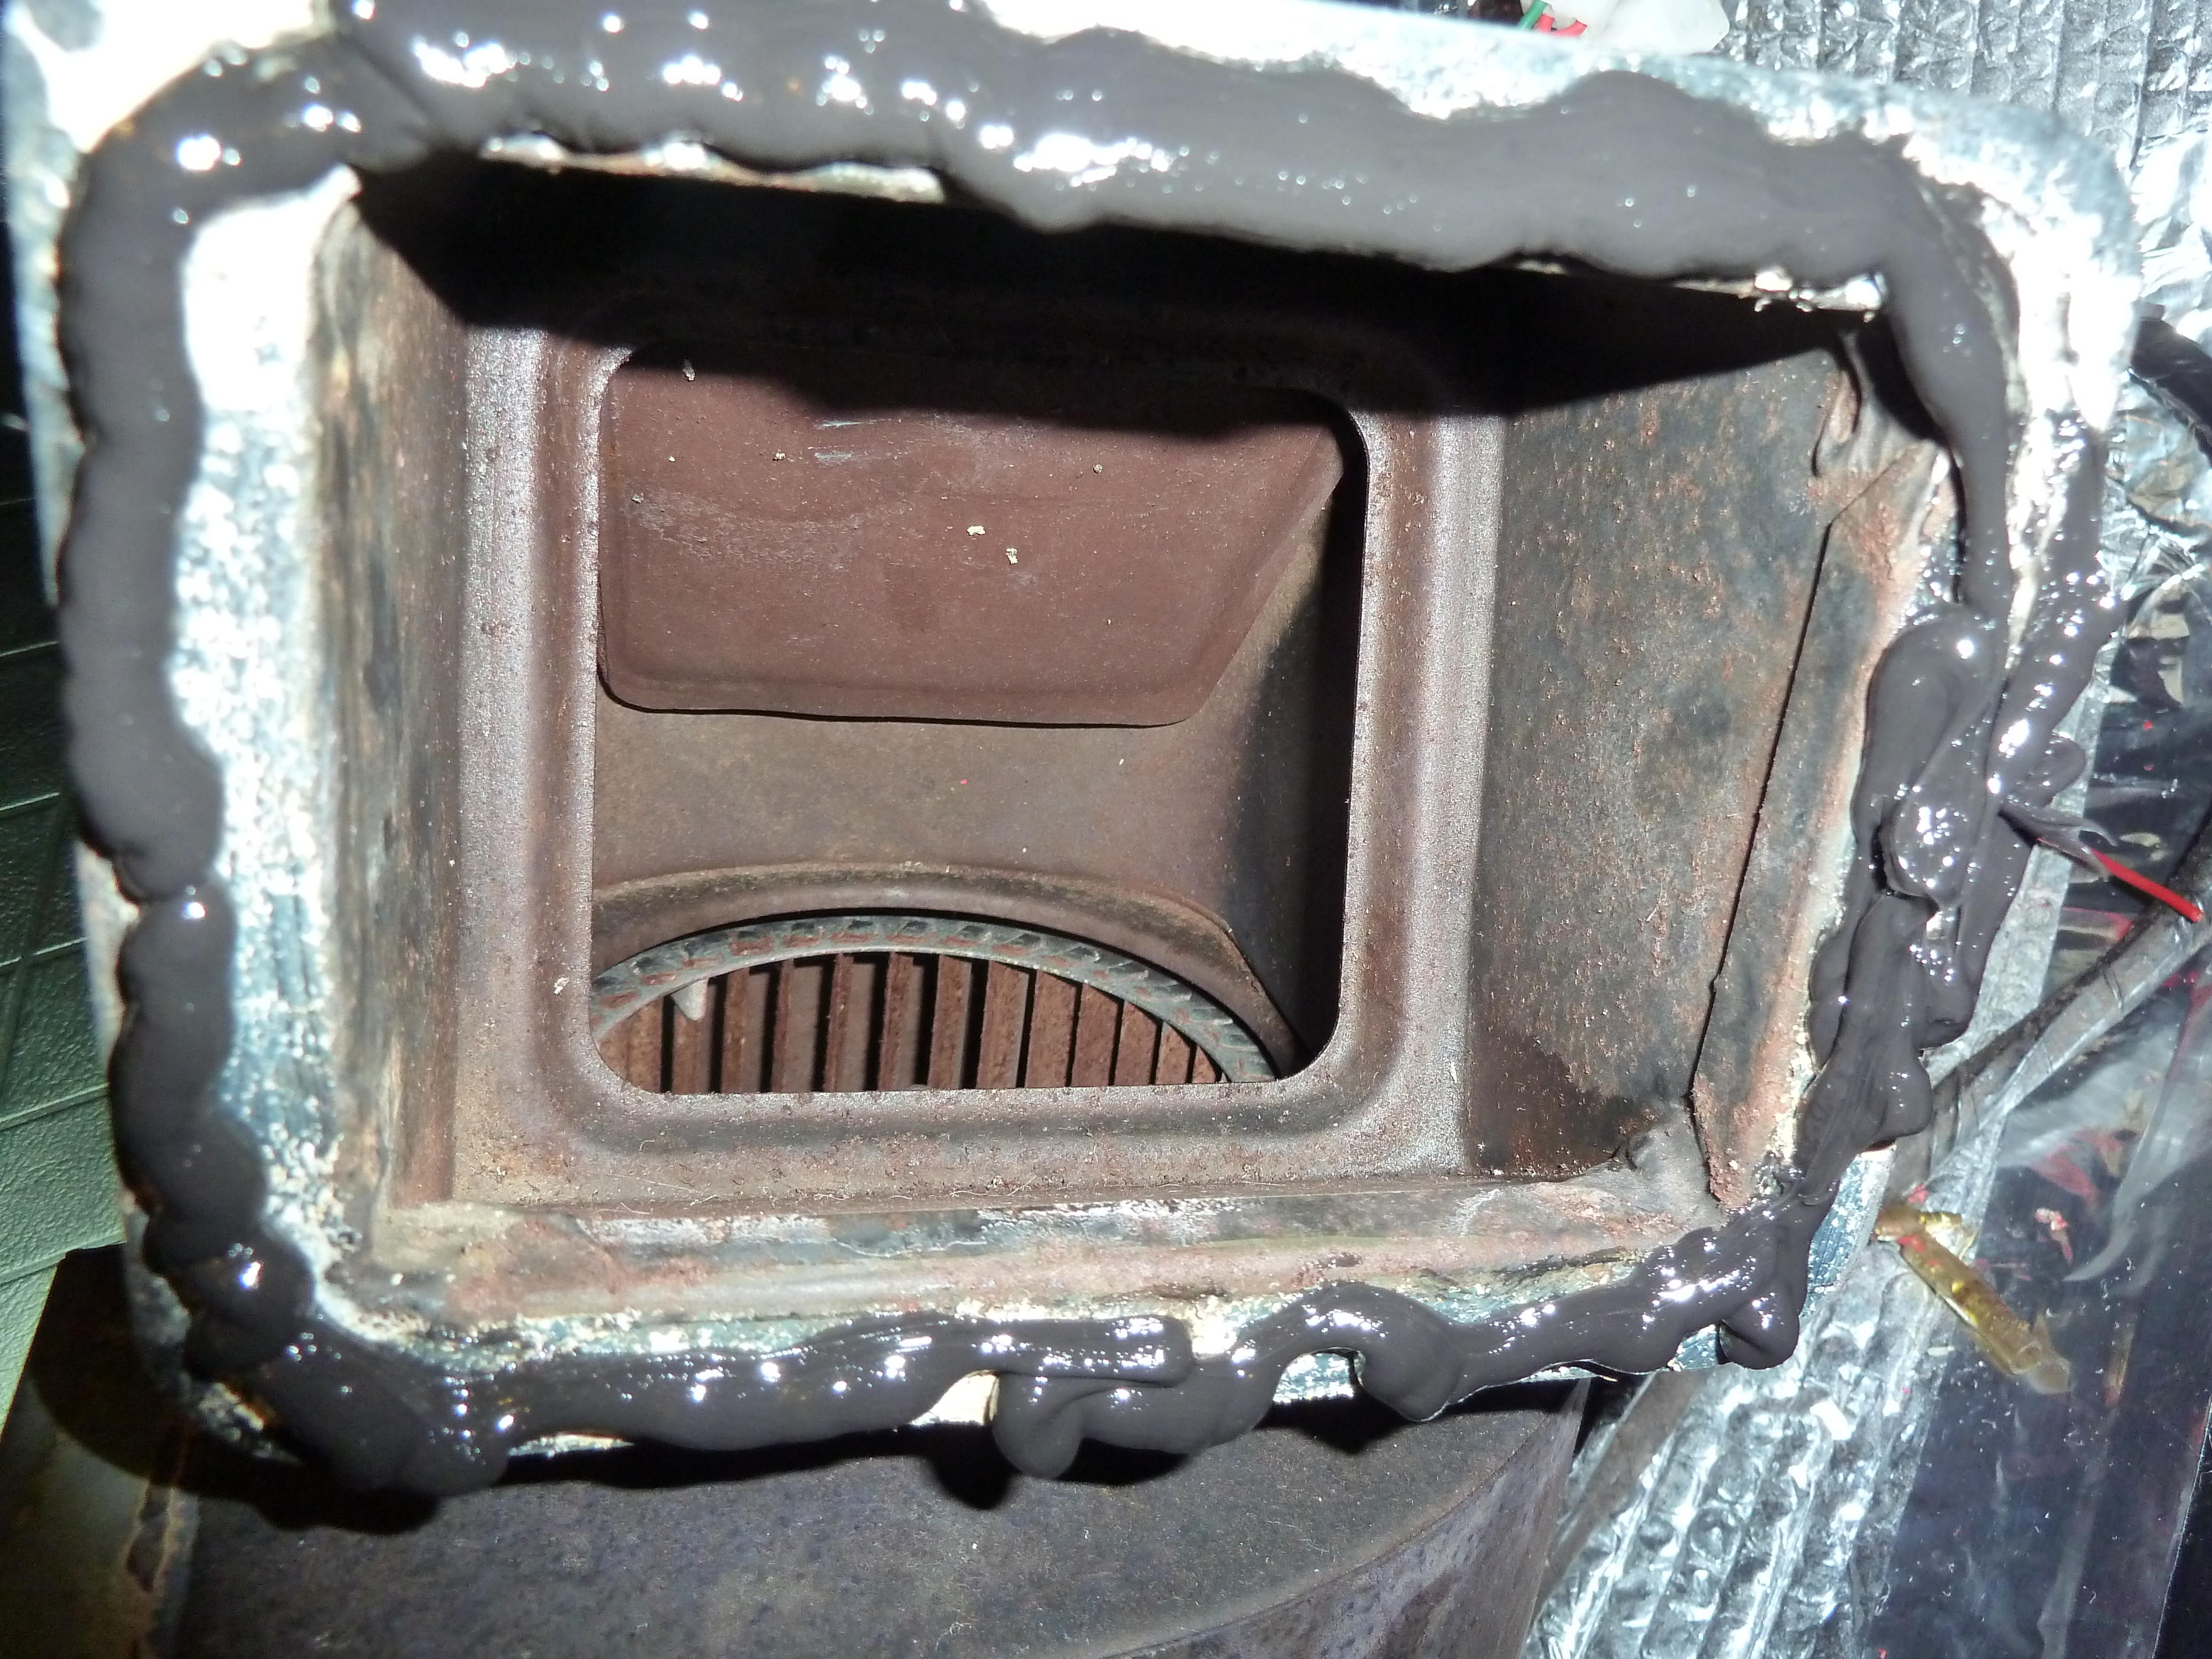
Overview of control cable routing (correct me if I am wrong, I never decoded this stuff before). 1) the top slider controls two flaps (red) -a fresh/recirculate flap in the fan box -a direction flap in the middle assembly (routes air from fan towards vents in dash or through heater core towards floor and windshield defrost) This flap can completely close off air flow through heater core. 2) the middle slider controls the hot water valve (blue) 3) the bottom cable controls the foot area doors (green) - when the air is routed through the heater core with the top slider, it then routes to the windshield and foot area; this slider can close off the foot area and force all hot air to the windshield Controls as viewed from fire wall Water Hoses, core and control wire: Flap that closes off air flow through heater core and middle control wire 1 of 2: Flap that closes off fresh air at glove box (control wire 2 of 2 not shown) Floor Door flaps, internal linkage to other door, and control wire
The only time when "You broke it, you bought it." feels good.
Overview of control cable routing (correct me if I am wrong, I never decoded this stuff before). 1) the top slider controls two flaps (red) -a fresh/recirculate flap in the fan box -a direction flap in the middle assembly (routes air from fan towards vents in dash or through heater core towards floor and windshield defrost) This flap can completely close off air flow through heater core. 2) the middle slider controls the hot water valve (blue) 3) the bottom cable controls the foot area doors (green) - when the air is routed through the heater core with the top slider, it then routes to the windshield and foot area; this slider can close off the foot area and force all hot air to the windshield Controls as viewed from fire wall Water Hoses, core and control wire: Flap that closes off air flow through heater core and middle control wire 1 of 2: Flap that closes off fresh air at glove box (control wire 2 of 2 not shown) Floor Door flaps, internal linkage to other door, and control wire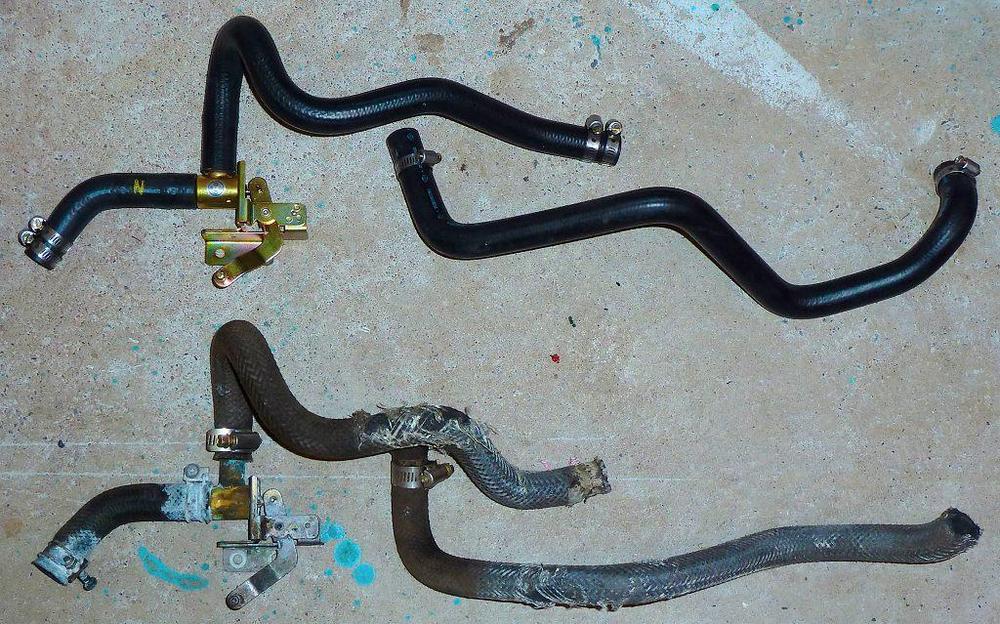


 More good pictures here: 1971 S30 Chassis Supplement V1.pdf Mother lode: http://240260280.com/Docs/
 3 amigos!
Here is a 1973 240z heater supplement. 1973 s30 heater supplement.pdf
For all of Alan's Alan-isims, you have to love and respect him. He is a great resource and shares a lot of interesting information that few in the world have. We are a band of brothers and sisters here..... life is too short to waste time bickering. Just look for someone's good points and life will be better for all....
Cylinder #1 looks close enough to TDC in top picture above. Here are steps: 1. Install sealant at junction of block and timing cover 2. Ensure valve alignment matches head is at TDC. 3. Install head gasket and head. 4. Torque head bolts correctly. 5. Remove cam sprocket. 6. Fit chain on cam sprocket 7. Install cam sprocket (don't torque cam nose bolt yet) 8. verify timing marks on crack pulley and on cam sprocket. 9. If timing marks are off a little: Turn cam a little so that the crank pulley timing mark is aligned then note how many teeth the cam sprocket is off. 10. Remove cam sprocket and adjust to match the correct teeth. 11. repeat 6 to 10 until aligned. (You can use sprocket settings 1,2,or 3 to optimize cam advance). 12. Torque cam sprocket 13. Remove timing chain tensioner tool.
3 amigos!
Here is a 1973 240z heater supplement. 1973 s30 heater supplement.pdf
For all of Alan's Alan-isims, you have to love and respect him. He is a great resource and shares a lot of interesting information that few in the world have. We are a band of brothers and sisters here..... life is too short to waste time bickering. Just look for someone's good points and life will be better for all....
Cylinder #1 looks close enough to TDC in top picture above. Here are steps: 1. Install sealant at junction of block and timing cover 2. Ensure valve alignment matches head is at TDC. 3. Install head gasket and head. 4. Torque head bolts correctly. 5. Remove cam sprocket. 6. Fit chain on cam sprocket 7. Install cam sprocket (don't torque cam nose bolt yet) 8. verify timing marks on crack pulley and on cam sprocket. 9. If timing marks are off a little: Turn cam a little so that the crank pulley timing mark is aligned then note how many teeth the cam sprocket is off. 10. Remove cam sprocket and adjust to match the correct teeth. 11. repeat 6 to 10 until aligned. (You can use sprocket settings 1,2,or 3 to optimize cam advance). 12. Torque cam sprocket 13. Remove timing chain tensioner tool.


Important Information
By using this site, you agree to our Privacy Policy and Guidelines. We have placed cookies on your device to help make this website better. You can adjust your cookie settings, otherwise we'll assume you're okay to continue.