Dave WM
Free Member
-
Joined
-
Last visited
Everything posted by Dave WM
-
 Rad is done, picking that up today, Now I just have to wait for the parts to come in. I think I will go out on a limb and suggest to everyone, REPLACE the timing chain guide if you don't know the history. This assumes the chain is ok, replace the guide anyway. One more thing CLEAN the tensioner. Its the only active part of the whole system, seems like a good thing to make sure its not hung up. I am adding this to the list of all things to do on a Z. 1st water pump now chain guide. It seems the L28 is pretty bullet proof, but don't want to skimp on those two things.
 -
I am all set for the chain, got the TDC checked, found the two bright links on my existing setup, on over the #1 on the cam sprocket the other over the dimple on the crank sprocket (3 o clock). I confirmed my TDC with a dial indicator held in the #1 hole while I cranked on the crank bolt put back in the crankshaft. I was reading the Datsun book, I see they recommend some gasket sealant around the water holes on the block to cover, I assume the rest is not the much of an issue. I was going to do that around the oil holes to and from the pump as well. I spent quite a bit of time trying to get as much of the old gasket scraped off, one of the advantages I suppose of not having parts is I tend to spend more time prepping and cleaning. The v notch was directly over the timing mark on the camshaft retainer, so I assume my OE chain was no stretched at all, but after seeing all that gouging I made me worry hence the new chain. That and the fact that I don't really know what went wrong so replace it all...
-
ok popped for the OSK kit from a local supplier, good price too! Not much more than the Oreily kit was going to be. If I am going to make my trip to Alaska via the Yukon, I need Dat Boi it top shape.
-
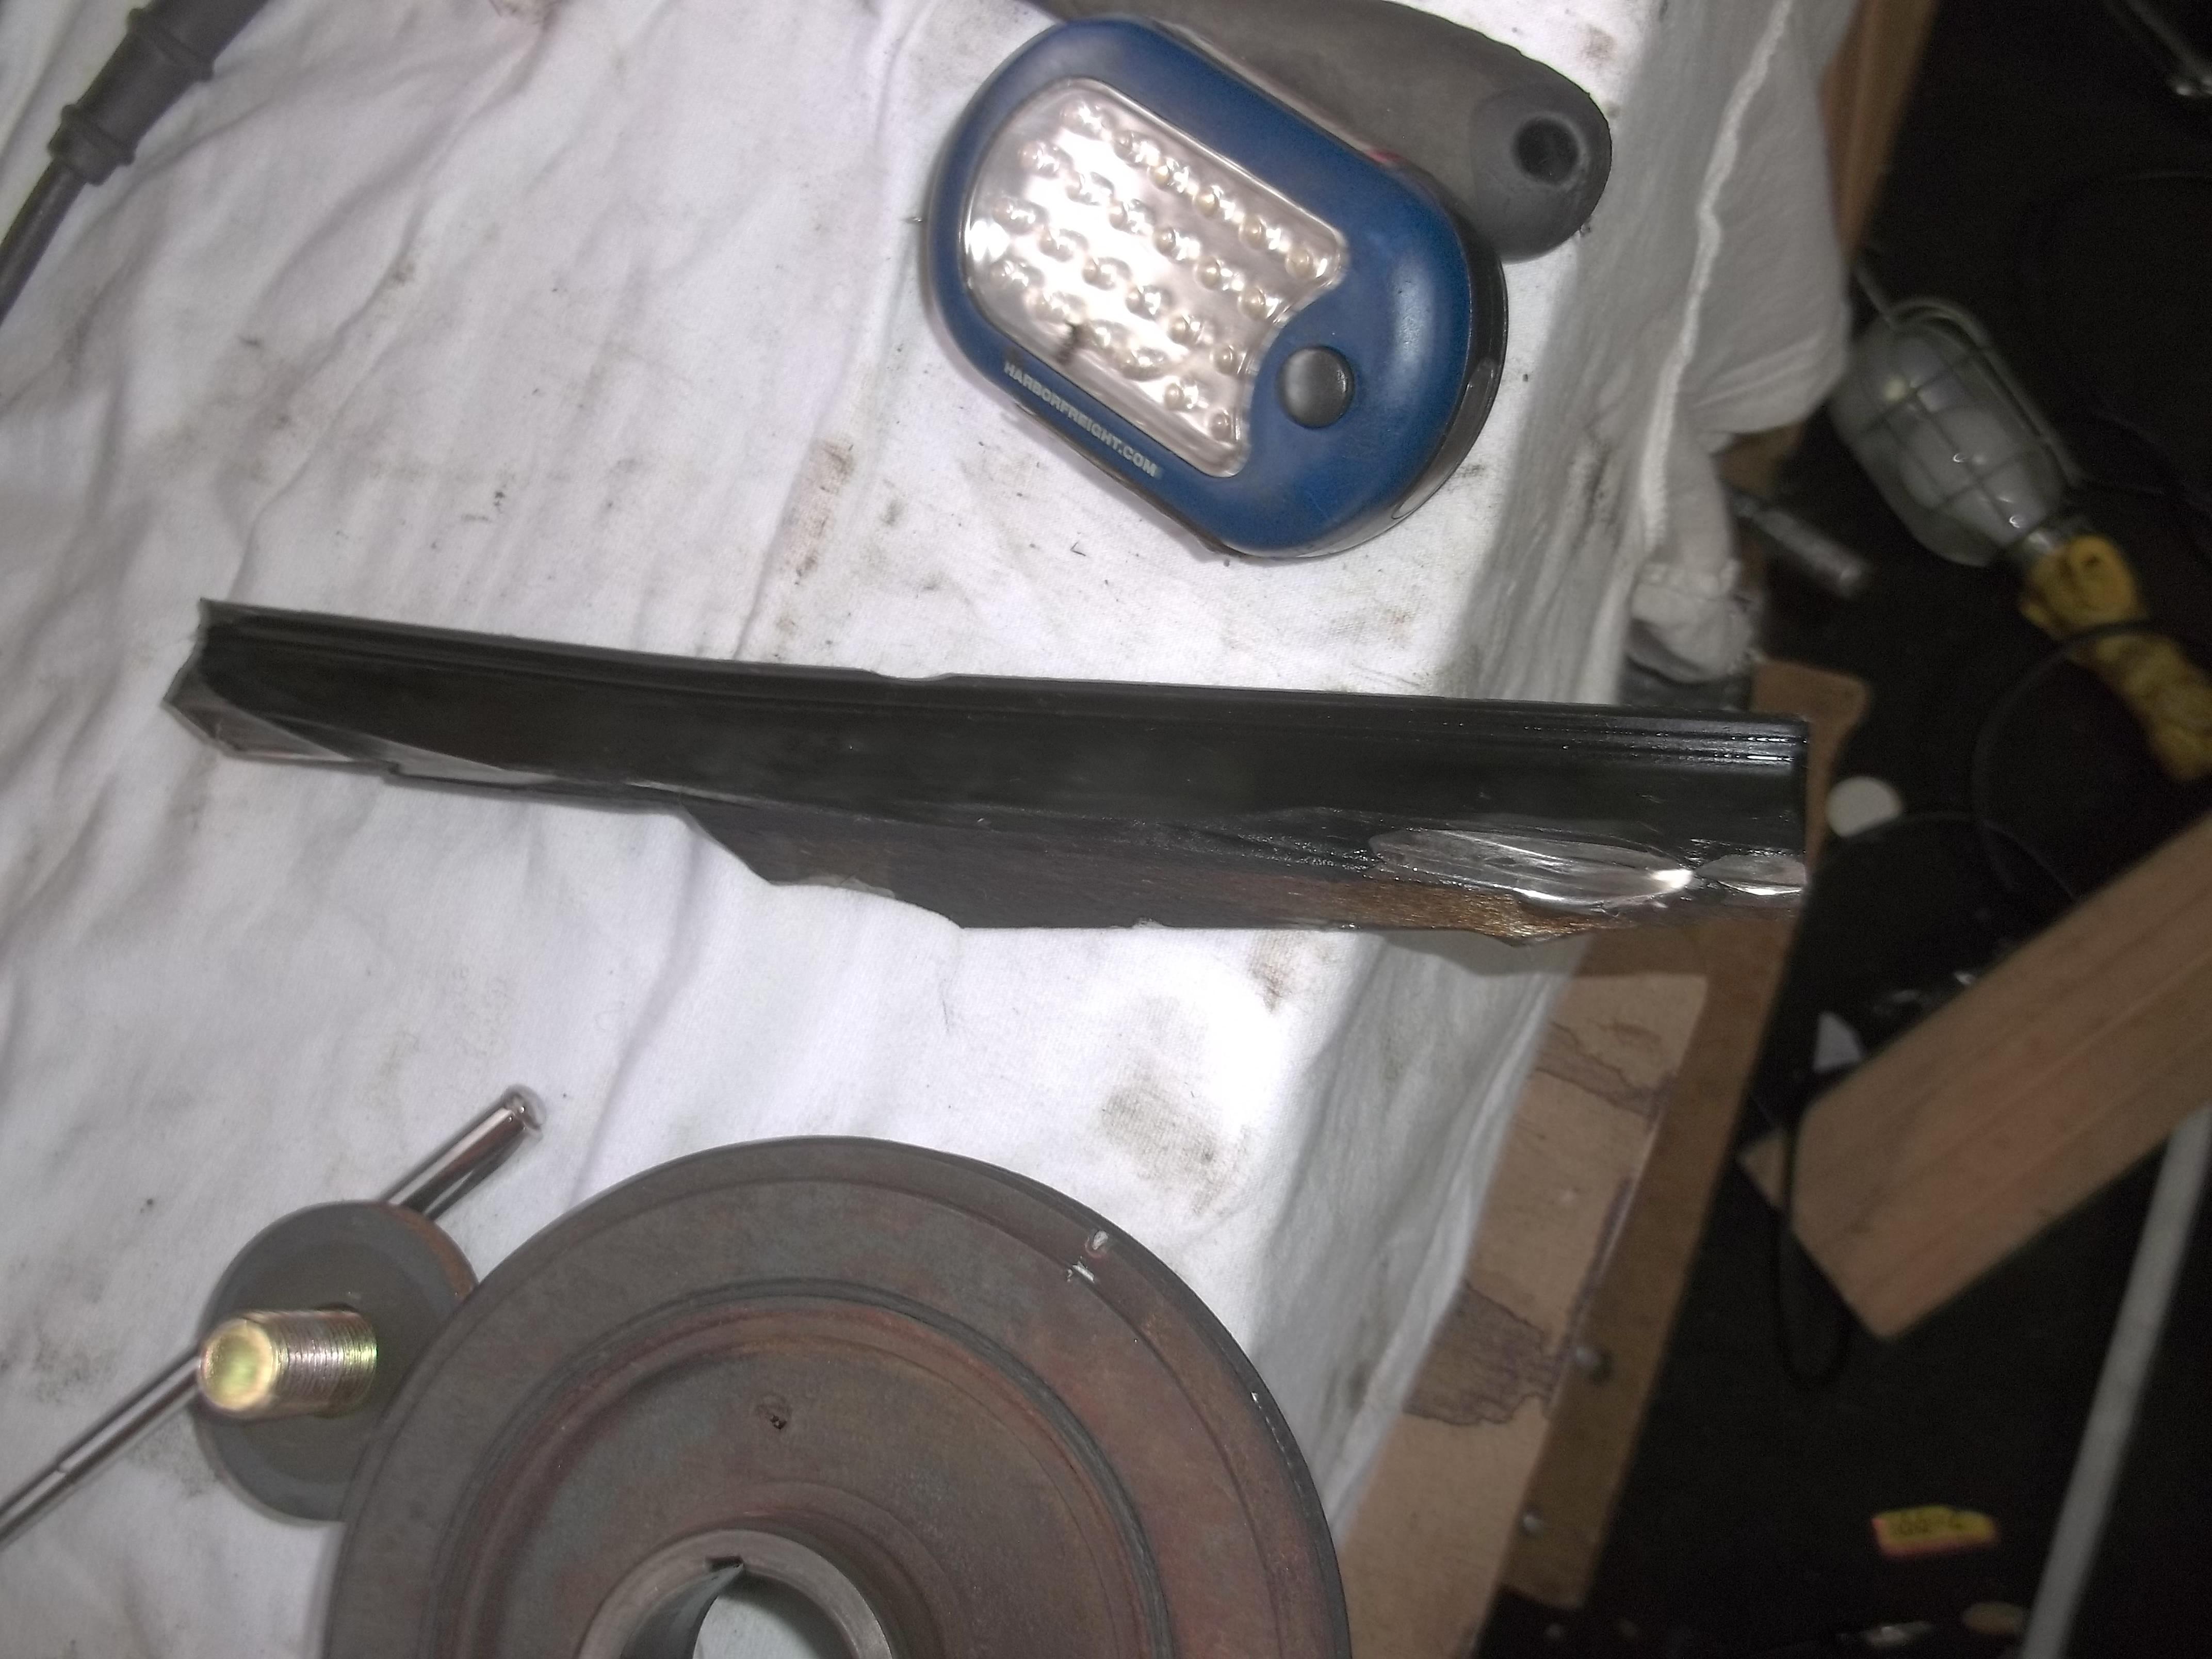
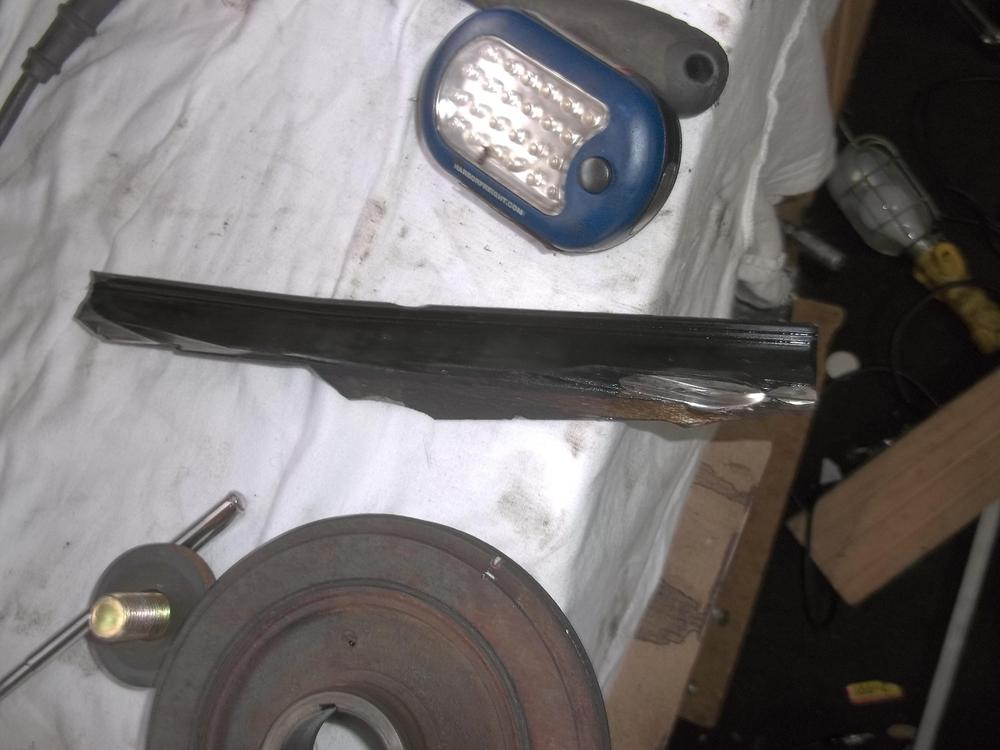
Or maybe it just wore thru the plastic part, the chain starts beating on the metal to a point where it grabs the very top (see how its kinda peeled down in the pic) and whamo!
-
Maybe the non stop running could have somehow created vibration enough to fatigue the metal? oh more info, no overheating at all, good oil pressure the whole trip. Never let it run low on oil, burns about 1Q every 1000 miles, I would top up the oil at every fill up (approx. 300 miles) adding a few oz of oil each time.
-
Never experienced any bucking or backfiring or any other odd running of the engine. And all this happened AFTER a 3600 mile nearly non stop but for some few hour rest stops.
-
I double checked the V notch and all looks right for #1 at TDC setting so it would seem the chain is not stretched.
-
I don't see how the chain can become loose on the tight side. So unless somehow the tensioner can effect the tight side, the only thing I can think of is if the tensioner got hung up. let the chain run loose, it somehow snags the guide. Of course that presupposed the tight side can somehow become loose.
-
oh and the chain looks perfect to. so odd.
-
Will stop by oreily tomorrow and take a look at what the have. Spent some time cleaning off the old paper gasket from the block, stuffed some paper towels material in the pump holes of the block to keep any trash from getting in there. Degreasing the cover now, just to make it less of a mess to handle, will make sure to scrape the paper gasket off of it as well (care not to gouge the aluminum). No evidence of any damage to the cover on the inside.
-
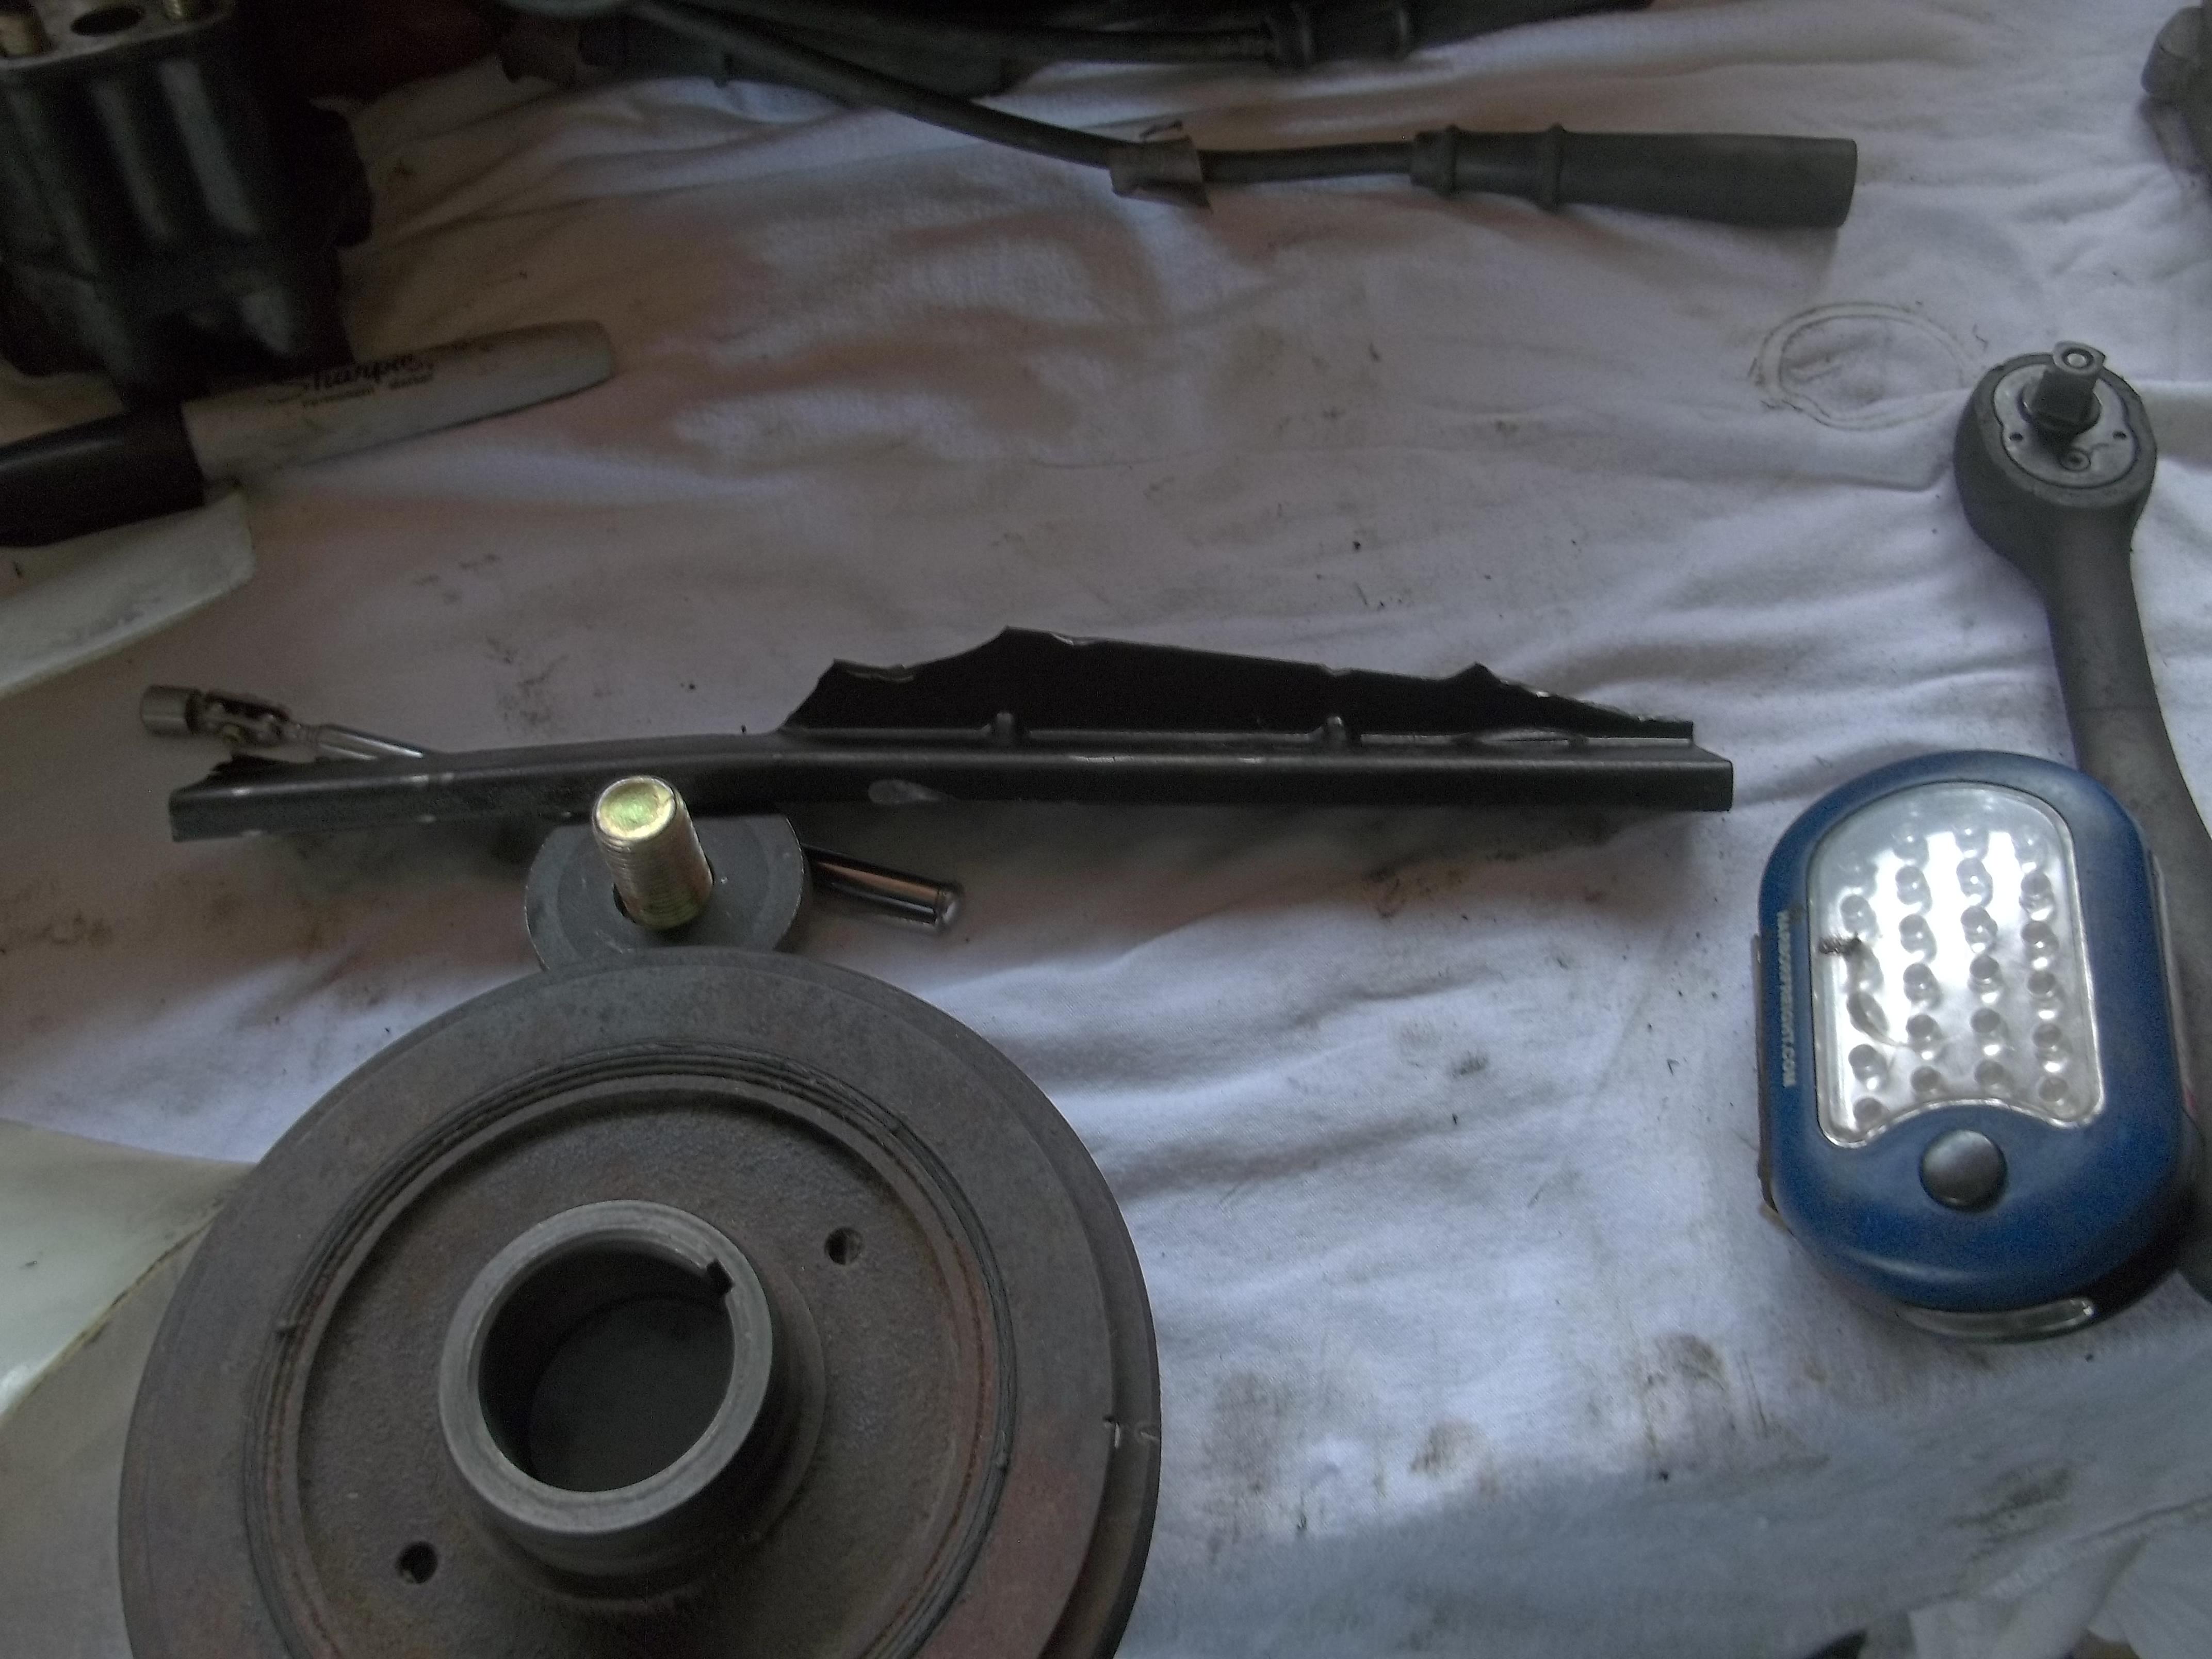
tensioner was still in, the bolts that hold on the guide were still in and tight. Mystery.
-
ok I can pick up the kit from oreilly tomorrow at 11:00, think I will go check it out and if seems good quality go that route. Somewhere I read that some kits do NOT have the V cut for setting timing, clearly I want that.
-
or this https://www.ebay.com/itm/Datsun-1975-83-280Z-280ZX-L28-L28E-Timing-Chain-Set-Kit-Japan-NEW-1792/323877232158?_trkparms=aid%3D111001%26algo%3DREC.SEED%26ao%3D1%26asc%3D40719%26meid%3Dea1fc267270e4d0b94088a6d447a7a76%26pid%3D100675%26rk%3D1%26rkt%3D15%26sd%3D323877232158%26itm%3D323877232158%26pmt%3D0%26noa%3D1%26pg%3D2481888&_trksid=p2481888.c100675.m4236&_trkparms=pageci%3A78c99905-e211-11e9-8754-74dbd1801ea2|parentrq%3A78d107a116d0abd9a7dbde50ff770b1a|iid%3A1
-
maybe order this? https://www.oreillyauto.com/detail/b/cloyes-3218/engine-parts---mounts-16774/timing-parts-16584/timing-set-16863/timing-chain-set-12195/9438d0f2adb0/cloyes-timing-chain-kit/94134sa/2624741/1980/nissan/280zx?q=timing+chain+set&pos=0
-
-
Not really sure why It failed, looked like the top mount just fractured, but I cant see how that could happen. Maybe just metal fatigue? not a materials expert here. I did nothing around the timing chain for the T stat housing recently, and the problem seemed to happen at least 3000 miles into the trip. I have good oil pressure (3/4 of the 90 psi gauge at 3k), so I assume the tensioner was working well, but if for some reason it did not apply enough tension could that allow the chain to whip and maybe cause a cascade failure? just wondering if anyone has seen a fail like in the photo.
-
It was a lot of fun, good way to see the USA. I would do it again tomorrow, in fact one of the trips I want to take is up thru the Yukon to Alaska.
-
here you go, posting up a video soon. I was planning to just replace the broken piece, but since I don't know what happened, maybe I should pop for the whole setup. I see there is the cheap one and then the japan ones on the Z stores.

-
its about 3 years old, I will prob replace it since I have a new one. the old one has just the tinyest about of radial play. I could see some evidence of weeping from the bottom hole.
-
I am a little concerned about the water dripping out around the water pump, when I pull the timing cover off am I going to get a bunch of water coming out of the block flowing down into the pan? I have hand spun the water pump and was able to get a few oz of water to come out of the water inlet. I am going to go pull the dizzy and confirm my tang position (11:30), then will get the oil pump and pan bolts tomorrow. all the TC bolts are loose, no issues.
-
happy happy joy joy, I unbolted the compressor completely from the mount (easy) the mount I removed 3 of the 4 bolts that go to the block the hardest one to get at I just unscrewed as much as I thought safe to still have some threads in. It would be a pita to get started if I had to take it out, its kinda hard to reach and is very close the compressor (you can only move the compressor about 1" even unbolted due to the lines still attached). With everything pulled up and away I was able to get a clean shot a the 2 10mm cover bolts that were covered by the mount. I loosened those as well as the long water pump 10mm (just wanted it to come out without breaking). So I think its down hill from here (famous last words). giving it a break now will resume in the morning. I took the rad to the shop (prater radiator in Orlando, been there forever, guy recognized the rad as a Nissan instantly). I asked them to look it over, rod it out or replace the core if it looks suspect. I would say I had about 20% blockage in the tubes that I could see right in the middle top. The car did not leak at all and was able to maintain temps of no more than about 185f but I just wanted peace of mind, besides I think the rad was right at its max limit, I have a 165 f t stat that it will hold to on all but the hottest days, then it just runs up to about mid or a little past mid, so the T stat is no longer controlling the temp, the rad is. Hoping the unblocking will allow the T stat to control temps even on hot days with AC on max (have some head room on the rad). I considered popping in Jeffs alum rad from the test stand to see how well it works, but I would rather stick with a brass/copper if I can. Something about cheap alum rads I just don't trust. I know there are some very good high end ones, but they don't seem setup for stock installs, AC/shrouds etc....
-
oh my, compressor looks to be in the way of two of the timing cover belts. I hope I can loosen/pull etc and get enough room to get to them without messing up the pluming of the compressor. Its a HUGE SWP style with a massive mount that looks like it may be a bi%%h to get loose.
-
so far... Remove fan and pulley removed AFM and air filter to get at top rad bolt driver side (make for more room and easy to do). drain rad, remove bolts pull rad set aside, hoses attached. loosen and remove compressor belt and alt belt. Now the fun, no room for impact driver (AC condenser in the way) so 4th gear, jam the drive shaft at the diff with a large screw driver to hold the engine (I tried just using the ebrake and some wheel chalks, no joy) then a 1/2" breaker bar and pipe as an extension, bingo came right off. 3 Jaw puller to extract the harmonic damper and pulley on the crank (easy with that). Break time. coming attractions: Clean up work area org parts and bolts then... alt comes off distributer comes off Oil pump comes off then I will attend to all the bolts that attach the cover. have to pace myself as its still VERY hot here and I don't want to do anything stupid so will take time (like when I forgot to tighten the rear brake line). Parts coming in Monday so no big rush anyway.
-
copy that. I just took another look, if I back the cam shaft up a bit to get some slack I can get a slightly better view, I think I can see a top bolt still in place, not sure how that can be, unless some how the guide has separated from the mounting frame. even with the bore scope and flash light its hard to see what is going on, but its loose as a goose so will be the next project.
-
have impact gun, I used a 3 jaw puller on the pulley as well. I presume just remove the pan bolts on the front, maybe loosen the rest so it does not want to clamp, don't have to remove oil pan (unless I cant find the bolts, then will go fishing) will have to see where they ended up. I recall having to use a rubber mallet on the spare engine when I removed the cover on that one. The pan gasket is one of those reusable fancy ones from MSA. I cant find any OE tight side guides, so I guess I will go with an after market kit for both.