Matthew Abate
Free Member
-
Joined
-
Last visited
Everything posted by Matthew Abate
-
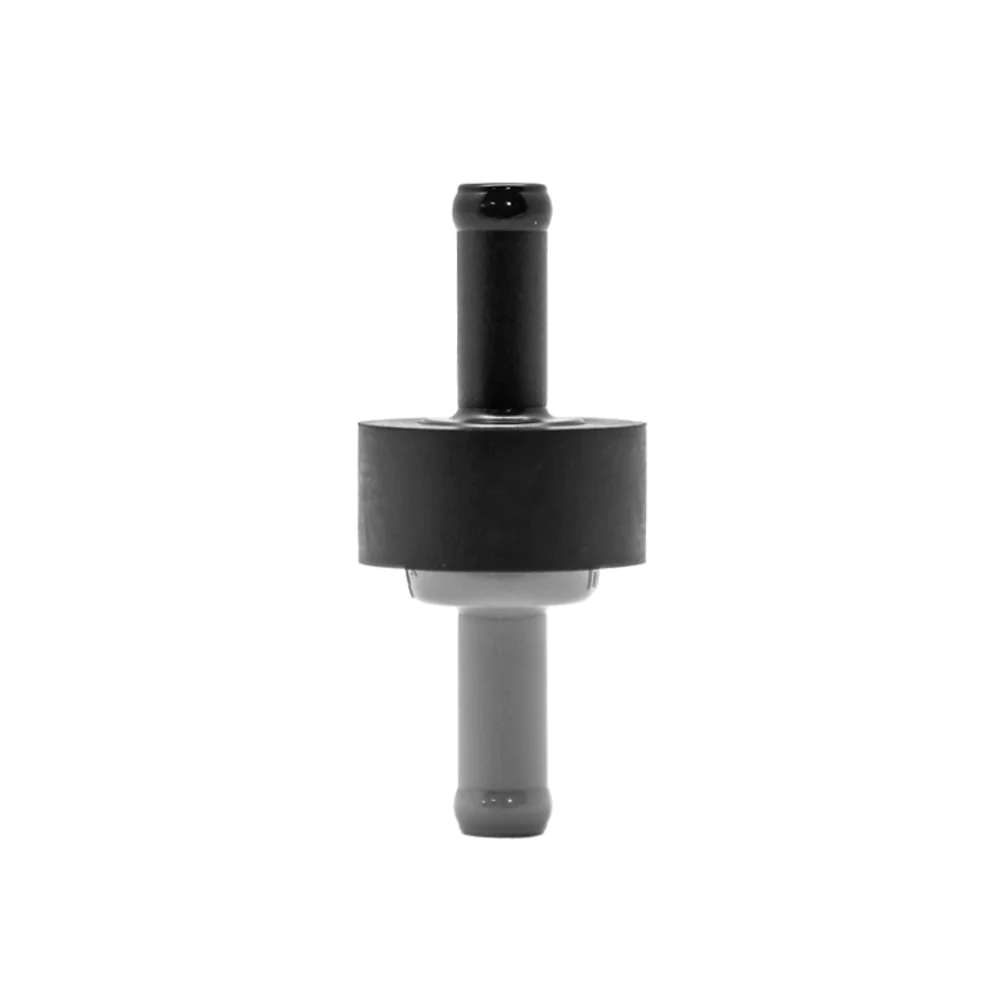
 Thanks for the info everyone! Okay, quick recap: 1. The silver check valve connecting two black hoses is for the brake booster vacuum. The black and gray one I have is also a brake booster vacuum check valve. The red ring is for the silver valve. I will test the silver one. If it works I’ll use it. 2. The 240 Z did not have a check valve in the vapor lines prior to (I think) 8/73. There is one on the brake booster, one on the smog system, and a flow valve on the left inner fender for vacuum lines. There IS one on the vapor line for cars that came with a charcoal canister (9/73?). I think there is also a fuel check valve between the fuel pump and the fuel rail on FE equipped cars. *** I think I will set up the fuel lines as they were OEM and investigate having one after the fuel pump somewhere (both placement and necessity).
 -
Oh jeeez. What a mess. Okay. I also have one of these in a box somewhere: I understood that to also be a brake booster check valve.
-
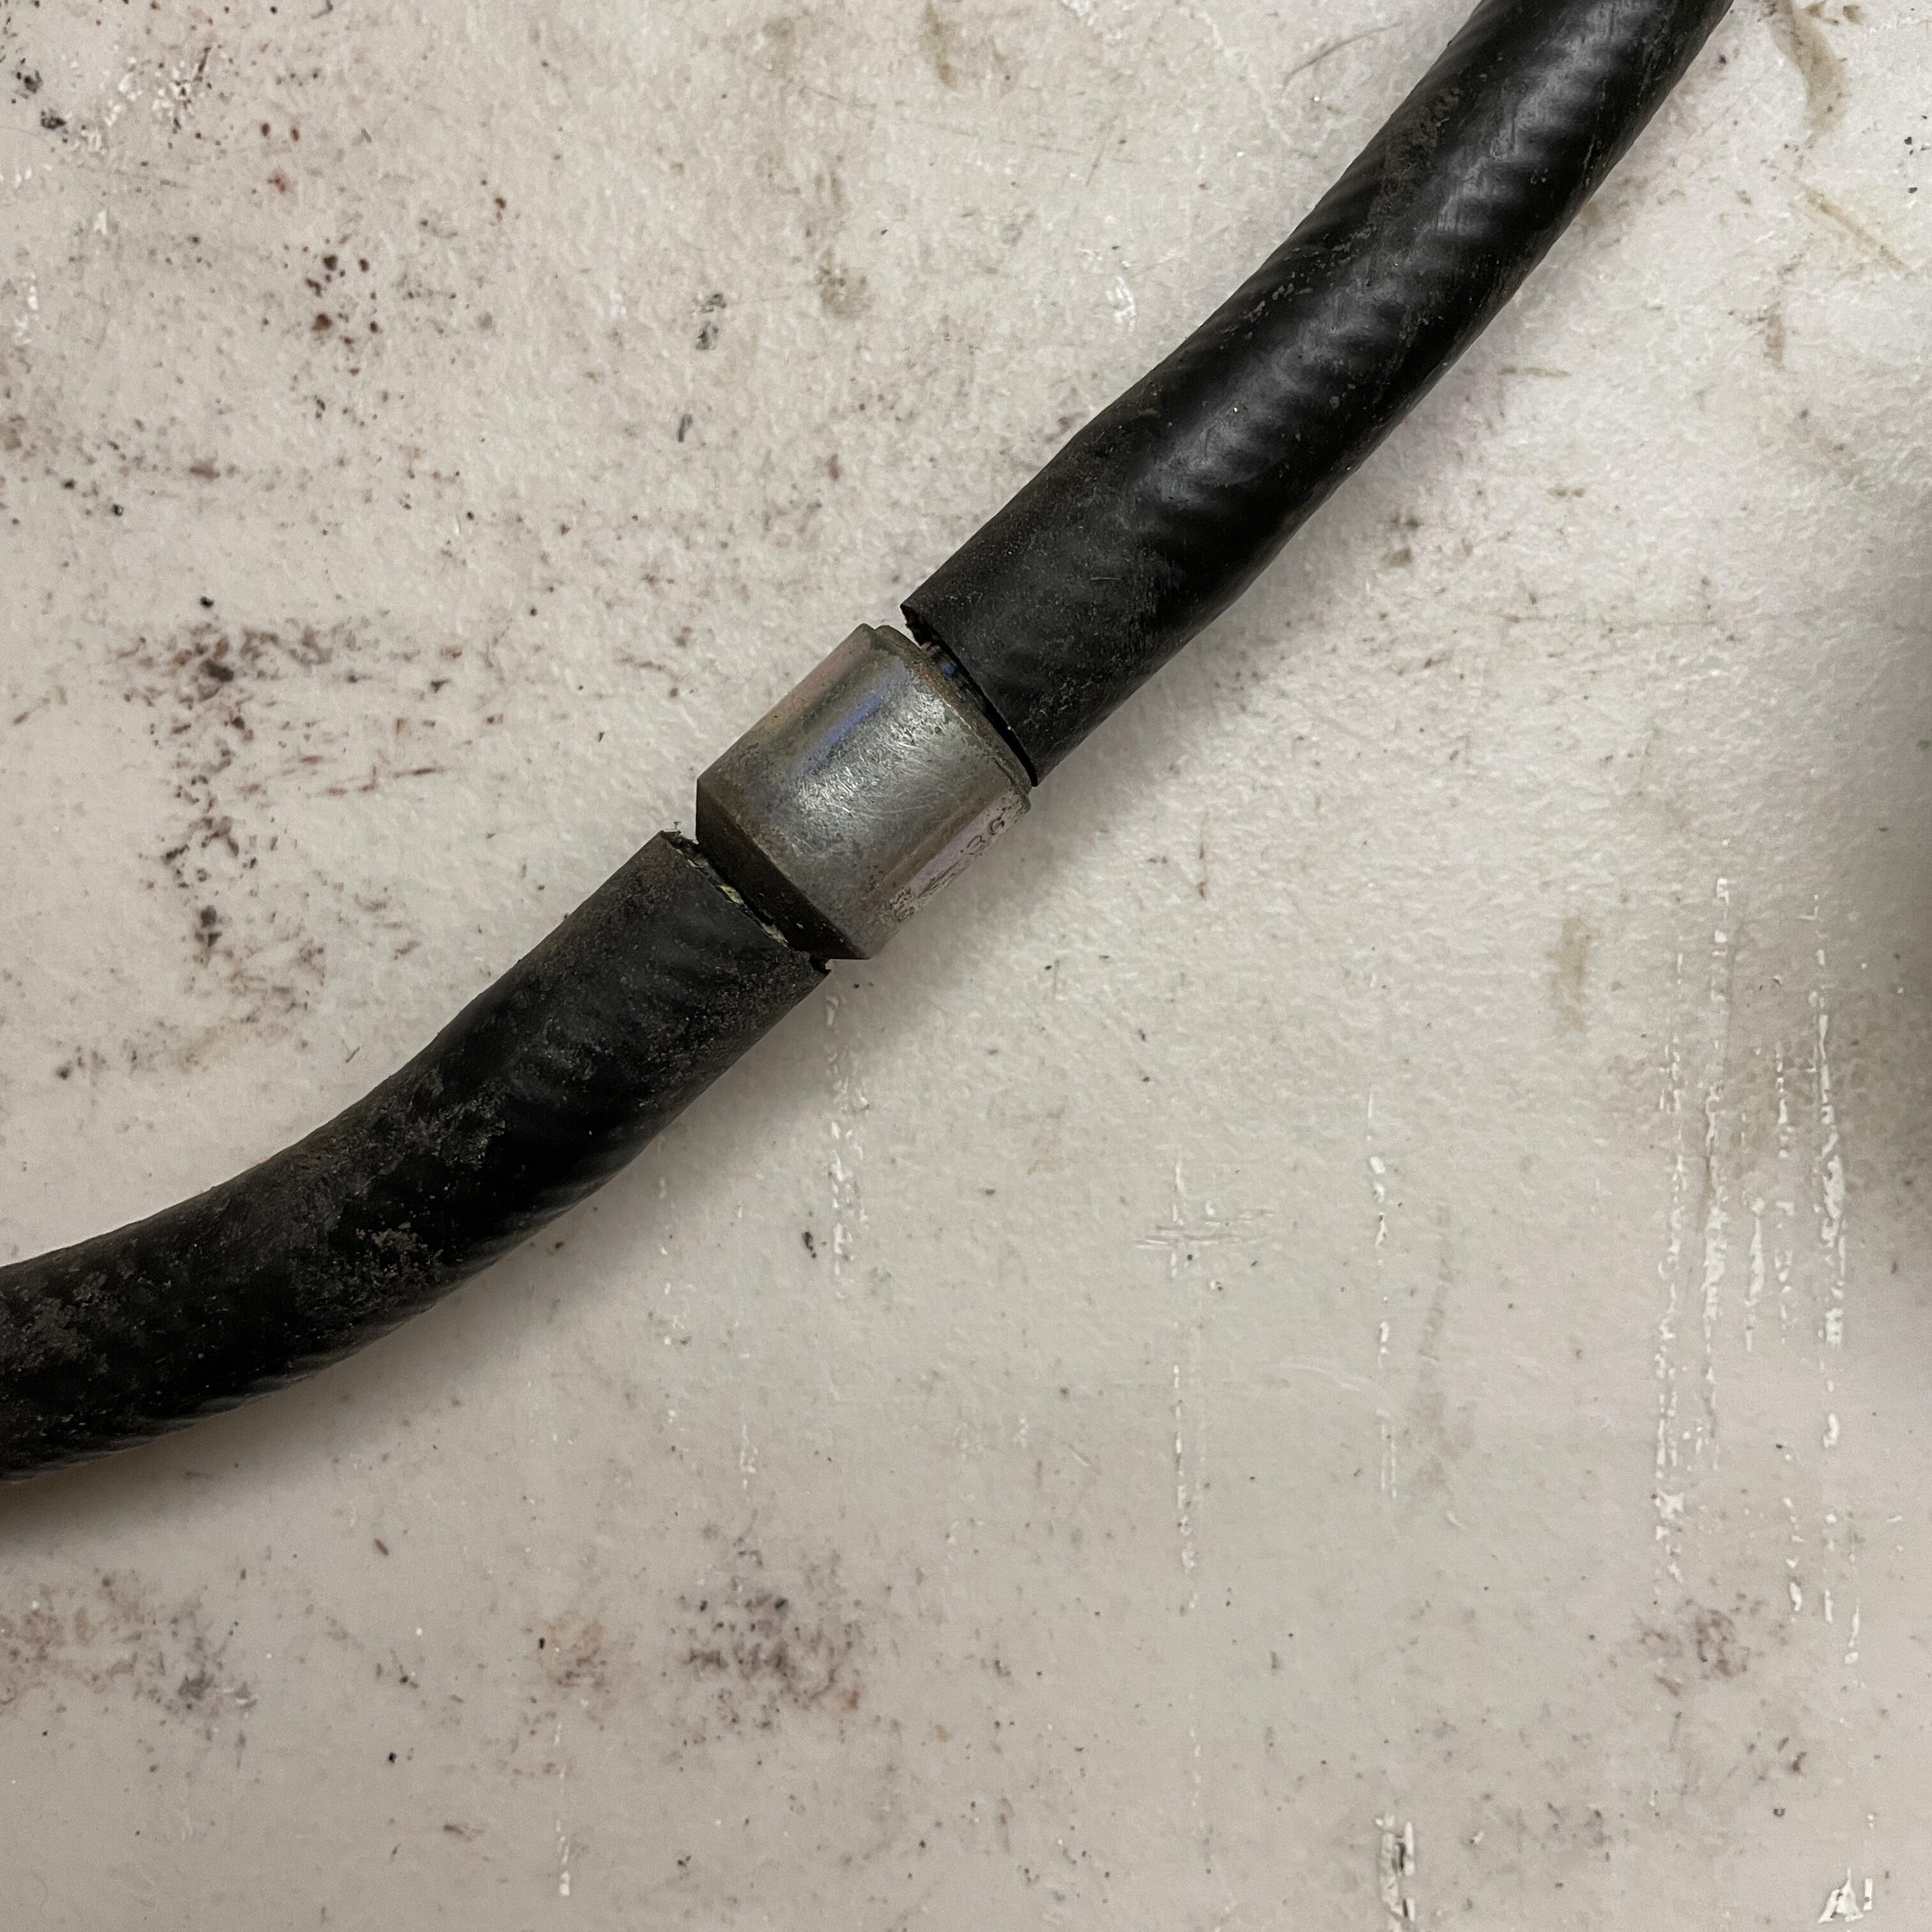
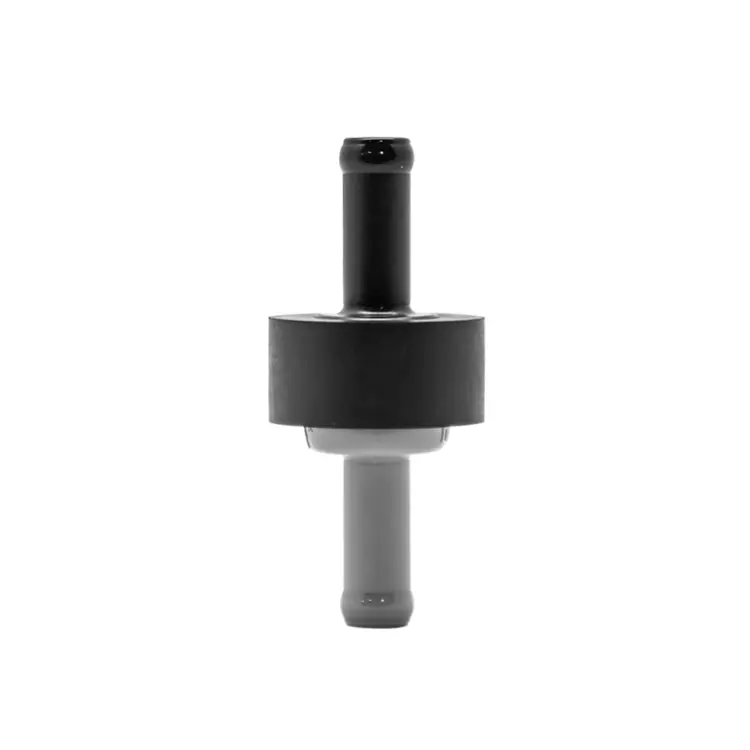
Here’s the fuel hose check valve that isn’t in the diagrams:

-
I will check that out and see if it fits. The interior diameter looks a little big compared to your photo, though. Speaking of check valves, one of the fuel hoses has one but I don’t see it in the diagram and it’s not listed in the parts for the fuel tank assembly. I am assuming it goes from the tank to the vapor canister and is supposed to prevent backflow but I’m not confident in that assumption. Any ideas? Any good places I might want to add an additional one?
-
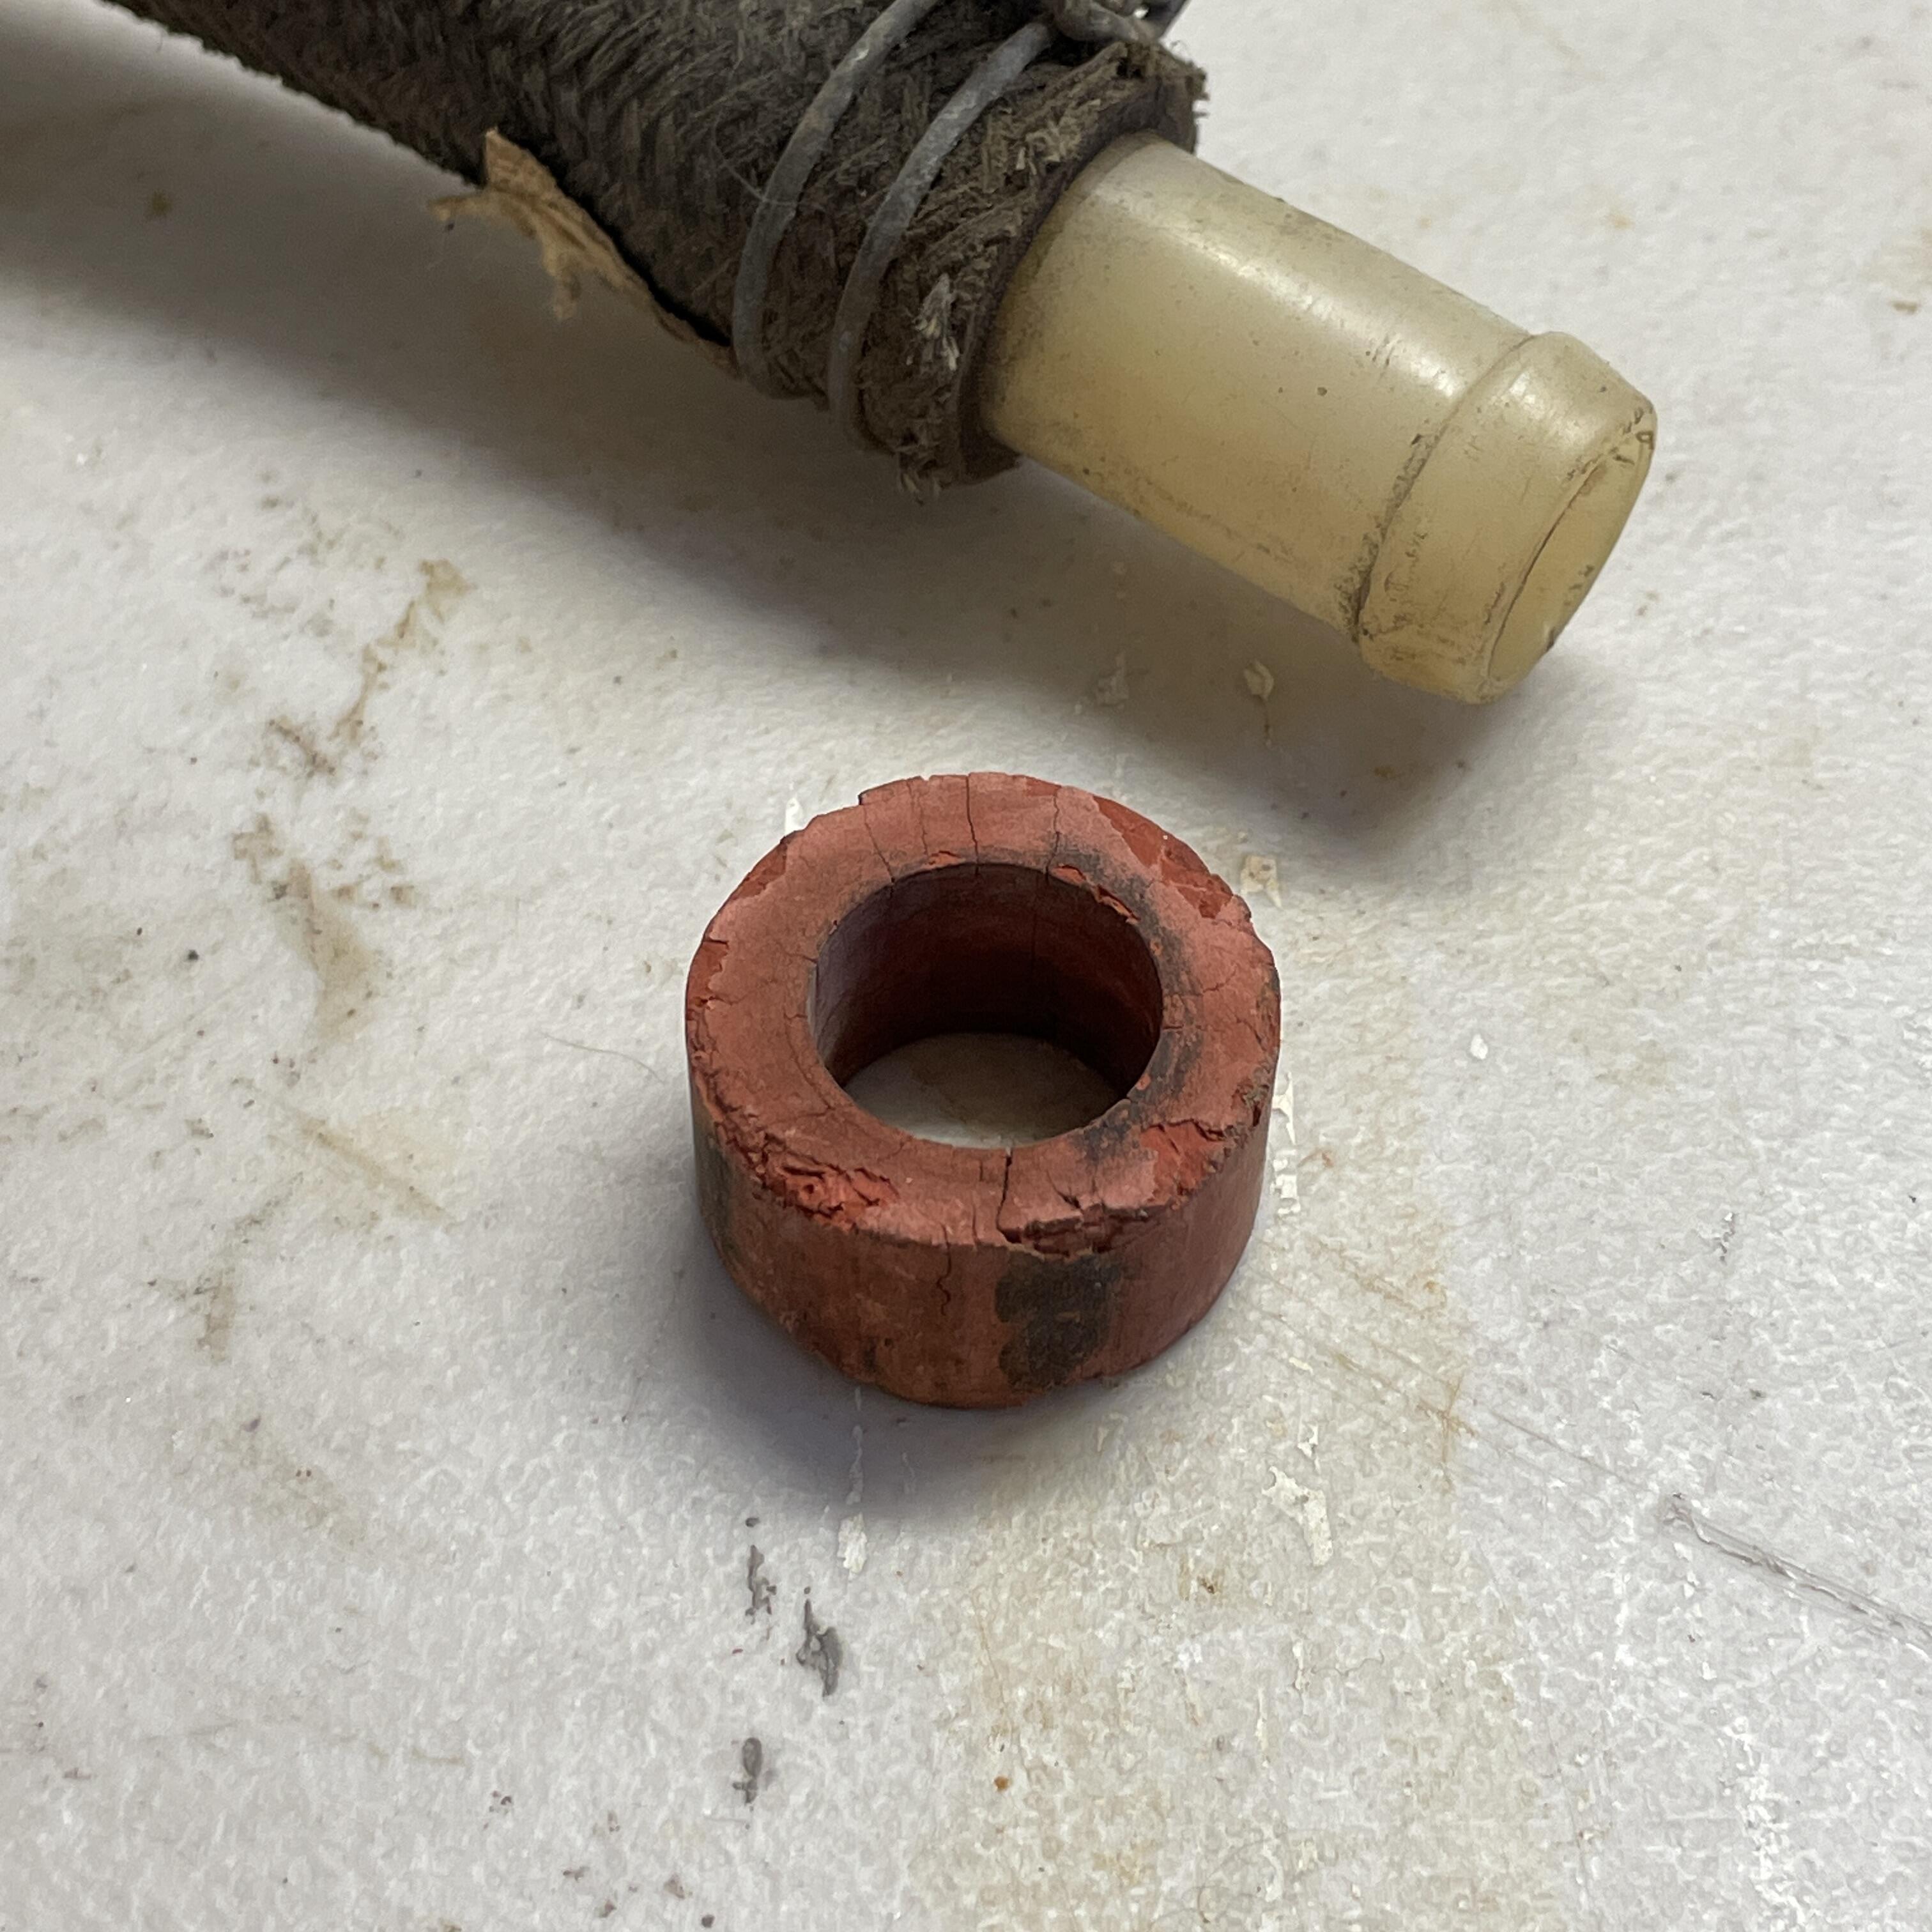
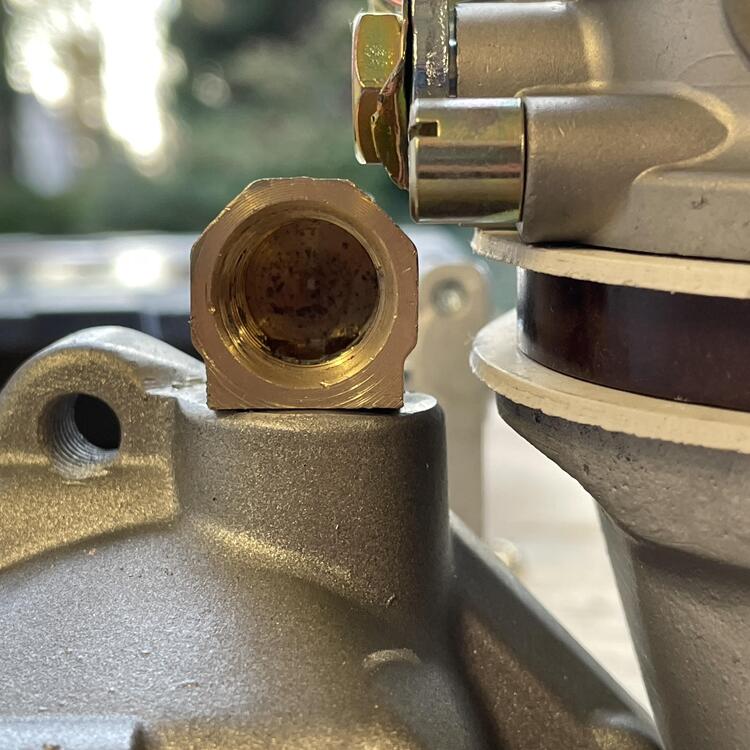
I found this red cylinder in the box with all of my old fuel hoses for the gas and vapor tanks. Anyone have any idea what this is? I don’t see it in the exploded diagram and a search yielded zilch. Is this just some random object the previous owner put in the box mistakenly, or is this some mystery part that I should replicate? (17mm hose with plastic barb for size reference)

-
Has anyone tried the AC hoses Godzilla Raceworks makes specifically for the Vintage Air evaporator? This looks like it might be the lowest cost option to complete the AC system’s refrigerant circuit. https://www.godzillaraceworks.com/hvac/datsuns30vintageairhoses I would really like to have stainless steel hardlines for the majority of my system, but I can’t rig weld OR silver braise, so it may not be possible for me to do myself. I was also looking into Aeroquip EZ-Clip connectors and narrow hose, but I’m unclear as to the reliability of that vs beadlock fittings. These Godzilla hoses will definitely be cheaper and I won’t have to buy tools. I just don’t know if they will route the way I would want them to if I did it myself.
-
Okay, that reinforces my assumptions. I think I will put the windshield in first also. I just think I need the space to work.
-
Question about the assembly sequence: Is it better to put the windshield in before or after the dashboard. It seems that putting it in first would be easier to get the windshield in, but also increase the likelihood of damaging it (and maybe the dash). But it also seems that it would be easier to install the dash with the windshield out. Which would you do first?
-
Very cool. I may copy that, but I also just confirmed that the hose would be further away from the headers if I ran it under them next to the block than it would if I route it under the carbs. Looks like a lot of the stuff I’ve bought to solve this has been a waste.
-
No, it’s just a scratch. It’s shiny if you look at it from a different angle. There are a few of those. Thanks for looking out, though.
-
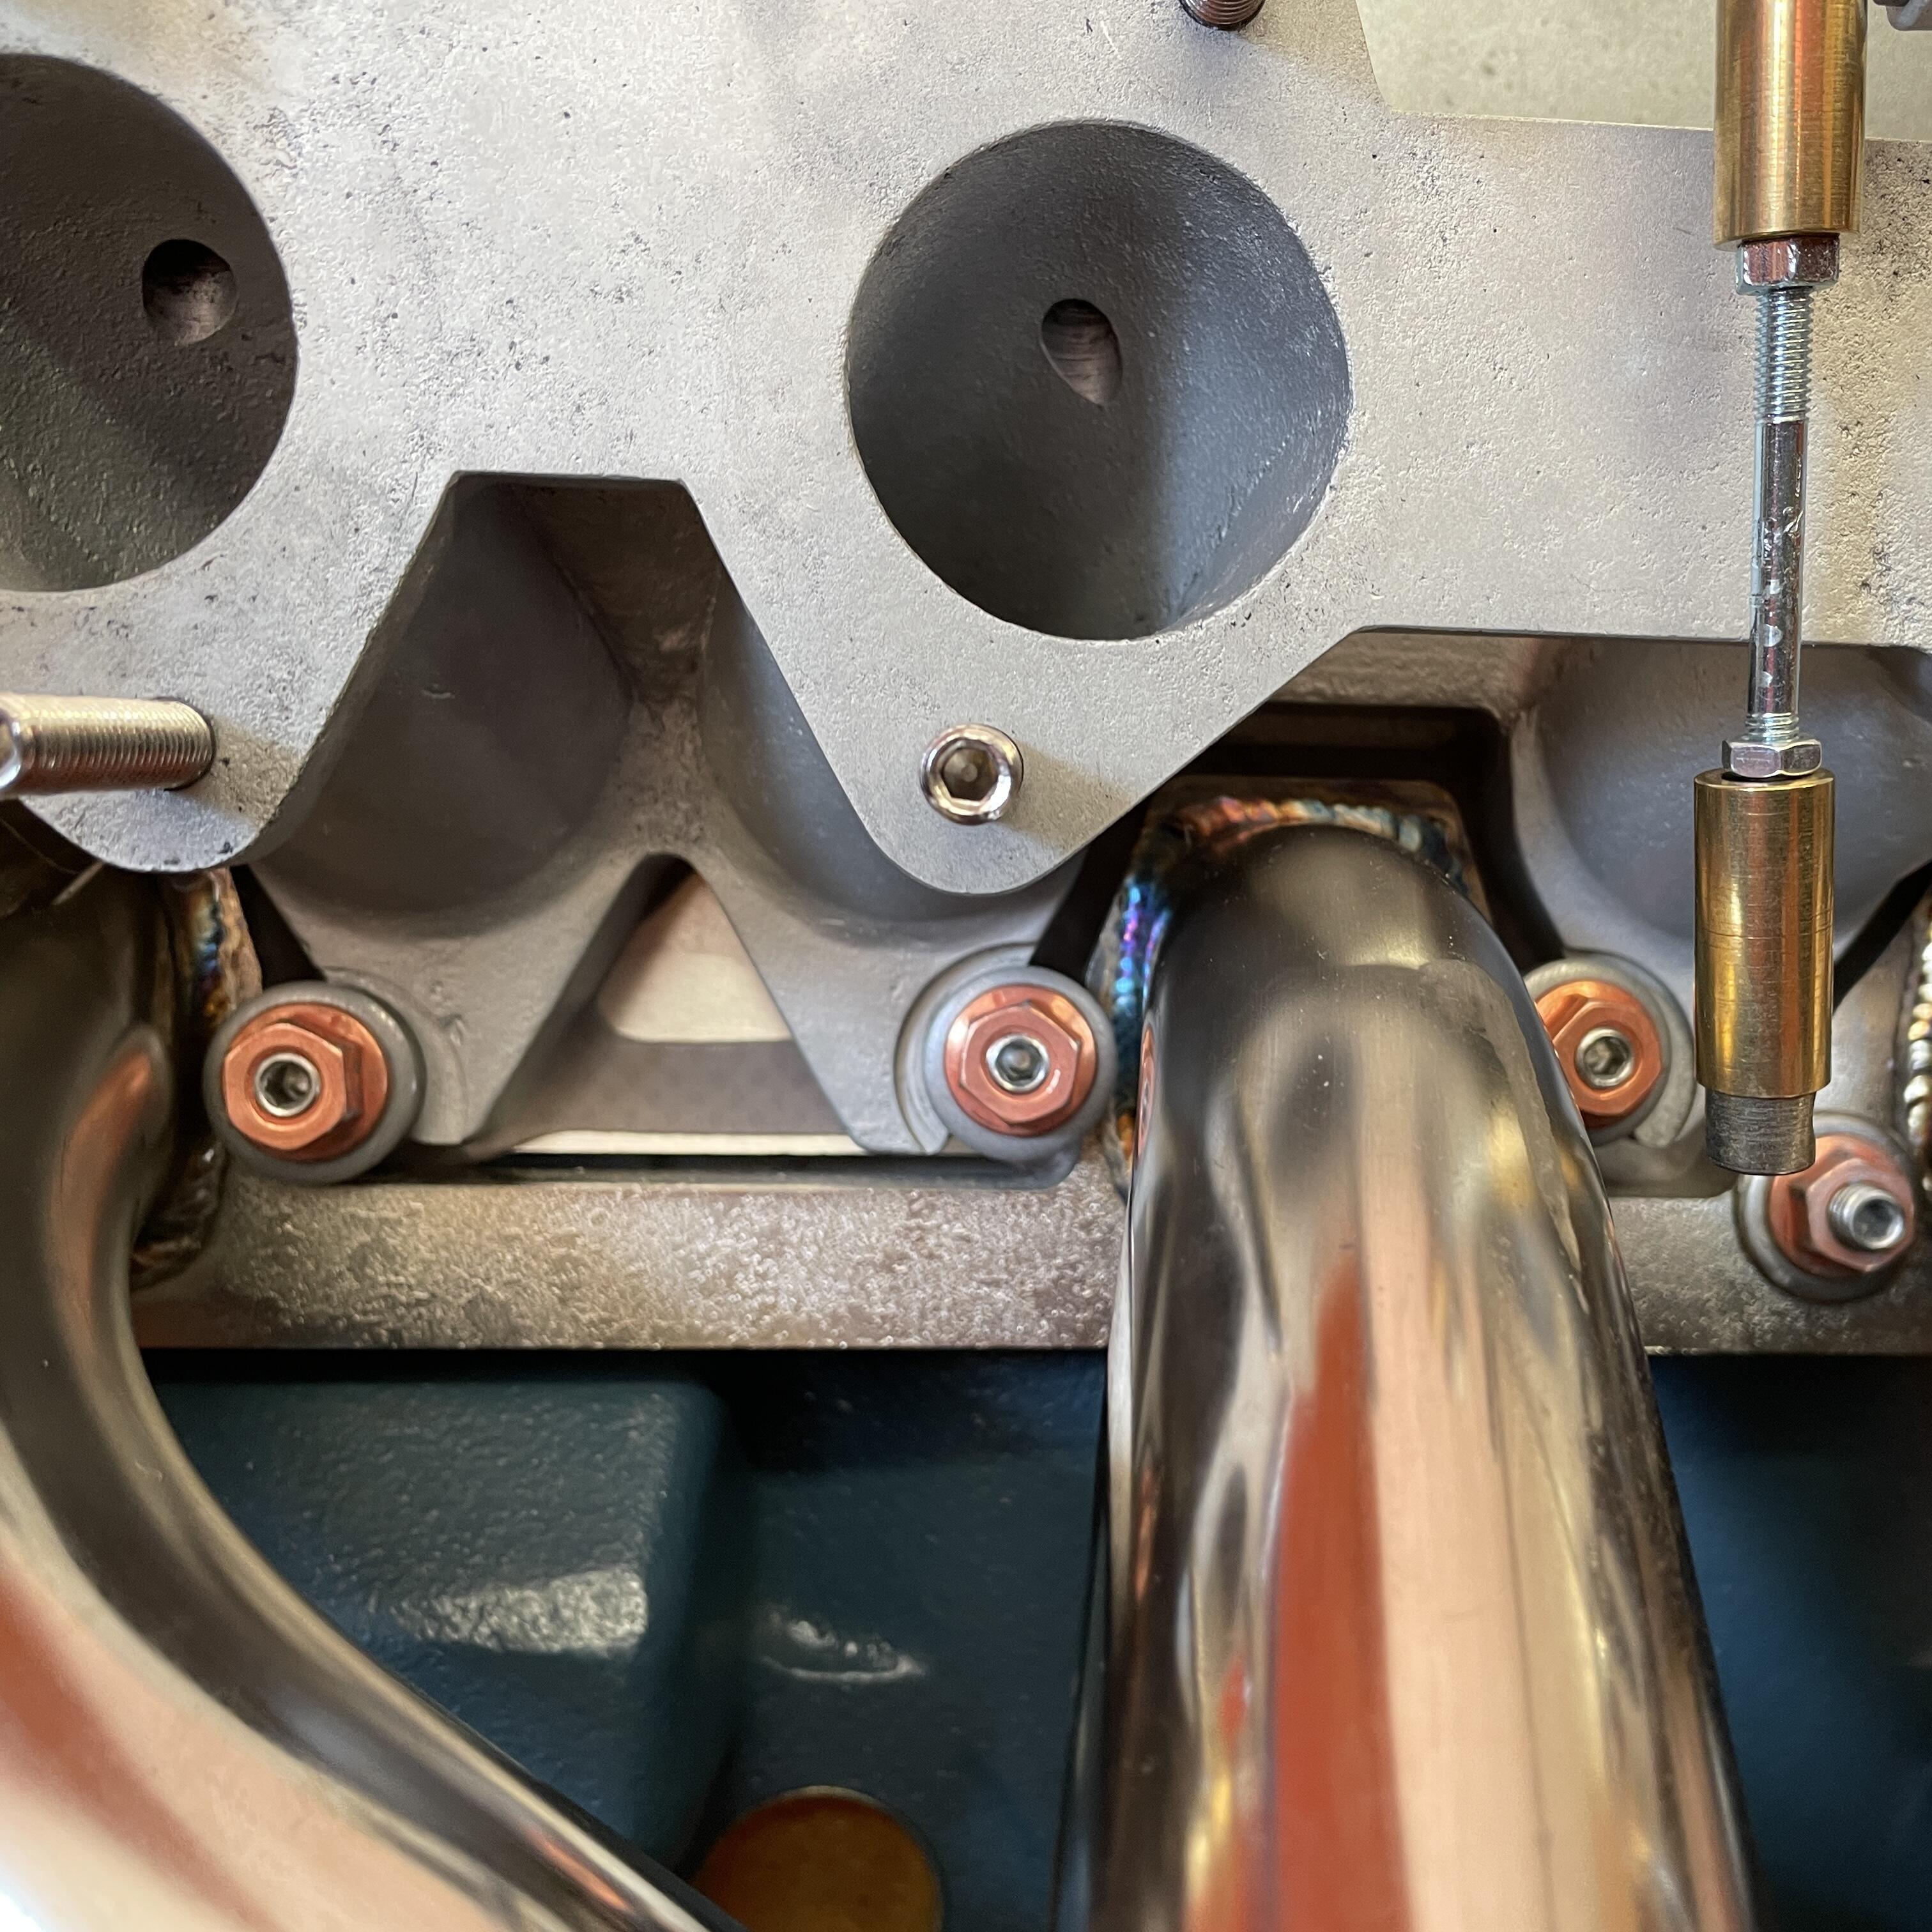
I hadn’t because of the belts for the alternator and compressor. I will take a look at that though. I’m also thinking about whether it could go under the headers instead of cramming them in between the headers and the carbs. It might actually be cooler if I get it low enough.
-
It’s forward of the runner, but it may still give me problems. I’m going to try to get the tube to work, but it’s going to take some experimenting with different hoses to do it. I may still end up doing something different with that whole setup. Regarding the studs, I think I’m going to figure out an optimal length after I get all of the plumbing worked out. I will have to pull the carbs off when I route my AC lines anyway. I have 45mm studs on there now, and I’m nearly certain 50mm will hit, so I’ll have to machine the 50mm ones down to make them work. All of this probably explains why you don’t see this manifold much.
-
Kameari makes a gusset that uses the oil pan bolts to accomplish the same thing. I’m not sure it works without their aluminum oil pan, though, which is thicker.
-
The Mikuni studs can’t be much longer because they will hit the manifold when it’s tightened down. I might be able to add 5mm but not more. same story with the carburetor studs. Thanks. Yeah, they are a ZX thing. They were also used on some L20 configurations.
-
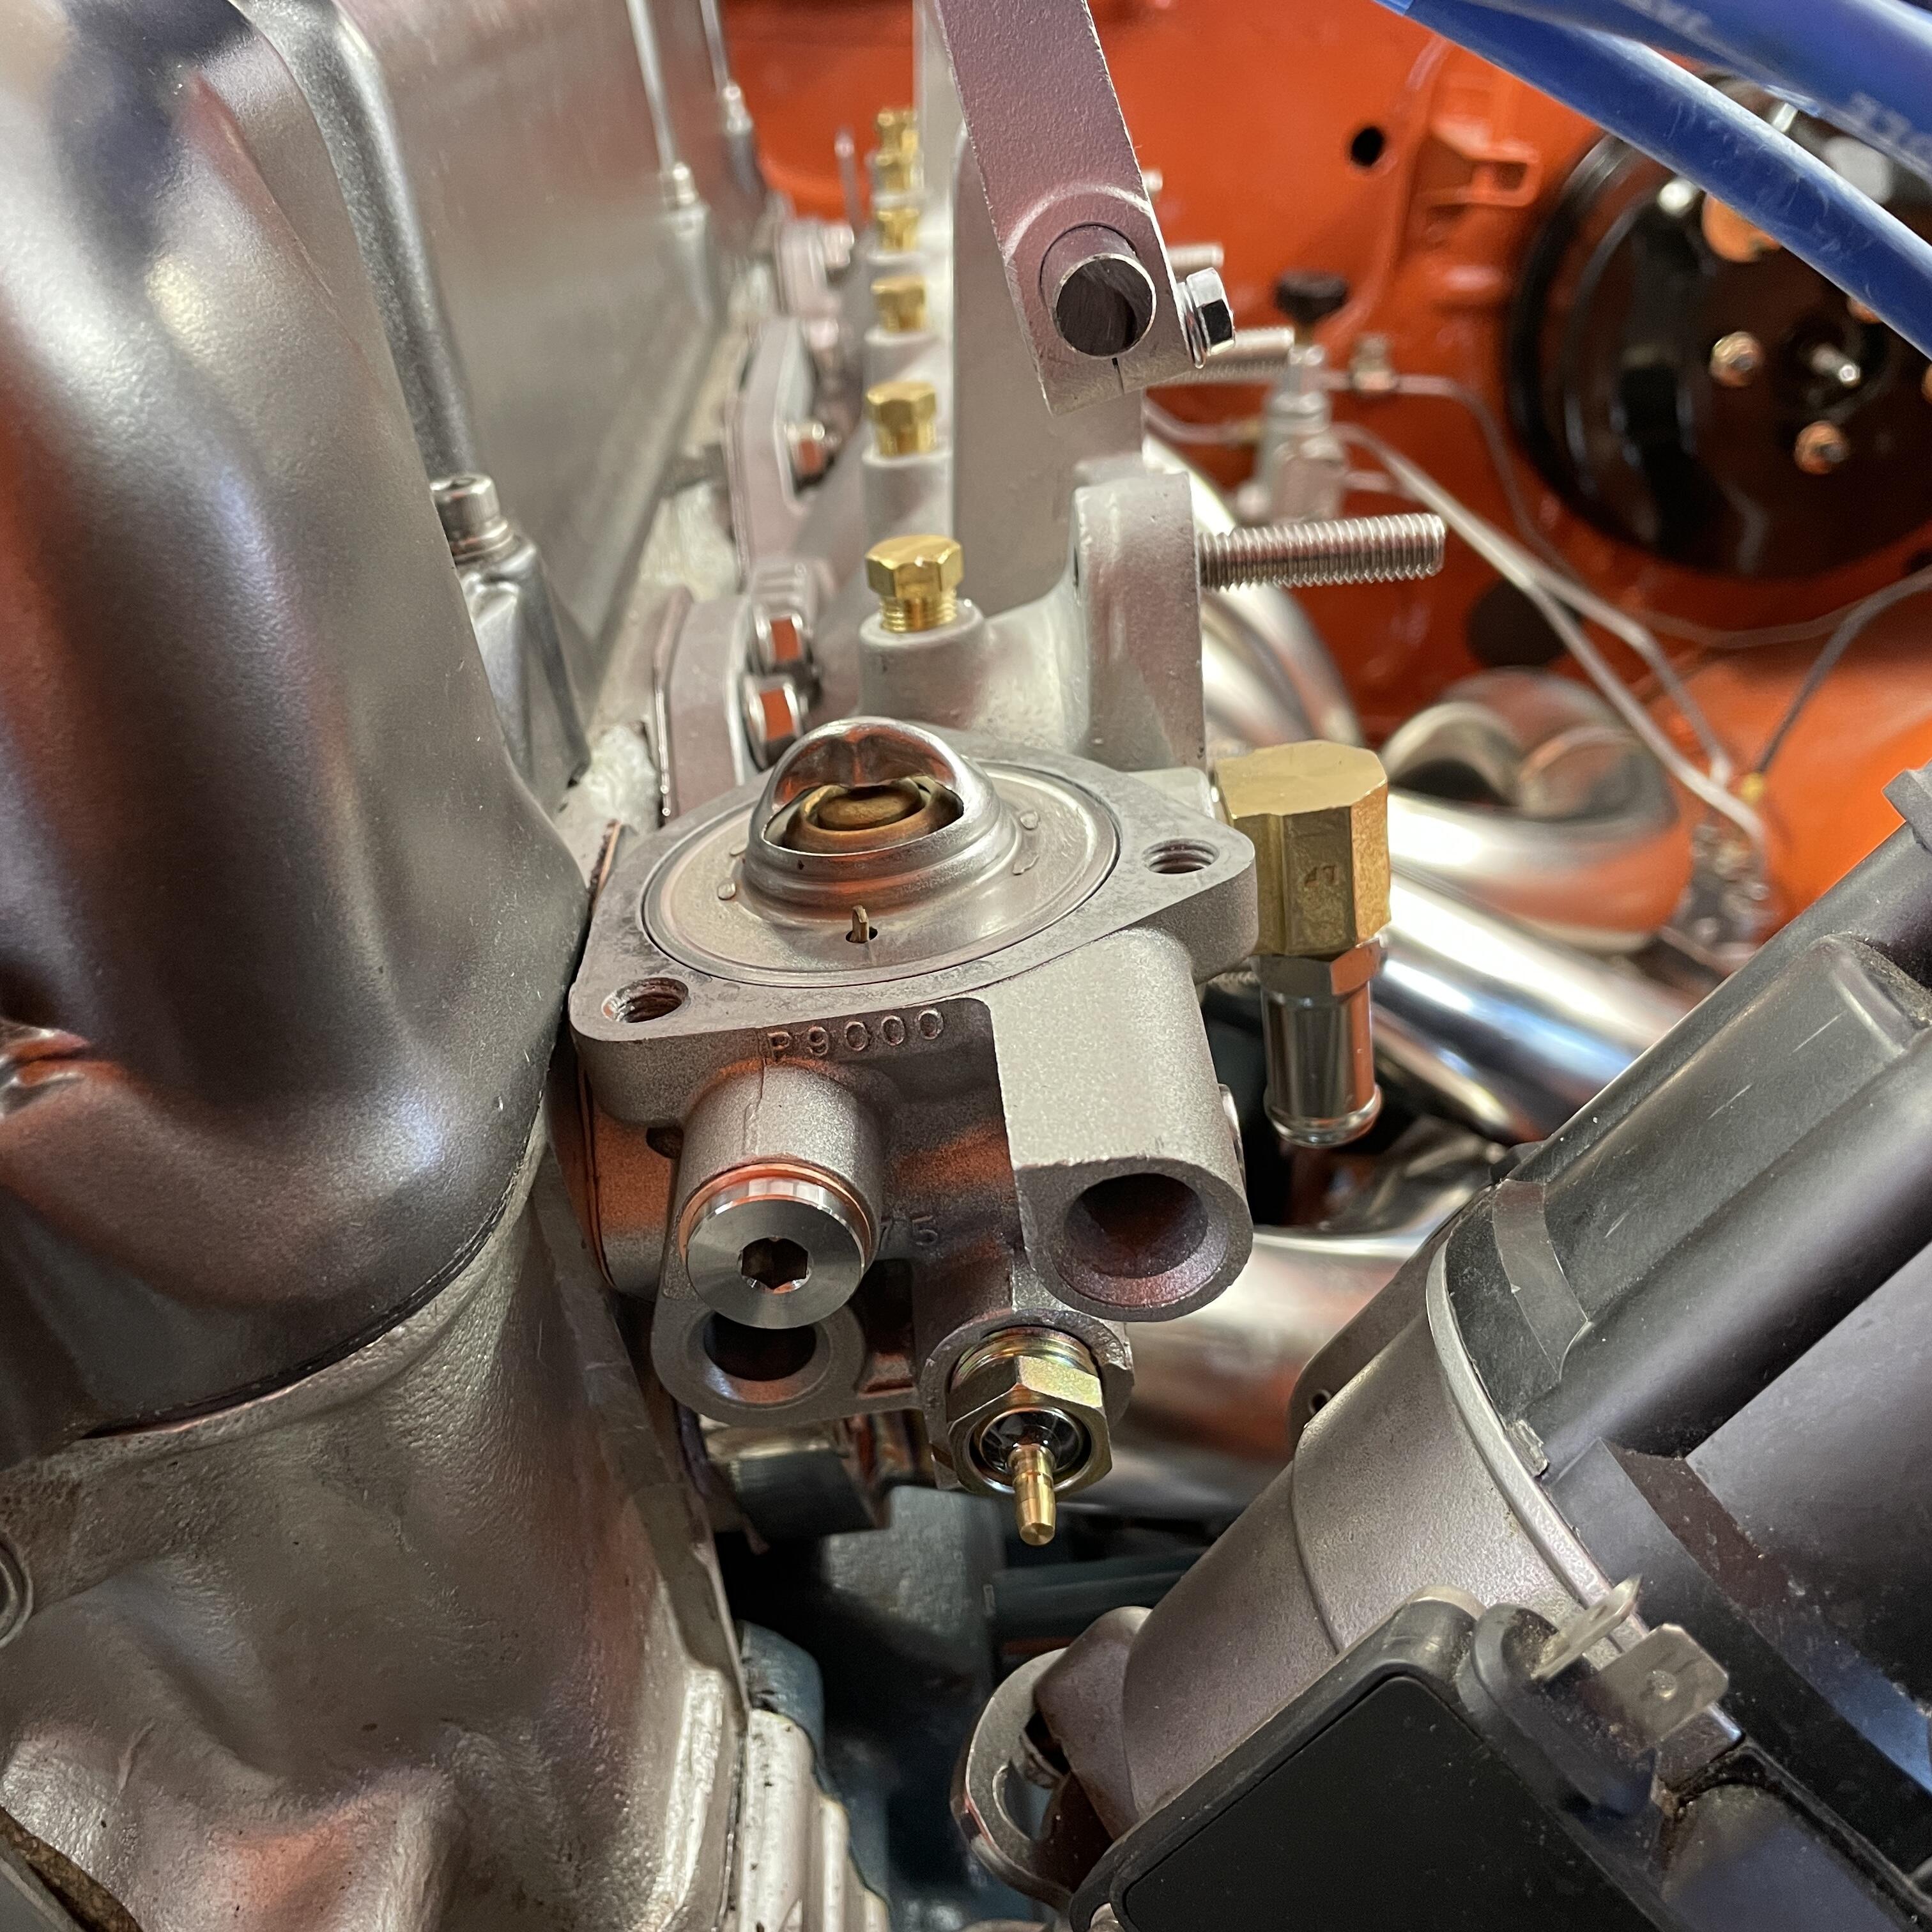
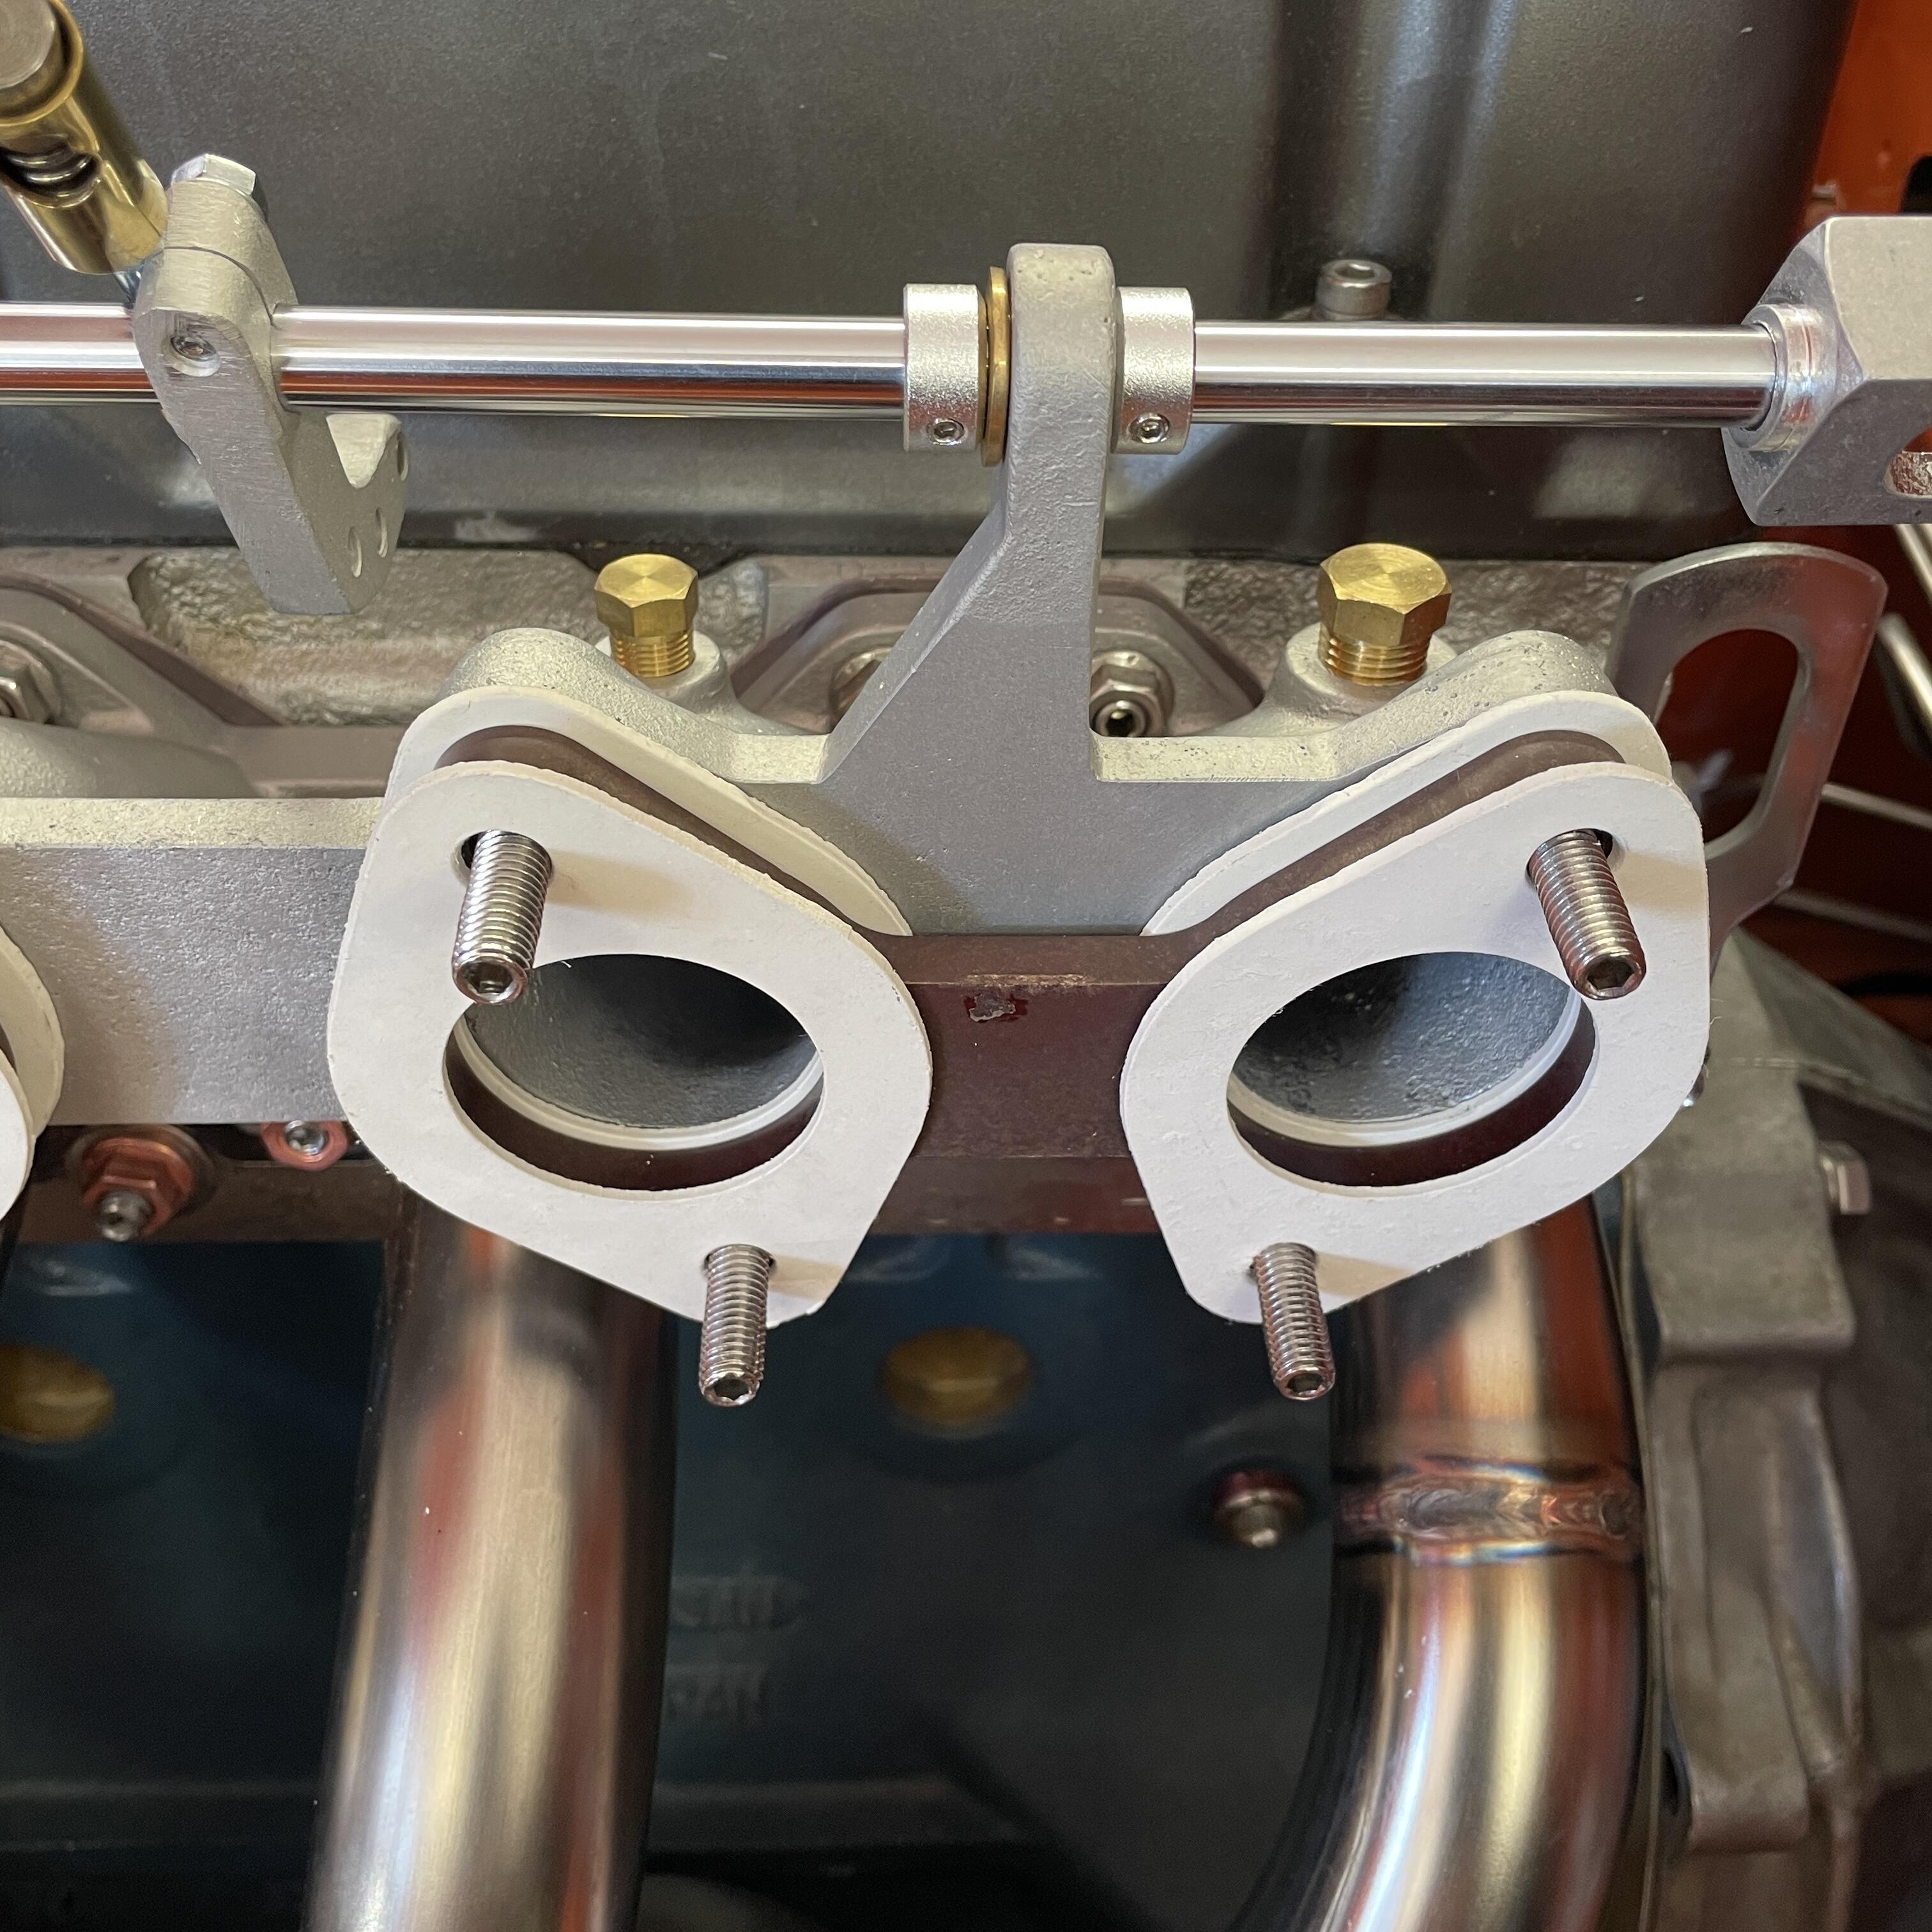
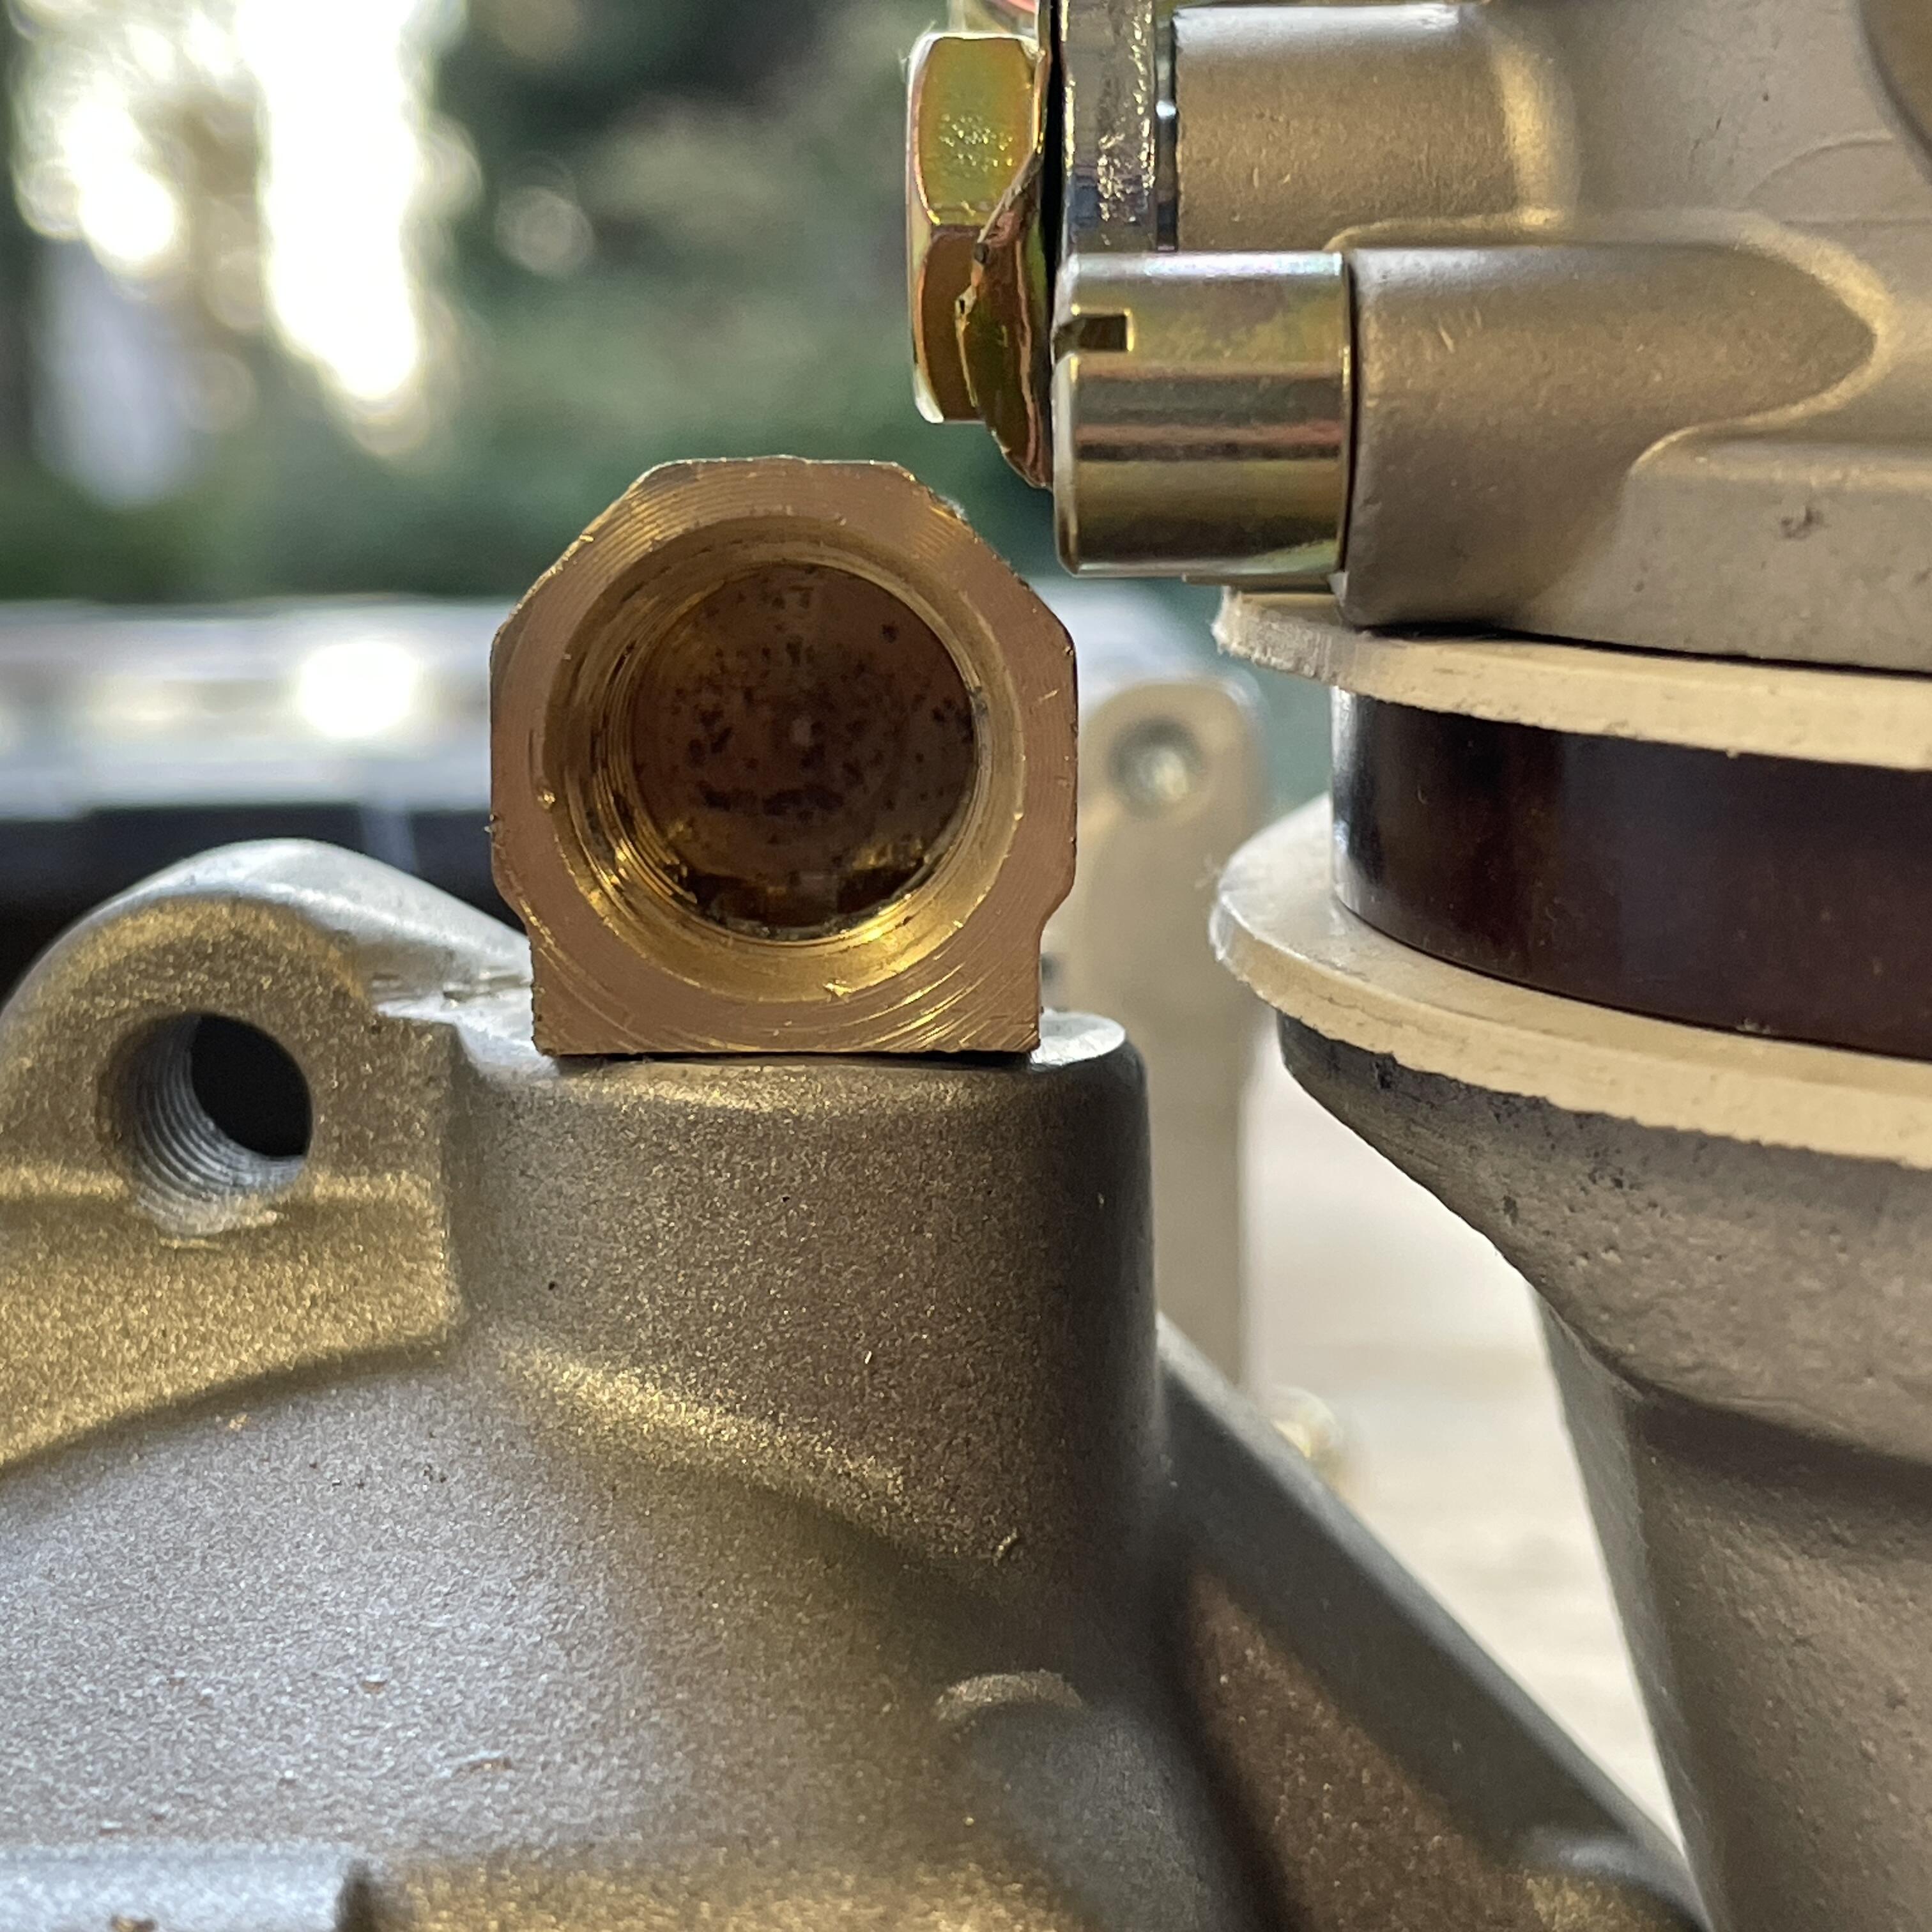
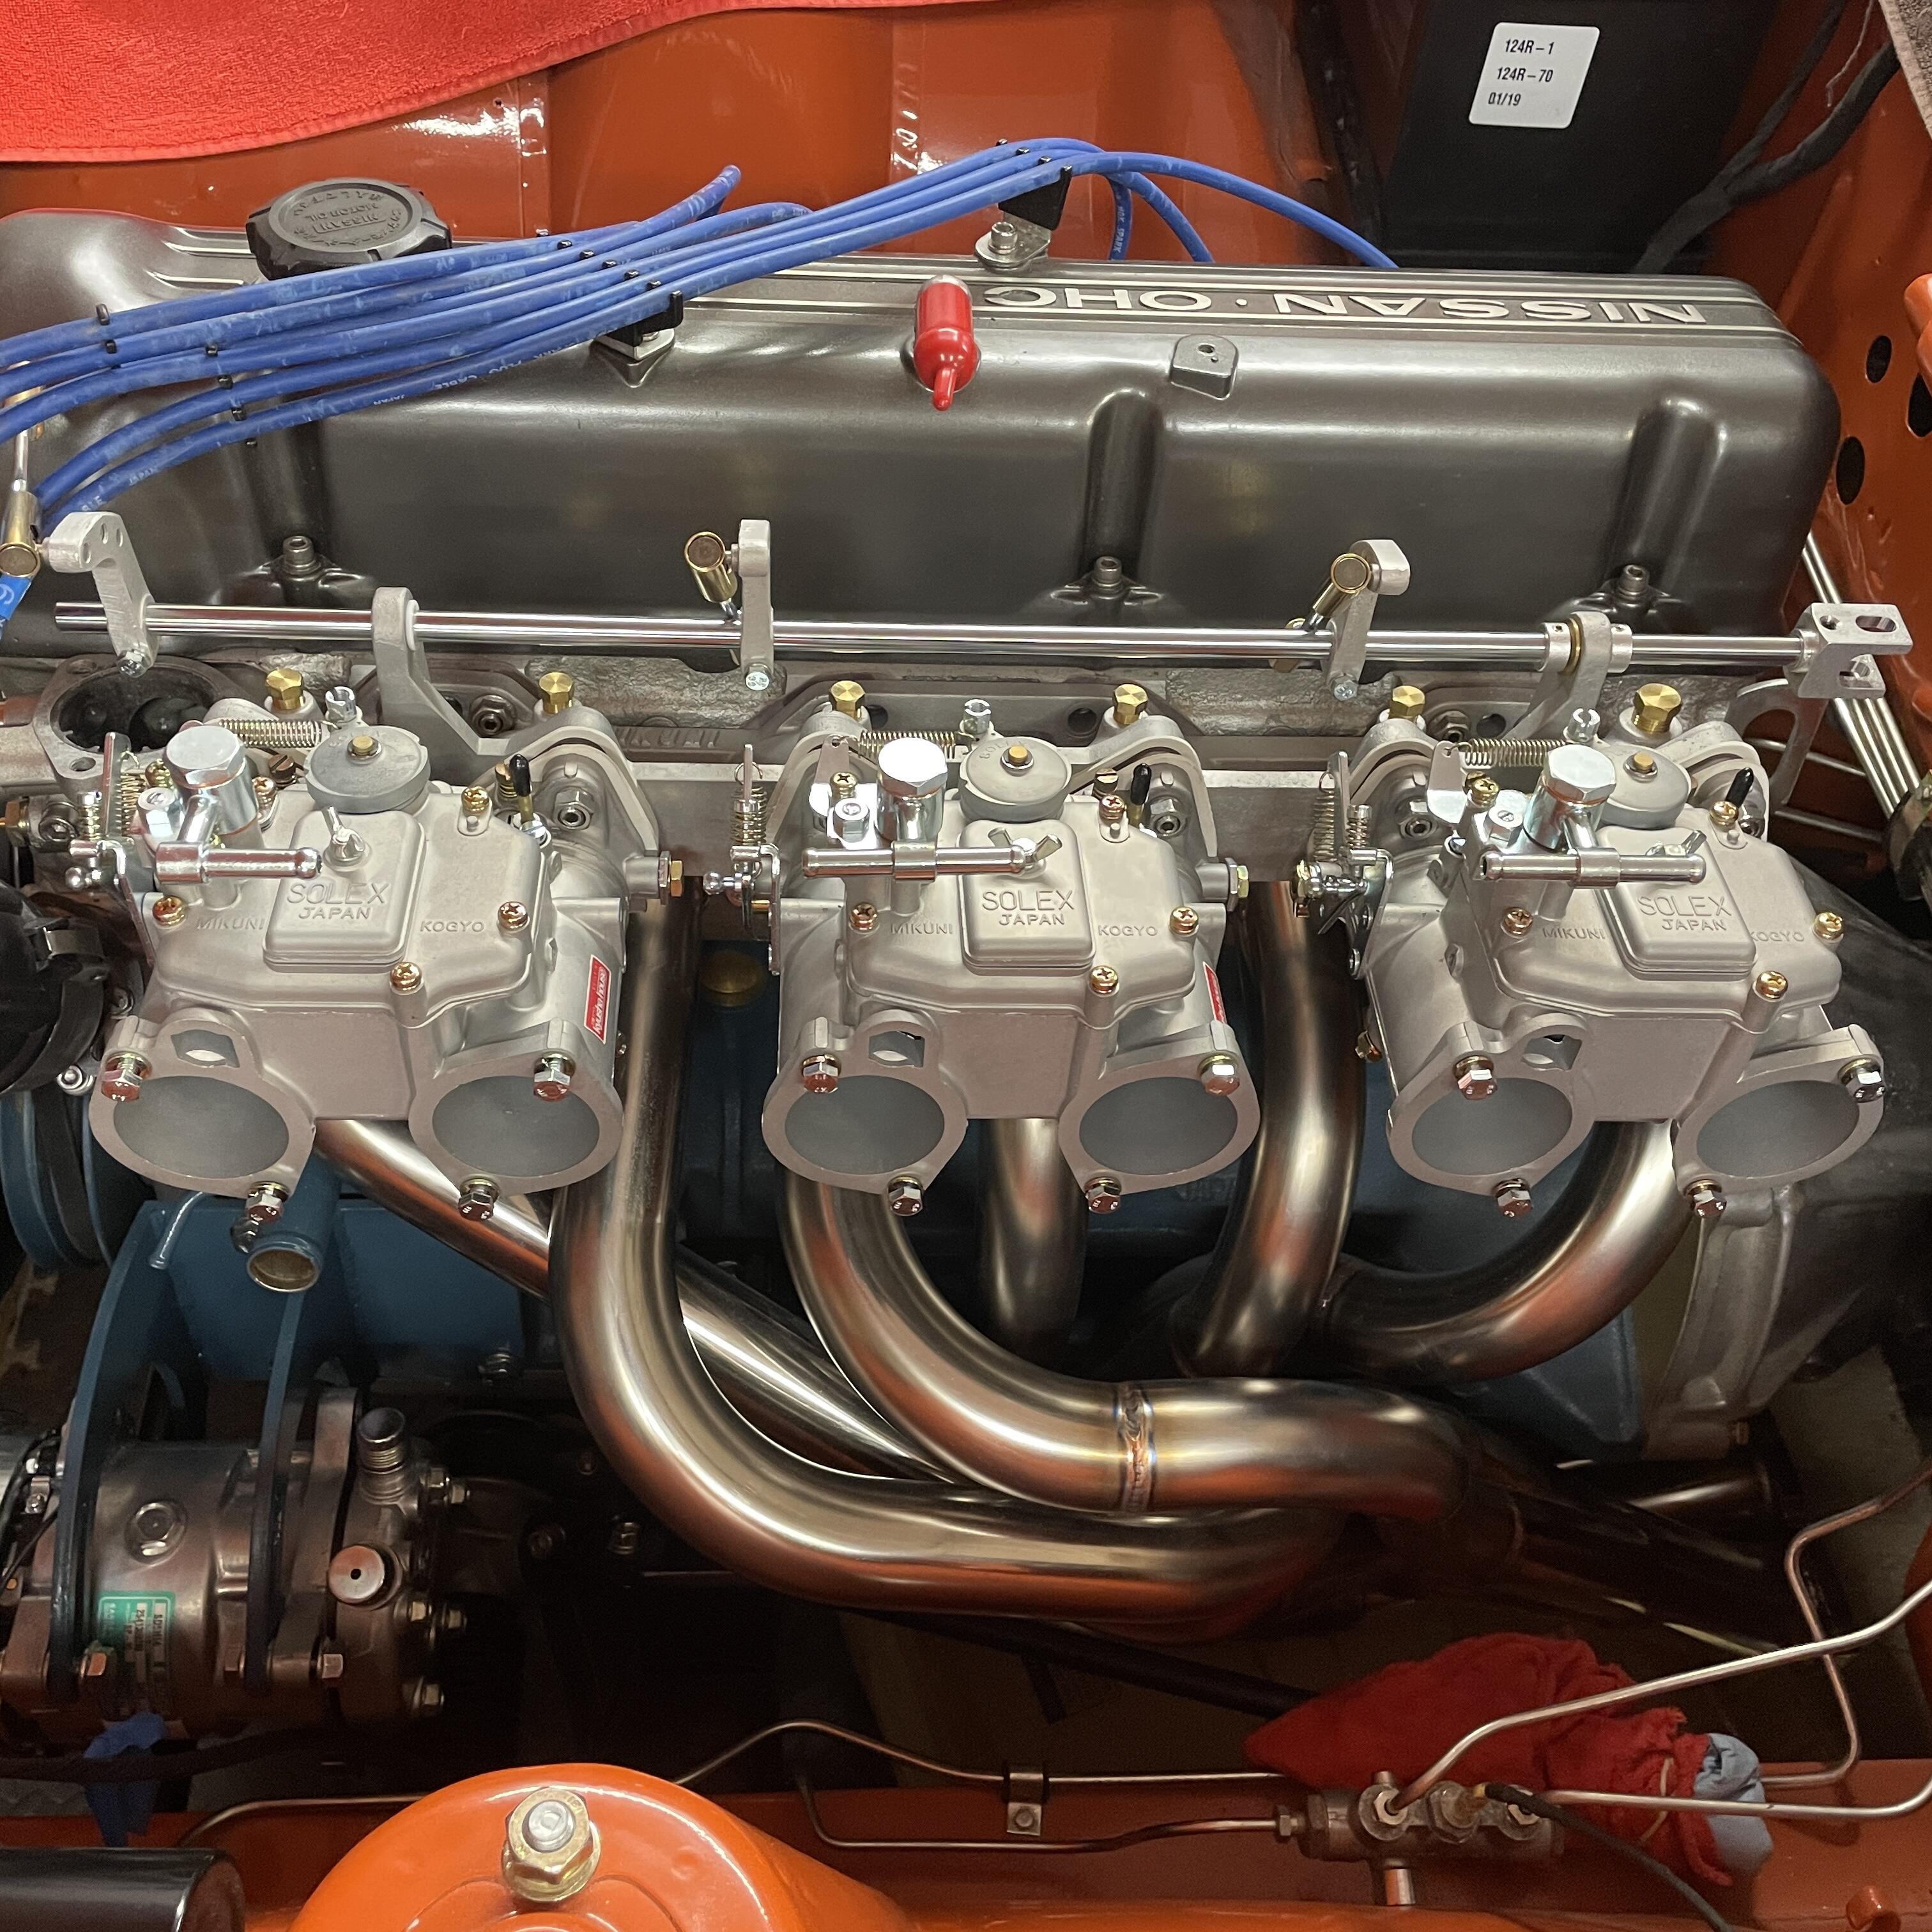
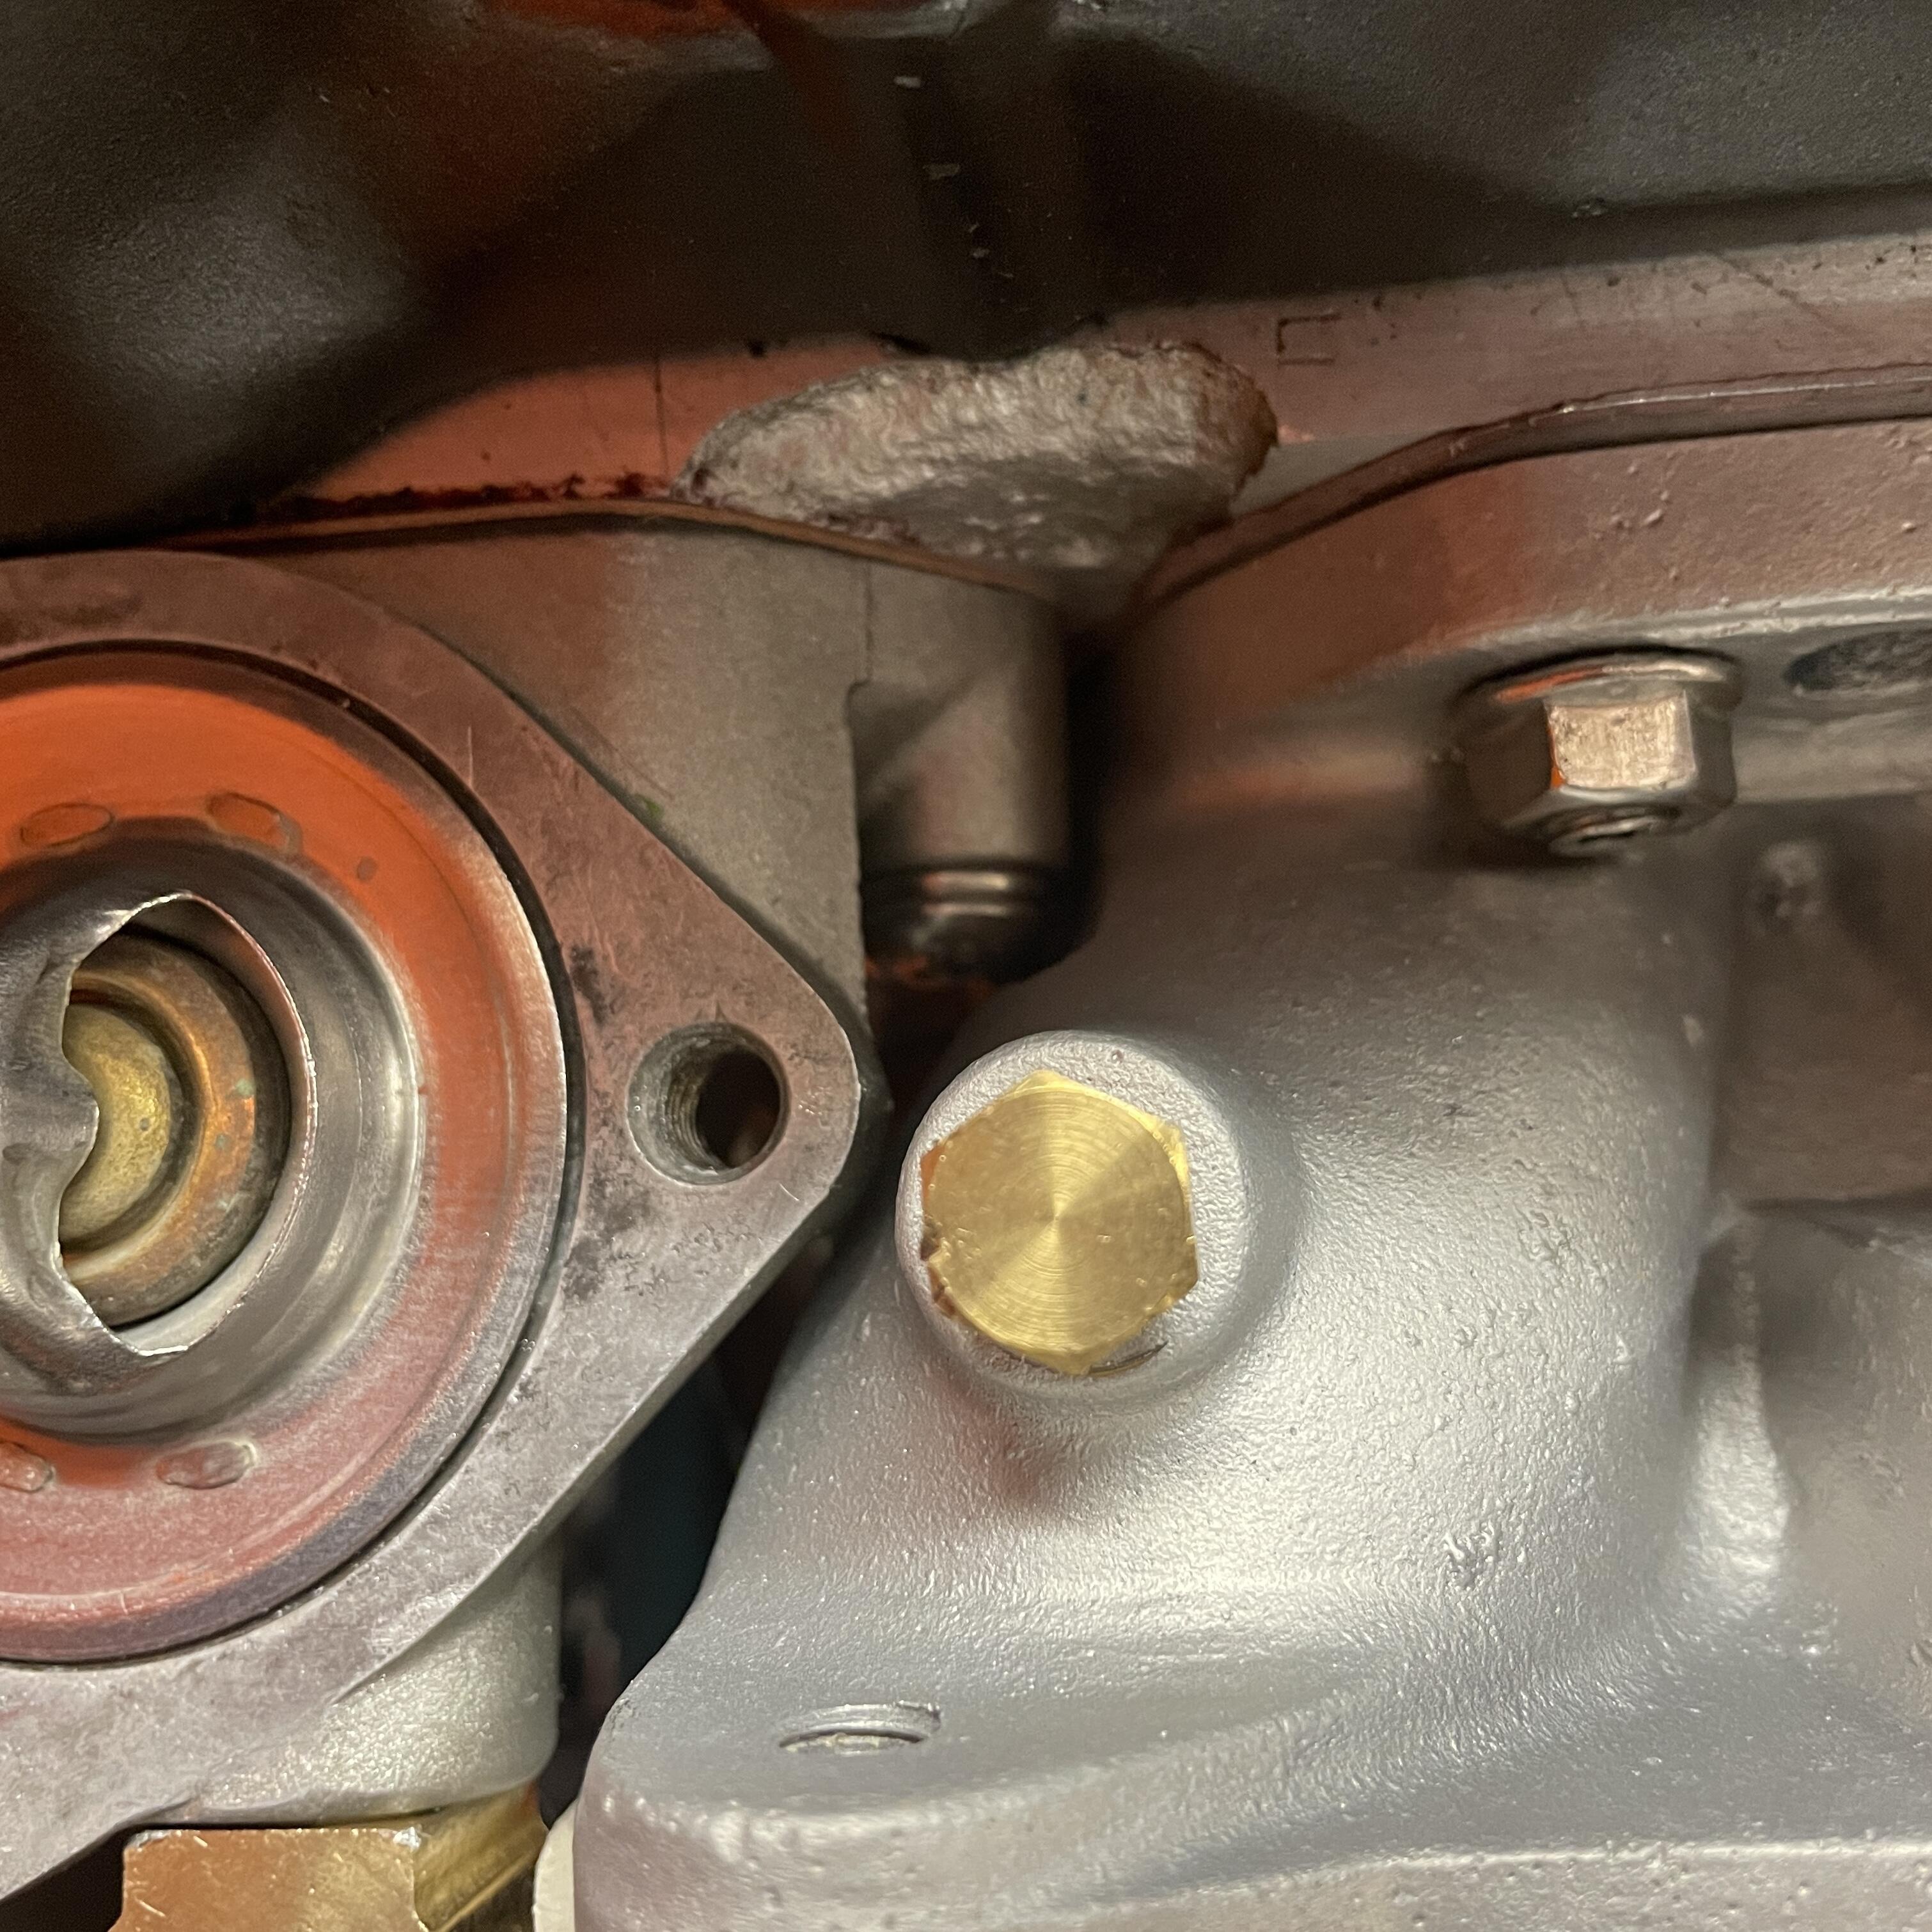
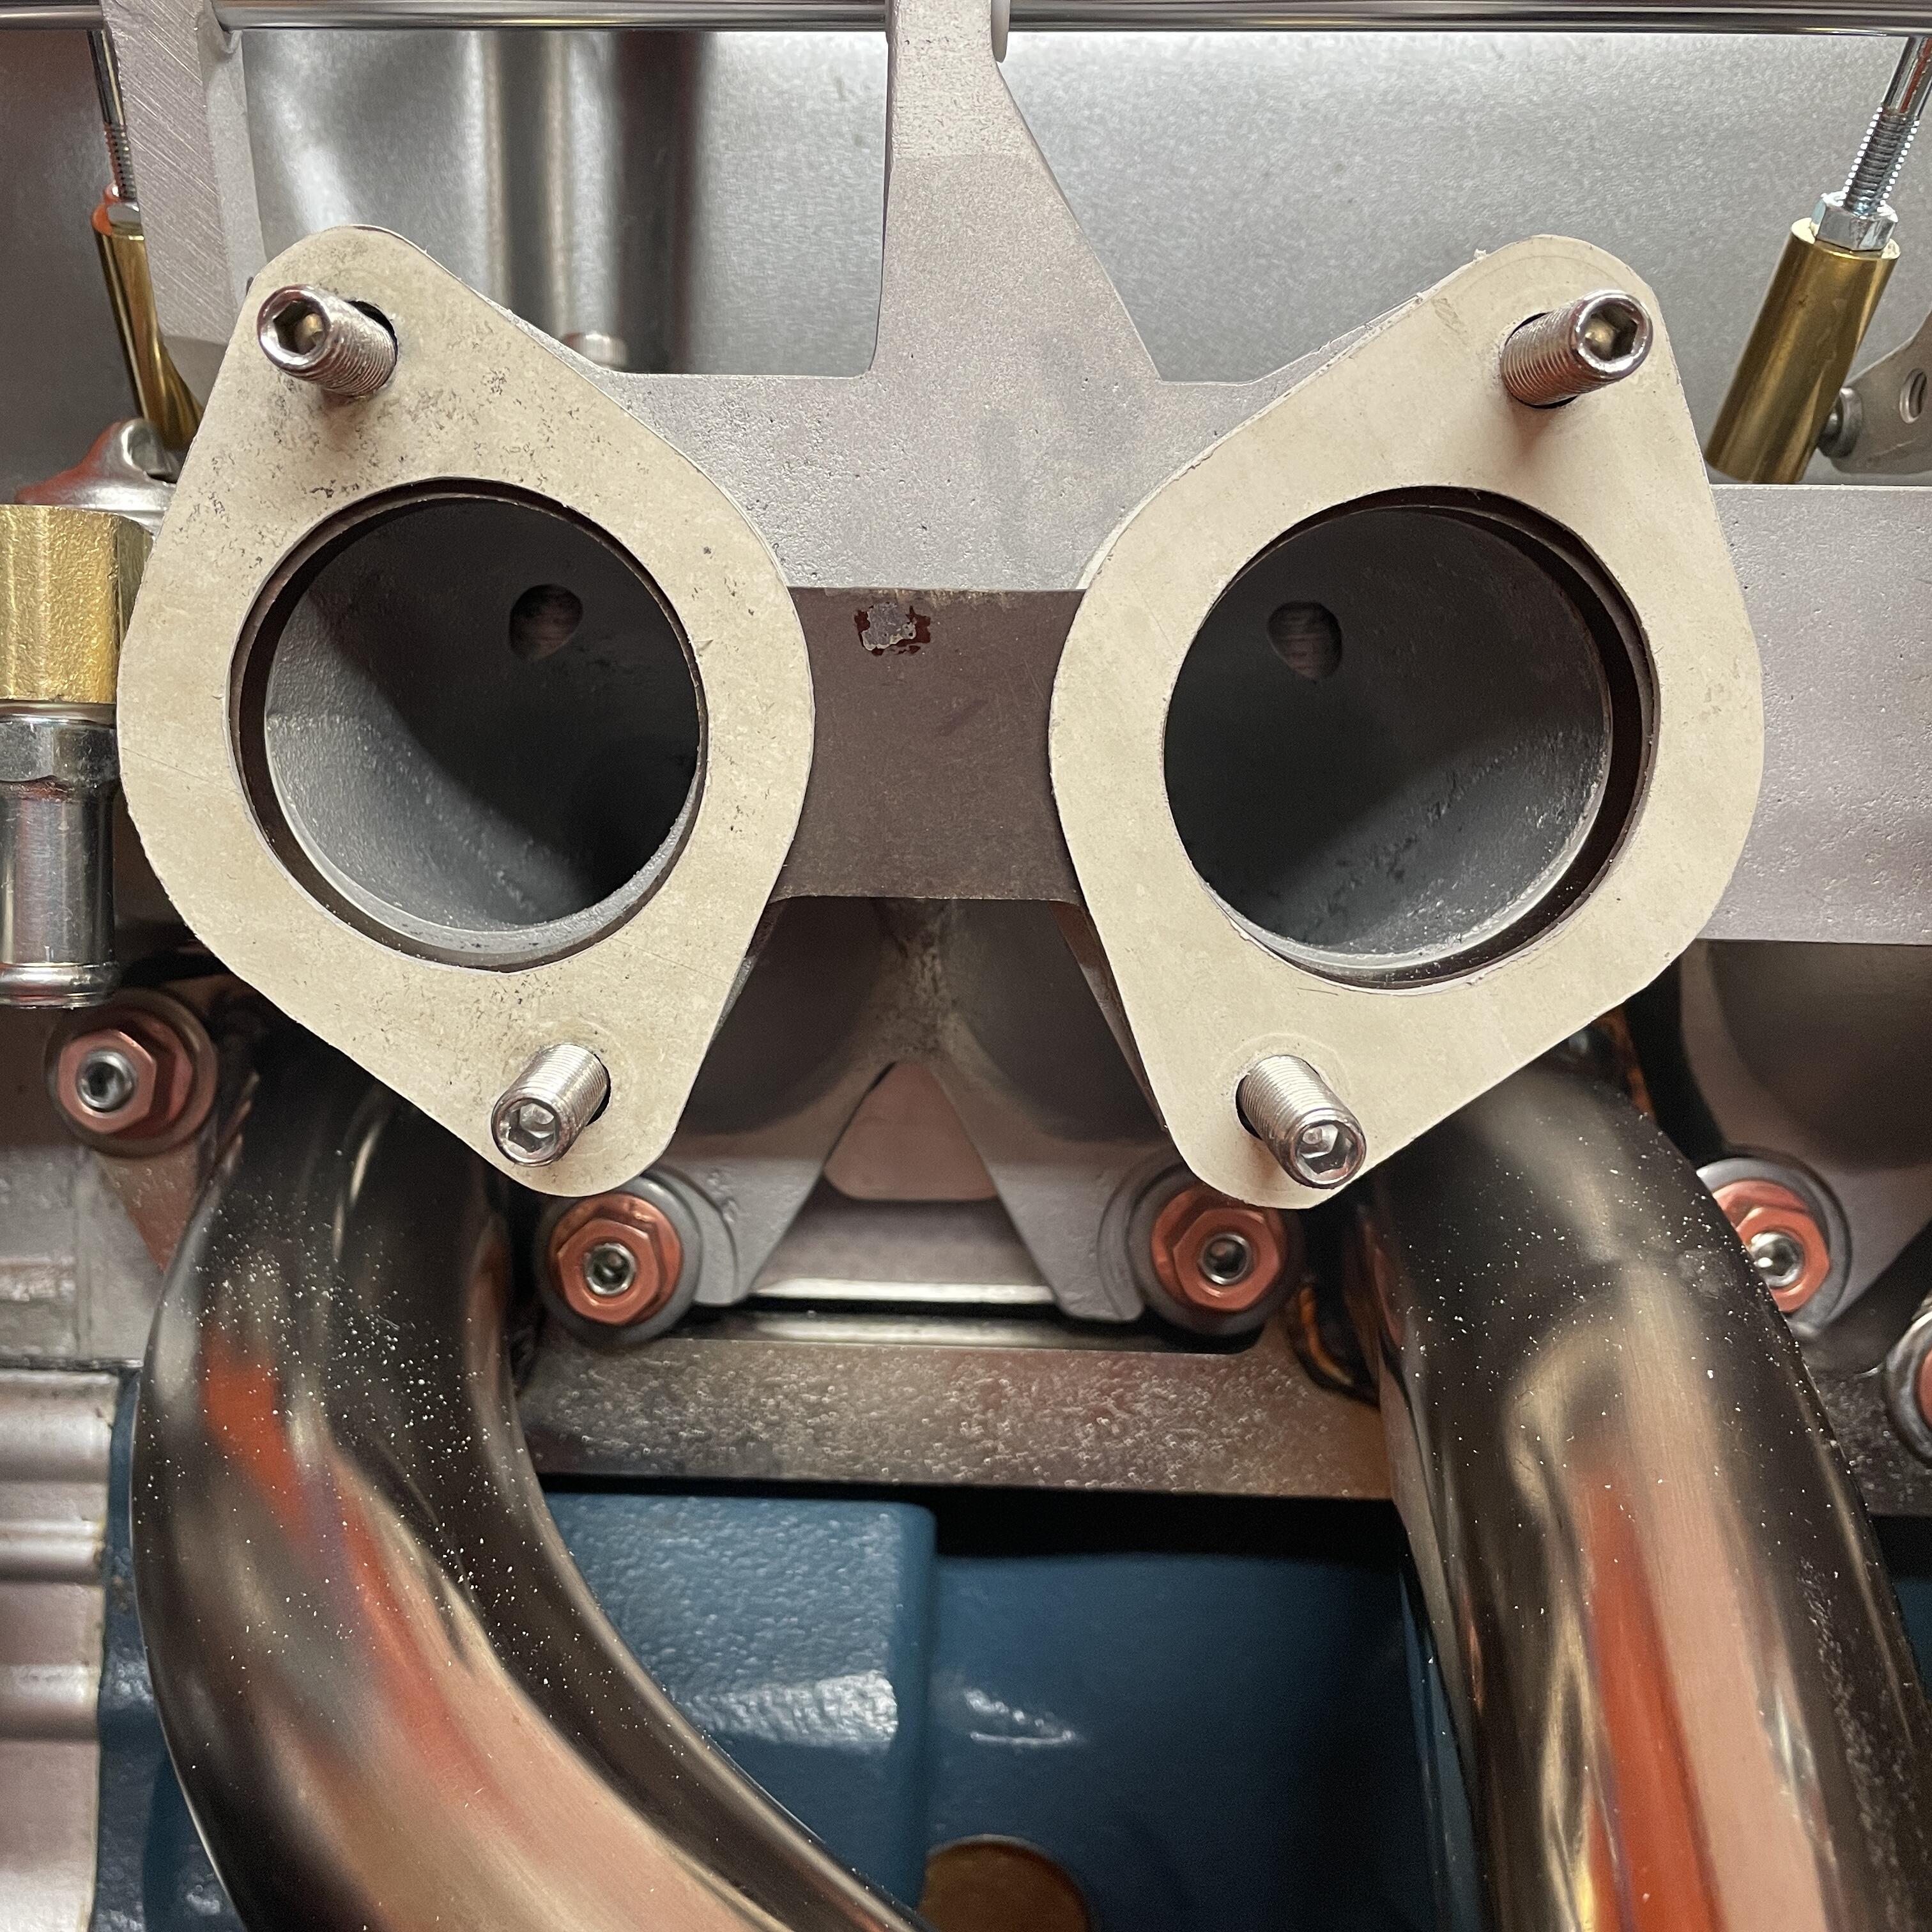
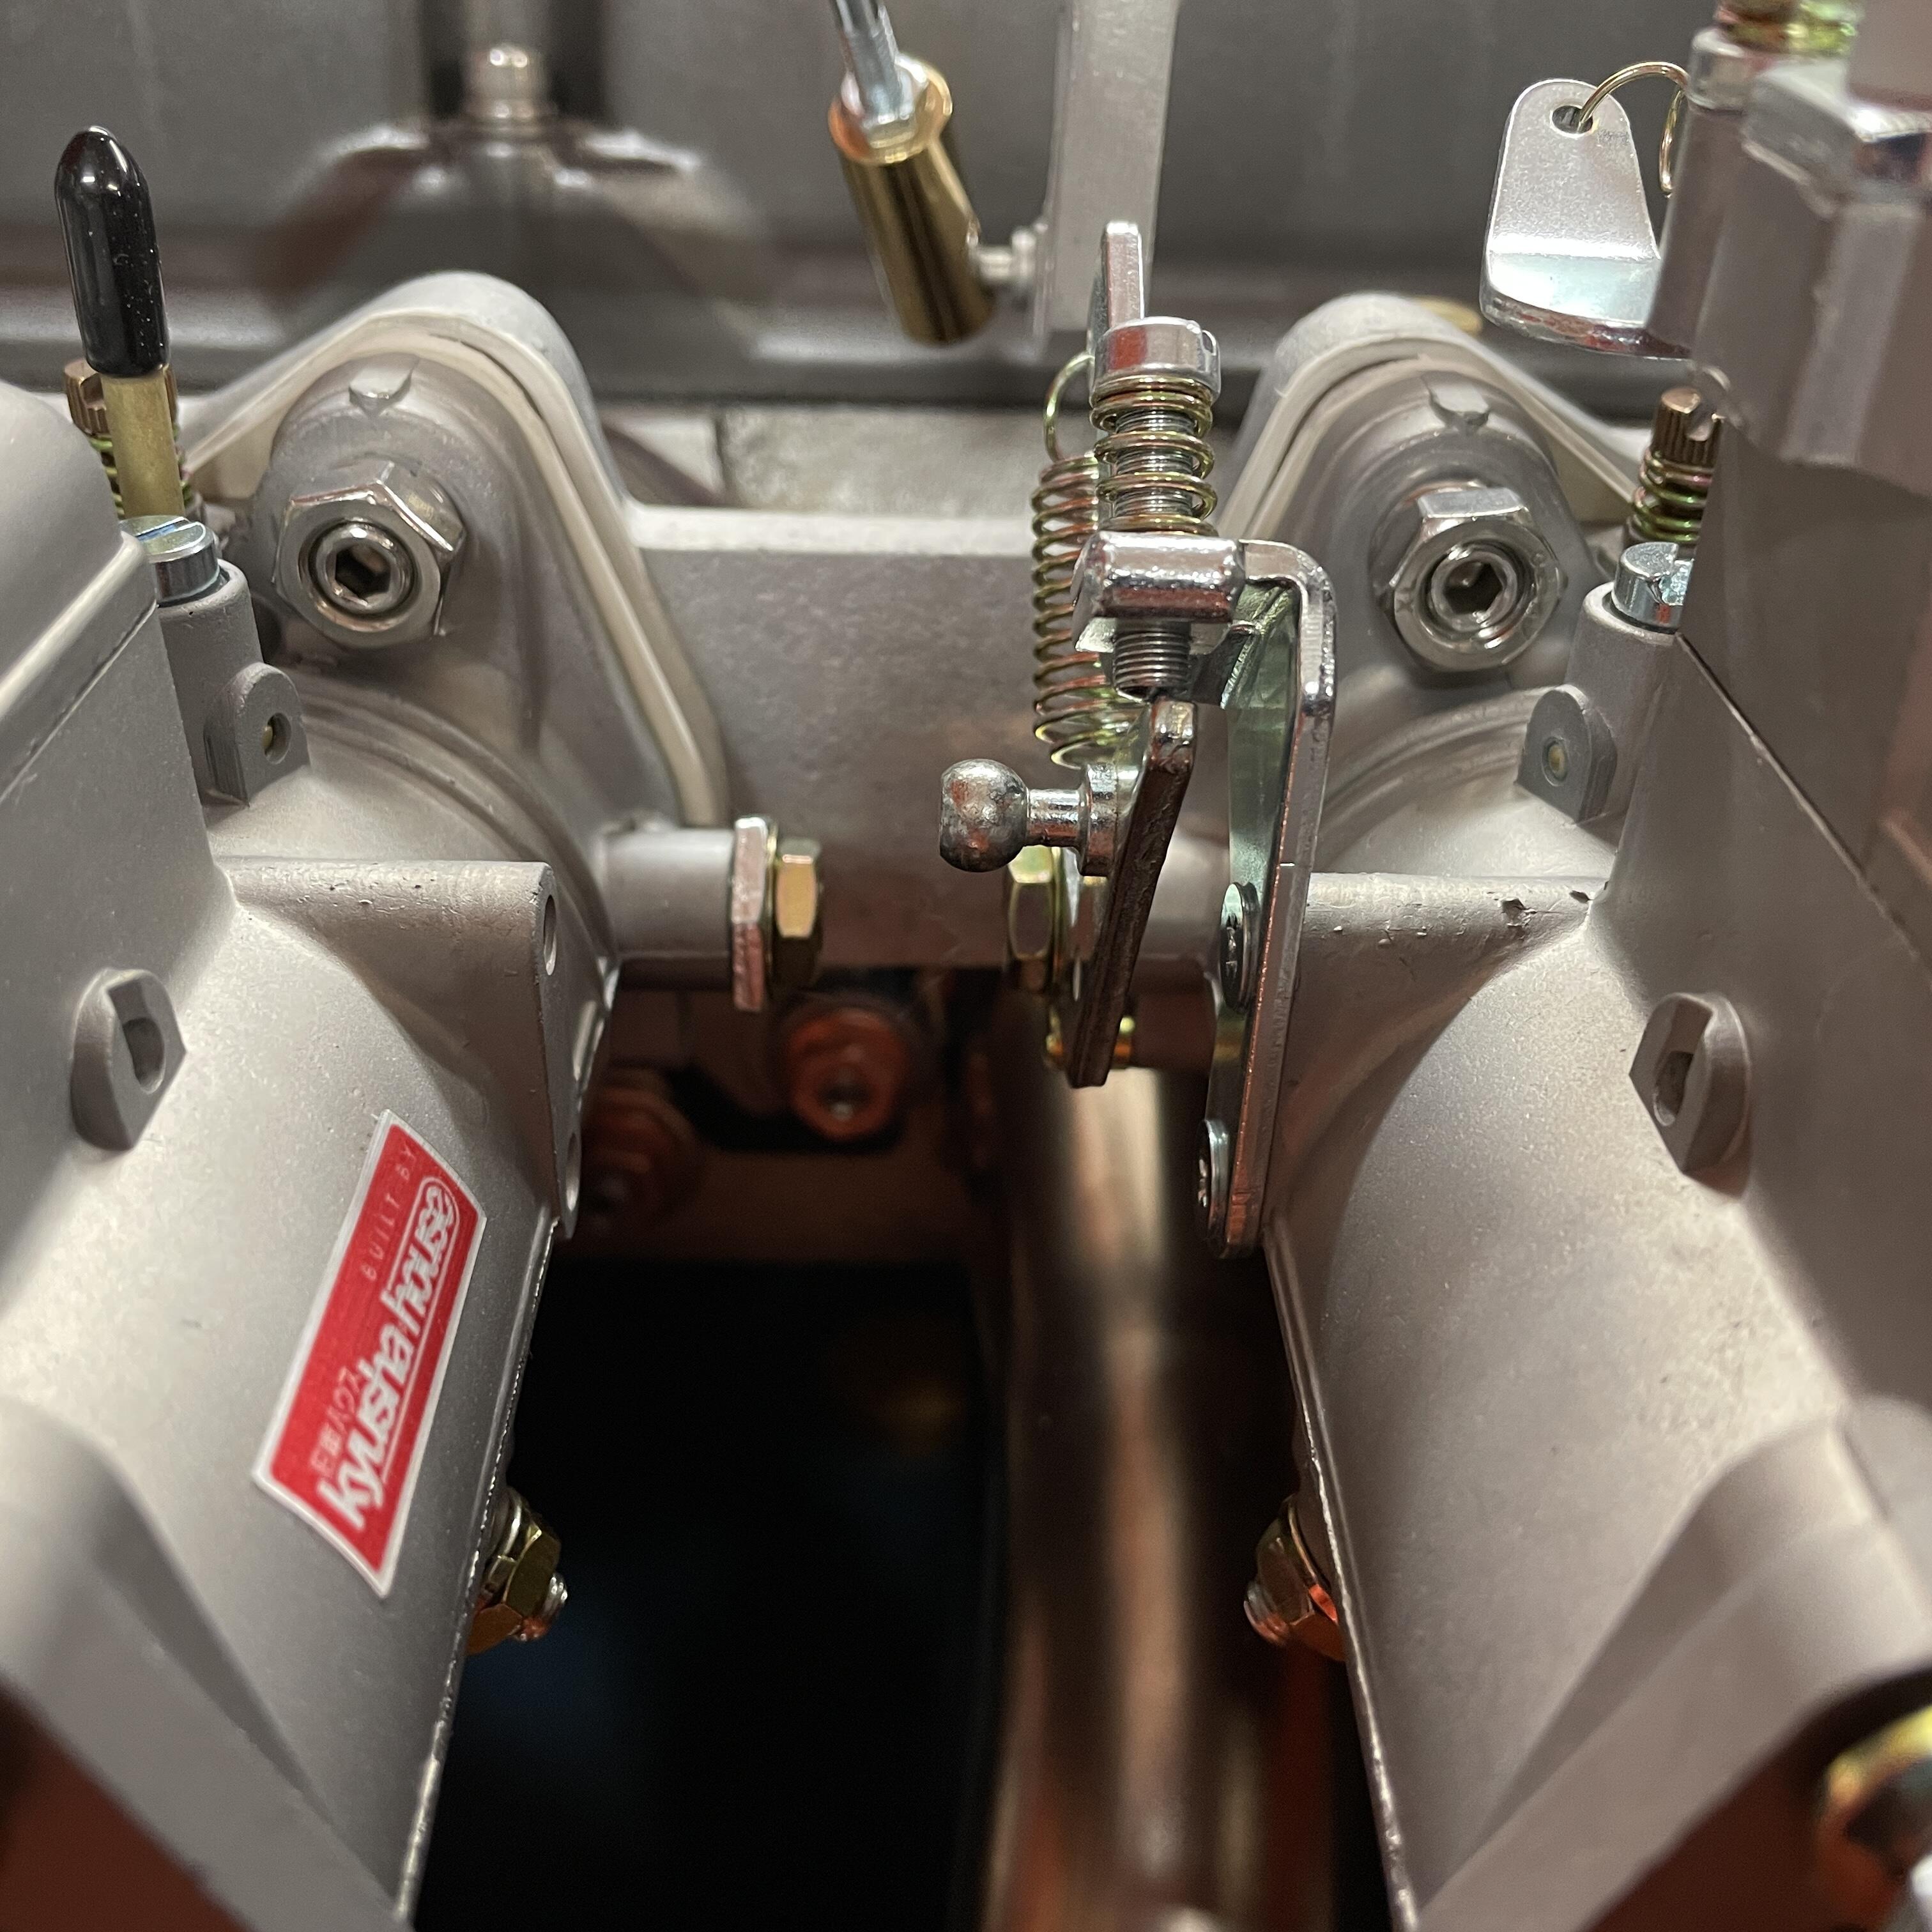
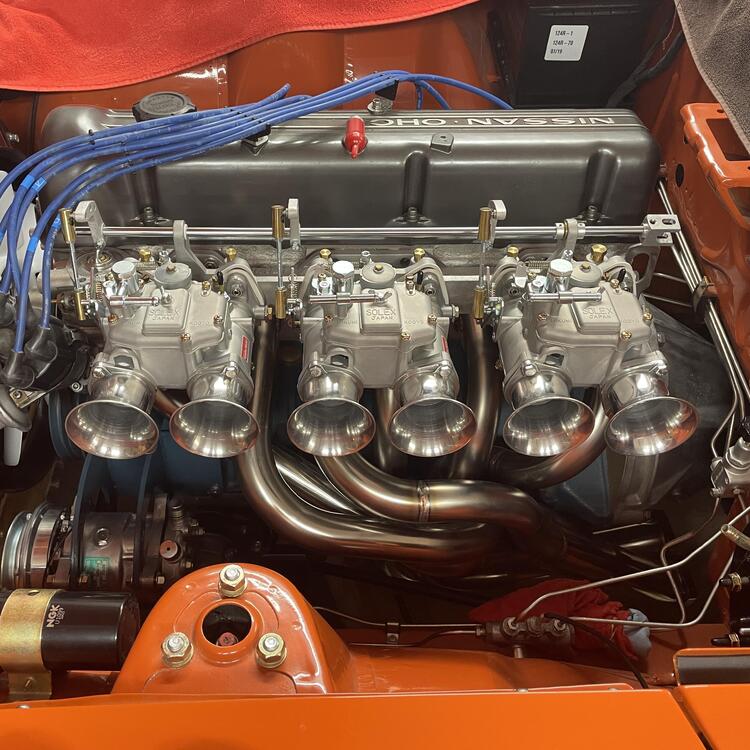
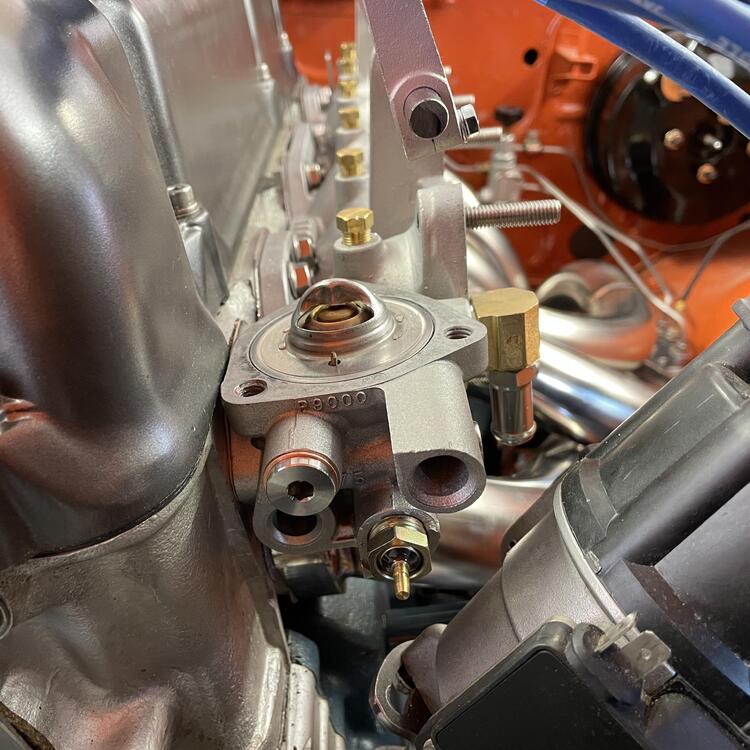
My Mikuni 44PHH carburetors are in. This. Took. Some. Work. They are fitted to a Mikuni short-runner intake manifold, which sounds all well and good until you try to fit it along side a 240z thermostat housing, which fouls the manifold. I had to switch back to the ZX housing. It doesn’t interfere with the manifold installation, but it’s cover sure does. Also, the water inlet for the coolant fouls the front carb and the throttle linkage. I want to retain a functioning heater, so I need that water pipe to work. I tried a bunch of stainless adapters, which were all much too big, but was saved by this little brass guy from Home Depot (a 90° 1/4 npt M to 1/4 npt F street / adapter). I still had to drill it out to increase the flow, as well as tap both the adapter and the thermostat housing and cut down the water inlet pipe to ensure a high rate of flow through the whole junction. I also replaced the thin black carburetor gaskets that came on them with VW carburetor base gaskets by EMPI from JBugs California Pacific. I was a little bummed to find out that they are white and not the grey in the photos, but I am pleased with how thick they are. That extra few millimeters helped push the carburetors away from the thermostat housing and gave me some much needed clearance. The gaskets are the perfect thickness for want I needed when it came to making clearance, but they aren’t an exact fit for the PHH carbs. They’re meant for VW solexes (so downdraft) and the bases are different, which meant I needed to trim them to no be sticking out a mile. They also needed to be opened up from 40mm to 44mm to not interfere with the airflow. On the left is one with the outline of the gaskets that came with the carburetors drawn in pencil. On the right is a trimmed gasket before final cleanup. In the next photo you can see that the holes are now the same size as the phenolic. They are slightly bigger than the carburetors and manifold, which I think is fine. If I have trouble I’ll make something from scratch that is custom to each port. The last photo just shows that they don’t stick out a mile anymore, even though I could probably trim them further. For the thermostat cover, I took a gamble on a NOS one for L20Bs and JDM C210 Skylines for $20 on Amayama. It looks like it uses the same gasket as the ZX, so hopefully it will fit. It looks just like the three-bolt ZX cover, except it doesn’t have the two extra bosses on the rear end, which hopefully means it won’t hit anything. We will find out when it arrives. Now on to the goodies: the carburetors are 44mm Mikuni PHH side drafts (I explained in an earlier post how I got them). They are on the previously mentioned Mikuni short intake manifold, held on with OEM manifold washers and copper flange nuts on the bottom and SS flange bits on top, and wearing 50mm Kameari velocity stacks. Next I plan to fit the heat shield and solve the water pipe routing problem. I have air filters but don’t expect to mount them until the brake and clutch master cylinders are in and the fuel routing is worked out.


-
These windows are scratched so I will probably end up replacing them. The ones I’ve seen for sale done have the black pieces in them. The circles are probably solvable but the rectangle curves away from the glass like it does something so I want to make sure that gets done correctly.
-
Does anyone know where to find the five rubber parts that are adhered to each door window? I just did a search on Google, MSA, and ZCD and found nothing.

-
Is he the Ralph Nader of LED lights?
-
I did not know this. I guess those brand new flashers I bought were a waste. @SteveJ do you recommend a particular one? Are they different for hazard and turn signal, or can you get two of the same kind?
-
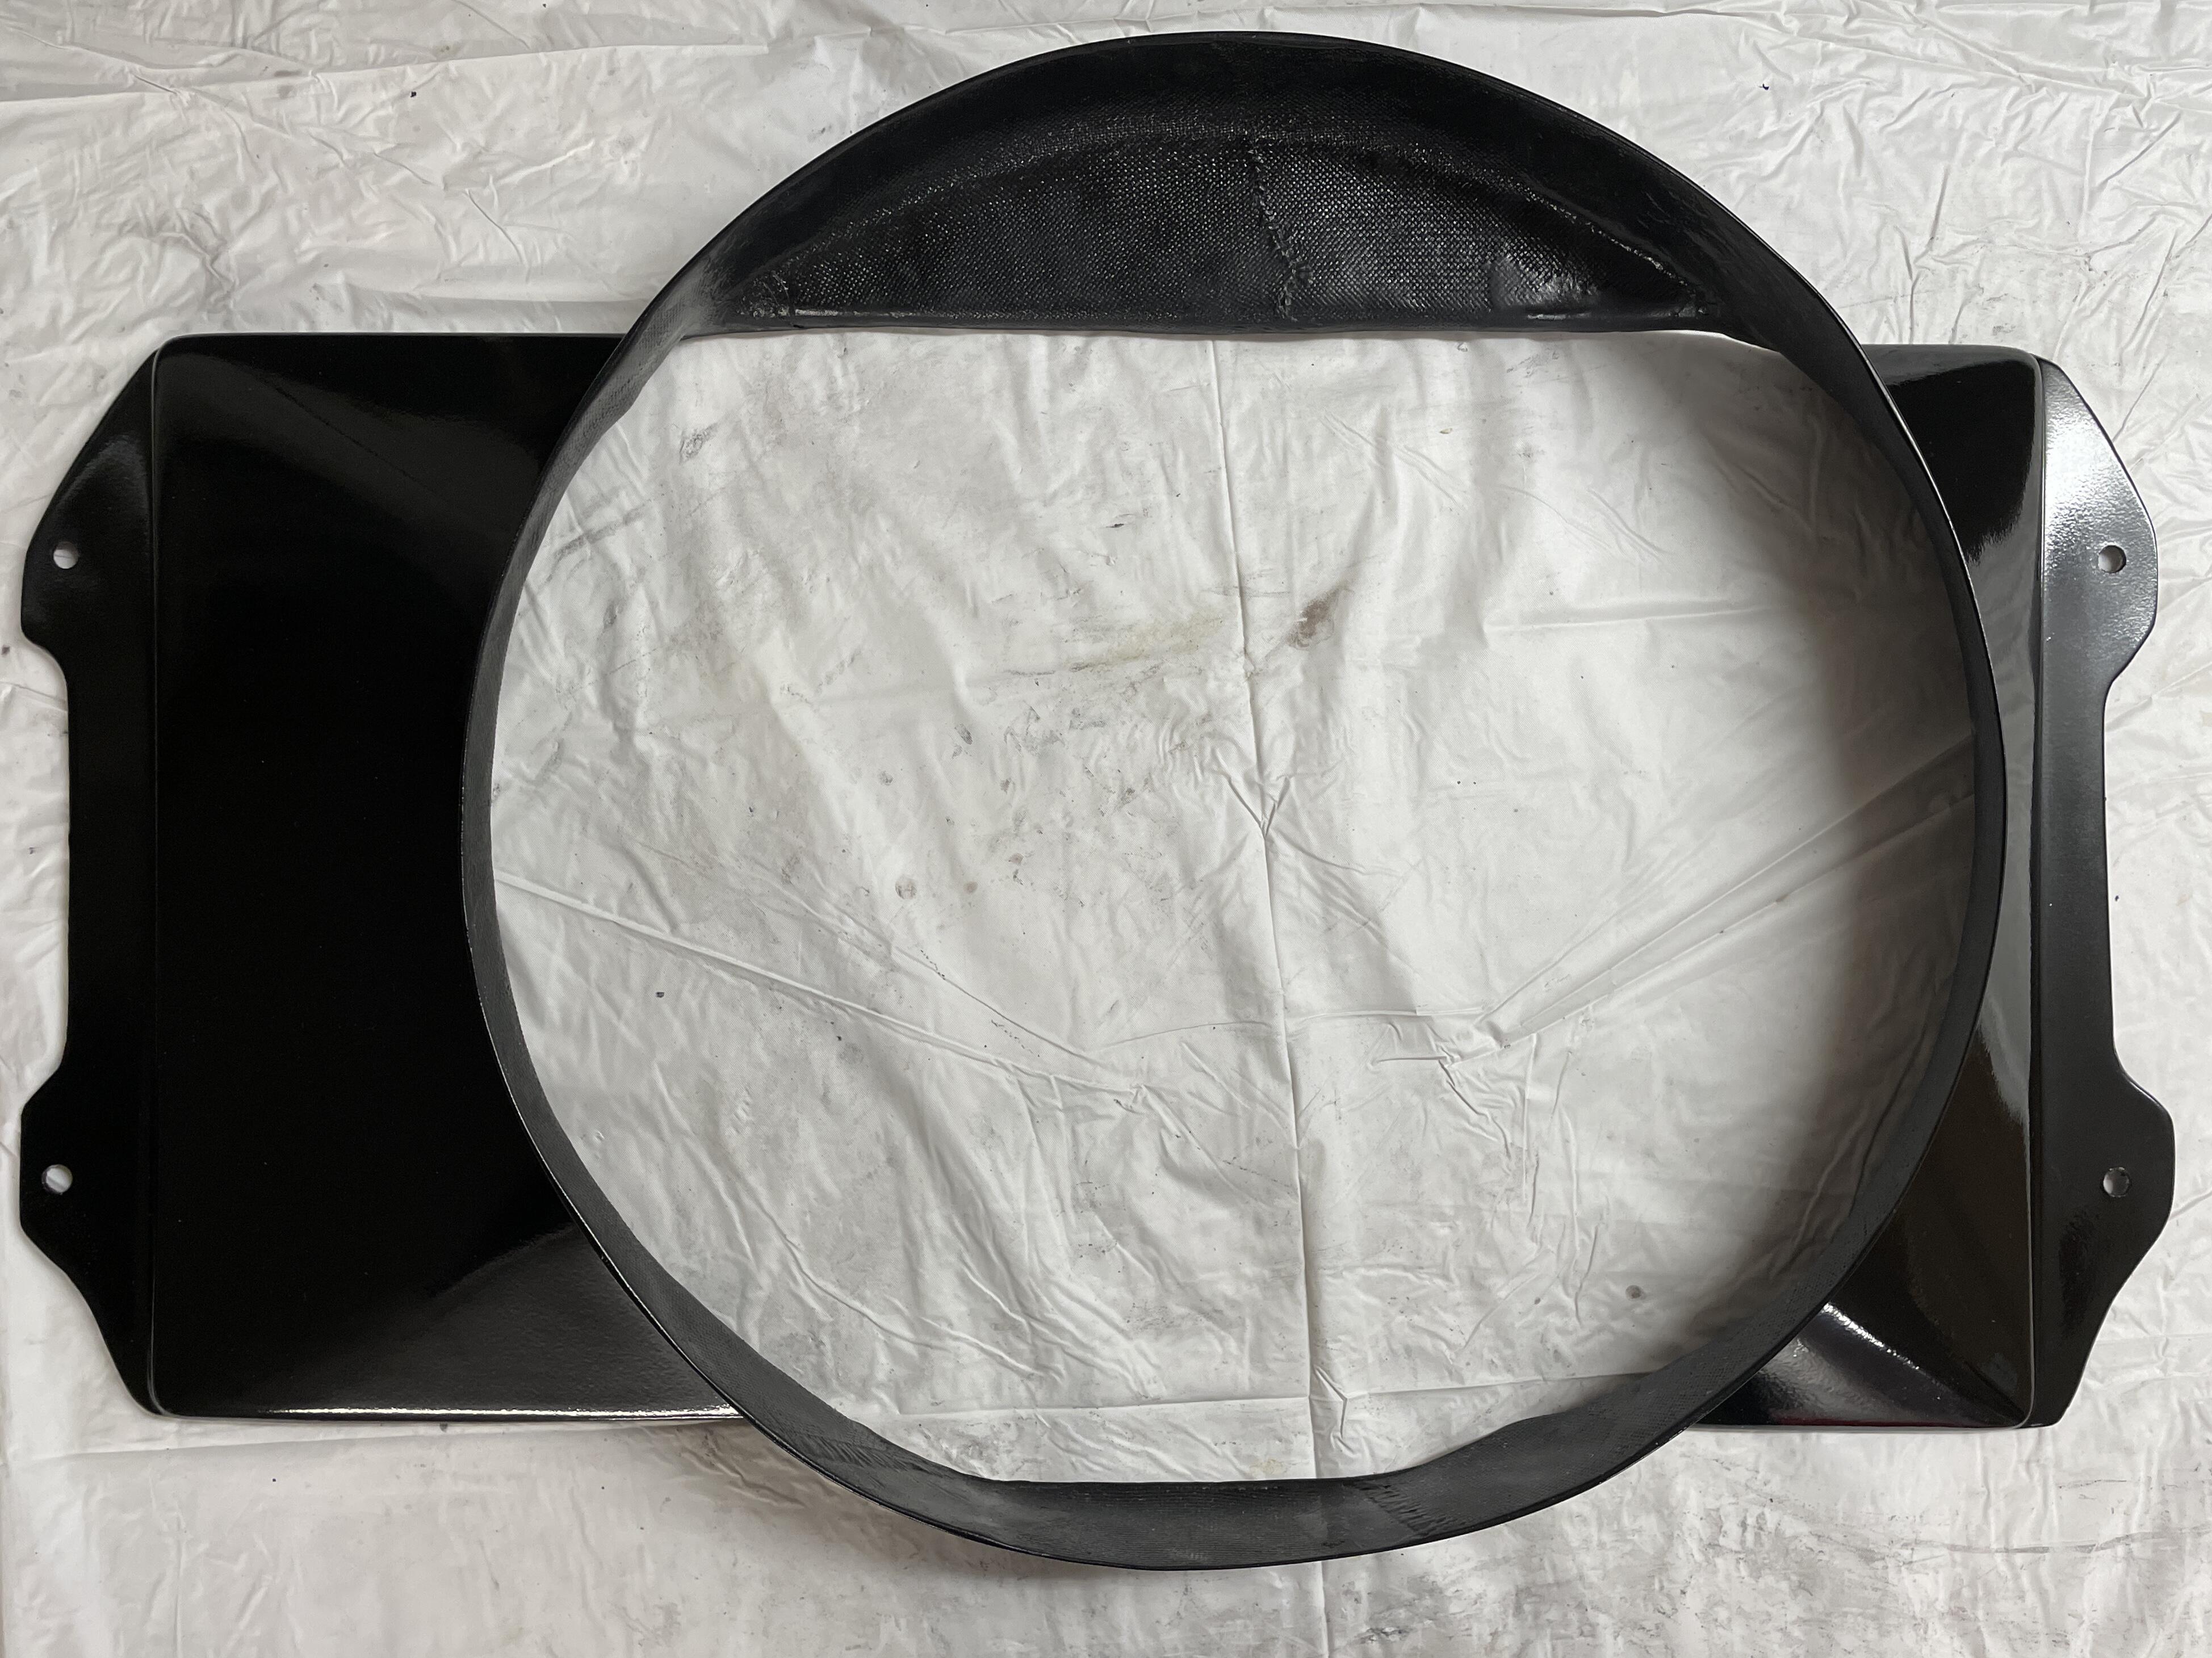
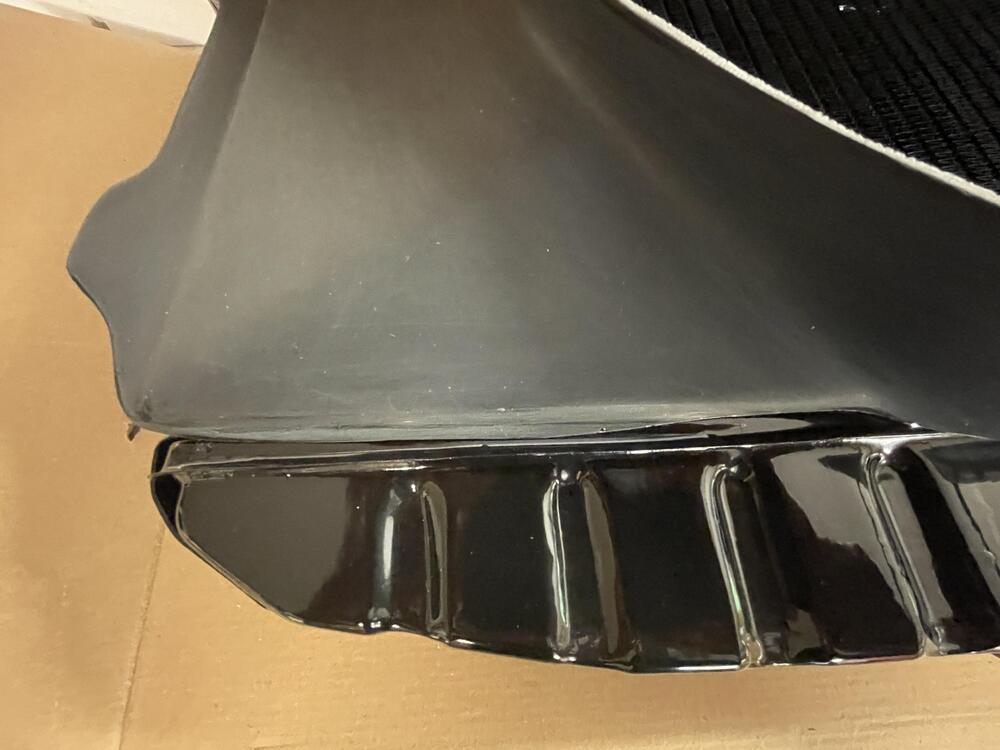
McMaster-Carr has high-temp closed cell adhesive foam in a variety of sizes, so I’m sure I can find something. I will run a strip across the top and bottom because it’s clapping against the radiator toward the center where it’s most flexible. Right now the plan is to adhere it to the shroud and not the radiator. Should be an easy fix.
-
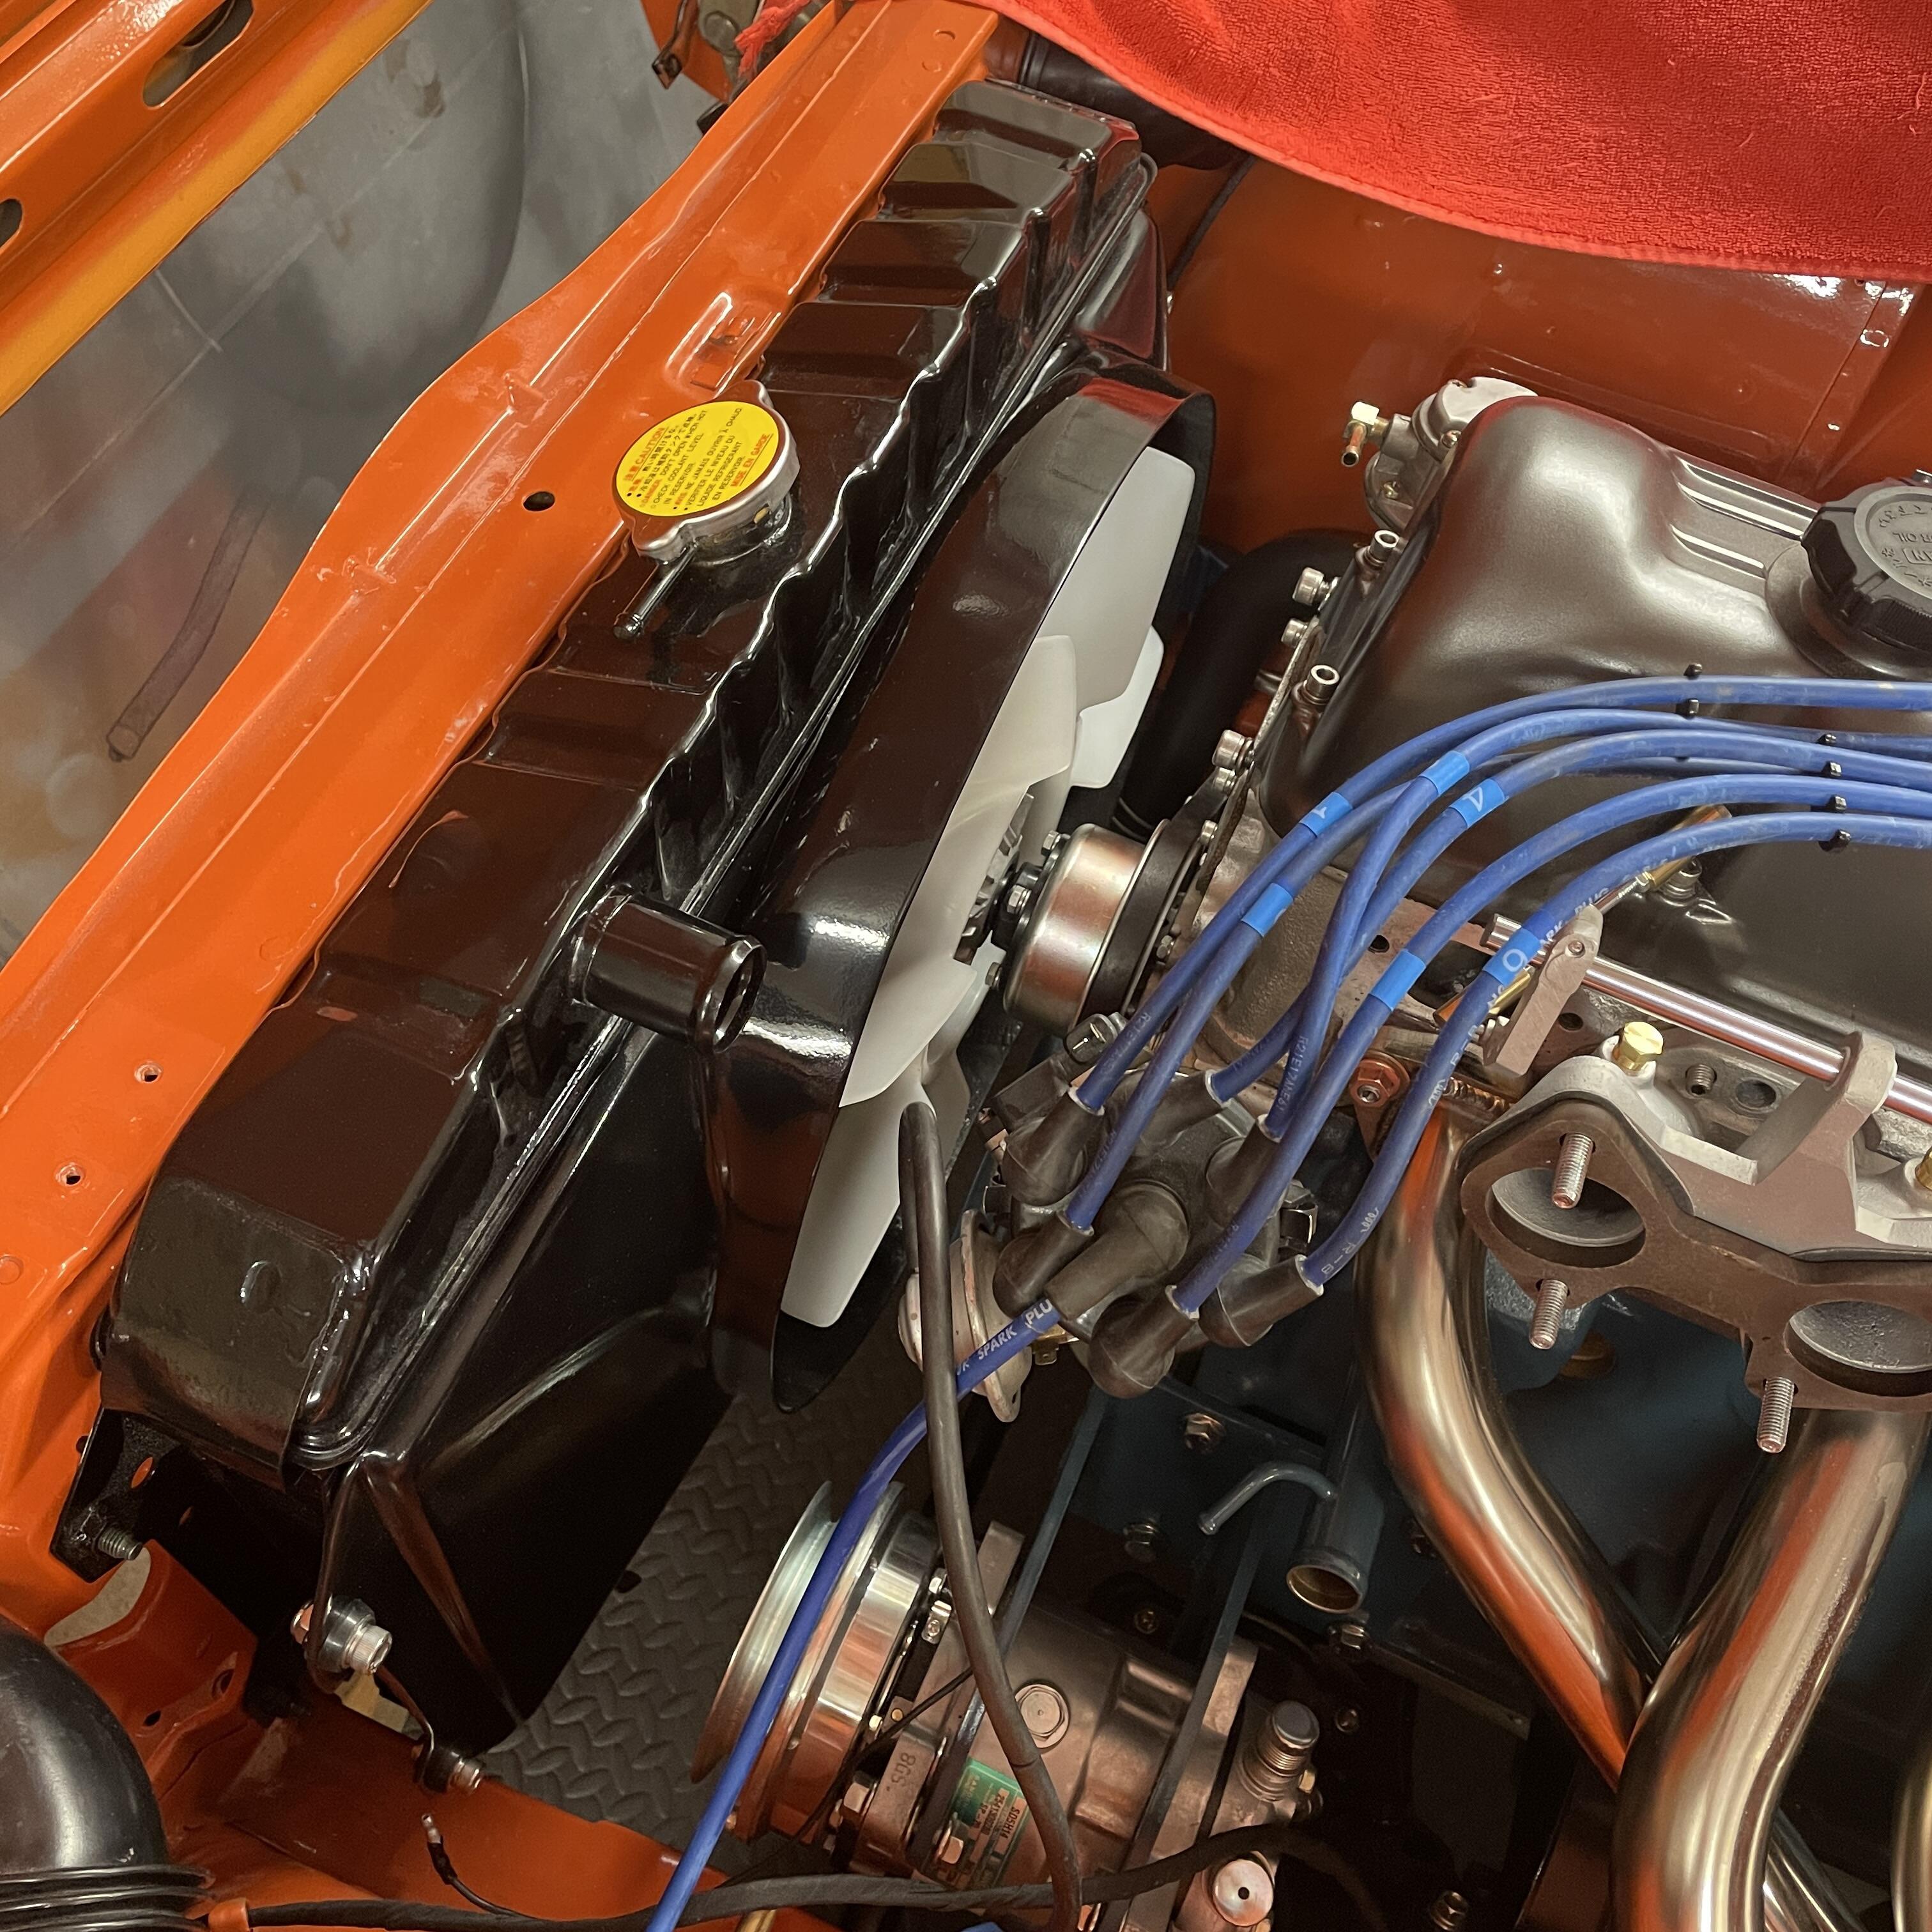
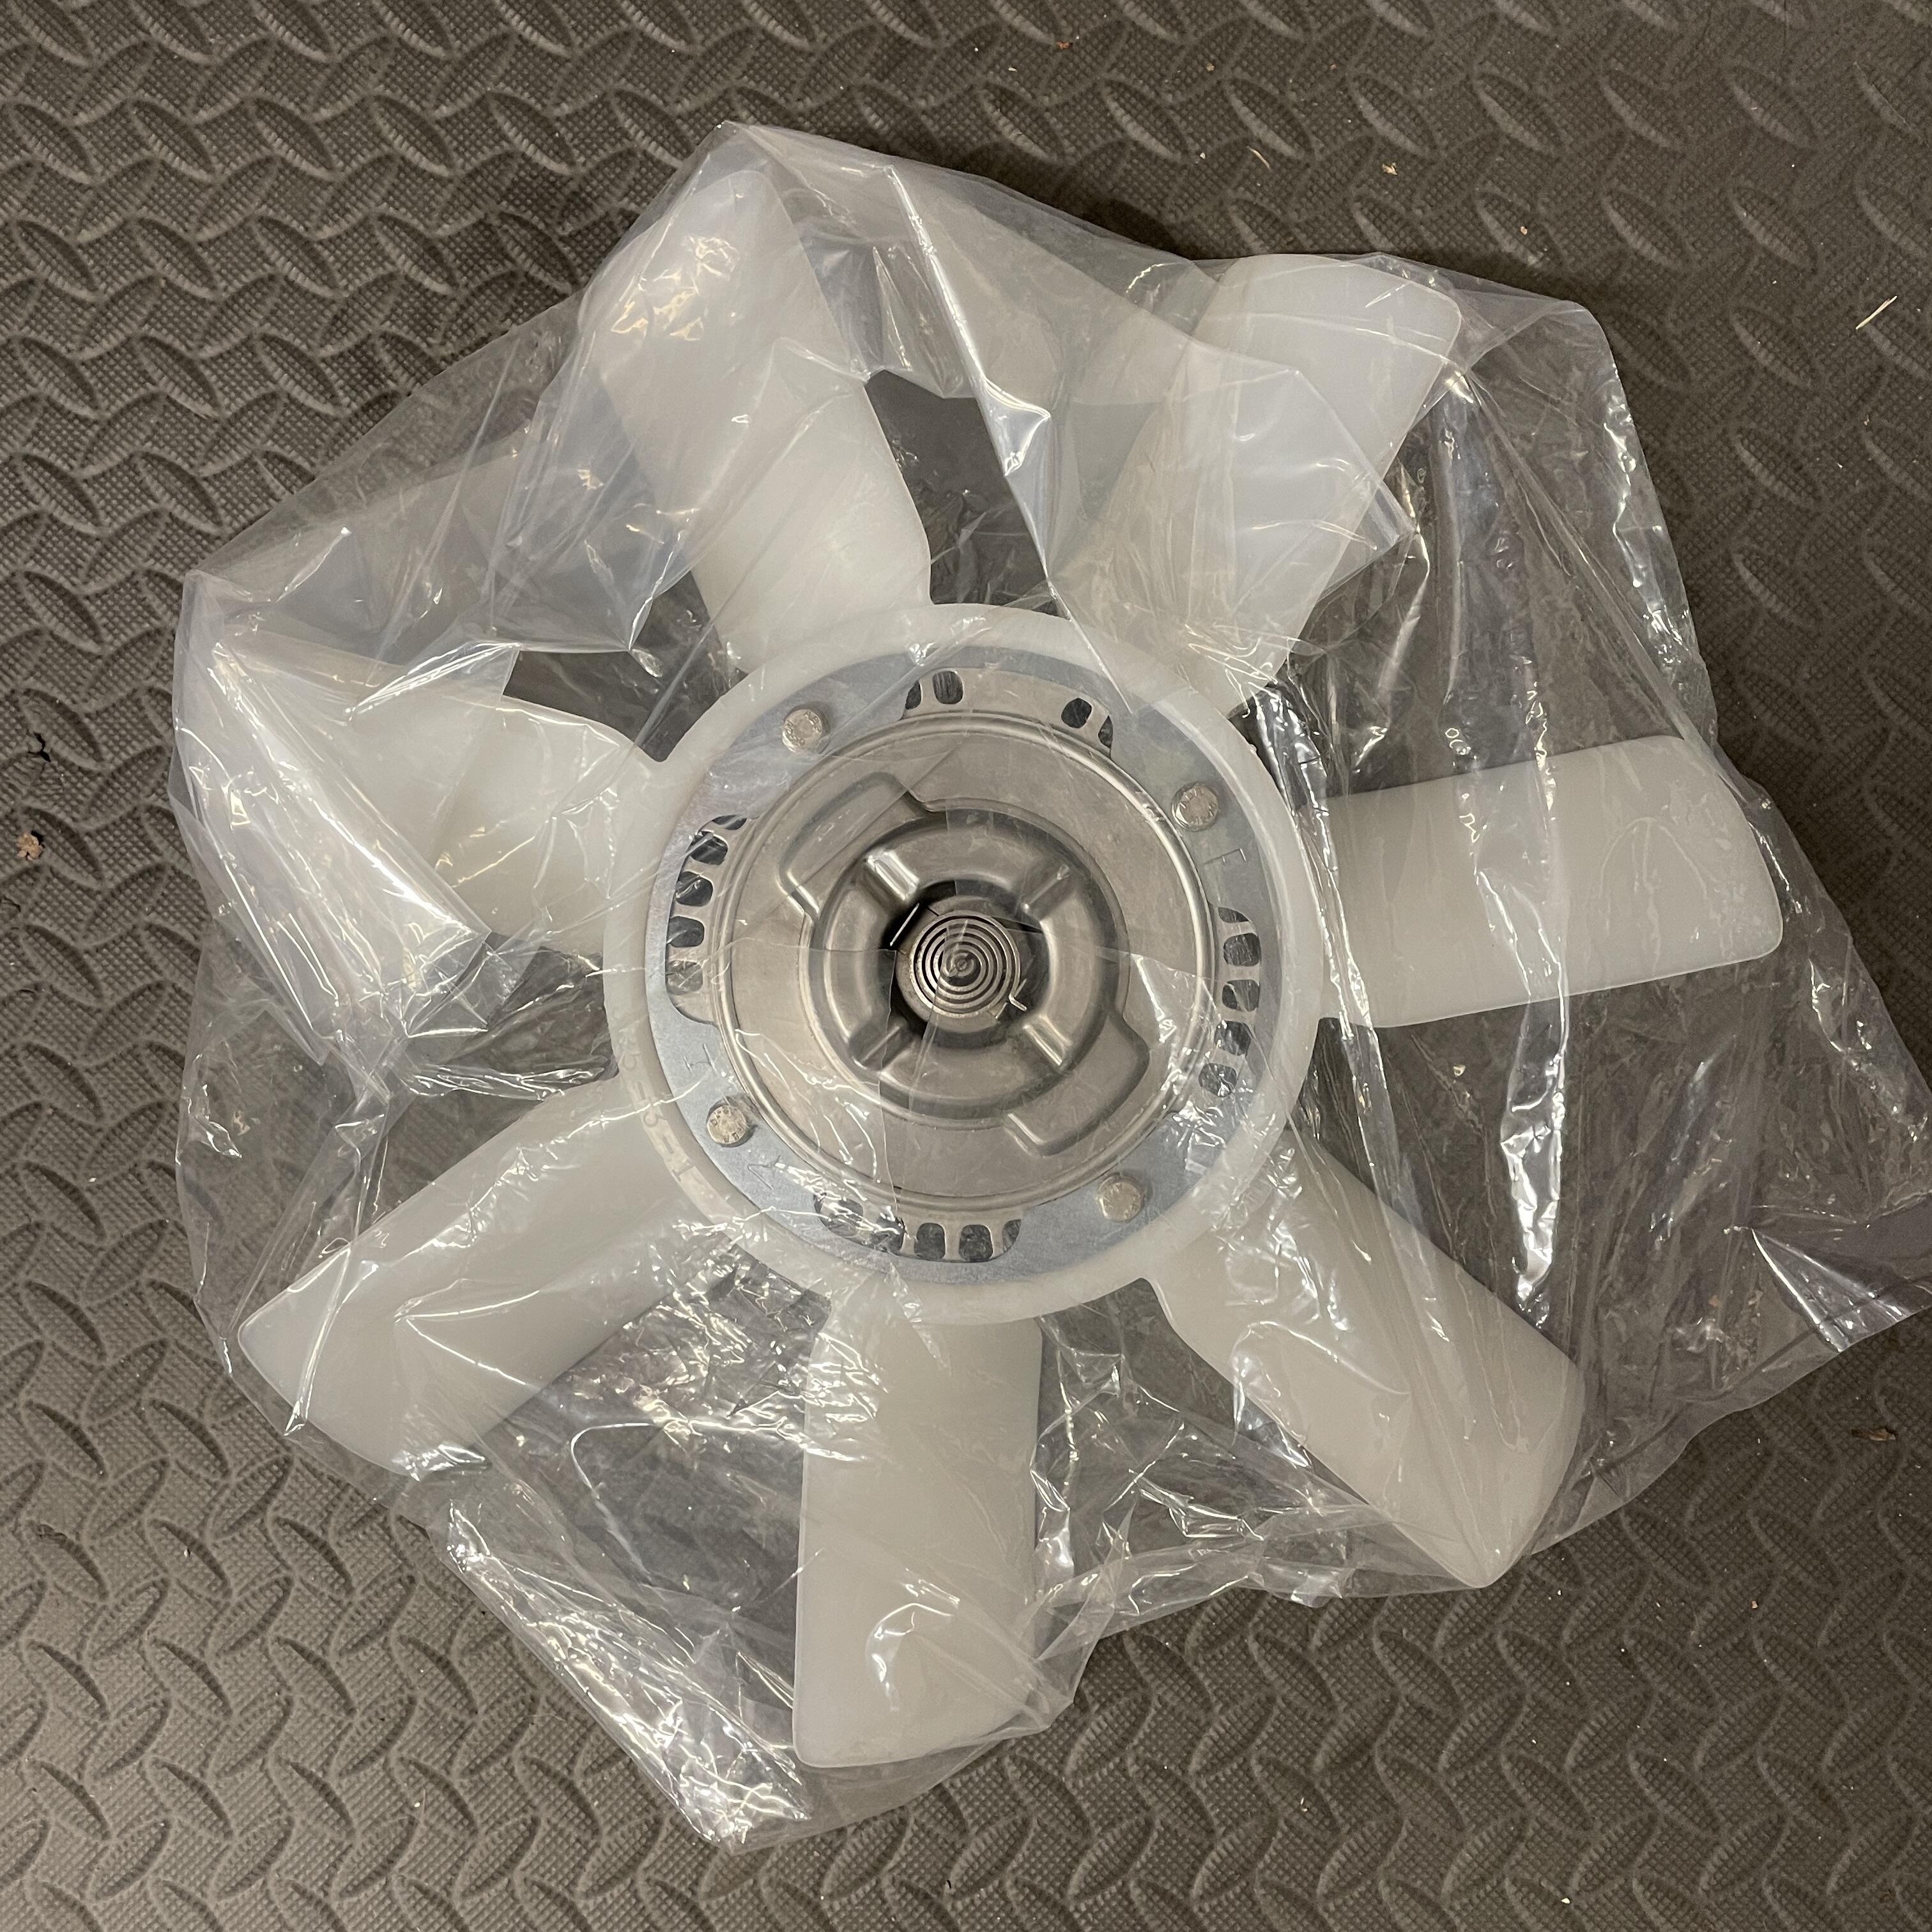
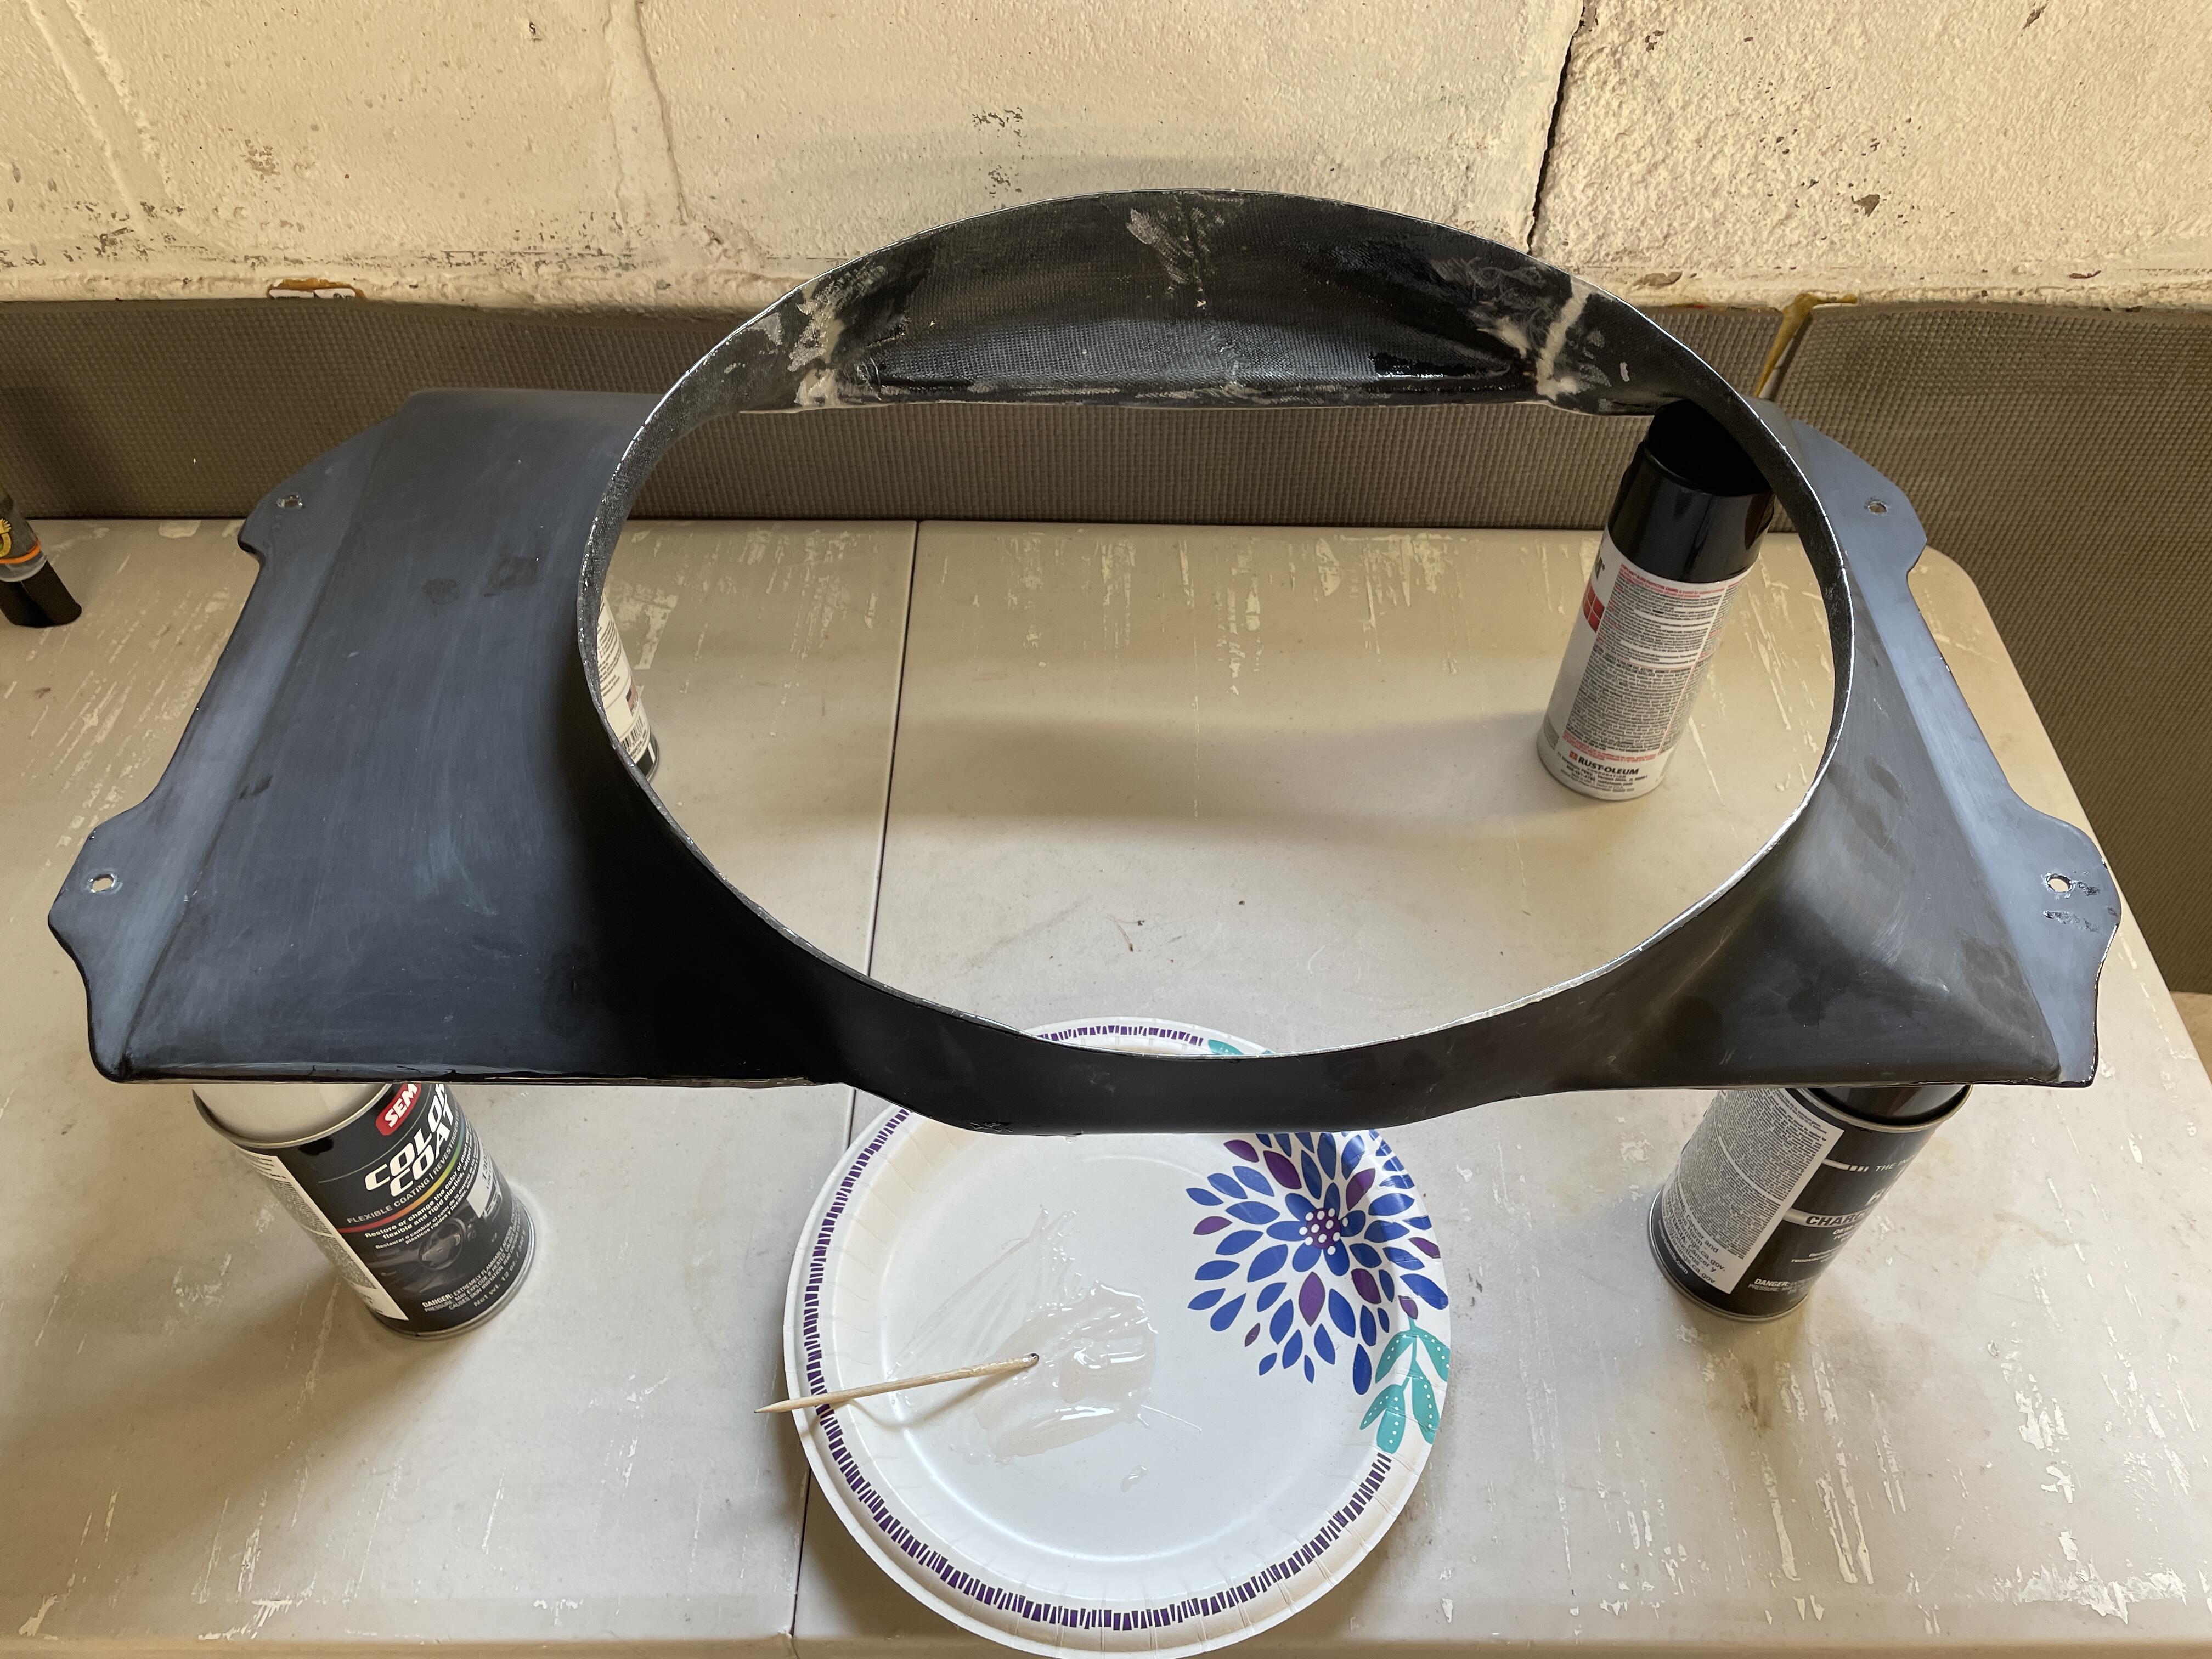
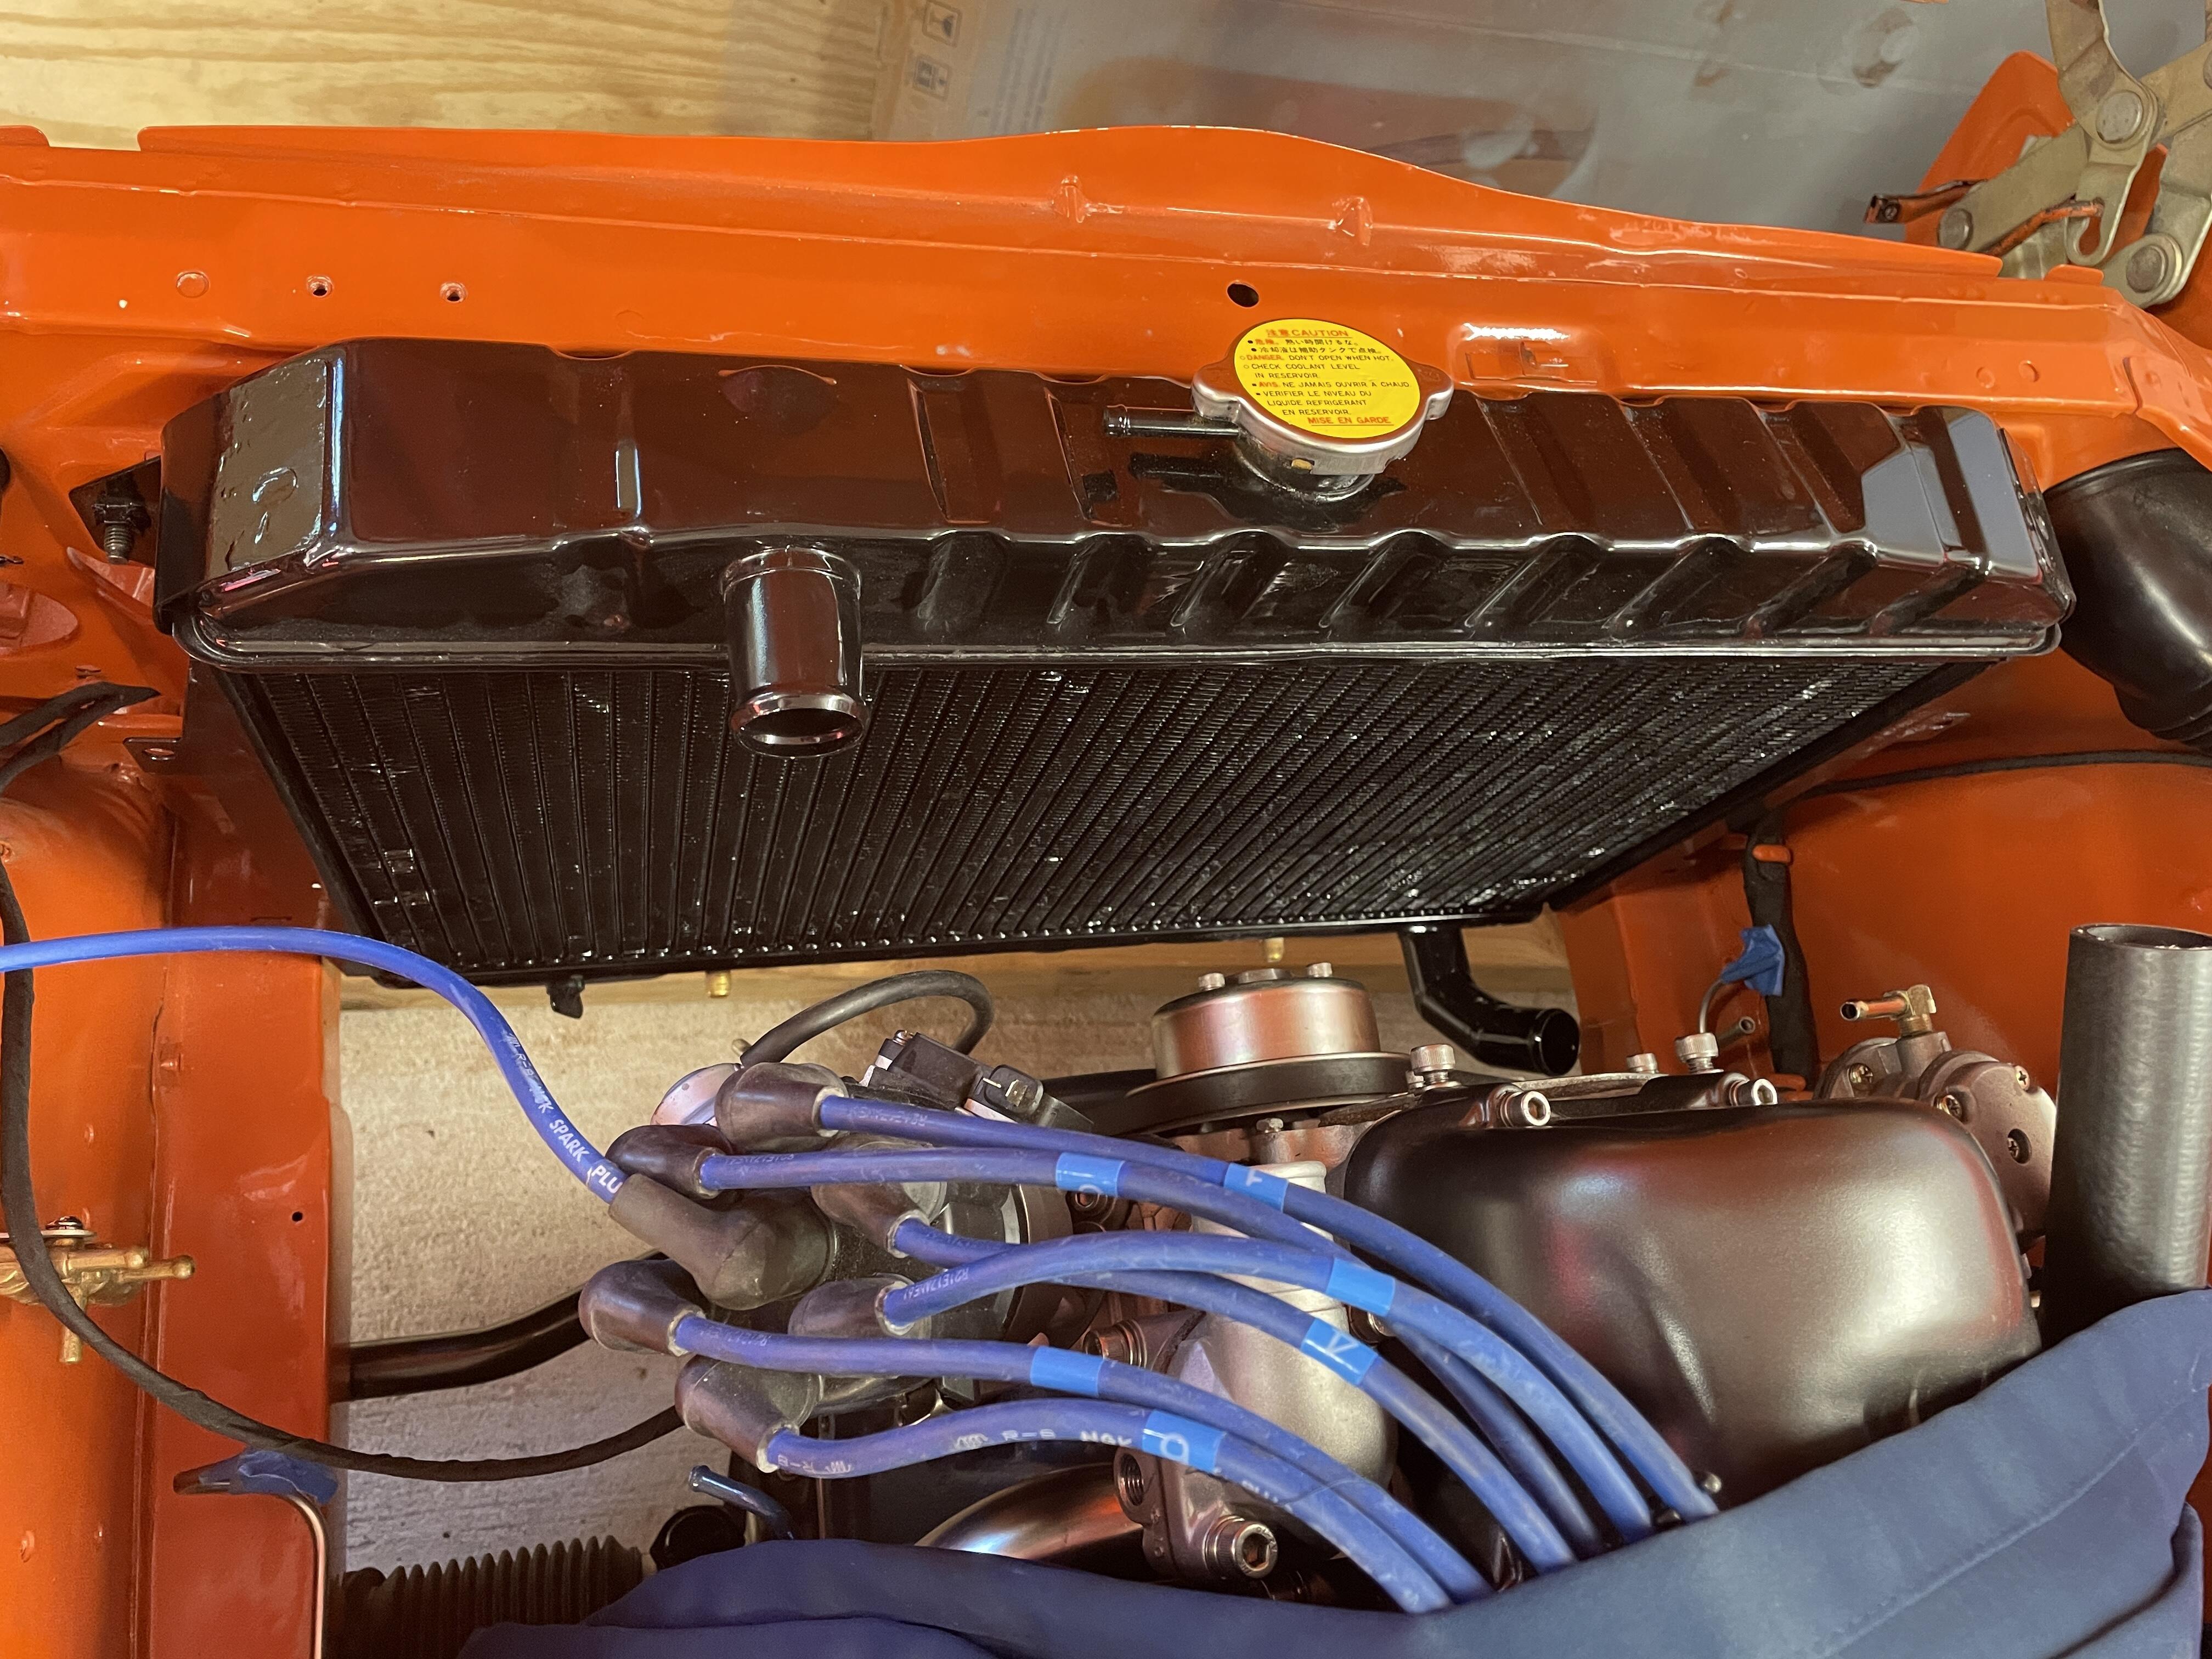
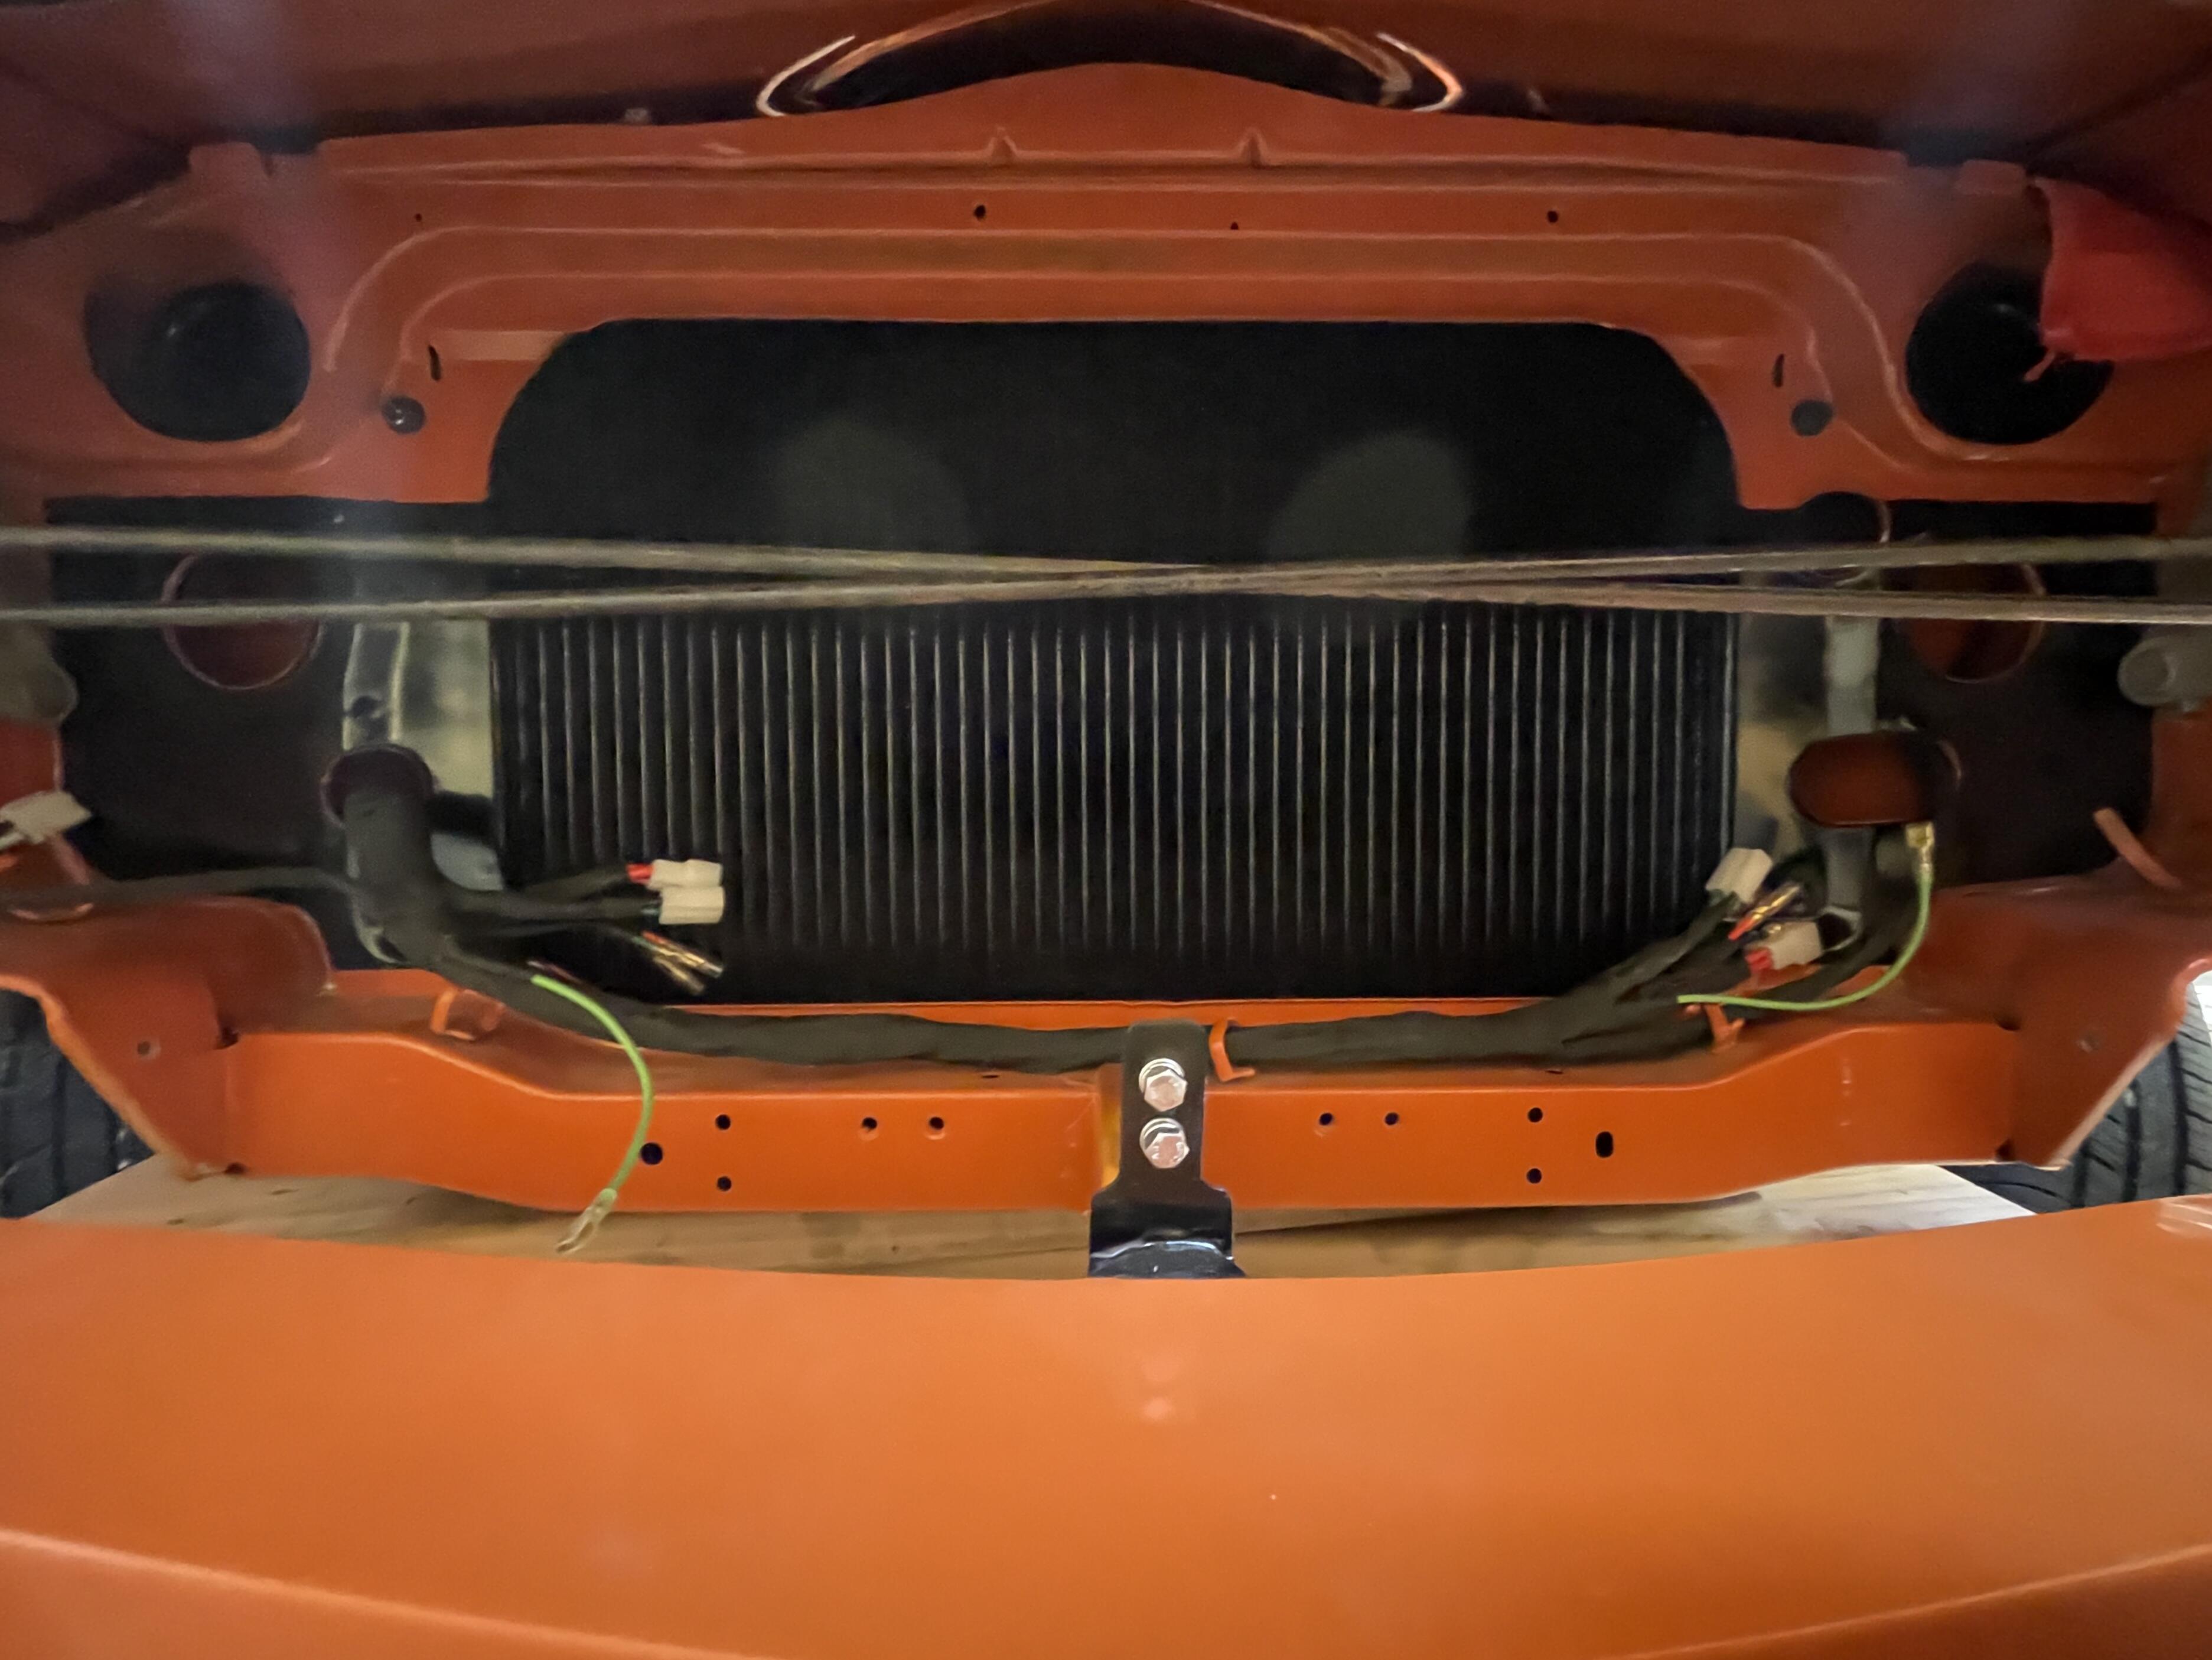
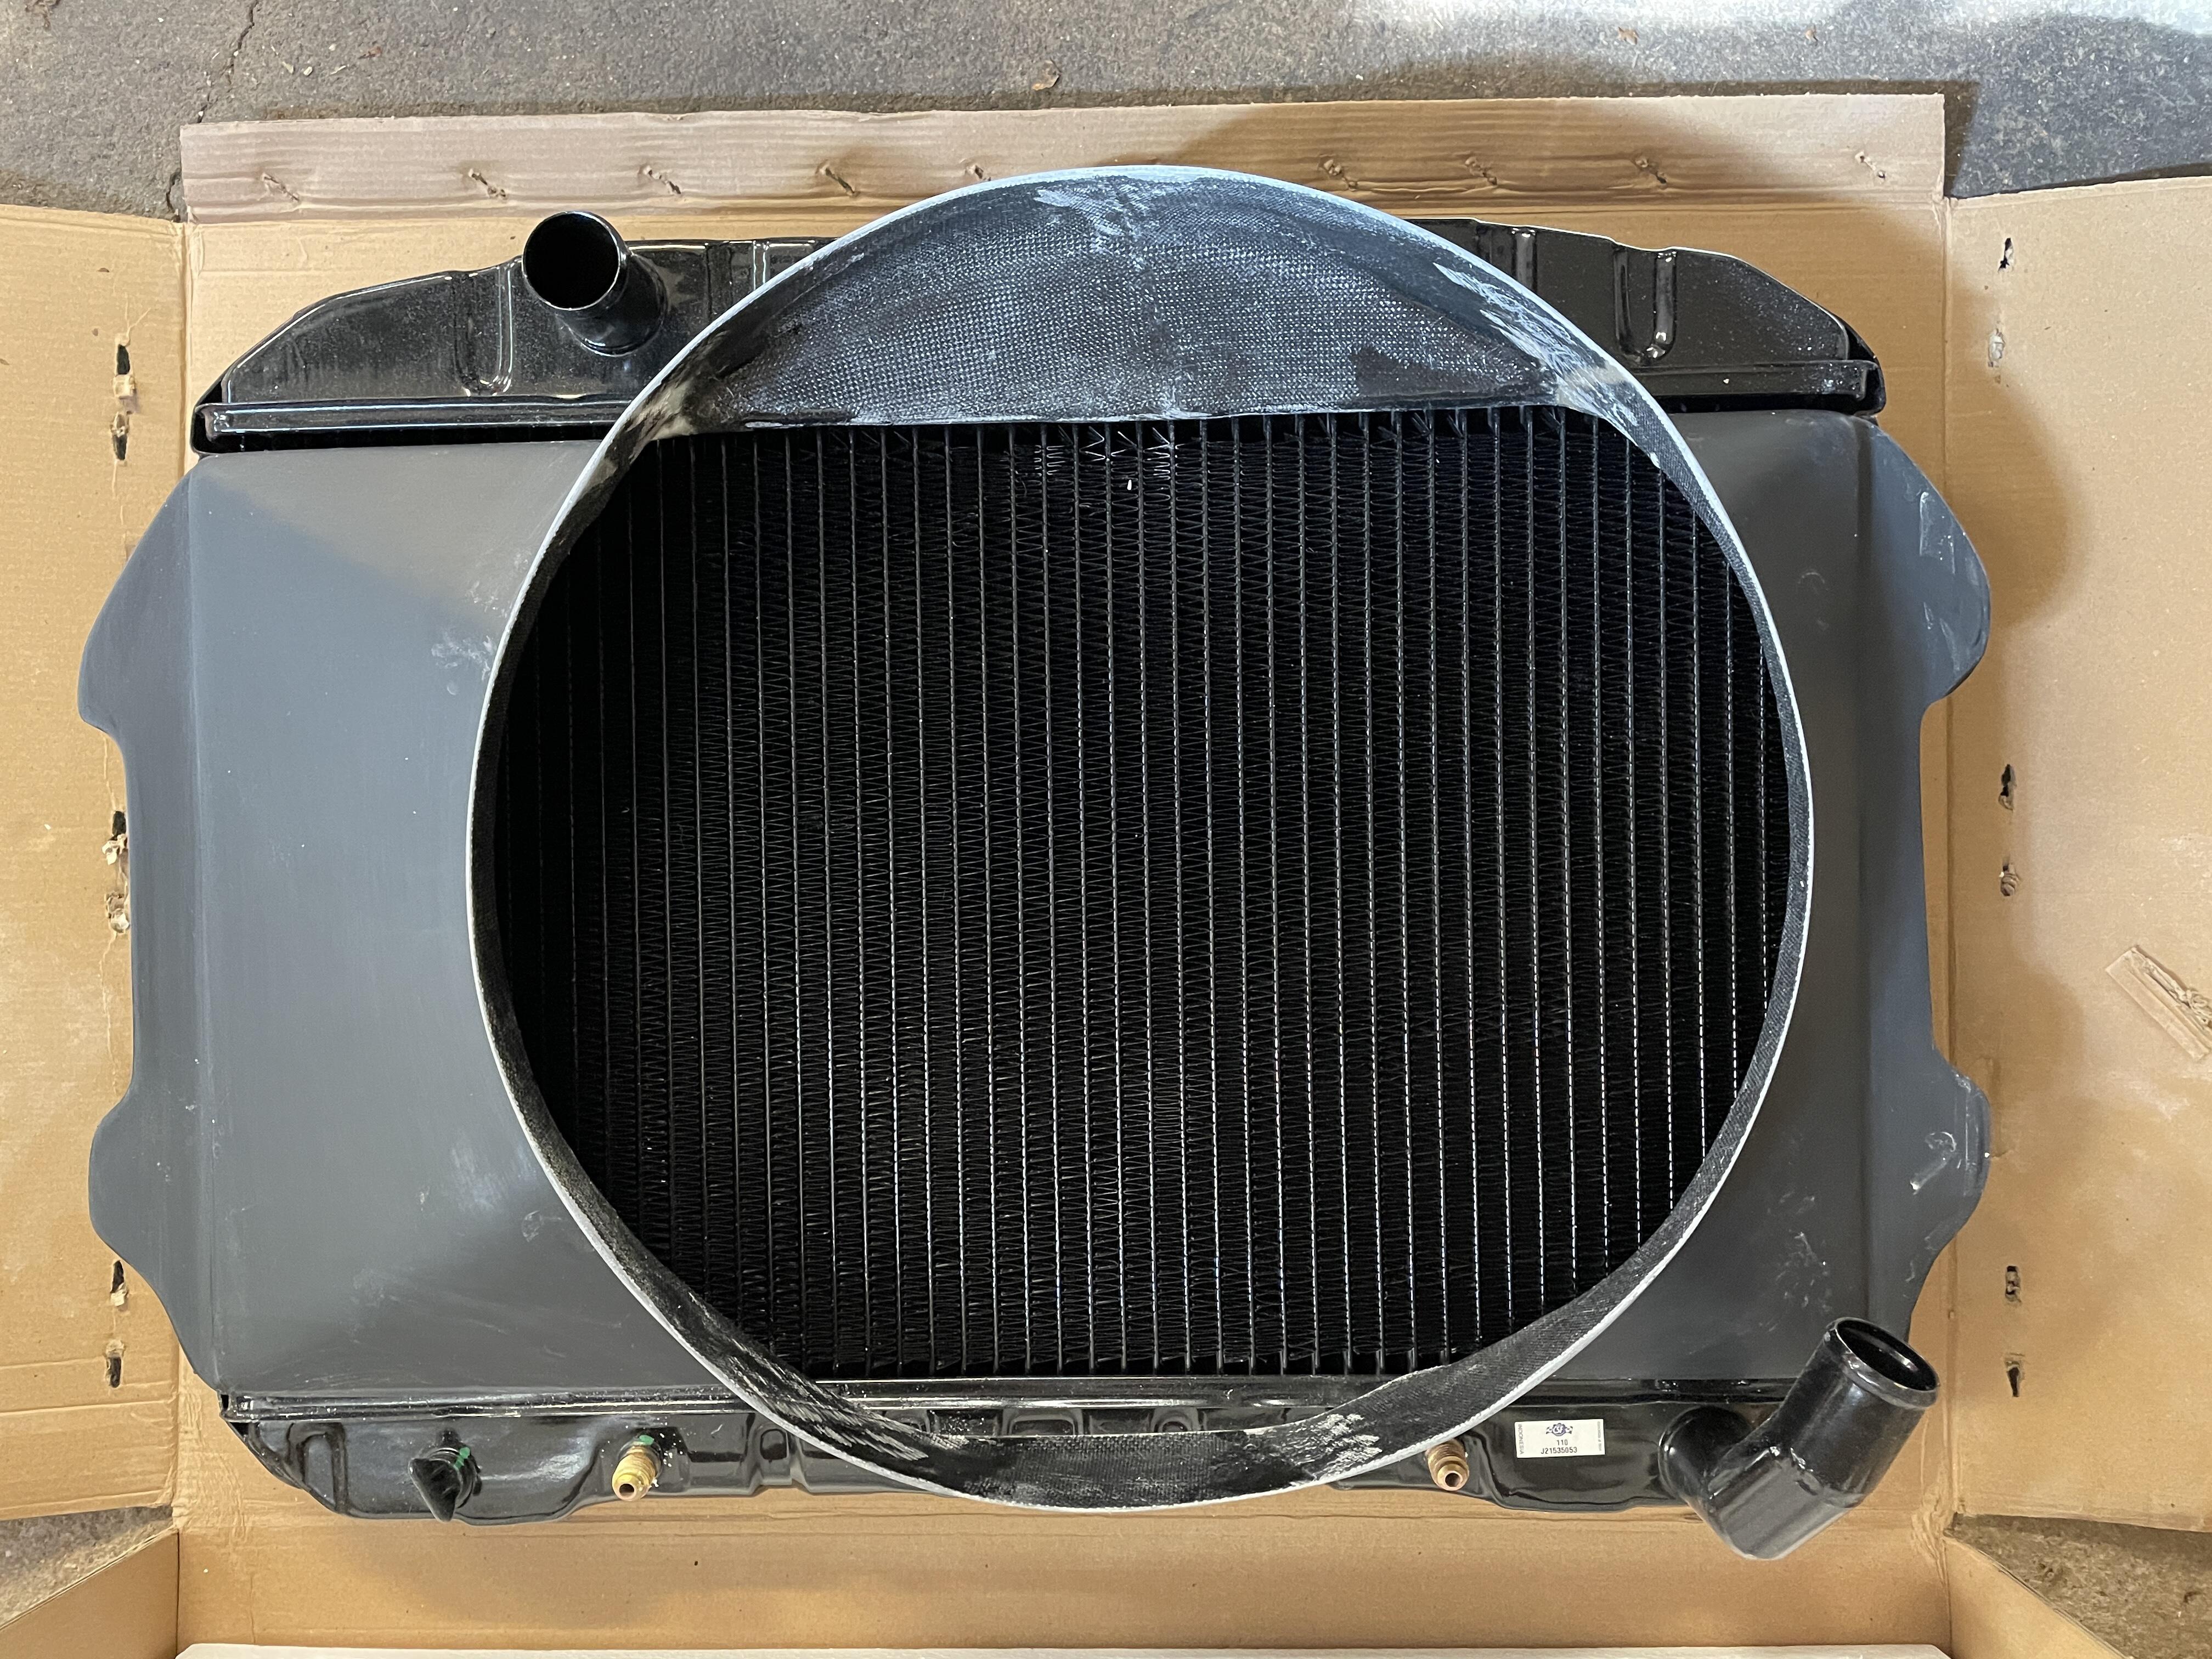
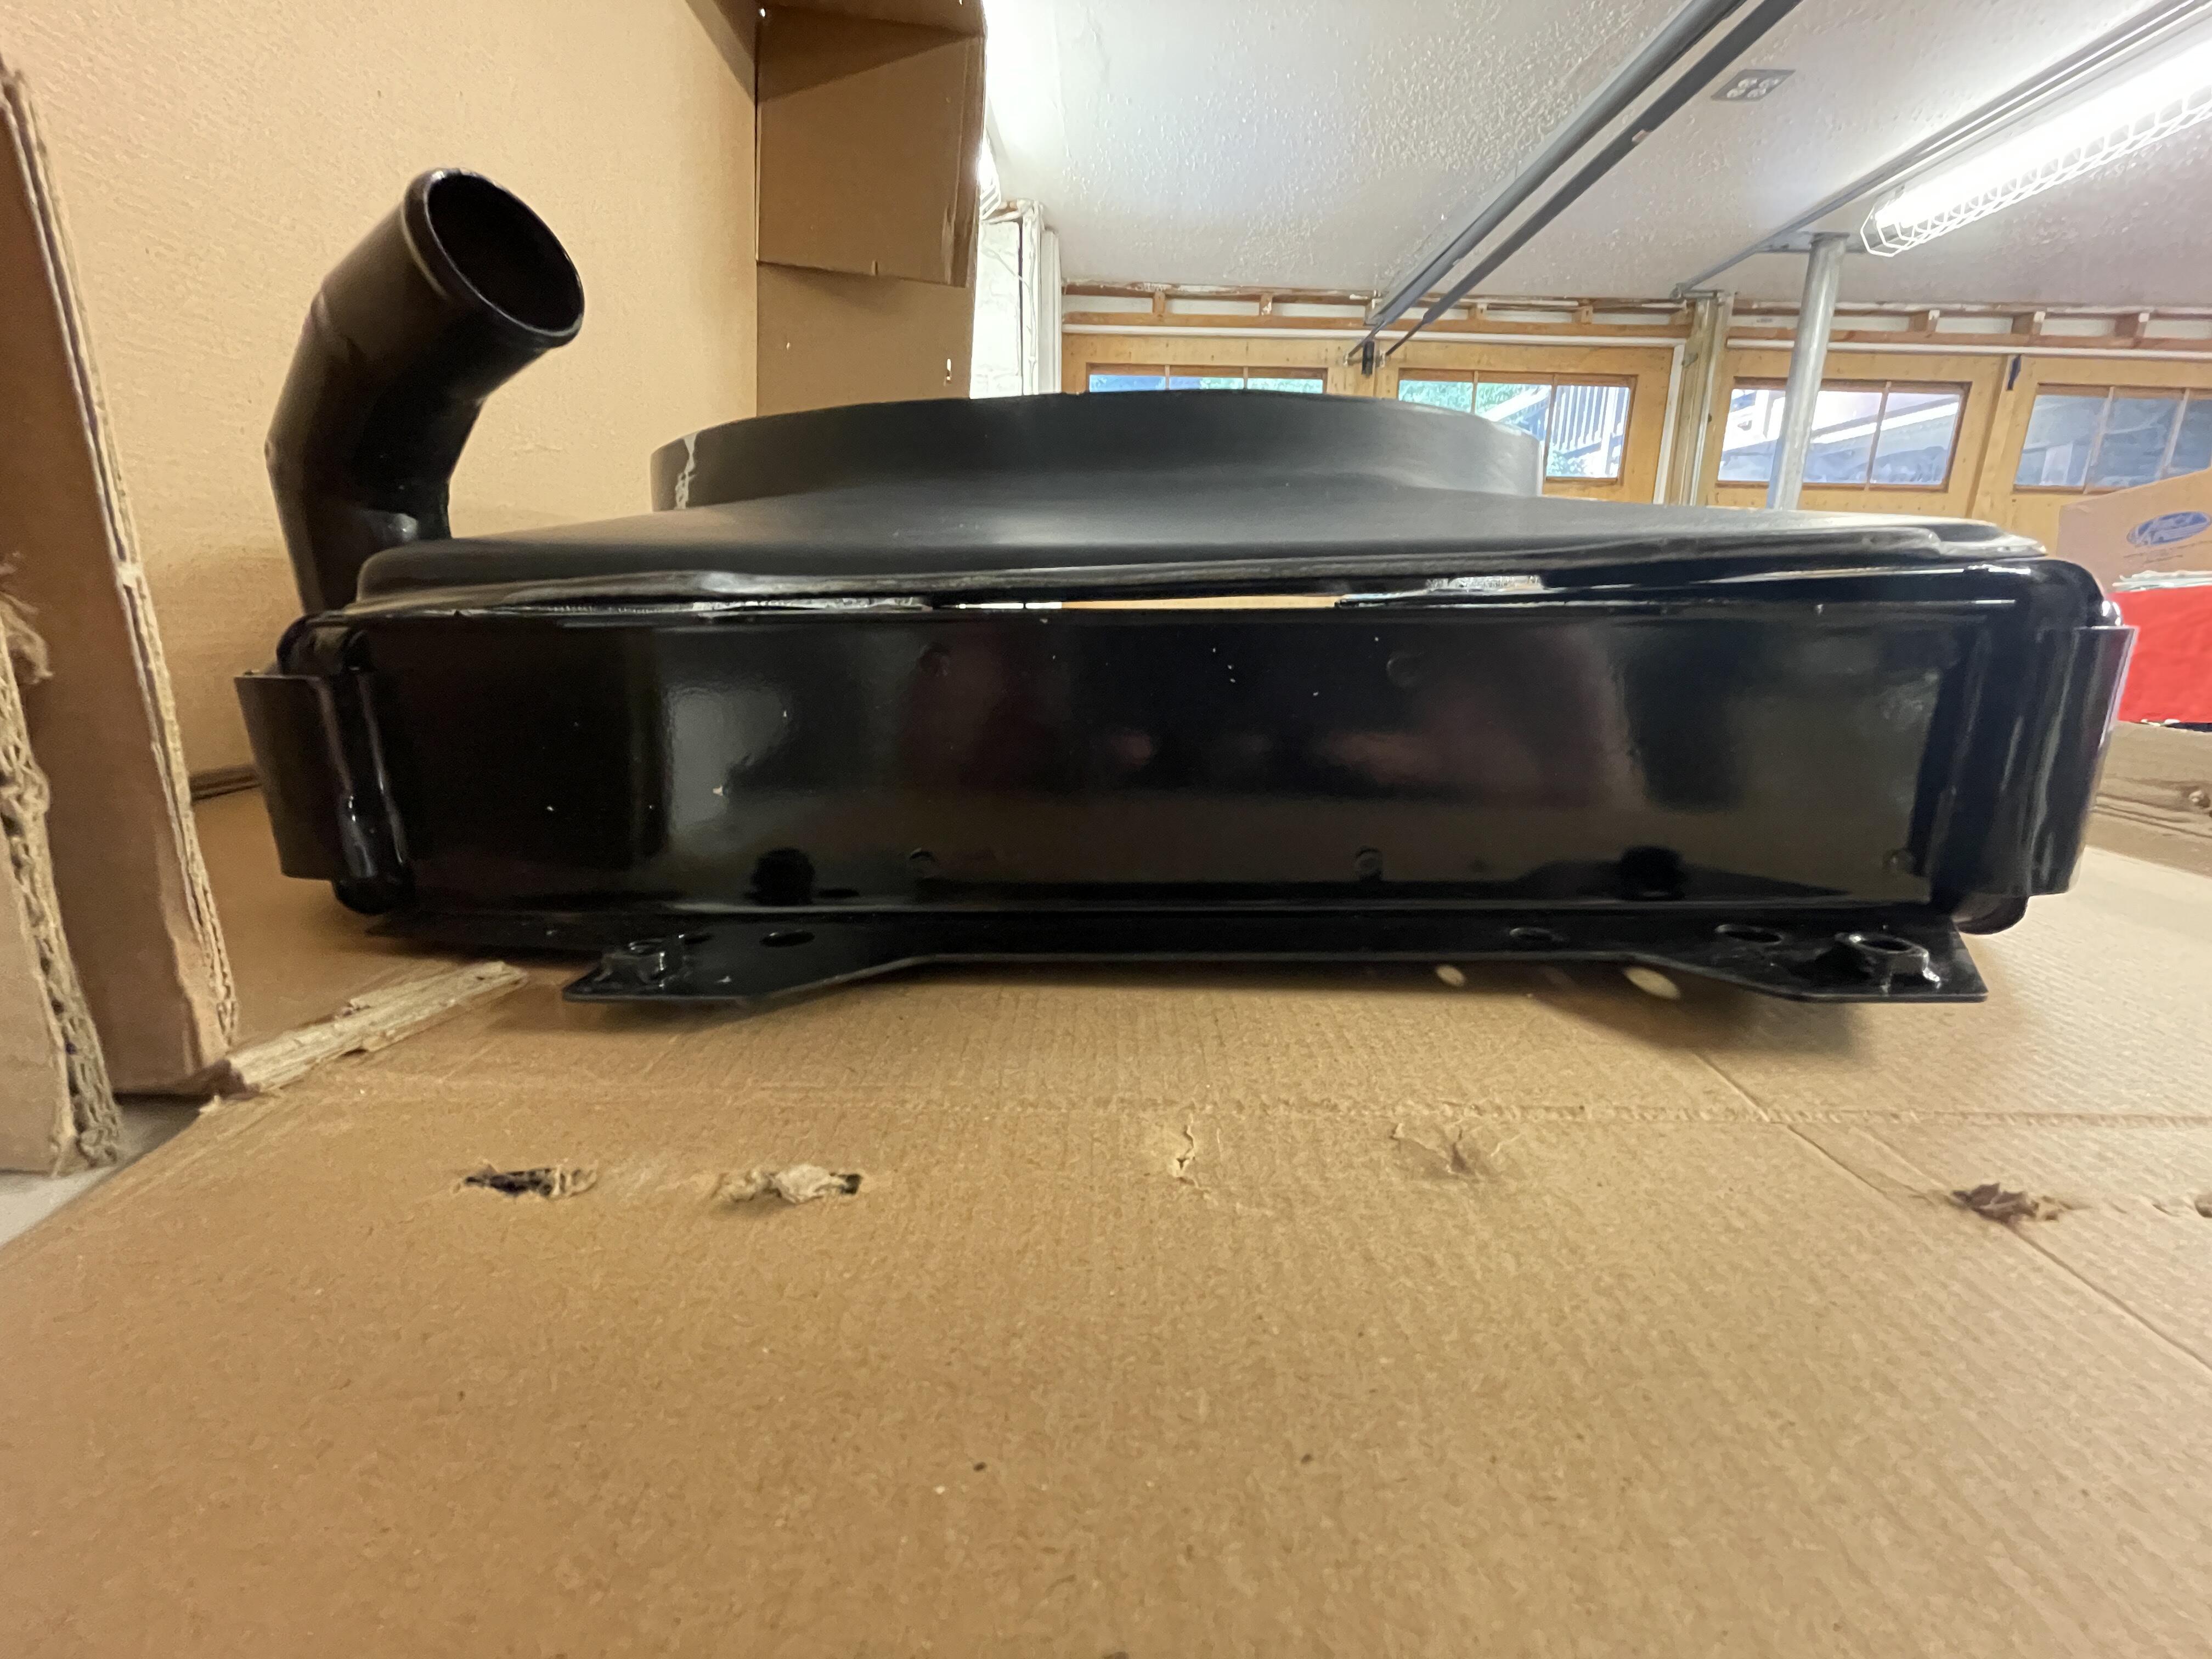
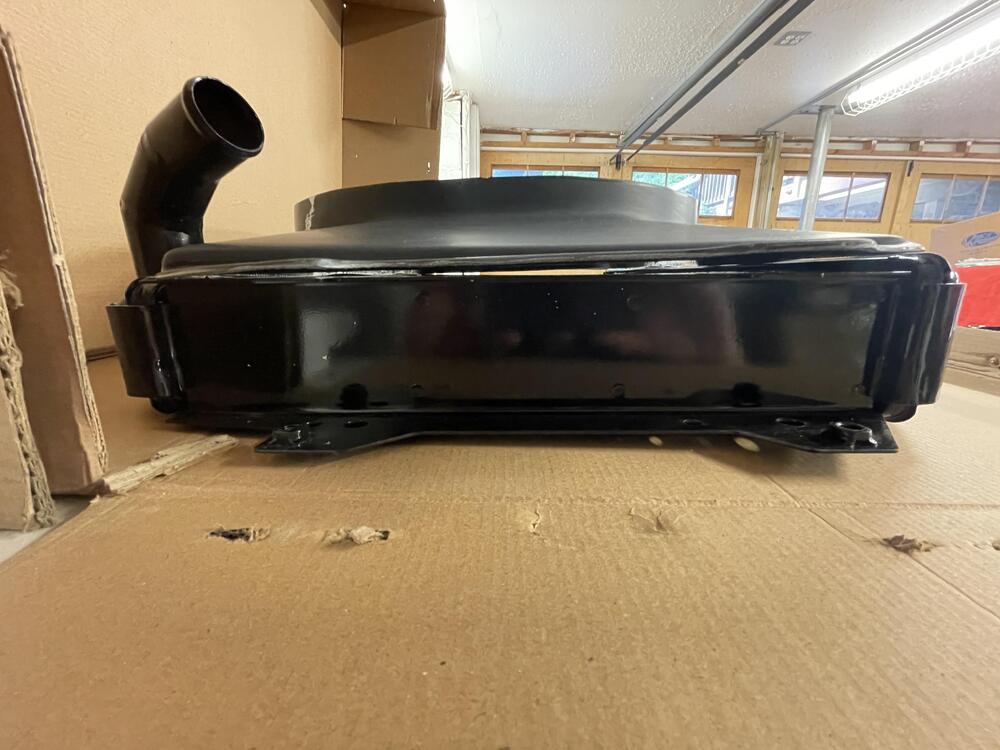
“…he never drives it. He just rubs it with a diaper.” After several days of painting, sanding, and polishing, the radiator and fan are in. The fan shroud is the fiberglass one from MSA, the fan is a seven-blade OEM, and the clutch is the original that came with the car (after much polishing and some matte high-temp clear coat). The fan shroud comes untrimmed, so there were a few days of cleaning up the fit. The paint is rattle can engine paint, just with several sanded coats and some heavy layers of clear sanded to 5000 then polished out. It’s held on with SS cap heads, but I’ve insulated it with rubber spacers on both sides of the fiberglass to prevent delaminating or cracking. The radiator is the 3-core 110 copper/brass radiator from @csf_radiators. Zero adjustments were needed. It just dropped right in. I think this really went a long way toward making this ZX engine look like it’s supposed to be in this car. I’m pretty happy with this arrangement. The only thing I’m concerned about is that the fan shroud flexes and will probably rattle against the radiator. I’m considering putting some weatherstripping foam around the perimeter of the shroud if I can find some with a high enough temperature rating.


-
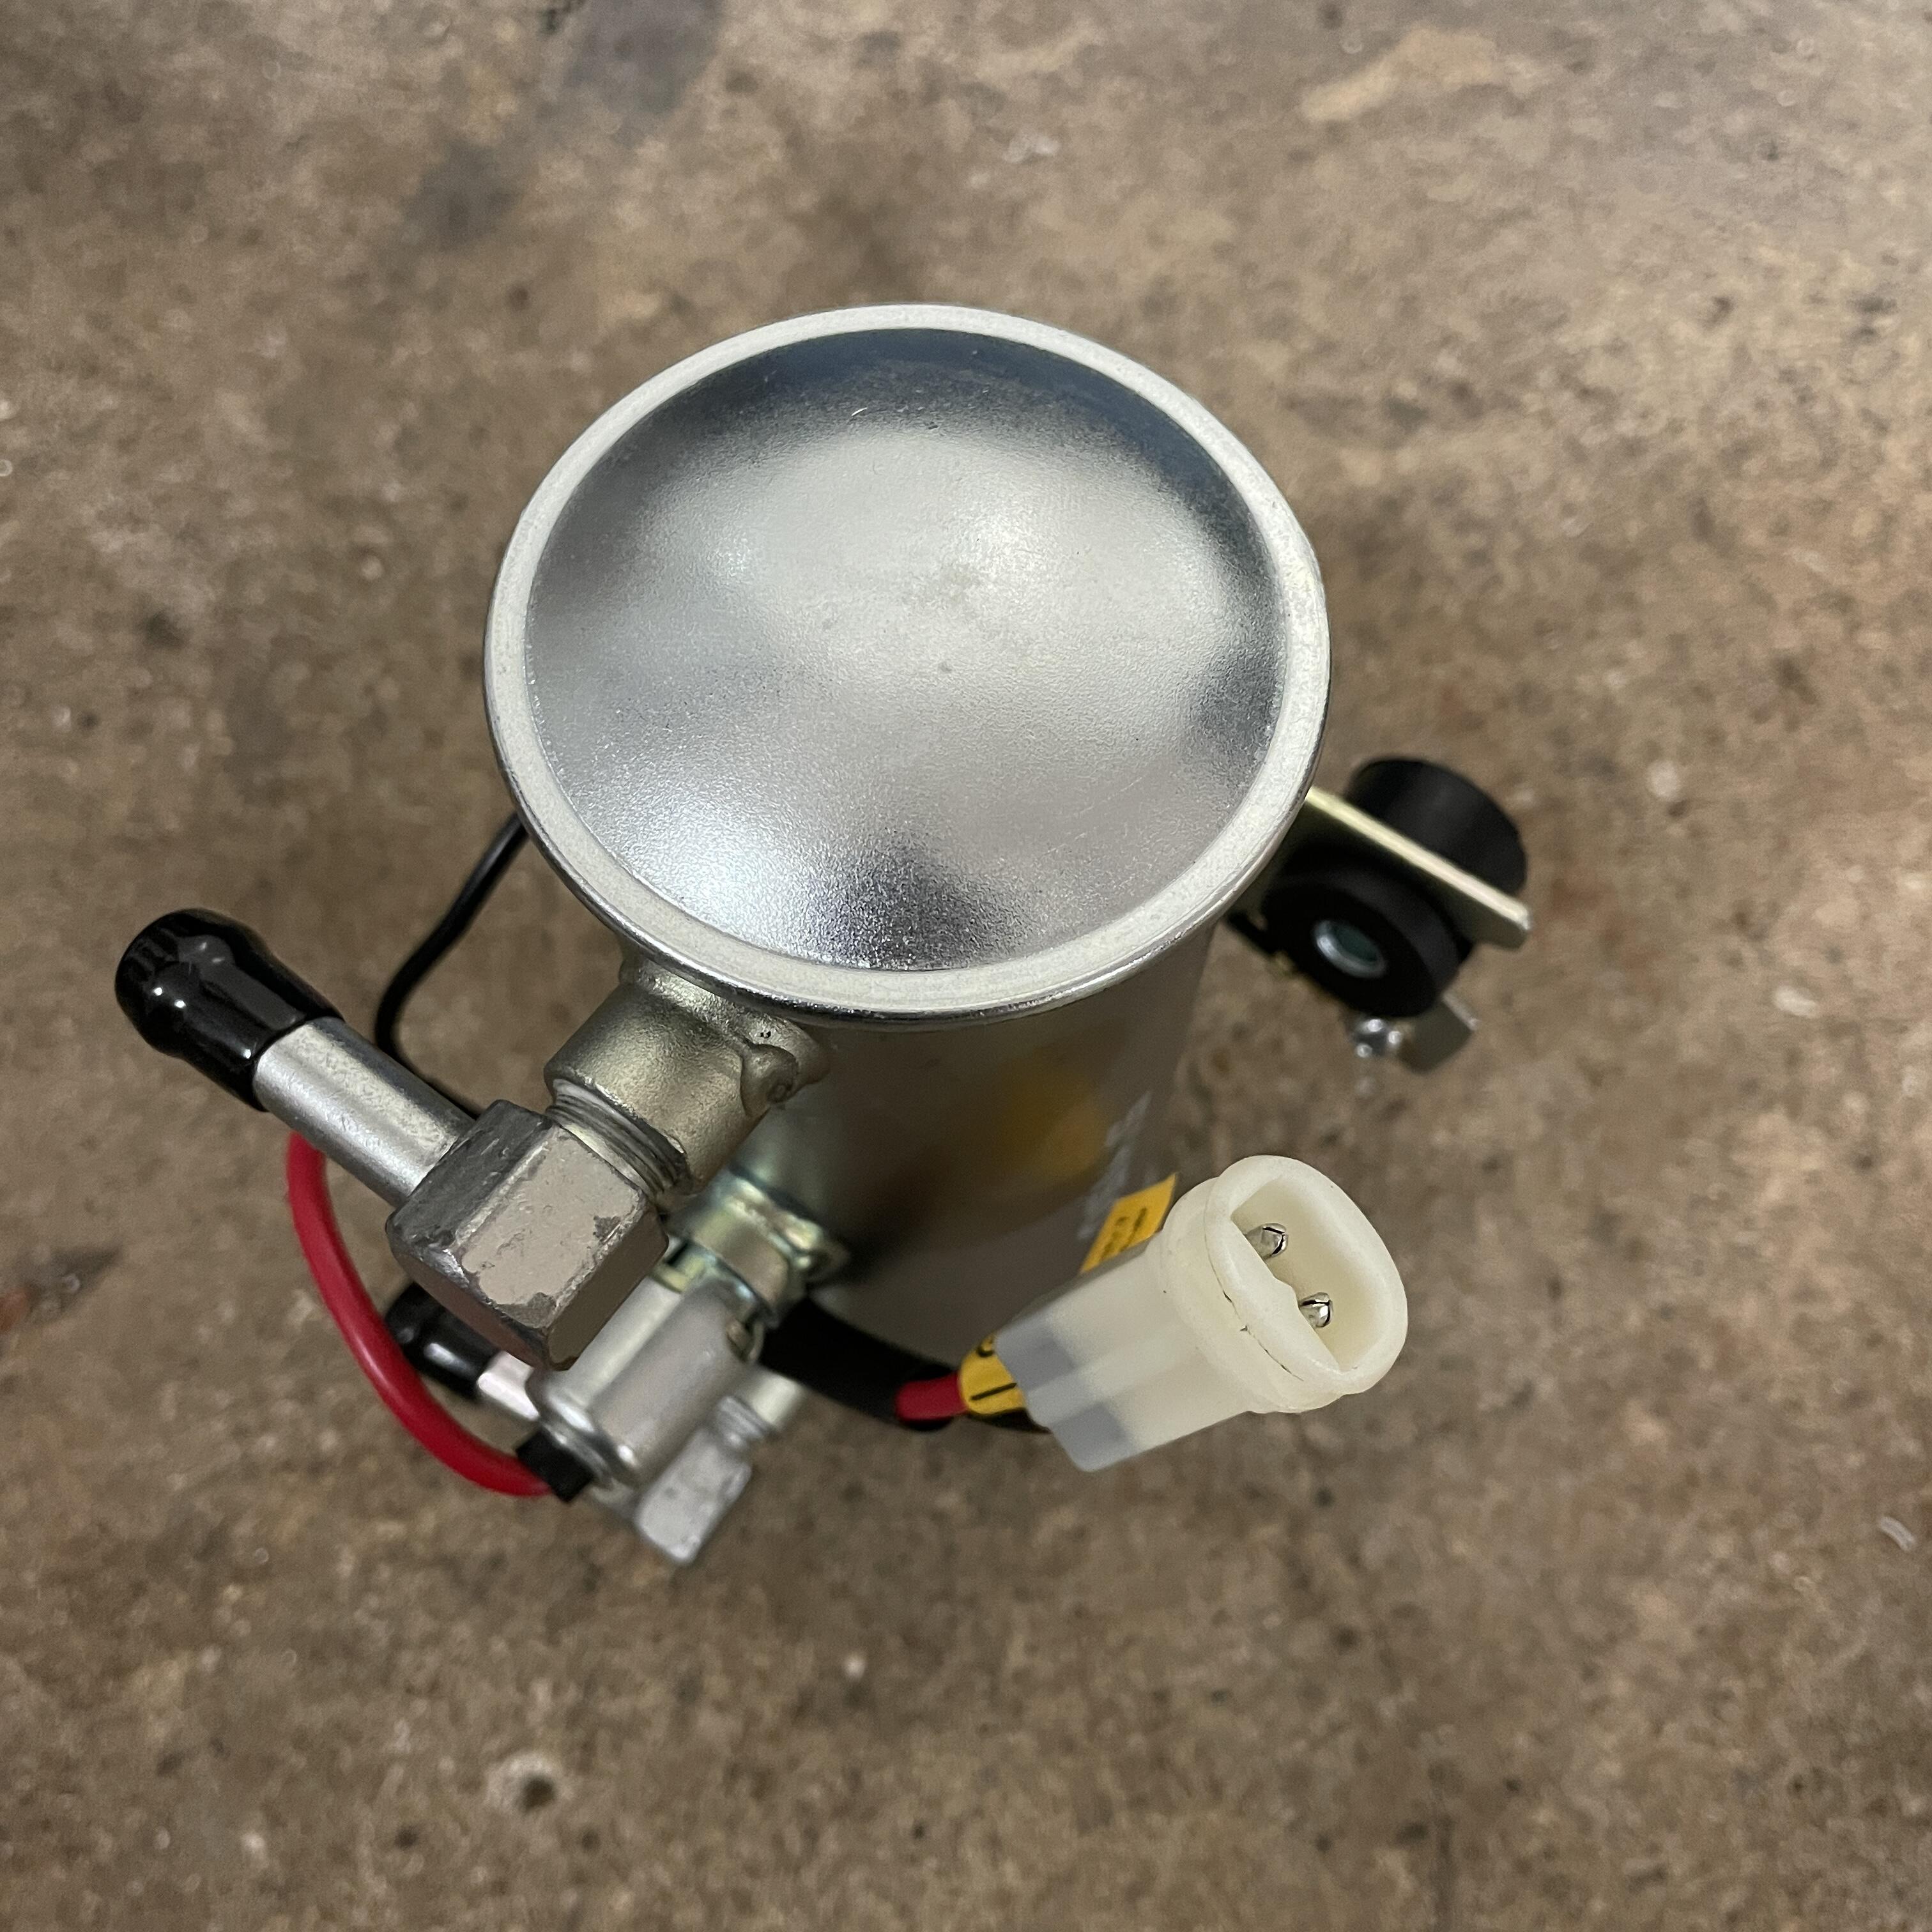
Can anyone point me to a place where I can buy the female partner to this male plug on the fuel pump?

-
Thank you! I just wish I hadn’t forgotten to paint the starter plate.
-
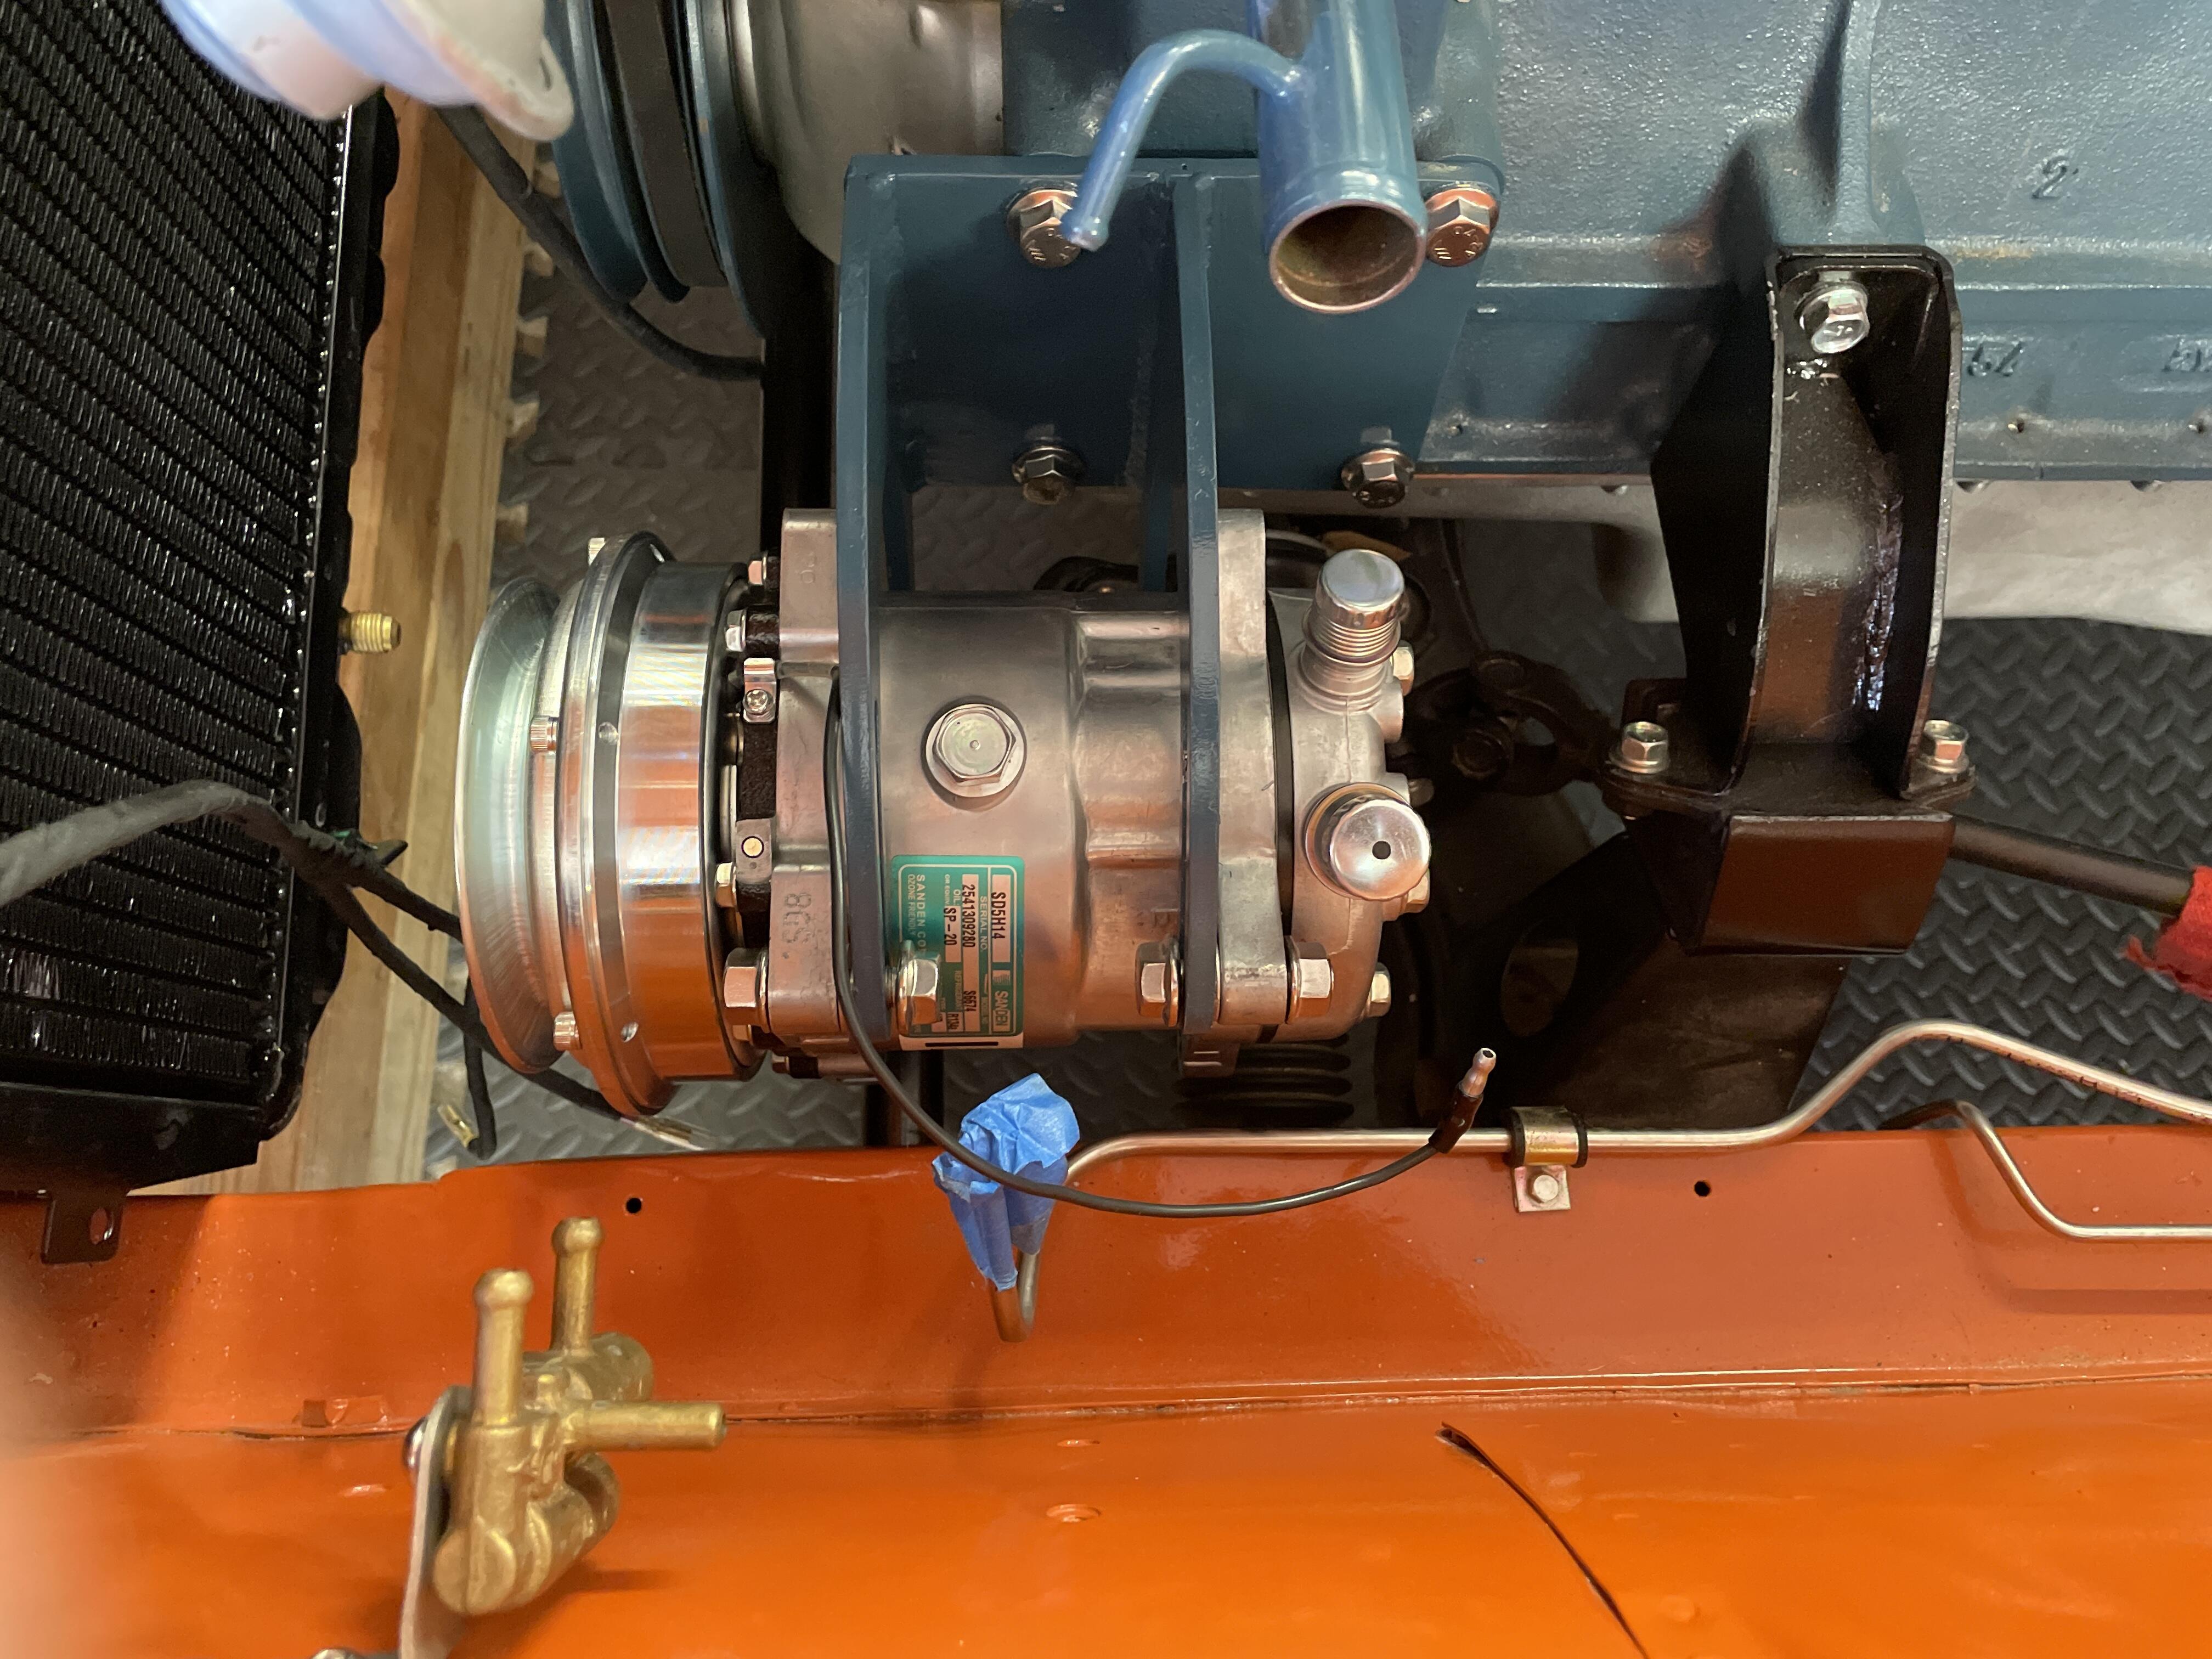
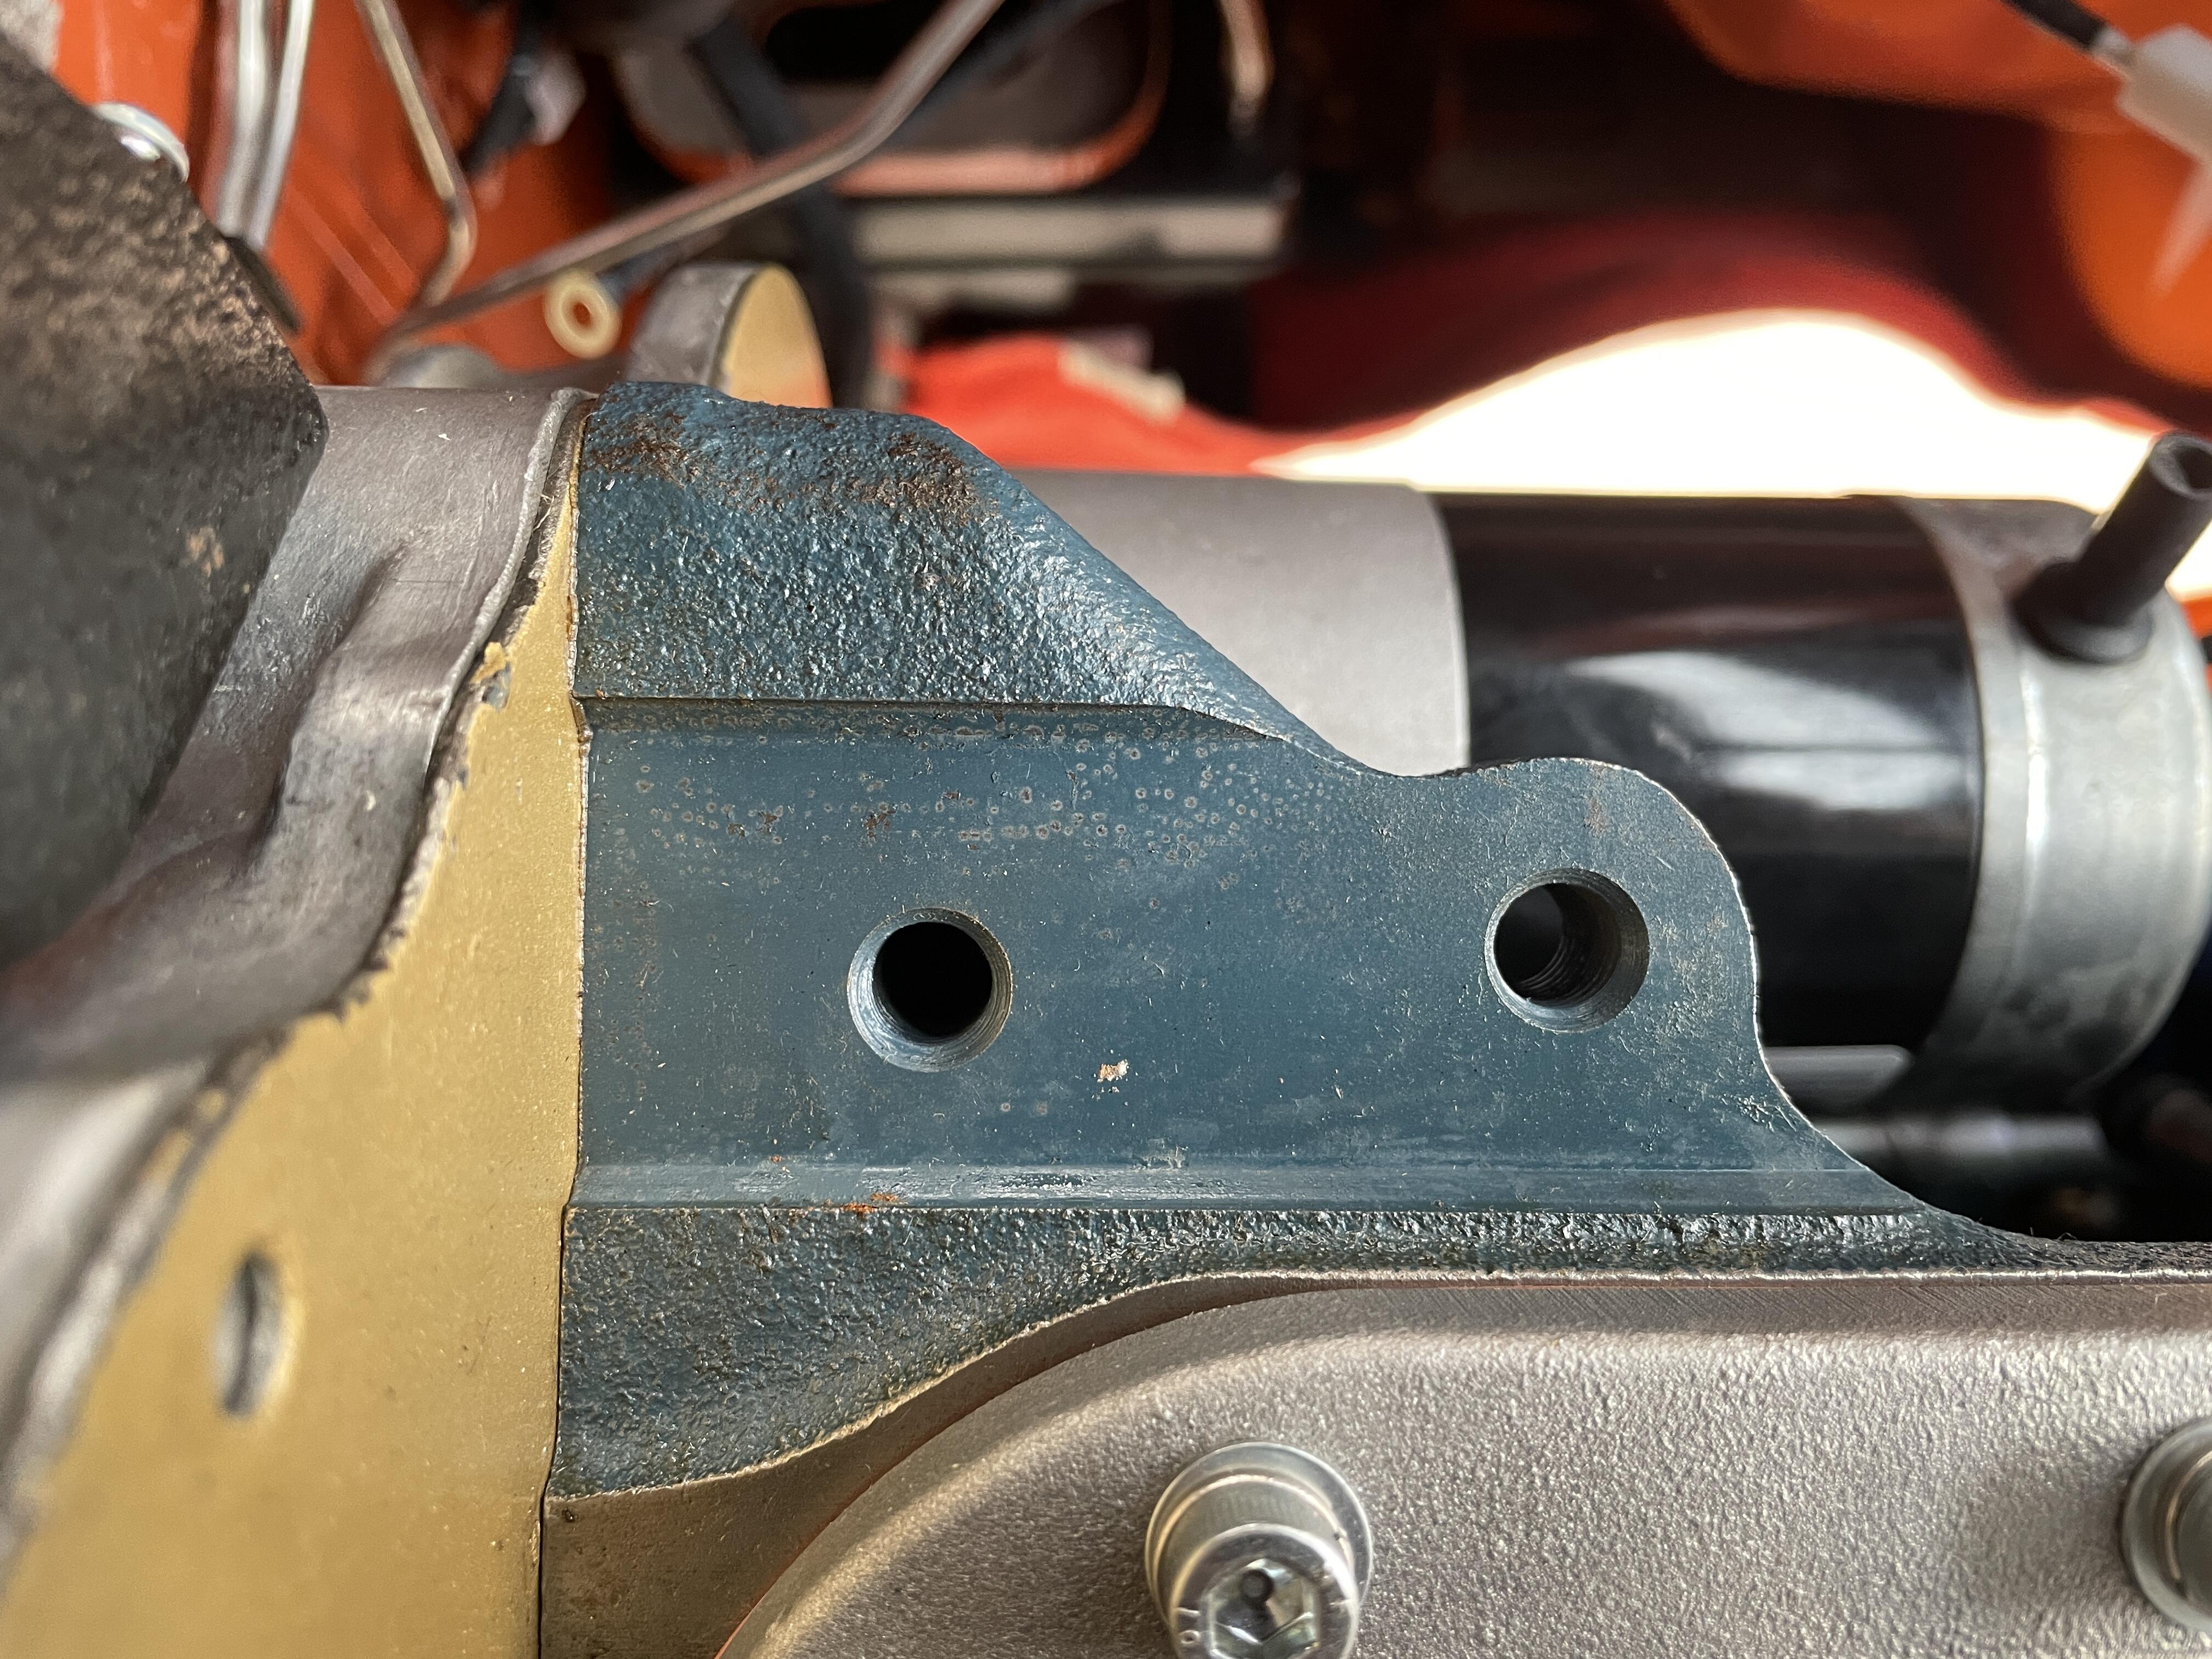
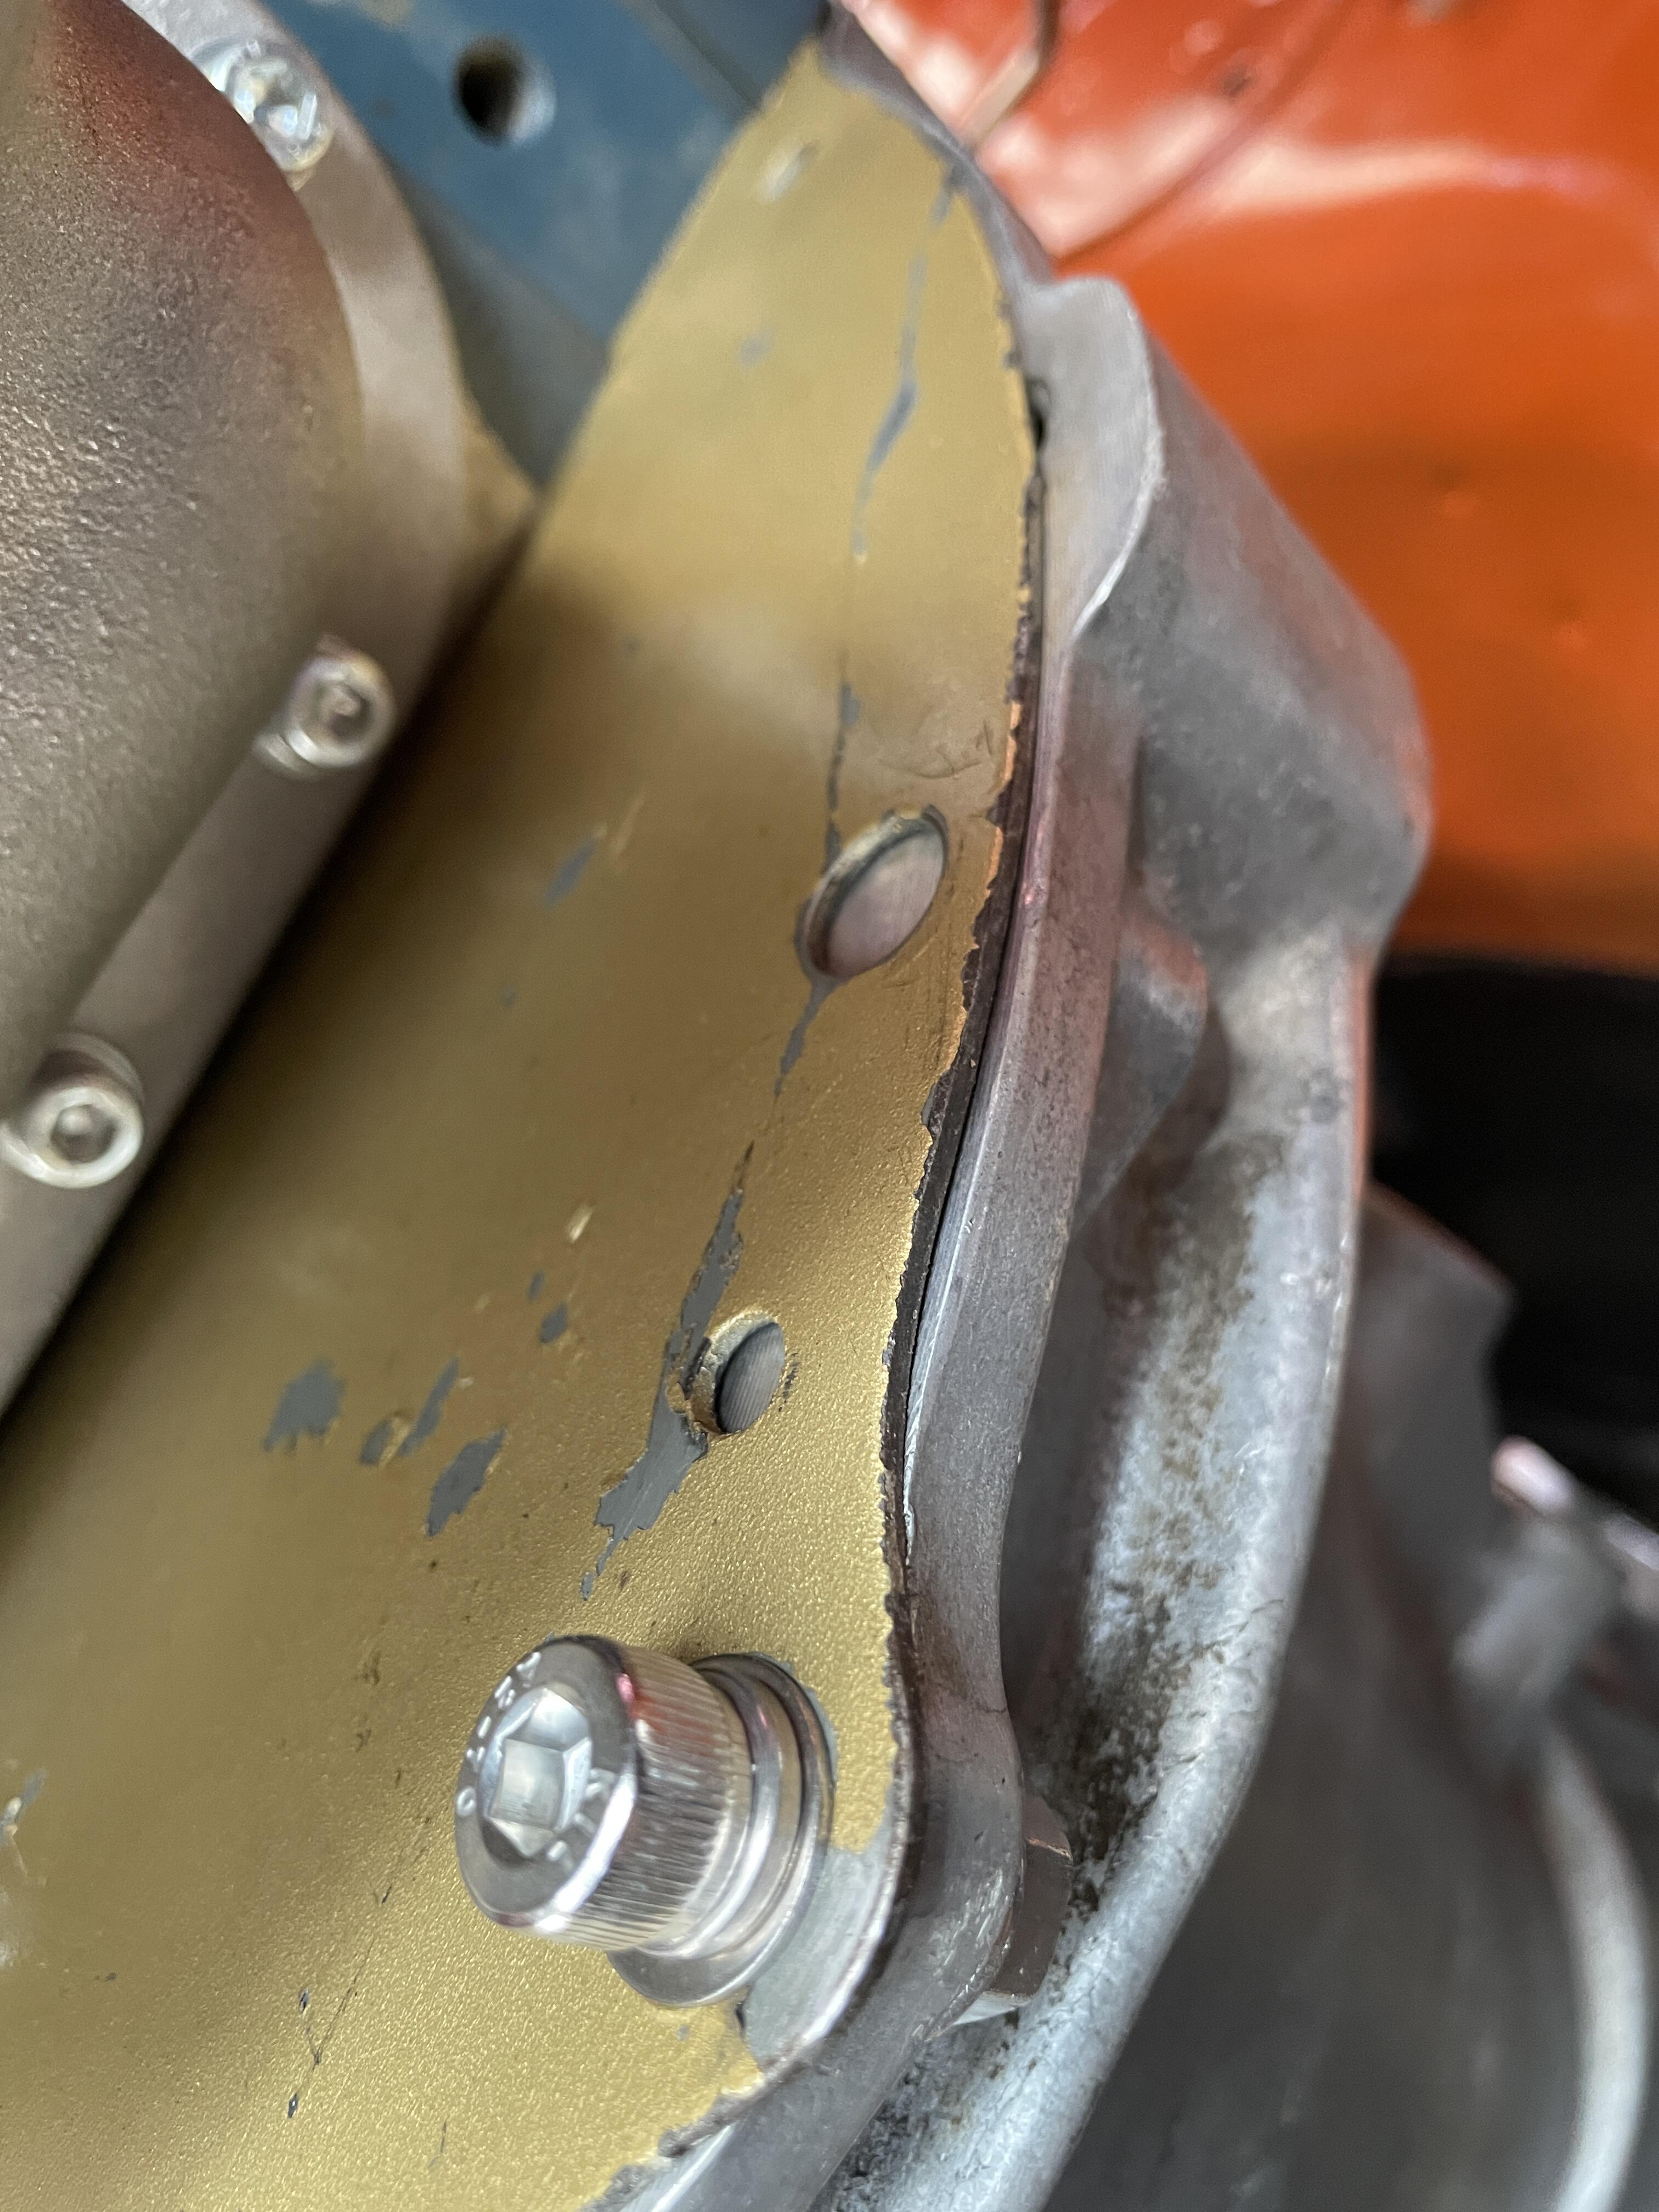
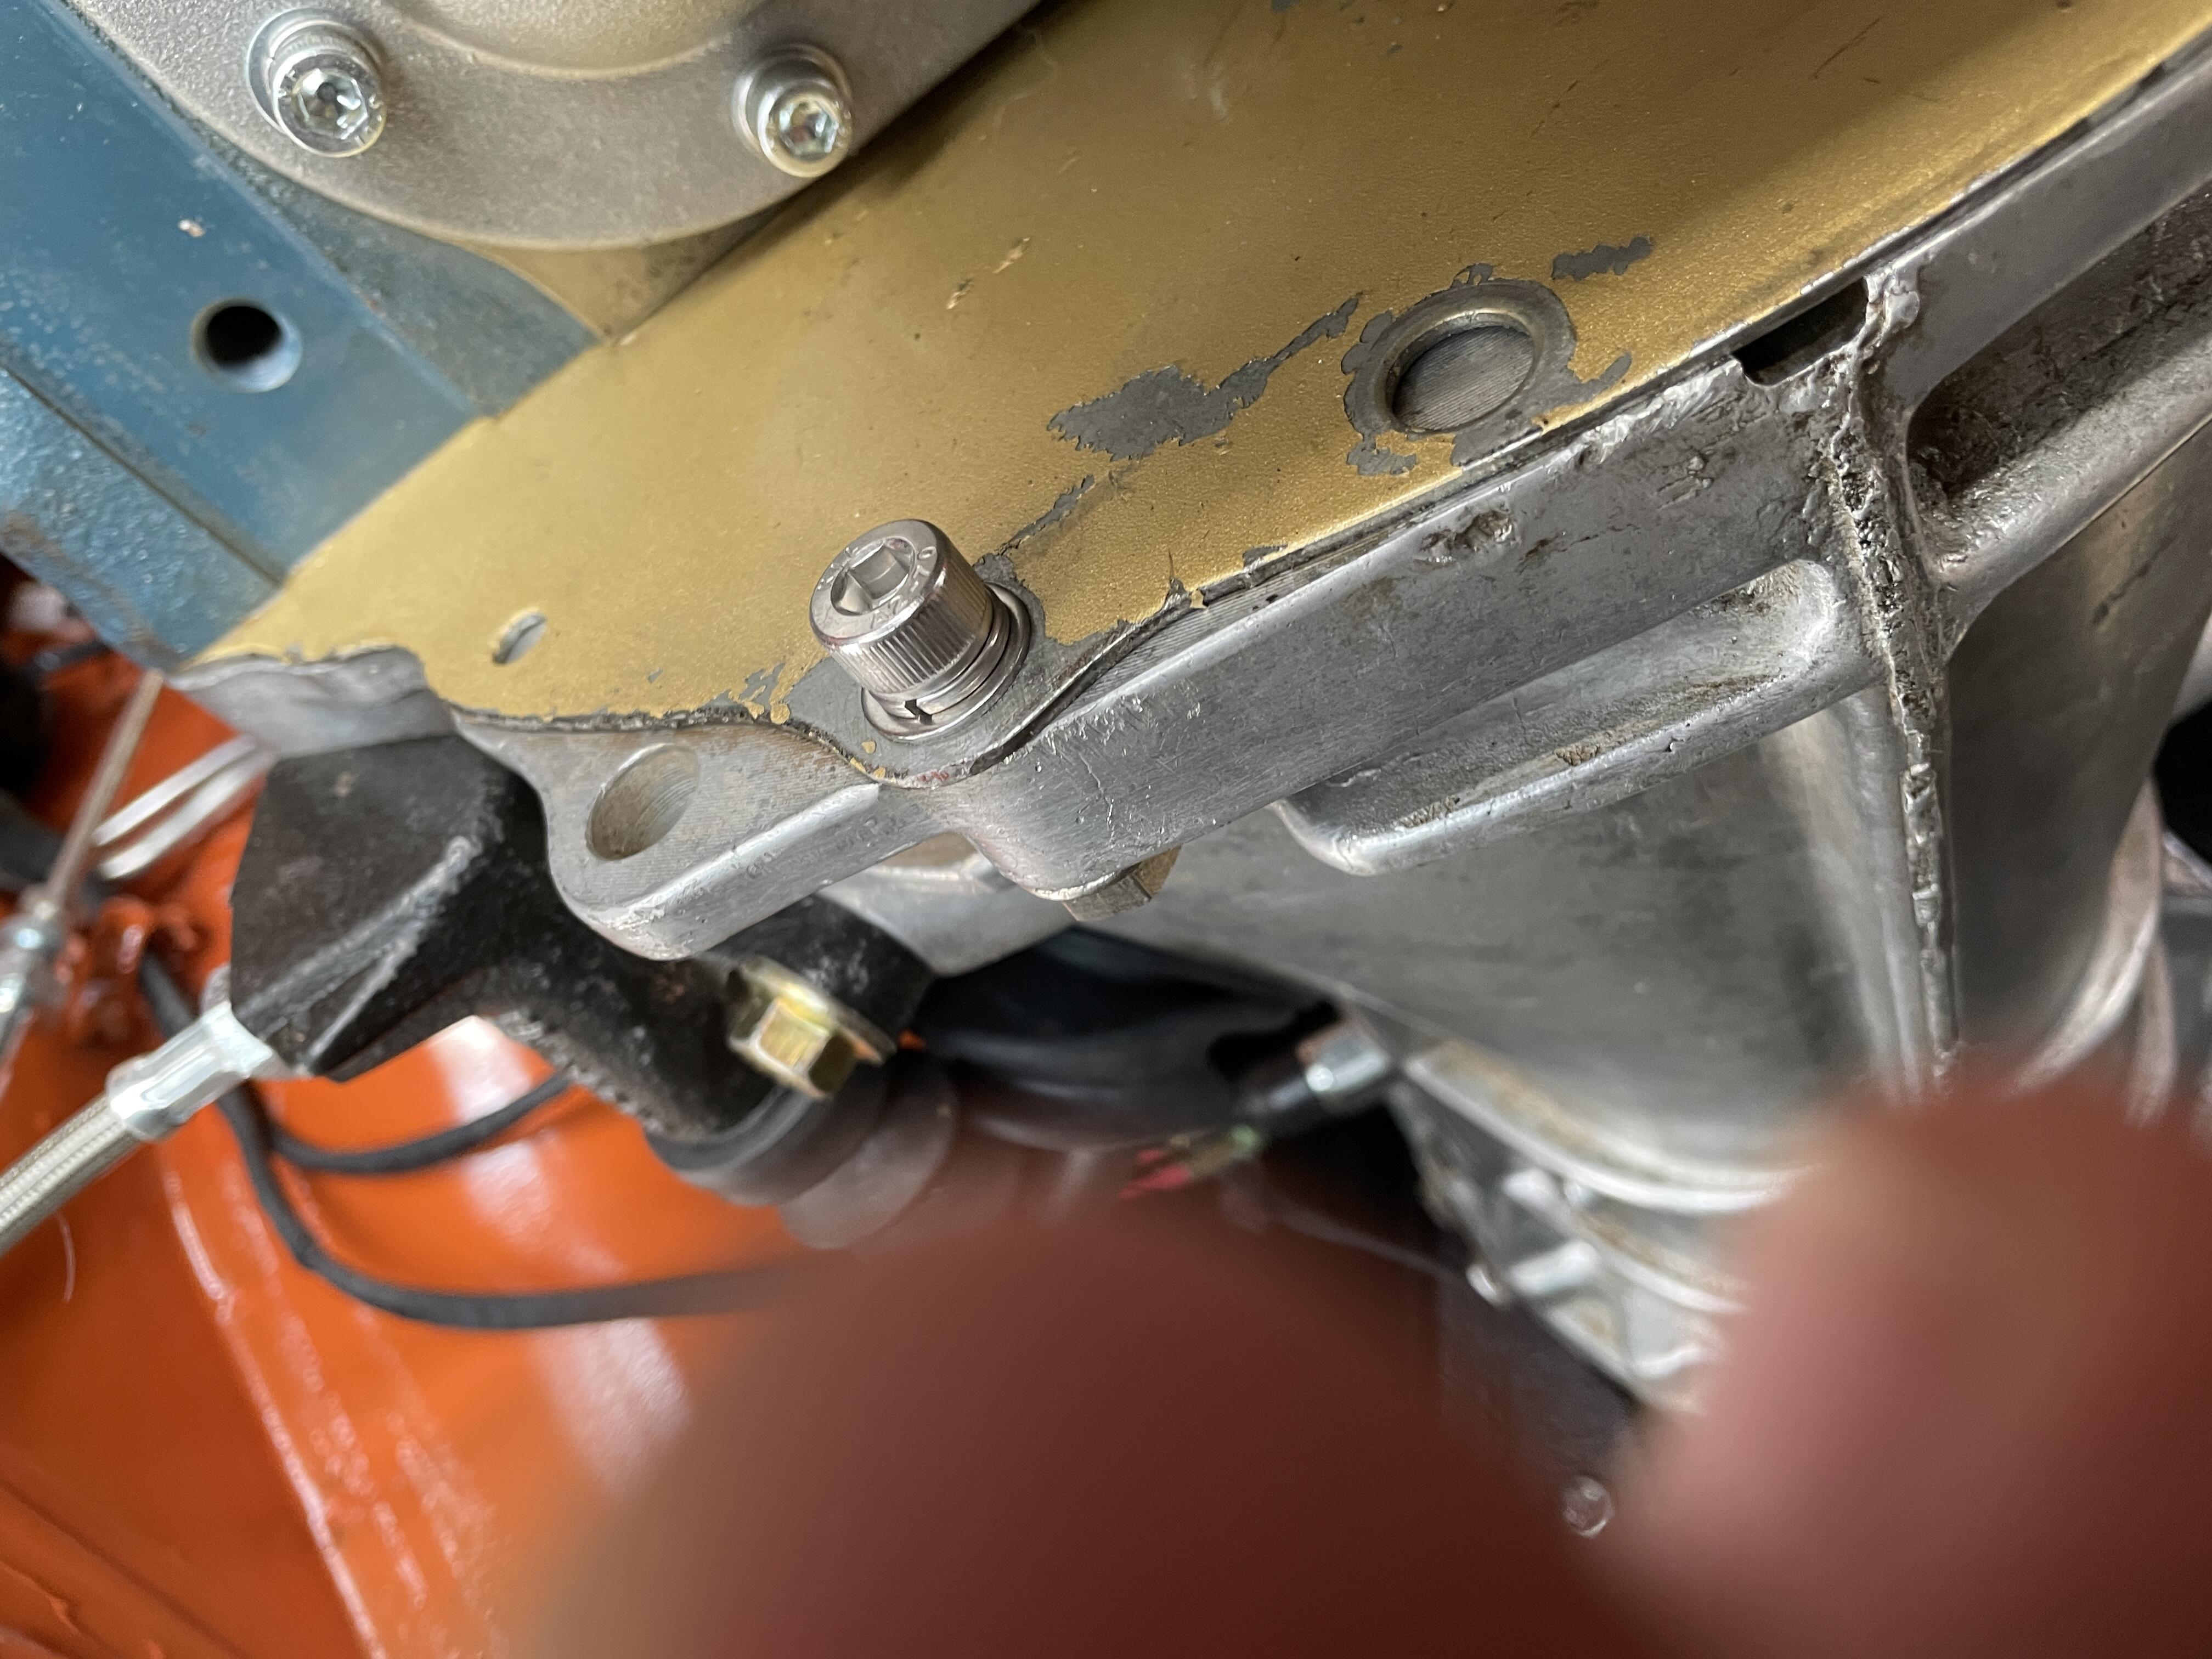
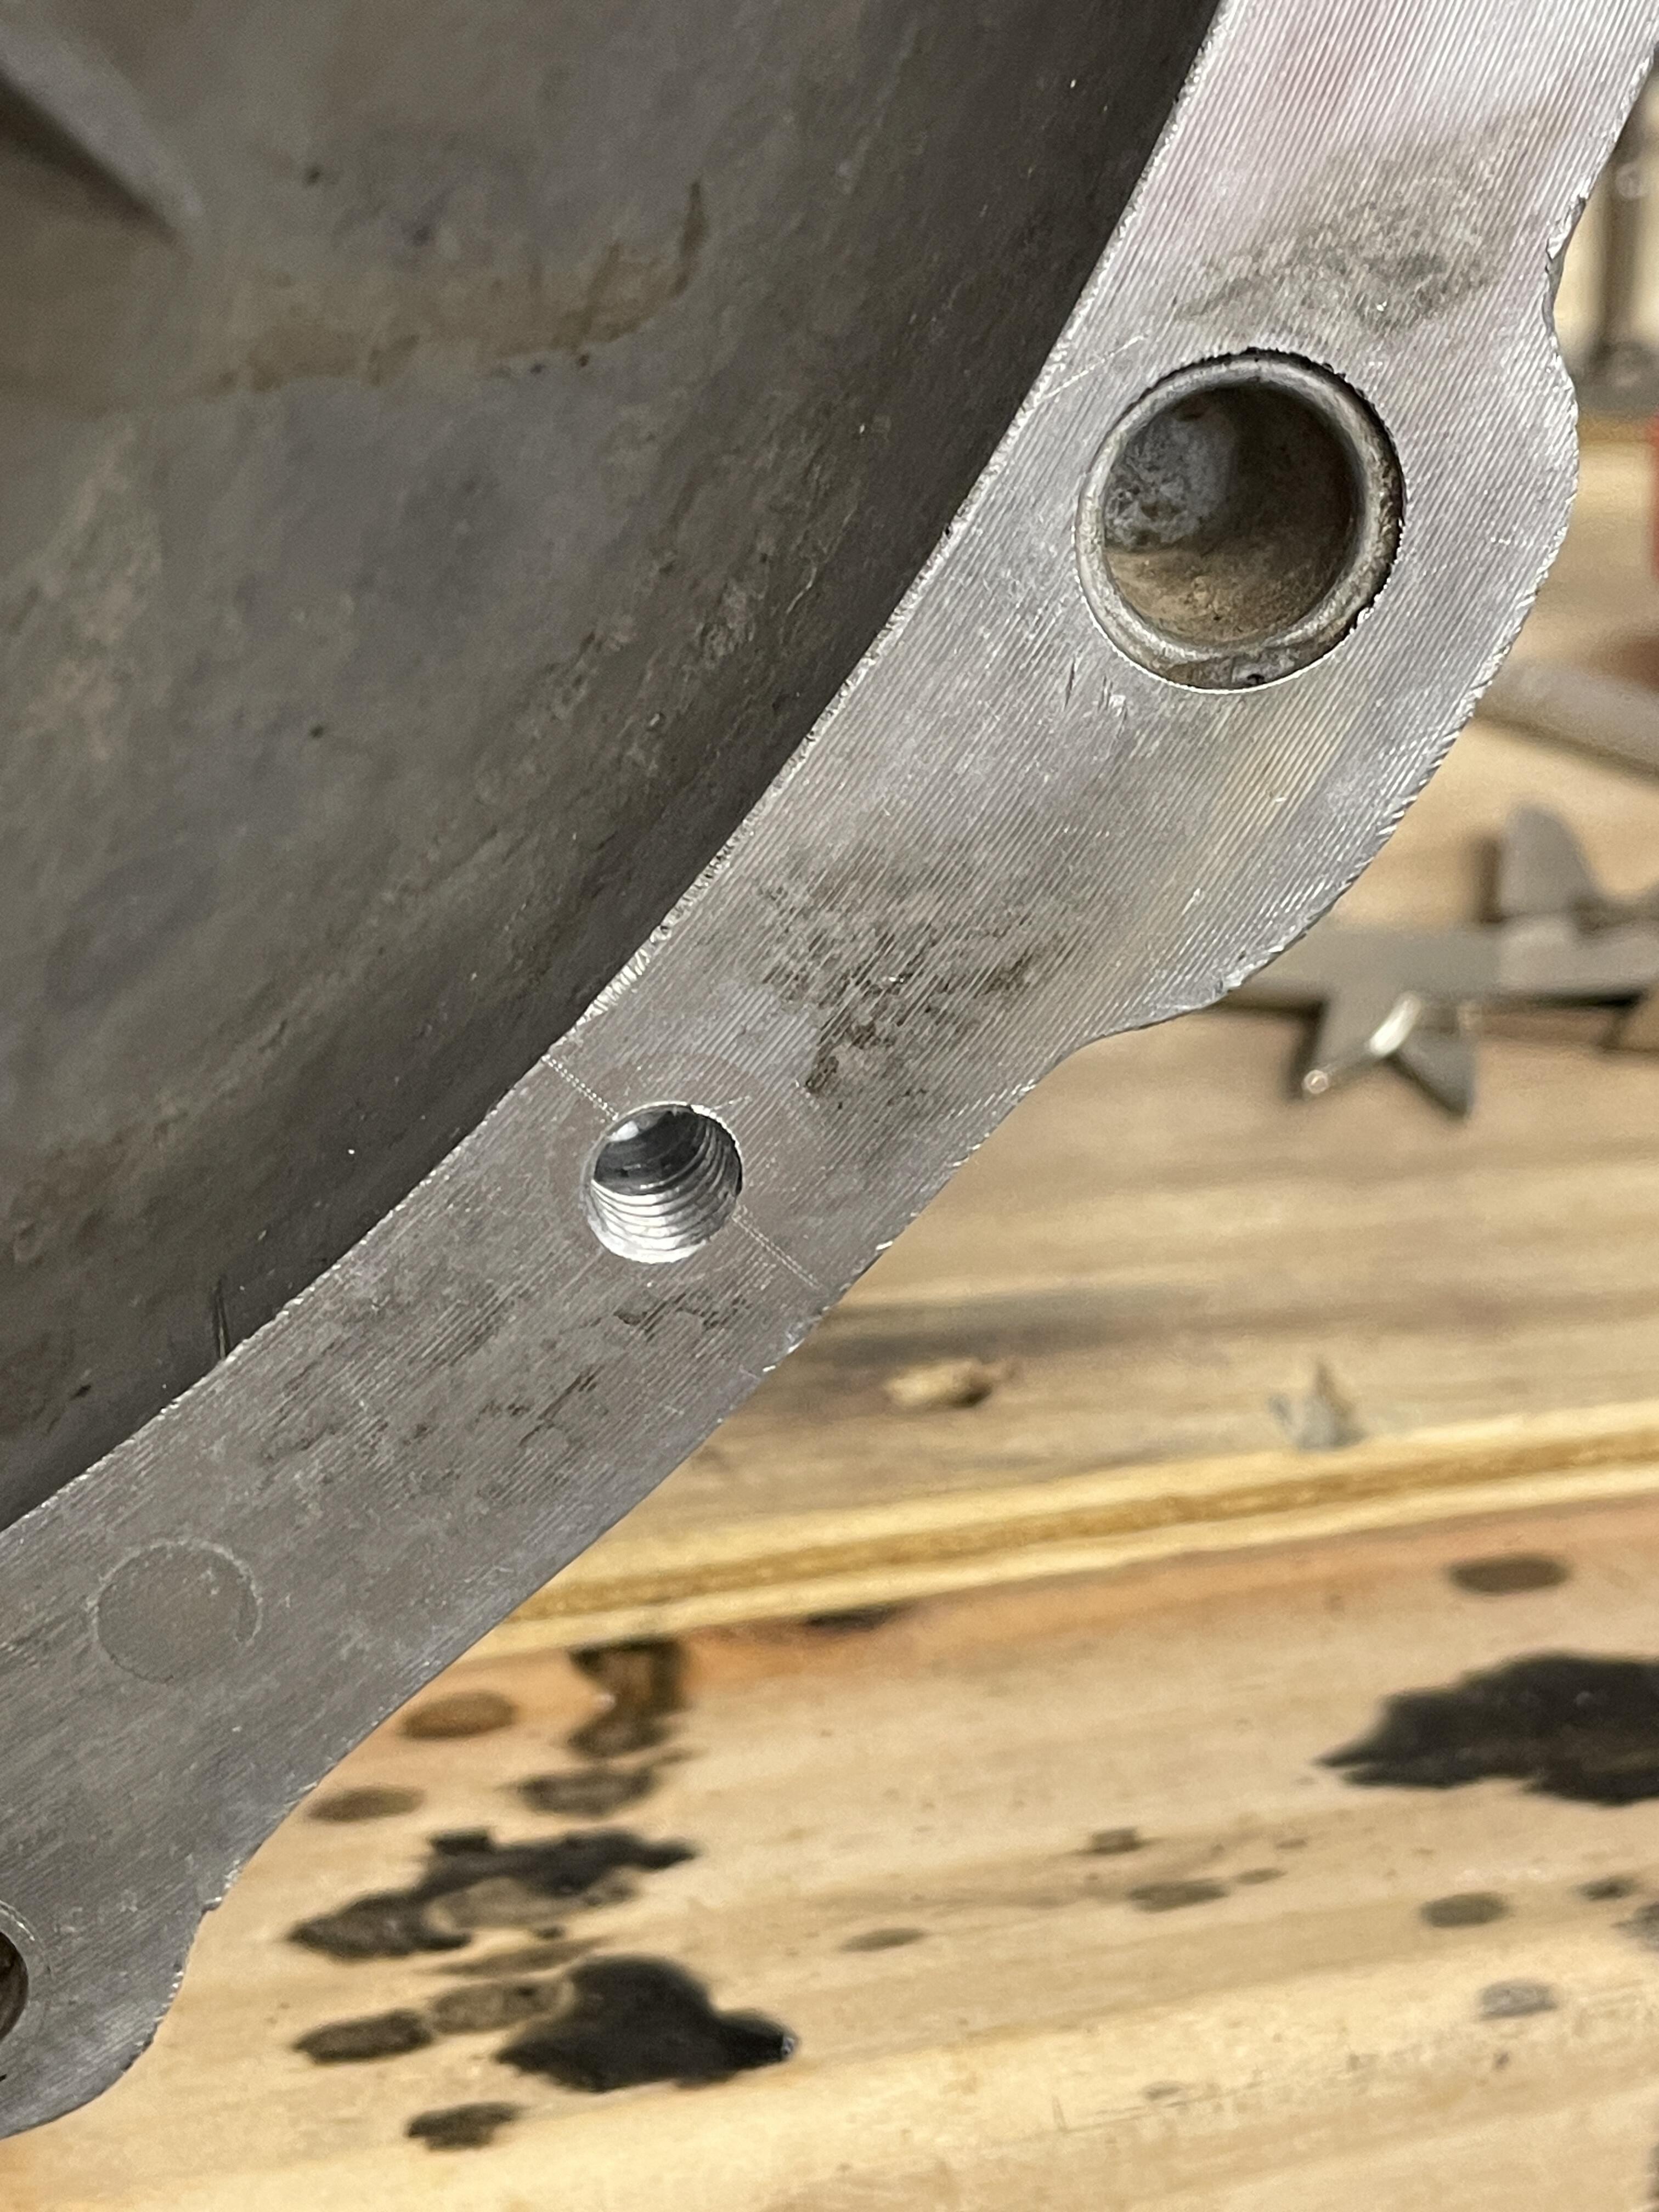
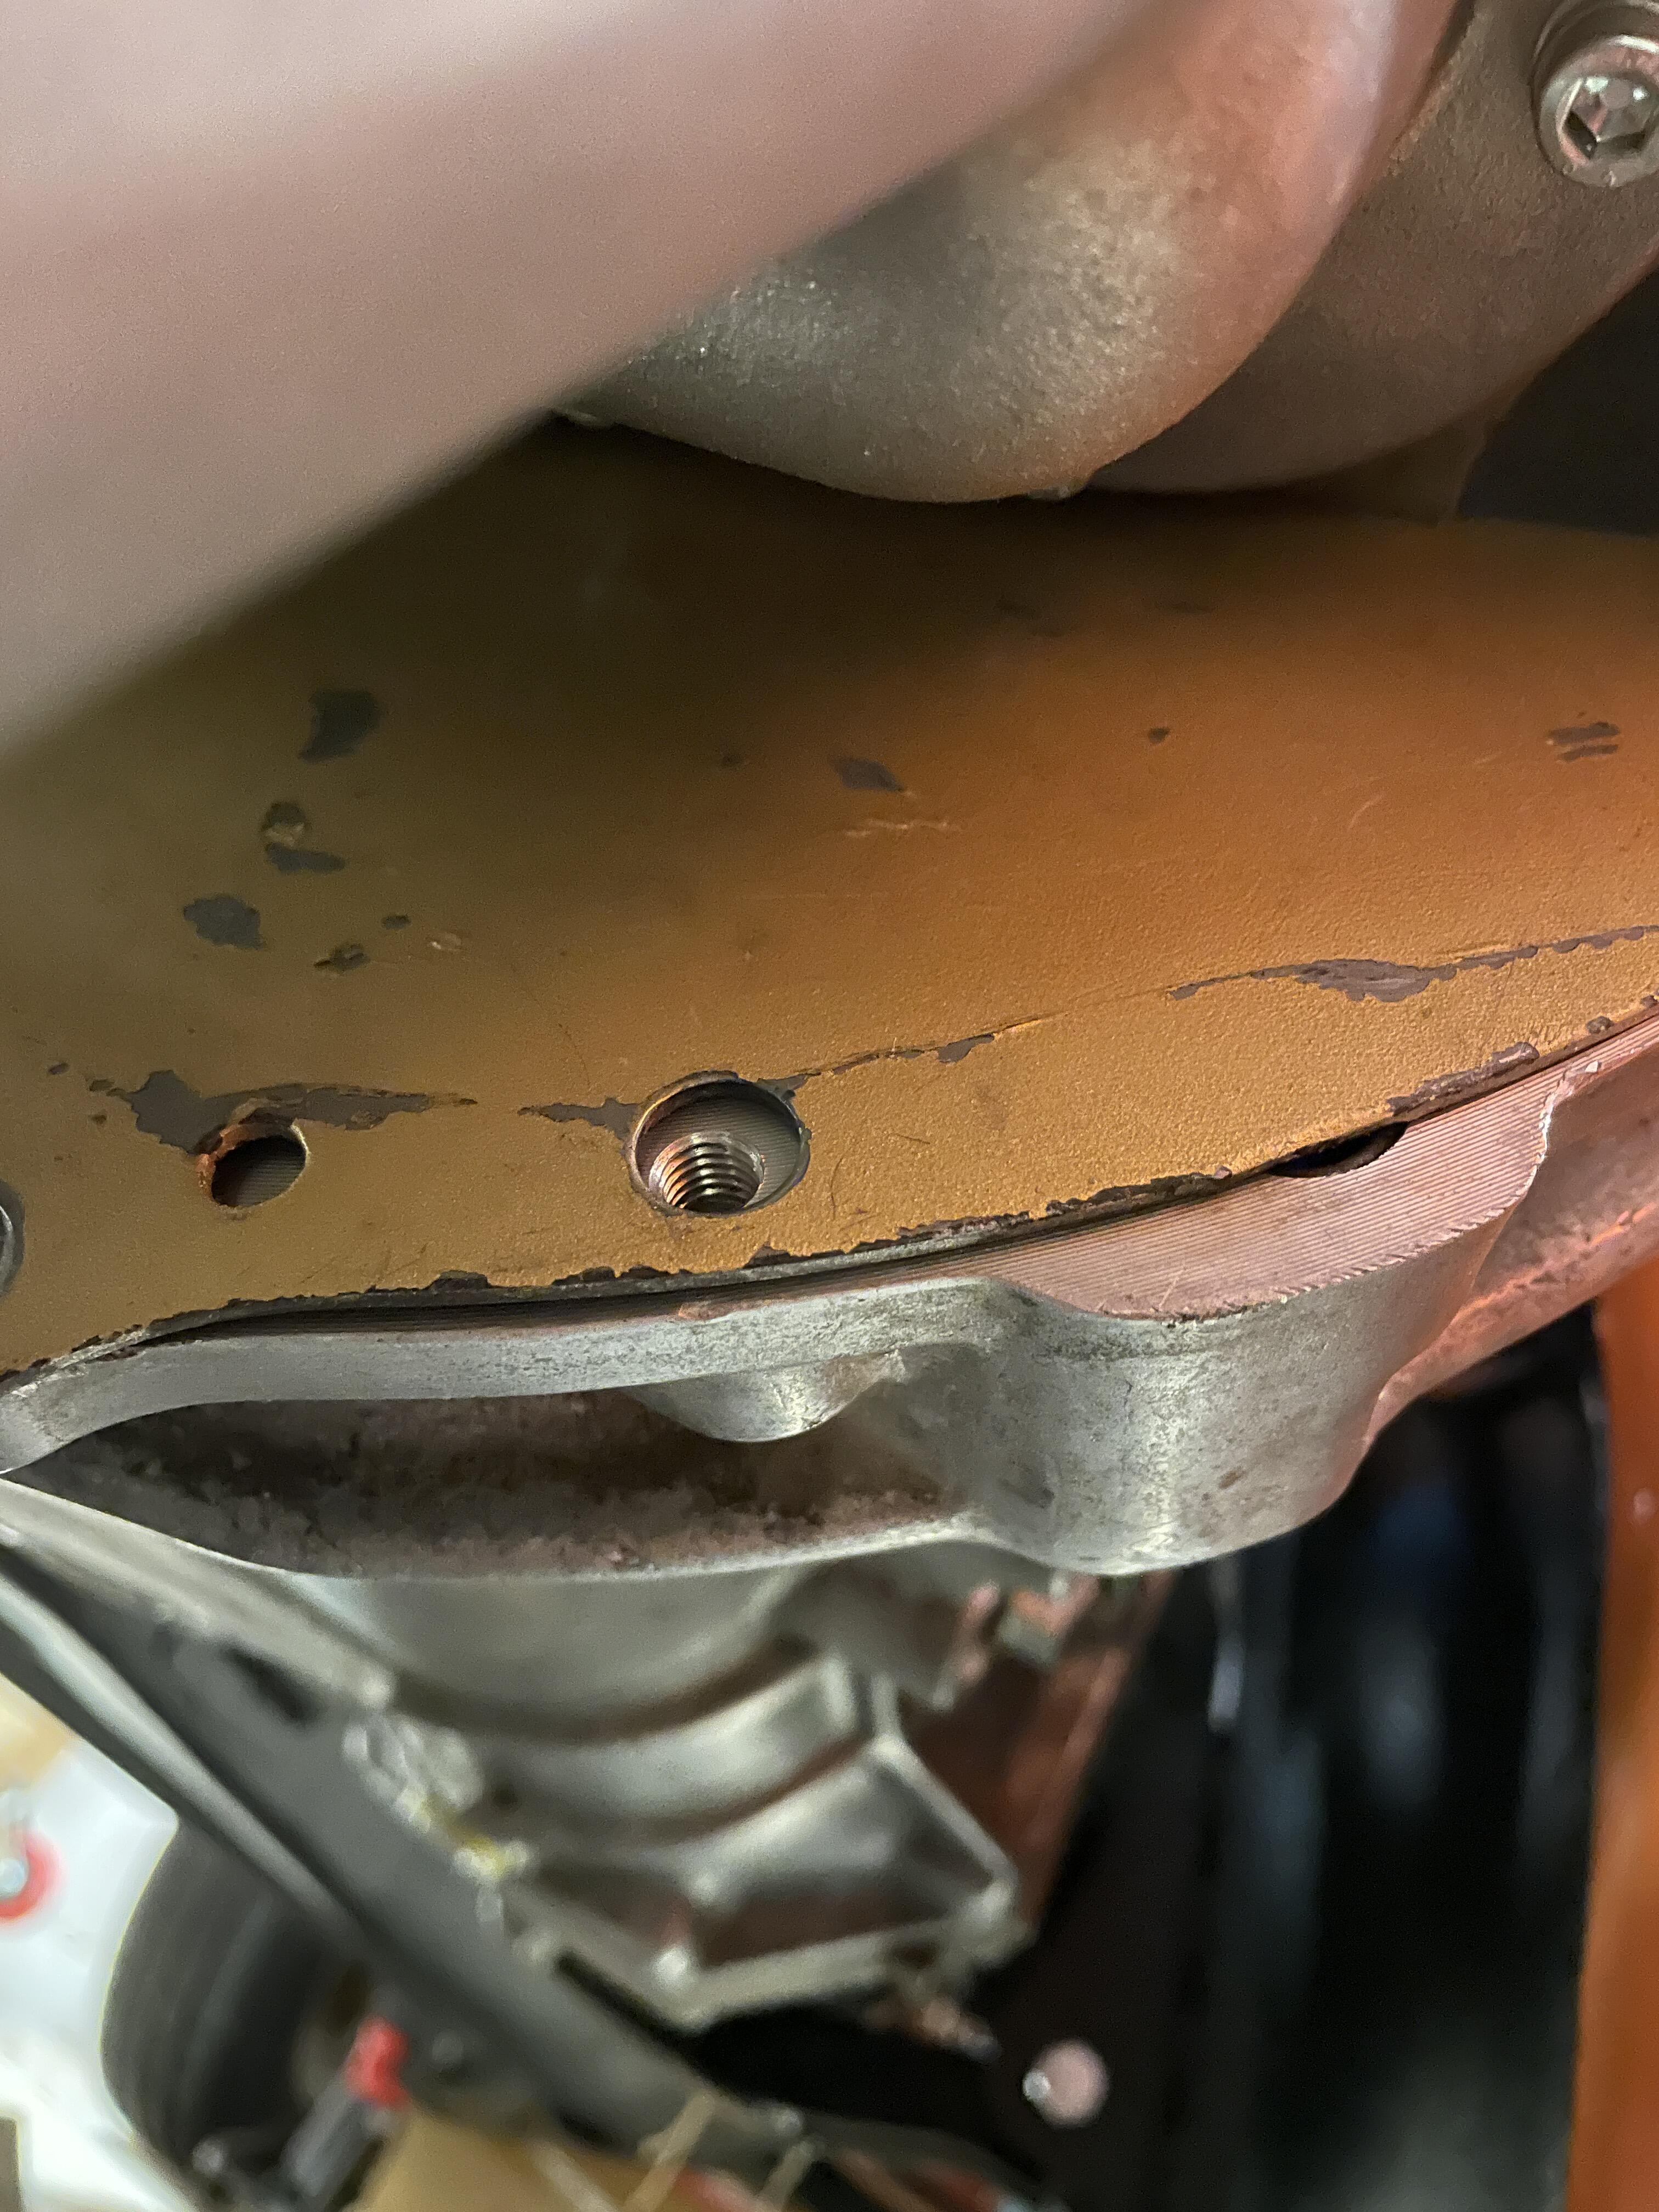
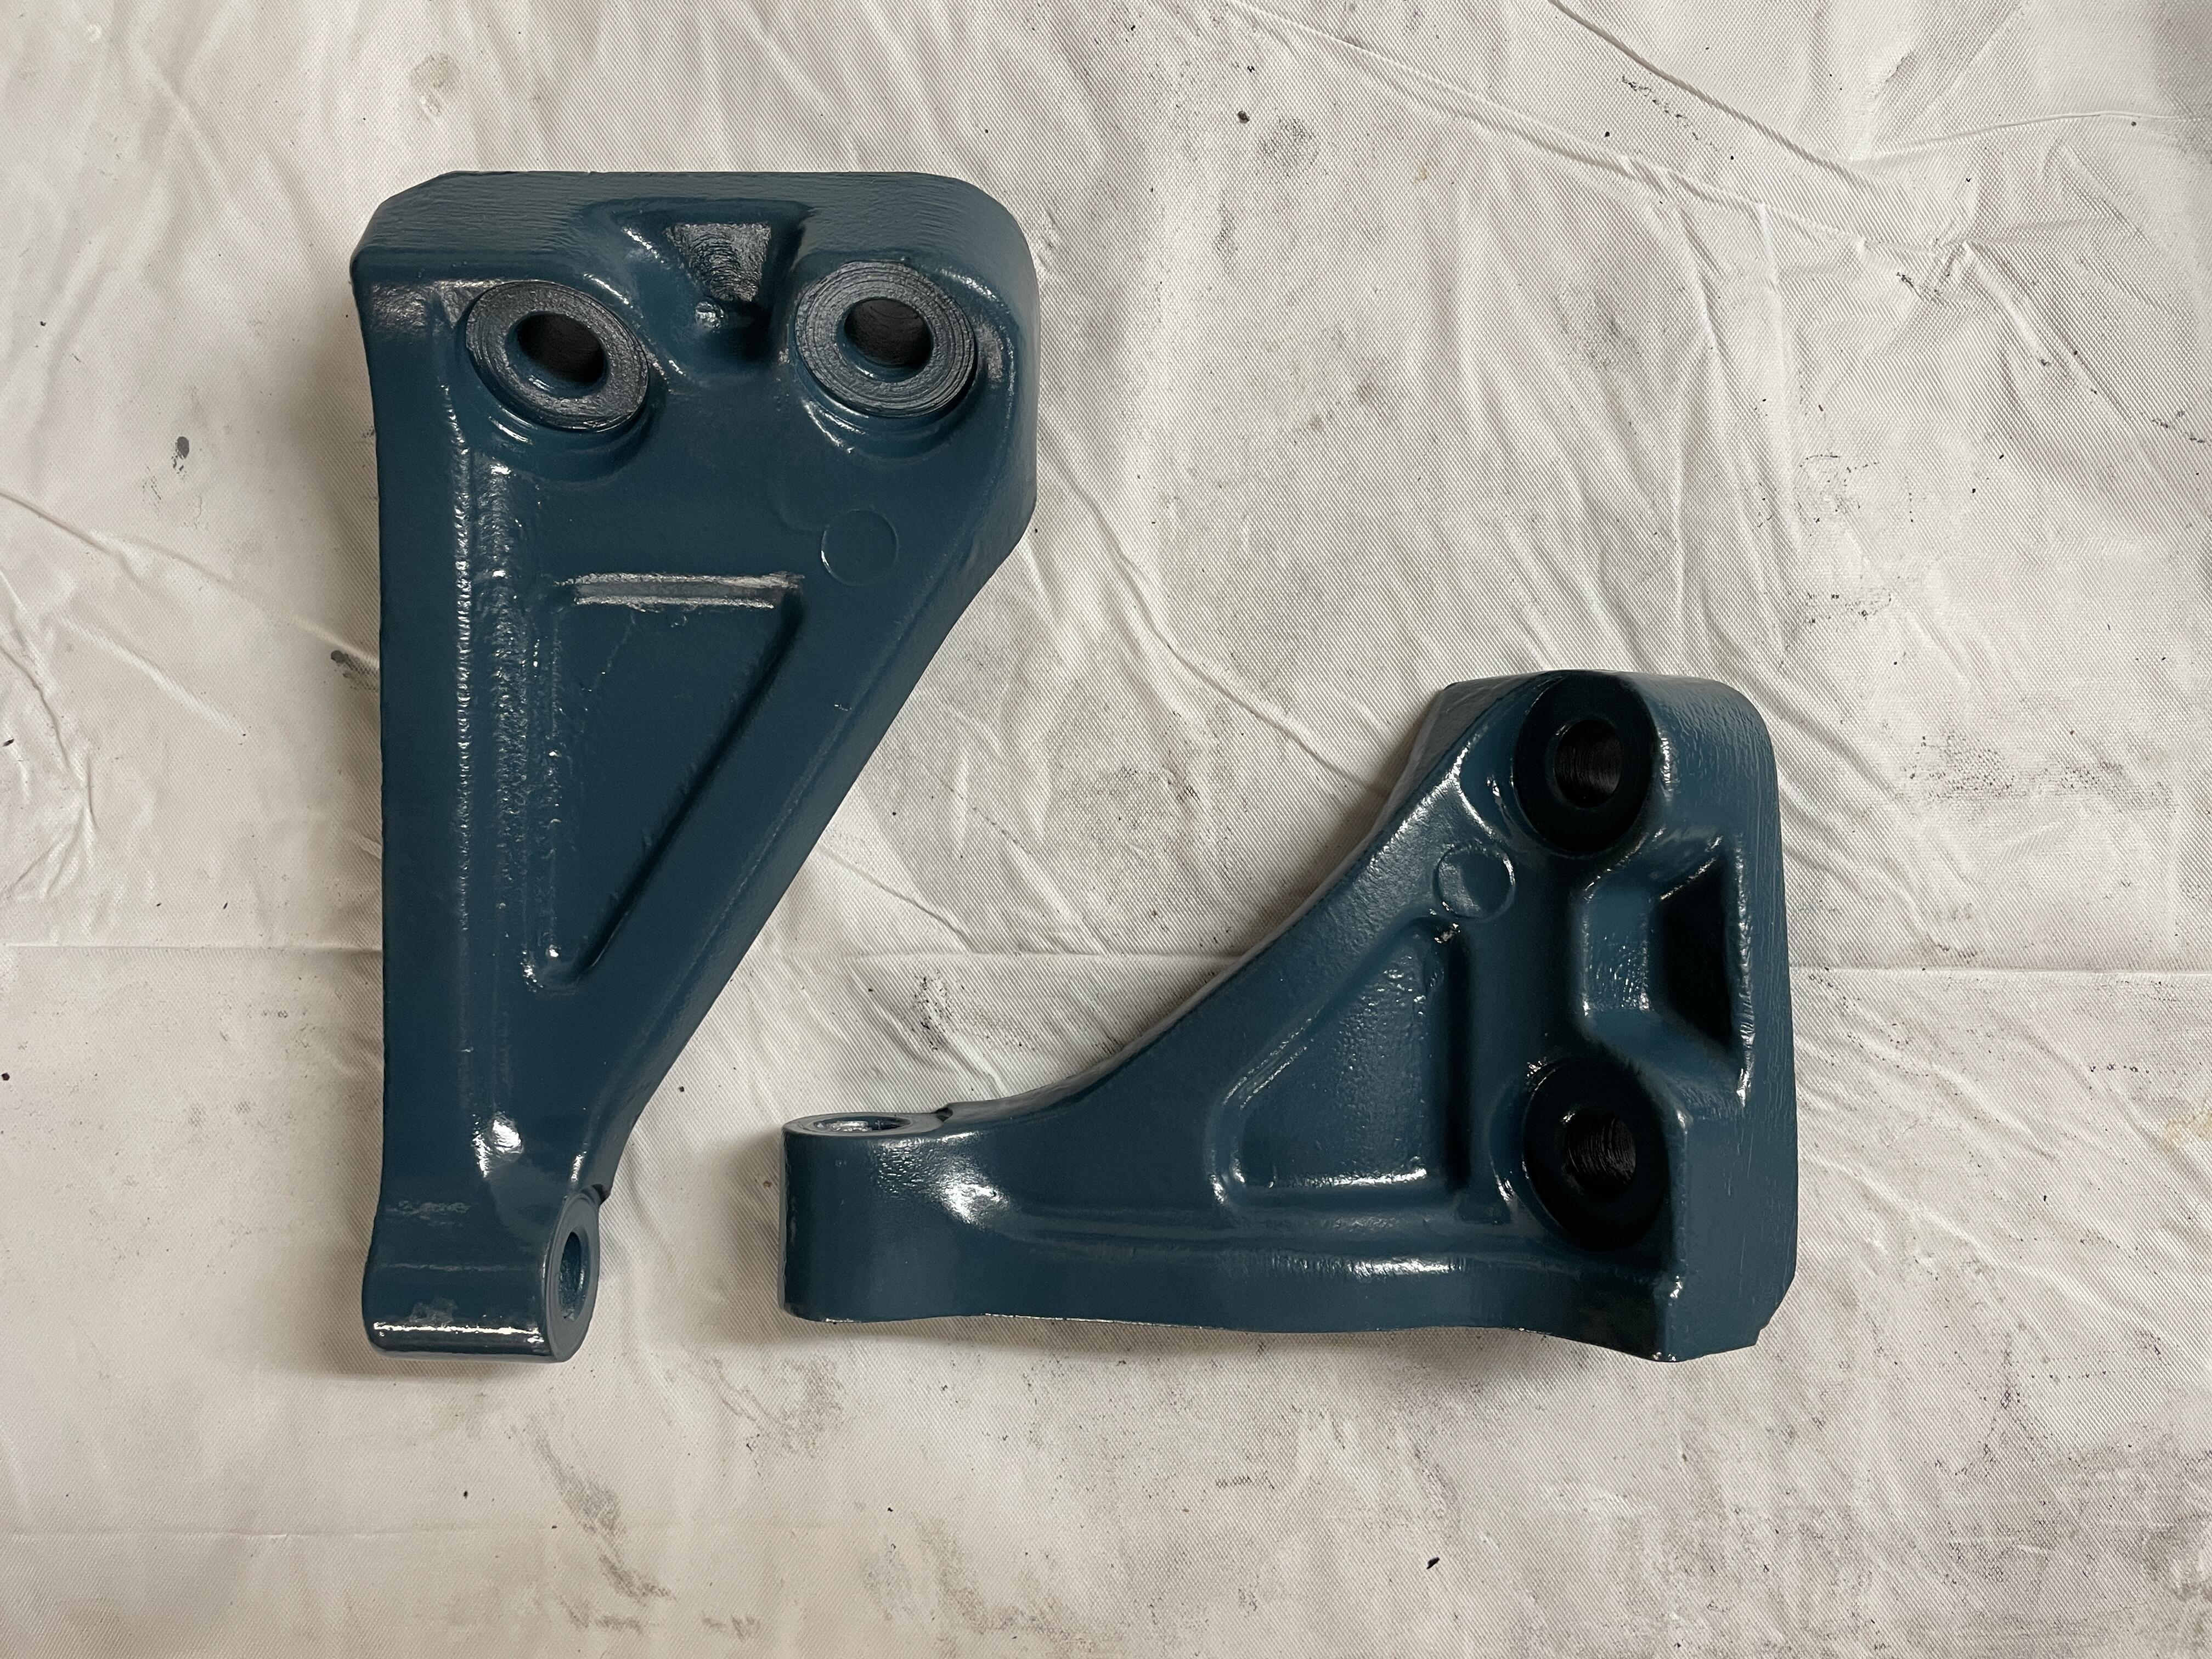
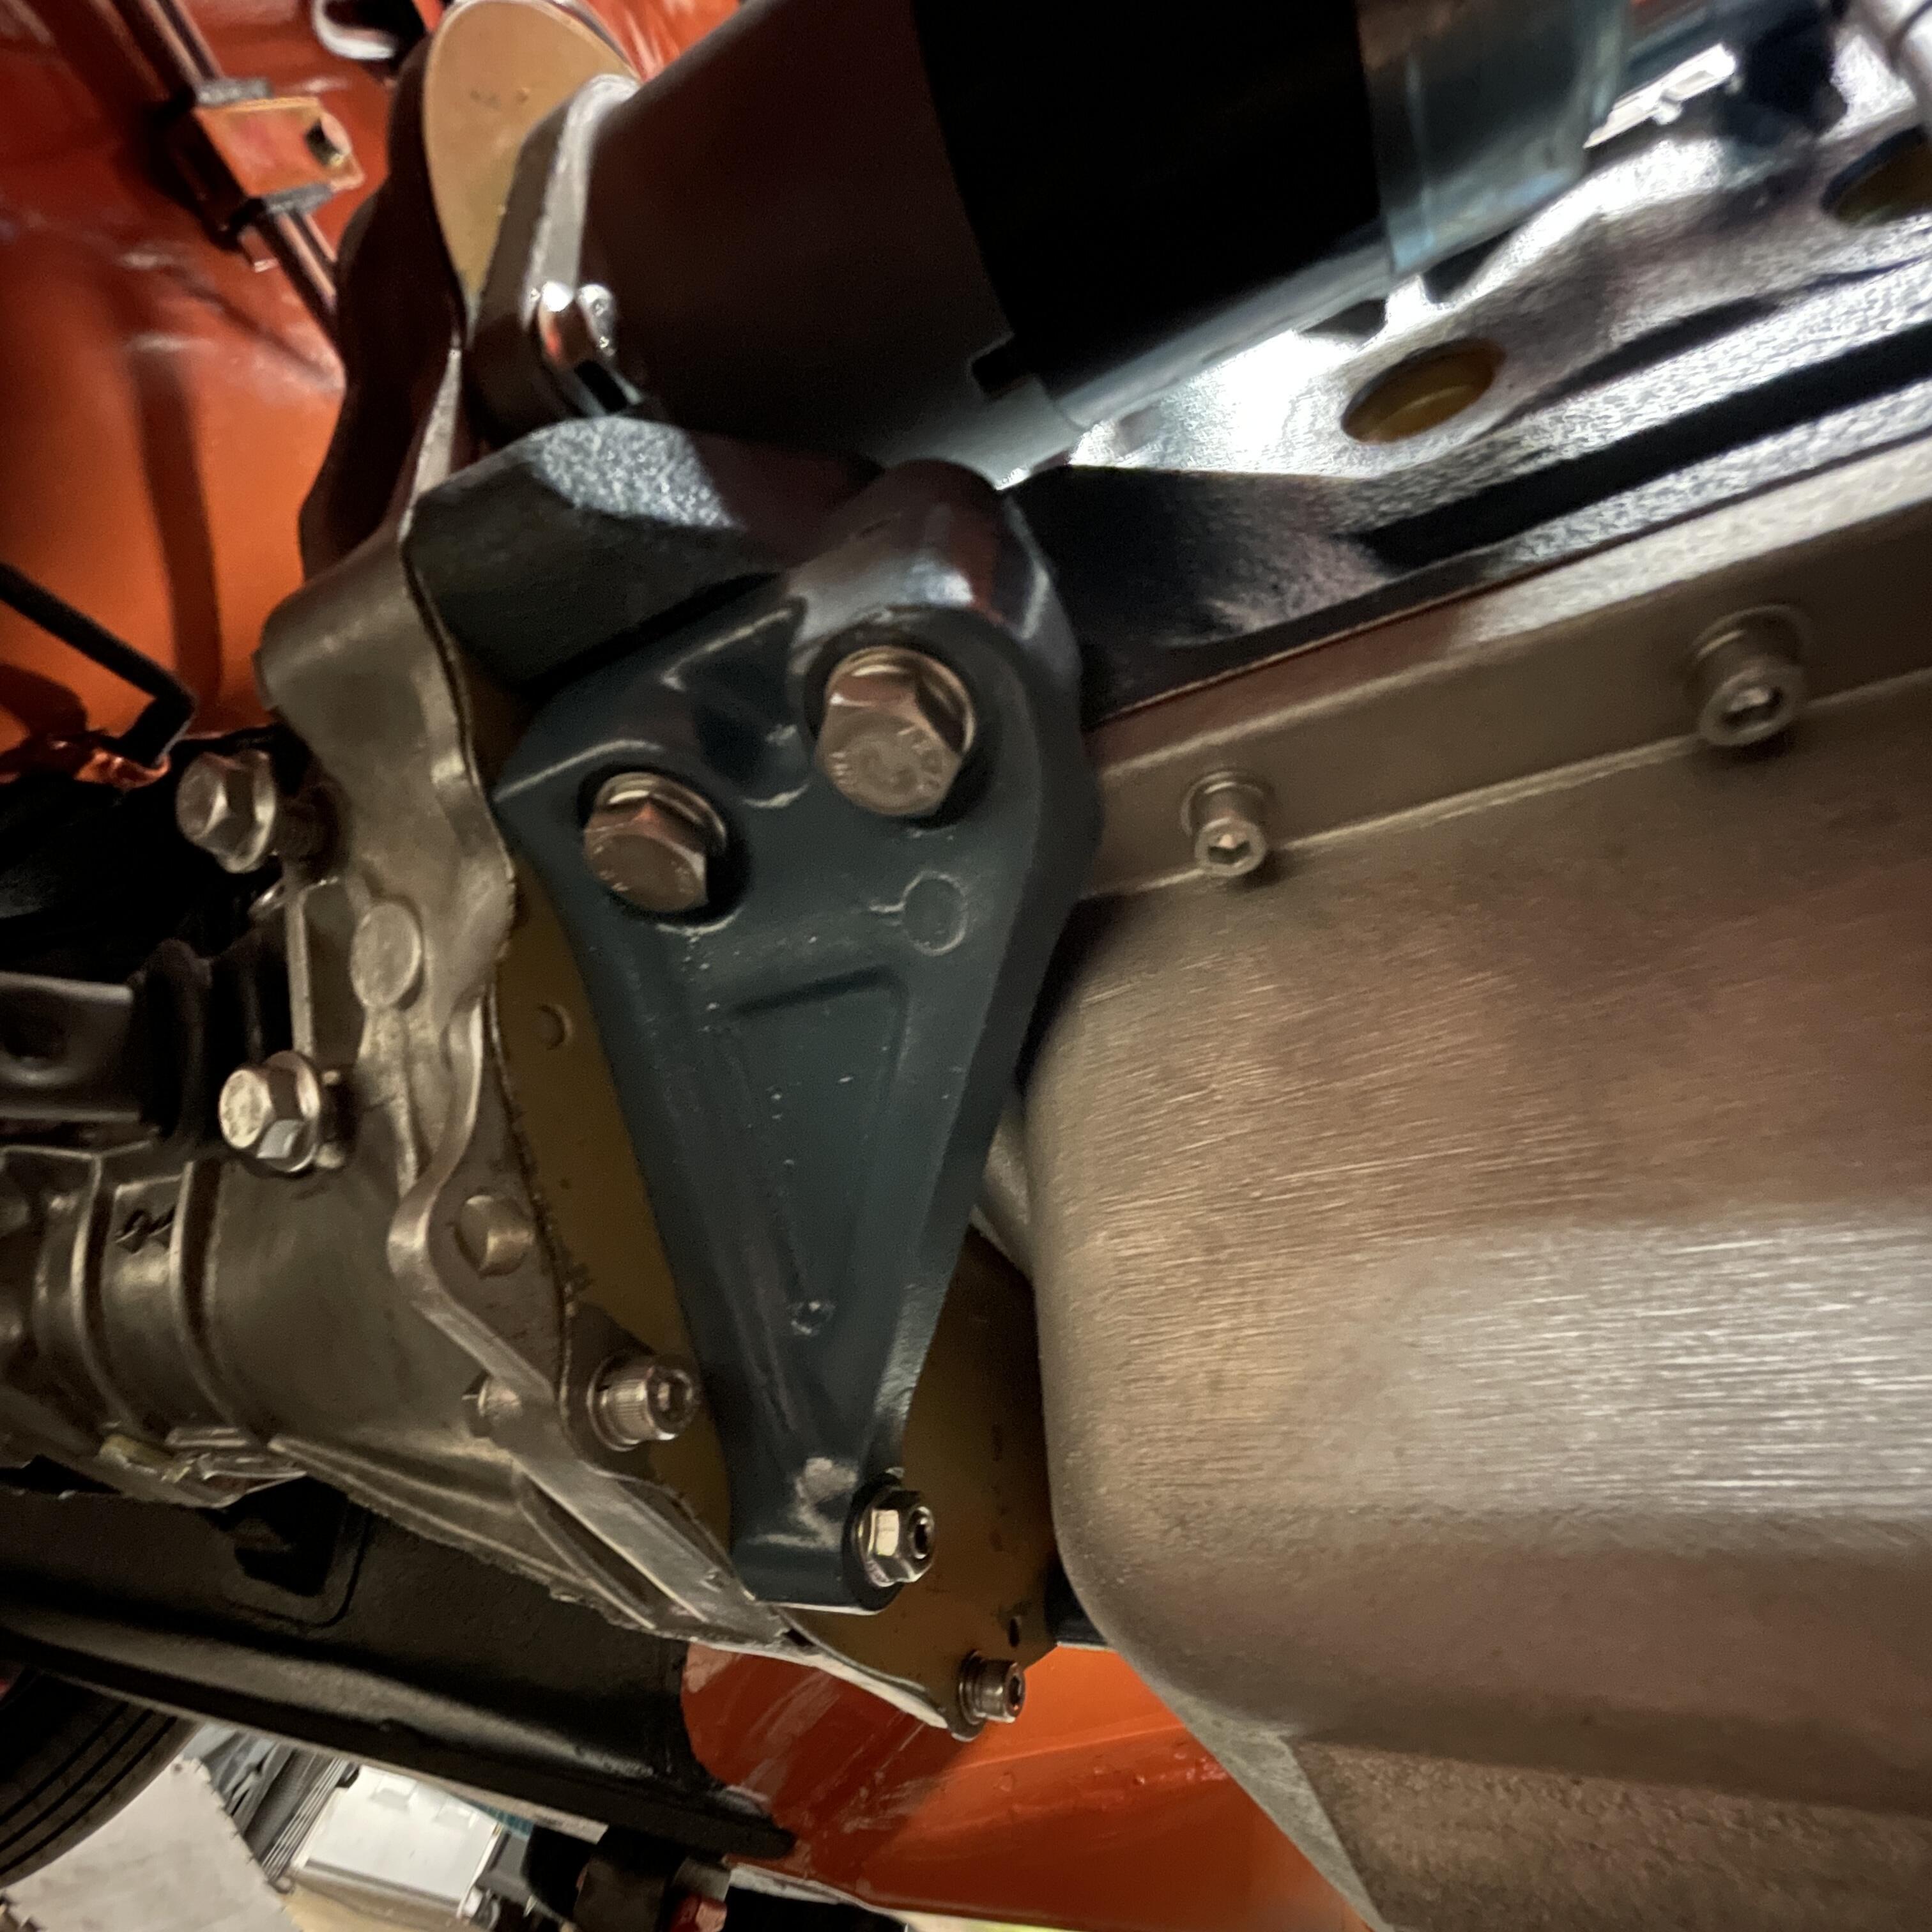
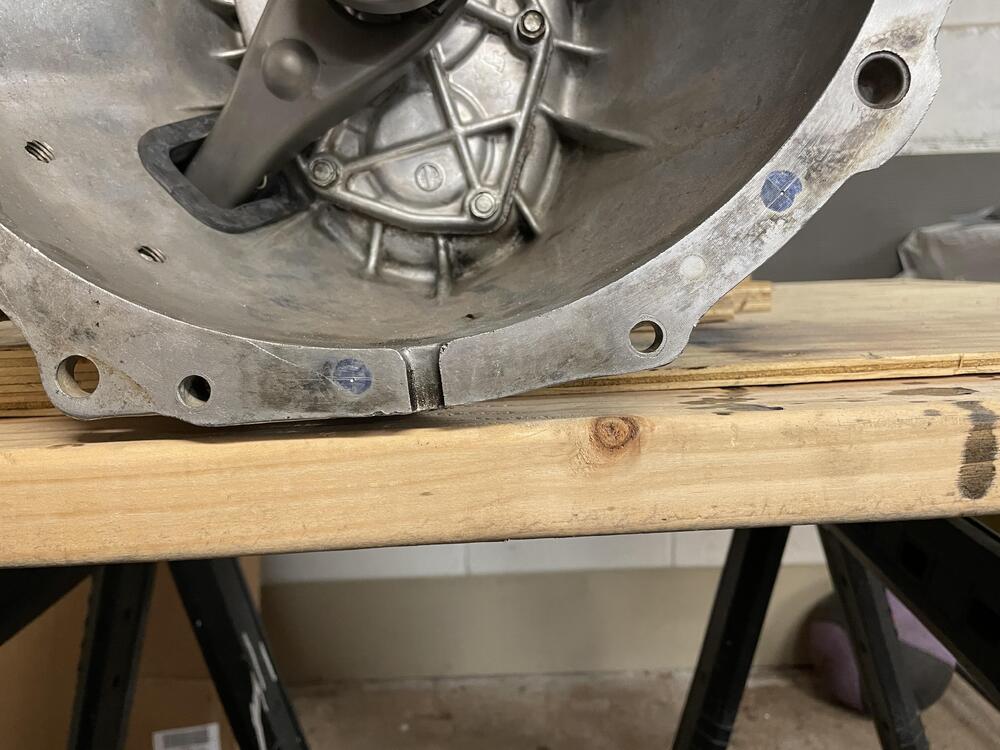
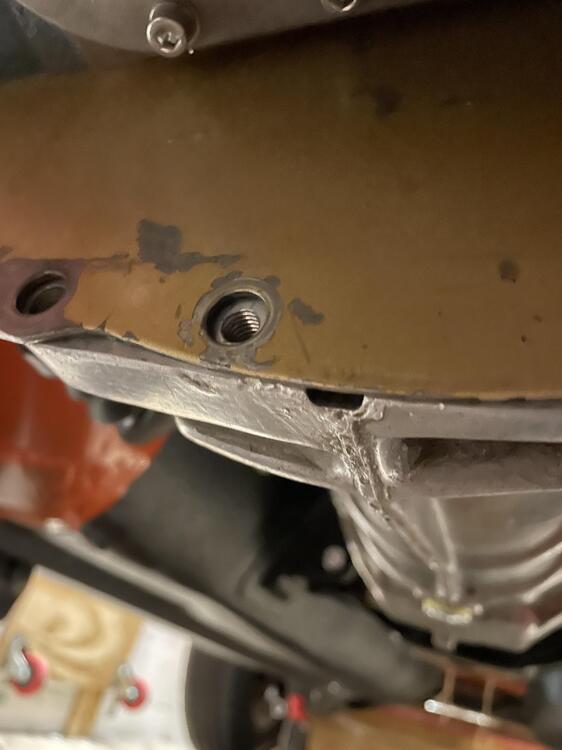
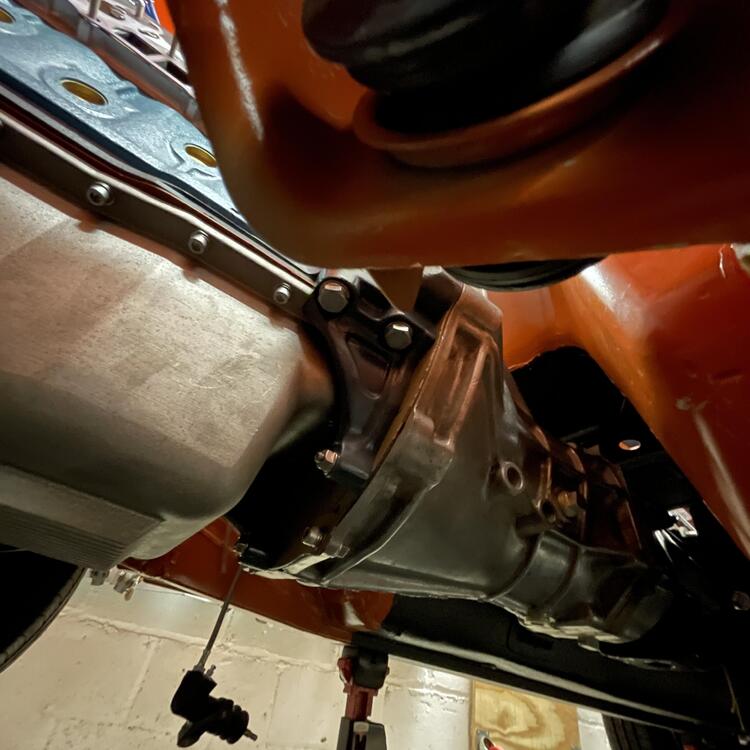
Did some stuff… Chopped up and rebuilt my compressor bracket to move it up and toward the block… I rehabilitated my transmission gussets and made them work on this 720 transmission. The gussets needed relief to accommodate the rear left corner of aluminum oil pan and the bolts. You can see where I carved that out in the process shot below where they are hanging on wires. I tapped the bell housing for m8-1.25 manifold studs and finished it off with flange nuts.


-
I see that N3300 was used on the manual. Any idea how it was different from N3301?