Chickenman
Free Member
-
Joined
-
Last visited
Everything posted by Chickenman
-
 No.. You can still buy the inner seal and outer O-ring from Nissan. Inner Seal = 32709-14600 Outer O-Ring = 32710-14600
 -
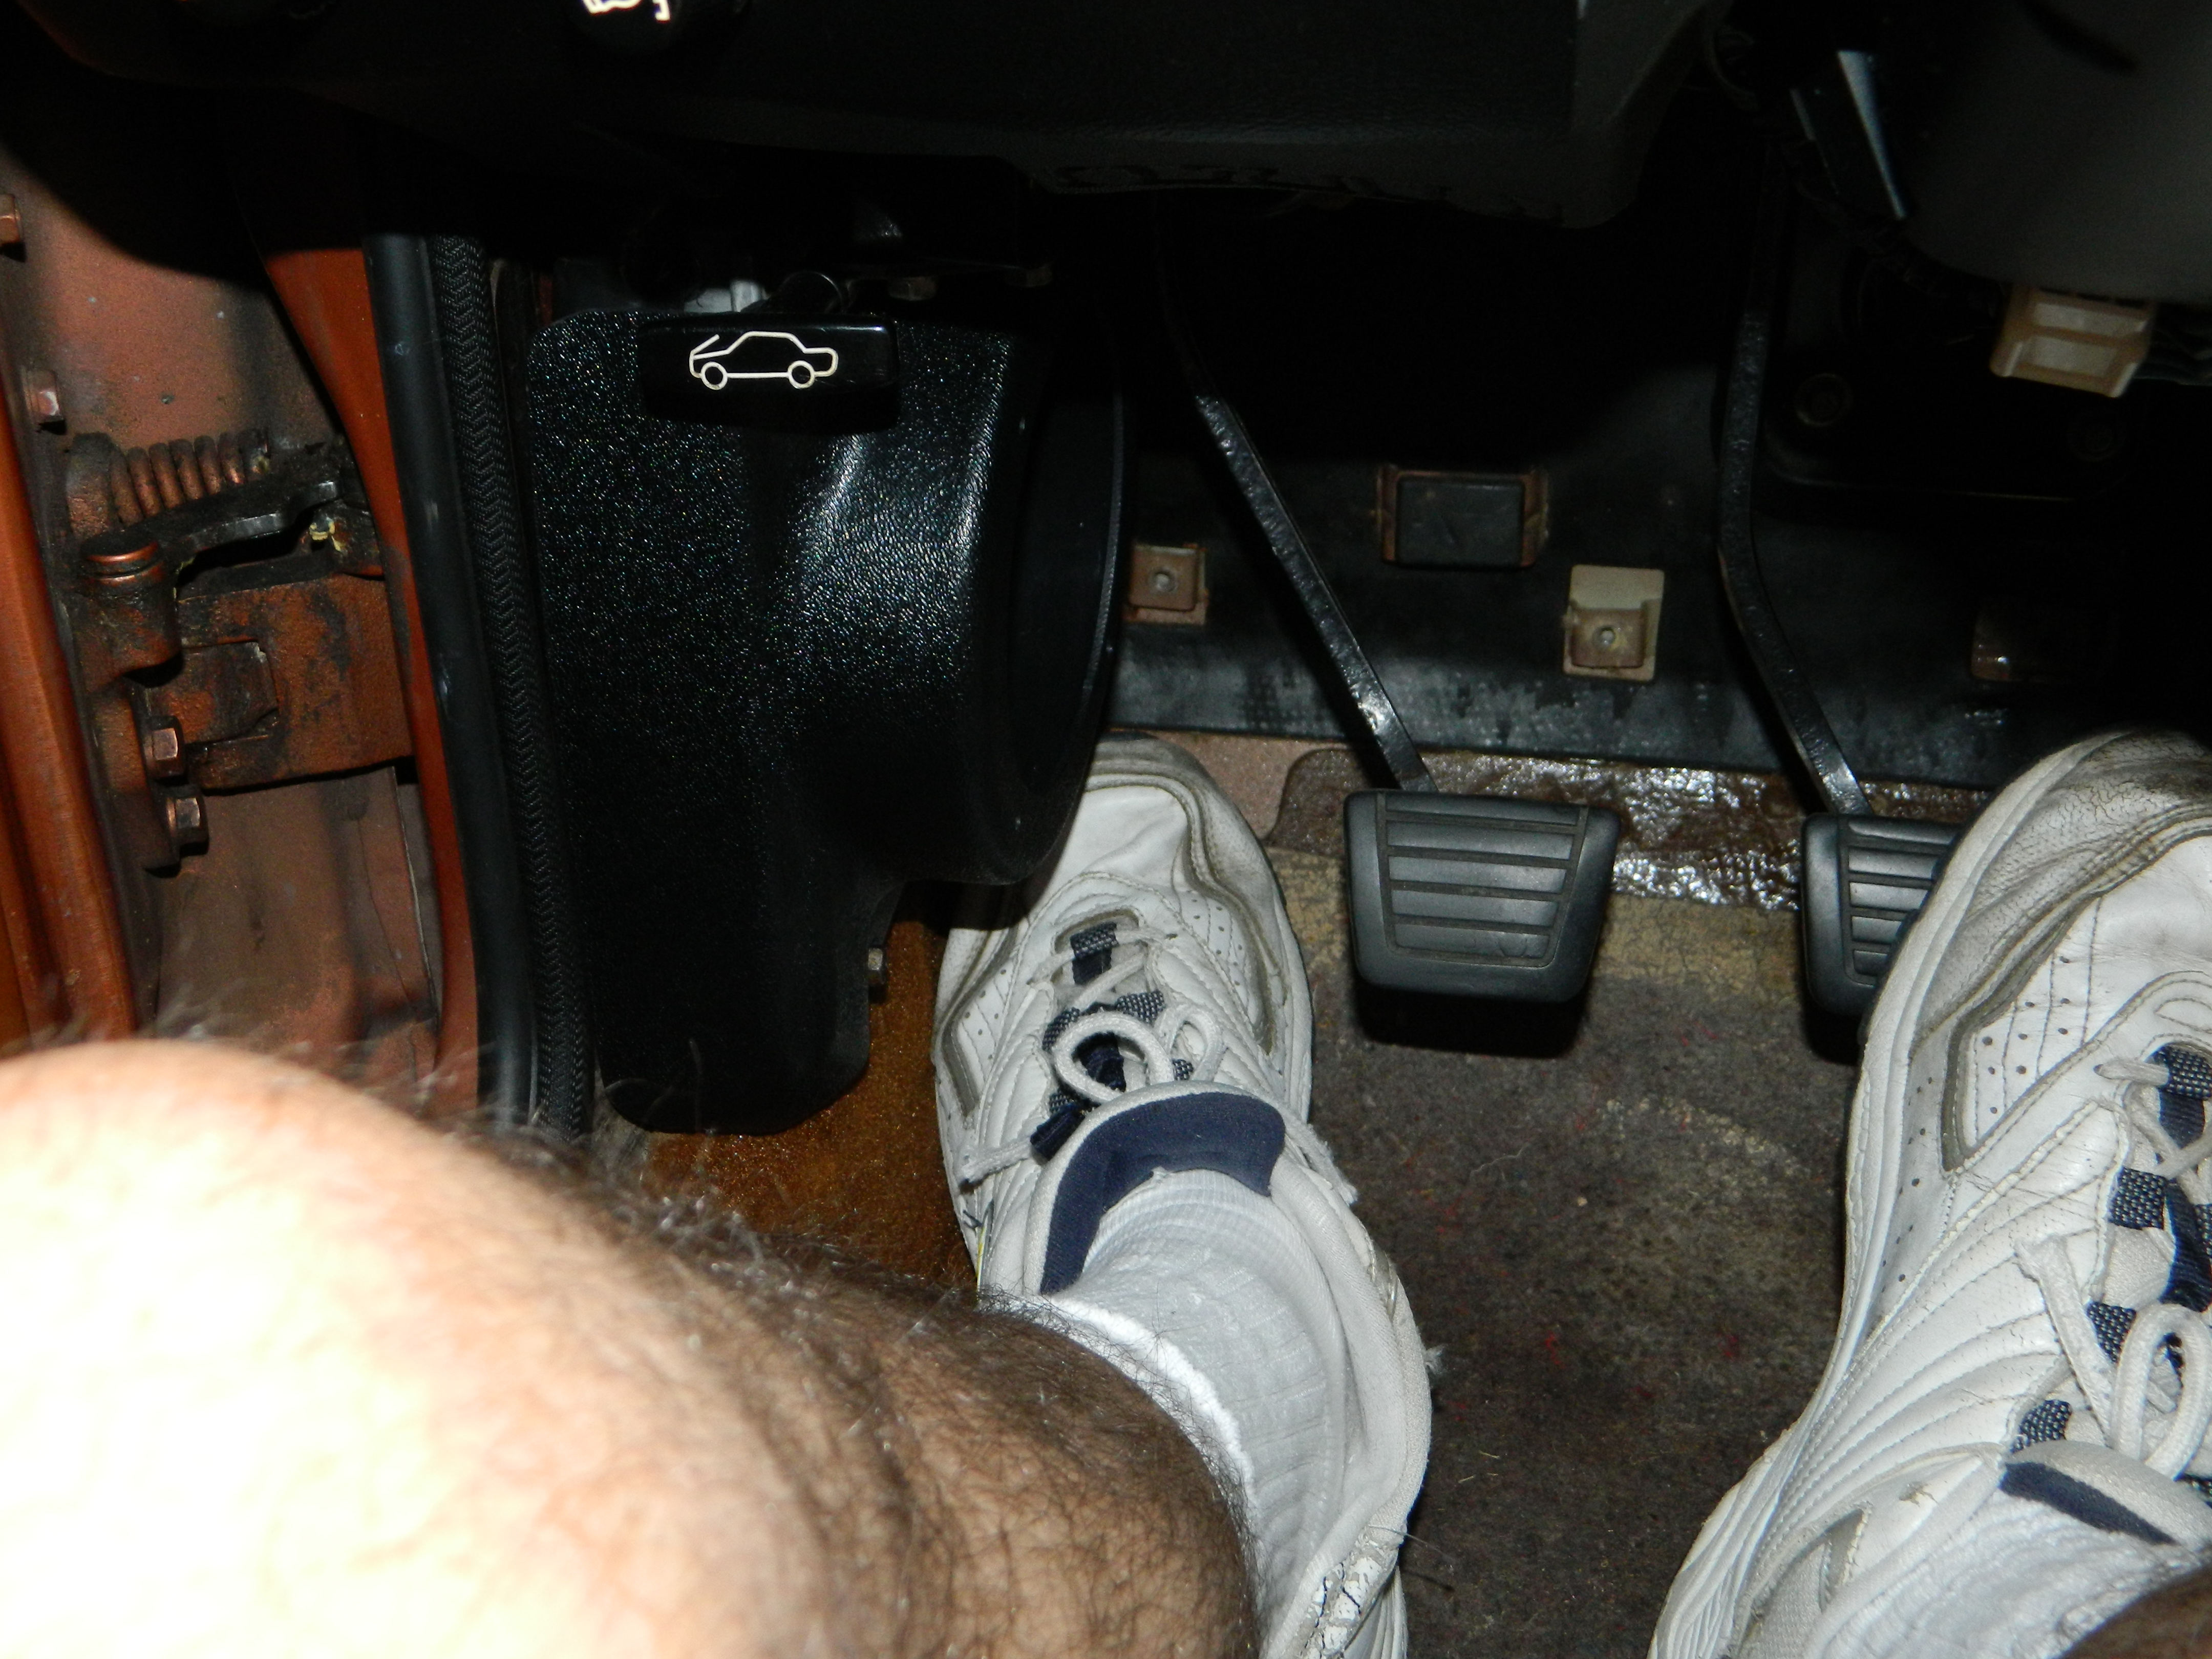
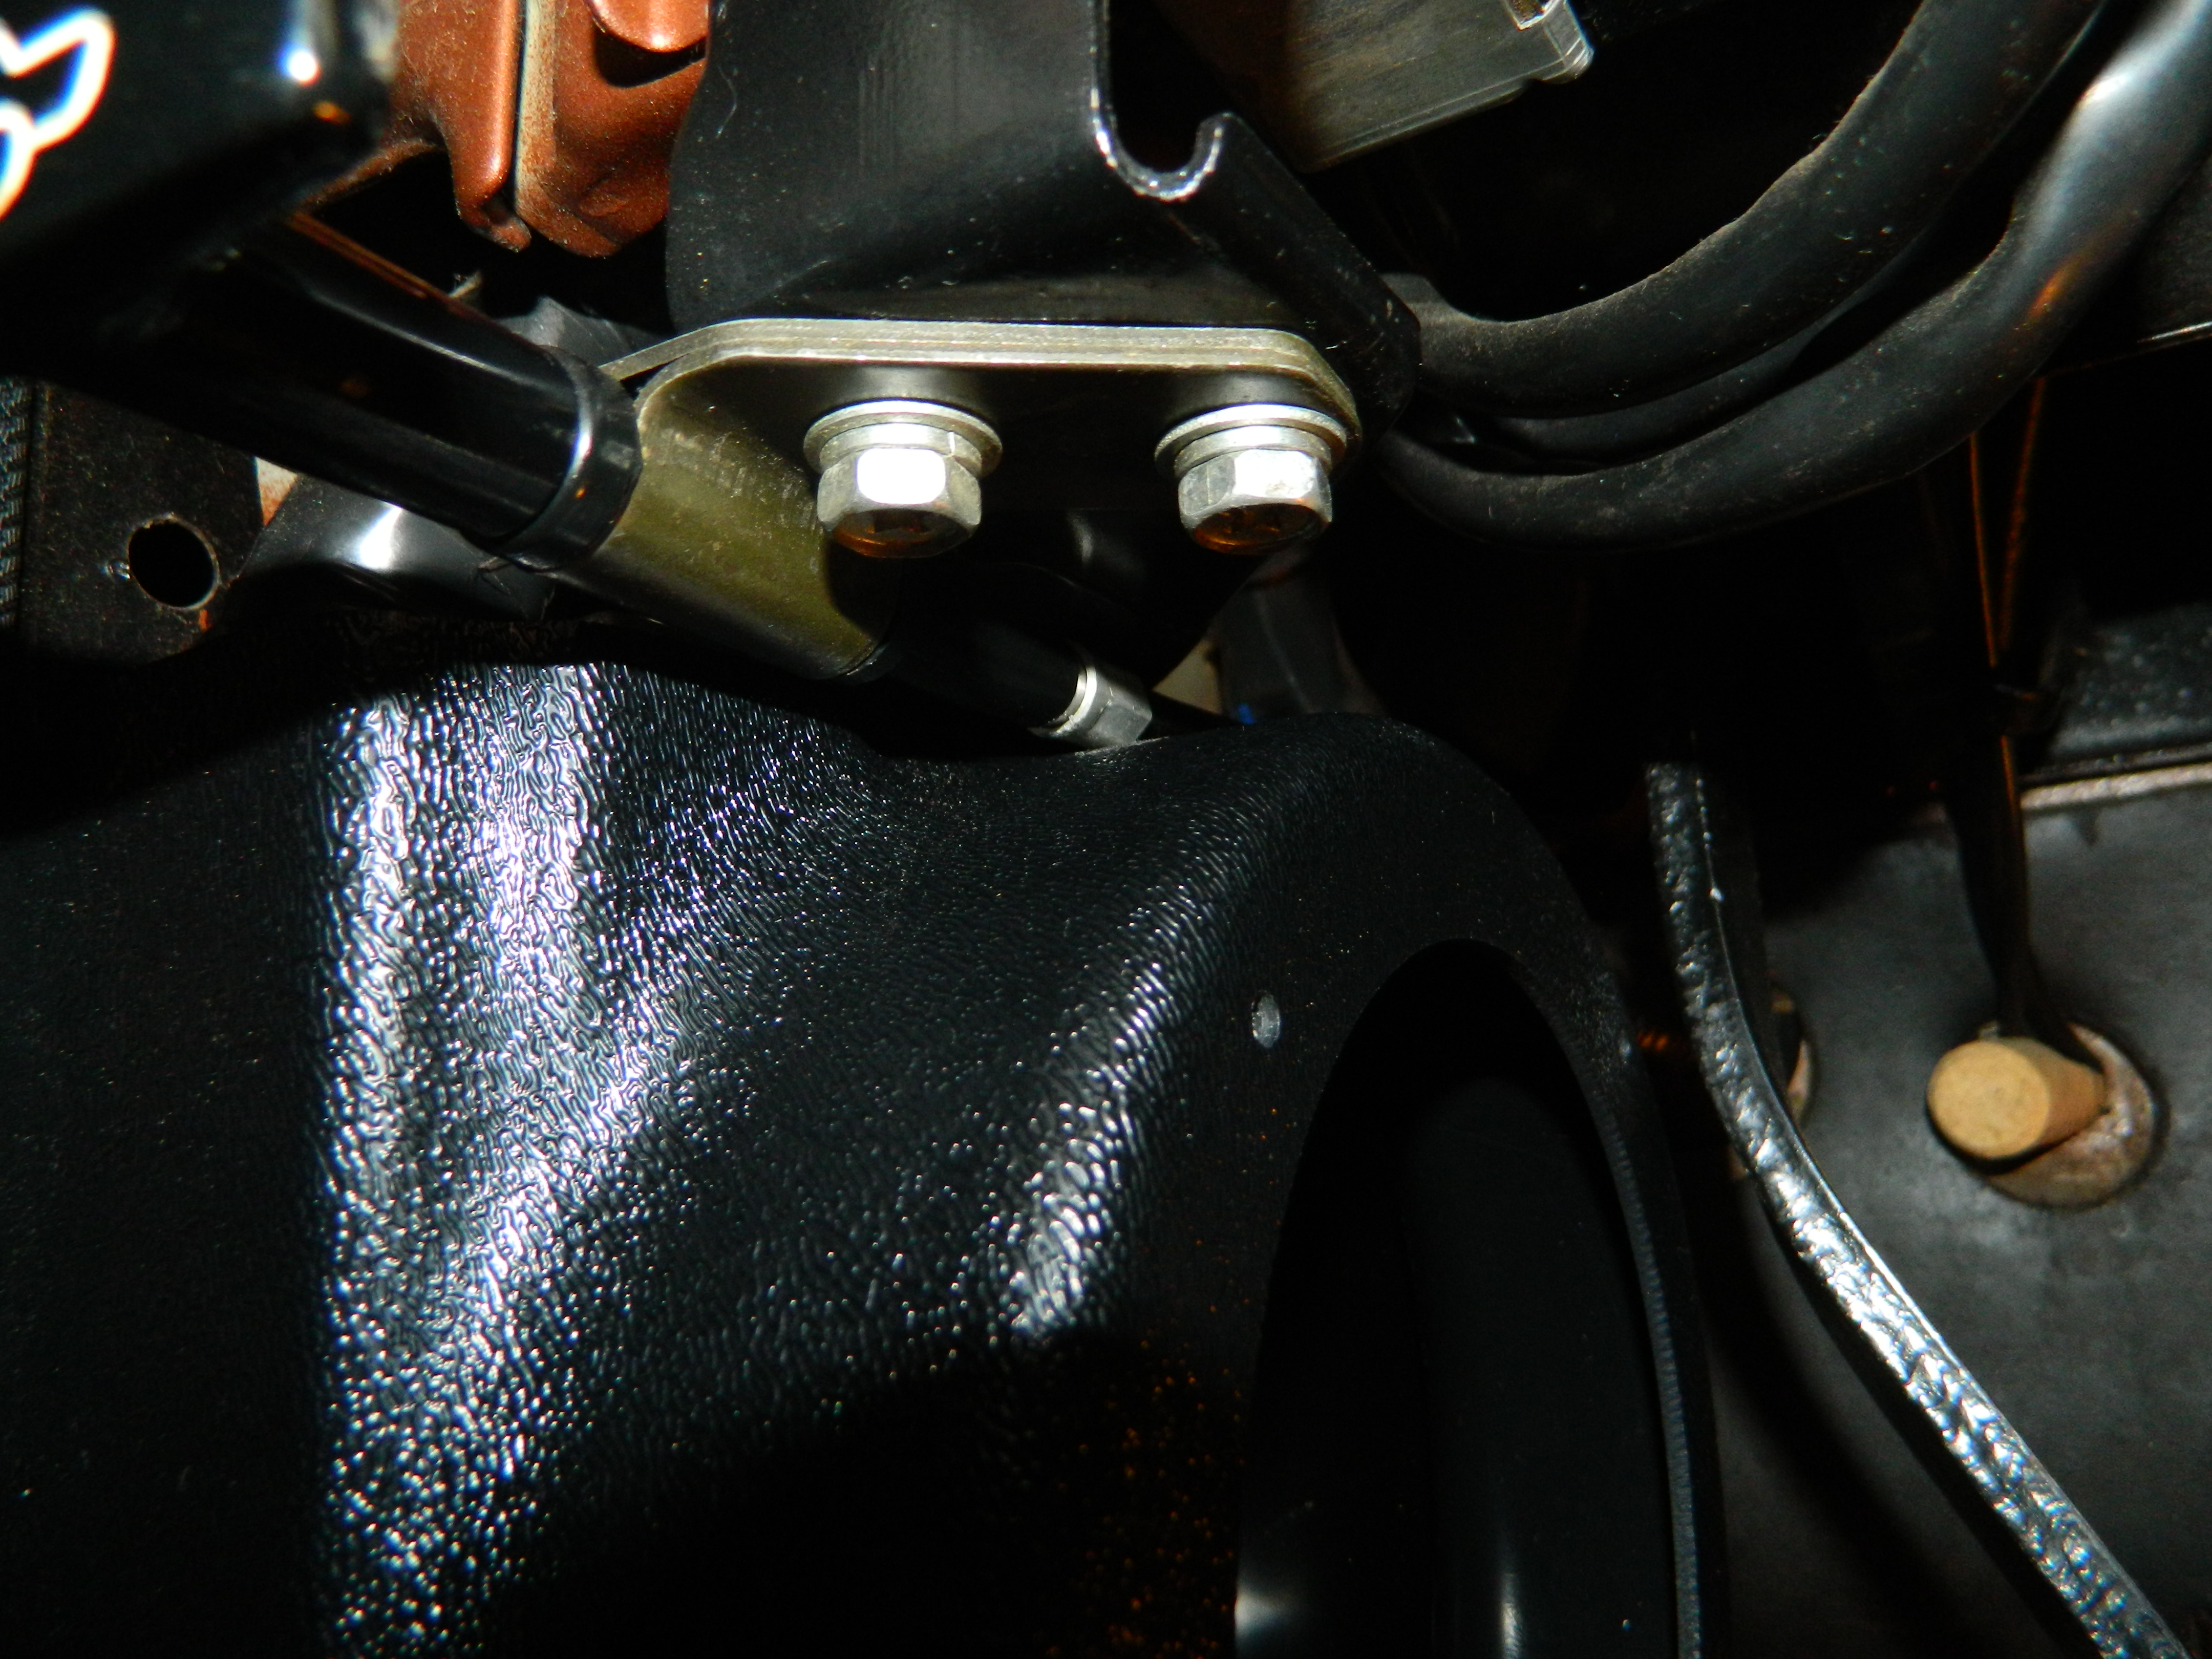
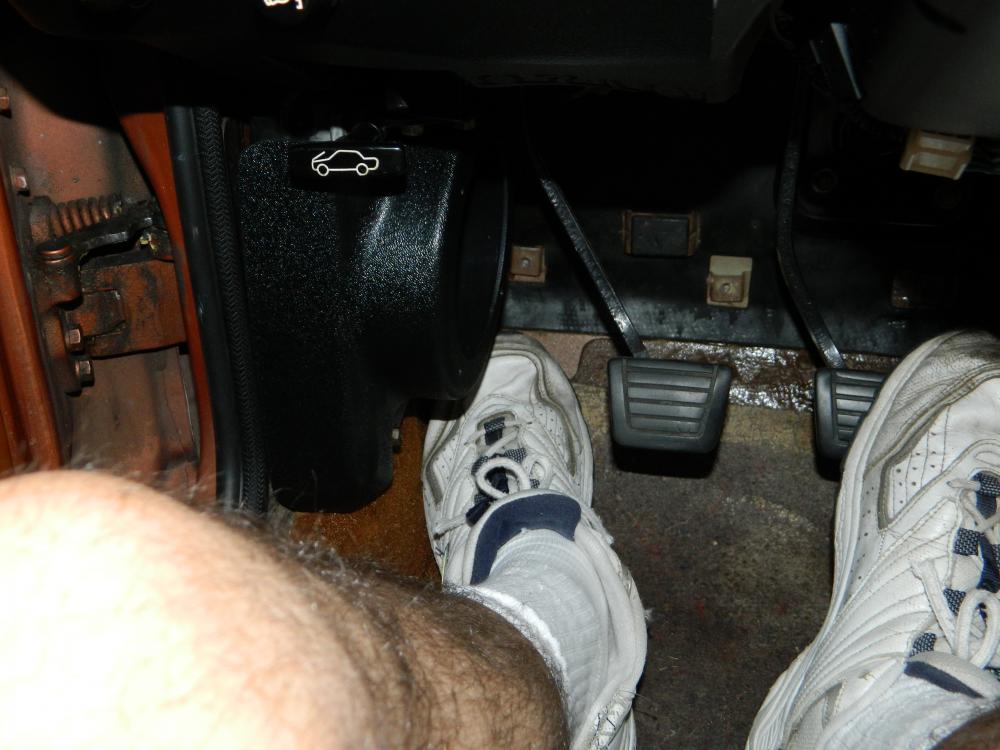
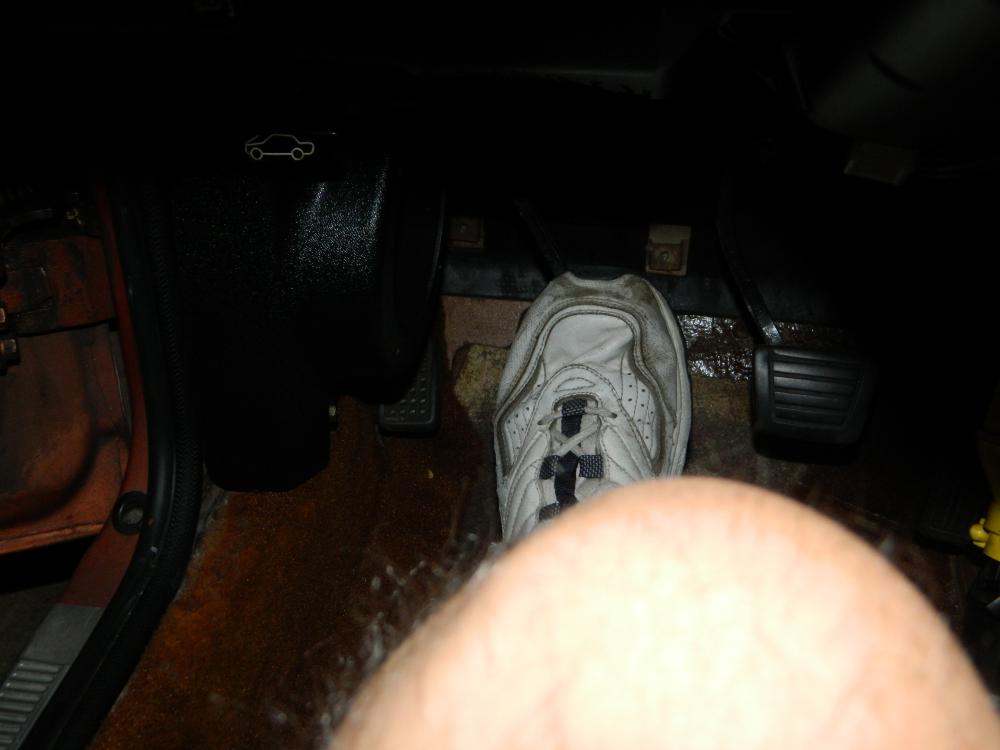
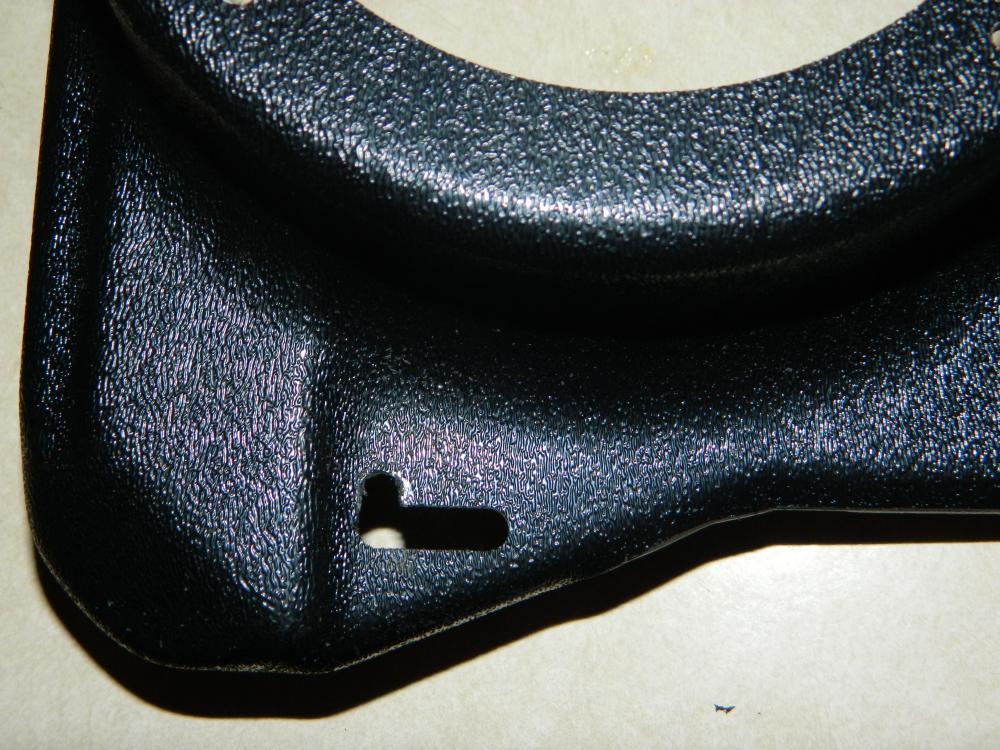
Sorry for the delay, but I've been having some back issues lately and I can't get under the Dash for very long. Here are a few more pictures and some notes. 1: Driver side fits much easier with small notch I made. Derek will likely modify production models based on this feed back. 2: I have included some pictures with my size 12, D width running shoes on. These are the bulkiest shoes I own ( with a big flare on side of soles ) and as you can see, there is lots of space. I have a lot more room with my dress shoes or driving shoes. Access to clutch pedal is a none issue. Access to dead pedal is fine. you just learn to slip your foot back and under. People without size 12 feet would have even more clearance. I'll update later with speakers in place.

-
I'm using R12-A in my 1976 factory system. Works just fine and requires no retrofit.
-
205/50x15's look very good on a lowered car. One of the more popular sizes as well, so lots of choice.
-
^ Yes, I do believe he did check electrical connectors and #5 connector worked with a different injector swapped in. Quote from Post #1:
-
-
There's a supplier on E-Bay who sells new sets of six Standard Blue Streak injectors for around $165.. That's the best deal you'll likely find. If it's in the budget that is your best option. Just replace them all. I'll see if I can find the link. Edit: Here ya go: http://www.ebay.com/itm/75-76-77-78-79-80-81-82-83-Datsun-280Z-Fuel-Injectors-FJ707-FJ3-/152062929686?hash=item2367a82b16:i:152062929686
-
A little story relating to the above post. . A friend of mine ( whom I mentored when we raced together ) now works in the High Performance division of a very large BMW dealership. He was in the " regular " shop one day talking to a Technician who had a problem with a new Bimmer. Engine was direct injection V8 and had a misfire. BMW's specialized engine scanner didn't show any hardware faults, but it was obviously running on only seven cylinders. He suspected a bad injector, but didn't know how to identify it. My friend Karl, asked if he had a Stethoscope. He did. 30 seconds later bad injector was identified. All the good injectors went Ping Ping Ping. Bad injector went Thunk Thunk Thunk. Easy peasy. Why didn't the factory trained BMW Technician used this simple method? Because BMW does not train mechanics to " Think " any more. They train them only to read electronic scanners and follow approved factory " Flow Charts " and repair procedures. . Any thinking " outside the box " is discouraged. BMW will not pay for any warranty work unless their EXACT procedures are followed. And those procedures relied solely on using the BMW electronic scanners and Flow . I fact even after replacing the faulty injector and the engine now running smoothly, BMW would not pay warranty as the Factory scanning tool showed " no faults" with the injector. An Electronic readout of before and after is required with every warranty job. And the scanning tool is used from start to finish of job. It effectively does the " thinking " the Technician just pushes buttons. About 2 hours of additional paperwork was required, because BMW did not recognize an " Old school " method, such as a Stethoscope as an " Official " testing method.
-
OP.. you are over thinking this. Your definitive test was the screwdriver test where the #5 injector made no noise or tap when engine was running. That's a done deal right there. Injector is defective. Replace it. Period. Edit: Check electrical connector with a NOID lite of course. But you already swapped injectors and problem injector moved cylinders, so that eliminates an electrical harness problem The screwdriver or stethoscope method is a very good test that is often forgotten about. It will immediately show up a bad injector, whether through electrical fault or a mechanical fault. Injectors can test fine electrically, but mechanical faults, such as sticking, will not show up with electrical tests.
-
-
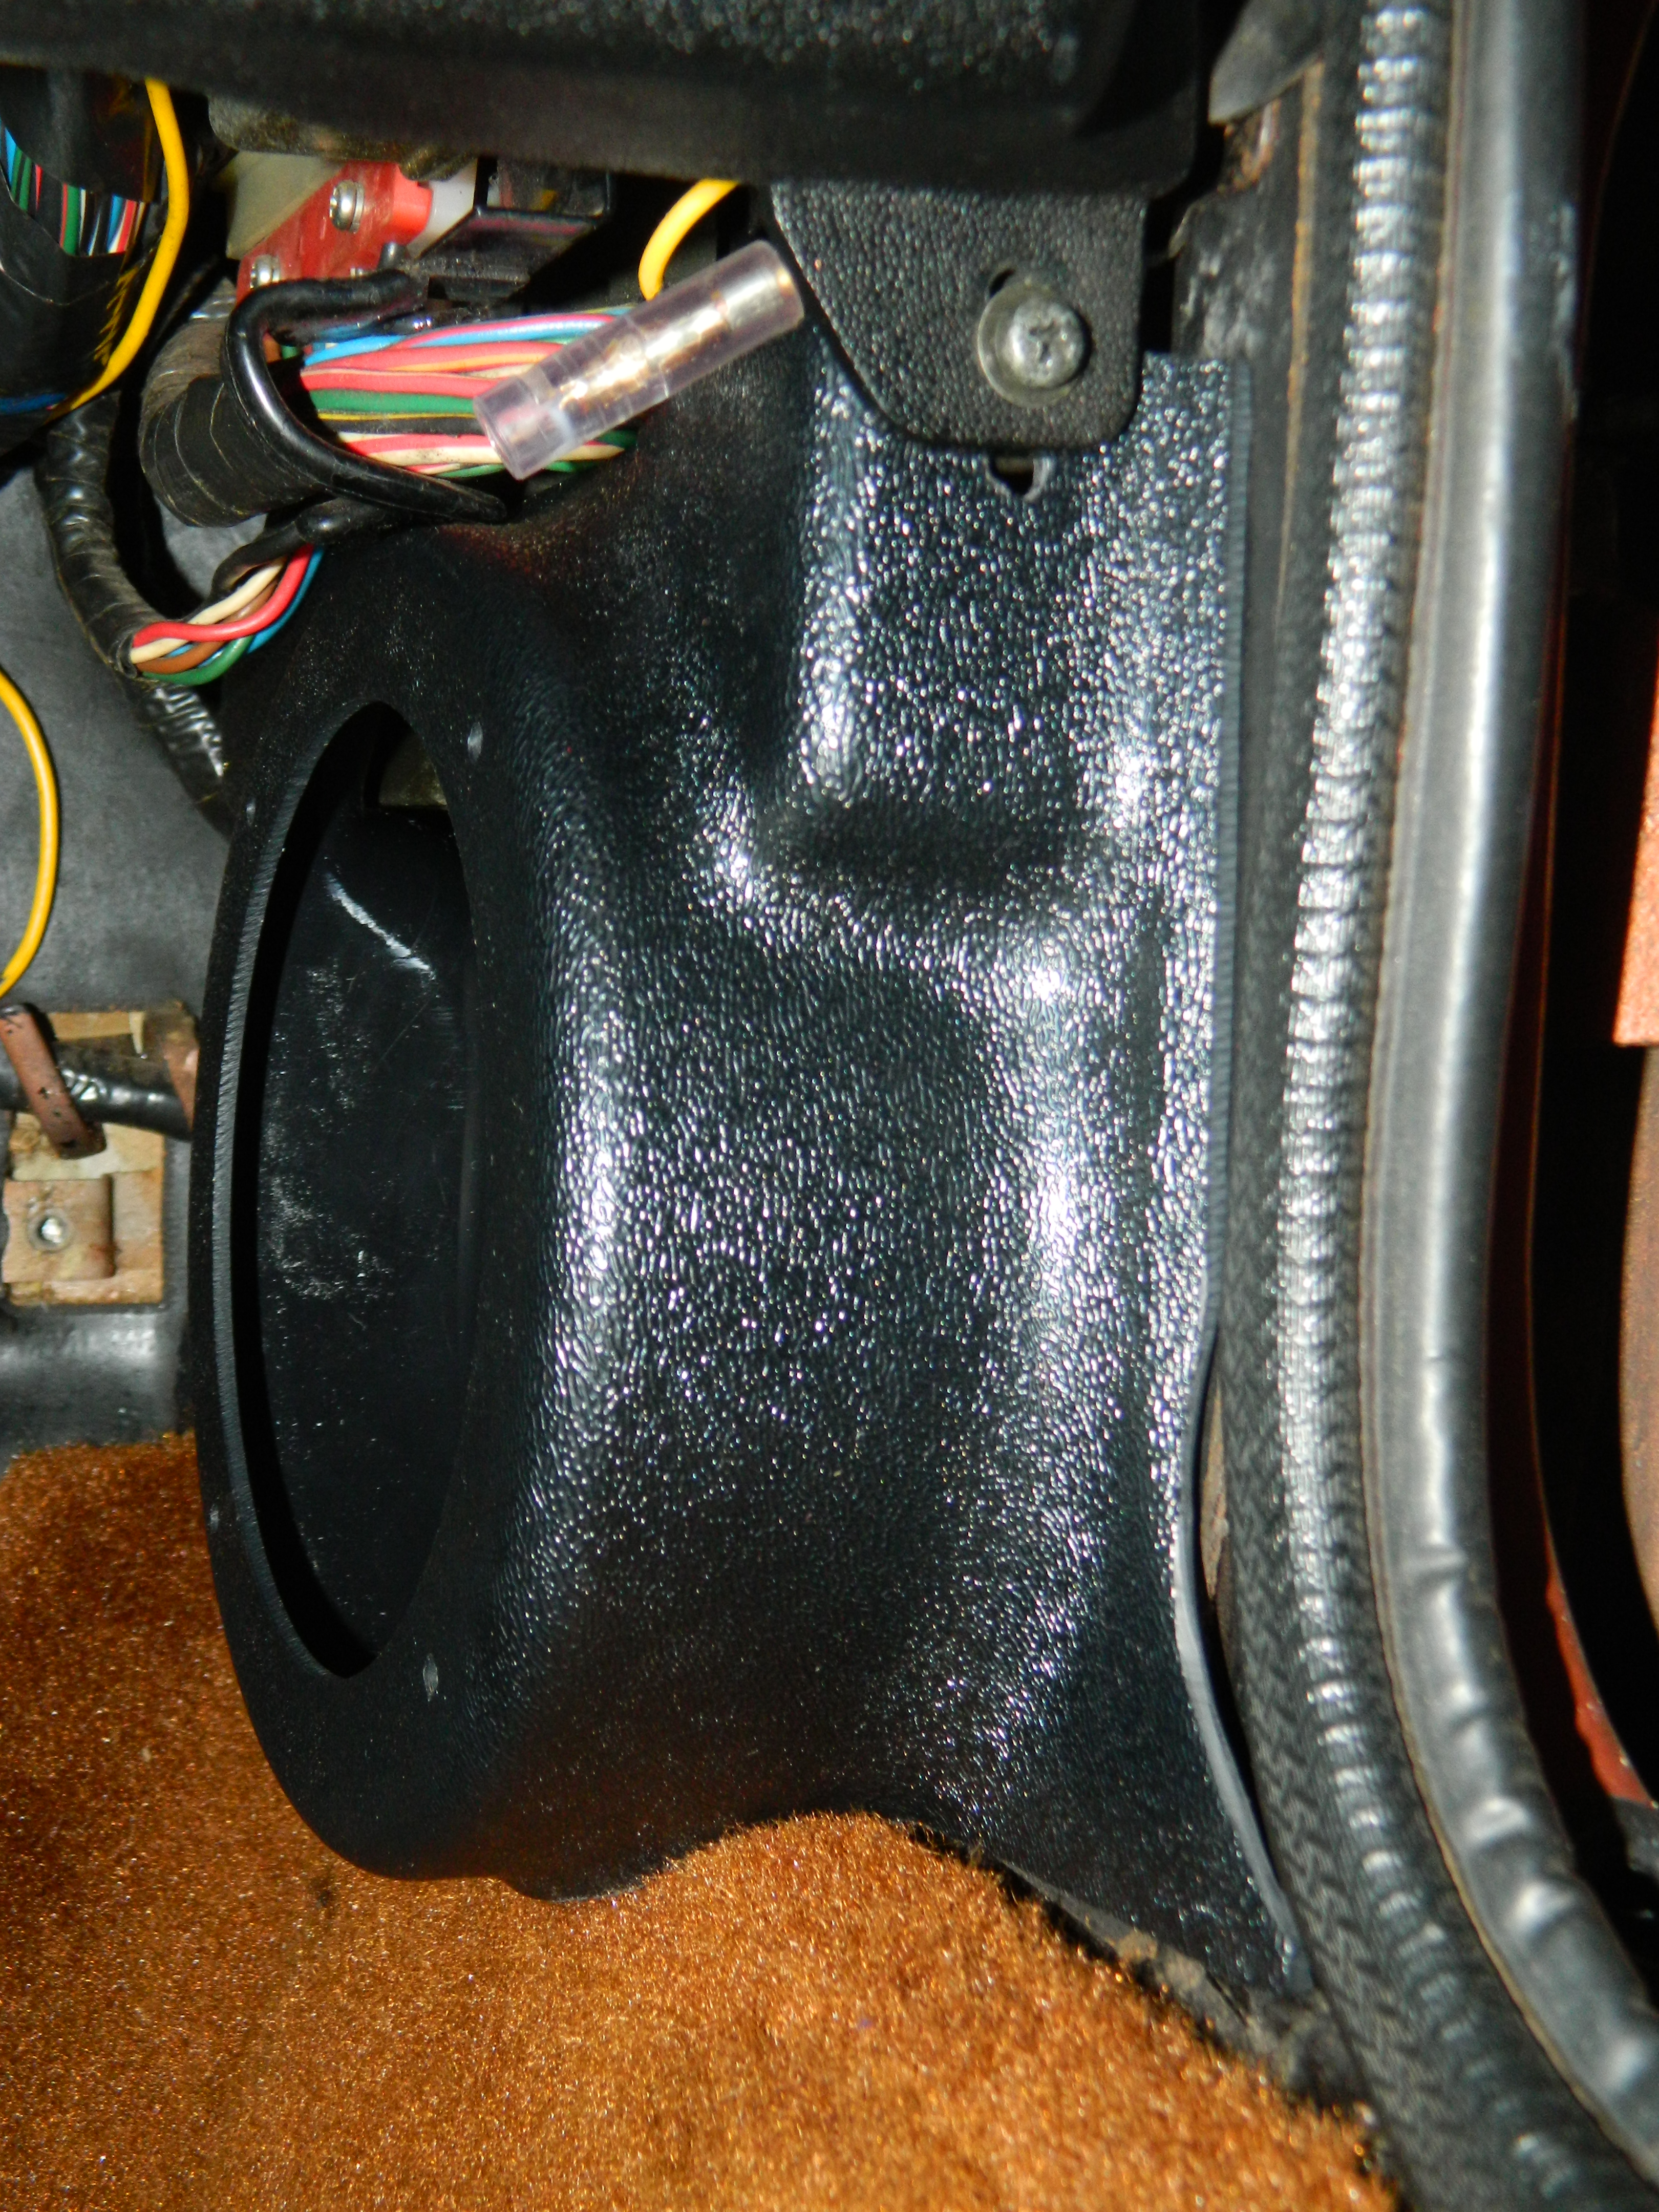
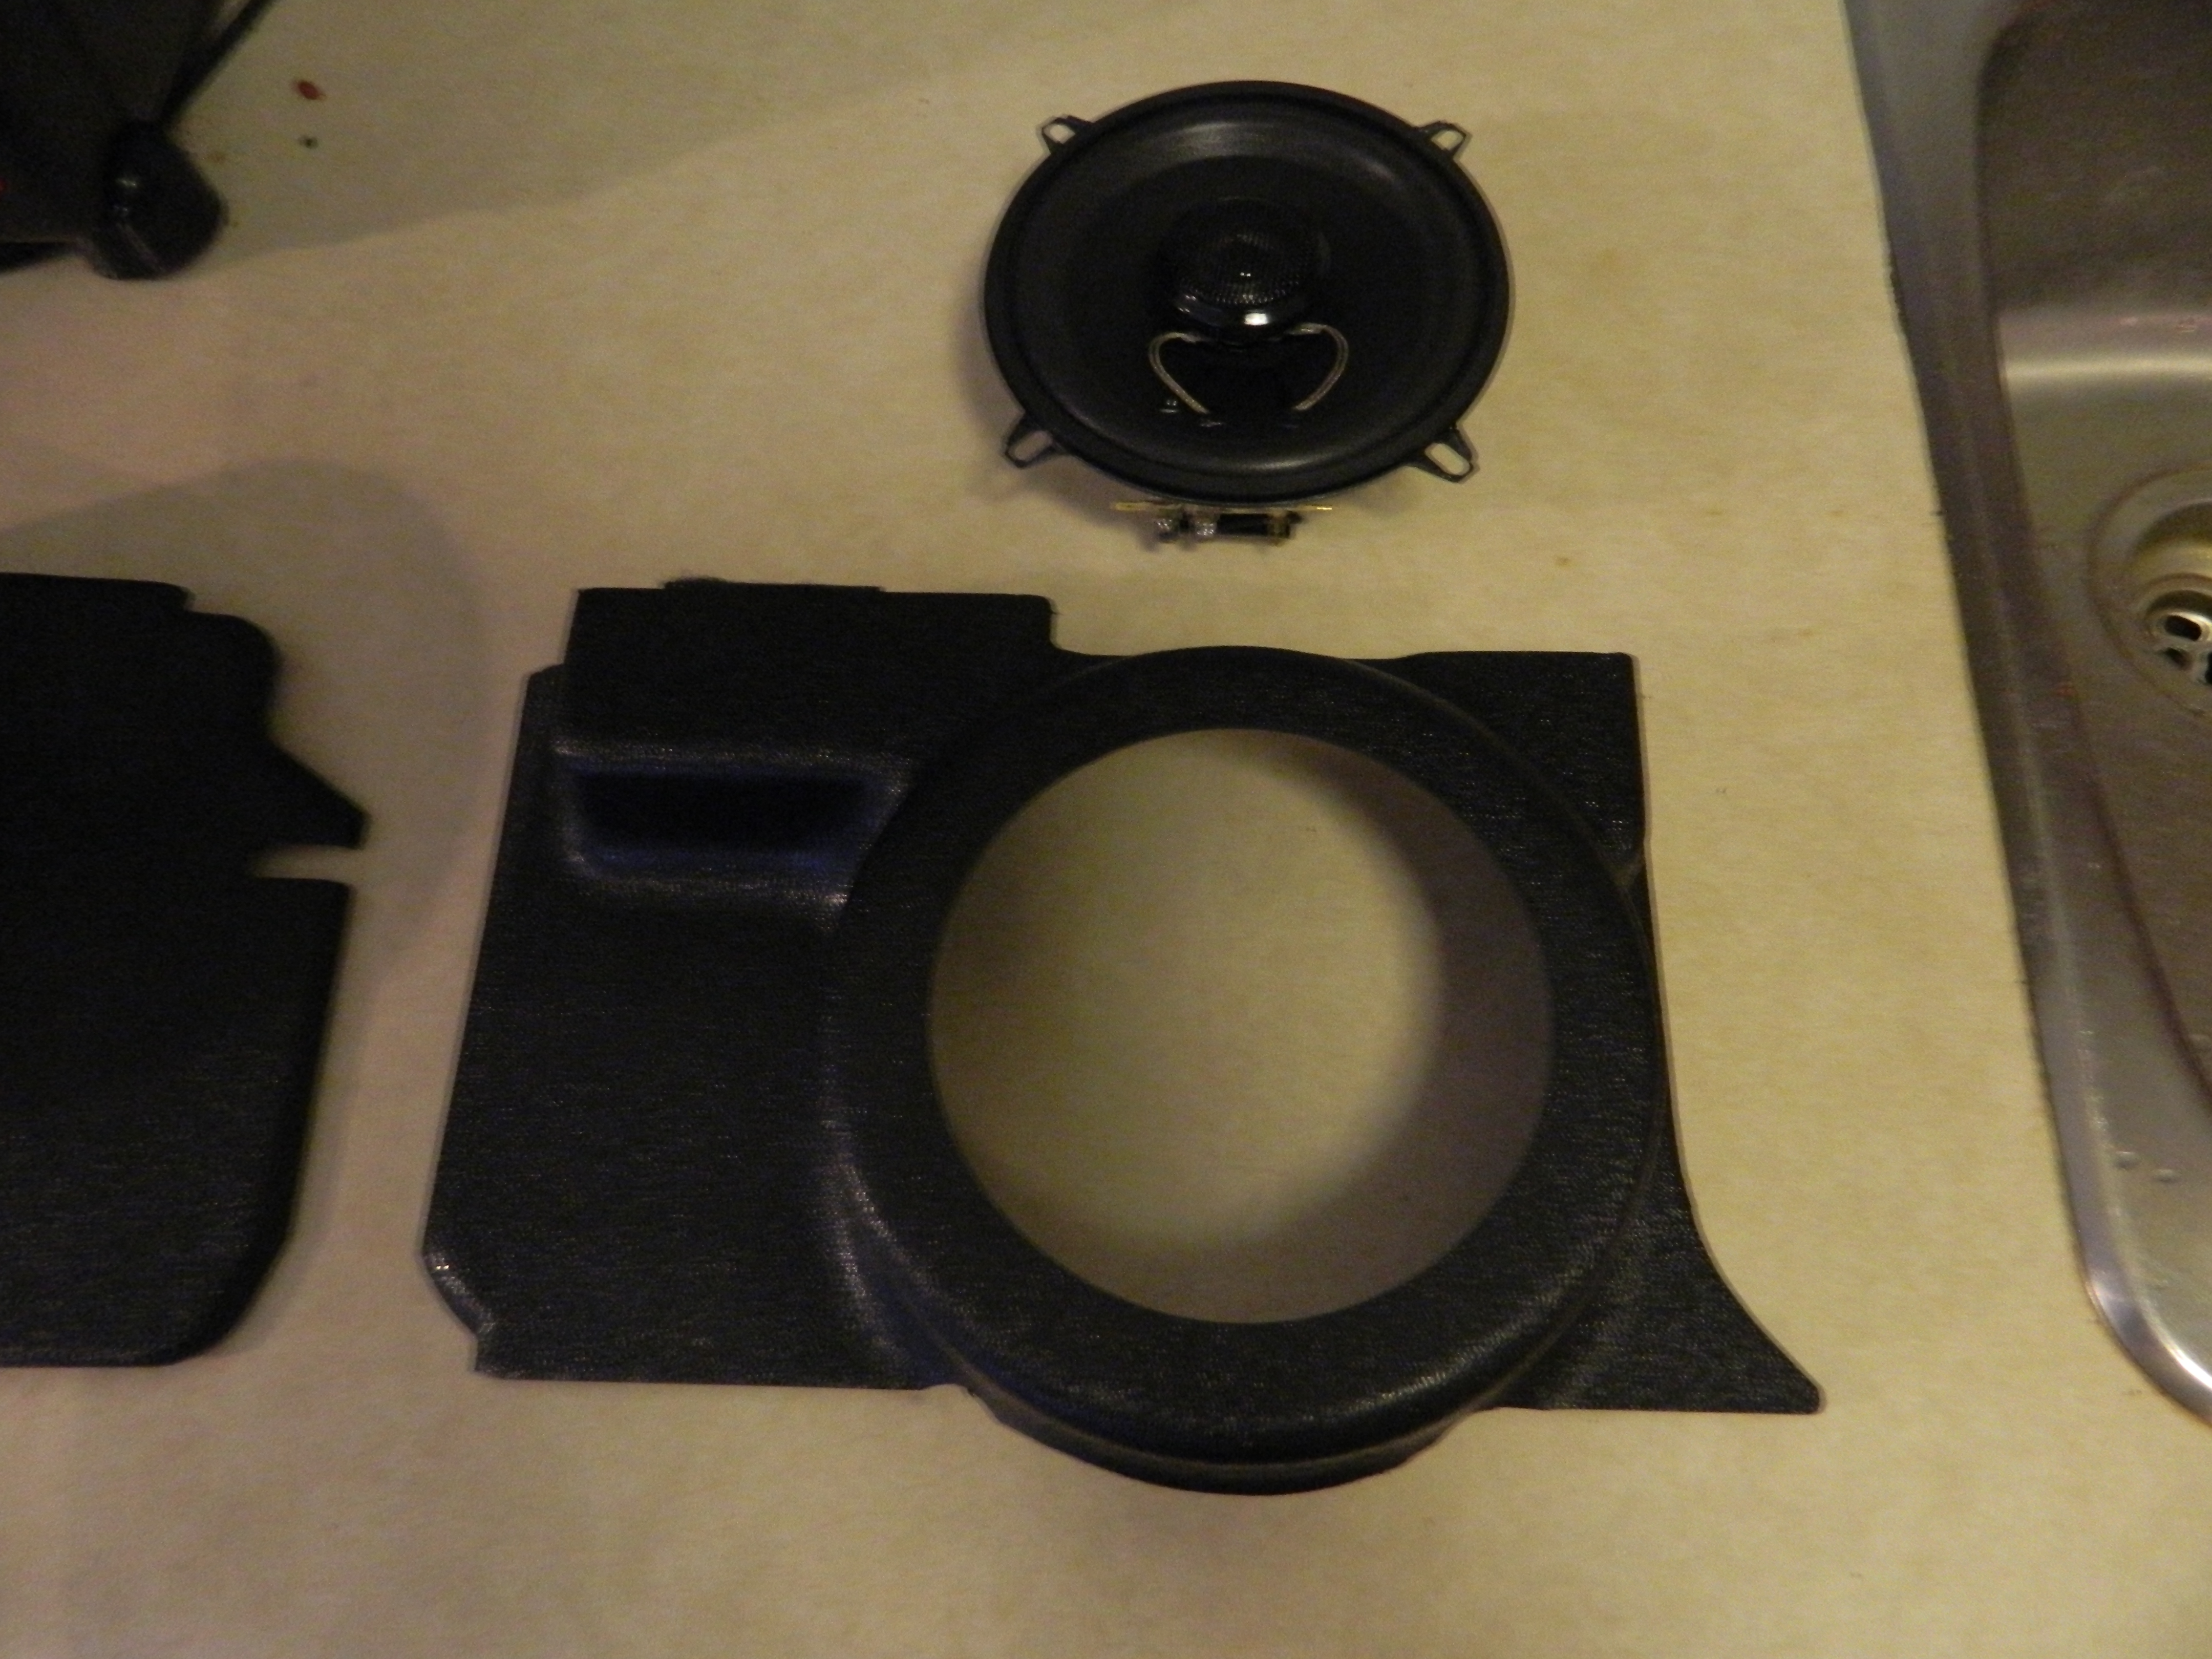
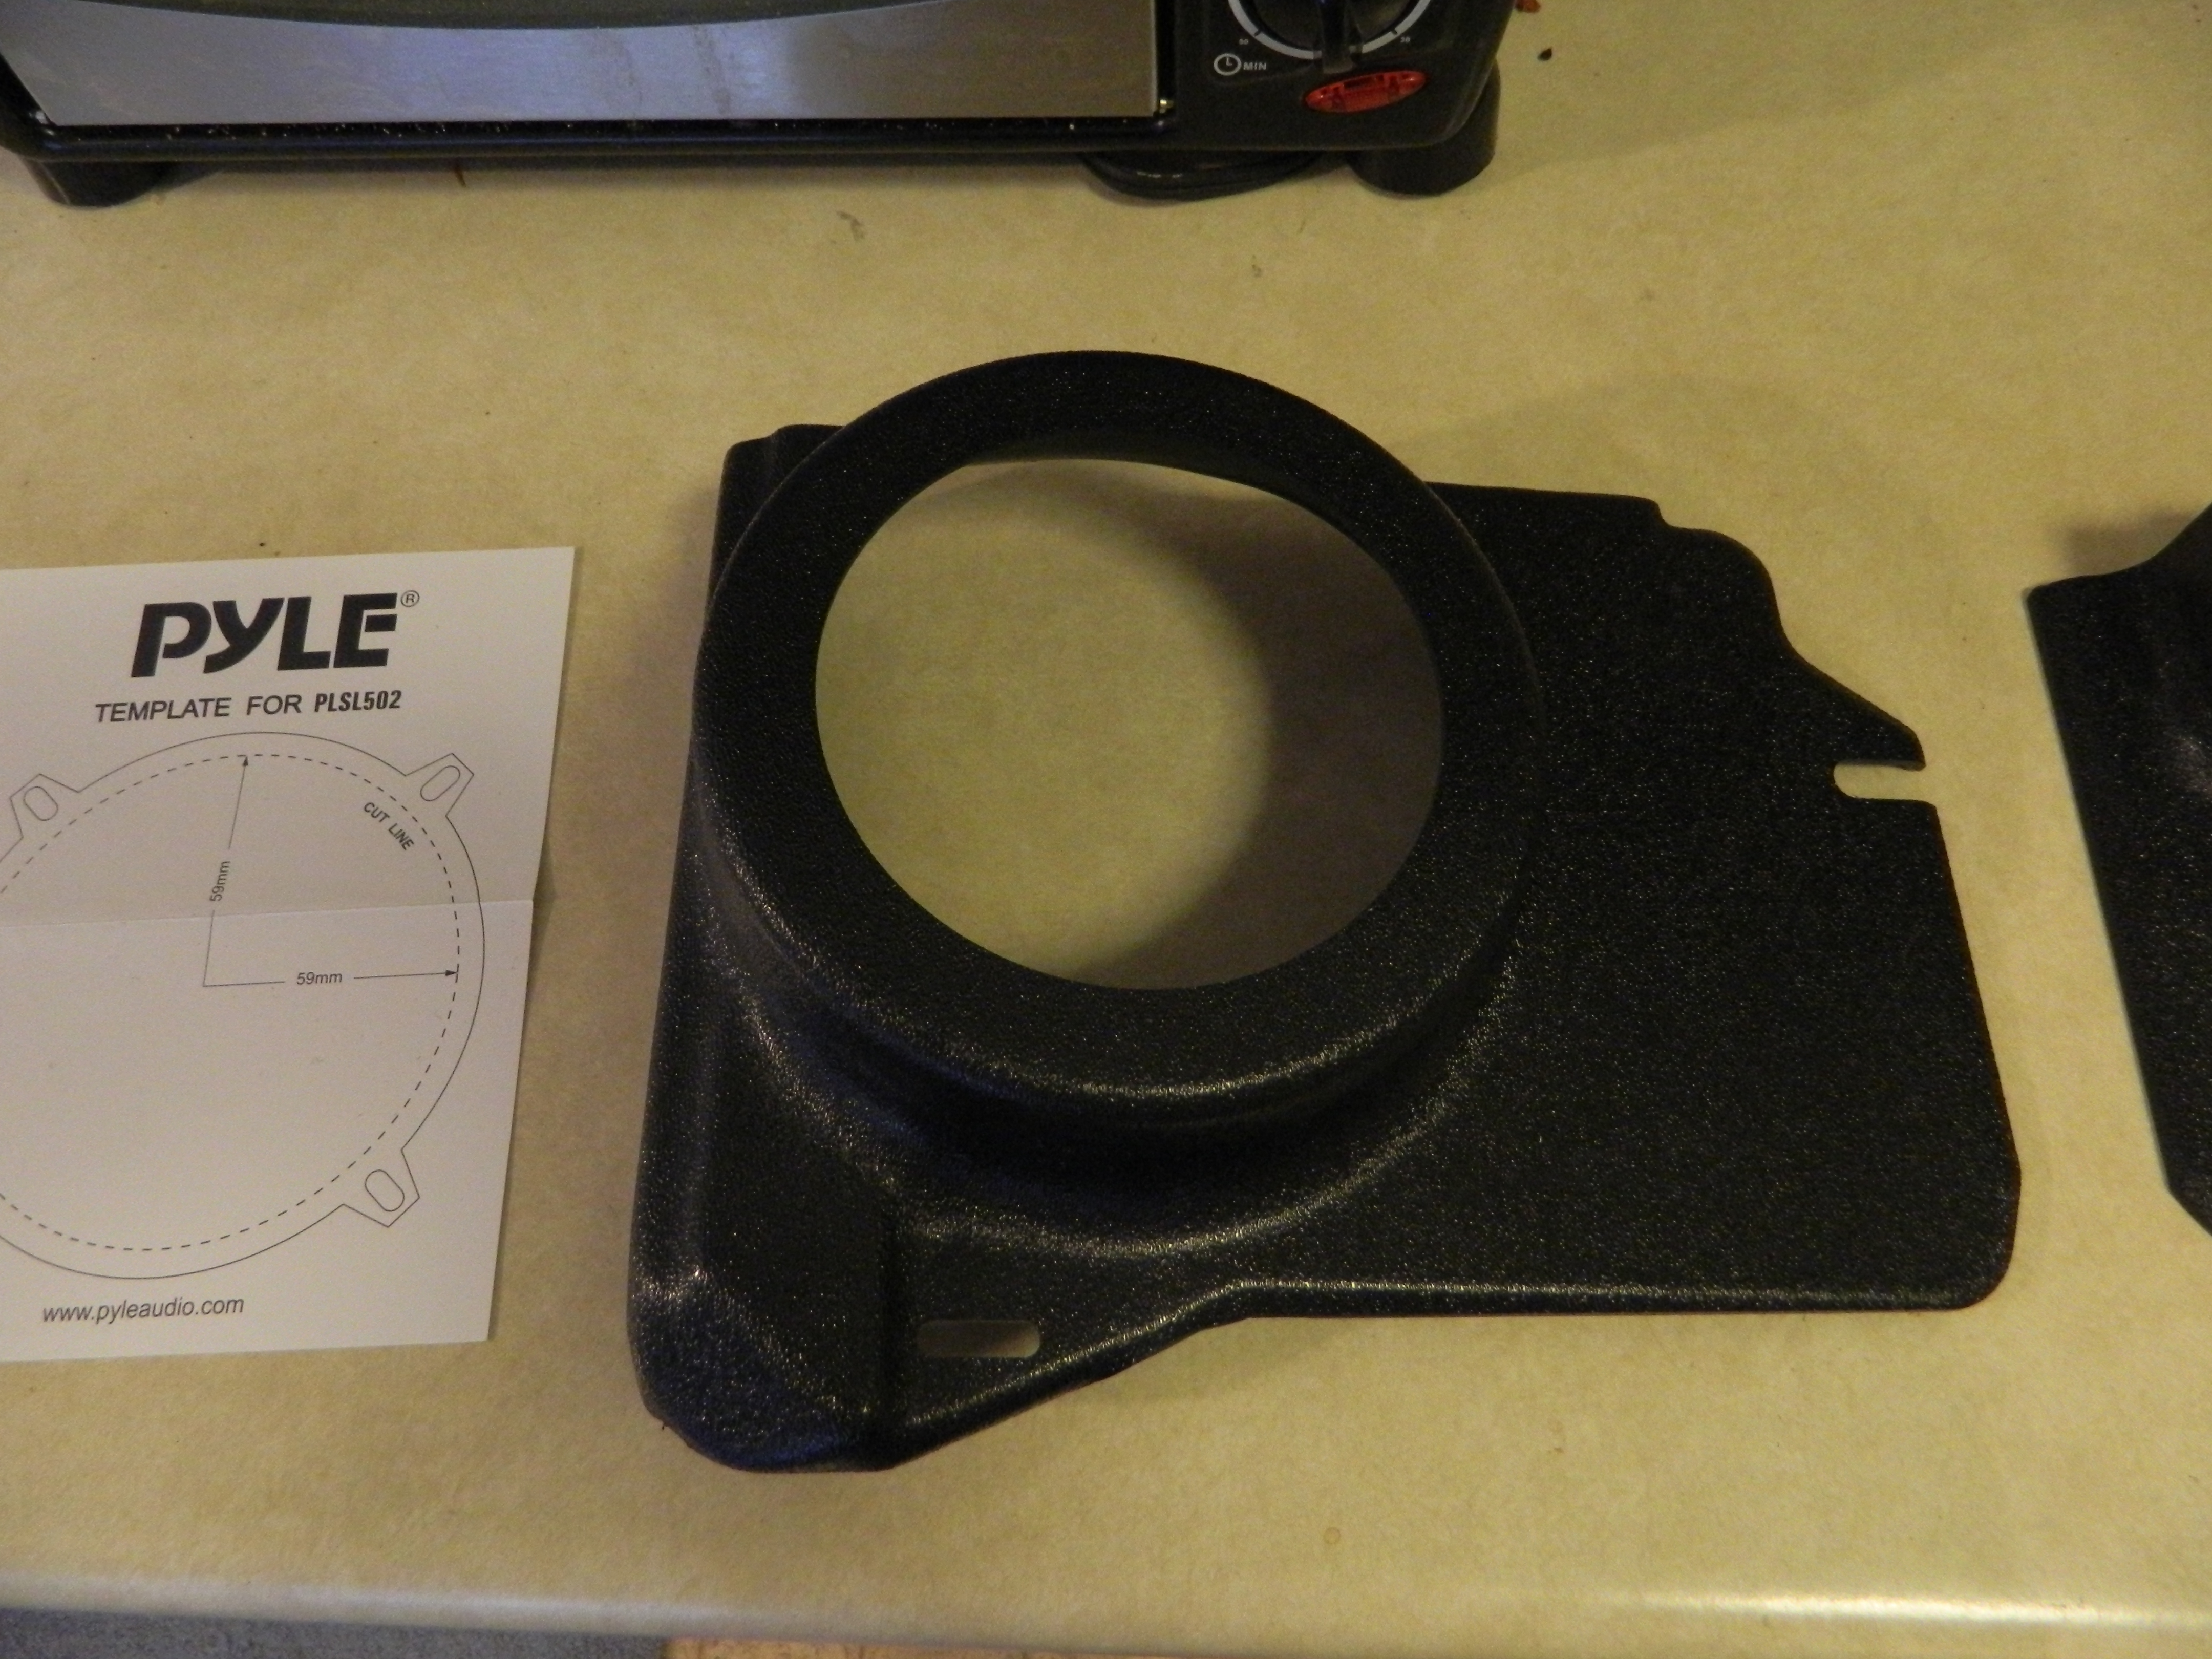
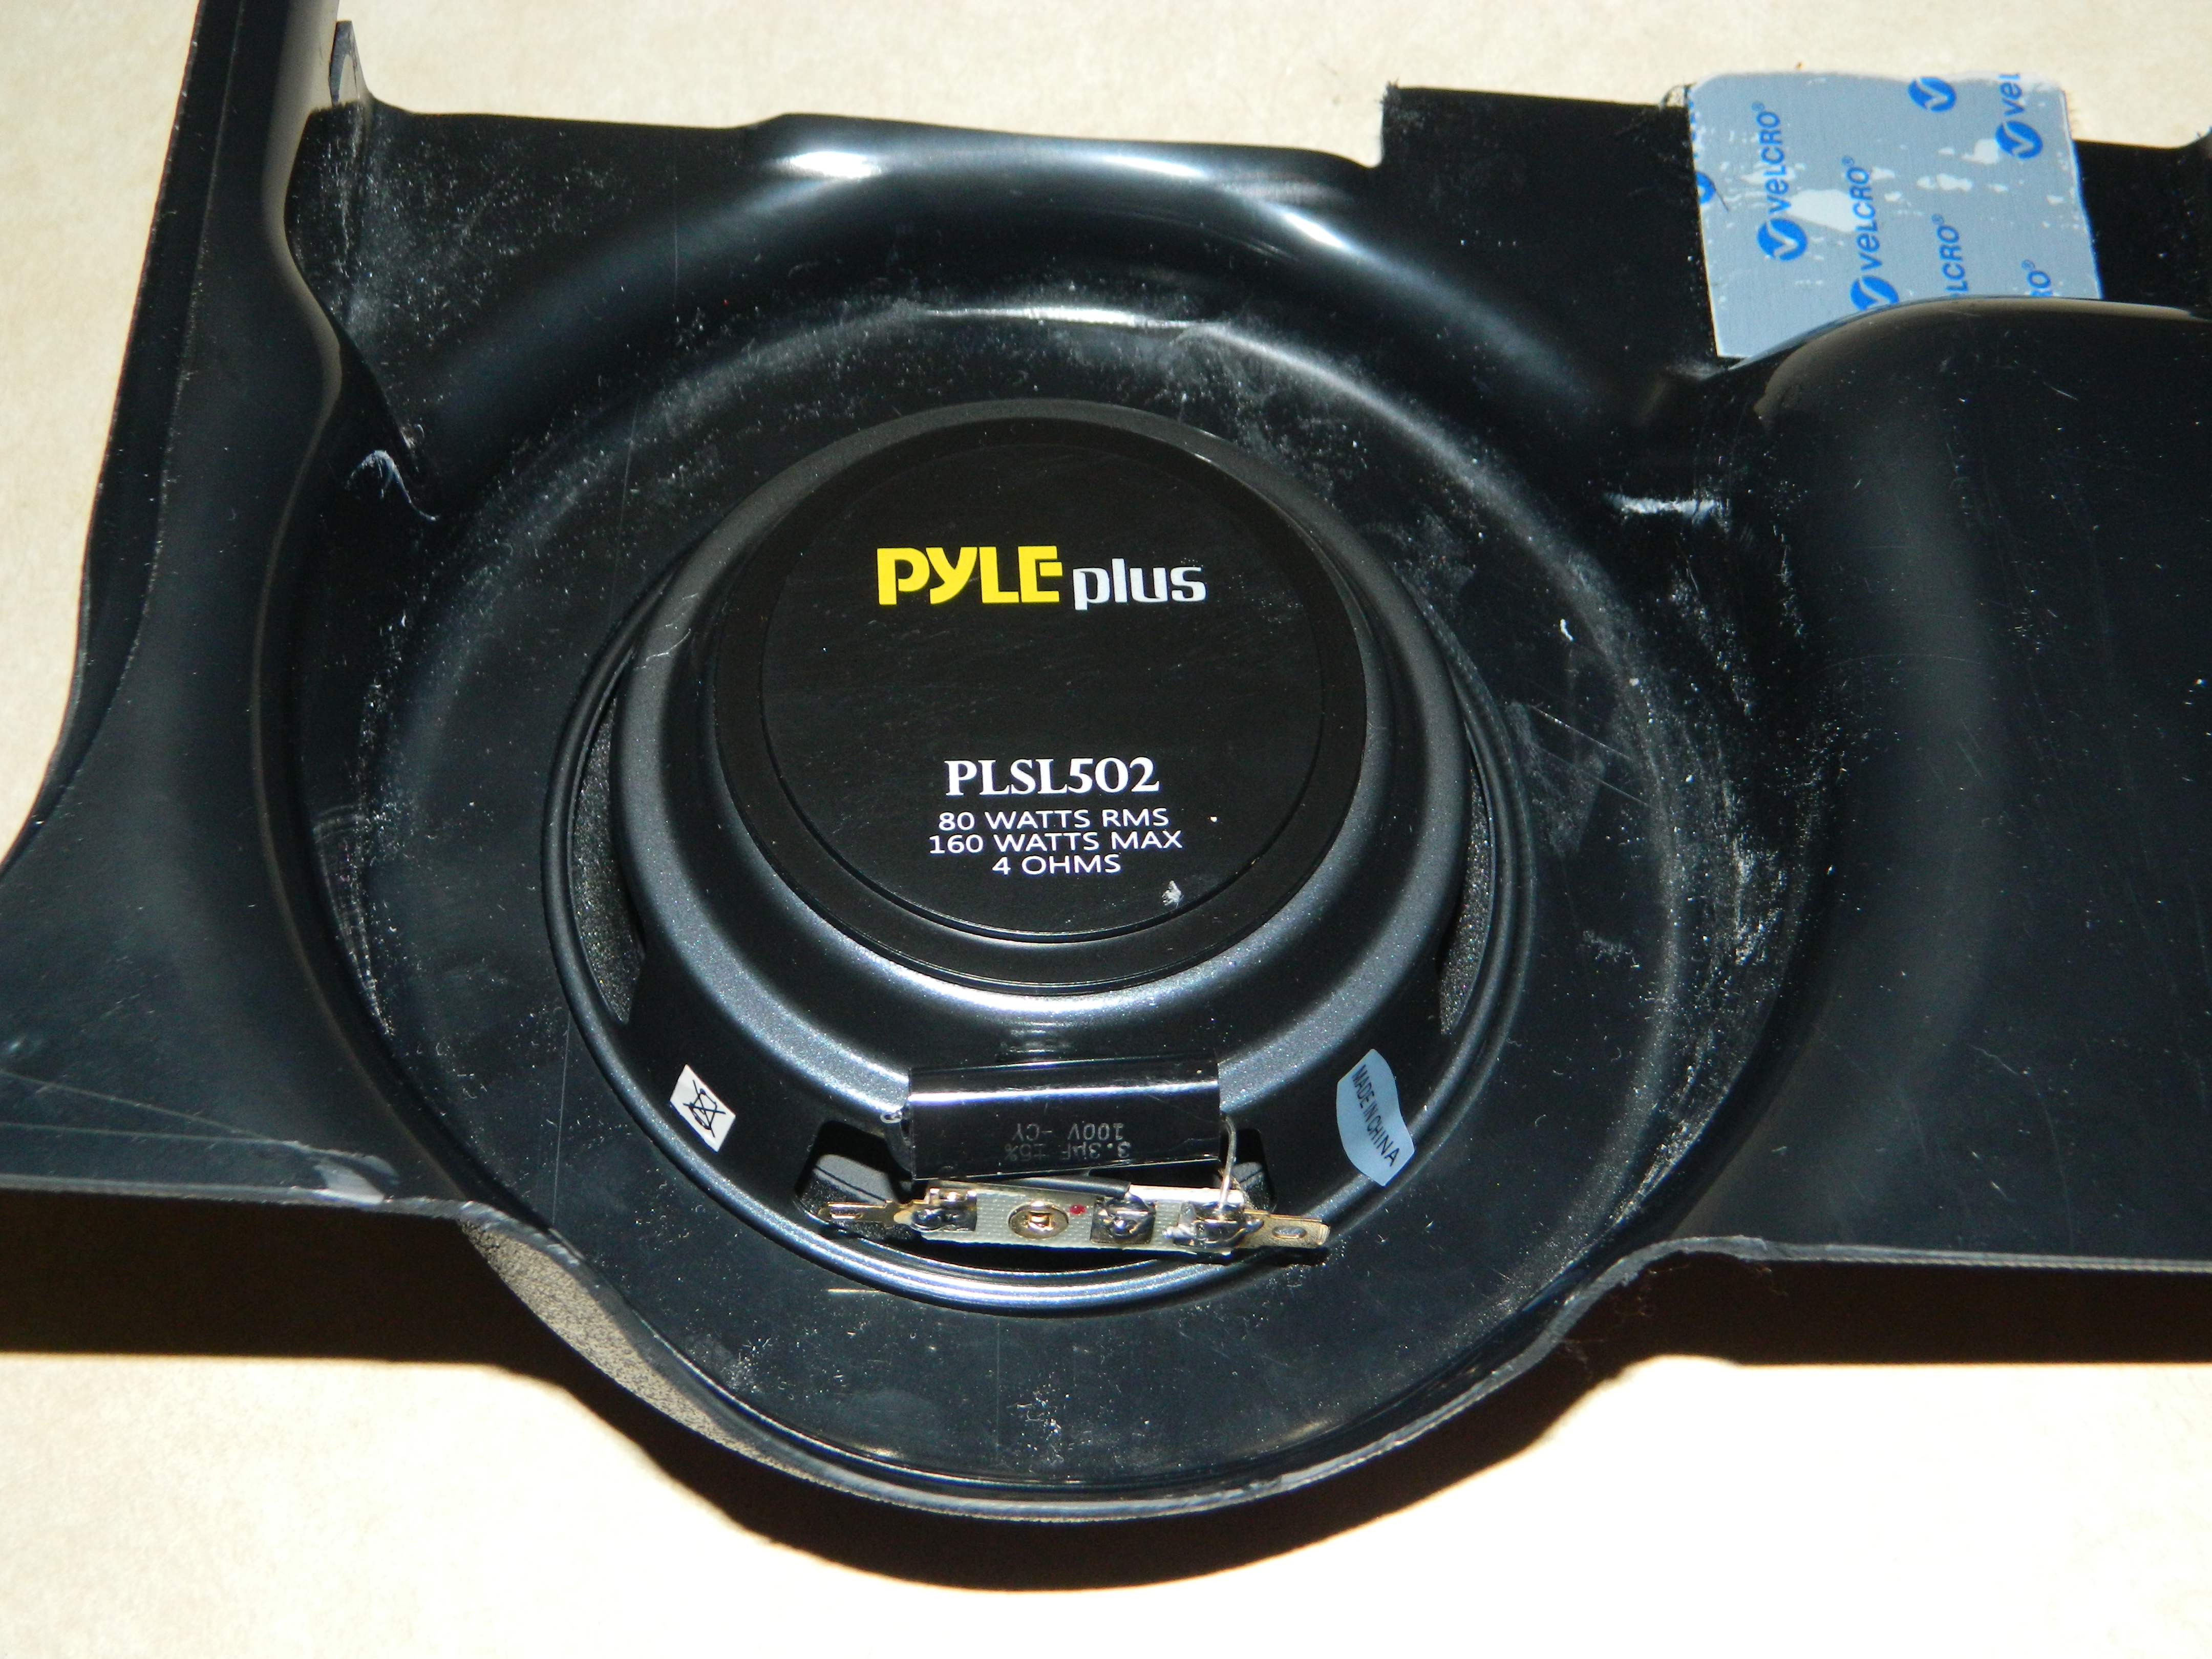
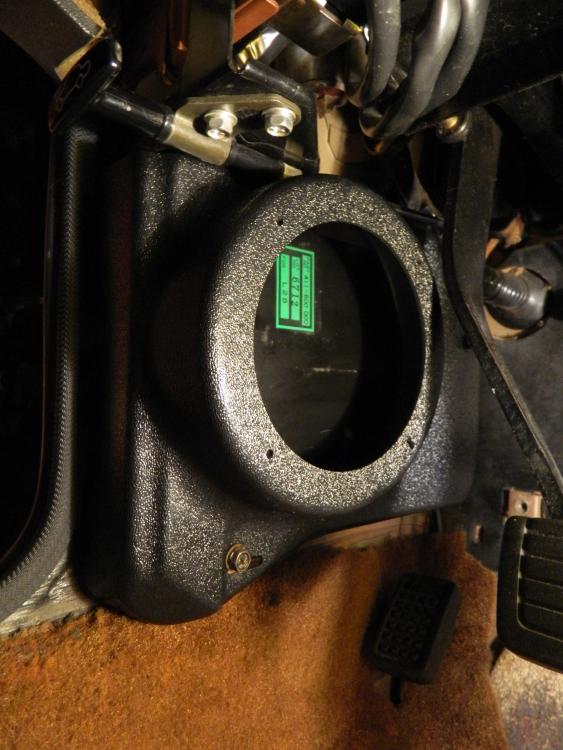
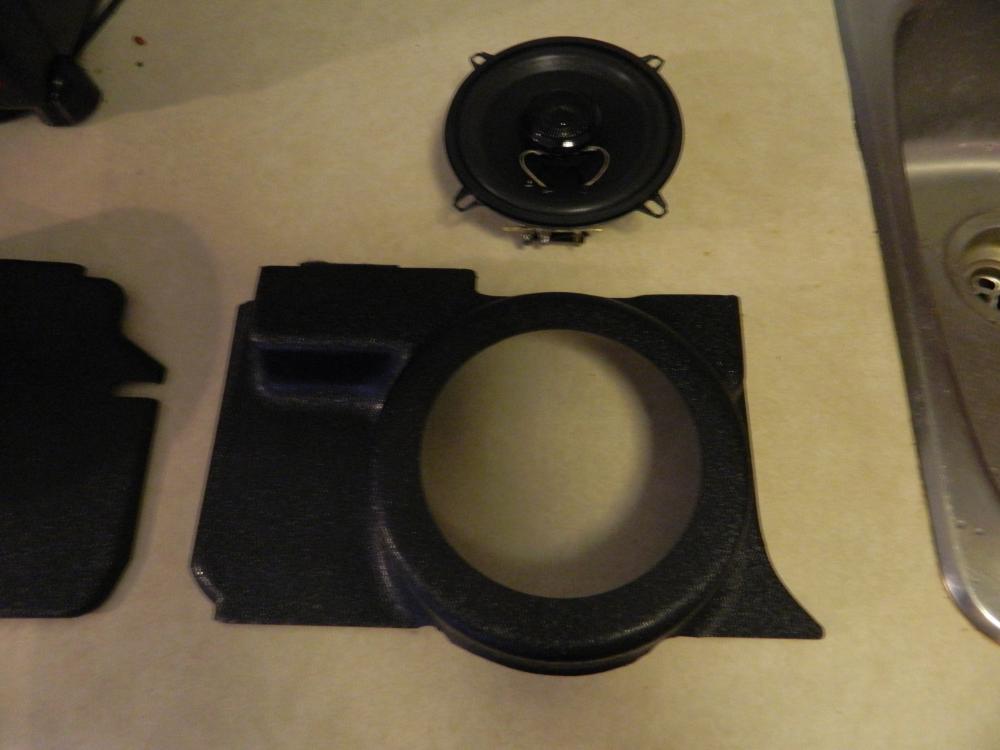
Had to wait for speakers to come in. So here are the first few pictures of the Datsun-Works 280Z front speaker Panels on my 1976 280Z. Fit and finish is excellent. They look factory made. I only had to make one small modification on the drivers side to the lower mounting hole. This may be due to the hood cable being positioned slightly lower on the 1975 and 1976 models than the 77's and 78's. There is a difference in layout between the years. The Pyle PLSL502 fit perfect and are highly rated from what I've read. I got mine on E-Bay for $36 pair USD. The speaker is exact;y 1.643" from the bottom of speaker cone, to the bottom mounting lip of the speaker. On the passenger side panel. there is 1.858" clearance to the top of the fuse box lid.These dimensions may be important to others who may prefer different speakers. There are shallow component speakers available, so now you have the dimensions you need to use alternative speakers. Didn't get a chance to measure clearance on Drivers side as my back muscles spasmed on me. That put paid to any further work today!!! Suffice to say, that the Pyle PLSL502 speakers will fit. Edit: On the drivers side there is 1.965" clearance to the top of the ECU.


-
Just picked up Derek's 280Z speaker panels. I must say I am very impressed with the quality of the product. The finish is excellent and looks factory made. Shipping was very fast and well packaged. Will do the initial install tomorrow on my 1976 280z and report back on fitting. I am waiting on my speakers to arrive ( Pyle PLSL502 Shallow speakers ) , and they should be here next Wednesday. Meanwhile the installation and picture I take tomorrow should show up any issues with installs on 1975 and 1976 models. I can also take measurements to see exactly how much space is available. BTW, my car has factory A/C, not that I think that will make a difference to the install.. To be continued...
-
That Borescope inspection camera is something I need to get. My Audi has a water leak at the back of a new coolant flange that I just installed. Several different ports, all -O-ring fittings so leak could be at any one of three different places. Can't see anything with the naked eye, but a Borescope like that would be perfect. Less than $15 !! That's amazing. Thanks for the tip.
-
^ Yes, that's the method I've used most of the time as well. Quick and easy and pretty much fool proof..
-
^ Air gap for early style dizzy's with the VR pickup is critical. FSM spec is .02 to .4mm or .008" to .016". Use a Copper or non-magnetic feeler gauge to set gap. I prefer to adjust to the minimum gap possible. VR pickup's lose signal strength very quickly as the gap increases. Lower gaps will provide a stronger and cleaner signal to Trignition box.
-
Juts a quick note. Picture in Jason's link is of a ZX distributor which uses a different style magnetic pickup coil ( Bottom mount GM HEI style ) ) and a stator and reluctor. OP dizzy is original Z style which uses a side pickup coil and a VR Reluctor. California models have one pickup coil and some Federal models have two: Early Z reluctor and VR pickup coil:
-
Just a note on pedal height. Normally you would never touch the clutch Master cylinder to pedal rod length to compensate for clutch wear. If you " played " with it, you may want to check that dimensions in the FSM and set it back to stock.... especially with the self adjusting mechanism style of clutch. You can adjust the clutch pedal height " somewhat " by adjusting the MC rod length and the stopper bolt. Just make sure that the MC returns ALL the way to the fully closed position after adjustment. There is a specific measurement required in the FSM, but having the C/MC piston bottom out on the retaining clip assures this. The last thing you want is the clutch MC rod adjusted too long and applying release pressure to the clutch P/Plate. The self adjusting clutches are more sensitive to this problem than the manual adjusting type, because with a manual adjusting S/Cyl you can always have Free-play between the clutch fork and the clutch slave cylinder threaded rod just by shortening the S/Cyl threaded rod.
-
With the self adjusting clutch slave cylinder the pedal will start out low and then get progressively higher as the clutch wears. Clutch fork moves forward. When the clutch disc is very worn, then pedal will be very near the top. That's the nature of the the self adjusting mechanism. Manual adjusting slave cylinders are similar in function. As the clutch disc wears the clutch fork moves forward, but in this case it just uses up the free-play in the adjusting rod. When you adjust the clutch rod to re-establish free-play, the clutch pedal is re-centered in it's travel. The clutch fork has still moved forwards, but you physically shorten the slave adjusting rod, thus returning the pedal to it's " Normal " position. .
-
-
Delete: Double Post again. Somethings jacked up with the Forum right now.
-
Glad you got it in. A proper transmission jack really makes a difference. Looks like the " strap method" was the major cause of the installation issue. Makes sense. As you push the transmission forwards, the straps would change their effective vertical length ( straps travel in an " Arc " ) and thus change the angle of the Transmission. A transmission jack doesn't do that, so alignment angle as you push forward remains constant.
-
Delete. Double Post
-
With a new clutch assembly, the Clutch fork position will move towards the rear of the car when compared to a used clutch This is normal. Once you bleed the clutch, all should be fine. I'd bleed it and try it out first before yanking the tranny again.
-
Getting the entry angle wrong can really be a pain in the Butt...
-
Looking at this picture, you don't seem to have the transmission mainshaft EXACTLY parallel to the engine crankshaft center-line. Looks like there is a bit more clearance between at the bottom of the Bell housing and engine block than at the top. I'm going by the amount of exposed flywheel in this picture. It doesn't look even. If that view is correct, then the tail of the tranny needs to come down a small amount. I think your " Ratcheting straps " idea could be messing you up. Beg, borrow or Rent a hydraulic floor jack. Put it under the middle of the tranny and just bring it up enough so that it's barely taking the weight of the tranny off the straps. Then remove the straps. The hydraulic jack can then be adjusted to get the top and bottom clearance between the Tranny Bell housing and the engine block even. The spacing has to be has to be even up and down and side to side. Once you get things aligned EXACTLY... these things usually just POP into place. . Never get the tail of the tranny too high .( Which is what it looks like you have in the above picture ). It will never go in thet way. Dead nuts parrallel is best, but you can get away with having the tail a bit low. As you push onon the back of tha tail housing, the natural forces tend to push the tail up a bit, bringing things into alignment. The floor jack will allow you to wiggle the transmission while pushing forwards. The straps may be restricting forward motion. Also, make sure that you haven't damaged the pilot bushing. You may have put a Burr on it or the input shaft. Some of the alignment tools can be a pretty " sloppy " fit. The actual Input shaft has a pretty tight tolerance to the Pilot bushing. One more thing. Make sure that you didn't " Pack " the Pilot bushing with too much grease. That can actually " Hydraulic lock" the Input shaft from being inserted all the way. A very light coating of Moly grease on the Input shaft is all you need. If all else fails... put some " Fur " around it... that always helps me find the " hole "