inline6
 Subscriber
-
Joined
-
Last visited
Everything posted by inline6
-
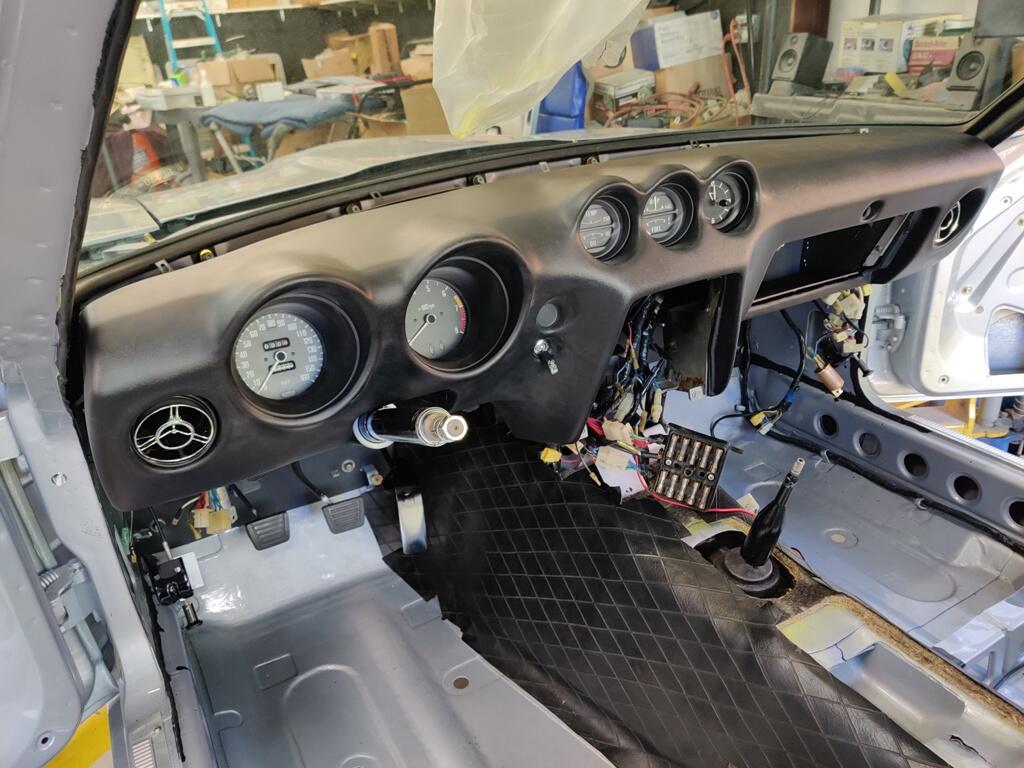
 That is a later dash board for sure. If the early oil pressure gauge was swapped in (looks to be the case) than I would think the dash portion of the harness would be original to the car as well. There are part number tags attached to the harness on the right side corner, several inches before the connectors.
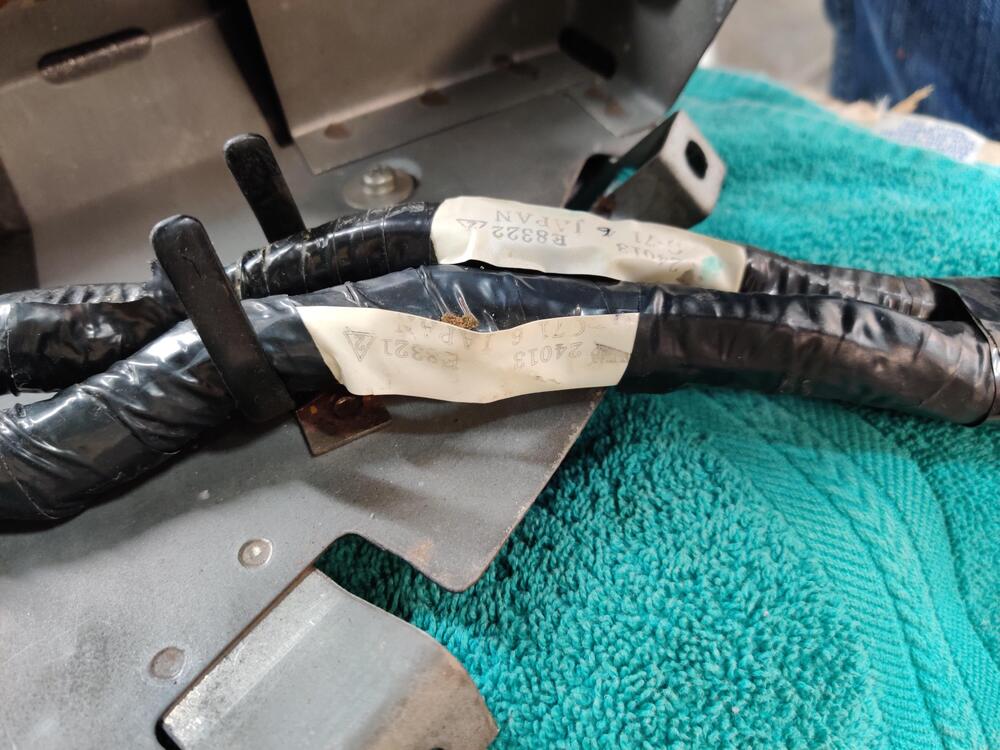
-
oil pressure gauge is from an early car.
-
I took the diff apart again today. Annoyingly, I found that I had one more .005" shim in there that I thought. I am unable to make edits to prior threads to adjust my observations to match what I actually had... and with taking it apart and putting it back together so many times, there is no way to be sure of when I was accurate and when I was inaccurate with the stack of additional shims I was using. I have edited the sizes below to reflect what I found when I pulled it apart today. After analyzing all of the information and pictures I put in this thread, I have decided to stick with .025" extra as the final amount of change. What I believe was .035" more shim looked to me to be too much, as evidenced by the greater offset in the wipe marks on the drive and coast sides of the ring teeth. .015" more pinion shim required that I move all the side shims to the right side of the differential to get back lash within specification (measured back lash at .005"). While that might be ok, it looks to me like the wipe patterns are very similar with the .015" and the .025" extra thickness pinion shims. But, with the .025", I am able to use a .2 mm shim on the left and two .5 mm shims on the right. With this setup, I get a back lash (.006") which is within specification. I was going to try another combination of something between .015" and .025", but I don't see the point. I think that will increase the backlash, making it so I can't run a shim on the left flange. And going larger than .025" on the shim thickness seem like it will start shifting the offset in the wipe marks on the coast and drive sides of the teeth further away from what is optimal. Now, I will need to have a shim made in the full thickness to avoid risking having issues with using these "mock-up" shims when the diff is put into operation.
-
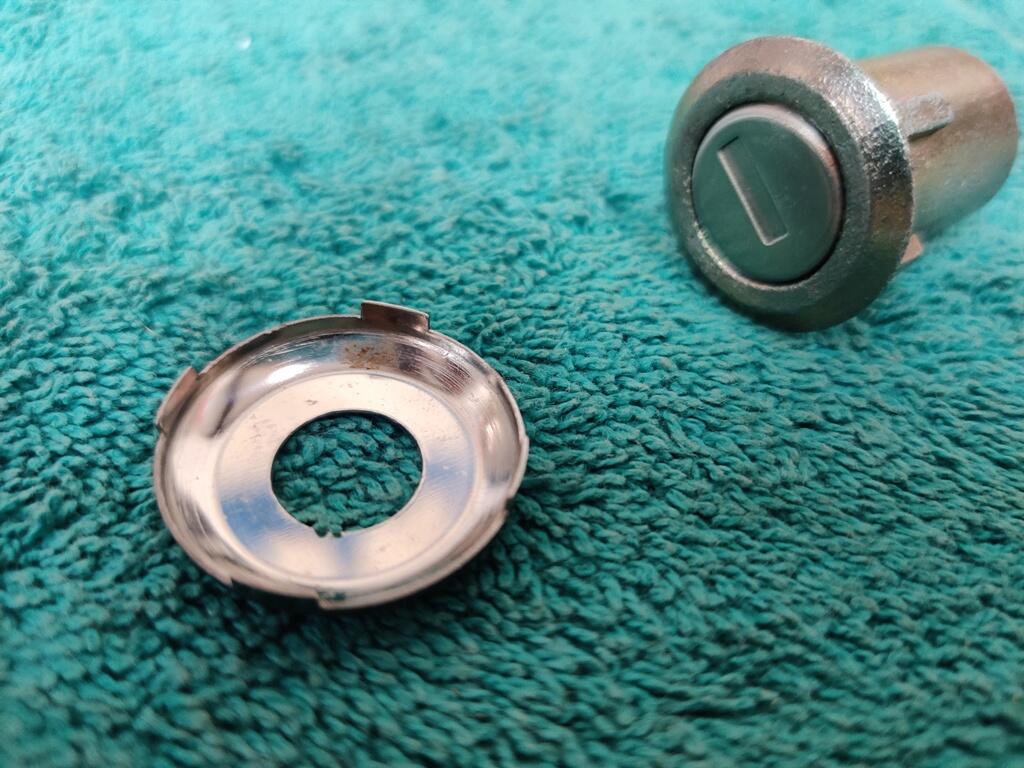
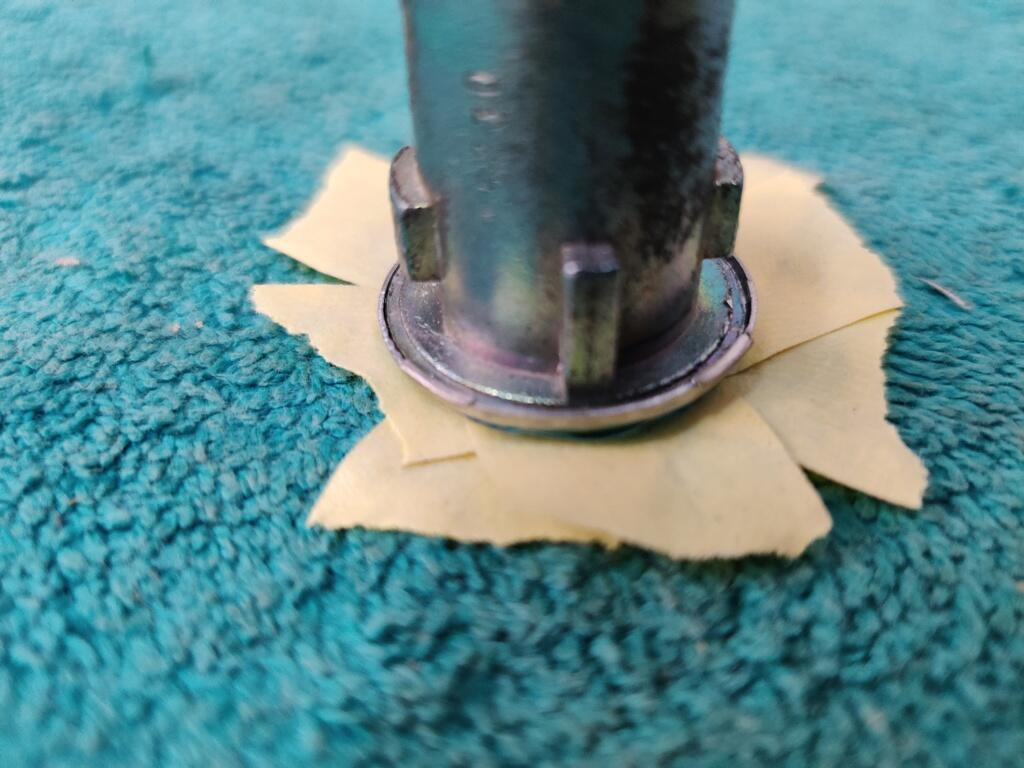
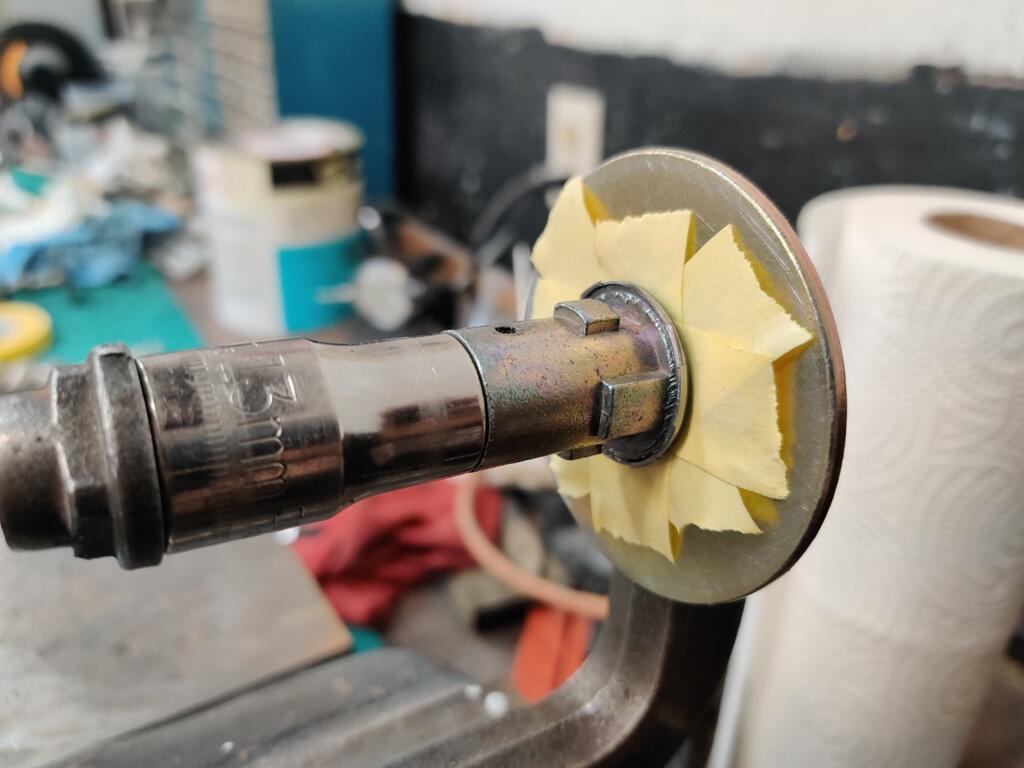
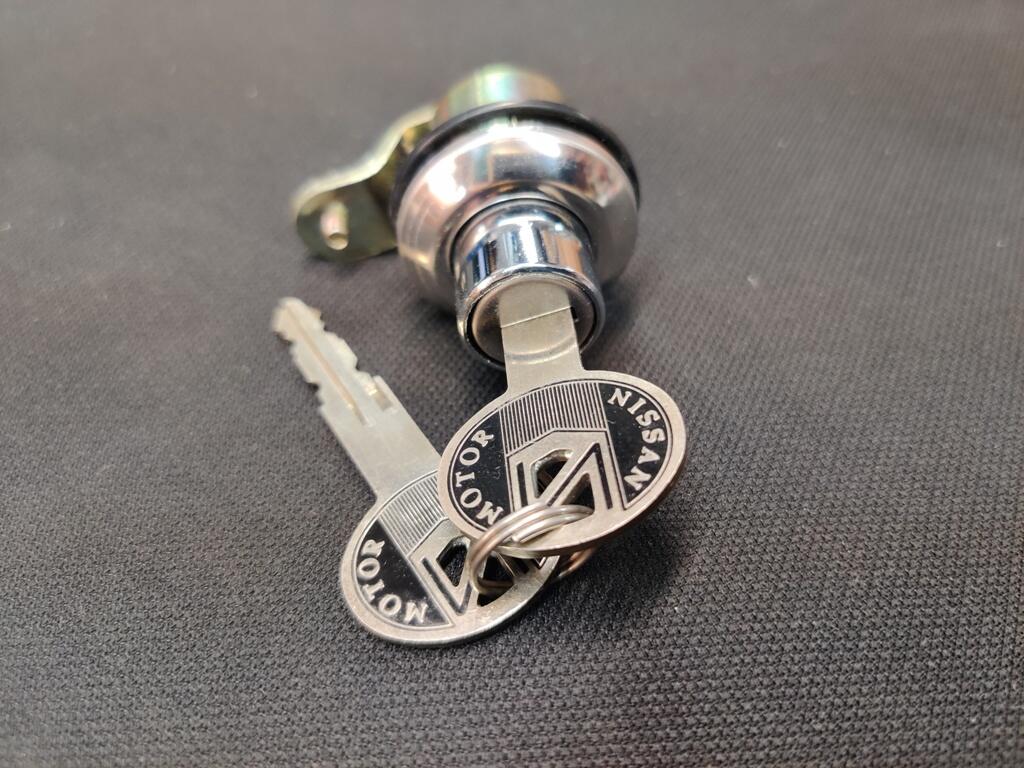
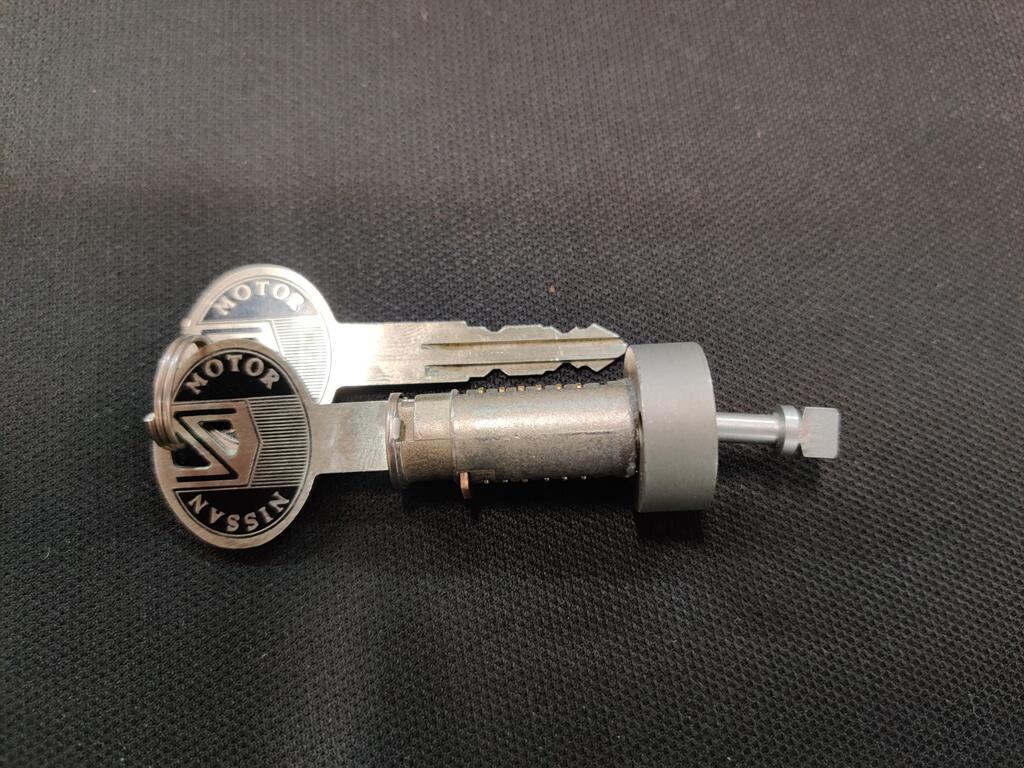
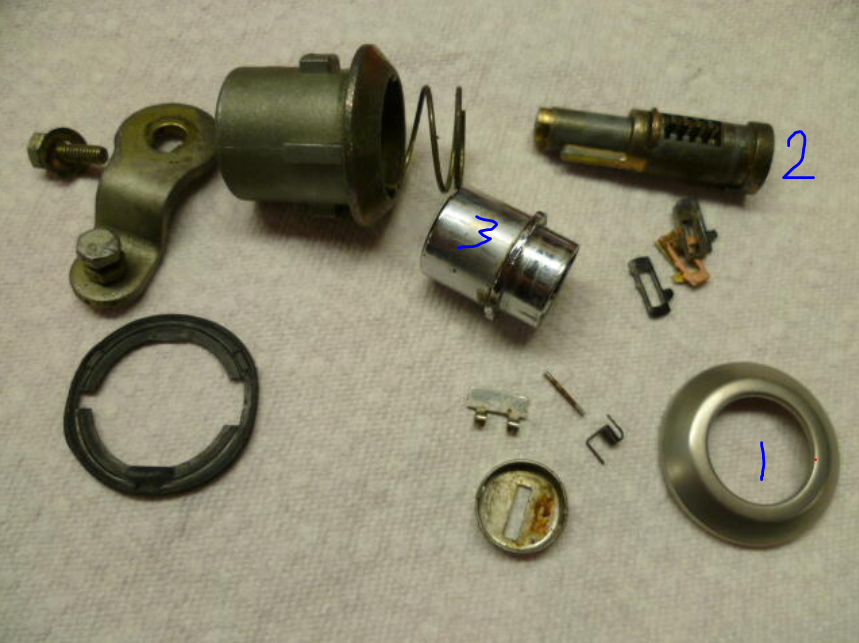
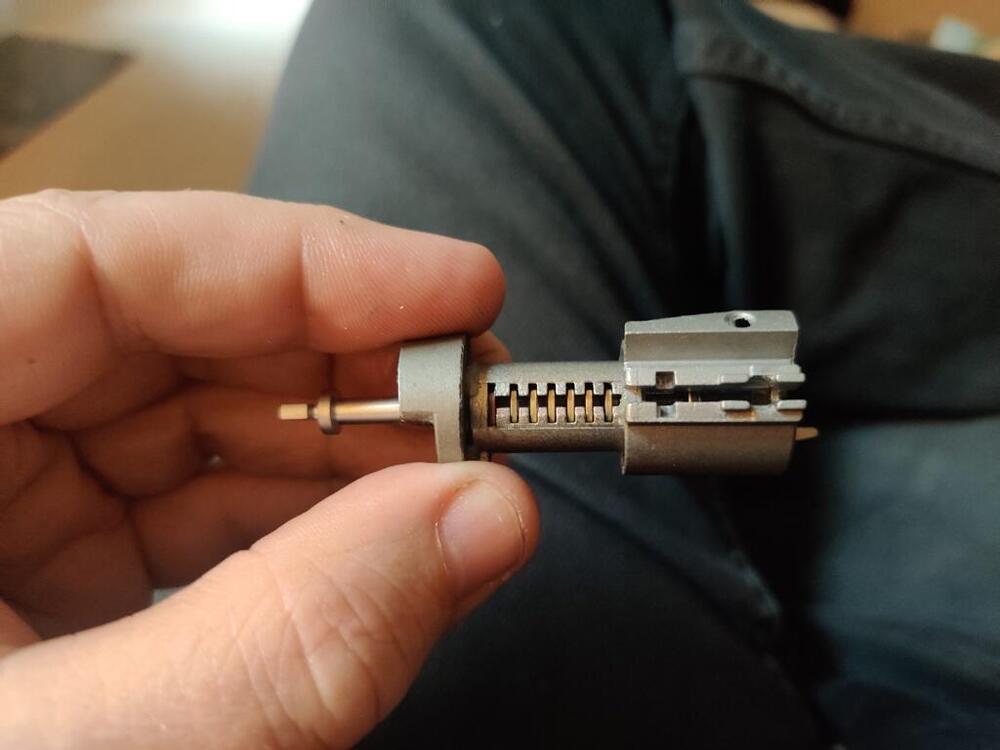
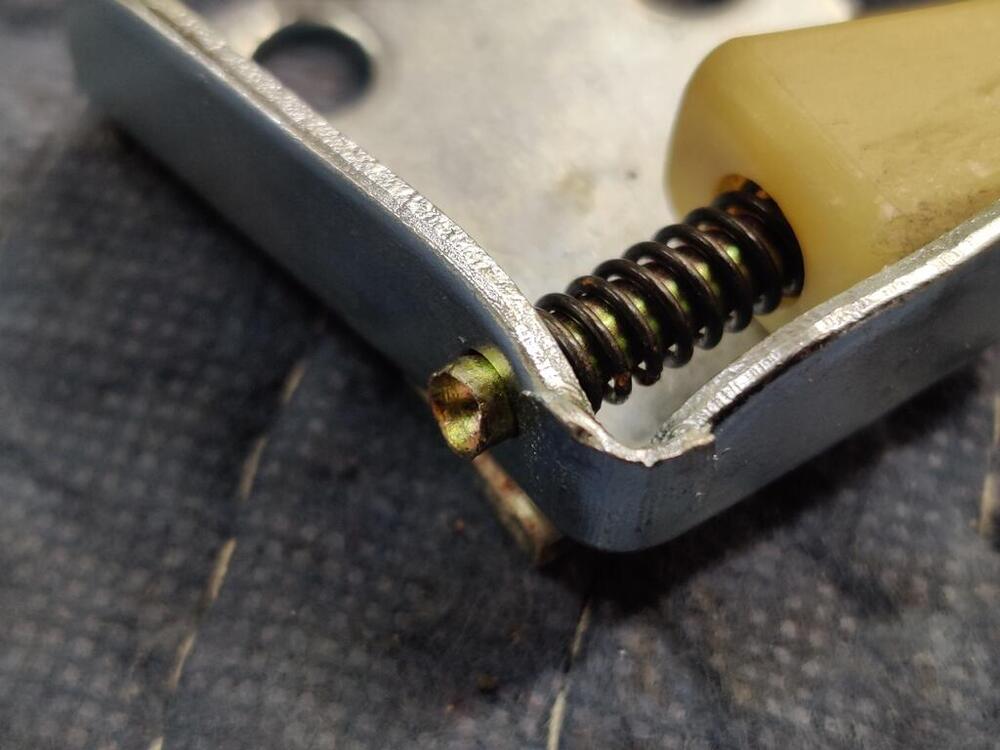
As @Captain Obvious said, the hatch lock is the easiest when compared to the door and ignition locks. To get it apart, you just have to straighten the 3 little tabs on the backside of the stainless trim ring. The trim ring (1) then releases from the lock case, and you can take out the tumbler assembly (2) with the sleeve (3) still on it. To remove the sleeve, you just have to depress one of the "wafers". Then (2) slides out of the sleeve (3). You can then swap out the wafers to match your key. The ignition key and the door locks are more difficult to take apart and put back together. The keying kits I bought off of eBay had replacement stainless steel covers for the door locks. Though this is picture after putting on the replacement cover, you can see here that the cover edge is simply bent around the circumference of the lock case. To get the old ones off, I used an air powered cut off tool with cut off wheel attachment, and simply ground the edge of the existing stainless steel cover (for one half or 180 degrees) of the periphery. I use the flat surface of the disc and not the cutting edge. It is easy. When the stainless cover edge gets really thin, it is easy to pick at the backside fold, and break it away from the case. Then the old cover is easily slid away from the case. With the cover off, as with the hatch lock, you can remove the lock apparatus from the case and change out the wafers. The new covers in my kit.. have these extra tall tab areas (4): They are not needed and would interfere. So, I ground those down with the cut off wheel (again side of wheel - not cutting edge). Then I put several layers of tape to protect the stainless cover surface: Finally, I used a high quality C clamp - clamped into my bench vise, along with a large, thick washer (for backing against the new stainless cover, and a 1/2" drive socket to press the lock tightly against the washer... and used a hammer and flat punch to work the edge of the new stainless cover down around the case flange. I am in the middle of this part of the work to finish up the door locks, and will put finished pics up soon. Maybe with this info, you can convince your locksmith to give it a go?


-
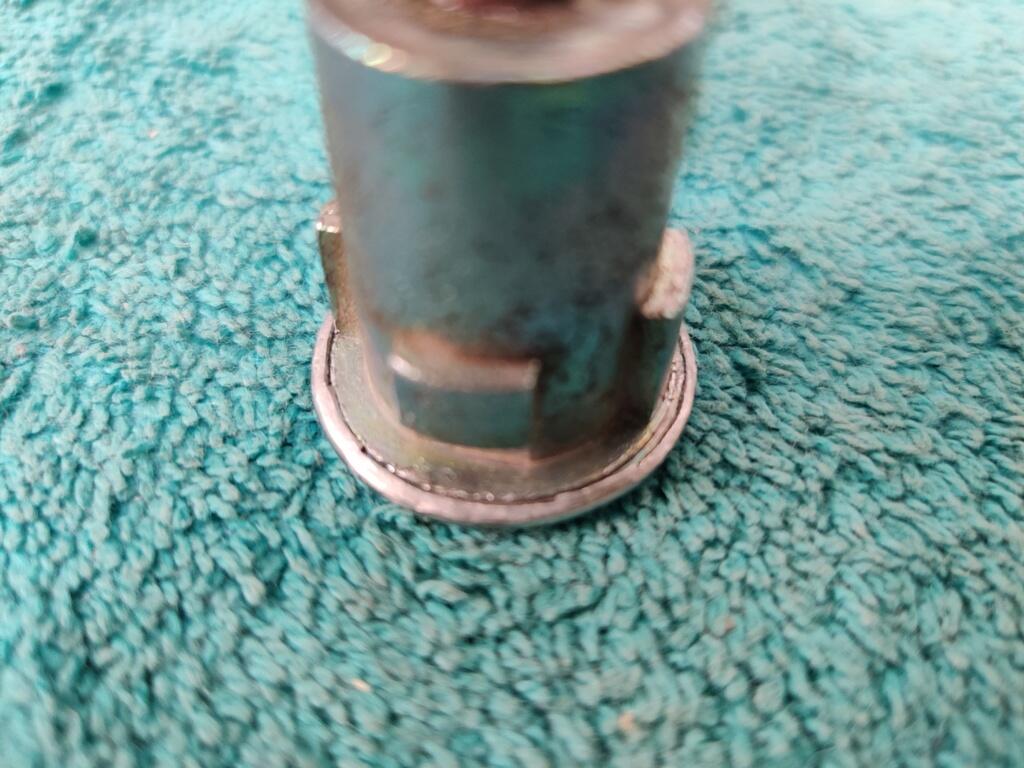
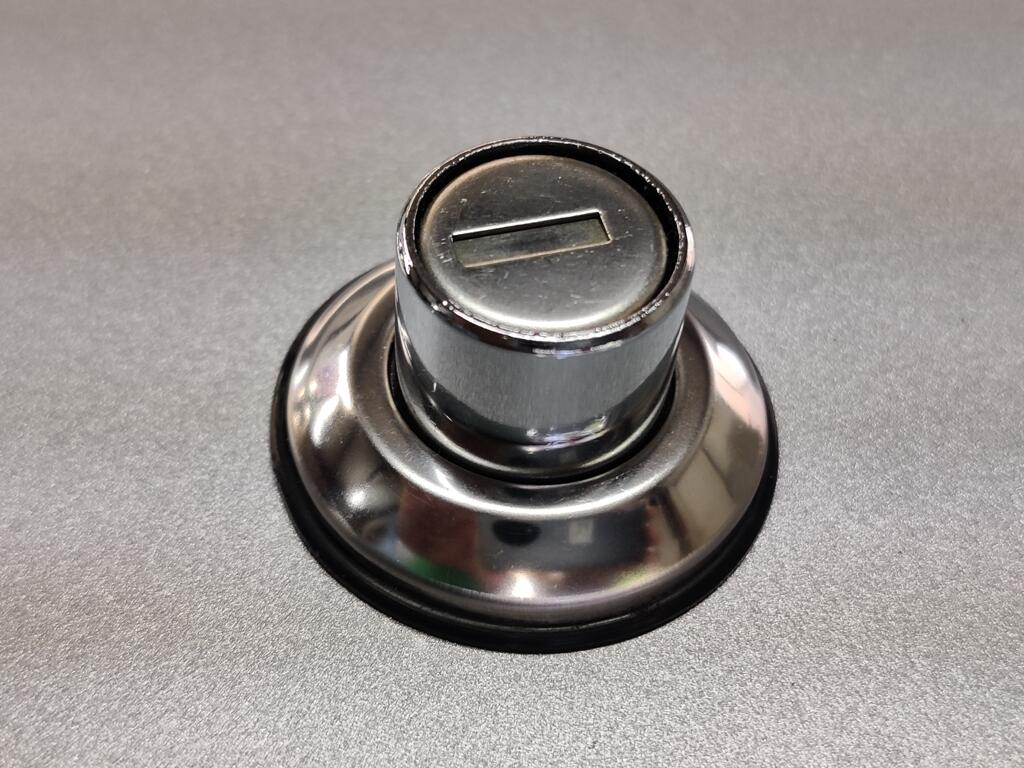
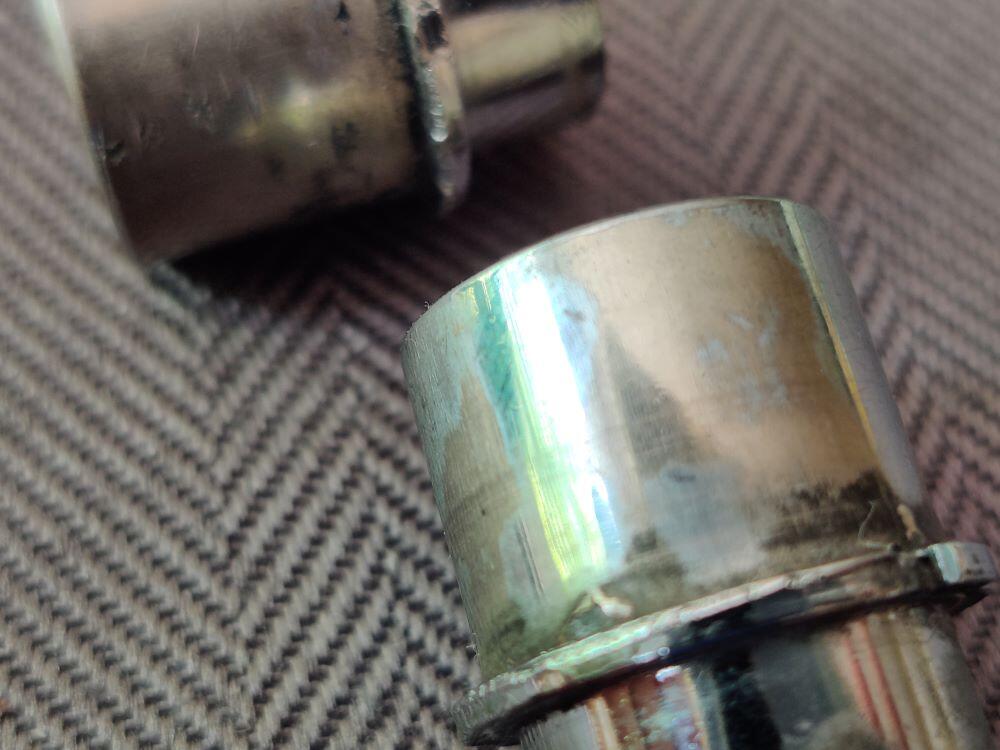
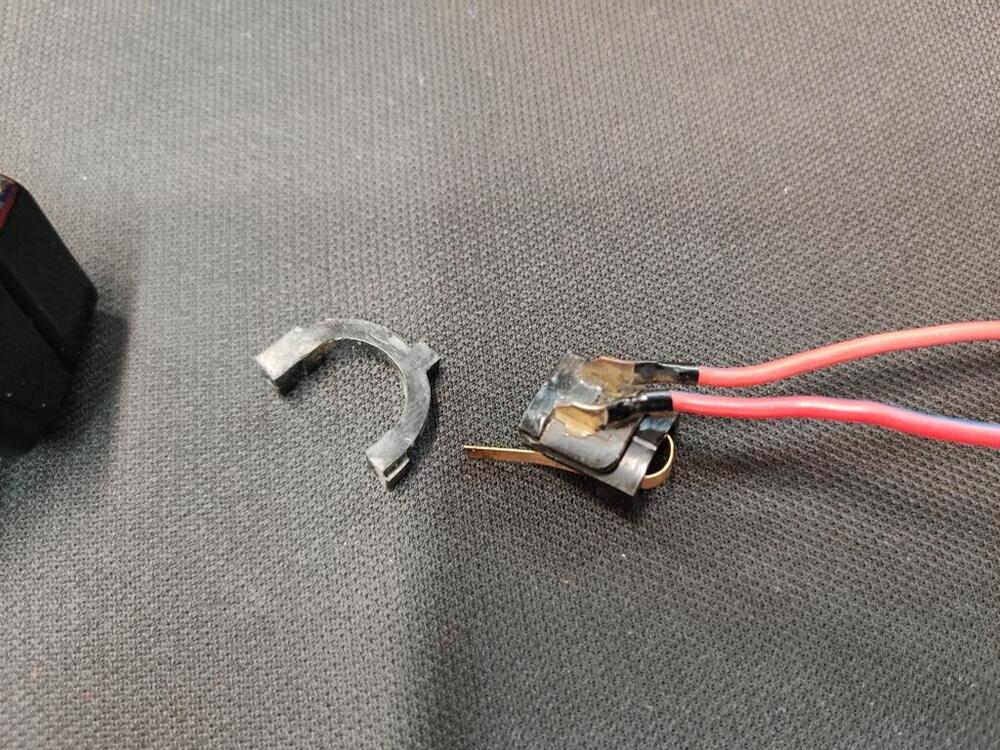
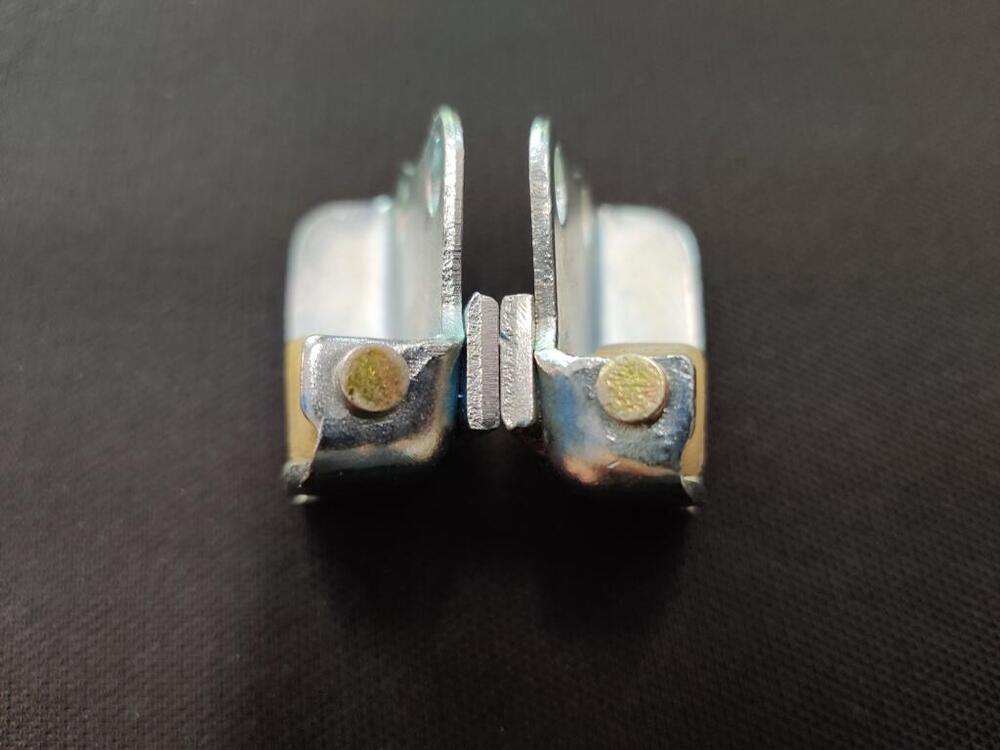
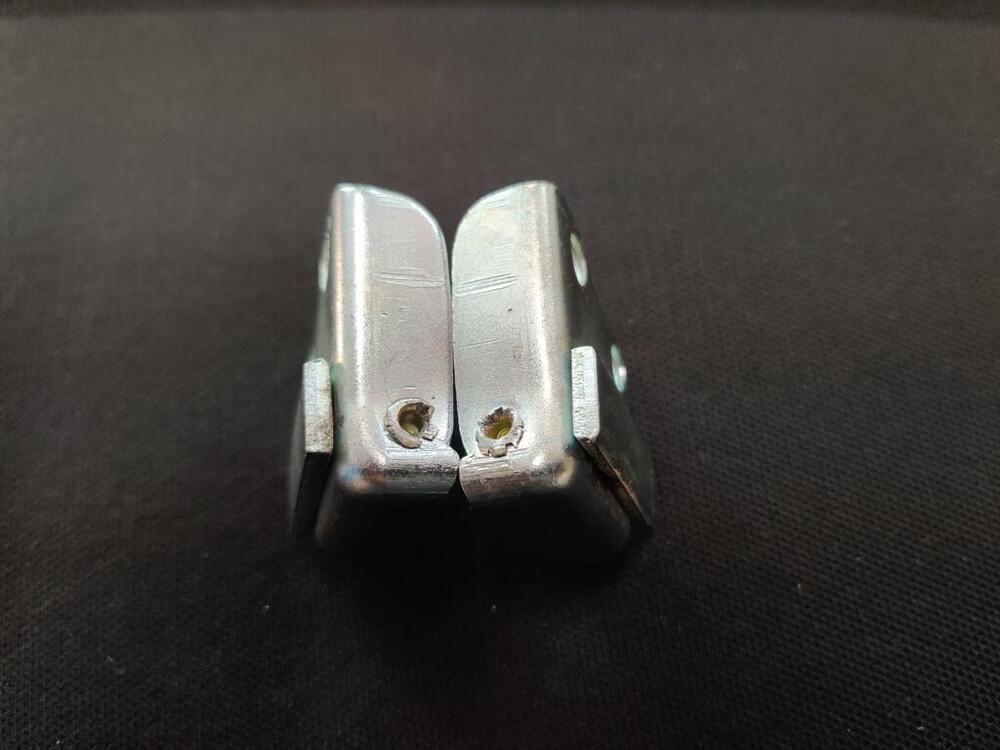
The sleeve around the lock tumbler is made of "pot metal" and is chrome plated. The movement in and out to open the hatch slowly wears through the chrome plating. As you can see in this picture, the chrome has worn away, exposing the copper layer beneath in a couple of areas. Polishing will not revive the uniform silver appearance. Additionally, because it is a soft metal, it wears relatively quickly. And that is significant, because the inside of this sleeve is what the tumblers work with for correct operation of the lock. The result is that many keys will work on this lock when only one used to. 🙂

-
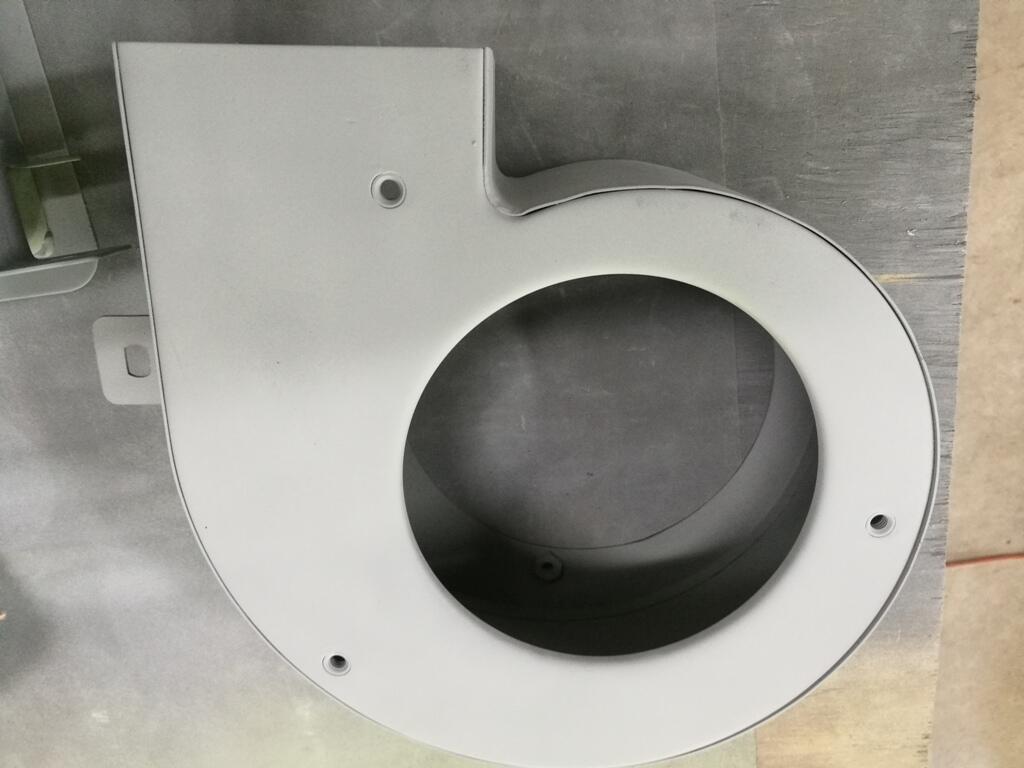
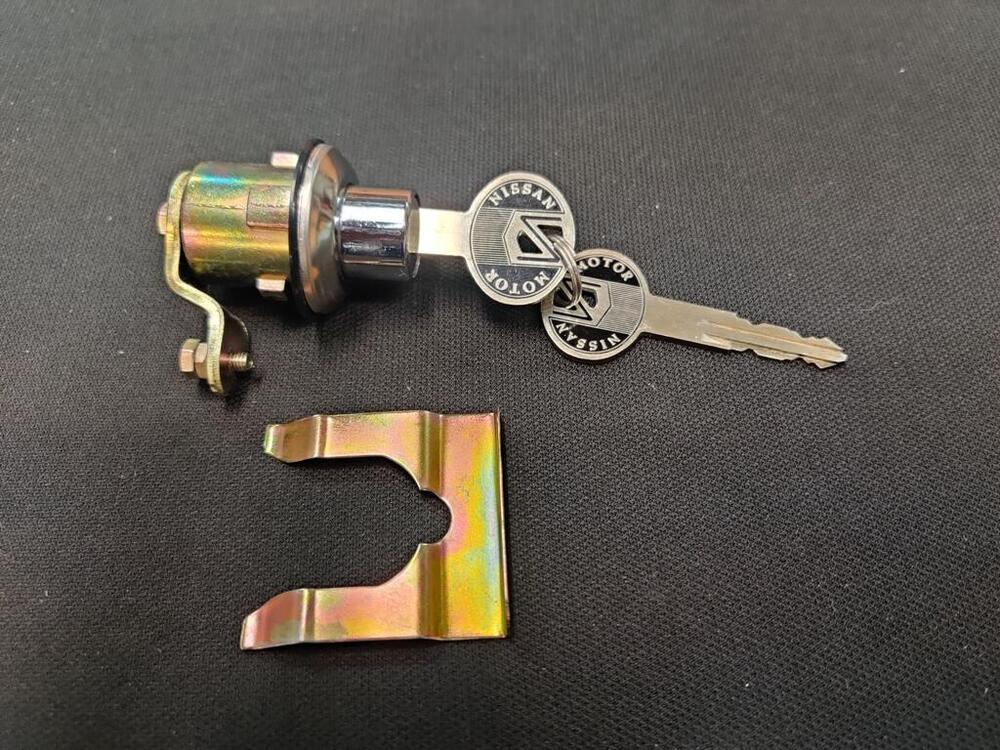
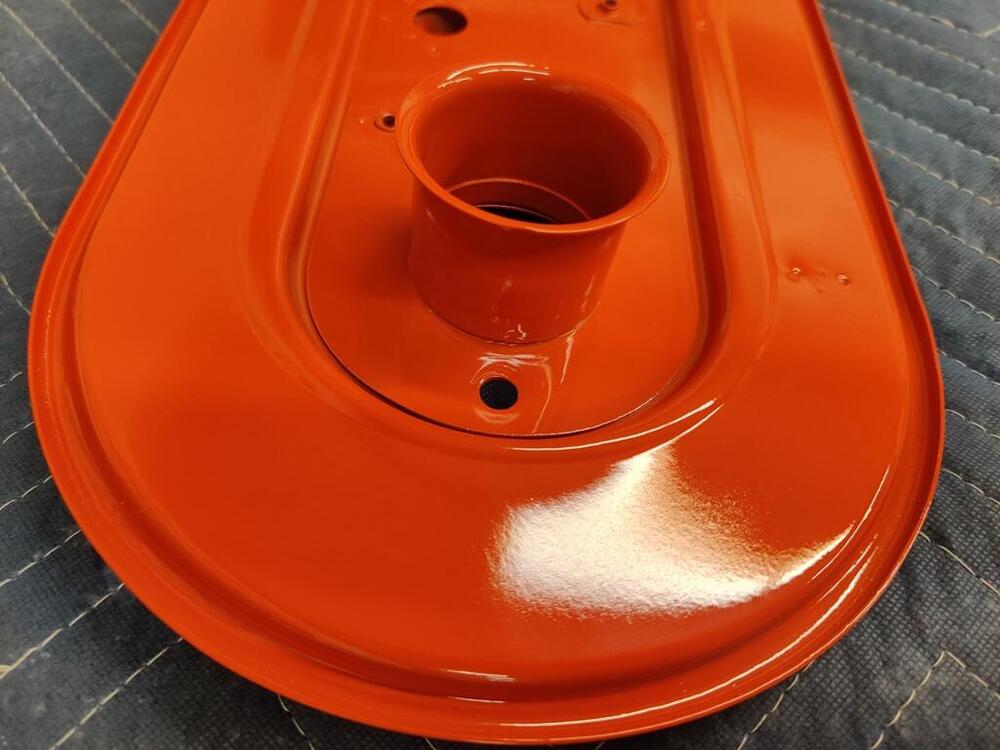
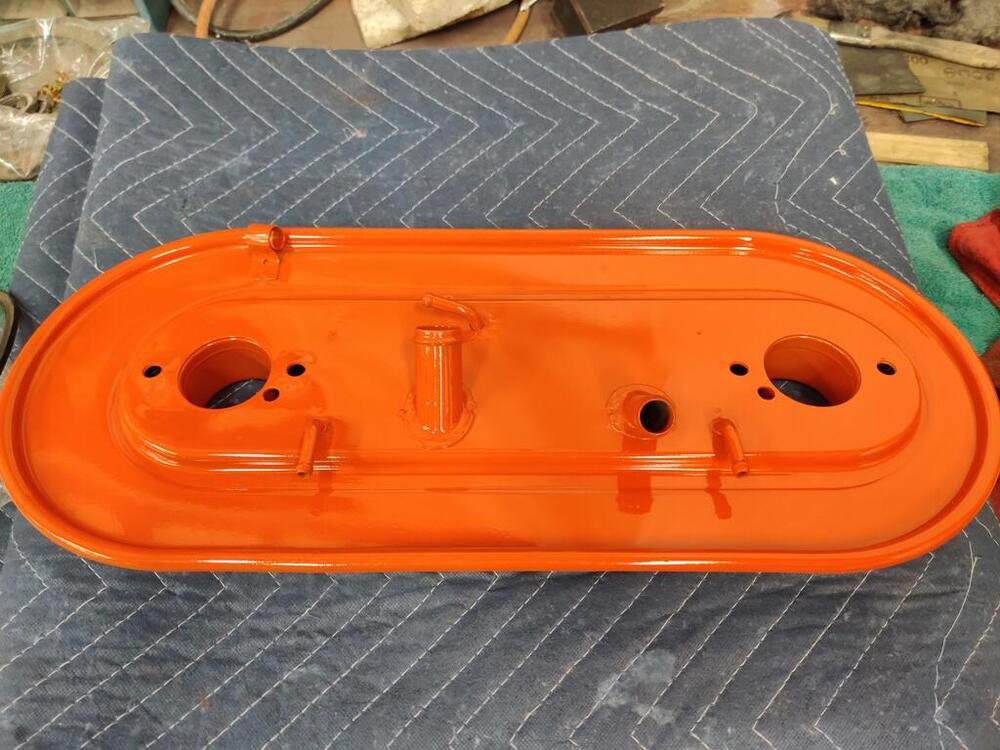
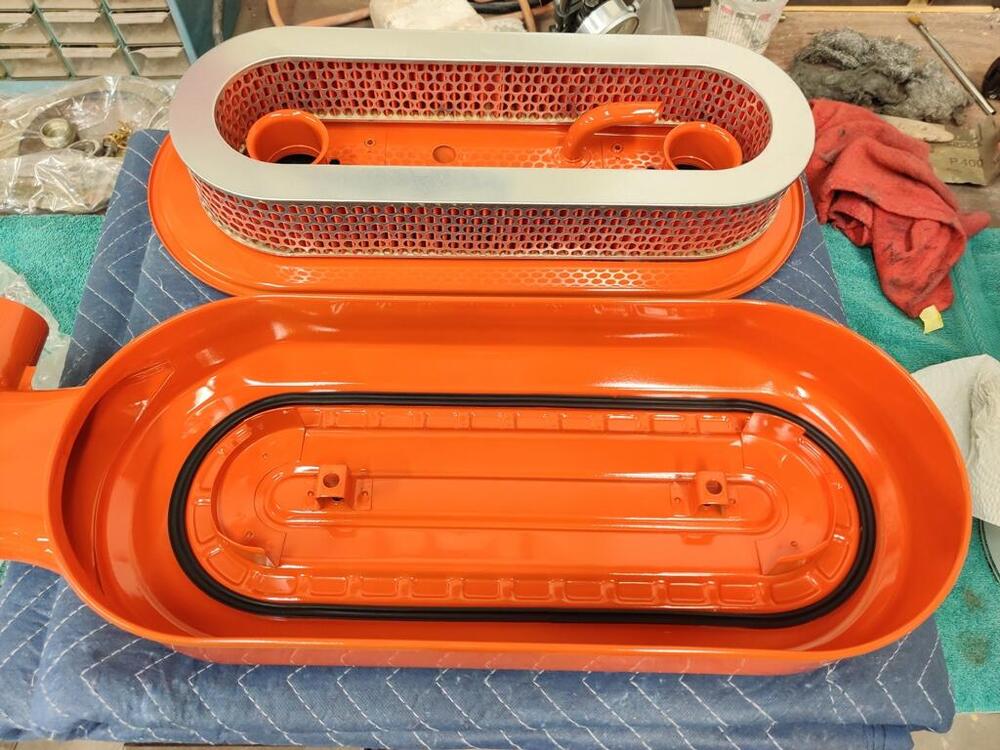
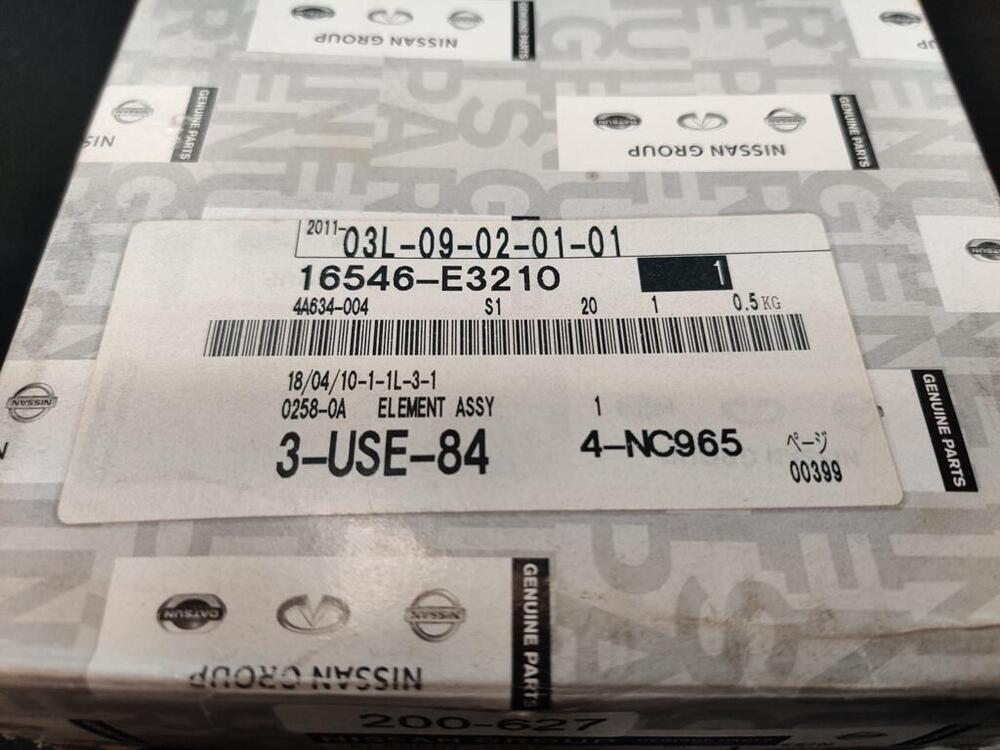
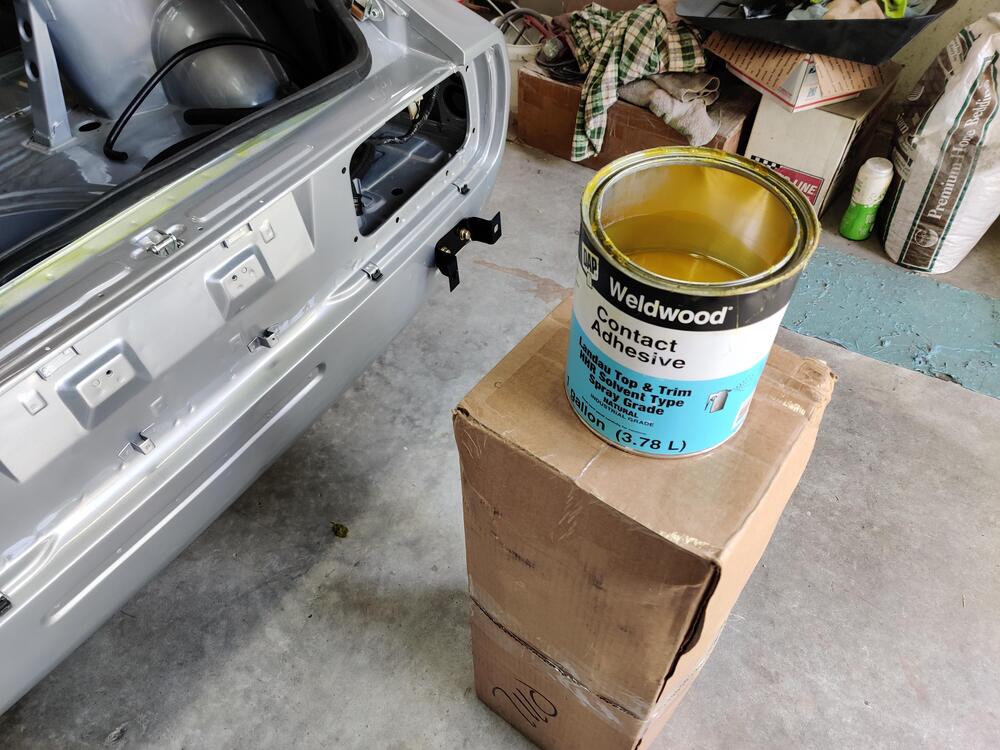
I switched out the wafers in the NOS hatch lock to match the new keys and installed the lock in the hatch panel. These hatch locks start showing wear when the chrome on the sleeve gets thin from rubbing during operation. I am happy to have this as a new part! I decided to work on the air cleaner this evening. This was one of the first parts that I stripped, primed and painted a few years ago. Tonight, I re-glued the inner rubber strips. I used the same contact adhesive I have been using for everything. I have not made much progress in the last couple of weeks; however, I did get the bumpers and the seat belts shipped off finally. Turn around time for both is many weeks, so I am glad to cross that off the list. With any luck, I would think I could be able to finish the car by the end of July - right at six years from when I brought it home.


-
So very nice, @AZ-240z!
-
Just as another data point, my HLS3016511 made in 12/70 had the 140lb gauge.
-
Thanks for this. That is the most accurate engine and engine compartment I have ever seen. I especially like the plating, and the finish on the SU domes and valve cover. While my plating is nice, I wish it was more authentic, like yours. Incredible.
-
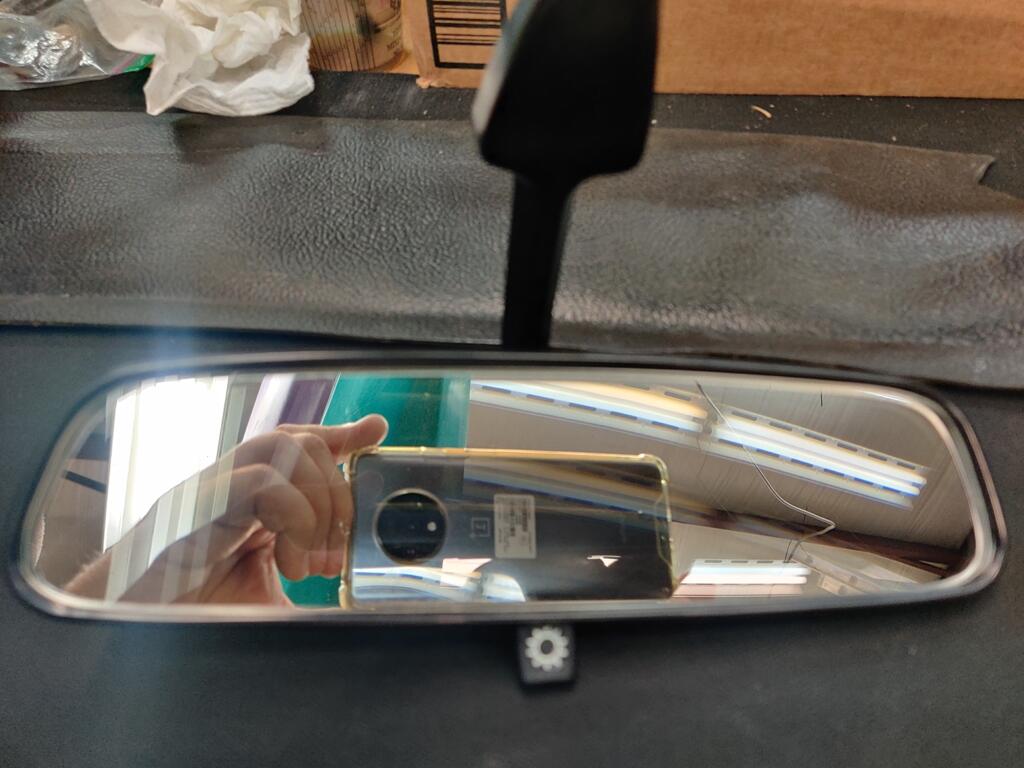
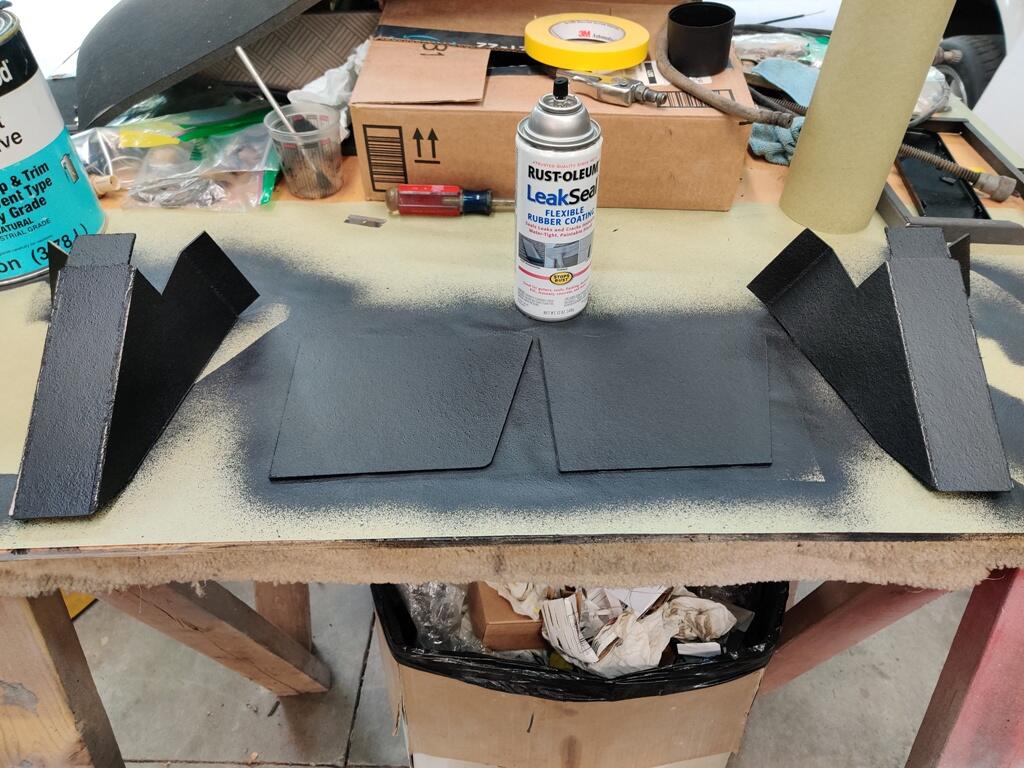
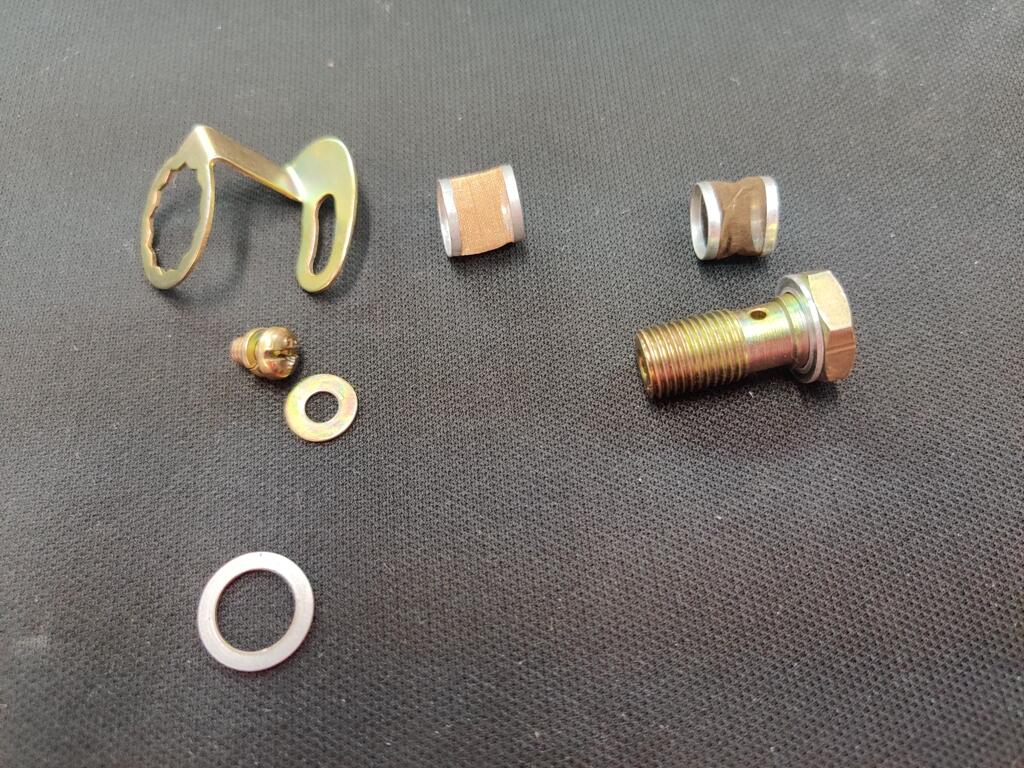
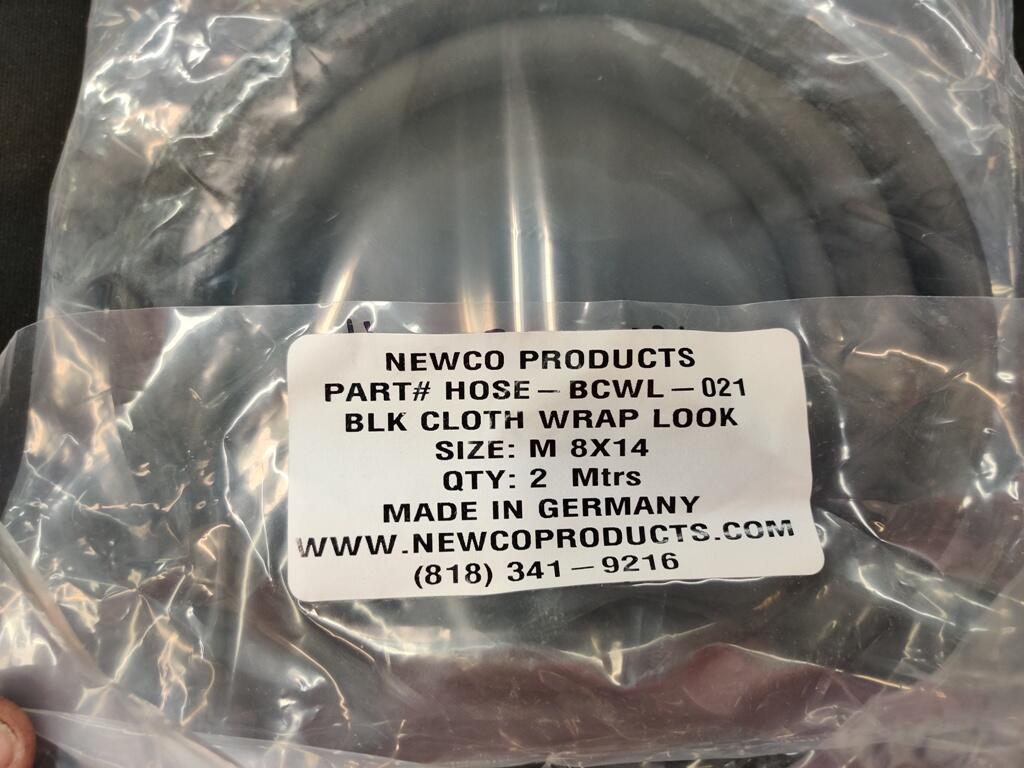
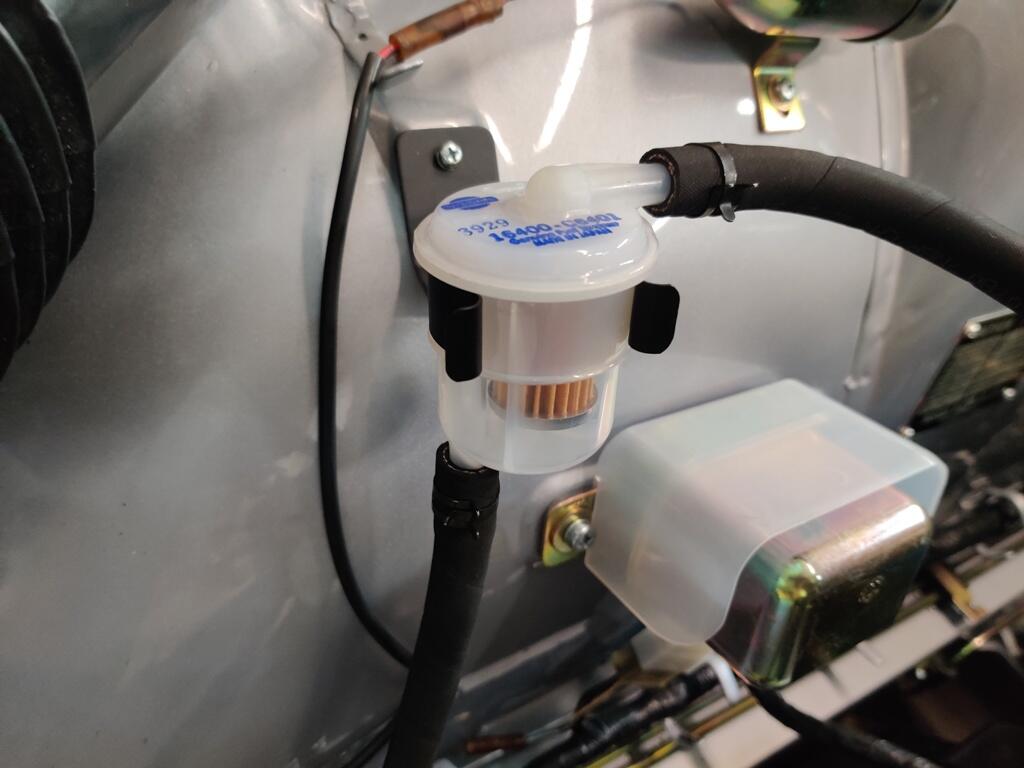
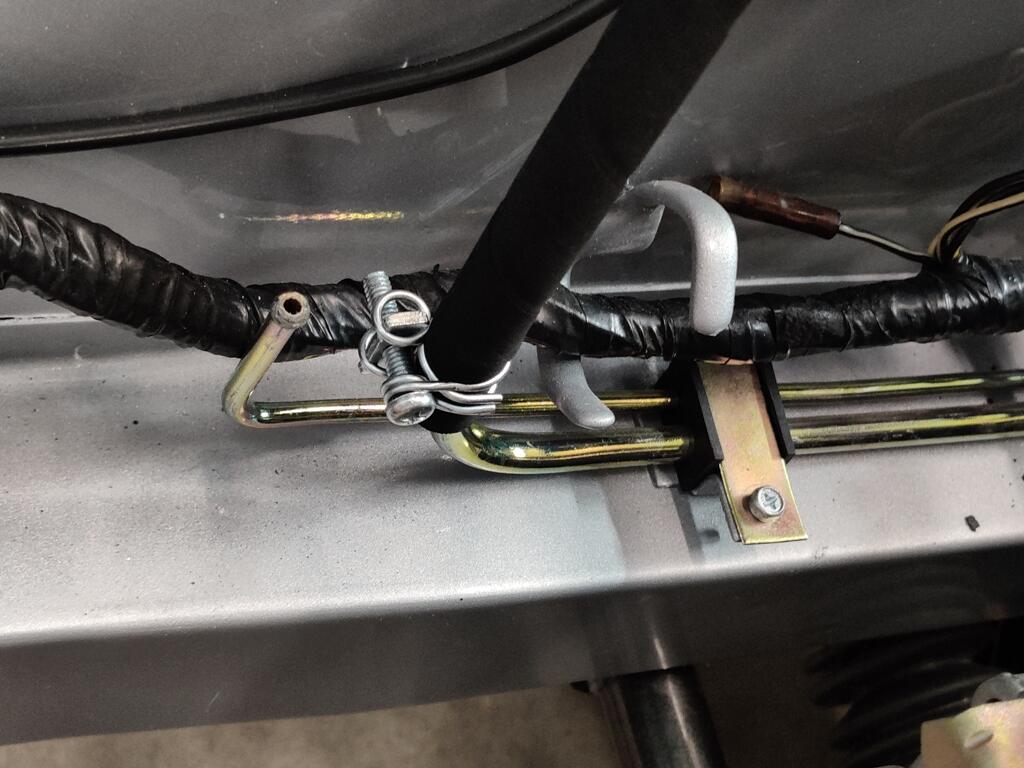
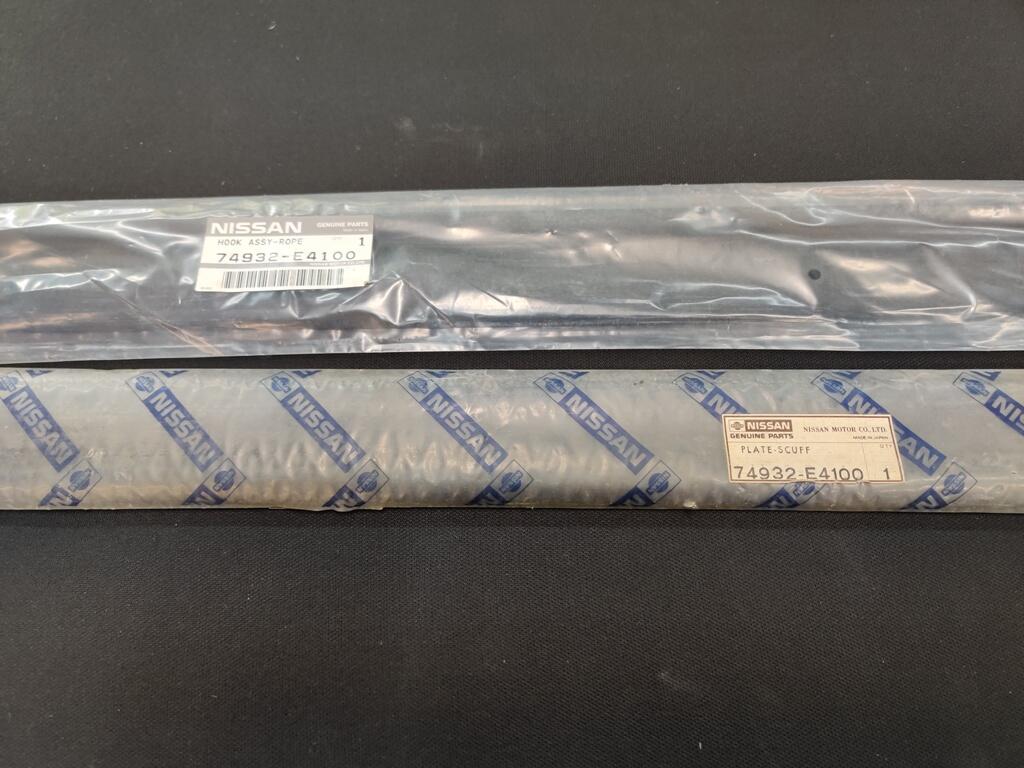
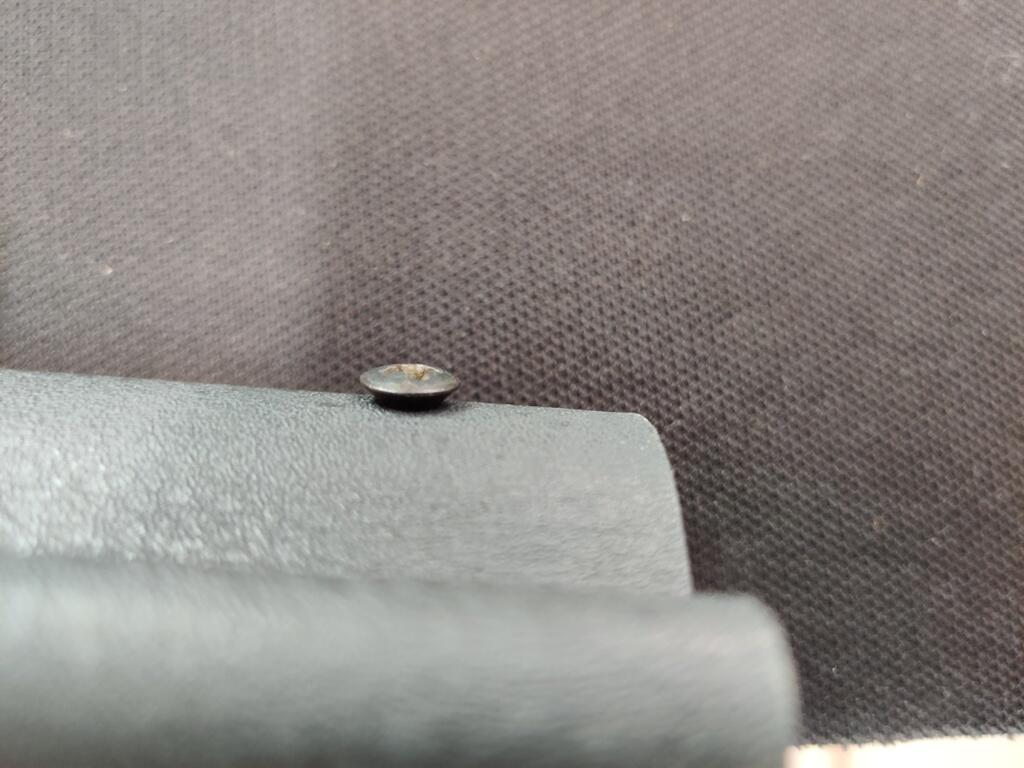
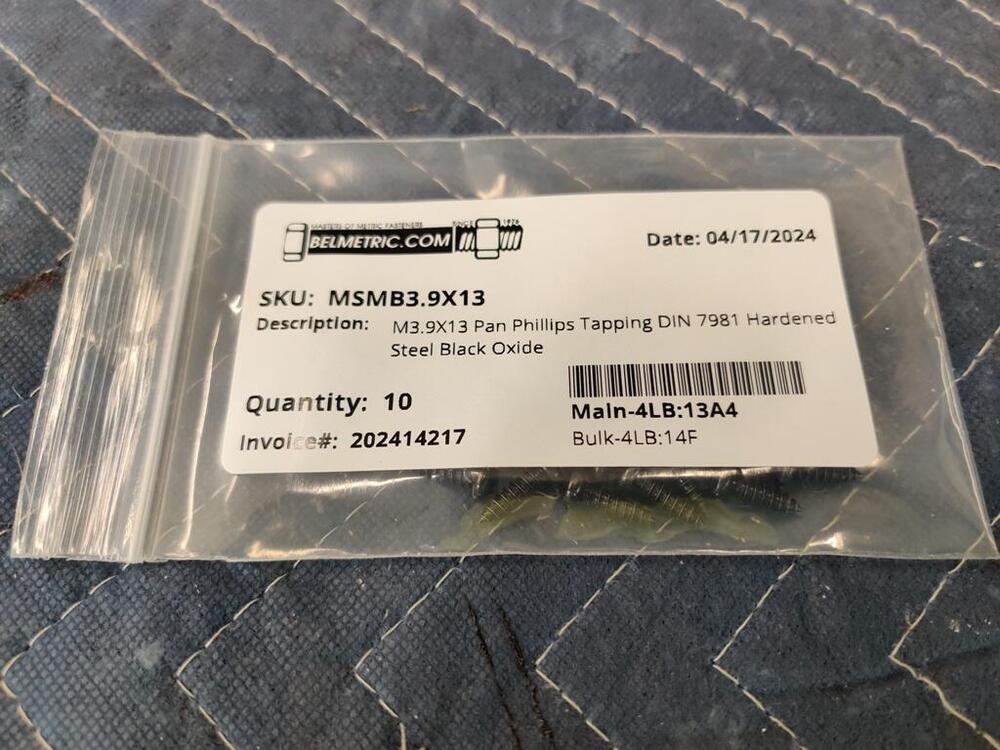
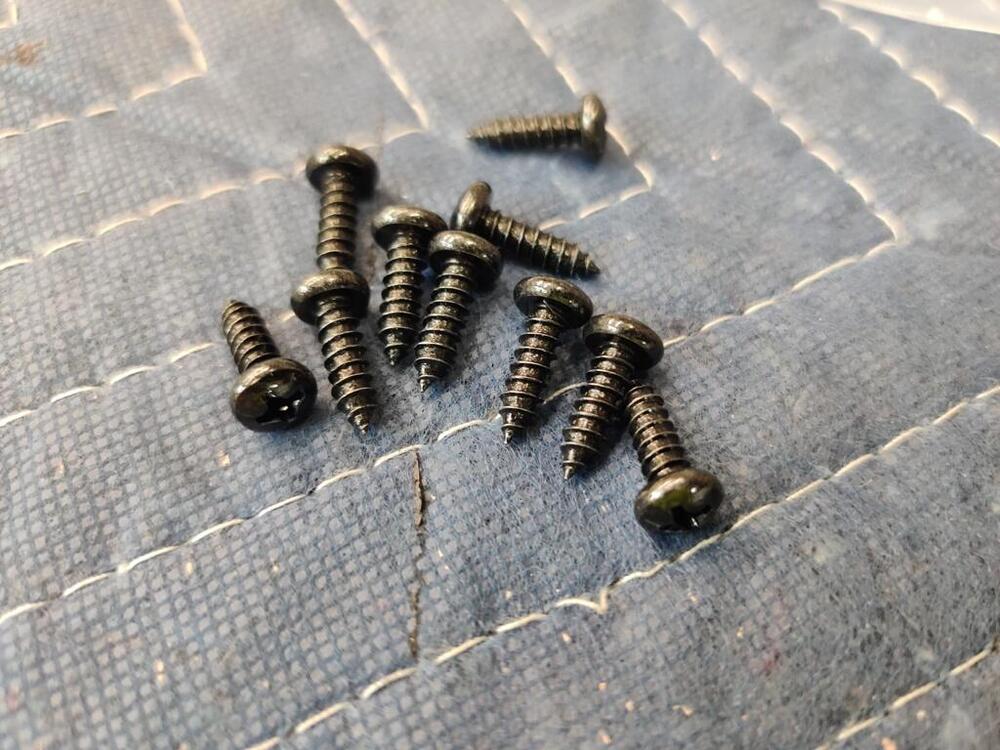
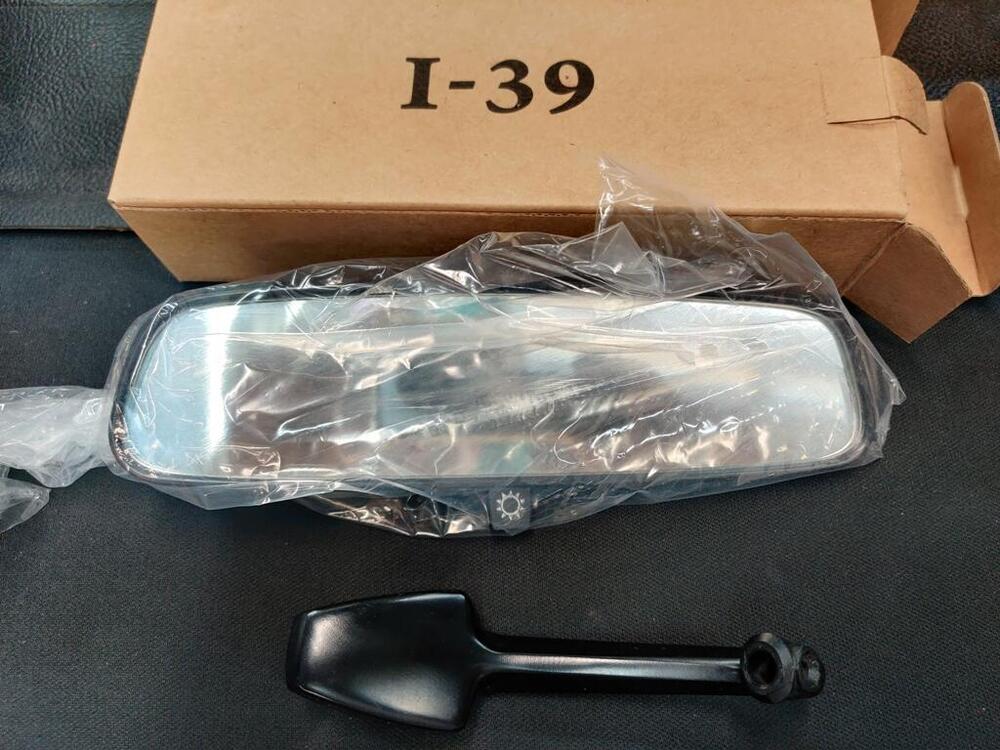
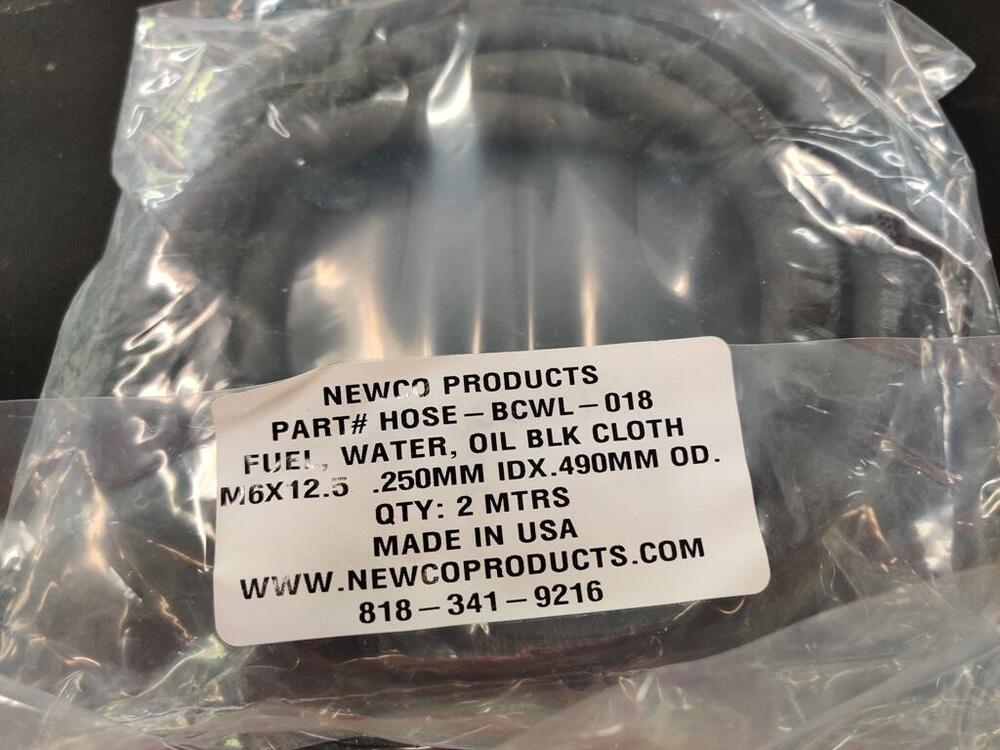
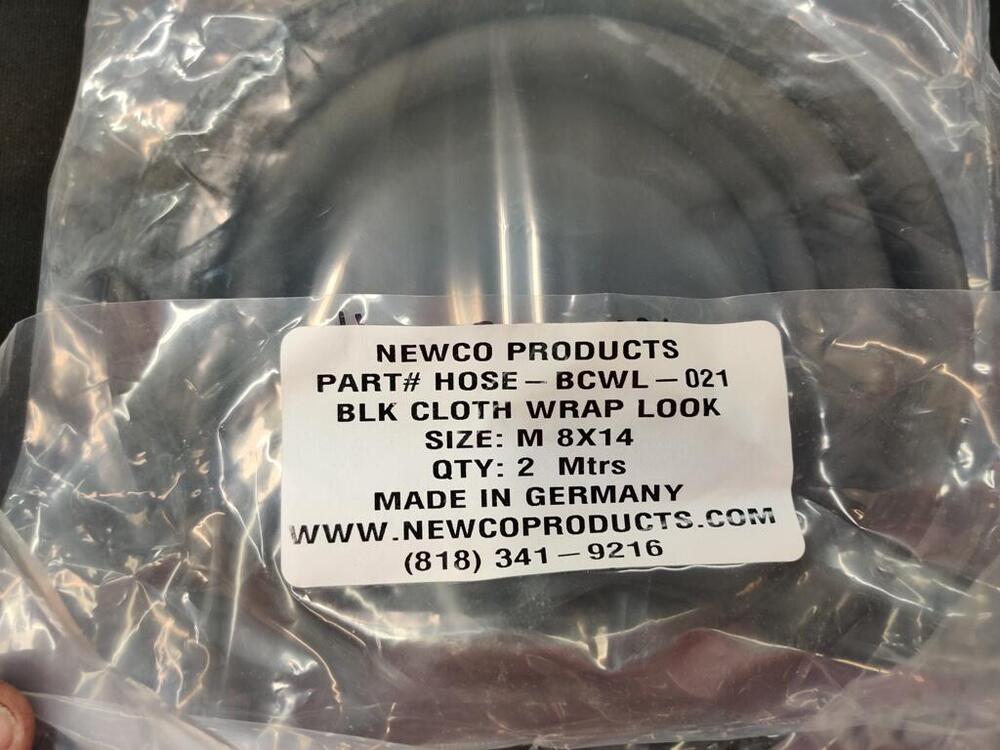
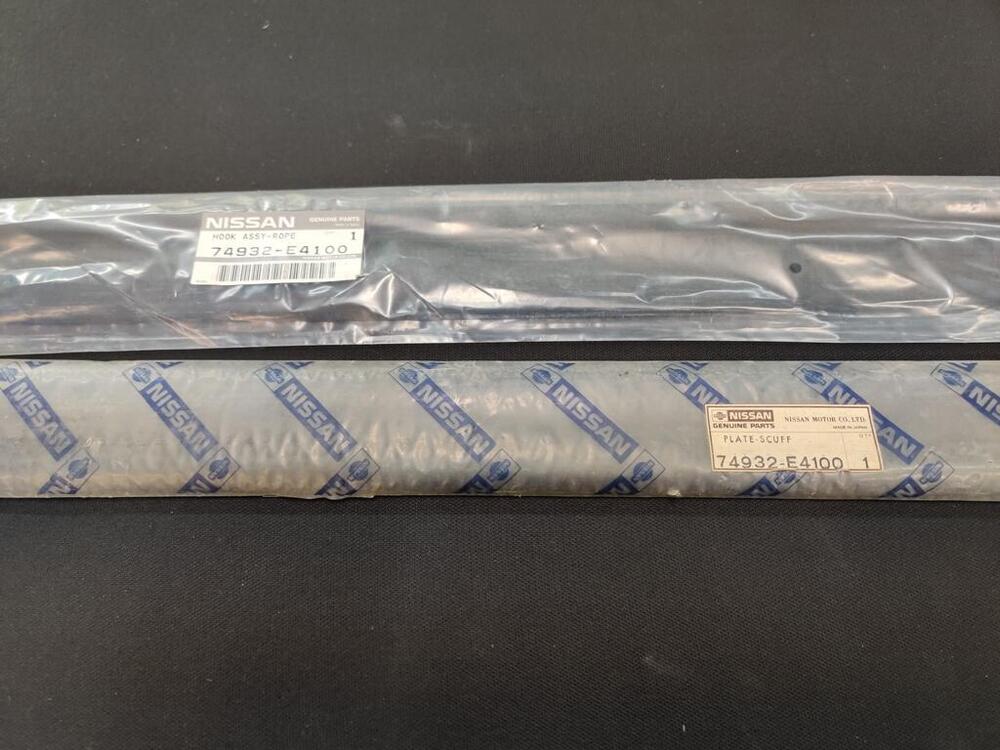
I couldn't find the original screws for the threshold plate, so I got these from Belmetric - some of the only non-original hardware anywhere on this car! 🙂 I have looked for many years for a 240z rear view mirror that doesn't show signs of corrosion on the edge of the glass, but haven't found any. I am thankful that @zspert sells an excellent reproduction: Next step for the upholstery cardboard was to coat it in a rubber coating to keep moisture from causing it to lose its rigidity over time. These are ready to glue into place now. Speaking of gluing, I finished gluing the rear hatch main seal in place this weekend. I again used the yellow "landau" contact adhesive. I glued the four corners in place first. This seal is a bit small for the opening and requires stretching. So, gluing the corners first allowed me to put sufficient stretch into the rest of the seal. Then, it was a matter of using the acid brush to apply the adhesive in the remaining areas. This adhesive sets up in under one minute, and is super strong. I found that it was best to work in sections that were only about 18" in length. I would apply adhesive with an acid brush on the weld flange as well as the backside of the weather strip, then wait about one minute. As soon as I put the two together, it sticks, and goes nowhere. Great stuff to work with. I started to install the fuel hose in the engine compartment. Before doing so, I checked to see if the carburetors had inline fuel filter screens. The front carb did not, and the back carb did. I installed new ones. I have to check that the floats are set correctly, so I elected to hold off on installing the hoses that go from the fuel rail to the float chambers. I did install the hose to and from the fuel filter. Hose is cloth covered; the closest thing I could find to original. Can anyone confirm the hose clamps I am using here are correct? I think that the clamps at the filter are supposed to be spring clip type... while the connections at the hard line and fuel pump inlet are supposed to be the zinc plated hose clamps as seen here: I also got all the bumper pieces packaged up. I will be sending them to Tri-City plating to get them redone.


-
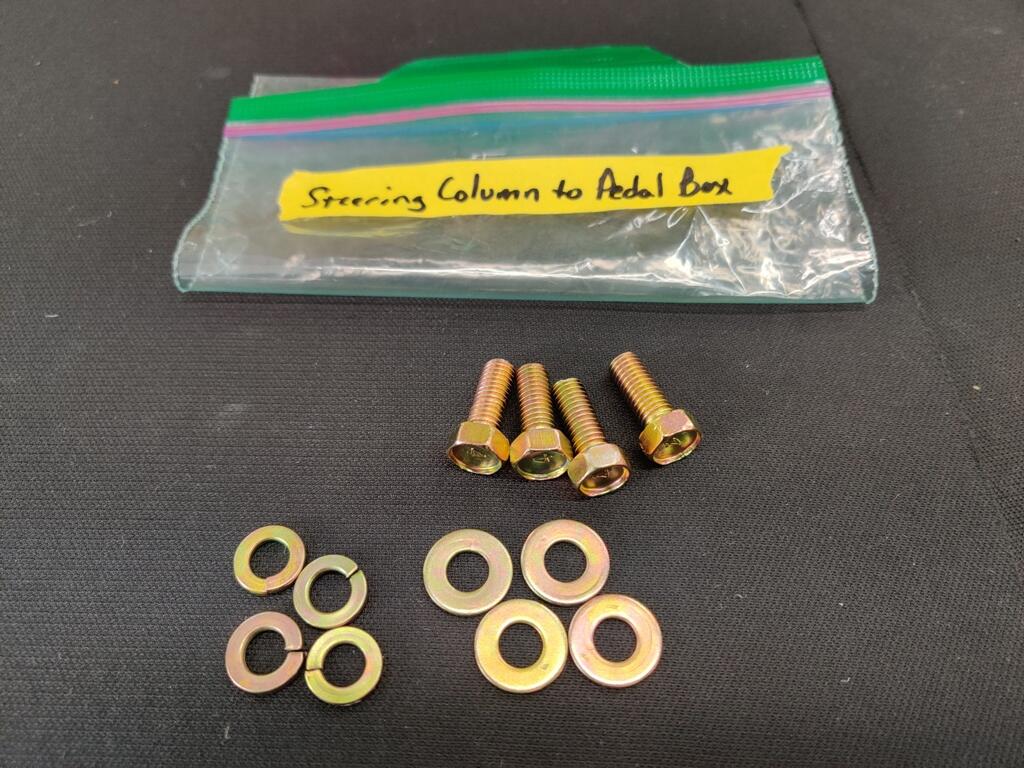
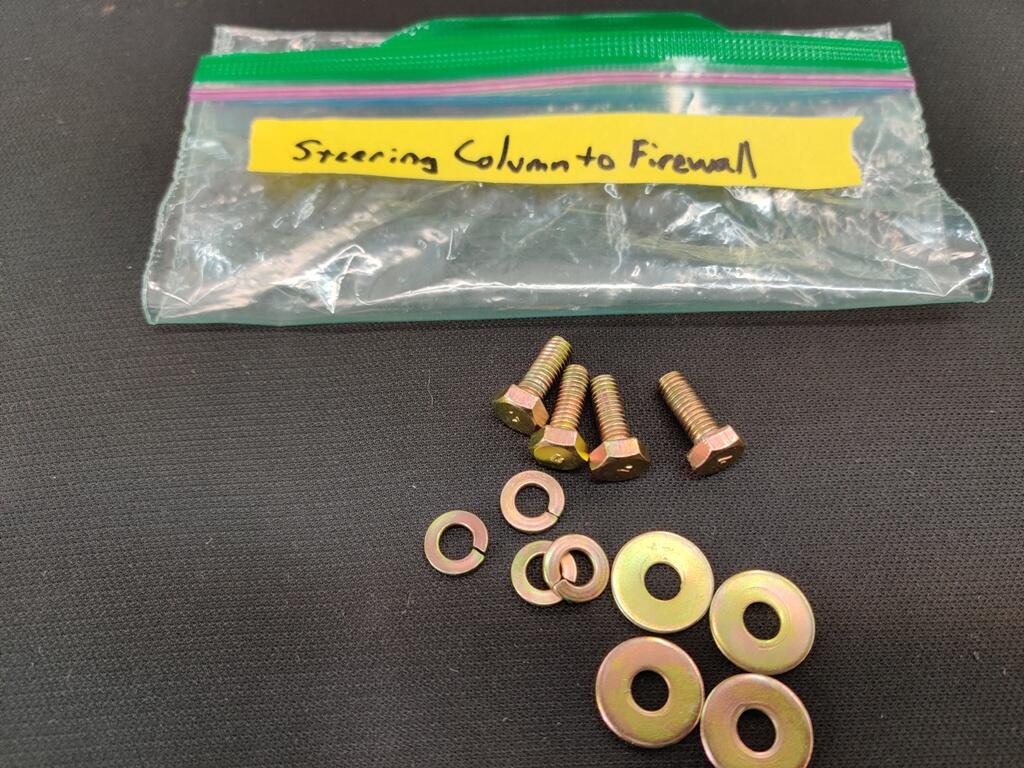
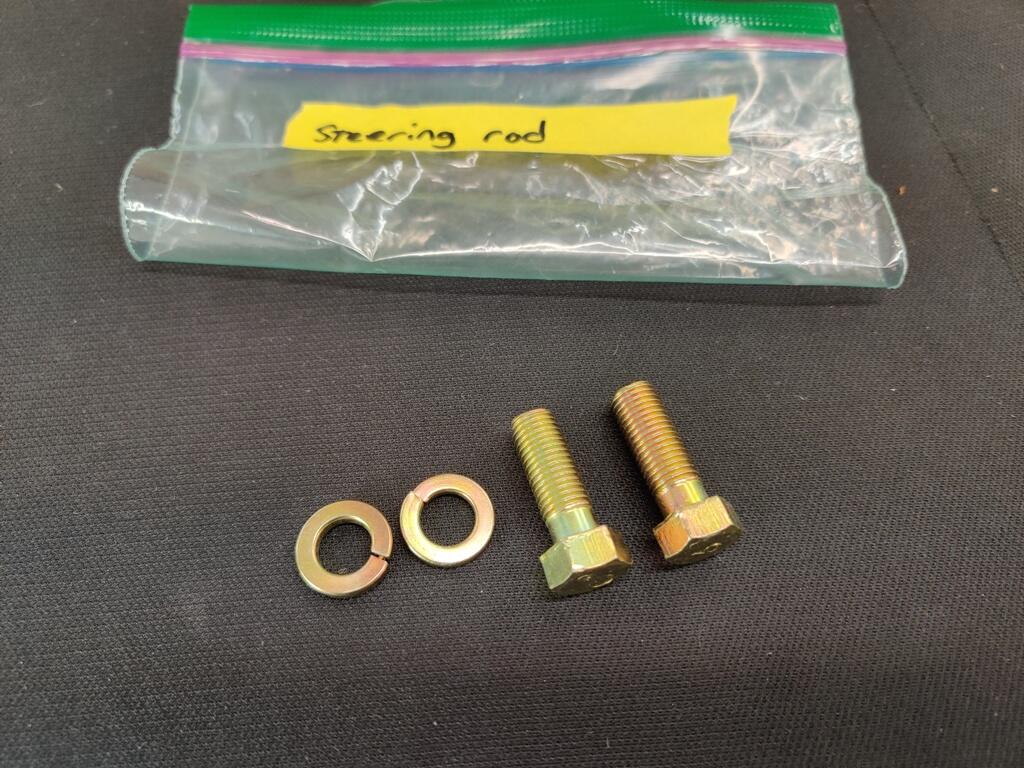
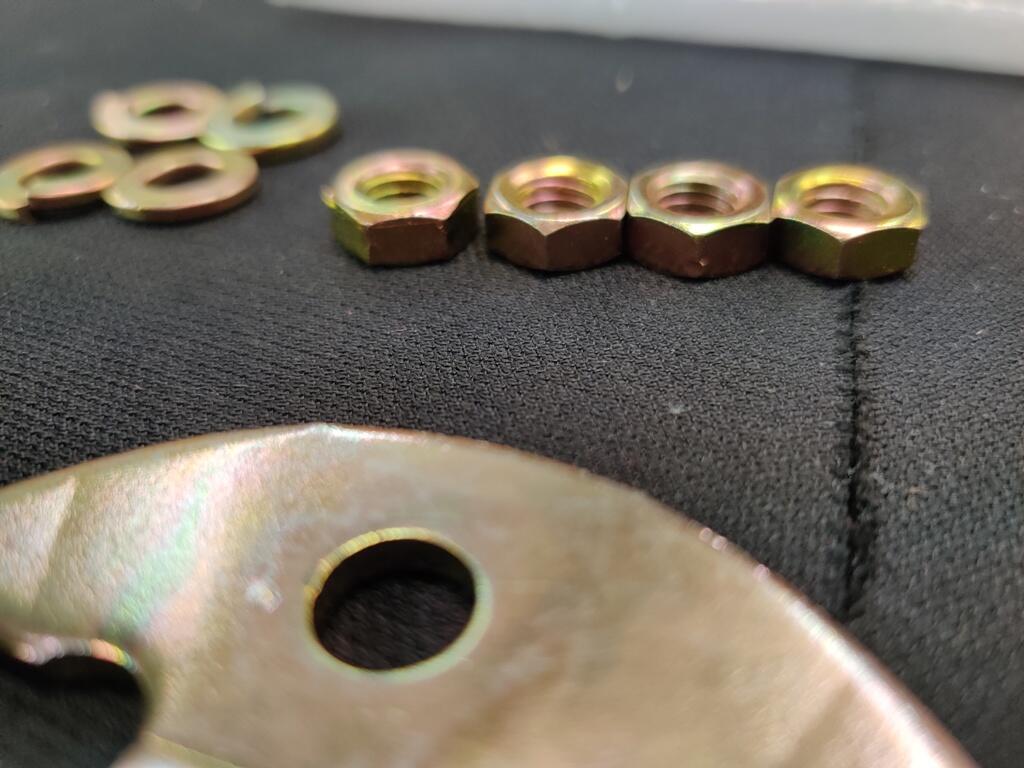
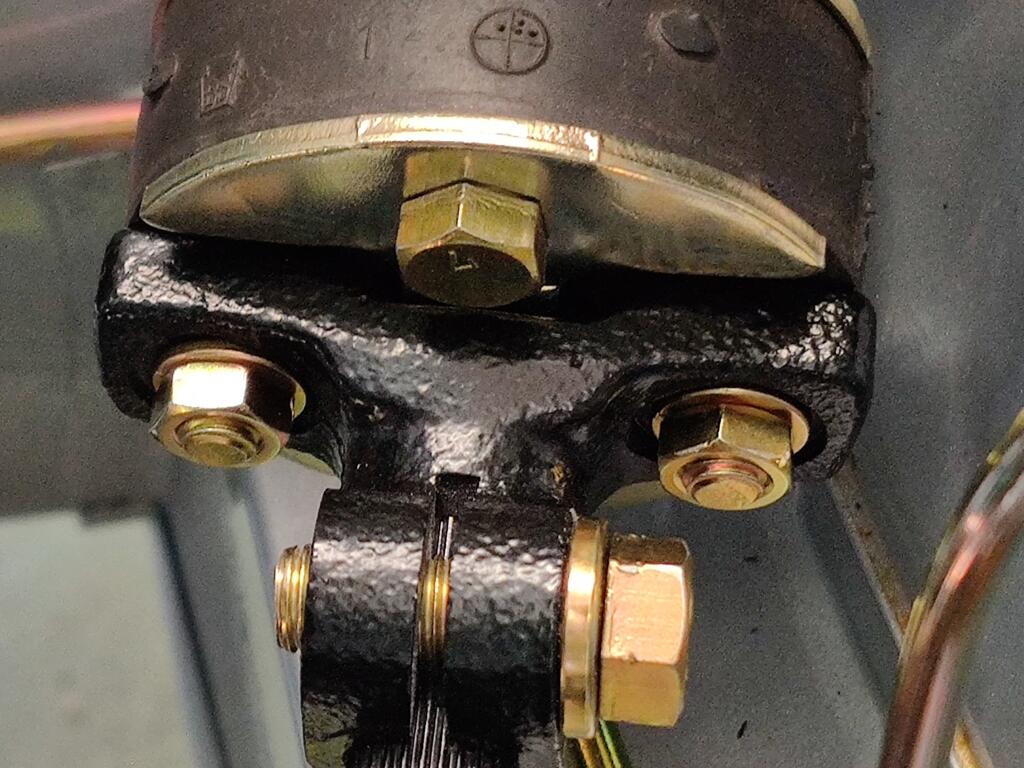
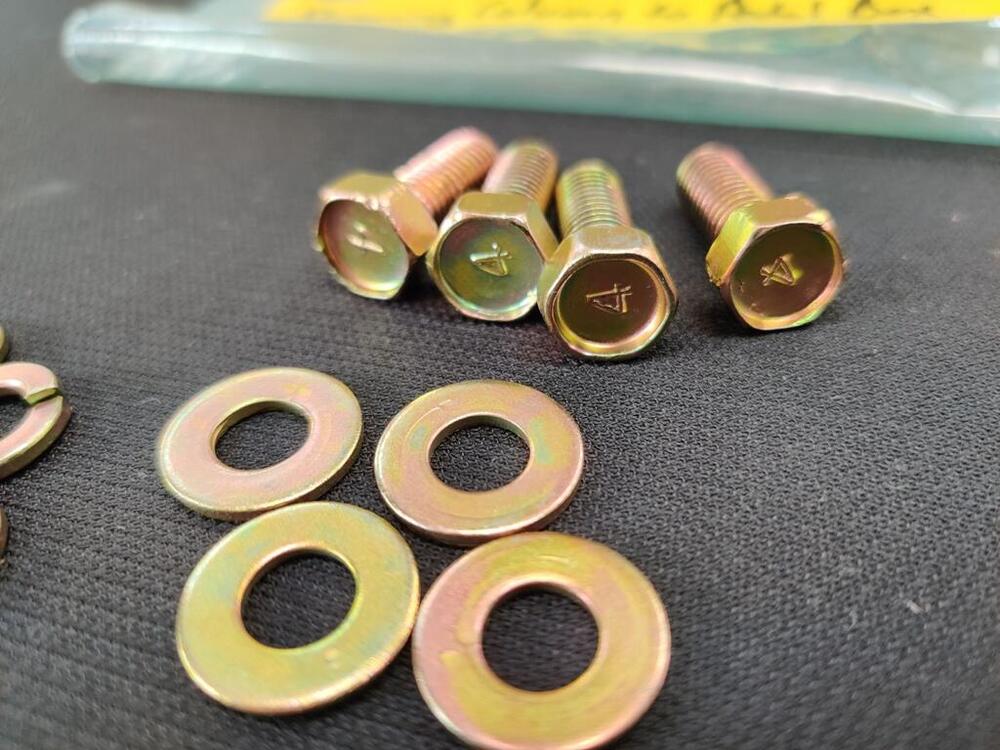
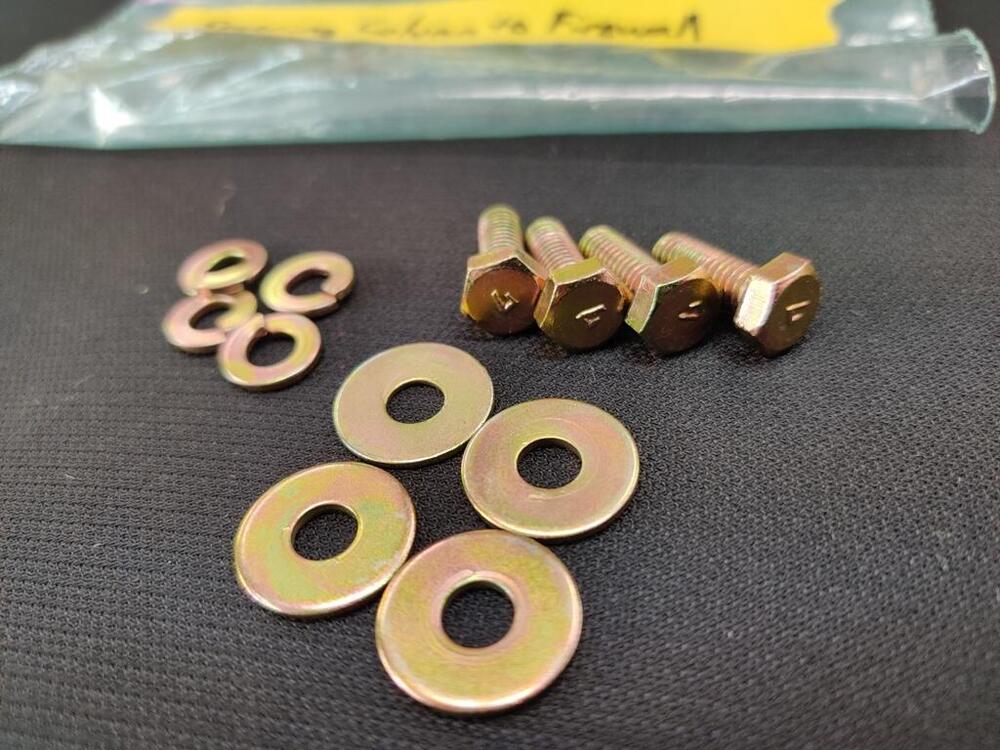
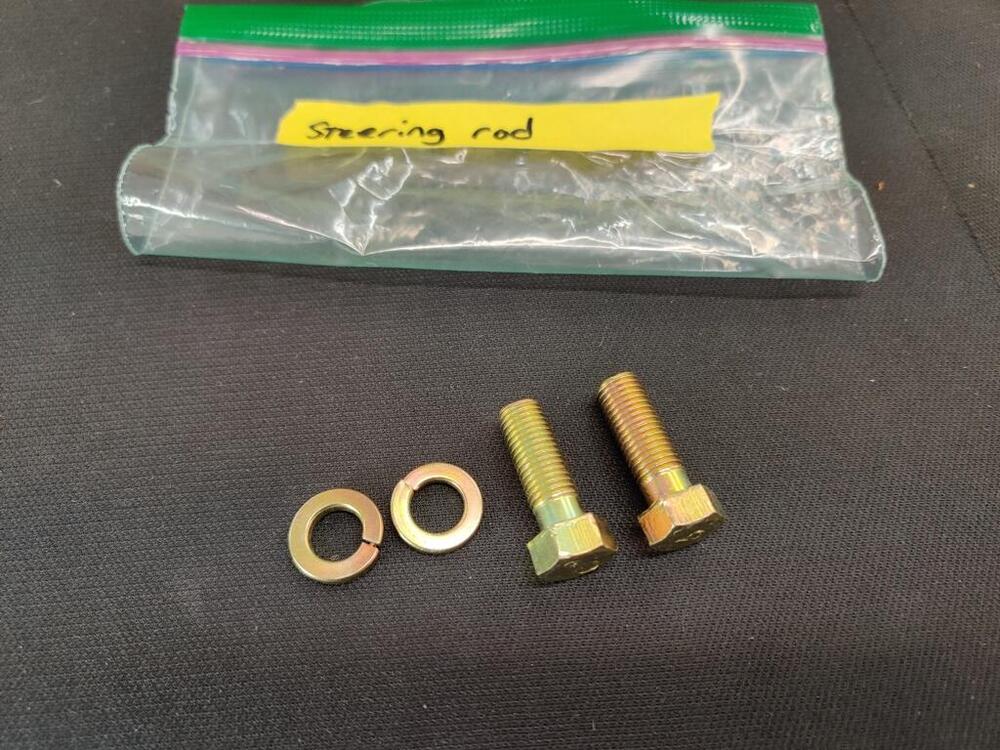
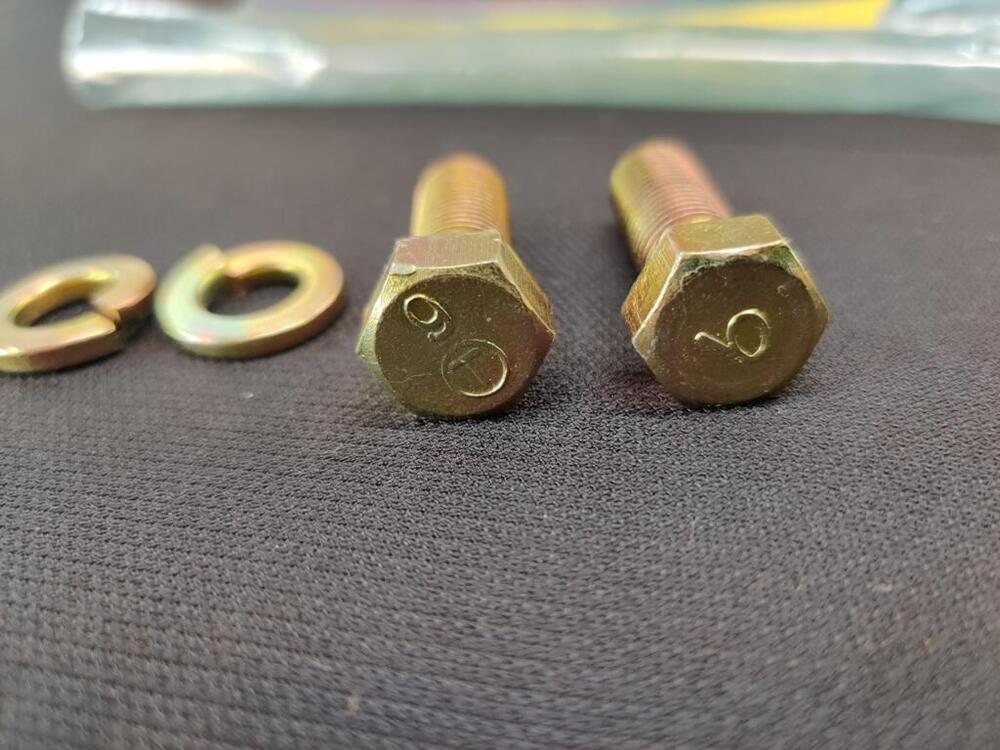
Not that long ago, I got the steering column in the car. Here are some reference hardware pics. Note that in the first two pics I have the wrong flat and lock washers. The ID is too large. Can anyone confirm that this is the correct orientation of the bolts and nuts? I didn't recall exactly how they were originally and couldn't find any reference pictures. I have two bolts going upwards and two going downwards. The bolt heads and the nuts seem to be a bit lower profile than standard, and the way I have them installed seems to be the most logical.


-
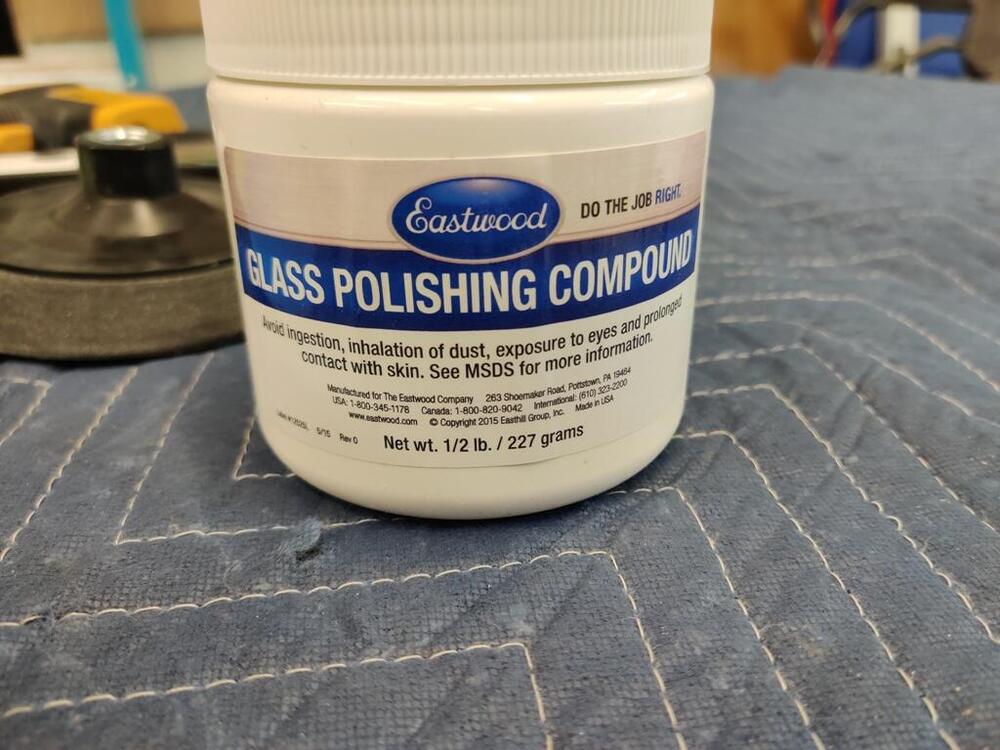
No, the Eastwood powder is white.
-
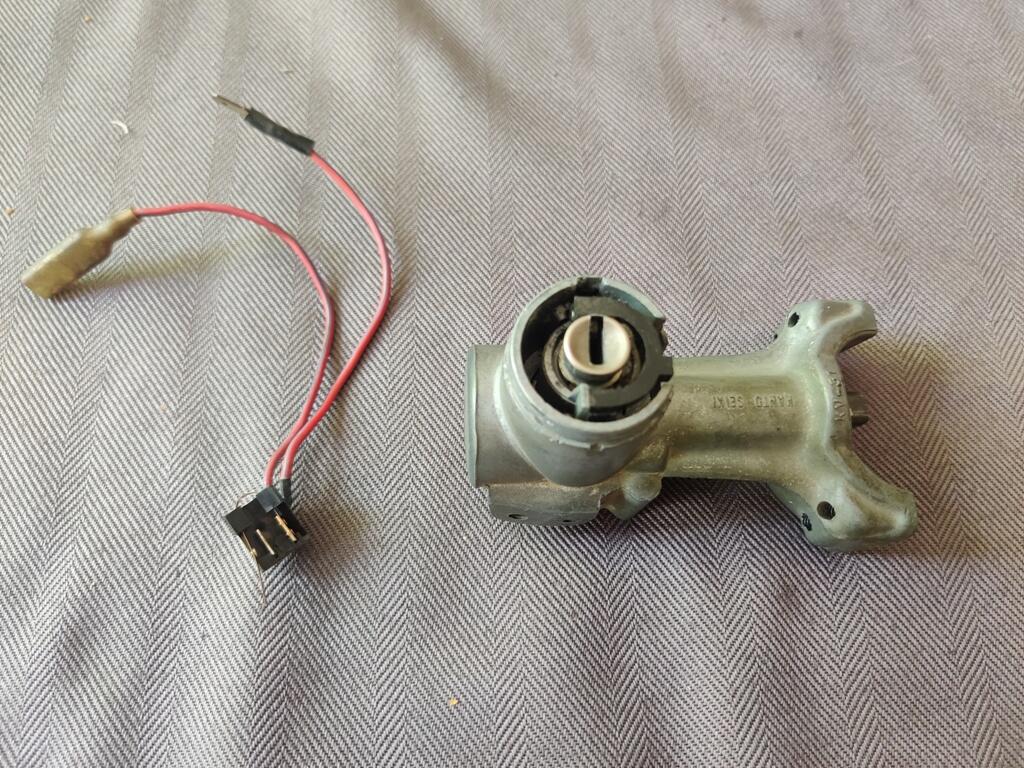
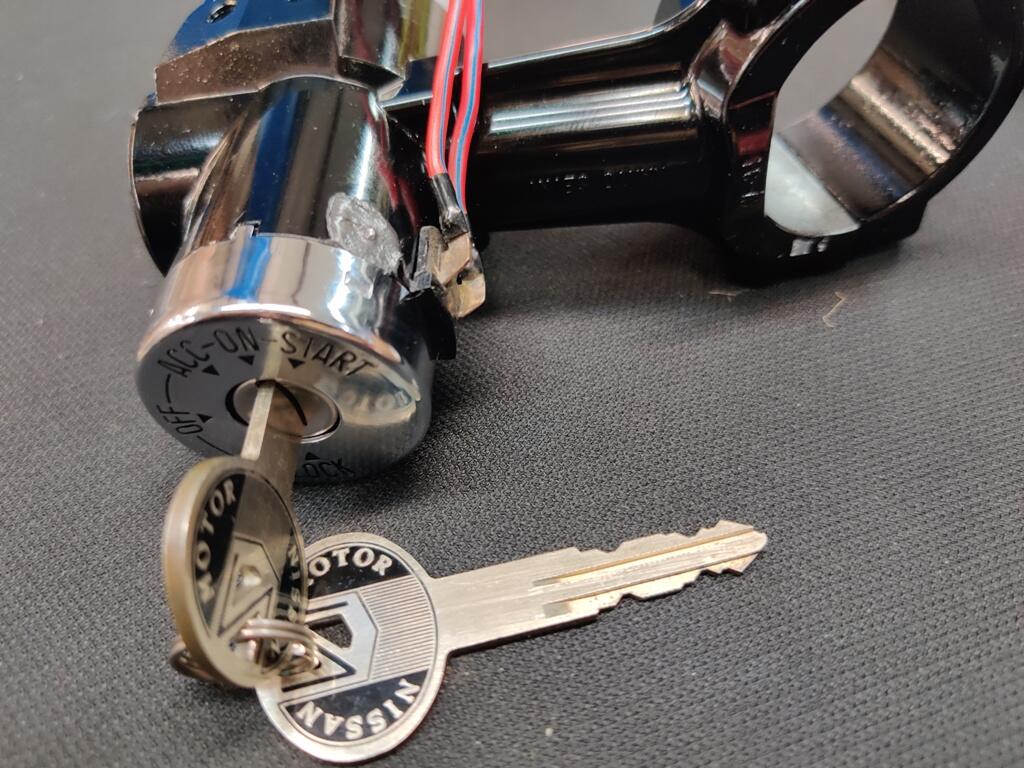
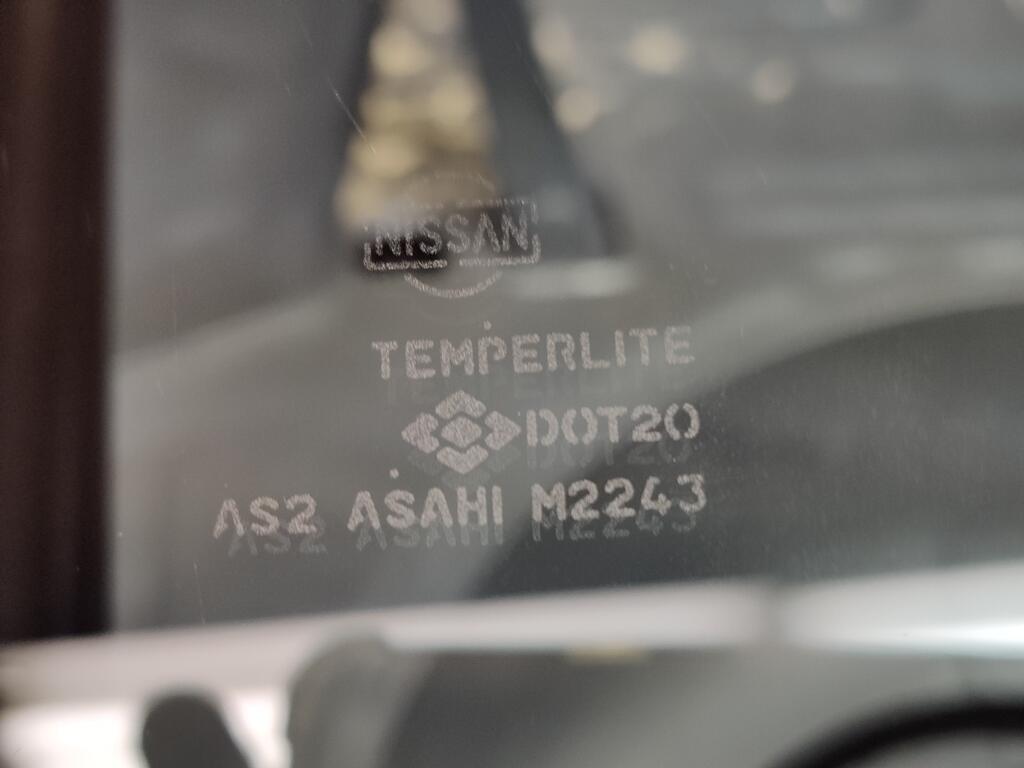
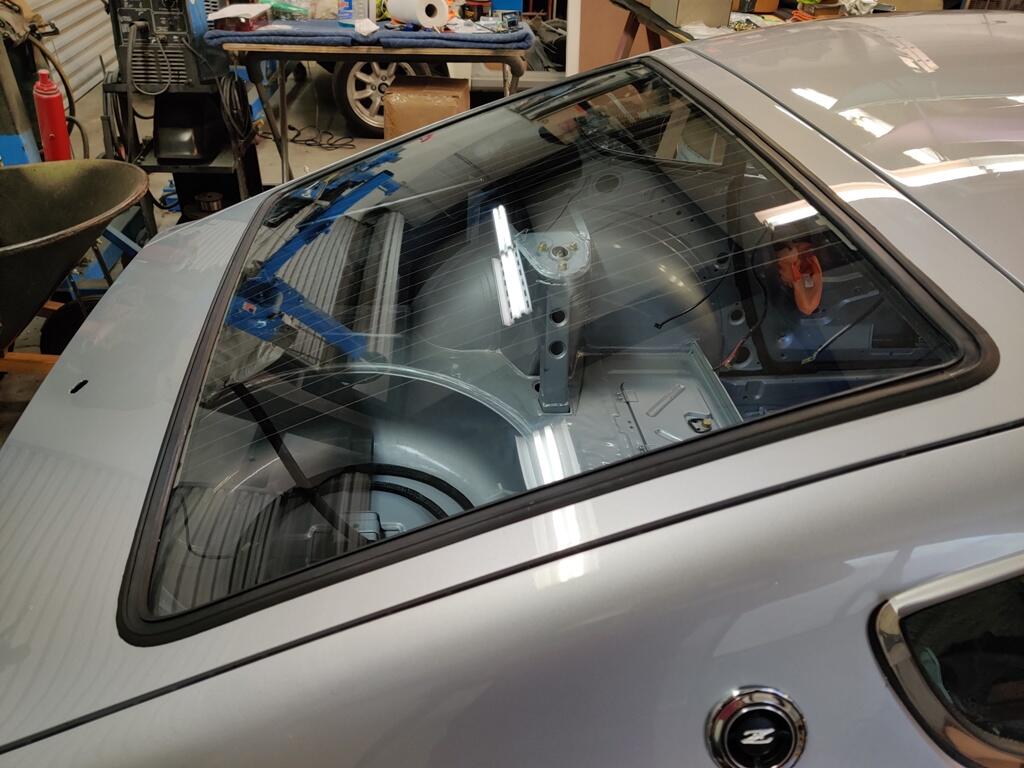
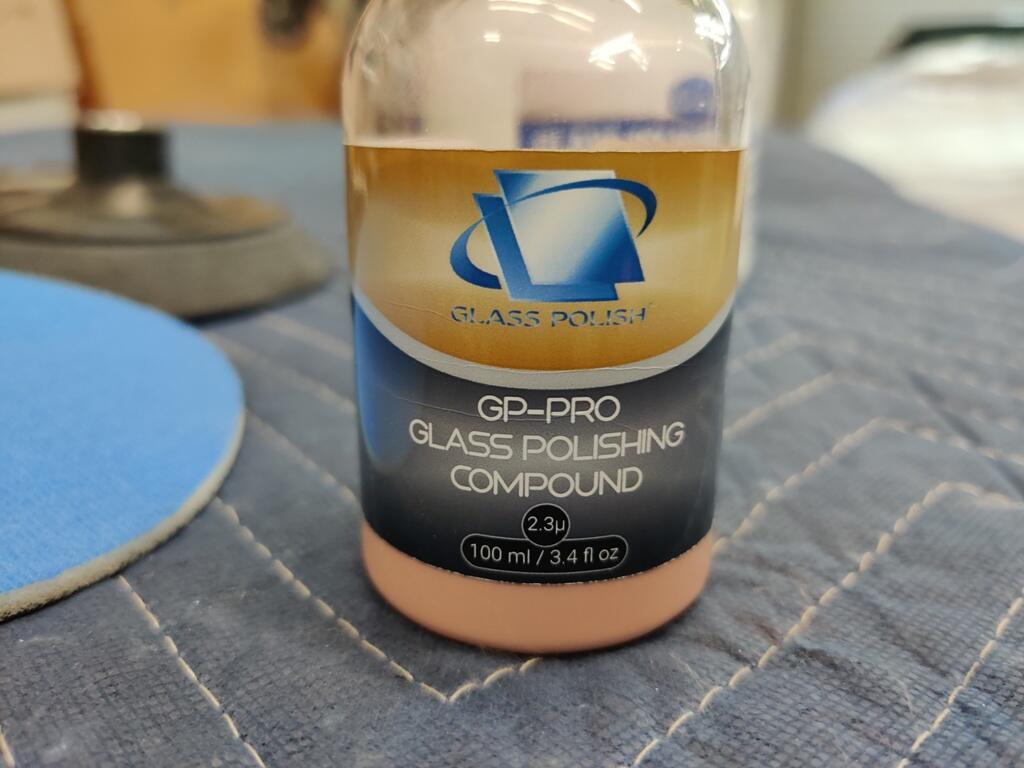
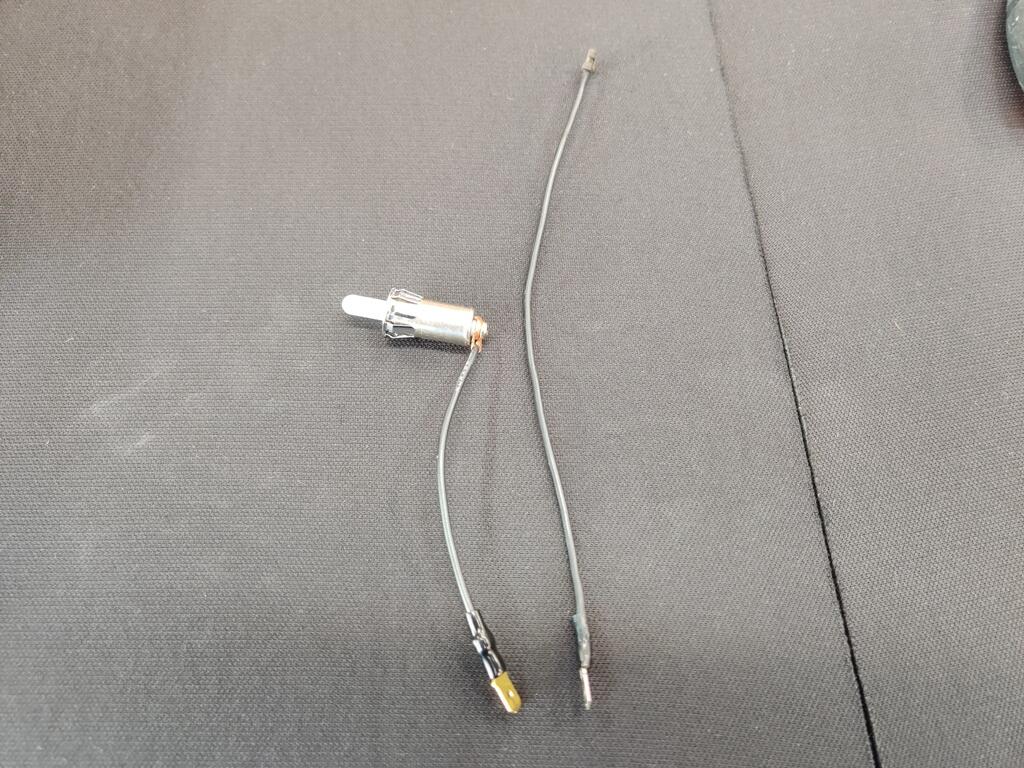
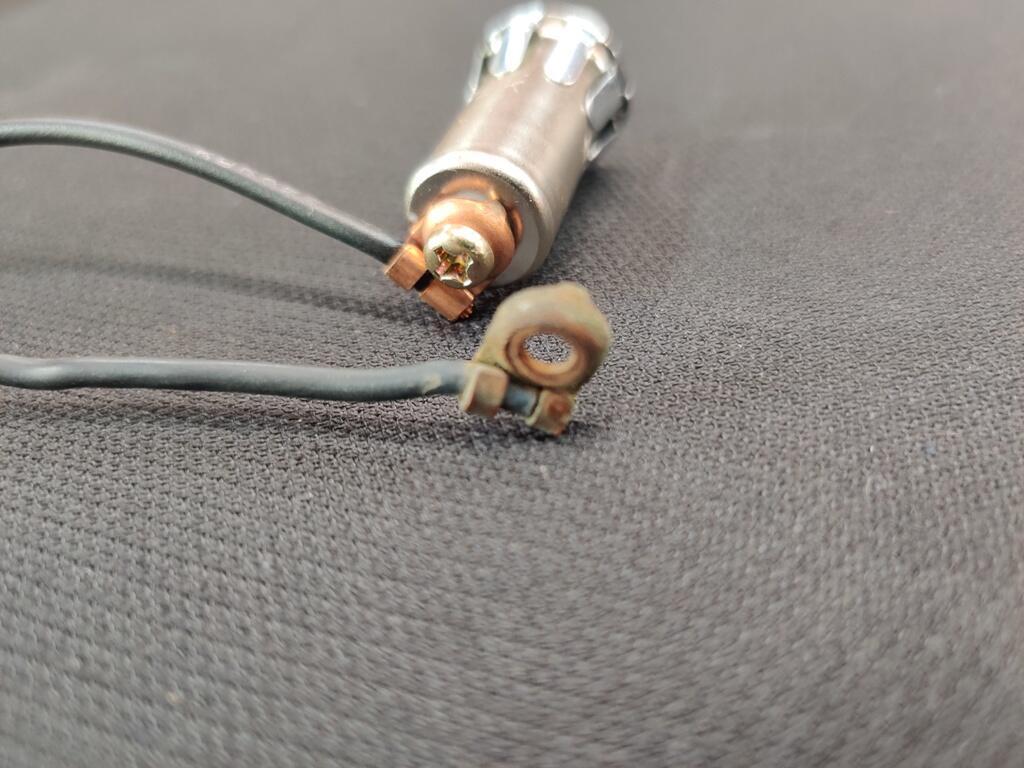
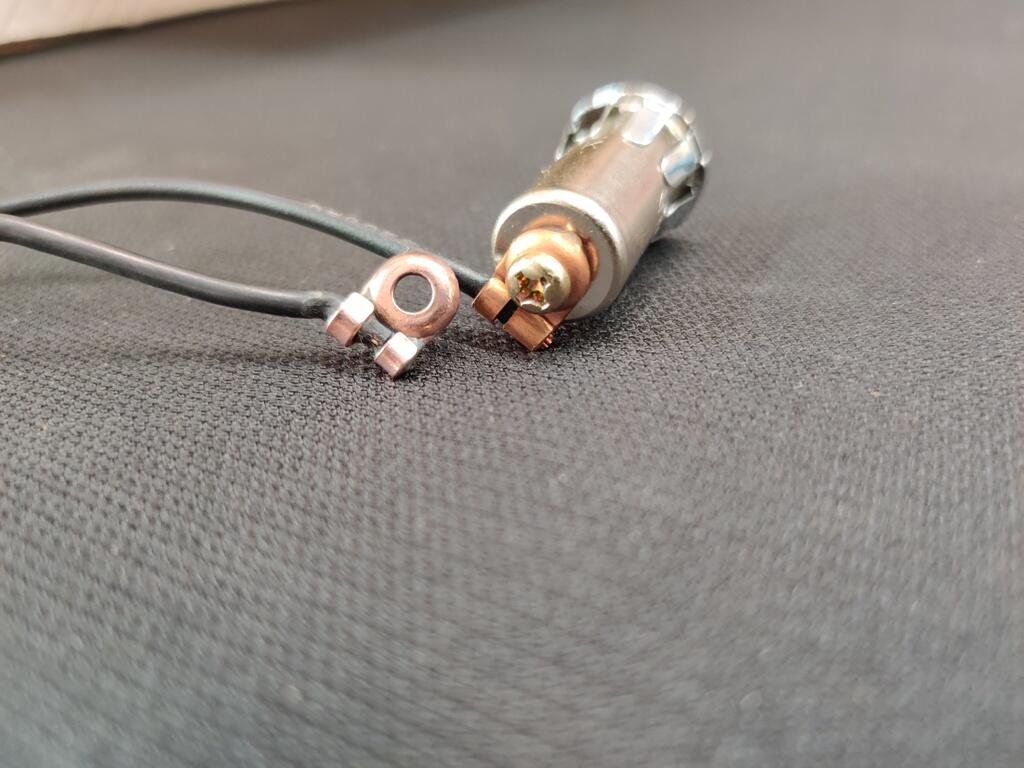
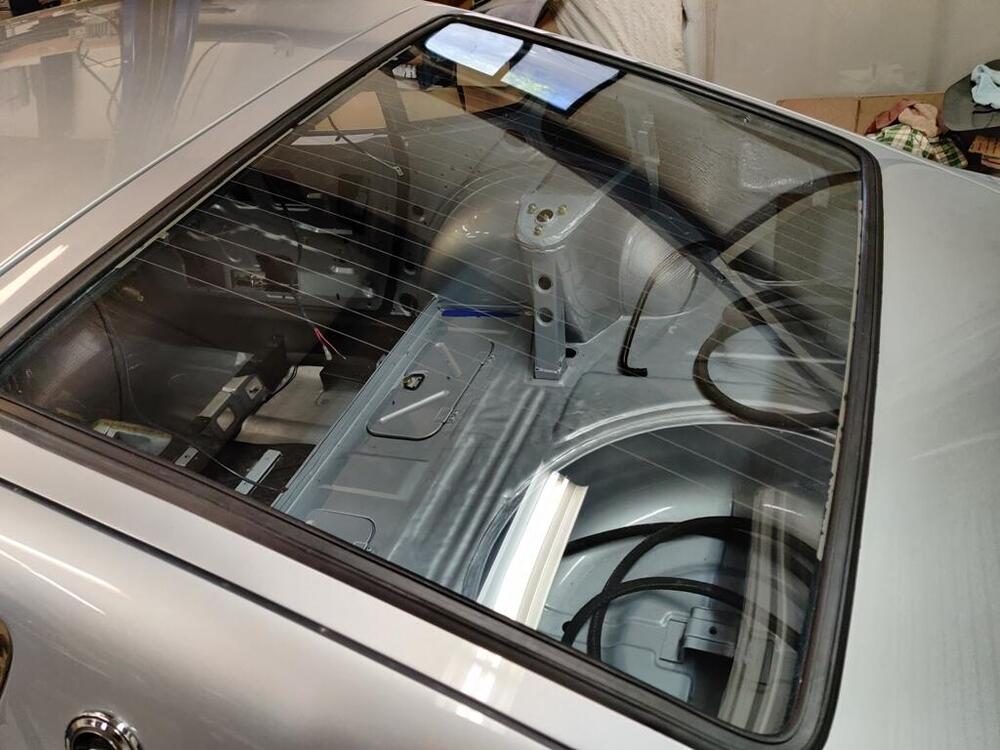
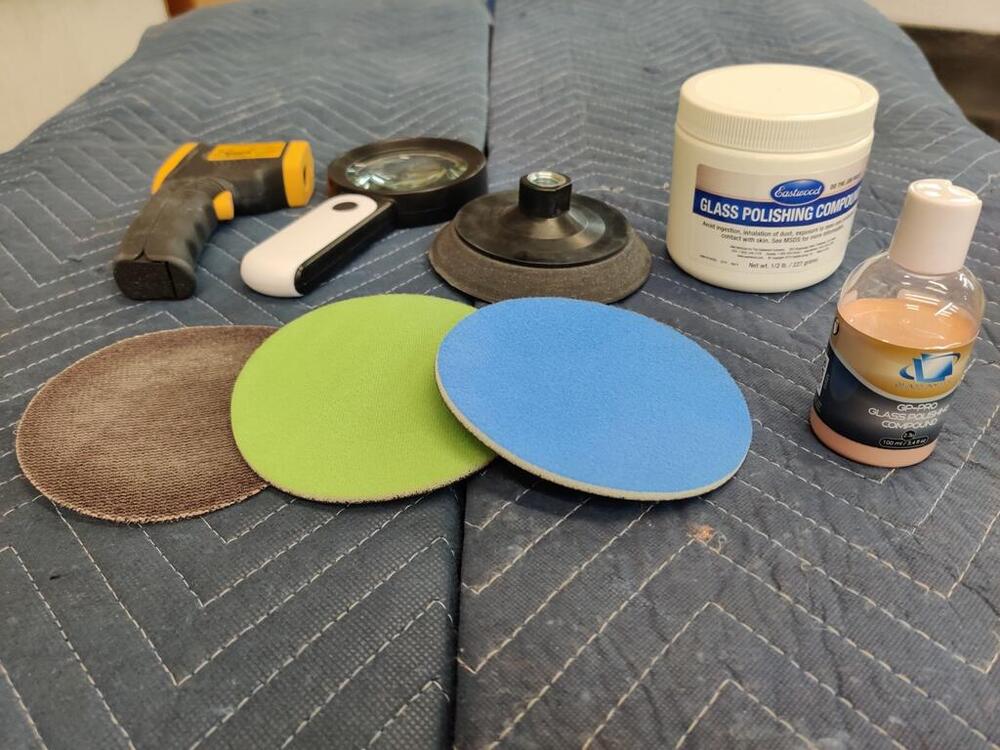
This weekend, I disassembled the new Kanto Seiki ignition switch I got from Japan and changed out the wafers to work with the new, original keys that came with a new old stock hatch lock I bought off of eBay a while back. I found this link to Ratsun forums to be helpful with getting the key tumber out of the switch assembly. In order to get to the wafers, you have to remove the tumbler assembly which requires removing a small steel pin. I drilled as small hole in a spot that allowed me access to the backside of the pin. I was able to push it out and then pull out the tumbler assembly. After I got it out, I swapped a few wafers so I could use the keys with the black paint on them. The new ignition switch did not have these electrical wires. However, these were easily moved over to the new switch. All done: That was the light work for the weekend. Then I switched over to the hatch glass again. I have been dreading getting back to this, because I knew it would require many hours, and I was a afraid that even after investing many more, I would not achieve a satisfactory result. Last time, while I achieving success with removing the deep scratches that were in the glass, I was not having much success getting the glass shiny again. I picked back up with experimenting with the polishing compound that came with the kit. After repeatedly going over a relatively small area, I was unhappy to see I had made next to no progress. I just seemed to be going through polish with no real improvement. The manual said that if the polish wasn't working, I may need to got back to the previous grits. So, I decided to get my magnifying glass and have a closer look. Under magnification, I could see that the polish wasn't doing much even in the area I had concentrated on. I also saw, however, that there were some scratches left over from the first grit. Clearly, I would have to revisit use of some of the prior grits and rework. So, I used the magnifying glass and the green grit (second stage) until I had addressed everything I saw. Then I switched to the blue grit. I went over everywhere that I had used the green. I also went beyond where I had sanded with the green by a couple of inches. For the most part, the sanding scratches looked like )))))))))))). So, when using the blue grit, I went 90 degrees to that, so I could see when all the scratches from the green grit were gone. I used the magnifying glass to check progress. When I was done with the blue grit, I switched over to an Eastwood glass polishing kit I bought a long time ago to polish some wiper marks out of my BMW windshield. From memory, I recalled that the Eastwood kit was able to remove the wiper marks, but also polished that glass back to normal finish. So, rather than using the polish that came with the new kit, I decided to use the Eastwood kit instead. The Eastwood kit contains a powder. To that, you add water. Within a few minutes of polishing with this, I was able to see much better progress with the polishing stage. So, I kept going this route. I also utilized a laser thermometer to check heat, as polishing can heat the glass quite a bit. Polishing glass... is not easy. When I quit yesterday, I had worked on the hatch glass for 6 hours straight with just one 10 min break. And it wasn't done, but I no longer feared that I wouldn't be able to use the hatch glass. Today, I picked up where I left off with more polishing. After another two hours, I called it good enough. I put the factory original weather strip on the glass and proceeded to install it on the car. While that didn't go well, and I became highly irritated, I did eventually get it in. So, I have something like 14 hours of work in polishing the hatch glass. I have learned a ton about how to remove scratches. The kit I bought from Europe will remove deep scratches. But, it takes a lot of time and very careful work with the sander and the grits to get the glass back to a point where you can polish it. I think the polish that came with the kit is worthless. Perhaps it is ok on non-tempered glass. Instead, I recommend using the Eastwood product for the final polishing. Is it perfect? No. But, I got rid of a bunch of deep scratches and I learned a lot. If I had to do it again, I think I could get the time down to around 9 hours which is still crazy, but for what it is worth, I was able to save the original hatch glass:


-
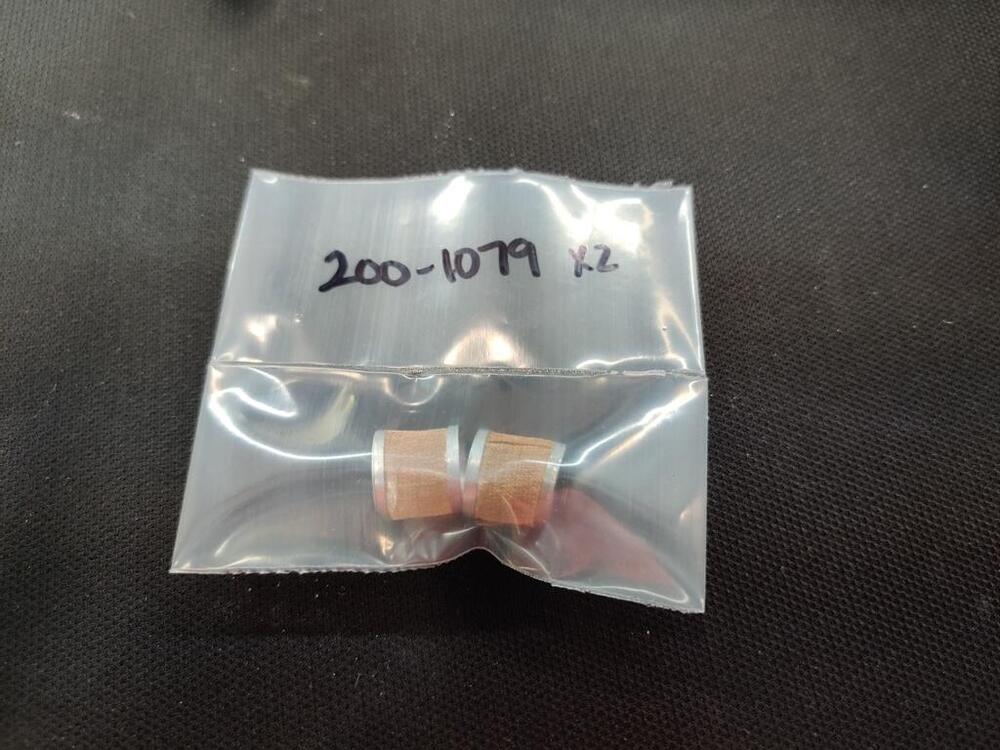
They fit loosely. They drop out if you turn the cylinder upside down.
-
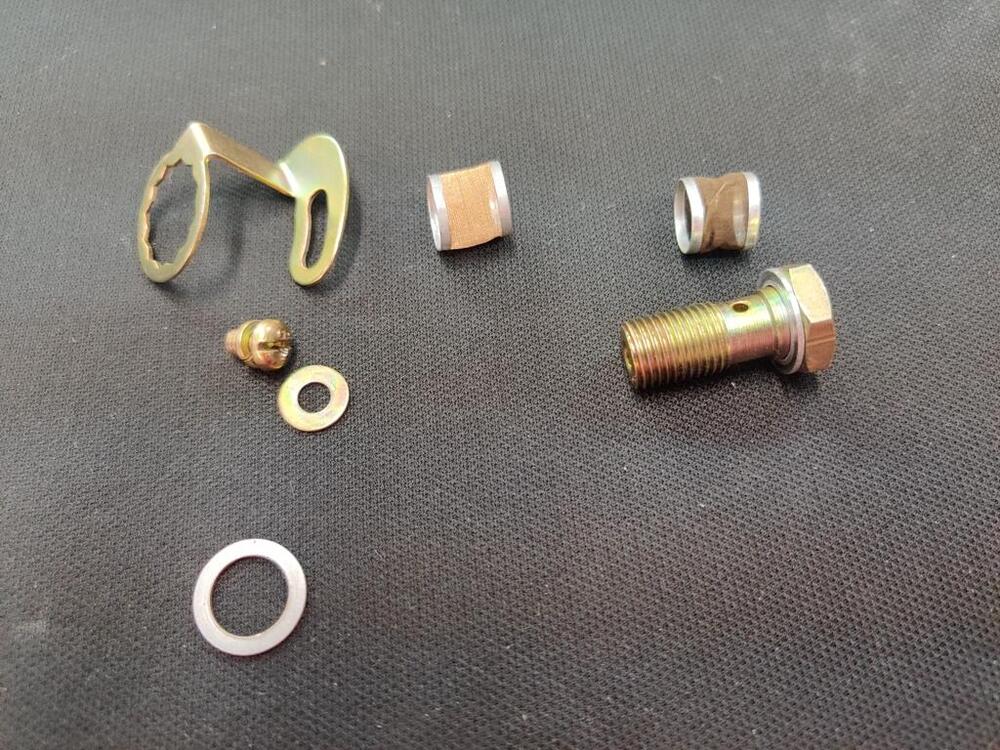
I think mine turned out nicely. I will have to wait and see when I actually put fluid in the system and bleed it. By the way, getting the new seals on can be difficult, but they are made out of some amazingly tuff stuff. I found that using straight dishwashing liquid on them made it possible to stretch and slip them into place where they needed to go. To get the sleeves out, I believe I chucked the master cylinder in my glass bead cabinet (after cleaning any wet gunk off with lacquer thinner). Stripping all of the corrosion off of the casting as well as those little parts made it much easier to get them "unstuck" from where they sit.
-
Great! Thanks for that. I will need to forage through my hardware for the zillionth time to look for those.
-
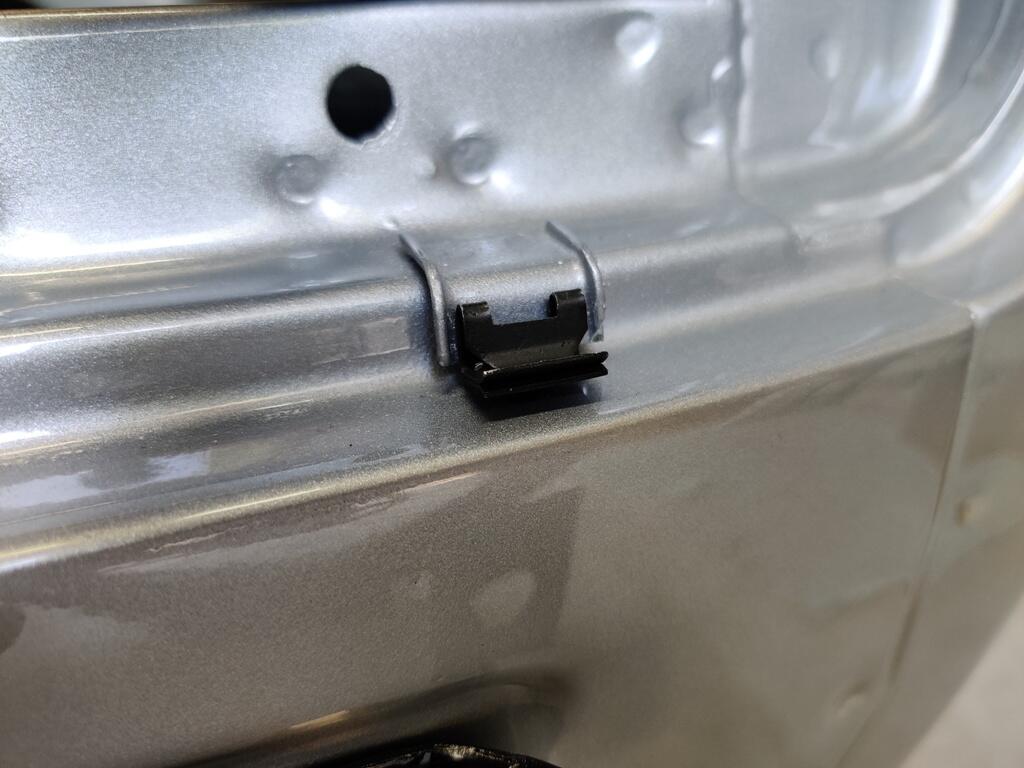
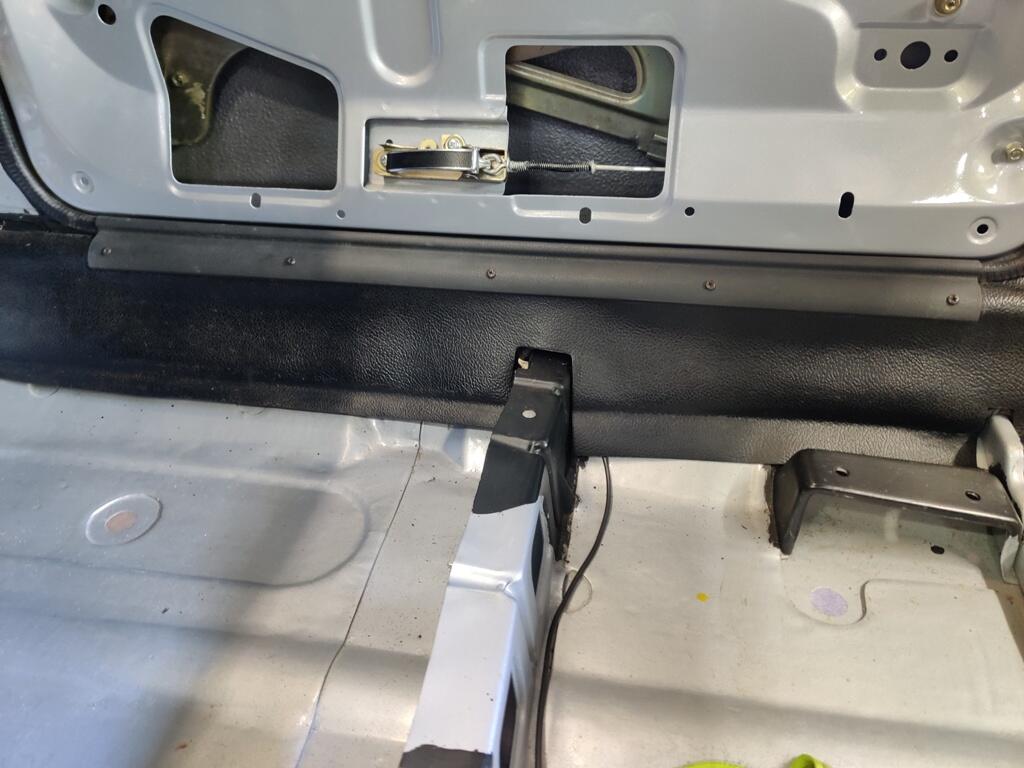
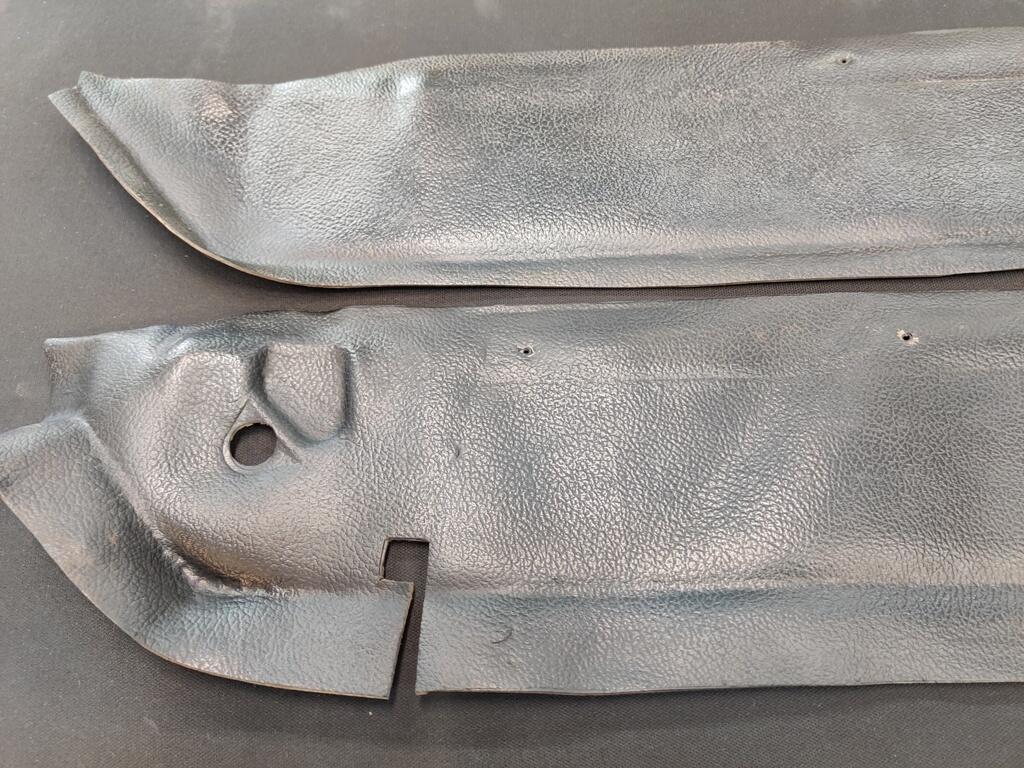
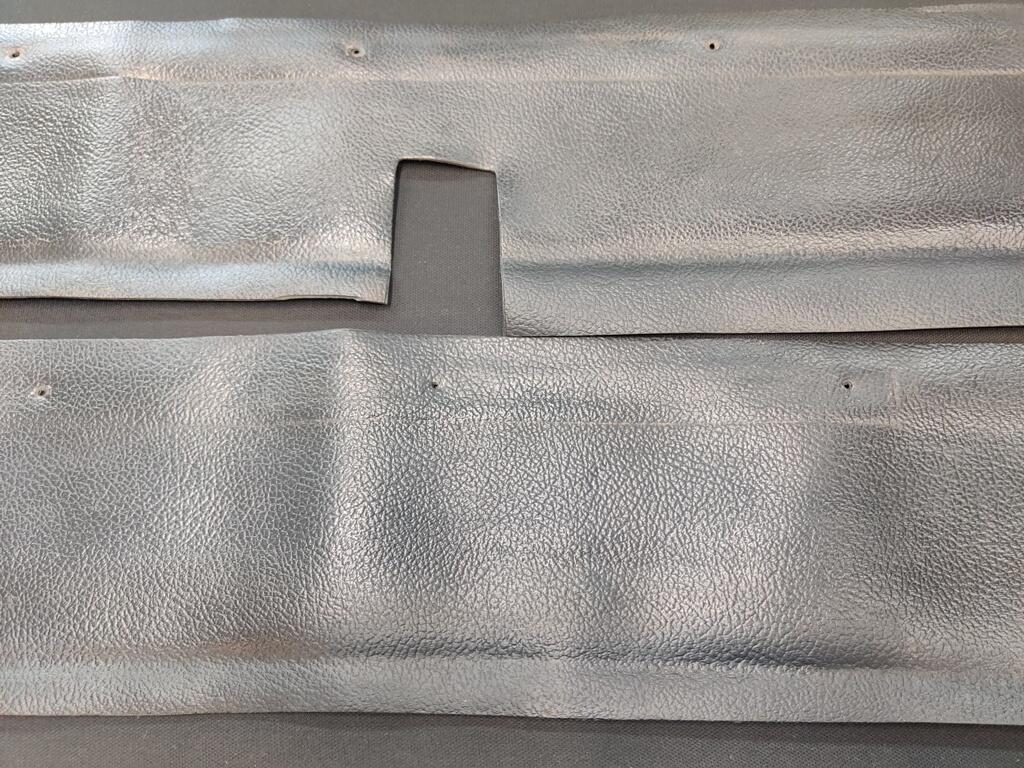
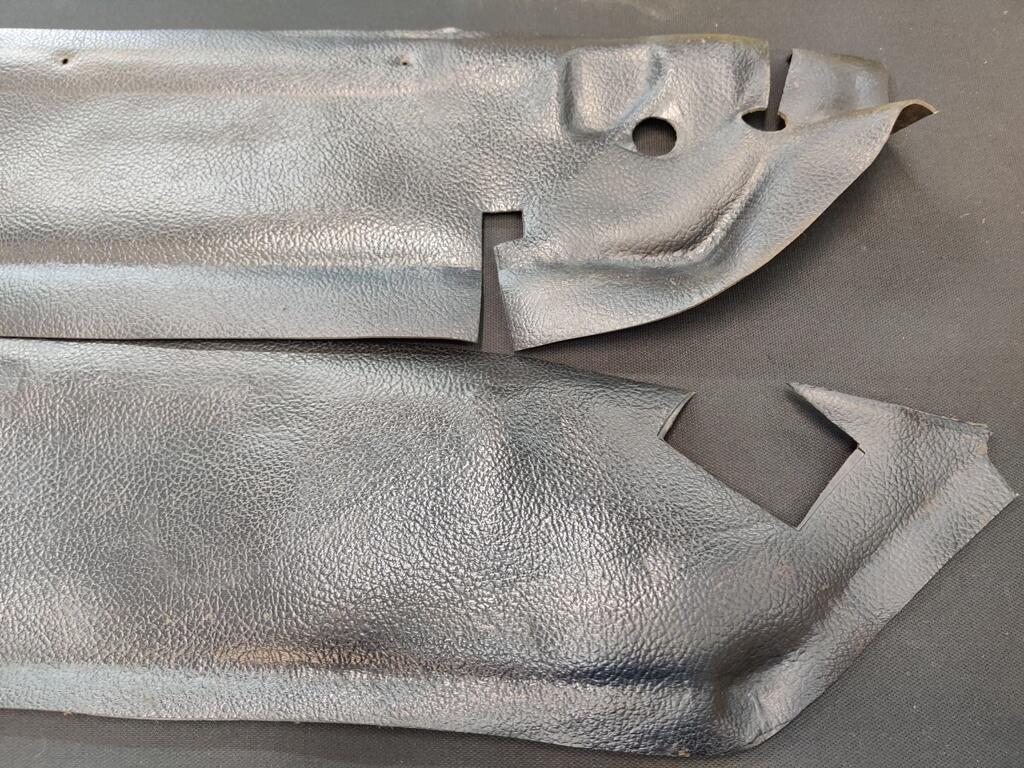
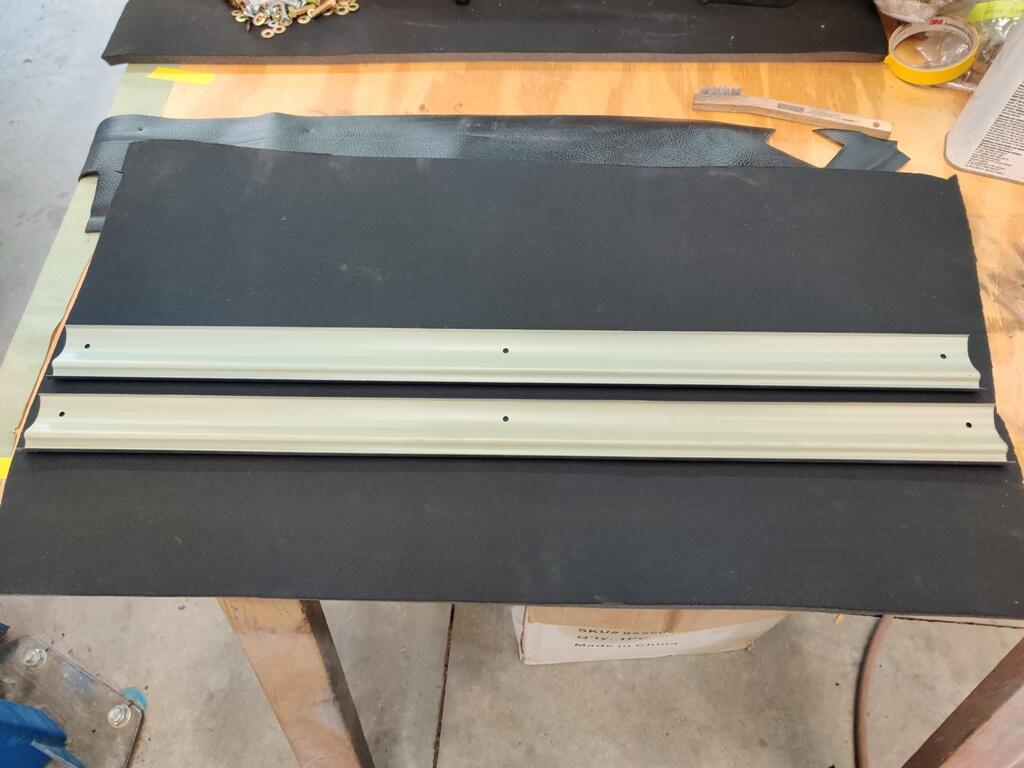
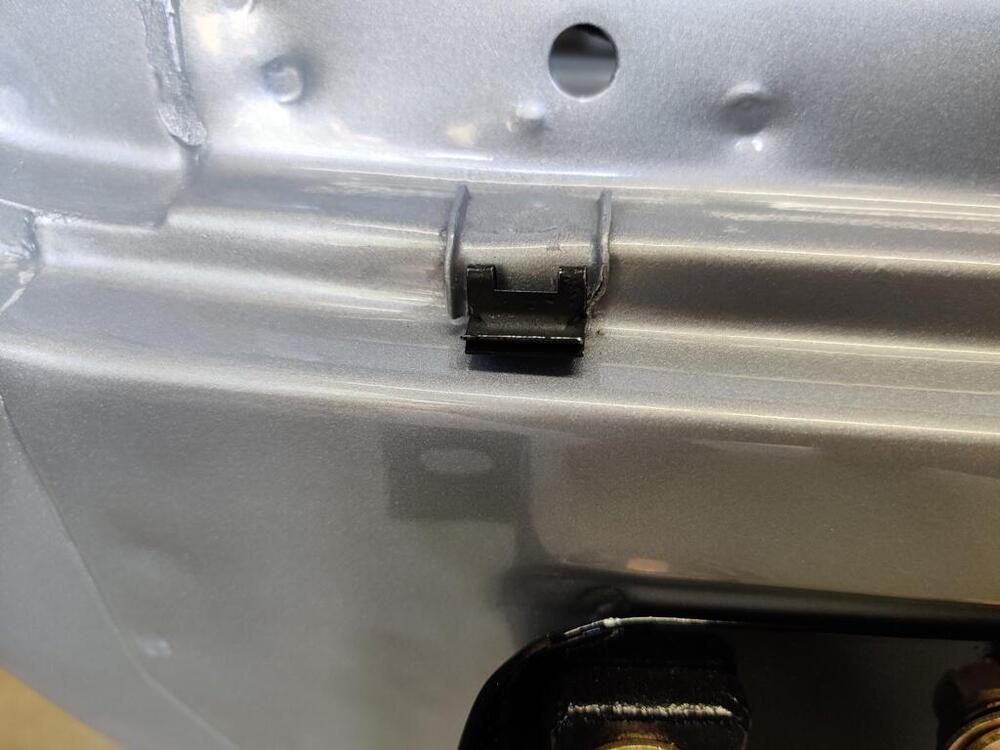
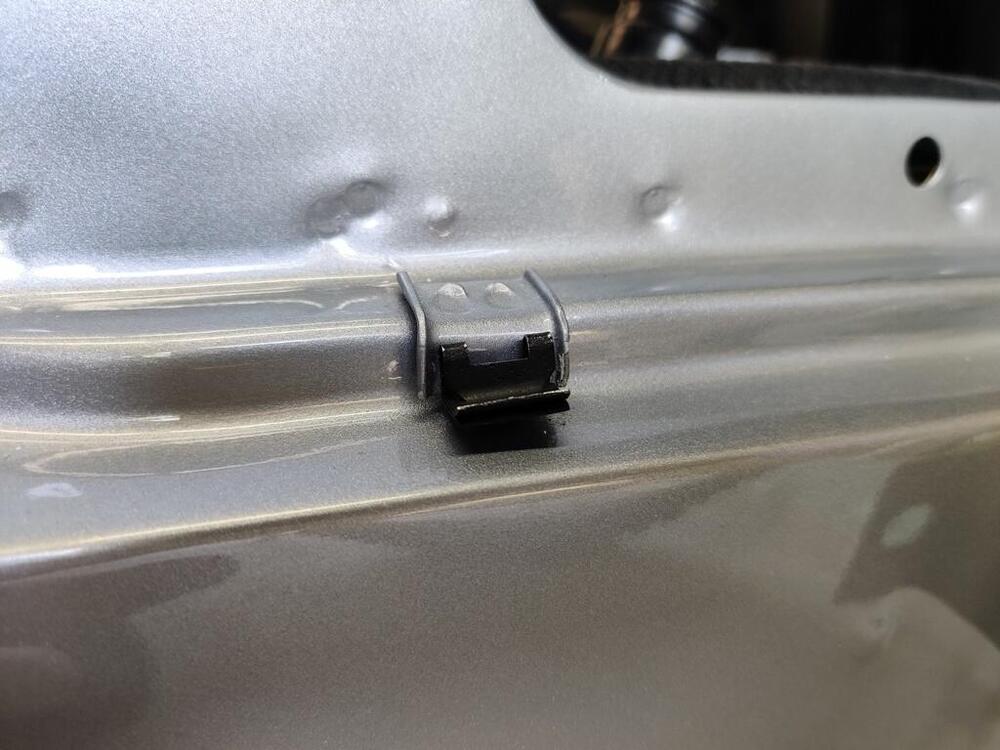
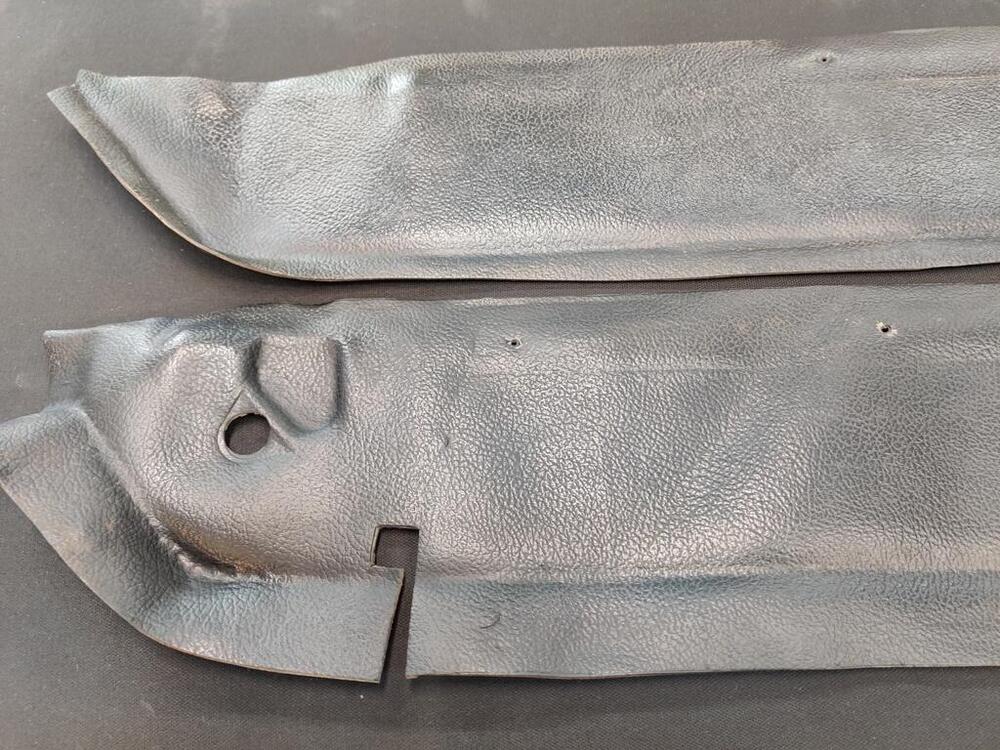
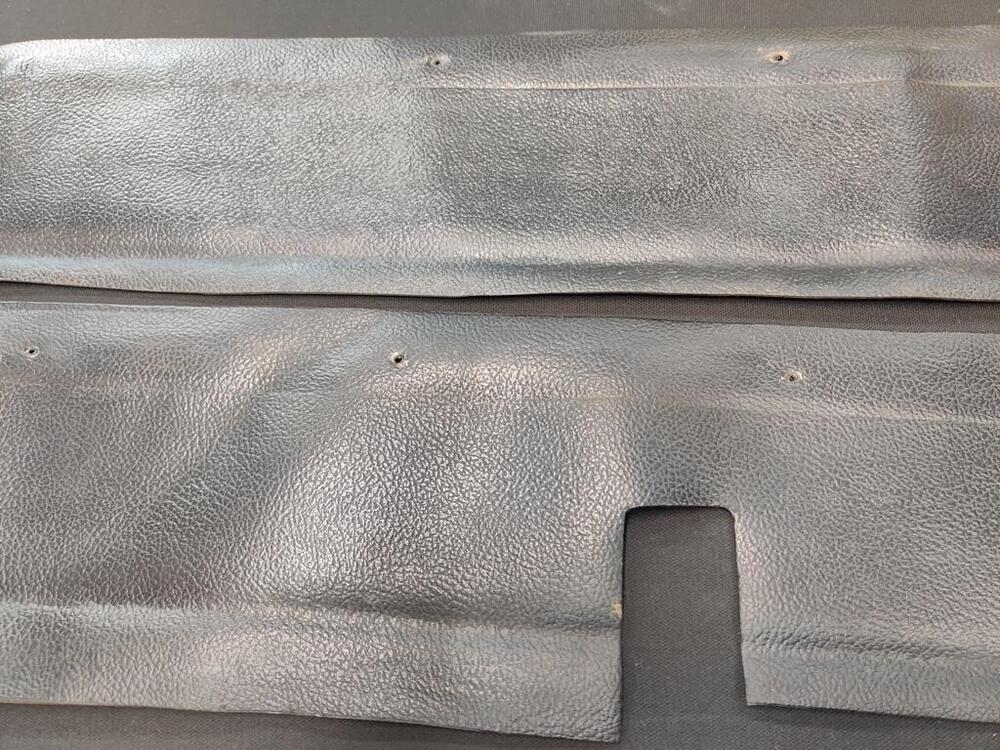
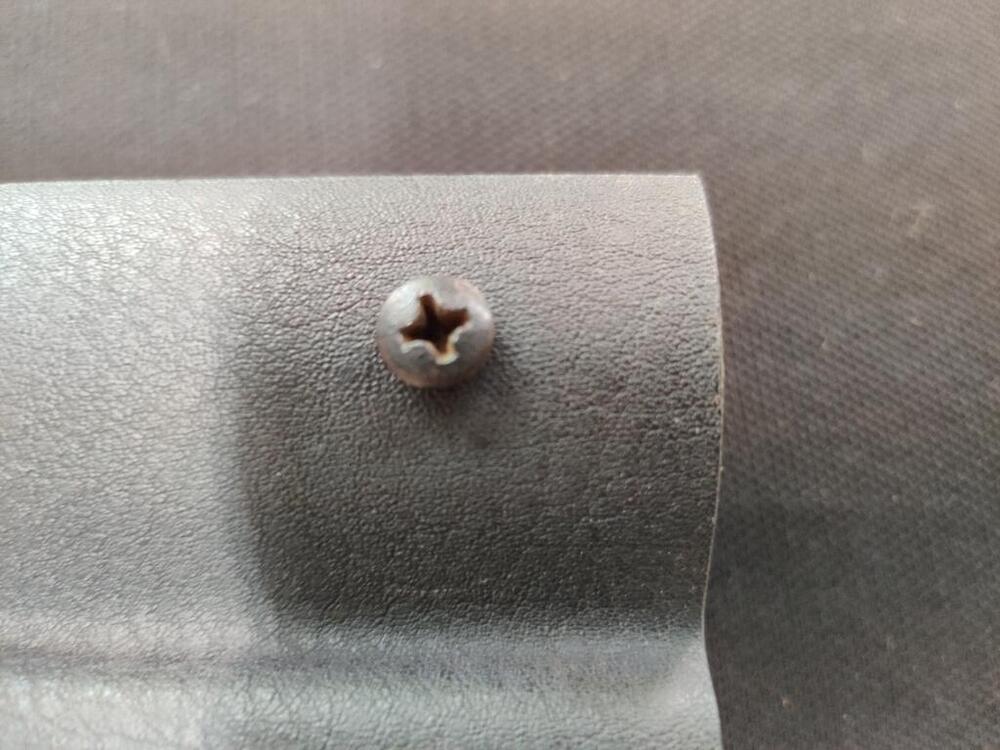
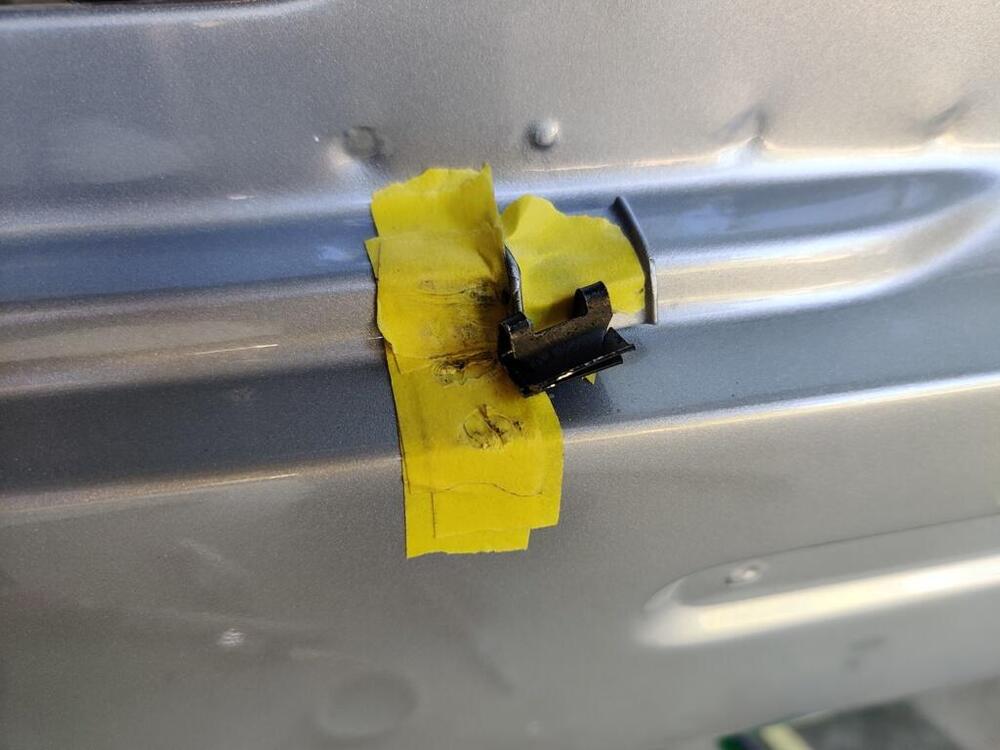
Nice! I think aftermarket support for these cars is at its zenith. My clips were nearly rust free, so I glass bead blasted them and had them re-plated in black. Once I got the first one on, the next three went a lot easier, but key was sliding them on from the edge that was not as tall. A bit of damage to the edge occurred on a couple of them. If I were to do it again, I'd grind down the height of the lip on the part that is spot welded to the body - just the bottom 1/8 of an inch and just to make it half the existing amount of edge height. Doing that would be sufficient to make slipping the clip on from the slide easy. I spent a lot of time with adhesive remover and a wire brush getting these vinyl trim pieces cleaned up. A few pics of the install of the right side vinyl covering on the rocker: The right side is only partially installed. I put contact adhesive along most of the top of the rocker panel (for about an inch wide inside the weld flange). Then I stretched the vinyl lengthwise as needed to get the 5 screw holes to align with the holes in the vinyl. I installed the new threshold as well. I have to add some more contact cement on the front and back portions. The NOS thresholds had 3 holes instead of five. I added two more to match what the car came with. I do not know which hardware was used to hold these thresholds in place. I found only 6 of these screws in my miscellaneous hardware. Are these correct? The taper head makes me think not.


-
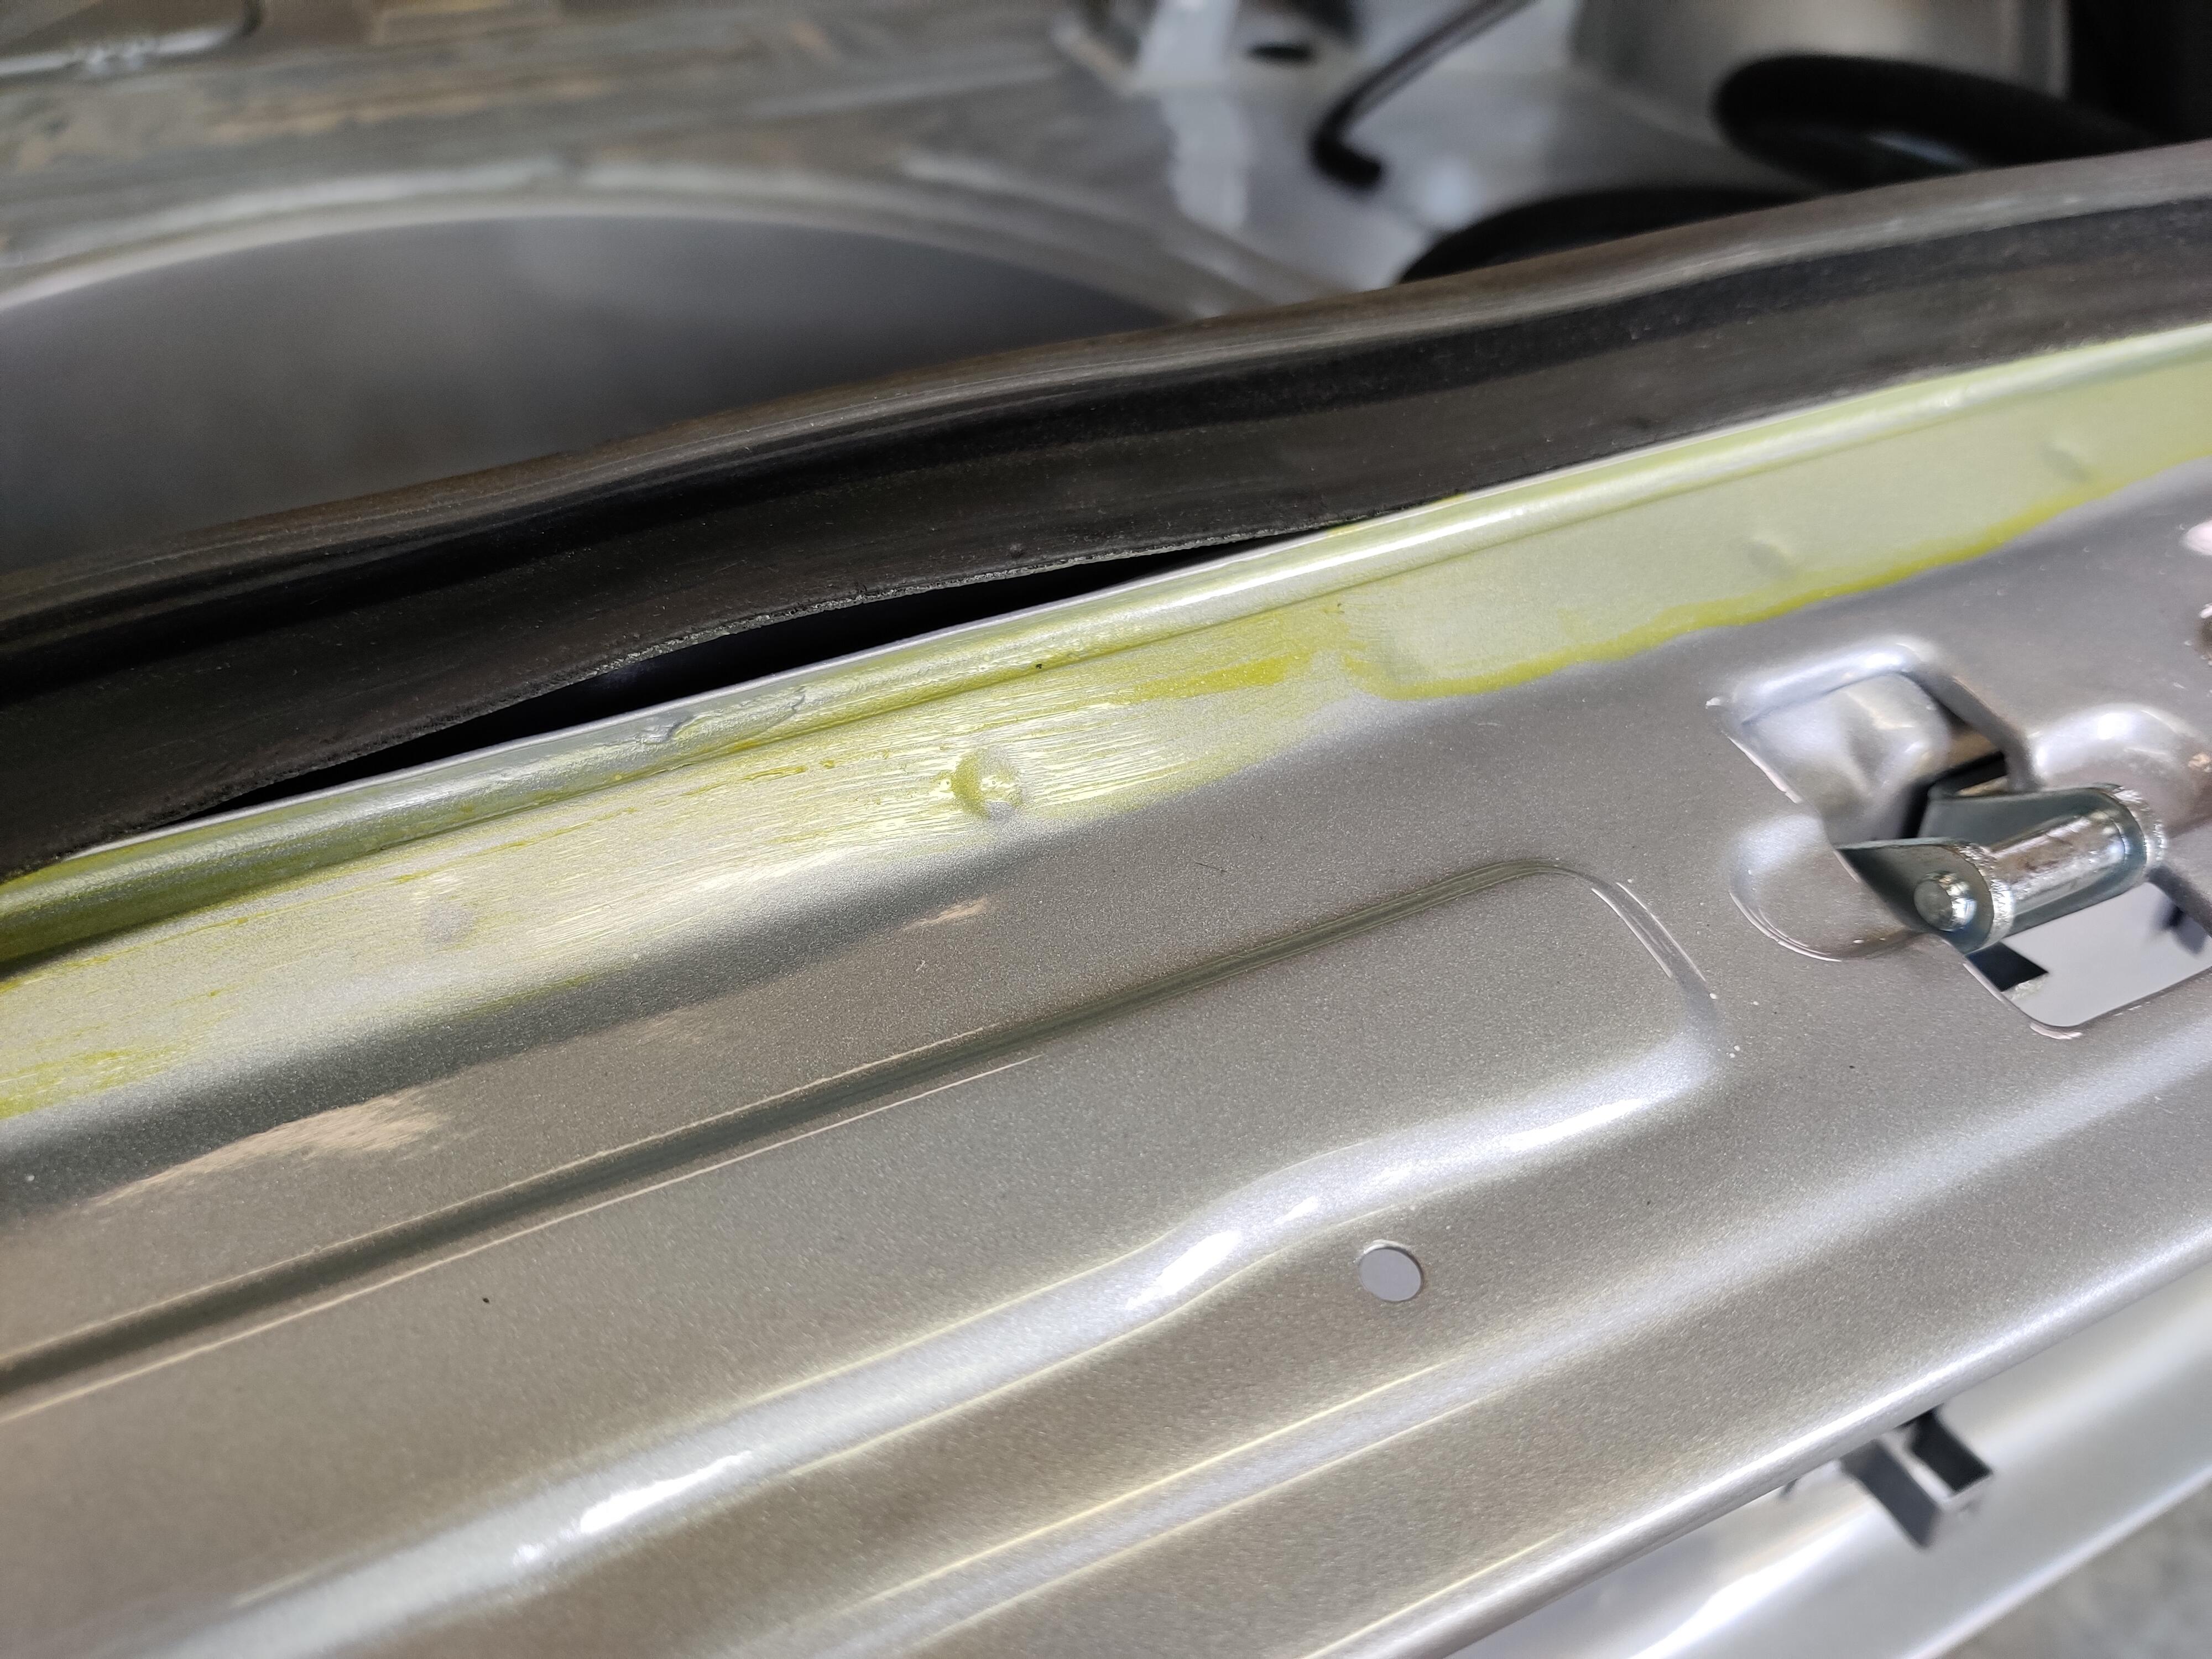
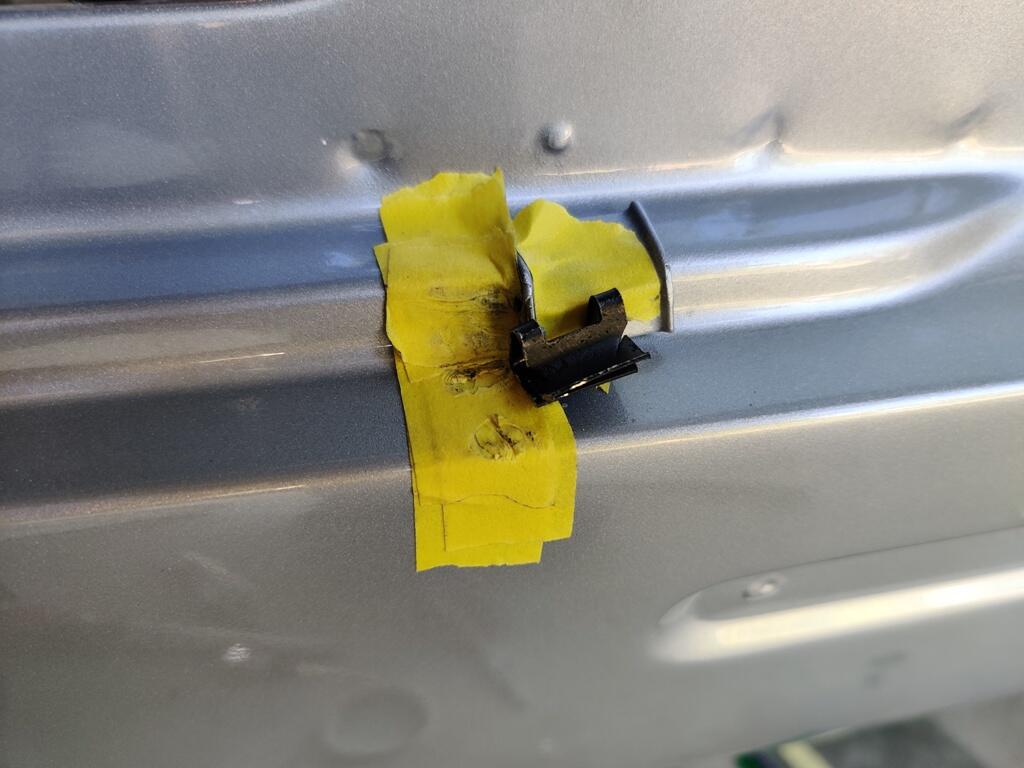
I am not getting interference there... at least nothing I can feel. Is it hitting the rubber, or the metal strip of the plate that goes over the rubber. The metal plate is thin and easily bent. If it is that which is interfering, you could try tapping it down with a hammer and a punch. If a lot of sealant is poofing the rubber up, causing the interference, then yeah, you may need to put attention to removing that.
-
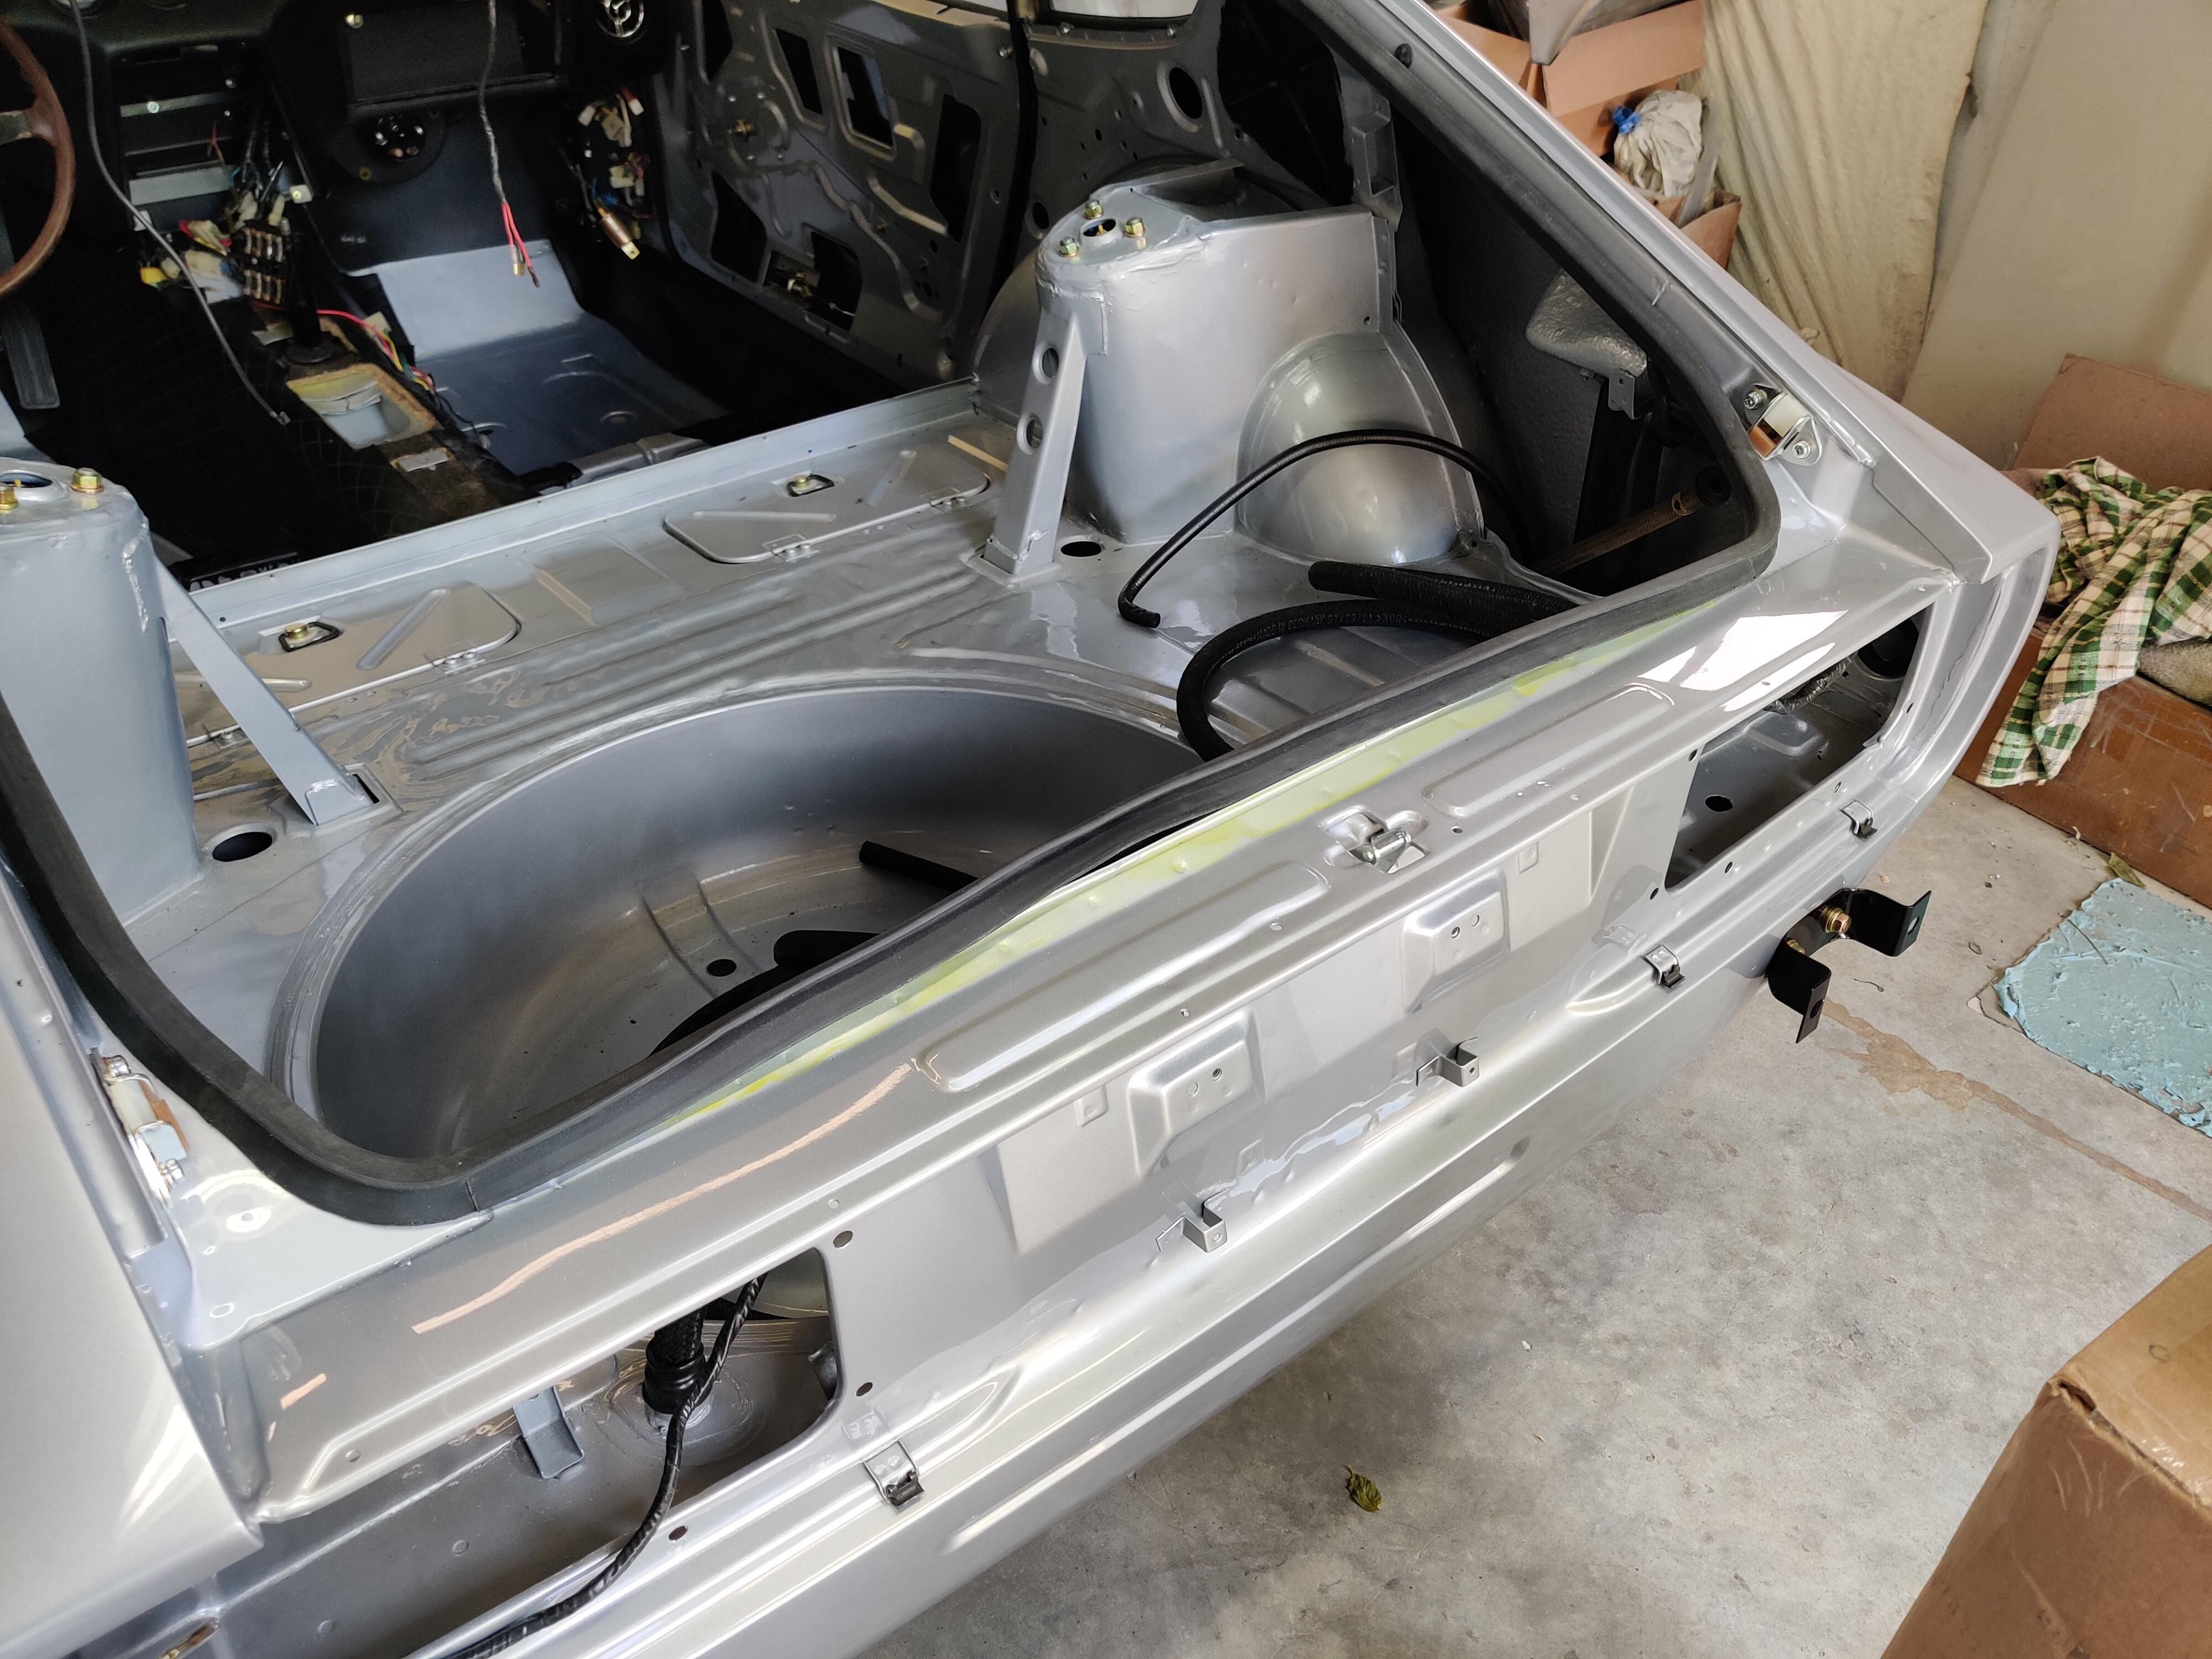
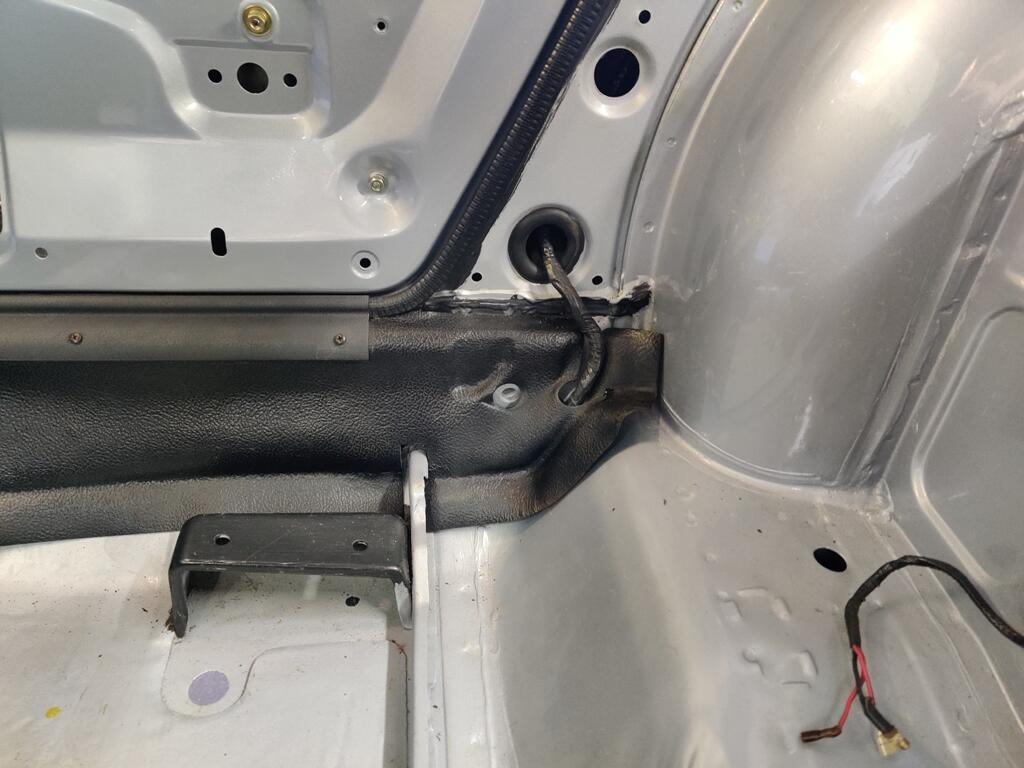
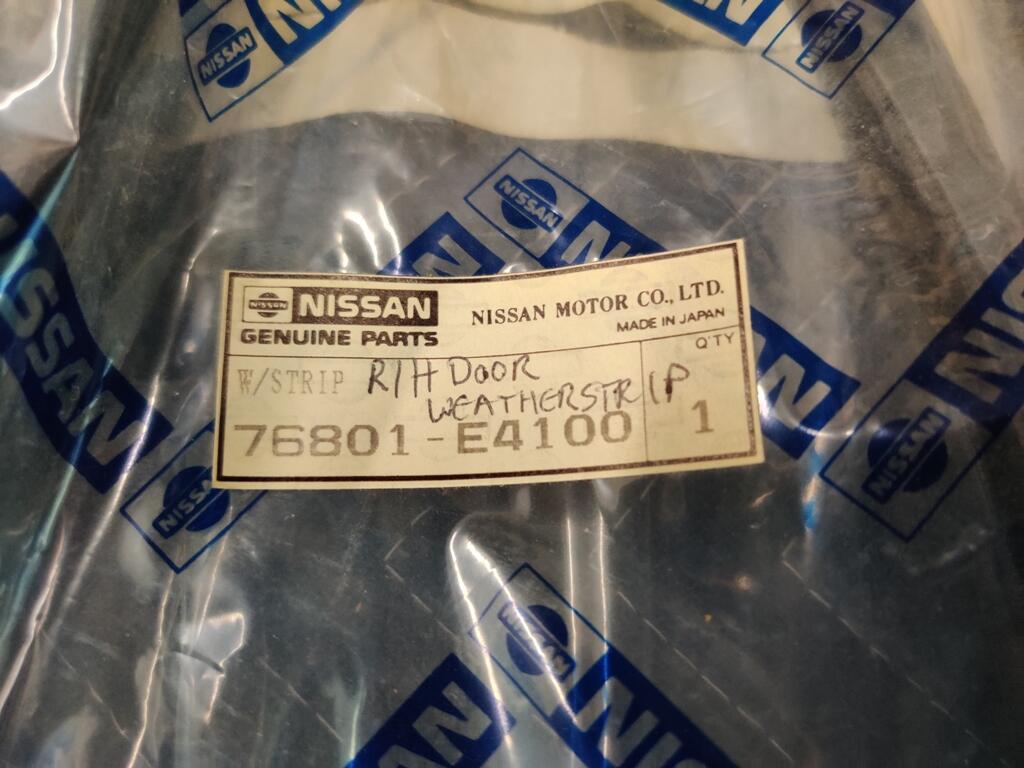
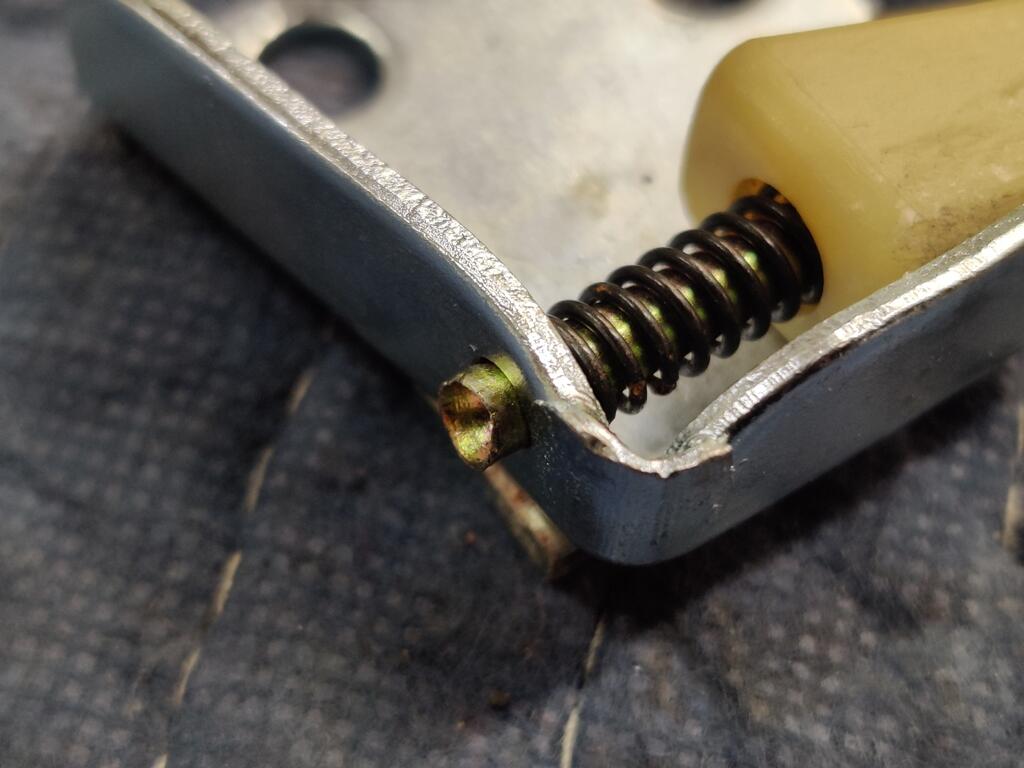
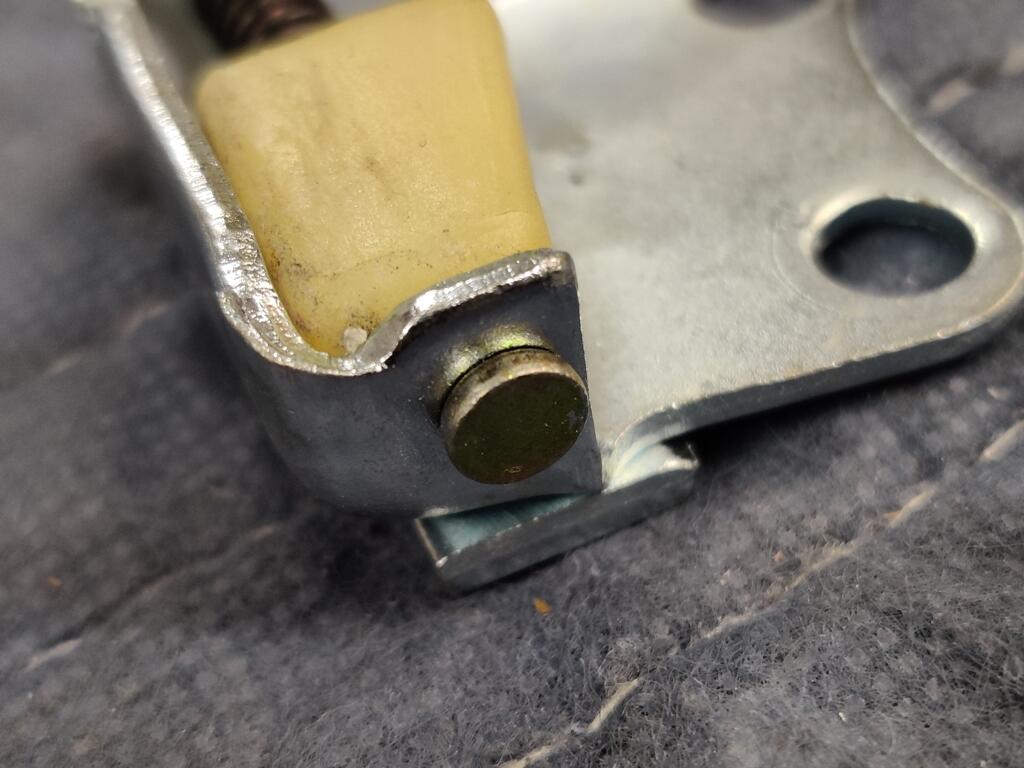
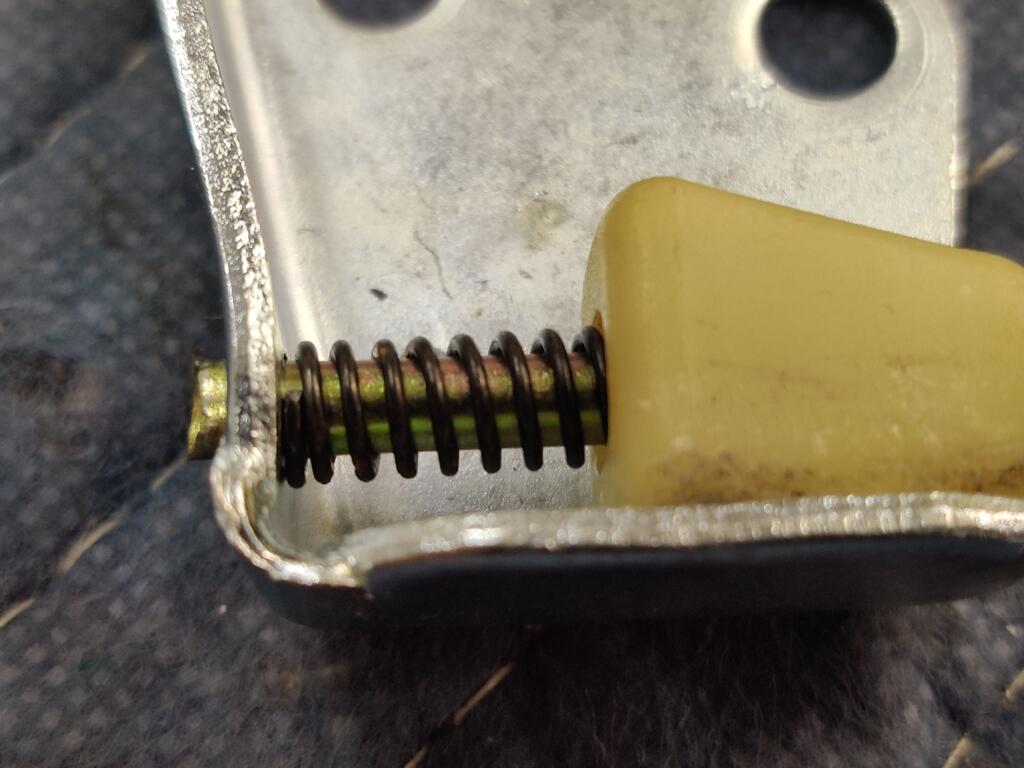
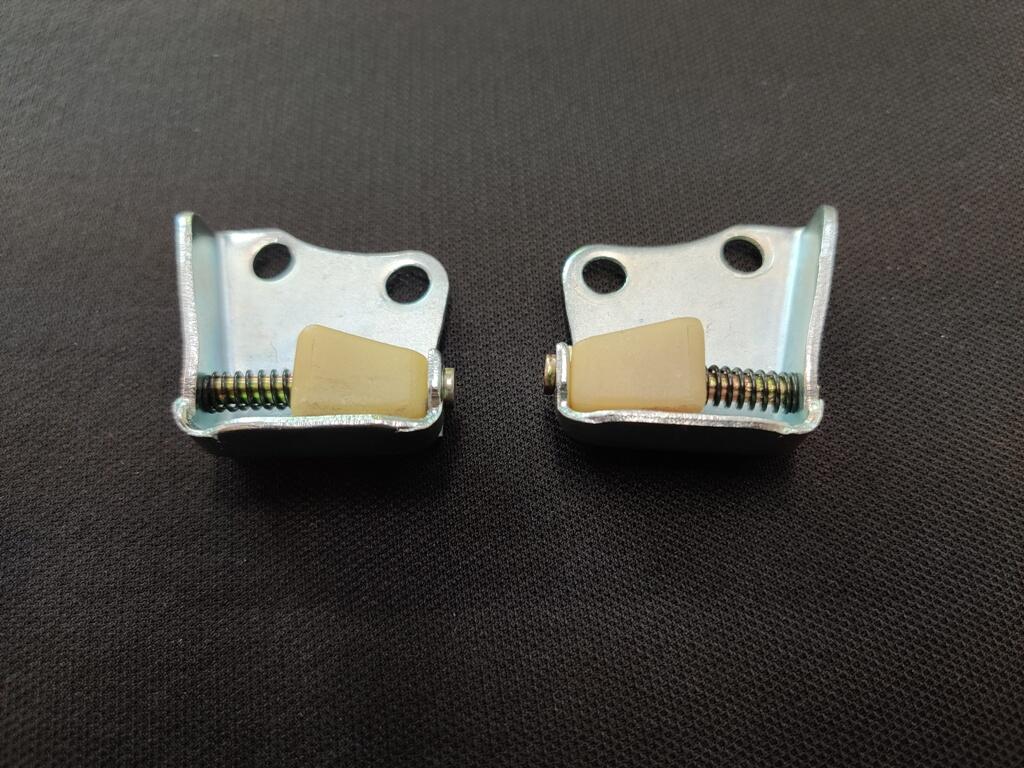
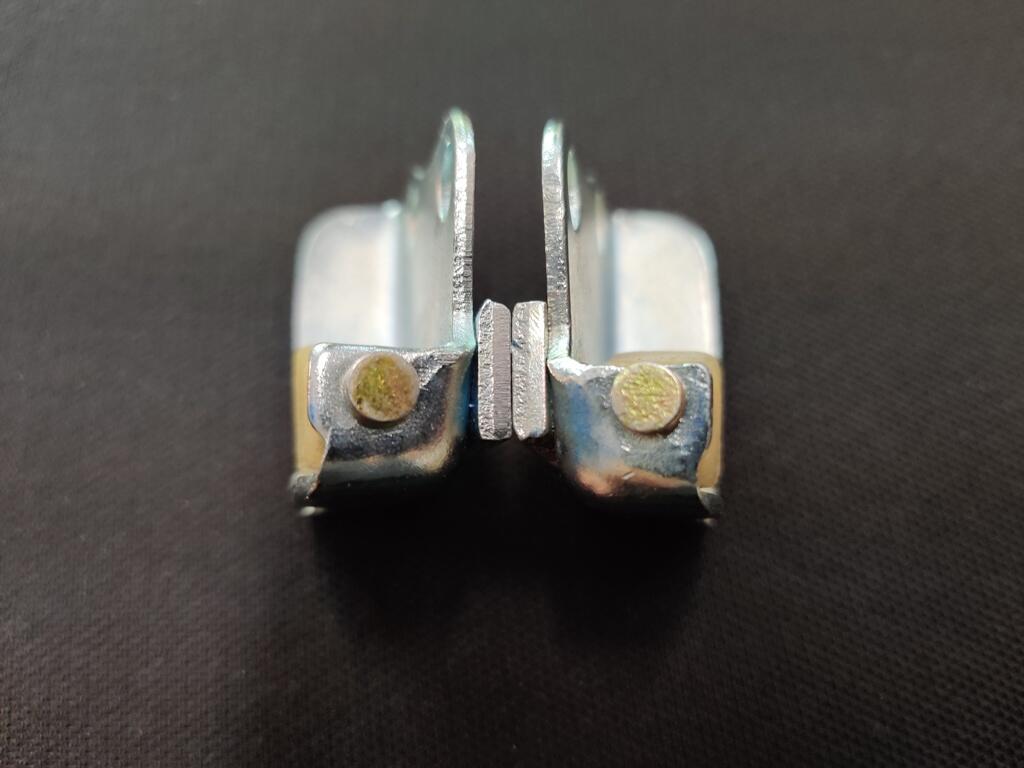
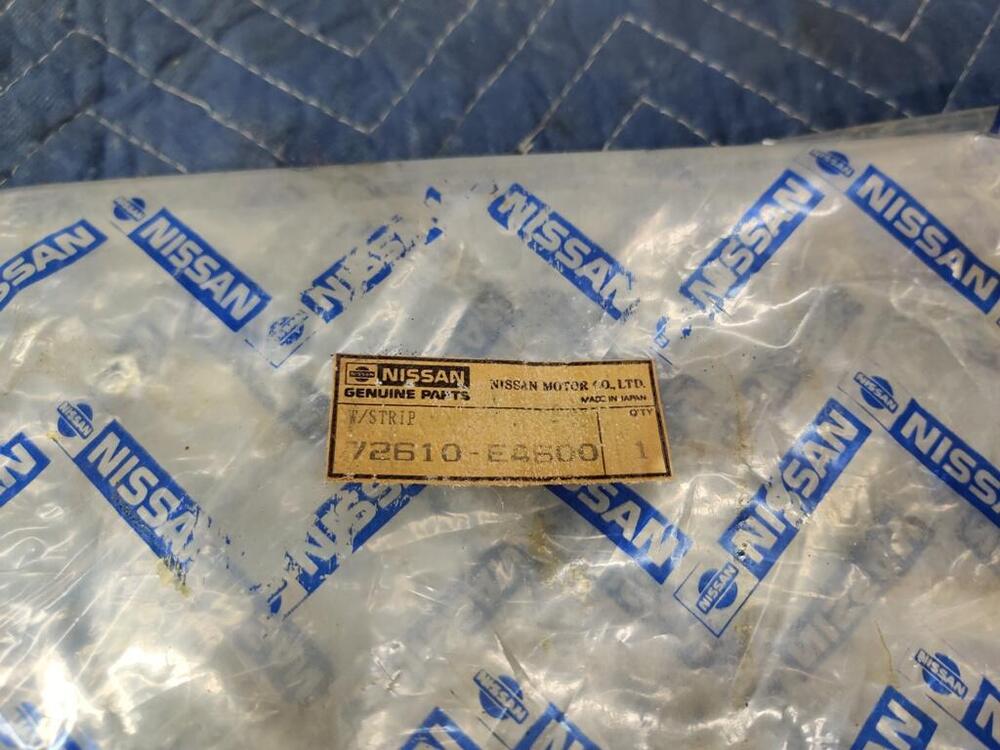
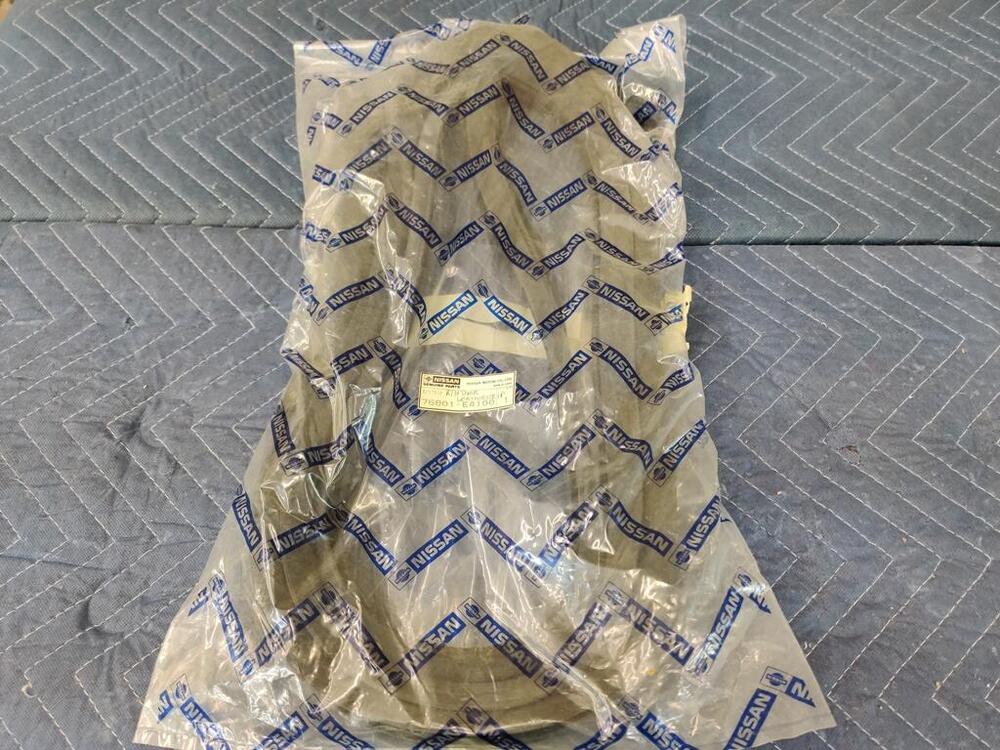
Recent progress included spraying the inside of the rocker panels and the upper front area of the quarter panels with Eastwood internal frame coating, routing and fishing the rear wiring harness through, an installing both door weather strips. These NOS weather strips were purchased by the previous owner of the car, so they have been sitting in these bags for a very long time. They are in great condition though, and it is nice to have original parts like this. One thing I have learned is that adjusting position of strikers and latches until confirming the door shuts properly and aligns properly with the body is best done without the weather strip installed. I did this before installing the weather strips. And I added the "dove tails" afterwards as well. I took out the rivets in these and had the plates, springs, and rivets re-plated separately. I also swapped in a plastic piece from a passenger side to replace the worn one that was on the driver side. I wasn't sure I would be able to reuse the rivets, but it seemed to go well. What didn't go well was trying to install these high strength steel clips for the tail light finishers on the body. This is how far I got one of them after about 45 minutes. I knew it wouldn't be easy to put these back on because it wasn't easy to take them off. The lips on the sides of the tabs which are welded onto the body make it very difficult to slide the clips in place. They can't be slid on from the underside. Looking closely, I was able to see some of the side lips are shorter than others. So, for the clip above, I switched installation to be from the right side instead. My recommendation is to either not remove these, or if you do, modify the lips on the tabs. They don't need to be tall to keep the clip from sliding off the tab. With short side lips, installation of these clips (from the side) is not that difficult.


-
I think the bits of debris (sand) get onto the rubber roller and cause the scratches. It seems that all the door windows have scratches there. I dunno. Just guessing.
-
I set it aside to work on another day. Have to be in the mood to spend hours making little progress... which I don't feel like taking on often.
-
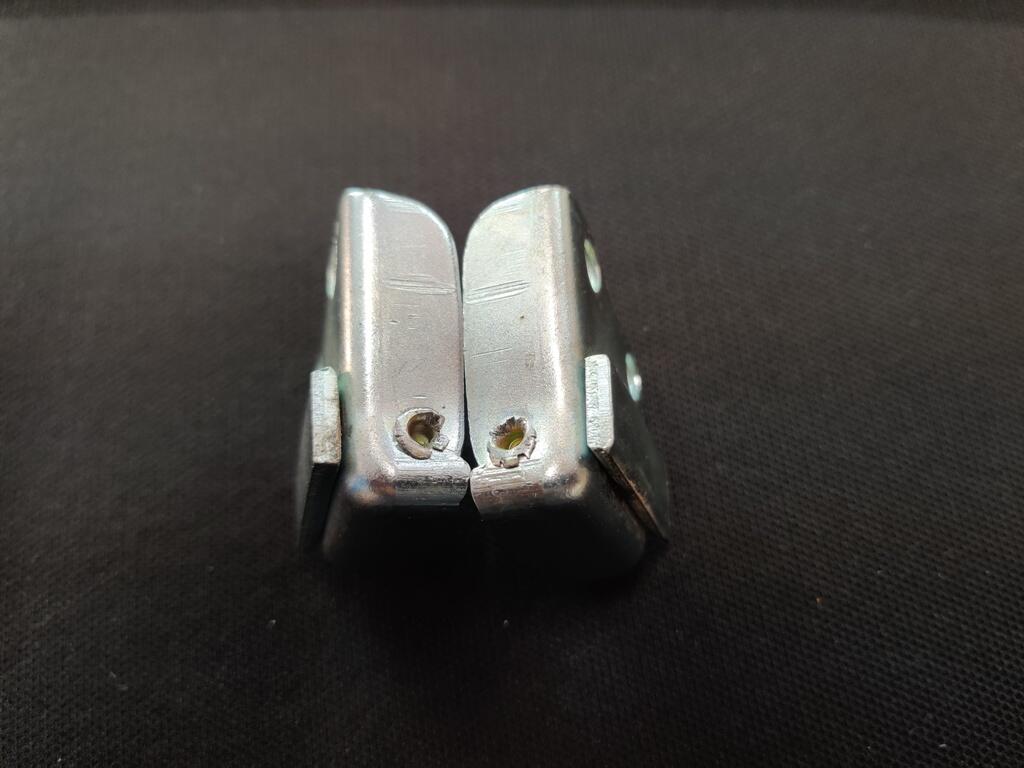
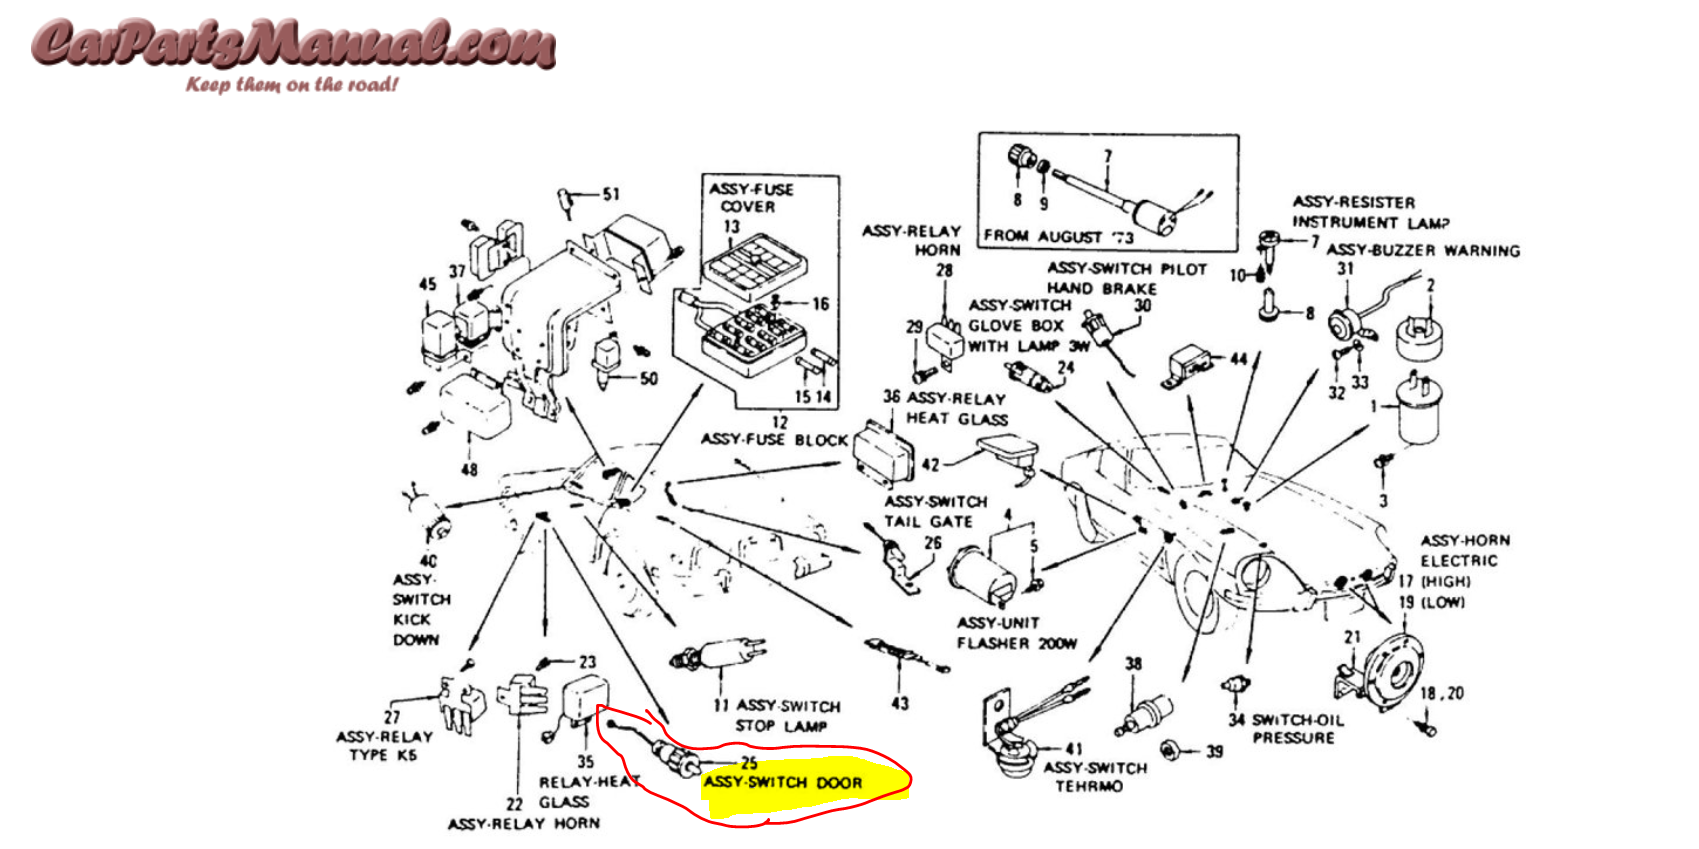
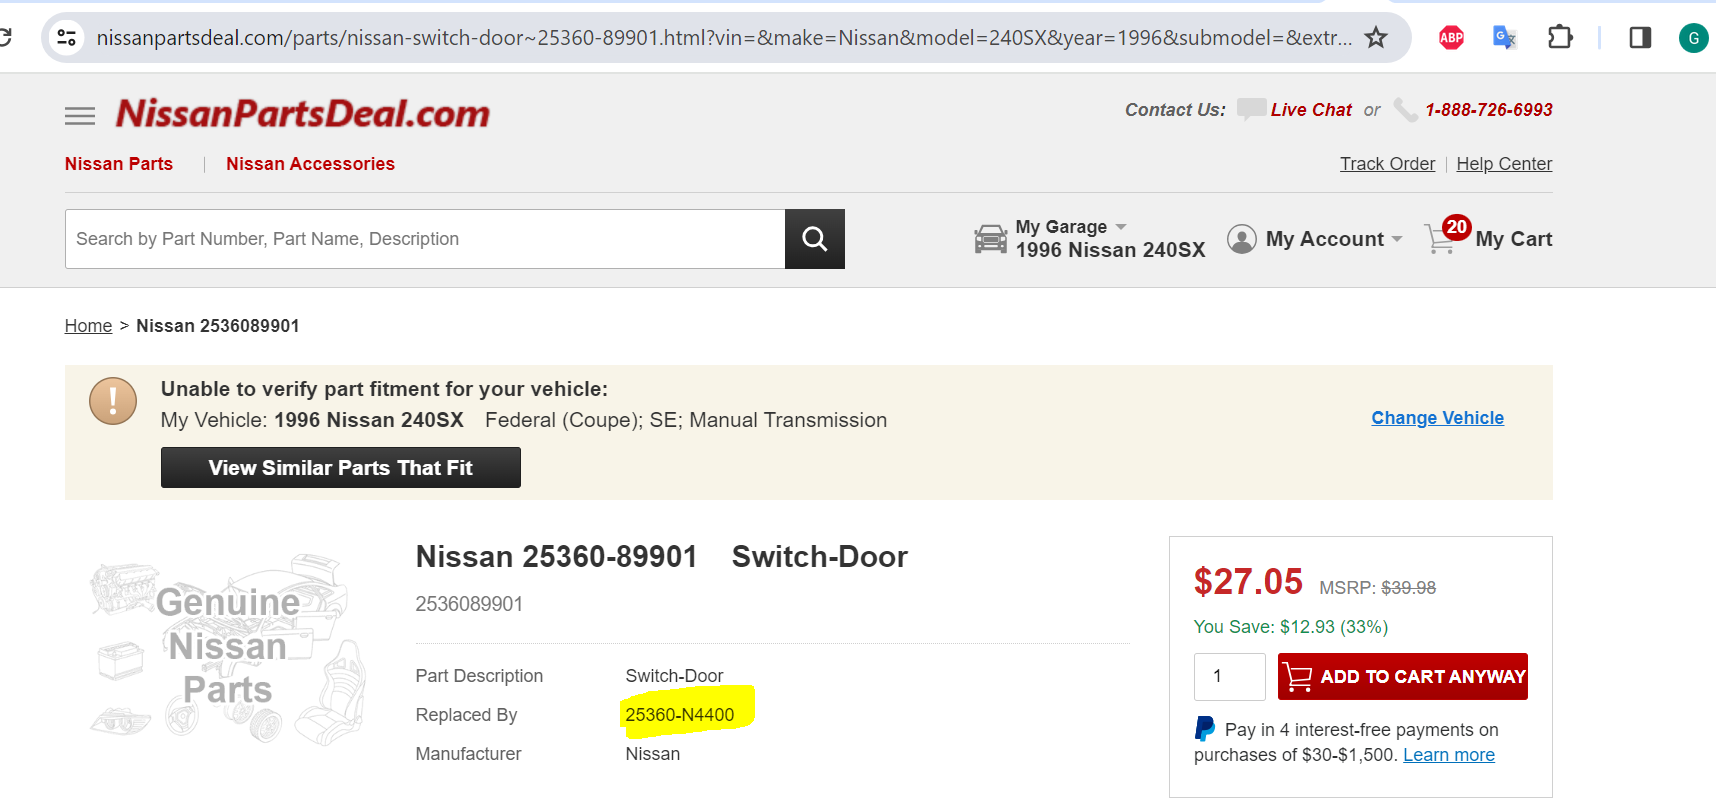
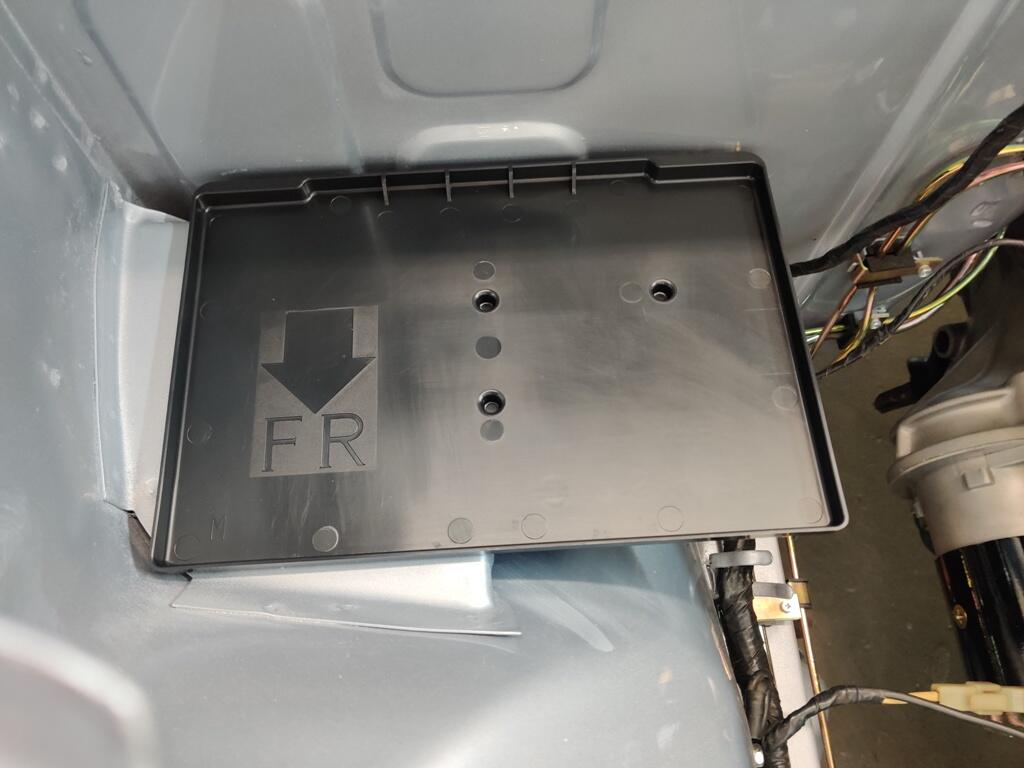
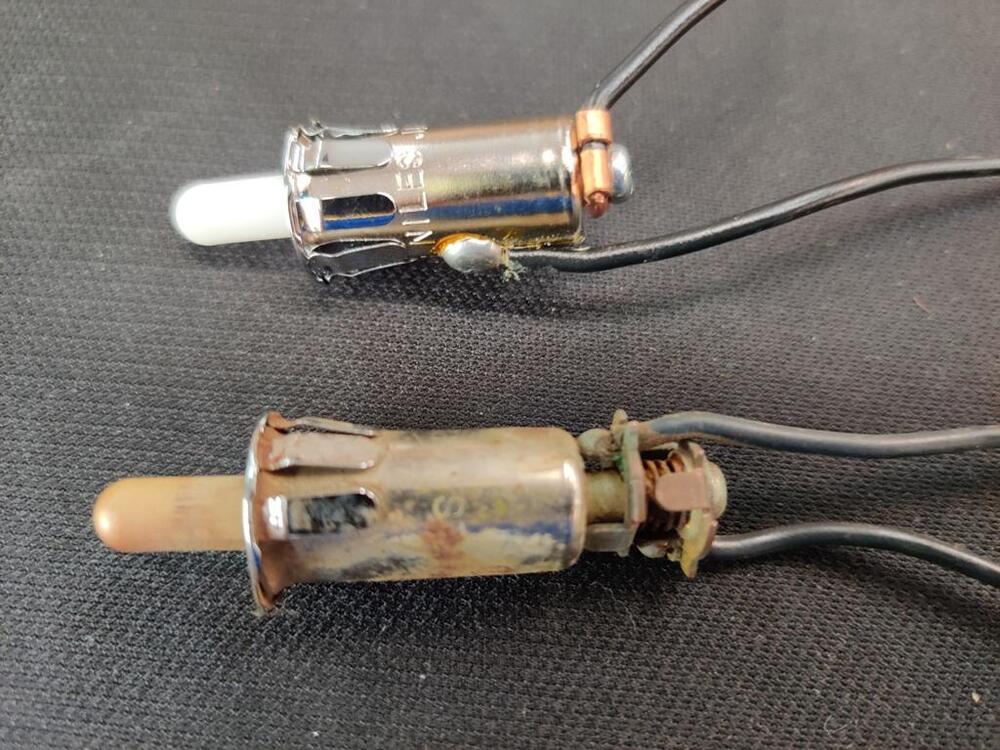
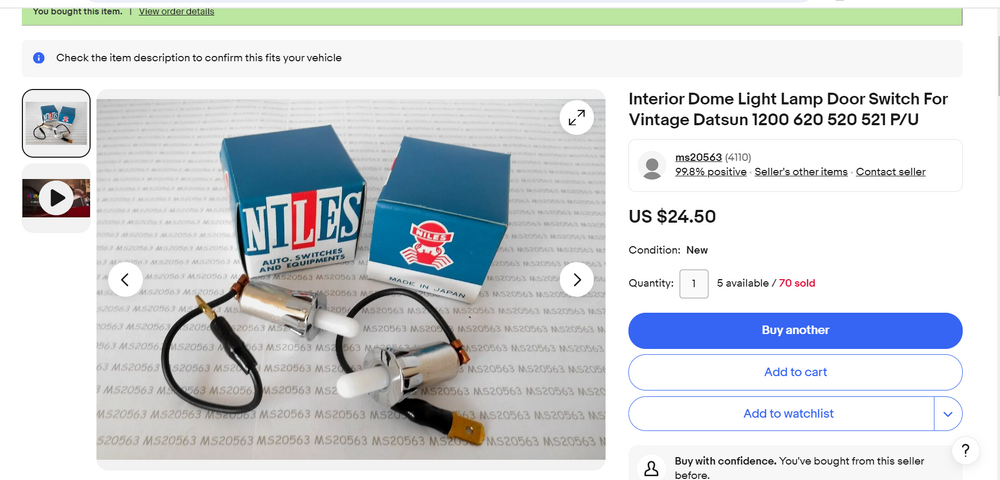
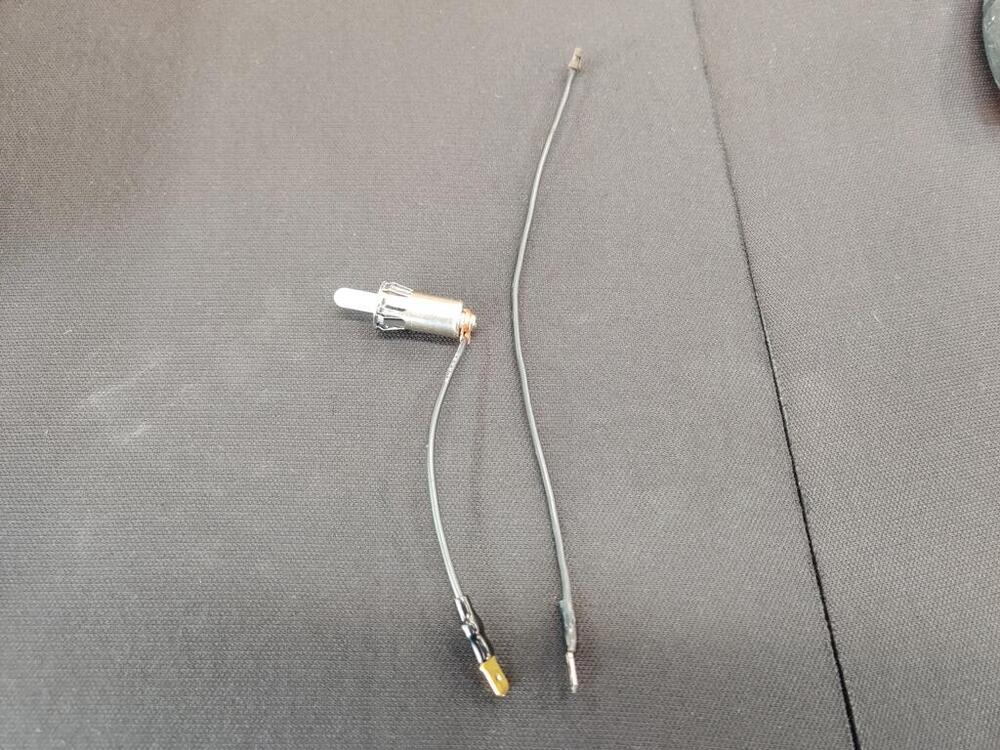
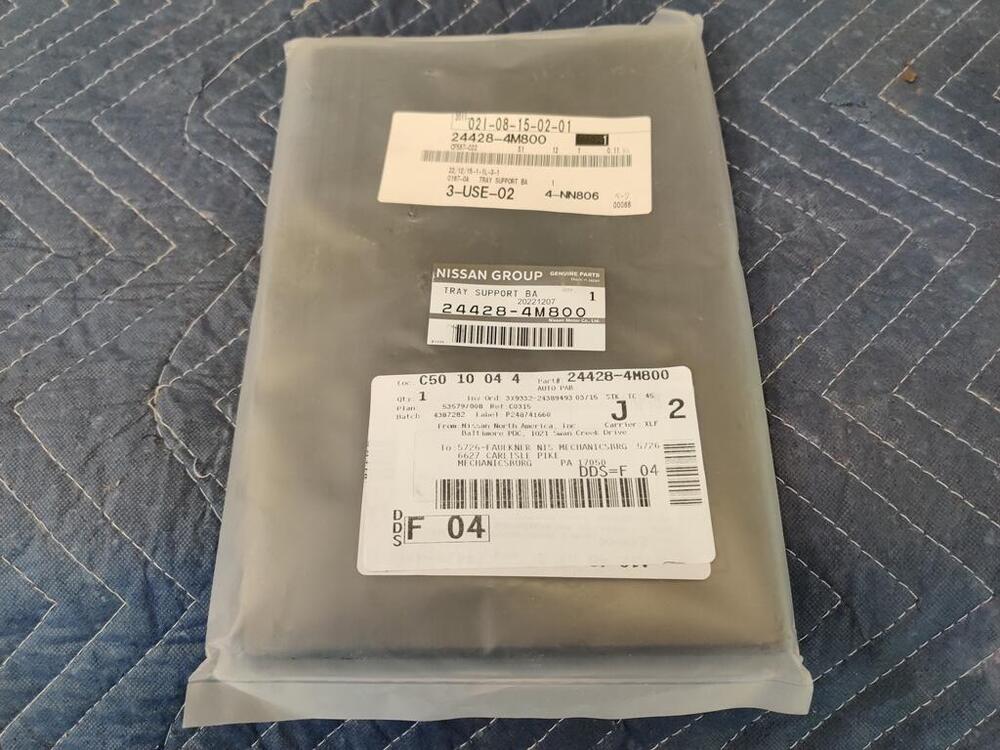
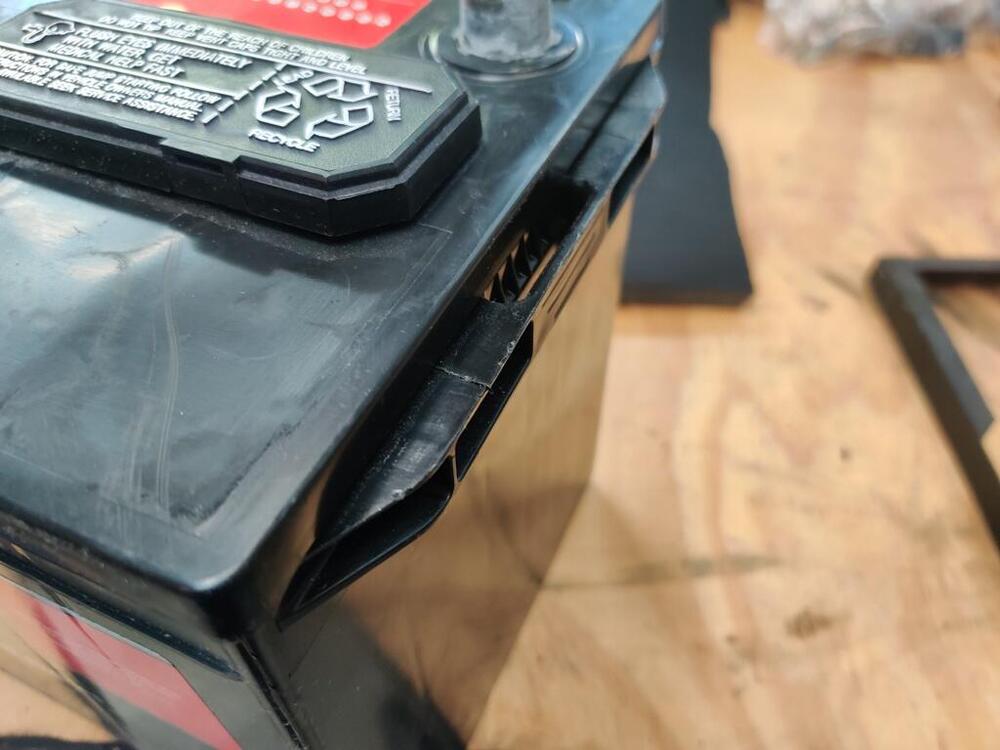
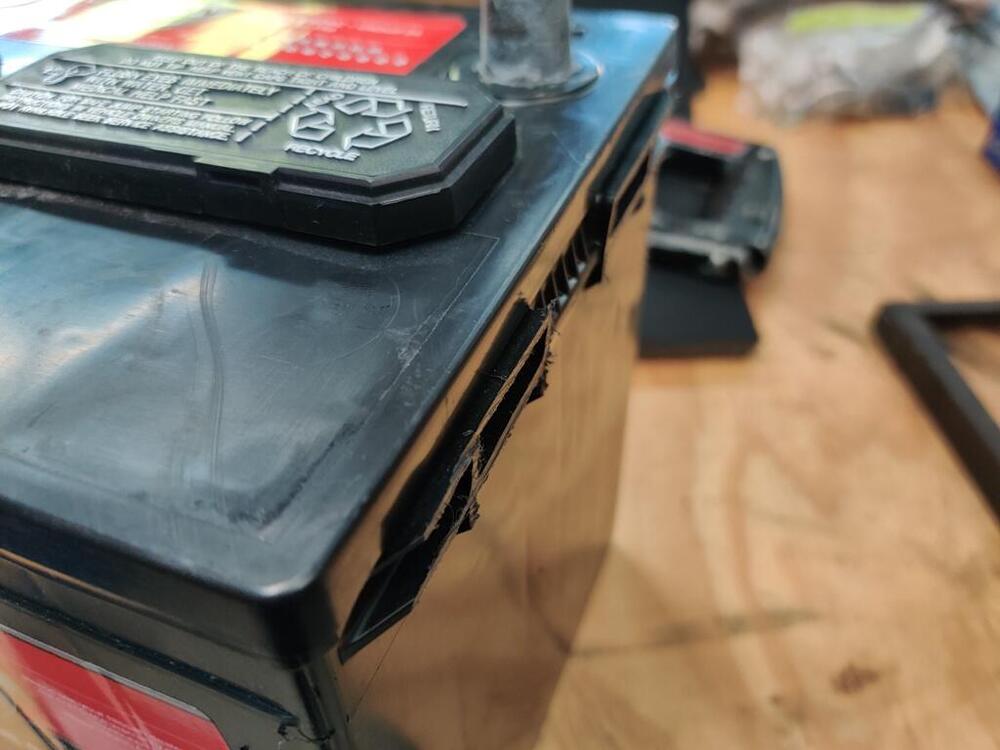
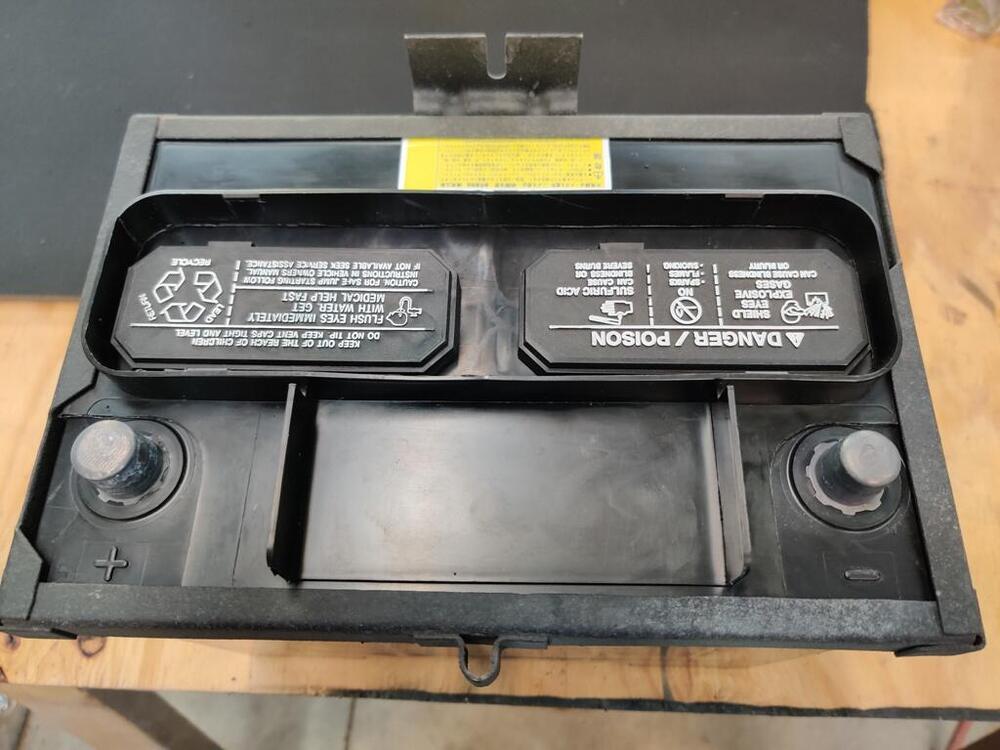
Here is an example of why you don't throw anything away, at least until you have a working replacement part installed - number 25 - assembly door switch (which I bought quite a while ago: The original part number (25360-89901) is the only one out of the thee listed for that part that is not discontinued. It supersedes to 25360-N4400: That new one is in the top of this pic - old, original left door switch is the lower one in this pic: They are... different. I haven't looked to refresh my memory, but I believe one of the wires is for the dome light circuit and one is for the door open "buzzer". The new switch has one wire that is soldered to the switch case - that is going to be a permanent ground. That wire is not going to work with either the dome light circuit or the buzzer. the plastic pin of the old switch is longer than the pin in the new one. So, it looks to me like I will need to either move the old pin and wires to the new switch (to make both circuits function as they should. Or, hook up only the one wire that is not soldered to the new switch case to the dome light circuit and leave the buzzer circuit unconnected. Right side switches are discontinued. I was able to find some similar "Niles" switches (pack of two) on eBay: In this case, the wire was shorter than the original: So, I cleaned up the old one with a wire brush on a dremel and swapped it to the new switch: I also unpacked the new battery and tray and the new, related reproduction parts I got from Steve at 240Zrubberparts.com: I had to remove the handle from the battery. And for the battery frame to fit, I used a hack saw to cut part of the plastic (that the handle clips into) off of the sides of the battery. This third pic shows the correct orientation in the car (terminals at the front and secure to firewall in the back), correct?


-
I thought your car was silver? You have more than one?
-
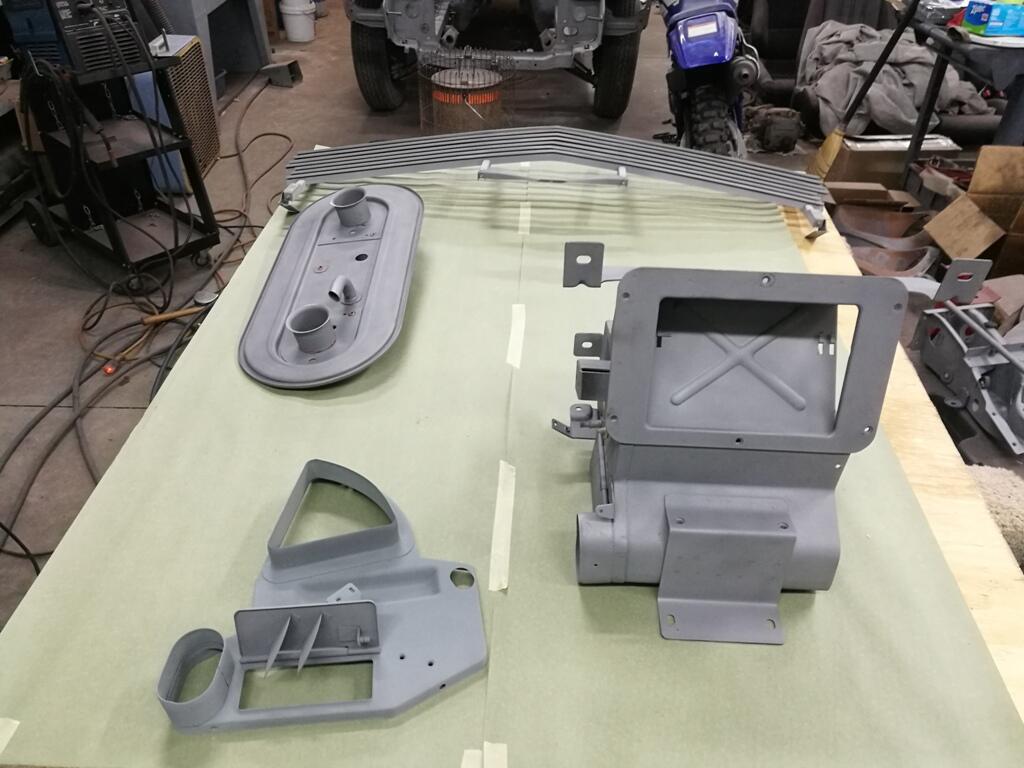
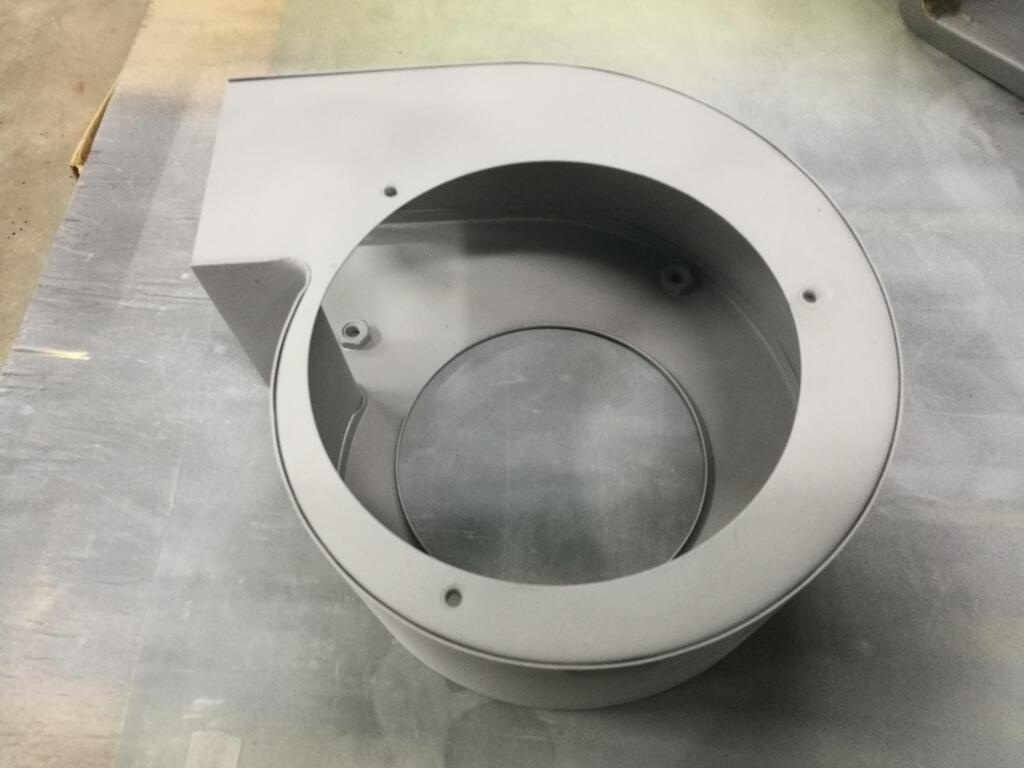
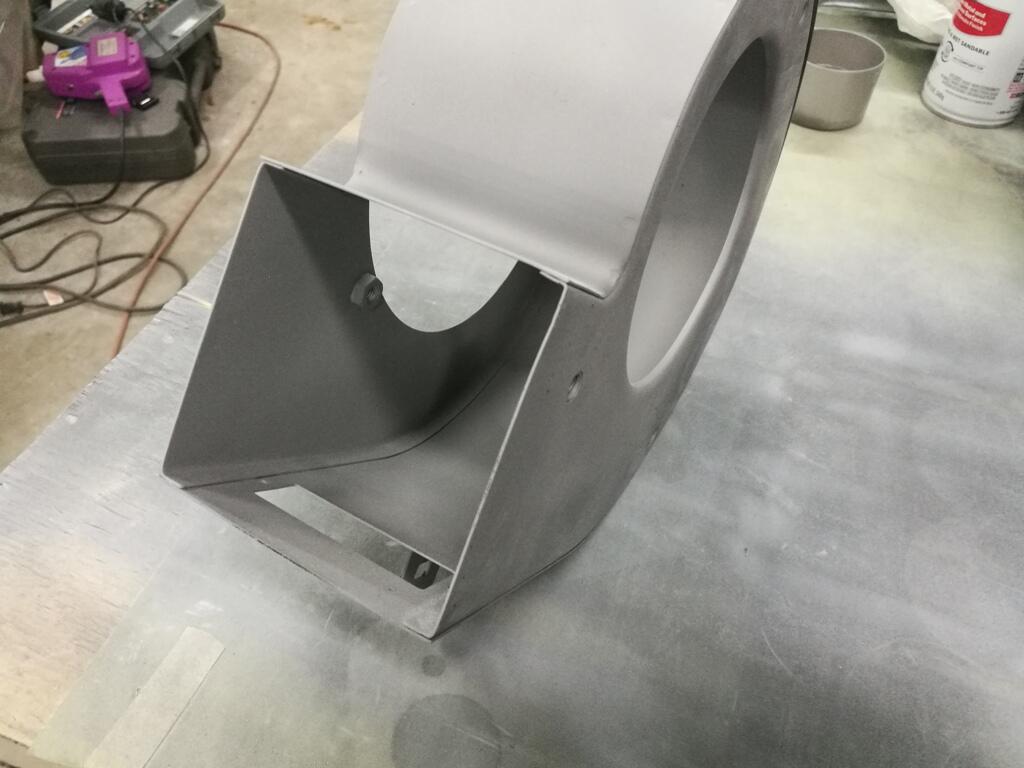
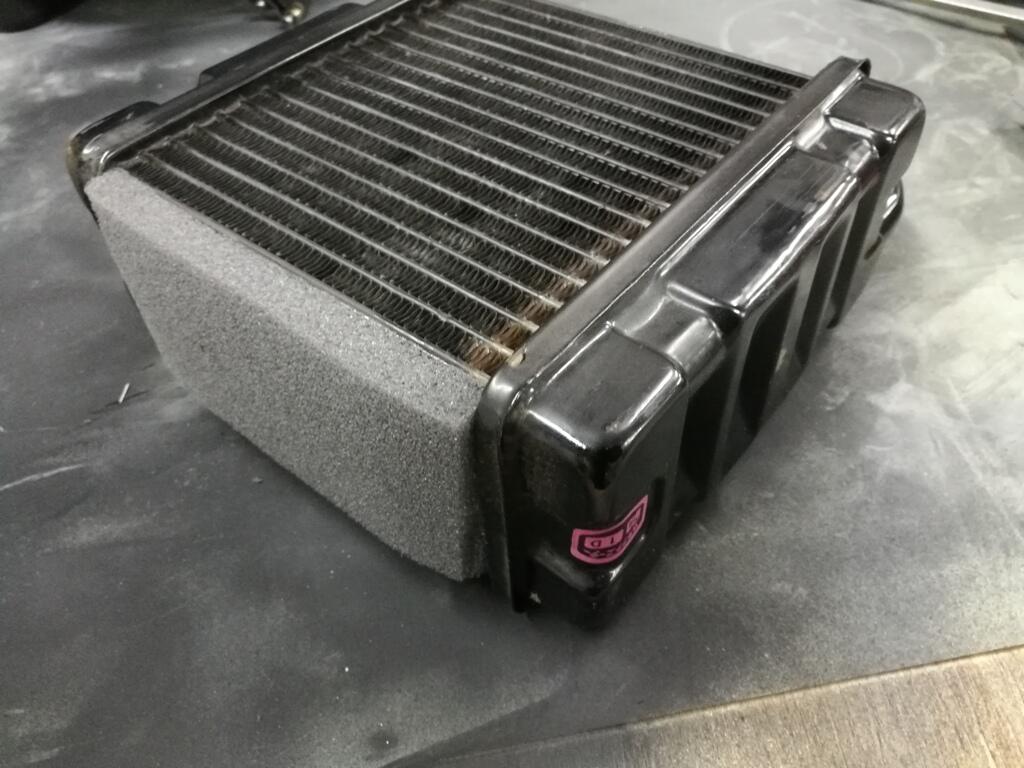
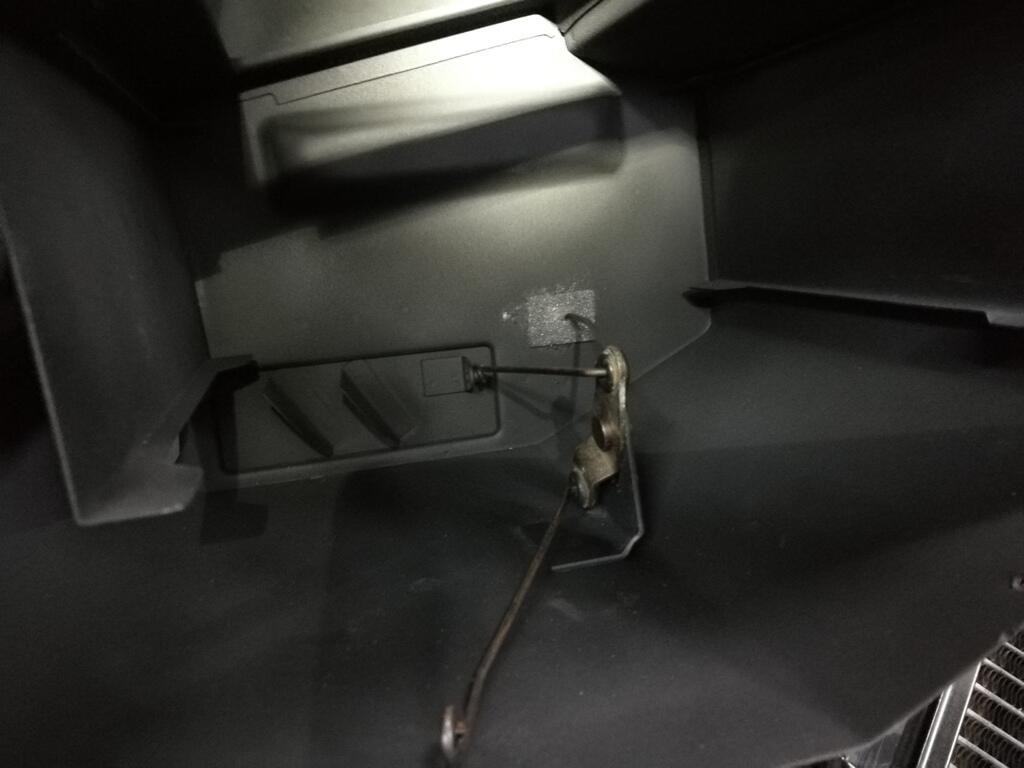
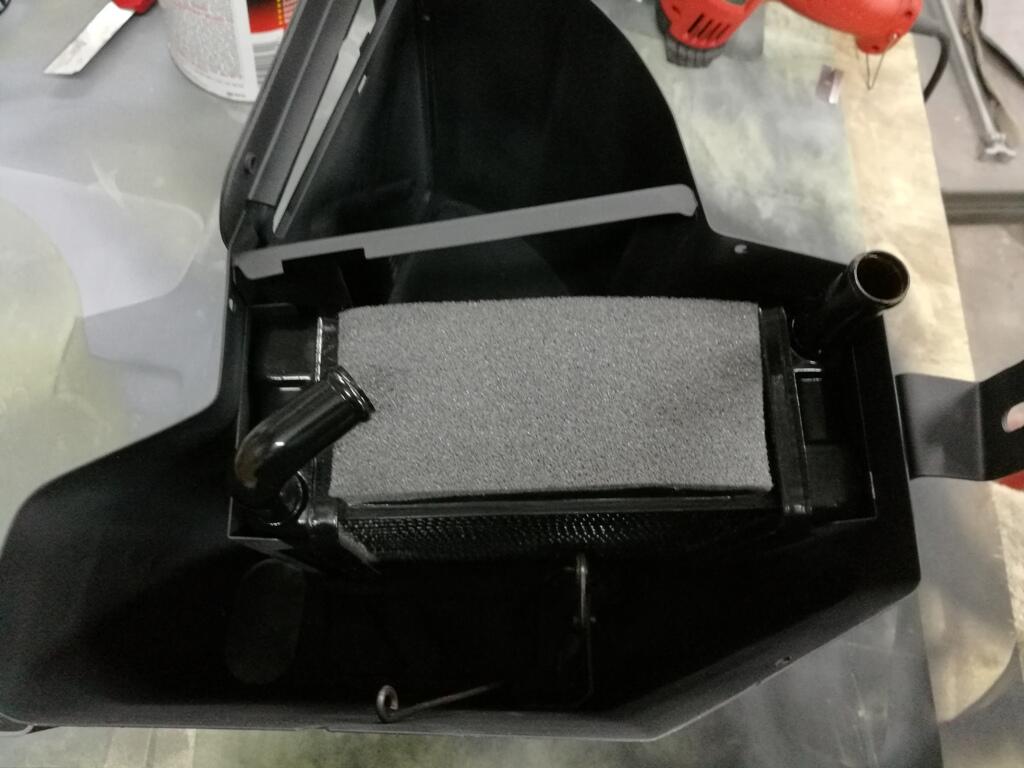
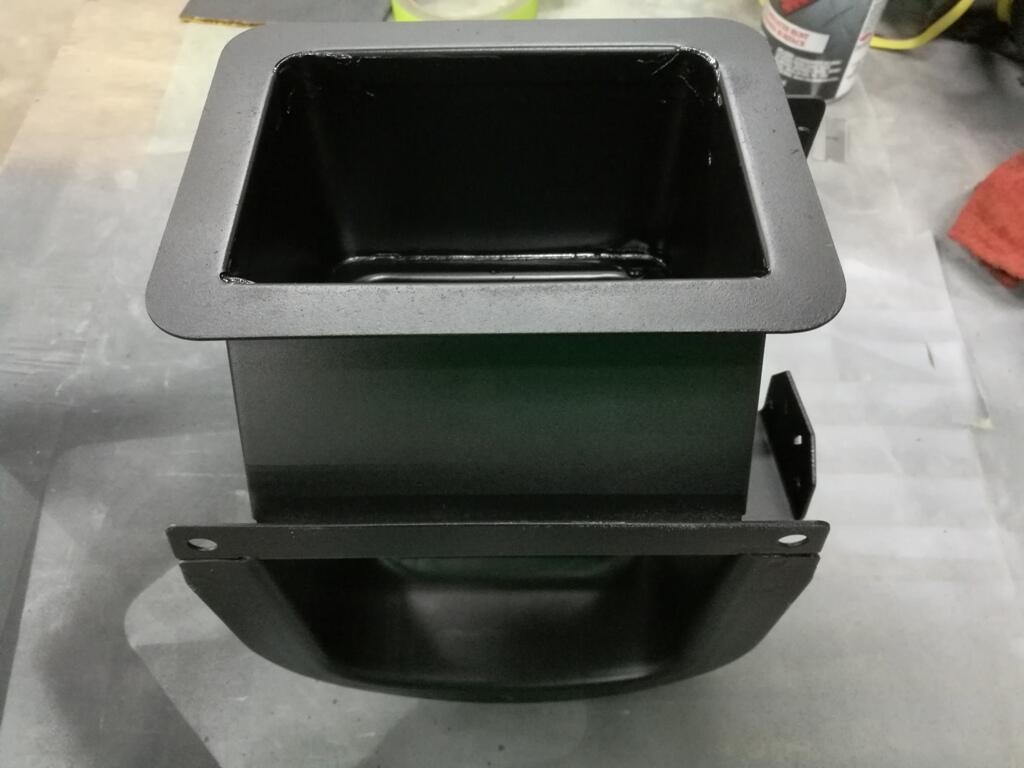
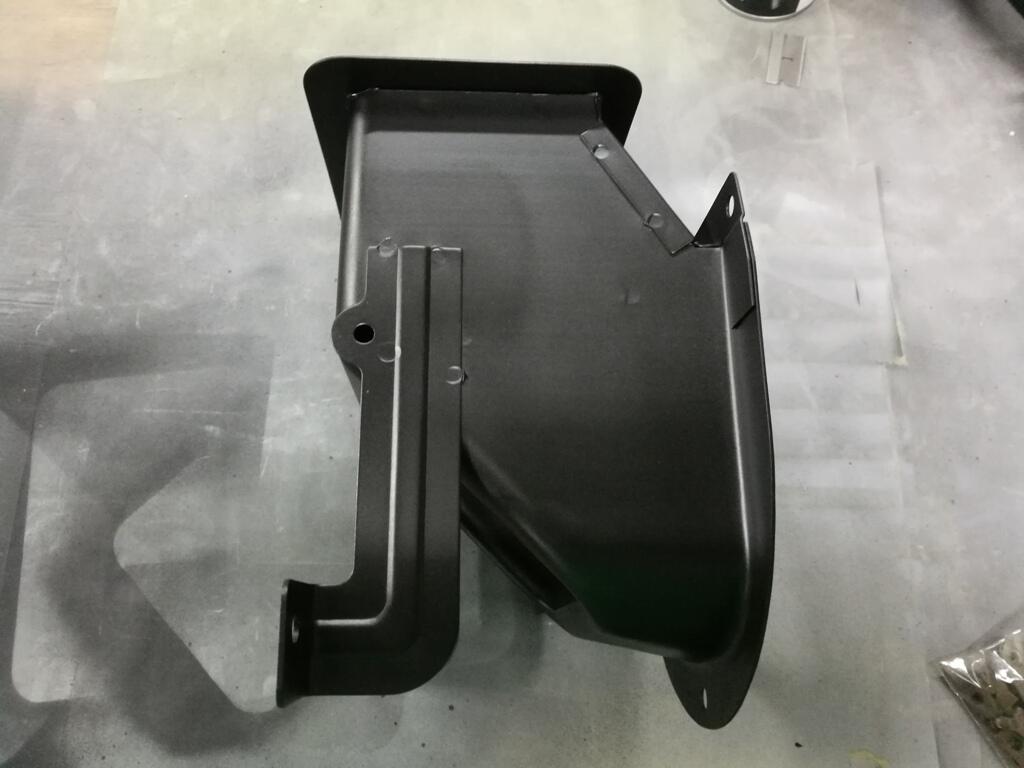
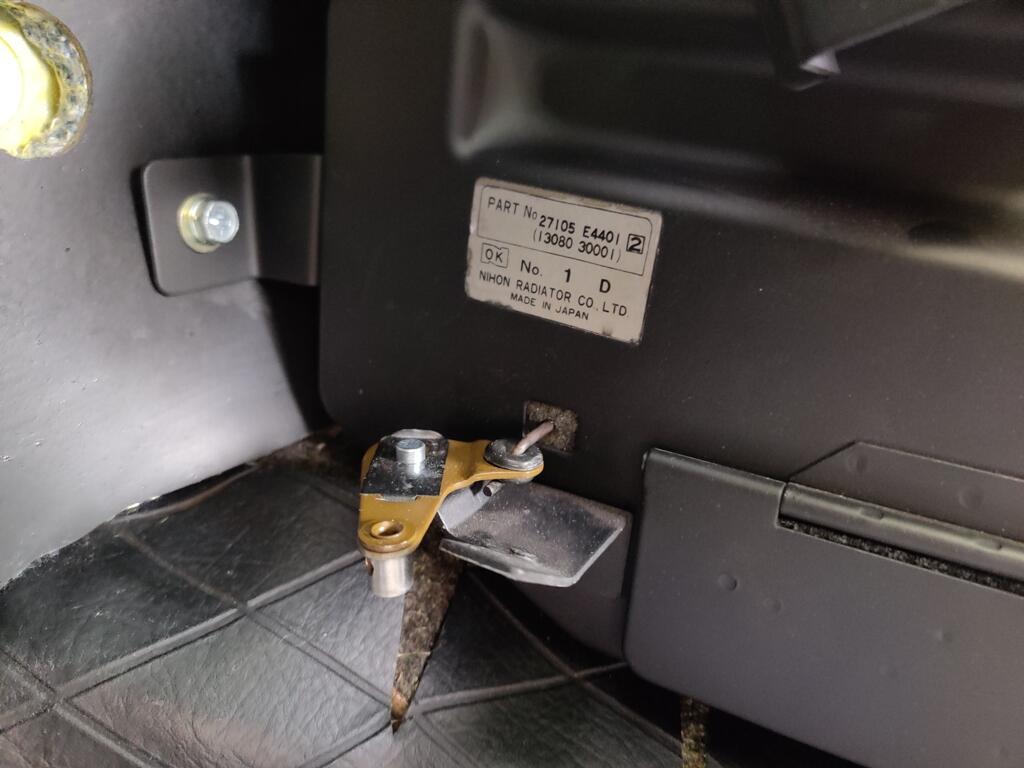
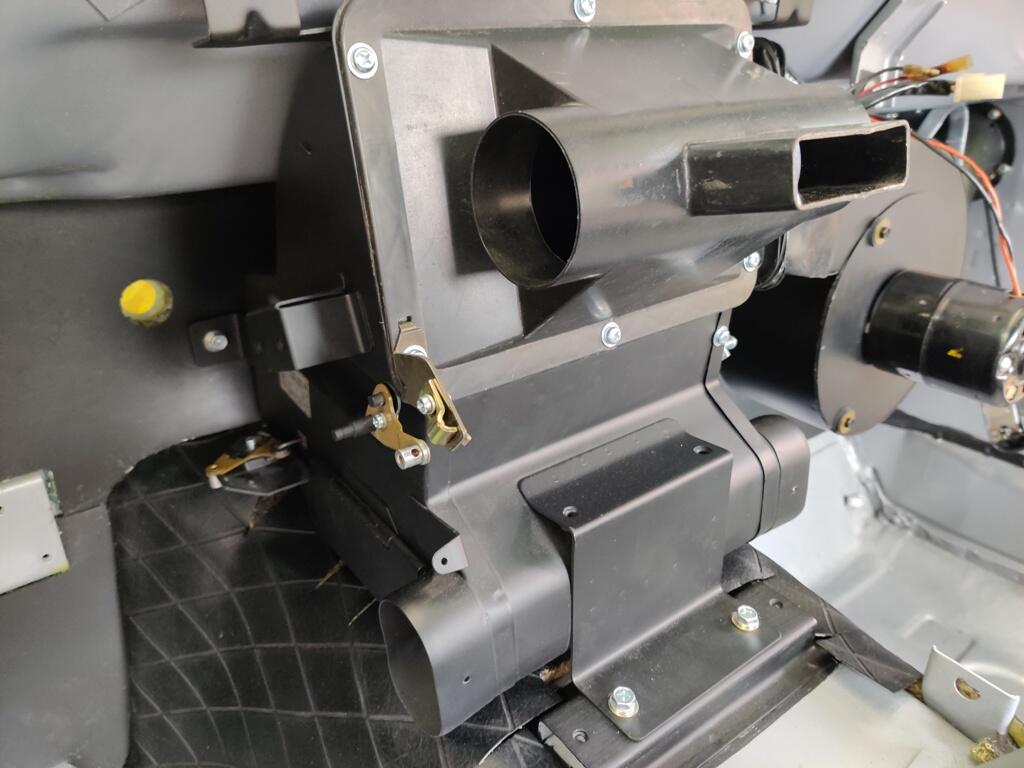
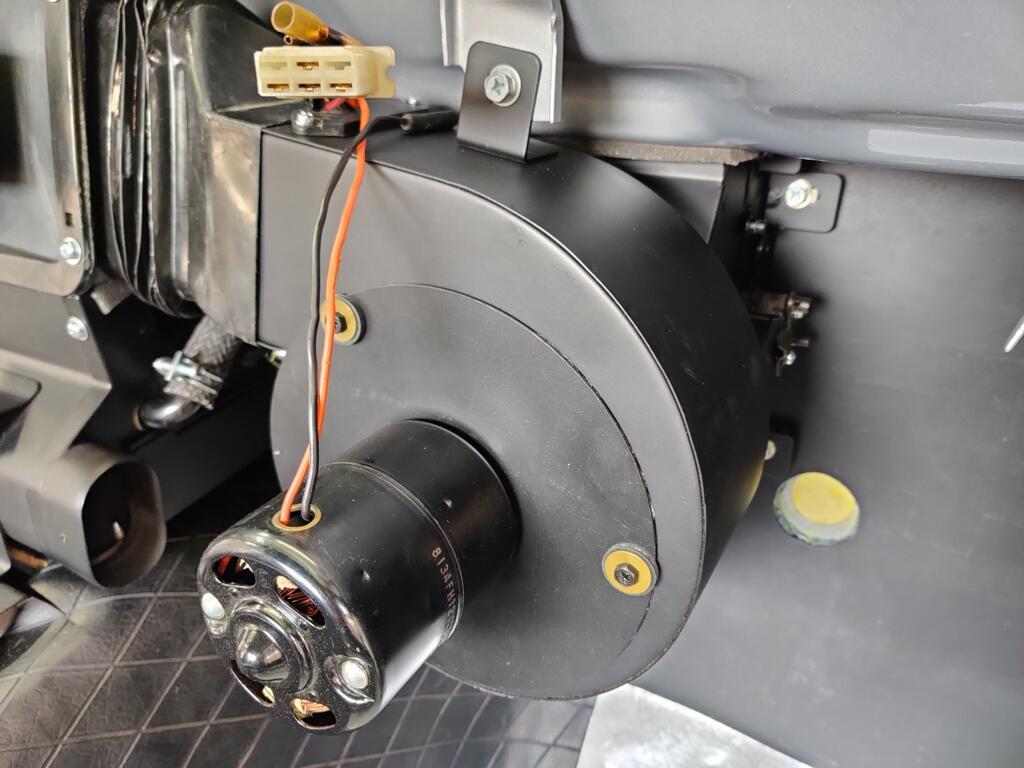
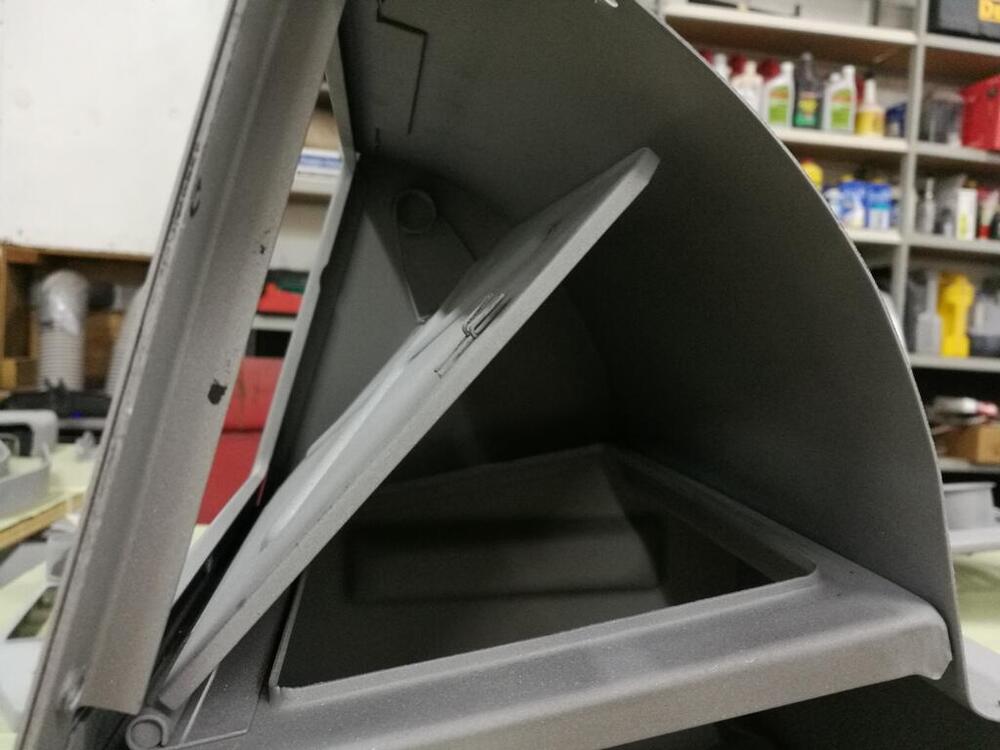
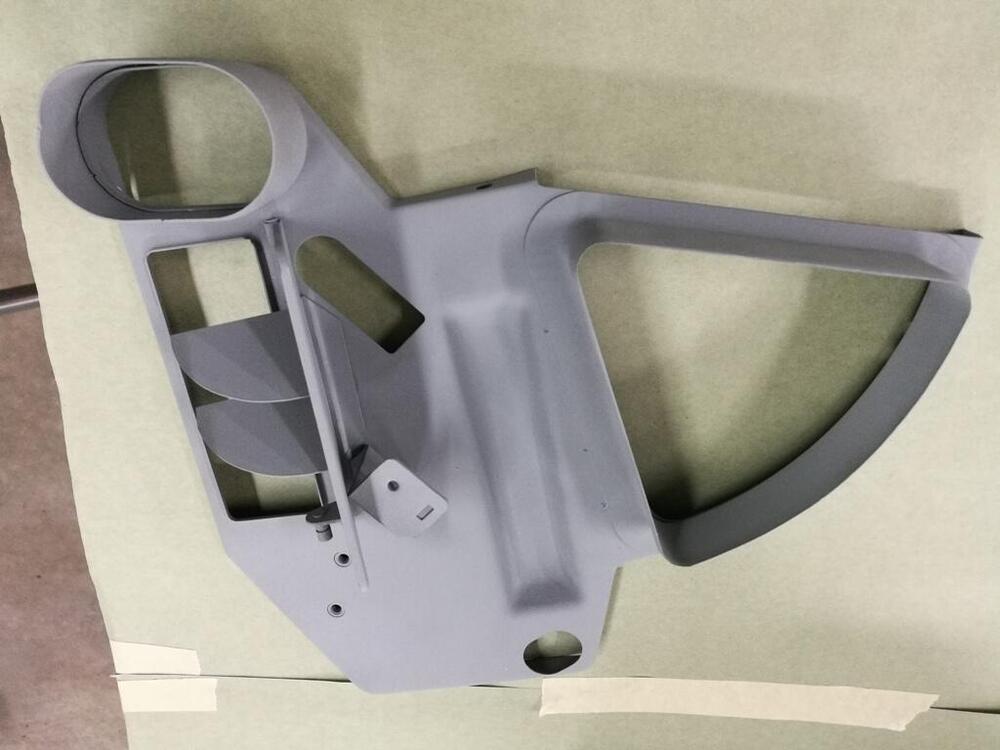
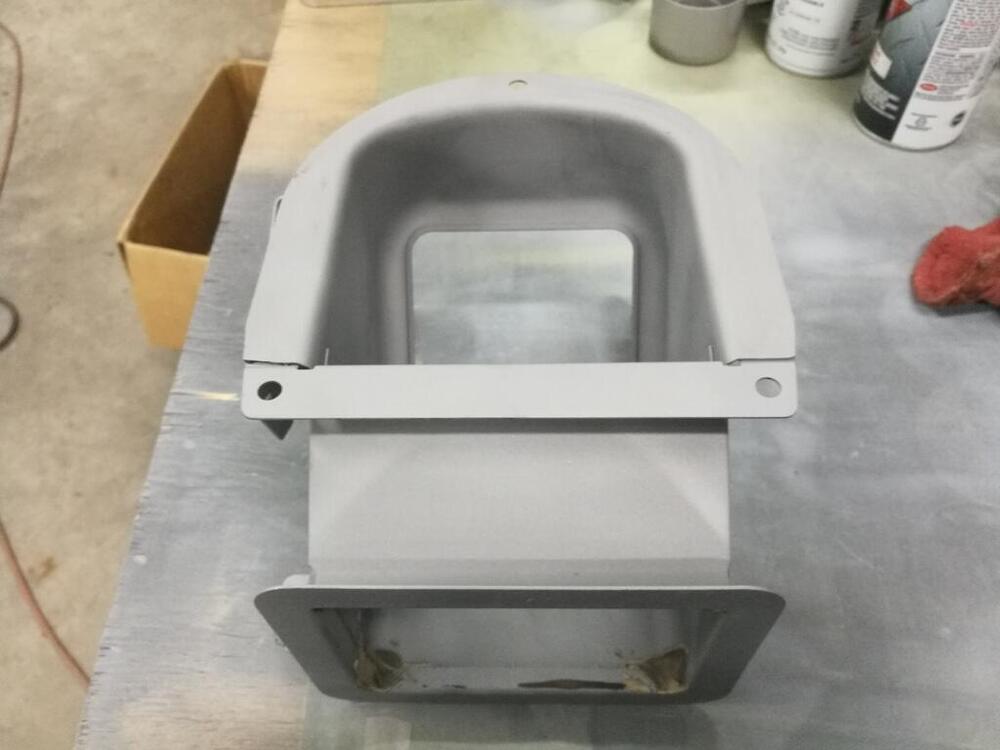
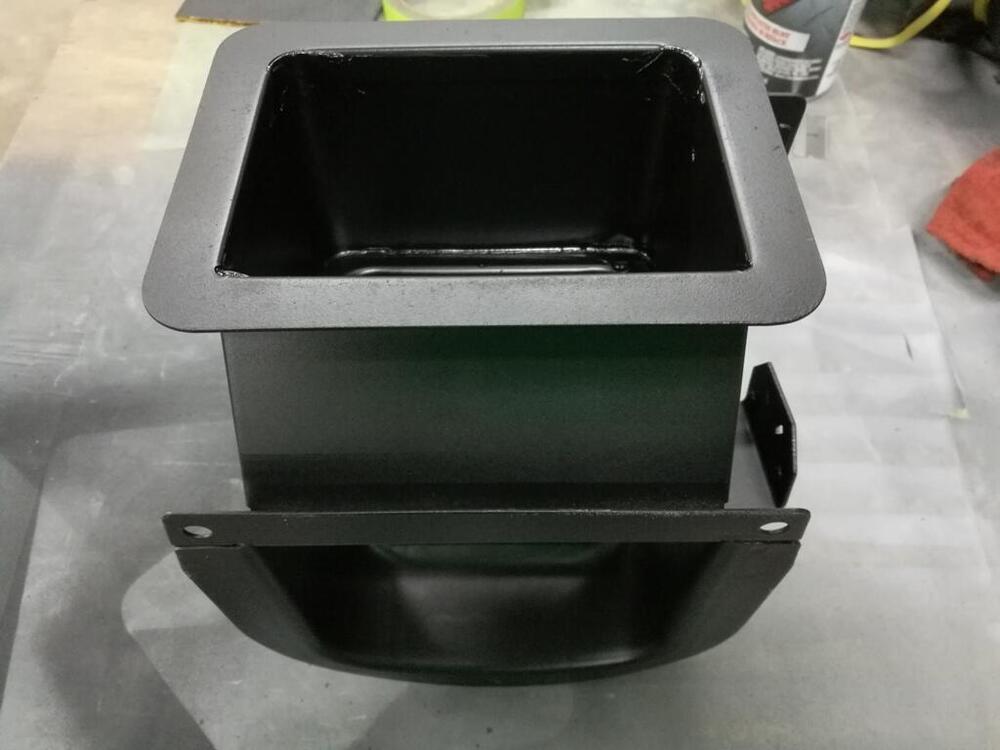
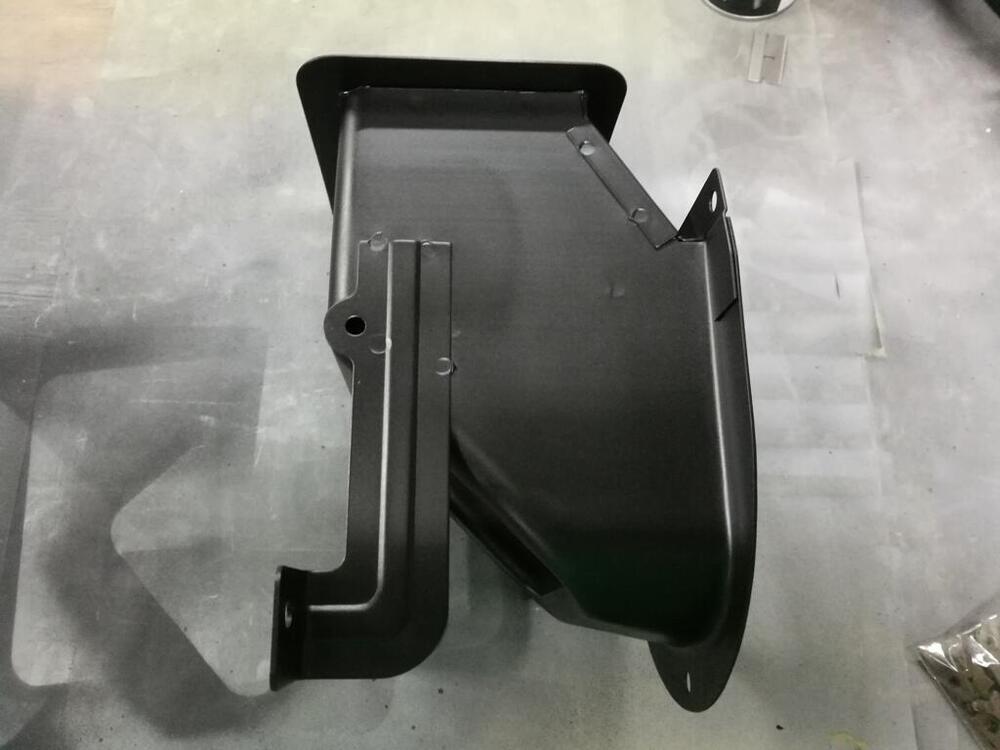
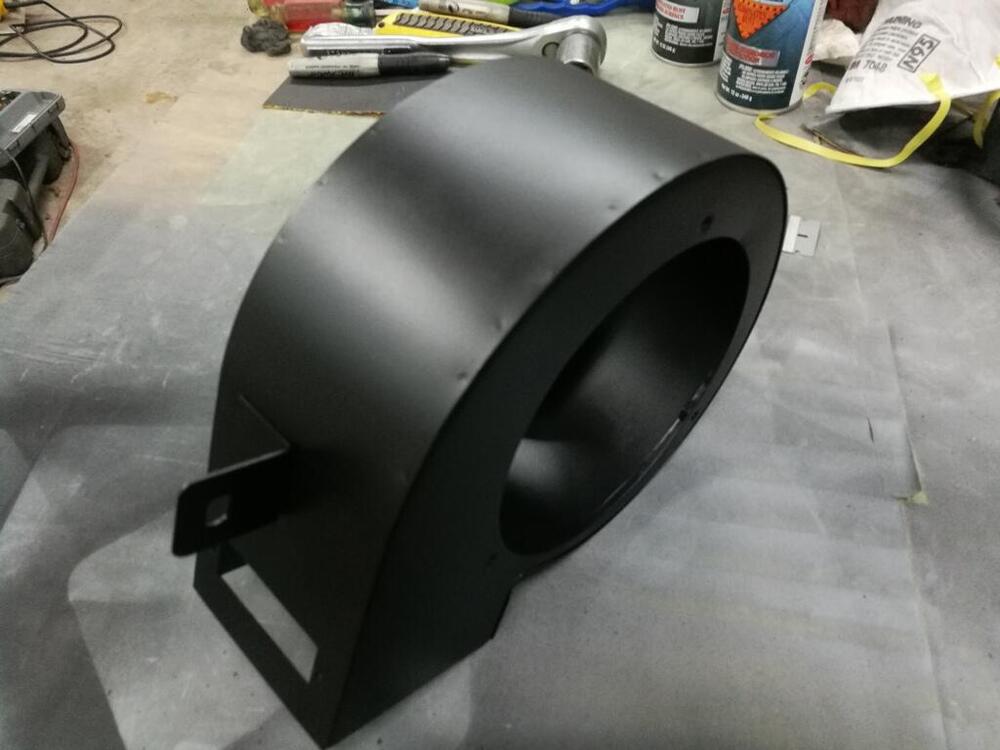
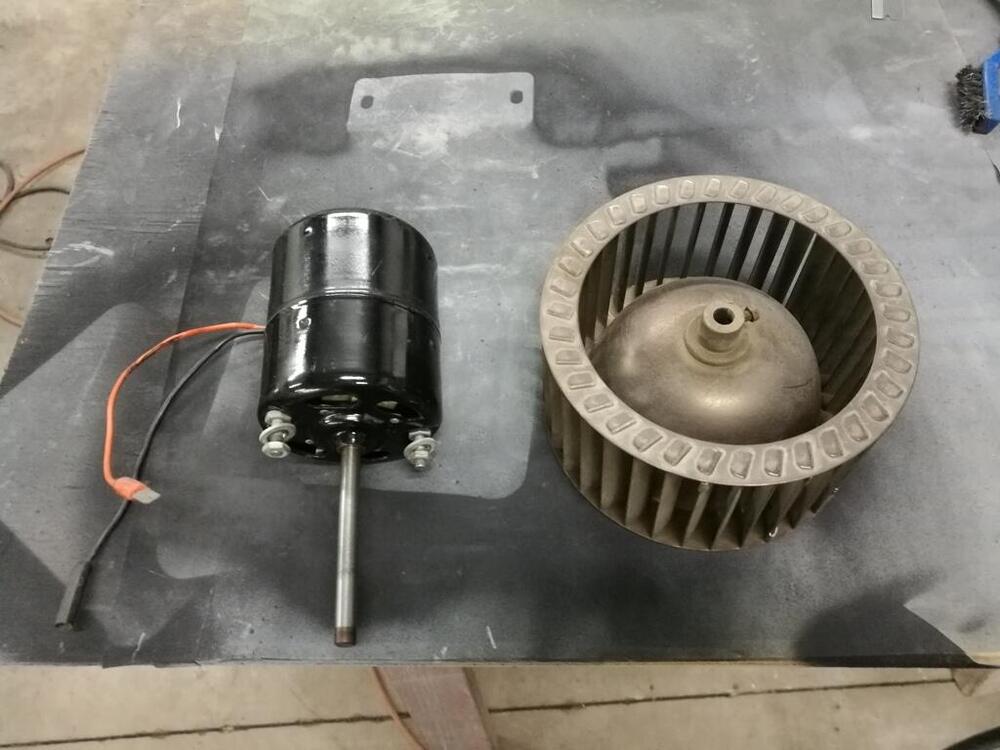
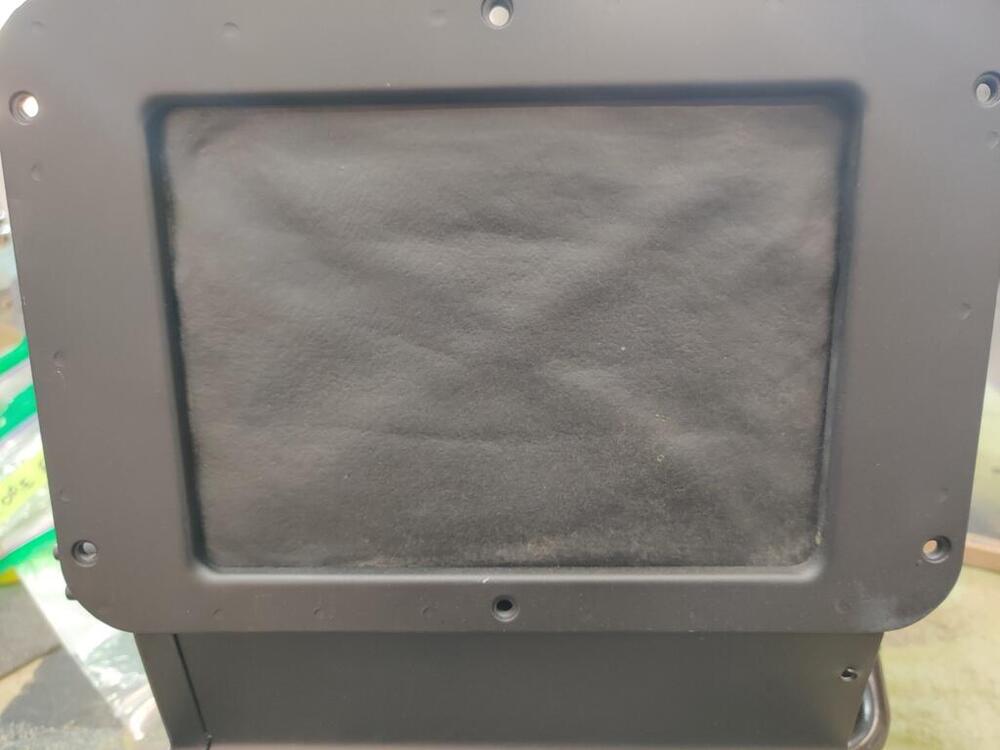
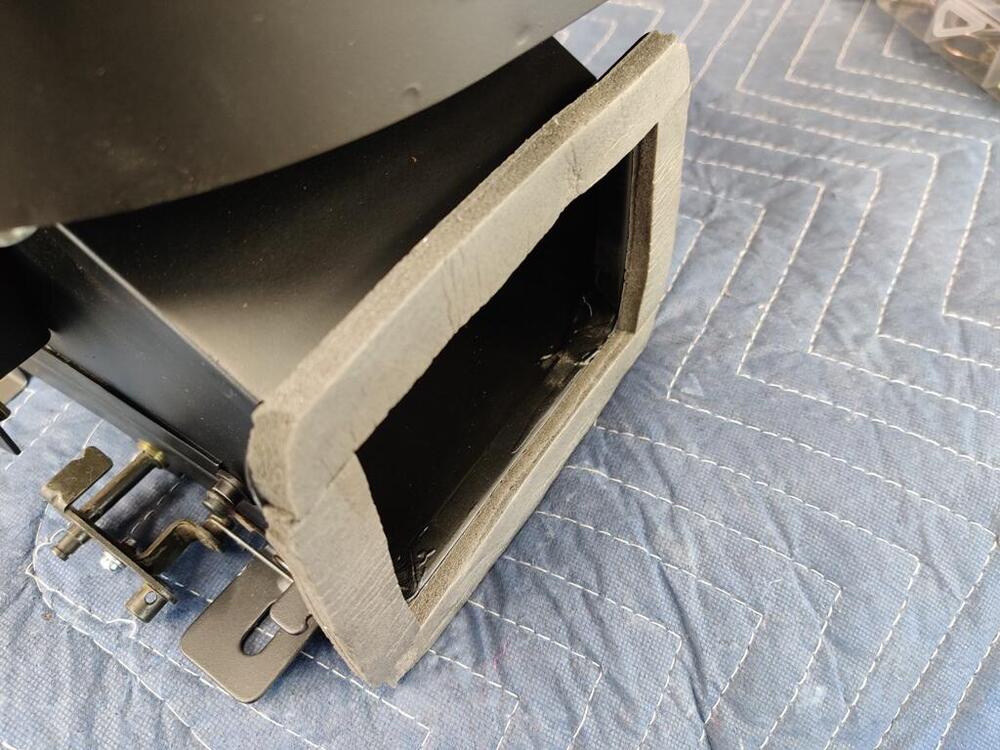
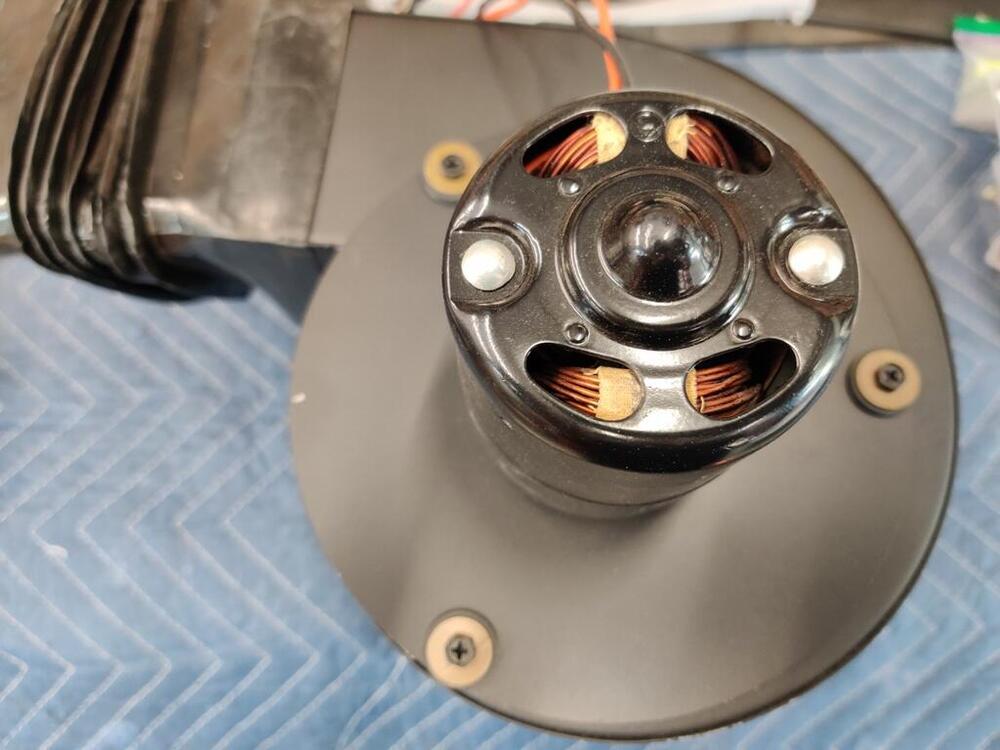
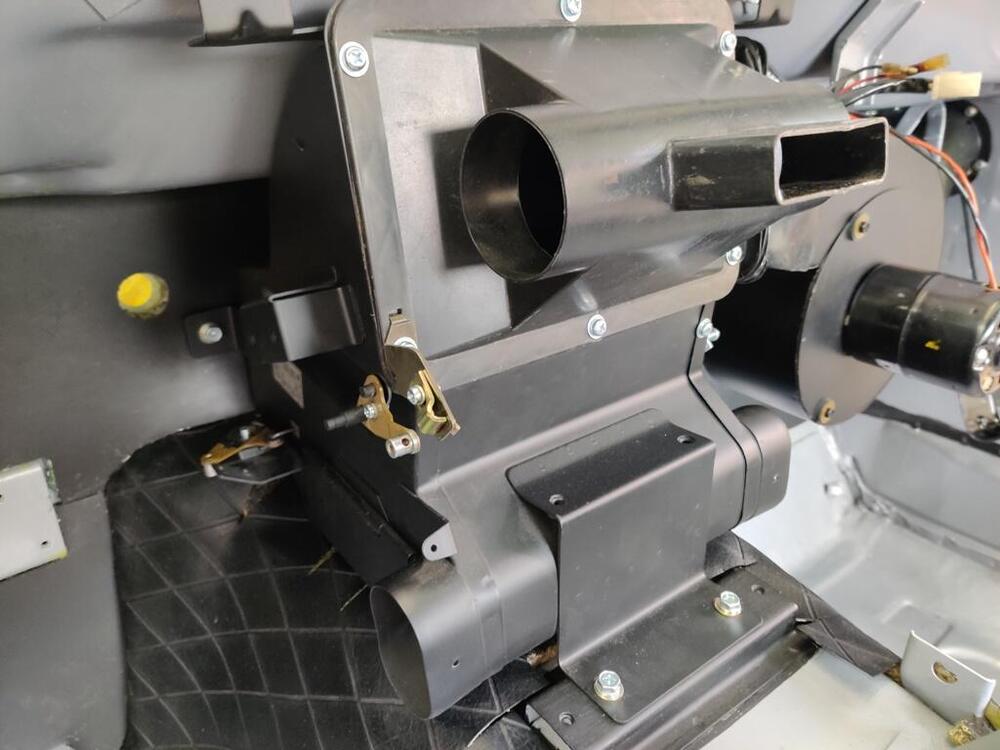
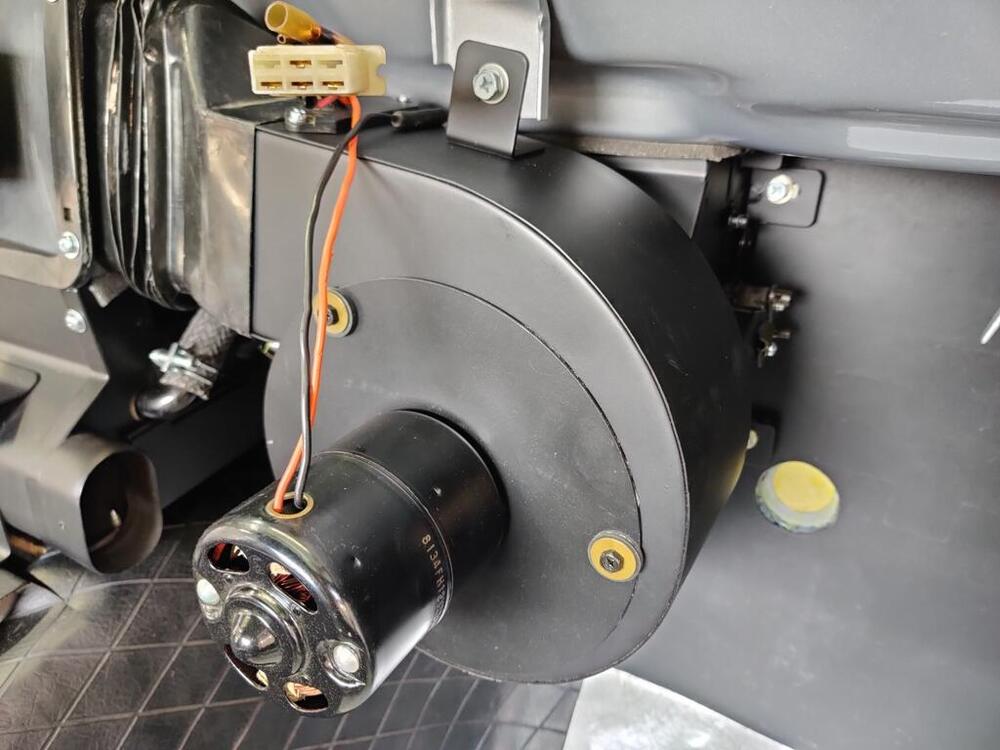
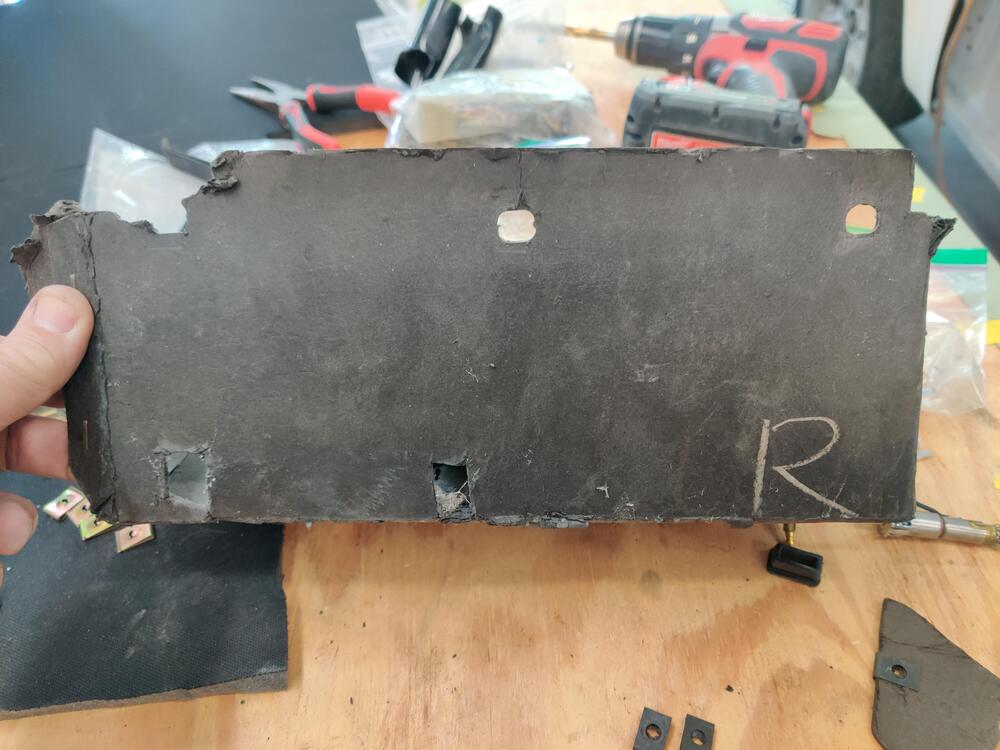
It's been a while since I posted an update. I went on vacation for a bit. However, I made some progress this weekend and a bit last as well. I put the heater box back together. Some of these pics are old, as I sand blasted and painted the heater box early on in the restoration. And, I worked on getting everything back in the dashboard. For the side vents, I purchased NOS chrome ones, and managed to track down vent housings that have the vertical "rib" that keep the chrome vents from rotating all the way sideways. Both vent directors fit nice and tight. I also installed an aftermarket glove box. Some are better than others, and this one is a nice. The original had an R on it, written with what looks to me like a white grease pencil: Putting the steering column in was a pain! For a while, I felt like I had been beat up, as all the hard and sharp edges of the seat brackets and weld flange on the top of the rocker panel were digging to me. Next time I have to spend time upside down on the floor I am adding some temporary padding!


-
I am planning to have some carpets made. I'd like to find a good heel pad I could use. And am looking for some donor pieces that could be used as reference - condition not that important. Anyone have any original 71 carpet pieces you'd be willing to part with?