EuroDat
Free Member
-
Joined
-
Last visited
Everything posted by EuroDat
-
 Rossiz, Thinking about your method, would it be easier to use pliers to grip the threaded section on the plug to form vertical lines on the thread. It is steel instead of aluminium, so it would be harder to do, but that would lightly "damage" the thread and cause the cap to bind. Squeezing the cap has its risks and my luck I would probably crush one out of six.
 -
110 with wobbly tyres and not really knowing what condition the running gear is in... Naughty naughty. People call the Toyota 4x4 calipers an upgrade, but calipers alone isn't really. If that is all you are doing, it will stuff up the balance between the front and back systems. The 240Z -280Z has good brakes when rebuilt properly and high quality pads and shoes are used. If you bleed the brakes, the MC will probably start leaking shortly after. That happens went the rubber cups get cut up when they slide over the gunk in the cylinder. The pedal doesn't normally go to the floor so gunk get build up en the bore can get pitted. I rebuilt my calipers with genuine nissan pistons, seal kits, new discs and pads. The rear drums skimmed, new wheel cylinders, a fixing kit from rock auto and new shoes. It wasn't cheap, but I think the brakes are one of the best things on my car. Now the rest Enjoy it, they are great fun and there are plenty of mods you can do to keep yourself entertained.
-
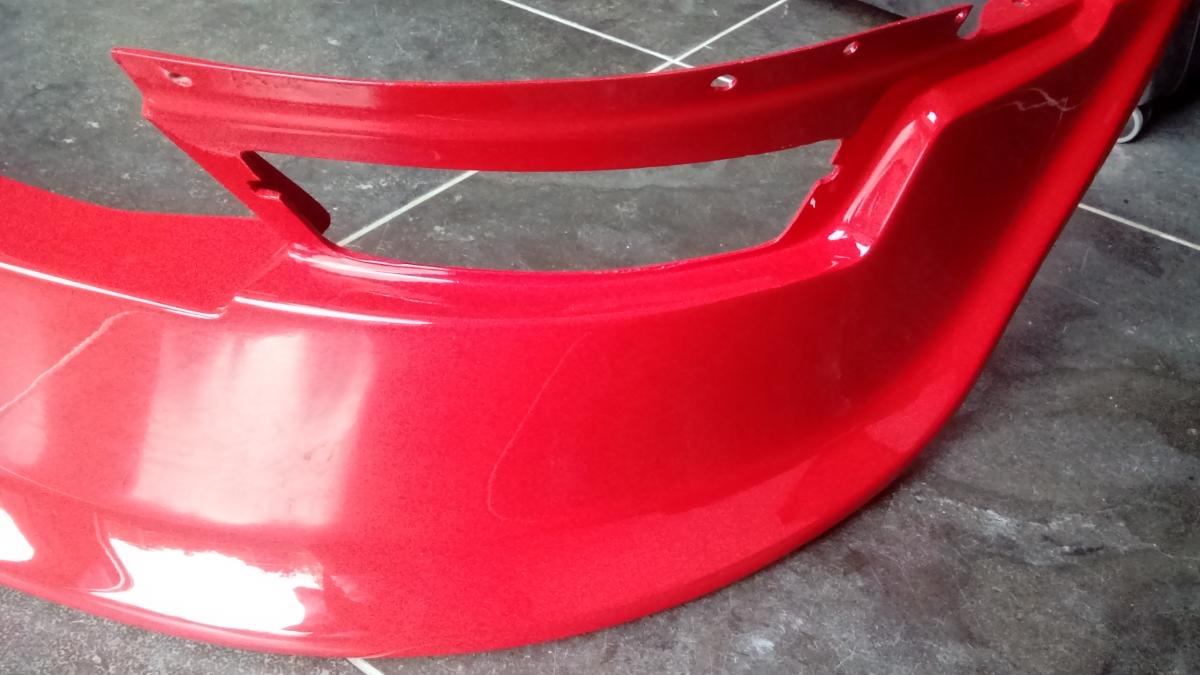
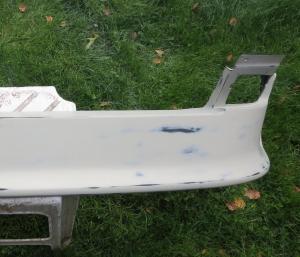
I have not seen the youtube film from eatwood. I have not seen a powder treatment for this work. After filling minor repair work and skin coating with filler I give it a coat of spray putty and then I use a rattle can and give it a light dust coat of black. That way I can see where the high and low spots are when I block sand it. Im absolutly not a speacialist on the subject, but it works for me. I have some photos of my spoiler. It was primed with plastic primer than a coat of spray putty and a rattle can. Sanded back and then primed for the top coat. Its not perfect, but a lot better than just painting it. Another trick I learnt when sanding lines along the side of the car is to tape the line and sand to it. Then change over by taping the section you sanded and sanding the other side. Gives you nice straight lines.

-
Running lean. What is your fuel presure doing? There are various problems in the fuel system that can cause low pressure and create a lean condition. You might want to do some more testing before throwing money at it. Have you downloaded the EFI Bible? Even simple penny and dime stuff can add up quick. Just saying...
-
Just noticed you are in the uk. I have some spares that are still in good nik. If yours don't clean up pm me, you can have them.
-
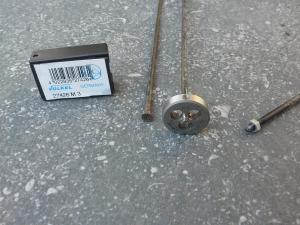
Paul, You will have trouble finding M3 x235mm bolts. I ended up buying 3mm stainless rod and welding M3.5 nuts, thats a ISO262 size and cut the thread on the other end. M3 will work, but the M3.5 was easier to tig weld. They can take a little more heat without burning. Not all shops have them and in the states it might be harder to locate. M3 is spanner size 5.5mm. M3.5 is spanner size 6mm
-
Its an ISO 261 standard (coarse) thread M3 x 0.5mm.
-
+1 The wedge pin or cotter pin as its often called (google: cotter pin crank) does exactly what Captain Obvious described. It stops the spindle pin from roataing and positions the pin for final tightening. Without it the nut with the least resistance could tighten until it bottoms out and the other nut will be hanging on by a threw threads. The front suspension inner bushing has a bolt and nut where this can not happen. In principle you could remove it once the nuts are tightened to spec and it wouldnt effect performance.
-
Here is a link to the Aussie website. http://www.awcinfo.com/secureshop/category.php?cat_id=64 It looks a lot like the DN006 on there website. The image on there site is low quality and its darn hard to tell what it is, but I have this photo of one which makes it a little clearer to identify.

-
It looks very much like an air dam I was thinking of buying, but the company wouldn't ship to europe. He didn't trust the shipping companies to get it there in one piece. It was a company in the outskirts of Sydney Australia. I have thd address at home somewhere and there is also a thread here about it.
-
+1 on Zed Heads post. I made a post for this same wire in a thread for another member. See post nr7 in the thread for the photo's. Photo's can make the wiring diagram easy to follow. http://www.classiczcars.com/topic/51696-redwings-disconnected-wires/?hl=redwing
-
Bart, You might need to get the radiator cleaned. Years ago I had a MKII Escort and it would overhaet in weather over 40 degc. I ended up putting a Capri radiator in it. My friends 240Z never had that problem and it was standard with no cooling mods or upgrades. PS: She is ooking good, Bart. Job well done. Can't wait to see her next weekend.
-
I was almost positive there was only one gasket and it was on the back side of the vibrating plate thingy. To be sure I took the cover of one of my spares and took some photos. My gaskets were pretty sad too. I made new ones out of the thinest gasket paper I could find in that tan colour. Measured it with the calipers and it was 0.25mm. If you need anymore info just ask, glad to help. BTW: They sound awful without the paper. Thicker paper might alter the soaund too.

-
I would check the clutch pedal adjustments and the series I slave cylinder adjustment (If you have the Series I version) first and then bleed the clutch. New oil can cause this, but its mostly an accumulation of things and the new oil is a new factor. Your synchos are probably in good condition, mostly 2nd and reverse are the first ones to show these problems. Is the lever hard to move or does it seem to hit a stop and not go into reverse? If its the later, then its probably hitting the reverse gear and the gear is sitting dead still. A new reverse gear is pointed to allow easy selection, but with old transmissions these pointed sections wear down and exaggerate the problem. You can test this by someone rocking the car back and forth while you select reverse or engaging and disengaging the clucth and then select reverse. The new oil is thicker than the old oil and the gears are stopping quicker. You should read this thread. The GM oil might be an option for your problem. I have never used it, its not available over here so Im only going by the experiences of other members. http://www.classiczcars.com/topic/51698-how-should-a-71-240-4-speed-feel/
-
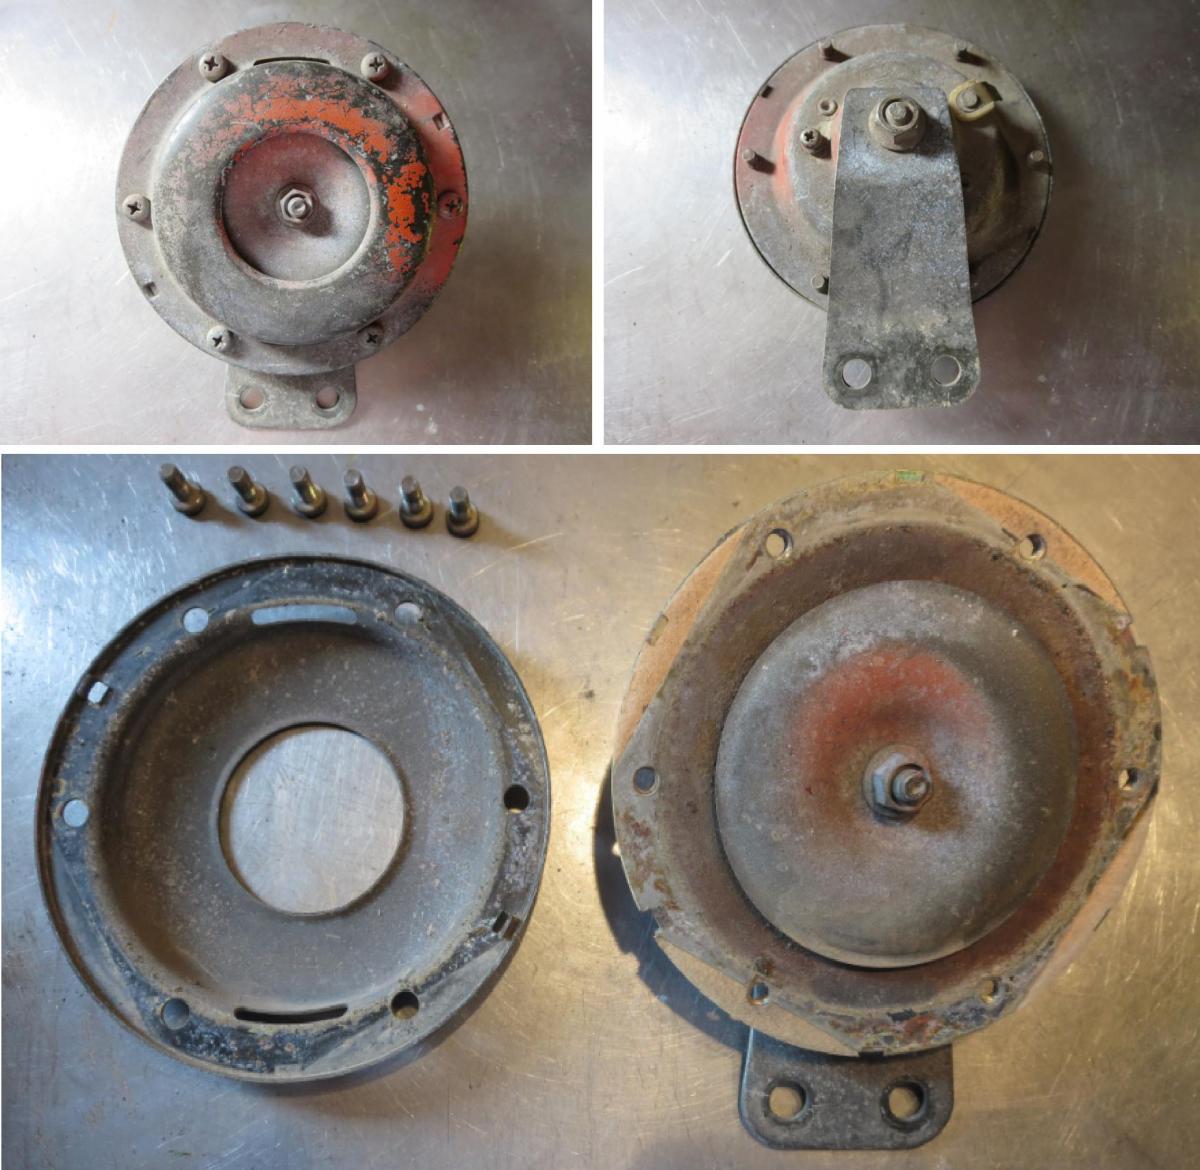
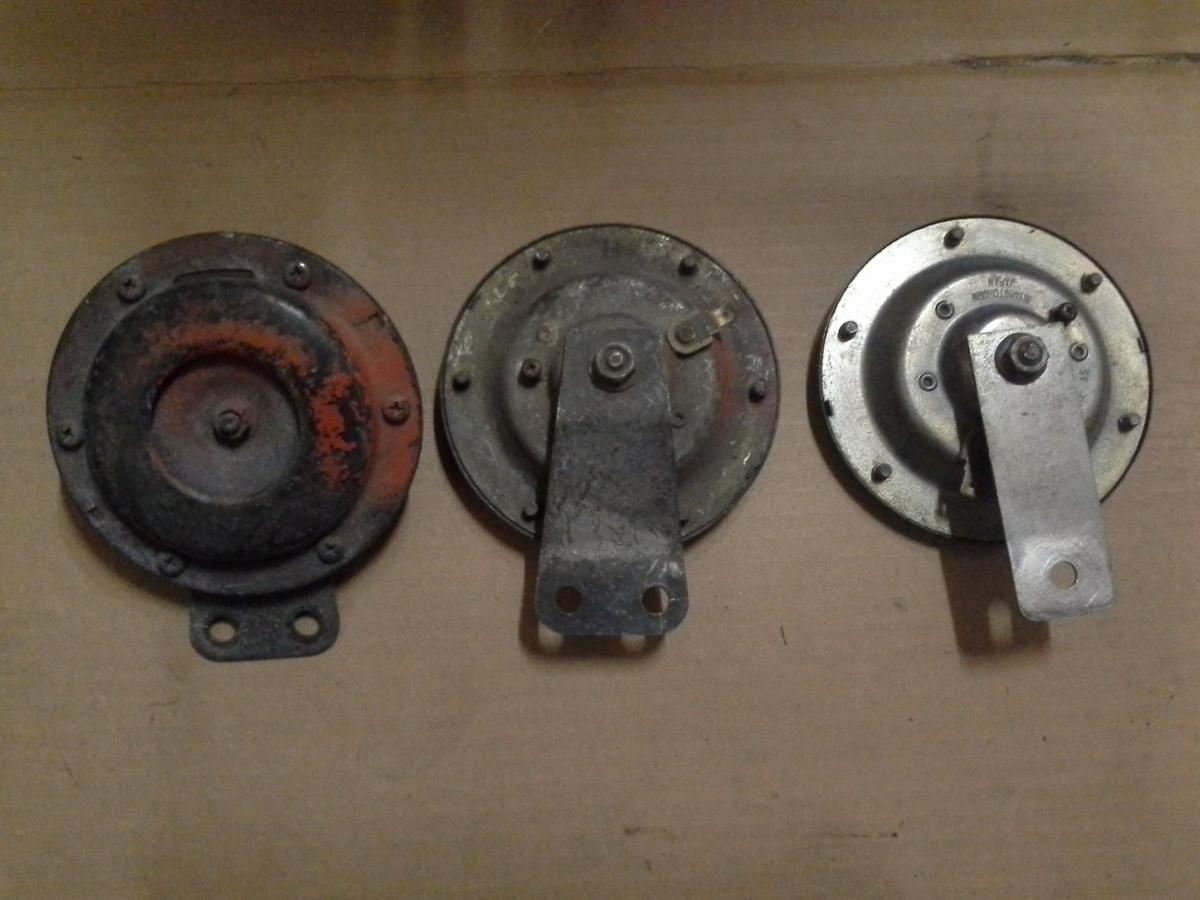
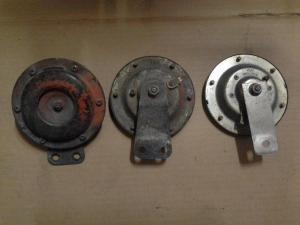
I think they changed somewhere mid 1976. You have the early units with the mounting bracket with two bolts. The later version had a strip with one mounting bolt. I took a photo of my spares. The photo has the 240Z type on the left and center. Later type on the right. The earlier 280Z would be similar to the 240Z but then bent at right angles so the horns are verticle. Chas
-
-
I think I might have some photo's on my tablet somewhere otherwise I have them at home. Mine was in a shocking state. I wanted to buy a new one, but the price was 4 times that for a 240Z. I removed the protection clip on shield and cleaned it with a toothbrush. It didn't make the resistance any better or worse. The problem was in the end of the wiper arm that contacts the resistance wire. The little round ball section was loose and had extra resistance. I was so happy I found my wonky fuel gauge problem and ball fell out and I lost it. 30 minutes searching and after saying several beep words I was ready to give up on it and buy a new one. As a last resort I use the end of a pop rivit nail and soldered it in the wiper arm. It now works ok now. I calibrated it by filling the tank in steps. Started filling it until I could suck fuel out the pump outlet through a clear hose. Used a foot pump for pumping up and deflating air beds and stuff to keep sucking until fuel came out. Then played with the arm and lower tab to get it reading E on the guage. Also checking the it would also reach the full position. Filled it with five liters and adjusted the sensor for the low fuel warning light. Filled the tank with jerry cans until it was full. It was full before the last 6-8 liters went in. That was ok, empty was more important for me. Ill post some photo's when I find them. Chas
-
The higher resistance is the full reading. It seems high IIRC mine was something like 90ohm and the low reading was a little under 10ohm. It should be in the fsm in the body electrical or fuel and exhaust. Im on a smartphone so I can't look it up atm.
-
-
Steve, Next time you go, take some extra high pressure fuel hose so yoh can mount the fuel gauge on one of the wiper arms. You can leave the bonnet slightly open. I found it very handy for testing and watching what the pressure was doing while driving and stalling etc.
-
I worked with a guy that started his career (25years ago) in a company that remanufactured brake and clutch parts. He had a weekly run to pickup candidates parts from wreckers. They would clean the outside, remove the bleeder and flush then with slovent. Then test them by stroking the piston. If it moved smoothly and held pressure they would replace any corroded bolts and box it up for "remanufactured" part. He called it flipping parts for a quick buck. The exchange parts would be tested the same way, but if they failed the test they would discard them because the costs to rebuild was too high. If a certain part was becoming rare they would to a "full" remanufacture on the they could find. He said if your cr was very rare and hard to find, then chances are it would have ben rebuild the right way. Its probably why he doesn't trust anybodies workmanship. He is always sceptical. I wonder if this method is use by the supplier to Rockauto. PS: I purchased a set of rear cylinders and master cylinder plus the clutch MC and slave. I pulled them apart. They were all new but still have traces of metal from machining. Point is even new stuff should be dismantled and cleaned to ensure long reliable life of the unit and system in question.
-
The only test I can think of is the one I tried. Fill the tank with just enough fuel to cover the pickup. Connect a clear hose to the pickup and then set the tank on a table or higher that the ground. If you hold the clear tube a meter high let it syphon into a bucket and watch for bubbles. When it stopped syphoning I added another 5 liter to the tank and tried again until the 5 liters filled the bucket. I had no bubbles during the hole test. Maybe someone has a better method, but I couldn't think of any.
-
I drained mine a couple of times while shaking the rear of the car and not much came out. I was surprised how much can out when I cleaned it and coated it. Something my back took a couple of days to get over. Won't be doing that again. You could still have a lot of rust and debris floating around in the tank, but the flow through the drain only takes the stuff very close to it giving you an impression its fairly clean. That was my experience.
-
Just to add to the discussion and not blur it any. The inlet filter or strainer in Siteunseens post#12 is for the Bosch type fuel pump. The strainers in the JECS type pump are shorter and wont fit inside the bosch inlet. The Bosch strainer is loose in the JECS inlet. The new pump and the one in the car in that post are both Bosch, even though the new one is in a Nissan box. The giveaway is the black plastic around the terminals. I have only seen JECS with light blue coloured terminals. They all (Bosch and JECS) have a strainer in the inlet, although a lot have been removed over time. It is a very good idea to fit a G3 filter in the line and forget about trying to find one of these old strainers. The block easily and you can not see its blocked without removing it. Trivia: In my searching I found an article for bosch and some photo's of a JECS pump in Bosch packaging with Bosch's own part number on the box and "Made in Japan" on the box. It appears when Bosch stopped making them for a while they used JECS and Nissan was also using Bosch pumps for a while. The Nissan box must be NOS. I don't know when they started using JECS or when JECS stopped making them. I have seen a 79 280ZX with one, so it could be somewhere around then they started, if that was still an original pump.
-
Hi Steve, Welcome to the frustrations of problem solving an old j-jetronic type efi system. I have explained my pressure test method a couple of times in other threads. Jai's system is loosing prssure quickly so it should be easy to find. Its not causing her problems though fixing the pressure loss will help starting. Interesting point when it was warmed up and the pressure increased to 34-36psi. Thats approaching max for a good functioning fpr. Sounds like the vacuum dropped off completly to get this pressure. Normal idle pressure should be around 28psi, 30 seems to be a bit high, but could just be calibration issues. The potinometer would help, but I don't think it will solve the problem. When Jai got the car it was running fine and this started suddenly. The temperature tweak solves problems that take a long time to evolve. The AFM cops a lot of blame and its often adjusted with no real results. Mine was way off until I adjusted it by the method on AtlanticZ and added the temperature tweak. Test method once you have fitted a pressure gauge. 1- Build up system pressure (remove solenoid conector on starter and turn ignition key to start to run fuel pump). You may need to do this a couple of times to buid up pressure while going through tests. 2- Stop pump and clamp hose after gauge. If pressure drops its the check valve in the fuel pump leaking back to the tank. If not 3- Build up pressure again and this time clamp the return line from the fpr. It wil be next to the fuel gauge. If it now holds pressure the fpr is leaking back to tank. If not 4- Cold start valve. The hoses going to the csv are too short to clamp so I remove the two screws and gently pri it loose from the manifold. Remove the EV1 connector and build up pressure again and check if it drips. If not, the only source of leakage after this is the fuel injectors. When you pressure build up for the testing, you should be getting 36-38 psi. That the max for the fpr, like removing the vacuum hose while running or WOT no vacuum conditions. Goodluck solving it.