EuroDat
Free Member
-
Joined
-
Last visited
Everything posted by EuroDat
-

-
It could be a broken diaphram in the pressure plate. That is the dics with all the fingers. It's what applies the pressure to the disc. When did this nasty noise on deceleration start? Going by the symptoms you have described: Slipping clutch, Grinding into reverse and now nasty noise when decelerating. Looks more like a clutch group problem and not an adjustment problem. Clutch plates really don't like slippy in the othr direction: deceleration. Slipping would mean adjusted too tight with clutch not fully engaged and grinding gears would mean adjusted too loose and clutch not fully disengaging. Or it could be worn clutch and someone adjusted it tò loose to try to solve it that way. Do you know the history of the clutch? Checking the adjustment won't cost anything but time and will eliminate that as a posible cause to your problem.
-
Your problem with slipping in second through to 4th and not slipping in 1st is very typical of a worn out clutch. You generally notice clutchs slipping in the high gears much earlier than the lower gears. Its the lower gearing that helps the clutch in 1st, not wanting to get into the theory of torque and acceleration. If you are happy with the reviews and still want the Exedy clutch, I would just buy it. As to which collar is the correct one, who knows. You won't really know until you remove your transmision. Unless you know all the history of this car? If you put the pressure plate on a flat surface and place the throw bearing with collar on top of the fingers. Measure the height of the tabs for the clutch fork. It should be around 92mm.
-
Cliff, Extra material could make a difference in price, but I think imho it's coming down to demand. More 280Z's and 280ZX's out there and to fit that pressure plate in the 240Z/260Z you would just need the matching collar. The clutch forks, slave cylinders, and non-adjustable or adjustable push rods all have the same dimensions. It's the pressure plate / collar combo that derails most people.
-
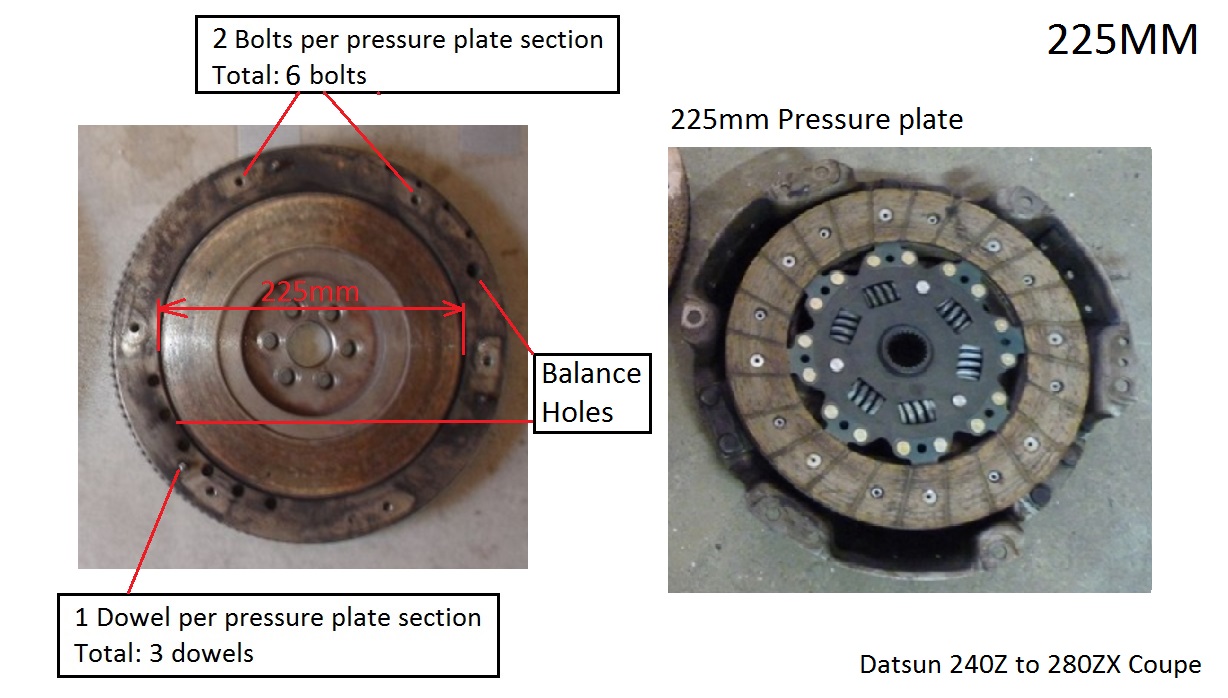
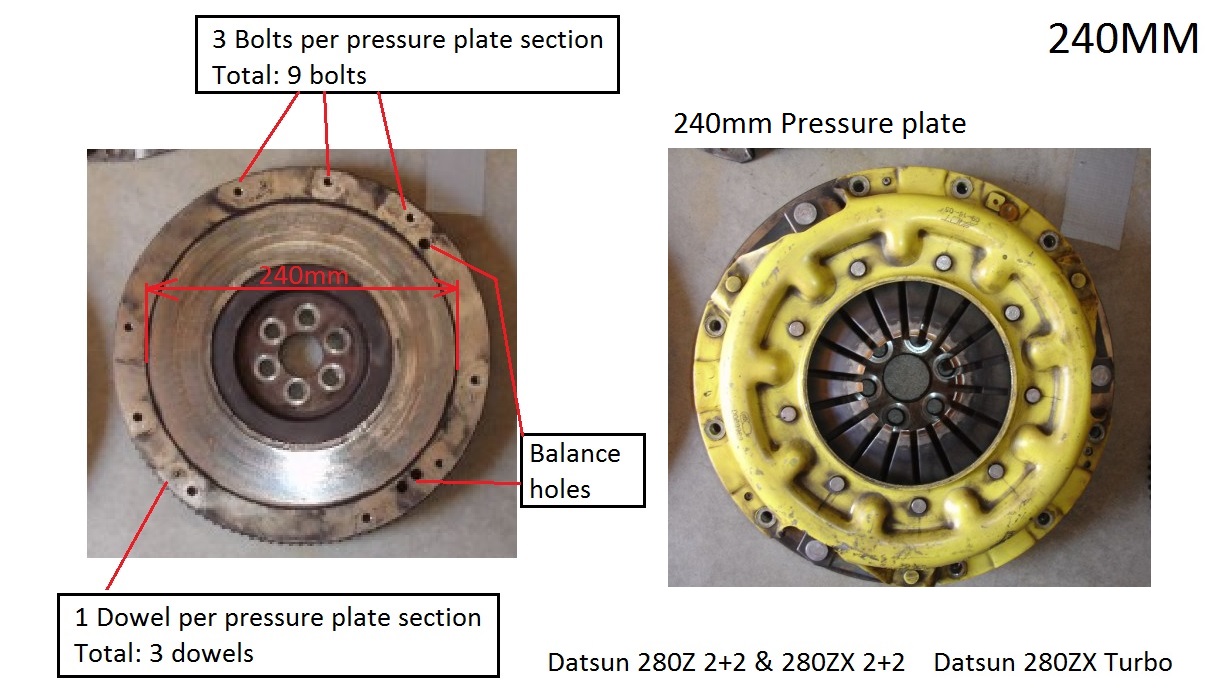
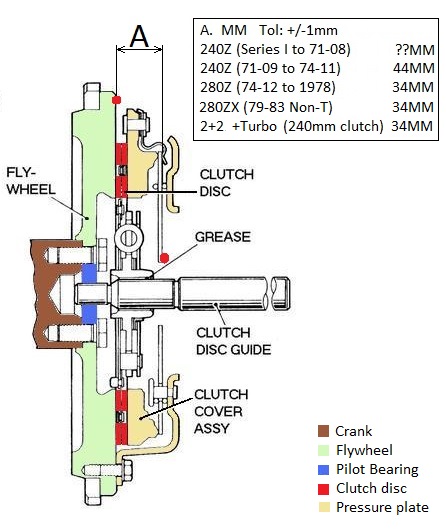
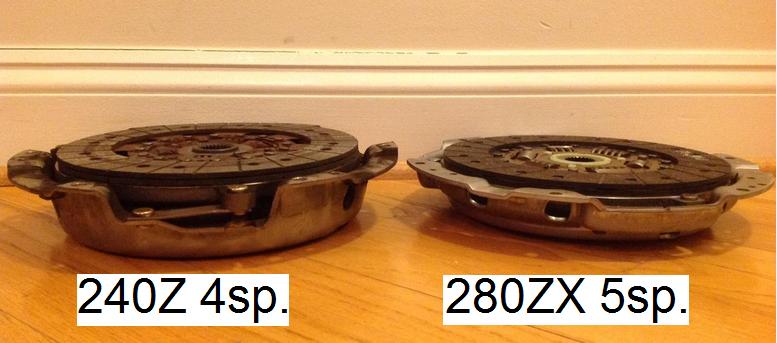
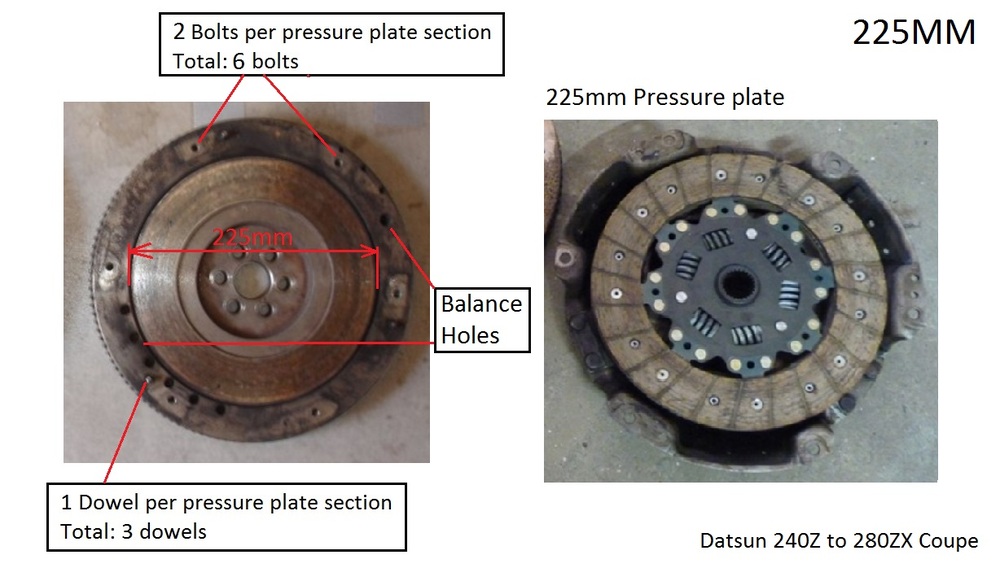
Hi Cliff, It might be because the 240Z has a different pressureplate height than the later 280Z and 280ZX. A lot of people just simply buy the 280ZX with the collar and be done with it. I think that will be eventually the only option available, due the demand reasons. There is just a lot more 280Z and 280ZX's out there. Your 240Z might already have had a replacement 280Z pressure plate when you changed it. If its still original, then you only need the collar from a 280Z or ZX and it will work perfectly. The sketch and photo might help clear it up a bit. Im not ure if the sketch is 100% correct. I only know the 280Z, 280ZX non-turbo and the 2+2 & Turbo is correct because I have both in the garage somewhere. Btw, The photo is not mine, I think I found it here. Someone here might be the owner, so thanks
-
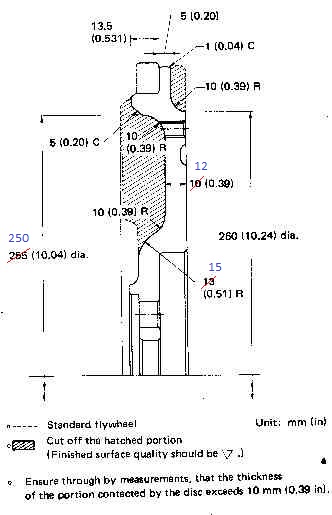
Here is the sketch with the alterations we made and a couple of files showing the difference between 225mm and 240mm. I have it in Acad at work somewhere and it drop about 2.8kg which comes out just over 6lbs. The Fidanza Aluminium flywheel is 4.85kg (10.7lbs) Fidanza P/N: 143281 and fits all 240Z, 260Z 280Z & 280ZX. Thats like over 50% reduction in weight. I think for street use its a bit of overkill. I have read about people having problems with the Fidanza flywheel midlle bolt not lining up on the 3 bolt sections, but never seen one to comfirm it. I have seen one car with a Fidanza flywheel (it was a 280ZX) and it wasn't real easy to drive from a standing start. I can remember when we turned it off and the engine just stopped dead like it had a hydraulic lock or something. It didn't idle all that smooth either.

-
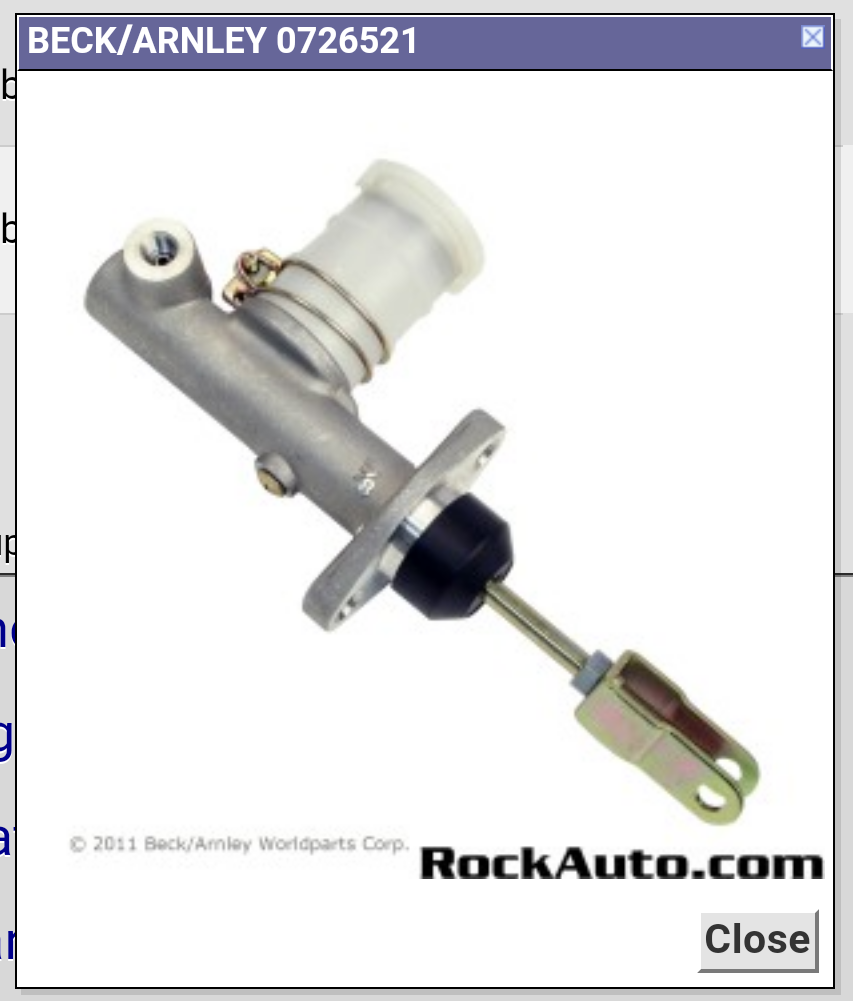
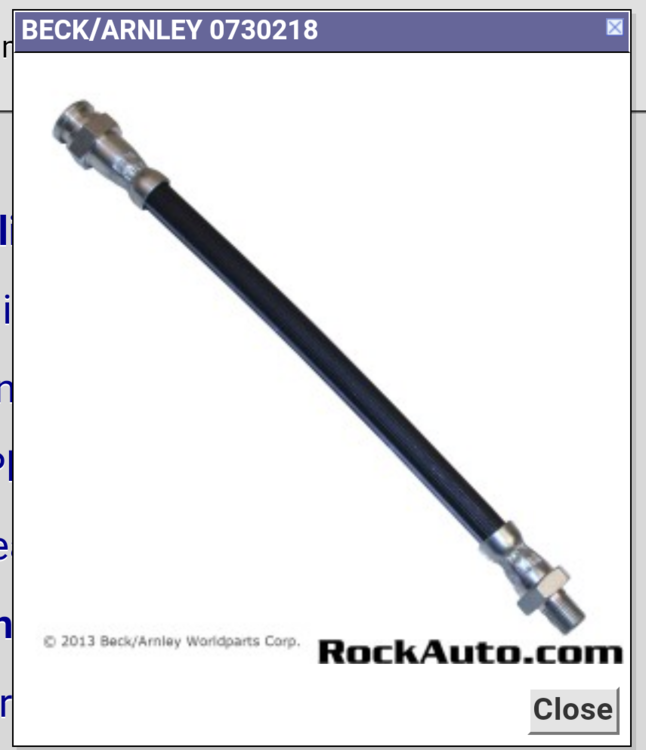
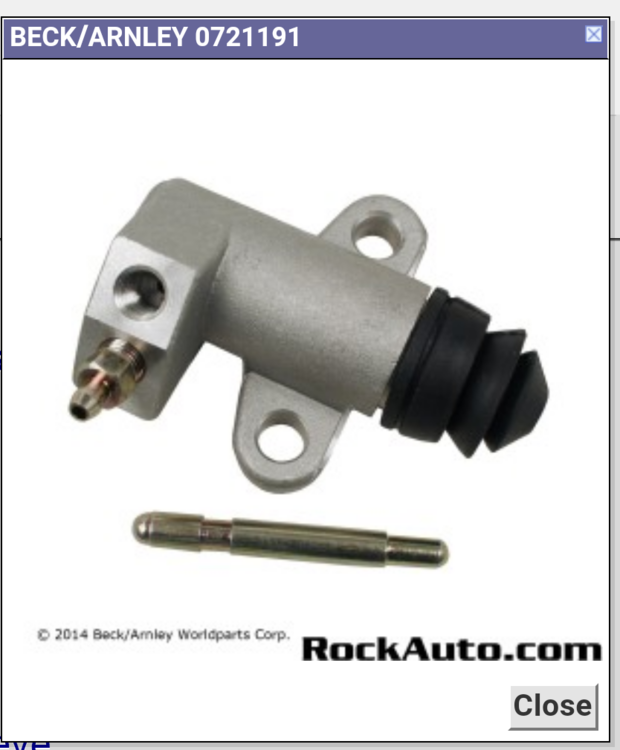
I just ordered a set including the hose from RockAuto. That was 5 years ago and never had any problems with them. I strongly recommend dismantling both and cleaning them before using, even if new. Mine still had machining grit inside which would have damaged the rubbers and reduced the service life. My clutch is a new standard 280Z 2+2 clutch with a lightened flywheel. It works great and designed for the heavier 2+2and Turbo 280ZX. I like it because it has the light feel and still really good grip behind an L28 in a standard 280Z. You will need the 9 bolt 240mm flywheel. The 225mm has 6 bolts. A lot of aftermarket flywheels are setup for both. I had the flywheel lightened myself from a drawing which I can post if you want. I think the drawing was posted by @Blue and I downloaded it. The machine shop changed a couple of radius' because they would make it (what we thought would be) too thin in places. The main reason for me lightening the flywheel was to compensate for the heavier pressure plate. Its about 2,5lbs heavier and the disc is also a fraction heavier. The lightened flywheel makes it snappy of the line and help it accelerate better. My wife had a little trouble with stalling it the first time she drove it, but only in the begin. Setup: Flywheel: 240mm out of 280ZX 2+2 lightened to about 15lbs if I recall correctly. (Can check when I get back home) Pressure plate: Standard unit via the Nissan dealer here in NL. Clutch disc: Standard unit from Nissan. Throw out bearing collar: My original 280Z collar. New (Rock Auto) I think Beck/Arnley brand Master cylinder New (Rock Auto) Slave cylinder and haydraulic hose. Self adjusting type, (no adjustable push rod). Ofcourse you can source others brands that are just as good. My experience up to now is positive.


-
Just read through this thread and it seems like you might have more than one problem. A slipping clutch can be caused by two things. 1. Incorrect adjustment or 2. Worn out pressure plate or clutch disc. Pressure plate diaphrams can crack (not often, but they do) which can give the clutch a light feel and it will slip. Check your clutch fork. If you can move it forward and backward in the slave cylinder, then its not an adjustment problem causing the slipping. The very early series I 240Z had the adjustable push rod and a spring to pull it back into the slave cylinder. Remove the spring and check free travel. The later type is non adjustable. You should be able to push the rod/clutch fork into the slave cylinder about 10-15mm depending on clutch disc wear and correct collar/pressure plate combination. If you have no free travel or the adjustable version slave cylinder piston seems to come out to far, check your pedal adjustment. It's important the clutch master cylinder returns all the way. Otherwise it will not expose the rear port and fluid can not return to the tank. Follow the FSM to adjust it. If all this checks out and it still slips then you will need a new clutch. Your second problem, grinding in reverse is mostly caused by poor adjustment. 1. Then you have way too much free travel, which in turn will not cause the clutch to slip. Other things that can cause a sticking clutch are: 2. Air in the hydraulics. Try bleeding the clutch. 3. A dry binding pilot bearing or spigot bearing as it as sometimes called. It's in the back of the crank and people often forget to lube it when doing clutch work. 4. When you disengage the clutch the clutch disc moves away from the flywheel a fraction. It does this by sliding along the input shaft. If the input shaft is really dry it won't move and the disc will drag on the flywheel. 5. Incorrect pedal adjustment. See FSM for adjusting pedal. The original clutch should handle your engine without slipping. If you are worried about the collar and pressure plate combinations, you can order the kit with the collar. Not as common as they use to be. Back when the series I was still common the replacement pressure plates were for the latrr versionand needed the corresponding collar.
-
I have heard a couple of reasons why they break, but can't prove any of them right or wrong. Forgetting to fit a pilot bearing or spigot bearing as its sometimes called when going from auto to manual is a common reason. I would expect this to cause some vibraction because the clutch disc would be of center. No lube on the clutch fork fingers. The dry contacts don't let the fingers slide over the tabs on the collar. That causes a sidewards force when the fork goes through its pivot radius. That force back and forth breaks the guide. The bearing pieces are most probably from the main bearing in the adapter plate. It's the one that goes most the time. Strip it down and inspect the parts first. Then decide if its rebuildable. I have a list of all the more common parts you will need and all the lastest Nissan part numbers or all the bearing and seal sizes if you want to go aftrr market.
-
I don't think it will be the deal your thinking of if they sent you a quote. I got a quote from them a couple of years back for some stuff. They were using UPS at yhe time, and it was way above what I was expecting. Ended up going by a member here. Maybe a member on this forum can be your middleman to close the deal. I have a couple of members do it for me. A big THANK YOU for their efforts. Just going from fedex or ups to usps can make a big difference in shipping costs. Pitty another vendor is stopping. It's bound to happen eventually, just sad to see it.
-
I would have it just for the bellhousing to swap on my 71C. Just thinking about shipping it scares me a bit
-
I want the fuel tank pickup & sender. The later model after july 76 is NLA through nissan and what is still out there is getting expensive. Pitty it doesn't have 5 slotted mags. They look like 15x7", but it could be just the photo. Nice offset.

-
Front oil seal is the same as the 5 speed with part number: 32114-Y4000. $5.09 at Courtesy Nissan. Nissan supplieed me a NOK. Type: AH1679G. Size: 30/45x8mm. Not sure if the rear is the same as the 5 speed. The shaft diameter is the same, but Im not sure about the outer seal diameter. I have a 280Z 5 speed seal and the dimenssions. It also fits the 71C transmissions. The part number is 32136-U010A. You could check your outer diameter. The 5 speed has a NOK Type: 400402N. Size: 35/50x11mm.
-
-
Thanks Captain. I can use that formula to map the temp on my spitronics when I get back and have some time to work on it. Like your attention to details.
-
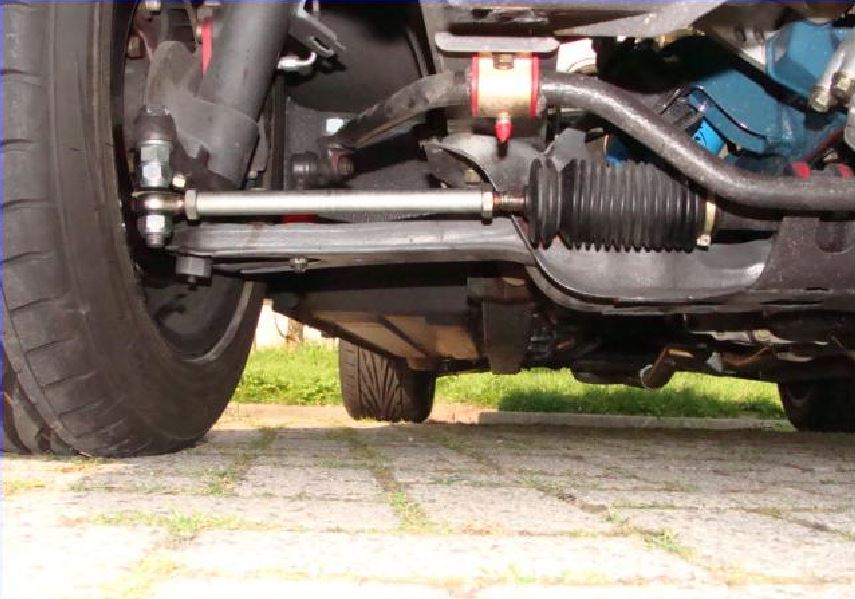
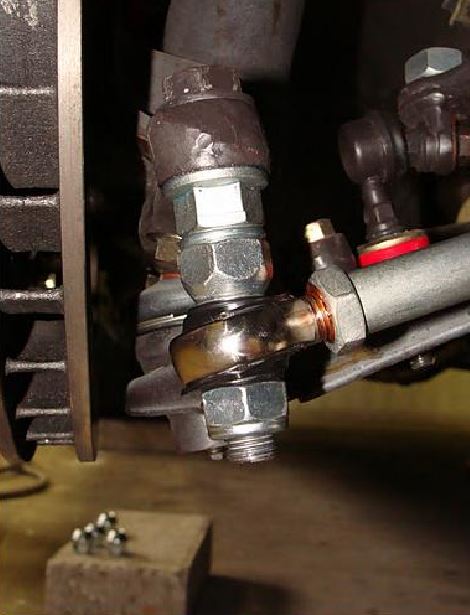
Hi Chris, Looking good. I like your idea with the washers. Nylock nuts don't like being re-used and on the steering is not a good place to start. You are probably going through the same thing we went through. I think it might be in the alignment of the radius lower control arm versus the radius of the steering arm. The steering rack is not centered, a little to the left or right can cause this, so the inner steering swivels is not geometrically the same. Its hard to tell with the rubber accordian in place, but if you can losen one end and slide them to one side you can check if the rack is centered correctly. Just because the steering wheel is centred, doesn't mean the rack is positioned central between the control arms. People often play with the steering wheel so the wheel is centred when driving down the road, but don't realise it can effect the steering geometry. You are getting there. I like watching your progress.
-
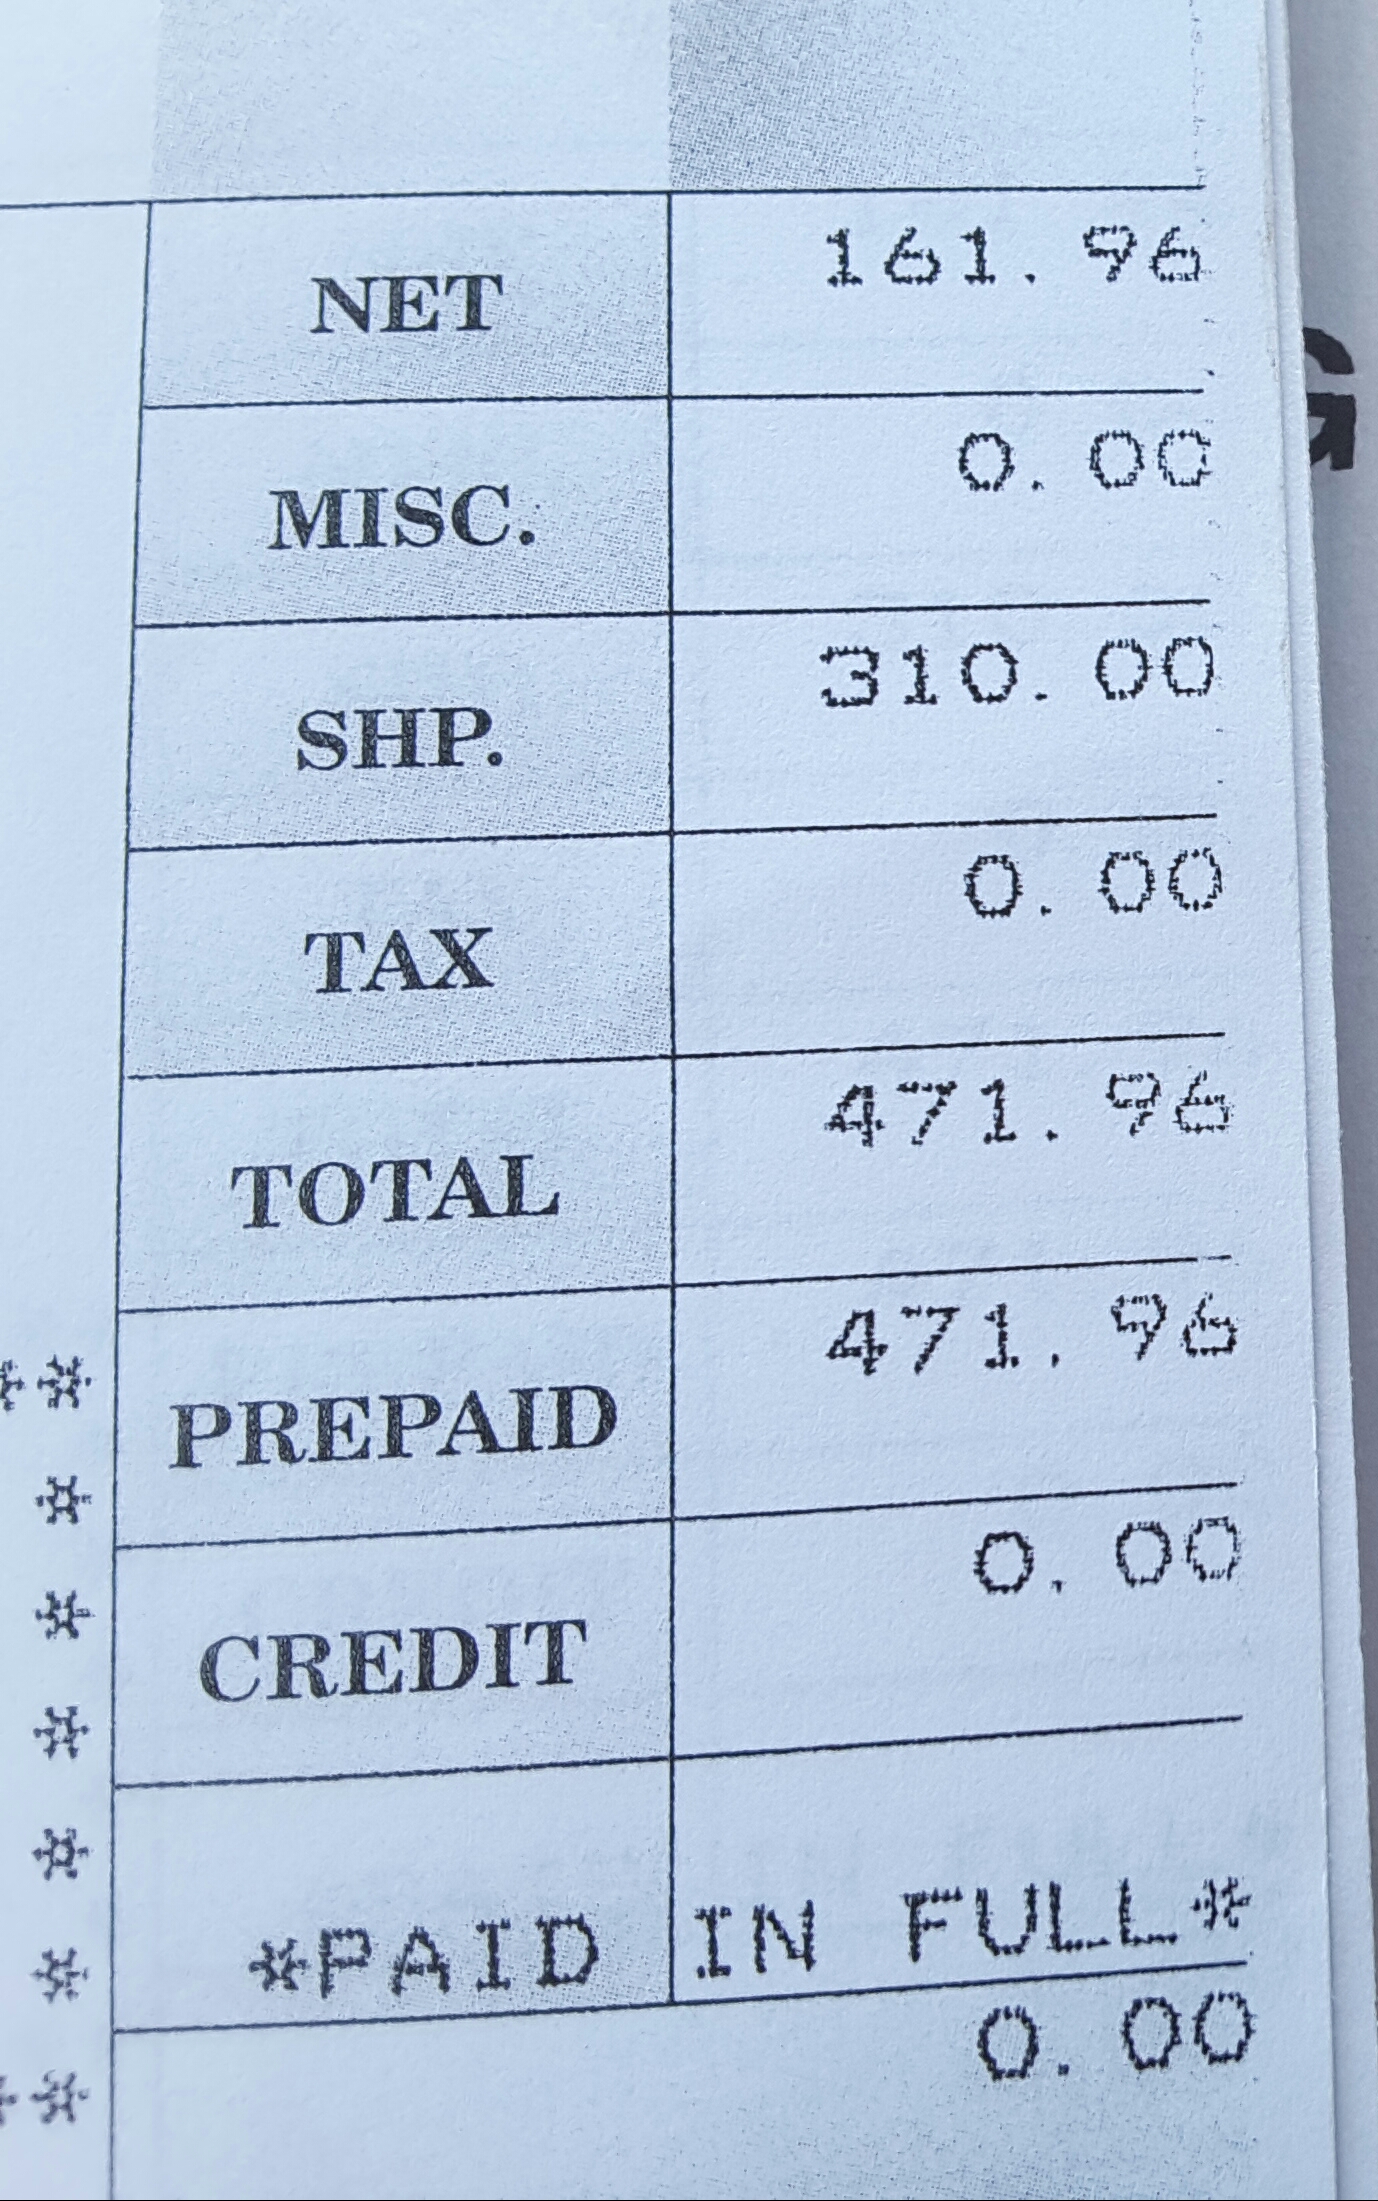
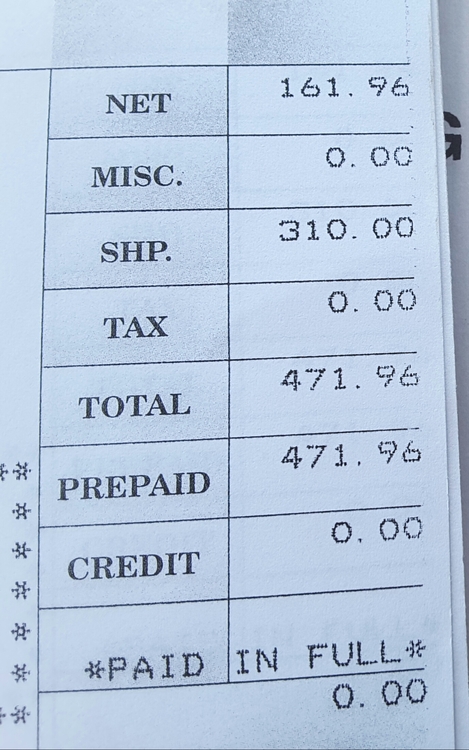
@Namerow. I have paid a lot more than 68%. A couple of yesrs back I ordrrd a air dam from MSA. The package was 15cm too long, so Fedex charged for oversized package. That added an extra $70. Anyway, I paid $165 for thd airdam and $310 for shipping and then another $120 for Fedex admin costs, customs charges and gst. Thats $590 for a airdam that someone in the US can get for less than $200. Grannyknot: Those tie-rods certainy look neat. TTT is not cheap, but it sure has bing bing.
-
Chris, The volvos, anything after 2004 should have an eleftric vac pump and a vacuum switch to activate the pump when the vacuum is low. The pump will activate with key on until the switch de-activates it. Wel thats how the XC90 2006 model works. Im sure a volvo would be easy enough to find at a pick & pull or you could buy a new switch. https://www.fcpeuro.com/products/volvo-brake-booster-vacuum-switch-xc90-31265826 Its a pitty you tossed the bmw unit in the garbage. Mmm you are starting to make a habbit of losing good parts in the garbo. A lot of european makes use mechanical pumps for vacuum. VW use one that looks like a distributor, and renault have one on the end of the cam shaft. Volvo seems to like the electric version.
-
Me too
-
-
A common type used on a lot European cars is made by Hella P/N: 31317530. If you google Hella 31317530 you will find them for about $175 over in the US. https://www.ipdusa.com/products/10334/121739-brake-vacuum-pump-p2-s60-v70-xc70-s80-xc90 http://www.ebay.com/itm/Volvo-S40-XC70-XC90-V40-V50-C30-2001-2013-Hella-Vacuum-Pump-for-Brake-Booster-/151135861207?fits=Make%3AVolvo Volvos have them. They work on 12V and pull almost full vacuum, down to 35mBarA. I had one for my rubbers, but he didn't like the fumes that came off the resin. Used for its original purpose (brake vacuum) it would be Ok. You could find one in a pick and pull easy enough.
-
If I understand your problem, its the steering rack thats giving you most of the clearance issues? If that is the case then I would leave the cross member where it is and lower the rack first. Buy a set of techno toy tie-rods (see link) and use then to correct the tie-rod height. You will need to work the cross member for the steering column shaff clearance. I wouldn't use the bump steer spacer if posible. I have read on this forum and others that they can make steering worse. You should be able to get 25mm by driling the cross member and repositioning the lower control arm pivit point. https://technotoytuning.com/nissan/240z/outer-tie-rods-datsun-240z-260z-and-280z Here is an article on redrilling the anchor point for the LCA to improve the geometry on a lowered 280Z. http://www.zcar.com/forum/10-70-83-tech-discussion-forum/285255-drilling-new-holes-control-arm.html I have seen this done on Zeds and I was involved with one a long time ago (back in the eighties). We basically did the following: Removed the spring to make moving the suspension easier. Cut a bolt so it would fit between the cross member faces. This bolt would fit the inner pivot on the LCA and you could clamp it in place with a G-clamp on the outside of the cross member. That would give you all the movement needed to test toe-in with the suspension in all its travel. Once you found the best position, you drill the cross member and reinforce it with an extra plate or washer on the outside. The new hole doesn't necessarily need to be directly above the original hole. It depends on the radius of LCA versus steering arm. The one we did, it moved out about 5mm further out.
-
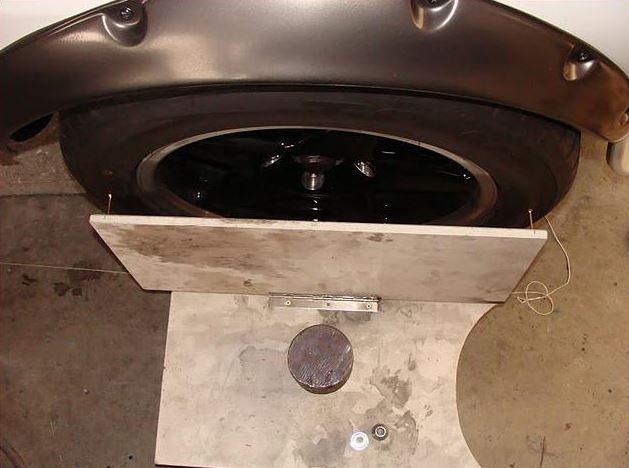
I found the photo's and a brief description of what was done in dutch. The car is lowered about 1-1/2" and the lower control arm anchor point was raised to bring it back to hroizontal. The distance between the steering arm and the ball joint on the tie-rod is 36mm. The bolt is an M14x1.5mm high tensile grade 10.9. Bump steer and toe was checked using a wooden panel in the last photo. The car had coil overs and they were screwed all the way down to get free travel. If you look in the first photo, you can see the lower control arm pivot point in the crossmember is higher. Its about 30mm higher. The reason for the 6mm difference (36 spacer in tie-rod end and 30mm in control arm pivot) is because the new arm is straight compared to the original has a slight bent just after where it connects to the rack. Like Namerow said, you can find plenty to read about this one the internet. Enough to drive you nutters. If you experiment a bit and test like in photo 3 you will get there. I have faith
-
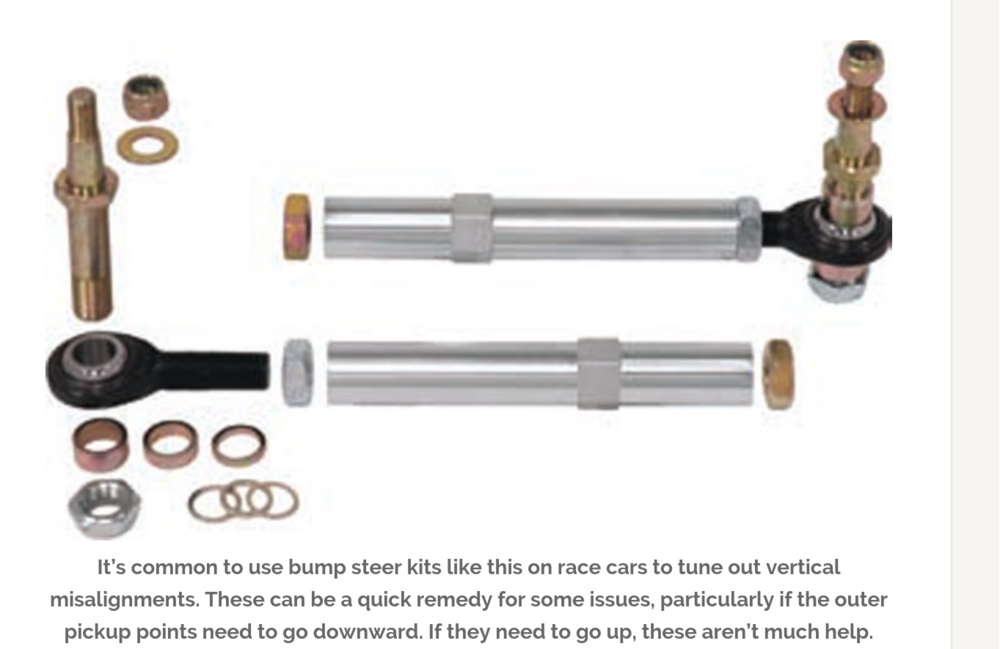
Chris, I have some photos on an external hard drive. Ill dig it up tomorrow and post what I have. Unfortunatly the car (260Z) is no more. The owners son spun off the road and rolled it into a ditch. The important thing is keeping the tie-rod parallel with the control arm and the same length as the original. I think Techno Toys make such a kit. Its been a while since Ive seen one. I found this by googling "bump steer tie rod kit datsun". You need the type with the adjustable pivot bolt on the end so you have vertical adjustment.

-
You could lower the steering rack and correct the geometry by replacing the tie-rods ends with straight ones. The originals are bent downwards. That would give you some room. I have some photos of the straight type. Not original datsun of course. Anyway, the tie-rod should be parralel with the lower control arm and the same length, othrwise they work on a diferent radius and your toe-in goes all over the place when the suspension moves up and down.