


EuroDat
Free Member
-
Joined
-
Last visited
Everything posted by EuroDat
-
 Looks like one of the first 280Z. I'm not 100% sure, but the afm looks very much like the Bosch unit Datsun used in the first months of production. Bosch p/n: 0 280 202 001 (A31 000 050) Must be pre May 75. In May they changed to the Jecs units.
 -
You will be very lucky to find a NOS vacuum modulator. Your best bet would be to search for a vacuum modulator for a Holden Commodore VL in Australia. It used a Nissan 3.0L inline six for a couple of years back in the eighties. It came with a 5 speed or a 4N71B auto. Here is an example ad: http://trade-alley.com.au/modulators-vacuum/commodore-vl-4n71b-4-speed-automatic-transmission-vacuum-modulator-non-turbo.html It should work on the 3N71B.
-
If you want a rebuild kit, look for the 300ZX, 200SX, Maxima kits. Plenty out there. http://www.ebay.com/itm/Fits-Nissan-200SX-300ZX-Hardbody-FS5W71C-F4W71E-Transmission-Rebuild-Kit-5spd/171273648905?_trkparms=aid%3D222007%26algo%3DSIM.MBE%26ao%3D2%26asc%3D41376%26meid%3D20436572be504cd5896109aaba761520%26pid%3D100623%26rk%3D1%26rkt%3D4%26mehot%3Dpp%26sd%3D221371830904&_trksid=p2047675.c100623.m-1 The only thing that won't fit is the front cluster shaft bearing. You need a 63/22 C3 (ID22 OD56 x 16mm) which will cost about $15 - 25 depending on where you go and brand. The one in the kit is the larger FS5W71C bearing (ID22 OD62 x 16mm). The synchros will fit the 280Z close ratio.
-
Hi Daniel, Welcome to the club. I don't know any place in Switzerland, buf in the Netherlads youcan try these guys. http://www.bccp.eu/index.html Here is the kits for the 70-71 240z. Didn't see the 72,butyou couldmail them. They have more than they advertise. http://www.bccp.eu/contents/nl/p3237.html
-
Siteunseen makes a good point. If you can't find someone to press the bearing onto the collar, you can do it yourself. Just don't put the bearing on the work bench and tap the collar into place with a hammer. The bearing is too soft and you can damage the contact surfaces. You can use a couple of metal plates or hard wood (4"×2") with a hole drilled through them for a 1/2" bolt. You will need a bolt or threaded bar long enough to go through both pieces of wood the bearing and the collar and some washers and nuts. When you screw it all together, the bolt will squeeze the bearing onto the collar. To make it go a lot easier, put the collar in the freezer over night. If you are using wood, you will need to freeze the collar. You can also warm the bearing a little in the oven (50 deg C). I like to clamp the bolt head or about an inch of the threaded bar in a bench vice. Then the washer, block of hard wood, bearing with light oil on the collar surface, throwout collar, hard wood, washer and nut. Screw it down until the bearing bottoms out on the collar.
-
Sounds like you are making good progress. The rear seal is expensive via Nissan. Not sure why, compared to the front crank shaft seal which is about $8. The rear will cost $30 at your local Nissan dealer. Part nr: 12279-2B500. The size of the rear seal is 80/100x10mm if you want to try aftermarket. Should be about $5 to $10. While you are at it, I would replace the transmission rear oil seal and the selector bushes (pin bushes and ball bush). The seal and bushes will set you back about $22 in total via Nissan. Change the oil. Most recommend Redline MT-90 gear oil. Suitable for brass synchros. Selector bushes and rear transmission oil seal. https://www.courtesyparts.com/oem-parts/nissan-bushing-lever-32861n4200 https://www.courtesyparts.com/oem-parts/nissan-bushing-32855h1010 https://www.courtesyparts.com/oem-parts/nissan-extension-housing-seal-32136u010a Note: The 32136-U010a replaces the original oil seal 32136-U0100 Word of wisdom when selecting your clutch. Make sure you compare the height with the new with the old. So many people get into trouble with the throwout bearing collar height. If you do this quick procedure with the old clutch and pressure plate, you will know what to expect with the new old. Sort of a practice run. If you already removed the pressure plate then keep going and remove the flywheel. Once you have it out, lay the flywheel on a table or bench and assemble the clutch disc and pressure plate. The disc doesn't need to be lined up perfectly, its just to measure the height of the throwout bearing collar. Position the throwout bearing and collar on the pressure plate and messure the height from the clutch fork contact points to the flywheel surface. It should come to 92mm. The worn clutch disc will make it a little more, but 92 is approximatly where it should be. Do this same procedure with the new clutch. 30 minutes checking this could save you hours of frustrating re-work. There are four different throwout bearing collars and a lot of people get them mixed up with the pressure plate. Nearly always requires removing the tranny and fit the correct collar to solve it.
-
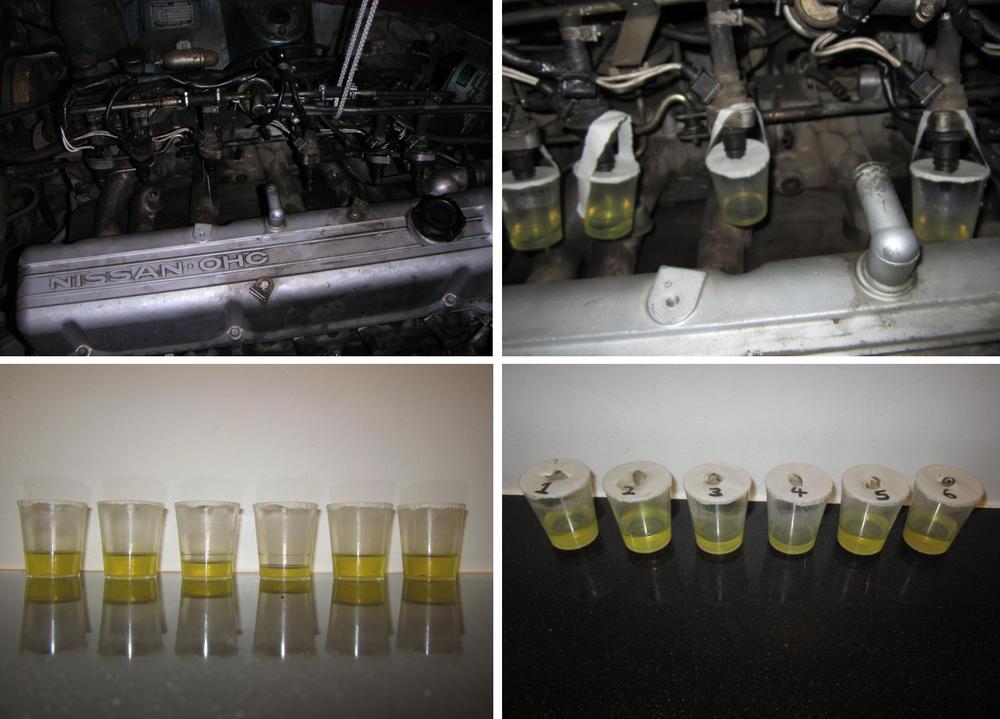
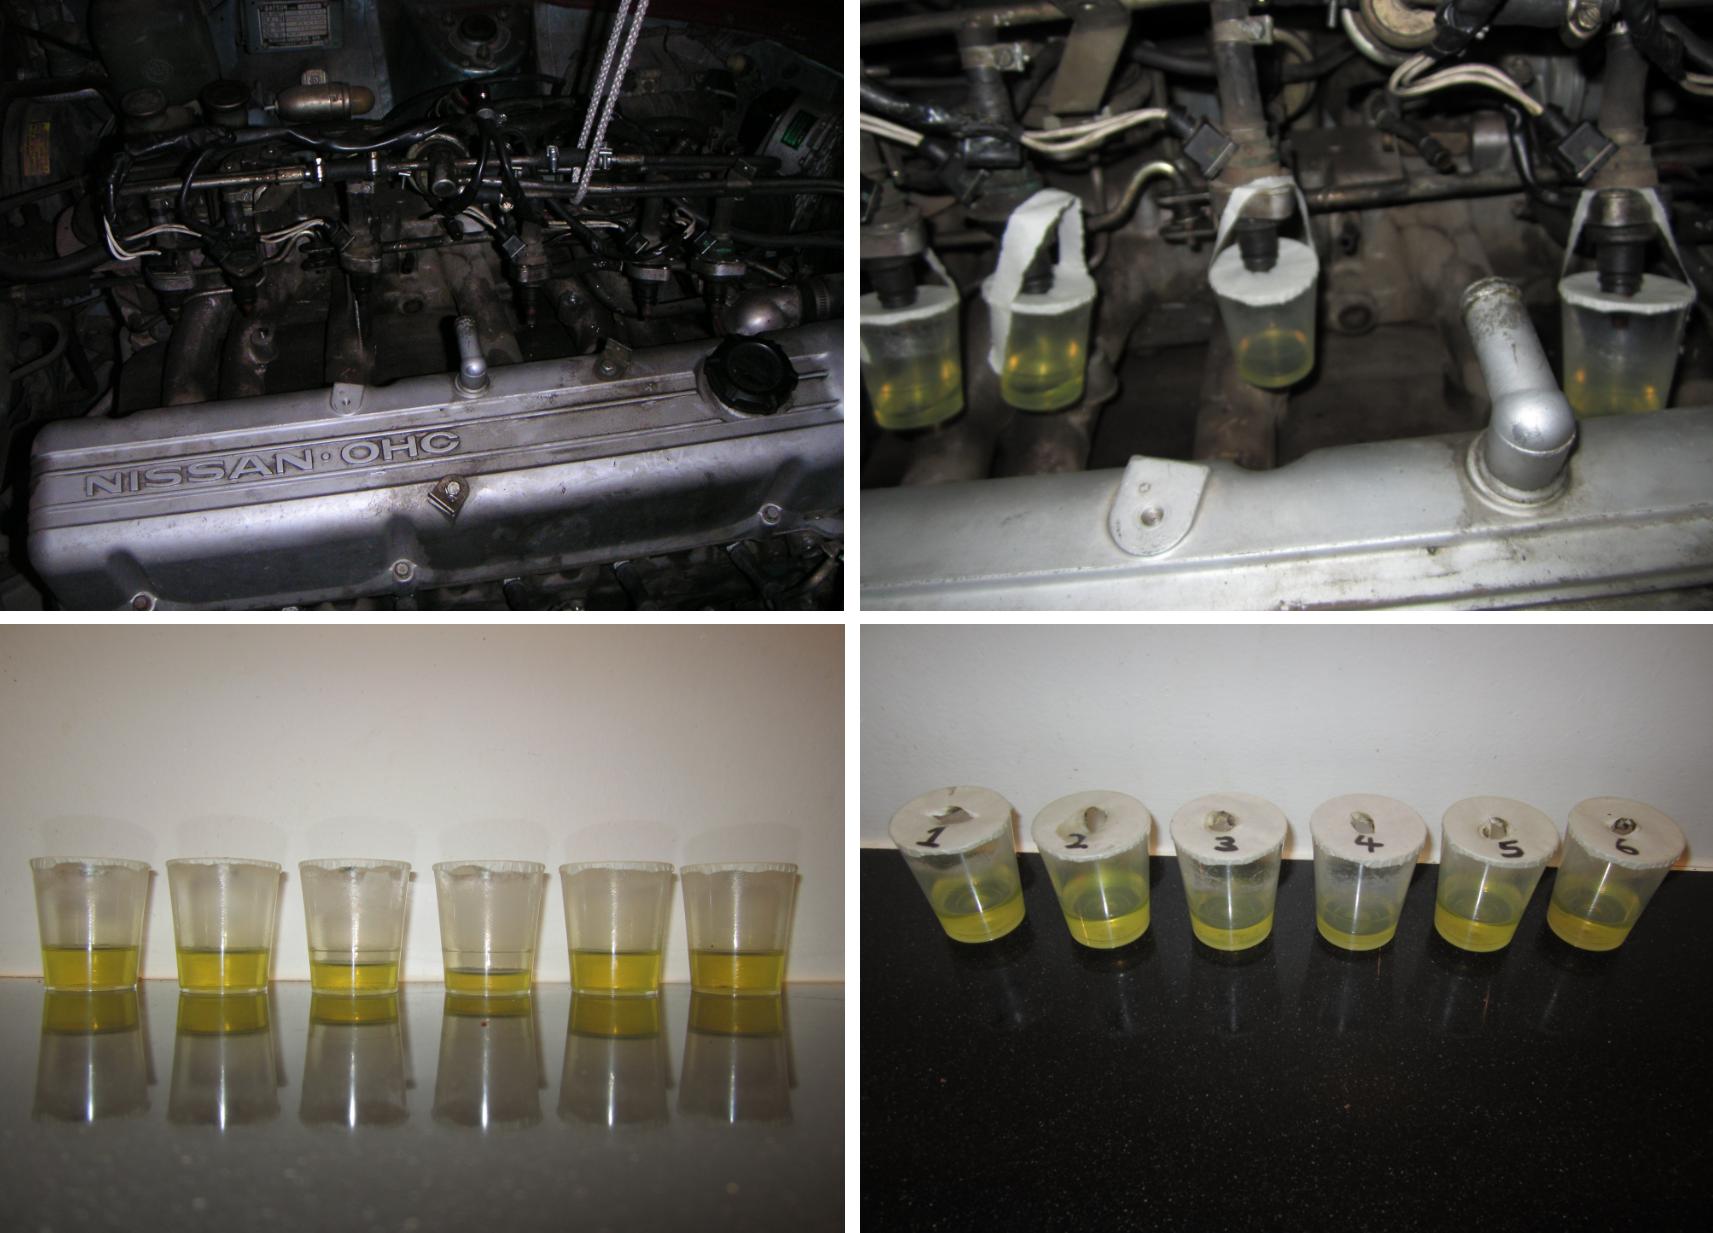
I first tried cranking, but it would take a long time to get any usable results, and even with the plugs out it would be hard on the starter/battery. In the end I made a harness with some old connectors. 3 sets of two injectors in series so they would not be running at full battery voltage. Then two aligator clip on the battery. I still have the harness somewhere. Il take some photos of it and post them for reference. Used a screwdriver through the aircleaner to activate the AFM flap and turned the ignition on to run the pump.
-
Hey Captain, That method looks firmiliar... I found number 3 and 4 injectors were cloggeed using that method by lifting the fuel rail and making a simple container with masking tape for a lid.
-
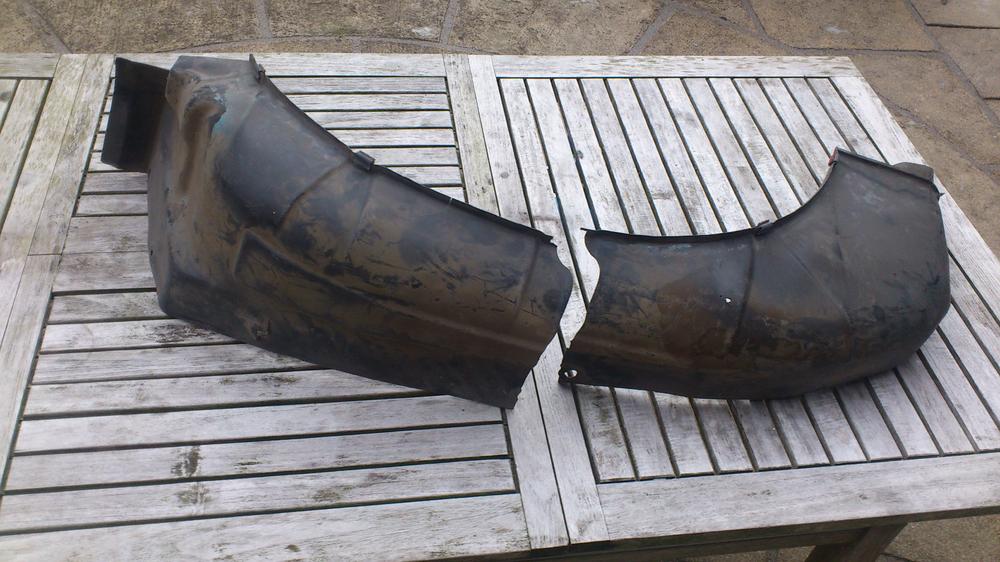
This is what they look like. Different to the 240Z version. Im debating repairing these so I could make a mold and then make a new set out of fibreglass. It's way down on my "to do list". Finding a set in good condition will be hard.
-
I have HLS30-403100 and it's build date is 05/77. I have seen some here in NL: HLS30-378285 with a buid date 2/77. HLS30-386338 with build date 4/77. That would put yours in late January or Feburary.
-
Captain, Im a bit the same. I don't know what mine is atm, other than caster is slightly positive. Ill just sit on the side line and watch Chris do his thing.
-
-
-
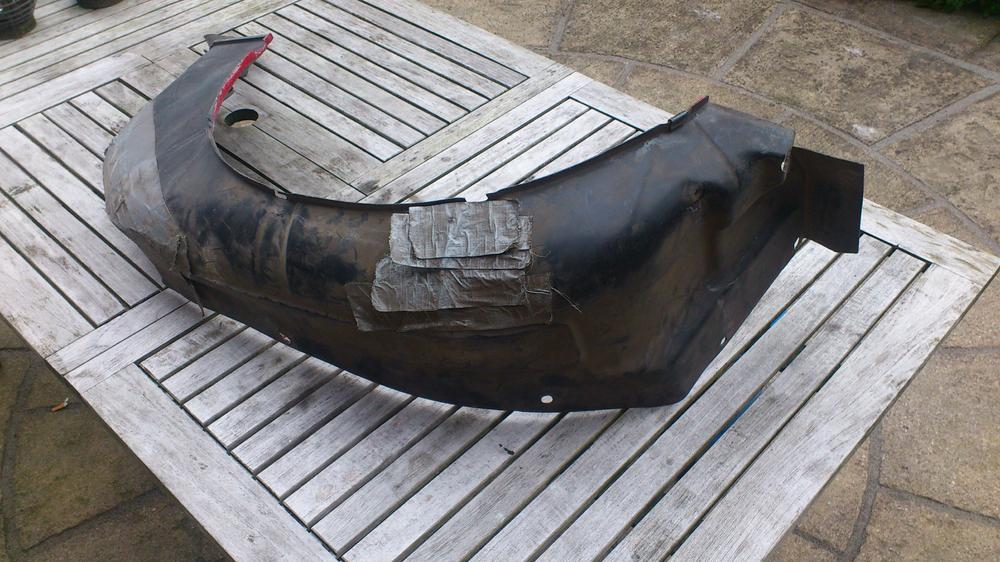
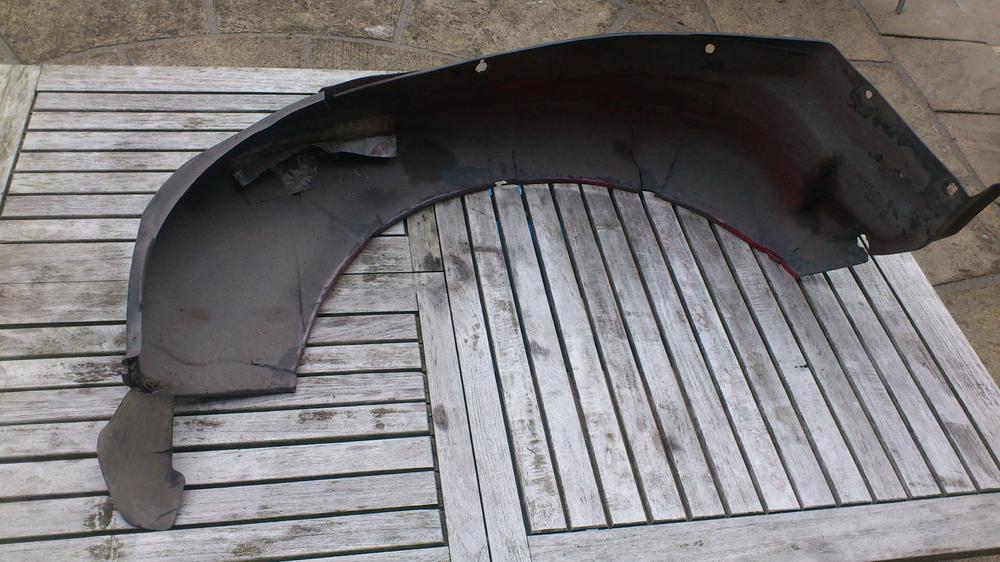
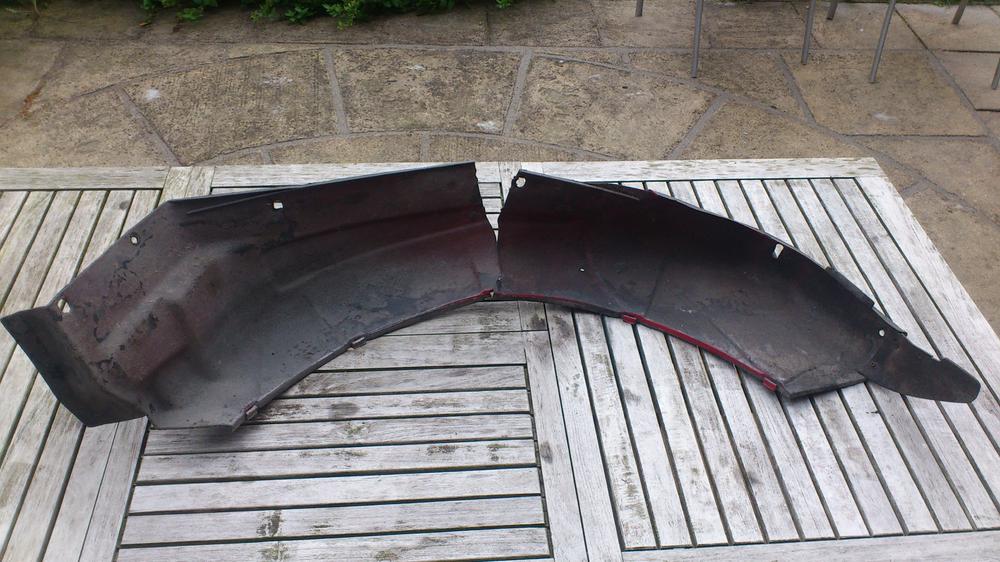
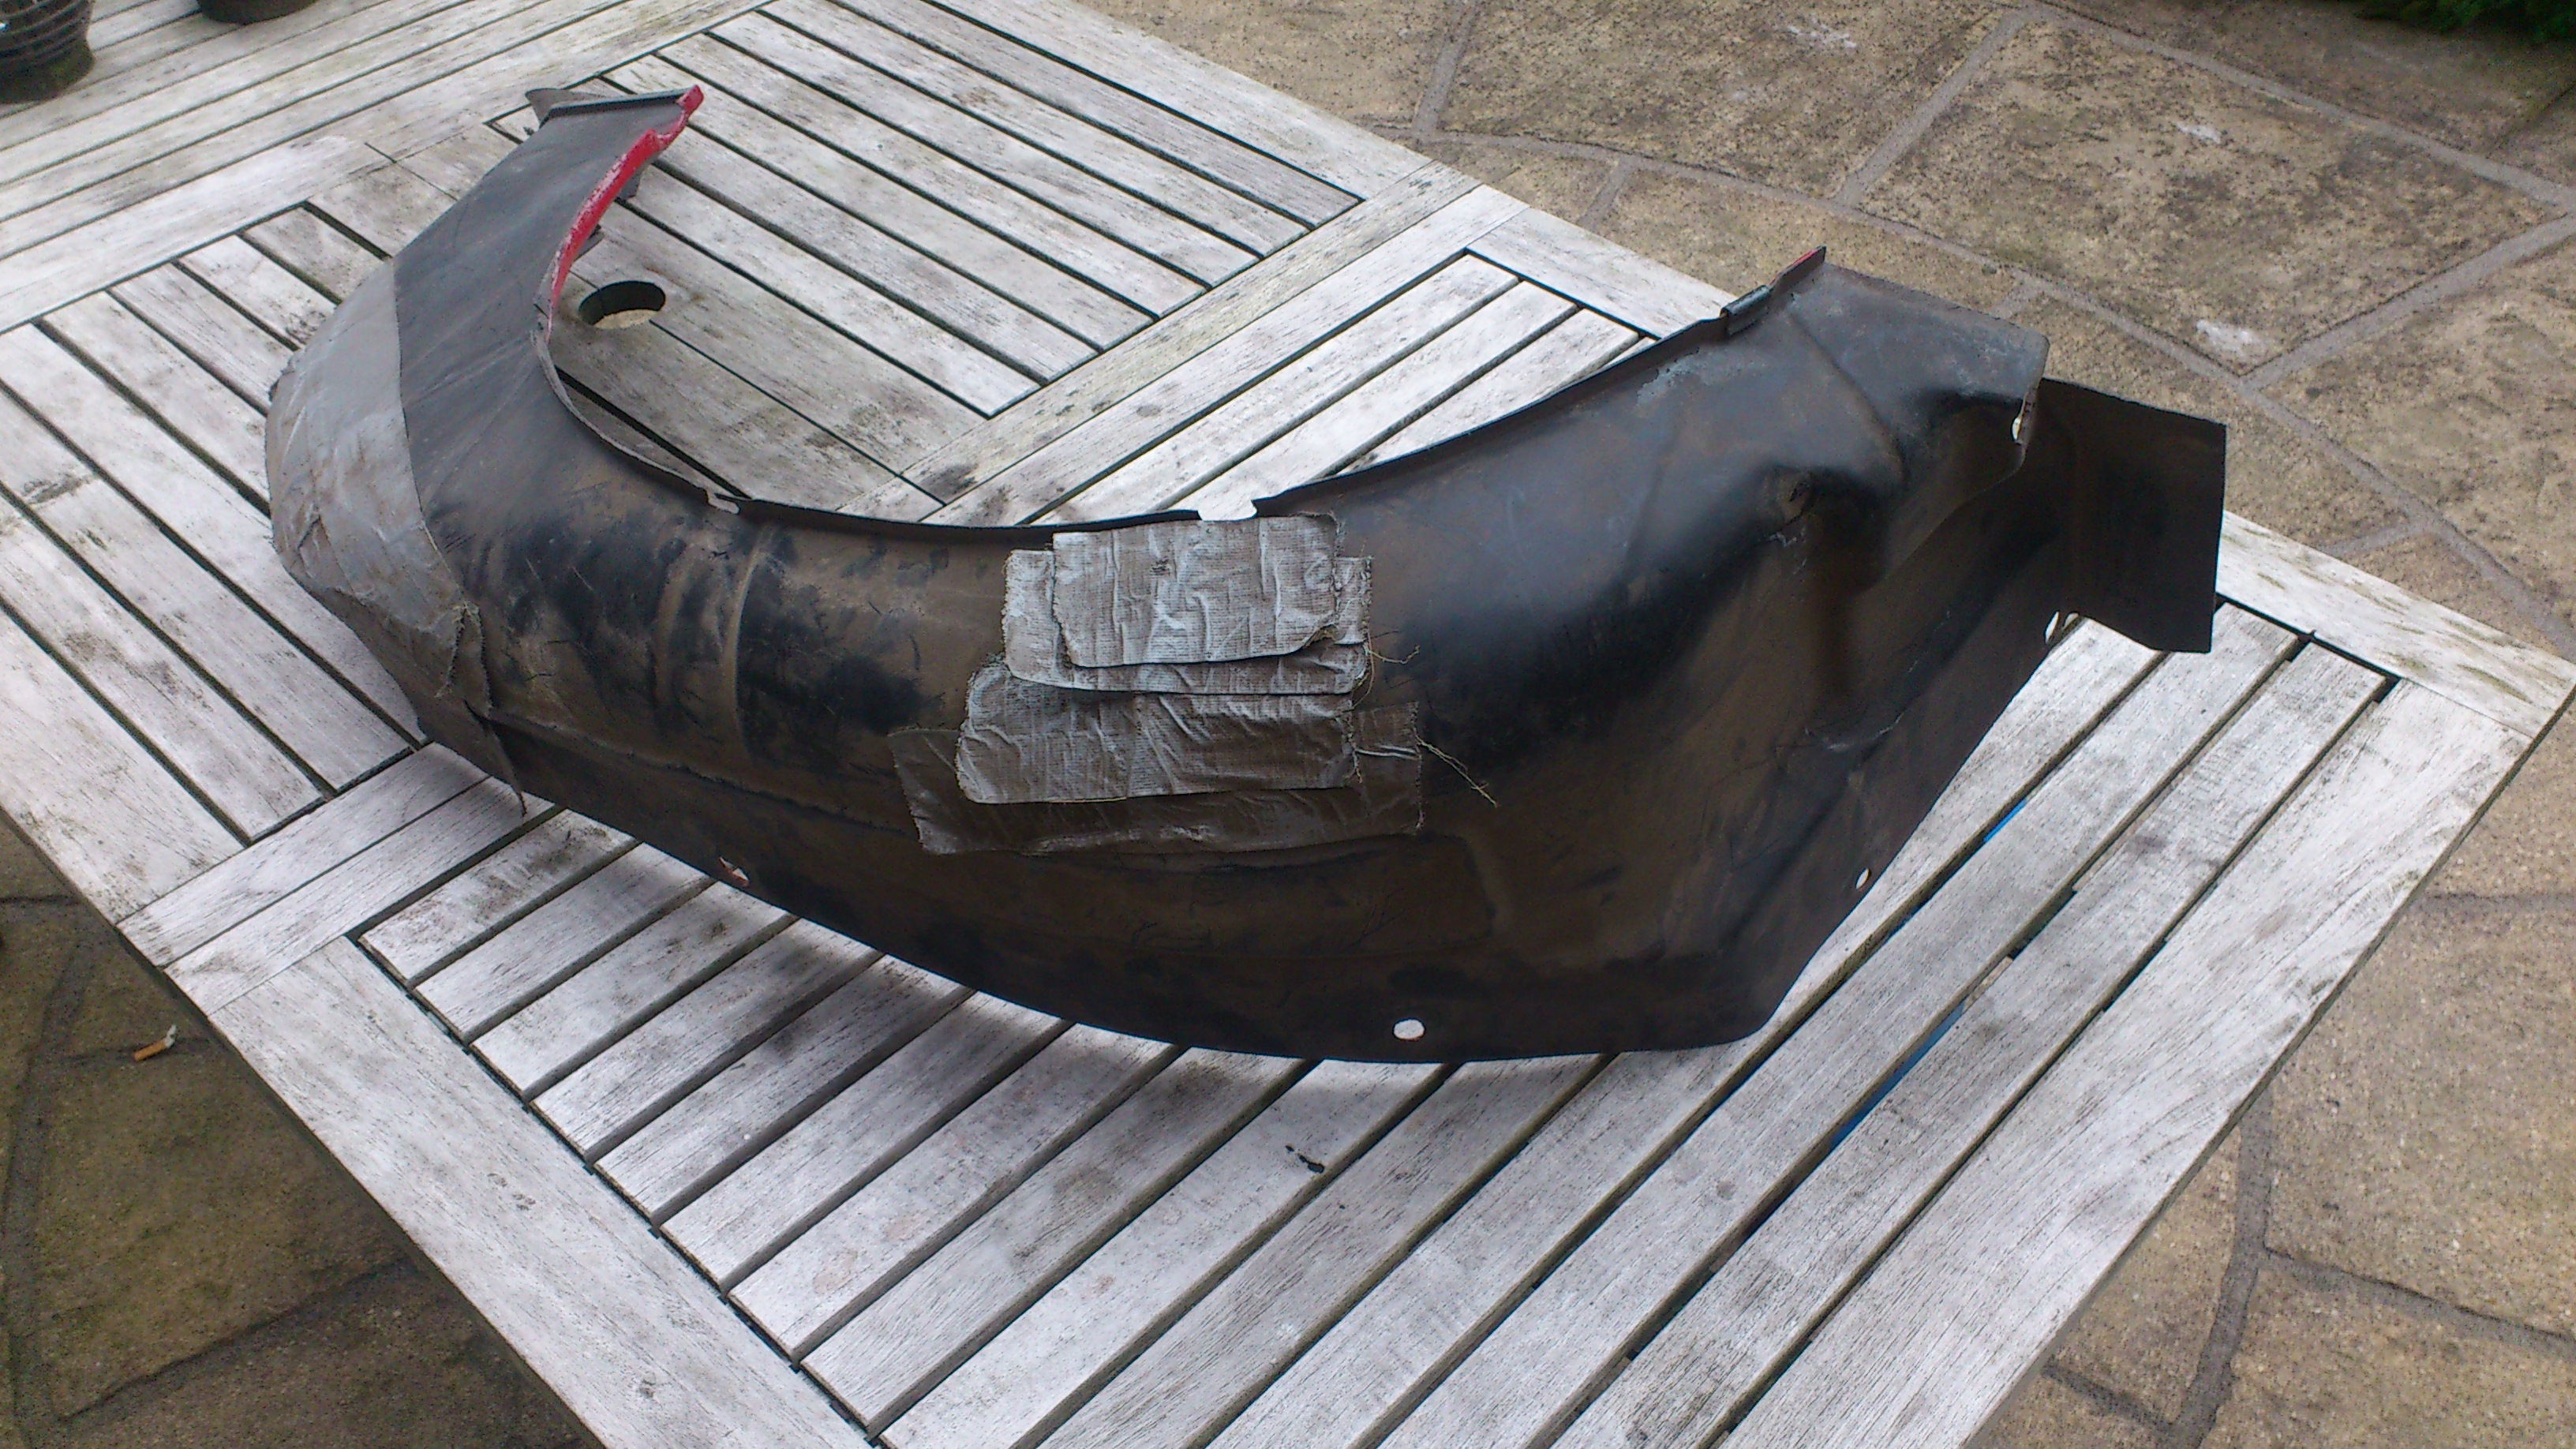
I am a bit the same way. All my mods are reversable if you drill the spot welds carefully and not all the way through, its and easy job to weld the front indicator mounts back on. It took me about 4 hours to get the rear bumper "gap" shield of without damaging it too much.
-
They changed the fuel tank at the same time they introduced the space saver spare in july 1976. The raised deck was done in the 1978 model from august 77 I think. Yours is a 75 so normal spare should fit the well. Whether a normal spare will fit and clear your brakes would be my concern.
-
You can read through my thread. Might give yoh some pointers. If you need anything, just send a pm. Impo done properly, it really looks good.
-
That would be my next move. See if it fits without the o-ring. If that works, then buy a new o-ring and try it again. Is the o-ring new? The o-ring can swell up andmake it very have to fit. Other things to try: 1. See if it goes all the way in without the speedo gearin theadapter. Just the adapter. 2. Can you check the gear height with the electric unit. Top of the gear to the slot for the locating tab/bolt. It could be to high and bottoming out against the other side of the transmission. The gear sits in the adaptor. The clearence to the other side of the transmission stops it from coming out. That clearance could be too small. You can check this by putting a small dab of play doe on the end then installing it. Remove it and check if the play doe shows any sign of contact.
-
If the front brakes are working perfectly and the drums and shoes are assembled correctly, try bleeding them again by pumping the peddle and cracking the left rear bleeder. You should feel the peddle depress further and the brake switch will activate. If you don't get the brake warning light, you could have a couple of problems to fix. 1. Brakes switch seized and failed or light not working. Check the light circuit by removing the bullet connector on the switch and earthing it on the body of the brake switch. 2. Proportional valve is seized and clogged up. 3. A lot of air in the rear brake system. If nothing happens when you crack the bleeder, you most probably have a blockage in the rear system somewhere.
-
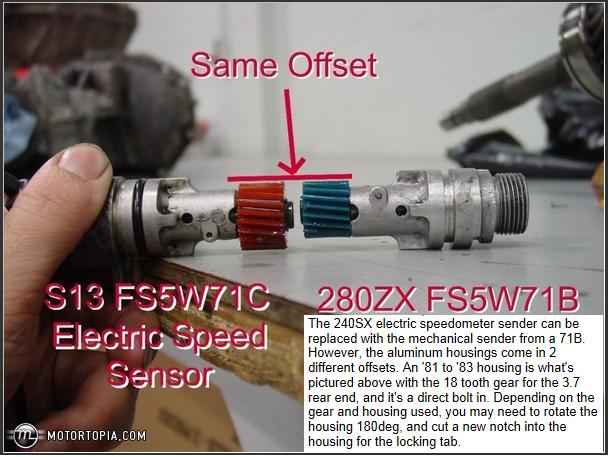
If I understand this correctly, you have a speedo gear, gear adaptor and cable from the original 280Z transmission and now you want to fit it to the ZX transmission. It sounds like you have an adaptor that should face upwards with the slot and bolt at the top, but the transmission has the bolt under the adaptor. See photo. Therefore you have rotated the adaptor 180 degrees to fit it. To solve this problem, you need to machine or file a slot in the opposite side so you can rotate the adaptor 180 degrees. This problem occurs when you do the transmission upgrade from a 240SX with electirc speedo to a 240Z or 280Z with manual cable version. It should be easy to correct if that is your problem. Goodluck.

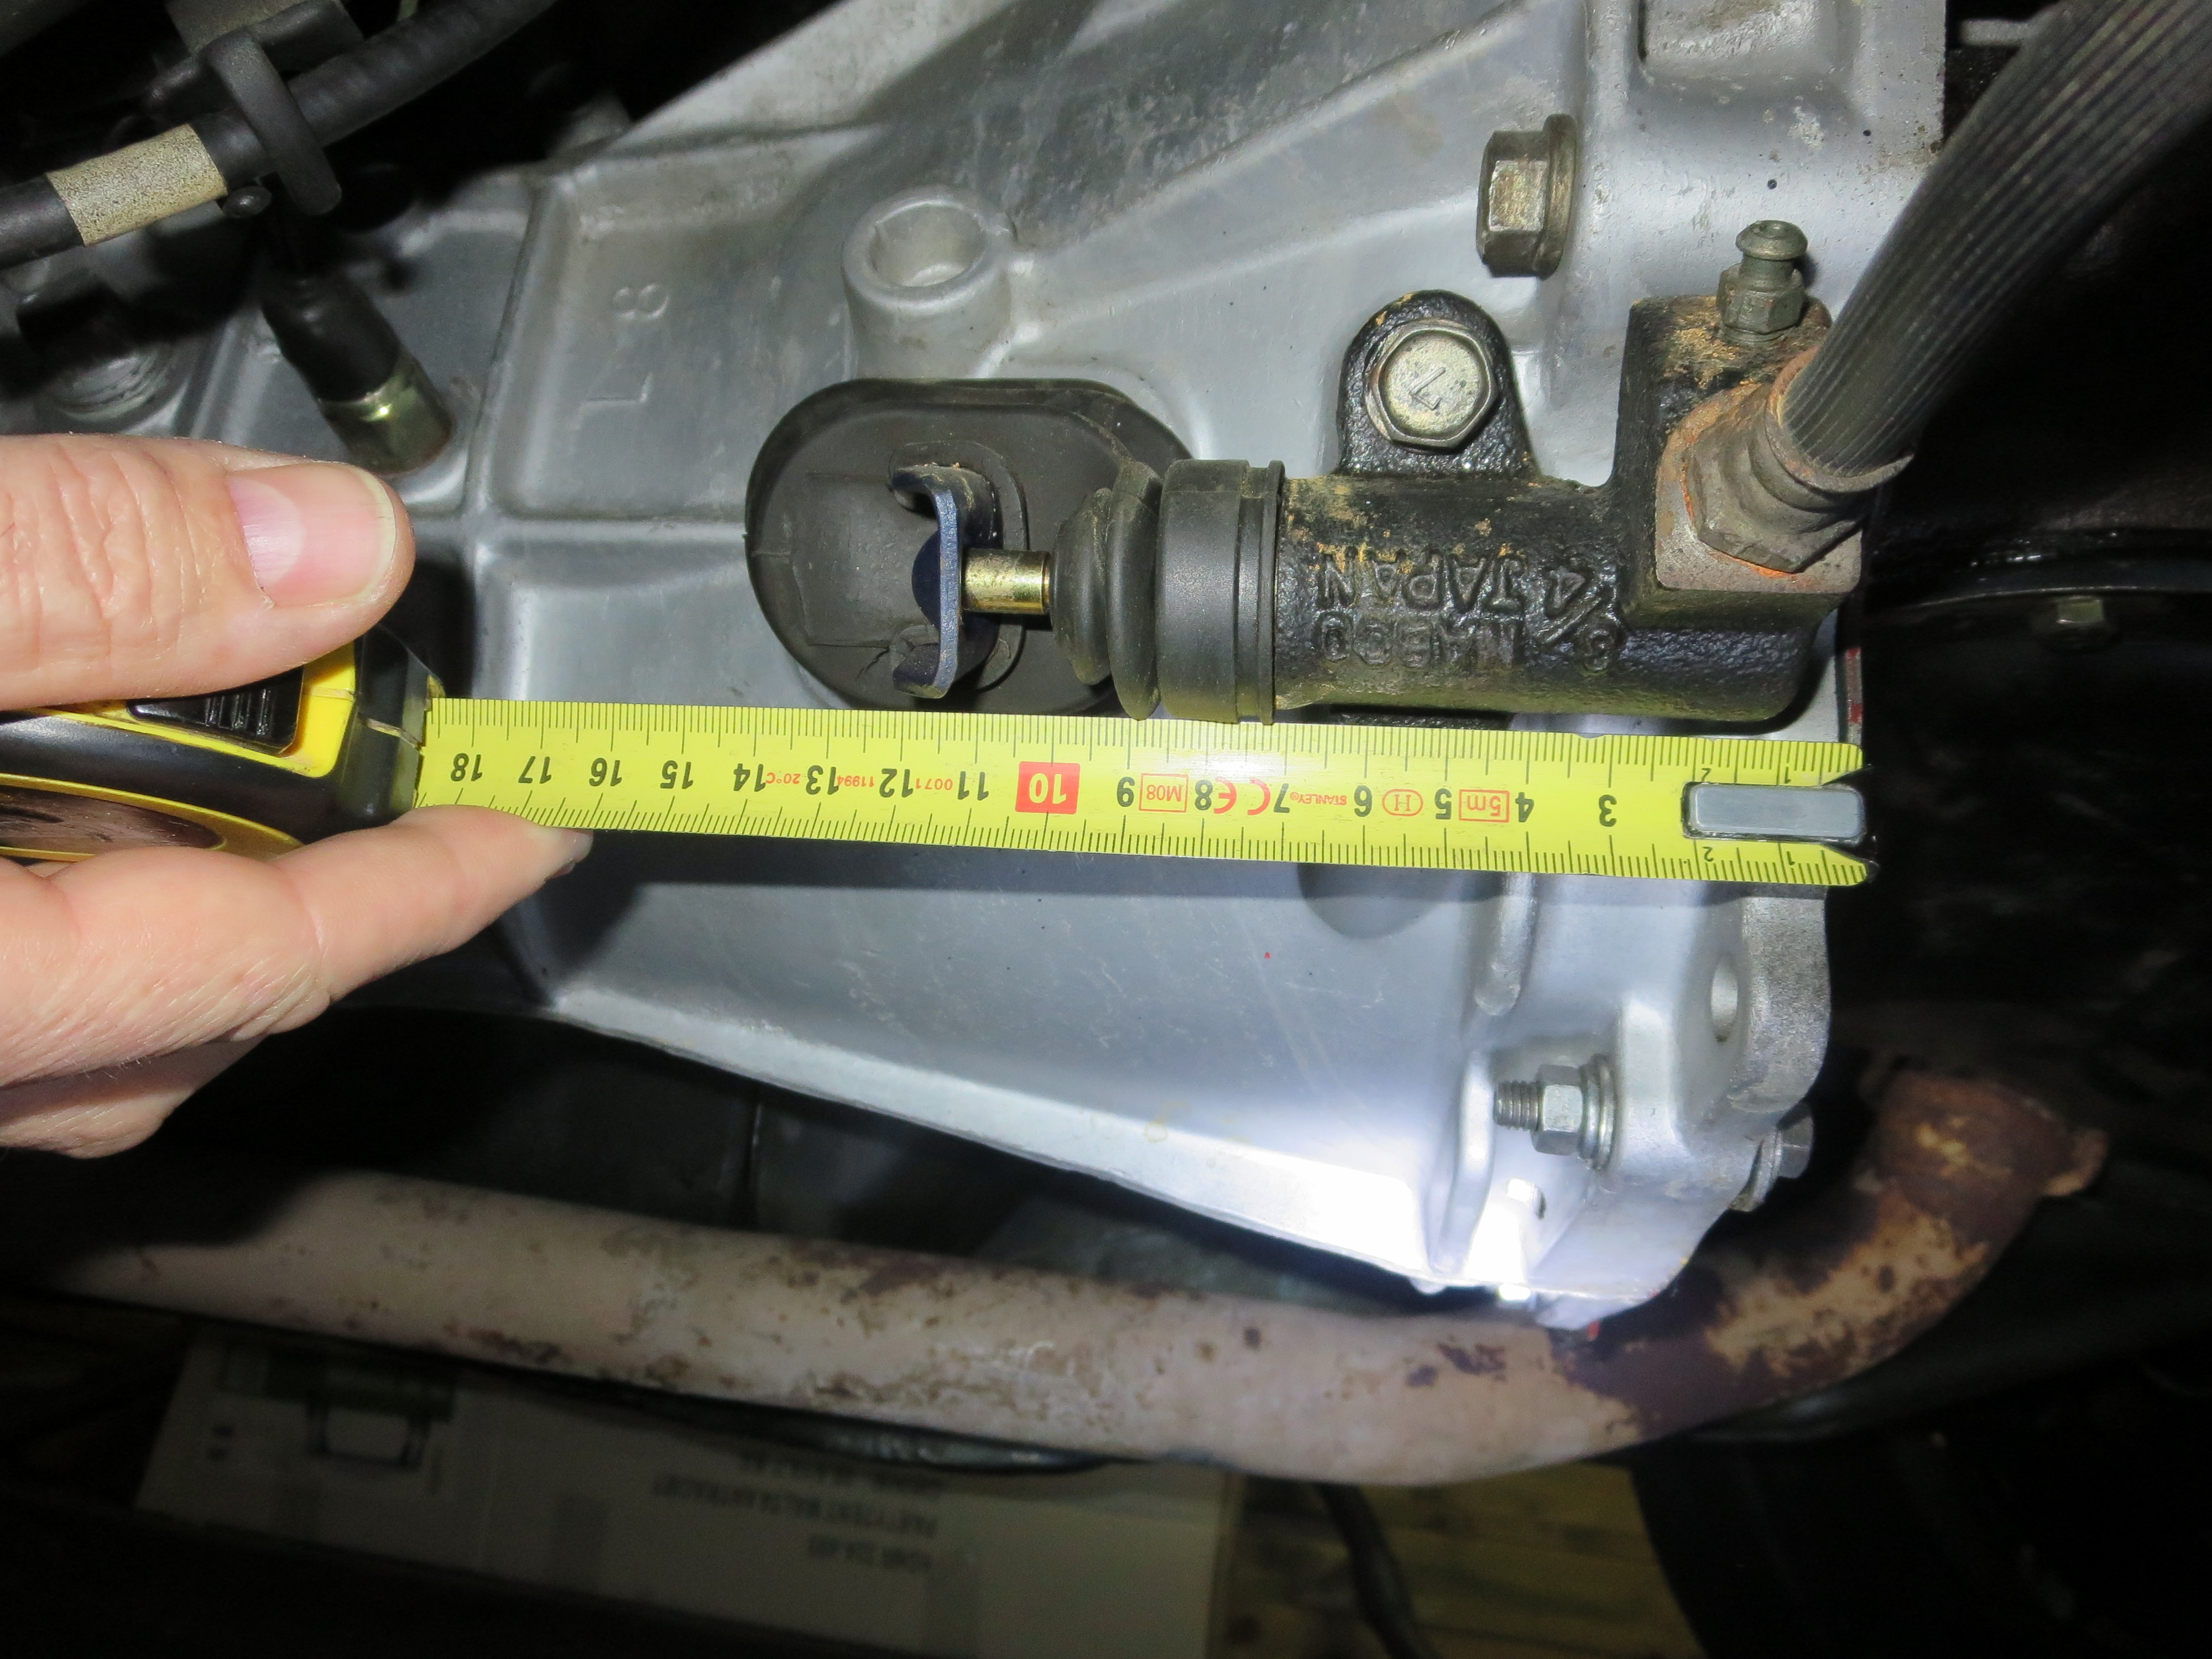
 The sentence in bold italics is sometime that I would check too. You have not mentioned seeing the clutch fork move when you press the peddle. Can someone help you to confirm its moving? Have you adjusted the master cylinder rod correctly? If it doesn't return completly (incorrect adjustment) the hydraulic fluid will not pass from the reservoir to the cylinder. You can tell if you have the correct (or one that should work) by measuring the distance between the fork and the bell housing. It should be around 110 - 115mm. See photo. If you are getting less than 120mm, you are in trouble. The collar doesn't match the pressure plate. It is the pressure plate and collar the have to match and add up to the holy number of 92mm. Clutch disc, clutch fork, slave cylinder etc are for all intentions the same. With a new clutch disc and the correct collar you should be down around the 110mm or even a little lower. The collar you should have for the 280Z orriginal pressure plate is 29mm. If you have a pressure plate for the 2+2 it will need the 25mm. You should be able to push the slave cylinder push rod back into the slave cylinder about 10 - 15mm. Just push firmly on the back of the clutch fork with the palm of your hand. This will tell you a couple of things: 1. The master cylinder port is open to its reservoir, and 2. The push rod is the correct length and allows for clutch disc wear.
 Jalexquijano, Chickenman is spot on. I know some other (non datsun) old timers using the carb junky set-up and it works well for them. It's wired in the same relay (double 87 pin) that activates the compressor. You can simply adjust the rod to the corrsct idle setting you need. Only negative thing I have headd, is one celica driver was complaining about it not compensating for a cold engine, but the origjnal system didn't compensatd either. He was using it to de-fog in the winter when the engjne was cold and then it wasn't increasing the revs enough to idle smoothly.
Im interested in hearing what they say. I have used their fkm and isolast products a lot and they have made special parts for the company I work for in the past. Set-up costs will be the main hurdle. Captain Oblivious posted a schetch of the centre bushing, but has anyone made a schetch of the washer ends? I have a set of washers that are still in good condition.
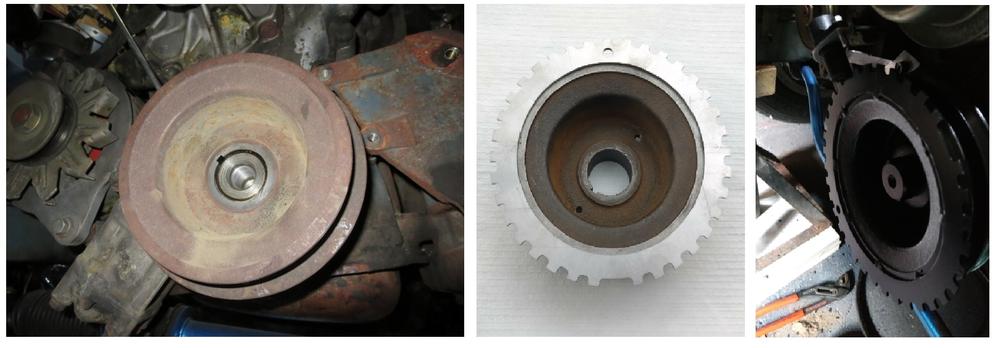
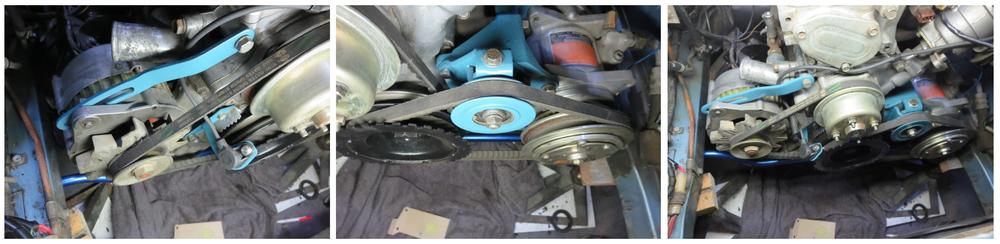
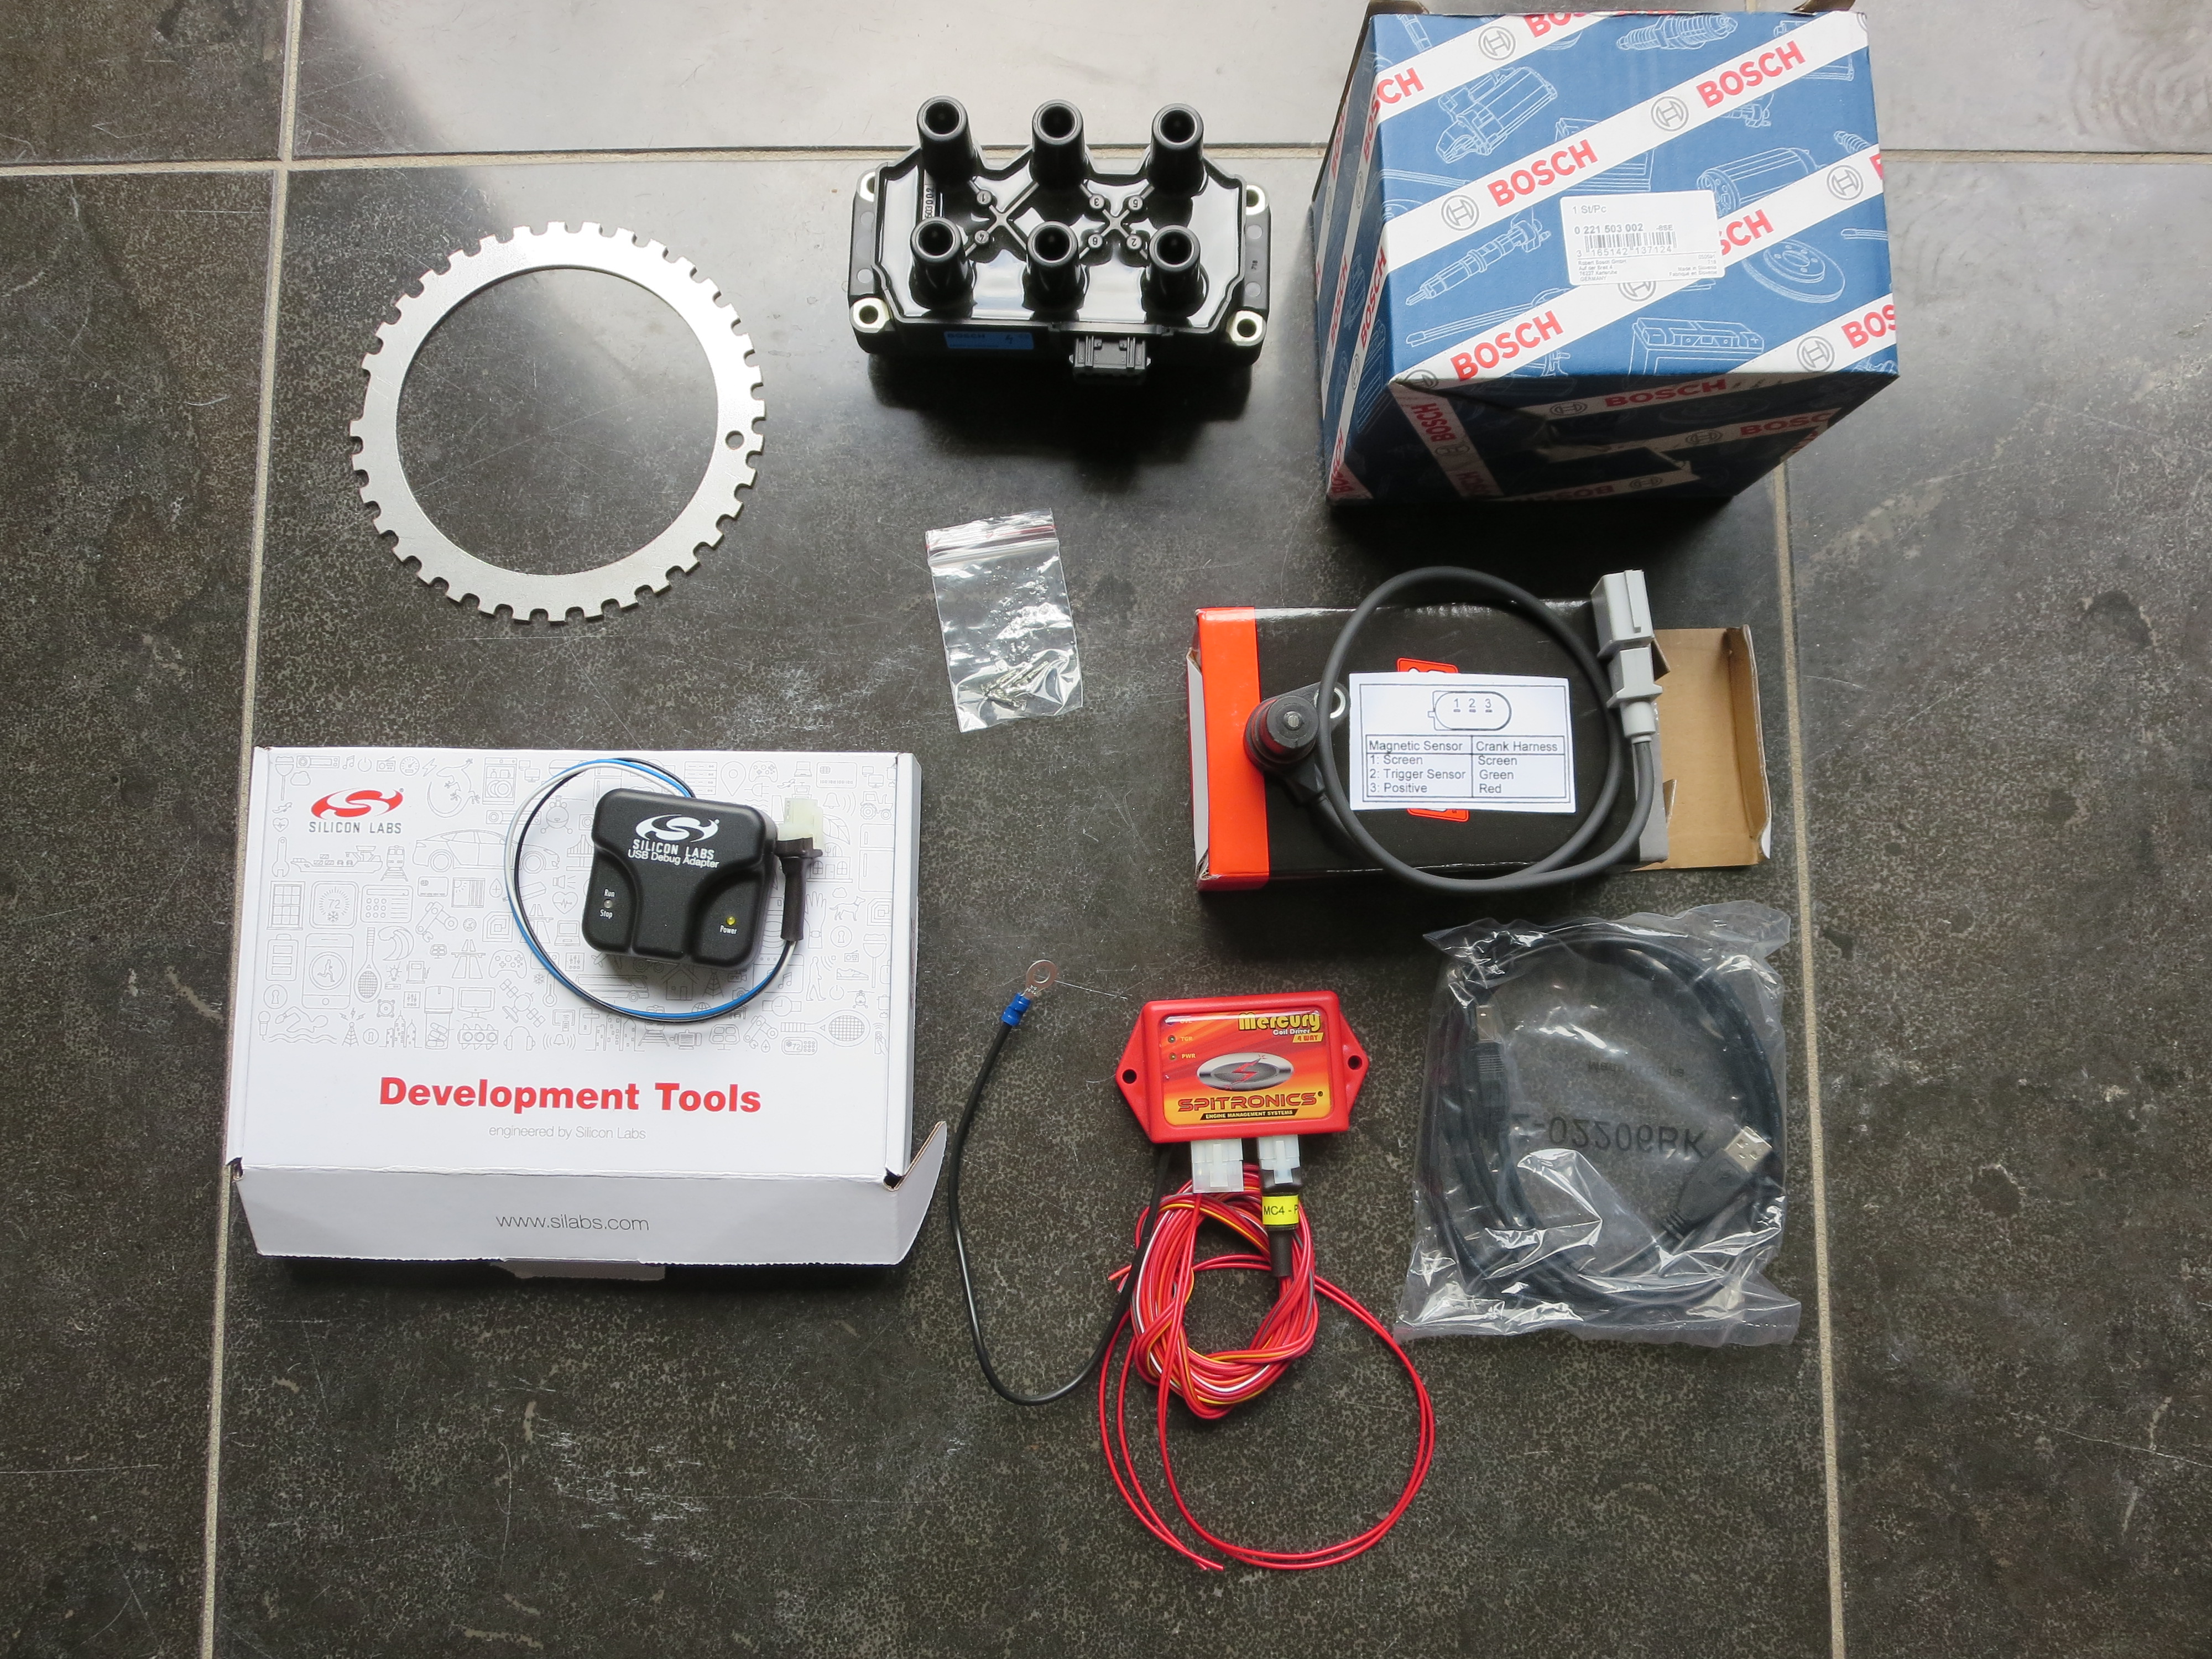
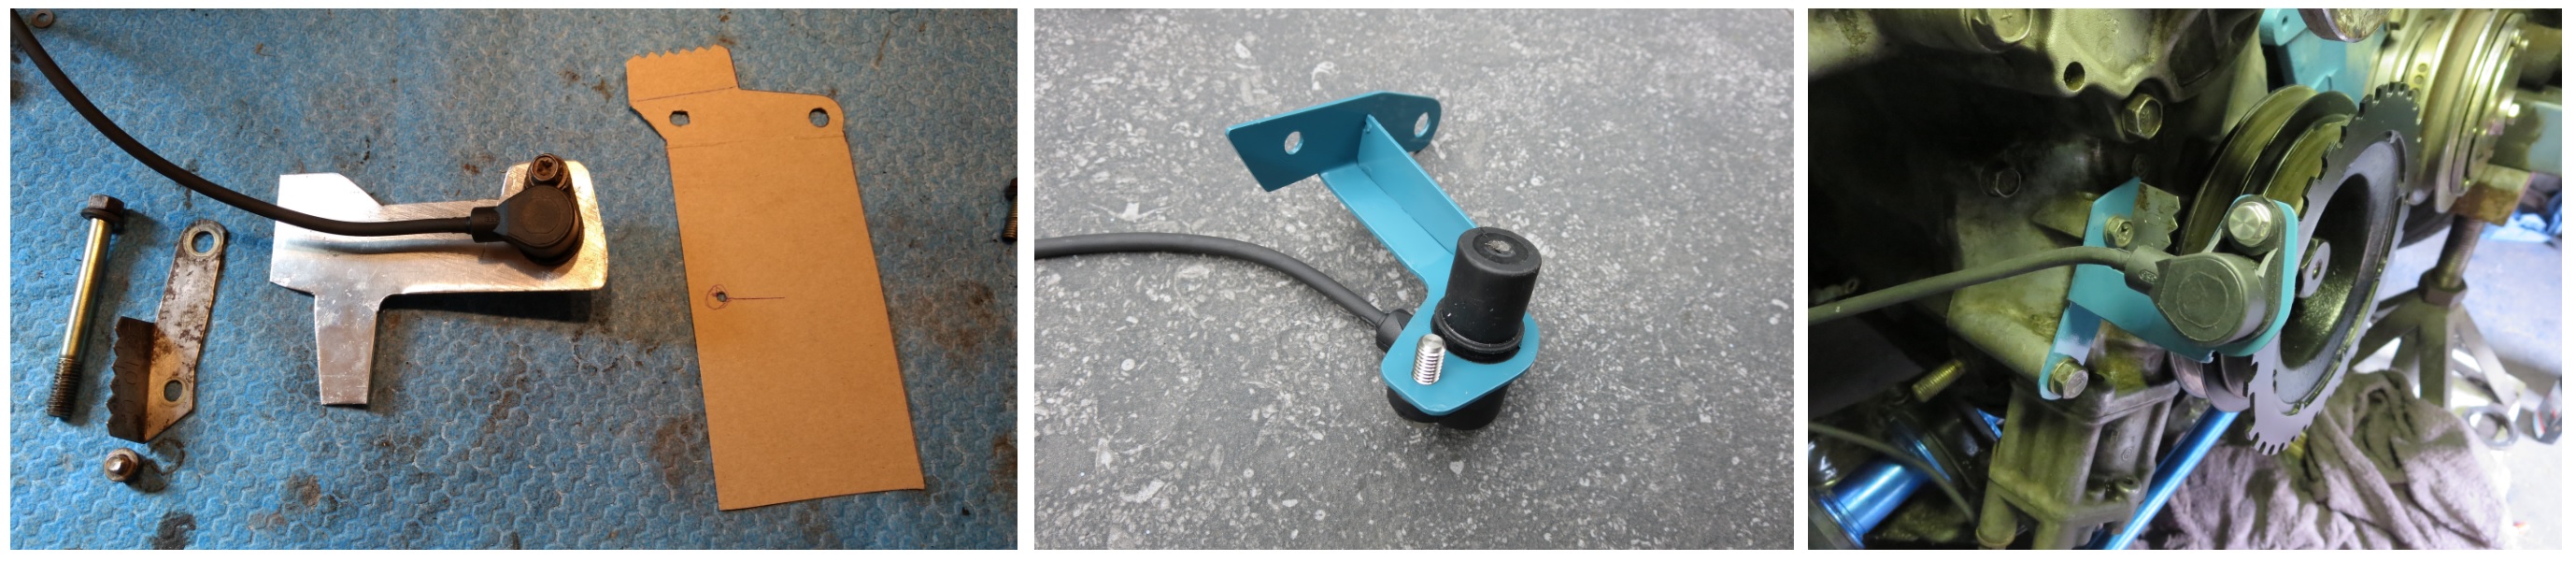
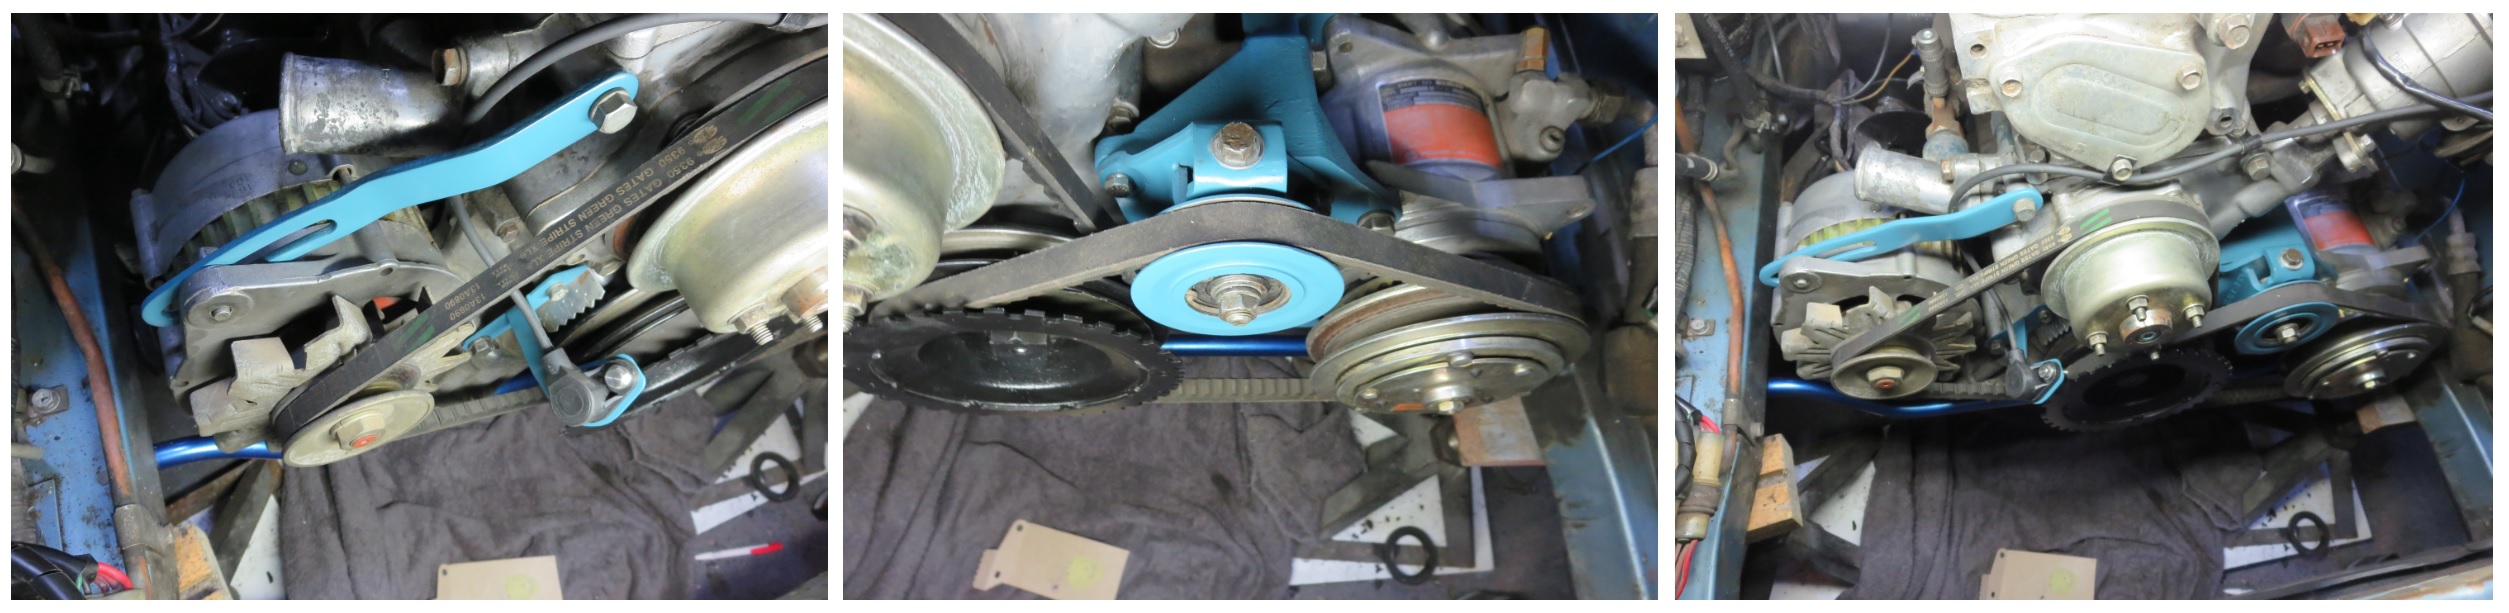
I have not had a lot of time on the datsun lately. Summer holidays and paving the driveway and some other little projects keeping me occupied. I did some more testing on the VR output. With the dissy out of the car running in a lathe at engine speed 1200rpm engine speed, it produced around 1 vac. At 350rpm, during cranking, the 0.45vac is just not enough for the mercury and that generates an error. I wanted to eventually go to a wasted spart system, using a crank sensor in the backing plate and notches in the flywheel. Now with this error problem, I decided to fast track that idea and ordered the multy coil driver and coil packs. For the time being, Ill fit it to the front pulley. It took a couple atempts to find the best position for the sensor and clear the belts and fan. It mounted nicly in between the alternator belt. Fitted the trigger wheel and set it to +/- 60 degrees btc. I can fine tune it in the software later. You can set it just about anywhere, but it the ECU goes in limp mode, it will go to 10 degrees btc. That doesn't work it you set it anywhere other than 60degrees btc. A couple of while Im at it projects. The AC compressor seal needed replacing and I sent the radiator off for cleaning. hope that will be back by the end of the week. Cleaning and painting all the brackets.
Jalexquijano, Chickenman is spot on. I know some other (non datsun) old timers using the carb junky set-up and it works well for them. It's wired in the same relay (double 87 pin) that activates the compressor. You can simply adjust the rod to the corrsct idle setting you need. Only negative thing I have headd, is one celica driver was complaining about it not compensating for a cold engine, but the origjnal system didn't compensatd either. He was using it to de-fog in the winter when the engjne was cold and then it wasn't increasing the revs enough to idle smoothly.
Im interested in hearing what they say. I have used their fkm and isolast products a lot and they have made special parts for the company I work for in the past. Set-up costs will be the main hurdle. Captain Oblivious posted a schetch of the centre bushing, but has anyone made a schetch of the washer ends? I have a set of washers that are still in good condition.
I have not had a lot of time on the datsun lately. Summer holidays and paving the driveway and some other little projects keeping me occupied. I did some more testing on the VR output. With the dissy out of the car running in a lathe at engine speed 1200rpm engine speed, it produced around 1 vac. At 350rpm, during cranking, the 0.45vac is just not enough for the mercury and that generates an error. I wanted to eventually go to a wasted spart system, using a crank sensor in the backing plate and notches in the flywheel. Now with this error problem, I decided to fast track that idea and ordered the multy coil driver and coil packs. For the time being, Ill fit it to the front pulley. It took a couple atempts to find the best position for the sensor and clear the belts and fan. It mounted nicly in between the alternator belt. Fitted the trigger wheel and set it to +/- 60 degrees btc. I can fine tune it in the software later. You can set it just about anywhere, but it the ECU goes in limp mode, it will go to 10 degrees btc. That doesn't work it you set it anywhere other than 60degrees btc. A couple of while Im at it projects. The AC compressor seal needed replacing and I sent the radiator off for cleaning. hope that will be back by the end of the week. Cleaning and painting all the brackets.


Important Information
By using this site, you agree to our Privacy Policy and Guidelines. We have placed cookies on your device to help make this website better. You can adjust your cookie settings, otherwise we'll assume you're okay to continue.