grannyknot
Free Member
-
Joined
-
Last visited
Everything posted by grannyknot
-
 Now I have no crushing need for an answer, just thought this was kinda puzzling. As I have been cleaning up the original bolts and screws I noticed that all of the M6 x 1.0 bolts have the number 4 stamped on the top. Just trying to figure out what it signifies, strength perhaps?
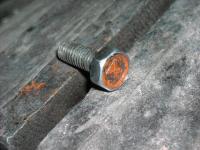
-
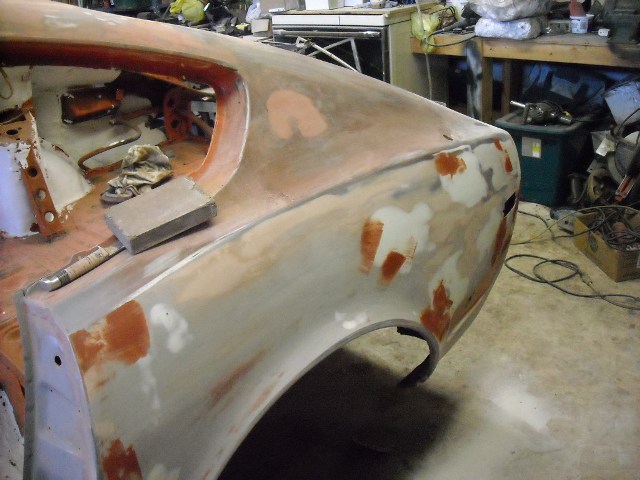
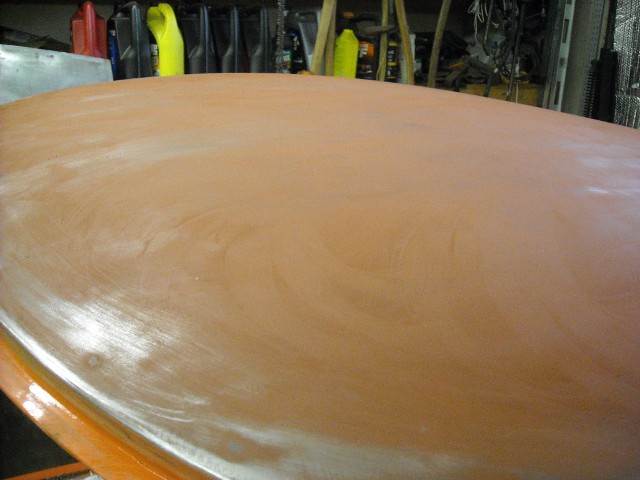
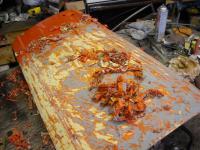
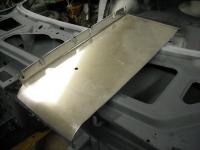
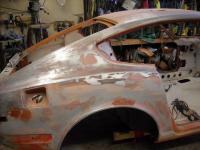
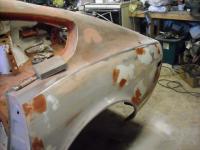
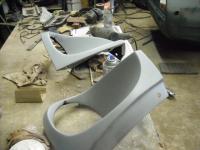
The shop in sanding mode Underneath 2 layers of orange then blue, then yellow, then orange again then brown primer. That's what you can see here under that was 1/4" of body filler and when I got down to the steel there was 3 smallish dents and a 1 ground out area where some rust was taken care of. I have had a nice piece of stainless steel kicking around the shop for 5-6 years now, it was a 3rd shelf from a BBQ that I didn't need so I kept it figuring it would come in handy at some point, Thought it might make a good heat shield for under the triple carbs, this is it in rough. Still have to clean up the edges and polish. Sand, fill, sand, fill, primmer, NO MORE ORANGE! Just have to do one more coat of primmer, sand with 460 and it's ready for sealer, then paint!


-
Just finish this thread off for anyone searching the archives: I started to make up some templates to build the hard board covers, only an hour of work or so when I thought I would check my new diamond embossed vinyl kit to see how much slack I had to play with in the fabric and guess what I found? Brand new hard board covers at the bottom of the box, didn't even see them. This was the MSA kit. Chris
-
I'm just eating these photos up! So glad this collection of pics will be archived so we can all see how it is suppose to be done. The man doing the work, he's the real thing. If it can be replaced with equal or better he replaces, if it has to be patched he does so perfectly but doesn't hide it, accept for show panels of course. A joy to watch.
-
15/40 diesel oil, lots of ZDDP, lots of detergents, dirt cheap.
-
That is exactly where my door broke the weld and I found a broken window roller in the bottom of the door. It needs to be welded.
-
Wow, I can't see fault anywhere, Your not finished yet but to my eye it's perfect so far.
-
It's a disease isn't it? Just can't stop. I think it's just the orange ones,
-
Beautiful! The engine bay is stunning. You must feel pretty good.
-
I'm in the "all or nothing" camp, I don't feel like the car is mine until I have torn it down to the last bolt. If it ain't broke, it soon will be. Chris
-
Steve, do they wrap around completely or just fit into those triangular holes?
-
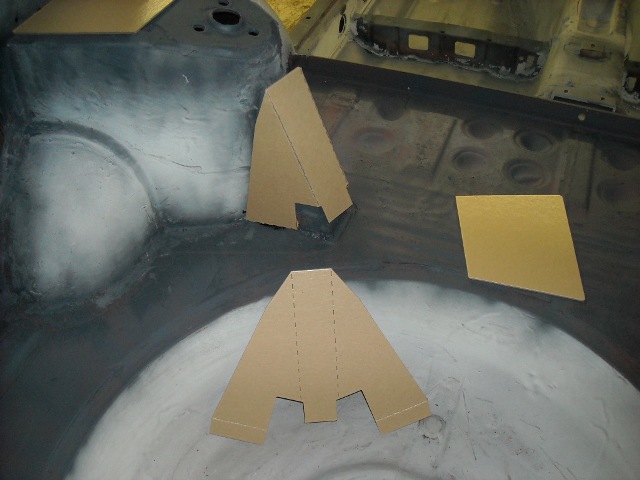
In Wick Humble's How to restore your Datsun Z car, he mentions that there were hard board covers that went on top and around the sides of the rear shock towers before the vinyl went on. He also says the early cars didn't have them and mine certainly doesn't. Having a hard time picturing what they would look like, does anyone have a pic of these things. Thanks, Chris
-
Thanks, I have to go back to work in six weeks so I'm hustling a bit, I want to drive this thing this summer!
-
Canadian military does that all the time on winter manuvers, the meals come in foil packets so they just slap them on the valve cover of any idling truck.
-
I found the best way was a putty knife and a heat gun set on low or even a hair dyer. I didn't intend on trying to use it again, it just had to be in good enough shape to use as a pattern on new vinyl. Chris
-
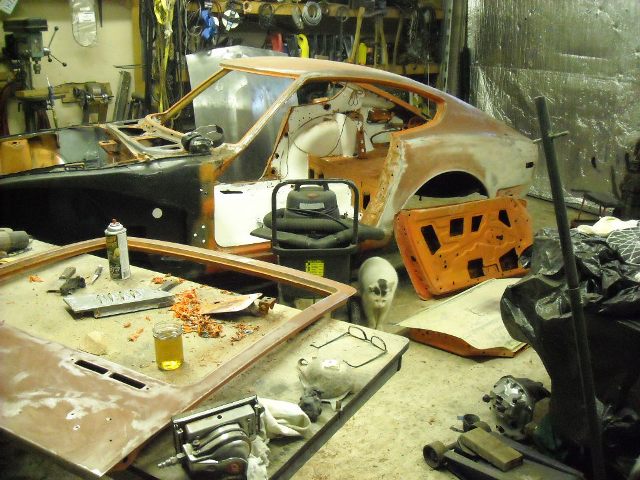
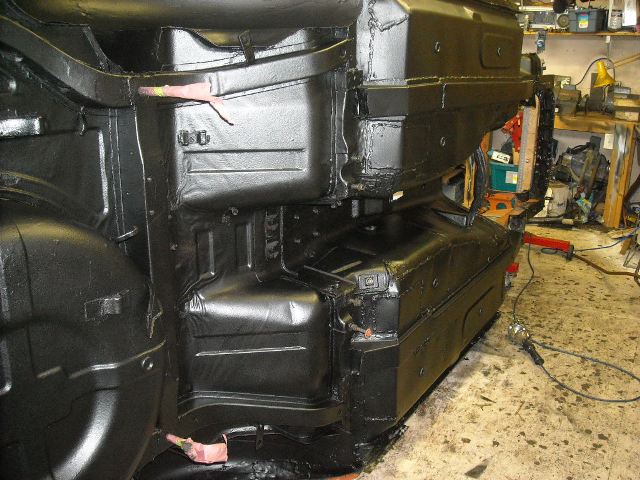
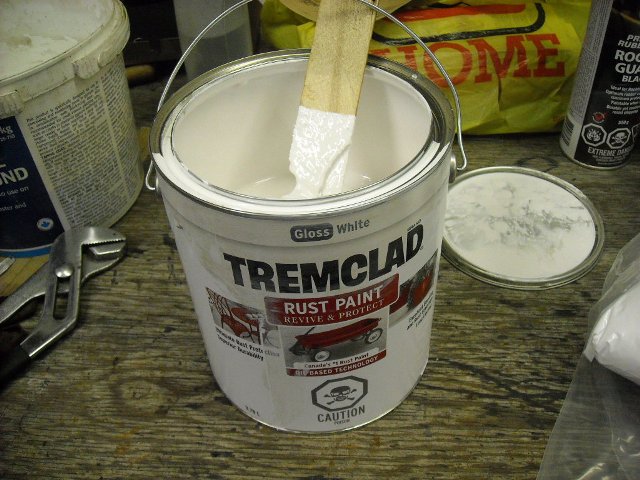
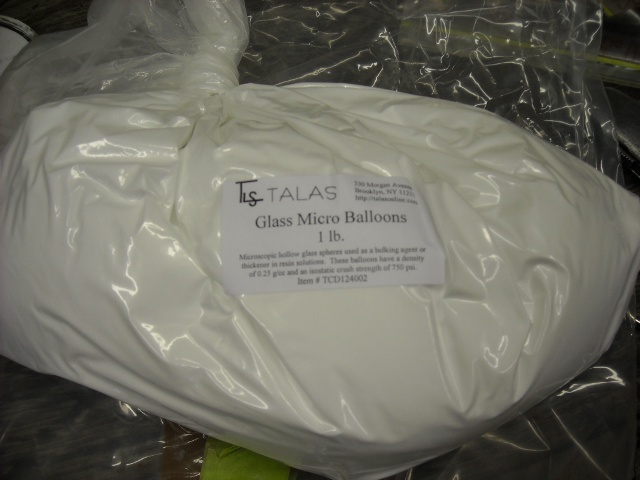
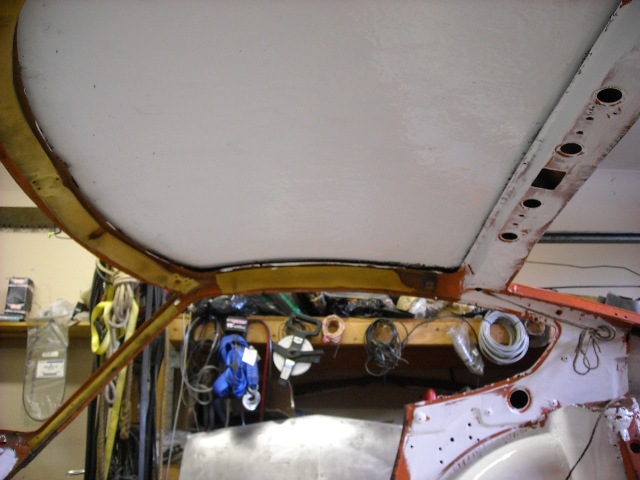
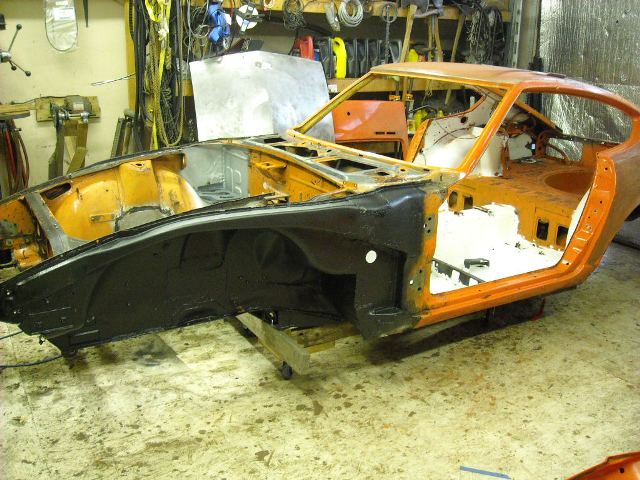
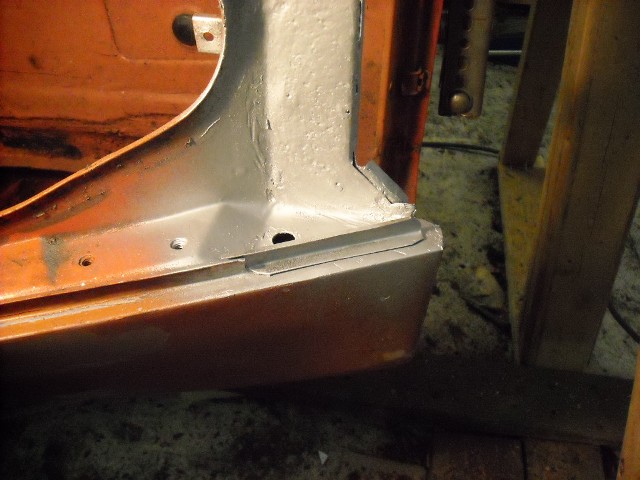
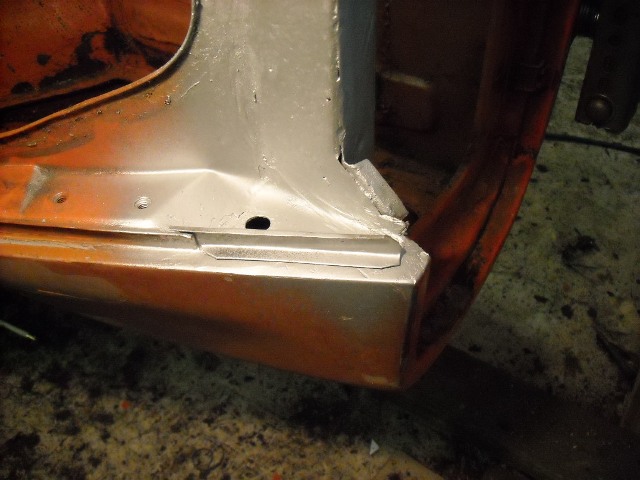
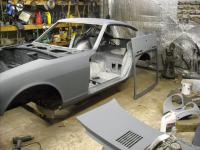
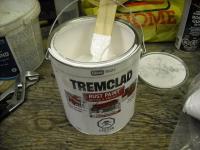
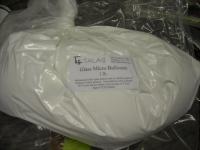
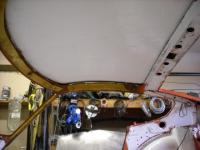
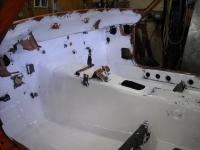
Well I've got a few things done since the last entry, all new metal and rust prone areas have been coated with POR15, then all seams were filled with seam sealer and a coat of rocker guard over everything, I have read few things in the archives about making your own "Lizard Skin" and considering what they are asking for it I thought I'd give it a try, I started with half a gallon on white Tremclad and1lb of micro spheres that I bought on ebay for $15. I mixed in almost the whole pound until it was difficult to stir. Sort of like the consistantcey of sloppy drywall mud and applied it to the interior, A few days later after everything had cured I was trying to find the best way to remove the many layers of paint from the roof and tried a heat stripping gun. It didn't work very well but while the roof paint was bubbling I put my hand on the other side, inside the roof and it was just warm so it seems to be doing its job. Here is one of the new front quarter panels just before test fitting, While the car was still on the rotis I got the roof stripped, and once that was done I could bring it back down on to the ground, it's sitting on a dolly I made up in order to roll it onto the flat bed to be taken for paint. And now I'm sanding, my favourite pastime.


-
Looks like good stuff, as long as wax sprays go on as a wet mist they can work well, it's the thick wax sprays that don't creep into the seams.
-
I don't know what the products ML and Dinitol consist of but if they are not oil based I believe you are wasting your money. Oil sprays seal the existing rust for a period of time, six months to a year and a half and MUST be done every year while you own the car. Asphalt and rubberized sprays can do perfect sealing IF they are sprayed on perfectly sound clean dry metal that has been primed at the factory. If they are sprayed on any car that is not brand new they just seal in the existing rust and prevent oil sprays from doing their job. Having repaired rust on many 60's to 80's cars I can say that I curse the owner that let some salesman sell him asphalt/rubberized spray. I always think about the life of the car, there will always be another owner in the future after me.
-
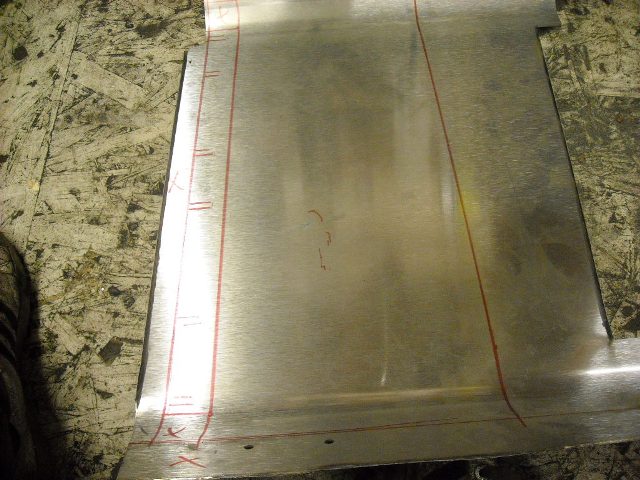
That is 20ga sheet metal, same as most of the car. I almost used heavier gauge but realized I would probably blow holes in the original metal. You know I think there is a product here that every Z owner could use, 2 one piece plastic channel pieces with self adhering waterproof glue that can be installed in 5 min. I'm not that guy but someone out there could make a few bucks and do a great service to the early Z world.
-
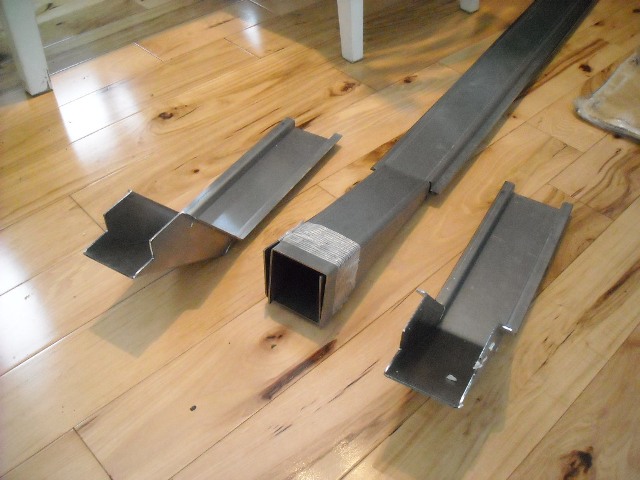
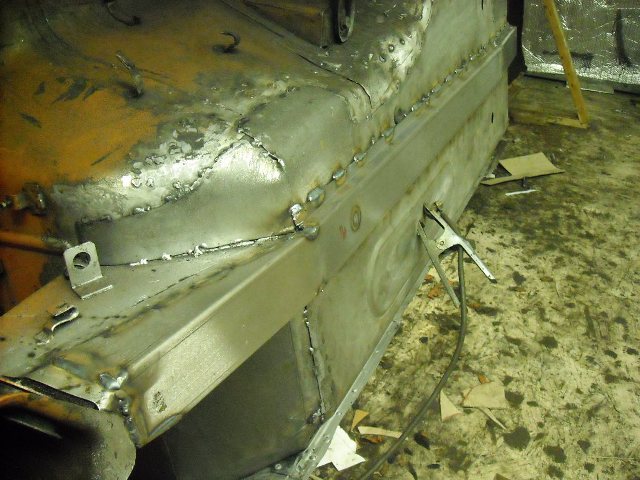
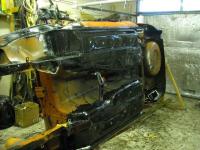
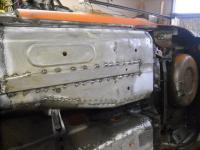
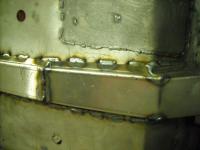
The Bad Dog rails arrived last night! These things are beautiful, 11ga metal, 17lbs total and very well made. I see why john has such a good reputation. So here is the stock rails installed, and the B/D rail slip over top, Now it's not like you can just take them out of the box and install them, they need a bit of "massaging." Quite a bit in certain areas but for me it is worth the trouble, and I think that is about all the welding that needs doing, I'm certainly not going to be able to keep the same pace as I have done up to now, from here on in is the POR15 and then... sanding, filling, sanding... I'm not a bodyman, and I have great respect them. You need zen like patience to be good at body work. That's not me, can't say I'm looking forward to it.


-
Chas, you're right about it being a poor design, I'm pretty sure it's the main reason these cars always rust out on the hatch deck.
-
I was just doing some rust repairs to the hatch deck when I saw this thread so fabbed up a couple of little chanels. Great idea guys, thanks. Chris


-
Here is the thread I was referring to, http://www.classiczcars.com/forums/body-paint-s30/48317-what-do.html
-
George, I just got my MurderMax the other day, the reviews are good and I thought the price was fantastic. It will be a few months before I install it.
-
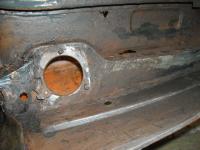
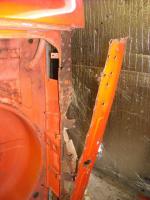
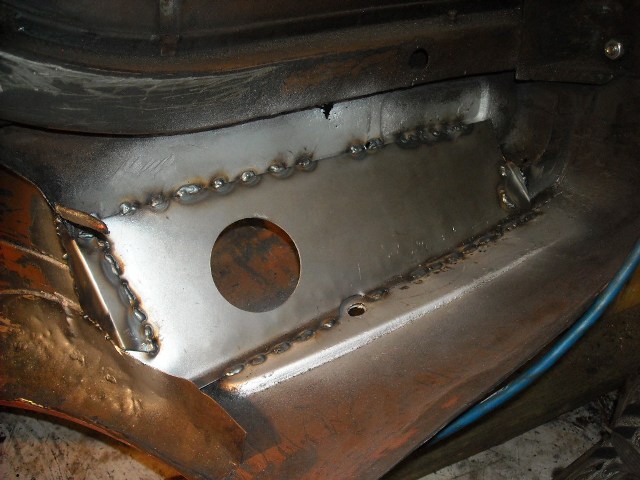
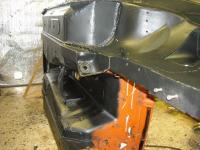
Here is a job I have been avoiding. If the passenger side rear panel was off this would be a breeze and I didn't want to have to remove a perfect panel so I cheated a bit, the angle of the new panel is almost the same as the mounting area of the flange on the tank filler hose but the rest is different. Real hard to get in there and work with a welding helmet on. here the rear hatch deck is rusted in the usual places, I can't believe it, I deleted the image before I saved it, what a twit. I'll try and insert the finished deck next time. Here is a little improvement on the original design, I got this idea from a recently posted thread that I can't find at the moment. Basicly the drip rail in the hatch area dumps rain and wash water right into the spot where it always rusts...I wonder why, so after reading this thread (sorry guys I have tried twice to find it now, it was just a couple of days ago) I decided that now is the perfect time to weld in 4" of new chanel.