siteunseen
Free Member
-
Joined
-
Last visited
Everything posted by siteunseen
-

-
We're talking about a different forum. Not Blue or Mike. Done!
-
If I'm thinking about the same guy, I'm with you. He could shove all his knowledge up his impulsive a**. If you're not helping, the ranting and raving makes you seem ignorant no matter what you know. I think the hot California sun mixed with some intoxicants has made him irreverent.
-
I'm positive he's with us! I bet if I posted something even dumber than my normal ones, he'd ring my phone at least. He has a good heart and loves to help out dummies like me. I understand why he dropped out, there's people on here that don't like any opinions other than theirs. It's a damn public forum! Who cares if he doesn't like Chinese junk, move on to another thread and help somebody. Lets see who comes after me now.
-
Very easy and inexpensive parts-a-plenty. You're going to surprised at what your local dealership can get overnight. I've got a file full of part numbers for my '77. Just ask. That motor was used until '84 Maxima.
-
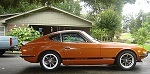
Yes, great looking '77! It has some shine to it. I gambled on a none running car and bought it for less than half asking price, it is nerve racking and tough to keep your poker face. This was a bad distributor and cruddy fuel tank. $200 in parts and some elbow grease and now it's my favorite car, EVER. Congratulations. Lots of help here, lots of '77 owners. Cliff
-
I don't know if you've read this yet but it's pretty well written and informative. Babalouie, about post #4 I've got a set but way too intimidating right now, I'm just getting comfortable with the simplistic SUs.
-
I bought a gallon, way too much!, of Rustoleum flat oil and a gallon of high gloss. Then mixed 50/50 for a nice satin finish for my suspension parts but I'm thinking I'll go 75/25 for a glossier finish on my oil pan. Looking at a ton of pictures, the oil pan has more sheen. I used a rattle can of Rustoleum grey etching primer after a good cleaning with 220 grit sanding sponge. Get a new copper washer for the plug while you're at it and hammer down around the edge. I used a 5 lb sledge and a small piece of 1x4. I've read the same about POR 15, not worth the trouble for something that'll never get touched. I'll spray it today, next door kids played in their yard all day yesterday and they're parents are freaks when they smell something chemically.
-
I like it! You've got a little Blue and some red in your blood. But more precision and finesse! I knew it when you first came around, those Ducatis are like artwork.
-
Having a hard time replying with my Samsung phone? Anyway, my '77 5 speed has the rails and the ones I'm using on my 240 are off a '79 ZX 5 speed. Maybe they were on the auto 240s? Both my '72s 4 speeds do not have them though. I think that extra flange looking thing on the straight side is for the autos though? Maybe the line to the radiator protection somehow? Do not know for sure but they are on my five speeds. FWIW. Steve I'm kinda on the edge with my carbs. I just had rebuilt them thinking the car would run better but of course that wasn't the fix so I pulled the motor in a all out effort. I hope it pulls after this. At least past six thousand! It was flat at about fifty five hundred before. I know theres more. My 110 red and white stock hits six grand in a heartbeat. This orange one was off a tooth or two somewhere. I never could figure it out and I like to tinker more than drive, (read DRINK)! Cliff
-
I've got those two flat steel bars for the rear of the pan I'll be using, for sure. I guess the reason they only did the rear is because thats where the load is? 5 quarts is pretty heavy with such a fragile pan, i.e dimpling and low torque specs. That's my guess. Rossi your are great idea, ah ha! inspiration person! You always have a good common sense reply that make me think "why didn't I think of that" Thank you both. Now back downstairs for more sanding, I'm painting the pan and rails black like they should be.
-
I've got acetone and lacquer thinner and could get some mineral spirits, I use a good bit of oil based paint. I'll try acetone first. It would evaporate before damaging the seals. No, no. If I do what you say and dribble it through the ports directly onto the valve, it'll never get to the seals! I'm looking forward to doing this, got the desire back after a short lull. Damn leaky oil pan made me mad, I thought I'd done a good job. Thank you Mark!
-
Thanks for reminding me about that Mark, I'll write that in "what to do next" timeline/steps. The first head I tried to reassemble I put the springs on and forgot the valve seals. It seems like someone said rubbing alcohol would be good? What would you recommend? Thanks again Cliff
-
Good news! He's worked on the "slow side" but I had other things to do so it worked out for me. I finally got my E31 back and am about to start putting it back together with the Schneider cam kit I bought almost a year ago. He put new intake valve seats in and a 3-way facing and said I need to "lap'um in", talking about the valves. So I assume he means lap the valves until they're smooth sounding? I lapped the valves on the stock E88 I have on there now for the break in and the sound definitely changes on when they're smooth. I'm going to take my time assembling this head with a new cam kit, putting some miles on the stock motor while I'm doing the work. Would that be wise or should I wait and build the head then install the motor. I'm thinking I could work out any bugs with the carbs and get the rings seated with the E88 I have on it now. Then in a couple of months pull that one off and put the newer camed E31. I'm almost ready to put the rebuilt stock motor in now. I went ahead and notched the block for the bigger valves on the E31 by the way so it should be a simple head swap I hope. Fun times ahead, finally! Thank you Guys for any advice, critical or not, I need to know. Cliff

-
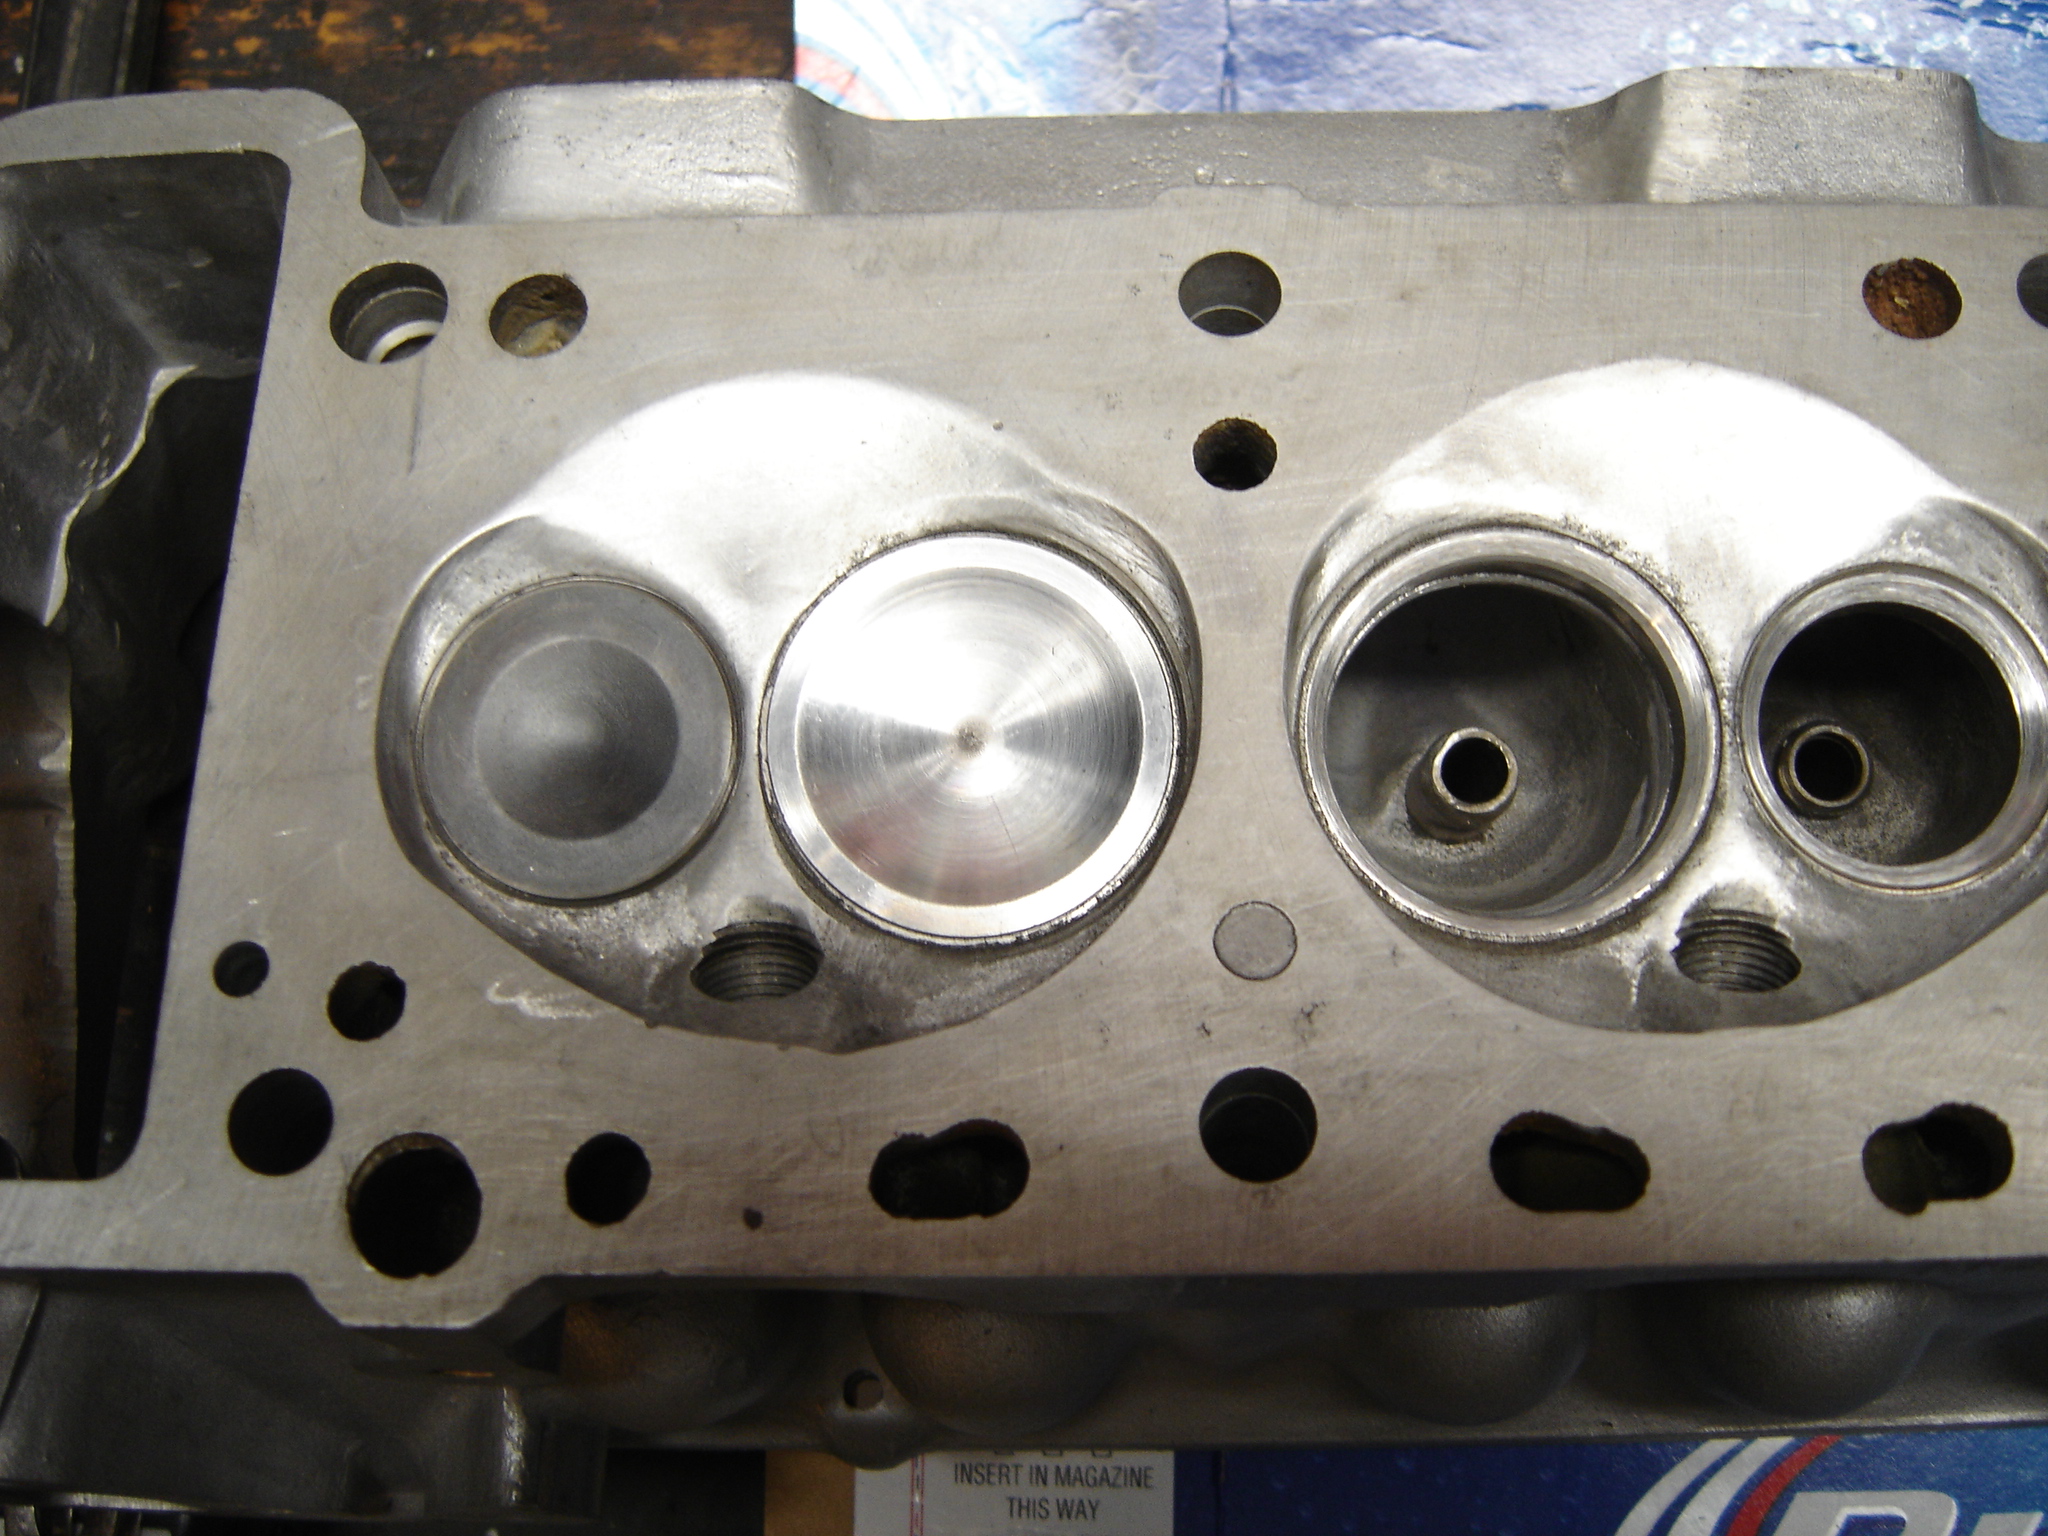
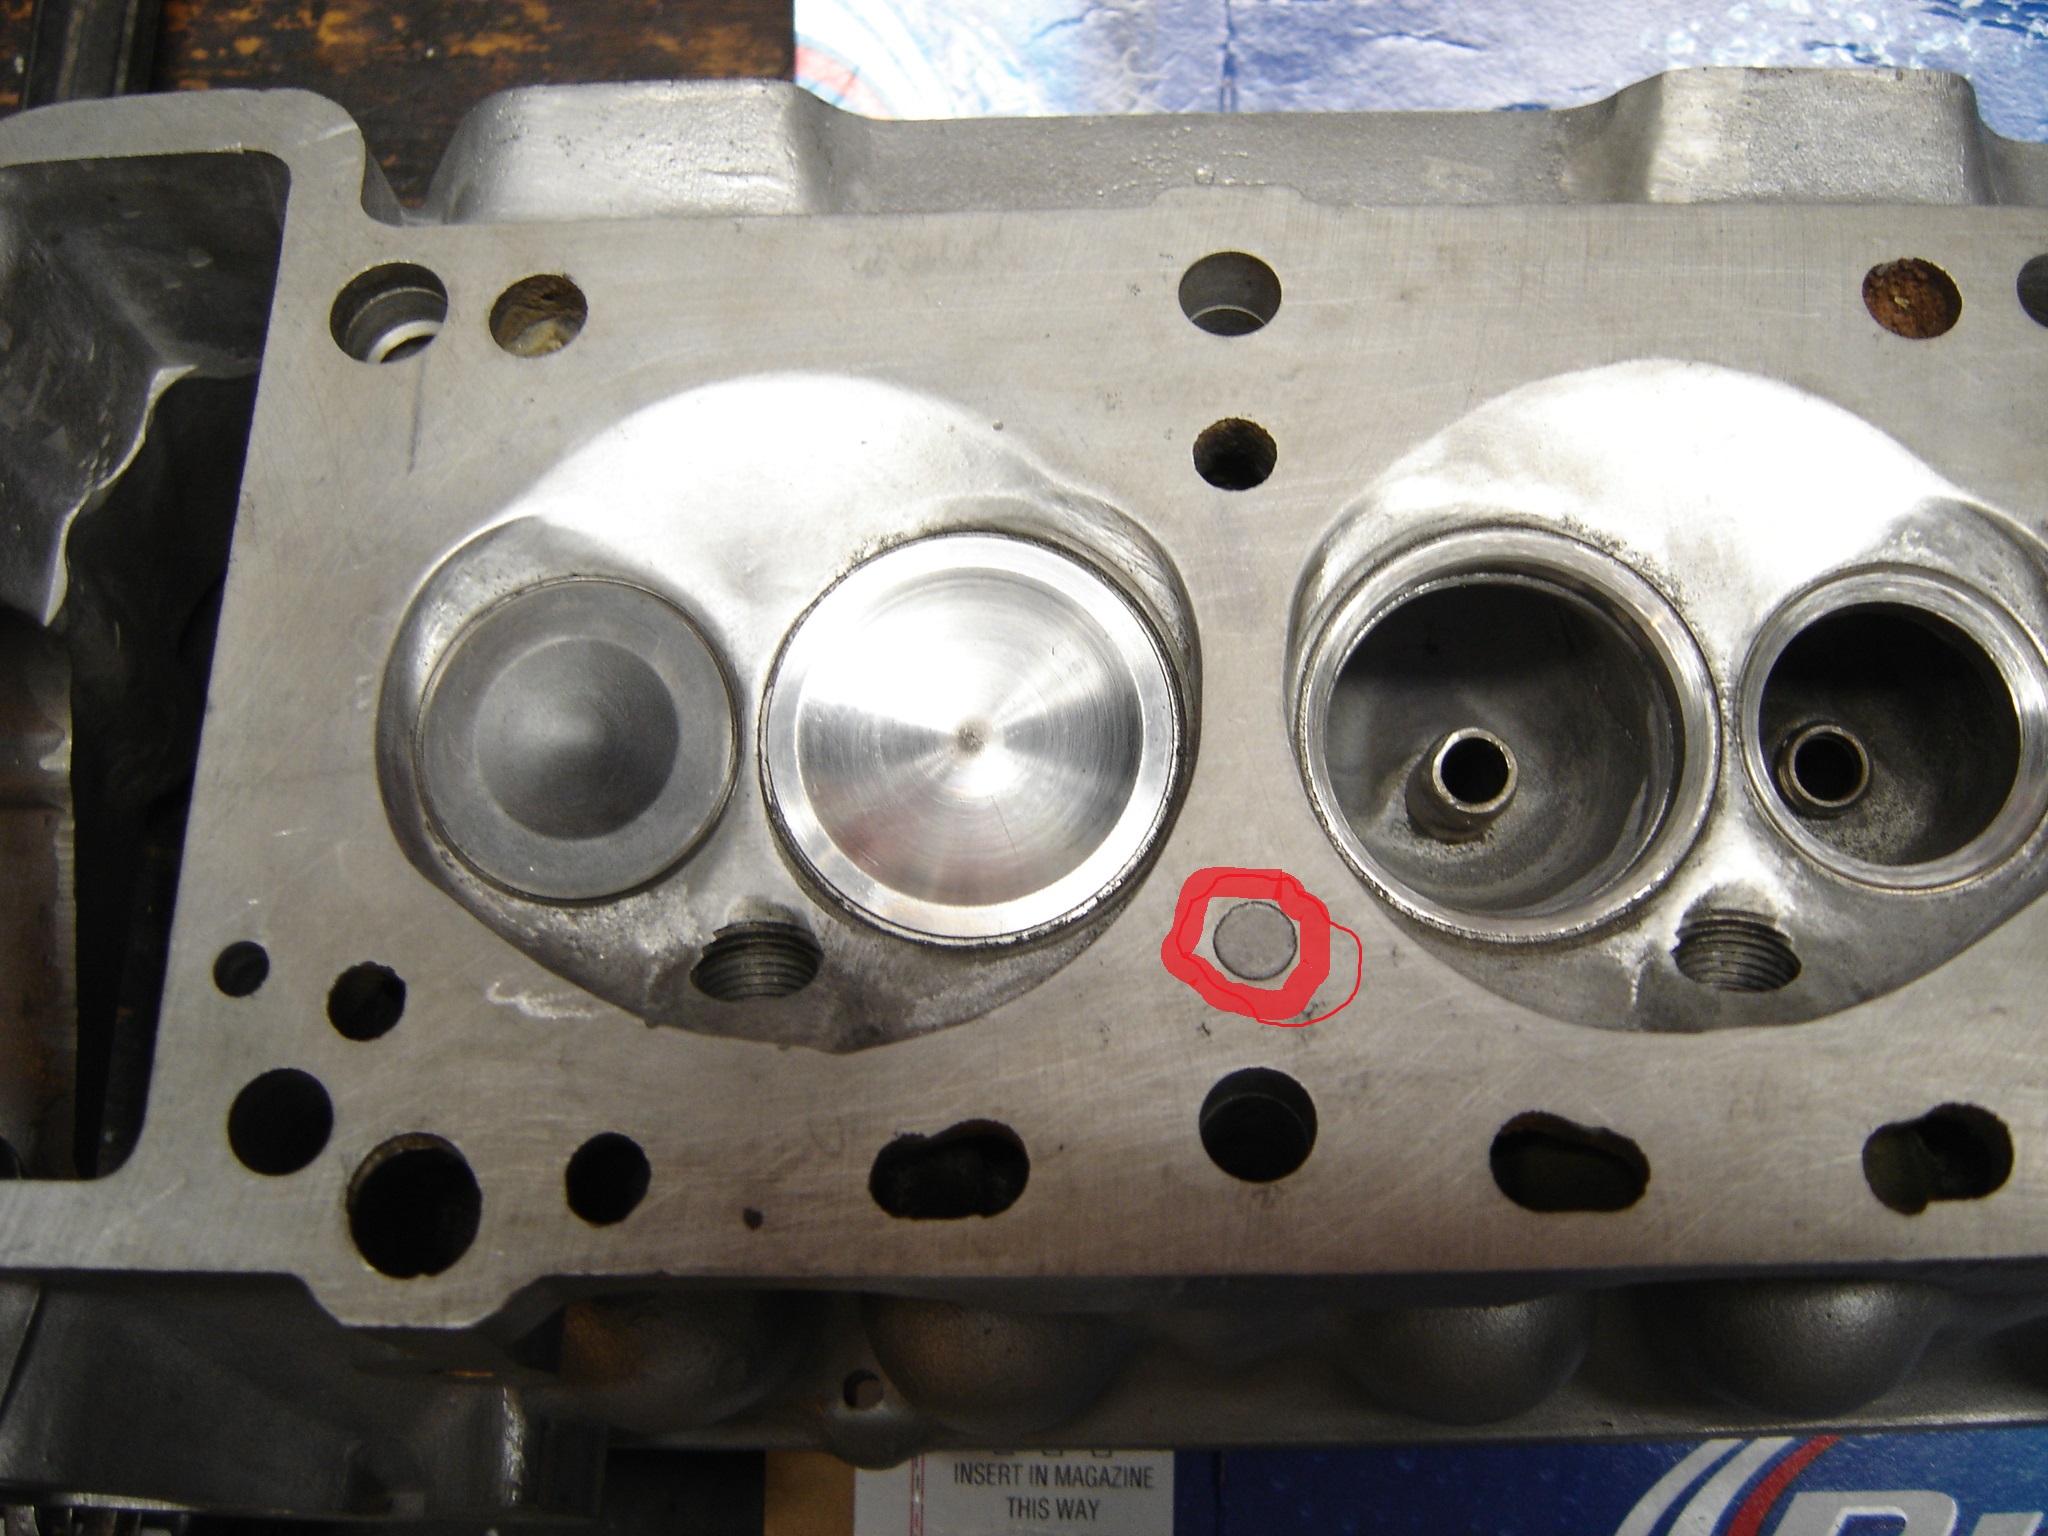
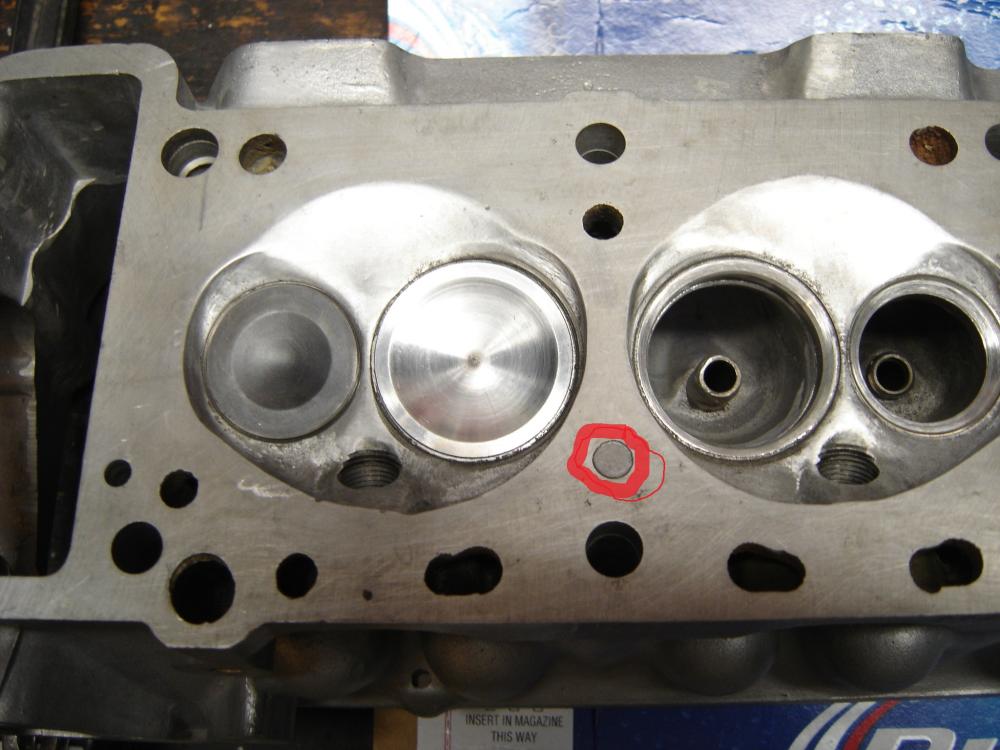
Someone had asked about this earlier but I don't remember who and it has probably been answered, BUT I'm excited and wanted to post! The little circles on the bottom are markers of how much has been removed, I think there's 3 across the bottom. My machinist friend finally got my E31 finished and he was telling me it was nice and flat, it had been cut before and I could cut it again. He pointed to those circles and said they were indicators of how much had been removed and when you couldn't go any further without shims. Just thought I'd share this as I was curious myself when someone mentioned it earlier.
-
Link and Pink, sounds like characters off The Andy Griffith Show. They could've been two of the Darling's.
-
I'm building a 2.4 myself, pretty much done. Needs a little more work to get as close to perfect as I can, don't want to touch it again. I had a leaking oil pan gasket and it was suggested that I use those flat bars to help keep it from leaking on down the road. My '72 240Z didn't have those but I had some from a junkyard ZX motor I had, so I am using them. Not sure what year the engineers at Nissan decided the need for them but I'm positive they'll help. You need to look above the first 2 spark plugs and see what cylinder head you have, N42 or N47 most likely but who knows with an older car like ours. I have a '77 280 that had a N47 head. It was built in 9/'76 and had the oil bar and a oiling cam both, not too many of those from all I've read. It was built during a changeover period. The '75 and '76 had the oil bar with square exhaust ports, N42. The '77 and '78 had a self oiling cam and round port exhaust, N47. People often change the cylinder head for different reasons so it would be interesting to know what you have. I'm gonna guess it's an N42 from an earlier year car. I'm sure it has been suggested that you put all the nuts and bolts in ziplock bags? The first motor I built I just marked the baggie with a Sharpie, most all of them smeared off. Now I know better and write the description on a piece of paper and drop it in the bag. The parts you take off, the front cover, water pump and the oil pump, thermostat housing etc., will have bolts of different lengths. It's important to keep up with those and their locations. I put the bolts back in the part and use some small wire to wrap around the threads. That holds them in place. Good luck with your project and have fun cleaning those old parts, lacquer thinner is a good cleaner. You can get a five gallon bucket with a lid and all six piston will fit in the bottom, pour in some lacquer thinner and put the lid on tight or it'll evaporate. Let them soak a couple of days, use a brass wire brush to clean them and all the aluminum parts. They will look like new! EDIT: I looked back at your pictures, you have an N42 head. The square exhaust ports are desired by most folks. The N47 that is original to your '78 had round ports with liners that people don't like because they restrict the flow, from what I've read.
-
-
For sure put the new fuel filter on and see how long it runs. If it stays running you can bet the fuel turned to "varnish" and is causing the intermittent running. You should use that as a bargaining point if he's not a close friend. Once you get the car you should install a fram g3 clear filter right out of the tanks supply hose, before the pump. You can see if it gets crudded up fairly quick. Maybe running some new gas a few times through the system will clean it out without dropping the tank. After installing the new filter check the pressure first with the car sitting still. Something I would do is check the air filter for derbies such as acorns, damn squirrels and other rodents love to get in these cars, as much as I do! Look for broken vacuum hoses or ones that may have come off completely. Lots of help here on a '77. I've got one myself. Good luck and stay positive in your post. Nobody here likes a smarta**.
-
-
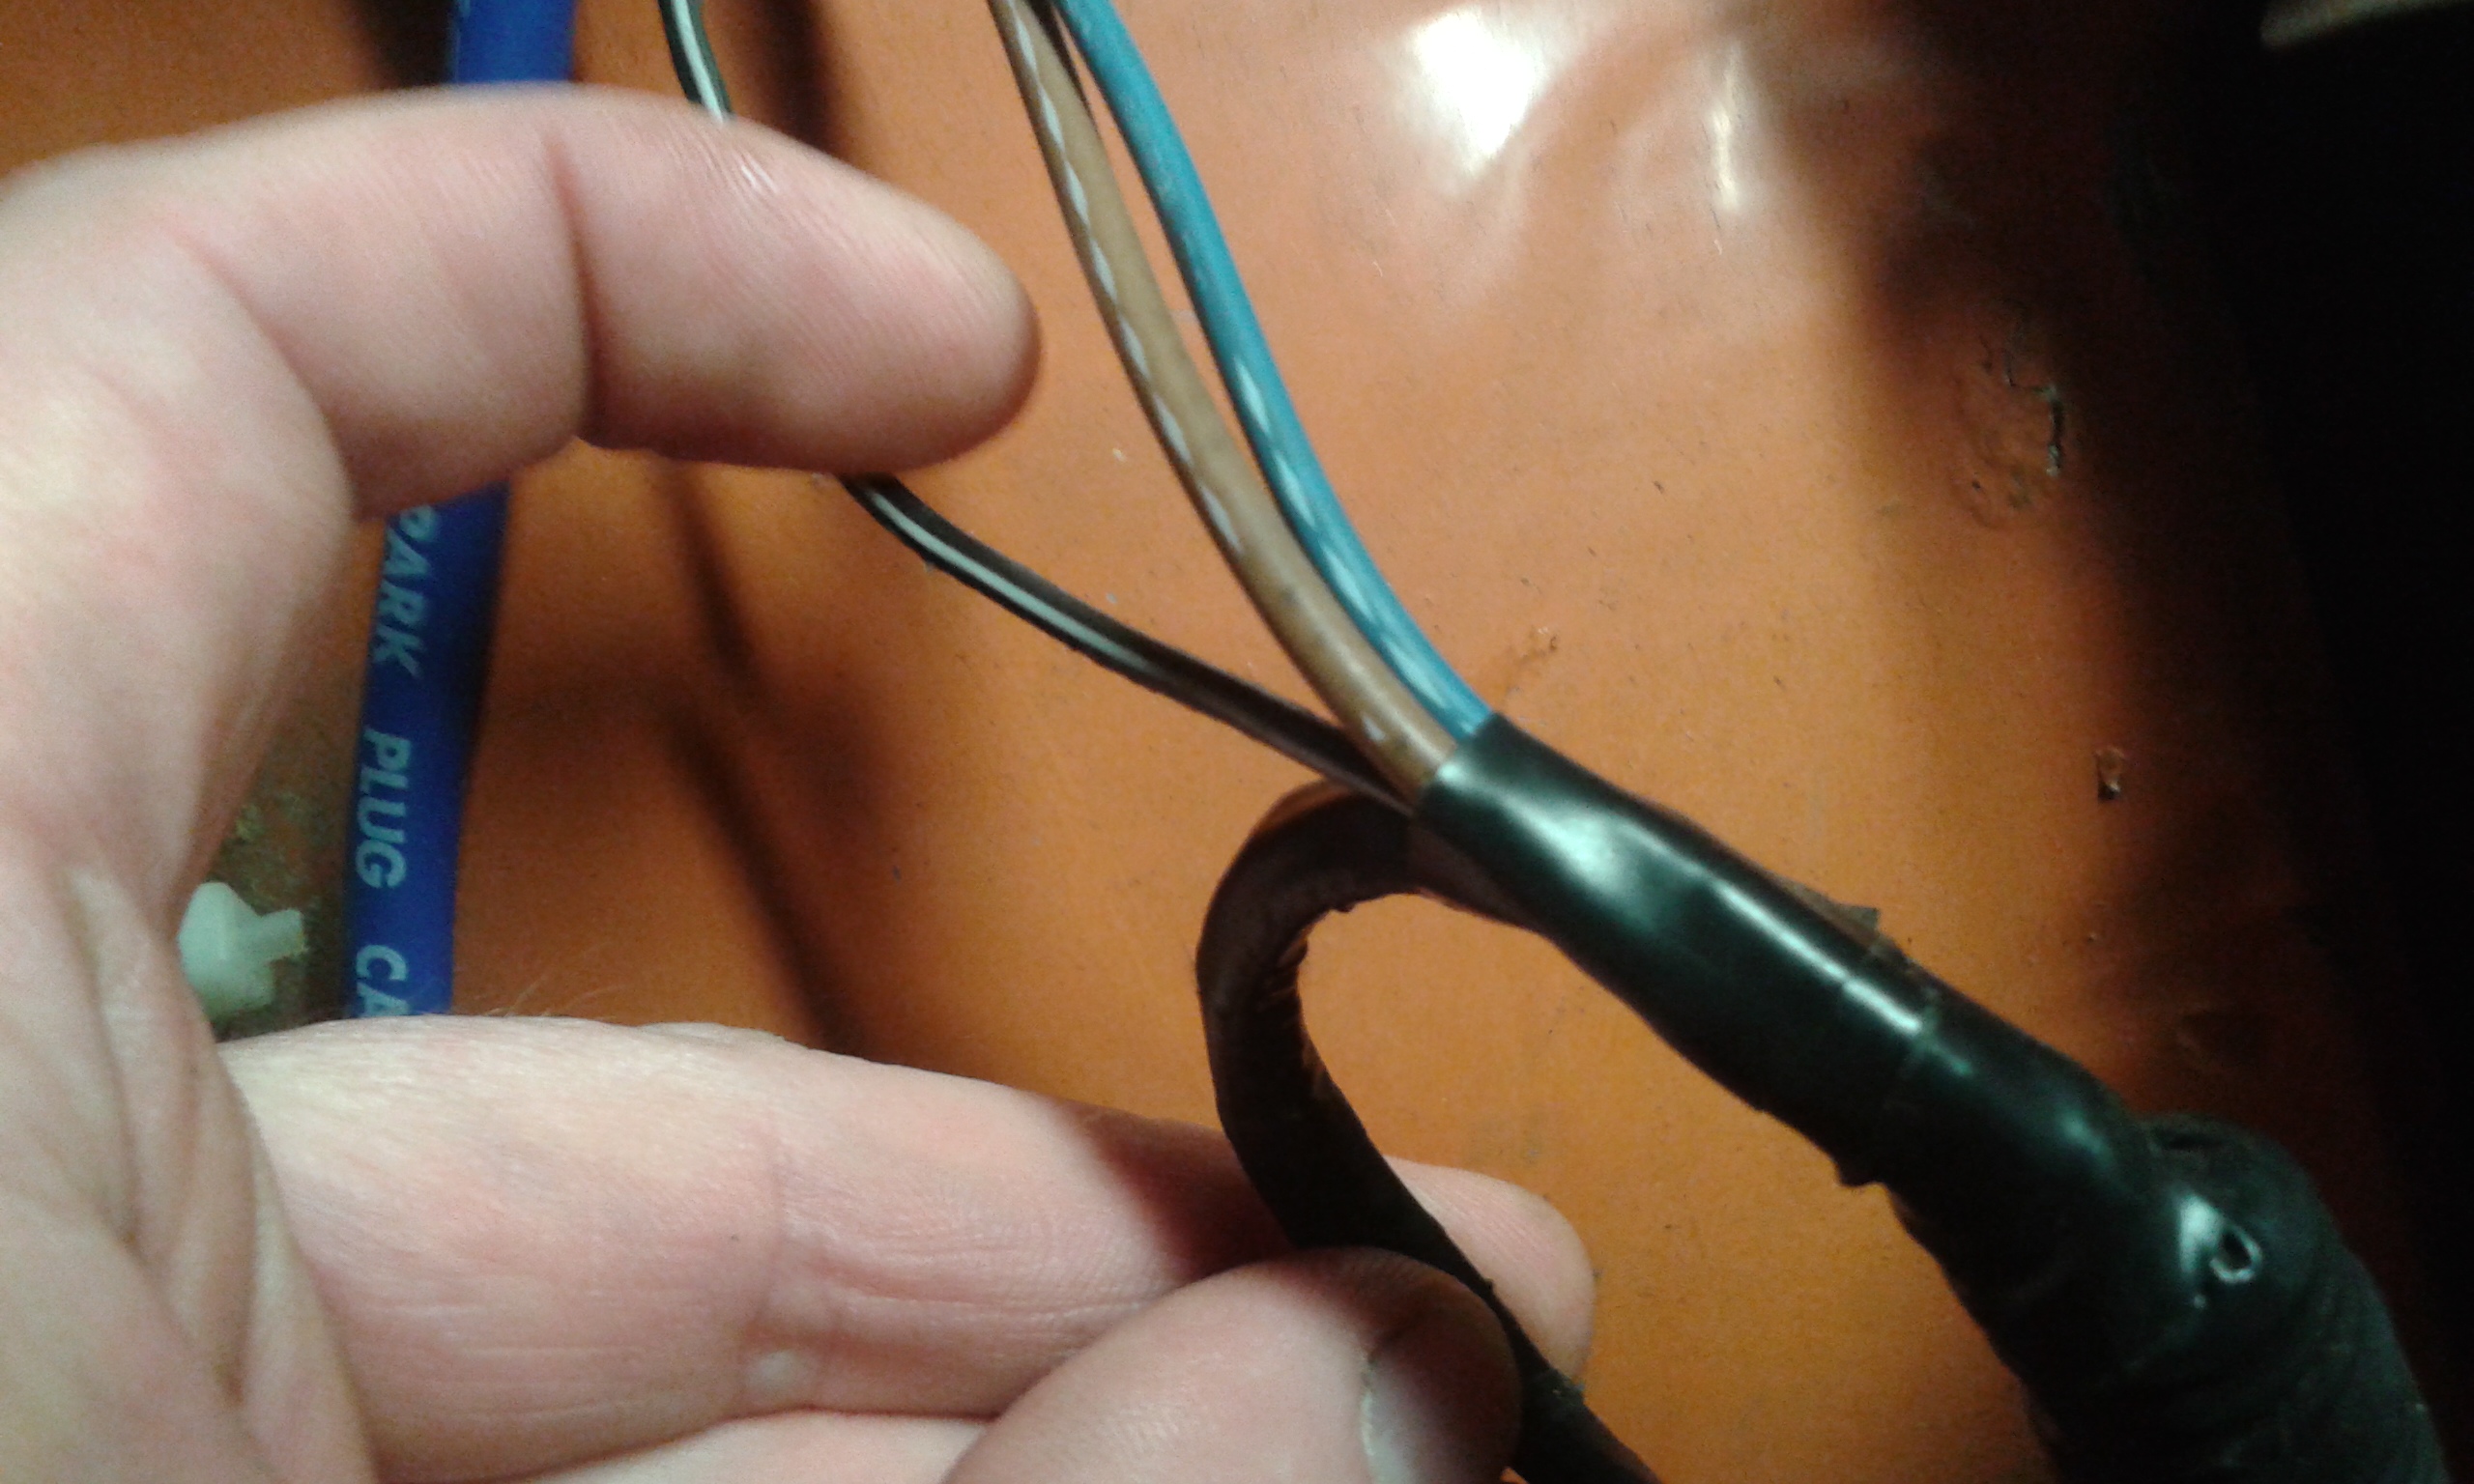
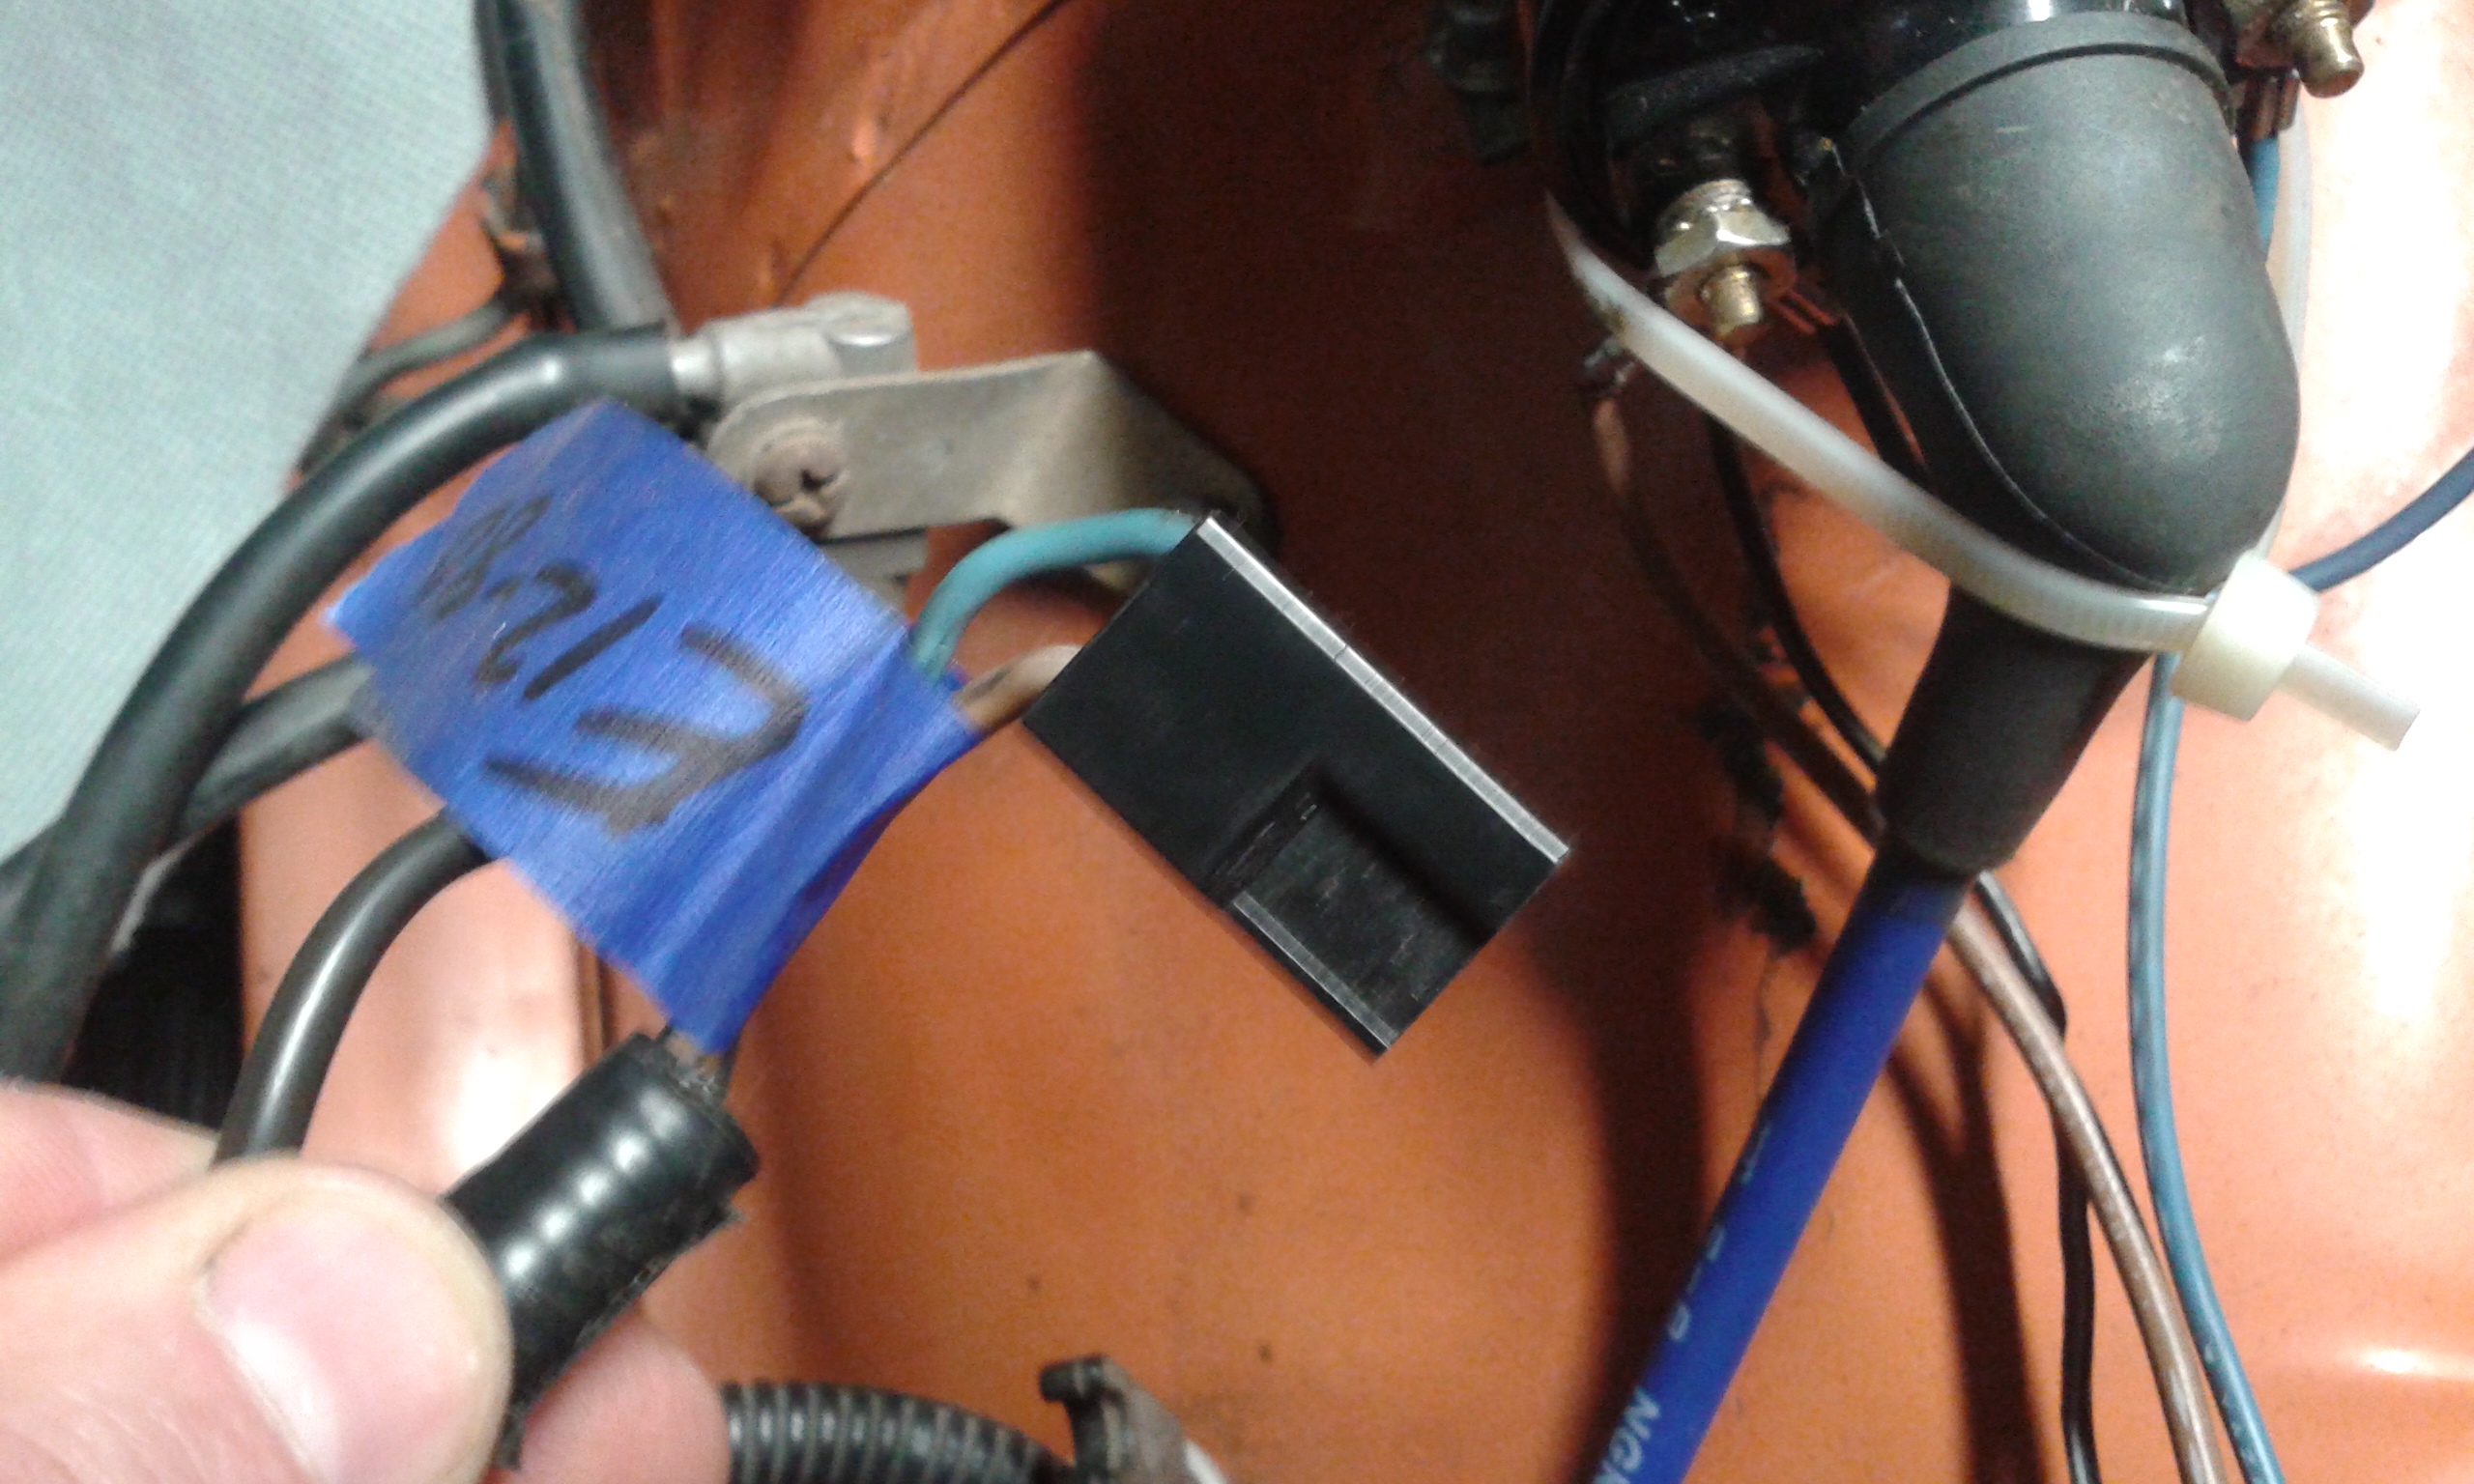
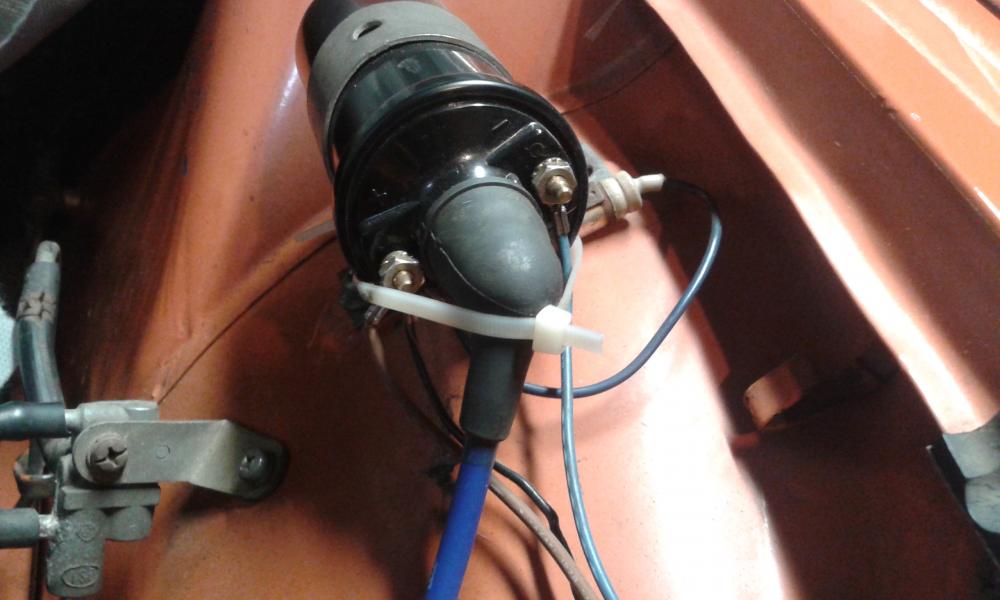
That brown and blue wire are coming off the plug that connects to black box on the side of the dizzy. I thought I had the ceramic resistor still but I was WRONG. I do not have it. It seems like I tried that on one of my zs but apparently I did away with it. I remember the wiring diagram showing it "straight wired" with a jumper wire. If I'm not mistaken the black with white stripe is the tach wire. It was tapped in with the others on the harness that runs down under the radiator and horns. Mine are 1972s.
-
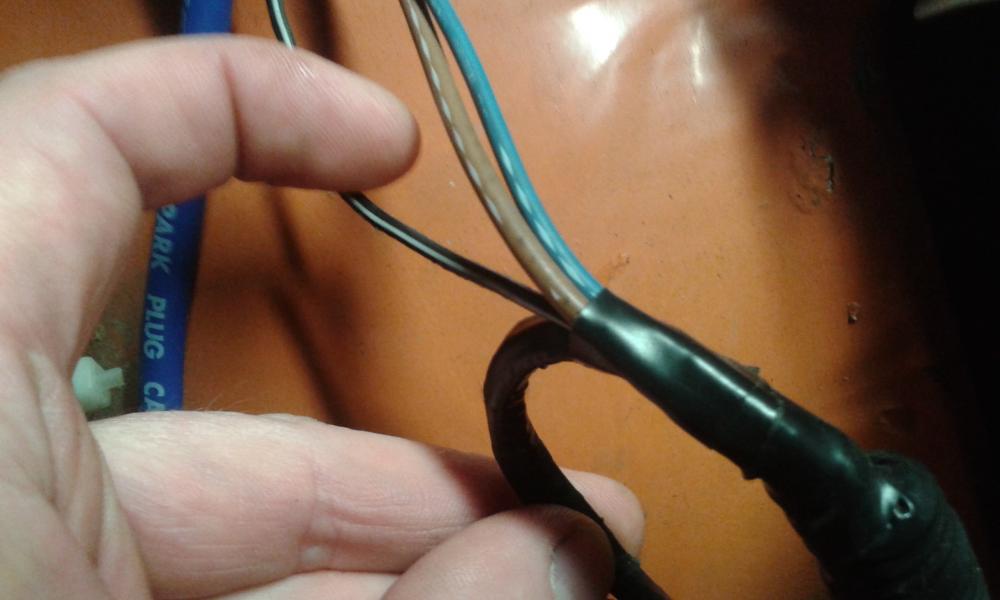
I told you wrong, sorry. I ran home and took some pics. The blue wire goes on the negative side of the coil. Reddish brown on the positive side as well as the blak/white. I got the blue and reddish brown along with the plug of a donor zx. The blue and red go to the plug on the dizzy. The black/white comes off the old dizzy through the harness. I hope that helps but without the wiring diagram I can't say much else.

-
I kept my ceramic resistor and ran a wire across it tying the two together. I'm away from my car now and can't provide a picture for you. 8 ( On the tech tip the 240 wiring diagram is at the bottom the page. I followed that and mine works fine. If no one has put something up when I get. home, I will.
-
I had a Nakamichi Dragon in my 280 in 1987. Cassette deck only but that thing was awesome. I haven't head that name in a long time, brings back some great memories. THANKS!
-
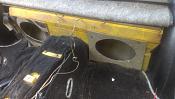
I finally found what I was looking for. I don't like this new layout, too much crap to trudge through. Anyway, here's a picture I had where someone used the storage bins for 6x9 speakers in a '77 car.