


Captain Obvious
Free Member
-
Joined
-
Last visited
Everything posted by Captain Obvious
-
 You can do final torque to the center nut after installation of the strut assy on the car. That way, the three insulator studs are held firm by the car body and you can get a good torque on the enter nut. So keep an eye (or ear) on it and if the clunk develops again, it's quick and easy to snug those center nuts while on the car. If if happens again and torquing those nuts takes care of the issue, it might be time to get some new vibration resistant center nuts. Replacing those nuts is easy with the car on the ground... The weight of the car will keep the springs compressed and you can take that center nut completely off and replace it. Buzz one off, buzz new one on. Easy peasy.
 -
Glad the clunk is gone. I assume it was the strut nuts. A small amount of play in there can be tough to discern with gas struts and spring pressure helping hold things still. But if it went away with some torque on the nuts, I'm guessing that's what the issue was. The fact that it appeared gradually over time is still a little disconcerting. Are they nyloc style vibration resistant nuts on the tops of the struyts?
-
Both of those plates are for 72, so it wasn't the very early cars. Maybe the GVWR wasn't increased for the car itself... Maybe they were increased for the change in American drivers. 😄
-
Oh, I totally get it and agree completely. It's just odd that Datsun put out a document that seemingly delineated the timeline. Sounds like they were trying to differentiate between the two and put a stake in the ground as to "when". So here's a thought... Maybe that VIN of 21001 would be better interpreted as "We've been making changes over the past couple months, and as of VIN 21001, here's a list of what we've changed so far. Moving forward, all the cars will have these changes incorporated." Maybe that's a better way to think about it instead of "As of this VIN, we will be making all of these changes from this point forward." and changing all of them overnight at that VIN.
-
Interesting that you two guys @Johnz1971 @w3wilkes both have the hooded map light. Poking around a little, there was a doc put out by Datsun in Feb 1971 that described a bunch of changes to the 240Z for "1971 late models", and that map light hood was one of the changes listed. But according to the document, those changes went into effect at VIN 21001. Seems that was not correct?
-
At the top of my list is that it does not have the 2400 valve cover. Did they talk about if the engine was original or not? Between the over 100K miles, the carbs, the fan, and the valve cover, I'm thinking not. So it's a historic car, but it would be a huge project. And the biggest hurdle to getting it to top level would be if the engine had been replaced and the original is not available.
-
My bad. Still a discontinuity, but I had it in the wrong spot: 16530 has the black - inline6 17486 has the yellow - w3wilkes 17770 has the black - Johnz1971
-
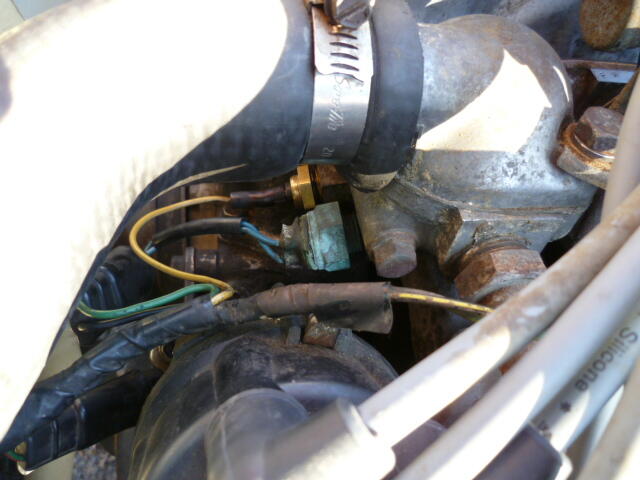
Actually, looking at that thermostat housing you have on your 1/70 is not from 73... It's from couple years later than that. 75 at least. It's got a thermotime switch and temp sensor for the EFI system.
-
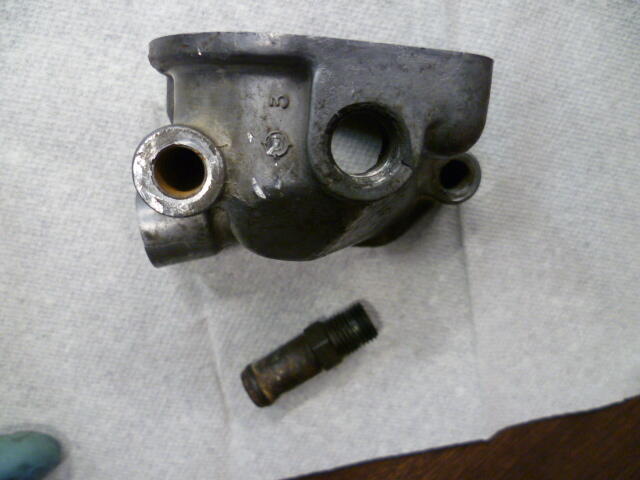
I believe that hole on the 73 was used for the temperature switch for the EGR system. This pic is from 74 260, but 73 had the same thing:
-
Amazing enough to dig up a six year old post just to say that? @Mike Looks like a bot.
-
Haha!! Unfortunately, it's not yet clear: inline6, when you get a chance, can you double check what you have on your 16530 car?
-
Yeah, I would start there. Remember that you need to compress the springs to the point where you could remove that center nut on the strut, just like when you are replacing strut inserts. With the springs that much compressed, you will be able to check everything in that top mount assembly. The nut tightness, the plastic spacer, the integrity of the rubber, etc. Do you have a rear sway bar? Another location that can easily produce clunk noises on small road bumps is the sway bar end links. But that's easy stuff... I assume you checked all that already.
-
Defroster switch... When did they change from the black unlit design to the yellow backlit version? Here's a hoovered pic of the unlit black: And here's the yellow backlit version: The wiring diagram I've been working on shows the simpler black unlit version. When did they change to the yellow backlighted version?
-
This pic is from a mid-1970 car. I believe it is original. (I have no reason to believe otherwise):
-
This pic is from a mid-1970 car. I believe it is original. (I have no reason to believe otherwise):
-
I doubt that hairline crack is the source of your problem, That crack probably doesn't go very deep. Hopefully it's just a surface feature. So, the first thing I would check are the nuts on the top of the strut insert (down in the recess in the top center of the strut insulators). If one of them has worked their way loose (or were never tight to begin with), you would get a noise like what you describe. And you can't just "check for play" with the strut assembly off the car. That spring will extend to take up any available play. There would only be play with a load on the strut that has partially compressed the strut insert. So was this noise always there, or is it something that has developed over time?
-
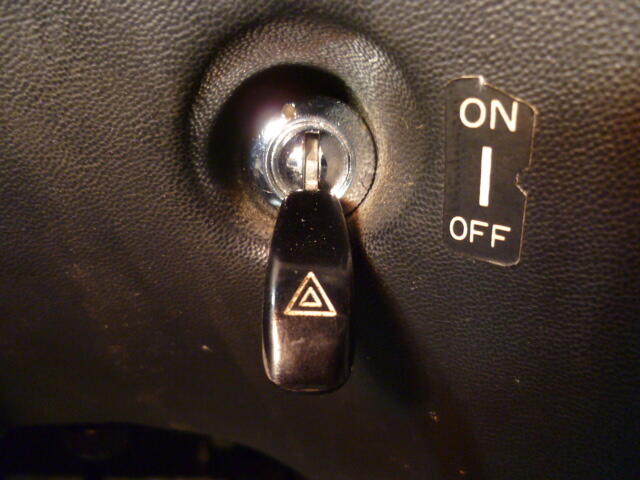
I haven't messed with that flasher, but I have a couple ideas... First, yes, it is completely conceivable that the electronic flasher is susceptible to polarity issues. I'd certainly make sure you have it wired with the load on the "L" pin and power on the "+" as shown in that diagram. I found a couple other pics of that flasher from other vendors, and the mounting tab is not electrically connected in any way. So forget about the below. Second, does that "two wire" flasher need to be mounted with it's tab attached to ground? In other words, is it really a three wire flasher, but they don't count the third wire because they might be making a ground connection through the mounting tab? Just some ideas.
-
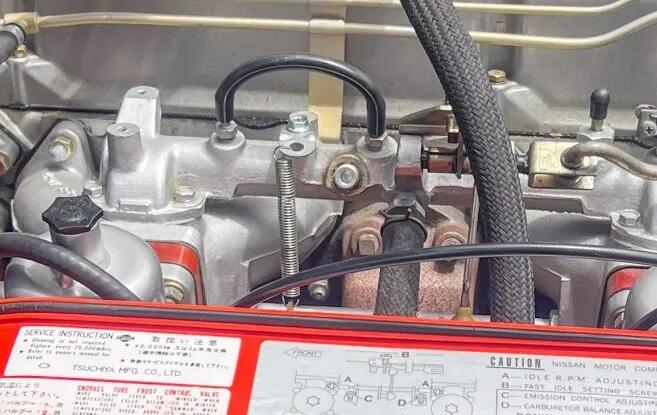
Well apparently bypassing the filter and sucking dirty air into the clean side of the air filter is a thing. Wonder how long THAT engine has been breathing dirty air. Also a whole bunch of hokey-ness going on here. ☺️ Hahaha!! :
-
You've got to be kidding!!! Five minutes after wearing that, my wrist would look like this:
-
I'm guessing that you didn't see the movie..... ☺️
-
Namerow, thanks for the input, and also thanks for the work you had done previously with the wiring. Your previous work helped me with the diagram that I've been working on. So for the comments above... First, the horn. I understand the desire to have an actual switch depicted on the diagram. And in one of my earlier revisions, I actually did have one in there. But then I took it back out because I decided that I wanted to conform more closely to the original scheme depicted in the other areas of the combo switch. By that, I mean... There aren't any actual switches shown for any of the combo switch functions. Not for the headlights, the wipers... No switches for anything. Instead, "connection" is indicated by the existence of the dot. I though it would be closer to Datsun's original scheme to have a dot connection to ground when the horn is pushed. Next, the wipers. I haven't dug into that system at all, and I'm kinda hoping that I never have to. I turned mine on and the arms move, and that's hopefully all I need to know. So, with that said... Are you confident in the switch connections you have laid out? If you are sure, I'll change the diagram to what you indicate. As for the letters in the second column, I'm in the same boat as you... I think I knew at one point, but don't remember. I'll look into it. And lastly, you are correct about the change of wire colors on the combo switch side of the connectors. Problem is that situation exists all over the car. They got better with that in the diagrams for the later years, but for the early cars, the colors on the diagrams are the "colors of the harness". I'm sorry, but I'm in no position to add all the connectors for all the devices that plug into connectors and indicate the wire colors on both sides of those connectors. Haha!!! Thanks for the help!
-
All work and no play makes Matthew a dull boy.
-
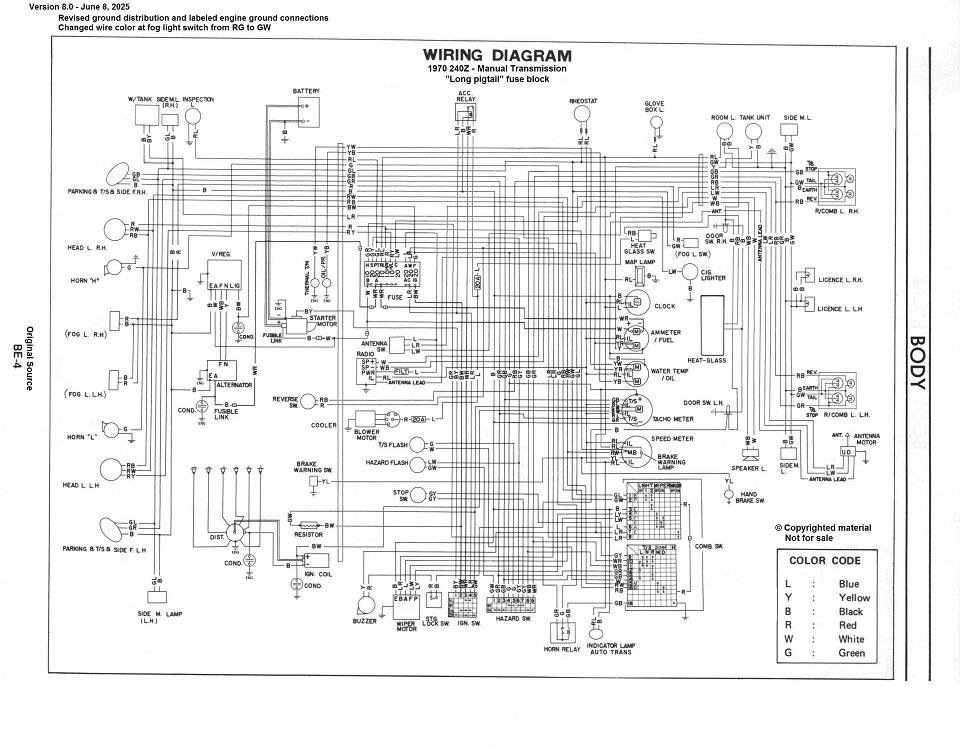
Here's the latest wiring diagram. I changed the ground distribution scheme to add the dedicated ground strap directly from the battery terminal to the firewall, and also labeled the ground connections that are through the engine metal. Hope this helps depict how the car is actually wired. I also changed one of the wire colors leading to the fog light switch. Might only matter to people in other parts of the world who have fog lights. <V8.0> _obvious 240Z Wiring Diagram 8.0.pdf
-
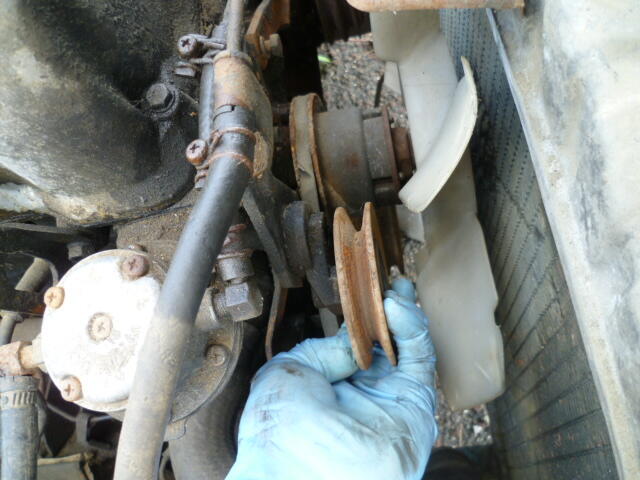
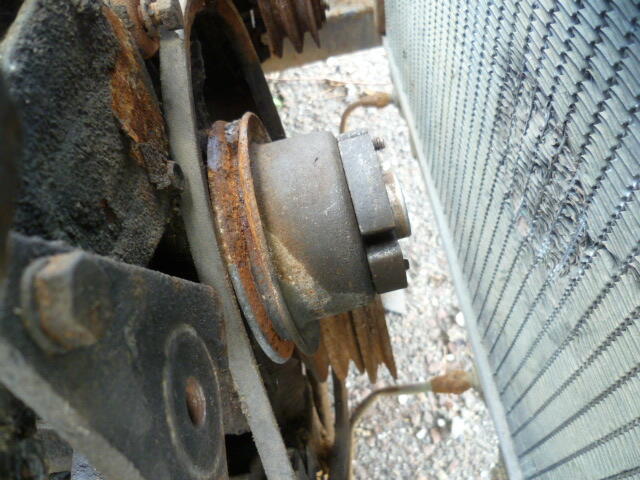
I don't think either of those water pumps you pictured are "original", but as for "correctness", here's a couple pics from a 9/70 car. Note that this car has A/C and I don't know if that makes any difference, but it's what I got:


-
Thanks guys. I will add that dedicated wire. Even though there is a path through the alternator and you don't really "NEED" that ground strap for the system to work, I was a little uncomfortable counting on pass through the alternator case as the only way for current to get back to the negative battery terminal. Hmmm... Now how to depict that on the diagram that makes it clear... ☺️


