


Captain Obvious
Free Member
-
Joined
-
Last visited
Everything posted by Captain Obvious
-
 Awesome. Let's hope this is the end of it and it's smooth sailing from this point forward!! Good work!
 -
Nothing dramatic. Run it with the system a little under filled* for a couple minutes with the radiator cap off. Then top it off, fill up the overflow tank to "F", and put the cap on. Any remaining air should (in theory) work it's way out of the system over the next couple heat/cool cycles. I've not found the Z to be one of those cars that really needs a complicated burping process. * The reason for the underfill is if there is a big air bubble in there somewhere it will expand much more than the liquid coolant will. And if the system is full to the top, it'lcould belch out the top of the radiator.
-
Yeah, I assume the mention about the oil pressure gauge by Mike was simply due to the fact that with the dash out, you wouldn't know if you had an oil pressure issue or not. But if you didn't have any sort of oil pressure issue beforehand and the only reason you were messing around with the dash was to make it easier to get to the HVAC system, then I believe the concern is unnecessary. Glad to hear it worked out so far. Remember that it may take some time for the whole coolant system to come up to pressure. Oh, and I'd approve of a picture of you driving the car without a dash installed. Slow enough to guarantee you weren't speeding of course, since you don't have a speedometer. Hahaha!
-
@kats might have some suggestions?
-
There have been reports of the engine not running if the tach resistor is removed, but I have not verified that behavior. Seems unlikely to me. But in any event, having the dash removed would have the same effect as removing the tach resistor. I can't see any reason it wouldn't run. None of the EFI stuff goes through the dash harness. And from Mike's list above... You obviously won't have an oil pressure gauge.
-
My 280 starts smoother and easier than that. Even when cold and without a CSV. And if I prime the fuel system first, it starts even easier.
-
Glad to help. And as I continue to work through stuff here, I'll keep the documented updated if I find anything else that needs attention.
-
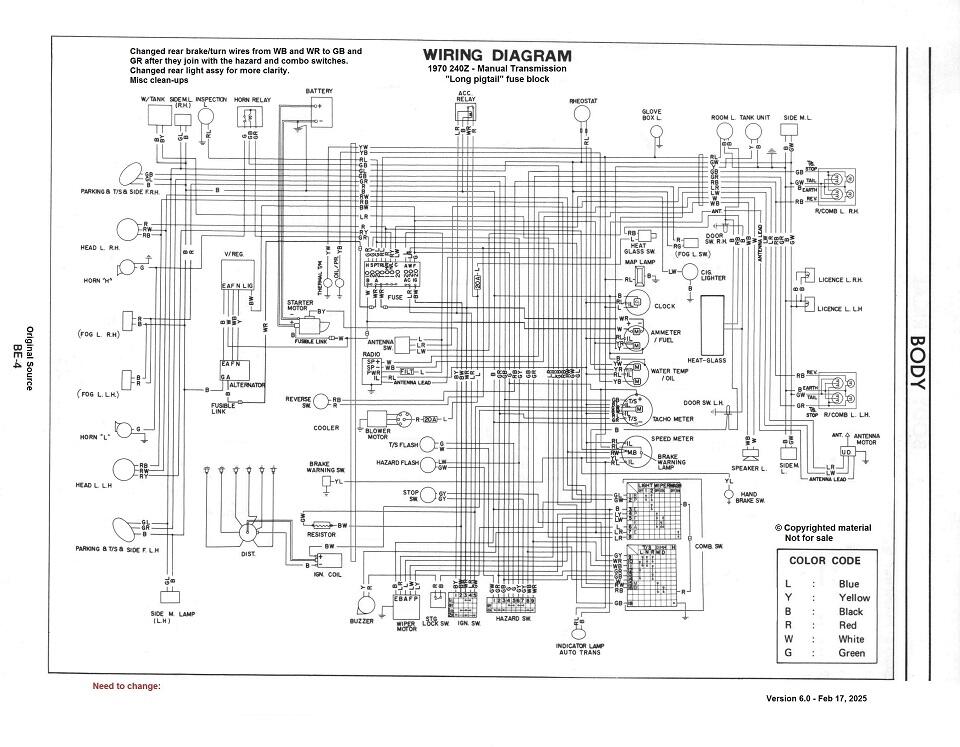
Here's the latest wiring diagram. I changed the wire color leading to the rear tail light assembly. At the hazard switch and the combination switch, the rear brakes/turns use a W/B and W/R pair, but somewhere inside the harness, they change to G/B and G/R pair by the time they get to the rear of the car. I also changed the portrayal of the rear light assemblies to show the bulbs inside. Note that in later 240's they changed one of the dual filament lamps in the back to a single filament. The car I'm working on is mid 1970 and I've got two dual filament bulbs on each side in the rear. <V6.0> _obvious 240Z Wiring Diagram 6.0.pdf
-
Thanks for the fog light pics. So my "F" switch clearly is just something that a PO stuck in there and I'll never know the intent. I'll pull it and plug the hole.
-
Assuming you could find a suitable stainless, I think it would work just fine. I think the rust you often see on them comes from the non-stainless parts that come into contact with the shims, not the shims themselves. In other words, I don't think the shims are rusted at all... I think that rust is just mechanically transferred onto them by rubbing against other rusty parts. @Patcon, are the shims magnetic?
-
Glad you got it worked out. Perfect timing. I'll be posting a new version with the changes to the rear lights soon. You can plot out the new one then.
-
Sendcutsend has .030 thick stainless. That's the thinnest they list. @Patcon, what's the thickness of those anti-squeal shims?
-
I took a peek behind the dash today and there isn't anything hooked up to the "F" switch and my blue tape Easter Egg is still intact and unwrapped. I did make another discovery though while I was back there as well... The wire colors for the rear rear taillights needs work. There are some errors on the diagram.
-
Cool. Sounds like good progress. So how's the lean running thing? Is that still gone?
-
Wow! No kidding you've been busy!!
-
Funny you should mention that... I haven't dug deep into the details yer, but I got this going on here. Thoughts?

-
I don't think any of that is at my end. I think all the printer settings should be at your side. I'm no tech guru, but I'm pretty sure I can't do anything about that?
-
Thanks again for the help guys. I added the speaker wires and here's the latest. I've been trying to stay very close to the original diagram style and wording, but I agree with the use of the designation "cooler". I changed it to "blower motor". I have no outstanding known issues at this point. If anyone turns up a problem somewhere, let me know. Lower resolution thumbnail pic good enough to get the idea, but if you want a higher quality version, download the pdf. <V5.0> removed in favor of newer version below later in the thread
-
Got it, and you're right. I glommed onto this thread because it was talking about the seals, but the original intent was the later style. I'm the one who's guilty of the time shift into the older O-ring style.
-
I think those are for after they went away from the grooved valve cover and moved the seal to the cap.
-
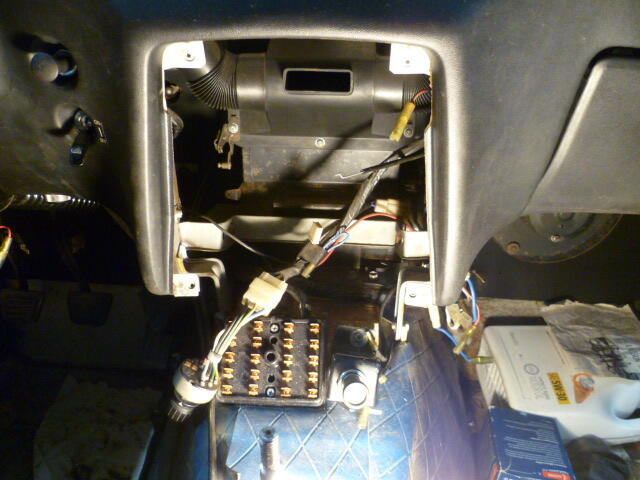
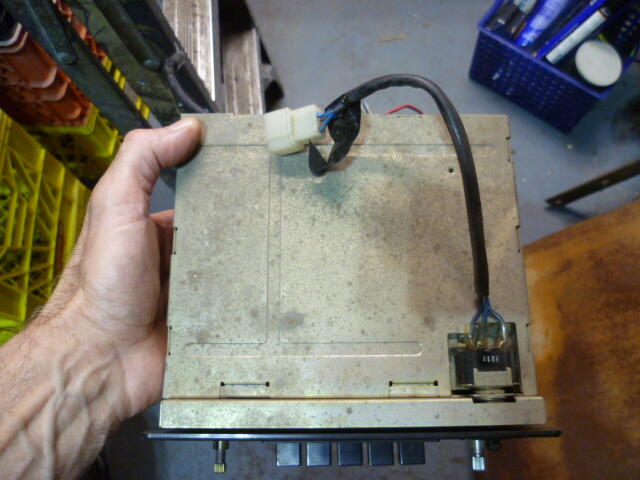
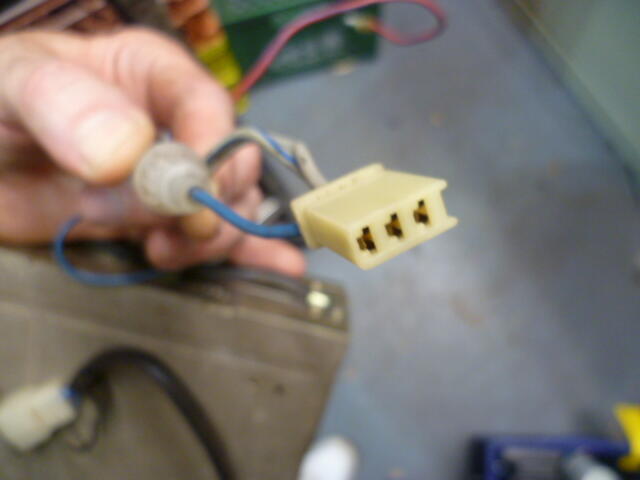
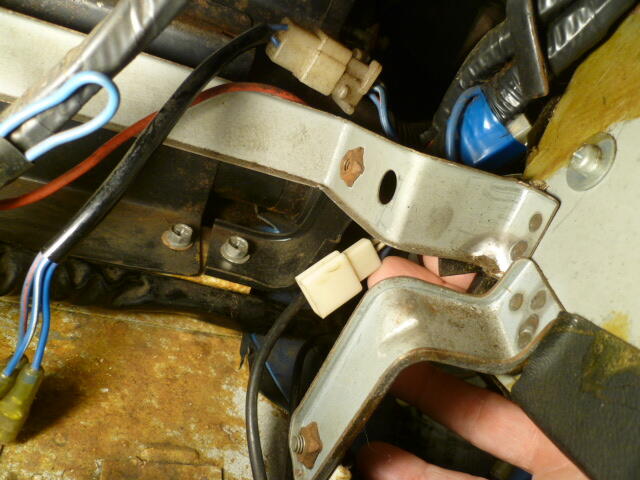
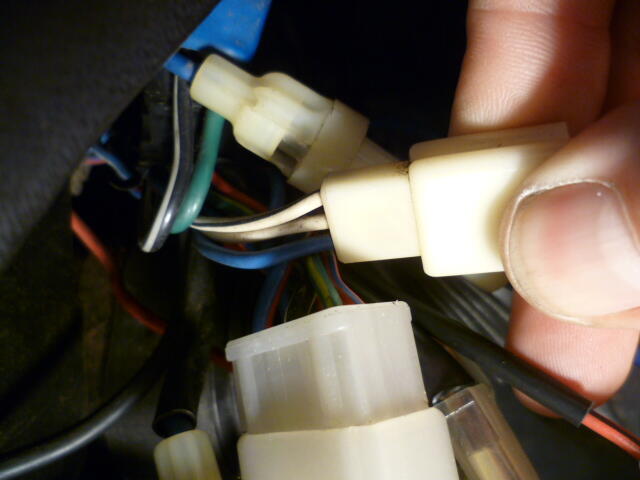
Thanks for the help. Strange that the OEM wiring diagrams include the radio, but don't include the speaker. And I will most certainly add a speaker icon. Still not sure how to connect it, but I'll add one! So here's a couple pics of an early radio, but not the earliest. It's the one with the horizontal antenna switch, not the vertical one: I'm assuming the blue wire is 12V power in (because of the fuse and the noise filter choke ). Then that would make the other two the speaker connections: And here on the chassis side, I've got this connector: This connector seems to have basically the same colors as the one that goes to the radio. Blue power, plus the W and W/B for the speaker: But the connector shape and is different than what you posted above? And your's has four wires, while what I have here only has three? I guess I need to see where that W and W/B go.

-
Oops. Probably my mistake. I knew it was just the "early" valve covers, and I assumed that "early" meant "2400". I may have been a little to confining with that.
-
Here's the latest version of this diagram. I made it more clear what was on each side of the firewall bulkhead, and also changed the oil pressure sender wire color from Y/W to Y/B. <V4.0> removed in favor of newer version below later in the thread
-
The grooved valve covers designed for an O-ring were only the early valve covers "2400" style. The later style design had the seal as part of the cap like your car.
-
I figured that somebody went through that. I sent you PM. Thanks for the help!


