


Captain Obvious
Free Member
-
Joined
-
Last visited
Everything posted by Captain Obvious
-
 I found a razor knife in the cavity down under my windshield cowl panel. WOOOOO!!!!! $$$$$$$$
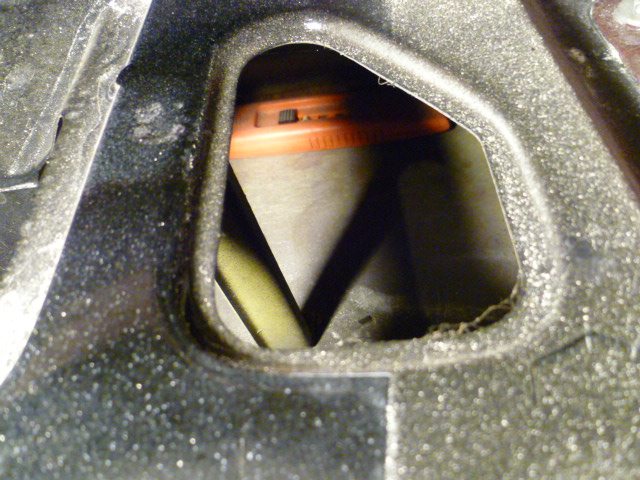

-
I'll check the next time I'm looking at a set of round tops. The amount of throttle increase is "adjustable"* but I thought the throttle increase is about the last thing that happens. Memory says (take that for what it's worth ) the nozzle has already started to drop before the idle increase kicks in. * By bending the linkage
-
I know you said the chain is already tight, but I'm thinking if you loosened the top of the curved (slack side) guide, it might give you enough slack to move the bottom end in and use the other hole.
-
That's not good. I heard about the flooding. Hope everything recedes and turns out OK. So definitely the first thing would be to check the choke cables to see if they are just too tight. And yes, I would leave a little margin there. In other words... You should be able to move the choke lever a little bit without the nozzles moving at all. I don't know if you need as much safety margin as what Patcon suggested, but if you've got the travel in the choke lever, then even that much doesn't hurt. Here's to hoping it's that simple.
-
Yeah, most of the linkages on the SU's are a sloppy affair. I wouldn't worry at all about the slop in the fast idle actuator, and I also wouldn't worry at all about the fact that the linkage that connects to the nozzle wiggles around a bunch. Except... When the choke is off, that linkage that connects to the nozzle should always be pulling the nozzle up tight against the underside of the carb. In other words, even though the linkage is sloppy, there should still be some spring pressure pulling that nozzle all the way up "with a snap" when you push the choke off. So, I got two quick thoughts... First thought is that you simply have the choke cables mis-adjusted and pulled to tight. If that's the case, even with the lever pushed all the way to "OFF", the nozzle will still be held down a little bit by the cable. To check that, what happens if you loosen the clamp screw onto the cable and let the lever down further? Does the nozzle come all the way back up then? If that isn't it, my second thought is that maybe one of the return springs on the choke linkage mess is not installed correctly. Take some good pics of the springs on that choke actuation linkage so we can have a look?
-
I'm not really digging the "bump" in the chain flow in that pic. It doesn't look smooth where the chain where it steps off the tensioner and onto the slack side guide. Could you pull the top of the slack guide out some away from the cam and then push the bottom end in a little? That might make the chain "flow" a little more smoothly from tensioner to the guide?
-
Haha!!!
-
Whatever works.
-
Oh, and forgot to mention... Since you're trying to create a complete path that clears out the entire engine interior, that's why the two vent connections are so far apart. If they were both on the valve cover, you would set up a little circle there. And if they were both on the block, you wouldn't clean out the head area. They put one on the head and one on the block so it pulls through the entire block. On "V" style (and opposed) engines, you can put one vent on each valve cover because they are each joined to each other through the block cavity. But on the inline engines, you need one at the bottom and one at the top.
-
The top and bottom are not sealed at all. There are huge holes between top and bottom at both the front (where the timing chain lives), and the rear where the valve train oil drains back down into the oil pan. Top and bottom are in no way sealed from eachother. The point of the two vents is that you are supposed to have positive crankcase ventilation (PCV) under all operating conditions. With just one vent hole (located at either top or bottom) you could vent off the blow-by, but you would not be able to completely remove the vapors from the block. By having two vents, you can set up a circulatory path and actually refresh the air inside the crankcase with fresh clean air. This enables you to do more than just vent off the excess... It allows you to evaporate off the water vapor and more thoroughly remove any corrosive blow-by gasses.
-
Gotcha. So he's assuming you (the purchaser) will do something appropriate with that crankcase vent and NOT leave the vapors in the block. @duffymahoney
-
Newer cars have MAP sensors, AFM's, TPS sensors, and O2 sensor feedback. Using all of those tools allows them pull out of one block vent through the PCV right into the intake manifold while venting the second block vent back to the air cleaner in front of the AFM. Problem is that on our early (much more crude) EFI cars, we had only one of those input sources (the AFM)*, and we have no feedback system (O2). The whole system operates on "assumption". Assumption that everything is working as designed because the ECU module has no way to know or tell if it isn't. So if you pull from one side of the AFM without balancing it with the replenishment source being pulled from the same side of the AFM, things get out of whack. And there's no feedback source of info to account for it, and no computer to learn from it. * We do have a three position TPS, but that three position switch won't do anything to help with PCV details.
-
When you say he provides engines without them (the block breather tube) in place... Are you saying that his engines (as delivered) just have the breather hole hanging open with no tube installed, or are you saying that he actually blocks off the hole with a plug of some sort?
-
I don't know what year they started putting that support bracket in, but I can tell you it was present on my 3/74 small bumper 260.
-
I've run into the same thing and I was planning to use the green loctite sleeve retainer. Haven't tried it yet, but I have high hopes for that. And I agree that it's weird that the original pipe was in there so firmly, but pretty much shows no retention at all when pushed back in once it was pulled out. As for the PCV and catch can thing... With the EFI, things get a little more complicated. You need to either vent everything upstream of the AFM, or vent everything downstream of the AFM. But don't mix the two. Or vent everything completely separate from the EFI system. In theory, PCV systems change direction depending on the engine RPM and load. So the whole notion of "inlet" and "outlet" is a little troubling for me. At low load (low blow-by), high intake manifold conditions, the flow goes one way. But at high load conditions when the blow-by is higher and the intake manifold vacuum is pretty much non-existent, theory says that the flow direction reverses. I guess the "normal" direction is pulled out the large pipe in the crankcase, through the PCV valve, and into the intake manifold. So if I had an "inlet" and an "outlet", I would connect the inlet to the big pipe on the crankcase and the outlet to the valve cover.
-
My thoughts (for what they're worth): There are those that say machining the sintered oil impregnated stuff can be problematic. Unless you do it right, you can "smear" some of the material and close off the oil holes. That said, if you're only machining the OD, then that shouldn't matter. Also, SAE 841 is softer than the traditional "bearing bronze (932 or 660 leaded)". It's probably going to be softer than the original bushing, but for the steering rack application, it's probably good enough. As for the second choice from McMaster, I like that it's made from 932, and I like the oil groove. But if you cut 20mm off, you'll be cutting right through the middle of the oil groove. Now since we're using thixotropic grease and not oil... Does it really matter? And as you mentioned... I think a lot of this will all come down to how you like the fit on the ID. Good luck with the lathe work and keep us posted!!
-
I haven't personally vetted the details in the below, but here's a thread in which some people actually mounted pressure sensors before and after oil filters and measured the differential pressure across filters. https://bobistheoilguy.com/forums/threads/oil-filter-pressure-differential-testing-psid.341925/ I didn't study it thoroughly, but a quick skim seems to support the theory that the delta-P over the filter media on any clean filter is very low and not enough to open the bypass valve. And that delta-P is pretty much unaffected by oil temp and only goes up as the filter becomes dirty.
-
I should have expected that. Unfortunately I couldn't find any details about the internals of the Nissan stock filter. Not surprising, but unfortunate. So I don't know if Nissan included a bypass valve inside their filters or not. The advantage of putting a bypass in the filter is you can use it in applications whether there is a bypass built into the block or not. The disadvantage of putting a bypass in the filter is it takes up space which could otherwise be used by filter media. In other words, you can have more filter in the filter if you don't have to put a bypass valve inside. So if your're positive that the application where you are putting the filter has a bypass valve elsewhere, you don't have to burn that space with at valve inside the filter. And since Nissan designed both sides of that equation, I don't know what they did. But if you want to send me one, I would be happy to cut one open for you. And still... The claim that if you change your oil and filter at reasonable intervals and never let it on there so long that it clogs up the filter, it doesn't really matter.
-
Don't make me come down there to make sure that happens.
-
What filter are you running? I'll see if I can dig up details on the internals. And by the way... In theory, the filter bypass only ever comes into play if you let the filter get so dirty that it clogs up the filter media. I know you're going to be changing your oil on your nice new motor way frequently enough that's not going to be an issue.
-
Bummer. It's back? Or it never left completely?
-
Pretty much all of the new filters these days include a bypass valve built into them. You might not need that bypass in the block at all?
-
If both the pickups are moved by the vacuum advance plate, then it really doesn't matter which one he uses. Just set the timing with a light and everything else should come out in the wash, right? The two pickups never change with respect to eachother. They're a fixed delta under all conditions.
-
Right. On paper, that's not it. Of course, however... There is still the possibility that it's intermittent, and it was 740 Ohms that instant with the wires in exactly that position when you measured it. Aren't I just the bluebird of optimism?
-
You can certainly measure the resistance of the pickup coil. I assume (but haven't looked) that there is a spec in the FSM to compare it against. But I'm thinking that if there is enough heat up there to cook the insulation on the wires, that just wrapping them with tape wouldn't change much. You would just start cooking the tape instead of cooking the wires. Bottom line? I think it might be a red herring, but I'd keep a close eye (and nose) on it. There should never be a hot electronics smell in the engine compartment. I know exactly the smell you're talking about, and that should not be happening.


