Captain Obvious
Free Member
-
Joined
-
Last visited
Everything posted by Captain Obvious
-
 Sheesh Dave, It's only funny(ish) because you weren't hurt. Glad that didn't go worse!!
 -
It sounds like you are assuming that the front ride height is the same for all the years, and I'm pretty sure that is not the case. And you are also making the assumption that the center line of the bumpers was the same for all the years? I'm not sure if this is the case, but I'm not comfortable making that assumption without data. And to make that point... Here's a pic showing how they changed the front spring perch location between the 240 and 260. So in theory, not all the front ends are at the same height from the factory : That pic came from this thread. Some good pics and info: https://www.classiczcars.com/forums/topic/60161-lowering-bottom-spring-perch/ And forget 77 and 78... According to the FSM's the rear bumper was lowered compared to the previous 280's. The front seems to be the same as the rest of the 280's but the rear is different.
-
All we know is that there's still no contact with the colony, and a xenomorph may be involved.
-
I'm confused... It looks like you only have half the switch in there? Like the whole top half is removed and missing? Like someone has totally hammered your switch to pieces? Take a look at this thread for some other pics: https://www.classiczcars.com/forums/topic/65118-dome-light-repair/
-
Wow. Don't want to pay $174 for a pair, but it's cool they are there!
-
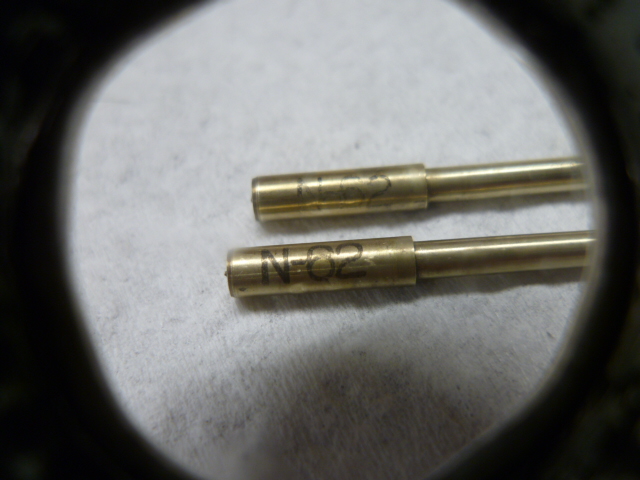
Thanks. I've found the inked on numbers on the needles are not very durable. Wouldn't surprise me at all if they were illegible or even gone completely. That pic I posted above is the best pic I have of the number. I've got other pics, but that is the most readable I've found to date. And one wipe with a strong solvent (like carb cleaner), and poof... It's gone.
-
Thanks again for the info. it's been too long ago for me to remember why I was measuring the bowl capacity, but I show the results mentioned above. And I agree about the bowl placement down by the exhaust manifold with no thermal break isn't ideal. The round top bowls were not only located farther away from the exhaust, but they also had the rubber vibration and thermal break mounting. Both of those probably helped keep the fuel in the bowls cooler than the that tops. And I'm not saying that the flat tops can't rub the needle against the nozzle. I'm just saying they are not more prone to it than the 72 round tops. I wonder if they were having some sort of alignment issue at the factory. It just seems weird that with the exact same design, nobody seems to complain that the 72's rub. So did you happen to take notice of the needle number on the flat tops you stripped down?
-
Thanks for the thoughts Ian. The parts breakdowns (for the US) list the needle numbers for the later (three screw) version of the round tops as N-54 and N-58. It isn't explicit on the breakdowns, but my assumption is that those two numbers were determined by whether the car had a manual or an auto transmission. But as far as I can tell, neither of those numbers were ever used in a flat top. At least not in the US. Then in June 72 they changed to the flat tops, and while they list the needle part number as 16354-N3310, they no longer listed the needle profile number (N-27, N-54, etc) on the parts breakdown. And there does not seem to be any variation based on any car configuration (like whether it's a manual or auto). That said, my experience is that the needle number used, at least in the US, is N-62: I've messed with a couple distinctly different versions of the flat top carbs, but there's no indication that those versions correspond to any of the "first type, second type" etc notations on the Fuel System Modification Plus literature. In fact I believe that they do not. It is clear, however, that Nissan was "flailing" during the early flat top years trying to get things right. Some additional thoughts about your thoughts : Yes, you do remember rightly about the shared idle mixture control and I don't think that's the best system either. I have modified a couple flat top systems to allow independent adjustment of the idle mixture instead of one shared control and that seems to work well. With regard to some of the other things you mentioned, the flat tops shouldn't really be any different than the round tops. For example, the round tops have a very similar inlet filter which needs to be kept clean, and the flat tops should not be any more or less susceptible to nozzle wear due to needle rubbing than the round tops are. In fact, the dome alignment scheme used on the three screw round tops is identical to what they used on the flat tops. I find your mention about small bowl capacity a little curious. The flat tops have a larger bowl capacity than the round tops, so if the round top capacity is "enough", then the flat tops (which have about one and-a-half times the capacity of the round tops) shouldn't be an issue? Thanks again for the input.
-
That circuit looks OK to me. Have you considered using a microprocessor and pulse width modulated outputs instead of relays? Or little CAN bus receivers?
-
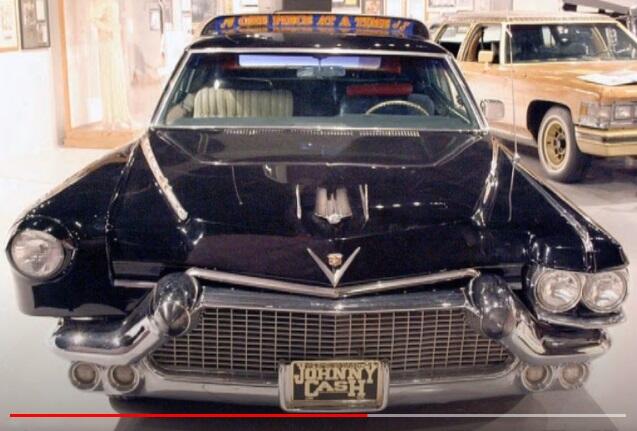
The first year, they had me putting wheels on a Cadillac:
-
Thanks for the links Gav240Z.
-
I don't think it was for more charging time. I think it was for a sharper steeper less scattery firing time. Based on the shape of the ZX reluctor, it looks to me like they were trying to reduce the amplitude of the negative pulse before a super-er steeper rising edge. Better for noise rejection and repeatability? And I'm sorry for the sporadic updates. I'm working on this little bit at a time as I get the chance. But here's a preview... The E12-80 is essentially the same as the previous versions, but in a different form factor. Electrically very similar, but different shape. But the E12-92 is not. It's different.
-
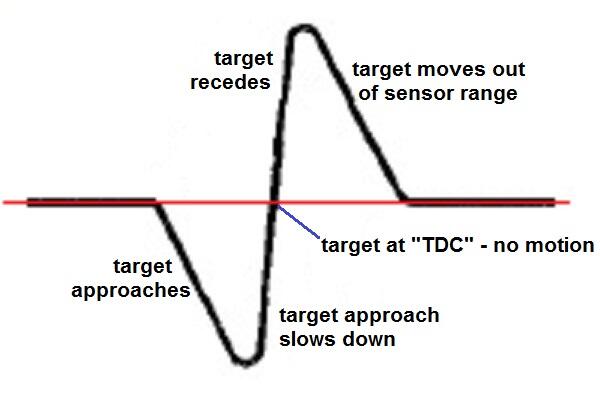
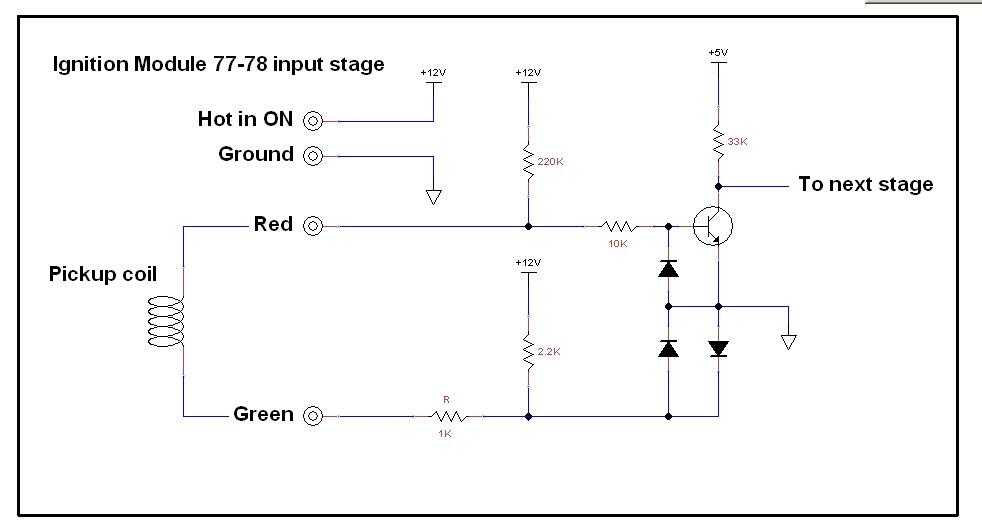
Here's a sketch I whipped up showing a simplified input section of the 77-78 ignition module*. The topic and concept of "polarity" keeps coming up, and I'm going to explore that some more: So take a look at the input pickup coil connections... The red and green. If you know what you're looking at, it's clear that the red is the "controlling" connection while the green connection is pretty much tied to ground. If you connect up a voltage source between the red input and ground and wiggle that voltage around, the output of the module will switch. However, if you connect up the same voltage source between the green wire and ground, the output will never change regardless of what voltage you apply to the green input connection. In fact, if you connect up a voltage source between the green input connection and ground, you will forward bias one of the diodes and pass a bunch of current through the 1K resistor. The green input is tied to ground through diodes and will pass significant current if you connect up a source to it. The red input does the switching and the green input is the "ground" side. And I know from looking at the rest of the module that when the red input is negative, the output charges the coil. And when the red input goes positive, the module releases the coil and causes a spark. So for the early modules, the spark occurs at pretty much the zero crossing on the rising edge of the switching input. On this pic, the spark would occur on the steep rising edge when the red wire goes from negative to positive: *I assume that 74-76 is pretty much the same as 77 and 78
-
Thanks again for the help guys. I'll hold tight and hope others can chime in. And I'm certainly in agreement with the flat tops being good carbs. Swimming upstream against strong current, but moving my arms anyway. And thanks Dutch for that document page. I'll add that to my files.
-
Thanks all for the help so far. Hoping that someone can turn something up. The documentation I have mentions nine different revisions of the flat tops (HMB46W-1 through -9) used in the US. But who knows how, or even if, those revisions correspond to your 1A through 1C. And beyond that, the doc I'm referring to is dated at the end of 1975, so who knows what happened after that through 1978? Does your UK market docs indicate any time line as to WHEN those 1A, B, C variants were used?
-
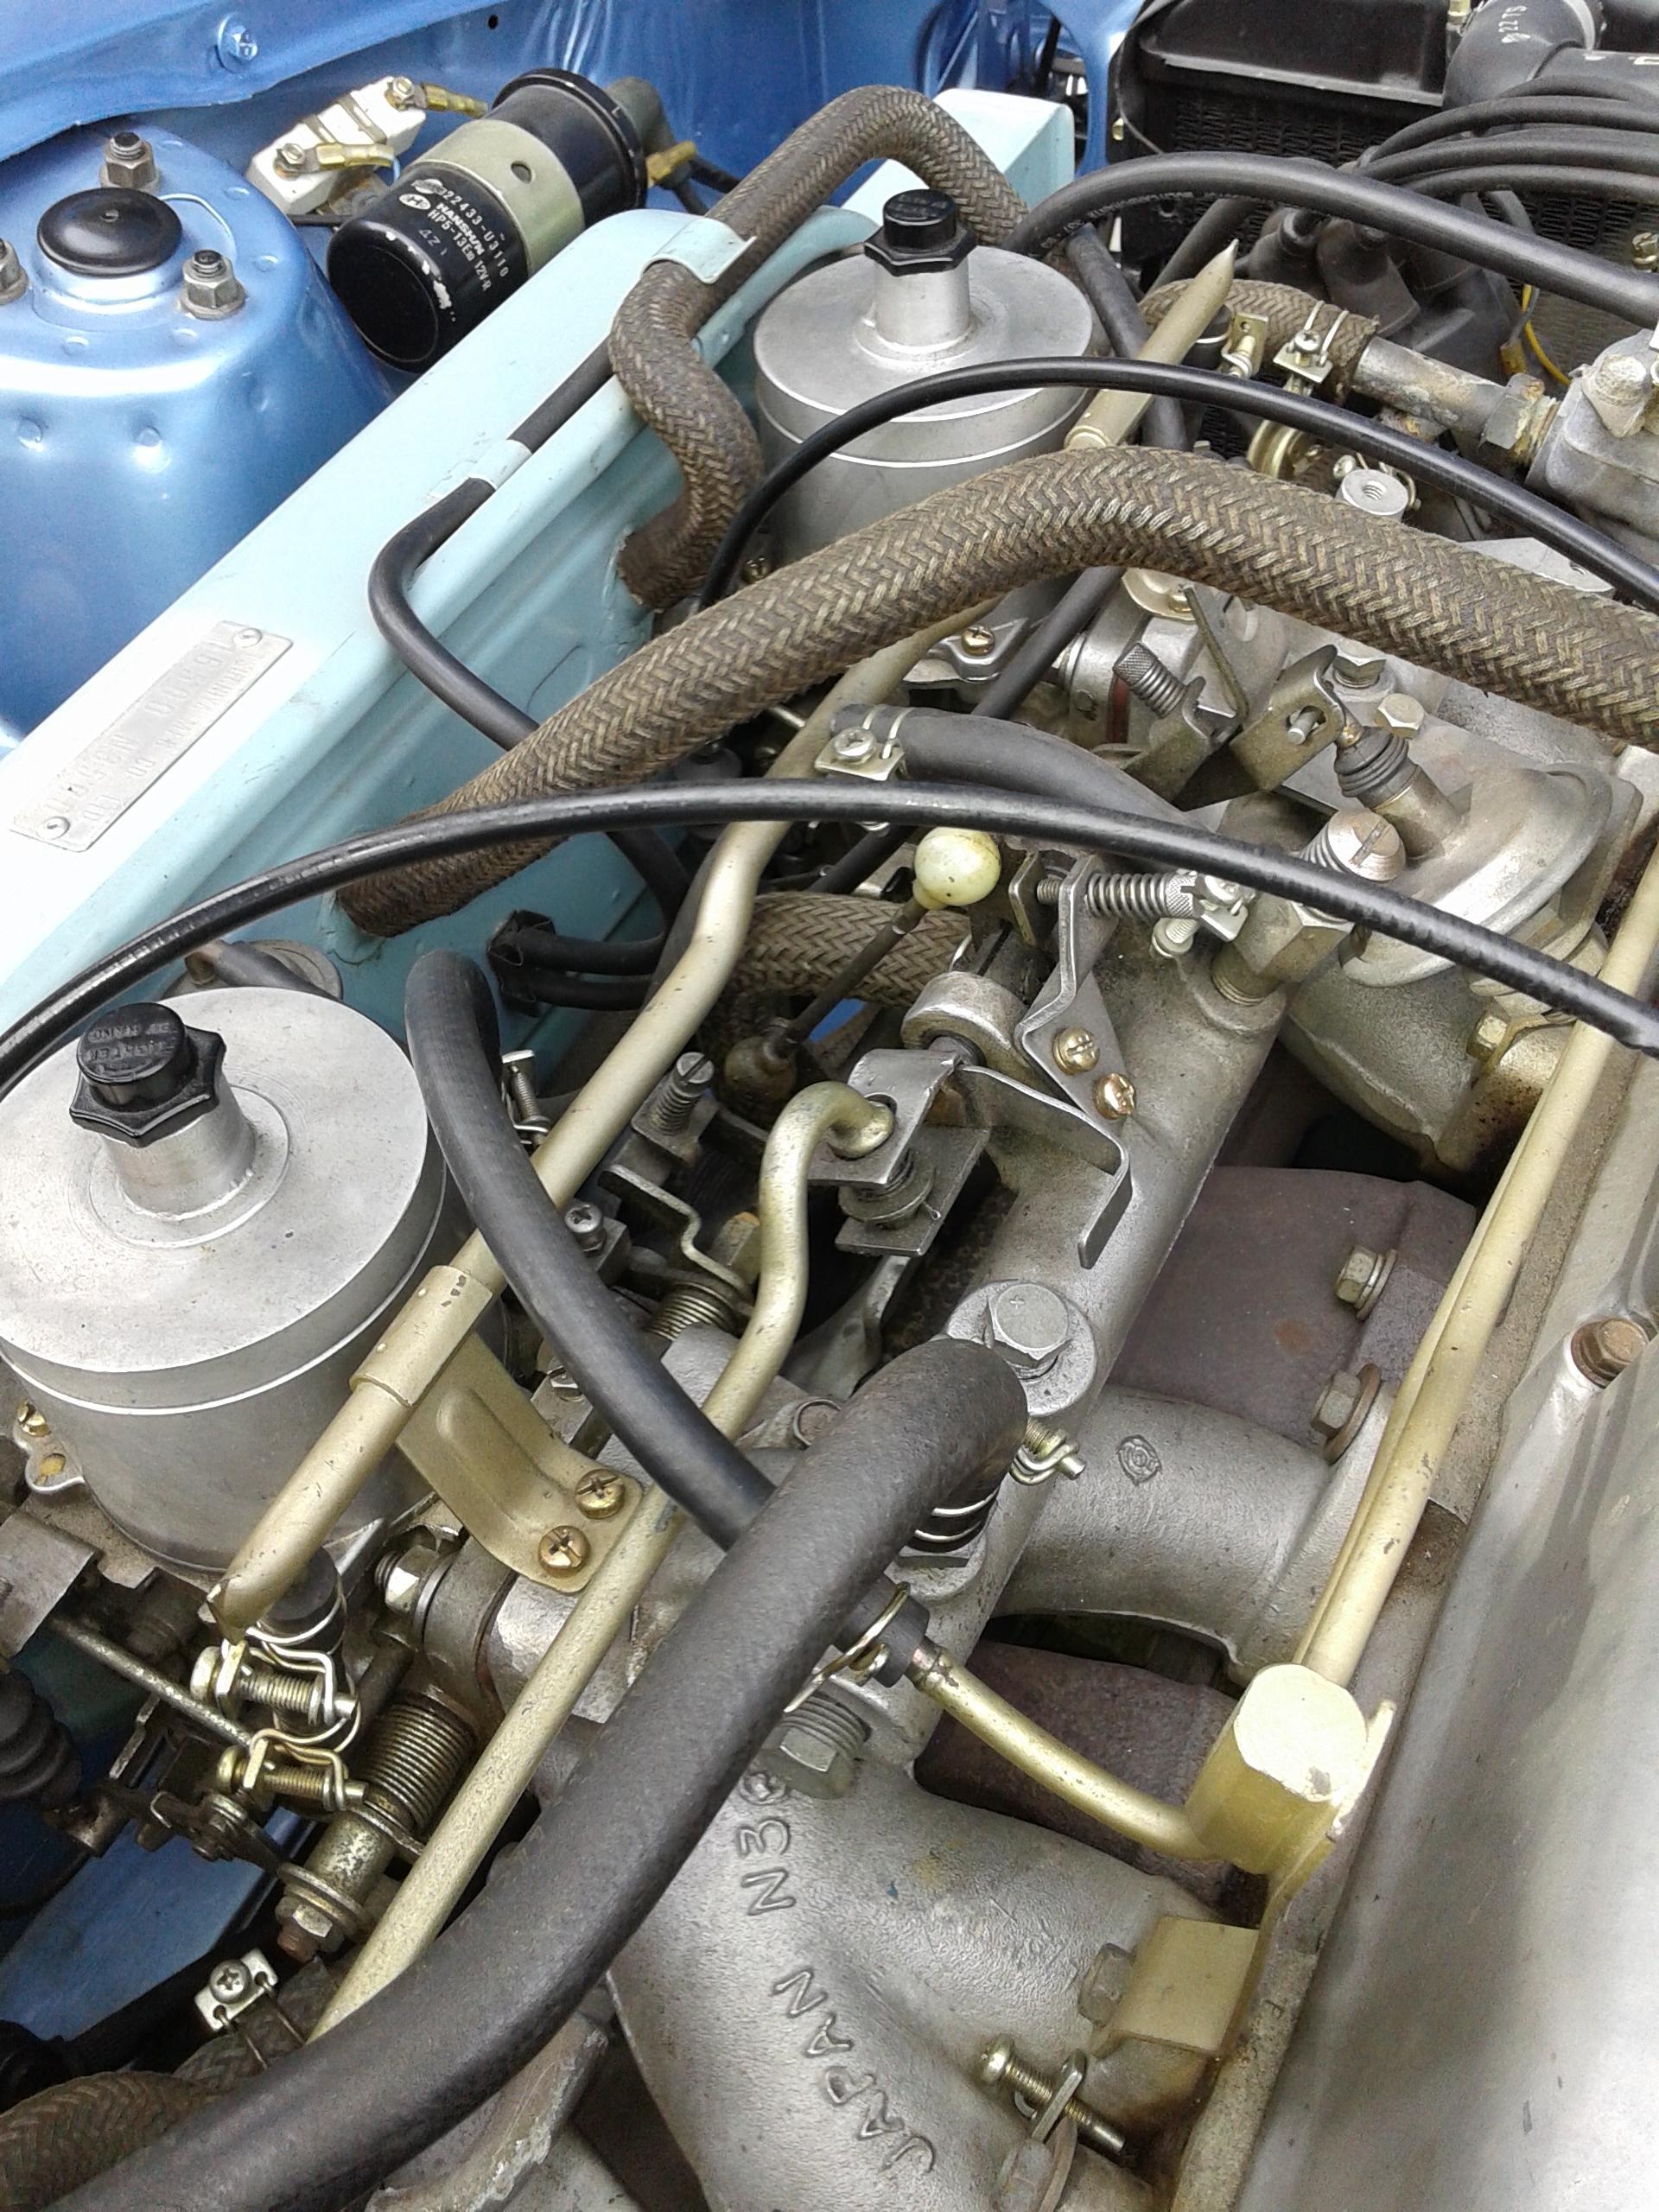
So here in the US, they used P/N 16354-N3310 needles in the flat top carbs in 73 and 74. The parts manuals says they used the same needle for both years. Then in America they changed out the carbs completely in favor of fuel injection in 75, but I know that's not the case in other parts of the world. So I'm wondering if they used the same needles in flat top carbs in other parts of the world from 73 to 78. Did they use the 16354-N3310 globally, or did they use something else? So do any of you non-US enthusiasts have any experience with this? Off the top of my head, just tagging people (not in the US) I can think of? @kats @EuroDat @dutchzcarguy @Gav240z @RIP260Z @jonbill @Jason240z And just because everyone likes pics, here's a pic of 78 flat tops that I hoovered up some time ago:

-
Ignore the bright links. They only properly line up every eleven revolutions of the cam (every 22 rotations of the crank).
-
-
-
Woot!!
-
Sorry. I thought you were saying that Dutch adage was the direct translation of what I wrote. Thanks, I get it now! So for the OP... De onderste steen boven halen.
-
Yup! So what's the old adage in Dutch that implies you need to dig deep to the root cause of a problem when looking for the solution? I'm sure there has to be one!
-
Yes, sorry. It's a translation issue AND a cultural issue. Goes like this... When investigating a mystery, it's important to hunt for clues and look into all possibilities in order to truly solve the mystery. And here in the US there is an old saying along those lines that goes: "Leave no stone un-turned." The meaning of which is "turn over every stone looking for clues as to what's really going on." or in other words, "When looking for the true root cause answer to a question, do a thorough investigation and make sure you look into everything." Then also some time ago, some silly person manipulated that old saying juxtaposing letters and turned "leave no stone un-turned" into "leave no tern un-stoned" which is just a silly concept of a flock of seabirds stoned on drugs. Back to the topic at hand, I was implying (in a silly stoned bird way) that it was unclear how the OP of this thread claims that his back-up lights worked a bunch of times before failing, but the current theory (wrong bell housing) should have made that completely impossible. It's a mystery that has not been solved. I'm sure there is a similar saying in Dutch that would make no sense to me.
-
Kinda doesn't matter much since (it seems) you guys have presumably hit on the root issue, but is there any explanation for this? Terns unstoned and all that.
-
Put me into the "I want a dimmer" crowd too. I run my dash lights just bright enough that I can see them when I drive. I want the gauges to be visible if I need them, but not the main area of focus. LOL... In other words, I need my 50 year old headlights to be brighter than my new LED dash bulbs.