Captain Obvious
Free Member
-
Joined
-
Last visited
Everything posted by Captain Obvious
-
 Well I don't have any hard numbers for you, but IMHO that cold start valve looks perfect. I took a quick look through the FSM to see if I could find some real numbers and came up empty. There may be some flow measurement numbers in there somewhere for the CSV, but with a quick review, I didn't find any. Only thing I DID find was in the FI manual... On page 16 where they are describing the operation of the CSV, they say "the fuel injected Z-car needs a choke system which supplies very large amounts of fuel only during starting." So the factory expected amount of fuel is "very large". I think you nailed it.
 -
No technical input (at this time), but props for the Predator reference.
-
And that color scheme... Deep blue with a wide white stripe? Makes me ill. Who would do that to a Z???
-
Figure out why about what? Why the cold start put out a lot more fuel than the individual cylinder injectors? Because it's designed that way. Seems completely normal to me. I still think the obvious explanation is that you are flooding your engine by trying to start an engine that was working properly when there was a significant bypass around the throttle plate (the AAR). You removed that bypass and didn't add extra air from somewhere else, but you kept the fuel the same. Did you try holding the gas pedal down a little bit while you cranked the engine? That might not be it, but it's so simple to try!
-
As expected, I don't see an obvious smoking gun, but here's a couple things to think about and/or look into. First, all that TVV thing does is block the vacuum to the EGR system until the engine warms up. It should be a closed valve until the engine warms up and this disables the entire EGR system. You can "manually" disable the entire EFR system by pulling the tube off the underside of the throttle body and capping it. This won't work for you when inspection time rolls around, but just for troubleshooting this current problem, it would be easier if that thing wasn't hanging off the engine. And as a caveat (1a) to the above... The vacuum source for the EGR system comes off a ported source from the throttle body that presents no vacuum at idle anyway, so that whole thing shouldn't be doing anything at all unless your foot is on the pedal. It's similar to the distributor advance vacuum... Nothing at idle, nothing at WOT, but highest at light cruise position. Second, the simplest suggestion would be to try pushing down on the gas pedal a little bit while you try to start the car. Your AAR looks to be open a significant amount and once you took that off the car and blocked the holes, you have removed that amount of idle boost. Your car may simply be completely clamped shut now and can't get enough air to even idle. Try holding the pedal down a little and see if it'll run. Third, I see the rubber stopper in the intake duct for one side of where the AAR used to connect, but I'm not sure what you did with the other side over on the throttle body top. Looks like aluminum foil or something? The point is... The AAR connection side coming off the throttle body is the high vacuum side and needs to be sealed very well. Even more important than the side coming off the intake duct. They're both important, but because of the high vacuum on the intake manifold side, that side needs to be even better. Fourth... All that wiring going to your potentiometer and the water temperature sensors in the thermostat housing? Ewwww.
-
I saw the pipe, but didn't know what it was. Miles and miles away!!!
-
@Jeff G 78 Wow... That is many many miles away from what I consider a good time. Woof!
-
Can you take a decent res pic or two of the engine? Maybe someone will spot something?
-
Forget the dash... Are those un-rusted original frame rails? Don't drive it like you stole it. You totally stole it. Just don't drive it like that. It'll give it away.
-
Well since this all started when you messed with the AAR, the logical conclusion is that the AAR work is related somehow. Of course, there's always the possibility of a completely spontaneous unrelated failure, but let's just mess with the idea of the AAR being involved somehow. I don't know what's going on, but I'm just gonna poke around a little. At the beginning of the thread, you said you took the AAR off. What exactly did you do? You detached the electrical connector off the AAR and then what? I assume you loosened a couple hose clamps and took out the bolts that hold the AAR to the intake manifold and pulled the AAR off the manifold. Did you cap the connections that used to go to the AAR (right way)? Or did you put in a piece of tube to connect the two ends where the AAR used to be (not the right way)? Did you take off any other electrical connectors as part of the job? Cold start? Throttle position sensor? At the beginning of the thread, you said you had spark. Are you sure?
-
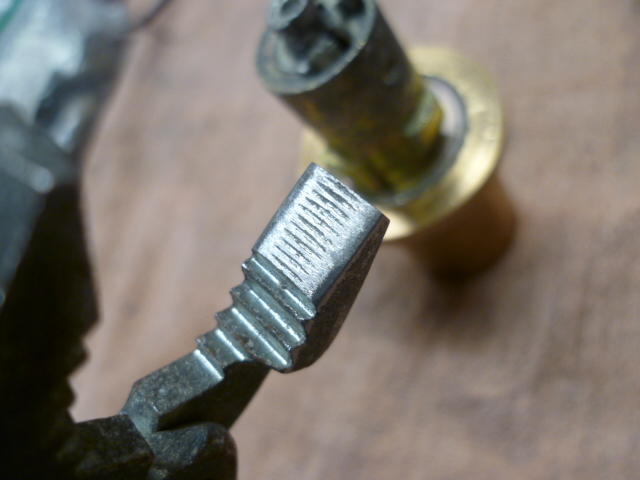
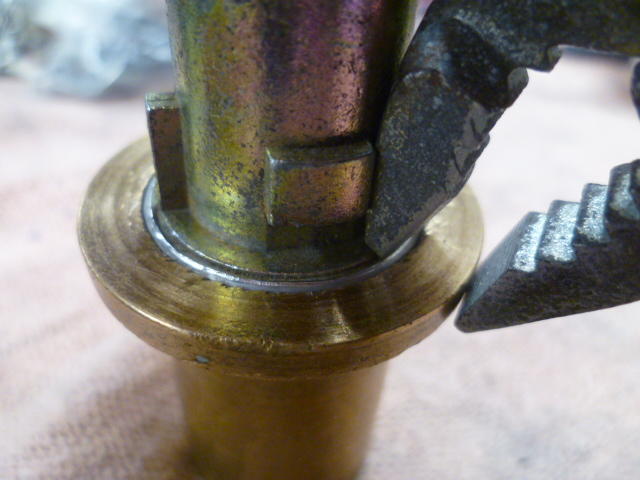
The tip of the plunger doesn't really stick out of the end during normal operation? Like this? There's normally something else covering the outlet end of the injector, isn't there?
-
What's the latest on this? With the sudden onset and complete (not intermittent) failure, it seems like it should be a simple issue to find and fix. "Should be." If I were anywhere near you, I'd be happy to come over and help figure it out.
-
Back when I had my Z32, I dissected a couple failed 300ZX injectors (different style), but I've never done any autopsy work on a 280Z injector. I'd be happy to do so if you (or someone else) wants to send me a surplus injector or two. I would have to dig out my Z32 injector box to be sure, but I don't think they used stainless steel. I think it's carbon steel, and therefore susceptible to rusting. I assume they believe that situation won't occur as long as the internals of the injectors are constantly bathed in dry fuel not containing any water. Just like the gas tank. But if the car sits for a long time with the system open, water can accumulate where the fuel is/was. Just like the gas tank. The point is... If they didn't make the internals out of a magnetic stainless, then there may be some rust inside inhibiting movement.
-
Excellent. Make sure the brass connections on the car are really really clean (600 or 800 grit emery cloth) and make sure you get the links in the proper locations. Biggest one on the passenger fender side of the block closest to the radiator:
-
Pics of the underside or it didn't happen!
-
I didn't see this before. Yeah, I don't remember all the details, but I went through the same thing with the first door lock I opened up. I know I used a couple little screwdrivers and other pointy tools, but I don't remember how many times I stabbed myself. I do know that I used screwdrivers and little chisels that I ground to shape to try to make the job easier, and while I did succeed, the face caps were a little ragged around the edge. The current set of tools of my pliers combined with the anvil holder have produced results good enough to re-use the face caps.
-
Sorry. I was off-line for a day. Just sent you PM.
-
Wow. I'd love to find something like that in my barn! Of course, I'd have to get a barn first, but... Details. Do you have documentation to support the 35K original miles claim? And do you have any pics of the underside? With all the rust on the stuff on the top side, I'd be most interested in what's going on underneath. I gotta get a barn...
-
-
Here's a pic of the ignition lock I bought off ebay for my 77. My 280 uses the Taylor X7 key blank also known as Silca DAT6R blank. I believe the mirror image locks are Taylor X6 and DAT6L. There are seven tumblers, although the careful reviewer will notice that there are actually eight slots in the cylinder. The eighth one is not actuated by the key and is simply a retainer to keep the cylinder from pulling out of the lock body. It's not counted as a tumbler. So this is what my 77 280 uses. I'm not sure if the longer seven tumbler locks will fit into the earlier assemblies that were originally designed for the six tumbler versions:

-
I'm not sure what requisite lugs you're talking about. I do have first hand experience with some lock stuff from ebay, although since it's been a number of years since I messed with them. I'm not sure if what's available now is the same stuff that was available six or seven years ago, but back when I was doing my locks, the only locks that were being produced new were door locks and ignition locks and I they were being made in Taiwan (by ASP). I've never seen any new production for glove box or hatch locks. So back when I was doing all my locks, I purchased door locks and ignition lock stuff from ebay. Be aware, however, that there are a couple different gotchas... First of which is that the really early cars used single sided keys and all that lock stuff is very different than what was used on the later cars. I don't know what constitutes "early" and "late" exactly, but I can guarantee that my 77 is "later" and I have absolutely no experience with the early single sided key stuff. I don't know if that's a 69-70 thing, or what. Second possible gotcha is the key blank as there were a couple different blanks used (at least in the later years). By the time they got to 77 there were two blanks available which were a mirror image of each other. I'm not positive, but I believe this practice started in 74 with the 260. The third gotcha is the length of the ignition cylinder and the number of tumblers included within. By the time they got to 77, the ignition locks used seven tumblers. But some year prior to that, the ignition locks only used six tumblers. So I'm not exactly sure on what year the change went into place, but at some point, they upped the number of tumblers from six to seven. I haven't researched it, but I believe all the door locks used six tumblers even into the later years. The last gotcha is that the actuation arms on the 77-78 door locks are different than previous years and most of the ebay door locks won't work. I did a quick check and there was at least one seller that had stuff that was 77-78 specific, but the point is, if you're looking for 77-78 stuff (which I know you are not), you have one extra hurdle to overcome. So the summary is.... If you're going to buy lock stuff off ebay, make sure it uses the correct (mirror) blank. And if it's an ignition lock you're buying, make sure it has the appropriate number of tumblers (six or seven - also referred to as "short" or "long" body). And if you're looking for door locks for 77-78, make sure you get the ones with the correct actuator arm. Wow. Lots of words. Sorry.
-
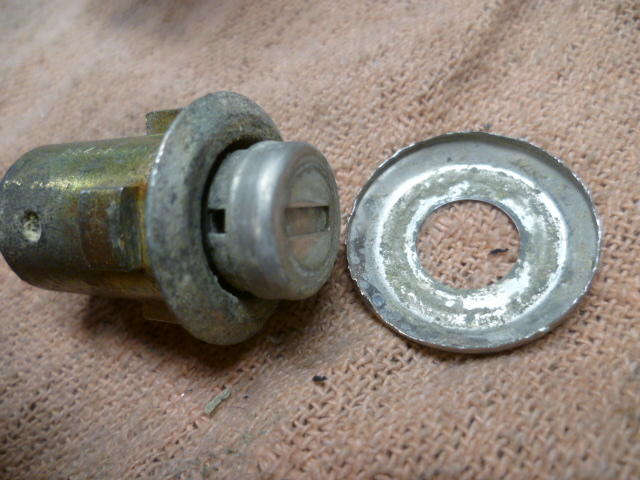
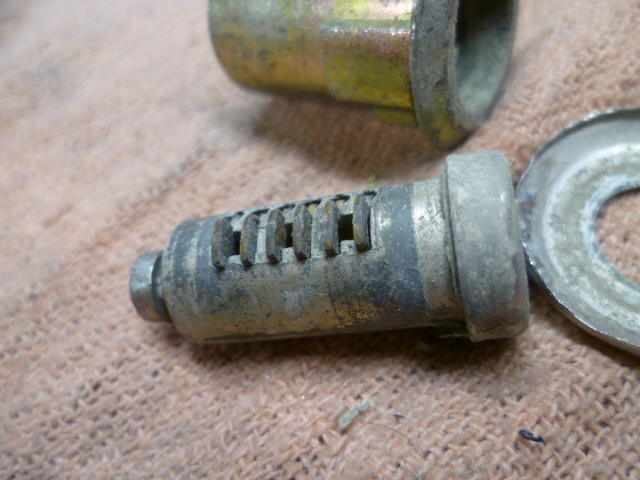
Yeah, I get that a lot. You need a lathe, my friend. Once you get the seam opened up, the face cap just pulls off the front of the lock: And the cylinder slides out of the lock body: Here's some of those corroded crusty tumbler wafers I was talking about earlier. However, despite the way it looks, this is actually the BEST door lock I've ever opened up. In fact, I wouldn't feel bad about reusing this one if I had to: And here's a shot down into the lock corroded lock body. If you look closely you can see some grooving in the body where the tumblers have dug in: And since I had the camera out, here's how the front face keyhole cover is held on. Note the dimples in the side where it was crimped into place. It's easy to just slide it off. Maybe use a small tool to un-bend the crimp a little bit if necessary:


-
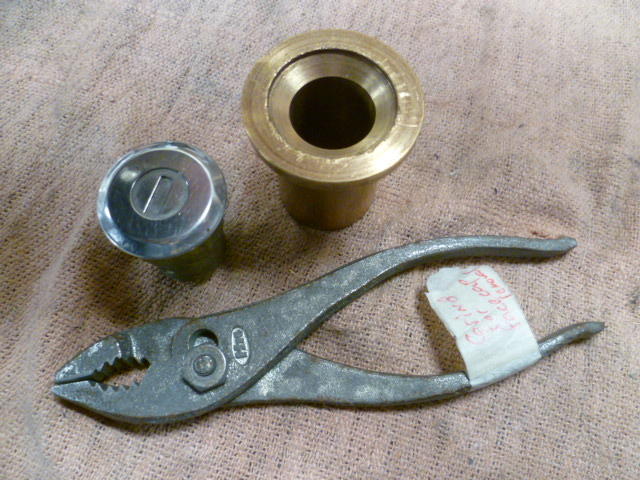
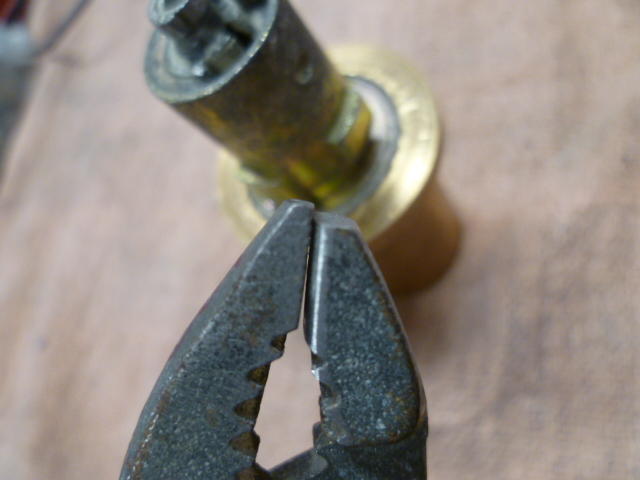
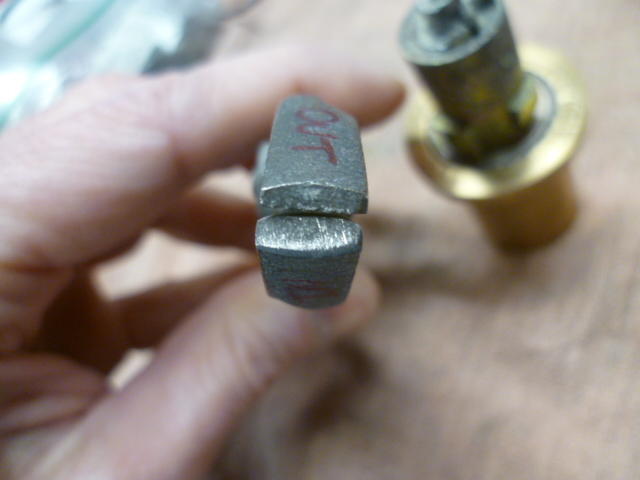
So for those of you that I haven't scared off yet, I got a couple minutes to take a previously unmolested door lock apart. Here's a lock, my anvil holding fixture, and my home-brew face cap pliers: For the pliers, I ground one tip down a little so it's slightly shorter than the other leg: And I ground a radius into the jaws to kinda sorta fit the curve of the face caps. It's not a perfect match, but the intent is mostly to keep the corners from digging in and creasing the face cap material: Here's another pic with a better view of the radius ground into the jaw: Using those pliers, I am able to catch the lip of the face cap and straighten up the bent bead around the edge. Like this: And after a couple minutes of careful prying and working my way around the lock a couple times, I end up with the lip pried up straight enough that the face cap can be popped off the front of the lock. Takes some finesse and "the knack", but in the end, it looks like this:

-
And some words of experience about reusing the original locks... Every original lock I've ever opened up (with the exception of the rarely used glove box lock) has been a mess inside. Corroded. Pitted. Grooves worn where there shouldn't be grooves. Wafer / tumblers worn and sometimes bent. The pot metal they used for the lock body castings was probably chosen more for cost and it's ability to cast fine detail than it was for it's longevity. And the corresponding keys were worn as well, meaning that even replacing the wafers with new ones might not fix a sticky lock problem. The point is...... All you guys buying face cap pliers thinking you're going to open up and rebuild your original door locks? Based on my experience, you're going to find a worn, corroded, rusty, grooved, hunk of what used to be a lock. I would probably recommend buying a new set of door locks off ebay and opening them up and rekeying them to the rest of your car instead. If you can get new replacements that use the same blank as the rest of the car, then that would be a much better way to go. New versions of both the ignition locks and door locks are available. The ones you can't get are hatch and glove box, and thankfully those two usually got much less use than the doors and ignition and stand a better chance of being salvageable. Of course, YMMV.
-
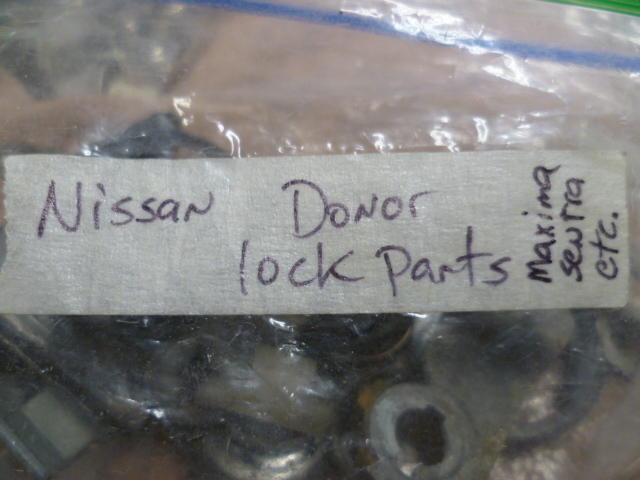
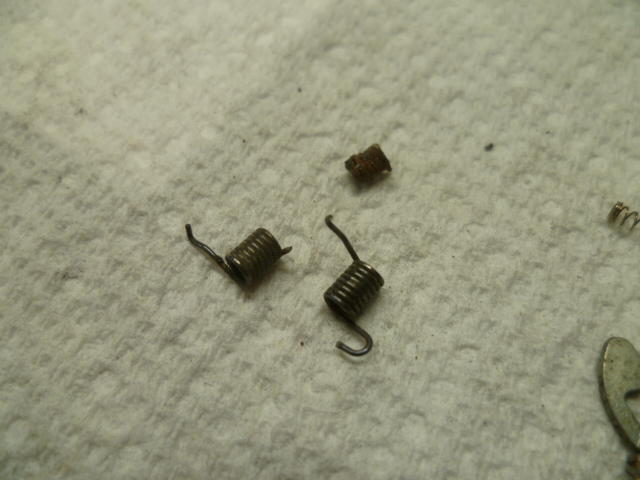
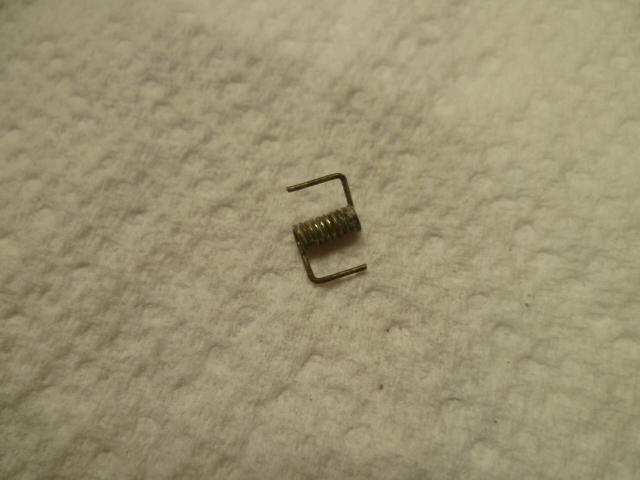
So I found my box of lock related stuff... Unfortunately, there wasn't any definitive help in there about which specific donor I used for the springs. The notes on the bag indicate that it was a NIssan model and there is no mention of Honda parts: And I did find the following spring stuff together in one small bag. Not conclusive, but indicates that I did NOT use half of the two section spring: All indications are that I used the one that looks like this. Probably clipped the ends off and maybe shortened it a turn or two so it would fit between the hinge holes on the hatch keyhole door: