


tymarbry
Free Member
-
Joined
-
Last visited
Everything posted by tymarbry
-
 I was wondering if the intakes on the 280zx's will work on say a 280z?
 -
Are there any real good ways to upgrade the fuel rail syster for a 280z? I was wonderinf if you could just get a fuel rail from a 2JZ motor from a toyota or from a 280zx or anything? Are there any good/cheap aftermarket billet rails? I just hate having to mess with the tiny segments of fuel hose every other week and have a new leak. any help is good help thanks.
-
Thank you!! I will try tomorrow to see.
-
Why would the oil in my motor smell like gas? Car runs fine it seems and doesnt smoke from what I can see. Sometimes I can smell gas fumes from engine when I first start it up. Engine/Trans hums and lightly vibrates at 3,000RPMs when in gear but out of gear ints fine. Im guessing this problem might be caused from low gear oil? Please help thanks.
-
Ive worked at Home Depot for over 4 years now. The idea is that treating the customer fairly will get them to come back. We even will cut off $50 on a product just if a customer tells us that someone is selling it cheaper. We dont even have to see an ad, we just do it because building trust and friendship between seller and buyer is a key. Ive emailed and asked for a reimbursement for the mirrors. I have yet to get a reply we will see how this goes. maybe they can redeem themselves.
-
Ok now Im pretty pissed. I bought some mirrors off of MSA for $34 or something, shipped. got them today just to realize that they are generic brand mirrors that go for about half the price I bought them for. MSA: http://www.thezstore.com/page/TZS/PROD/EM/50-1153 AMAZON: http://www.amazon.com/Source-1600B-Sport-Mirror-Universal/dp/B001A0IRG8 I think in short its safe to say "**** MSA".
-
Ive changed mine with the signal at the bottom and the signal is much more clear. I think that in a 240z it would probably be preference solely. Do 240z's have a split upper lens like in 280's? The 280z lens style has a lower lens and an upper lens that is split to include a smaller inside indicator. I wonder what that is for actually?
-
-
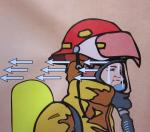
Are the turn signals for the 280z tail lights supposed to be above or bellow? Mine is setup wrong I think. Tried to find some videos of 280z turn signals for the rear but I found only custom LED light setups that implement the JDM or Europe style tails. these have an amber lens at the bottom of the red lens. Here is an illustration I did to show what I mean. The turn signals are barely visible so I'm thinking they are in the wrong place maybe.
-
Good looking out. Knowledge is power and better us knowing than to be fooled.
-
Haha Ive got the anti-perspirant for those hot days but I dont mind the heat, I just hate the cold. My A/C unit was not factory installed and the Radiator whatchamacallit for the A/C is blocking my car's main radiator which causes high coolant temps. The person who installed said A/C radiator did so with exhaust hanging wire. I also figure that I never use it and its just a hindrance on the engine sucking down alittle MPG and HP by being there so I might was well clear it out.
-
didn't know what section to post this. I want to remove my A/C but dont want to remove any valves or anything that would mess with the vacuum for the engine or anything. Whats the route to take to do this? thanks
-
Thanks all for the replies. I like to be involved in a good online community like this one. I did a write up on how to remove the green from the gauges to give them a brighter output but in turn makes them orange. I didn't mind but some people may like the green setup. Writeup Here: http://www.classiczcars.com/forums/showthread.php?p=359002#post359002 Build Update: Got my autopal H4 headlights a while back and finally got them installed. Looks pretty sexy. Better light coverage on the road and now I can use H4 bulbs with more "ummmphh".
-
I just use the cheapest and I dont see much of a difference other than the consistency. I think 5W-30 is the best for most passenger cars, so thats what I go with.
-
I think im going to 2nd this.
-
Hmmm yeah I dont know what your talking about either. if youve got pictures that would help.
-
Yeah if I were to put in LEDs I would probably get some aluminum spray paint or just some model paint from like testors to help the light spread more thoroughly. Because the black gauges will absorb some of the light and silver or white would be the best to in illumination for the gauge. I think it just might be hard to spray paint it because you'd have to remove all of the parts inside the gauge and losing or breaking something wouldn't end well.
-
Yeah I didnt mind the green, I guess but it was dim and I did replace the standard 3.4W with 4w bulbs also and it didnt help much. Even with my rheostat on the highest setting it still wasnt bright enough for me. If you do want to go with green LEDs you wouldnt need to remove the green domes inside the gauges as green light would not be filtered (hardly at all if any) by the green LED. Also LEDs have a limited degree of output. Most standard bulbs have a range of like 270deg or more of light eminating from the source. While LEDs usually at most have 120-160deg output. So im not sure if the LEDs would be good for gauges as the light wouldnt be spreading throughout the instrument to illuminate it.
-
I tried to make a drawing to help show what I did, since Im a visual person. To take the needle off of the gauge you just pull it straight off. Dont bend or twist as you pull the needle off as you will damage the instrument. The needle on the gauge has a small pin on the back of it that fits into a cylinder on the gauge itself. Press the needle back onto the gauge when you are done removing the green dome or whatever you are doing to your gauge.
-
Here is what my dash looks like now with the green removed from them. I did leave the Green domes in for my tach and my clock because the clock doesn't work. This is also good for a comparison as well. ------------------------------------------------------ Results: You can barely even see the clock and tach when compared, so I think the end result is great. I also like the orange over the green as well. If you need help or have comments, feel free to reply or PM me.
-
---------------------------------------------------- Speedometer and Tachometer The tach and speedo are a bit harder. For one they are a pain in the arse to remove from the dash. My dash has a cap and its especially hard. I spent quite a bit of time tugging and pushing and cursing getting the speedo out. I didnt do the Tach yet as I ran out of time but it also is good for the end result comparison. To remove the Speedometer: I removed the 45 Deg screw set in the gauge itself and the screw that is on the inside of the dash. To get the speedometer out after the screws are out you must also remove the Tripometer line (I left mine unplugged from when I removed my dash, I think its useless) and the Speedo cable. The tripometer has a small screw that hold the line on. This screw is on the side of the line right behind the gauge in the bottom right corner. The speedo cable can be removed by unscrewing the outter sleeve from the back of the gauge. After everything is unscrewed and only the harness is attached, you can push the gauge from behind the dash and pull it out at the same time. To each his own really, whatever works, works. It will be easier if you dont have a dash cap for sure. When you get the speedometer out, you can remove the screw that holds the harness and the ground for the gauge. When you remove that, then the speedometer is all yours. There are a total of 4 small screws on the sides of the gauge that hole the main instrument to the tunnel thing. The screws may be covered in Electrical Tape. To get the plastic domes out of the Speedometer you actually have to remove the faceplate since there is no space for the dome to slide past when you tap the pegs out. So, remove the needle in the center of the gauge and be sure to mark/write/remember where the needle sat before you removed it. For my car the needle sat at the 10mph position. The needle will be hard to remove and be sure not to bend or twist as you pull the needle off. The cylinder that the needle attaches too needs to be straight to give an accurate reading on speed, DUH. After removing the needle you can remove the 2 screws to the faceplate or go ahead and tap out the pegs to the domes (There are 2 in the speedo and tachometer). The speedo also has 2 rubber boots that direct the light for the brake light warning and the high beam indicator. Make sure to not lose these and place them in the correct spots if they come out. My speedo gauge was covered in oil so I cleaned mine up a bit and re-assembled it. The domes I removed from the gauges
-
Next re-assemble the Climate faceplate. To get to the middle 3 gauges (Oil, Temp, AMP/VOLT, Time, etc.) You need to remove the AC/Heater divider that sits behind the middle vents. Its held in with 2 hoses on each side that can be tugged off. Using a short philips head screwdriver you can remove the retaining straps to the 3 small gauges. I removed the Oil/Temp gauge first. After removing the retaining strap you can push the gauge inwards then pull it from below after pulling its plug connection. This can be easy if you can squeeze your hand into the hole that the gauge sat in and press the sides of the connectors, allowing them to be pulled and released. Removing all of the 3 middle gauges are similar. Also these 3 middle gauges use bayonet style bulbs (1189 or 1198 I believe) and each have a metal strap on the back that will need to be removed. The back strap on the guages are held in with 2 very small screws and have divits to help them align back up when you put the strap back on. To remove the plastic green domes inside the gauge you need to tap the 2 pegs with a small nail. Use light taps so you dont damage your gauge. After both of the pegs are tapped and the dome is freed up inside the gauge, you need to remove the 2 screws that hold the face of the gauge to its backing. After you free the dome and remove the screws for the face of the gauge. Take the face of the gauge and just rotate the gauge until the plastic dome comes out. It should slide past the gauge easily. Tapping on these domes shouldnt damage them, mine came out with no problems. I kept mine in case I needed them later. =P Here is the Oil/Temp gauge after I took the green dome out. Now the light is less filtered and shines a bit brighter. Remember, all 3 of these gauges are similar and I think they all use just 1 (1198? or 1189?) bulb to illuminate the gauge. The volt gauge has a seperate light for the over-charge warning.
-
Now Some Tools: Screwdrivers (Phillips and Flathead) -Small and Wide heads 8mm Wrench (Removing Climate Cont. Faceplate) Hammer (Something simmilar?) Hole Punch or Thin Nail -I used a Nail Gun Nail 1<sup>1/2</sup>" Possibly a Drill ------------------------------------------------------------------ I might miss some small steps here but Im sure for those who follow this, that it will be easy enough. Steps: I started by removing the center console screws. 280Z has 2 screws in the sides where the passanger/drivers knee would be roughly. Also 3 more inside the center console storage. I didnt remove my center console, I just took the screws out so I could move it back a bit. I then Removed the 4 screws to the Middle Vents and Map Light bezel. Remove the plugs to the maplight and Fuel warning light (Also floor temp light if Cali model). Then unscrew the Center Vent bezel mounts that hold it to the dash. I broke my climate faceplate on accident, but to avoid this in removing it: Use a 8mm or a 5/16 wrench (they are the same) to losen the side bolts on the climate faceplate. The bolts face outwards to the left and right so you cant use a ratchet unfortunatly. The first thing that would be easy to upgrade is the climate controlplate. This faceplate uses a wedge base bulb. You can put in an LED if youd like but it still wont really improve its visibility. What I would recomend is to take the faceplate and unscrew the light housing from the back. Should be 2 screws on the back. The housing has a green plastic dome in it that I removed. To remove these little green domes all you need to do is tap in the 2 little pegs that hold the dome in place. For this I use a thin nail with a flat tip. After giving it a light tap the pegs give out. Here is the back of the climate contrl. housing, this shows the pegs that hold the dome into place. I drilled these pegs a bit because they were heat pressed into place and couldnt be tapped out. To get the dome out I just poked it out with my pinky finger after the pegs were drilled enough. As I said before the Climate plate uses a wedge base bulb, so I had a choice in using the stock bulb or a spare Amber bulb I had as a spare. I used the amber because it provided more detail of the climate controls in the dark and it also matched the gauges after I removed the green in them also. Here it is with an Amber Bulb
-
<font color="red" size="20"><b>Ok</b></font> So I got tired of the very dim green dash and gauge lights for my 280z. I didnt see anyone on the forums so far doing this yet so I decided to take a crack at it. Gonna try and make this easy to follow and understand. ------------------------------------------------------------------------- If you too are tired of having to squint in at your gauges when driving at night, then you might want to also consider this. Just some basic info: Most production cars use wedge type bulbs for gauge lights that twist out of the back of the gauge. These wedge bulbs also usually have a type of plastic coating on the tips that is Green/Blue so that when installed and turned on they give off the color they are coated with. Like green or blue as described. Our Z cars use a different setup (atleast the 240z-280z). These Z cars use an older system of bayonet style bulbs that you push in and twist to lock in place. And instead of the bulbs having a coating on them to give off a certain color, the gauges themselves have clear plastic domes fitted into them that filter the light. In our cases the Standard Green. When the dome filters the light its also cutting its lumen count down also. Which means its not as bright. <font size="2">This is a comparison of a wedge type bulb and a bayonet bulb</font>
-
The speedometer was also pretty hard. The dome fitting isnt able to slide past the face of the gauge so I had to take the needle off and the faceplate also. The needle is pretty damn hard to pull and be carefull not to twist or bend while pulling because then things will be really crap for a while. The faceplate has 2 screws holding it on and after that its an easy deal. Yeah so in the end its pretty darn good. The right side is the tach with the green domes left in still. pretty bleak. I just need to wait for my H4 headlight setup from Autopal and the lighting upgrade will be done.