Patcon
 Subscriber
-
Joined
-
Last visited
Everything posted by Patcon
-
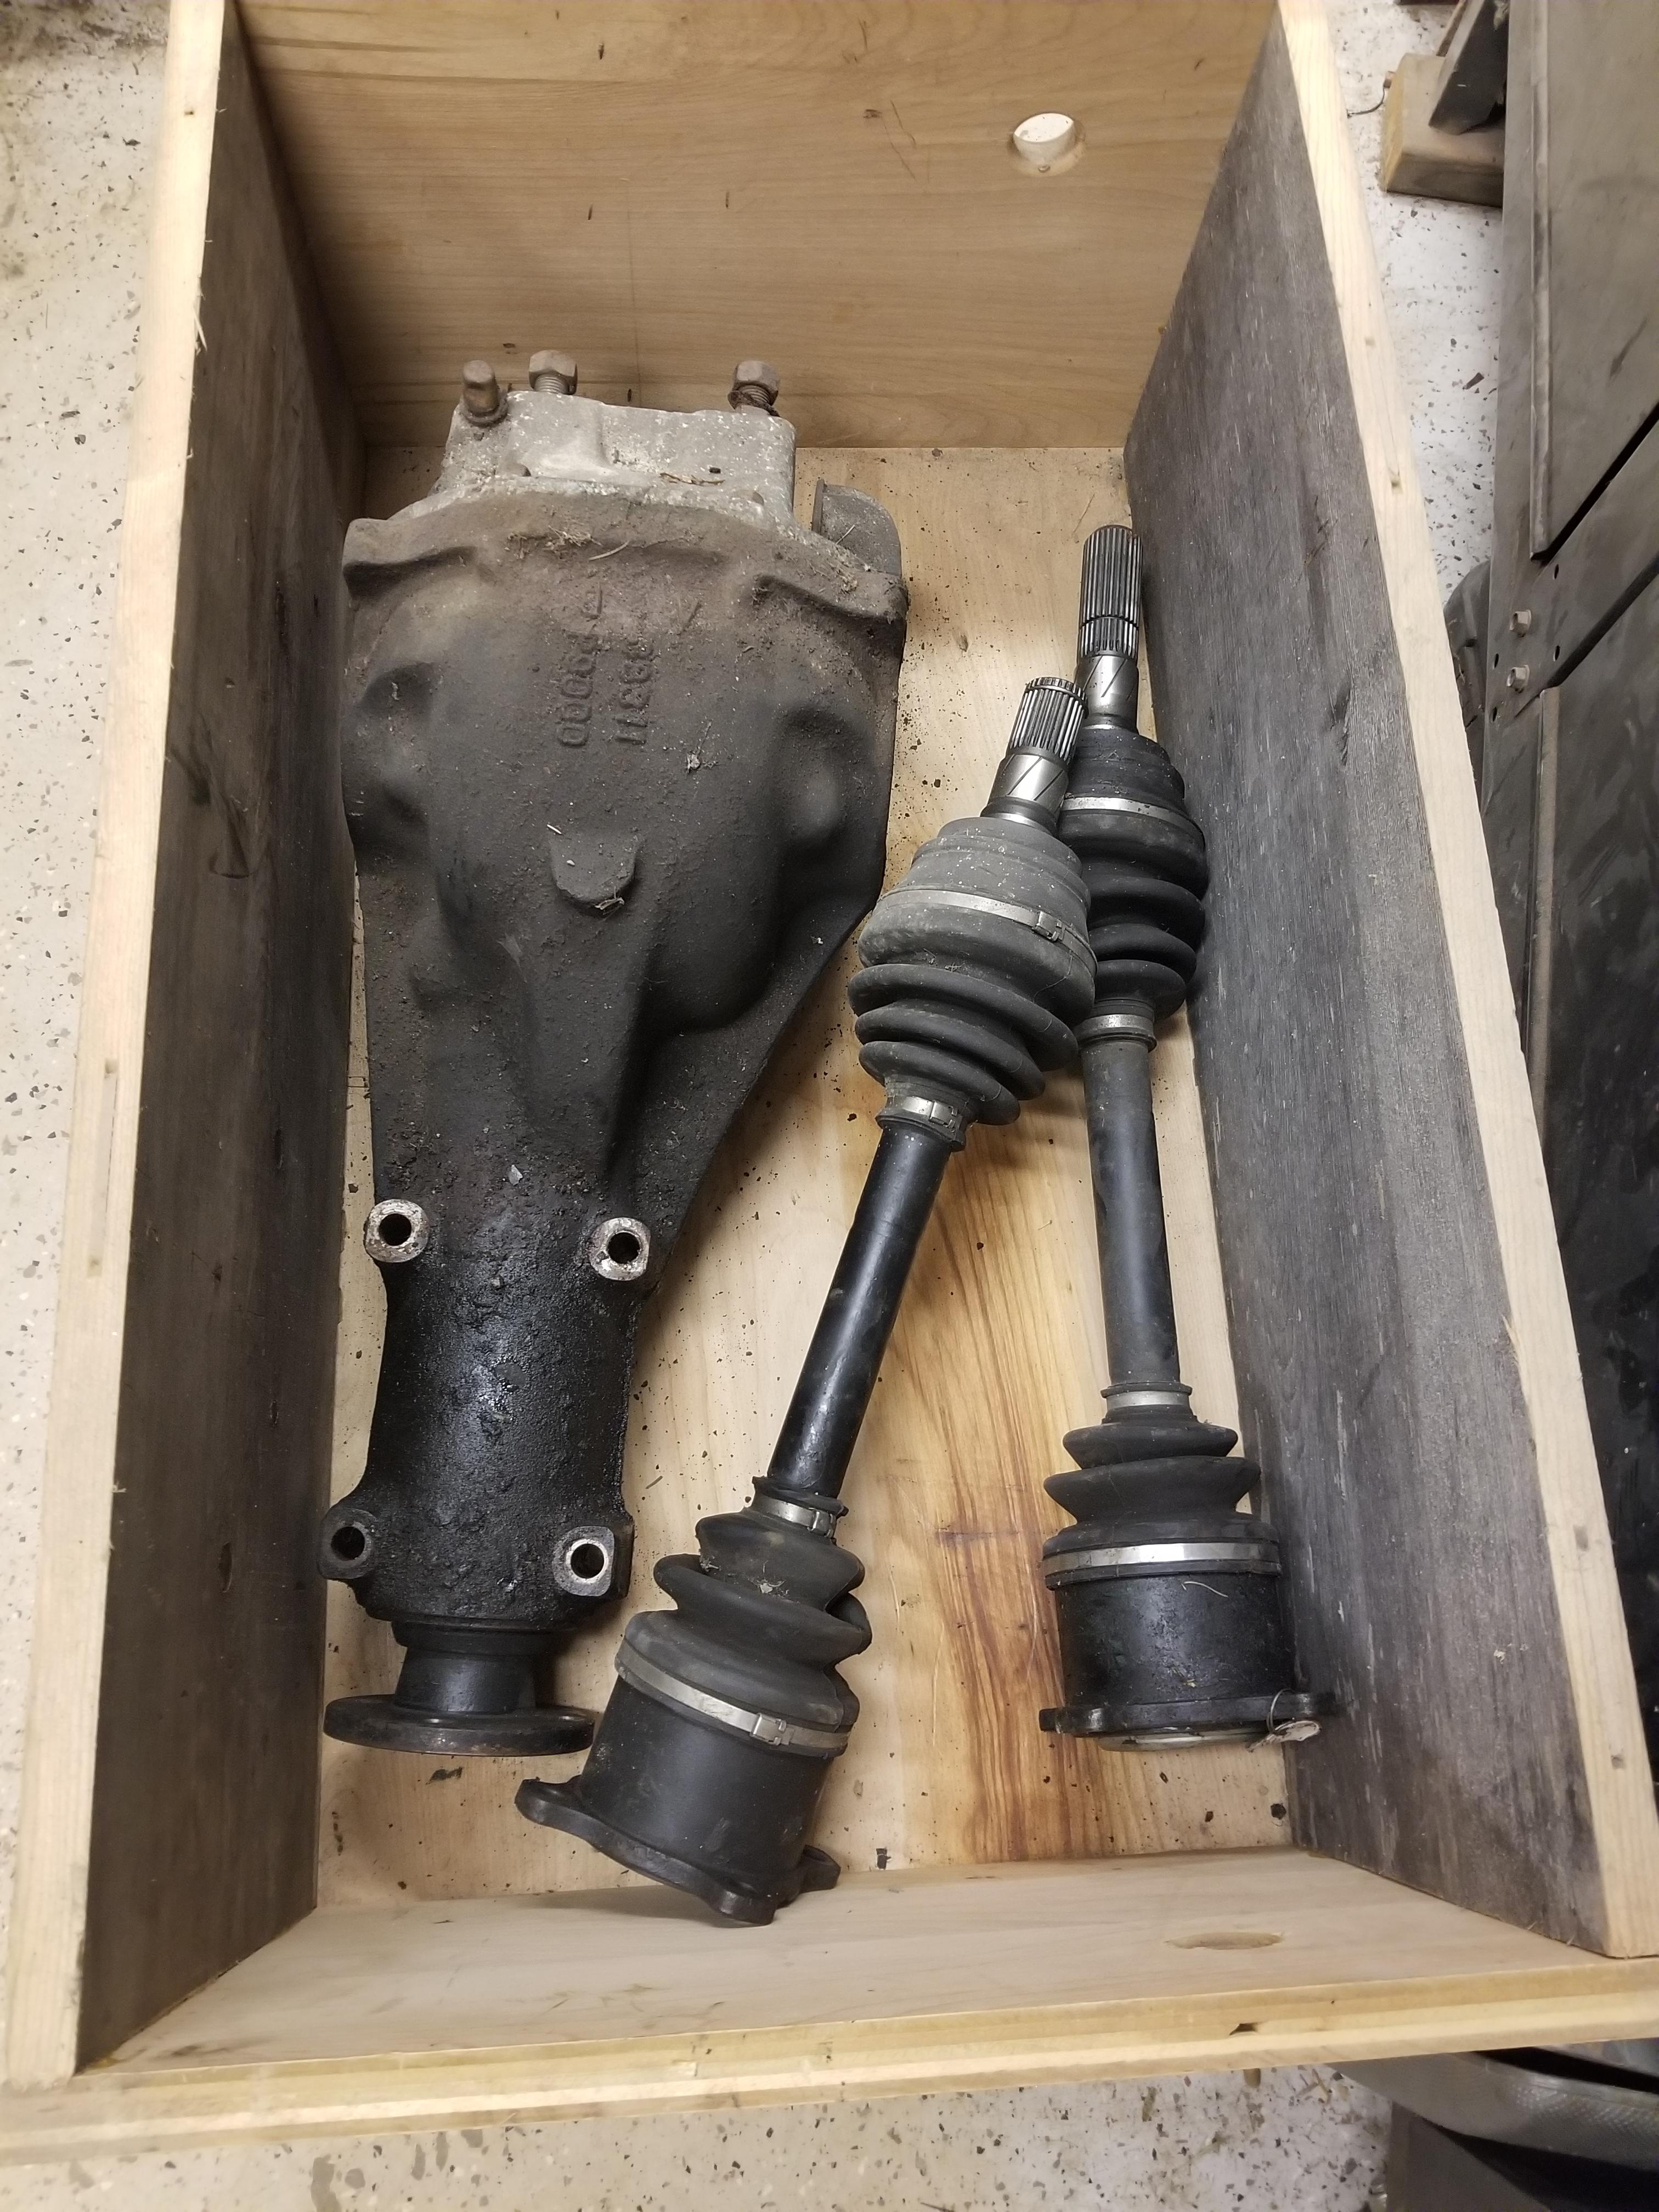
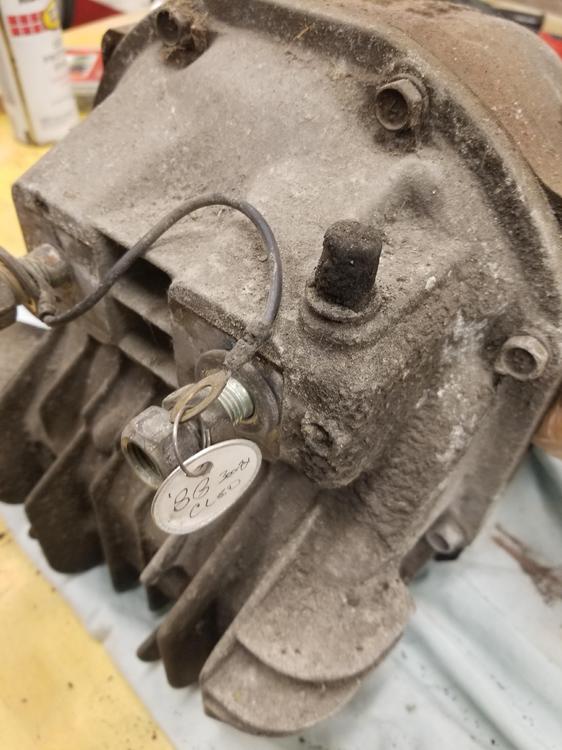
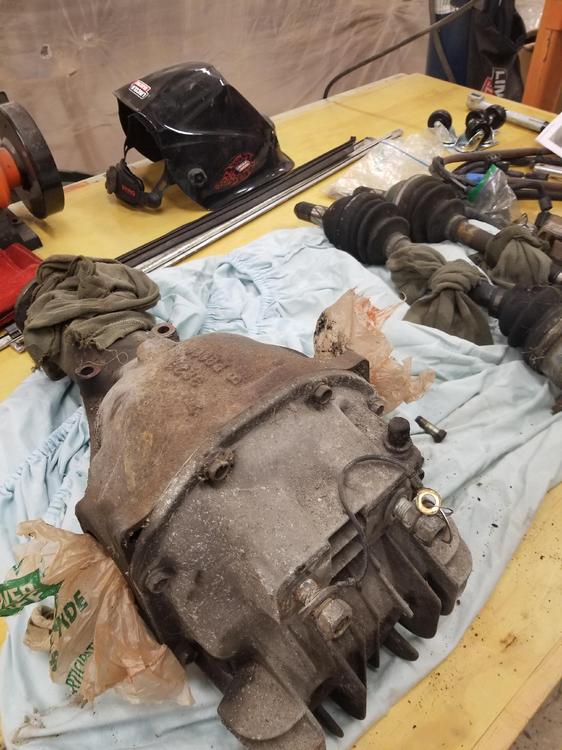
 So I have been trying to make some progress, even though the paint booth is occupied. So I pulled out my 2 LS differentials. I have done some searching but haven't found the info I wanted. I have a CLSD and a VLSD avaialble complete with drive shafts Here is the VLSD from an 88 Shiro Here is the CLSD on the bench with the driveshafts I want to make up something like this. So I can use the finned cover 2 I tried to contact Savage 42 by PM at HybridZ but never got a response. He said he would post up dimensions in the thread I found this in. I was hoping to get some dimensions for a template, but I guess I will have to start from scratch. So any thoughts on this? Also is there a way to inspect the condition of this diff before I install it?
-
-
I like the plan!
-
So was the car originally silver? What color will you go with?
-
I would expect higher vacuum on a cam with less over lap and possibly less duration I thought the leak down numbers were really good all things considered
-
You know, you could manually check the ratio by counting rotations to see if it lines up with Philips 3.18
-
Camshafts could contribute to the discrepancy
-
There as been a lot of discussion about large sizing if rod bolts are changed. Madkaw is dealing with that I believe
-
At least you got it out. Probably better it broke than get used and cause problems later
-
I couldn't figure out how to let Frank know...
-
Thanks guys I pasted it in and got there but there may be some reason it doesn't work for you. Just wanted to get it tagged somewhere so it could be found.
-
They have moved sidedraft@vintagetechnologygarage.groups.io
-
I have not tried this on a 240z but the arm rest in the BMW Z3's is atrocious! I took the metal bit out of the arm rest and welded a piece of bolt or screw to it. then I drilled a corresponding hole down the arm rest into the foam. I filled it with epoxy and pushed the screw down into the epoxy to harden. Keep in mind that Z3 armrest are about $200 each not $35 You could try something similar if you could get some wire wrapped around the metal plate or drill some small holes in it. Then epoxy the wires into the foam. I work with spray foam alot at work and I don't think you will have success going that route
-
If you are referring to the internal and external snaps to the right of center in the picture. I reused mine. I agree with Zed if you don't damage them, once they are back in place they should be good to go.
-
That is really a waste of time. But each to his own... The chassis was never meant to handle that kind of horsepower and you will have a hard time getting it to hook up. If you do get traction you will be looking at the sky as the front end twists all up. The car has to be re-engineered from the ground up for that kind of power. These cars are becoming too valuable to be practically used for a project that will return pennies on the dollar. If I were looking for a tune shop that would not be a badge of accomplishment in my eyes. A nice looking, good running, clean install of 250-300HP would be much more appealing. Which is still not a really easy thing to accomplish because of the tuning
-
That's Rear Wheel Horse Power. That's very different than the advertised horsepower for new cars and such. Those are all taken at the flywheel and are significantly higher numbers
-
I'm too tall to be a member of the band, but maybe I could be the manager?
-
Call Banzai motorworks ( 301) 420-4200 You'll get him
-
Thats good. You should have a good selection of clean fairly rust free Zs
-
I thought about panel bond too. Since he didn't do a butt weld and had the nice lap it would have been easy to panel bond that in and move on
-
Mine did not look like that. Those look to have the four welds around the perimeter like CO disassembled.Unless the 73 was different than a 71, I would say those have already been replaced once. Mine could be fully disassembled. In this picture you can see the inner rod studs (replated yellow) then the larger piece that threads onto the ends of the rack. The stud goes in first, from the back, then the small spherical washers go against the back of the inner stud. Then the springs I believe. The large squarish lock nuts (plated yellow) go on the rack ends first then the ball assembly get threaded on. You tighten them until the proper movement torque is achieved then the 30mm lock nuts get tightened down
-
I suspect other comparable vehicles have hidden issues. Most do. Where as after you have gone through the car for the 25k there shouldn't be any of those #2 cars on Hagerty are valued at $38,300 and we saw a 73' sell a few months back for $50+
-
Zeddsaver doesn't have the 115 either but maybe he could get it?
-
So they had 11 something in it and sold it for 12k which didn't include the 54 manhours... The english wheel is a must for making a good patch, but I suspect it takes some practice to get it right
-
I don't mind that look. Sometimes the blue seems to through the palatte off