jfa.series1
 Subscriber
-
Joined
-
Last visited
Everything posted by jfa.series1
-
 If the worst should happen and you damage the filler tube I have a used one in excellent condition that I will let go at a very resonable price.
 -
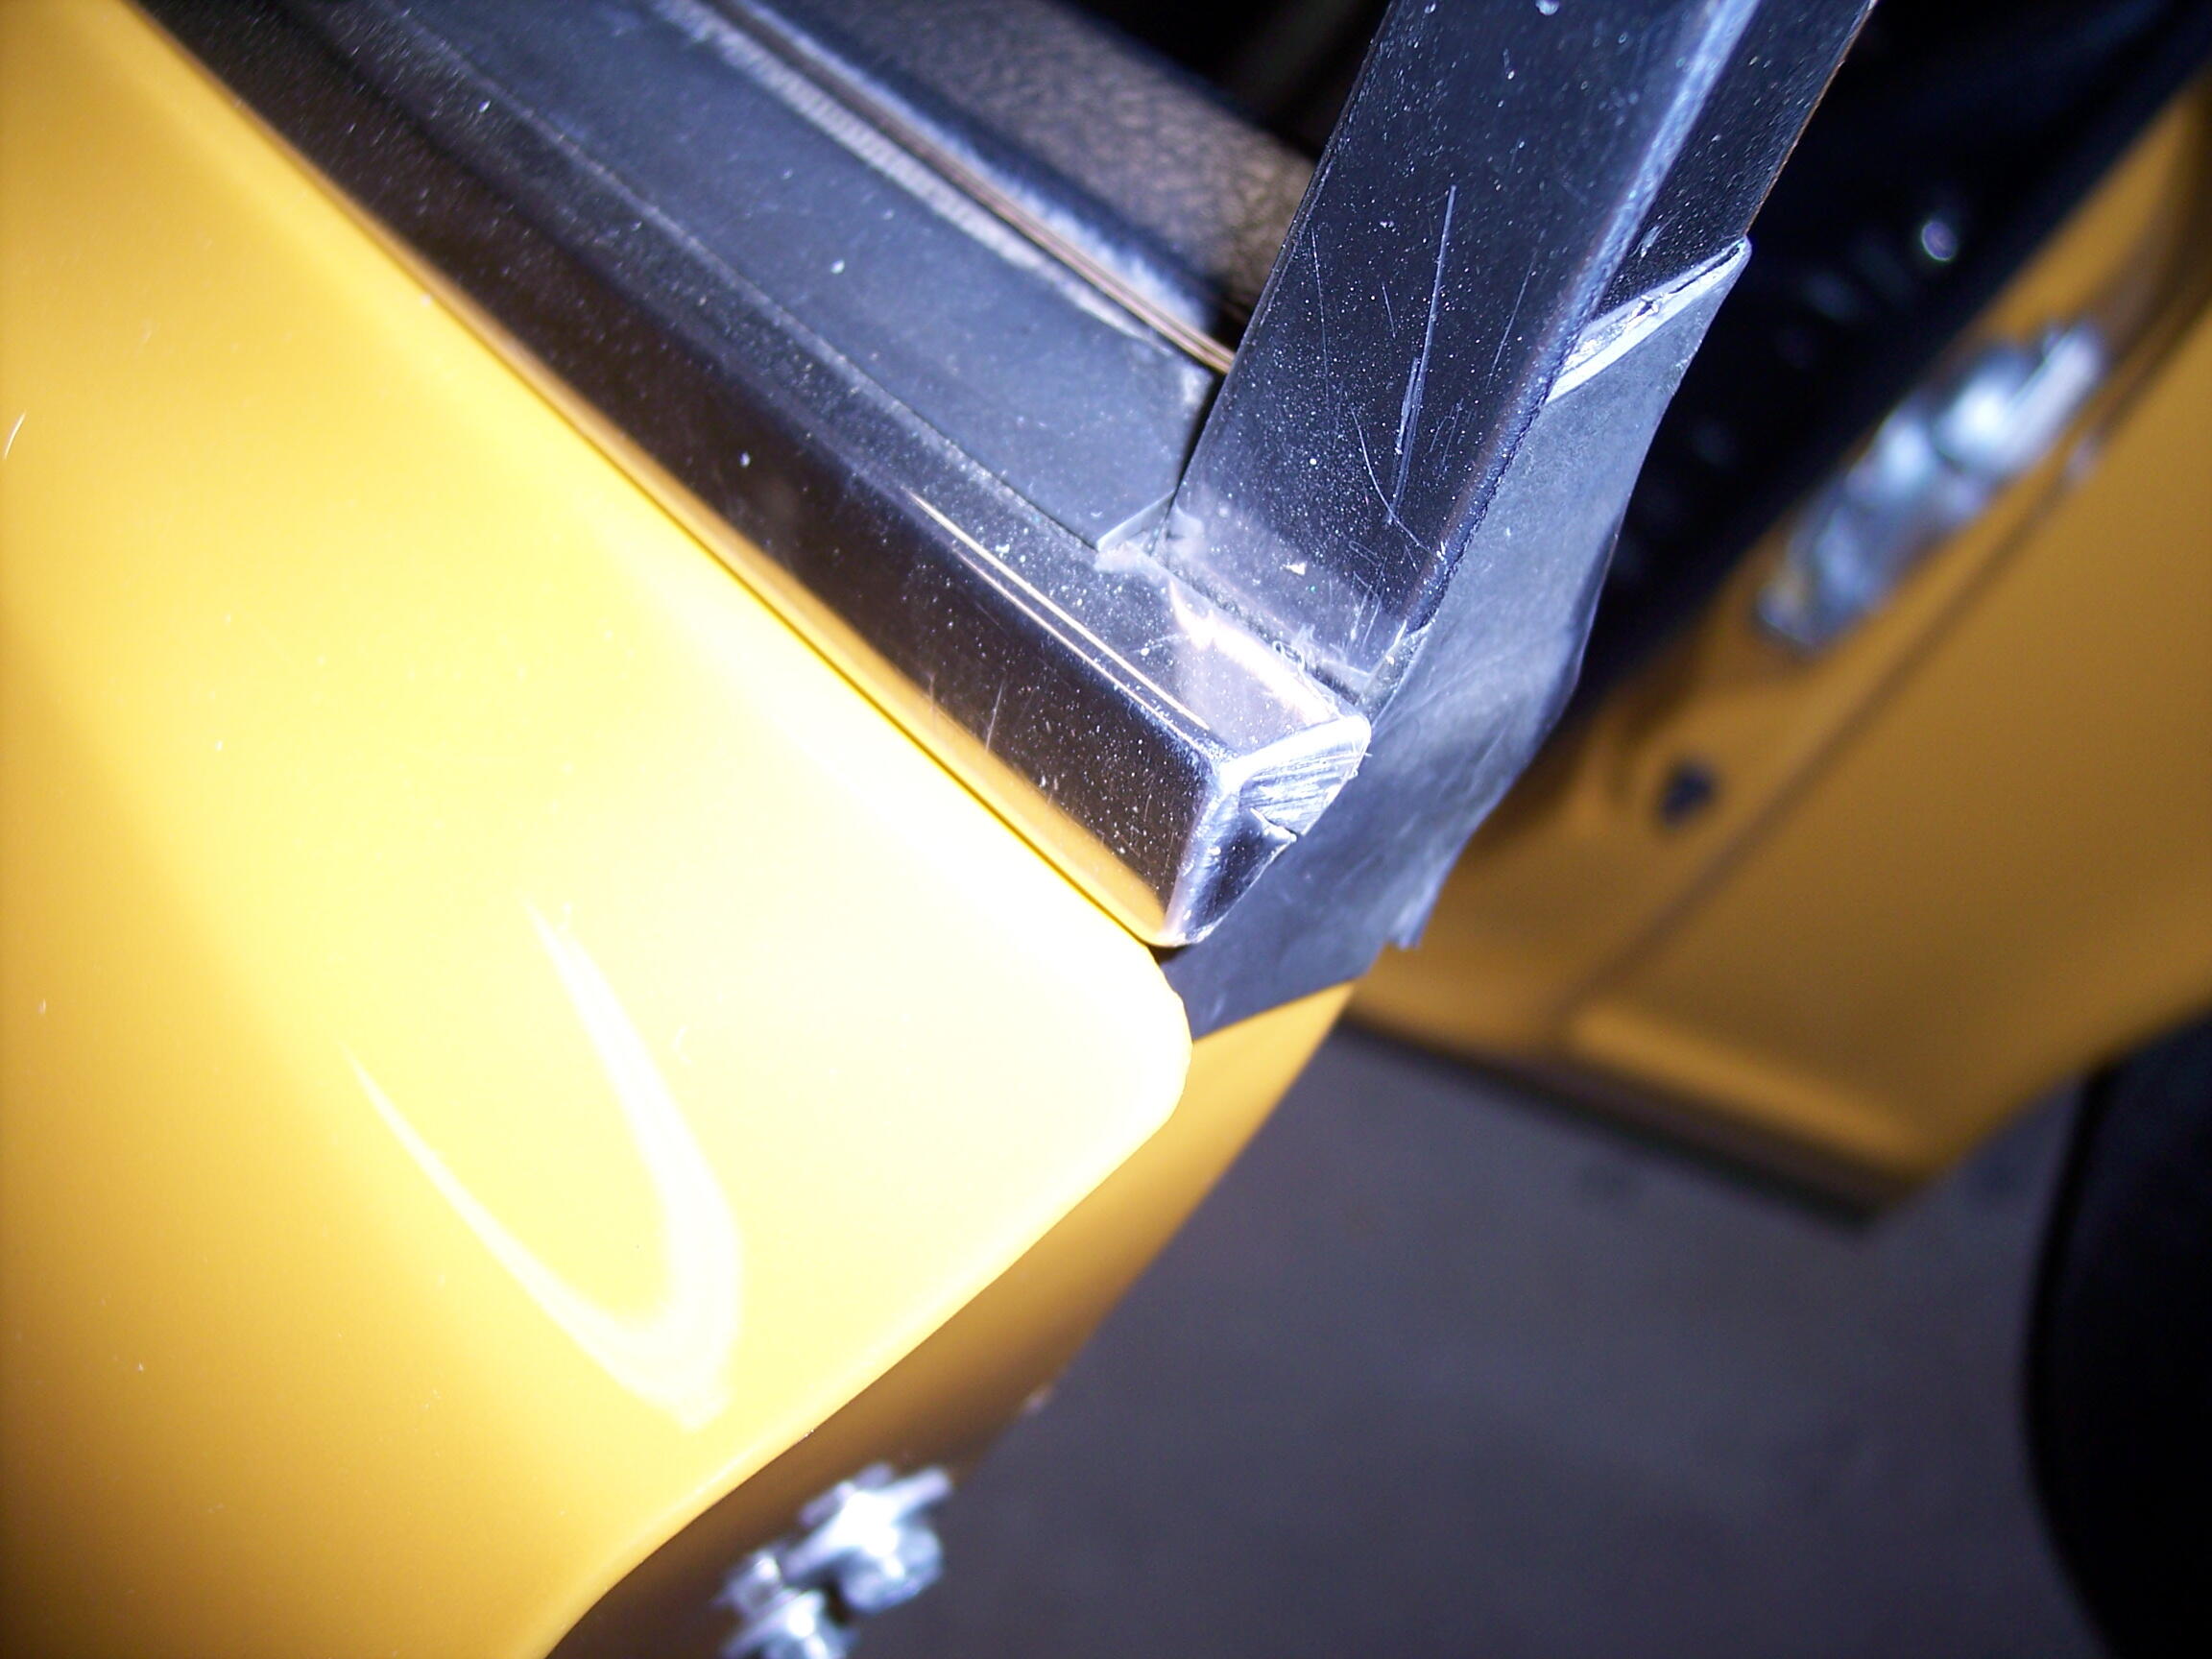
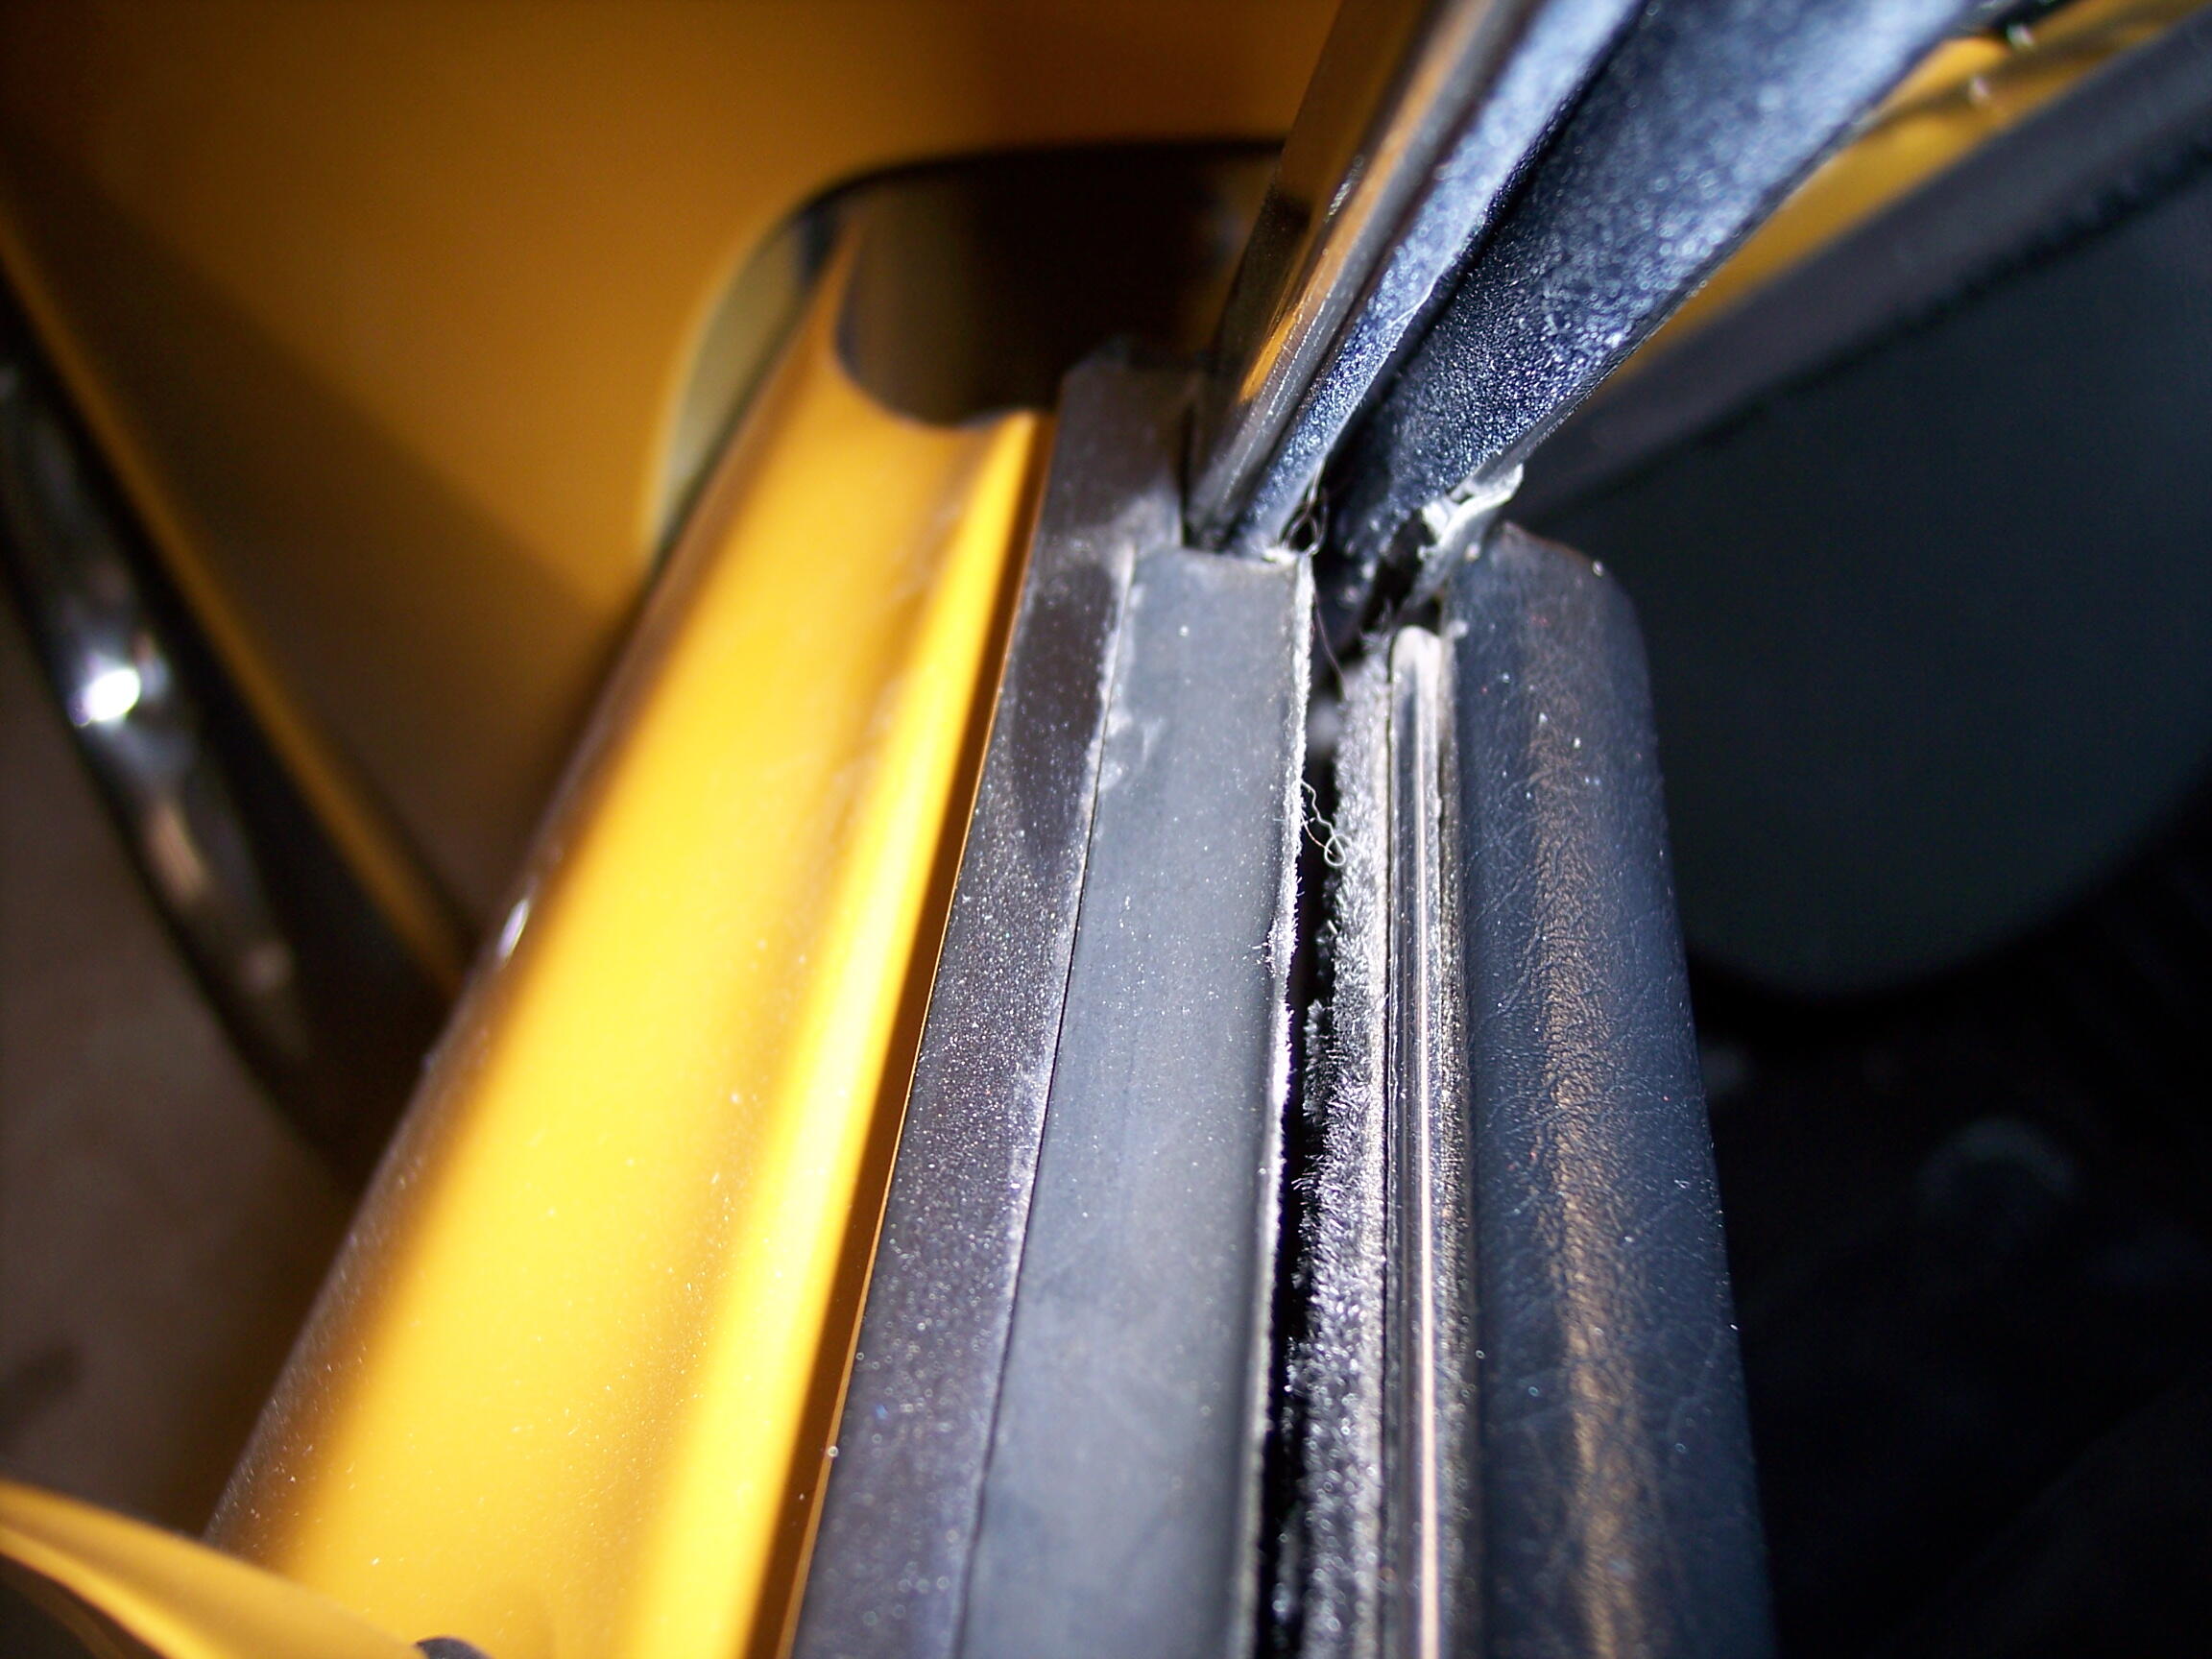
Ha! That links back to a post I did almost 7 years ago about using pop rivets to secure the sqeegee rubber to the belt molding, similar to how I did the replacment fuzzy strips to the door panel. @Patcon Charles, If you need some info I can pull off a molding and get some pics of the pop rivets.
-
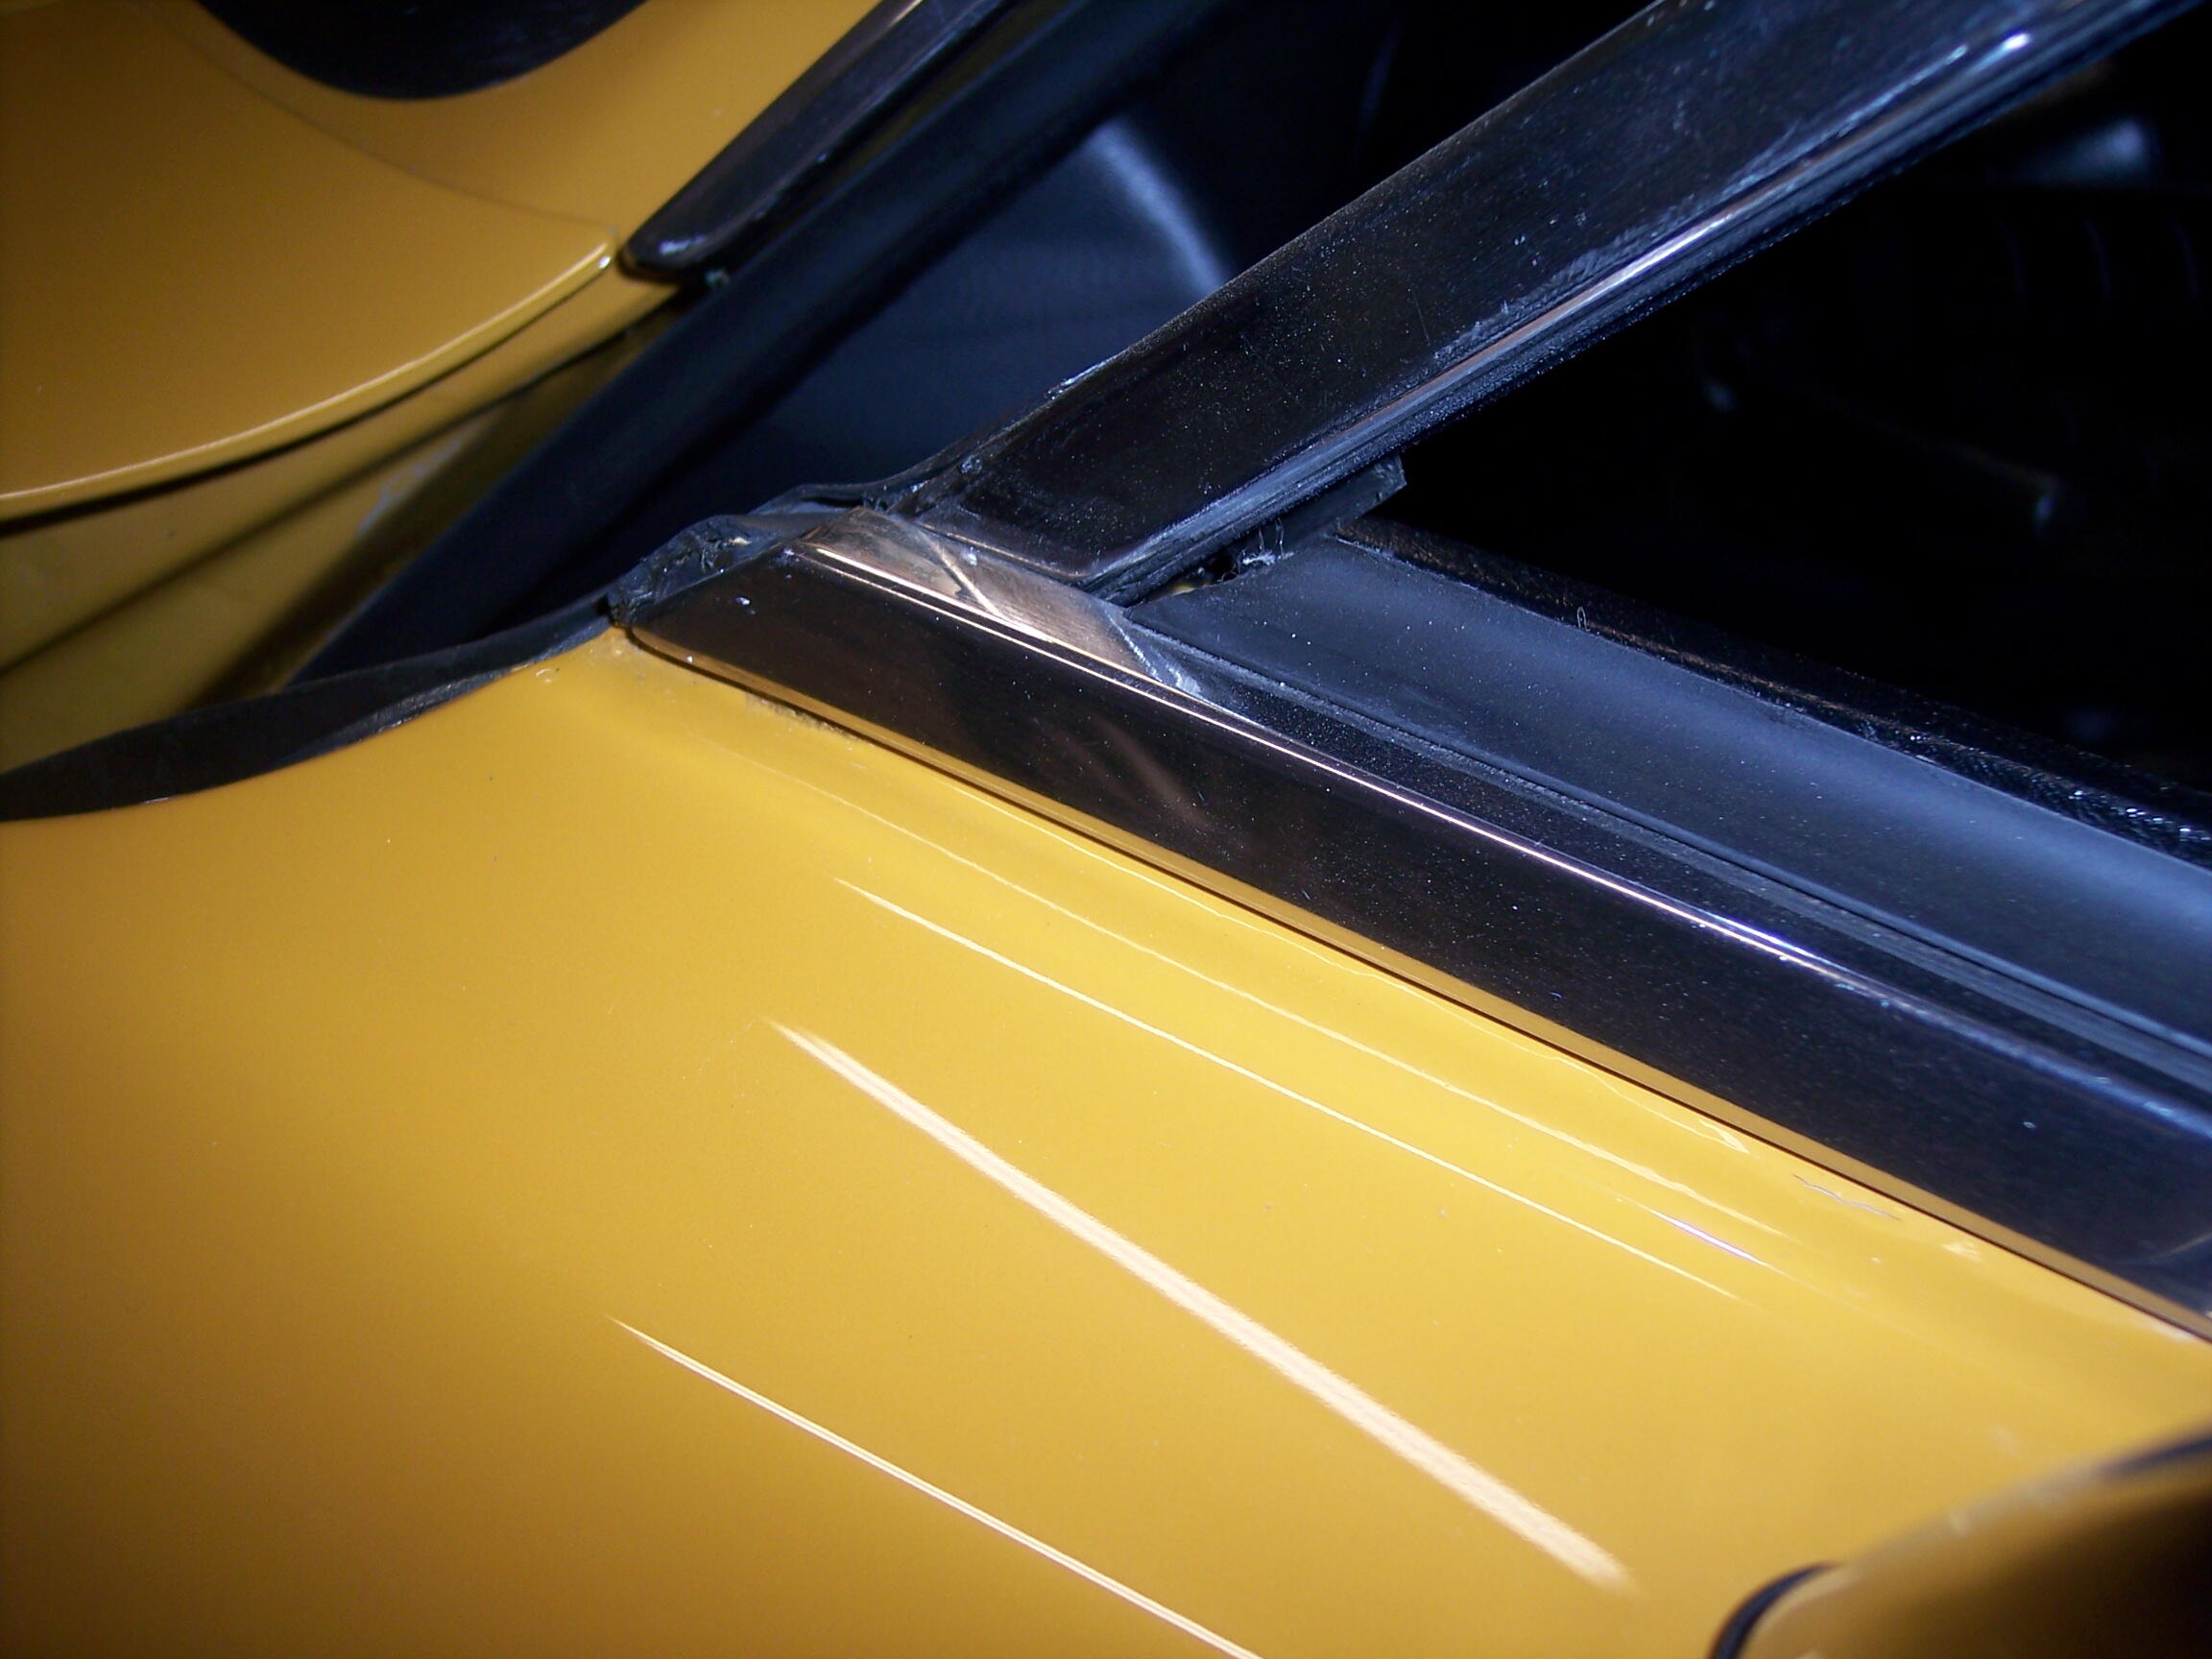
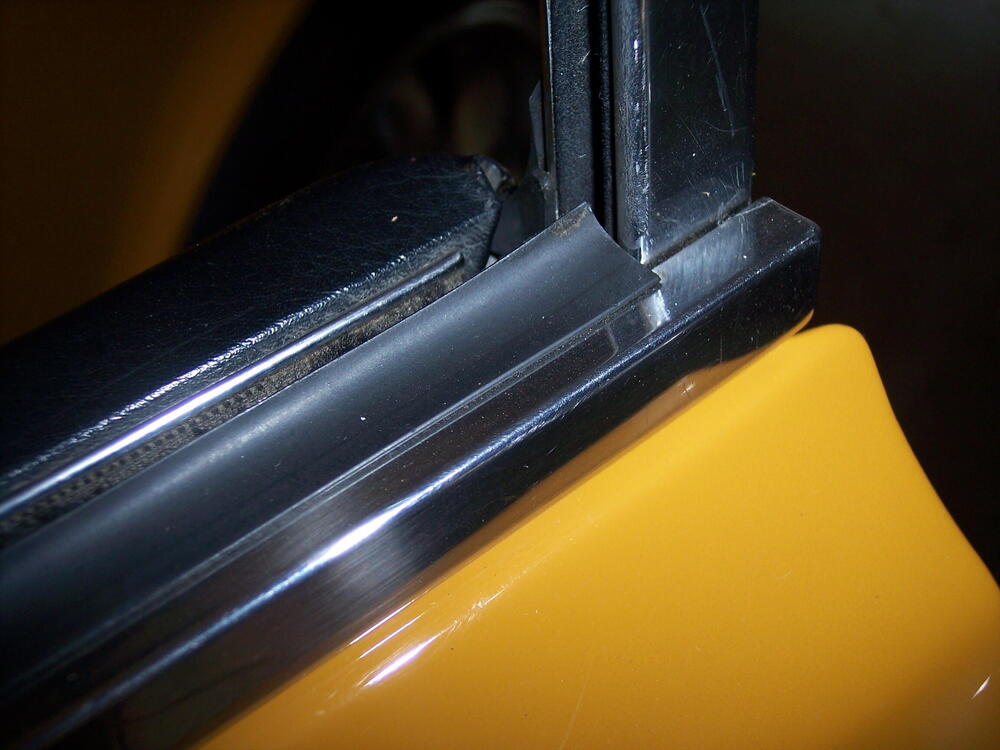
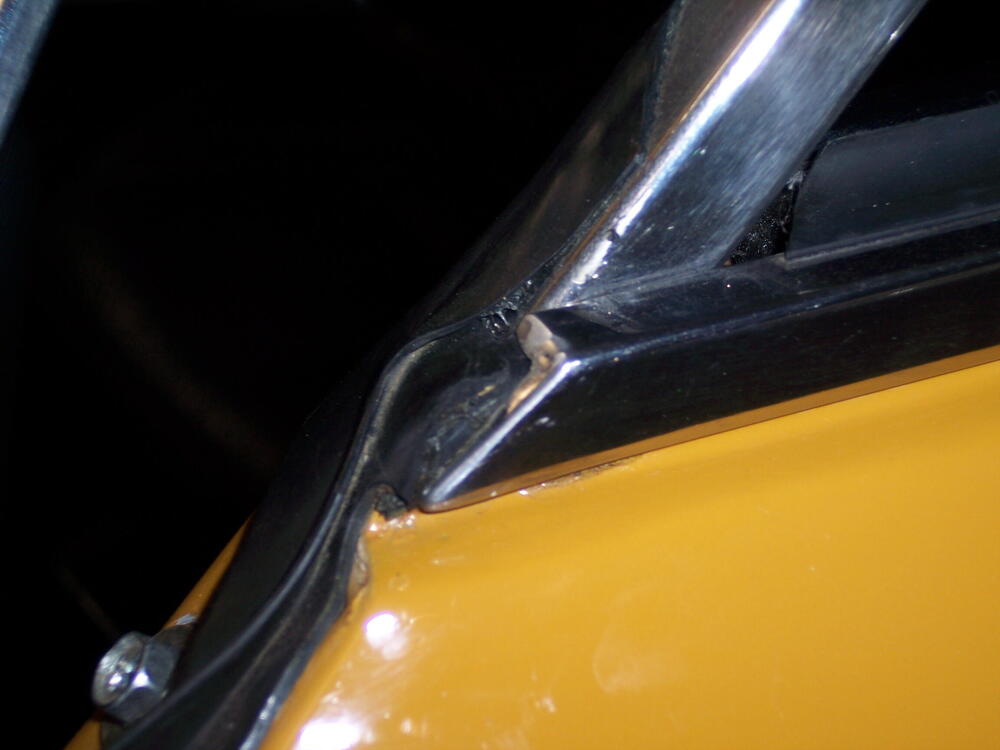
Charles, here are some pics of the belt molding and squeegee rubber on my car. Hope this helps with your question and yes, the rubber does trim out inside the window frame.


-
A true beast, so very well thought out. Awesome work! Safari Gold rules!!!
-
Thanks Guy, but I am disinclined to follow someone else's work in this case. In his ebay post I noted that he "modified" plastic connectors and the metal base. With all of the switches I have refurbed I have not yet found a need to modify the OE components - sometimes replaced with new or from the parts bin but never modified.
-
Per the recommendations from @Zed Head , here are two excellent upgrades you can make to improve your lighting situation: Headlight relay kit: https://www.thezstore.com/product/3861/headlight-relay-upgrade-harness-70-73-240z Parking light relay kit: https://www.thezstore.com/product/5031/parking-light-upgrade-harness-70-73-240z Take note of the fitment limitation regarding the Parking Light kit for the '73 240Z. Another improvement you can make is to switch out all of your small exterior bulbs to 3W LEDs. This would be front parking and turn signal, sidemarkers, rear tail light and brake, license. If you do so, rememebr to use LEDs that are the same color as the lens cover. If making this change for the turn signals, you will also need to swtich the OE flasher cans for the turn signals and hazard switch to aftermarket electro/mechanical units, a easy plug-and-play change. Your turn signal issues are possibly caused by the heat from high resistance in your wiring circuits: corroded bulb sockets, fouled terminals in the wiring, damage at the fuse block (check the underside), damaged wiring. Hope some of this helps.
-
Yet another body blow to Nissan USA: ABC NewsNissan recalls over 480,000 vehicles in the US and Canada...Nissan is recalling more than 480,000 of its vehicles across the U.S. and Canada due to potential manufacturing defects that could cause engine failure
-
Actually, the report is in VIN sequence, column #2. The six-digits in column #1 are the registry numbers.
-
-
Ten years ago I came across a online spreadsheet called the "2015-2020 Datsun 240Z Registry of America". Someone set it up so that owners could register the details of thier car. Why it was bracketed as 2015-2020 I have no idea. Anyway, I was the 32nd entry and it grew to about 600 entries. In 2021 I captured a PDF of the file and sometime later discovered that the online file had disappeared. The PDF is interesting to browse as it lists VIN's, orginal engine numbers, colors, owners, locations, ...etc. It has some HS30's and S30's listed at the end. The earliest VIN is #23, owned by Chris Visscher in the Netherlands. Check it out, maybe you'll find some interesting info about your car or one owned by a buddy. 240Z Master Registry.pdf
-
Interesting that there was no decal on my 12/70.
-
I can't recall anything like that on my ride, so no idea.
-
I never had any pushback and I have friends getting work done there now.
-
Yep.
-
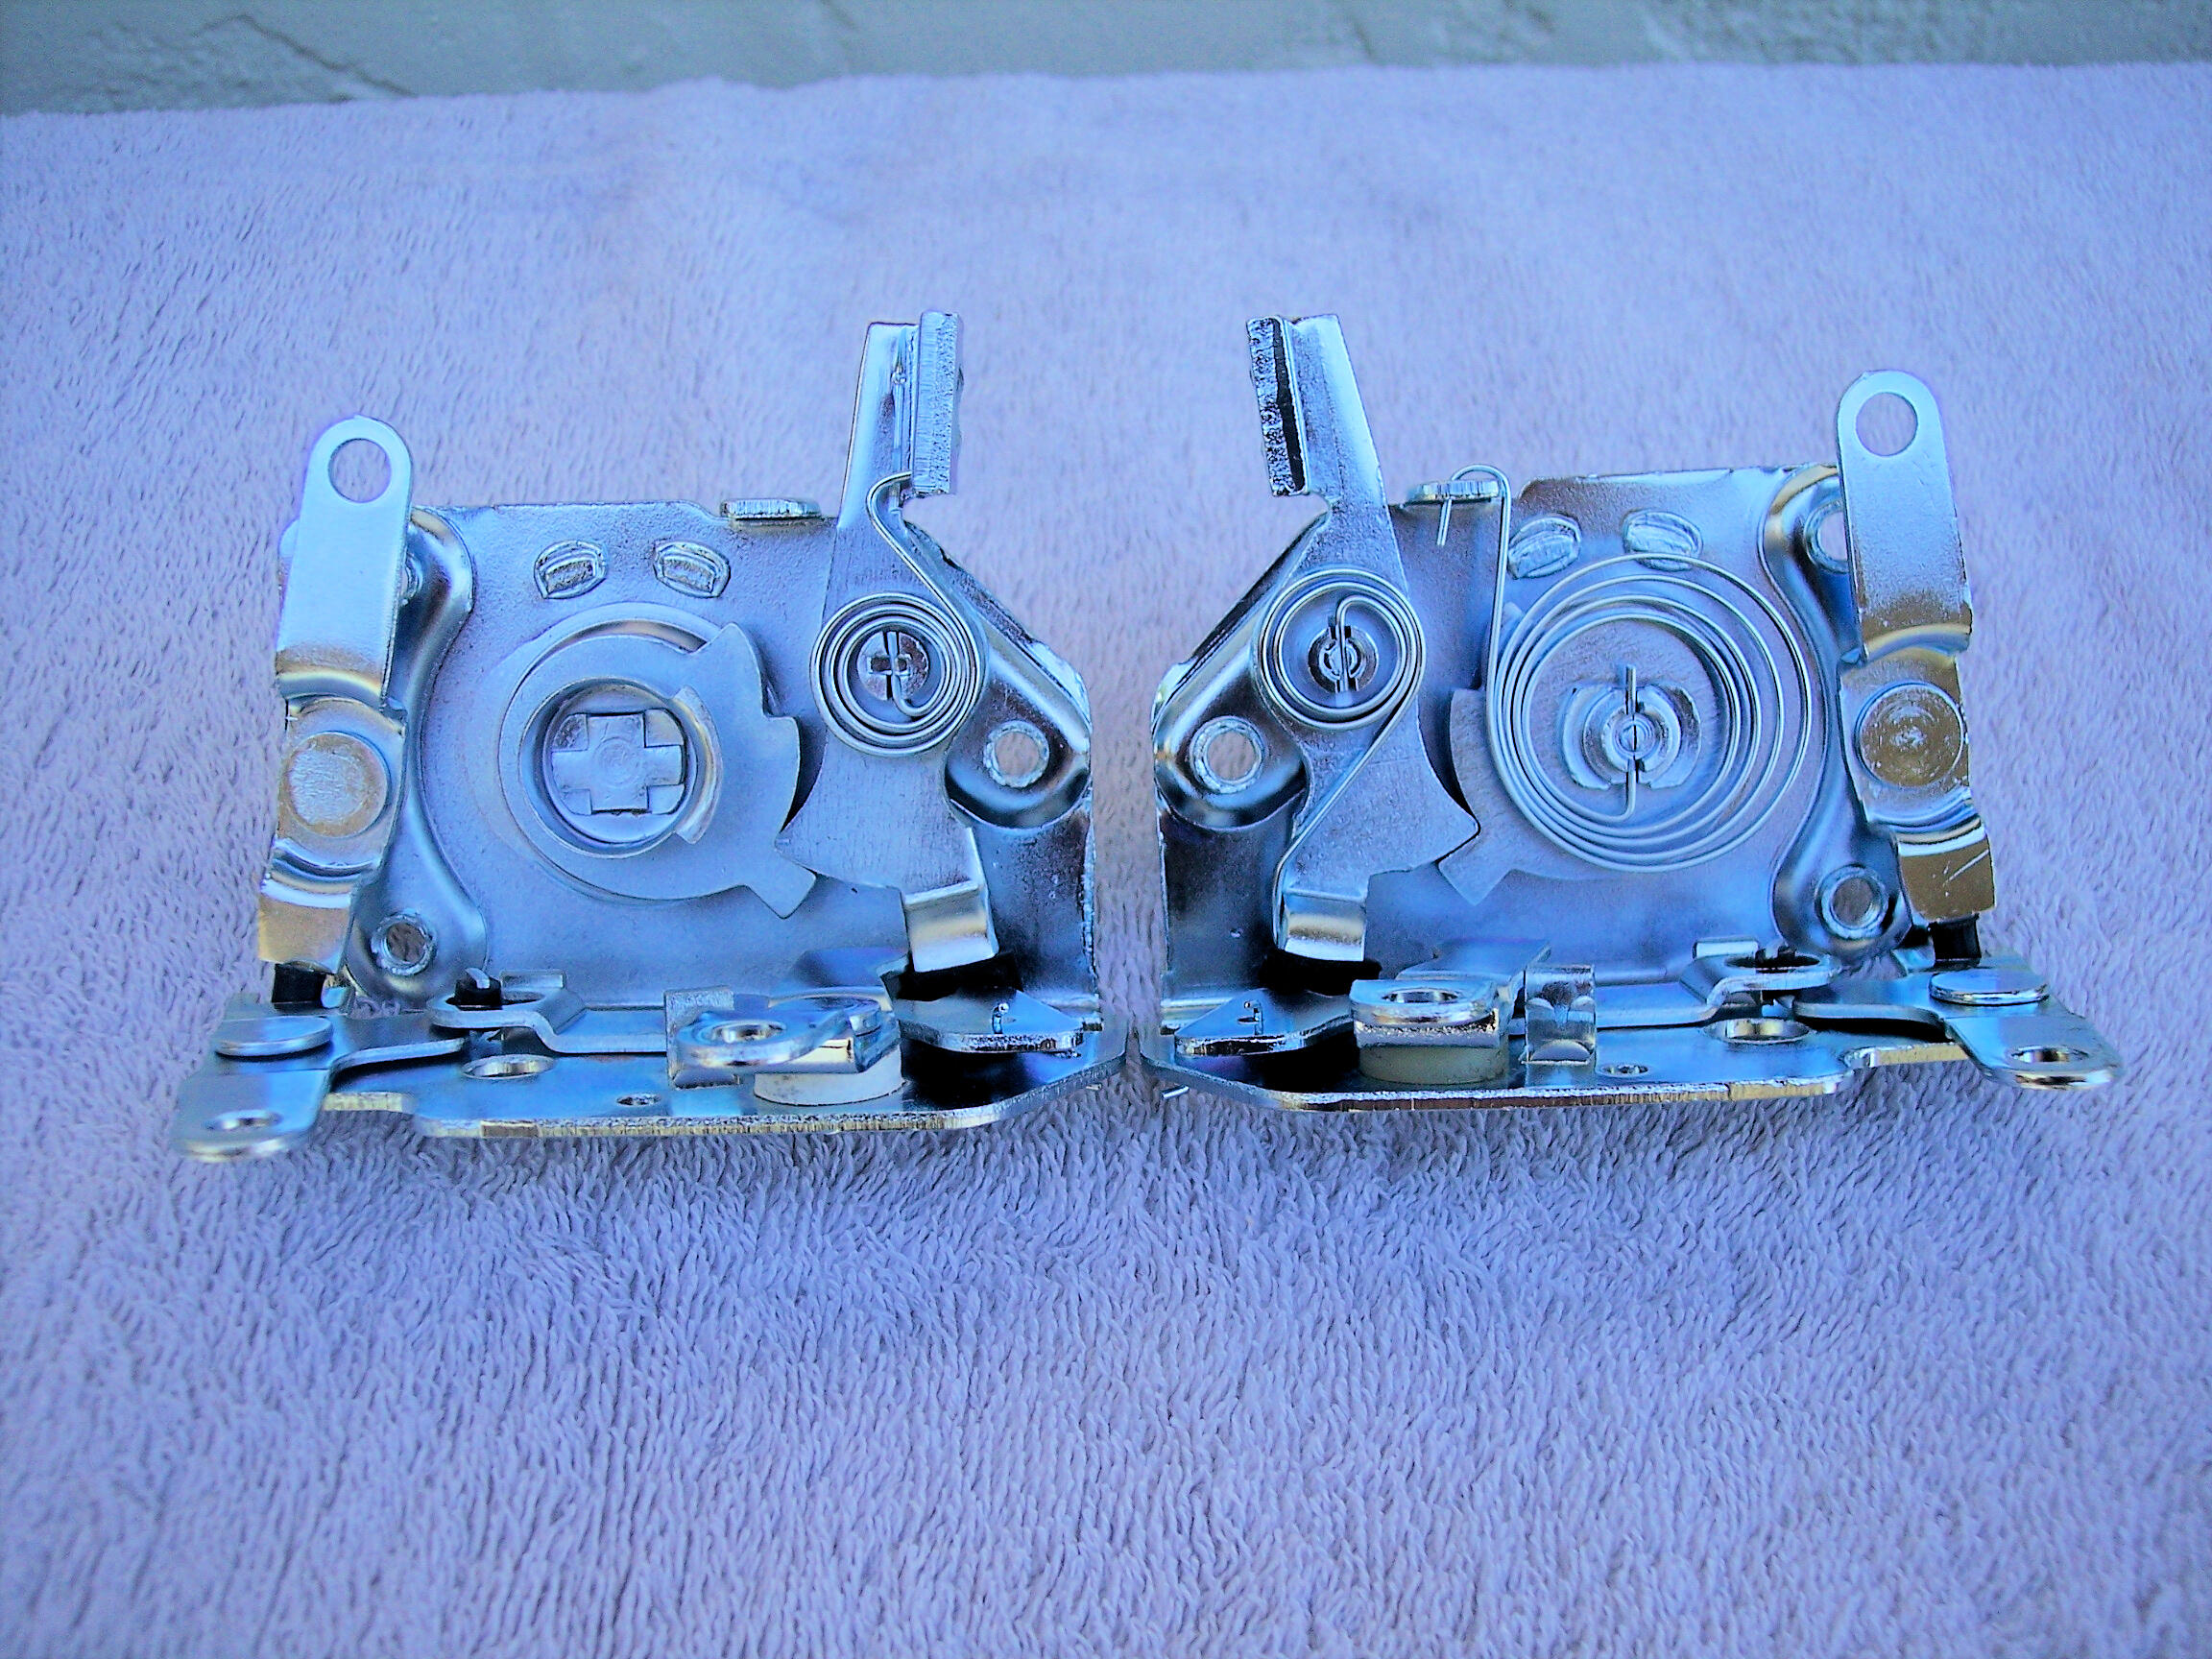
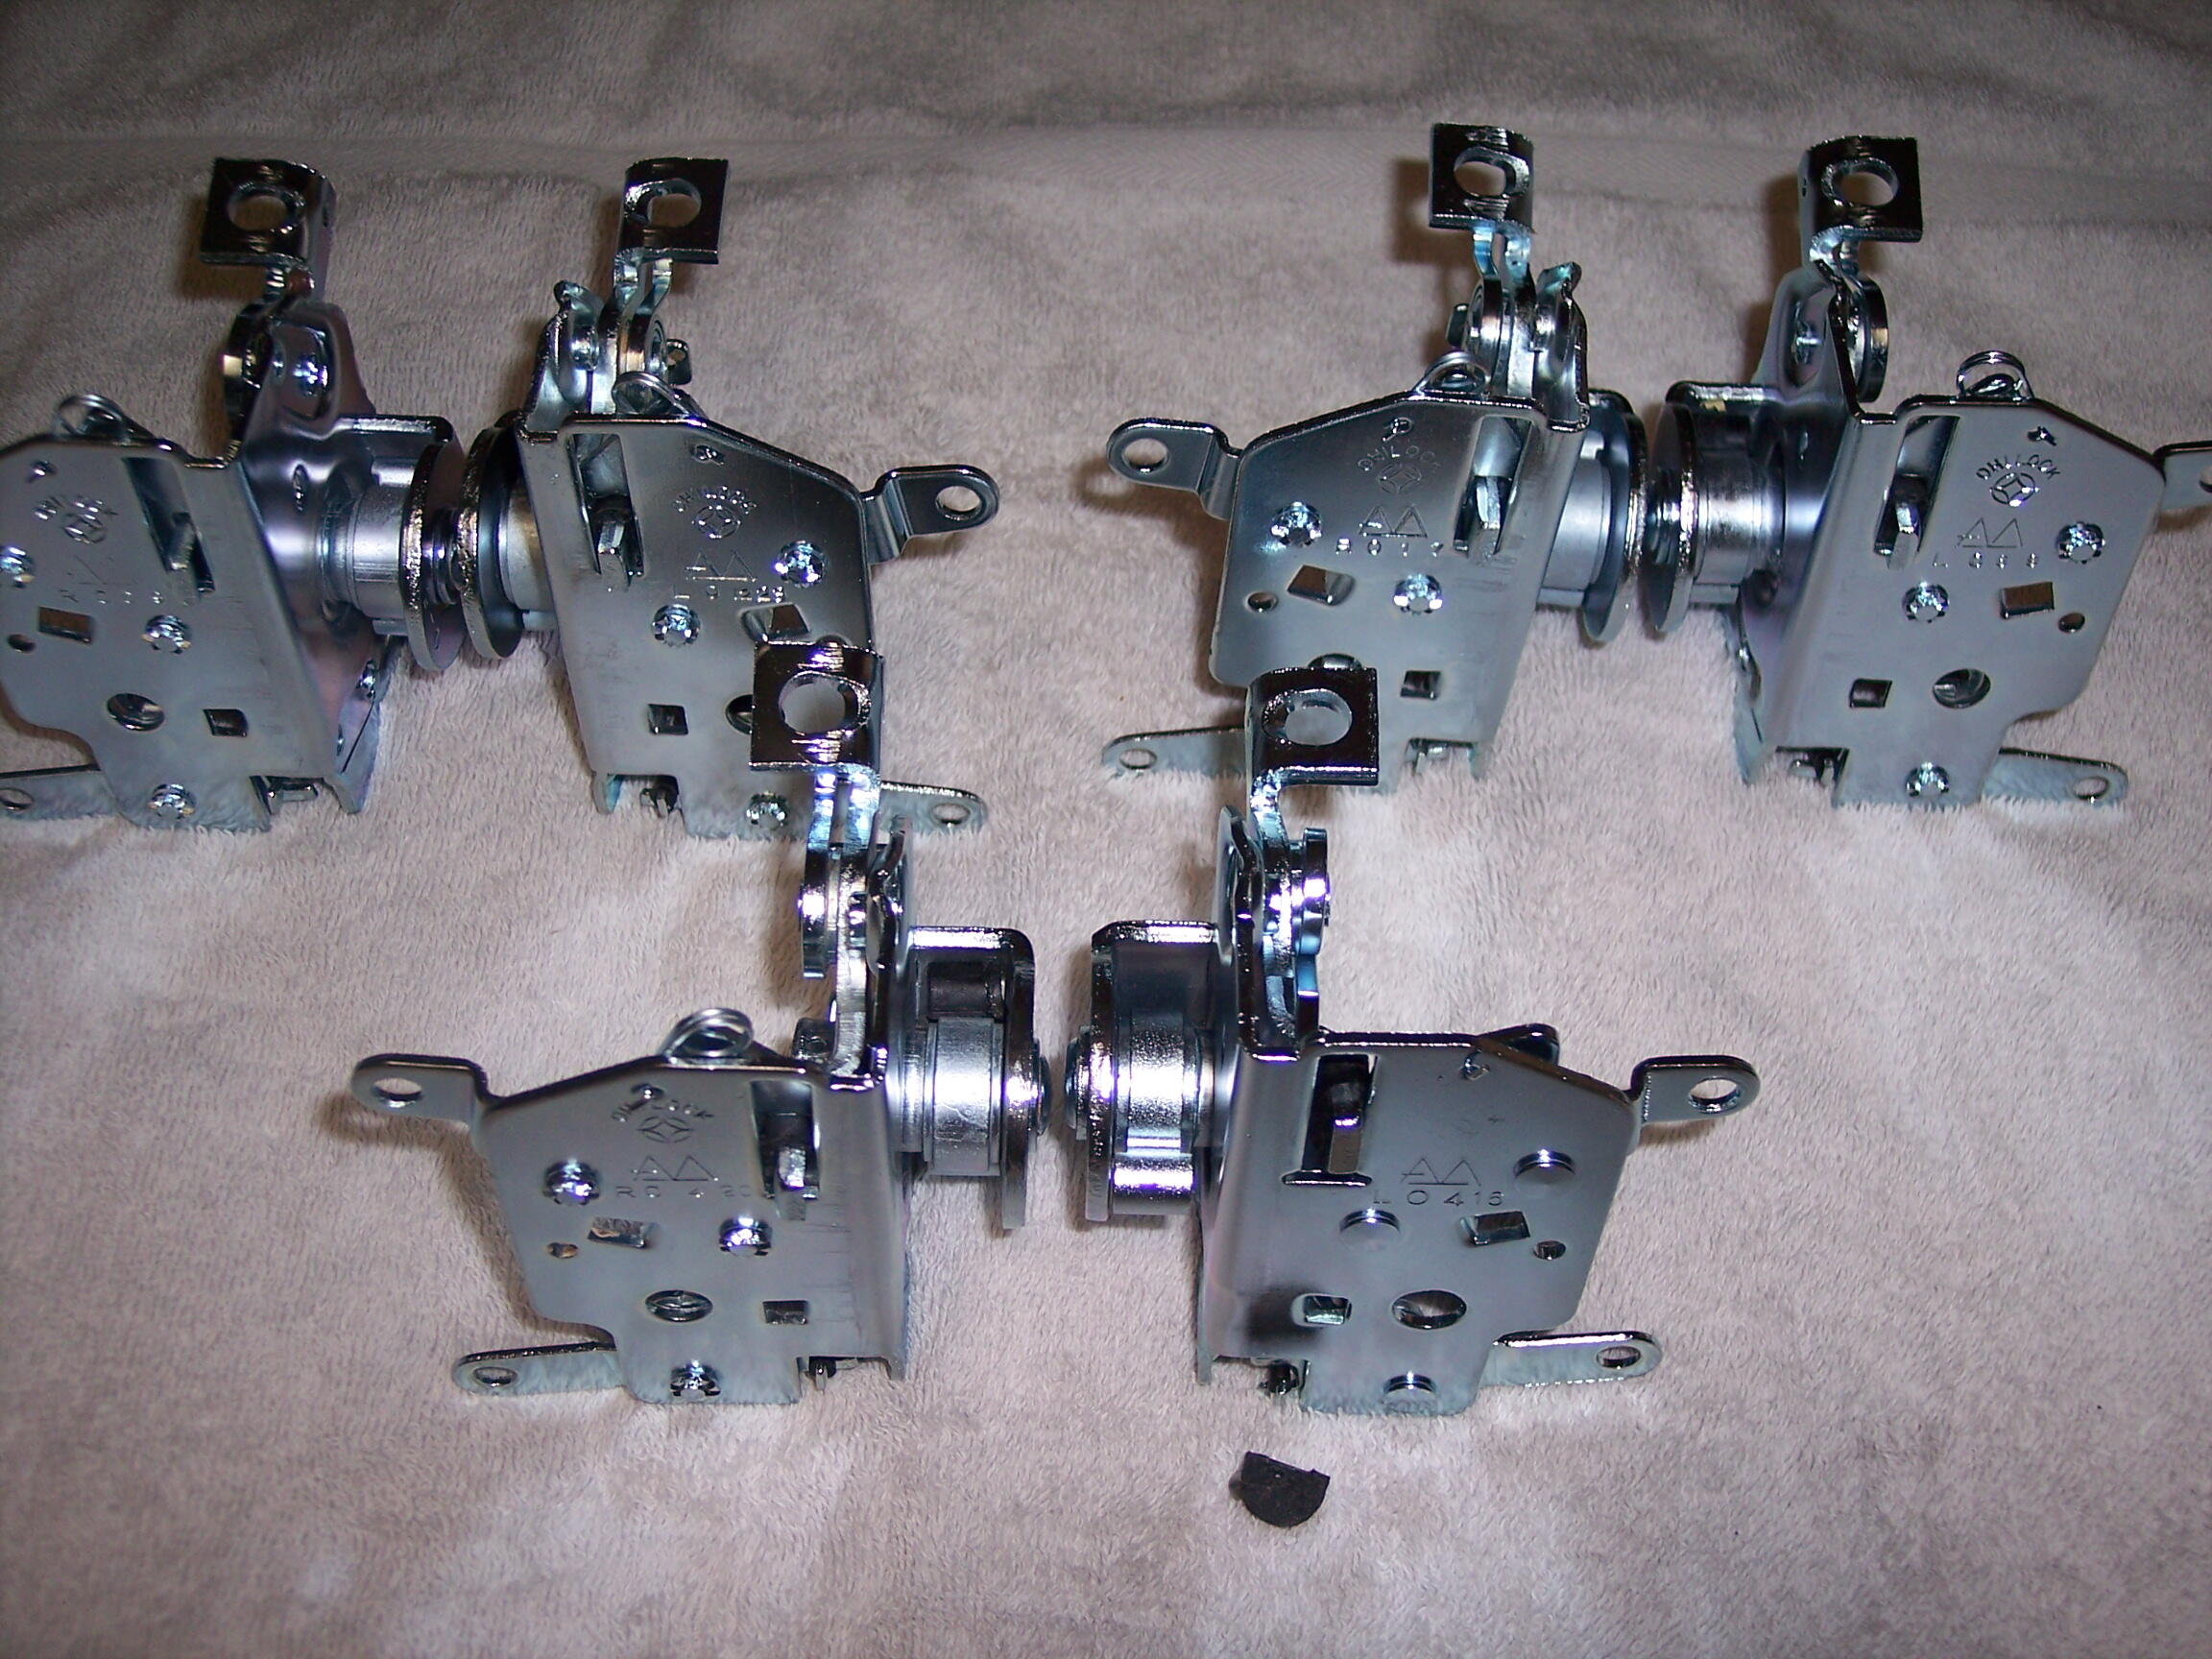
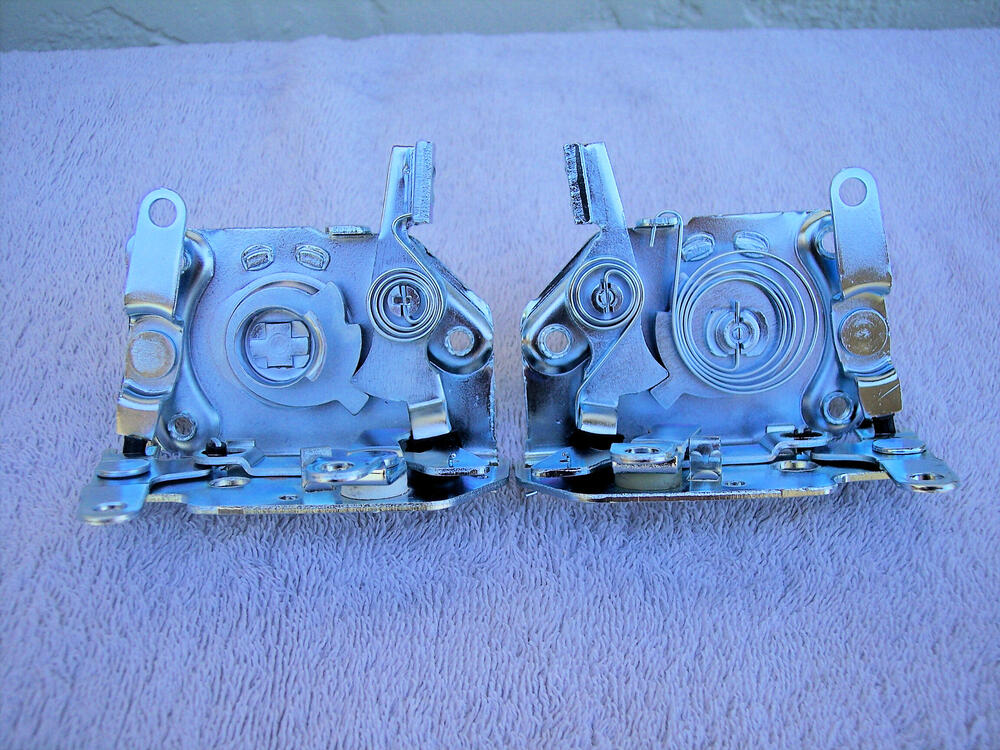
That was the 1st pic I posted, here it is again. The clock spring was only on one of the batch of six I picked up, all the others used a coil spring. What was interesting was that five of the six bodies had the straight slot, not the "T" slot. Pretty sure the "T" slot was an improvement to retain the bumper - at the bottom of the pic. Sorry I don't have a better pic to discern the date codes. I recall one set was matched and an early date, I think they went to @26th-Z .


-
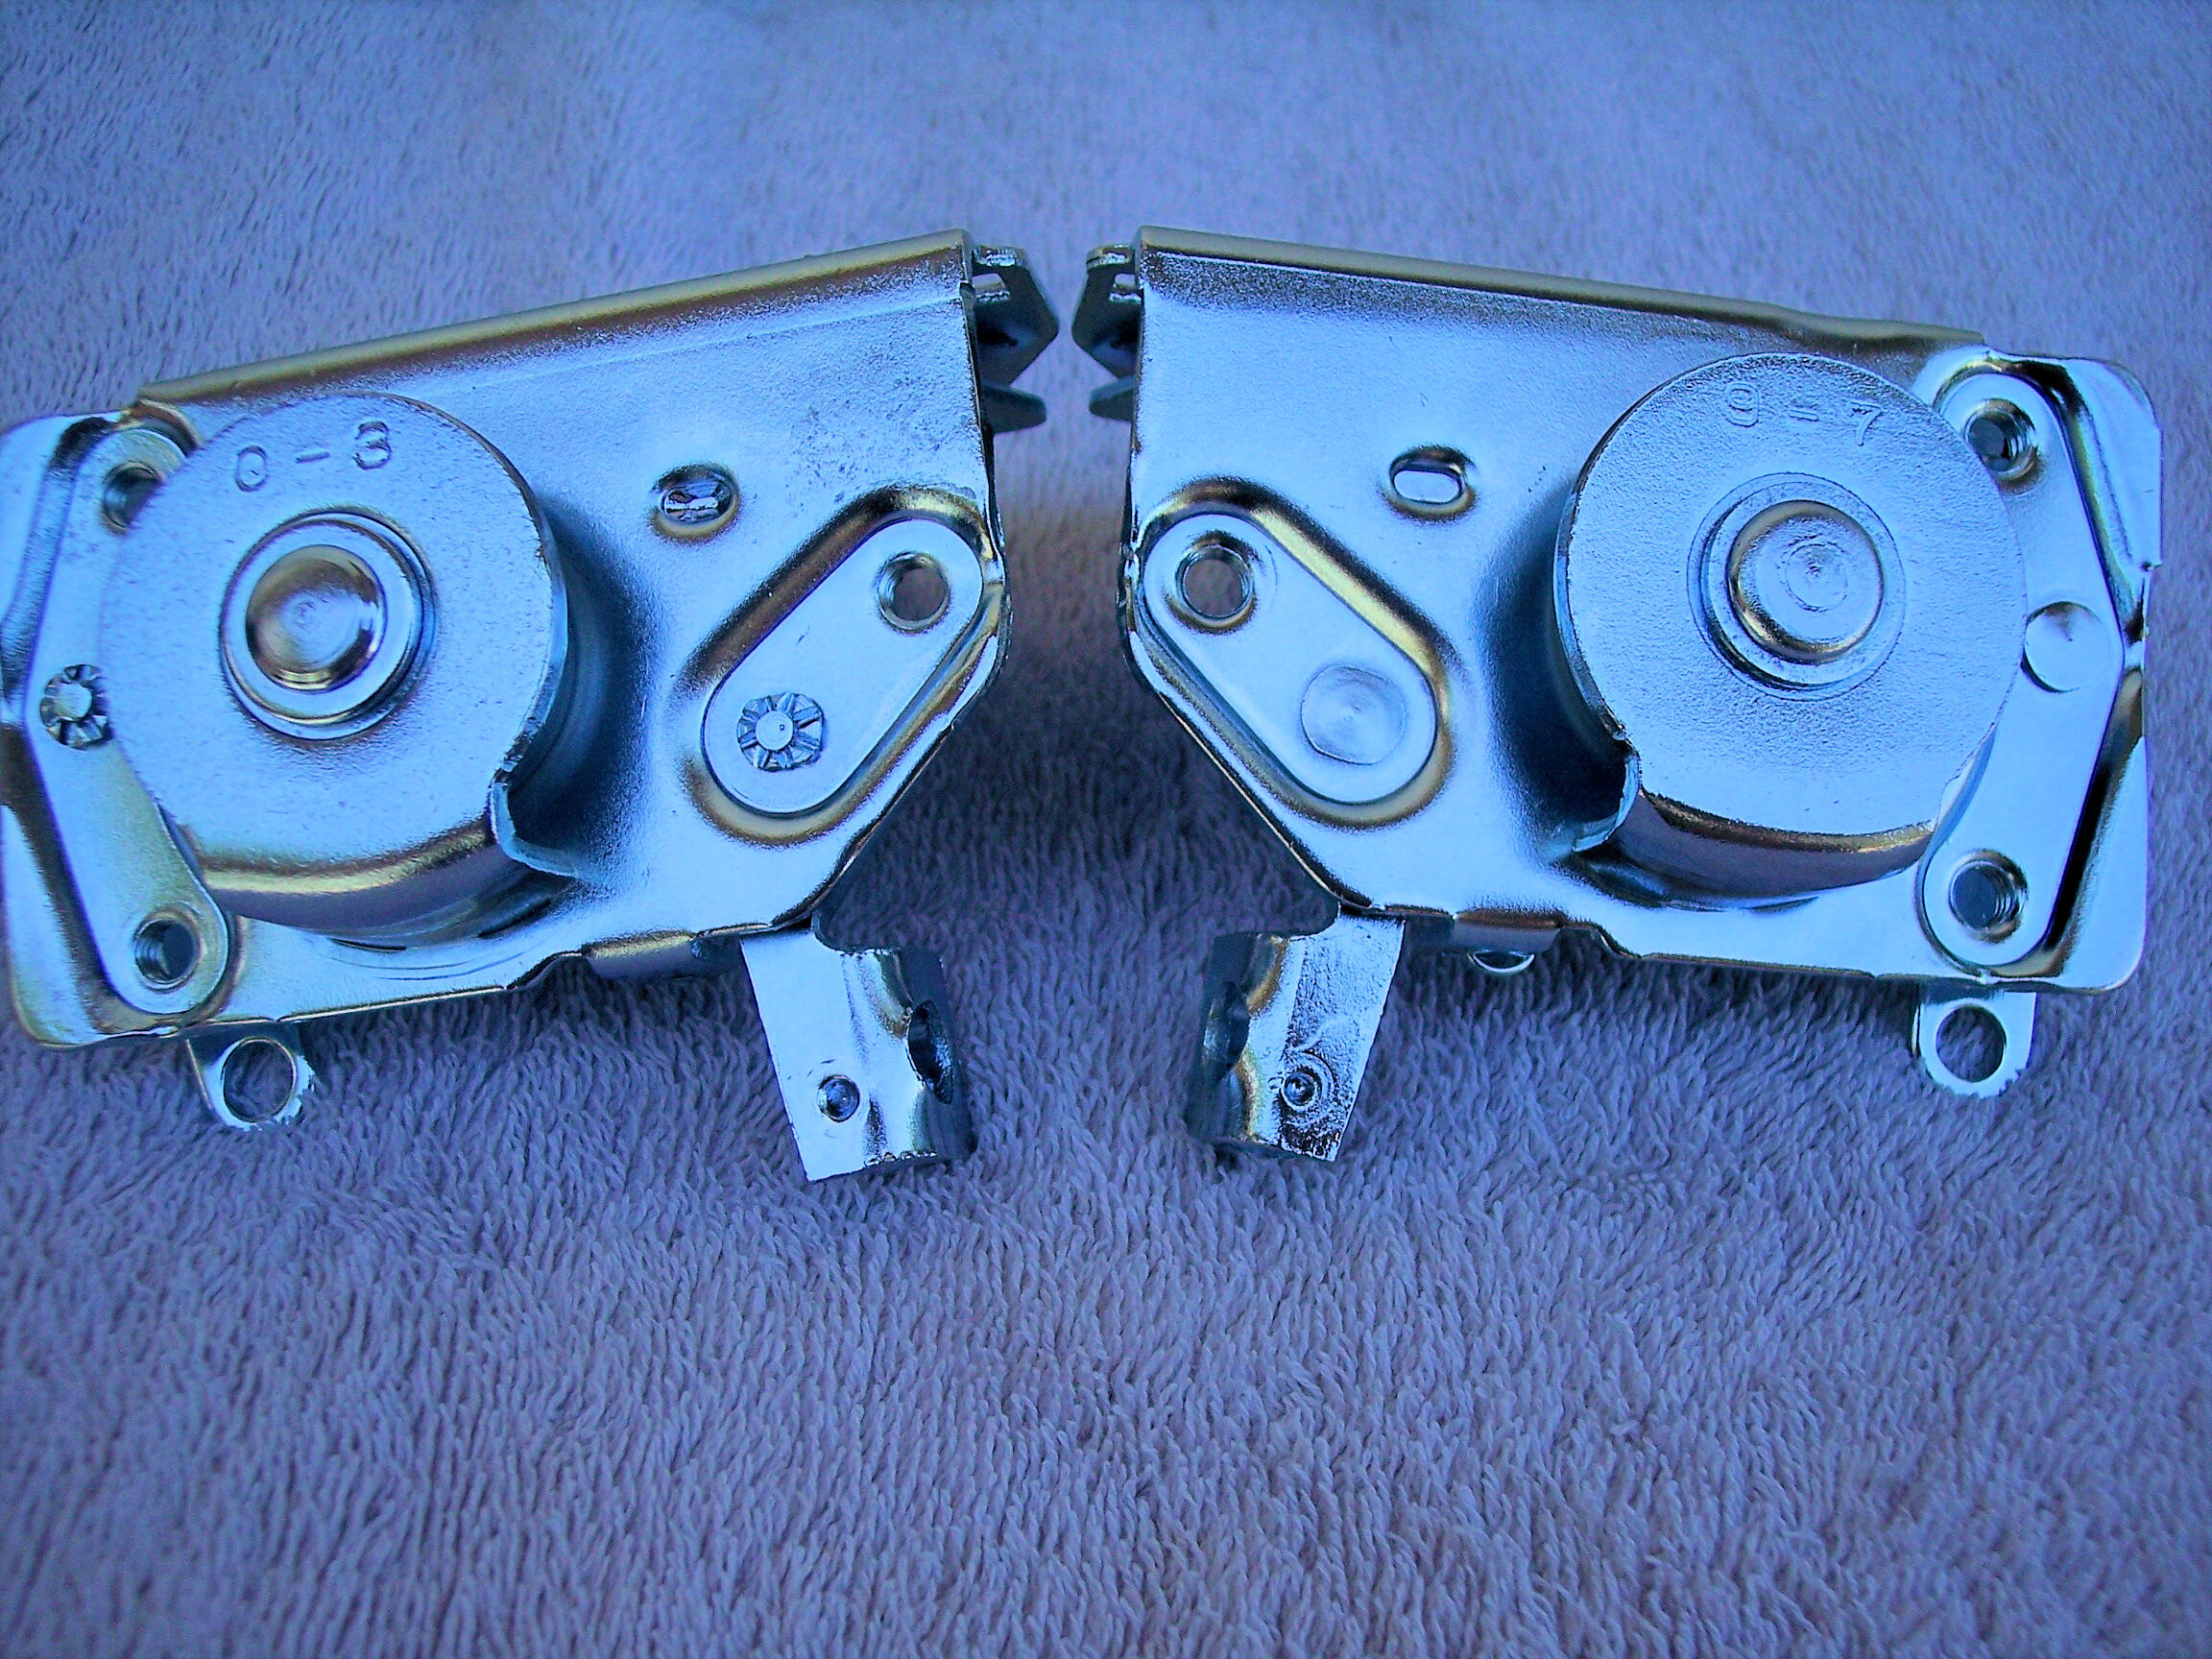
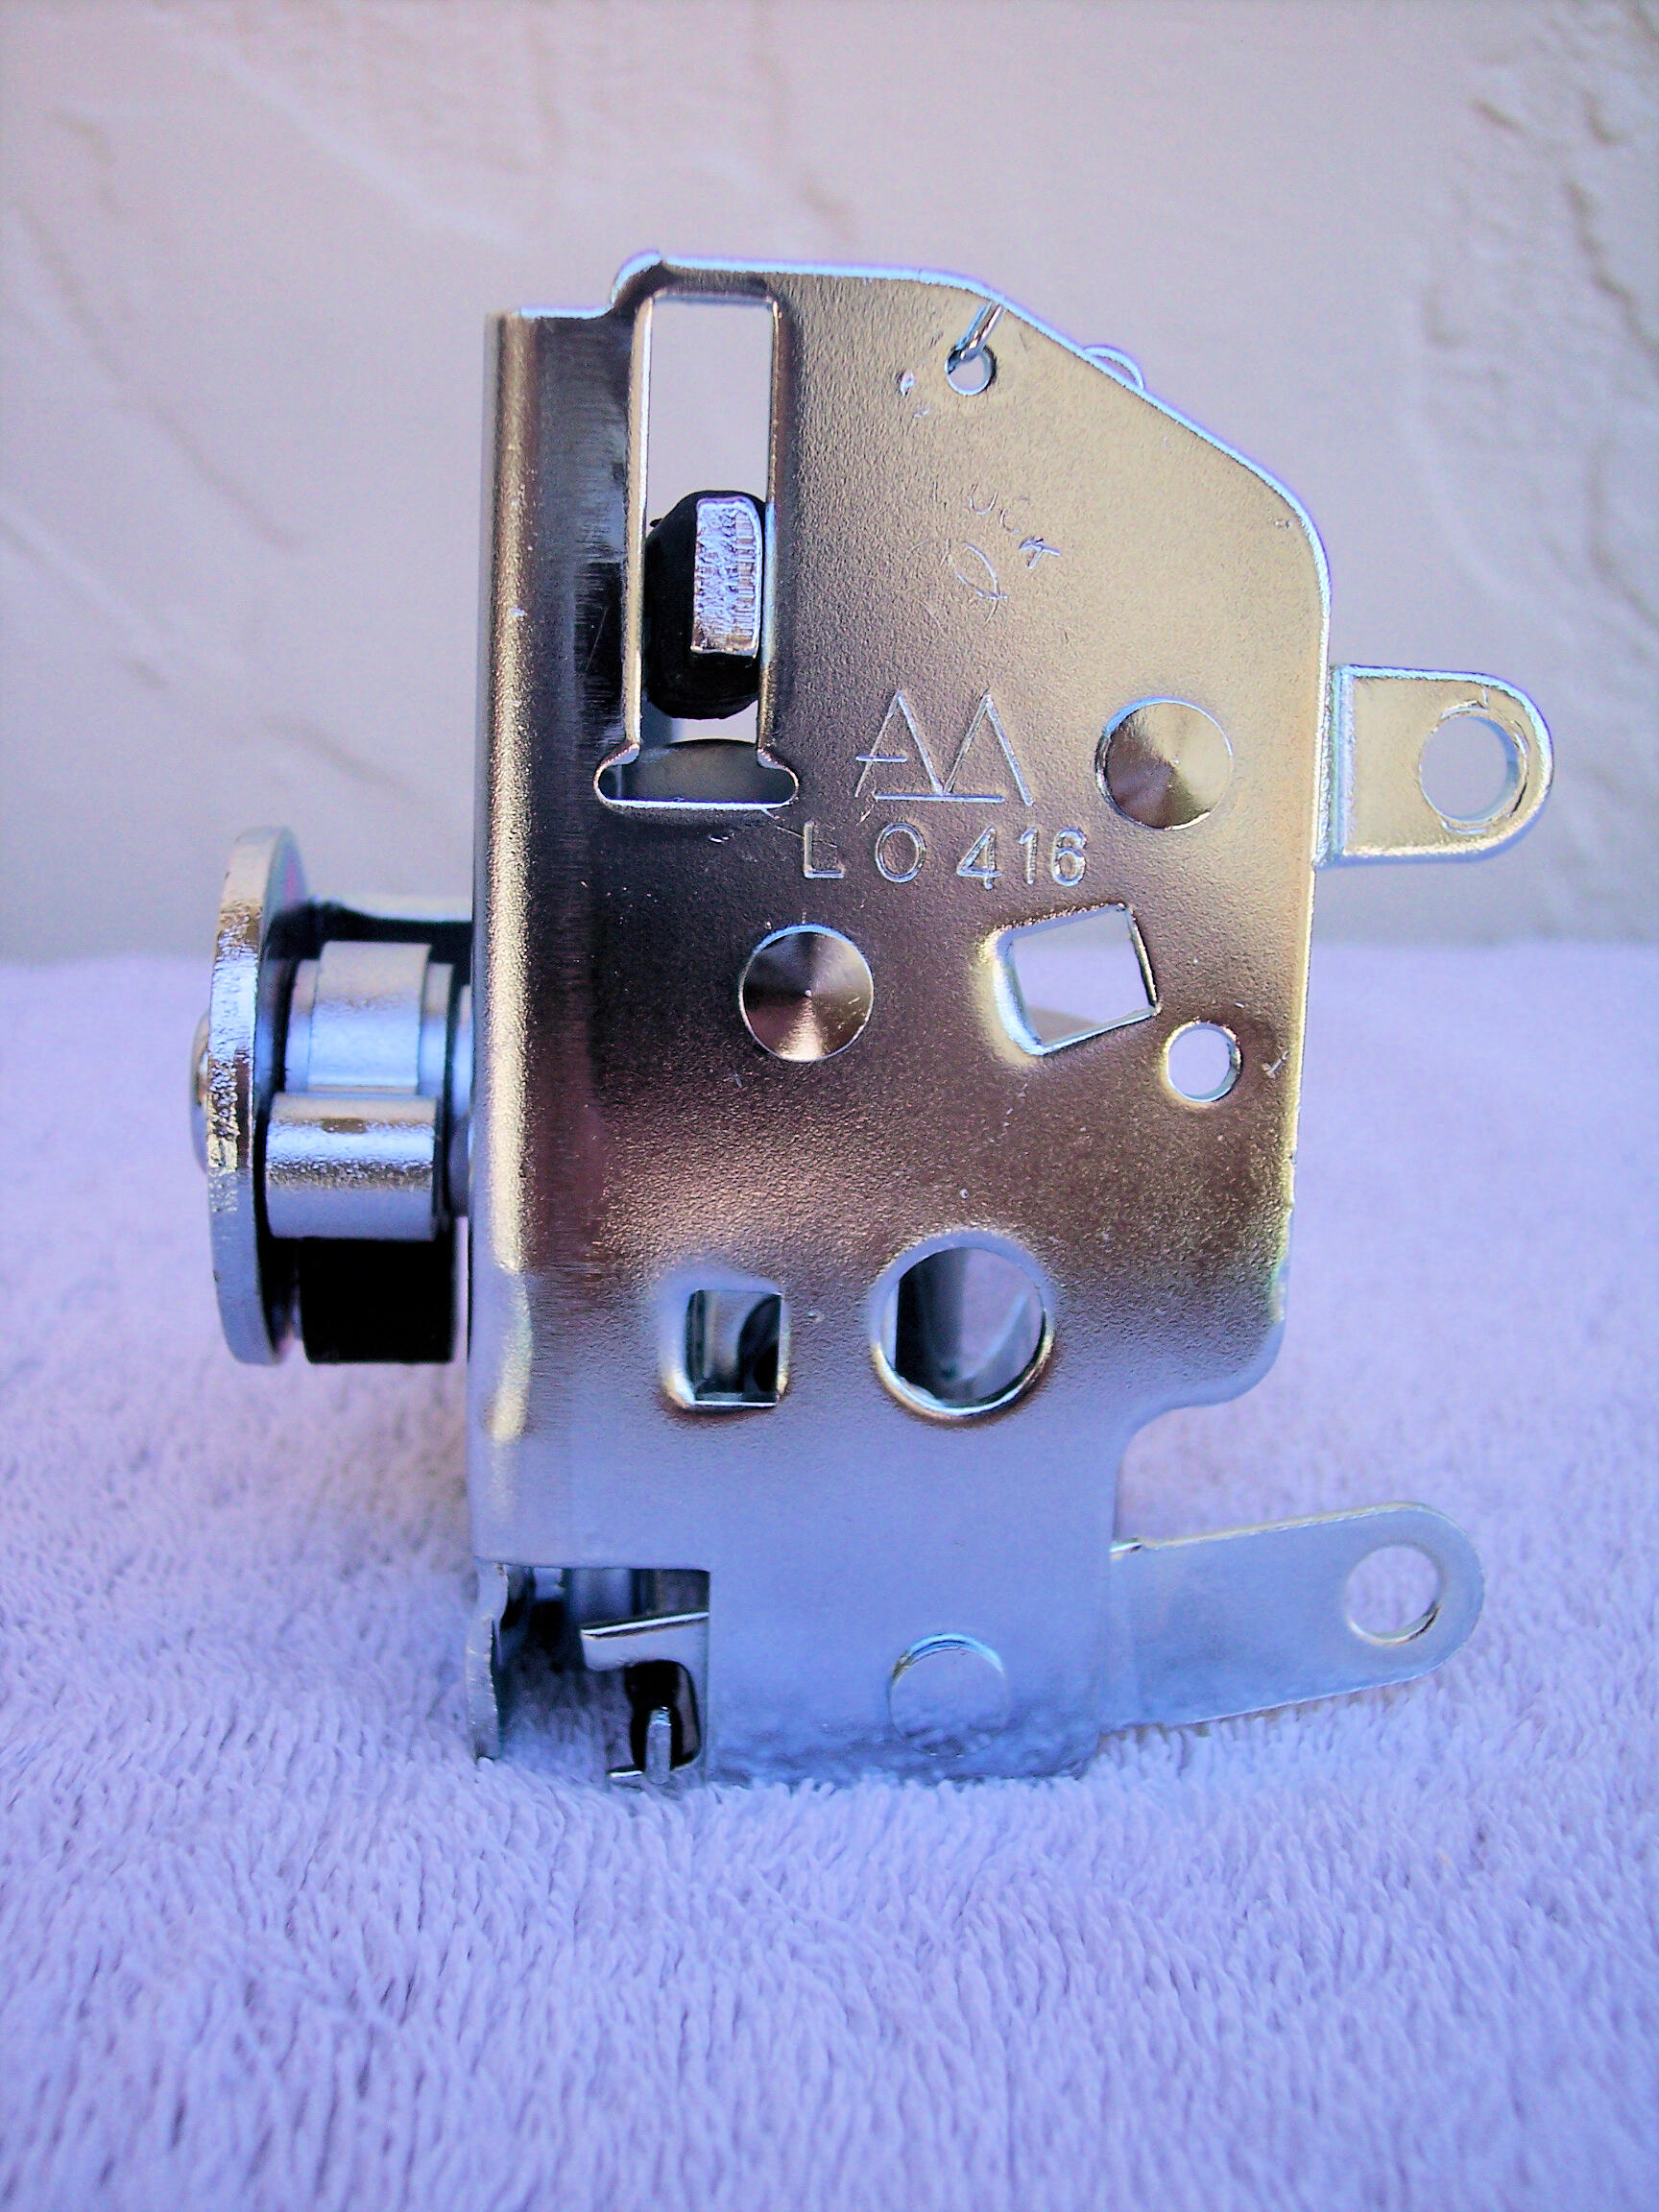
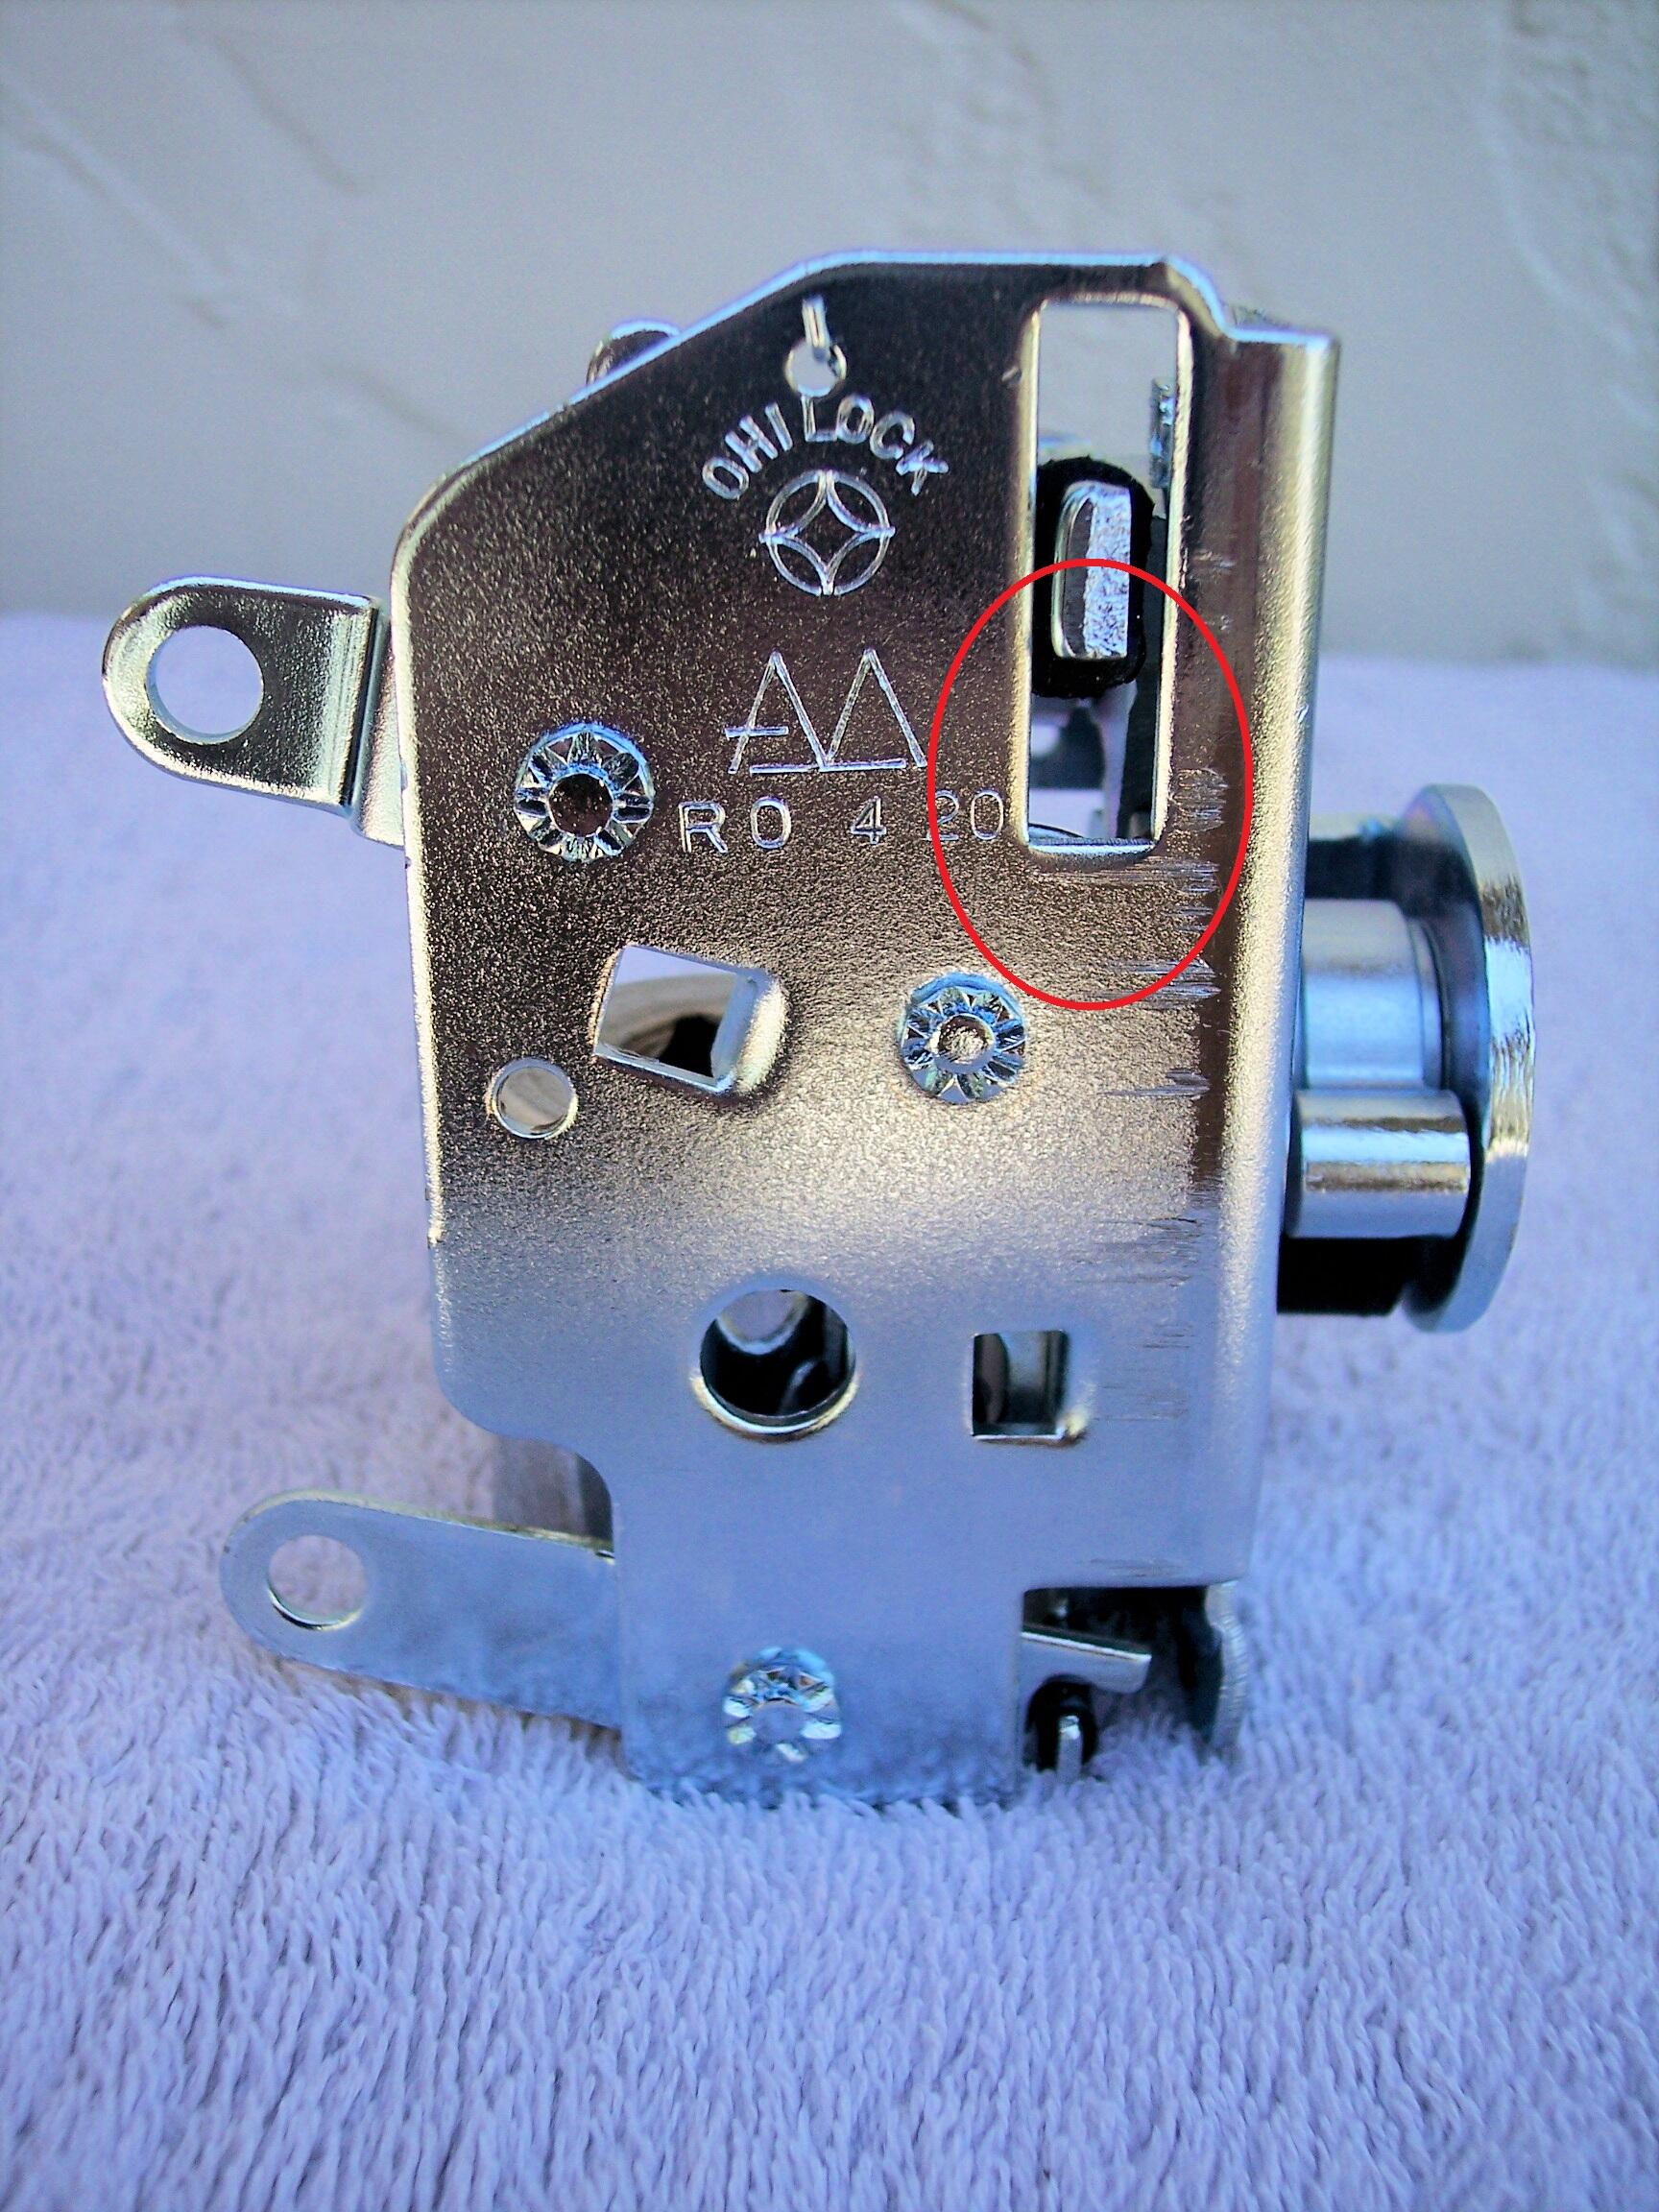
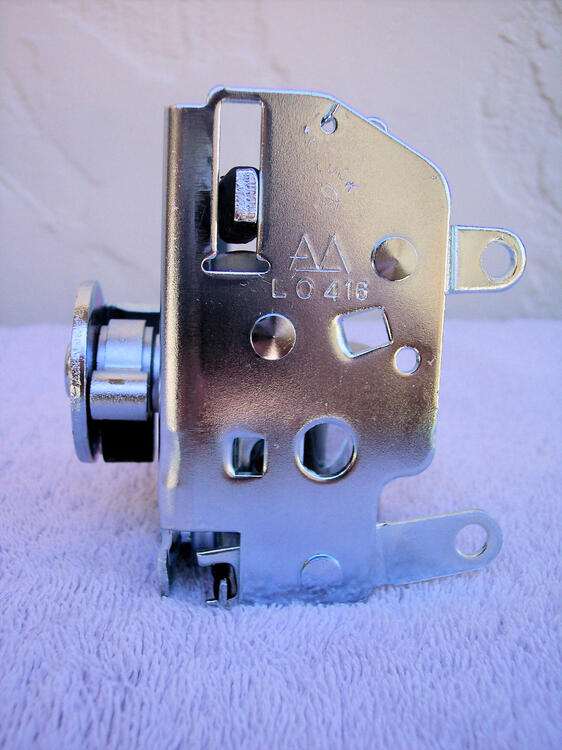
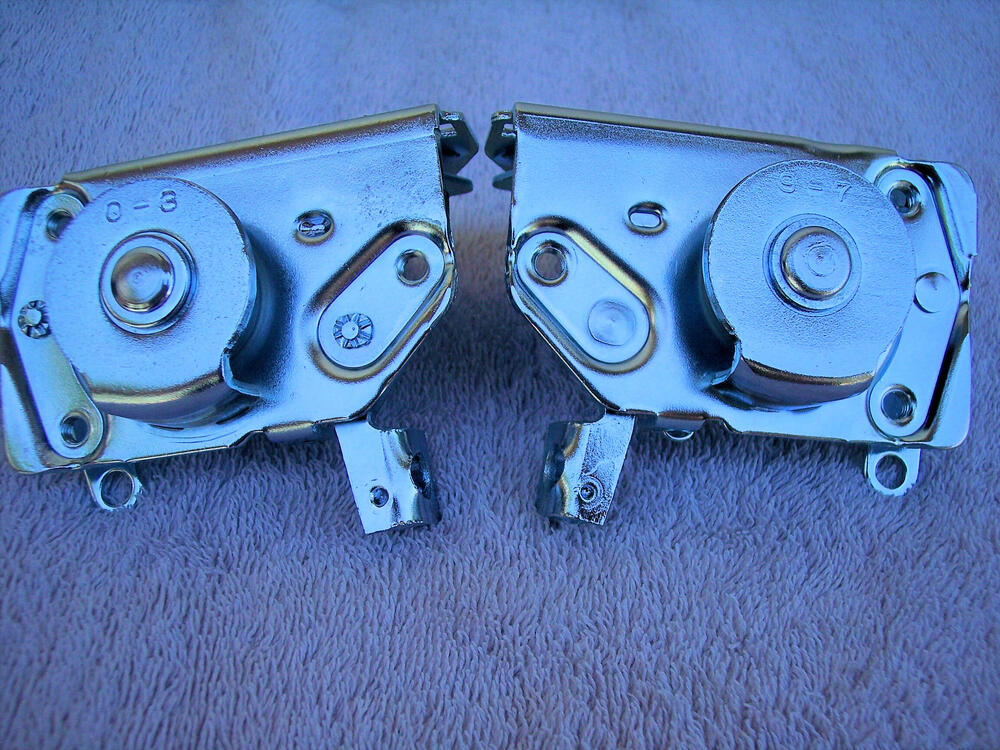
The lock core has its own date code. Below on the left is year 0 (1970), month 3. On the right is year 9 (1969), month 7. The lock assembly also has its date code. This one is Left, year 0 (1970), month 4, day 16 (I think). This pic is the assembly for the 0-3 lock core above. Just for grins, here is the lock assembly for the 9-7 core above, note the difference in the slot as you noted on one of yours.


-
I'm not sure it it made it the resources. Look for the thread titled 1970 Wiring Diagram in the electrical forum. Go to the May 1 post to get the download able PDF
-
Hey Charles, I found the same difference in the return spring on one of a batch of door locks I picked up a few years ago. The unique one had a date code of 1969. The later style coil spring was not yet installed on the one on the left.
-
Did you download the latest wiring diagram PDF from Captain Obvious? He has resolved a lot of discrepencies in the FSM.
-
That boss could be a surface for locating the part in a machining fixture.
-
You are correct in using this product to seal affected areas but only after the rust has been treated. From the product description: APPLICATION - Remove grease, oil, and other foreign substances using POR-15 water-based Cleaner Degreaser followed with POR-15 Metal Prep to etch the surface and neutralize rust. Stir POR-15 Rust Preventive Coating thoroughly, DO NOT SHAKE. Always apply thin coats, minimum of two. May be recoated or top coated when dry to the touch, typically 2 to 5 hours. Topcoat when surface will have exposure to UV light.
-
You don't want to seal the area until you have neutralized the rust. This is a great product to kill the rust and leave a zinc phosphate protective coating before laying down the POR paint. You an get it locally at English Paint. Been there, done that! POR-15POR-15® Metal PrepRestore rusted metal objects with POR-15's Metal Pep. This metal-etching rust neutralizer provides great adhesion for coatings on any type of metal surface.
-
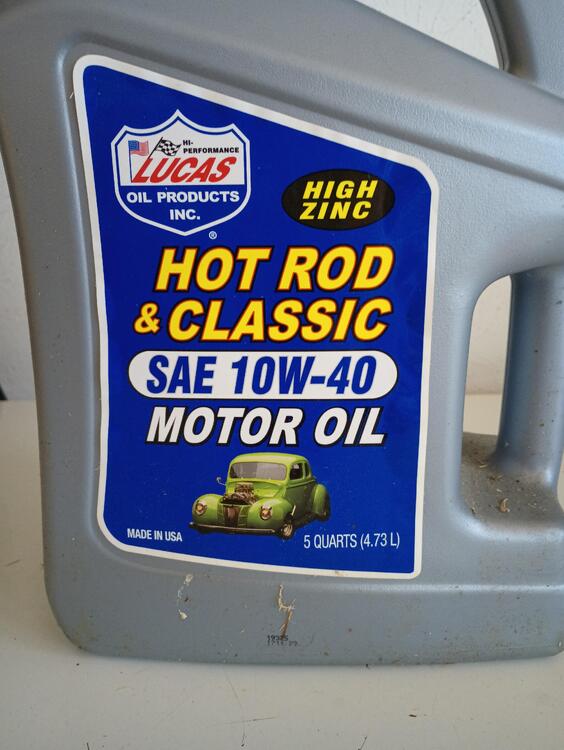
One of the highest zinc content, non-synthetic oils available, perfect for our L-series engines.
-
@AZ 240 Care to chime in?
-
Bruce, Many thanks for all your hard work on this project. Jim