Zed Head
Free Member
-
Joined
-
Last visited
Everything posted by Zed Head
-
 I had a few more thoughts on how the AFM does its thing. They're just broad "can this thing work like it's supposed to" kind of thoughts. 126 is 26% higher than than 100. 226 is 26% higher than 180. So in percentage terms, the AFM being discussed is pretty far off. (In retrospect, this is why I bit the bullet and bought a reman). 180 - 100 =- 80 ohms (the ohm range for the factory settings on the AFM) 226 - 126 = 100 ohms (the range for the AFM being discussed) The working range of the AFM is 25% wider, which would give a shallower enrichment curve (more vane movement required for the same relative change in resistance). So adjusting the vane spring would only get you back to "perfect" spec. if it also changed the slope of the enrichment curve. The test that might be the most telling is the last one on page EF-51. Connect 12 volts to 9 and 6 and measure output at 7 and 8. Unfortunately, they don't tell what the values of the output should be, they just ask for smooth operation. It would be interesting to know what the upper and lower limits are though using a 12.6 volt battery. I might try it on my spare 1978 AFM. IF you had the upper and lower output values expected for a certain voltage in, AFM closed vs. AFM wide open, then I think that you could be confident that your ECU is seeing what it's supposed to for a certain volume of air entering the engine. Otherwise, it's still a guessing game. Just throwing some stuff out there while it felt clear in my head, plus for the mental exercise. It would be great if we could come up with an inexpensive fix or tuning procedure for this expensive part. If I get time, I'll put the results from that final test out here, just for reference.
 -
Yes, 68.7 ohms is continuity. That is about right for the heating element in the Air Regulator. I bought a new one for my car, because I accidentally pulled the heating element/bimetallic strip right out of the housing when trying to remove the connector, then I got a parts car, so now I have two extra. I found that all three had around 60+ ohms of resistance and that they all worked after I cleaned up the valve inside (glued the first one back together). It get's gummed up like everything else in the intake system from backflow from the PCV system. You can move the valve back and forth with a small screwdriver, and spray it down with carb cleaner or WD40 or similar. You can also connect 12 volts directly to the two small terminals to confirm that the heater works, and the valve opens and closes correctly. But be very careful that you don't touch your clips at the connector contacts, it's tight. As cozye said though, if it's closing when the engine warms up (there is actually a small heater block under it with engine water running through it) then it is a secondary problem.
-
Actually, motorman's picture is on the left/driver's side, you can see the base of the distributor and the vacuum advance canister. Plus the air pump is on the left of the crank shaft pulley. Motorman's timing tab is on the left side of the engine. It might be that the bracket serves dual purpose, AC compressor and air pump. I know that the AC compressor mounts in the same general area on my 1976 car. Either way, they would be mounting holes for parts that were not common on all cars, so yoshi is probably not missing anything.
-
The 280Z dist. uses a VR, or magnetic pickup, to trigger the spark. You would need either an electronic ignition module from a 280z, or a GM HEI module. The ZX swap is popular because the ignition module is mounted on the distributor, so there's only two wires to connect. But it works the same way as the externally mounted module. I think that you will need the distributor base also, the part with the set screw for adjusting timing. Here is one swap article, although it may not be perfectly clear. - http://zhome.com/ZCMnL/tech/gmhei.html
-
I think that the holes in the block are for the AC compressor bracket. I was just fighting with one the other day. The wire picture by the battery is too dark to see (for me). Where does the other wire go? What year Z, and what engine?
-
Your first post said "My car will start but the engine will die out once i turn on the headlamps. The car will run with the parking lights on but once I switch it one more level to turn on headlights, it turns off. " What you're saying at the top here is different. Has something changed or is one these statements not right? First the car would start then die if you turned the headlight switch to on. Now the car won't start unless the headlights are on? Almost opposite statements, so hard to figure out what's going on. Either way, one good way to problem solve is to isolate circuits. Unplug your headlight switch entirely and see if the car starts. See if it starts with the headlights on low beam and high beam. Take some fuses out and see if one fused circuit or another has an effect. Eventually you'll narrow it down to one area.
-
This is a good thought. You should test your voltage regulator and alternator with the lights off and engine running. That will tell you if they are okay. If your regulator and alternator are putting out the correct voltage with the lights off, you should leave them alone. It's actually a good easy way to get used to using a multimeter. Connect the positive lead to the positive post on the battery and the negative to negative, set the scale to read around 12 volts, start the car with the lights off, and take some readings at idle and at higher rpm. Hold the engine at higher rpm until the voltage reading stabilizes. You will probably be at around 13 at idle and 14 - 15 at higher rpm. If they test out okay, leave them alone, and focus on the headlight switch issue. From what I've read, your problem has something to do with bad wiring or maybe a loss of ground when you use the headlight switch. Your "beating on the dash" story is significant, that would have nothing to do with your regulator or alternator since they are in the engine bay. The picture of the white wire doesn't look very good, it looks like it got pinched and shorted through the insulation some time in the past.
-
Of course, you know that you've circled all the way back to jmortensen's own Hybridz thread from November 2006? tlorber had a good idea. 160, 180 and 200 are the ring size in mm. Stick a tape in there. Did you confirm that it is limited slip? Turn one wheel and see if the other turns the same way? By the way, the 83 transmission is probably your best option for those gears since it has the highest (speed-wise) ratios of the bolt-on transmission options.. Interested to hear the options on swapping different gears to the differential, or vice-versa. From what I've been able to figure out, the way to do it is to take the differential out and put it in a carrier that has the gears you want. But I haven't figured out the details on how to do it yet. I think if the diff bolt pattern matches the ring gear, and the diff fits the carrier, it's doable. But, as I said, I don't know the details.
-
IK, do you have 4 Zs, or had 4 Zs? You have four listed in your sig. At least one of your 240s should have an R180 unless you've swapped them to something else. Is this a new diff you picked up, or it came in a car, or ??? Did it come in a Z? Curious, a little background story might help.
-
Actually, 37/8 is 4.625. It does look R180ish, rectangular and skinny, although it would be easier to tell with the cover on (for me anyway). Here's a calculator you can play with. There's an 18% difference from the 83's stock 3.9 to your 4.625. http://www.car-videos.net/tools/speedrpm.asp?Car=Select&Num1=205&Num2=70&Num3=14&AxleRatio=4.625&Ratio1=3.062&Ratio2=1.858&Ratio3=1.308&Ratio4=1&Ratio5=.773&Ratio6=&Ratio7=&Redline=6250&Increment=500&B1=Recalculate
-
The FPR on my 78 parts car read 40 psi. I picked up another used one, just to try to get the spare engine tuned up and it read 38 psi. The FPR on my 76 driver read 36 psi cold, but the pressure crept up in to the 40s when it got hot, so the engine ran rich and the exhaust was real gassy. It took me quite a while to figure out, since I only put the test gauge on when the engine was cold. I now have an aftermarket FPR on it, set to 36 psi, and the difference in the way the engine runs and gas mileage is significant (an extra 2 mpg). So, in my experience, the FPRs can go bad. I have had one that read right cold, but wasn't, and two used ones that read high cold. argniest, your gauge setup is correct, between the filter and the rail. The fuel pressure will creep up as the fuel in the rail gets hot when the fuel pump shuts off. Gauge accuracy is always worth checking, even on a good brand name. I dropped my dial-faced tire pressure gauge (same mechanism probably as the fuel gauge) and it is now off by 4 psi. 2 psi might not make a difference (38 vs 36). The best way to check the FPR's performance is on a running engine. Take a reading with the vacuum hose hooked up and then disconnect the hose. It should read 36 (or close) without it, and down around 30 with it connected. When you blip the throttle, the pressure should rise up to 36, then drop back down. You can actually calculate your engine vacuum off of your fuel pressure if you want to. Just adding some information, not recommending anything. Use at your discretion. There are so many parts that work together on these cars, it's hard to tell which one's to "fix."
-
It sounds like the fuel pump contact switch in your AFM. I wish I would have thought of disconnecting the starter wire when mine went bad on the road, I had to tap in to my defroster circuit to keep my fuel pump running to get home.
-
That's good news Jenny. Maybe I was close, thinking that the 126 and 226 resistance readings would give a shifted fuel curve from the AFM. If I had known more when I got my car, I might have got in there and tried adjusting it but I barely knew where these forums were at the time, and was just working from the FSM. Your vacuum advance should not be active at idle. If your vac advance line is connected to ported vacuum, which is the stock configuration, then you will have no vacuum advance at idle when the throttle is closed. So I would not look there to fix your idle problem. You didn't say how long you took to warm up. For at least the first minute or three, your Auxiliary Air Regulator should keep your idle up (around 1200 to 1500 rpm, slowly dropping as it warms up). If it is not, then it is either stuck closed or open, or is not getting power. The test to see if is open is to pinch shut one of the hoses connected to it, and see if the idle goes down. It should be open when cold and closed when warm. Your car is driveable with no really bad problems. Looks like you're winning.
-
I asked MSA about this before I bought mine. They said that they use an improved design over factory, with a thicker carbon trace. Of course, when I got it, it said rebuilt by "Fuel Injection" corporation or something similar (not Python, another rebuild wholesaler) so MSA does not actually rebuild themselves. But maybe MSA sets the specs. I think that they replace the electronics but keep the mechanical components that are still good. I've had the cover off of mine and the internals looked brand new. On the other hand, I think that many companies that rebuild alternators, for example, just test components and put them right back in if they test in-spec. They even say so in the packaging that comes with a rebuilt. Also, one more data point - I tested the AFM off of the 1978 parts car that I had for a while and I got 100 and 180. The engine ran great, but again it was with no load, just garage tuning. And Jenny, to your question, the car would drive at a steady throttle setting, but it would stall and buck if I tried to give it throttle,with some intake popping. It seemed like it wanted to go, but there was no way to feather the throttle or do anything to get it to drive right. I had just bought the car and got it running, so had no points of reference to work from. Luckily it came with an FSM so I went through the testing procedures and found the AFM problems. When your first post came up I was second-guessing myself, but the fact was, in my case, that the rebuilt AFM made all the difference. If someone chimes in with a great-running engine with 126 and 226 AFM readings, I'll be confused again.
-
The 100 and 180 values are for the 1976 AFM for sure. In general, the AFMs are not interchangeable except for a few years. I think that 1975 and 1976 are the same, maybe 1977 too. It's possible that 126 and 226 will work. But the FSM says not. I'm not an electronics person so can't say exactly how these values come into play. I don't think that high resistance comes from the connectors, it comes from the resistive elements that make up the potentiometer.
-
Sorry Jenny, I meant that you had the exact same numbers as my bad AFM, the one that didn't work for me. When you said it was working for you after cleaning it up I left the subject alone. I did not do anything else to the car, I had to send the old one in for the core, and it was the last thing left for me to try. I tend to do things one at a time if I can so that I get the true effect of one change. For the record, with the bad AFM, my car revved fine with no load, but popped, spit and backfired when I tried to drive it. I had the same thought that maybe some component in the AFM goes bad and they all end up at the same 126/226 values. All I know is that my rebuilt one measured 100 and 180 and the difference was night and day between the two for me. The FSM shows continuity at the ECU connector as the quick test, then actual resistance measurements of the AFM off the car as the in-depth test, so you might get your money back if it's not the problem. Sorry. I don't know whether to hope that the AFM is your issue or not. They are expensive. If you could find one to borrow or find one in a junkyard that tests correctly, that might be the way to go. Some yards have a 30 day guarantee.
-
Steve, I was out staring at an old R200 yesterday and convinced myself that some of the oil is actually leaking up past the vent/cover interface, where it presses in. If you look at the surface of the plastic where it has the interference fit with the metal, it is a molded in rough surface. Probably so that you can get it in and out easily. But the rough surface offers an easy path out for hot oil. Even though it's up hill, a little dust and dirt acts like a sponge, drawing more oil out. I managed to crawl up under my car and remove the vent on the R200 in service in my car, throw a little silicone sealer on the sealing surface and pop it back in. I'll see how it works. How is yours doing so far?
-
Here is the original thread - http://www.classiczcars.com/forums/showthread.php?t=37299 I can't remember the pin numbers but what should have been 100 was 126 and what should have been 180 was 226. My car popped and backfired through the intake when I had those numbers. A rebuilt AFM cleared it up. From what I know now, I think the whole fuel curve was shifted lean, with those high resistance numbers. I think the ECU just runs 5 volts through the potentiometer and uses the split to determine enrichment. Worth a double-check probably. SBlake01 said he had seen some AFMs come back to life after cleaning like Jenny did, but not all (in the thread).
-
Actually, as I recall, your AFM did not pass the testing with flying colors. But you did some work on it, and put it back on your car and said that it ran great now so the problem was fixed, even though the resistance readings were out-of-spec.. I remember because the resistance numbers on your AFM were the same as mine had been when I got my car, and my engine ran terribly until I got a rebuilt AFM. I remember being surprised that mine tested the same as yours but mine would not run the engine well at part-throttle at all, but yours did. I also remember because the impression was that I had led you on a wild-goose chase, which I had not intended to do. So your AFM might be working fine, but the test resulkts of it were not "in-spec.", at least at that time. Just trying to help you keep things clear. You have a lot of things going on. My car ran terribly with a bad AFM but yours might be fine.
-
Since you don't know where the engine came from, you need to find out if you have a 225 or 240 mm clutch disc and pressure plate. You also need to find out more about your transmission, for the throwout bearing collar, otherwise you could swap the new bearing in to your old collar, if you get the wrong one. Is it a 5 speed or 4 speed? If you have a 5 speed, then someone probably swapped a newer engine and transmission in and you could just guess that it's a 1978 or later (because of the N47 head on an L28) and get a clutch set for that year. If it's the original 4 speed, then you should probably get the 74 260Z set. I am assuming that you'll buy a set, which usually comes with a new collar, but might just come with a bearing. Looking at the Oreillys Auto site,the change to a new clutch style (probably the throwout bearing collar) happened at 1975, so knowing your transmission is important.
-
I just realized/remembered something about the 1976 year and vacuum advance - you only get vacuum advance in 4th gear. It is controlled by a solenoid which is activated by a switch on the transmission. Unless it's been bypassed. So fixing the vac advance will only matter in 4th gear. One of those odd Datsun things they did for a few years for emissions.. Sorry to throw a damper on the potential for improvement with a fixed distributor. The car still needs drivin' though. Get the gas flowing through the injectors, hot oil washing the crud off the valve stems, warm up the valve seals so they seal better...it will add up to smooth things out. Climb some hills, put some load on it, rev it up. Bill Clinton was long ago.
-
Maybe you should just take it out and beat on it! You'll get your frustrations out, have some fun,and from what I've read and my experience with my own car, it will run better when you get done. Not joking! Your vacuum reading might go up also if you have gunked up piston rings. You might actually be losing your timing light signal to a different wire or just poor "induction" if you are using one of the clamp-on inductive trigger timing lights. Next time it does that, move the clamp to a new spot, away from the other wires and close to the plug. I've seen the same thing and it wasn't the engine, it was the clamp position. There is a second adjustment on the bottom of the distributor that would give you more "twist" on the distributor but I wouldn't worry about it right now. Are you still running without vacuum advance? I see an obsession starting with a number on a gauge (vacuum). How does the car run and drive? That should be your focus (in my opinion). My car was sitting at 16 inches for quite a while but I just lived with it and focused on other things and drove it around (with a few hard "tuning runs" thrown in). Months later, I checked the vacuum, even though I had stopped caring about it, and it was at 20 inches. There is no relation between spark plug tip shape or length, and ignition timing. It only affects how hot the tip runs. They are specified to run just hot enough to stay carbon free, but not so hot that they cause pre-ignition. Your car is stock so the stock plugs should work fine. Your thread is looking like you have many objectives in mind - getting a high vacuum reading, getting rid of the exhaust popping, removing the gargling sound, etc. If it was my car, I would fix my vacuum advance (because without it your engine will still be a little sluggish at part-throttle operation and you suggested that you had poor pickup), set the timing between 10 and 14, and drive it around for while. Take it out, run it through the gears hard a few times, get it nice and warm. Then re-evaluate what single thing you want to improve next and focus on that.
-
Tomohawk, thanks for the advice. You know what's funny though? - It only hides the avatars when you're logged in. If you're logged out, they're still visible. But that's okay...
-
Hey Darrell, sorry to make a scene, I should have just sent a message. Thanks for the new picture though! The other one was just a little jolting to the senses. Good luck with your project. I would just put a voltmeter at the battery while the engine is running and slowly rev the engine up and see what readings you get. If everything is working right, the voltage will probably rise a little bit from idle, then stabilize above ~1200 rpm somewhere around 14 - 15 volts, depending on the temperature. There is a actually a procedure in the FSM with a table of voltages but I think that it's a little bit complicated and convoluted.
-
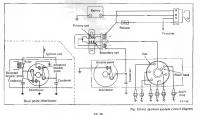
The points ground the coil primary circuit so that it can charge up the secondary circuit then break the circuit when they open, causing the secondary circuit to discharge to the plugs. Primary is the two lugs on the coil, secondary is the main terminal in the middle. If you disconnect the coil negative, you can check for continuity through the points to ground, with an ohm-meter, when the points are open and closed. Then you'll at least know the points are working. Attached a picture...